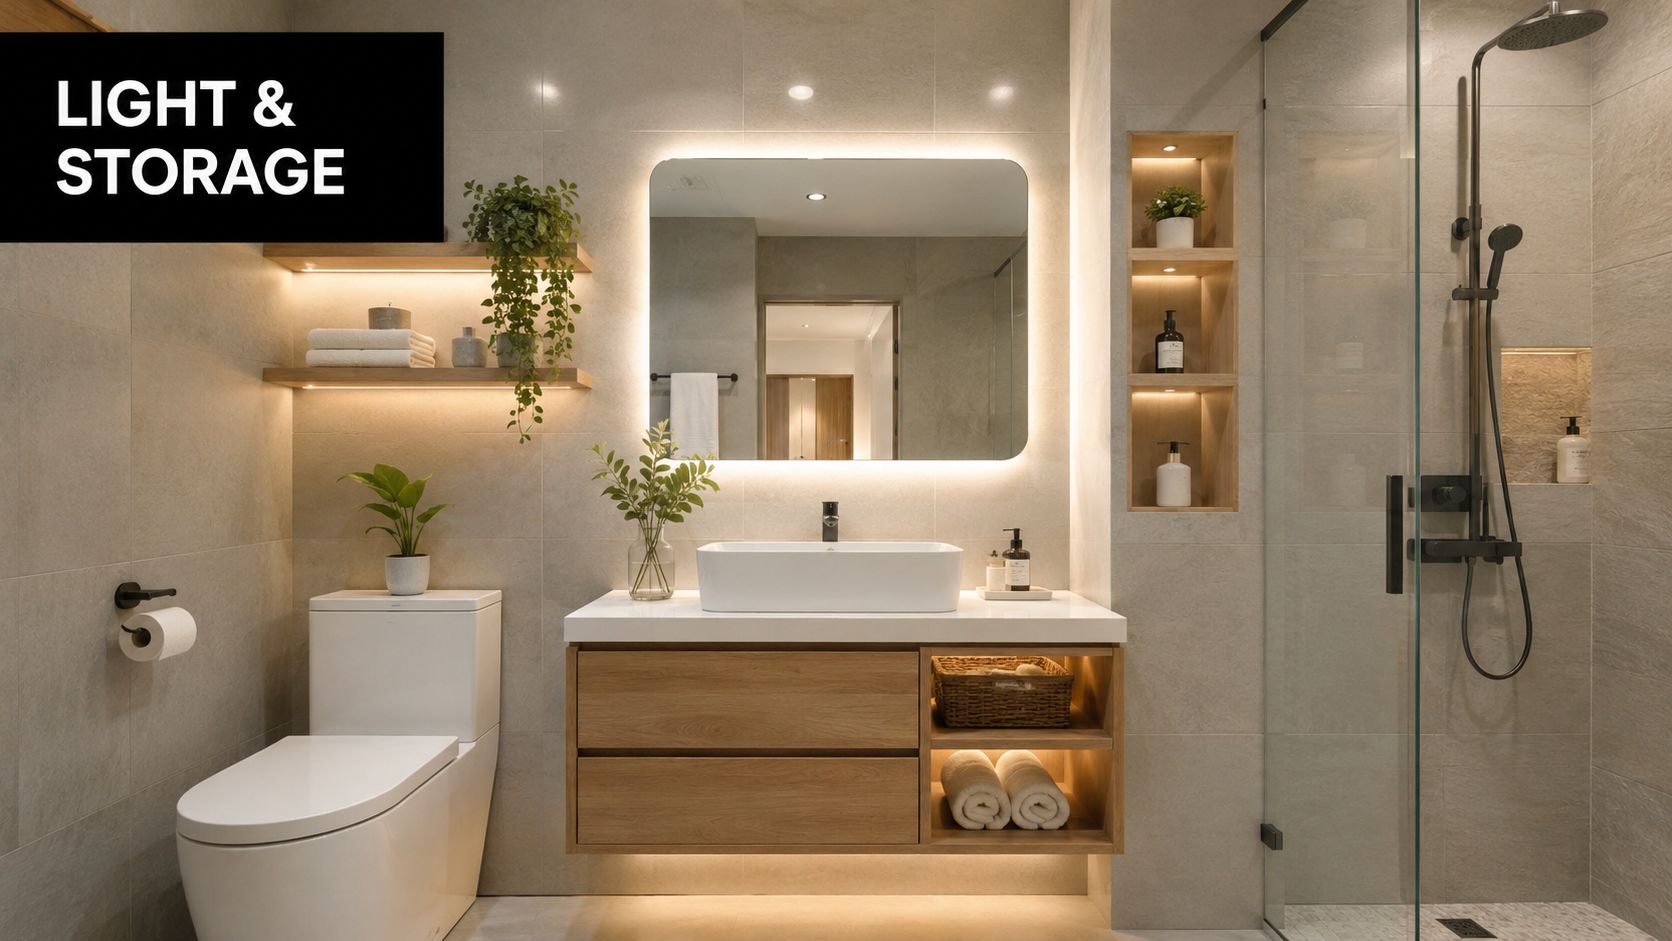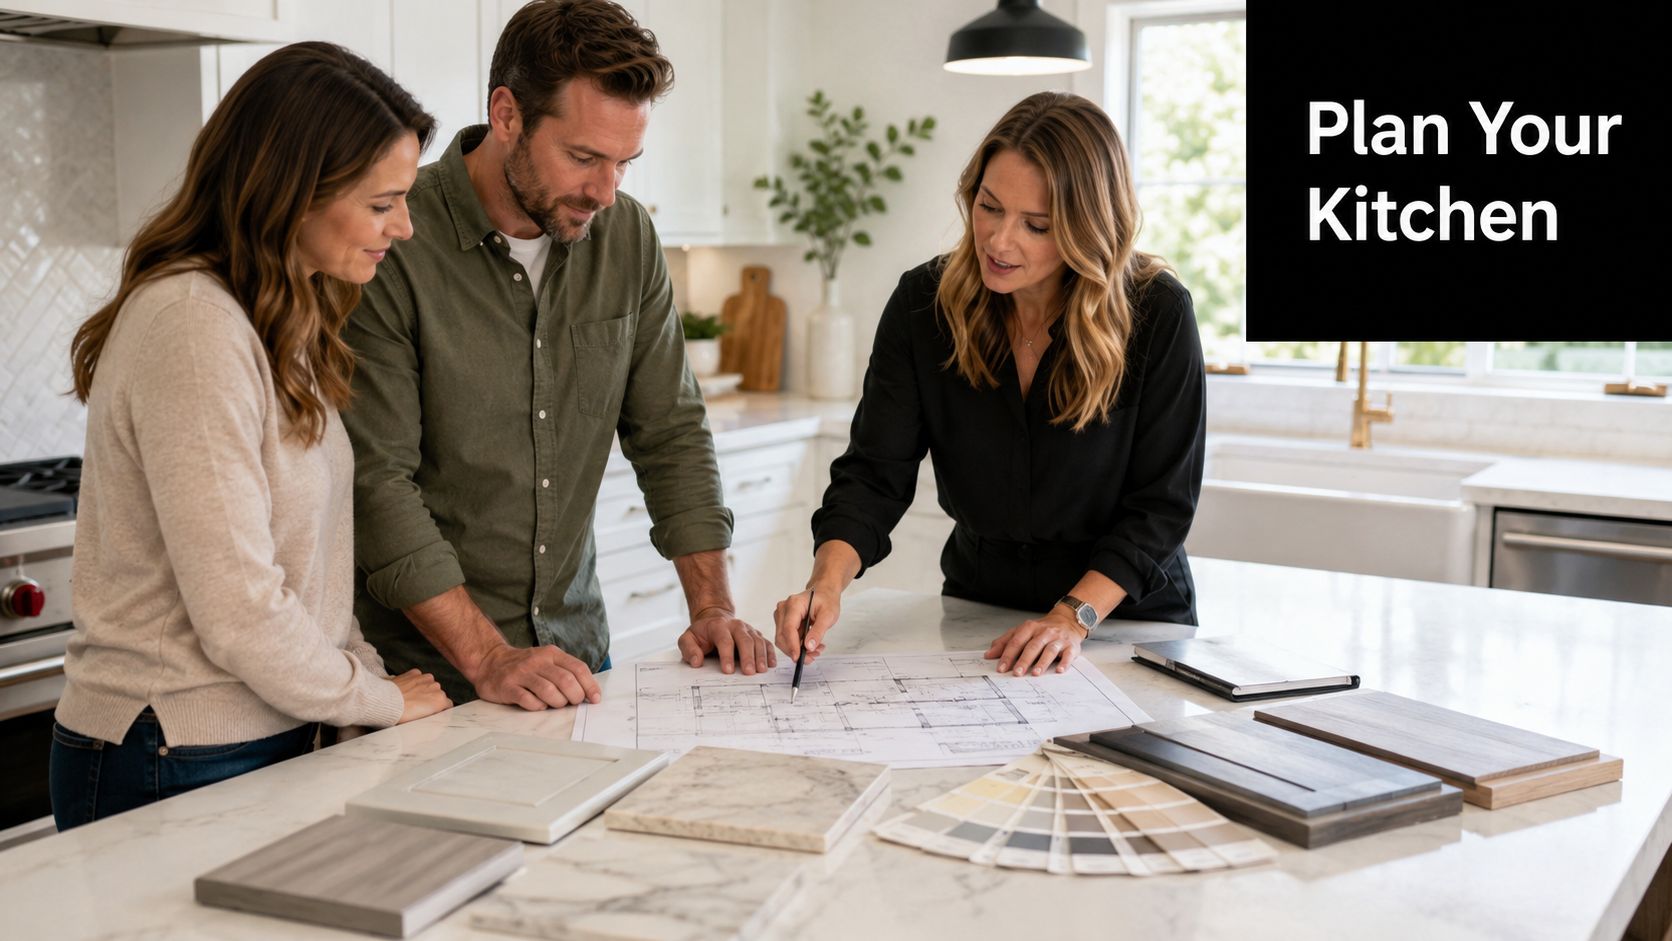
• siteprobathrooms

Laundries In Bathrooms: Layouts, Costs & VIC Rules

If you're standing in a bathroom wondering where a washing machine could possibly go without turning the room into a squeeze point, you're not alone. In Highett and across Melbourne’s tighter blocks, the old separate laundry often feels like wasted floor area in one room and missing function in another.

That’s why laundries in bathrooms keep coming up in renovation briefs. Homeowners want one space that works harder, looks cleaner, and doesn’t feel like a compromise. Done well, a combined layout can make everyday use easier, sharpen resale appeal, and give older homes a far more organised footprint. Done badly, it creates noise, damp, awkward circulation, and compliance headaches hidden behind tiles.

Why Combining Your Laundry and Bathroom Is a Smart Move

You see the same problem in a lot of Melbourne renovations. The bathroom is tight, the old laundry is stuck in a lean-to or back passage, and both rooms waste space in different ways. One is too small to work properly. The other takes up floor area without adding much value to daily use.

Combining them can fix that.

In older Victorian homes around Highett and the bayside suburbs, it often makes more sense to build one well-resolved wet area than keep two underperforming rooms. Grouping the bathroom and laundry together can shorten plumbing runs, reduce duplicated joinery, and free up area for storage or circulation elsewhere in the house. That matters on compact blocks and in homes where every square metre has to earn its keep.

The value is practical before it is cosmetic. A combined room can make washing, bathing, linen storage, and cleaning products easier to manage in one location. It also removes the need to walk baskets through living areas or maintain a second service room that is cold, dated, or poorly ventilated.

In Victoria, the main advantage is often in the buildability.

I regularly see DIY plans and builder-drafted layouts that look efficient on paper but ignore what the room needs to comply and last. A laundry inside a bathroom changes the demands on waterproofing, ventilation, drainage falls, appliance clearances, power locations, and service access. If those items are treated as an afterthought, the room becomes harder to certify, harder to maintain, and more expensive to fix once the tiling is finished.

Why it works in real homes

The best combined rooms solve two problems at once. They improve function now, and they simplify the floor plan for the long term. Instead of splitting storage, wet services, and cleaning tasks across separate rooms, the house gets one organised utility zone that is easier to heat, clean, and use.

That does not mean every home should combine them. In larger family homes with enough width for a proper walk-through laundry, keeping the spaces separate can still be the better call. But in many post-war and mid-century homes across Melbourne, especially where the existing laundry is an add-on with poor insulation or awkward levels, combining the spaces is often the cleaner renovation move.

Practical rule: A bathroom laundry should still read as a bathroom first. The laundry function should be integrated into joinery, not left visually exposed as the dominant feature.

A good result usually comes from restraint. Keep the appliance setup simple. Give the washer and dryer proper ventilation and service access. Make sure wet-zone detailing is resolved before cabinetry is drawn. That approach produces a room that looks calm and works hard.

Better use of space, with fewer hidden problems

The old assumption was that a bathroom laundry was a compromise made only in small apartments. That is not how I see it on site. In many Victorian renovations, it is a deliberate design decision that gets rid of wasted circulation and improves how the home works every day.

It also forces better discipline early in the project. Once a washing machine, vanity, shower, toilet, storage, and door swings share one room, poor planning shows up fast. That pressure is useful because it exposes structural limits, service conflicts, and compliance risks before they turn into site variations.

Handled properly, a combined bathroom laundry is not a fallback. It is a tighter, more efficient solution that suits many Melbourne homes far better than the original layout ever did.

Planning Your Perfect Bathroom Laundry Layout

A layout can look fine on a floor plan and still fail once the room is built. I see this often in Melbourne renovations, especially in older brick homes where wall thickness, uneven floors, and tight existing drainage points limit what can go where. The right layout is the one that works with those conditions, not against them.

Start with circulation and servicing, not cabinetry. In a combined bathroom laundry, people still need to enter the room, use the vanity, access the shower, and open the machine without turning sideways or stepping around doors. In Victoria, that also means allowing enough room to keep power points, switches, and joinery clear of wet areas, while making sure waterproofing and drainage are resolved before the cabinet maker starts drawing up panels.

In compact rooms, the cleanest solution is usually a concealed laundry cupboard. In larger rooms, a full wall of joinery can work well if it does not dominate the bathroom or crowd the fittings. The exact footprint depends on the appliance model, wall construction, ventilation path, and door clearances, so I prefer to measure the selected machines first and build the joinery around real dimensions rather than generic allowances.

Bathroom Laundry Layout Comparison

Layout Type Typical Footprint (W x D) Pros Cons
Stacked in a cupboard Tall cabinet zone sized to the selected appliances Preserves floor area, easier to conceal, suits tighter rooms Needs careful ventilation, service access, and cabinet depth planning
Side-by-side under bench Full bench run along one wall Gives usable bench space, easier loading and unloading Uses more wall length and can make the room feel joinery-heavy
Washer-dryer combo in joinery Single appliance bay within a tall or under-bench cabinet Reduces appliance count and simplifies the layout Longer cycle times and less flexibility for larger households

What works best in smaller bathrooms

For small and medium bathrooms, stacked units usually give the best result because they protect the clear path through the room. That matters once the vanity projection, toilet set-out, shower screen, and open appliance door are all shown properly.

Side-by-side layouts suit wider rooms or renovations where one long wall can carry the vanity, machines, and storage without making the room feel flat. They are easier to live with day to day, but they demand more discipline in the design. If the bench line is too long or too deep, the bathroom starts reading like a laundry with a shower added to it.

A combo machine can be the right call in apartments and smaller townhouses where space is tight and service routes are limited. I only recommend that path after checking how the household washes. A neat plan on paper means very little if the machine setup frustrates the people using it every day.

The questions that should be settled before demolition

These are the checks I would lock in before any wall linings come off:

  • Door swings: The bathroom door, shower screen, appliance door, and cupboard doors must all open without conflict.
  • Standing space: Allow enough room to load the machine and stand at the vanity comfortably.
  • Hamper position: Give baskets a proper landing spot so they do not block the toilet or walkway.
  • Wet-zone separation: Keep detergent, GPO locations, and appliance controls outside the main splash areas.
  • Service access: Taps, traps, power, and shut-offs need to stay accessible after the joinery is installed.
  • Wall capacity: In older Victorian homes, check whether the wall can take recessed services or stacked appliance loads without extra framing.

If the room only works when every door is closed and no one is using the vanity, the layout is not resolved.

Why 3D planning matters

I rely on 3D layouts for this type of renovation because they expose problems early. You can test appliance depth against vanity depth, overhead cupboard height, mirror placement, and the line of sight from the doorway before any waterproofing starts.

That matters even more in Victorian homes, where existing walls are rarely as straight or as generous as the original sketch suggests. A few millimetres lost to render, battens, or wall correction can affect machine clearance, cabinet door operation, and compliance around fixtures. Sorting that out in design is far cheaper than rebuilding joinery or shifting services after rough-in.

Choosing the Right Appliances for a Bathroom Laundry

Appliance choice drives more than convenience in a bathroom laundry. It affects moisture load, cabinet detailing, service access, and whether the room performs properly once the door is shut.

I usually narrow it to three workable setups. A stacked washer and dryer, a side-by-side pair, or a combo unit. The right answer depends on the household’s wash volume, the room width, and how much ventilation and service space the build can support under Victorian requirements.

A modern black washing machine installed in a bright room with wooden floors and large windows.

Dryer type matters more in a bathroom

Dryer selection causes more problems than the washing machine. In a dedicated laundry, a poor dryer choice is inconvenient. In a bathroom, it can add condensation, affect waterproofed finishes, and create defects that are expensive to rectify later.

Heat pump dryers usually suit these rooms better because they do not rely on the same external venting approach as a vented unit. They also tend to make more sense where the appliance is being concealed in joinery and the room already has shower steam to manage. The trade-off is purchase price, longer cycle times on some models, and tighter manufacturer clearance requirements around the cabinet.

Vented dryers are the units I treat cautiously in bathrooms. If the duct run is too long, poorly terminated, or squeezed into a wall that was never framed for it, performance drops and moisture ends up where it should not. In older homes around Highett and across Melbourne bayside suburbs, that is often where DIY planning comes unstuck. The appliance may fit on paper, but the wall cavity, ceiling path, or external discharge point does not.

For Victorian compliance detail, I always check appliance selection against the service design and the relevant bathroom renovation regulations in Victoria before joinery is finalised.

A practical appliance checklist

Before ordering the machine, check these points:

  • Overall depth, not brochure depth: Allow for hoses, taps, plugs, drainage bends, and the ventilation space required by the manufacturer.
  • Door swing and user clearance: The appliance door needs to open fully without hitting a vanity, toilet, or shower screen.
  • Dryer technology: Heat pump, condenser, and vented units behave differently. The wrong type can load the room with moisture or force awkward ducting.
  • Noise and vibration: This matters in ensuites, apartments, and homes with lightweight timber floors where spin cycles can travel through the structure.
  • Stacking suitability: Not every washer and dryer pair can be safely stacked, and the cabinet needs fixing points and tolerance for movement.
  • Maintenance access: Filters, isolation taps, traps, and power points must remain accessible after the cabinetry goes in.
  • Finish and controls: If the appliance sits in view, the fascia, handle profile, and control layout should suit the rest of the bathroom joinery.

What tends to work, and where the compromises sit

A stacked pair usually gives the best result for families who run frequent loads and want one load drying while the next is washing. It uses height instead of floor area, which is often the smarter trade in a compact bathroom. The catch is structural and joinery coordination. The wall, cabinet carcass, and fixing method all need to be planned properly so the installation stays stable and serviceable.

A side-by-side pair works well in larger rooms where there is enough bench length above for folding and storage. It is easier to access and often simpler to maintain. It also uses more wall space, which can put pressure on vanity width or linen storage.

A combo unit suits low to moderate laundry demand where concealment and space saving are the top priorities. It keeps the room tidy and reduces the number of service connections. The compromise is throughput. One machine cannot process back-to-back family loads as efficiently as separate appliances.

The best appliance is the one that fits the room, the framing, and the service design you can build to standard the first time.

Navigating Plumbing Electrical and Waterproofing Needs

A bathroom laundry can look straightforward on the plan. The problems usually start once the wall is opened up. In Highett and across Melbourne’s older housing stock, I regularly see shallow framing, awkward floor levels, dated wiring, and pipe runs that were never designed to carry both bathroom and laundry services in one room.

That is where DIY jobs and general bathroom fit-outs often come unstuck. The room still has to satisfy wet-area requirements, electrical safety rules, drainage falls, ventilation needs, and access for maintenance after the cabinetry goes in. If those decisions are left until rough-in, the fix is usually more framing, more patching, and a more expensive job.

A modern laundry unit and blue marble pedestal sink in a luxurious, tiled bathroom interior.

Plumbing behind the wall

A combined room only works if the service wall is designed for the pipework from the start. In many Victorian renovations, that means checking stud depth, drilling zones, nogging positions, and whether the existing wall can carry waste, water, and vent connections without weakening the structure.

The common mistake is trying to force laundry drainage into a wall or floor zone that does not have enough room for compliant falls and fittings. Builders then start notching or over-drilling timbers to make it fit. That can create a structural problem and a plumbing problem in the same spot.

For this kind of work, I set the layout around the services early. The washing machine location, trap position, isolation taps, and any dryer duct route need to be resolved before the room is sheeted. In apartments and townhouse work, penetrations and discharge points also need closer checking because body corporate rules, fire separation, and existing slab conditions can limit what is possible.

Electrical and ventilation

Power in a bathroom laundry needs proper circuit planning by a licensed electrician. This is a wet area with high-load appliances, heat, steam, and metal fixtures in close proximity. Power point placement, appliance supply, switching, and safety protection all need to suit the room layout and the relevant Australian rules.

Ventilation is where a lot of combined rooms underperform. A fan sized for shower moisture alone may not be enough once the room is also handling washing, drying, and closed cupboard spaces around appliances. If the dryer is ducted, the path has to be short, serviceable, and installed to the manufacturer’s requirements. Long flexible duct runs are one of the first things I look for on problem jobs.

Poor extraction shows up fast. Condensation sits on mirrors and ceilings, cabinet interiors stay damp, and mould starts in the corners or behind joinery.

Waterproofing has to allow for appliance risk

In a bathroom laundry, waterproofing is not limited to the shower zone. The floor and wall junctions need detailing that accounts for routine bathroom moisture and the kind of leaks laundries produce, such as hose failures, loose waste connections, or an overflowing machine tray.

Victorian compliance matters here. Wet area work should align with NCC requirements and AS 3740, and any plumbing and electrical work must be carried out by licensed trades to the applicable standards. For strata and apartment projects, Victorian bathroom renovation regulations are worth checking early because shared walls, waterproofing interfaces, penetrations, and approvals can affect the design before demolition even starts.

I also want service points left accessible wherever the layout allows. Hidden taps, inaccessible traps, and power points buried behind fixed joinery turn a small maintenance issue into a cabinet removal job.

What I insist on getting right

These are the items I treat as required on a bathroom laundry build:

  1. Framing and set-out that suit the actual pipework and ducting, rather than cutting timbers to rescue a bad layout.
  2. Licensed plumbing and electrical design, with appliance loads, outlet locations, and wet-area safety resolved before rough-in.
  3. Mechanical ventilation sized for how the room will really be used, not just the minimum someone hopes will pass.
  4. Waterproofing addressing the whole risk profile of the room, including appliance-related leaks outside the shower area.
  5. Access for isolation, cleaning, and future repairs, so the room stays serviceable after the joinery and tiles are finished.

The neat tiled finish is the easy part. Getting the hidden work right is what makes a bathroom laundry last.

Smart Storage and Accessibility in Designer Bathrooms

The best combined rooms don’t just fit a washing machine. They remove the clutter that usually gathers around it. That’s the difference between a functional bathroom and a room that feels resolved.

Storage needs to work on two levels. First, the room has to hide detergent, baskets, cleaning products, spare towels, and daily mess. Second, it has to make those things easy to reach without forcing awkward bending, overreaching, or constant reshuffling.

A modern bathroom featuring built-in wooden laundry storage cabinets, organized shelves, and a bathtub with green surfaces.

Storage that earns its floor space

In a good designer bathroom, every cabinet has a job. Tall cupboards can conceal stacked appliances and still leave room above for bulk items. A shallow overhead can hold light-use products. A base cabinet beside the machine can take a pull-out hamper or laundry basket shelf.

Useful storage ideas include:

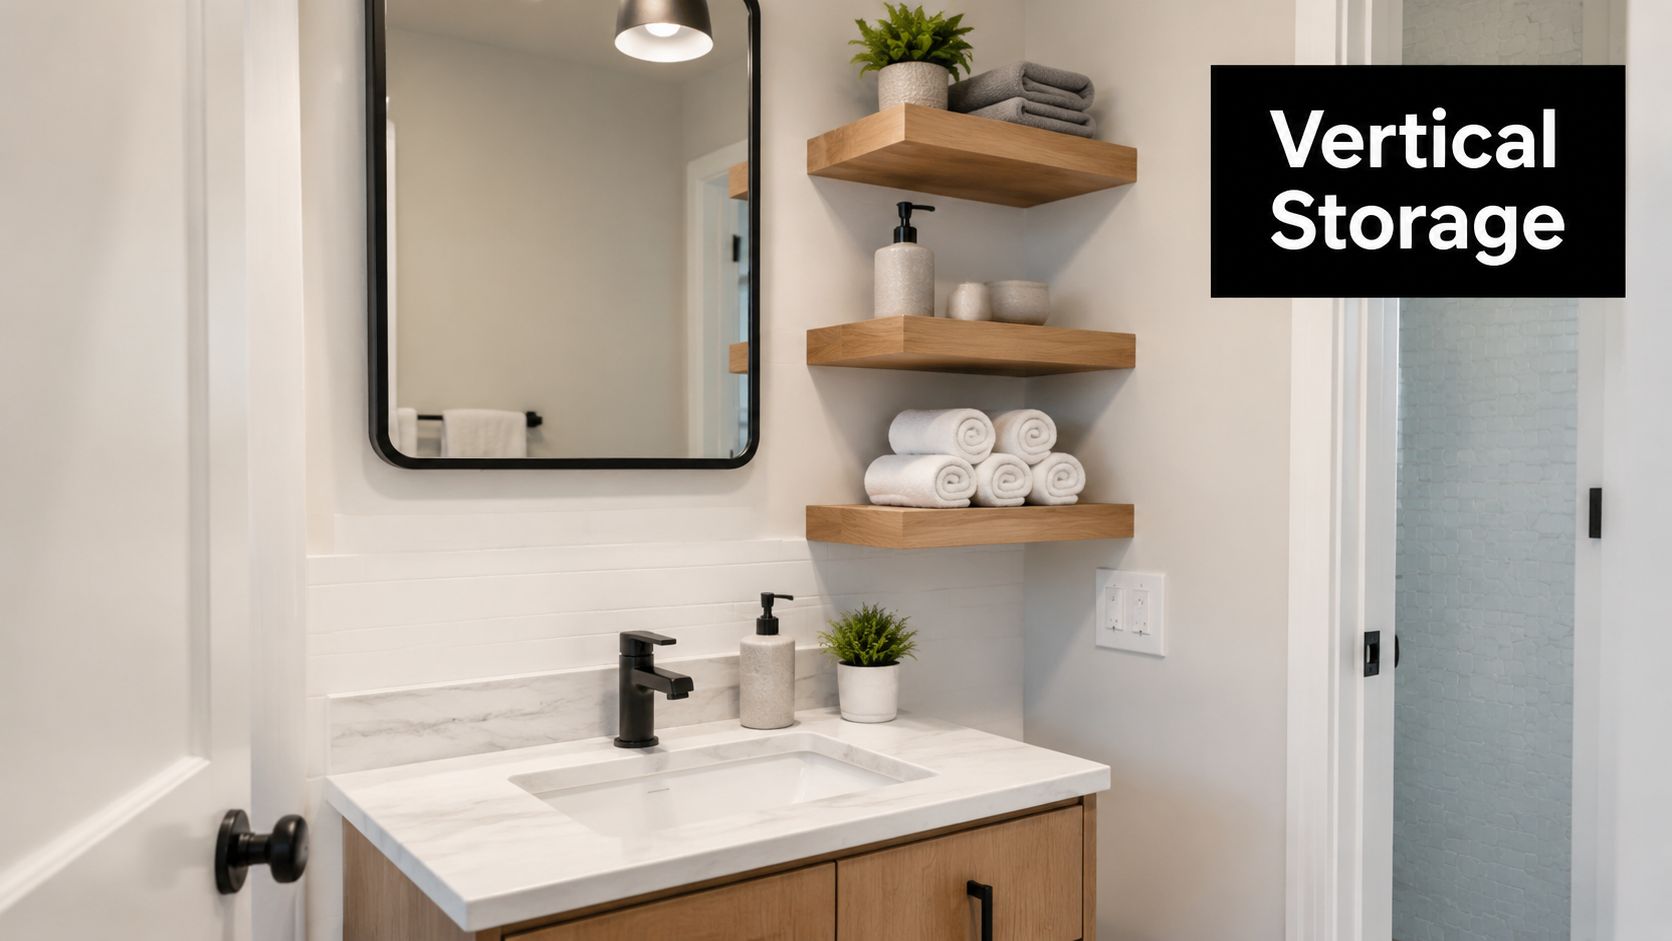
  • Tall linen towers: Good for towels and backup supplies without taking over the vanity wall.
  • Internal shelves above appliances: Best for detergents and items you don’t want left on display.
  • Pull-out hampers: Keeps dirty clothes contained and off the floor.
  • Benchtop landing area: Even a short section matters for folding, sorting, or placing a basket.
  • Closed joinery fronts: Keeps the room reading as one clean composition.

Accessibility matters in everyday use

Accessibility isn’t only about formal compliance. It’s about reducing strain and making the room easier to use over time. Front-loading machines raised within joinery can reduce bending. Handle placement, shelf height, and door clearances all affect whether the room feels effortless or annoying.

Bench height and appliance alignment need to be thought through together. This makes standard benchtop height guidance for renovation planning practical, not cosmetic. It helps set cabinetry at a level that works for daily tasks rather than just matching a visual line on an elevation.

A designer bathroom isn’t defined by expensive finishes. It’s defined by how calmly the room handles everyday use.

Small details that improve the room

Some of the strongest new bathroom ideas are quiet ones. A recessed power point inside a cupboard. A shelf tall enough for detergent bottles without wasted voids. Cabinet doors that open clear of the vanity. A towel rail placed where it doesn’t fight with appliance doors.

These choices don’t shout. They just make the room easier to live with. In modern bathrooms, that’s often what gives the space its polished feel.

Project Costs Permits and Partnering with a Builder

A combined bathroom laundry can look straightforward on plan. Then demolition starts, the wall depth is wrong for services, the floor waste falls the wrong way, or the owners corporation asks for documents no one allowed for. That is where budgets usually shift in Victorian renovations, not because the idea was ambitious, but because the build was under-scoped from the start.

In Highett and across Melbourne, I see the same pattern. The rooms that run over budget usually involve hidden framing problems, extra plumbing work, switchboard upgrades, slab penetrations, or waterproofing details that were never properly resolved before tiles were selected.

What usually drives the cost

The biggest cost items are rarely decorative. They are the parts behind the walls and under the floor that have to be done properly the first time.

  • Structural changes: Removing or altering walls, adjusting noggings, or creating enough depth for drainage and ducting can add labour and engineering input.
  • Service relocation: Moving waste points, hot and cold lines, power, lighting, exhaust, and appliance connections costs more than working with the existing layout.
  • Custom joinery: Cabinetry that conceals machines, protects ventilation clearances, and still allows maintenance access takes more planning and better detailing.
  • Apartment conditions: Access restrictions, booking lifts, protecting common areas, and working within owners corporation rules all affect labour time and sequencing.
  • Finish complexity: Full-height tiling, recessed niches, custom screens, feature stone, and tight appliance integration leave less room for installation error.

A cheap quote can miss half of that.

Permits, approvals, and compliance in Victoria

Victoria is strict on wet-area work for good reason. Bathroom laundries combine plumbing, electrical, waterproofing, ventilation, and often structural changes in one compact room. If one trade gets the set-out wrong, the rest of the build can unravel quickly.

Not every project needs the same approvals, but assumptions cause trouble. In apartments and units, owners corporation approval may be required where works affect common property, service penetrations, membranes, acoustic performance, or external venting. In houses, the key questions are whether the proposed work triggers building permit requirements, whether structural work is involved, and whether all plumbing and electrical work will be carried out and certified by the right licensed practitioners.

The Victorian Building Authority sets the expectations around compliant building and plumbing work in this state. A registered builder should be checking those requirements before work starts, not after demolition.

Why the right builder changes the outcome

A bathroom laundry has very little tolerance for guesswork. Appliance sizes, door swings, waste locations, waterproofing set-downs, ventilation paths, and joinery clearances all compete for the same small footprint. General building knowledge helps, but renovation-specific experience matters more here.

The builder should be asking practical questions early. Can the existing floor system take the new drainage route without weakening the structure? Is there enough wall depth for pipework and recessed storage? Will the exhaust path comply and still perform properly? Can the washing machine be serviced without dismantling half the cabinetry?

Those questions protect the finish, the program, and the compliance side of the job.

If you are weighing up who should manage the work, this guide on why using a registered builder matters for your bathroom renovation explains what accountability should look like in a Victorian renovation.

The best value usually comes from a build that does not need rectification, reapproval, or trade call-backs six months later.

A combined bathroom laundry is a smart use of space, but only when the cost plan reflects the construction work involved. Good projects are priced around structure, services, approvals, and execution. The styling sits on top of that.

  • siteprobathrooms

How Long Should A Bathroom Remodel Take: Expert Timelines

A simple cosmetic update can take 2 to 3 weeks, a standard remodel usually takes 4 to 8 weeks, and a full-gut renovation with layout changes commonly takes 8 to 12 weeks or more in Victoria. Those are useful starting points, not promises, because permits, trade coordination, apartment approvals, and material choices can all change the pace of the job.

If you’re planning bathroom renovations in Highett or elsewhere in Melbourne, that timing question usually comes up before anything else. You want to know how long you’ll be without the room, how disruptive the job will be, and whether the timeline you’ve been given is realistic or just optimistic sales talk.

The honest answer is that scope decides the base timeline, and Victorian compliance requirements decide how much margin you need around it. A like-for-like update in the same footprint moves far faster than a project that relocates plumbing, changes waterproofed areas, or needs Body Corporate approval. That’s especially true when people want modern bathrooms or more ambitious designer bathrooms, because the finish level may be higher even if the room is small.

Your Bathroom Renovation Timeline at a Glance

A blueprint roll lies on a marble countertop in a modern renovated bathroom during construction.

Most delays happen because people treat all bathroom projects as if they’re the same job. They’re not. If you want a realistic answer to how long should a bathroom remodel take, start by placing your project into the right category.

Cosmetic update

This is the quickest version. The layout stays put, plumbing points remain where they are, and the work focuses on surface-level improvement. Think new tapware, updated fixtures, painting, a vanity swap, or replacing selected finishes without rebuilding the room.

A cosmetic update is the closest thing to a short timeline in bathroom work. It’s also the least disruptive option for owners who want a fresh result without opening up the whole room.

Standard remodel

This is the middle ground and the most common type of family bathroom project. You’re replacing most finishes, likely updating the shower area, vanity, lighting, tiling, and fittings, but you’re not dramatically changing the room’s structure.

This type of remodel allows for many good new bathroom ideas. The bathroom can look completely different at the end, but the job remains manageable because the wet areas and services are still broadly where the original design placed them.

Full-gut renovation

A full-gut renovation takes the longest because you’re rebuilding rather than refreshing. Walls may need adjustment, fixtures may move, older plumbing may need replacement, and permit requirements become much more important.

According to Housing Industry Association data on Melbourne bathroom renovation timing, 68% of full bathroom renovations in Melbourne suburbs take 8 to 12 weeks on average, with professional contractors completing 85% within this window, while DIY efforts extend to 16+ weeks in 42% of cases due to inspection delays.

Practical rule: The more you move, the longer it takes. Moving the room’s bones is what stretches a schedule, not choosing prettier tiles.

A quick way to classify your project

Project type What it usually involves Typical timing
Cosmetic update Surface changes, same layout, minimal service changes 2 to 3 weeks
Standard remodel Full finish replacement, better function, same general footprint 4 to 8 weeks
Full-gut renovation Layout changes, major plumbing or structural work, full rebuild 8 to 12 weeks or more

Two homeowners can both say, “We’re doing the bathroom,” and be talking about completely different programmes of work. One is replacing finishes. The other is effectively rebuilding a wet area under Victorian compliance rules.

If you’re aiming for modern bathrooms with cleaner lines, improved storage, and better lighting, you may still stay in the standard-remodel category. If you’re chasing high-end designer bathrooms with custom layouts, relocated fixtures, or a larger walk-in shower, you’re usually in full-gut territory whether the room is large or not.

The Stage-by-Stage Renovation Breakdown

A construction site featuring renovation supplies like tiles, a drill, and scaffolding for bathroom remodel work.

A bathroom timeline makes more sense when you stop looking at it as “one job” and start looking at it as a sequence. Each stage has its own purpose, and some stages can’t be rushed without creating defects.

Planning and approvals

A standard Victorian bathroom renovation commonly begins with planning and 3D design for 1 to 2 weeks, followed by permit approval for 2 to 4 weeks. The same benchmark places demolition and rough-in at 3 to 5 days, with finishing, including tiling and fixtures, at 1 to 2 weeks, while allowing 48 to 72 hours of cure time for epoxy grouts under AS 3958 as outlined in this Victorian bathroom renovation timeline reference.

That early planning period matters more than clients expect. It’s where selections are locked, measurements are checked, the layout is resolved, and any permit-triggering work is identified before the room is opened up.

If those decisions are vague at the start, the rest of the programme becomes stop-start. That’s when trades arrive ready to work, then lose time waiting for missing instructions or missing products.

Demolition and rough-in

Demolition looks fast because the room changes quickly. In practical terms, it is fast. But it only works well when the team already knows what’s replacing everything that comes out.

Once the room is stripped back, rough-in work follows. This involves the hidden services: plumbing lines, drainage points, electrical wiring, and any framing or wall preparation needed for the new layout.

Rough-in is the stage that decides whether the finished bathroom works properly. If levels, falls, set-outs, or service positions are wrong here, the room may still look nice later, but it won’t perform the way it should.

Waterproofing and tiling

This is the stage owners most often underestimate. Waterproofing isn’t paint. It’s a controlled system, and the work around it has to be sequenced properly.

Tiling also takes longer than many people assume because tile setting, alignment, cuts, trims, junctions, and curing all matter. A rushed tiling stage usually shows up later as uneven lines, weak detailing, or cracking around movement points.

Here’s what tends to happen on well-run projects:

  • Surface preparation: Walls and floors are corrected before membrane work begins.
  • Waterproofing application: Wet areas are treated as a system, not as isolated patches.
  • Cure time: This waiting period isn’t wasted time. It protects the work.
  • Tile installation: Floors, walls, niches, and shower areas are laid in the right sequence.
  • Grout and finishing: Final sealing and curing must happen before heavy use.

Final fix and handover

The final stage includes the visible items clients care about most: vanity, toilet, shower fittings, mirrors, lighting, accessories, and finishing details. It also includes testing, defect checking, cleaning, and any required inspection sign-offs.

This stage should feel calm, not chaotic. If the project has been organised well, the room comes together cleanly because the hard decisions were made earlier.

That’s why the smoothest bathroom renovations aren’t the ones with the fastest demo day. They’re the ones with the clearest planning, the best sequencing, and enough respect for curing, compliance, and finishing standards.

Hidden Factors That Can Delay Your Project

A half-finished bathroom renovation featuring green tiles and a bathtub filling with water during a delay.

The timeline on paper is the ideal path. The timeline in real life depends on what sits around the build itself. In Victoria, those external factors are often what separate a tidy renovation from a drawn-out one.

Apartments and Body Corporate approvals

Apartment owners usually assume the builder can start once the quote is signed. That’s often not the case. If the work affects shared building interests, access arrangements, noise conditions, or major wet-area changes, approvals can slow the start before a tradesperson touches a tool.

Under the Owners Corporations Act 2006 in Victoria, 75% owner approval can be required for major works, and that often delays bathroom renovation starts by 4 to 8 weeks in apartments. The same source notes an average of 7.5 weeks for apartment renovations versus 4.5 weeks for houses in Victoria, as detailed in this summary of strata-related bathroom renovation delays.

That doesn’t mean apartment projects are bad candidates for renovation. It means they need earlier paperwork, clearer communication, and a schedule built around approval reality rather than wishful timing.

Permits, compliance and inspections

Victorian bathroom work can trigger permit and compliance obligations that owners don’t always see at first glance. Structural changes, plumbing changes, and waterproofing-related inspection points all add administration and sequencing.

The common mistake is treating permit time as separate from the renovation. It isn’t. Permit and inspection timing is part of the programme, not an optional extra.

Materials and unforeseen site conditions

Products can also hold up work. A standard vanity or stock tile is far easier to schedule around than custom joinery, made-to-order shower screens, or selected finishes with long lead times.

Then there’s the condition of the existing room. Once demolition begins, older bathrooms can reveal corroded plumbing, poor previous work, damaged substrates, or wall and floor issues that must be corrected before finishes go back in.

Common delay points include:

  • Late selections: Tile, fittings, and joinery choices still unresolved after the start date.
  • Older homes: Hidden defects only show themselves once walls or floors are opened.
  • Access limits: Apartment lift bookings, parking constraints, and site access windows.
  • Approval gaps: Missing Body Corporate paperwork or unclear scope submissions.
  • Trade bottlenecks: One delayed trade affects every trade booked after them.

If a project stalls, it’s rarely because one task took slightly longer. It’s usually because a decision, approval, or product wasn’t ready when the next trade needed it.

What works better in practice

The jobs that stay on time usually have a very ordinary advantage. They are organised before they become urgent.

That means selections made early, approvals lodged early, site access discussed early, and realistic allowances for what might be hiding behind an older bathroom. In Melbourne, especially in established suburbs, that preparation matters just as much as workmanship.

Sample Bathroom Renovation Schedules

A schedule becomes easier to trust when you can picture the flow of work. Below are two realistic examples based on common project types.

Sample 6-Week Standard Bathroom Renovation Schedule

This type of job suits a family bathroom where the room is fully renewed, the layout is broadly retained, and the project is managed in a disciplined sequence.

Week Key Activities
Week 1 Final site check, protection of surrounding areas, demolition, strip-out, waste removal
Week 2 Rough plumbing and electrical work, substrate preparation, framing adjustments if needed
Week 3 Waterproofing system application, cure time, pre-tiling checks
Week 4 Wall and floor tiling, set-out adjustments, trim installation, grout preparation
Week 5 Vanity, toilet, fittings, shower screen measuring or installation depending on sequencing
Week 6 Final electrical fit-off, painting touch-ups, accessories, testing, clean, handover

This isn’t a promise for every standard bathroom. It’s a practical model of how a coordinated project runs when planning is settled before the start date.

If you want to see what a finished local renovation can look like once that sequencing is executed properly, this bathroom renovation in Sandringham shows the sort of end result many homeowners are aiming for when they want a clean, updated family space.

Compact ensuite update

Smaller ensuites often move faster because the work area is tighter, the fixture count is lower, and the project can stay in a straightforward pull-and-replace format.

For compact ensuite remodels under 4m², a pull-and-replace process can be completed in 3 to 5 weeks, with on-site works taking 10 to 14 days total. That includes demolition in 1 day, rough plumbing and electrical in 2 to 3 days, waterproofing in 2 days with cure time, and tiling and fixtures in 4 to 5 days. 65% of these projects finish within 4 weeks when layout changes are avoided, according to this compact ensuite renovation benchmark.

A typical ensuite schedule often looks like this:

  • Pre-start period: Final selections, access planning, confirmation of all fixtures and finishes
  • Start of on-site work: Quick demolition and immediate rough-in preparation
  • Middle of project: Waterproofing, curing, tiling, and fixture installation
  • Final days: Testing, touch-ups, clean, and handover

Small doesn’t automatically mean simple. A compact ensuite can run quickly, but only if the layout stays stable and every fitting has already been chosen.

That’s why investors and busy homeowners often get caught out on small rooms. They assume a smaller footprint means fewer planning demands. In reality, a compact room has less margin for error. A poorly chosen vanity depth, misjudged tile set-out, or late fitting decision can cause just as much disruption as it would in a larger bathroom.

How to Keep Your Bathroom Renovation on Track

A modern bathroom vanity featuring wooden cabinets, a marble sink, and green marble wall tiles.

Most bathroom projects don’t drift off schedule because bathrooms are unpredictable. They drift because too many moving parts are left unmanaged.

A major Victorian audit found the same pattern. A 2022 VBA audit of 500 Victorian jobs found that 78% of compliance-related delays that pushed a 3-week remodel to 5 to 7 weeks came from uncoordinated or non-compliant work by separate, unmanaged trades, as reported in this VBA delay summary.

Lock decisions before demolition

The first protection against delay is simple. Don’t start demolition while key selections are still floating.

That includes tiles, tapware, vanity dimensions, mirror sizing, lighting positions, shower screen type, and any layout adjustments. If these aren’t fixed early, trades start making temporary assumptions, and temporary assumptions are expensive.

A cleaner process usually follows this order:

  1. Define the scope clearly: Know whether you’re refreshing, remodelling, or rebuilding.
  2. Finalise selections early: Every item that affects set-out or installation should be chosen before work begins.
  3. Confirm availability: Make sure the chosen products will arrive when needed.
  4. Sequence the trades: Each trade should know when they start and what condition the room must be in before they arrive.

Use one coordinated project lead

Registered builders unlimited and properly managed renovation teams matter. The issue isn’t only technical skill. It’s control of sequencing, compliance, and responsibility.

When one party coordinates the work, decisions are clearer, defects are caught earlier, and inspection requirements are easier to manage. When multiple separate trades are left to self-coordinate, gaps appear between them. Those gaps are where delays usually start.

This practical guide on project management essentials for staying on schedule and under budget explains why renovation timing improves when one team controls communication, scheduling, and handover standards.

Build in sensible contingencies

Even well-run projects can uncover hidden issues. That’s normal in bathrooms, especially in older properties. What matters is whether the schedule has enough breathing room to absorb them without collapsing.

Useful habits include:

  • Allowing approval time: Especially for apartments or more involved wet-area work
  • Ordering early: Long-lead items should be on hand or confirmed well before install dates
  • Keeping communication tight: Clients who respond quickly keep trades moving
  • Respecting cure and inspection time: These pauses protect the finished result
  • Avoiding mid-project design changes: Late “small tweaks” often have large scheduling consequences

On-site habit: The fastest projects aren’t the ones where everyone rushes. They’re the ones where nobody has to stop and ask what happens next.

If you want a bathroom that lasts, speed alone can’t be the goal. The primary goal is controlled progress. That’s what keeps a project moving without cutting corners on waterproofing, set-out accuracy, compliance, or finish quality.

Start Your Timely Renovation with Confidence

A bathroom remodel should take as long as the scope and compliance requirements demand, no less and no more. For most owners in Victoria, that means thinking in practical ranges rather than fixed promises: a quick cosmetic refresh at one end, a standard remodel in the middle, and a longer full-gut renovation when layout and services change.

The clearest pattern across Melbourne projects is straightforward. Simple bathrooms move quickly. Complex bathrooms move well only when they’re properly planned. If approvals, product selections, and trade sequencing are all organised before demolition, the timeline becomes far more predictable.

That matters whether you’re updating an ensuite for an investment property, rebuilding a worn family bathroom, or creating one of those polished modern bathrooms that needs both strong aesthetics and solid day-to-day function. The room has to look right, but it also has to pass the practical test of waterproofing, compliance, access, ventilation, and long-term durability.

For homeowners in Highett and across Victoria, the safest way to reduce timeline stress is to work with a team that can handle design, approvals, and construction as one connected process. That’s also why using a registered builder for your bathroom renovation matters. It brings accountability to the whole programme, not just the build itself.


If you want a realistic timeline for your own project, SitePro Bathrooms can help you plan it properly from the start. Their end-to-end service covers 3D design, permit handling, trade coordination, and construction, giving homeowners a clearer path to well-executed bathroom renovations, modern bathrooms, and designer bathrooms without the usual guesswork around timing.

  • siteprobathrooms

Designing an Ensuite: Modernize Your Victorian Bath

You’re probably at the stage where the idea sounds simple enough. Take part of the bedroom, convert an old robe, borrow space from a hallway, and create an ensuite that makes mornings easier. Then the key questions start. Will it feel cramped? Can the plumbing go there? Is a toilet opposite the bed always a bad idea? Will the renovation add value, or just cost money?

That’s where good planning matters. Designing an ensuite isn’t only about fitting in a shower, vanity and toilet. In Victorian homes, especially in tighter footprints, the best results come from balancing layout, compliance, storage, light, and future use from the beginning. A smart ensuite should work well on day one, still work years later, and sit naturally with the rest of the home.

Your Ensuite Vision and Foundation

An ensuite changes how a home feels to live in. It cuts traffic to the main bathroom, gives privacy, and makes the morning routine far less chaotic. It can also strengthen resale appeal. In Victoria, homes with an ensuite command a $160,000 premium compared with similar homes without one, according to Domain’s report on ensuite design and buyer appeal.

That figure gets attention, but the practical side matters just as much. A valuable ensuite isn’t the one with the most fittings. It’s the one that feels easy to use, suits the household, and doesn’t create maintenance problems later.

A modern luxury ensuite bathroom featuring green marble walls, a wooden vanity, and a glass shower enclosure.

Start with the space you actually have

Most ensuite mistakes happen before tiles or tapware are chosen. Homeowners often measure wall to wall and assume every millimetre is usable. It isn’t. Door swings, wall thickness, plumbing positions, windows, and circulation all take space.

A better starting point is to map the room in layers:

  1. Structural limits
    Mark the full room dimensions, ceiling height changes, windows, and any bulkheads or nib walls.

  2. Fixed services
    Locate waste points, water supply lines, and likely ventilation paths. If these are awkward, the design needs to respond to them.

  3. Useable floor area
    Work out where a person can stand, turn, dry off, and open joinery comfortably.

Define who the room is for

An ensuite for a young couple looks different from one for ageing parents, a landlord fit-out, or a family home where one bathroom is always under pressure. The brief should be specific.

Ask these questions early:

  • Daily use
    Will two people use it at the same time, or is it mainly a private single-user space?

  • Storage needs
    Do you need medicine storage, makeup lighting, towel storage, a laundry hamper, or shaving access at the vanity?

  • Comfort level
    Are you after a compact, efficient room, or are you trying to create one of those polished designer bathrooms that feels more like a retreat?

  • Future use
    Will this need to suit reduced mobility later, even if that isn’t a concern today?

Practical rule: If a feature looks good on a wishlist but makes movement harder every day, it usually doesn’t belong in a small ensuite.

Build a brief before choosing finishes

Plenty of homeowners jump straight into new bathroom ideas. They save marble-look tiles, brushed metal tapware and timber vanities, but they haven’t settled the core brief. That leads to expensive redesigns and compromises.

A good brief is short and clear. It should list the absolute necessities first, then the desirable extras. In most ensuites, the essentials are the shower, vanity, toilet, ventilation, lighting, and storage. Extras might include a double basin, heated floor, niche lighting, or feature stone.

If you want to test ideas visually before construction, a proper bathroom interior design process helps sort out proportion, fixture placement, and finishes before trades are booked.

If the room feels resolved on paper, the build runs more cleanly on site.

Mastering Your Ensuite Layout Strategy

A good ensuite layout feels obvious once it’s built. You walk in, everything is where it should be, nothing blocks movement, and the room feels bigger than its footprint. Getting there takes restraint.

In compact Victorian homes, layout matters more than almost any finish selection. For ensuites in the 2 to 4m² range, a linear layout can free up 1m² of floor area and improve usability by 25% in user trials, according to guidance on small ensuite design layouts. That’s why it’s usually the first arrangement worth testing in tight rooms.

Why linear layouts work

A linear layout places the main fixtures along one wall. Usually that means vanity, toilet and shower aligned in sequence, with the shower often positioned at the end wall. The benefit isn’t style alone. It clears the centre of the room and improves circulation.

That matters in a narrow ensuite where every projection competes with body movement. It also tends to simplify cleaning, glazing, and visual order.

Sightlines matter more than people think

Homeowners often focus on whether everything fits. The better question is what you see first. If the toilet is the first thing visible from the bed, the room will feel less considered no matter how expensive the finishes are.

A stronger arrangement often does three things:

  • Protects privacy by keeping the toilet out of direct bedroom sightlines
  • Presents the vanity first because it’s the most furniture-like element
  • Contains the wet zone so overspray and moisture stay controlled

In small ensuites, a room can be technically compliant and still feel wrong. Sightlines are usually the reason.

Ensuite layout options for small spaces

Layout Type Best For (Room Shape) Pros Cons
Linear Long and narrow rooms Clear circulation, simple plumbing runs, cleaner visual lines Can feel rigid if storage isn’t integrated well
End-shower layout Rectangular rooms with a clear short wall Strong sense of depth, shower is easy to screen off Needs careful door and vanity placement
Corner shower layout Squarer rooms Makes use of awkward corners, can open central floor area Corners can feel tighter and glazing can interrupt flow
Opposing fixtures Wider rooms Balanced look, allows separation of functions Can create pinch points in small footprints
Pocket-door ensuite with side entry Very tight or retrofitted spaces Removes door swing conflict, improves entry sequence Requires early wall planning and joinery coordination

The layout trade-offs that matter on site

There’s no perfect plan. There’s the plan that suits the room and the household best.

A few trade-offs come up often:

  • Door swing versus usable wall space
    A standard hinged door can steal the best vanity wall. In some rooms, changing the door arrangement solves more than changing fixtures.

  • Larger vanity versus movement space
    Extra bench space sounds attractive, but not if it narrows the route to the shower.

  • Feature shower screen versus maintenance
    Frameless glass keeps the room open. Heavier framing creates more visual interruption and more edges to clean.

If you’re selecting vanity dimensions, mirror size, and basin placement together, it helps to understand standard benchtop height considerations in bathroom planning because comfort at the vanity affects how the whole room is used.

A simple way to test a plan

Print the floor plan and mark the path from bed to vanity, vanity to toilet, and door to shower. If any path feels squeezed, interrupted, or visually awkward, the room needs refining. That test is basic, but it catches many layout problems before construction starts.

Plumbing Ventilation and Waterproofing Essentials

The part of an ensuite you don’t see is what determines whether it performs well for years or starts causing trouble early. Many bathroom renovations are won or lost based on these unseen elements.

A polished tile finish won’t compensate for poor falls, weak extraction, awkward plumbing runs, or bad waterproofing. Those aren’t cosmetic issues. They affect moisture control, durability, maintenance, and compliance.

Plumbing decisions should happen early

The easiest ensuite to build is usually the one that respects the existing plumbing logic of the home. If the new room can sit close to existing waste and water lines, the design tends to be simpler and the construction sequence more predictable.

That doesn’t mean the layout should be dictated entirely by old pipework. It means the design needs to understand what can be moved, what shouldn’t be moved, and what impact those moves will have on floor build-up, wall thickness, and fixture positioning.

In older Victorian homes, that’s especially important where underfloor structure, slab penetrations, or wall framing can limit options.

Ventilation isn’t optional

Ensuites work hard in a short period of time. Hot showers, little natural air movement, and closed doors create the perfect conditions for lingering moisture. If extraction is poor, mirrors stay fogged, grout stays damp, and mould finds a foothold.

Good ventilation should be planned as part of the room, not added as an afterthought. That means looking at fan location, duct route, air movement, and whether the room also benefits from natural ventilation. In practice, the best ventilation setups are usually the least noticeable because they keep the room dry and stable.

A bathroom that doesn’t dry properly will keep reminding you that the hidden work wasn’t resolved.

Waterproofing needs a zero-compromise approach

Waterproofing failures are expensive because the damage often shows up late. By the time a stain appears on an adjacent wall or moisture gets into joinery, the repair is no longer minor.

That’s why this part of the work belongs with qualified trades and a builder who understands sequencing. Substrate preparation, set-downs, junction detailing, waste installation, membrane application, curing times, and tile installation all affect the final outcome.

For homeowners comparing contractors, why using a registered builder matters for your bathroom renovation is worth understanding before you commit. If you’re searching for registered builders unlimited experience, the point isn’t the label alone. It’s whether the team can coordinate compliance, trades, inspections, and responsibility for the finished room.

What works and what doesn’t

  • Works well
    Keeping plumbing efficient, specifying proper extraction, and treating waterproofing as a controlled trade sequence.

  • Usually goes wrong
    Moving fixtures late in the process, underestimating moisture loads, or letting visual choices drive technical decisions.

The most successful ensuites feel effortless because the infrastructure was handled properly first.

Choosing Fixtures for Style and Function

Once the layout and technical framework are settled, the room starts to become real. This is the stage homeowners usually enjoy most. It’s also where plenty of projects drift off course if every choice is made in isolation.

Good fixture selection isn’t about collecting attractive pieces. It’s about building a room where each element supports the others. The vanity should suit the wall and circulation. The shower screen should suit the light. The tapware finish should suit the maintenance expectations of the household, not only the showroom display.

A curated collection of modern bathroom fixtures including gold faucets, knobs, and decorative glass elements.

Think like you’re walking through the room

A practical way to choose fixtures is to imagine using the room in sequence.

You enter. You see the vanity first. The mirror and lighting shape the room immediately. You move to the shower. The screen either keeps the room feeling open or cuts it up visually. Then you notice whether storage is hidden, whether cleaning looks manageable, and whether the finishes feel calm or busy.

That sequence is why the vanity usually carries so much weight in ensuite design. It’s the main piece of joinery, the visual anchor, and often the hardest-working storage element.

Vanity choices that hold up

A floating vanity can make a small ensuite feel lighter and easier to clean. A floor-mounted vanity can offer a more grounded furniture look and sometimes extra practical storage. Neither is always right.

The better decision usually comes down to four questions:

  • How much storage do you need every day
  • How much floor area do you want visible
  • Will the room benefit from a slimmer profile
  • How much maintenance are you willing to take on around edges and finishes

For modern bathrooms, clean-lined vanities with restrained detailing usually work best. For more layered designer bathrooms, timber texture, curved forms, stone tops, and carefully chosen handles can add warmth without cluttering the space.

Screens, glass and light

One of the smartest choices in a compact ensuite is the shower screen. In many projects, it is through this choice that function and appearance either come together or pull apart.

Reflecting current standards in Victoria, 72% of dwellings built post-2000 include at least one ensuite, and one strong design move for light and privacy is fluted glass, which can allow up to 80% more natural light penetration while still screening views, according to advice on ensuite design and fluted glass use.

That makes fluted glass especially useful when a homeowner wants privacy between the shower and vanity zone, or wants to soften the view of the toilet without shutting the room down.

If clear glass makes the room feel exposed and full opacity makes it feel boxed in, fluted glass often lands in the right middle ground.

Finishes that look good after the handover

Some new bathroom ideas look excellent in a sample tray but become harder to live with once soap residue, fingerprints, and daily wear arrive.

A few reliable principles help:

  • Matte textures can soften glare and add depth, but they may show residue differently depending on colour.
  • Highly reflective finishes can brighten a room, though they often need more regular wiping.
  • Timber-look joinery adds warmth, but the detailing around handles, edges, and kick zones matters.
  • Feature stone or stone-look surfaces work best when the rest of the palette is restrained.

The most convincing ensuite schemes usually mix a few materials rather than too many. One statement surface, one grounding neutral, and one metal finish is often enough.

Integrating Smart Storage and Accessibility

Storage and accessibility are often treated as separate topics. In practice, they belong together. Both are about reducing friction. Both make the room easier to use. Both improve the long-term value of the renovation.

That matters in Victoria because 16% of Victorians are over 65, and a 2024 Master Builders Australia report noted that 35% of Victorian bathroom renovations require modifications within 5 years due to poor forward-planning for mobility, as outlined in guidance on small ensuites and accessibility planning.

A future-ready ensuite doesn’t have to look clinical. Most of the best accessibility decisions are almost invisible when they’re planned well.

An elegant bathroom vanity with marble countertop, featuring organized toiletries, a plant, and an open storage drawer.

Storage that removes clutter properly

In a small ensuite, clutter isn’t only untidy. It makes the room harder to clean and harder to move through. Good storage should pull everyday items off the bench and off the floor without making the room feel overbuilt.

The most useful storage is usually integrated into the room from the start:

  • Recessed mirror cabinets keep daily-use items close to the vanity without adding bulk.
  • Drawer-based vanities generally make access easier than deep cupboard shelves.
  • Shower niches work when they’re planned around tile set-out and bottle height.
  • Joinery for hampers and bins helps keep laundry and waste out of view.

Accessibility that still feels residential

Many people hear accessibility and picture grab rails added late, bulky fittings, or a room that looks institutional. That’s usually the result of retrofitting, not thoughtful design.

A better approach is to build flexibility into the room early. That might mean:

  1. A step-free shower entry so access is easier now and safer later.
  2. Wall reinforcement in key zones so support rails can be added cleanly if needed.
  3. Door and circulation planning that reduces tight turning and awkward entry points.
  4. A vanity setup with clear legroom or more forgiving edges if mobility changes.

These decisions also help households beyond ageing-in-place. They suit injury recovery, temporary mobility issues, visiting parents, and multi-generational living.

The best accessible bathroom usually doesn’t announce itself. It simply feels easier for everyone to use.

Future-proofing is a design decision

When storage and accessibility are planned together, the room becomes calmer and more resilient. There’s less visual noise, fewer obstacles, and a safer movement path.

That’s especially relevant when designing an ensuite in a compact footprint. Every drawer front, nib wall, threshold and fixture projection affects how the room works. A beautiful room that can’t adapt is a short-term solution. A well-planned room keeps earning its place in the home.

From Plan to Reality with a Renovation Specialist

A well-designed ensuite still needs disciplined delivery. Many projects become stressful at this point. Not because the idea was wrong, but because selections were incomplete, site conditions weren’t considered early enough, or no one was properly coordinating the moving parts.

A smoother renovation usually comes from a simple sequence and clear decisions at each point.

Start with a realistic brief and budget

The budget should reflect more than visible finishes. It needs to account for demolition, services, substrate preparation, waterproofing, tiling, glazing, joinery, electrical work, plumbing, and any compliance-related adjustments uncovered on site.

It also helps to separate wants into levels. Keep one list for essentials and another for optional upgrades. That makes it easier to protect the function of the room if something in the build needs adjustment.

Resolve design before construction starts

The more decisions made before work begins, the fewer disruptions during the build. That includes confirming fixture sizes, tile set-out intent, joinery details, lighting positions, power points, and how doors and screens will operate in real life.

Visual planning helps. SitePro Bathrooms offers concept development, detailed 3D design, construction, and finishing as part of an end-to-end renovation process, which gives homeowners a way to test the room before demolition begins.

Know what a managed process should look like

A renovation specialist should be able to give you a clear path from first measure to handover. That normally includes:

  • Site assessment
    Checking the room, services, access, and likely constraints before design is locked in.

  • Design resolution
    Finalising layout, fixtures, finishes, and practical details such as storage and lighting.

  • Construction coordination
    Sequencing demolition, rough-in work, waterproofing, tiling, fit-off, and finishing so trades don’t work against each other.

  • Handover
    Walking the room with you, checking operation, finish quality, and any maintenance guidance you’ll need.

Expect questions during the process

Even a tightly run project will involve decisions once walls are opened or services are confirmed. That isn’t a warning sign on its own. What matters is whether those decisions are handled clearly, documented properly, and resolved without guesswork.
An ensuite renovation should feel organised, not chaotic. When the planning is sound, the layout is practical, and the build team handles the technical work properly, the end result is more than an extra bathroom. It becomes one of the hardest-working rooms in the home.


If you’re planning an ensuite in Highett or greater Victoria, the strongest results come from getting the layout, compliance, storage and accessibility right before construction starts. That’s the difference between a room that merely fits and one that feels right every day.

  • siteprobathrooms

Standard Benchtop Height: Your 2026 Design Guide

You’re probably deep in selections right now. Tiles are shortlisted, tapware is pinned, vanity finishes are under debate, and the kitchen palette has finally stopped changing every second day.

Then a builder or designer asks a less exciting question. What height do you want the benchtop?

That’s the point where many homeowners realise a renovation isn’t held together by colour choices alone. A benchtop that looks perfect in a showroom can feel wrong every single day once you’re chopping vegetables, loading the dishwasher, cleaning teeth, or helping kids get ready in the morning. In both kitchen and bathroom renovations, small dimensional decisions shape how the room works long after the styling is finished.

The Critical Detail in Your Renovation Plan

A standard benchtop height sounds like a technical detail. In practice, it’s one of the decisions that determines whether a renovation feels effortless or slightly annoying every day.

The usual pattern is familiar. Homeowners spend weeks refining layout ideas, comparing stone finishes, and collecting new bathroom ideas for modern bathrooms or designer bathrooms. Measurements often get pushed into the background because they don’t feel as visible as the fun choices. But height is one of the details that changes how a room performs from the first day of use.

In kitchens, the wrong height shows up quickly. Prep feels awkward. Dishwashing feels harder than it should. Appliances don’t line up cleanly. In bathrooms, vanity height affects daily routines just as much, especially in family homes where more than one age group is using the same space.

A renovation manager sees this issue before installation, not after handover. That’s the difference good planning makes. If the bench height is resolved early, cabinetry, appliances, splashbacks, and circulation all fall into place with fewer compromises. If it’s left vague, the project often ends up chasing fixes late in the process.

Practical rule: If a dimension affects comfort, appliance fit, and cabinet selection at the same time, it isn’t a minor detail.

This matters even more when the project includes both kitchen and bathroom work. A home doesn’t need every surface at the same height, but it does need a clear logic behind each one. That’s why early planning on kitchen renovation layouts and inclusions should always include benchtop and vanity height, not just finishes and fixtures.

Homeowners usually remember the look first. They live with the height every day.

The Australian Standard Benchtop Height Explained

In Australia, the standard benchtop height is 900mm to 920mm from the floor. That benchmark is widely used because it suits standard appliances, standard cabinet manufacturing, and common installation methods across residential projects, with base cabinets typically 720mm high plus a kickboard and a 30 to 40mm benchtop. That convention influences over 80% of Australian residential projects, according to Australian kitchen bench height guidance.

A close-up view of a person resting their arms comfortably on a smooth wooden tabletop surface.

How the height is built

Think of the final bench height like a recipe. It isn’t one piece. It’s the sum of several parts working together:

  • Base cabinet: This is the main body of the joinery and forms the structural core.
  • Kickboard: This lifts the cabinet off the floor and creates the recessed space near your feet.
  • Benchtop material: Stone, laminate, timber, or another surface adds the final thickness on top.

When those components are set up in the usual way, the finished working surface lands in the standard range. That’s why the number keeps turning up in renovation plans. It isn’t arbitrary. It’s tied to how cabinets and appliances are made.

Why it became the norm

Many homeowners assume 900mm to 920mm is a hard building code requirement. It usually isn’t. It’s better understood as an industry convention that became dominant because it works well for most households and for standardised manufacturing.

Cabinet makers, appliance suppliers, and installers all benefit when common dimensions align. The more a project stays within established norms, the easier it is to coordinate ovens, dishwashers, end panels, and adjacent finishes without introducing avoidable complexity. That’s one reason standard height remains the default in Victorian renovations.

For homeowners, this is the practical takeaway. Standard height is popular not because people lack imagination, but because it solves several buildability problems at once.

A standard height usually gives the cleanest path to appliance compatibility, predictable joinery, and fewer surprises on site.

If you’re comparing renovation concepts, it helps to understand where standards and technical requirements overlap. Broader renovation regulations and planning considerations shape the project, but benchtop height itself is often a design and manufacturing decision rather than a strict compliance rule.

Ergonomics The Science Behind the Standard

The standard works because it suits a lot of people, not because it suits everyone.

That distinction matters. A bench can be conventional and still feel wrong for the people who use it most. Ergonomics is what explains that gap. It looks at how the body moves during everyday tasks and where strain starts to creep in.

A person wearing headphones holding a tape measure while planning a home improvement or design project.

What your body is doing at the bench

A benchtop isn’t just a shelf. It’s a work surface. In a kitchen, you lean over it to slice, rinse, scrub, lift, plate up, and clean. In bathrooms, vanity surfaces support grooming tasks that also depend on posture, reach, and comfort.

A useful rule in practice is the bent-elbow check. If the work surface sits too low relative to the user’s elbow, the person bends through the upper back and shoulders. If it sits too high, the shoulders rise and the wrists start working at awkward angles. Neither feels dramatic in the first minute, but both become obvious over repeated daily use.

Why average doesn’t always feel right

The trade-off behind a standard dimension is simple. It aims to work reasonably well for the average adult across common tasks, even though every household is different.

That compromise is visible in the data. A 915mm high bench can force stooping for 40% of adults taller than 173cm because of an elbow-to-bench mismatch of 10 to 15cm, according to analysis of bench height and body fit. That’s a clear reminder that “standard” and “ideal” aren’t always the same thing.

On site, this is usually where complaints start: not with the colour of the stone, but with the feeling that the bench is making someone lean or hunch.

Work zones matter

Different activities place different demands on the body. A prep zone, sink zone, and vanity area may all look visually connected, but they don’t always need to behave the same way.

That’s why experienced renovation planning looks beyond a single number. Good design tests whether the main user can stand comfortably, reach naturally, and work without unnecessary bending. For households with one primary cook or with very tall family members, that check can change the whole conversation.

The standard is a strong baseline. It isn’t a substitute for thinking about who uses the room.

Beyond the Standard Task-Specific Bench Heights

Not every surface in a home should sit at one uniform height. That approach can make a floor plan look neat on paper, but it often ignores how people use different zones in practice.

A well-planned renovation treats the home as a series of working surfaces with different jobs. Kitchen prep, island seating, and bathroom vanity use all place different demands on posture, reach, and circulation. That’s where practical design starts to move beyond the default.

Kitchen benches and island seating

The main kitchen bench usually needs to support standing tasks. Prep, rinsing, and everyday clean-up all happen there, so the height has to feel comfortable over time and still coordinate with appliances and joinery.

Island seating is a different category. Bar seating heights are engineered to 1050mm and require a minimum 300mm clearance for legroom, which helps create a comfortable dining position and a clear visual break in open-plan layouts, as outlined in Australian guidance on kitchen bench dimensions.

That’s why a breakfast bar shouldn’t merely be treated as an extension of the prep surface. It has its own ergonomic and spatial logic.

  • Prep bench: Usually benefits from a height selected for standing comfort and easy task flow.
  • Bar seating zone: Needs stool compatibility, overhang planning, and enough knee space underneath.
  • Visual separation: A raised seating edge can help define the kitchen without adding walls.

Bathroom vanities need their own logic

Bathroom renovations often expose the same mistake in a different form. Homeowners carry kitchen assumptions into a vanity design, then wonder why the basin area feels awkward once it’s built.

Vanity use is different. People lean in closer, use mirrors continuously, and share the space with different family members. In homes with children, grandparents, or mixed accessibility needs, the vanity height deserves just as much attention as the kitchen bench. This is especially relevant in modern bathrooms where floating joinery and vessel basins can distort the perceived working height if the planning only focuses on appearance.

A surface can look balanced in elevation drawings and still be uncomfortable once a basin, mirror, and tap projection are added.

Purpose-built zones work better than one-size-fits-all

Task-specific planning often produces better outcomes than insisting every horizontal line match throughout the house. That doesn’t mean creating visual clutter. It means assigning the right height to the right use.

Good examples include:

  • A lower surface for force-based tasks: Some homeowners prefer a dedicated area that assists in applying force for hands-on food preparation.
  • A raised bar edge: This suits seated use and separates entertaining from cooking mess.
  • A customized vanity: Useful when the bathroom is shared by adults, children, or older relatives.

New bathroom ideas and kitchen planning transition from style exercises to functional designs. The most successful spaces usually aren’t the ones that follow one number everywhere. They’re the ones that understand what each surface is supposed to do.

When to Customise Your Benchtop Height

Custom height makes sense when the people using the space don’t fit the assumptions behind standard joinery.

That often happens in homes with very tall adults, shorter users, people with mobility needs, or multi-generational households where one surface has to work for very different bodies. It also comes up in bathroom renovations where vanity use patterns are very specific. A family ensuite, a children’s bathroom, and an investor-grade rental upgrade don’t always need the same answer.

The trade-off is straightforward. Customisation can improve comfort and usability, but it can also make the project more complex. Deviating from the 900–920mm standard can increase costs because cabinets may need to be specially manufactured, and it may complicate future resale value. Sticking to the standard generally preserves compatibility with off-the-shelf cabinetry and market appeal, according to Australian kitchen measurement guidance.

The clearest reasons to customise

Some scenarios justify a custom approach more strongly than others.

  • A primary user is noticeably taller or shorter than average: Daily comfort can outweigh the convenience of staying standard.
  • The household includes accessibility needs: A standard bench may not support safe, independent use.
  • The room has more than one working zone: A split-height approach may solve a practical problem without forcing the entire room to change.
  • The bathroom has a specific user group: Kids’ bathrooms, ageing-in-place planning, and shared family bathrooms often need more nuanced thinking.

For homeowners wanting to see how these choices play out in finished spaces, reviewing a built bathroom renovation project in Sandringham can help translate dimensions into real layout decisions.

Standard vs Custom Benchtop Height A Comparison

Factor Standard Height (900-920mm) Custom Height
Cabinet compatibility Works smoothly with off-the-shelf cabinetry May require special manufacturing or adjustment
Appliance coordination Usually simpler to integrate with common kitchen appliances Can require more planning around alignment and fit
Budget control More predictable during quoting and procurement Can increase costs through bespoke joinery
Resale appeal Familiar to buyers and generally easier for the market to accept May suit a niche buyer if highly personalised
Daily comfort Good general solution for many households Better when tailored to a clear user need
Accessibility response Limited if users need a non-standard working level Stronger option when mobility or reach is a key issue

Decision test: Customise when a real user need is clear and ongoing. Don’t customise just because the option exists.

That’s the balance registered builders unlimited and renovation managers have to get right. Personalisation is valuable when it solves a real problem. It doesn’t help when it adds cost without improving day-to-day use.

Planning Your Perfect Height with 3D Design

Choosing the right height gets easier once you stop treating it as an abstract number.

Most homeowners understand the issue as soon as they stand at a proposed surface and compare it with their natural elbow position. If the bench sits too low, you’ll feel the forward bend. If it sits too high, your shoulders and forearms tell you quickly. That simple body check is useful, but it becomes far more powerful when it’s combined with a proper design model.

A minimalist graphic with the text Planning Your Perfect Height above a green Book Consultation button.

Use the elbow rule as a starting point

For practical planning, measure where your bent elbow naturally falls while standing in a relaxed position. The goal is to place the main work surface below that point so the shoulders stay settled and the wrists don’t have to compensate.

That doesn’t produce one perfect answer for every room. It gives you a realistic starting range that can then be tested against cabinetry, appliances, basin choice, and circulation. In kitchens and modern bathrooms alike, the best dimension is the one that survives contact with real use.

A few checks help before anything is locked in:

  • Test the main user first: Not the occasional guest, but the person who uses the room most.
  • Check the task, not just the room: Prep, washing, grooming, and seated use can all point to different solutions.
  • Account for finished elements: Basin height, benchtop thickness, and splashback details all affect the final feel.
  • Review adjacent fixtures: The bench has to work with drawers, mirrors, appliances, and tap locations.

Why 3D design reduces expensive mistakes

3D modelling earns its place in a renovation process. It lets homeowners assess proportion, height relationships, and visual balance before joinery is manufactured.

That matters because adaptive planning is becoming more relevant. There has been a 25% rise in adaptive height projects in Melbourne, and 3D modelling is useful for testing options such as split-height benches like 900mm for prep and 850mm for a sink to support accessibility needs in multi-generational homes, according to guidance on adaptive countertop height planning.

Good 3D design doesn’t just show what the room will look like. It helps confirm whether the room will work.

For homeowners planning designer bathrooms, new bathroom ideas, or a full kitchen update, that visual testing reduces guesswork. You can compare a standard layout against a custom one and decide whether customisation improves daily life enough to justify the change.
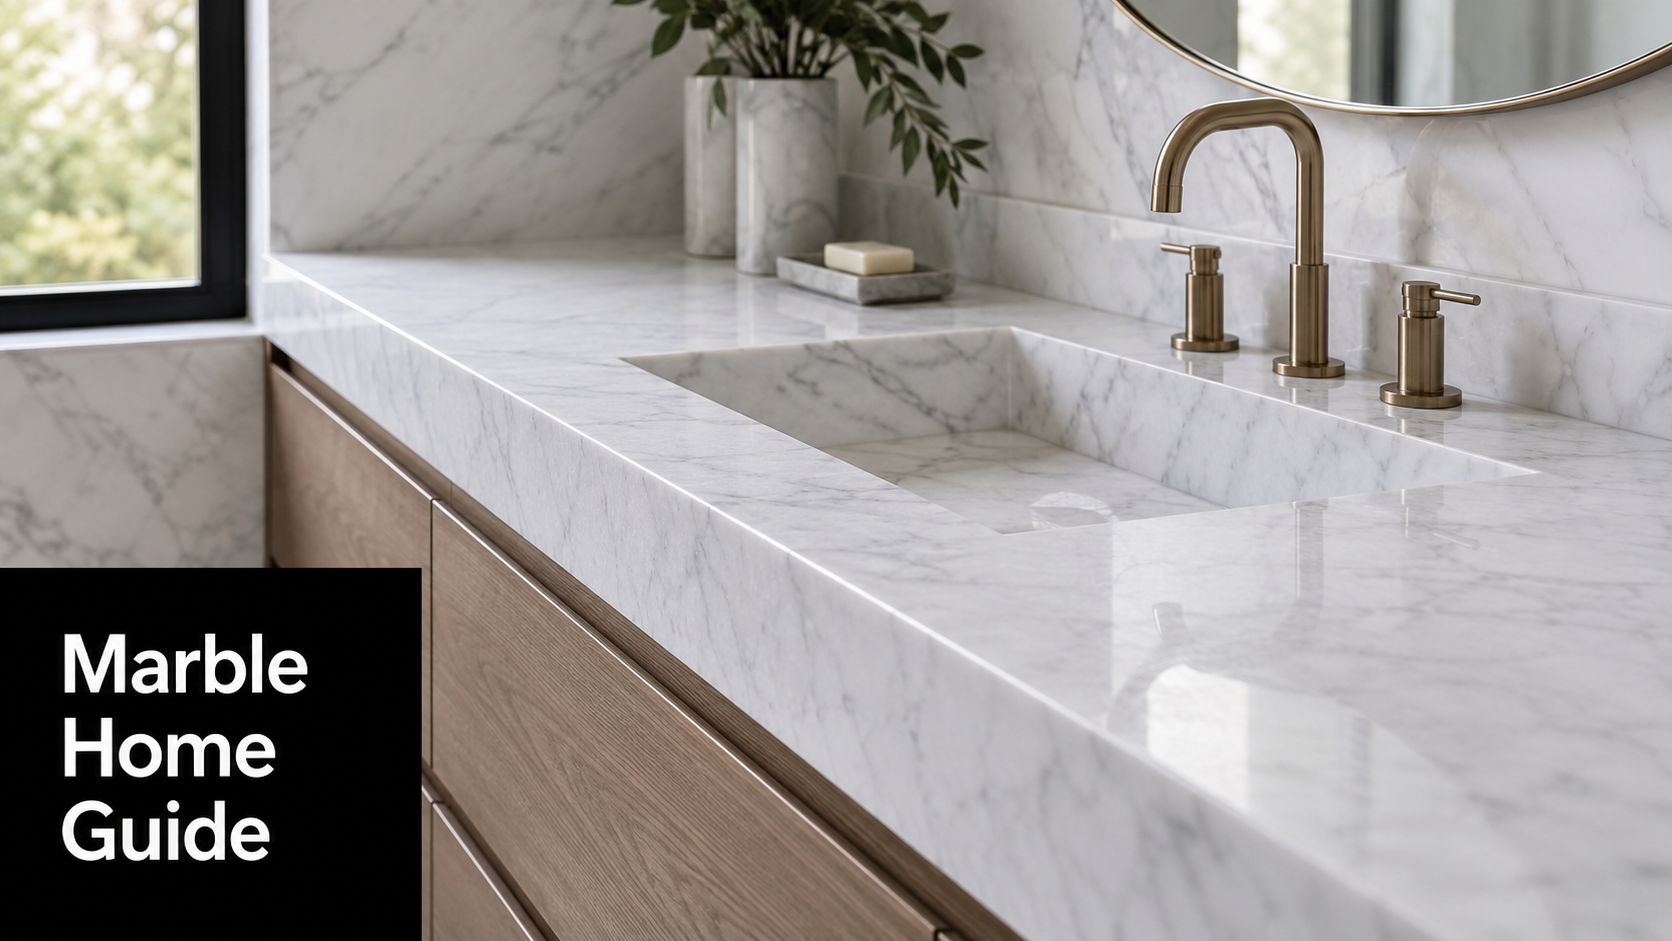
A standard benchtop height remains the right answer for many Victorian homes. But the strongest renovation outcomes usually come from testing that standard against the people who’ll live with it.


If you’re planning a renovation in Highett or greater Victoria and want expert guidance on benchtop or vanity heights, SitePro Bathrooms can help. Their team handles concept planning, 3D design, and construction for kitchens, bathroom renovations, modern bathrooms, and designer bathrooms, with the practical oversight you’d expect from SitePro Bathrooms.

Refined using the Outrank app

Importance of registered builder in bathroom renovations
  • siteprobathrooms

Why Using a Registered Builder Matters for Your Bathroom Renovation

Planning a bathroom renovation is an exciting step toward improving your home’s comfort, functionality, and value. However, behind every great-looking bathroom is a complex process involving plumbing, waterproofing, electrical work, and structural considerations.

Choosing a registered builder is one of the most important decisions you can make. It ensures your renovation is completed safely, legally, and to a professional standard — protecting both your investment and your peace of mind.


What is a Registered Builder?

A registered builder is a qualified professional licensed to carry out and manage building work in accordance with industry regulations and standards.

In regions like Victoria, registered builders must meet strict requirements set by authorities such as the Victorian Building Authority.

This includes:

  • Proven experience and qualifications
  • Knowledge of building codes and compliance
  • Appropriate insurance and warranties
  • Accountability for completed work

Compliance with Building Codes and Regulations

Bathrooms are classified as wet areas and must comply with strict construction and waterproofing standards.

A registered builder ensures:

  • All work meets current building regulations
  • Waterproofing systems are compliant and certified
  • Plumbing and electrical work follow legal requirements
  • Necessary permits and inspections are completed

Non-compliant renovations can result in costly repairs, fines, and complications when selling your property.


Licensed Trades for Every Stage

A bathroom renovation requires multiple specialised trades, all of which must be properly licensed.

This includes:

  • Plumbers
  • Electricians
  • Waterproofers
  • Tilers

A registered builder coordinates these professionals to ensure each stage is completed correctly and in the right sequence.

Using unlicensed trades can lead to serious issues such as:

  • Hidden water leaks
  • Electrical hazards
  • Structural damage
  • Failed inspections

Waterproofing: The Most Critical Step

Waterproofing is one of the most important — and most commonly overlooked — aspects of bathroom renovations.

A registered builder ensures:

  • Certified waterproofing systems are used
  • Membranes are applied to required standards
  • Proper drainage and falls are achieved
  • Work is documented and compliant

Poor waterproofing can lead to mould, rot, and expensive structural damage over time.


Insurance and Warranty Protection

One of the biggest advantages of hiring a registered builder is the legal and financial protection it provides.

Homeowners benefit from:

  • Domestic building insurance (where required)
  • Workmanship warranties
  • Clear contracts and scope of work
  • Protection against incomplete or defective work

Without a registered builder, you may have little to no recourse if something goes wrong.


Professional Project Management

A bathroom renovation involves careful coordination of trades, materials, and timelines.

A registered builder manages:

  • Scheduling and sequencing of trades
  • Quality control at each stage
  • Material procurement and delivery
  • Problem-solving on-site

This ensures the project runs efficiently and reduces the risk of delays or costly mistakes.


Increased Property Value and Buyer Confidence

A professionally completed bathroom renovation adds significant value to your home.

Buyers and inspectors often look for:

  • Compliance certificates
  • Quality workmanship
  • Proper documentation

Renovations completed by a registered builder provide confidence that the work has been done correctly and legally.


Safety Comes First

Bathrooms combine water, electricity, and structural elements — making safety critical.

Using a registered builder ensures:

  • Electrical work meets safety standards
  • Plumbing systems are installed correctly
  • Ventilation is adequate
  • Slip and moisture risks are minimised

This protects both occupants and the long-term integrity of the home.


Avoiding Costly Mistakes

Cutting corners by hiring unqualified contractors may seem cheaper upfront, but often leads to higher costs later.

Common issues include:

  • Rework due to failed inspections
  • Water damage repairs
  • Poor finishes and defects
  • Delays and budget blowouts

A registered builder helps you get it right the first time.


Peace of Mind from Start to Finish

Ultimately, working with a registered builder gives you confidence that:

  • Your renovation is compliant
  • Qualified trades are involved
  • The project is professionally managed
  • The final result is built to last

Conclusion

A bathroom renovation is a significant investment that requires more than just good design — it demands proper planning, compliance, and expert execution.

By choosing a registered builder and licensed trades, you ensure your project is completed safely, legally, and to the highest standard.

When it comes to your home, cutting corners is never worth the risk. Investing in the right professionals delivers long-term value, durability, and peace of mind.ation is completed to the highest standard — and stands the test of time.

  • siteprobathrooms

Installing Large Format Porcelain Tiles

Large Format Porcelain Feature Panel Installation

Large format porcelain tiles are redefining modern interiors — creating seamless, high-end feature walls that deliver both luxury and long-term durability.

From bathroom statement walls to full-height living space panels, these oversized tiles offer a refined architectural finish that traditional tiling simply cannot achieve.

Professional installation is essential to ensure structural integrity, perfect alignment, and a flawless final result.


Expert Installation You Can Trust

With over 24 years of industry experience, Melbourne Tiling Services P/L are recognised as leading installers of large format porcelain panels.

Their specialist approach ensures:

  • Precision substrate preparation
  • Full adhesive coverage for maximum bond strength
  • Seamless panel alignment
  • Mitred edge finishing
  • Structural durability

Visit Melbourne Tiling Services to learn more about their professional installation solutions.


Why Choose Large Format Porcelain Panels?

Large format tiles (1200mm and above) are ideal for feature applications thanks to:

  • Minimal grout lines for a seamless look
  • Natural stone and concrete finishes
  • Moisture and stain resistance
  • Low-maintenance surfaces
  • Long-term durability

They transform walls into design centrepieces while maintaining practicality.


Where Feature Panels Work Best

Large format porcelain tiles are perfect for:

  • Bathroom feature walls
  • Walk-in showers
  • Kitchen splashbacks
  • Fireplace surrounds
  • Living room statement walls
  • Commercial reception areas

These installations enhance both visual impact and property value.


Precision Preparation Matters

Unlike standard tiles, large panels require perfectly level and stable surfaces.

Professional installation includes:

  • Wall levelling and preparation
  • Surface priming
  • Structural assessment
  • Advanced bonding techniques

This ensures longevity and prevents cracking or movement over time.


Advanced Installation Techniques

Installing large format porcelain tiles involves specialised methods, including:

  • Dual adhesive application (substrate & tile)
  • Mechanical levelling systems
  • Pattern and vein alignment
  • Precision cutting and mitred joins

These techniques ensure a seamless, slab-like finish.


Seamless Luxury. Built to Last.

When installed by experienced professionals, large-format porcelain feature panels create a sophisticated finish that combines design excellence with structural reliability.

With decades of expertise, Melbourne Tiling Services continues to set the benchmark for high-end porcelain panel installation across residential and commercial projects.


Upgrade Your Space Today

If you’re planning a renovation or new build, large format porcelain panels offer the perfect balance of style and performance.

Contact Melbourne Tiling Services P/L to bring your feature wall vision to life with precision installation and industry-leading craftsmanship.

  • siteprobathrooms

Safety First: Best Practices for Ensuring Worker Safety on Construction Sites

Safety on construction sites is not just a legal requirement — it is a critical responsibility that protects workers, reduces project risks, and ensures smooth project delivery. With multiple trades operating simultaneously, heavy machinery in use, and constantly changing environments, construction sites present a wide range of hazards that must be actively managed.

Implementing proven safety practices helps minimise incidents, improve productivity, and create a culture of accountability across every project.


Why Construction Site Safety Matters

A strong safety framework delivers more than compliance. It:

  • Protects workers from injury or fatality
  • Reduces project delays and downtime
  • Minimises legal and financial risks
  • Improves team morale and productivity
  • Enhances company reputation

Safe sites are efficient sites — and well-managed safety systems directly contribute to successful project outcomes.


Conduct Regular Risk Assessments

Identifying hazards before work begins is the foundation of construction safety.

Key steps include:

  • Evaluating site conditions and access points
  • Identifying high-risk activities (working at heights, electrical, excavation)
  • Assessing equipment and material handling risks
  • Implementing control measures before work starts

Risk assessments should be ongoing, especially as site conditions change throughout the project lifecycle.


Provide Proper Training and Inductions

Every worker on-site must be properly trained and informed.

This includes:

  • Site-specific inductions
  • Safe Work Method Statements (SWMS)
  • Equipment operation training
  • Emergency procedures

Workers who understand risks and procedures are far less likely to be involved in incidents.


Use Appropriate Personal Protective Equipment (PPE)

Personal Protective Equipment is essential for reducing exposure to hazards.

Common PPE includes:

  • Hard hats
  • High-visibility clothing
  • Safety boots
  • Gloves
  • Eye and hearing protection

PPE must be properly fitted, maintained, and consistently used across all site activities.


Maintain Clear Communication

Effective communication prevents confusion and accidents.

Best practices include:

  • Daily pre-start meetings (toolbox talks)
  • Clear signage and hazard warnings
  • Defined site access and exclusion zones
  • Coordination between trades

Strong communication ensures everyone understands their role and the risks around them.


Ensure Safe Use of Equipment and Machinery

Construction sites rely heavily on machinery, making proper operation critical.

Safety measures include:

  • Regular equipment inspections
  • Licensed operators only
  • Following manufacturer guidelines
  • Keeping plant and pedestrian areas separated

Faulty or misused equipment is one of the leading causes of site accidents.


Implement Fall Protection Systems

Working at heights remains one of the highest-risk activities in construction.

Control measures include:

  • Guardrails and edge protection
  • Scaffolding compliant with standards
  • Harness systems where required
  • Safe ladder use

Preventing falls should always be a top priority on any site.


Keep the Site Clean and Organised

Good housekeeping is a simple yet powerful safety practice.

Maintain:

  • Clear walkways
  • Proper material storage
  • Immediate waste removal
  • Spill management

A tidy site reduces trip hazards and improves overall efficiency.


Monitor and Enforce Safety Compliance

Safety procedures are only effective if consistently followed.

Site supervisors should:

  • Conduct regular inspections
  • Enforce safety rules
  • Address unsafe behaviour immediately
  • Encourage reporting of hazards

Creating a culture where safety is taken seriously at all levels is key.


Emergency Preparedness

Every construction site must be ready to respond to emergencies.

This includes:

  • First aid kits and trained personnel
  • Fire extinguishers and evacuation plans
  • Clear emergency contact procedures
  • Incident reporting systems

Preparation can significantly reduce the impact of unexpected events.


Building a Safety-First Culture

Beyond rules and procedures, the most successful construction sites promote a safety-first mindset.

This means:

  • Leadership prioritising safety over speed
  • Workers feeling confident to speak up
  • Continuous improvement of safety systems
  • Learning from past incidents

When safety becomes part of the culture, it leads to better outcomes for everyone involved.


Conclusion

Ensuring worker safety on construction sites requires a proactive, structured approach that combines planning, training, communication, and accountability.

By implementing best practices and maintaining high safety standards, construction professionals can protect their workforce, reduce risks, and deliver projects efficiently and responsibly.

A safe site is not just a compliant site — it is a productive and successful one.

Project Management
  • siteprobathrooms

Project Management Essentials: Tips for Staying on Schedule and Under Budget

ThDelivering a construction project on time and within budget is one of the biggest challenges in the industry. With multiple trades, material lead times, design changes, and site conditions all influencing progress, effective project management is critical to success.

A well-managed project not only protects your bottom line but also ensures quality outcomes, client satisfaction, and long-term business reputation.


Why Project Management Matters in Construction

Strong project management provides structure, control, and accountability across every stage of a build or renovation.

Key benefits include:

  • Improved scheduling and workflow coordination
  • Accurate cost control and forecasting
  • Reduced delays and rework
  • Better communication between stakeholders
  • Higher quality outcomes

Without proper management, even simple projects can quickly exceed timelines and budgets.


Start with Detailed Planning

Every successful project begins with a clear and detailed plan.

This should include:

  • Defined project scope and objectives
  • Accurate cost estimates
  • Material selection and procurement timelines
  • Trade scheduling and sequencing
  • Risk assessment and contingency planning

The more detailed the planning phase, the fewer surprises during construction.


Set Realistic Timelines

Overly optimistic schedules are one of the most common causes of project delays.

To stay on track:

  • Allow for lead times on materials and fixtures
  • Factor in weather conditions and site access
  • Schedule trades in logical sequences
  • Build in buffer time for unexpected issues

Realistic timelines create achievable expectations and reduce pressure on trades.


Budget Control and Cost Tracking

Maintaining financial control is essential for keeping a project profitable.

Best practices include:

  • Creating a detailed, itemised budget
  • Monitoring expenses in real time
  • Tracking variations and scope changes
  • Comparing actual costs against forecasts

Early identification of cost overruns allows for quick corrective action.


Hire Qualified and Licensed Professionals

Working with experienced, licensed trades ensures the job is done right the first time.

This reduces:

  • Costly mistakes
  • Delays due to rework
  • Compliance issues

Engaging professionals also improves coordination and overall project efficiency.


Effective Communication is Key

Clear communication keeps everyone aligned and accountable.

Successful project managers:

  • Hold regular site meetings
  • Provide progress updates to clients
  • Coordinate trades effectively
  • Address issues before they escalate

Miscommunication is a leading cause of delays and budget blowouts.


Manage Variations Carefully

Changes during construction are common, but they must be controlled.

To stay on budget:

  • Document all variations clearly
  • Get client approval before proceeding
  • Assess cost and time impacts
  • Update schedules and budgets accordingly

Uncontrolled variations can quickly derail a project.


Schedule and Coordinate Trades Efficiently

Construction projects rely on multiple trades working in sequence.

Proper coordination ensures:

  • No overlap or downtime between trades
  • Work is completed in the correct order
  • Reduced risk of damage to completed work

Efficient scheduling improves productivity and keeps timelines intact.


Monitor Progress Regularly

Tracking progress against the schedule is essential.

Project managers should:

  • Conduct regular site inspections
  • Compare actual progress with planned milestones
  • Identify delays early
  • Adjust resources if required

Proactive monitoring helps keep projects moving forward.


Quality Control Prevents Costly Rework

Cutting corners often leads to expensive fixes later.

Maintaining quality standards:

  • Ensures compliance with regulations
  • Reduces defects and call-backs
  • Protects project timelines
  • Enhances client satisfaction

Doing it right the first time is always more cost-effective.


Use Technology and Project Management Tools

Modern tools can significantly improve efficiency and accuracy.

These include:

  • Scheduling software
  • Budget tracking systems
  • Communication platforms
  • Document management tools

Technology provides better visibility and control across the project lifecycle.


Plan for Risks and Unexpected Issues

No project runs exactly as planned.

Prepare for:

  • Material delays
  • Weather disruptions
  • Design changes
  • Site condition surprises

Having contingency plans in place reduces the impact of unforeseen events.


Conclusion

Staying on schedule and under budget requires a disciplined, proactive approach to project management.

By focusing on detailed planning, clear communication, cost control, and efficient coordination, construction professionals can deliver successful projects that meet both client expectations and financial targets.

Strong project management is not just about control — it is about delivering consistent, high-quality results with confidence.

The Rise of Smart Technology in Construction Sites
  • siteprobathrooms

The Rise of Smart Technology: How IoT is Revolutionizing Construction Sites

The construction industry is undergoing a major transformation, driven by the rapid adoption of smart technology and the Internet of Things (IoT). What was once a traditionally manual and reactive industry is now becoming data-driven, efficient, and highly connected.

From real-time site monitoring to predictive maintenance and safety tracking, IoT is revolutionising how construction projects are planned, managed, and delivered.


What is IoT in Construction?

The Internet of Things refers to a network of connected devices that collect, transmit, and analyse data in real time.

On construction sites, this includes:

  • Smart sensors
  • GPS tracking systems
  • Wearable safety devices
  • Connected machinery
  • Environmental monitoring tools

These technologies provide valuable insights that help improve decision-making, efficiency, and safety.


Improving Site Safety with Smart Technology

Safety is one of the biggest challenges in construction, and IoT is playing a critical role in reducing risks.

Examples include:

  • Wearable devices that monitor worker location and fatigue
  • Sensors that detect hazardous conditions such as gas leaks or temperature extremes
  • Real-time alerts for unsafe movements or restricted zone breaches

By using IoT, site managers can respond instantly to potential dangers, significantly reducing workplace incidents.


Real-Time Project Monitoring

IoT enables construction managers to track progress in real time.

With connected systems, you can:

  • Monitor equipment usage
  • Track material deliveries
  • Measure productivity levels
  • Identify delays as they happen

This level of visibility allows for faster decision-making and improved project control.


Equipment Tracking and Predictive Maintenance

Heavy machinery is a major investment, and downtime can be costly.

IoT solutions allow for:

  • GPS tracking of equipment across sites
  • Monitoring of machine performance and usage
  • Predictive maintenance alerts before breakdowns occur

By addressing issues early, companies can reduce downtime, lower repair costs, and extend equipment lifespan.


Enhancing Productivity and Efficiency

Smart construction sites use data to optimise workflows.

IoT helps:

  • Allocate resources more effectively
  • Reduce idle time
  • Improve trade coordination
  • Streamline operations

Automation and data insights enable teams to work smarter, not harder.


Better Resource and Cost Management

IoT provides accurate data that supports better financial control.

Benefits include:

  • Tracking material usage to reduce waste
  • Monitoring labour productivity
  • Improving cost forecasting
  • Minimising delays and budget overruns

This leads to more predictable project outcomes and improved profitability.


Environmental Monitoring and Sustainability

Sustainability is becoming increasingly important in construction.

IoT technologies help by:

  • Monitoring air quality and dust levels
  • Tracking energy consumption
  • Managing water usage
  • Ensuring compliance with environmental regulations

Smart systems allow construction companies to reduce their environmental impact while maintaining efficiency.


Improved Communication and Collaboration

Connected devices enable better communication between teams on-site and off-site.

This includes:

  • Real-time data sharing
  • Remote project monitoring
  • Faster reporting and issue resolution

Improved collaboration leads to smoother project execution and fewer misunderstandings.


Challenges of IoT Adoption

While IoT offers significant benefits, there are challenges to consider:

  • Initial setup and implementation costs
  • Data security and privacy concerns
  • Training requirements for staff
  • Integration with existing systems

However, as technology becomes more accessible, these barriers are gradually decreasing.


The Future of Smart Construction

The adoption of IoT in construction is only expected to grow.

Future developments may include:

  • Fully automated construction sites
  • AI-driven project management
  • Advanced robotics and drones
  • Digital twins for real-time simulation

Companies that embrace smart technology early will gain a competitive advantage in efficiency, safety, and project delivery.


Conclusion

The rise of smart technology and the Internet of Things is transforming construction sites into intelligent, connected environments.

By improving safety, increasing efficiency, and enabling real-time decision-making, IoT is helping construction professionals deliver projects faster, safer, and more cost-effectively.

As the industry continues to evolve, adopting these technologies is no longer optional — it is essential for staying competitive in the modern construction landscape.ents will not only improve your operational efficiency but also appeal to tech-savvy clients looking for modern construction solutions.

Sustainable Construction
  • siteprobathrooms

Sustainable Construction: Building for the Future with Eco-Friendly Materials

TSustainable construction is no longer a trend — it is the future of the building industry. As environmental awareness grows and regulations evolve, builders, developers, and homeowners are increasingly choosing eco-friendly materials and smarter construction methods to reduce environmental impact while improving long-term performance.

From energy efficiency to material selection, sustainable construction focuses on creating buildings that are durable, efficient, and environmentally responsible.


What is Sustainable Construction?

Sustainable construction refers to building practices that minimise environmental impact while maximising efficiency and durability.

It involves:

  • Using eco-friendly and renewable materials
  • Reducing waste during construction
  • Improving energy and water efficiency
  • Creating healthier indoor environments

The goal is to build structures that perform better over time while reducing their carbon footprint.


Why Sustainable Building Matters

The construction industry has a significant impact on the environment, contributing to resource depletion, waste, and emissions.

Adopting sustainable practices helps:

  • Reduce environmental impact
  • Lower energy consumption
  • Decrease long-term operating costs
  • Improve occupant health and comfort
  • Increase property value

Sustainable buildings are not only better for the planet — they are also more cost-effective over their lifecycle.


Eco-Friendly Building Materials

Choosing the right materials is at the core of sustainable construction.

Popular eco-friendly options include:

Recycled and Reclaimed Materials

Using recycled timber, steel, and concrete reduces the demand for new raw materials and minimises waste.

Low-Emission Products

Materials with low volatile organic compounds (VOCs), such as paints, adhesives, and finishes, improve indoor air quality.

Sustainable Timber

Responsibly sourced timber from certified forests ensures environmental balance and renewability.

Energy-Efficient Insulation

High-performance insulation improves thermal efficiency, reducing heating and cooling requirements.

Durable Finishes

Long-lasting materials reduce the need for frequent repairs or replacements, saving resources over time.


Energy Efficiency and Smart Design

Sustainable construction goes beyond materials — it includes how buildings are designed and operated.

Key strategies include:

  • Passive solar design to maximise natural light and heat
  • High-performance glazing and insulation
  • Energy-efficient appliances and lighting
  • Solar power integration

These features reduce reliance on external energy sources and lower utility costs.


Water Conservation

Efficient water use is a major component of sustainable building.

This can be achieved through:

  • Water-efficient fixtures and fittings
  • Rainwater harvesting systems
  • Greywater recycling
  • Smart irrigation systems

Reducing water consumption benefits both the environment and long-term property costs.


Waste Reduction on Construction Sites

Construction waste is a major contributor to landfill.

Sustainable practices include:

  • Accurate material estimation
  • Recycling construction waste
  • Reusing offcuts and materials
  • Minimising packaging

Efficient waste management reduces environmental impact and project costs.


Green Building Standards and Certifications

Many projects now aim to meet recognised sustainability standards, such as those set by the Green Building Council of Australia.

These frameworks promote:

  • Energy efficiency
  • Sustainable material use
  • Reduced emissions
  • Improved indoor environments

Achieving green certification can enhance property value and market appeal.


Long-Term Cost Benefits

While some sustainable materials may have a higher upfront cost, they often deliver savings over time.

Benefits include:

  • Lower energy bills
  • Reduced maintenance costs
  • Longer material lifespan
  • Increased resale value

Sustainable construction is an investment in long-term performance and efficiency.


Healthier Living Environments

Eco-friendly buildings are designed with occupant wellbeing in mind.

They offer:

  • Better indoor air quality
  • Natural lighting and ventilation
  • Reduced exposure to harmful chemicals
  • Improved thermal comfort

These factors contribute to healthier, more comfortable living and working spaces.


The Future of Construction

Sustainable construction is rapidly becoming the industry standard.

Innovations include:

  • Carbon-neutral building materials
  • Modular and prefabricated construction
  • Smart energy management systems
  • Net-zero energy homes

As technology advances, sustainable building will continue to evolve, offering even greater efficiency and environmental benefits.


Conclusion

Sustainable construction is about building smarter — using eco-friendly materials, efficient designs, and responsible practices to create structures that stand the test of time.

By embracing sustainability, builders and homeowners can reduce environmental impact, improve performance, and achieve long-term cost savings.

Building for the future means building responsibly — and sustainable construction is leading the way.