• siteprobathrooms

Waterproofing Standards Australia: 2026 Compliance Guide

You're probably here because a bathroom renovation has stopped feeling exciting and started feeling risky.

You've picked tiles, saved new bathroom ideas, and pictured one of those clean, modern bathrooms with a frameless screen and tidy joinery. Then someone mentions waterproofing, certificates, inspections, membrane heights, falls to waste, and compliance. That's usually the point where homeowners realise the part nobody sees is the part that matters most.

A bathroom can look perfect on handover day and still be built wrong underneath. Water doesn't need a dramatic leak to cause trouble. It only needs a weak corner, an unsealed penetration, or a floor that doesn't drain properly. Then it gets into plaster, framing, skirting, ceilings below, and the kinds of repairs that force you to rip out work you've already paid for.

Why Waterproofing Is the Most Critical Part of Your Renovation

The most expensive bathroom problems usually start unnoticed.

A shower goes in. The grout looks neat. The silicone is fresh. Everything appears finished. Months later, paint near the shower starts to bubble, a skirting board swells, or a musty smell hangs around longer than it should. By then, the tiles are often the least of the problem. The damage is behind them.
A damaged bathroom wall with severe paint peeling and water stains near a glass shower enclosure.

That's why waterproofing standards in Australia matter so much. They're not paperwork for the sake of paperwork. They're the rules that stop a bathroom renovation turning into demolition later. If you're still planning your project, a practical bathroom renovation checklist for homeowners helps you catch the big issues before work starts.

What failure looks like in real homes

When waterproofing fails, the water rarely stays where you can see it. It tracks into wall cavities, sits under tiles, reaches adjoining rooms, and damages materials that were never meant to get wet.

Homeowners usually notice one of these signs first:

  • Peeling paint: Moisture pushes through adjacent walls or ceilings.
  • Persistent mould: Cleaning removes the surface, but the source stays active.
  • Loose tiles or drummy tiles: Adhesives can fail when moisture gets where it shouldn't.
  • Swollen trims and door jambs: Timber products show water exposure quickly.
  • Ongoing damp smell: A bathroom should smell clean, not stale.

Practical rule: Tiles are a finish. The membrane is the real defence.

The core standards exist to stop exactly this kind of slow failure. In Australia, bathroom wet areas are governed by the National Construction Code and the relevant Australian Standard. For homeowners, the point isn't memorising every clause. The point is knowing that compliant waterproofing protects your structure, your budget, and your peace of mind.

Why this matters before design decisions

A common pitfall is that many people choose layout and style first, then expect the waterproofing to somehow fit around the design. It should be the other way around.

If you want open showers, designer bathrooms, recessed niches, or a level-entry look, those details have to be designed around compliant waterproofing from the beginning. Good bathrooms balance appearance and performance. Bad ones force a trade-off that usually shows up later as damage.

The Two Pillars of Waterproofing Compliance

There are two documents that matter most in domestic wet area work. Think of one as the law, and the other as the rulebook builders use to satisfy that law.

The National Construction Code, or NCC, sets the legal performance requirements for building work. The Australian Standard AS 3740:2021 gives the detailed methods commonly used to meet those requirements in wet areas. If the NCC is the destination, AS 3740 is the map most trades follow to get there.

A stack of various building code regulation manuals and professional documents sitting on an architectural blueprint drawing.

The NCC sets the legal baseline

For homeowners, the key point is simple. The NCC isn't optional. It's the compliance framework for new building work and renovations that fall within its scope.

That matters because people still talk about waterproofing as if it's just “how one tradie likes to do it”. It isn't. It has minimum requirements, and those requirements exist because bathrooms are one of the easiest places in a home to create hidden building damage.

AS 3740 gives the technical pathway

The detail sits in AS 3740:2021. As noted in this summary of the AS 3740 update, the current Australian Standard governing domestic wet area waterproofing, AS 3740:2021, is referenced in the NCC 2022 as an alternative compliance option alongside Part 10.2. It also introduced a new requirement that the waterproof membrane itself must be graded to the drain waste puddle flange, not just the surface tile finish, which changed installation practice for commercial wet areas and multi-unit dwellings.

That distinction matters more than homeowners realise. A floor can look like it falls correctly once tiled, but if the membrane underneath doesn't direct water properly, moisture can sit below the finished surface where you can't see it.

The bathroom doesn't pass because it looks neat. It passes because the concealed work meets the standard.

Why builders usually follow the standard closely

A good builder wants a clear compliance path. AS 3740 provides that path. It tells the trades how to handle junctions, penetrations, shower areas, drainage, and substrate conditions in a way that aligns with the code.

For a homeowner, that means asking a direct question is perfectly reasonable:

  • Which compliance pathway are you using
  • How are you documenting the waterproofing work
  • Who is carrying out the membrane installation
  • What inspection happens before tiling

If a contractor answers vaguely, that's a warning sign. Waterproofing shouldn't rely on memory, habit, or “she'll be right” judgment. It should rely on documented method, correct sequencing, and proper sign-off.

Key Technical Rules for Your Bathroom Renovation

This is the part homeowners should understand well enough to ask smart questions.

The technical rules aren't there to make a bathroom harder to build. They exist because water behaves predictably. It sprays, runs downhill, sits in low spots, and wicks into joints. The rules respond to those behaviours.

Under NCC 2022 Part 10.2 wet area waterproofing provisions, shower walls must be waterproofed to a minimum height of 1800 mm above the finished floor substrate. The code also requires wall and floor junction protection extending at least 40 mm on either side of the joint, and where there's a timber-based floor, the entire floor of the wet area must be fully waterproofed.

Minimum waterproofing requirements at a glance

Area Minimum Requirement
Shower walls Waterproof to 1800 mm above finished floor substrate
Wall and floor junctions Protect junctions with coverage extending at least 40 mm on either side
Timber-based wet area floors Entire floor must be fully waterproofed
Shower floor Full waterproofing to the shower area, including relevant transitions and junctions

If you want a more visual explanation of how these details come together beneath the tiles, this guide to bathroom waterproofing requirements and process is useful background.

The 1800 mm shower wall rule

This one catches people by surprise because older bathrooms were often treated more lightly. Current rules are stricter for good reason. Shower spray doesn't stop neatly at shoulder height, and water vapour and splash don't respect guesswork.

In plain terms, the wet zone in the shower must be treated as a real wet zone. If the membrane stops too low, water can migrate into the wall lining and framing above the protected area.

Junctions and penetrations are where failures often start

Corners, wall and floor junctions, pipe penetrations, mixer points, and shower fittings are all stress points. Those areas move slightly over time. Buildings settle. Materials expand and contract. If those locations aren't treated properly, the membrane can fail at the exact points where water pressure and movement combine.

That's why the junction protection requirement matters. It gives vulnerable transitions a properly treated zone instead of a thin line of hope.

On site check: Before tiles go on, look for continuous membrane coverage at corners, around outlets, and where surfaces change direction. Those details matter more than the tile pattern ever will.

Why the floor fall matters

A waterproof bathroom still needs to drain. If water sits on the floor because the fall is wrong, the bathroom is under stress every time it's used.

According to guidance on AS 3740:2021 wet area falls and drainage, shower recess walls in Category 1 areas must be waterproofed to 1800 mm above the finished floor level, or to the height of the shower head outlet if greater. The same guidance notes that the shower floor, including any hob or step-down, must be fully waterproofed, and that internal and external corners within this zone must be reinforced with fabric embedded in the first membrane coat, extending at least 40 mm on each side of the junction.

That reinforcement matters because corners crack first if the installer treats them like flat surfaces.

Timber and concrete are not treated the same way

Substrate changes the approach. Timber-based floors move more with moisture and load. That's why the code requires full wet-area waterproofing on those floors. Concrete and compressed fibre-cement conditions are different, so the compliance path can differ too.

For homeowners, the lesson is simple. The bathroom build-up must suit what the bathroom is built on. A method that works over one substrate may be wrong over another.

Your Renovation Team and Their Responsibilities

A lot of bathroom disputes happen because everyone assumes someone else is handling waterproofing compliance.

That assumption is expensive.

In a properly run renovation, each person has a clear job. The builder manages the project and carries overall responsibility for compliant construction. The waterproofing contractor performs the specialist membrane work. The independent inspector or surveyor checks what needs to be checked before the job gets covered.

The builder owns the result

If you're engaging a company to run the full bathroom renovation, the builder is the person coordinating the sequence, selecting qualified trades, and making sure work meets the required standard. In Victoria, that responsibility sits heavily with the registered practitioner in charge of the build.

That's why working with a registered builder for bathroom renovations in Victoria matters. If you're dealing with a team that handles design, demolition, waterproofing coordination, tiling, and sign-off, there should be one accountable point of control.

For larger renovation work, homeowners often hear the term registered builders unlimited. What matters to you isn't the label by itself. It's that the person managing the project understands the legal and technical obligations and doesn't outsource responsibility in a vague way.

The waterproofer does specialist work and must certify it

Waterproofing isn't the place for rough estimates or casual patch-ups. It's specialist work that has to be installed to the substrate, the layout, and the standard.

In Victoria, professional bathroom waterproofing requirements include an independent inspection before tiling and the issuance of a formal Installation Certificate by a licensed waterproofer. The same source states that proper installation costs around $2,000–$3,500, while rectification costs for failed work can reach $15,000–$30,000.

That cost gap explains why cheap waterproofing quotes are often false economy.

The inspector checks before the work disappears

Once tiles go on, most of the critical work is hidden. That makes pre-tiling inspection one of the most important control points in the whole project.

A sensible homeowner should know:

  • When inspection happens: It must happen before tiling covers the membrane.
  • What's being checked: Coverage, detailing, continuity, and readiness for the next stage.
  • What document follows: A certificate or formal record that the waterproofing has been completed correctly.

If the team wants to tile immediately and deal with paperwork later, stop the job and ask questions.

How to Verify Correct Waterproofing Installation

You don't need to be a builder to verify the basics. You just need to know what to look for before the tiles hide everything.

This is the stage where homeowners should slow the job down, walk the room, and ask direct questions. A decent renovation team won't be bothered by that. They'll expect it.

A construction worker inspecting a waterproofed corner installation with a clipboard for compliance checks.

The pre-tiling checklist

Before any tile adhesive goes down, check these points:

  • Full visible coverage: The membrane should be continuous in the areas being treated, with no missed patches or thin-looking edges.
  • Corners and junctions: Look closely where walls meet floors and where walls meet other walls.
  • Penetrations sealed: Tap outlets, mixers, shower fittings, and pipe penetrations should be properly integrated into the membrane system.
  • Drain detail finished correctly: The membrane should terminate correctly at the waste detail, not loosely around it.
  • No rushed sequencing: Waterproofing needs proper curing before the next trade covers it.

Take photos at this stage. They're useful records if questions ever come up later.

Flood testing and DFT testing

According to guidance on AS 3740 acceptance testing and Victorian compliance, AS 3740 requires post-installation acceptance testing via either a controlled water flood test for a minimum duration of 24 hours or a non-destructive dry film thickness (DFT) test to verify membrane integrity before tile installation. The same guidance states that in Victoria, compliance is a legal obligation under the NCC 2022, and non-compliance can void building insurance.

That's not a minor procedural step. It's the proof stage.

A flood test is straightforward in principle. The waste is controlled, water is held to the required level, and the area is monitored over the required period. If the system can't hold water properly before tiles are laid, it certainly won't improve after the room is finished.

Documents you should ask for

Ask for these before handover:

  1. The Installation Certificate from the licensed waterproofer.
  2. Evidence of inspection before tiling, where required.
  3. Product details for the membrane system used.
  4. Photos of the membrane before it was covered.
  5. Confirmation of testing, whether flood test or DFT test was used.

“Can I see the waterproofing certificate before tiling starts?” is one of the best questions a homeowner can ask.

If that question creates discomfort on site, you've learned something important.

Common Pitfalls and Designer Bathroom Solutions

The trouble with stylish bathrooms is that people often assume a clean look means a simple build. It usually means the opposite.

Many modern bathrooms and designer bathrooms hide a lot of technical work. Flush floor finishes, open shower zones, niches, frameless glass, and minimalist detailing all reduce the margin for error. The nicer the bathroom looks, the more disciplined the concealed work has to be.

Hobless showers are not flat showers

This is the biggest point of confusion in current bathroom design.

A level-entry shower can appear continuous, but it still has to control water. As explained in this discussion of NCC 2022 hobless shower requirements, the NCC 2022 Housing Provisions now mandate a minimum 25 mm step-down from the shower floor to the external wet area, replacing the 15 mm figure many older guides still repeat from AS 3740:2010.

That means a compliant hobless shower usually relies on hidden structure and careful set-down within the floor system. It doesn't mean “make the whole floor flat and hope the screen handles it”.

Patching a membrane is not a proper fix

Another common mistake is assuming a damaged membrane can just be touched up wherever someone nicked it or missed a section.

Current industry guidance reflected in the verified material is that membranes must be installed as a continuous unit, and patching is not permitted. That's a practical issue as much as a compliance issue. Once continuity is compromised, the whole system becomes harder to trust.

Design choices that need early planning

If you're collecting new bathroom ideas, these features need careful early coordination:

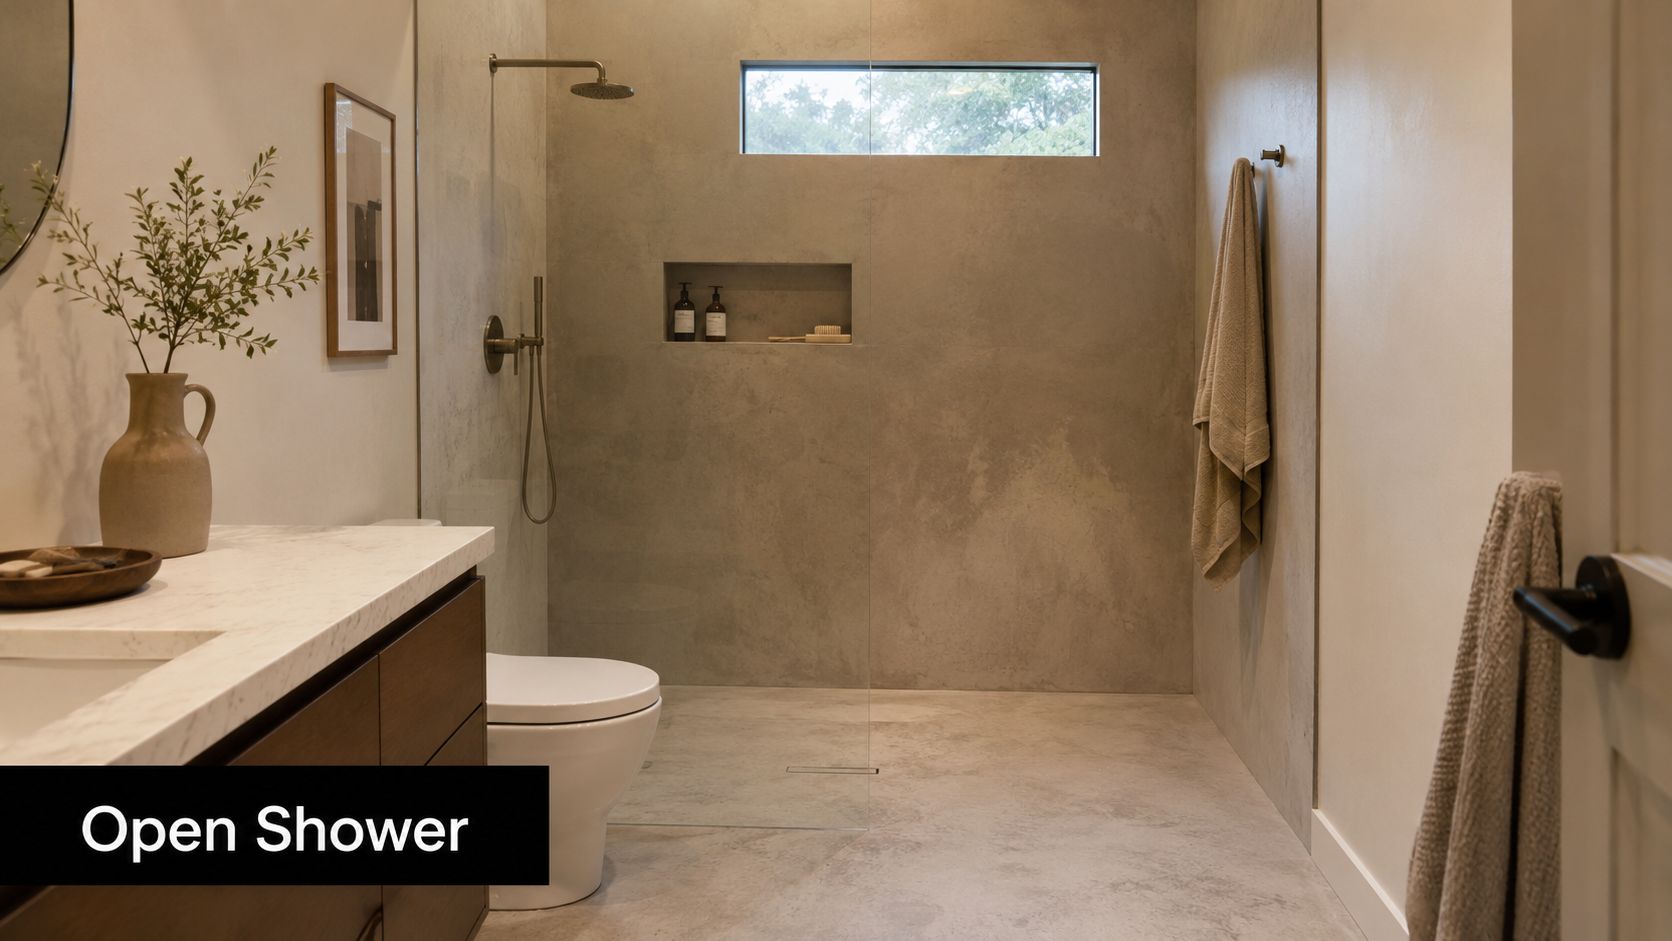
  • Open or frameless showers: They need excellent drainage planning and correct waterproofing extent.
  • Wall niches: Every recess creates extra corners, edges, and sealing points.
  • Linear drains: They can work well, but only when the falls and membrane detailing are planned properly.
  • Large-format tiles: They look great, but they don't fix poor falls underneath.
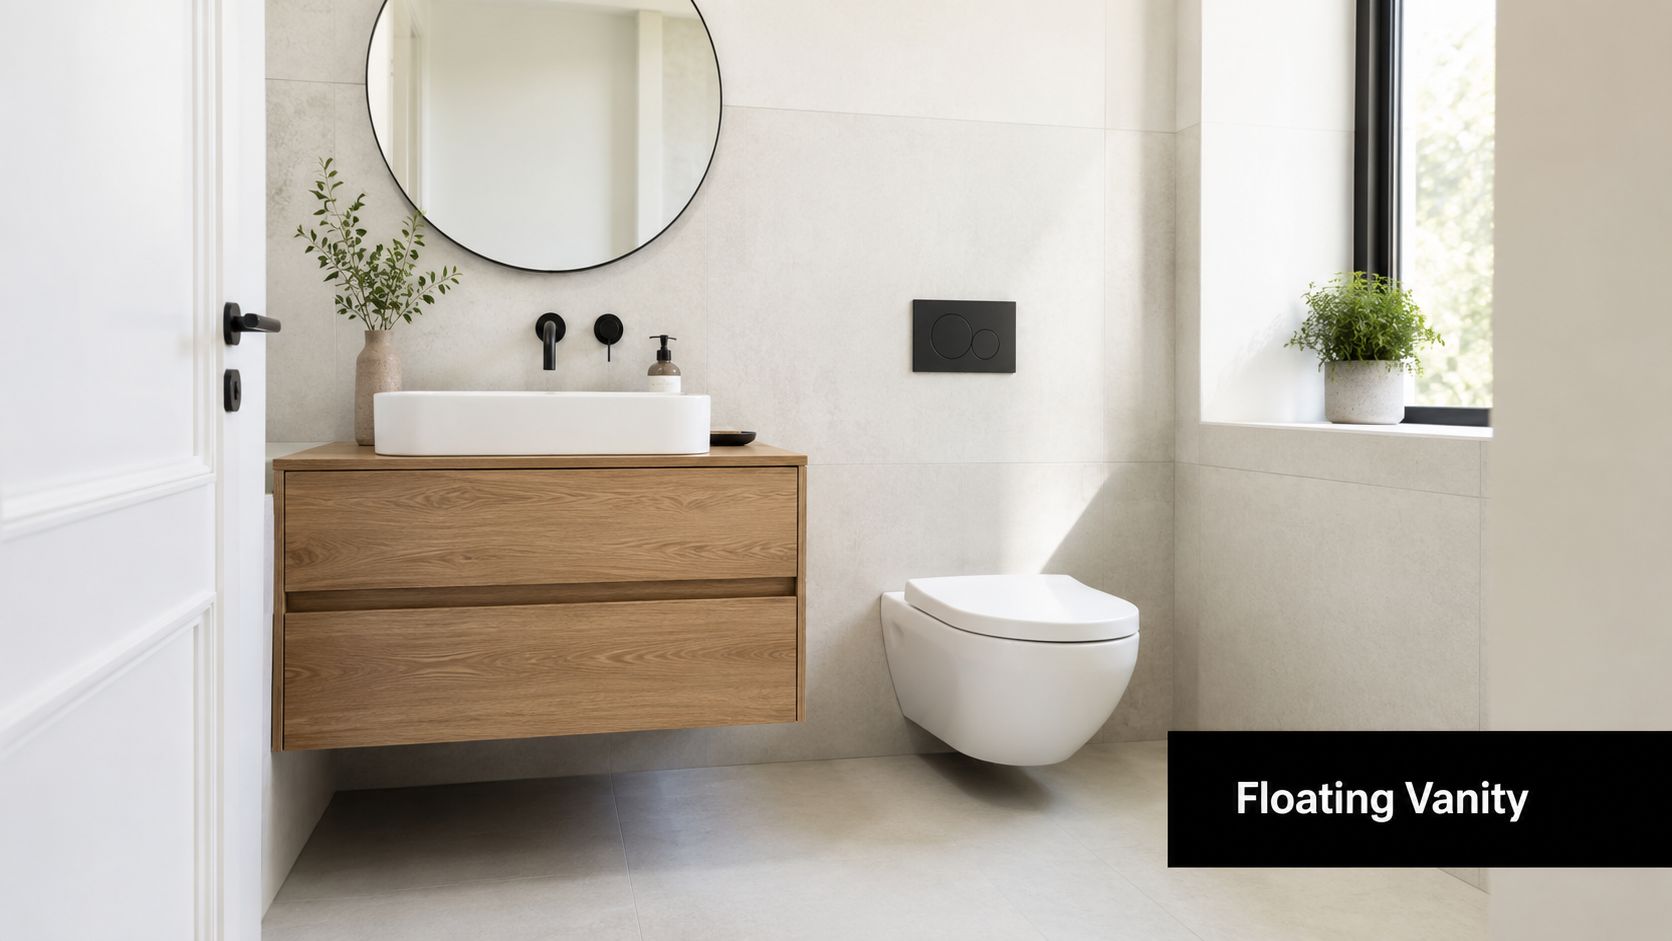
  • Floating vanities near wet zones: The wall protection and penetration detailing still need to be right.

A good builder won't tell you these features are impossible. They'll tell you what the design needs so it performs properly.

Partnering with SitePro for a Compliant Renovation

Waterproofing standards in Australia aren't hard because the rules are unclear. They're hard because bathrooms combine water, movement, multiple trades, and concealed work in a small space. That's why the safest renovation projects are the ones run with strong process from the start.

SitePro Bathrooms handles bathroom renovations as an end-to-end service, from planning and layout through to build coordination and finishes. That matters because compliance doesn't happen in isolation. It depends on the design, the substrate, the sequencing, the licensed trade work, the inspection timing, and the final documentation all lining up.

Screenshot from https://siteprobathrooms.com.au

For homeowners in Highett and across greater Victoria, that means less guesswork. If you're planning a family bathroom, an ensuite upgrade, or one of the more ambitious modern bathrooms people save for later, the value is having one experienced team manage the details that can't be left loose. That includes working with registered trades, coordinating waterproofing correctly, and making sure certification is part of the process rather than an afterthought.

The result should be simple. A bathroom that looks right, drains properly, meets the rules, and stays that way.


If you want a renovation team that understands both compliance and finish quality, SitePro Bathrooms is a practical choice for homeowners who don't want to chase trades, decode standards, or risk hidden waterproofing failures after handover.

  • siteprobathrooms

10 Key Kitchen Trends 2025 Australia for Your Reno

Planning a 2025 renovation? Are you still choosing your kitchen and bathroom as if they have nothing to do with each other?

That's where many projects drift off course. Homeowners pick a kitchen look from one mood board, a bathroom style from another, then try to force both into the same house. The result often feels disjointed, harder to build, and more expensive to finish well. In Victoria, the smarter approach is to treat both spaces as part of one renovation language from the start.

As 2025 approaches, Australian homes are moving away from isolated design decisions. Kitchens are becoming warmer, more social, and more layered. Bathrooms are following the same direction with calmer palettes, better storage, and more tactile finishes. The strongest projects don't just copy trends. They balance layout, maintenance, material performance, and buildability.

This guide covers the kitchen trends 2025 Australia homeowners should pay attention to, while also showing how those same ideas carry into bathroom renovations. For those seeking new bathroom ideas, modern bathrooms that feel practical, or designer bathrooms that still suit everyday family life, consider this guide a starting point. It also reflects a reality many homeowners learn too late. Good design only works when it's backed by proper planning, registered builders, and clear documentation before construction starts.

Whether you're updating a compact ensuite in Highett, reworking a family kitchen in Melbourne, or planning a whole-home renovation with Registered Builders Unlimited, these are the ten trends worth understanding before you commit to finishes, fixtures, and layout.

1. Sustainable and Eco-Friendly Materials in Kitchen and Bathroom Design

What makes a material sustainable in a renovation. The label, or how it performs in a real kitchen or bathroom over the next ten years?

In our experience, the better answer is performance first. A recycled or low-toxicity product only makes sense if it can handle heat, steam, cleaning products, and daily wear without failing early. In kitchens, that often means recycled composite benchtops, FSC-certified timber, low-VOC cabinetry finishes, and water-efficient fixtures. In bathrooms, it usually means moisture-resistant joinery substrates, low-VOC paint systems, porcelain that mimics stone or timber without the upkeep, and tapware that reduces water use without compromising pressure.

Victorian homeowners are also looking at these choices across the whole home, not room by room. If a kitchen uses warm timber tones, recycled surfaces, and muted natural colours, the bathroom should carry that language through in a way that suits wet areas. That creates a more resolved result and helps avoid the common problem of a stylish kitchen paired with a bathroom that feels unrelated.

A modern kitchen interior featuring natural bamboo cabinetry, a sleek induction cooktop, and a recycled glass backsplash.

What to ask before you specify materials

The trade-off with sustainable products is simple. Some look excellent on a sample board but need more care, better ventilation, or more precise installation than homeowners expect. Reclaimed timber adds character to an island panel or vanity face, but it moves more than manufactured board and needs proper sealing. Bamboo can work well for joinery finishes, but not every product sold as bamboo is suitable for a bathroom environment.

A few checks will save time, budget, and rework:

  • Ask for certification and substrate details: Confirm where timber comes from, what adhesives are used, and whether boards are suitable for kitchens or wet areas.
  • Check moisture performance: Veneers, laminates, and painted finishes all behave differently once steam and splashback exposure are factored in.
  • Review maintenance: Natural stone, timber, and some recycled surfaces need periodic sealing or gentler cleaning methods.
  • Test the palette in 3D: A material that looks balanced on a small sample can feel heavy or flat across full-height joinery, splashbacks, or a long vanity wall.

Registered builders and proper documentation are essential considerations. Good sustainable design is not just product selection. It is making sure the build-up behind the finish is right, the ventilation is adequate, and the detailing suits the room. For a practical overview, SitePro's guide to eco-friendly construction and sustainable material selection sets out the main considerations.

Practical rule: Choose materials that reduce environmental impact and still suit the moisture, heat, and cleaning demands of the room.

2. Luxe Minimalism and Decluttered Bathroom Spaces

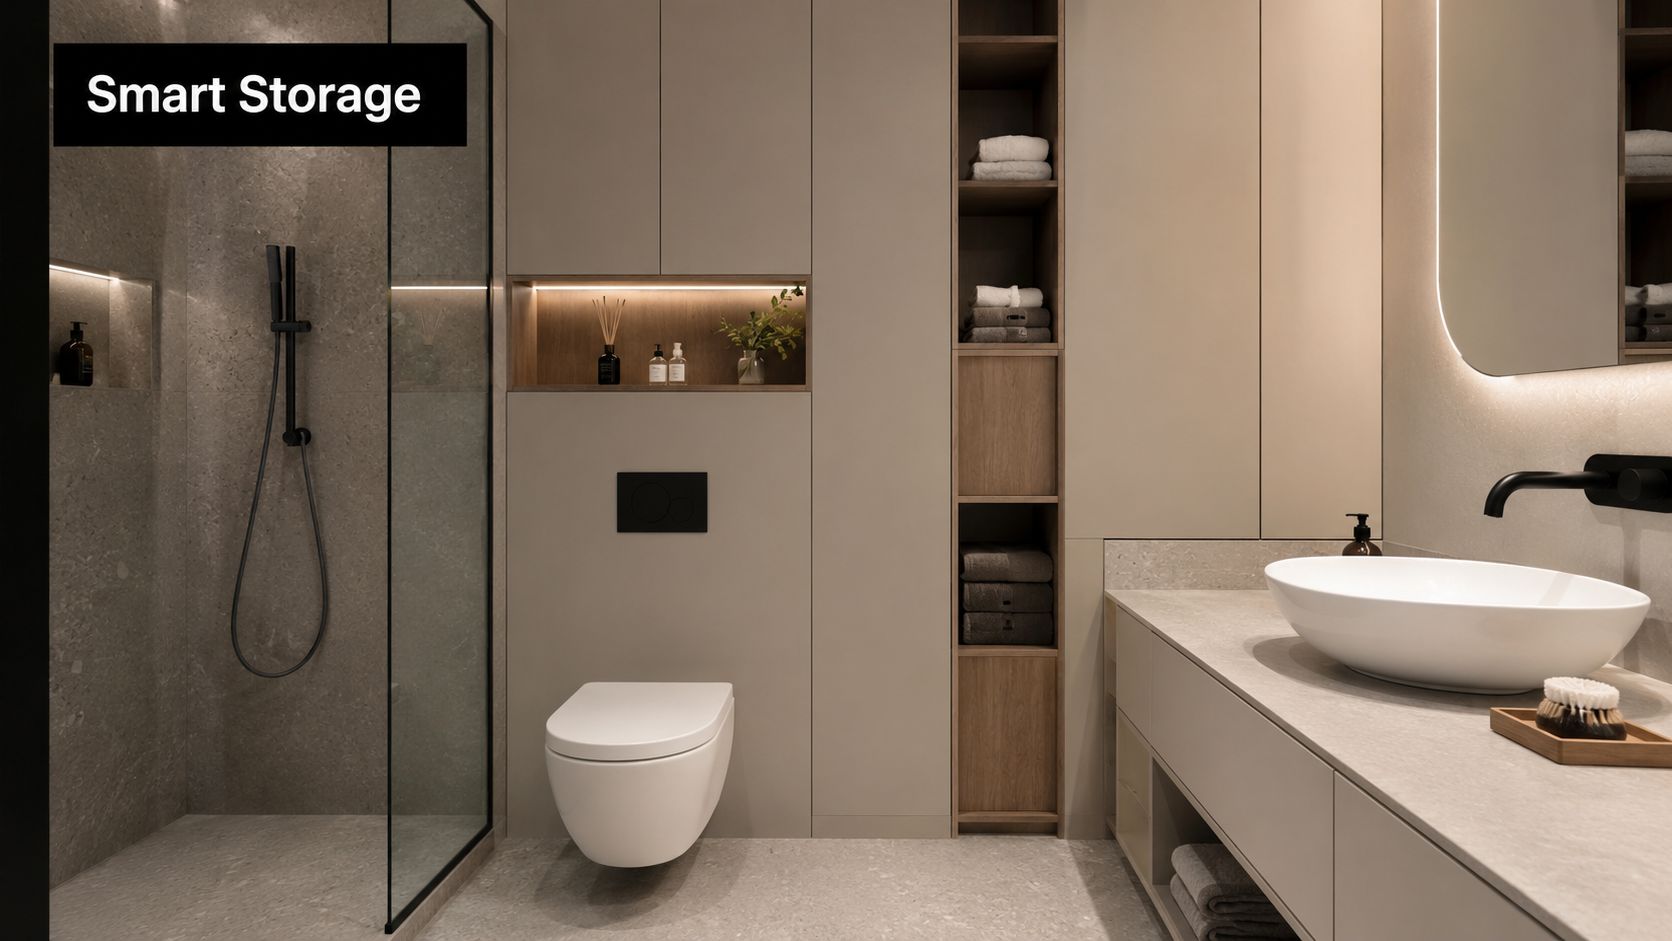
Minimalism in 2025 doesn't mean cold, empty, or clinical. The better version is quieter and more resolved. In bathrooms, that means floating vanities, recessed niches, integrated mirror storage, and finishes that feel premium without relying on visual clutter. In kitchens, the same thinking shows up in concealed appliance storage, flush cabinetry, and cleaner sightlines.

This trend works best when storage is designed first, not patched in later. A bathroom can look beautifully restrained in a render, but if there's nowhere for spare towels, hair tools, cleaning products, and daily toiletries, the room won't stay minimal for long. The same is true in kitchens with too little pantry space and too much open display shelving.

The difference between minimal and underdesigned

A luxe minimal room still needs visual warmth. Large-format tiles, brushed metallic tapware, timber accents, and soft lighting stop a plain room from feeling flat. In Highett homes, this usually means pairing sleek joinery with one or two tactile finishes that soften the harder surfaces.

What doesn't work is stripping out detail without replacing it with quality. Thin laminate, poor lighting, and shallow storage make a “minimal” room feel cheap, not refined. Designer bathrooms need restraint, but they also need a clear hierarchy of materials.

  • Choose one hero detail: A sculptural basin, framed mirror, or stone vanity top is enough.
  • Hide the daily mess: Mirror cabinets, drawer organisers, and full-height joinery keep benchtops clear.
  • Use warmth deliberately: Timber grain, textured porcelain, and brushed metal stop the room feeling sterile.

If you're collecting new bathroom ideas, this is one of the most reliable. It suits compact ensuites, family bathrooms, and higher-end projects because it solves a practical problem. People want calm rooms, but they also need places to put things.

3. Statement Tiles and Bold Geometric Patterns in Kitchen Backsplashes and Bathroom Features

Not every room needs to be quiet. One of the stronger kitchen trends 2025 Australia is embracing is the return of feature tiling, especially where it adds identity without overwhelming the whole space. In kitchens, that usually means a backsplash zone. In bathrooms, it often appears behind the vanity, inside a shower recess, or on a single bath wall.

The key is placement. A patterned tile can carry a room when the surrounding materials are disciplined. If the cabinetry profile is busy, the benchtop has heavy movement, and the floor tile is also trying to lead, the room loses coherence fast.

A close-up view of elegant green and blue patterned kitchen backsplash tiles with a ceramic vase.

Where bold tiling earns its keep

A geometric splashback can sharpen a simple kitchen. A terrazzo-style floor can bring life to a restrained bathroom. Moroccan-inspired shapes, stacked layouts, and coloured grout all have a place, but only when they support the architecture of the room.

In Melbourne renovations, one of the most dependable ways to use statement tile is to keep it to the eye-level focal area and let the other finishes stay calm. That gives the home some personality without locking you into a look that becomes tiring in a year or two.

Keep the boldest tile where you naturally pause and look. Behind the cooktop, above the vanity, or at the bath end wall usually works better than covering every surface.

For practical execution:

  • Preview grout carefully: Grout can completely change the read of a tile. Dark grout sharpens pattern. Matching grout softens it.
  • Use experienced trades: Pattern alignment, set-out, and edge finishing matter more with decorative tile than plain field tile.
  • Balance scale: If the room is small, oversized pattern can dominate too aggressively.

This is one of the easier ways to personalise both kitchens and modern bathrooms without changing the entire construction approach.

4. Integrated Smart Home Technology and Automated Bathroom Systems

Smart products are no longer limited to high-end display homes. They're moving into mainstream renovation planning because they solve everyday problems. Better task lighting, easier temperature control, touch-free operation, and integrated appliance management all improve how a room functions.

That shift isn't just anecdotal. The Australia Smart Kitchen Bathroom Products Market is projected to be valued at USD 950 million in 2025 and grow at a 15.40% CAGR to reach USD 1.5 billion by 2031, driven by energy-efficient, AI-enabled appliances and smart home integration in this Australian smart kitchen and bathroom market analysis.

A modern, minimalist smart bathroom featuring an elegant wall-mounted faucet, illuminated circular mirror, and grey tiled walls.

Start with the features you'll actually use

In bathrooms, smart mirrors with demisters and integrated LED lighting make sense because they improve daily use. Heated towel rails, automated lighting scenes, and temperature-controlled shower systems can also be worthwhile if they're planned early. In kitchens, touchless taps, connected ovens, and integrated appliance control are practical additions when matched to the household.

The common mistake is overloading a renovation with gadgets that aren't supported by the wiring, joinery, or user habits. Technology should disappear into the room, not become the room.

  • Plan infrastructure early: Power, switching, Wi-Fi strength, and access panels need to be resolved before walls close up.
  • Choose serviceable brands: Replacement parts and ongoing support matter more than novelty.
  • Keep manual overrides: If the app fails, the room still needs to work.

SitePro's article on how smart building technology is changing site planning and connected systems gives useful context for homeowners who want smart features without unnecessary complexity.

5. Warm and Textured Natural Materials, Timber, Stone, and Earth Tones

Want a kitchen or bathroom that still feels current in five years, not just at handover? Warm natural materials are one of the safer directions for 2025 because they add character without locking the room into a short-lived colour trend.

Across Victorian renovations, we're seeing the same shift in both spaces. Kitchens are moving toward timber grain, warmer stone, softer browns, muted greens, and finishes that feel lived-in rather than glossy and cold. Bathrooms are following with sandy neutrals, clay tones, eucalypt-inspired colours, and brushed metal details, as shown in this Australian bathroom and kitchen trend overview. The result is a more coordinated home, especially when the kitchen joinery, vanity finishes, and tile selections are designed together from the start.

That said, natural-looking materials need discipline in specification.

Timber veneer suits vanities, overhead cupboards, and feature panels, but it should not be treated as a maintenance-free finish in a wet room. Around basins, shower zones, and poorly ventilated bathrooms, edge detailing, substrate choice, and exhaust performance matter as much as the look of the board itself. In kitchens, timber tones soften harder surfaces well, but real timber near high-splash or high-heat zones needs more care than many homeowners expect.

Stone has a similar trade-off. It brings variation, depth, and a premium feel that laminates usually can't match, but some natural stones mark, etch, or need regular sealing. That's why we usually walk clients through where to spend and where to simplify. A natural or composite stone benchtop in the kitchen might carry the visual weight, while the bathroom gets the same warmth through porcelain, joinery colour, and textured tiles rather than full stone slabs everywhere.

A rustic wooden vanity with a stone countertop and gold faucet in a warm, natural-toned bathroom.

Texture also affects budget. Fluted timber fronts, heavily veined stone, curved end panels, and handmade-look tiles generally cost more in materials, fabrication, and labour than flat, standard finishes, as discussed in this discussion of 2025 kitchen material trends. They can be worth it, but they need to be placed where they will be seen and used, not scattered through every surface.

For Victorian homeowners, the best results usually come from restraint. Use one or two warmer hero materials, repeat them across the kitchen and bathroom, and have a registered builder coordinate the details before anything is ordered. If you're comparing tactile surfaces for the kitchen first, SitePro's guide to modern kitchen benchtop styles is a practical place to start.

6. Open-Plan Kitchen and Bathroom Concept Living with Integrated Wet Rooms

Could opening up your kitchen and bathroom make the home feel larger without adding a single square metre? In many Victorian renovations, yes, but only if the layout is resolved properly before demolition starts.

Open-plan planning now reaches beyond the kitchen, dining, and living area. Homeowners are also asking for bathrooms that feel less boxed in, especially in ensuites, apartments, and narrow family homes where every line of sight matters. In kitchens, that often means a more open secondary prep zone instead of a fully closed pantry. In bathrooms, it usually means wet-room detailing, frameless glass, and fewer visual breaks across the floor.

The appeal is easy to understand. Better sightlines make compact rooms read as larger. A continuous floor finish can help the kitchen and bathroom feel connected as part of one renovation story rather than two unrelated projects.

That connection has to be built, not just styled.

An integrated wet room asks much more of the builder than a standard shower recess. Floor falls have to be accurate. Drain placement has to suit the tile set-out. Waterproofing has to match the room layout, and ventilation needs enough capacity to clear moisture before it settles into joinery, paint, and ceiling linings. These are not details to leave to guesswork or to sort out on site after tiles are ordered.

Open layouts need stronger technical planning

At SitePro Bathrooms, we usually advise clients to test open-plan bathroom ideas against daily use, not showroom photos. A couple in a low-maintenance townhouse may be happy with a near-open shower area and a single fixed panel. A family with children often needs more splash control, more towel storage, and easier cleaning access around the wet zone.

What tends to work well in Victorian homes:

  • Frameless glass used selectively: enough screening to control water, without chopping the room into small sections
  • Continuous porcelain flooring: easier to maintain than more porous finishes in full wet areas
  • Linear or well-positioned drains: better drainage outcomes depend on the room shape and tile format
  • Mechanical ventilation sized for the room: open bathrooms hold and spread moisture differently from enclosed shower rooms

One mistake we see is copying a hotel-style wet room into a suburban home without adjusting the details for real use. The room may look sharp on day one, then become frustrating once water tracks across the floor, storage is too limited, or the toilet sits too close to the splash zone.

The kitchen side has similar trade-offs. A more open prep area can look clean and social, but it also puts pressure on storage discipline, appliance placement, and finish consistency. If the back kitchen is partially visible, the joinery, lighting, and benchtop choices need to relate to the bathroom as well. That is where a whole-home design approach pays off. The materials do not need to match exactly, but they should speak the same language.

For homeowners in Melbourne and across Victoria, the safest path is to have the kitchen and bathroom resolved together in 3D before construction begins, then have a registered builder coordinate the waterproofing, drainage, ventilation, and joinery set-out as one package. Open-plan living can work exceptionally well. It just needs proper containment behind the clean lines.

7. Personalized Kitchen Islands and Multipurpose Bathroom Vanities

Could your island or vanity solve two or three daily problems instead of serving a single purpose?

That is the direction we are seeing across Melbourne and wider Victoria. Homeowners want joinery that suits the way the house runs. In the kitchen, the island often needs to handle prep, casual meals, charging, school bags, and overflow storage. In the bathroom, the vanity now has to support shared morning routines, better drawer organisation, and cleaner bench space.

The common mistake is sizing these features by showroom photos instead of room dimensions. A large island can dominate the kitchen but still perform poorly if stools block the main walkway or the sink, bin, and fridge are set too far apart. In bathrooms, wide vanities often look generous on plan, then lose usable storage once plumbing and basins take up the drawer space.

Custom sizing usually gives a better result than adding more features. We often recommend resolving the kitchen island and bathroom vanity together during 3D design because the same questions apply to both. Who uses it, at what time of day, what needs to be stored, and how much clear floor area must remain around it? That whole-home approach helps the kitchen and bathroom feel related without forcing them to match exactly.

For Victorian renovations, a few options consistently work well:

  • Prioritise circulation first: Allow enough space around the island for open drawers, stools, and more than one person moving through the kitchen.
  • Plan services early: Power points, task lighting, plumbing, and appliance locations should be set before joinery is finalised.
  • Use drawers where possible: Deep drawers generally outperform shelf cupboards for pans, toiletries, hair tools, and cleaning items.
  • Protect high-contact areas: Island ends, vanity edges, and handle zones need finishes that can cope with knocks, water, and constant cleaning.

Material choice matters here. A fluted vanity front may look sharp, but it takes longer to wipe down than a flat polyurethane or laminate door. A waterfall stone island adds visual weight and can hide wear on the end panel, but it also increases cost and can make future alterations harder. Good design comes from balancing appearance, maintenance, and budget.

In suburbs such as Highett, where many homes are being updated for family living rather than display-home impact, the strongest results usually come from practical restraint. One well-planned island and one properly resolved vanity can improve daily use far more than a long list of add-ons. Have both designed in detail before construction starts, then use a registered builder to coordinate set-out, services, and installation properly.

8. Neutral Colour Palettes with Layered Textural Depth

Want a kitchen or bathroom that still looks current in five years, not just at handover? Start with a neutral base, then build interest through texture, finish, and material contrast. That approach is holding up well across Victorian renovations because it gives the home a calmer, more consistent design language without forcing every room to look the same.

The shift in 2025 is clear. Neutral schemes are warmer, softer, and more tactile than the cool grey formulas that dominated for years. In practice, that means soft whites, mushroom tones, warm beige, greige, muted clay, and stone colours paired with surfaces that catch light differently. The colour palette stays restrained. The room still feels detailed.

Texture carries most of the visual weight.

In kitchens, I'd usually create that depth with a mix of matte cabinetry, a lightly veined benchtop, a splashback with some surface movement, and metal finishes that blend into the background. In bathrooms, the same principle works through porcelain, timber grain joinery, ribbed or fluted vanity fronts, brushed tapware, and towels or window furnishings that soften the harder surfaces. Kitchen and bathroom planning should connect, guided by this shared philosophy. If the kitchen has warm stone and low-sheen joinery, the bathroom should pick up that same mood in its own way.

The main mistake is choosing “neutral” as a colour only. A room with flat paint, flat laminate, flat tile, and no variation in sheen often feels unfinished, even if every sample looked right on the board. Depth comes from contrast between smooth and textured, plain and patterned, matte and gently reflective.

A few combinations work consistently well in Australian homes:

  • Warm white and timber grain: Reliable, easy to live with, and suitable for both kitchens and bathrooms.
  • Stone-look porcelain with plain wall tile: One surface adds movement, the other keeps the room settled.
  • Matte joinery with brushed metal finishes: Clean and understated, with enough variation to stop the palette feeling flat.
  • Textured feature surface used once: A fluted vanity, handmade-look splashback, or lightly structured tile is usually enough.

There are trade-offs. Textured doors, finger tiles, and heavily grained finishes can look excellent, but they often take longer to clean. Pale grout keeps a soft look, yet it needs better sealing and more maintenance in wet zones and splashbacks. Darker joinery can add depth to a neutral palette, but it will show fingerprints more readily, especially on matte finishes.

For Victorian homeowners, this is one of the safer ways to tie a renovation together. A restrained palette gives builders, cabinetmakers, and tilers less room for visual conflict, and it also makes 3D design planning more useful because small differences in finish and texture become easier to assess before construction starts. At SitePro Bathrooms, we often guide clients toward a neutral base for exactly that reason. It gives the kitchen and bathroom a shared design logic, while leaving enough flexibility to suit the age of the home, the budget, and how the family lives in it.

9. Accessible Design and Universal Bathroom Renovations for Aging in Place

Accessible design has shifted from specialist requirement to mainstream good planning. Homeowners are thinking longer term, and that's smart. A bathroom with a step-free shower, better circulation, stronger lighting, and safer flooring doesn't just suit older residents. It's easier for children, guests, and anyone recovering from injury.

Cost planning matters here. In 2025 Australian bathroom renovations, a mid-range remodel typically sits between $20,000 and $35,000 and commonly includes a custom vanity, new tiling, a walk-in shower, and quality fixtures, while premium renovations above $35,000 often include large-format porcelain slabs, underfloor heating, bespoke storage, and premium tapware in this Australian bathroom renovation cost and trend guide. If you're already investing in a walk-in shower and custom joinery, it often makes sense to future-proof the layout at the same time.

Features that improve daily use without making the room look clinical

The best accessible bathrooms don't announce themselves as “special needs” spaces. They work better. A curbless shower can look cleaner than a framed cubicle. A wider vanity zone improves movement. A properly positioned grab rail can be integrated into the design language rather than treated as an afterthought.

For Victorian homeowners, this is one of the strongest categories of new bathroom ideas because it combines resale logic with immediate practical benefit.

  • Use non-slip flooring with care: Safety matters, but so does cleanability and comfort underfoot.
  • Plan reinforcement in walls: Even if rails aren't installed now, the room can be prepared for them.
  • Check manoeuvring space in 3D: Here, digital design adds real value before construction starts.

Registered builders are especially important here because accessibility only works when set-out, waterproofing, fixture heights, and structural prep are resolved correctly from day one.

10. Kitchen and Bathroom Integration Through Coordinated Design Languages

The strongest renovation projects in 2025 won't treat the kitchen and bathroom as unrelated rooms. They'll feel connected through colour temperature, joinery style, hardware finish, tile mood, and overall proportion. Not identical. Coordinated.

That's particularly important in Victorian homes where renovations often happen in stages. If the kitchen is warm, textured, and softly contemporary, while the bathroom is cool, glossy, and sharply modern, the house can feel patched together. A more disciplined design language creates better flow and usually makes future updates easier.

Build one visual system across the home

This doesn't mean matching every surface. It means carrying certain decisions through. If the kitchen uses warm timber with brushed nickel or brushed gold accents, the bathroom can echo that with vanity detailing and tapware selection. If the kitchen cabinetry is heavily profiled and traditional, the bathroom should probably nod in the same direction rather than switching abruptly to ultra-flat gloss panels.

The furniture market also reinforces where homeowners are still placing value. In Australia's 2025 kitchen furniture market, kitchen cabinets account for 53.74% of total value, wood holds a 60.62% material share, and metal components are projected to grow at a 6.52% CAGR through 2031, according to this Australia kitchen furniture market report. That points to a practical reality. Joinery and material combinations drive the feel of the room more than almost anything else.

A few reliable coordination moves:

  • Repeat finish families: Timber tone, metal tone, and stone mood should speak to each other.
  • Keep profiles consistent: Rounded details, shaker details, or flat fronts should feel intentional across spaces.
  • Use one design model: A full-home 3D approach helps homeowners spot clashes before any orders are placed.

For homeowners considering bathroom renovations, modern bathrooms, or designer bathrooms as part of a larger home update, this is often the difference between a renovation that feels complete and one that feels pieced together.

10-Item Comparison: Kitchen & Bath Trends 2025 Australia

Trend Implementation complexity Resource requirements Expected outcomes Ideal use cases Key advantages
Sustainable and Eco-Friendly Materials in Kitchen and Bathroom Design Moderate, needs certified sourcing and specialist fittings Higher upfront cost; recycled/sustainably certified materials; specialist suppliers Lower operating costs (water/energy); healthier indoor air; stronger resale appeal Eco-conscious homeowners, long-term investors, sustainability-focused projects Reduced water/energy use; improved air quality; market appeal
Luxe Minimalism and Decluttered Bathroom Spaces High, custom cabinetry, concealed systems and precise detailing Premium materials, skilled joinery, custom fabrication Clean, timeless, high-end spaces that feel spacious and easy to maintain Small bathrooms, luxury renovations, investors seeking timeless finishes Space enhancement, low visual clutter, timeless aesthetic
Statement Tiles and Bold Geometric Patterns Moderate–High, complex layouts and professional tiling required Specialty/artisanal tiles, higher material and labor costs Strong visual focal points; personalized look; social-media appeal Feature walls, backsplashes, accent floors in bathrooms and kitchens Distinctive design impact; supports artisans; durable visual masking of stains
Integrated Smart Home Technology and Automated Bathroom Systems High, electrical, networking and systems integration Expensive devices, certified installers, ongoing software/maintenance Improved accessibility, safety and efficiency; convenience and high perceived value Smart homes, accessible renovations, luxury properties and tech-forward owners Water/energy control, touchless hygiene, enhanced safety and convenience
Warm and Textured Natural Materials: Timber, Stone, Earth Tones Moderate, sourcing, sealing and skilled installation required Costly natural stone/timber, sealing products, expert installers Warm, biophilic and timeless interiors with tactile depth Homes seeking comfort and natural aesthetics, high-end renovations Natural warmth, longevity, biophilic wellness benefits
Open-Plan Kitchen and Bathroom Concept Living with Integrated Wet Rooms High, waterproofing, ventilation, drainage and structural planning High-spec waterproofing, mechanical ventilation, possible structural work Increased perceived space and flexibility; privacy and moisture trade-offs Apartments, small homes, open-plan living layouts Space optimization, enhanced light flow, contemporary feel
Personalized Kitchen Islands and Multipurpose Bathroom Vanities High, bespoke joinery and integrated services Custom fabrication, specialist carpentry, plumbing and electrical Highly functional, personalized centers that boost usability and value Families, entertainers, homeowners wanting tailored functionality Tailored workflow, increased storage, strong design statement
Neutral Color Palettes with Layered Textural Depth Low–Moderate, careful selection of materials and lighting design Standard finishes with emphasis on texture and quality lighting Calm, timeless, flexible spaces that are easy to update Broad-market renovations, rental properties, buyers seeking longevity Broad appeal, easy to refresh, creates refined, spa-like environments
Accessible Design and Universal Bathroom Renovations for Aging in Place Moderate–High, compliance with accessibility standards and detailed planning Specialized fixtures, possible layout expansion, expert knowledge (AS 1428) Safer, more independent living; better marketability to diverse buyers Aging in place projects, multigenerational homes, accessibility-focused builds Improved safety and independence, inclusive design, potential rebates
Kitchen and Bathroom Integration Through Coordinated Design Languages Moderate, requires whole-home coordination and planning Consistent material sourcing, designer coordination, cohesive finishes Cohesive home aesthetic and flow; higher perceived property value Whole-home renovations, open-plan properties, apartment conversions Polished, professional appearance; economies of scale; visual continuity

Turn Your 2025 Vision into a Reality

The best kitchen trends 2025 Australia is embracing aren't just about what looks current. They're about how homes are used. Kitchens are becoming warmer, more social, and more suited to daily life. Bathrooms are becoming calmer, smarter, and better planned for long-term comfort. When those spaces are designed together, the result feels more coherent, more valuable, and far easier to live with.

That's the major shift many homeowners miss at the start. They focus on products before layout, visuals before storage, or trend boards before buildability. In practice, a successful renovation works the other way around. You need a design direction that suits the house, a material palette that can handle real wear, and a builder who can coordinate every technical detail from waterproofing to joinery set-out.

Across kitchen and bathroom renovations, the same principles keep showing up. Sustainable materials need proper sealing and sourcing. Smart technology needs to be planned before walls are lined. Natural stone and textured timber need a realistic maintenance conversation. Islands, vanities, and wet areas need dimensions that reflect how people move through the room. None of that happens well through guesswork.

That's why registered builders matter. Homeowners often spend months comparing tiles, colours, and tapware, but the actual performance of the renovation depends on what happens behind those finishes. Proper documentation, sequencing, trades coordination, and compliance protect the investment. They also reduce the risk of common problems such as poor drainage, storage shortfalls, awkward circulation, or expensive changes after construction starts.

For Victorian homeowners, there's also real value in seeing the renovation before it's built. A professional 3D design process helps test proportions, check visual balance, and align the kitchen with adjoining bathrooms and living zones. It's one of the most effective ways to avoid mismatched finishes and expensive late-stage revisions. If you're choosing between several new bathroom ideas or trying to settle on a kitchen layout that fits your family, those early visuals make decisions clearer.

SitePro Bathrooms takes that whole-of-home approach seriously. From Highett to greater Melbourne and across Victoria, the focus is on functional planning, cohesive style, and durable workmanship. Whether you're aiming for a refined ensuite, a family bathroom with better accessibility, or a full kitchen upgrade that aligns with the rest of the house, the goal is the same. Build spaces that look considered, perform properly, and still feel right years from now.

If you're ready to move from inspiration to a practical renovation plan, contact SitePro Bathrooms and start shaping a kitchen and bathroom design that works as one complete vision.

  • siteprobathrooms

8 Small Bathroom Layout Ideas to Maximise Space

Transform Your Compact Space: A Builder's Guide

Struggling with a small, awkward bathroom? You're not alone. Many older Highett homes have compact bathrooms that feel harder to use than they should. The room is small, the door swings into the wrong spot, the vanity is too deep, and every decision seems to affect three others.

That doesn't mean you're stuck with a bathroom that feels cramped. With the right layout, a compact room can work well, look clean, and still deliver the finish people want from modern bathrooms. Good planning matters more in a small room because every millimetre counts, especially once waterproofing, drainage, and fixture depths are locked in.

At SitePro Bathrooms, we handle bathroom renovations across Victoria and we see the same pattern often. People start with tile colours and tapware, but true success of the room comes from the plan underneath. A good layout improves movement, storage, cleaning, sightlines, and how spacious the room feels when you walk in.

Australian small bathrooms are often tighter than people expect. A typical small bathroom sits between 2.5 and 5 square metres, and the NCC 2022 and ABCB Housing Provisions place the minimum compact footprint at about 1,500mm × 1,800mm, which is why layout discipline matters from the start (Australian small bathroom design guidance).

1. The Galley Layout

A modern, minimalist bathroom with a wood vanity, tiled walls, glass shower, and a galley-style floor plan.

You open the door and step straight into a narrow run of fixtures, with no spare corner to hide bad planning. That is where a galley layout either works brilliantly or feels frustrating every day.

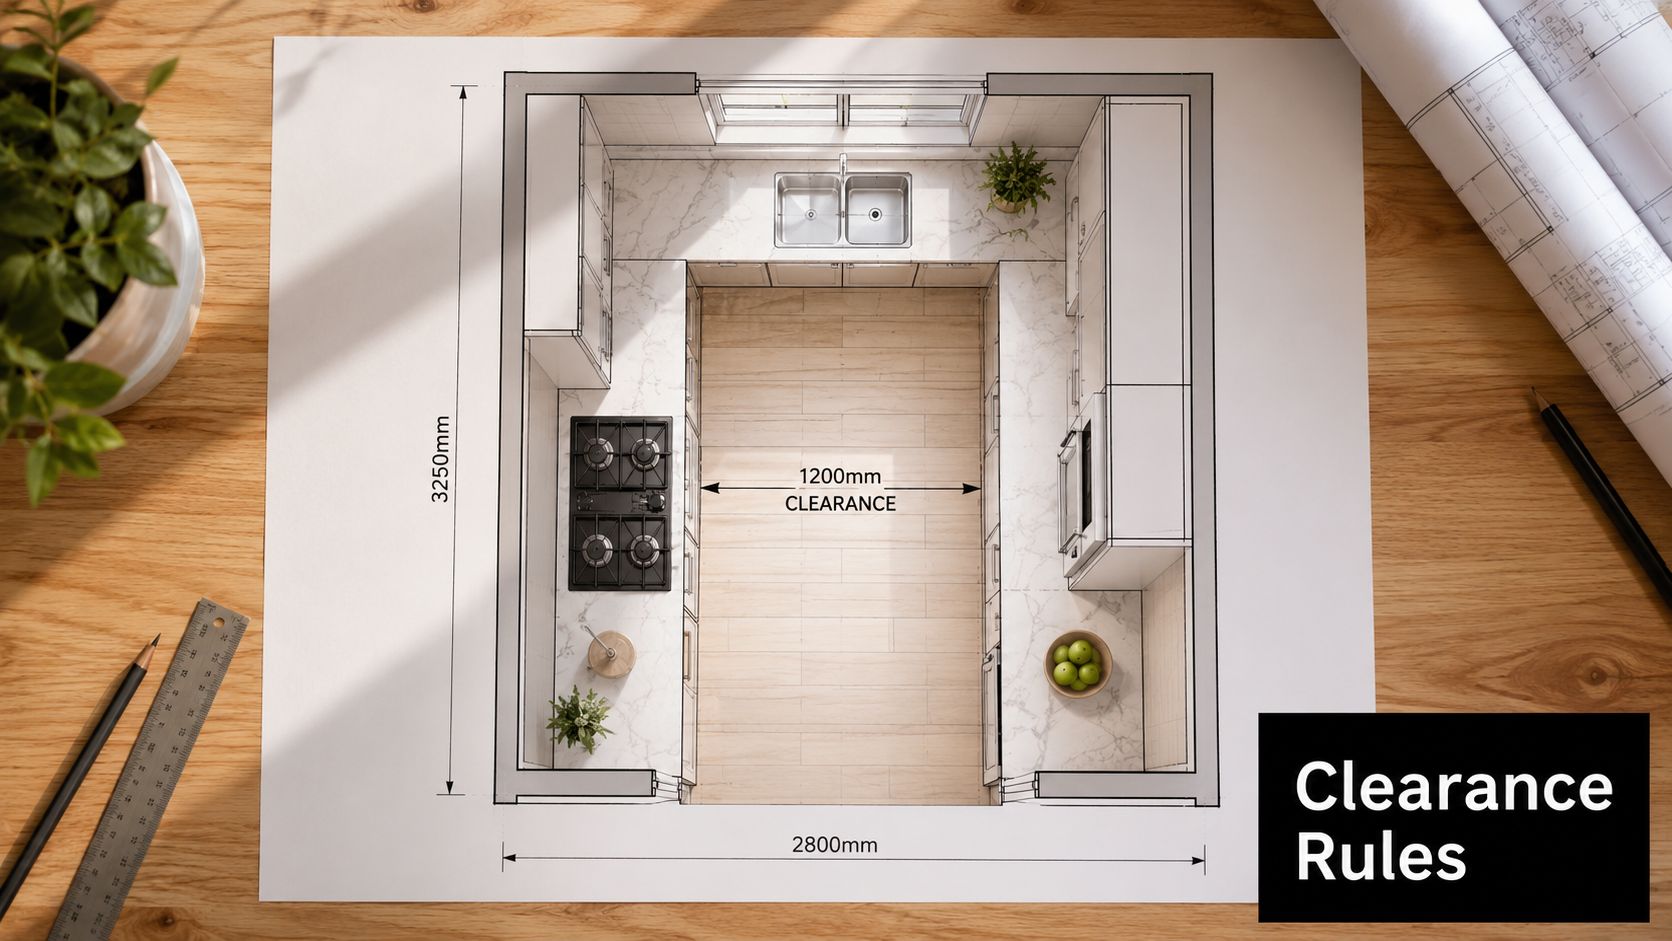
In long, tight bathrooms, this is often the clearest layout to test first. Fixtures run along two opposing walls, creating a direct path from the entry to the shower or toilet. We use it often in Melbourne apartments, compact ensuites, and older Victorian terraces where the room is rectangular and every fixture depth affects circulation.

The strength of this layout is discipline. Keep both sides slim and the room feels ordered. Oversize one element, especially the vanity, and the centre aisle starts to feel cramped fast.

What makes it work

A galley layout usually performs best when one side carries the vanity and the other takes the shower, with the toilet positioned toward the end of the room where it is less dominant on entry. That arrangement gives a cleaner sightline and a more practical walking path. In renovations across Victoria, it is often the most buildable option when the existing room shape is narrow and relocating plumbing needs to stay controlled.

Fixture depth matters more here than in almost any other small bathroom layout. A wall-hung vanity helps because it keeps more floor visible and makes cleaning easier around the base. A frameless or lightly framed shower screen also reduces visual weight, which helps the room read as one space instead of a series of obstacles.

Door planning can make or break the result. If the existing swing cuts across the vanity or toilet clearance, a cavity slider or out-swing door is often worth pricing early. I have seen otherwise solid galley plans fall apart because the door was treated as an afterthought.

Practical rule: In a galley bathroom, protect the walkway first. Finishes can improve the look later, but poor circulation is hard to hide.

A few choices usually improve this layout:

  • Use a wall-hung vanity: It frees up the floor line and makes the room easier to clean.
  • Keep storage vertical or recessed: Mirror cabinets, niches, and shallow shelving work better than full-depth tall units.
  • Place the toilet carefully: Tucking it further down the room usually improves privacy from the doorway.
  • Use clear glazing where possible: It keeps the full length of the room visible.

For narrow ensuites, our guide to ensuite bathroom design planning shows how to adapt this kind of layout without wasting width. For more planning examples, our guide to small bathroom ideas in Australia shows how these compact layouts can be adapted without wasting space.

The trade-off is straightforward. Galley bathrooms are efficient and easy to read, but they leave little tolerance for bulky fixtures, thick nib walls, or poor door placement. Get those details right and the room feels calm and functional. Get them wrong and the bathroom will always feel tighter than the floor plan suggests.

2. The Corner Layout

A bright, compact bathroom featuring a space-saving corner shower stall and a dark wood vanity sink cabinet.

A corner layout suits small bathrooms that are closer to square than rectangular. The main advantage is visual. By pushing the shower, vanity, and toilet into corners, you leave the centre of the room clearer, and the room feels less congested the moment you open the door.

This is a strong option for compact ensuites in newer Highett builds and for older bathrooms where the existing plumbing limits how far fixtures can move. It also works well when you want the bathroom to feel open without committing to a full wet room.

Best use cases and trade-offs

Corner showers are often suggested for tiny rooms, but the layout still needs to be buildable. In very small ensuites and older Victorian homes, the problem isn't the 3D view. It's whether the clearances comply once wall thicknesses, plumbing walls, and fixture projections are accounted for. That gap between attractive design and workable construction is a common reason small bathroom plans need redesign before build starts (small bathroom layout compliance discussion).

That's why we don't treat corners as leftover space. They need proper waterproofing, ventilation, and access around fixtures.

A corner layout usually works best when you:

  • Anchor the shower first: The shower takes the most visual space, so set that position before choosing the vanity.
  • Use corner storage deliberately: Built-in shelves or a compact corner vanity can stop the room from feeling patched together.
  • Protect the middle of the room: Clear floor space improves flow more than adding one extra cabinet ever will.

If you're working on an ensuite, our article on designing an ensuite goes into the planning decisions that matter before waterproofing and tiling begin.

What doesn't work here is forcing all three fixtures into corners without checking how each one projects into the room. A corner layout should feel balanced, not shoved outward just for the sake of keeping the centre open.

3. The L-Shaped Layout

The L-shaped layout is one of the most forgiving options in small bathroom layout ideas because it suits rooms that aren't perfectly narrow or perfectly square. It places the main fixtures along two adjoining walls, which naturally creates a more open zone in the remaining part of the room.

In family bathroom renovations across Victoria, this often gives the cleanest separation between grooming and bathing. A vanity can sit on one wall, while the shower or bath runs along the perpendicular wall. That keeps the room organised without making it feel too segmented.

A modern bathroom features a light wood floating vanity with black fixtures and a minimalist walk-in shower.

Where this layout earns its keep

This layout helps when the doorway arrives at an awkward point or when one wall is better suited to plumbing than the other. In renovated period homes, that's common. You don't always get symmetry, but you can still get a room that feels intentional.

It's also a good fit for people collecting new bathroom ideas who want a bit more design flexibility. The corner where the two walls meet can hold a mirror return, a niche, open shelving, or a feature light. That gives the room some personality without interrupting movement.

Good L-shaped bathrooms feel calm because they direct use naturally. You walk in, turn once, and the room makes sense.

A few practical choices improve the result:

  • Keep the vanity on the more visible wall: That gives you a cleaner first impression from the doorway.
  • Use the junction well: A dead corner is wasted space in a small bathroom.
  • Light both sides properly: If one wall is bright and the other falls into shadow, the room can feel uneven.

The downside is that poorly planned L-shaped rooms can create one tight pinch point, usually near the shower entry or toilet approach. When that happens, the bathroom looks fine on paper but feels awkward every day. The fix is usually simpler fixture selection, not more joinery.

4. The Open Plan Floating Vanity Layout

This is one of the most effective layouts for clients who want designer bathrooms without crowding a small footprint. The floating vanity does two jobs at once. It gives you storage, and it leaves the floor line visible underneath, which immediately makes the room feel less boxed in.

Wall-hung vanities are a recognised design solution for small bathrooms because they free floor area and improve the sense of space while still fitting modern minimalist styling (bathroom ideas for Australian homes). In practice, that matters most in ensuites and compact family bathrooms where a full-height vanity can feel heavy.

What to get right before installation

The visual effect is simple. The construction behind it isn't. The wall has to be framed properly to support the vanity and plumbing needs to be coordinated early, especially if you want drawers rather than a basic shelf arrangement. Consequently, working with registered builders unlimited in scope on renovation delivery matters, because the clean look depends on what's hidden in the wall.

The best versions of this layout usually pair the vanity with an open or lightly screened shower zone, simple mirrors, and restrained finishes. If you overload the room with too many feature materials, the floating vanity loses the clean effect that made it useful in the first place.

A practical approach is to focus on these details:

  • Keep the vanity proportionate: Slimmer joinery often looks better than trying to force extra width into a small room.
  • Use integrated storage: Drawer organisers and mirrored cabinetry reduce clutter on the benchtop.
  • Light the underside carefully: Soft under-vanity lighting helps the room feel layered instead of stark.

This layout is ideal for modern bathrooms, but it isn't the best choice if the household needs maximum enclosed storage at all costs. Open visual space and bulky storage don't usually coexist well in a tight bathroom. One has to lead.

5. The Wet Room Layout

A wet room strips the bathroom back to its simplest form. Instead of treating the shower as a separate object inside the room, the whole room becomes the waterproofed environment. In a compact bathroom, that can be a smart way to remove visual barriers and open the floor area.

This layout suits clients chasing cleaner lines and a more contemporary feel. It also works well where accessibility, easier movement, or long-term usability matter as much as aesthetics.

Why it can feel bigger than it is

Large-format tiles and porcelain panels are widely used in Australian small bathroom renovations because fewer grout lines reduce visual clutter and create better surface continuity. In particular, 1200mm x 600mm tiles help the room read as more expansive, especially when paired with light-coloured glossy or satin finishes that reflect natural light well (small bathroom ideas and layouts in Australia).

That's one reason wet rooms often photograph so well. The floor and walls read as one connected envelope instead of a collection of pieces.

Builder's note: A wet room only feels effortless when the falls, drainage, screen placement, and waterproofing have been resolved before tiling starts.

For homeowners exploring wet room bathroom ideas, the layout can be excellent in small spaces, but it isn't a shortcut option. It requires discipline in set-out and a builder who understands how all the elements interact.

A strong wet room usually includes:

  • A controlled splash zone: Even in open layouts, a fixed glass panel often improves usability.
  • Reliable drainage planning: The floor has to fall properly to the waste without creating awkward tile cuts.
  • Slip-resistant flooring: The room must be safe when fully wet.

What doesn't work is treating a wet room as just a standard bathroom with the shower screen removed. Without proper planning, water tracks further than expected, storage gets wet, and the room becomes harder to live with, not easier.

6. The Separate Toilet Alcove Layout

This layout changes how the room functions rather than just how it looks. By tucking the toilet into its own alcove, you free the main bathroom to focus on the vanity, mirror, and shower or bath. In family homes, that can make a compact bathroom feel far more usable because more than one person can use the broader space without conflict.

It's a practical option in older Victorian homes where separate WC arrangements already existed in some form, and it also suits modern bathroom renovations where privacy matters. The trick is to make the toilet alcove feel intentional, not like a leftover cavity created after everything else was squeezed in.

When separation helps and when it doesn't

The upside is obvious. The main room feels cleaner and more open, and the toilet is less visually dominant. This can lift the overall feel of a compact bathroom, particularly in homes where the vanity wall is the main design feature.

The downside is that splitting a small room can also make both zones feel tight if the original footprint doesn't support it. Door positions matter a lot. Ventilation matters too, especially if the alcove has limited natural airflow. In some homes, keeping everything in one carefully planned room works better than forcing separation.

A few design choices improve the result:

  • Define the zones with finish changes: A different tile, paint tone, or joinery detail helps each area feel resolved.
  • Keep access straightforward: Avoid doors that collide or create awkward circulation.
  • Plan maintenance access: Concealed cisterns and tight service spaces need forethought, not guesswork.

This layout is often one of the better new bathroom ideas for households with kids, guests, or busy mornings. It's less about making the room look larger and more about making the room work harder.

7. The Offset Double Vanity Layout

In a small bathroom, a double vanity often sounds good but creates more problems than it solves. The offset version is the smarter compromise. Instead of forcing a wide, heavy unit into the room, this layout staggers the basins or the joinery so two people can share the space with less visual bulk.

It suits master ensuites and family bathrooms where two users regularly get ready at the same time. Done well, it gives you shared function without the oversized, hotel-style vanity that dominates the whole room.

A better shared setup for compact rooms

The appeal of this layout isn't just capacity. It's flexibility. One user can have a full mirror and storage zone while the second basin sits slightly offset or lighter in profile. That breaks up the mass of the joinery and helps preserve some air around the room.

In designer bathrooms, this can also look more custom than a standard side-by-side double basin. Different mirror shapes, lighting points, or drawer configurations can make the room feel more suited to how the household uses it.

A practical offset setup should prioritise:

  • Separate task lighting: Each user needs usable mirror light, not just one central fitting.
  • Balanced storage: Shared bathrooms fail fast when one side gets all the drawers.
  • Simple plumbing paths: Complicated under-slab changes can make a clever concept expensive very quickly.

This isn't the right move for every compact bathroom. If the room can barely fit one well-proportioned vanity, trying to make it a two-user zone usually backfires. In that case, a generous single vanity with better drawer organisation is often the more successful renovation decision.

8. The Alcove Shower with Vanity Focus Layout

You walk into a small ensuite at 7 am, and the basin is doing more work than the shower. That is the reality in a lot of Victorian homes we renovate, especially where the bathroom connects to a walk-in robe or serves as the main getting-ready space for a couple. In that setting, pushing the shower into an alcove and giving the vanity the prime wall often produces a better daily layout.

The main benefit is visual order. A recessed shower keeps the wet zone contained, so the room reads as a vanity-led space rather than a corridor of glass, tile, and fittings. That usually makes the bathroom feel calmer and easier to use, even when the footprint is tight.

From a builder's point of view, this layout works best when the alcove is properly resolved, not treated as leftover space. The recess needs enough width to shower comfortably, enough depth for screen placement and waterproofing, and a clear approach path that does not clip the vanity corner. Get those proportions right and the plan feels intentional.

It also gives you more freedom to make the vanity work harder. We often pair this layout with full drawers, mirrored storage, and lighting that is effective at the basin. Inside the shower alcove, recessed niches and a frameless screen help keep the detailing clean without asking the shower to dominate the room.

The biggest trade-off is the bath. In many small bathrooms, removing the bath and installing a hobless walk-in shower is the move that frees up the most usable floor area. If the household still needs a bath, the layout gets tighter fast. A compact tub, a slim vanity, and a modest shower zone can work, but only if each fixture is kept in scale. Trying to fit a generous alcove shower, deep joinery, and a full-size bath into one compact room usually leaves poor circulation and awkward clearances.

This layout suits households that shower daily and want the vanity to carry the room. It is less successful in family bathrooms where regular bathing is still a fixed requirement. At SitePro Bathrooms, we usually recommend it when bench space, storage, and mirror access matter more than squeezing in every possible fixture.

Small Bathroom Layouts: 8-Point Comparison

Layout Implementation complexity Resource & cost Expected outcomes Ideal use cases Key advantages
The Galley Layout Low, straightforward plumbing along parallel walls Low–Medium, cost-effective renovation Efficient single-file workflow; maximizes linear space Narrow apartments, ensuites, compact bathrooms Space-saving, simple plumbing, clear traffic flow
The Corner Layout Medium, corner plumbing and angles require planning Medium, may need custom fixtures or fittings Open center, perceived larger space, flexible arrangements Small square bathrooms, modern ensuites, renovated period homes Maximizes visual openness, flexible storage, good flow
The L-Shaped Layout Medium, plumbing on two perpendicular walls; careful planning Medium, moderate installation complexity Distinct wet/dry zones; efficient use of rectangular space Rectangular bathrooms, family baths, master ensuites Zoning, ample counter space, versatile layouts
Open Plan Floating Vanity Layout Medium–High, requires robust wall framing and support Medium–High, premium fixtures and installation costs Strong visual spaciousness; modern minimalist aesthetic Designer bathrooms, high-end renovations, modern apartments Visual openness, easier cleaning, contemporary look
The Wet Room Layout High, full waterproofing, precise slope, specialist trades High, expensive waterproofing and drainage work Seamless open wet space; spa-like feel; high accessibility Luxury bathrooms, accessible design, space-conscious builds Maximum openness, accessibility, easy maintenance
Separate Toilet Alcove Layout Medium, adds partitions, door, and separate ventilation Medium, extra construction, plumbing and ventilation Increased privacy; main bathroom feels larger; dual use possible Family homes, ensuites, European-inspired renovations Privacy, hygiene, allows simultaneous use
Offset Double Vanity Layout Medium, additional plumbing and thoughtful spacing Medium–High, two fixtures and more finishes Comfortable two-user operation; luxurious feel Master bathrooms, shared ensuites, family bathrooms Accommodates two users, design sophistication, increased storage
Alcove Shower with Vanity Focus Medium, waterproofing in alcove; careful partitioning Medium, depends on glass, tiles, and fixtures Prioritizes grooming; clear wet/dry separation; ample counters Grooming-focused bathrooms, dual-user spaces, contemporary renovations Ample counter/storage, distinct zones, grooming-focused design

Ready to Design Your New Bathroom?

Choosing the right layout is the first real step in a successful renovation. In small bathrooms, the plan isn't just one decision among many. It shapes how the room feels, how it functions, and how expensive it becomes to build. A layout that respects the room's dimensions, plumbing path, and clearances will nearly always outperform a prettier plan that ignores those constraints.

That's especially true in older homes around Highett and greater Victoria, where walls aren't always straight, plumbing positions can be limiting, and every fixture depth matters. We often find that the best small bathroom layout ideas aren't the flashiest ones. They're the ones that solve circulation first, keep the room easy to clean, and make the joinery and shower work together instead of competing for space.

Budget also plays a role in how far you can push the design. In 2026, a complete bathroom renovation in Australia for a standard-sized room using mid-range materials typically starts around $20,000, while projects with luxury finishes or plumbing wall relocation can exceed $35,000 (Australian bathroom renovation cost guide). That's why layout planning early matters so much. Changing the room on paper is manageable. Changing it after plumbing and waterproofing are underway is where costs climb.

Material choices can also help a compact room feel more resolved. Australian homeowners in 2025 are increasingly choosing native timbers such as spotted gum, Tasmanian oak, and blackbutt for vanities and wall cladding, often paired with earth-toned palettes like beige, terracotta, and soft green instead of an all-white scheme. In small spaces, that warmth can make the room feel considered rather than clinical.

If you're weighing up designer bathrooms, practical storage, or fresh new bathroom ideas for a compact footprint, 3D design is one of the smartest places to start. It helps test fixture positions, sightlines, screen placement, and door swings before construction locks the layout in. That's particularly useful in small rooms, where a few millimetres can change whether the room works properly.

SitePro Bathrooms is a Highett-based renovation company that provides concept planning, detailed 3D design, construction, and finishing for bathroom renovations. If you're ready to turn a cramped room into one that feels clear, modern, and highly functional, contact the team to discuss a layout that suits your home and how you live.

  • siteprobathrooms

Scandinavian Bathroom Design: A Highett Homeowner’s Guide

You're probably standing in a bathroom that technically works, but never feels good to use. The vanity is bulky, the storage spills onto the bench, the lighting is flat, and the whole room feels smaller at 7 am than it did the night before. That's a common starting point in Highett homes, especially where an older layout is still doing all the heavy lifting.

A strong Scandinavian bathroom design solves that problem by stripping the room back to what matters. Better light. Cleaner lines. Smarter storage. Materials that feel calm rather than busy. It suits bathroom renovations in Victoria because it isn't trend-driven in the throwaway sense. It's practical, restrained, and adaptable to compact ensuites, family bathrooms, and higher-end designer bathrooms alike.

From Cluttered to Calm Your Bathroom Sanctuary

A lot of clients start in the same place. They've lived with a bathroom that feels cramped, dim, and harder to clean than it should be. The bench fills up with daily products, the vanity feels too heavy for the room, and the finishes date the whole house even after other areas have been updated.

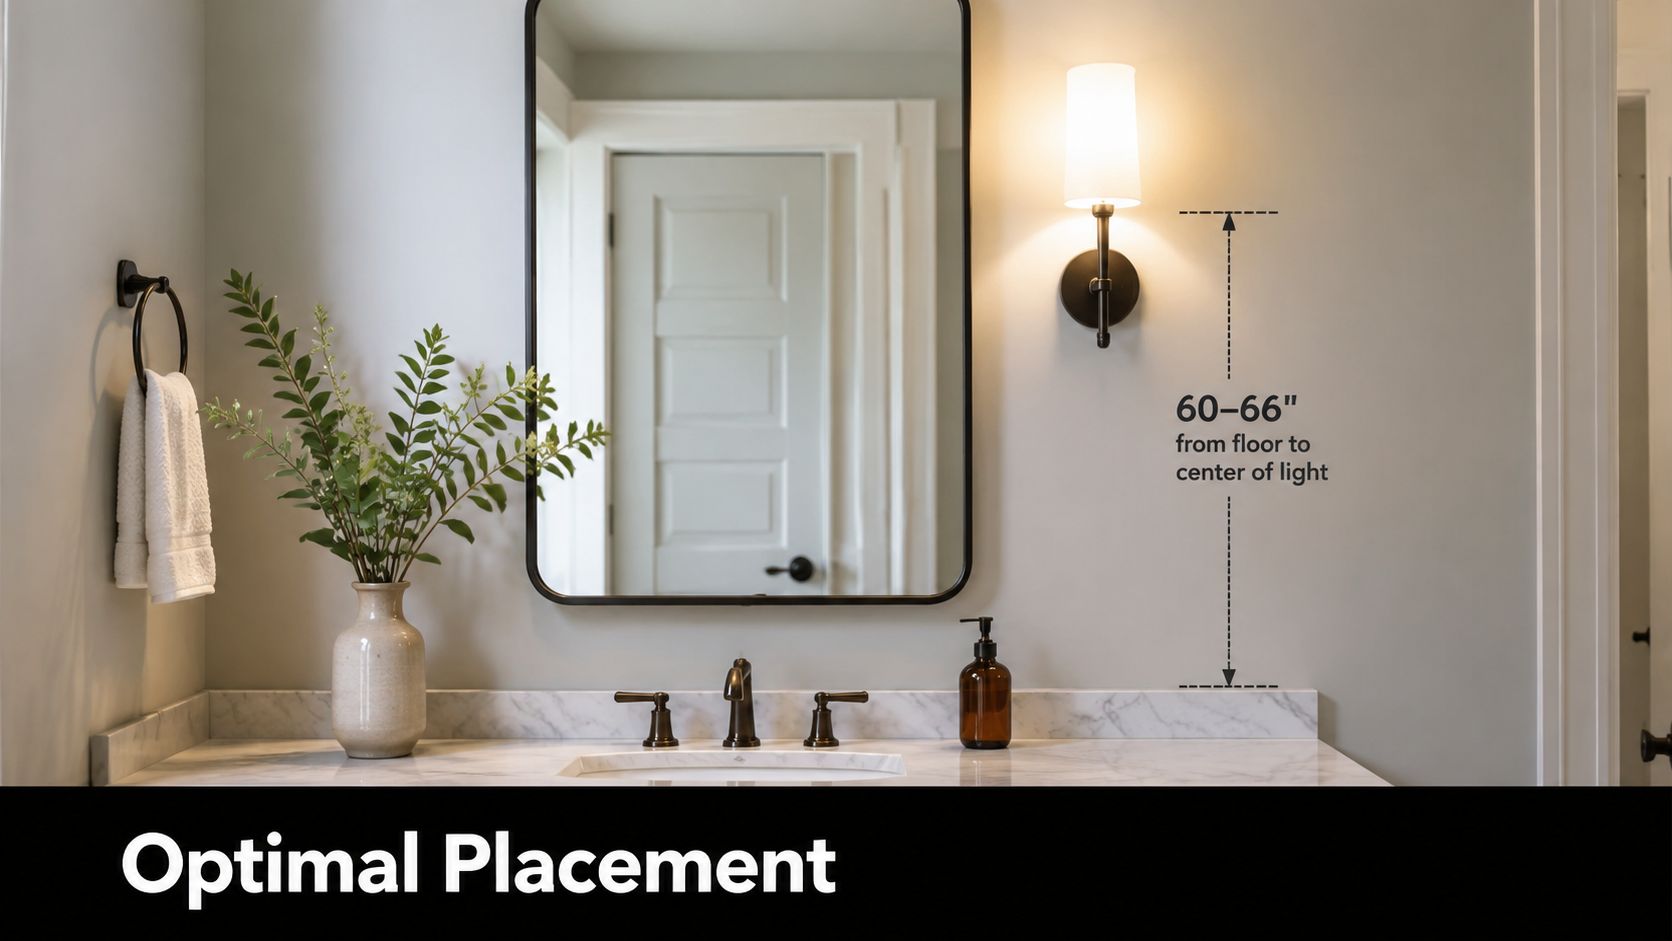
The appeal of Scandinavian bathroom design is that it changes the feeling of the room first. A bathroom can still be modest in size and feel calm if the layout is clear, the colours are light, and every fitting has a reason to be there. That's why the style works so well in Victorian homes. It doesn't ask for excess. It asks for discipline.

In practical terms, that usually means removing visual weight, opening floor area, and choosing materials that look honest rather than decorative. The result isn't cold if it's done properly. It feels settled.

A calm bathroom isn't created by adding luxury items. It comes from taking away the things that interrupt the room.

That shift is why Scandinavian-inspired spaces remain one of the strongest new bathroom ideas for homeowners who want modern bathrooms that still feel liveable every day.

The Philosophy of Scandinavian Bathroom Design

Scandinavian bathroom design is often reduced to white tiles and pale timber. That misses the point. The style lasts because it's built on a simple idea. The room should support daily life without noise, clutter, or awkwardness.

Two ideas sit behind that. Hygge is about comfort and ease. Lagom is about having just enough. In a bathroom, that means the room should feel warm and settled, but never overloaded. It should be useful without becoming harshly utilitarian.

Light first, decoration second

In Australia, Scandinavian bathroom design is strongly tied to light. Australian bathroom design guidance on Scandinavian style describes it as a look built around whites and soft greys chosen to increase openness and brightness, with large windows and skylights used to pull the outdoors in and keep the room feeling fresh and serene.

That matters in Victorian homes because many bathrooms weren't originally designed as generous spaces. Some are narrow. Some rely on limited natural light. Some sit in the middle of the floor plan and need every reflective surface to work harder. A Scandinavian approach responds well to those constraints because it uses brightness as part of the design, not as an afterthought.

For homeowners who like the pared-back end of the style, there's a close relationship with minimalist bathroom design principles. The difference is that Scandinavian rooms usually soften minimalism with timber, texture, and a more lived-in sense of warmth.

What the style gets right

A proper Scandinavian bathroom should do these things well:

  • Keep the palette restrained so the room feels larger and calmer.
  • Use honest materials that look like what they are, rather than imitations trying to create drama.
  • Prioritise function so movement, cleaning, and storage all improve.
  • Connect to nature through light, timber, stone, and simple texture.

What doesn't work

Some rooms miss the mark because they copy the surface look without the underlying logic. The most common mistakes are easy to spot:

  • Dark feature walls that absorb light and shrink the room.
  • Chunky vanities that sit heavily on the floor and block visual flow.
  • Too many finishes competing for attention.
  • Decorative clutter replacing proper storage.

The best designer bathrooms in this style don't feel styled for a photo. They feel resolved. Every fitting supports the room, and nothing fights for attention.

Core Elements and Essential Materials

The materials decide whether a Scandinavian bathroom feels refined or forced. Consequently, many bathroom renovations either settle into something timeless or drift into a generic white bathroom with a few timber accents.

A modern Scandinavian bathroom featuring a wooden vanity, vessel sink, white subway tiles, and natural decor elements.

The palette has to carry the room

The base is usually crisp white, warm white, soft grey, or a muted stone tone. Those colours give the room its openness. They also let texture do the work. In a Scandinavian scheme, texture matters more than contrast. Matte tile, pale timber grain, brushed metal, and woven accessories create depth without making the room feel busy.

One useful way to assess tile direction is to focus on consistency rather than novelty. If you're weighing tile formats and finishes, this guide on how to choose bathroom tiles helps sort out what will age well and what may date quickly.

Timber should lighten the room, not burden it

In Australian bathroom renovations, guidance on Scandinavian-inspired bathroom materials notes that floating vanities in pale oak or blonde timber are a popular choice because they make the space feel more open and support the uncluttered flow the style depends on. The same source points to light woods such as birch and ash wood counters as part of that natural material language.

That doesn't mean every timber look is right. In Highett homes, very yellow timber can feel dated, and very rustic timber can pull the room away from the clean Nordic line. Pale oak tones usually sit best because they warm the room without taking over.

Practical rule: If the vanity is the first thing you notice when you enter, it's probably too heavy for a Scandinavian scheme.

Fixtures should stay simple

The fittings should read as clean and quiet. That usually means:

  • Tapware with straightforward geometry rather than ornate profiles.
  • Wall-hung pieces where possible to keep the floor reading open.
  • Simple mirrors that enlarge the room without introducing visual clutter.
  • Stone or ceramic surfaces that feel durable and easy to maintain.

There's also a practical material trade-off in Australia. Some Nordic-inspired timbers need more protection in our conditions. Australian guidance on Scandinavian bathroom ideas from IKEA notes that over 60% of Australian bathroom timber fittings require specialised marine-grade sealing or alternative moisture-resistant materials to maintain the look in Victoria's climate. That's one reason good designer bathrooms balance natural finishes with durability rather than chasing a pure showroom version of the style.

A Scandinavian bathroom should feel light, but it still has to survive daily use.

Layout Ideas for Small and Large Bathrooms

Layout is where Scandinavian bathroom design either becomes convincing or falls apart. The style looks effortless, but it depends on careful planning. In Highett, that matters because room sizes vary wildly. One home has a tight ensuite carved out of an existing plan, while the next has enough space for a full family layout.

A modern Scandinavian bathroom featuring a white vanity, glass shower, wooden shelving unit, and natural woven accents.

Small bathrooms need visual discipline

In a compact room, the brief is simple. Keep the floor visible, reduce interruptions, and avoid anything that chops the space into pieces.

The strongest new bathroom ideas for smaller rooms usually include:

  • Wall-hung vanities so more floor area stays visible.
  • Mirrors sized to work hard rather than acting as decoration only.
  • Minimal framing around showers to preserve open sightlines.
  • Built-in storage so the bench stays clear.

For the walk-in shower look that many people associate with Scandinavian bathrooms, dimensions matter. Guidance on small bathroom dimensions for hobless showers states that a minimum shower footprint of 1200 x 900 mm is required to achieve the Scandinavian hobless aesthetic properly. That footprint allows for a frameless glass screen and proper circulation while keeping the tile plane visually uninterrupted.

If the room can't comfortably give up that area, forcing the issue often backfires. A shower that's too tight loses the airy quality the style relies on.

Larger bathrooms need restraint

A bigger room gives you more options, but it also creates more chances to over-design. Scandinavian layout planning in a larger bathroom works best when the room is divided into quiet zones rather than packed with features.

A practical arrangement often follows this order:

Area Best approach
Vanity zone Keep the joinery long and simple, with clean wall space around it
Shower zone Use clear glass and continuous wall finishes to avoid visual breaks
Bath zone Give the tub breathing room instead of crowding it with ledges and décor

Comparing what works and what doesn't

A small room benefits from compression and clarity. A larger room benefits from editing.

In a small bathroom, every extra object makes the room feel tighter. In a large bathroom, every unnecessary feature makes the room feel less resolved.

For both sizes, the same rule applies. Let circulation stay easy. If you need to twist past a vanity corner, step around a freestanding item, or squeeze into a shower opening, the layout isn't doing its job. The best modern bathrooms feel obvious to use because every element sits where it should.
Illuminating a Scandinavian Bathroom

Lighting carries more responsibility in this style than many homeowners expect. If the room has the right palette but poor lighting, it won't read as Scandinavian. It will just look flat. Good lighting gives the bathroom softness, function, and depth at different times of day.

A minimalist Scandinavian bathroom featuring a freestanding tub, natural wood vanity, and warm layered lighting.

Layer the light properly

One ceiling light in the middle of the room rarely does enough. Scandinavian bathrooms work better when lighting is layered with purpose.

A practical setup usually includes:

  • Ambient light for overall illumination.
  • Task lighting at the mirror for shaving, skincare, and makeup.
  • Accent lighting to add warmth around niches, joinery, or the bath area.

For homeowners sorting through fitting placement and practical ceiling options, this article on downlights in a bathroom is a useful reference point.

Let reflection do some of the work

In Victorian conditions, natural light can be inconsistent through the year. A technical discussion of Nordic bathroom lighting choices points to crisp white tiles with reflectance value greater than 85% paired with light oak or cream-toned fixtures as a way to maximise luminous reflectance. It also notes that dark blinds or heavy window coverings run against the principles of the style.

That has a very practical effect. Surfaces bounce available light around the room, and the bathroom stays brighter without relying on a harder, colder artificial setup.

Storage has to disappear into the design

A Scandinavian bathroom can't stay calm if daily items are permanently on display. The room needs places for everything people use.

Good storage usually comes from a combination of:

  • Vanity drawers with internal organisers
  • Mirror cabinets that don't look bulky
  • Recessed niches in the shower
  • Shelving used sparingly for items worth seeing

The common mistake is assuming open shelves will solve storage. They don't. They create styling pressure and visual clutter unless the household is unusually disciplined. Closed storage does more for the room, and it's easier to keep clean.

Budgeting Your Bathroom Renovation in Victoria

A Scandinavian bathroom often looks restrained, but the build rarely is. In Highett and across Victoria, the budget is shaped less by the minimalist look and more by what sits behind it: substrate repairs, waterproofing, ventilation, electrical work, plumbing access, and joinery sized to the room.

That matters even more in older Victorian homes. Once walls or floors are opened, it is common to find uneven surfaces, tired plumbing, or framing that needs correction before the new finish can go in. A simple-looking room can still be a detailed renovation.

For bathroom renovations in Australia, Canstar's summary of HIA renovation cost data states the average cost is $26,000 as of 2023, with a typical range from $8,000 for basic projects to over $35,000 for high-end or complex renovations. In practice, Scandinavian bathrooms often sit in the middle or upper part of that range when clients want custom joinery, better lighting, cleaner tile set-out, and durable natural finishes that suit the style.

Where the money usually goes

Labour usually takes a large share because clean design needs precise execution. Straight tile lines, neat junctions, flush transitions, recessed storage, and carefully placed lighting all take time on site. If the plan also includes moving plumbing or correcting an out-of-level floor, costs rise quickly.

If you're comparing proposals from a team operating as registered builders unlimited or from specialised renovation contractors, read the inclusions line by line. A lower quote can still cost more later if it carries light allowances, skips surface preparation, or leaves out items like demolition, disposal, waterproof certification, or electrical upgrades.

A practical budget usually includes these categories:

Expense Category Estimated Cost Percentage
Labour 40% to 50%
Fixtures, finishes and fittings Varies by project
Permit fees Small but necessary project cost
Contingency 10% to 20%

The contingency matters in Victorian homes. On a newer build, it covers minor adjustments. In an older home, it often covers the kind of work no one can confirm until demolition starts.

Where to save and where not to

Good savings keep the room calm and durable. Bad savings show up in six months.

Save carefully in these areas:

  • Layout retention: Keeping the toilet, shower, and vanity close to existing plumbing points usually reduces labour and risk.
  • Tile format: Standard tile sizes are often cheaper to buy, faster to lay, and easier to match later if repairs are needed.
  • Feature count: One well-resolved focal point, such as a timber vanity or quality wall light, usually does more than several expensive statements competing in a small room.

Spend carefully in these areas:

  • Waterproofing and substrate preparation: This work protects the room from failure and is expensive to rectify later.
  • Ventilation: Victorian winters and cooler coastal conditions around Highett make moisture control a practical issue, not a styling extra.
  • Tapware, runners, hinges, and shower hardware: Daily-use components need to hold up under constant use.
  • Joinery finish and construction: Scandinavian design relies on quiet detail. Poorly built cabinetry stands out immediately because there is nowhere for it to hide.

A Scandinavian bathroom does not cost more because it has less in it. It costs more when every visible line needs to be clean, every material change needs to be deliberate, and the hidden work has been done properly.

Sustainable choices can still make sense on budget, but they need to be selected with care. Water-efficient fixtures, durable porcelain in place of higher-maintenance natural stone, and locally available finishes often suit the Scandinavian approach while keeping the project grounded in Victorian building realities. The aim is not to copy a Nordic showroom. The aim is to build a bathroom that feels calm, wears well, and makes financial sense in the home you have.

A Highett Homeowner's Renovation Checklist

A Scandinavian bathroom comes together best when the renovation process is organised from the start. In Highett, that means balancing the look you want with the practical limits of the home you already have.

Screenshot from https://siteprobathrooms.com.au

Start with the non-negotiables

Before choosing tapware or tiles, lock in the fundamentals:

  1. Define how the room needs to work. A family bathroom needs different storage and circulation than an ensuite.
  2. Set the budget range early. That keeps layout and finish decisions realistic.
  3. Identify what must stay and what can move. Plumbing relocation, structural constraints, and window positions shape the project more than mood boards do.

Check the Victorian building realities

Not every Scandinavian feature transfers neatly into every Victorian home. That's especially true with curbless showers. Yahoo's discussion of Scandinavian bathroom design challenges in Australian homes notes that curbless showers can be difficult in Victoria's heritage homes, particularly where concrete slabs can't be easily lowered without structural engineering approval.

That's a serious point in Highett renovations. The look may be desirable, but the subfloor has the final say. If the structure won't allow the recess you need, the room may need an alternative shower detail that still feels clean and open.

Use a practical selection process

Avoid selecting everything at once. Work in order:

  • Layout first: Decide where the shower, vanity, toilet, and bath belong.
  • Surfaces second: Lock in the main tile and timber direction.
  • Fixtures third: Choose pieces that support the room rather than dominate it.
  • Lighting and storage last: Fine-tune the daily function once the framework is fixed.

Choose a renovation team that can see the whole room

The best results come from teams that understand both design intent and construction limits. That matters if you want one of those modern bathrooms that feels effortless when finished. It matters even more if you're dealing with an older floor, hidden services, or a room that needs reworking rather than simple replacement.

A good process should include:

  • Clear scope documentation
  • Realistic allowances
  • Thoughtful design development
  • Attention to waterproofing, ventilation, and joinery detail
  • A clean handover without unresolved finishing issues

The smoothest bathroom renovations aren't the ones without decisions. They're the ones where the right decisions are made in the right order.

If you're planning a Scandinavian bathroom design project in Highett or elsewhere in Victoria, working with a specialist can make the difference between a room that merely looks the part and one that lives well. SitePro Bathrooms provides end-to-end renovation support, from design development through construction and finishing, for homeowners who want a bathroom that's calm, durable, and built properly from day one.

  • siteprobathrooms

Ensuite Renovation Cost: A 2026 VIC Price Guide

A professional ensuite renovation in Victoria typically lands between $25,000 and $35,000. A light cosmetic update can come in lower, while a luxury project with layout changes, structural work, and premium finishes can rise well beyond that.

If you're pricing an ensuite right now, you've probably already noticed how wide the numbers are. One guide says it's straightforward, another makes it sound cheap, and then the first real quote arrives and the budget shifts fast. That gap usually comes down to two things generic guides miss. Victoria's labour rates are high, and apartment or townhouse projects often carry approval costs and delays that don't show up in headline pricing.

That's why the smartest way to look at ensuite renovation cost isn't as one average figure. It's to understand the renovation tier you're planning, where your money goes, and which choices increase cost without always increasing value.

Ensuite Renovation Costs in 2026 What to Expect in Victoria

For Victorian homeowners, the biggest budgeting mistake is treating an ensuite like a small room that should have a small price tag. In practice, compact bathrooms are often expensive rooms to renovate because they still need the same licensed trades, waterproofing, demolition, tiling precision, and fixture installation as larger bathroom renovations.

Market data and contractor quotes for smaller ensuites in 2025 and 2026 indicate that a realistic budget starts between $25,000 and $30,000 for a standard renovation with professional trades in Victoria, according to Victorian ensuite pricing guidance for standard professional renovations. That starting point catches many homeowners off guard, especially if they've only seen broad national guides.

Cosmetic refresh

A cosmetic refresh is the lower-cost end of the spectrum. It usually means keeping the layout, keeping much of the existing structure, and focusing on surface-level improvement. Think updated tapware, fresh lighting, paint, mirrors, and selective replacement of fittings that are worn but not failing.

This type of work can sit closer to the lower renovation tiers seen across Australia, where basic ensuite renovations are often placed between $12,000 and $15,000 when the work is limited to fixture replacement and minor tiling, based on Australian ensuite tier ranges by scope. In Victoria, though, that figure is only realistic when the scope stays tight and avoids hidden rectification work.

Mid-range renovation

Most homeowners gravitate towards this choice. It usually includes new wall and floor tiling, a new vanity, updated lighting, fresh shower screen, and selected plumbing upgrades without a major relocation of services. For an average-sized ensuite, this is often the sweet spot between visual improvement and sensible spending.

At a broader national level, the most common spend for an average-sized bathroom sits between $25,000 and $30,000 for a standard quality upgrade that includes new tiling, vanity, and tapware, according to Canstar's bathroom renovation cost guide. That aligns closely with what many Victorian homeowners face for a properly managed ensuite.

Practical rule: If you want a genuinely new ensuite, not just a few swapped fittings, budget for a proper renovation rather than a patch-up.

Full-gut and high-end renovation

A full-gut renovation strips the room back and rebuilds it. This is the category for layout changes, larger showers, recessed storage, premium tiles, custom joinery, upgraded ventilation, and the finishes people often associate with modern bathrooms or designer bathrooms.

Builders also sometimes cost bathroom renovations by area, with rates ranging from $2,300 to $4,600 per square metre, while tiling labour alone can sit between $35 and $120 per square metre, according to bathroom renovation pricing by square metre and tiling rates. Once you start adding premium surfaces and detailed installation, the cost rises quickly.

For homeowners collecting new bathroom ideas, the key trade-off is simple. Keeping the existing layout protects the budget. Changing plumbing positions, chasing a more custom look, and specifying higher-end finishes is what pushes an ensuite from standard into premium.

Itemised Breakdown Where Your Renovation Budget Goes

Once homeowners move past the headline number, the next question is usually more useful. Where does the money go?

In Victoria, labour typically accounts for 40% to 50% of the total ensuite renovation budget, and that has a direct effect on the full quote. Plumbers charge about $100 to $150 per hour, while electricians charge about $70 to $95 per hour plus a service fee, according to Victorian ensuite labour and trade rate benchmarks. That's why an ensuite can feel expensive even before you've selected feature tiles or upgraded tapware.

Typical Ensuite Renovation Cost Allocation Victoria

Expense Item Percentage of Budget Estimated Cost Range
Labour and licensed trades 40% to 50% Qualitatively, this is often the largest single share of the budget
Plumbing work Included within labour-led costs Affected by plumber rates of $100 to $150 per hour
Electrical work Included within labour-led costs Affected by electrician rates of $70 to $95 per hour plus service fee
Tiling labour Varies by scope $35 to $120 per square metre
Tile materials Varies by specification $20 to $28/m² for standard white ceramic wall tiles, $86 to $159/m² for handmade or artisan ceramic tiles
Contingency 10% to 20% Reserved for hidden issues and changes

That table doesn't show every single line item because quotes are assembled differently from builder to builder. Some package demolition, waterproofing, installation, and site management together. Others split them out. What matters is understanding which costs are fixed necessities and which are driven by your selections.

The parts homeowners underestimate

The first is preparation. Demolition sounds simple, but careful strip-out matters in a wet area. If the existing substrate is damaged or the framing needs rectification, the job can't move straight into finishes.

The second is waterproofing and tiling. These are not cosmetic extras. They are core performance items. Cheap work here can undo the whole renovation.

A common issue in budget conversations is the DIY assumption. Some homeowners see broad estimates suggesting a tiny ensuite can be completed cheaply if they source a few trades themselves. In Victoria, that usually falls apart at the waterproofing and tiling stage, where compliance requirements and labour pricing are much harder to compress than online guides suggest.

Good ensuite budgets don't start with the tile colour. They start with the non-negotiables: demolition, substrate prep, waterproofing, plumbing, electrical, and installation.

What a solid quote should make clear

When reviewing quotes from registered builders unlimited or specialist renovation teams, look for clarity around:

  • Scope of demolition: What's being removed, protected, and disposed of.
  • Plumbing extent: Whether the quote allows for like-for-like replacement or actual service relocation.
  • Electrical inclusions: Lighting, exhaust, power points, heated mirrors, and switch positions.
  • Waterproofing responsibility: Who performs it and how it's documented.
  • Tile specification: Labour range changes sharply depending on tile size, cuts, and pattern.
  • Joinery detail: Off-the-shelf vanity pricing is very different from custom cabinetry.

The reason detailed quotes matter is simple. A vague low quote often becomes an expensive project later.

Key Factors That Drive Your Renovation Cost

Two ensuites can be almost the same size and finish at very different prices. The room size matters, but it isn't the main driver. Scope, access, product selection, and site conditions are what usually decide whether a project stays sensible or drifts.

Layout changes versus like-for-like replacement

The cheapest version of a renovation is usually the one that respects the existing plumbing and electrical locations. If the shower stays where it is, the toilet stays where it is, and the vanity remains on the same wall, the job is simpler to sequence and easier to control.

Once you start moving services, your ensuite renovation cost changes direction. Wall chasing, new pipe runs, changed wastes, revised lighting positions, and more detailed patching all add labour. If you're still shaping the room, it helps to review practical ensuite design planning ideas before locking in a layout that costs more than it gives back.

Material grade and finish level

Style decisions create the biggest spread. Standard ceramic finishes, simple framed mirrors, and stock vanities can deliver clean modern bathrooms without overloading the budget. Imported tiles, artisan surfaces, custom shower screens, and bespoke joinery move the project toward designer bathrooms.

The difference isn't only the purchase price. Premium products often take longer to install, need more careful handling, or require supporting trades to alter walls, fixings, or lighting around them. That means the finish selection affects both materials and labour.

Why contingency matters

Bathroom renovations expose what the old room has been hiding. Damaged sheeting, past leaks, uneven floors, outdated wiring, and messy previous repairs often only become obvious after demolition.

Across Australia, renovators are advised to allow a 10% to 20% buffer for hidden plumbing, electrical, and structural issues, and labour commonly makes up 40% to 50% of the total renovation budget, according to this bathroom renovation cost breakdown and contingency advice.

Budget test: If removing one upgrade would make you nervous about the total, the allowance is too tight.

A contingency isn't there to encourage overspending. It protects the decision-making process. Without one, homeowners often end up compromising the wrong things. They keep the statement tile and cut back on practical items like storage, ventilation, or proper preparation.

For most projects, the best value comes from a balanced specification. Keep the layout sensible, choose one or two visual features you care about, and spend confidently on the parts you'll never want to reopen later.

Budgeting in Action Three Ensuite Renovation Examples

Real budgeting becomes easier when you stop thinking in categories and start thinking in outcomes. Most homeowners aren't buying “mid-range”. They're buying a cleaner daily routine, better storage, less maintenance, or a more attractive home for future sale or leasing.

A modern bathroom ensuite with a light wood vanity, white countertop, walk-in glass shower, and framed botanical art.

Cosmetic update for a tired ensuite

The owner doesn't hate the room. They hate how dated and worn it feels. The waterproofing isn't being opened up, the layout remains untouched, and the goal is presentation rather than transformation.

This sort of project usually focuses on selective replacement. New tapware, refreshed lighting, updated mirror, painting, resealing, and a few finish upgrades can lift the room sharply. It works best when the original bones are sound. It doesn't work when there's hidden water damage, poor ventilation, cracked tiling, or old shower issues that need proper rectification.

Standard family ensuite renovation

This is the most common practical brief. The owners want a room that feels new, functions better, and looks current without drifting into luxury for luxury's sake. The old vanity is gone, the shower is rebuilt, the room is retiled, storage improves, and the lighting is upgraded.

Many professional Victorian projects attain this standard. The result often looks like the kind of modern bathrooms people save to their inspiration boards, but the successful versions don't chase every trend. They use durable finishes, maintain sensible plumbing positions, and choose fittings that are easy to service later.

A family ensuite at this level usually gives the best value because the money goes into daily use. Better drawer storage. A larger mirror. Easier-clean shower glazing. Better lighting over the vanity. A cleaner tile palette that won't date too quickly.

If you want a room that still feels right in a few years, prioritise function first and style second. The best-looking bathrooms usually follow that order.

High-spec custom ensuite

This brief is different from the start. The owners want a stronger design statement and they're prepared to spend for it. The room may be reconfigured for a larger shower, double vanity, custom niches, frameless glass, feature lighting, and selected premium tiles.

Designer bathrooms earn their cost only if the detailing is handled properly. A beautiful render means very little if storage is awkward, mirror lighting is harsh, cleaning is difficult, or custom pieces crowd a compact room. The projects that justify a higher spend combine custom joinery, disciplined material choices, and proper construction sequencing.

For homeowners collecting new bathroom ideas, the lesson from all three examples is straightforward. Spend according to the problem you're solving. If the room is structurally sound and only looks tired, a cosmetic update may be enough. If the room fails functionally every day, a full rebuild is usually better value than repeated patching.

Beyond the Quote Timeline Contingency and ROI

One of the most misleading assumptions in renovation planning is that the quote tells you the whole story. It doesn't. Price matters, but timing, approvals, and risk planning often decide whether the project feels smooth or stressful.

A renovation project timeline chart printed on paper with architectural blueprints and a ruler on a wooden table.

The timeline isn't just construction

Homeowners often think in terms of demolition to handover. In reality, the process starts earlier with selections, final scope confirmation, trade scheduling, and access planning. For apartments and some townhouse settings, there's another layer before work even begins.

In Victoria, strata approvals can add 2 to 4 weeks and 15% to 25% in administrative fees to the total budget, and a 2025 Housing Industry Association report noted that “strata approvals add cost and time”, with 60% of 2024 Melbourne renovations facing delays due to approval processes, according to this Victorian strata approval and renovation delay report. That's a major issue for owners in buildings where water, noise, common property access, and waste removal all need formal approval.

A useful reality check is to treat the timeline as two separate clocks:

  • Pre-construction clock: approvals, selections, documentation, ordering, and scheduling
  • On-site clock: demolition, rough-in work, waterproofing, tiling, installation, finishing, and defects

If you want a clearer sense of what affects project duration, this guide on how long a bathroom remodel should take breaks down the moving parts.

Where the hidden spend shows up

The quote can be accurate and the project can still cost more than expected if the owner hasn't allowed for surrounding decisions. Temporary access arrangements, building rules, longer lead times for selected fixtures, and surprise substrate repairs can all affect the final cost path.

A renovation runs best when the budget covers the room itself and the process around the room.

What value actually looks like

Return on investment isn't only resale maths. A strong ensuite renovation improves daily use, presentation, and maintenance. It can also support rental appeal and property positioning, especially when the old room is clearly dragging down the rest of the home.

The highest ROI usually doesn't come from the flashiest room. It comes from a well-resolved one. Good waterproofing, durable finishes, smart storage, proper lighting, and a layout that works every morning are what hold value longest.

Get an Accurate Quote for Your Dream Ensuite

By the time you've compared ranges, scopes, approvals, and finish levels, the main takeaway is simple. Ensuite renovation cost is only predictable when the scope is documented properly. Loose allowances create stress. Clear selections and a fixed process create control.

That's where a specialist project team makes the difference. SitePro Bathrooms starts with a proper consultation, not a guess. The first step is understanding how you use the room, what isn't working, and which new bathroom ideas are worth pursuing in your space rather than just looking good online.

Screenshot from https://siteprobathrooms.com.au

From there, the process moves into detailed planning and 3D design so you can see the layout, storage, fixtures, and finish direction before construction begins. That's especially useful for compact ensuites where every decision affects movement, cleaning, and storage. It also reduces the risk of expensive late changes.

A professionally managed renovation should also cover the practical side homeowners often dread. Trade coordination, ordering, permits, sequencing, site management, and quality control all need one point of accountability. That's why many owners prefer working with a specialist team backed by registered builders unlimited, rather than trying to stitch trades together themselves.

If you want a customized starting point for your own project, use the SitePro Bathrooms renovation cost calculator to estimate a realistic budget range. Once the scope is clear, it becomes much easier to decide what to keep, what to upgrade, and where the value really sits.


A good ensuite doesn't happen because the room is small. It happens because the planning is disciplined, the pricing is honest, and the build quality holds up long after the handover. If you're ready to move from rough figures to a quote that reflects your home, your building conditions, and your design goals, SitePro Bathrooms can help map it properly from day one.

  • siteprobathrooms

Luxury Bathroom Renovation Victoria: 2026 Design Guide

You're probably at the point where a basic update no longer feels enough. The old bathroom still works, but it doesn't feel calm, generous, or aligned with the rest of the home. You want something that feels refined every morning, not just “new”.

That's where a luxury bathroom renovation becomes a different category of project. It isn't only about swapping tiles and tapware. It's about layout, proportion, storage, lighting, waterproofing, comfort, and the way every finish works together. In Victoria, that also means planning carefully around local trade costs, compliance, and the considerations of renovating older housing stock.

Embarking on Your Luxury Bathroom Renovation

A standard bathroom update solves wear and tear. A luxury renovation solves how the room feels and functions. It turns a hard-working room into a private retreat, but it only works when design and construction are treated as one decision, not two separate jobs.

In Australia, luxury bathroom renovations are generally considered to start at $35,000 and up, with high-end projects often falling between $50,000 and $75,000, compared with an average national bathroom renovation cost of $26,000 according to this 2025 bathroom renovation cost breakdown. That gap tells you something important. Luxury isn't just a nicer vanity. It's a project where layout changes, higher-grade finishes, specialist trades, and tighter detailing all start to matter.

For first-time renovators, the biggest mistake is assuming luxury means adding more of everything. It doesn't. The best bathroom renovations are edited. They're organised around how you live. That might mean a larger walk-in shower instead of squeezing in a bath you'll rarely use. It might mean custom joinery that hides the clutter, or lighting that works at 6 am and still feels warm at night.

A strong project usually balances four things:

  • Design quality: the room feels cohesive, not pieced together
  • Budget control: selections match the investment level
  • Buildability: what looks good on paper can be built properly on site
  • Long-term value: the result suits both your lifestyle and your property

If you're still shaping your vision, looking at bathroom renovation before and after examples helps clarify what changes make the biggest difference. Pay attention to layout and storage as much as finishes.

A luxury bathroom should feel easier to use, not just more expensive to look at.

That's the lens worth keeping from the start. The smartest projects in Victoria combine modern bathrooms, designer bathrooms, and practical project planning so the final space feels polished, durable, and worth the investment.

What Truly Defines a Designer Bathroom

A high budget alone doesn't create a designer bathroom. Plenty of expensive bathrooms still feel awkward, cluttered, or dated within a few years. The difference comes from restraint, planning, and how the room performs day to day.

A luxurious modern bathroom featuring a white soaking tub, marble walls, and sleek wooden vanity cabinetry.

Luxury starts with decisions, not price tags

The strongest designer bathrooms usually have a clear hierarchy. One material leads. One focal point anchors the room. Storage is integrated instead of added as an afterthought. Lighting is layered rather than relying on a single ceiling fitting.

That's why some of the best new bathroom ideas aren't about adding features. They're about removing the wrong ones. A recent Australian design perspective argues that the most underrated luxury detail is knowing what to omit, and current 2025 to 2026 trends favour uncluttered elements over excessive ornamentation under the idea of “luxury meets everyday functionality” in this design trend reference.

That principle matters in practice. If every wall has a feature tile, every surface has a different finish, and every fitting tries to be a statement piece, the room loses calm. Cleaning also becomes harder. So does coordinating the build.

What works in real homes

In Melbourne homes, especially period properties and family homes, the best luxury bathrooms usually share a few traits:

  • Custom joinery that earns its space: a vanity should solve storage, circulation, and visual balance at the same time
  • A layout with natural flow: enough room to open drawers, step out of the shower, and move comfortably
  • Lighting with purpose: task lighting at the mirror, ambient lighting for mood, and enough general light to keep shadows under control
  • A restrained palette: fewer materials, better quality, stronger visual consistency

Design test: If a feature doesn't improve comfort, storage, maintenance, or atmosphere, it probably doesn't belong.

The difference between styled and resolved

A styled bathroom photographs well. A resolved bathroom works every day. That means the basin height feels right, the mirror suits the vanity width, the shower niche lands neatly in the tile setout, and towel placement makes sense when you step out wet.

That's what people usually mean when they say they want designer bathrooms. They want spaces where nothing feels accidental.

The room should still feel current in years to come. That's why the best luxury approach isn't chasing every trend. It's selecting durable ideas with enough personality to feel distinct, but enough discipline to age well.

High-End Design Principles and Material Choices

Good luxury design gets tangible when selections begin. The room transitions from mood board to buildable reality. Materials, fixtures, and detailing determine whether the space feels crisp and refined, or merely expensive and overworked.

Start with surfaces that suit the room

Wall and floor finishes set the tone first. In many modern bathrooms, large-format porcelain gives a cleaner visual field because there are fewer grout lines and less visual interruption. It suits contemporary spaces, and it's often the easier option when you want a calm, architectural look.

Natural stone brings warmth, movement, and depth. It can look exceptional, but it asks more of the budget, more of the installer, and more of the owner in ongoing care. The right choice depends on the project. If you want a highly refined look with lower visual noise, porcelain often wins. If you want character and material variation to carry the design, stone can justify itself.

For homeowners exploring tile scale and layout, large-format bathroom tiles are worth considering early because tile size affects niches, setouts, drain placement, and the overall visual rhythm of the room.

Fixtures should do more than look good

Luxury tapware and fittings need to deliver tactility, finish consistency, and ease of use. The finish should connect across the room. If you choose warm metallics, carry that through the shower, vanity, accessories, and any door hardware that's visible in the space. If you choose matte black, make sure the rest of the room is simple enough to support it.

A frameless shower screen helps keep sightlines open. Wall-hung vanities lighten the room visually. Recessed storage usually feels more expensive than freestanding add-ons because it keeps the architecture clean.

Here's a practical way to think about selection priorities:

  • Choose the dominant finish first: tile, stone, or wall treatment should lead
  • Match tapware to the room's tone: brushed finishes often feel softer than highly reflective ones
  • Let one focal point carry the room: a freestanding bath, a sculptural vanity, or a statement wall is usually enough
  • Protect maintenance time: every groove, edge, and extra surface adds cleaning

Smart features and sustainable upgrades

Current Australian bathroom design also leans toward sustainable performance and integrated technology. Modern and designer bathroom trends in Australia now prioritise sustainability, including dual-flush toilets and solar-powered water heating, alongside luxury technology such as voice-activated shower controls, heated flooring, and anti-fog smart mirrors, as noted in this bathroom trends article.

Not every project needs all of those features. The smarter move is picking the upgrades you will use. Heated flooring can make a lot of sense in a primary bathroom. Smart mirrors can be useful if lighting and demisting are genuine needs. Voice control is impressive, but only if it suits the household rather than becoming a novelty.

The best technology in a bathroom is the kind you stop noticing because it works so smoothly.

Accessible design can still feel premium

This is one of the most overlooked areas in luxury bathroom planning. A bathroom can be easier to use long-term without looking clinical. Wider circulation, thoughtful shower access, anti-slip tile selection, and support fittings in premium finishes can all sit comfortably inside a high-end design language.

Accessible planning is especially useful for homeowners who want to age in place, support older family members, or future-proof a forever home. The key is integrating those elements at the design stage so they look intentional. Grab rails, handheld showers, and clear access work best when they're part of the original design story, not retrofitted later.

That's often the dividing line between a bathroom that looks polished for a year and one that keeps working beautifully for much longer.

Budgeting Your Luxury Renovation in Victoria

A luxury bathroom budget in Victoria often changes the moment real site conditions replace early wish lists. In Melbourne especially, labour rates, access constraints, older housing stock, apartment rules, and premium specifications can push a project well beyond a generic national estimate.

Recent Australian cost guidance places a luxury bathroom renovation around $30,000 to $50,000 or more, with many projects landing near $40,000. The same analysis notes that Melbourne and other high-cost Victorian metro areas often need extra allowance above that baseline, along with a contingency for hidden work, approvals, and site-related surprises, according to this 2025 bathroom renovation cost analysis.

That gap matters. A homeowner might price a bathroom from interstate examples, then find the Victorian version costs more once waterproofing standards, trade availability, and finish expectations are priced properly.

Where the money goes

The final number is rarely about one expensive tapware set or one slab of stone. Cost builds through layers. Demolition, plumbing adjustments, electrical upgrades, substrate repairs, waterproofing, screeding, tiling, glazing, joinery, ventilation, and fitting off all have to work together.

That same cost analysis found that materials typically make up 25 to 35 per cent of the budget and labour 30 to 40 per cent. In older Melbourne homes, labour can climb further if we uncover water damage, uneven framing, asbestos risks, or out-of-date services.

Category Estimated Cost Percentage of Budget
Materials $11,250 to $15,750 25 to 35%
Labour $13,500 to $18,000 30 to 40%
Contingency $4,500 to $6,750 10 to 15%
Remaining project costs Balance of budget Remaining share

The decisions that move the budget most

Layout changes usually have the biggest effect on price. Moving a toilet pan, shifting a shower waste, recessing storage into walls, or enlarging an opening can improve the room dramatically, but each choice carries plumbing, carpentry, waterproofing, and finishing costs. I usually tell clients to spend on layout only where it solves a daily frustration or improves resale appeal.

The smartest luxury spending tends to fall into four areas:

  • Layout and circulation: enough room to move comfortably, especially if you want accessible use later
  • Waterproofing, preparation, and ventilation: the work you do not see, but the work that protects everything you do see
  • Custom joinery: storage designed for the household, not a showroom photo
  • Lighting: task lighting, ambient lighting, and mirror lighting planned together

Accessible design belongs in the budget conversation too. In Victoria, it is far cheaper to allow for step-free shower entry, wider clearances, reinforced walls for future support rails, and safer tile choices during design than to retrofit those features after handover. Done well, they read as refined design decisions, not aged-care add-ons.

Where luxury projects go wrong

The most common budgeting mistake is overspending on visible finishes and underfunding the hidden work. Stone, feature lighting, and imported fittings draw attention. Failing to allow for floor correction, proper falls, waterproofing details, exhaust ducting, and precise set-out causes significant damage.

Another mistake is chasing every luxury feature at once. A larger vanity, better storage, and a generous shower often improve the room more than piling in extras that look impressive on a product list but add little in daily use.

Budget rule: Keep a protected portion of the budget for structure, preparation, waterproofing, and ventilation. A bathroom does not feel luxurious for long if those parts have been cut back.

For a first project, ask for an all-in scope before you compare prices. That means demolition, rough-in work, waterproofing, fixtures, finishes, joinery, labour, contingency, and any approvals or compliance requirements that apply in Victoria. Working with a registered builder who can manage bathroom renovation compliance and trade coordination usually makes those budget discussions far clearer.

The Renovation Process With a Registered Builder

A smooth renovation doesn't happen because the room is small. Bathrooms are compact, but they're dense. Waterproofing, plumbing, electrical, tiling, joinery, glazing, and ventilation all need to align in a tight footprint. That's why process matters so much.

From brief to buildable design

The project starts well before demolition. A proper consultation should test the brief against the room's realities. What do you need the bathroom to solve? Is storage the problem? Is the shower cramped? Is the room too dark? The answers shape the layout more than any tile sample does.

Detailed design work helps catch problems early. Vanity depth, mirror width, niche position, door swing, lighting placement, and tile setout all benefit from being resolved before trades arrive on site.

Screenshot from https://siteprobathrooms.com.au

When homeowners ask why it matters to work with a registered builder for a bathroom renovation, the answer is simple. Coordination, compliance, accountability, and sequencing all become clearer under one properly managed process. For larger and more complex projects, registered builders unlimited give homeowners confidence that the renovation is being handled with the right level of oversight.

The stages that can't be rushed

Once demolition begins, the room often reveals its real condition. Older homes can hide damaged framing, uneven substrates, or outdated services. This is exactly why planning and contingency matter.

A typical sequence looks like this:

  1. Demolition and strip-out
    Old fixtures, linings, and finishes come out. The room is taken back so defects can be identified.

  2. Rough-in works
    Plumbing and electrical services are relocated or upgraded to suit the new layout.

  3. Substrate preparation
    Floors and walls are levelled and prepared to receive waterproofing and finishes.

  4. Waterproofing
    This is one of the most critical technical stages in the entire build.

According to Australian bathroom waterproofing requirements explained here, shower areas must be waterproofed to 1800mm on all walls, while bath surrounds require waterproofing to 150mm above the rim, and licensed professionals must carry out this work to prevent structural damage.

Waterproofing isn't a detail. It's the line between a premium renovation and a future defect claim.

Fit-off and final detailing

After waterproofing cures and tiling is complete, the room moves into fit-off, when tapware, screens, basins, vanities, lighting, mirrors, and accessories go in. It's also where poor planning becomes obvious. If the rough-in was rushed or the setout wasn't resolved, fit-off won't hide it.

The final result should feel effortless. Fixtures should align cleanly, joins should be consistent, storage should work, and the room should feel as good to use as it looks in photos.

Maximising Your Home's Value and ROI

A luxury bathroom renovation should improve daily life first. If it doesn't make the home more comfortable, functional, and appealing, the financial case weakens. The stronger projects do both.

In Australia, experts recommend spending no more than 5 to 10 per cent of a home's value on a renovation to avoid overcapitalisation. With the average Australian home valued at $1,045,400 in 2025, that places a broadly safe upper limit between $50,000 and $100,000, although many successful projects sit below that range, according to this guide to renovation spend and overcapitalisation.

A luxurious bathroom featuring a marble vanity, a large glass shower, and a soaking tub by a window.

Value comes from alignment

The bathroom needs to match the home. In a well-located Victorian property, a poorly finished bathroom can drag the whole house down. But an oversized, over-specified renovation can also miss the mark if the home and suburb won't support that level of spend.

The sweet spot usually comes from alignment between four things:

  • Property value: the renovation sits comfortably within the home's market position
  • Buyer expectations: if resale matters, the room should appeal broadly
  • Household use: a family bathroom and a private ensuite don't need the same priorities
  • Quality of execution: the finish level must justify the budget

Lifestyle return matters too

Financial return isn't the only return. A well-designed bathroom gets used every day. Better lighting, easier storage, stronger ventilation, a more generous shower, and a layout that suits your routine all create value that doesn't show up neatly in a spreadsheet.

A bathroom can pay you back in two ways. Through resale appeal, and through the way it improves the home every single day.

That's why the best projects aren't designed as resale theatre. They're designed as durable upgrades with broad appeal. If you get the planning, specification, and workmanship right, the value conversation usually takes care of itself.

Your Pre-Renovation Preparation Checklist

A luxury bathroom usually starts to go off track before demolition begins. The common problem is not ambition. It is a brief that sounds polished but leaves too many practical questions unanswered.

Come to the first design meeting with a clear view of how you want the room to look, function, and wear over time. That gives your builder something solid to price and helps avoid expensive changes once waterproofing, plumbing rough-in, and tile set-out are underway. In Victoria, that early clarity also matters if your plans involve structural work, layout changes, or accessibility requirements that may affect approvals and buildability.

The homework worth doing first

  • Build a visual reference folder
    Save images that show more than style. Include vanity proportions, mirror shapes, lighting, tile scale, niche details, and shower screens. The goal is to spot patterns in what you like, not to copy a showroom bathroom that may not suit your room size or budget.

  • Separate daily needs from luxury extras
    Write down what the bathroom must do well, then list the upgrades you would like if the numbers allow. Underfloor heating, full-height stone, custom joinery, and premium brassware can all be worthwhile, but they do not deliver the same value in every home.

  • Audit the bathroom you already have
    Be specific. Poor ventilation, weak lighting at the mirror, nowhere to put appliances, awkward shower entry, or grout lines that are hard to keep clean should all shape the new brief. Good design solves those frustrations first.

Clarify how the room needs to work

Usage drives good decisions. A main family bathroom in a Melbourne home usually needs durable surfaces, better storage, and easier cleaning. A private ensuite can justify a more refined layout, layered lighting, and stronger feature materials because the traffic is lower and the experience is different.

If this is a long-term home, future access should be part of the planning now. Hobless showers, wider entries, reinforced walls for grab rails, and sensible circulation can be integrated without making the room feel clinical. Done properly, accessible design reads as considered and high-end.

A notepad with a checklist for a bathroom renovation project sits on a desk with tiles and fixtures.

Set the right budget frame

Set an all-in budget range before you ask for pricing. Include fixtures, finishes, waterproofing, labour, joinery, electrical work, and a contingency for what may be uncovered after strip-out. Older Victorian homes often hide uneven walls, dated plumbing, or substrate issues, and those findings affect cost quickly.

This is also the point to be honest about trade-offs. If the budget is fixed, you may need to choose between changing the layout and upgrading the finish level. In many projects, keeping plumbing close to its existing position frees up money for better tile selections, custom storage, or improved lighting, which homeowners notice every day.

A strong luxury renovation starts with a disciplined brief and realistic expectations. Working with an end-to-end team that can guide design, 3D planning, and construction, like the specialists at SitePro Bathrooms, can help keep the project aligned from the first concept through to completion.

  • siteprobathrooms

Frameless Shower Screen Guide: Costs, Pros & Design Ideas

You're probably in the same spot as most Highett homeowners when a bathroom renovation starts to feel real. You've saved a stack of new bathroom ideas, looked at modern bathrooms online, and noticed one detail keeps showing up in the rooms you like. The shower feels open, light and uncluttered because the screen almost disappears.

That's the appeal of a frameless shower screen. It doesn't just stop spray. It changes how the whole room reads. In smaller bathrooms, that visual openness matters. In larger designer bathrooms, it's often the feature that ties the room together.

A lot of people come into bathroom renovations thinking tiles or tapware will set the tone. Sometimes they do. But the shower screen sits at eye level, cuts across the biggest wet area in the room, and has a huge effect on whether the space feels refined or busy. If you get that choice wrong, the room can feel heavier than it needs to.

The Centrepiece of Modern Bathroom Design

Most homeowners don't start by saying, “I want a frameless shower screen.” They start by saying they want the bathroom to feel bigger, cleaner and more current. Then they show photos of rooms with uninterrupted glass, large-format tiles and minimal hardware.

That reaction makes sense. Frameless glass panels are identified as the most popular choice for modern bathroom designs in Australia because their sleek, minimal appearance creates a spacious and elegant environment, closely matching what people look for in new bathroom ideas and designer bathroom trends.

In practical terms, that popularity comes down to what the eye sees first. A fully framed screen introduces lines, corners and metal edges. A frameless setup leaves the tilework and room proportions more visible, which is why it suits modern bathrooms so well. It feels lighter without needing a flashy design.

Why homeowners keep coming back to frameless

A frameless screen usually works best when the rest of the renovation is trying to do the same thing:

  • Open up the room: Less visual clutter helps the bathroom feel less boxed in.
  • Show off the finishes: If you've invested in quality tiles or a niche detail, glass lets them stay visible.
  • Create a cleaner style: Frameless suits both restrained family bathrooms and high-end designer bathrooms.

A good frameless screen doesn't fight the room. It lets the layout, tile selection and lighting do their job.

There's also a renovation reality worth mentioning. If the bathroom shell is basically sound, replacing the screen alone can be a smart budget move. One Australian renovation source notes that replacing only the shower screen can act as a cost-effective anchor for a budget bathroom renovation. That's often true when the room feels dated but doesn't need a full rebuild.

Frameless vs Framed The Clear Winner

The term gets used loosely, so it helps to define it properly. A frameless shower screen uses toughened glass with minimal visible structure. You'll still have hardware such as hinges, brackets or channels where needed, but you won't have a full metal frame wrapping every edge.

That's different from semi-frameless and framed screens. Semi-frameless options reduce the visible aluminium but still rely on perimeter framing in parts of the screen. Fully framed screens use metal edging around the panels and door.

Close up view of polished chrome glass shower hardware components on a modern tiled shower enclosure.

Where frameless clearly wins

The biggest advantages are visual and practical. Frameless shower screens provide a clean, sleek modern look that makes the bathroom feel significantly larger compared to framed options, and they're easier to clean due to the absence of metal frames that trap dirt and grime, as outlined in this Australian overview of shower screen types.

That last point matters more than people expect. In framed units, soap residue, moisture and grime tend to build up around the lower frame and corners. Frameless screens still need cleaning, but there are fewer edges doing the dirty work of collecting buildup.

Where framed and semi-frameless still make sense

Frameless isn't perfect for every room.

In tighter bathrooms, especially awkward ensuites, some layouts need more water control than a frameless design naturally provides. Semi-frameless and framed screens can be more forgiving where the room is compact, the shower opening is narrow, or the floor fall isn't ideal. They also usually suit owners who prioritise containment over openness.

Cost also affects the decision. If the renovation budget is under pressure, framed and semi-frameless options can be easier to fit into the overall spend. That doesn't make them poor choices. It just means the trade-off is visible.

Shower Screen Comparison Frameless vs Semi-Frameless vs Framed

Feature Frameless Semi-Frameless Framed
Look Minimal, open, best suited to modern bathrooms Cleaner than framed, but still has visible structure More traditional, more visually busy
Cleaning Easier to wipe down, fewer grime traps Moderate More frame edges to clean
Water control Good when designed well, but can allow minor splash Better containment than frameless in some layouts Strong containment in many standard setups
Budget fit Usually the premium option Mid-range choice Often the more budget-conscious option
Best use Contemporary renovations, feature bathrooms, open visual style Practical compromise Utility-focused bathrooms, compact or highly contained shower areas

Practical rule: Choose frameless when you want the screen to disappear. Choose framed when water containment and budget matter more than the visual finish.

The trade-off most people should know upfront

Frameless screens can allow a small amount of water to escape if the shower design, floor fall or panel placement isn't right. That isn't automatically a defect. It's part of the design reality of using minimal barriers.

What works well is a layout that respects spray direction, door swing, floor waste position and the actual way the bathroom is used. What doesn't work is forcing a frameless look into a cramped layout that needed stronger containment from the start.

Understanding Glass and Hardware Essentials

A frameless screen only feels premium if the materials are right. Cheap hardware, poor fixing points or the wrong glass specification will show up quickly in daily use. The screen might still look good on day one, but that's not the benchmark. The benchmark is how it performs after years of steam, cleaning, opening and closing.

A modern minimalist bathroom featuring a frameless glass shower enclosure and a floating wooden vanity.

The glass specification that matters

In Australia, the essential first step is safety compliance. Frameless shower screens must be constructed using Grade A toughened safety glass that complies with AS 1288, with industry best practice specifying 10mm for enhanced structural integrity and safety, according to this Australian guide on frameless shower screen safety and construction.

That's the level most homeowners in Victoria should expect for a true frameless installation. If a quote is vague about the glass, ask direct questions. You want to know what thickness is being supplied, whether it's toughened safety glass, and whether the installer is treating compliance as a standard requirement rather than an add-on.

Hardware isn't decoration

The hinges, handles, brackets and channels do more than finish the look. They carry the load, manage movement and keep the glass operating smoothly.

When reviewing hardware, focus on:

  • Hinges: They need to feel solid and operate cleanly without sagging.
  • Handles: The grip should be comfortable, especially in family bathrooms where wet hands are a daily reality.
  • Brackets and support pieces: These should look minimal but still feel strong.
  • Finish selection: Chrome, matte black and brushed tones all work, but the finish should suit the tapware and hold up to bathroom cleaning routines.

What quality looks like on site

A good frameless screen feels deliberate. The glass edges are clean. The hardware lines up. The door swing is consistent. The silicone work is neat, not oversized and messy.

If the hardware looks like an afterthought, the installation usually was one.

Homeowners often spend a lot of time choosing tiles and very little time checking the specification of the screen. That's backwards. In a frameless setup, the glass and hardware are a major structural and visual component of the room.

Sizing and Layouts for Your Bathroom

You see this all the time in older Highett bathrooms. The plan looks clean on paper, the tile lines are sharp, then the actual room tells a different story once the screen is set out. A wall is slightly out, the floor falls harder than expected, or the vanity leaves less clearance than it seemed to during design. Frameless glass gives very little room to hide those issues, so sizing has to come from the actual bathroom, not a generic standard.

Screenshot from https://siteprobathrooms.com.au

Standard sizes and what they mean in practice

There are common size ranges for frameless screens in Australian bathrooms, but I treat them as a starting point only. In Victorian renovation work, the better question is whether the layout suits the waterproofed area, the shower head position, and the way the room will be used.

That matters because frameless glass has tighter visual tolerances than framed systems. If the walls are out of plumb or the opening has been set a little tight, the screen can still be made, but the result may need larger margins, altered hardware positions, or a door size that feels meaner than the homeowner expected.

For Victorian bathrooms, compliance also sits in the background of every sizing decision. The screen layout has to work with the waterproofing requirements under AS 3740 and the safety glazing requirements under AS 1288. In practical terms, that affects where glass can be fixed, how the wet area is contained, and whether the finished arrangement makes sense for the room you have.

Layouts that usually work well

A few frameless layouts consistently perform well:

  • Single fixed panel: Works best in a shower with enough depth and a shower outlet positioned away from the opening.
  • Corner screen with door: A sensible option where better water control matters but the room still needs to feel open.
  • Inline panel and door: Often suits rectangular bathrooms and gives a balanced look without making the shower entry awkward.
  • Nib wall combination: One of the better choices in older homes where you want more splash control and a stronger fixing point. If you are weighing up that option, this guide to a nib wall in shower design covers the layout well.

The right choice depends on more than appearance. Door swing, towel rail position, toilet clearance, and how close the opening sits to the main traffic path all matter. A screen can look minimal and still be annoying to live with if those details were skipped.

The layouts I treat carefully

Compact square showers need caution. A 900 x 900 enclosure can be made, but in a true frameless setup it often leaves too little margin for comfortable entry and reliable splash control, especially if the shower head is aimed toward the door side or the room has strong floor fall issues. In those cases, a more contained screen style or a different layout usually performs better over time.

Older properties are where this becomes obvious fastest. You might have a stud wall that is not quite straight, existing plumbing that limits outlet position, or a recess that looks symmetrical until you put a laser on it. The cleanest frameless design is the one that respects those limits early, before the glass is ordered.

In many Victorian renovations, the smartest layout is the one that keeps water inside the shower and still looks quiet in the room. Minimal glass alone does not guarantee that.

What to Expect During Installation

Most problems with frameless screens don't start with the glass. They start earlier, during set-out, waterproofing, wall preparation or assumptions about the floor. Homeowners often see installation as the day the glass arrives. In reality, the quality of the outcome is decided well before that.

The site check comes first

Before the screen is fitted, the installer needs to assess whether the walls are plumb enough, whether the floor falls correctly to waste, and whether the chosen layout is realistic for the room. This matters even more in older Highett properties where substrates can be out of square and floor levels can drift across the room.

That early check is where experience shows. A good installer won't just measure the opening. They'll look at where the water is likely to travel, how the door will swing, and whether the fixing points are sound.

Waterproofing is not the part to rush

For bathroom renovations in Victoria, waterproofing and shower screen installation sit inside a broader compliance framework. Australian Standard AS 3740 outlines the majority of requirements for bathroom waterproofing and shower screen installations, including critical thresholds for floor waste placement and waterproofing integrity that must be met by registered builders, as discussed in this Australian renovation discussion referencing AS 3740 requirements.

If you want a plain-language overview before work starts, this article on bathroom waterproofing requirements is a useful reference point.

Why older homes need more care

Generic advice often falls short, as installation conditions vary significantly. In newer builds with straight walls and compliant floor falls, a frameless install is more straightforward. In older properties, especially pre-2000 bathrooms, you can run into uneven substrates, awkward waste locations and existing floors that don't guide water well.

There's also a real guidance gap here. There isn't clear, current AU-specific data explaining how to maintain 10mm toughened frameless screens in high-moisture Victorian bathrooms without affecting compliance, especially in retrofit situations where the room isn't being fully rebuilt. That leaves a lot of the outcome resting on design judgement and installer skill.

The fitting stage

When the room is properly prepared, the final fit should be precise rather than rushed. Expect the process to include:

  • Careful placement: Glass panels are set to the measured tolerances of the room, not forced into them.
  • Hardware alignment: Hinges and brackets need to sit true so the door doesn't drop or bind.
  • Sealing: Silicone should be applied where needed for containment, without trying to hide bad workmanship.
  • Final testing: The installer should check the swing, gaps and general operation before sign-off.

Good frameless installation looks calm. There's no forcing, packing or improvising at the end.

If you're dealing with registered builders unlimited in a broader renovation sense, then their coordination is especially important. The tiler, waterproofer and screen installer all affect the final result.

Realistic Costs for a Frameless Screen in 2026

The cost question is usually asked too late. By the time many homeowners price the shower screen, they've already committed most of the renovation budget to demolition, waterproofing, tiling and fixtures. Then they discover the screen isn't a minor line item.

A price guide infographic showing realistic 2026 costs for frameless screen installation for homes.

The 2026 price range to budget for

For the Australian market, frameless glass shower screens typically cost between $360 and $690 for the panel alone, with installation fees ranging from $200 to $400, making the total investment about $560 to $1,090 depending on size and complexity, based on 2026 Australian pricing data for frameless shower screens.

That same pricing guide includes examples such as:

  • $360 for a 2100mm x 900mm walk-in panel
  • $410 for an 850mm x 2000mm two-panel screen
  • $690 for a 1740mm x 1785mm x 2000mm three-panel sliding door unit

Those figures exclude delivery and separate installation where applicable, so it's worth checking exactly what your quote includes.

What pushes the quote up

Not every frameless screen lands neatly inside the lower end of the range. Final cost is usually driven by a few practical variables:

  • Size and configuration: Larger or more complex layouts require more glass and more labour.
  • Site conditions: Tight access, uneven surfaces or difficult fixing points can make installation more involved.
  • Hardware choice: Premium finishes and heavier-duty components can lift the overall spend.
  • Custom work: If the bathroom doesn't suit a near-standard panel size, the price will usually move upward.

The quote question to ask

Ask whether the price covers panel supply only, or supply and installation together. In Victoria, confusion often starts when homeowners compare one quote that excludes install with another that rolls labour into the total.

A cheap screen quote can become an expensive screen once the missing labour, delivery and site complications show up.

Budgeting properly means treating the screen as both a product and an installation service. That's especially true in bathroom renovations where the room itself may not be perfectly square or ready for a simple fit-off.

Choosing Your Installer and Keeping Your Screen Pristine

A frameless screen can look perfect on handover and still become a problem if the set-out was rushed, the walls were out of plumb, or the waterproofing and screen positions were never properly coordinated. I see this more often in older Victorian homes, where floors can fall away slightly and corners are rarely as square as they look once the tiles go on.

The installer matters as much as the glass.

Questions worth asking before you sign

A good quote should come with clear answers, not vague promises. Ask these questions before any glass is ordered:

  • Are you properly registered and insured for renovation work in Victoria: That matters if the screen installation forms part of a larger bathroom project. If you want a clearer explanation, read why using a registered builder matters for your bathroom renovation.
  • Will the screen be installed in line with AS 1288 and the surrounding wet area work in line with AS 3740: An installer should be able to explain this plainly.
  • Who checks the walls, floor levels and tile set-out before final measure: In older homes, this step can save a lot of grief.
  • What is covered under workmanship warranty, and what is covered separately on glass and hardware: Those are often two different things.
  • Who is responsible for the handover between waterproofing, tiling and screen installation: A frameless screen relies on that sequence being right.

If the answers are unclear, expect trouble later. A poorly aligned panel, a door that drifts, or silicone applied to hide bad measuring usually points back to decisions made before installation day.

Keeping the screen looking good

Frameless glass is easy to maintain, but it does need regular attention. The biggest issue in Highett and across Melbourne is usually water spotting, not structural failure.

  • Wipe the glass down after use: A squeegee or microfibre cloth does more good than occasional heavy cleaning.
  • Use cleaners made for bathroom glass and hardware finishes: Strong acidic products can mark metal finishes and shorten the life of seals.
  • Check silicone, brackets and hinges every so often: Small movement or early mould staining is easier to deal with before it spreads.
  • Pay attention to splash-out: Persistent water outside the shower often means the layout, fall, or panel position was never quite right.

Open and near-open frameless designs need extra care in older properties. Some retrofit bathrooms have limited fall to the waste, tight room dimensions, or existing structural limits that affect how well a barrier-free shower performs. Compliance questions can also get murky once you move away from a straightforward enclosed screen, so project-specific advice matters.

A well-installed frameless screen does more than look clean. It keeps water where it should be, suits the lines of a modern bathroom, and still looks right years later if the glass, hardware and layout were chosen properly from the start.

  • siteprobathrooms

Minimalist Bathroom Design: A Complete Victorian Guide 2026

You're probably looking at a bathroom that works, but only just. The vanity top is crowded, the shower feels tighter than it should, and every extra bottle or towel seems to make the room look smaller. That's where minimalist bathroom design earns its keep. It isn't about stripping a room bare. It's about removing friction, visual noise, and expensive mistakes.

For Victorian homeowners, that matters because many homes in Highett and across greater Melbourne don't start with generous bathroom footprints. Good minimalist design has to solve real problems. It needs to make a compact room feel calm, handle family use, and still look like one of those designer bathrooms people save for inspiration. The challenge is doing that without blowing the budget on finishes that look impressive in a showroom but don't change how the room performs.

What Is Minimalist Bathroom Design Really

A minimalist bathroom works best when the room feels calm at 7am on a weekday, not just in a photo. In practical terms, that means fewer decisions, less visual clutter, and fittings that earn the space they take up.

A modern minimalist bathroom featuring a floating wooden vanity, double vessel sinks, and an indoor potted tree.

Minimalist bathroom design is disciplined design. The room is edited so the layout reads clearly, storage is built in, and the finishes work together instead of competing for attention. Good minimalism still has warmth and character. It just avoids decorative noise that makes a bathroom feel busy, smaller, or harder to clean.

In renovations across Highett and wider Melbourne, I find the best minimalist bathrooms usually share a few traits:

  • Clear benches and vanity tops because everyday items are stored properly
  • Simple, consistent forms that reduce visual breaks across the room
  • Less grout, fewer trims, and fewer awkward junctions so cleaning is easier
  • A stronger sense of space created by planning, proportion, and restraint

That last point matters. A bathroom does not need to be large or packed with expensive finishes to feel high-end.

Minimalist does not mean expensive

A lot of homeowners assume a minimalist bathroom needs imported stone, designer tapware, and custom joinery everywhere. Sometimes those choices suit the job. Often they are where budgets get burned without improving how the room functions.

A better result usually comes from spending money where the eye notices order and where daily use benefits from it. That might mean one well-sized vanity with full drawers, a large-format tile that cuts grout lines, and a mirrored cabinet recessed into the wall if the framing allows. Then you save on areas that do not need a premium material to look good, such as using quality porcelain instead of natural stone, or choosing a clean off-the-shelf vanity profile and upgrading the handle and benchtop.

A simple rule applies on site. If a feature does not improve use, storage, durability, or visual calm, it is probably not helping the design.

Bathroom renovation costs can vary widely depending on layout changes, waterproofing condition, fixture selection, and finish level. For Victorian homeowners trying to get a designer look on a realistic budget, the key is not stripping everything back for the sake of it. It is choosing fewer elements and choosing them well.

Why it suits Victorian homes

Many Victorian homes, and plenty of later homes around Bayside too, have bathrooms with tight footprints, odd corners, or older plumbing positions that punish over-design. Minimalism works well here because it forces sharper decisions early. You commit to a tighter palette, avoid unnecessary plumbing moves, and use each wall more efficiently.

That is why this style often looks more refined in real homes than trend-driven bathrooms with multiple feature tiles, open shelving, and oversized fittings. A floating vanity can make a narrow room feel lighter. A recessed niche can replace add-on shower storage. One tile used consistently across the floor and walls can make a modest bathroom feel more resolved than three premium finishes fighting each other.

Done properly, minimalist bathroom design is not about having less for the sake of it. It is about building a bathroom that looks composed, works hard every day, and feels more expensive than the budget suggests.

The Four Pillars of Bathroom Minimalism

Minimalism becomes much easier to apply when you stop thinking of it as a style and start treating it like a filter for decision-making. Four pillars usually separate a bathroom that merely looks sparse from one that feels resolved.

Intentionality over accumulation

The first question is simple. Why is each item in the room there?

If the answer is vague, the room starts to bloat. Double accessories, oversized mirrors, decorative shelving, feature tiles in three directions, and hardware in mixed finishes all add visual traffic. Minimalism cuts that back. The room should support the way you live, not the way a display suite is staged.

A good test is whether each inclusion earns its footprint. In family bathrooms, that often means prioritising drawer storage, usable bench space, and shower shelving before considering decorative extras.

Clean lines and simple forms

The strongest minimalist rooms rely on geometry. Straight runs, uncomplicated silhouettes, and surfaces that read clearly from the doorway all help a bathroom feel calmer. This is one reason wall-hung vanities, frameless or low-profile screens, and uncomplicated basin shapes work so well.

Not every item has to disappear. It just needs to belong.

A bulky federation-style vanity with ornate handles can work in another setting. In a minimalist room, it usually interrupts the whole composition. Clean forms don't mean clinical. Timber texture, soft stone tones, and brushed finishes can still bring warmth.

A restrained palette

Most modern bathrooms lose their edge when too many finishes compete. Minimalist bathrooms usually hold together because the palette is limited and repeated consistently.

That might mean:

  • One dominant tile finish across floor and walls
  • One timber tone for vanity joinery
  • One metal finish for tapware, shower fittings, and accessories
  • One accent move only, such as a niche tile variation or a curved mirror

Many designer bathrooms feel expensive, not because they say more, but because they repeat the right things.

A bathroom can be simple and still feel rich. Texture often does more work than contrast.

Light and space have to be designed

Minimalism falls flat in dim or cramped rooms. The visual calm people associate with the style comes from how light moves through the space and how much interruption sits at eye level.

That means paying attention to mirror size, shower screen placement, vanity depth, and where taller elements sit. If a room is small, the wrong tall cupboard can make it feel boxed in. If the lighting is harsh, every surface feels colder than intended.

A minimalist bathroom should allow the eye to travel. That's why open floor area, controlled materials, and unobtrusive fittings matter so much. They help the room breathe, even when the footprint is modest.

Smart Layouts for Modern Minimalist Bathrooms

A minimalist bathroom usually succeeds or fails before the tiles are chosen. I see it often in Highett and across older Victorian homes. Clients want the clean, designer look, but the room is fighting them with a narrow footprint, an awkward door swing, or plumbing that was never placed well in the first place.

A modern minimalist bathroom featuring a double vanity, a glass shower, and a freestanding soaking tub.

Start with the room's actual shape

Good layout work starts with the shell of the room. Measure wall lengths, ceiling height, window position, door clearance, and where the existing waste and water points sit. Then decide what the bathroom needs to do each day.

In many compact Victorian bathrooms, a linear layout is the most efficient option. Vanity, toilet, and shower sit along one wall, which keeps plumbing simpler and leaves clearer floor space through the centre of the room. That approach often gives a bathroom a more expensive feel because the eye reads one organised zone instead of several competing elements.

For tighter footprints, these bathroom design ideas for small spaces show how fixture placement can improve movement without adding size.

Layouts that usually work best

A few layouts consistently suit minimalist bathrooms because they reduce visual interruption and use space properly:

  • Linear layouts for narrow rooms where keeping services on one side controls cost
  • End-shower layouts where the shower sits at the back and helps the room feel longer
  • Open wet area plans where glazing is limited and floor lines run with less interruption
  • Floating fixture arrangements where wall-hung vanities or toilets expose more floor and make the room easier to clean

The wrong move is trying to fit every luxury item into a room that cannot carry it. A freestanding bath, separate shower, wide vanity and tall storage tower might sound appealing on a plan, but in a modest bathroom they often create dead corners, tight walkways and a crowded look.

That is where budget and layout need to work together.

A high-end minimalist result does not come from adding more. It comes from giving each element enough space to sit properly. In many Victorian renovations, I would rather spend money on a better vanity proportion and cleaner shower detailing than force in a bath that makes the whole room feel compressed.

Clearance is what makes the room feel calm

Minimalism has to work in real life. You need enough room to open a drawer, step out of the shower, dry off, and clean around the toilet without bumping into edges.

Small planning decisions matter here. A reduced-depth vanity can free up circulation without looking cheap. An in-wall cistern can pull the toilet zone back just enough to improve the walkway. A fixed shower panel can read cleaner than a full framed enclosure and often costs less than clients expect, especially compared with overcomplicated custom glass setups.

If you have to shuffle sideways past a fixture, the layout still needs work.

Keep plumbing moves honest

One of the simplest ways to get a designer look on a realistic budget is to avoid moving every service point just for the sake of novelty. In older homes across Victoria, relocating wastes and water lines can trigger more floor work, more wall repairs, and more labour than homeowners allow for at the start.

Keeping the toilet close to its existing position, or placing the new shower near the original waste, often frees up budget for the details people see every day. Better tile set-out. A custom-look mirrored cabinet. A wall-hung vanity in a practical finish that mimics timber or stone without the premium price.

That trade-off is worth making. A restrained layout with disciplined planning usually looks more refined than an expensive plan that has been stretched too far.

The Minimalist Toolkit Materials and Fixtures

Walk into a newly finished minimalist bathroom and the expensive look usually comes down to restraint, not rare materials. In Highett and across Melbourne's bayside suburbs, I see the same pattern. Homeowners assume they need natural stone, custom glass, and imported fittings to get that clean designer feel. In practice, careful selection does more of the work.

Screenshot from https://siteprobathrooms.com.au

Tiles that look calm, not busy

Tiles set the tone of the whole room. If the tile choice is fussy, no amount of tidy styling will make the bathroom feel minimalist.

For a high-end result on a realistic budget, I usually steer clients toward mid-range porcelain in a soft stone look, concrete look, or plain matte finish. Porcelain is hard-wearing, easy to clean, and far more forgiving than many people expect. Used well, it can give you much of the visual effect of pricier materials without the cost, sealing, or maintenance concerns that come with them.

Consistency matters more than novelty. One tile range across the floor and main wall areas often looks more refined than a patchwork of feature tiles, mosaics, and contrasting trims. Rectified edges help keep grout joints tighter, which suits minimalist design, but they only look good if the substrate is properly prepared. That is one of those trade-offs homeowners do not always see at the start. A cheaper tile can still look excellent. Poor installation never does.

If you're narrowing down finishes, this guide on how to choose bathroom tiles can help match the tile to the room size, use, and cleaning demands.

Grout colour deserves more attention than it gets. A soft grey or tone-matched grout usually reads calmer than bright white, especially on floors in Victorian homes where daily dust and traffic show up quickly.

Fixtures that support the look

Minimalist fixtures should disappear into the design, not fight for attention. Clean profiles, even proportions, and repeatable finishes usually give a better result than statement pieces.

The strongest selections often include:

  • Tapware with simple lines and no ornate detailing
  • Wall-hung or visually light vanities that keep the room feeling open
  • Basins with clean geometry that do not crowd the benchtop
  • Shower screens with minimal framing to keep the tile work visible
  • Flush plates, hooks, and accessories in the same finish family so the room reads as one design

Finish selection affects the mood more than many clients expect. Brushed nickel, brushed stainless, matte black, and muted gunmetal can all work, but they do not age the same way in every bathroom. Matte black looks sharp in the right setting, though it can show soap marks and hard water more clearly. Brushed finishes are often easier to live with day to day.

Warmth has to be built in

Minimalism can feel cold if every surface is flat, pale, and hard. The better bathrooms balance restraint with texture.

That can come from timber-look joinery, a lightly veined porcelain top, warmer whites, or a mirror cabinet with a subtle shadow line instead of a heavy frame. Large-format tiles also help, because fewer grout lines make the room feel quieter. In smaller Victorian bathrooms, that quieter surface treatment often gives a more expensive impression than adding extra details.

I also advise clients to be selective with trend-driven ideas such as full material wrap or wet room styling. These can look excellent, but only if the waterproofing, falls, ventilation, and glass detailing are handled properly. In the wrong room, they add cost without improving the outcome.

One useful planning tool

Before ordering tiles or locking in fixture sizes, it helps to test the room properly. SitePro Bathrooms offers browser-based bathroom design software with 3D views, so homeowners can check how materials, vanity proportions, and fixture placement will read before work starts.

That matters in minimalist bathrooms because there is nowhere for poor choices to hide. A tap set too high, a niche that cuts through a grout line, or a vanity finish that clashes with the floor will stand out straight away.

Clever Storage for a Clutter-Free Sanctuary

You see the problem a few weeks after handover. The finishes still look sharp, but the benchtop starts collecting electric toothbrushes, skincare, hair tools, spare rolls, and half-used bottles. In a minimalist bathroom, poor storage shows up fast.

Good storage is what makes the style workable in a real family home, especially in many Victorian bathrooms where the footprint is tight and every recess has to earn its keep. The high-end look people want usually comes from what stays out of sight, not from adding more features.

Storage should disappear into the design

The best storage is built in early, before tile setout and vanity sizing are locked in. A recessed mirror cabinet is one of the most cost-effective upgrades I recommend. It gives you everyday storage at eye level, keeps the vanity top clearer, and often delivers a cleaner result than trying to add extra joinery elsewhere.

Drawers are usually a better use of money than cupboard doors below the vanity. In practice, drawers waste less space and make morning routines faster because everything is visible and grouped properly. That matters in smaller homes where one bathroom may need to serve parents, kids, and guests.

Built-in niches help too, but they need restraint. One well-sized shower niche, planned to suit the tile layout, looks deliberate. Several small cut-ins can make a minimalist bathroom feel fussy and often cost more in waterproofing and detailing than people expect.

A modern minimalist bathroom featuring wood cabinetry, integrated lighting, open shelving, and a sleek wall-mounted toilet.

Visual calm and practical storage work together

Wall-hung vanities help because they free up floor area and make the room easier to clean, but they are not always the right answer. In some renovations, particularly older Victorian homes with uneven walls or limited cavity depth, a floor-mounted vanity with full-depth drawers gives better storage and costs less to install. The minimalist result can still look refined if the proportions are right and the kickboard is handled neatly.

Toilet placement matters as well. The Australian National Construction Code sets minimum space and access requirements so fixtures remain comfortable and usable. Minimalism only works if the room functions easily day to day. Tight clearances, hard-to-reach storage, and doors clashing with drawers will ruin the experience no matter how restrained the palette is.

Storage decisions that pay off

A clutter-free bathroom usually starts with a few practical choices made early:

  • Prioritise drawer storage for daily-use items, backups, and shared family products
  • Choose a mirror cabinet over a plain mirror if bench space is limited
  • Size the shower niche for the bottles you use, not for a showroom photo
  • Allow for cleaning products, spare towels, and toilet paper so utility items have a proper home
  • Use one or two open shelves at most if you are committed to keeping them tidy

For homeowners trying to balance a designer look with a realistic spend, storage is one of the smarter places to be selective. Custom joinery throughout is rarely necessary. A standard vanity cabinet, upgraded with better drawer internals, a recessed shaving cabinet, and one well-positioned niche will usually give a cleaner result for less money. If you are planning costs carefully, this guide to budgeting a bathroom remodel helps frame those decisions before you overcommit to custom work.

Closed storage keeps a minimalist bathroom looking expensive on an ordinary Tuesday, not just in the photos.

Budgeting Your Minimalist Bathroom Renovation

A minimalist bathroom can look expensive without demanding a luxury budget, but only if the money goes into the right parts of the room.

I see the same mistake often in Victorian homes around Highett. Homeowners strip the design back, assume the build will be cheaper, then spend heavily on custom finishes that do little for function. The final room still looks simple, but the budget has been eaten up in places that do not improve daily use.

Minimalist style does not set the price. Scope does. The biggest cost drivers are layout changes, plumbing relocation, tile choice, glazing, and how much custom joinery you introduce. A clean, restrained bathroom can be cost-effective. It can also become expensive very quickly if every item is bespoke.

Real budget ranges for 2026

For a professionally managed small bathroom renovation in Australia with a minimalist brief, realistic 2026 pricing usually falls into these tiers:

Renovation Tier Estimated Cost Range (AUD) Key Inclusions
Cosmetic refresh Starting at $8,000 Surface-level updates, selected fixture or finish changes, limited structural intervention
Professional minimalist small bathroom $20,000 to $29,995 Standard tile sizes, mid-range fixtures, minimal plumbing changes, shower, toilet, vanity
Mid-range minimalist renovation $29,000 to $38,000 Added features such as a bath, custom shower screens, or brick niches
High-end transformation From $35,000 and up Freestanding bath, separate shower, upgraded materials, more extensive design detailing
Luxury renovation range in Australia Exceeding $35,000+ Premium finishes, broader scope, more customised execution

For Victorian homeowners, the sweet spot is usually the middle of the market. That is where you can get a bathroom that feels sharp and designer-led without paying for every premium product in the showroom.

Good minimalist budgeting is less about choosing the cheapest option and more about choosing the right substitute. Large-format imported tiles often get replaced with a well-selected local porcelain in a standard size. Wall-hung vanities can be done in a standard cabinet range with a custom top instead of full custom joinery. Frameless shower screens look refined, but a well-detailed semi-frameless screen can save money and still suit the look.

If you are still mapping out allowances, this guide on how to budget a bathroom remodel will help you set the numbers before selections start drifting.

Where minimalist budgets usually go wrong

Budget blowouts usually come from a stack of small upgrades.

A client keeps the same footprint but decides to move the vanity slightly, shift the shower waste, add underfloor heating, upgrade to a recessed rail, choose a feature tile for the niche, then swap a standard mirror for custom cabinetry. Each decision sounds manageable on its own. Together, they push a disciplined renovation into a much higher bracket.

The common pressure points are:

  • Moving plumbing that could have stayed put
  • Using premium finishes in too many areas instead of one or two
  • Choosing custom sizes where standard fixtures would fit cleanly
  • Adding bespoke joinery late because the storage plan was never priced properly
  • Paying for intricate tile layouts that increase labour without improving the room much

In a minimalist bathroom, labour matters as much as materials. Simple-looking rooms often need tighter set-outs and cleaner detailing, so it makes sense to save on product selection where the visual difference is small and spend on workmanship where the difference is obvious.

Where to spend and where to save

If the goal is a high-end look on a realistic budget, I would protect these items first: waterproofing, tile installation, lighting, and the main fixtures you touch every day.

Savings usually come from smarter specification:

  • Keep the existing layout if it already works
  • Use standard tile sizes to reduce cuts and labour time
  • Choose one hero finish, not four competing ones
  • Use off-the-shelf vanities and mirrors where dimensions allow
  • Pick durable mid-range tapware over designer labels with a similar profile

That mix usually gives better value than pouring money into statement pieces. In practice, a calm palette, accurate installation, and good proportions do more for a minimalist result than a long list of premium upgrades.

Why professional coordination matters

Minimalist bathrooms leave little room to hide mistakes. If the tile set-out is uneven, you notice it. If the vanity feels oversized, the room loses balance. If the screen, niche, and tapware do not line up, the bathroom starts to feel unresolved even with expensive finishes.

That is why coordination matters. For homeowners who want a controlled result, working with a registered builders unlimited team and a clear design process helps keep cost decisions tied to the overall plan, not made one by one under site pressure.

A minimalist bathroom rewards early planning, careful selections, and disciplined spending. That is how you get the designer look without building a budget that fights the rest of the home.

Bringing Your New Bathroom Idea to Life

The projects that come together best usually start the same way. A homeowner has a room that feels crowded, dated, or harder to use than it should. They've collected new bathroom ideas, saved images of modern bathrooms, and noticed they keep returning to the same look. Clean lines, calm materials, good storage, and enough warmth that the space still feels lived in.
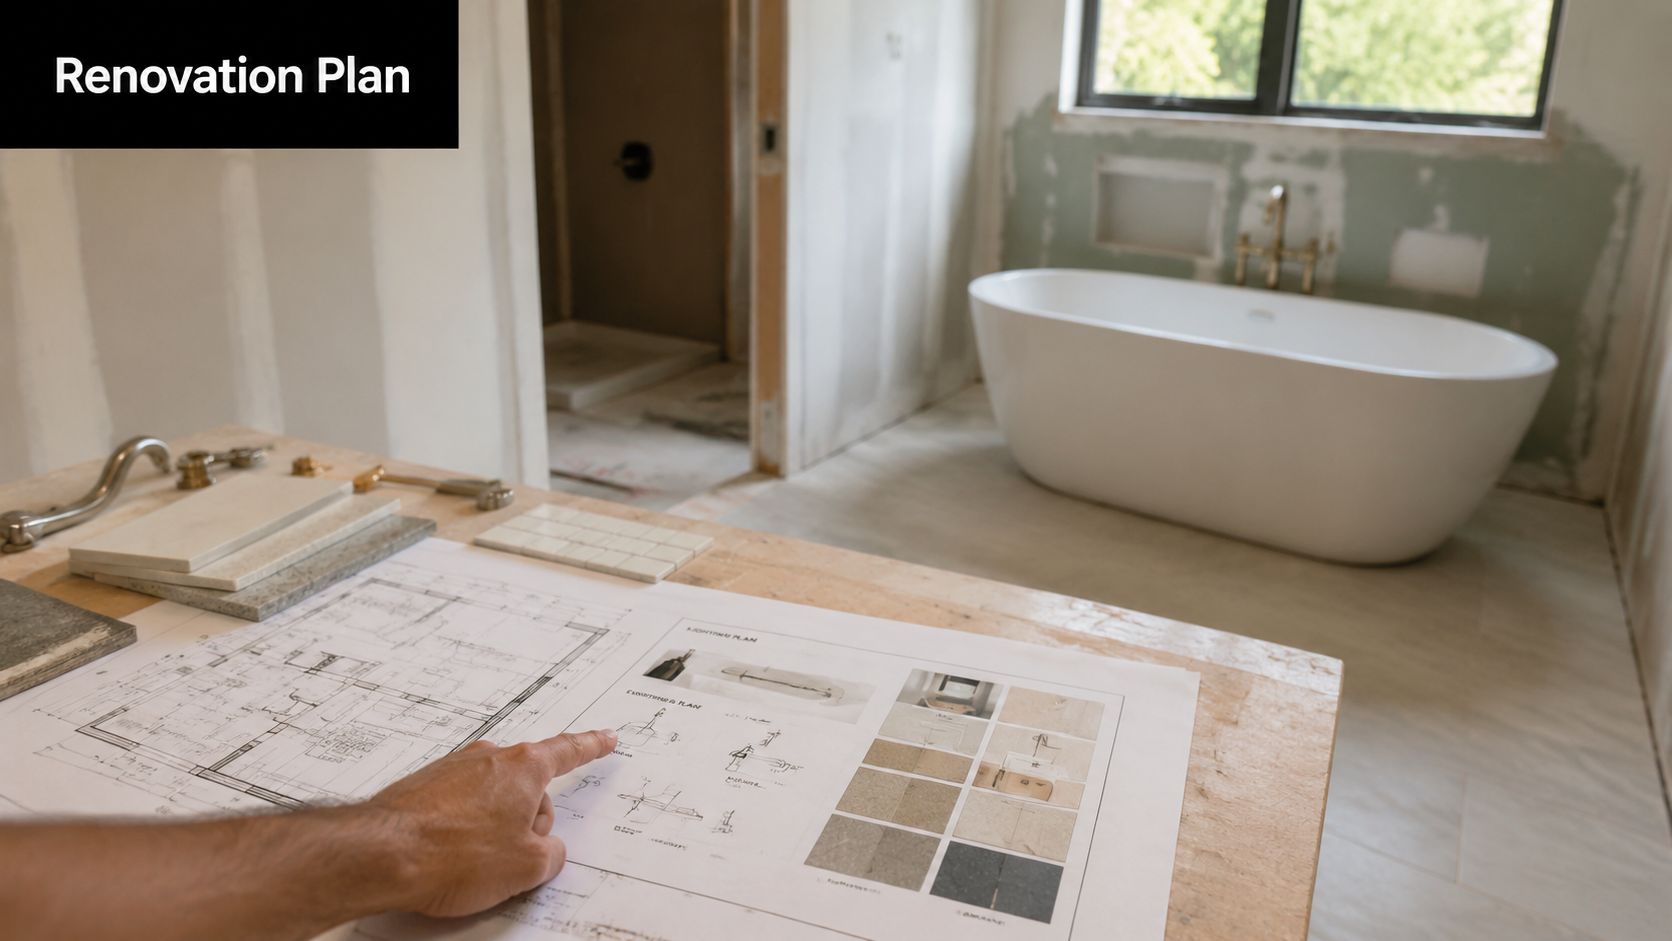
From there, the work becomes practical. Strip back the unnecessary. Keep the layout honest. Choose materials that deliver the effect without wasting the budget. Make storage part of the architecture, not an afterthought. That's how minimalist bathroom design moves from inspiration to a finished room that works on a Monday morning, not just in a photo.

For Victorian homes, especially in suburbs like Highett where room sizes and existing conditions vary so much, clarity at the planning stage matters more than chasing trends. A 3D design process helps because you can test layout, fixture spacing, and sightlines before demolition starts. That removes guesswork and makes the final decisions easier.

If you're weighing up bathroom renovations and want a space that feels cleaner, sharper, and easier to live with, the next step is simple. Book a consultation, bring your measurements, and talk through what your bathroom needs to do. The strongest designer bathrooms don't begin with expensive products. They begin with a plan that fits the home, the budget, and the way you live.


Ready to turn your bathroom into a calmer, more functional space? Speak with the team at SitePro Bathrooms to discuss your layout, finishes, and renovation priorities.

  • siteprobathrooms

Victoria Full Bathroom Renovation Cost Guide 2026

A full bathroom renovation cost in Australia now sits at around $26,000, and a real project can fall anywhere from about $8,000 to more than $35,000 depending on scope, finishes, and how much work sits behind the walls. For Victorian homeowners, that headline number is only the starting point, because older homes, compliance requirements, and demolition surprises can shift the budget fast.

That's the part many national guides gloss over. They give you an average, but they don't tell you what happens when an older bathroom in Victoria is opened up and the existing waterproofing has failed, the walls aren't straight, or asbestos testing suddenly becomes part of the discussion. Good bathroom renovations aren't priced by guesswork. They're priced by scope, trade requirements, materials, and risk.

A proper budget also needs to reflect the kind of result you want. A functional family bathroom, one of the many modern bathrooms built for day-to-day use, and a higher-end space with custom detailing all sit in different cost brackets. The same goes for projects driven by practical resale goals versus clients chasing new bathroom ideas or fully realised designer bathrooms.

Understanding the Average Bathroom Renovation Cost in 2026

The clearest benchmark available is still the national average. According to 2023 Housing Industry Association data, the average cost of a full bathroom renovation in Australia is approximately $26,000, up from $21,000 previously, with projects ranging from around $8,000 for a basic cosmetic update to more than $35,000 for a high-end renovation, as summarised by Canstar's bathroom renovation cost guide.

That figure is useful, but only if you understand what it includes. A full renovation isn't just new taps, a vanity, and fresh tiles. It usually means demolition, preparation, waterproofing, plumbing work, electrical work, tiling, fitting off fixtures, and final finishes. Once you're stripping a bathroom back and rebuilding it properly, the budget starts reflecting both visible selections and hidden construction work.

Why the average can mislead

A homeowner might start with the idea that their room is small, so the price should be modest. In practice, a smaller bathroom can still carry a substantial full bathroom renovation cost because the same core trades are required whether the room is compact or generous. You still need compliant waterproofing. You still need licensed plumbing and electrical work. You still need demolition and waste removal.

National averages help with first-pass budgeting. They don't replace a site-specific assessment, especially in Victoria where existing conditions often shape the final price more than floor area alone.

What the benchmark is actually good for

Use the $26,000 average as a reality check, not as a promise. If your expectations sit well above a standard specification, or if you're planning structural changes, premium finishes, or a complete redesign, your budget may move beyond the average quickly. If your scope is simpler and the layout stays put, you may remain closer to the lower end of the broader range.

The smartest way to read that national number is this: it tells you what a full renovation commonly costs, but it doesn't tell you what your bathroom will cost until the site conditions, scope, and selections are properly defined.

The Anatomy of a Renovation Quote Where Your Money Goes

A renovation quote should tell you more than a lump sum. It should show where the money is being spent and why. That's how homeowners separate a realistic proposal from one that looks cheap only because key items haven't been properly allowed for.

A hand pointing to an itemized cost estimate document for a professional bathroom renovation project on a desk.

One of the biggest budget drivers is labour. In Australia, labour typically accounts for 40% to 50% of a full bathroom renovation budget, with the work carried out by specialised trades including plumbing, tiling, and electrical, and hourly rates often sitting between $100 and $150, according to this Australian bathroom renovation cost breakdown.

Labour is usually the largest line item

Homeowners sometimes focus on fixtures because they're easy to compare. Labour is harder to see, but it's where quality and compliance live. A bathroom has very little tolerance for shortcuts. If waterproofing fails or plumbing has to be redone, the cost of rectification usually outweighs any saving made upfront.

Here's what labour generally covers in a full renovation:

  • Demolition and strip-out. Removing old fixtures, wall linings, floor finishes, and preparing the space for rebuilding.
  • Plumbing rough-in and fit-off. Adjusting services, installing wastes, connecting fixtures, and making sure the room functions properly.
  • Electrical work. Lighting, power points, exhausts, and any required upgrades within the room.
  • Waterproofing and tiling installation. Critical stages that affect durability, maintenance, and long-term performance.
  • Carpentry and finishing. Framing adjustments, wall preparation, trim work, and setting everything up so the finished room looks clean and square.

Materials can climb fast once selections change

The visible side of the quote usually includes tiles, tapware, vanity, shower fittings, screens, bath if included, mirror, accessories, and paint. This is where many projects shift from standard to premium.

Technical benchmarks from Hipages' bathroom renovation pricing guide put builders at $2,300 to $4,600 per square metre, tilers at $35 to $120 per square metre with an average of $60 per square metre, and waterproofing at $500 to $750. The same source notes installation benchmarks such as $350 for a bath and $275 to $450 for a vitreous china toilet, with premium tile selections like handmade Spanish white gloss subway tiles at $86 per square metre and artisan ceramic wall tiles at $159 per square metre.

A quote usually shifts upward for one of three reasons:

Cost area What keeps it controlled What pushes it up
Layout Existing plumbing positions stay in place Fixtures move and services need rerouting
Finishes Standard, readily available selections Imported, handmade, or artisan materials
Construction Straightforward replacement Corrective work, access issues, or wall and floor remediation

Practical rule: Spend carefully on the things that are hard to replace later, such as waterproofing, tile installation, and in-wall plumbing work. Save money on items that can be upgraded later, such as mirrors or accessories.

Permits and compliance aren't optional extras

Not every bathroom project needs the same approvals, but where permits apply, they need to be budgeted accurately. Permit costs can range from $500 to $1,000 for basic renovations and can increase for more extensive structural changes, as noted in the earlier cost breakdown source. If a quote looks lean, check whether these items are included, excluded, or still subject to confirmation.

A good quote doesn't just tell you the price. It shows the logic behind the price.

Key Factors That Influence Your Final Renovation Quote

Two bathrooms can look similar on a plan and still land at very different price points. The final number is shaped by choices you can control, plus site conditions you often can't see until demolition begins.

Scope changes everything

The biggest pricing fork in the road is whether you're replacing like for like or reworking the room. Keeping the same layout is usually the cleaner path because existing plumbing and drainage points remain where they are. Once the toilet shifts, the shower expands, or the vanity wall changes, the build becomes more involved.

Material selection has the next biggest impact. Standard finishes can produce a clean, polished result. Premium surfaces, feature tiles, custom joinery, and bespoke detailing move the project into the realm of designer bathrooms. That can be worthwhile, but it needs to be intentional.

A larger room doesn't just use more tile. It often encourages more features, more fixtures, and more visual detailing. That's why bathroom size and specification tend to rise together.

The hidden Victorian cost many guides skip

For Victorian homes, especially older stock, demolition risk needs to be part of the budget from the start. A broad national average won't capture what happens when a bathroom is opened up and hidden issues are discovered.

According to this cost analysis focused on Australian renovation risks, a 12% to 25% contingency is often required for Melbourne homes where asbestos or structural issues appear after demolition, and asbestos testing alone can cost $300 to $500 for pre-1990 homes.

That matters because many Victorian suburbs have exactly that housing profile. Older sheet linings, underlay, backing materials, and patched-over renovation layers can all change the job once the strip-out starts.

If your home was built before 1990, treat demolition as an investigation phase as much as a construction phase. The room you see today may not reflect the work needed underneath.

What usually catches homeowners off guard

These are the issues that commonly alter the quote after the initial concept stage:

  • Older substrates. Walls and floors may need levelling or replacement before waterproofing and tiling can begin.
  • Past poor workmanship. Hidden leaks, patch repairs, and non-compliant previous work often only show up after removal.
  • Access constraints. Tight hallways, upper-storey locations, and difficult parking or material handling can affect labour time.
  • Selection creep. A project starts with tidy, practical goals, then shifts toward premium surfaces and upgraded fixtures.

What works and what doesn't

What works is making major decisions early. Lock the layout, confirm fixture types, choose tile ranges, and allow for demolition risk before construction starts. What doesn't work is beginning with a low headline budget and hoping the details sort themselves out later.

That's where many budget blowouts start. Not with one big mistake, but with several smaller assumptions that weren't tested properly at the beginning.

Sample Bathroom Renovation Budgets for Victoria

A budget range becomes easier to understand when it's attached to a real type of room. The examples below aren't fixed quotes. They're planning scenarios that help frame what different investment levels usually achieve in Victoria.

What each budget tier tends to buy

Bathroom Size Budget Tier (Functional & Tidy) Standard Tier (Quality & Style) Premium Tier (Designer Finishes)
Small bathroom or ensuite Best suited to a straightforward update with practical fixtures, simple tiles, and minimal layout change Allows better fixture quality, more polished detailing, and a stronger finish selection Supports custom detailing, statement surfaces, and a more tailored look
Medium family bathroom Works when the layout remains efficient and the brief is focused on function Often the sweet spot for owner-occupiers wanting durability and style Suits feature lighting, premium tile choices, and refined joinery
Large bathroom or main suite Requires disciplined scope to stay economical Gives room for a balanced design with stronger visual impact Most likely to support high-spec modern bathrooms with layered materials and a luxury feel

For homeowners trying to map out likely ranges before briefing a builder, a bathroom renovation cost calculator can help organise early assumptions around scope and finish level.

Small bathroom scenario

A compact ensuite usually rewards restraint. The strongest budget outcomes come from retaining the existing footprint and choosing easy-to-maintain finishes. For practical bathroom renovations, these approaches often yield the best results. Good lighting, a clean vanity, and well-laid tiles can make a small room feel far more expensive than it is.

The mistake is trying to force too many features into a tight space. Oversized niches, bulky vanities, or complicated tile patterns can make the room feel crowded and increase labour at the same time.

Medium bathroom scenario

A mid-sized family bathroom tends to be the most balanced project type. There's enough room to improve storage, shower comfort, and circulation without every design move becoming expensive. Many homeowners pursue new bathroom ideas in these situations, but the projects that hold the budget best are the ones where those ideas are filtered through practical use.

A strong standard-tier renovation here often beats a stretched premium brief. Better planning, coherent finishes, and smart fixture choices usually deliver more value than scattered luxury upgrades.

Large bathroom scenario

A larger bathroom can justify bolder design choices, but only if the room will use them well. Double vanities, freestanding baths, layered lighting, and feature tiling can all work beautifully when the layout supports them.

Big bathrooms don't automatically need big spending. They need proportion, function, and finishes that suit the home rather than overpower it.

The most successful premium projects aren't just expensive. They're edited. That's what separates a polished result from a room full of costly decisions that don't quite connect.

Smart Ways to Manage Your Budget and Increase Value

The goal isn't to spend the least. It's to spend where the money will hold its value. Cheap bathrooms often cost more later through repairs, dated finishes, or rework. Well-planned bathrooms usually feel better to use and stand up better over time.

A woman holding two different stone tile samples while deciding on materials for a bathroom renovation project.

A useful rule of thumb from this Australian renovation value guide is to keep renovation spending at no more than 5% to 10% of your home's total value to avoid overcapitalisation. The same source notes that, for investors, a functional and modern bathroom upgrade can increase rental value by 15% to 20%.

Spend on the hard-to-fix items first

If the budget is under pressure, protect the parts of the renovation that affect performance and longevity:

  • Waterproofing and installation quality. These aren't glamour items, but they determine whether the bathroom lasts.
  • Good layout decisions. A room that works properly every day gives more value than an expensive fixture in the wrong spot.
  • Durable surfaces. Mid-range tiles and fixtures with solid everyday performance often outlast cheaper options and avoid the premium surcharge of highly specialised selections.

Save where upgrades are easier later

There are also places where restraint usually makes sense:

  • Accessory choices. Mirrors, towel rails, and styling elements can often be upgraded later.
  • Vanity complexity. A clean standard vanity can look sharp if the proportions are right.
  • Feature overload. Too many statement elements can make the room feel busy and drive labour costs up.

For a more practical planning approach, this guide on how to budget a bathroom remodel is a useful way to think through trade-offs before committing to selections.

Value depends on the property, not just the bathroom

Owner-occupiers and investors should think differently. If you're renovating your own long-term home, comfort and daily function matter as much as pure return. If the property is an investment, the best spending usually sits in durable, broad-appeal upgrades that photograph well, rent well, and don't introduce maintenance headaches.

What doesn't work is chasing high-end finishes in a property that won't support them. What does work is matching the bathroom standard to the home, the suburb, and the likely buyer or tenant.

The SitePro Process A Clear Path to Your New Bathroom

Most renovation stress comes from uncertainty. Not knowing what's included, not knowing who is coordinating trades, and not knowing how many decisions are still unresolved once demolition starts. A structured process reduces that uncertainty before it turns into cost variation.

Screenshot from https://siteprobathrooms.com.au

An end-to-end model works best because one team carries the job from concept through construction and finishing. That means the layout, materials, buildability, and sequencing are considered together rather than passed between disconnected trades. It's also why working with registered builders unlimited matters for full-scale renovation work where accountability and compliance need to stay clear from start to finish.

Why the process affects cost certainty

A professional process usually includes early site assessment, measured planning, design development, selection review, clear quoting, and coordinated delivery. Each step removes guesswork. If a client wants modern bathrooms with cleaner lines, more storage, or stronger material contrast, those decisions are easier and cheaper to resolve before construction begins.

3D design also has practical value. It's not just for presentation. It helps homeowners test new bathroom ideas, understand proportions, and avoid expensive mid-project changes once waterproofing, tiling, and fit-off are underway.

The cheapest variation is the one that never happens because the decision was resolved properly before work started.

What de-risks a renovation

A dependable renovation pathway usually includes:

  • Defined scope early. Fewer assumptions mean fewer disputes and fewer surprises.
  • Selections made before demolition. That reduces rushed decisions and availability issues.
  • One point of responsibility. Coordination stays tighter when one builder manages the whole sequence.
  • Transparent allowances. Homeowners can see what's fixed, what's excluded, and where genuine risk sits.

That's how a new bathroom moves from idea to finished room without the process becoming harder than it needs to be.

Frequently Asked Questions About Bathroom Renovations

What's the difference between a cosmetic update and a full renovation

A cosmetic update changes the visible finishes without rebuilding the room in a major way. A full renovation strips out the old bathroom and rebuilds it with new construction work, services, waterproofing, and fixtures. If you're comparing prices, make sure you're comparing the same scope. A cheap refresh and a full strip-out aren't the same project.

Do I need council approval in Victoria

Some bathroom projects won't need the same level of approval, while others may trigger permit requirements, especially if structural changes are involved. The safest approach is to confirm this before work starts and make sure any permit-related costs are clarified in the quote rather than assumed away.

Why do quotes vary so much between builders

The gap usually comes down to scope clarity, labour assumptions, material allowances, compliance inclusions, and how demolition risk has been addressed. A lower quote isn't always a better quote. It may exclude things that another builder has priced properly.

When should I lock in fixtures and finishes

As early as possible. Selections made before construction help avoid delays, rushed substitutions, and cost variations. That's particularly important when the design includes feature tiles, custom joinery, or more detailed finish requirements.

What's the best way to avoid a budget blowout

Start with a realistic scope, keep layout changes disciplined, allow for hidden conditions in older Victorian homes, and don't make major design decisions after the build is underway. Most blowouts don't happen because bathrooms are impossible to price. They happen because too much is left unresolved.

If you're planning a bathroom renovation in Highett or across Victoria and want a clearer path from concept to completion, SitePro Bathrooms can help you scope the work properly, visualise the outcome, and build with confidence.

  • siteprobathrooms

How to Budget a Bathroom Remodel: A 2026 AU Guide

The average bathroom renovation in Australia now sits at $26,000, with budget projects starting around $8,000 and premium work pushing beyond $35,000, according to Canstar's summary of HIA cost data. In Melbourne and wider Victoria, actual expenditure is often higher once trade rates, compliance and finish level are factored in.

That's why most bathroom renovations go wrong at the budgeting stage, not on site. The problem usually isn't that people forget to price tiles or tapware. It's that they start with a mood board instead of a scope, then make layout changes halfway through, then discover the room needs more rectification work than expected.

As a renovation project manager, I've found that learning how to budget a bathroom remodel comes down to one principle. Price the room you're building, not the one you're vaguely imagining. Once the scope is locked, the numbers become far more predictable. That matters whether you're planning a simple refresh, looking at new bathroom ideas for a family home in Highett, or weighing a DIY pathway against a professional build through a registered builders unlimited firm.

Defining Your Vision and Scope

A budget without scope is guesswork. Before you compare quotes or choose fixtures, decide what kind of project you're funding.

A professional interior designer sketching a bathroom renovation plan on a blueprint with material swatches nearby.

Some bathrooms only need a cosmetic update. Others need a full strip-out, waterproofing replacement, services review and layout redesign. Those are completely different jobs, and they sit in different pricing bands. Indicative Australian ranges place cosmetic upgrades at $10,000–$20,000, mid-range remodelling at $20,000–$35,000, and premium full reconfigurations at $35,000–$70,000+, with waterproofing required to comply with AS 3740, electrical work to AS/NZS 3000, and structural changes often triggering council approvals, as outlined by Joyce Kitchens' renovation guide.

Start with the type of renovation

If you're chasing savings, separate your project into one of these practical categories:

  • Cosmetic refresh. Keep the room layout, retain most services, replace selected finishes and fixtures, and improve presentation.
  • Functional remodel. Replace the room properly, update waterproofing and trades, and improve usability without major structural change.
  • Full reconfiguration. Move plumbing points, alter walls or openings, and build a different room than the one you started with.

That distinction matters because every extra trade dependency adds cost and risk. A toilet staying where it is creates one budgeting path. A toilet moving to the opposite wall creates another.

Practical rule: If you can't describe the project in one sentence, you're not ready to budget it.

Match your ideas to your budget ceiling

A lot of homeowners collect inspiration from modern bathrooms online, then price a very different project. That's where disappointment starts. A clean, restrained room with straightforward tiles and stocked fixtures can look sharp without entering the territory of fully bespoke designer bathrooms.

Use your inspiration properly. Ask these questions:

  1. What must change for the bathroom to work better? Think storage, shower size, ventilation, lighting, cleaning ease.
  2. What would be nice to change if the budget allows? Freestanding bath, custom vanity, feature tile, niche details.
  3. What can stay? Existing footprint, window position, waste locations, doorway, service points.

The best early planning tool isn't a shopping list. It's a scope list. If you need one, a bathroom renovation checklist for planning scope and layout helps organise the room before costs start drifting.

Scope creep is what breaks budgets

Most budget blowouts don't begin with one big decision. They come from five small ones. Changing tile format, shifting the shower screen, upgrading tapware, adding custom joinery, then deciding the room should feel more “architectural” all stack up.

Lock these items before pricing:

  • Layout
  • Fixture types
  • Tile extent
  • Vanity approach
  • Whether the work is cosmetic or structural

That discipline is what turns scattered new bathroom ideas into a buildable plan.

Itemising Your Bathroom Renovation Costs

Fixed scope still does not equal a working budget. The budget starts to hold together when every part of the job is priced in the order it will be built, not in the order you notice it on Pinterest or in a showroom.

In Melbourne and across Victoria, that matters more than many homeowners expect. Trade rates, apartment access, parking limits, older homes, and stricter compliance expectations can shift the cost profile fast. A project that looks like a simple cosmetic update on paper can become a full rebuild once waterproofing, substrate repairs, or service upgrades are properly allowed for.

What to itemise first

Start with trade packages and site costs. Product selections come after that.

A workable budget should include:

  • Demolition and strip-out. Removing old fixtures, wall linings, floor finishes, screed and waste.
  • Plumbing work. Rough-in, fit-off, drainage changes, mixer relocations and fixture connections.
  • Electrical work. Lighting, power, exhaust fans, heated rails, switch positions and compliance.
  • Waterproofing. Membranes, bond breakers, floor wastes, certification where required, and the prep work before any membrane goes down.
  • Carpentry and substrate preparation. Wall straightening, sheeting, floor corrections, noggings for fittings, door frame adjustments.
  • Tiling and materials. Tiles, trims, adhesives, grout, levelling systems and extra labour for patterns or large-format tiles.
  • Fixtures and fittings. Toilet, vanity, basin, tapware, shower set, screen, mirror, accessories and storage.
  • Labour and project coordination. Scheduling, site supervision, trade sequencing and defect correction.

That order matters because hidden build costs usually decide whether the project stays in the budget range you planned.

A practical way to structure the budget

I usually tell clients to split the budget into three layers.

Layer 1: Core construction
Demolition, plumbing, electrical, waterproofing, carpentry, screeds, tiling labour and waste removal.

Layer 2: Fixtures
Vanity, toilet, tapware, shower rail, bath, mirror, storage, screen and accessories.

Layer 3: Finish upgrades
Feature tiles, niches, underfloor heating, custom joinery, premium tapware finishes and bespoke glazing.

This makes the trade-offs obvious. If the numbers tighten, cut from Layer 3 first. Protect Layer 1 as long as possible, because that is the part that keeps the room straight, watertight, compliant and easier to maintain.

Where budgets usually go wrong

Homeowners rarely blow the budget on one dramatic decision. The drift usually starts with finishes.

A tile may only cost a bit more per square metre, but the primary increase is often in labour. Large-format tiles can require flatter walls and floors. Patterns increase set-out time and cutting. A wall-hung vanity may trigger extra framing. A frameless screen can demand tighter tolerances across the whole room. Those are normal trade consequences, and they should be priced before you commit to the look.

The same applies to layout changes. Keeping existing waste points and plumbing locations usually gives better budget control. Moving a toilet, changing the shower position, or shifting the doorway can be worth doing, but those decisions push costs into demolition, plumbing, carpentry, waterproofing and tiling at the same time.

Use a builder's lens, even if you're budgeting yourself

DIY budgeting often works at fixture level. Builders price at system level.

That gap is where many Victorian bathroom budgets fail. A homeowner might allow for a vanity, toilet, taps and tiles, then miss substrate repair, floor levelling, rerouting services, disposal fees, delivery coordination and supervision. A registered builders unlimited firm prices those connections because they carry responsibility for how the whole room is built, not just how the finished room looks.

You do not always need a builder from day one. For a straightforward bathroom with no structural work and a stable layout, early budgeting can be done room by room. Once the project involves complex access, significant plumbing moves, structural changes, heritage conditions, apartment rules, or multiple trades overlapping tightly, professional pricing usually saves money by reducing omissions and contract variations.

If you want to test different layouts and finish levels before requesting formal quotes, this bathroom renovation cost calculator for comparing renovation scenarios gives you a better starting point than pricing fixtures in isolation.

Keep the budget realistic for Melbourne

National averages can help set expectations, but local delivery conditions should shape the actual budget. In Melbourne, I would rather see a client spend more on proper waterproofing, reliable trade coordination and sensible layout decisions than chase a premium finish package that leaves no room for the build itself.

Good budgeting is detailed, a little conservative, and honest about what the room needs first. That is how you protect the result and avoid turning a standard bathroom renovation into an expensive recovery job.

Planning for Unexpected Expenses and Hidden Costs

The budget that survives is the one that expects trouble. Bathrooms are demolition-heavy rooms, and demolition reveals things the old surfaces were hiding.

A man examines mold and damaged plumbing inside an open wall during a bathroom renovation project.

Industry guidance recommends holding a 10% to 20% contingency buffer, specifically because opening a bathroom can expose issues like water damage or outdated plumbing. The same guidance notes that basic council building permit fees typically range from $500 to $1,000 in Australia, with more extensive work potentially costing more, as outlined by CO-architecture's bathroom renovation cost advice.

What usually sits behind the walls

Bathrooms age from the inside out. Tiles can look acceptable while the substrate, services or framing tell a different story once the room is stripped.

Common hidden issues include:

  • Water ingress behind showers and around failed seals
  • Outdated plumbing that no longer makes sense to reconnect into a new room
  • Electrical non-compliance that has to be corrected when works are opened up
  • Structural irregularities that affect lining, tiling and fixture installation

None of these are unusual. They're part of renovating older bathrooms properly.

If your budget has no contingency, the first concealed defect becomes a design decision you didn't plan to make.

Why contingency isn't optional

Homeowners sometimes treat contingency like spare money they hope not to use. It's better to think of it as risk funding. If you need it, the project continues without panic. If you don't, you finish with a healthier financial outcome.

That buffer also protects quality. Without it, people tend to cut the wrong things once a surprise appears. They downgrade waterproofing scope, rush trade decisions, choose fixtures based only on immediate price, or delay required rectification. Those moves can create far bigger costs later.

Permits and approvals belong in the budget

Another trap is treating compliance costs as someone else's problem. Structural changes can trigger council involvement, and even straightforward work may include permit-related expenses depending on scope. Those costs should sit in your budget from the start, not arrive as an unwelcome extra.

A clean budgeting approach includes:

  • Known construction costs
  • Approval and permit allowances where relevant
  • A separate contingency reserve
  • No overlap between the two

That separation matters. Permits aren't surprises. Hidden damage is.

Smart Ways to Save Money on Your Remodel

The cheapest bathroom isn't always the smartest one. The goal is to spend less without building a room that dates quickly, wears badly or needs correction work.

A man holds two white tile samples while comparing material options for a bathroom renovation project.

The biggest saving move is also the least glamorous. Keep the existing plumbing layout wherever possible. A verified Australian renovation guide notes the hidden cost of layout inertia clearly: moving plumbing even 50cm can dramatically increase costs, and bathroom renovation pricing can run from $2200–$5500 per square metre, which is why preserving the original layout is the most effective way to stay under the $15k mark for a budget renovation in many cases, according to Three Birds Renovations' bathroom cost discussion.

Save on the expensive parts first

If you want your budget to hold, target the items that trigger extra labour and coordination.

  • Keep services in place. Leaving the toilet, shower and vanity in their existing positions usually saves more than any sale-priced tapware ever will.
  • Reduce tile complexity. Simple tile sizes and straightforward laying patterns usually cost less to install and waste less material.
  • Choose stocked fixtures. Readily available products reduce delay risk and make replacements easier if anything arrives damaged.
  • Use custom work selectively. A custom vanity can be worthwhile, but not every element needs to be bespoke.

Spend where it improves function

Practical planning trumps social media inspiration. Good modern bathrooms don't need every upgrade at once. They need smart priorities.

Focus your money on:

  1. Storage that fits daily use
  2. Lighting that works at the mirror
  3. Shower screens and fixtures that are easy to clean
  4. Durable surfaces in wet zones
  5. Ventilation and detailing that help the room last

You can still create strong visual impact. Large-format wall tiles, a cleaner vanity profile, a framed mirror and restrained finishes often deliver a more polished result than chasing every trend.

Budget filter: If a change adds cost but doesn't improve function, longevity or maintenance, question it hard.

What DIY can do, and what it usually can't

There's a difference between DIY budgeting and DIY building. Homeowners can often save money by handling selection work carefully, comparing fixtures, avoiding reactive upgrades and doing low-risk tasks outside the wet construction sequence. But bathrooms are still compliance-heavy rooms.

That's why the most effective saving strategy usually isn't “do more yourself”. It's “make fewer expensive changes”. In practical terms, that means protecting the layout, locking selections early and choosing materials that are attractive without creating unnecessary installation complexity.

Financing Your Project and Integrating a Timeline

Most homeowners fund a bathroom remodel from one of a few common pathways. They use savings, short-term credit, equity access through their home loan, or a dedicated renovation finance product. The right option depends on your wider finances, not just the room itself.

The important point is this. The funding method should support the build sequence, not pressure it. If your cash flow only covers the first half of the renovation, decision-making gets worse when materials need to be ordered or a variation appears.

Match the finance method to the build

A simple refresh can often be managed differently from a full-service renovation. In Melbourne, anecdotal local pricing shared in a renovation discussion puts a small ensuite at around $25,000 for a full service build, while a DIY-style approach where the homeowner sources trades and materials could land around $10,000–$12,000 if no structural changes are required, based on this Melbourne ensuite cost discussion.

That gap tells you something useful. You're not only paying for labour. You're paying for coordination, sequencing, accountability and less risk falling on the homeowner.

Timeline discipline protects the budget

A bathroom budget isn't separate from the schedule. They're tied together. Delays in fixture selection, stock arrival, access to trades or approval timing can force rushed substitutions or leave trades waiting on site.

A better process looks like this:

  • Lock selections early so ordered items are known before the build starts.
  • Confirm who is supplying what because confusion over fixtures and fittings causes delay fast.
  • Allow time for fabrication items such as custom joinery or stone-related work.
  • Avoid changing the design once works begin because timeline drift often becomes budget drift.

If you're learning how to budget a bathroom remodel properly, treat time as a cost control tool. The cleaner the sequence, the fewer expensive decisions you'll make under pressure.

When to Hire a Professional for Your Bathroom Renovation

DIY can work for minor cosmetic changes. It usually stops working when the project needs trade sequencing, compliance oversight and cost control across multiple moving parts.

Screenshot from https://siteprobathrooms.com.au

The moment your renovation includes waterproofing, electrical coordination, drainage changes, structural questions, council approvals or premium finish expectations, professional management becomes a budget protection measure. That's especially true if you want certainty around sequencing and accountability rather than managing each trade yourself.

The point where expert help saves money

A lot of homeowners assume hiring professionals automatically costs more. On paper, yes, the upfront contract amount may be higher than piecing the job together yourself. In practice, self-managed builds often absorb hidden costs through delays, misordered fixtures, rework, compliance issues and fragmented responsibility.

A professional team earns its place by controlling variables:

  • The scope is documented before demolition starts
  • Trades are sequenced in the right order
  • Selections are locked before they create delays
  • Compliance requirements are managed properly
  • Variations are easier to identify and price

That's the difference between hopeful budgeting and managed budgeting.

When a registered builders unlimited firm makes sense

If you're reconfiguring the room, coordinating several licensed trades, or trying to achieve a refined finish rather than a basic update, a registered builders unlimited firm is often the safer financial call. Not because every project needs maximum complexity, but because some bathrooms stop being simple very quickly once the old room comes apart.

For homeowners who want one coordinated pathway from planning through construction, SitePro Bathrooms' bathroom remodel contractor service is one example of an end-to-end option in Victoria. The practical value in that model is clear scope management, organised trade delivery and a single point of responsibility.

The same logic applies whether you want a compact family bathroom, a polished ensuite, or one of the more bespoke designer bathrooms that require tighter finish control. Professional management doesn't just build the room. It protects the budget from the kind of mistakes that are expensive to fix later.


A realistic budget starts with scope, not shopping. Keep the layout stable where you can, separate essential construction costs from finish upgrades, hold a proper contingency, and don't underestimate the value of coordinated delivery. That's how bathroom renovations stay controlled, and that's how a project moves from ideas to a finished room without constant financial surprises.