• siteprobathrooms

How Long Does a Renovation Take in Australia

A typical Australian bathroom renovation takes 3 to 6 weeks on site, but the door-to-door project commonly takes 6 to 14 weeks once design, approvals and material lead times are included. The physical work is only one part of the calendar.

That distinction explains why a Highett homeowner can be told that a bathroom will take “about a month” and still find the renovation occupying much more of the season. Design decisions, documentation, permit assessment, product ordering, waterproofing hold points and final inspections all happen around the visible construction work.

A kitchen follows the same pattern. Australian renovation survey data puts kitchen work at 2 to 9 weeks and bathroom work at 1 to 3 weeks, while most respondents said their renovations generally took less than three months overall (Australian renovation timing data). Those figures are useful, but only when you understand what they include and what they leave out.

Why Renovation Timelines Are Longer Than They First Appear

A homeowner usually asks, “How many weeks will trades be working in the house?” The more useful question is, “How long will it be from the first consultation until I can use the finished room?”

Take a Highett homeowner planning a bathroom refresh. The demolition and installation might occupy 3 to 6 weeks on site, which is the common Australian baseline for a standard bathroom renovation. But the calendar starts earlier, with measuring, design, selections, quoting, documentation and product orders. If approvals or custom items are involved, the handover date moves further out.

The two clocks running on every project

On-site construction time begins when demolition starts and ends when the trades finish their work. Total elapsed time begins when the project is first scoped and includes every necessary step before and after construction.

The gap usually comes from:

  • Design documentation, including plans, selections and any engineering information.
  • Permit assessment, where the surveyor or council needs time to review the application.
  • Procurement, particularly for custom joinery, imported fittings and specialty finishes.
  • Waterproofing and inspections, which create fixed hold points during construction.
  • Final sign-off, defect correction and practical completion.

A straightforward Victorian building permit typically adds 2 to 4 weeks after the documentation is complete. A planning permit can add 4 to 12 or more weeks, depending on council assessment and the project's complexity (Victoria renovation permit guidance). That time may sit before demolition, not inside the builder's quoted construction period.

Practical rule: Treat the quoted on-site duration as a trade programme, not as the complete answer to how long a renovation takes.
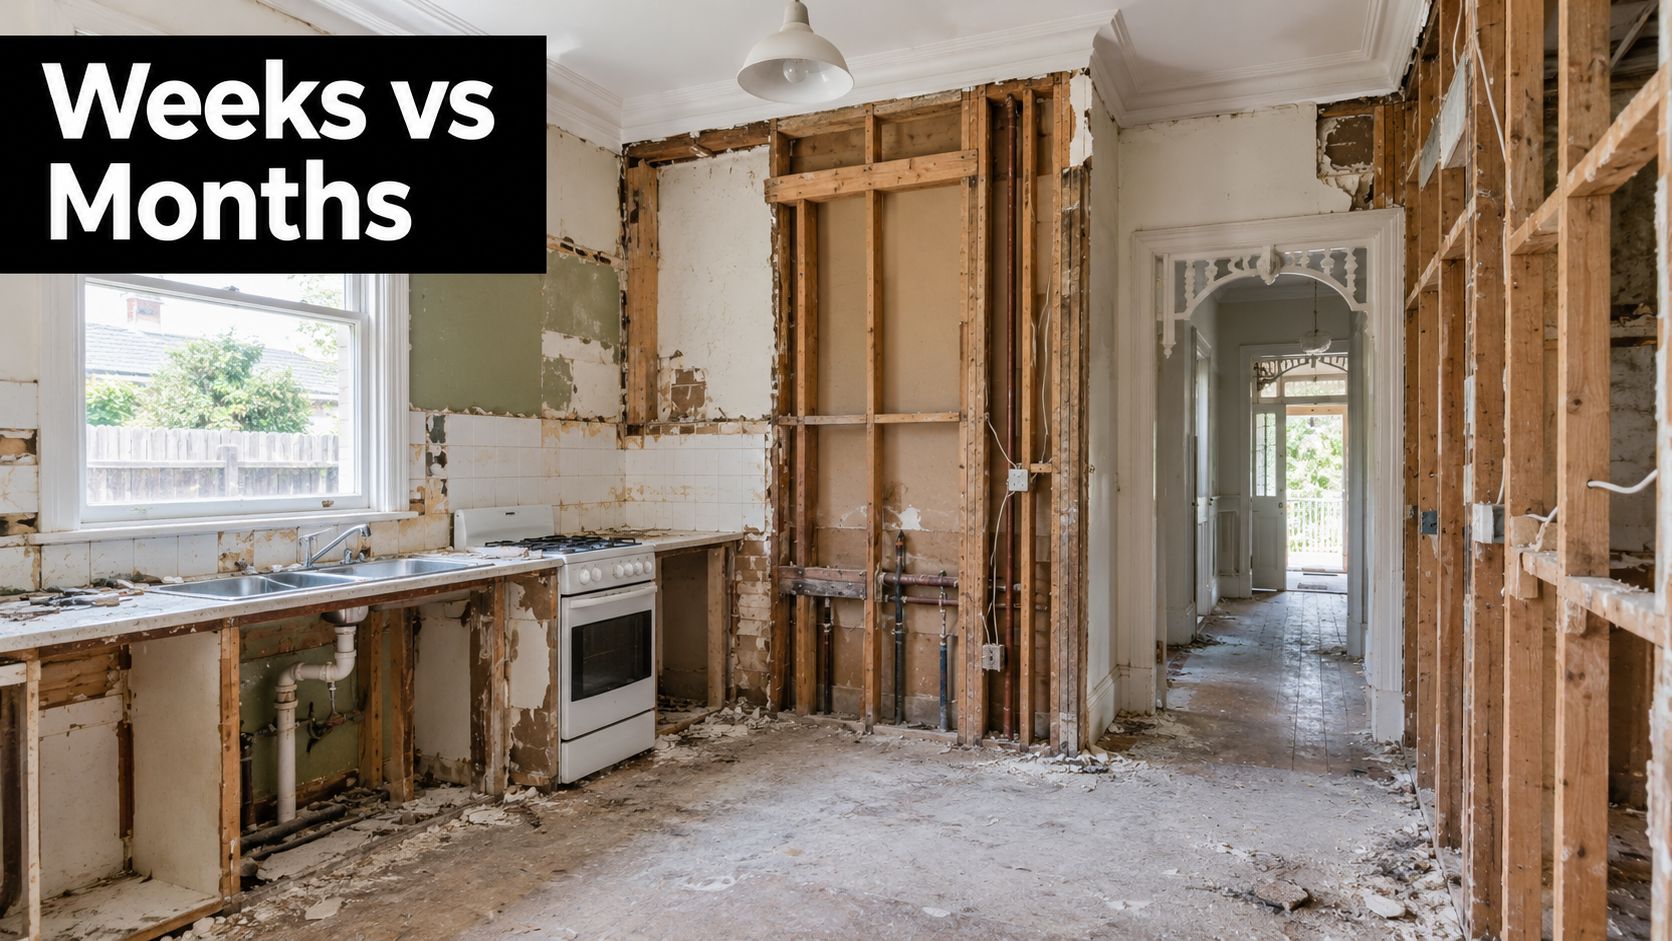
A kitchen under construction with exposed wooden wall studs and demolition debris on the floor.

The frustration is understandable. A bathroom may look like a compact room, but several trades still need to work in a strict order. Plumbing and electrical rough-ins must be checked before walls close, waterproofing must be applied correctly and allowed to cure, and the finished work may need inspection before the room is handed back.

The same principle applies to kitchens. An Australian mid-range kitchen renovation can take 10 to 18 weeks end to end, with 6 to 10 weeks of active construction (Australian kitchen renovation timeline benchmarks). Planning, quoting, cabinet manufacture, procurement and sign-off account for much of the difference.

The useful baseline is simple. Cosmetic work is often measured in weeks, while a coordinated bathroom or kitchen renovation is measured from first consultation to handover. The next comparison shows how that split changes by project type.

Typical Renovation Timelines by Project Type

Project scope sets the programme more reliably than room size. A compact ensuite with relocated plumbing can take longer than a larger bathroom that keeps its existing layout. Both require coordinated trades, but service changes add inspections, approvals and opportunities for concealed defects to affect the calendar.

The table separates on-site duration, when trades are physically working in the home, from total elapsed duration, measured from design commencement to practical completion.

A side-by-side comparison

Project Type Scope On-Site Duration Total Elapsed Duration
Ensuite Cosmetic refresh with stock fittings and limited demolition 2 to 4 weeks 5 to 10 weeks
Full bathroom Strip-out, waterproofing, tiling and fixture replacement 3 to 6 weeks 6 to 14 weeks
Full bathroom Layout change, plumbing relocation or hidden defects 6 weeks or more 2 to 3 months or longer
Kitchen Custom joinery, new finishes and coordinated installation 4 to 8 weeks 10 to 18 weeks
Kitchen Cosmetic fronts, benchtop or appliance updates Several weeks Often shorter, depending on procurement

These bands shift in Victorian homes with heritage constraints, multiple bathrooms or extensive service changes. A heritage property may require more documentation and careful work around existing fabric. A multi-bathroom project can extend the calendar through staged access, shared plumbing routes and additional selections, even when each individual room has a familiar construction sequence.

For a standard Australian bathroom, 3 to 5 weeks of on-site work is a common guide, while design, product selection and ordering may bring the overall period closer to 2 to 3 months. The distinction matters because waterproofing and other hold points occupy calendar time even when trades are not working continuously in the room.

Kitchens usually carry a longer supply-chain window. The 10 to 18 week end-to-end benchmark includes 6 to 10 weeks of active construction (Australian kitchen renovation timeline benchmarks). Custom cabinets must be measured, manufactured and delivered before installation. The site can therefore be ready while the project remains dependent on a supplier.

What changes the band

A re-tile over a suitable surface may reduce demolition, while a full strip-out exposes the substrate and services for inspection. Removing a structural wall adds engineering and approval work. Window replacement can introduce further documentation and compliance checks. Appliance choices also affect cabinetry dimensions, electrical planning and final installation.

The word “renovation” covers very different scopes. Compare bathroom remodelling timeframes by project scope and confirm whether any quoted period means active site work or the full door-to-door programme.

A credible timeline states what each band includes, including procurement, approvals, curing and handover. That clarity helps Victorian homeowners plan around the calendar rather than relying only on the weeks trades are present.

The Renovation Phases From First Consult to Final Handover

A bathroom renovation may involve only a few weeks of on-site work, yet the full programme starts much earlier. Decisions, documentation, approvals, procurement and inspection holds all occupy calendar time before handover.

Design and documentation

The first consultation and measure-up establish existing conditions, access limits and the intended scope. Layout development follows, including selections and, where used, a 3D design. Testing vanity positions, shower layouts and storage before ordering reduces the chance of expensive changes during construction.

Engineering and documentation are required if the work affects structure, services or compliance. The building permit then moves through lodgement, assessment and issue. Simple applications may take 10 to 15 business days, while complex applications may require 20 to 30 business days. A VicSmart pathway may take 10 business days where it applies. Homeowners should confirm the relevant pathway and documentation with the building surveyor before setting a handover date.

Construction and hold points

After approvals are in place, the physical sequence generally runs as follows:

  1. Demolition and strip-out. The team removes fixtures, finishes and affected wall or floor materials, then checks defects that were not visible earlier.
  2. Rough-in plumbing and electrical. New pipework, wastes, wiring and outlets are installed before walls and floors are closed.
  3. Waterproofing application. The substrate is prepared, membrane is applied and junctions, penetrations and wet-area details are completed.
  4. Cure and inspection. Waterproofing requires a 24 to 48 hour curing hold under AS 3740 before inspection, as outlined in this Australian bathroom renovation process guidance.
  5. Screeding, tiling and grout curing. Adhesive and grout need suitable curing time. A tight handover target does not remove those requirements.
  6. Fit-off. Tapware, toilets, basins, screens, mirrors, lighting and accessories are installed once tiled surfaces are ready.
  7. Final inspection and practical completion. The builder checks operation, finishes, seals, defects and cleaning before handover.

A contractor and a homeowner reviewing renovation project plans on a table at a construction site.

The schedule should protect each pause. Site access, trade bookings and deliveries need to align with waterproofing inspection and tile installation, rather than being arranged after the membrane is applied.

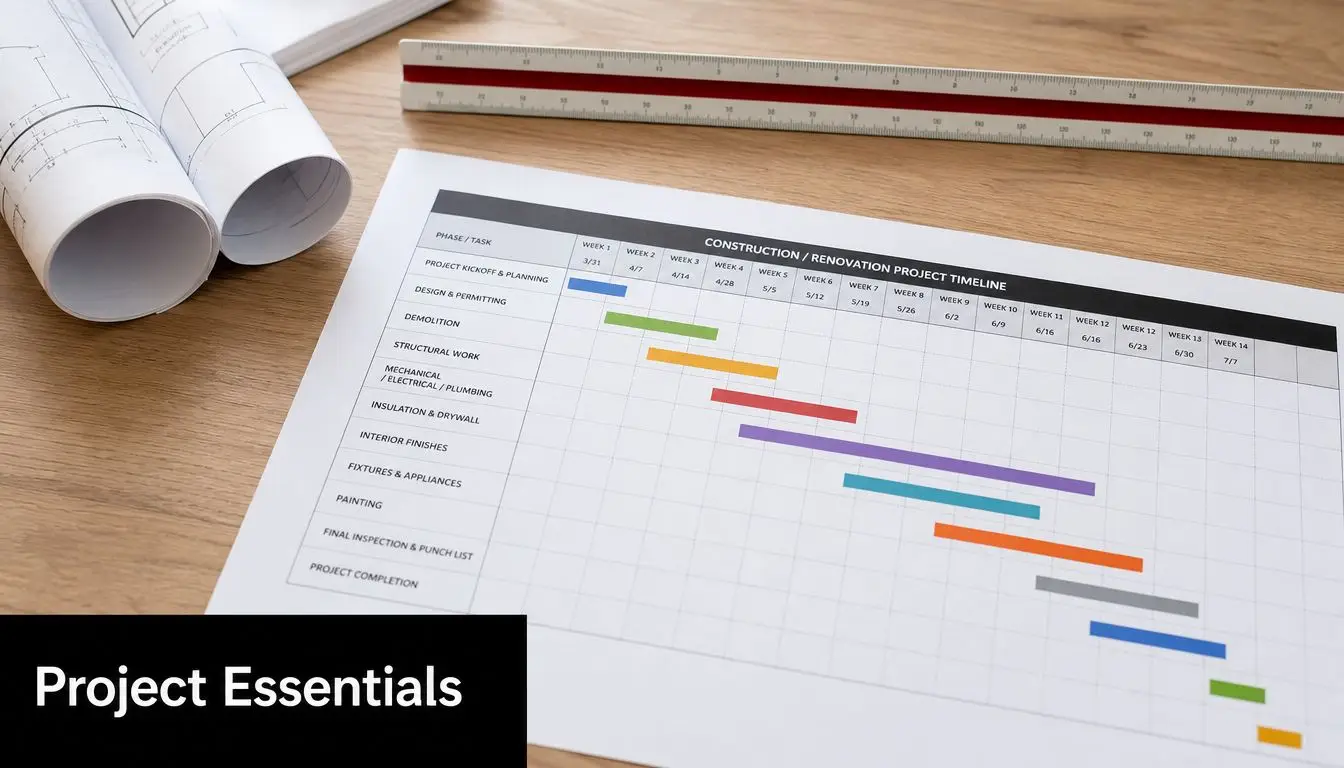
A coordinated builder also assigns responsibility for every milestone and tracks decisions, deliveries and inspections in one programme. These project management practices for staying on schedule matter before a delay appears. A missed inspection or late fitting can otherwise push every later activity into another calendar week.

Permits and Registered Builders in Victoria

Permit requirements can add calendar months around a job that takes only a few weeks on site. Victorian homeowners should establish the approval path before setting a start or handover date, particularly where the renovation changes structure, services, waterproofing or the building envelope.

A building permit may apply to structural alterations, significant waterproofing work, window changes or relocated fixtures that affect compliance. Repairs and maintenance can follow a different process, but the answer depends on the actual scope and the existing building.

Allowing for the approval clock

Once design documentation is complete, a straightforward building permit may take about 2 to 4 weeks. A planning permit can take 4 to 12 or more weeks, while simple applications may have a processing window of 10 to 15 business days and complex applications 20 to 30 business days (Victorian permit timing guidance). These are approval windows, not construction durations.

The practical trade-off is clear. A bathroom may need only a short period of demolition, rough-in, waterproofing and fit-off, yet the total elapsed time grows if documentation, surveyor reviews or required inspections are not arranged early. Do not commit to a handover date until the surveyor confirms the required documents and approval sequence.

A domestic building contract for work worth more than $10,000 must be in writing. Domestic building work over $10,000 requires a building permit in many cases, and the Victorian Building Authority separates registered building practitioners by class. The practitioner must work within the scope of that registration (Victorian bathroom contract and registration guidance).

Registration and inspections

“Registered builders unlimited” is not a useful check by itself. Confirm that the builder is registered for the proposed work and can legally manage that scope.

Using an unregistered handyman where a registered practitioner is required can create contract and insurance problems. The builder should state who will prepare permit documents, communicate with the surveyor and book inspections. Without that ownership, the homeowner may end up coordinating unrelated trades and approval steps.

Inspection dates also become fixed points in the programme. Framing, pre-waterproofing and final inspections can each stop the next activity until the relevant person has reviewed and accepted the work. A coordinated builder can lodge applications, track responses and book inspections early, but cannot shorten an external assessment that requires further information.

Confirm the building permit requirements for bathroom renovations before demolition is scheduled. That early decision separates the construction weeks from the full calendar commitment and leaves room for Victorian approval and inspection requirements.

How Modern Bathroom Ideas Shape the Project Calendar

A bathroom can take only a few weeks of on-site construction yet occupy several months of the Victorian homeowner's calendar. Design choices often create that gap. A Highett ensuite with a wall-hung vanity, custom joinery, matte black tapware, large-format 600 x 600 tiles and a frameless shower screen requires more coordination than a standard replacement.

Custom joinery must be measured, detailed, manufactured and delivered before installation. Imported tapware follows supplier availability, not the builder's preferred start date. Large-format tiles require a flatter substrate and careful handling. A frameless glass screen is measured after tiling, so its installation sits late in the sequence rather than being fixed from the initial plan.

Waterproofing and substrate preparation also affect the calendar. Work may be complete on site, but the next trade still has to wait for the relevant curing period or inspection before proceeding. Those pauses are construction requirements, not idle time, and they help explain why total elapsed time exceeds the visible work weeks.

Design Element Typical Added Lead Time Calendar Impact
Custom wall-hung vanity 3 to 4 weeks Joinery must be ordered and ready before fit-off
Imported matte black tapware 2 to 6 weeks Rough-in and final connection may depend on delivery
Large-format 600 x 600 tiles Additional preparation and curing time Substrate tolerance and sequencing become more important
Frameless shower screen After tiling and measurement Glass installation sits late in the programme
Stock vanity and standard fittings Minimal procurement delay Earlier installation and simpler coordination

A cosmetic refresh using a stock vanity, off-the-shelf fittings and standard mosaic tiles can remove 2 to 3 weeks from the door-to-door schedule when no approval, layout or hidden-defect issue intervenes. The saving comes from fewer dependencies, not faster workmanship.

Good bathroom design balances appearance with access, maintenance and availability. Current Australian design coverage highlights warmer palettes, curves, floating vanities, earthy textures, pale blue, brick-look tiles, neutral terrazzo and small square tiles as notable directions (Australian bathroom design trends). Homeowners control the largest variable by confirming selections early and accepting the calendar consequence of custom work. A coordinated end-to-end builder can remove hidden waiting between trades, but cannot eliminate manufacturing, curing or inspection time.

Common Causes of Renovation Delays in Australian Homes

Renovation delays usually accumulate. One late delivery, a revised selection and a booked-out inspection can each appear manageable, but they may all affect the same downstream trades.

The problems that move handover

  • Late or back-ordered materials: Imported tiles, specialty tapware and custom items can add 1 to 6 weeks when they aren't available at the required stage.
  • Scope changes: Adding a niche, changing the tile pattern or moving a fitting during construction can add 1 to 3 weeks, depending on the work already completed.
  • Inspection availability: A delayed waterproofing or building inspection can add 2 to 4 weeks if the next trade can't legally or practically proceed.
  • Hidden defects: Rotten framing, asbestos, non-compliant plumbing or damaged substrates can add 2 to 8 weeks once demolition exposes the problem.
  • Wet weather: Outdoor demolition, external works and deliveries may need to move when conditions make the work unsafe or unsuitable.
  • Trade sequencing conflicts: If the plumber overruns, the waterproofer, tiler, glazier and final installer may all lose their planned dates.

The quantitative delay bands above are planning allowances, not guarantees. A defect may be repaired quickly if materials and labour are available, or it may require redesign and approval. The important distinction is between a problem that has been identified early and one discovered after the next trade has already been booked.

How organised teams limit slippage

A weekly programme should show more than a list of trades. It should show:

  1. What must arrive, including quantities, finishes and approved alternatives.
  2. Which inspection is next, and who has booked it.
  3. What decision is still open, with a deadline before it affects construction.
  4. Which activity follows, so an overrun is identified before it blocks the next trade.

The most effective defence is transparency. A homeowner can't solve a delay that hasn't been reported, and a builder can't protect the handover date if selections keep changing without a documented effect on time.

How a Specialist Builder Like SitePro Manages the Clock

An end-to-end builder reduces dead space by managing design, procurement, permits and trades as one programme. That doesn't make curing periods or external approvals disappear. It means the team can prepare for them instead of discovering them after construction has started.

A coordinated process begins with in-house 3D design and a fixed-price quote before demolition is scheduled. Tiles, fittings, vanity details and joinery are resolved during design, so the site team isn't waiting for a homeowner to make a decision while a trade is standing by.

One programme instead of separate diaries

The project manager sequences demolition, plumbing rough-in, waterproofing, curing, tiling and fit-off on one calendar. Materials are ordered during design to absorb 4 to 8 week lead times for custom vanities and imported tiles before they create a site stoppage.

The permit application is lodged by the builder where that service is included, and the waterproofing inspection is booked as soon as the relevant work is complete. This protects the fixed hold point without leaving the homeowner to find a surveyor at the last moment.

SitePro Bathrooms is one example of a specialist renovation company that combines concept development, 3D design, construction and finishing within an end-to-end bathroom and kitchen service.

What to expect before signing

Ask for these practical controls:

  • Single point of contact: One person should explain decisions, changes and programme updates.
  • Written programme: The schedule should identify design approval, permit, demolition, waterproofing, tiling and handover milestones.
  • Selection deadline: Every product that affects rough-in or installation should have an approval date.
  • Procurement status: The builder should confirm what has been ordered, received or placed on hold.
  • Inspection responsibility: The contract or project plan should state who books and attends required inspections.
  • Proactive updates: A weekly update should identify completed work, next steps, risks and decisions.
  • Defined handover date: The date should be based on the agreed scope, with changes recorded rather than absorbed informally.

The builder can't control every external response, but the homeowner should never have to discover a programme risk by finding an empty site.

Setting Realistic Expectations and Quick Answers

The cleanest way to answer how long a renovation takes is to separate the construction period from the complete project window. Use the shorter figure to understand disruption at home, and the longer figure to plan your household, temporary facilities and finances.

The figures to keep in mind

  • Bathroom: 3 to 6 weeks on site and 6 to 14 weeks door to door, including design, approvals and lead times (Australian bathroom renovation timing).
  • Ensuite: 2 to 4 weeks on site and 5 to 10 weeks door to door, depending on scope, selections and approvals.
  • Kitchen: 4 to 8 weeks on site and 8 to 16 weeks door to door, with custom joinery and procurement often setting the pace.

These are planning bands, not promises. Victorian permits, waterproofing cure and custom joinery can influence the calendar more than the number of trades physically present.

Questions homeowners ask

Can I stay in the home during one bathroom renovation? Usually, yes, if another bathroom remains available and the household can manage dust, noise and temporary loss of facilities. Access, pets and working hours should be discussed before demolition.

Does the timeline shrink once demolition starts? Rarely. Demolition reveals the actual condition of the structure and services, so rushing the programme after strip-out usually increases risk rather than saving time. Allow a sensible buffer for defects, inspections and deliveries.

What decision protects the handover date most effectively? Make selections early. A homeowner who confirms the layout, tiles, fittings, joinery and screen requirements before ordering gives the builder a workable sequence instead of a series of decisions made during construction.

A realistic renovation plan doesn't promise that every project will finish in the shortest possible window. It shows the full calendar, identifies the hold points and gives every participant enough notice to do the work properly.


If you're planning bathroom renovations, a kitchen upgrade or a complete redesign in Highett or greater Victoria, contact SitePro Bathrooms with your room dimensions, preferred scope and must-have selections. Request an end-to-end consultation and ask for a written programme that separates design, approvals, construction and handover before you commit to a start date.

  • siteprobathrooms

How to Build a Kitchen Renovation Budget That Actually Holds

A realistic 2026 Australian kitchen renovation budget is roughly A$20,000–A$45,000 for a standard renovation, A$45,000–A$80,000 for premium custom work, and well over A$80,000 for a luxury build. A cosmetic refresh can cost less, but changing the layout, upgrading services, or commissioning custom joinery moves the project into a different financial bracket quickly.

You're probably looking at a quote right now that seems almost reasonable until you reach the provisional sums, appliance allowances, and vague “building works” line. That's where kitchen budgets lose control. In Highett homes, especially older properties, the final figure depends less on the room's label as a “small kitchen” or “large kitchen” and more on what you're asking trades to uncover, move, certify, and rebuild.

The right approach is to work backwards from the quote. Define the scope first, separate every cost bucket, test the builder's assumptions, and protect the project with a 15%–20% contingency. A low headline price is useless if it excludes the work needed to deliver a compliant, durable kitchen.

Start With Scope, Not a Dollar Figure

A quote can look manageable until you see provisional sums, appliance allowances, and a vague “building works” line. Start by identifying exactly what the contractor must remove, move, install, connect, and certify. The room's size matters, but the scope drives the final figure.

The What's the Damage Australian kitchen renovation cost breakdown places projects across several planning tiers: cosmetic refreshes at about A$8,000–A$20,000, budget renovations at A$12,000–A$25,000, mid-range work at A$25,000–A$45,000, premium custom kitchens at A$45,000–A$80,000, and luxury builds at A$80,000–A$150,000 or more. Its ranges overlap because a renovation can mean anything from replacing cabinet fronts to rebuilding the room.

The What's the Damage Australian renovation market guidance places standard renovations around A$20,000–A$50,000. Use these figures as planning markers, not as a substitute for a measured scope and itemised quote.

Cosmetic refresh

The existing footprint stays intact. You might replace doors, handles, benchtops, splashback, paint, lighting, or selected appliances while keeping plumbing and electrical points broadly where they are. This gives the builder fewer unknowns and usually produces the most controlled budget.

Layout change within the footprint

The kitchen remains in the same area, but cabinetry, appliances, power points, lighting, or the sink position changes. Allow for design coordination and extra trade labour. Moving a sink or cooktop can affect walls, flooring, cabinet dimensions, ventilation, and compliance. Require each relocation to appear as a separate quote line.

Structural reconfiguration

Removing a wall, changing openings, relocating the kitchen, altering windows, or moving major services increases uncertainty. The work may require engineering input, additional demolition, permits, and a longer trade sequence. Map those requirements before allocating money across cabinetry, benchtops, appliances, flooring, services, labour, and permits.

Practical rule: If the design changes walls, wet areas, gas, electrical layout, or ventilation, price it as a construction project, not a cabinet replacement.

Victoria also affects your builder shortlist. Work valued at A$5,000 or more must be carried out by a registered building practitioner. The summary of Victorian renovation registration requirements explains the threshold and registered-practitioner role. A Domestic Builder: Unlimited registration covers managing or arranging all components of domestic building work, while a limited class can cover a defined category such as a kitchen renovation. The Victorian domestic builder registration classes explains that distinction.

Decide first whether the project is a refresh, contained rework, or structural rebuild. Then match the builder's registration, quote, certifications, and contingency to that scope.

What Your Money Actually Buys in a Kitchen

A kitchen renovation budget becomes useful only when the quote shows where the money goes. Australian benchmarks indicate that cabinetry commonly absorbs about 30%–40% of total spend, making joinery the most important line to interrogate before you compare totals. The cost of kitchen cabinets can vary considerably with material, internal fittings, drawer construction, hardware, finish, and installation.

For a medium U-shaped kitchen, custom cabinetry may land around A$10,000–A$18,000. A stone benchtop may cost approximately A$2,500–A$6,000 installed, while a mid-range appliance package commonly sits around A$8,000–A$15,000. These figures are planning ranges, not promises. The specification and site conditions decide where your quote lands.

Cost Bucket % of Budget Typical Range (A$) Scales With
Cabinetry and joinery 30%–40% A$10,000–A$18,000 for medium custom work Cabinet length, drawer count, finish, hardware
Benchtops 10%–15% A$2,500–A$6,000 installed Surface area, cut-outs, edge profile, material
Appliances 15%–20% A$8,000–A$15,000 as a package Brand tier, integration, capacity, cooking technology
Splashback and finishes 5%–10% Varies by material and area Wall coverage, tile format, installation detail
Plumbing and electrical labour 15%–20% Varies by relocation and compliance work Number of points, access, upgrades, layout changes
Design, demolition and PC items Balance Varies by scope Documentation, disposal, selections, allowances

Cabinetry scales mainly with the size of the room and the amount of storage. Benchtops and splashbacks also expand with surface area, although sink cut-outs, waterfall ends, curves, and detailed edges increase cost through specification rather than simple length.

Appliances behave differently. A compact kitchen with a premium integrated refrigerator can cost more than a larger room with straightforward freestanding appliances. The same applies to joinery. Deep drawers, internal bins, pantry mechanisms, appliance garages, decorative panels, and special finishes add cost without necessarily adding much floor area.

Labour is the quiet budget killer

Homeowners often focus on visible products because they can compare showroom prices. Labour hides in preparation, demolition, protection, levelling, disposal, installation, coordination, reconnection, testing, and rectification. If a plumber, electrician, tiler, and cabinet installer each attend separately without a clear sequence, you pay for inefficiency as well as the work itself.

Read every allowance carefully. A “plumbing allowance” might exclude floor access, pipe replacement, or reconnection. A “benchtop allowance” might exclude templating, cut-outs, support, edge treatments, or difficult access. The total is only meaningful when inclusions and exclusions are visible.

Budget Tiers for Small, Medium, and Large Projects

The quote in your inbox should determine the tier, not the style board. A small refresh preserves the existing layout and directs money toward surfaces and selected replacements. A medium renovation adds new cabinetry, storage improvements, and some service changes. A large custom build usually combines structural work, extensive joinery, premium appliances, and detailed finishes.

Line Item Small Refresh (A$15k–25k) Medium Renovation (A$40k–70k) Large Custom Build (A$80k+)
Demolition and preparation Controlled, limited removal More extensive removal and disposal Significant demolition, protection and site preparation
Cabinetry Refacing or selected replacement New cabinetry across the room Custom joinery, detailed internals and feature panels
Benchtops Replacement surface or modest upgrade Larger surface, cut-outs and upgraded finish Premium stone, complex edges or feature applications
Appliances Selected replacements Coordinated mid-range package Integrated or premium specification
Plumbing and electrical Mostly existing points Some relocations and upgrades Major relocations, upgrades and coordination
Structural work Usually excluded May be limited Often a central cost driver
Finishes Splashback, paint and minor flooring Broader tiling, flooring and detail work High-spec finishes and extensive detailing
Contingency 15%–20% 15%–20% 15%–20%

Small refresh: A$15k–25k

This tier suits a Highett kitchen that works properly but looks dated. Typical work includes a new benchtop, selected appliance replacements, splashback repairs or replacement, paint, lighting, and new or refreshed doors. Keep the layout and service locations stable.

A full reconfiguration does not belong in this bracket. Moving walls, relocating plumbing, changing substantial cabinetry, or correcting poor access quickly changes the job from cosmetic work into a coordinated renovation.

Medium renovation: A$40k–70k

This is the practical range for many Highett homeowners seeking a meaningful improvement without commissioning a full architectural build. New cabinetry, better storage, a coordinated appliance package, updated services, and mid-range finishes can transform the room.

Cabinetry and trade labour take a larger share because the builder is installing more components and sequencing more people. Confirm what the quote includes before comparing totals. Two kitchens with the same headline budget can have very different allowances for installation, disposal, electrical work, or benchtop fabrication.

Large custom build: A$80k+

Large kitchens escalate unevenly. Removing a wall can add engineering, demolition, temporary support, flooring transitions, service relocation, and longer site coordination. Premium finishes create another increase through fabrication, handling, and installation time.

Cabinetry rises with the number of linear metres, then accelerates when you specify tall banks, curved panels, integrated appliances, detailed internal fittings, or special finishes. Electrical work can also rise sharply after a layout change. The electrician may need to chase walls, modify circuits, upgrade capacity, relocate lighting, and coordinate with plastering and cabinetry.

Set aside 15%–20% contingency in every tier. It protects the budget against conditions the initial quote cannot confirm and prevents a small change from forcing a higher specification bracket. The tier should describe the work you intend to purchase, not the total you hope the builder will never exceed.

For context, What's the Damage reports that the most common spend band for standard kitchen work is A$20,001–A$40,000. That range sits between the small refresh and medium renovation tiers, so scope and inclusions matter more than the label attached to the project.

Why Quotes Blow Out and How to Defend Against It

The cheapest quote often becomes the most expensive project. What's the Damage's analysis of hidden kitchen renovation costs found that projects exceed their original quote by 20%–40% more often than not. Hold 15%–20% contingency before work begins, then test every allowance against the scope.

A low headline figure usually points to omitted work, weak allowances, or untested site assumptions. The shortfall appears later as a variation, after demolition has started and your ability to change direction has narrowed. Compare quotes by inclusions, exclusions, allowances, and builder assumptions, not by the total on page one.

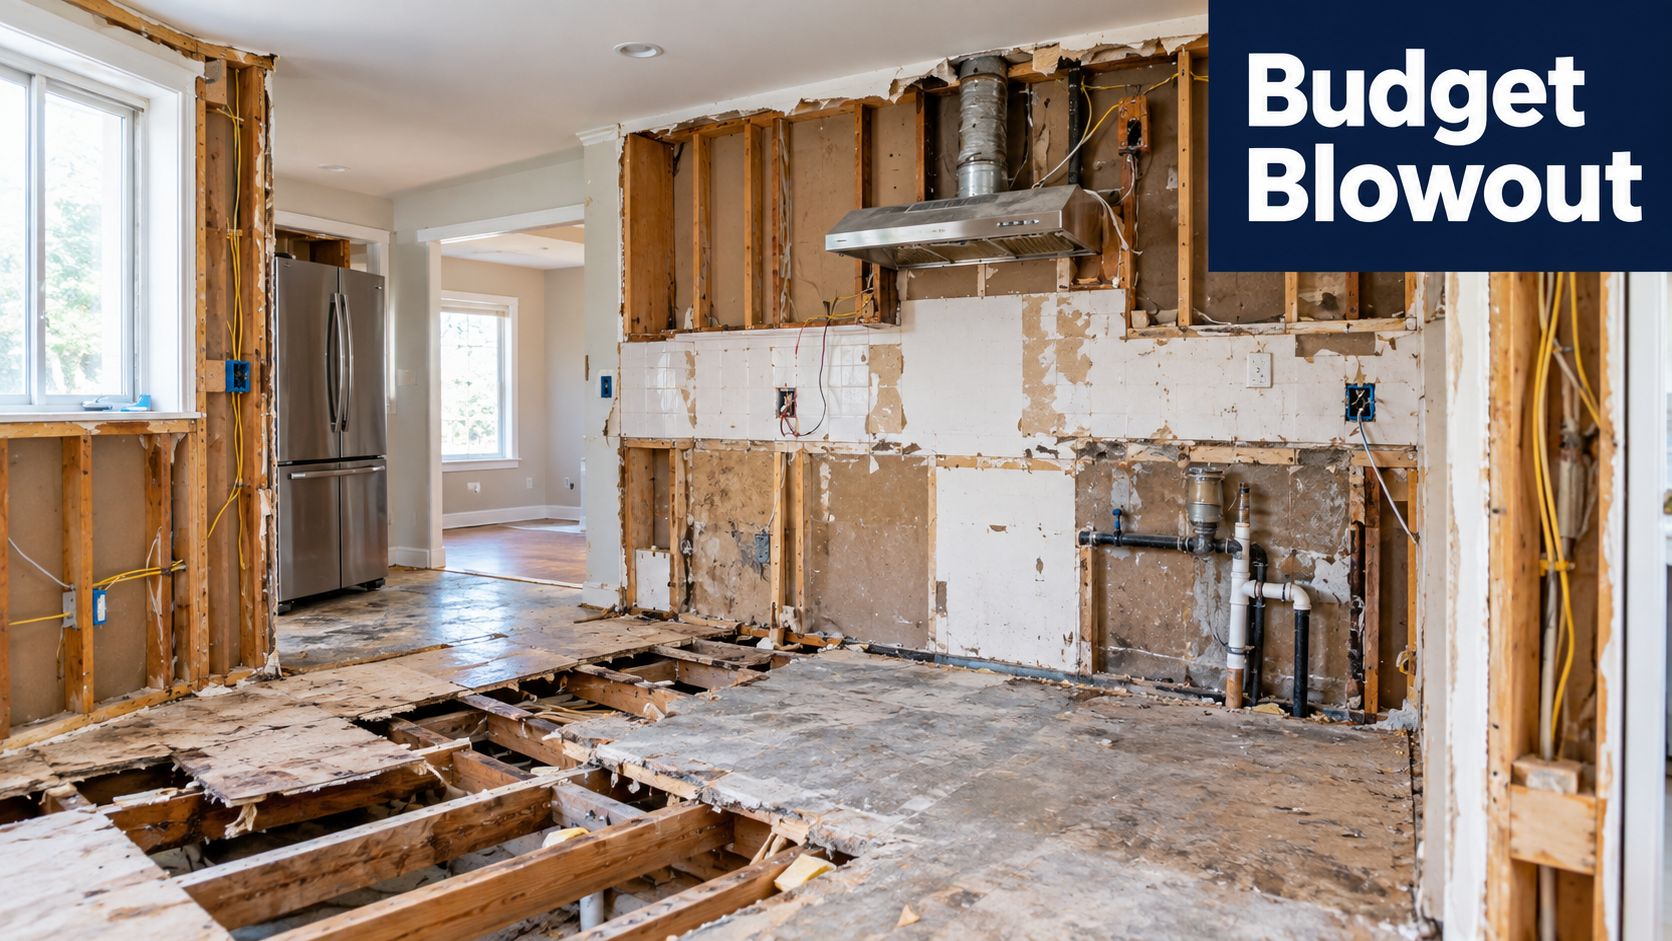
A kitchen under construction with exposed wooden wall studs, subflooring, plumbing pipes, and an installed range hood.

Force the uncertainty into the open

Require an itemised quote covering cabinetry, benchtops, appliances, plumbing, electrical work, tiling, demolition, waste removal, installation, design, and labour. If a line says “building works”, ask exactly what it includes, what it excludes, and which site conditions support the price.

Scrutinise every provisional sum. It is not automatically a problem, but it places the uncertainty and final cost on you. Ask why it is included and convert it to a fixed price wherever the design and inspection allow.

Check the builder's Victorian registration before signing. For a broad domestic project, investigate Domestic Builder: Unlimited registration. A defined kitchen renovation may fall within a limited category, so verify the registration on the VBA public register and confirm that the registered entity is the contracting party.

Lock selections before ordering. Changing appliance dimensions after cabinetry production, upgrading the benchtop after templating, or adding lighting during installation creates avoidable variations. Use a written schedule listing finishes, model specifications, colours, handles, sinks, taps, and electrical requirements.

Defence against blowouts: A quote is reliable only when it exposes the assumptions behind the number.

Your contingency covers concealed damage, non-compliant wiring, access problems, material changes, and decisions made after walls and floors are opened. Removing it does not remove risk. It shifts the cost to borrowing or an unfinished kitchen.

Use this practical guide to keep a renovation on schedule and under budget and require written approval for every variation before the work proceeds.

Smart Places to Save Without Cutting Corners

A quote lands in your inbox with a reassuring total. Then the builder prices a relocated sink, extra electrical work, replacement flooring, and revised cabinetry. The total rises quickly. Protect the budget by reducing complexity before choosing cheaper finishes.

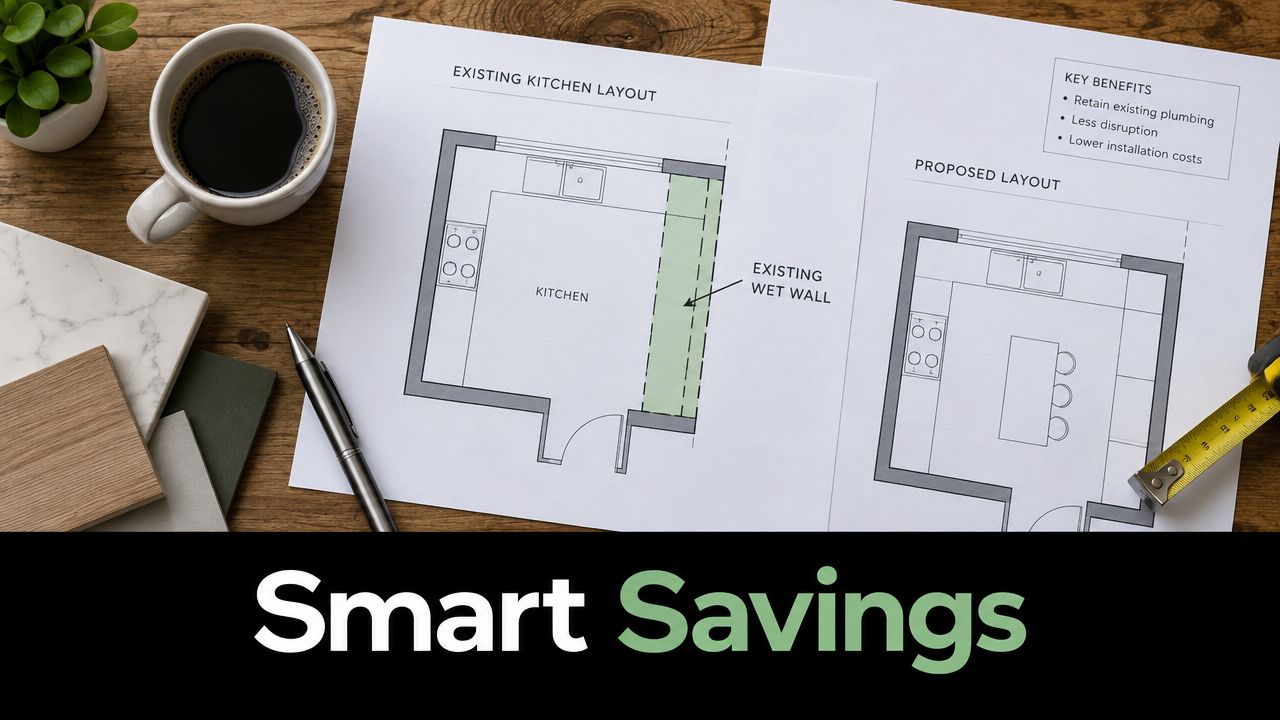
Keep the existing layout if it works. Retaining the sink, dishwasher, cooktop, and main service positions usually avoids substantial plumbing and electrical disruption. In our experience, kitchens that keep these locations stay far closer to the original estimate than full reconfigurations. Spend on function first, then refine the appearance.

Spend where use exposes weakness

Select a durable mid-range benchtop rather than paying for a premium surface for status alone. A well-specified engineered surface can provide the appearance and performance most households need without making the benchtop the project's dominant upgrade.

Coordinate appliance purchases where possible. One supplier and one delivery sequence can reduce mismatched dimensions, storage conflicts, and last-minute substitutions. Confirm every model before cabinetry production, particularly refrigerators, integrated dishwashers, ovens, rangehoods, and sinks.

Group trade work under a written programme. Demolition, rough-in services, plastering, flooring, cabinetry, templating, benchtop installation, splashback work, and final connections need a deliberate sequence. Batching does not mean rushing. It prevents trades from returning because the preceding work was incomplete.

False economies to reject

  • Unlicensed trades: A low price cannot offset defective work, weak records, or difficulty securing rectification.
  • Undocumented waterproofing: Wet-area work requires clear records and compliant installation, including projects that add laundry or bathroom work to a kitchen renovation.
  • Skipped approvals: Assess structural alterations properly. Confirm any required building permit and practitioner involvement before demolition.
  • Unspecified products: “Stone top” and “quality cabinetry” are allowances, not savings. Without defined products, the decision returns when the budget is already under pressure.

Keep a contingency for concealed damage, non-compliant wiring, access problems, material changes, and decisions made after walls or floors open. Removing that allowance does not remove the risk. It transfers the cost to borrowing, rushed substitutions, or an unfinished kitchen.

The best savings preserve useful storage, sensible appliances, durable finishes, and a workable layout. Trend-led changes that complicate the room without improving daily use are the first items to cut. Use this practical guide to keep a renovation on schedule and under budget and approve every variation in writing before work proceeds.

A top-down view of kitchen renovation blueprints on a wooden desk with a coffee cup and samples.

Return on Investment and Resale Logic in Victoria

A kitchen renovation budget must work for two outcomes: a better room now and a property that remains easy to sell later. The Housing Industry Association suggests allocating around 5%–8% of the home's value to a kitchen renovation. Use that benchmark as a proportion check, not a promised resale return.

On a A$750,000 property, the range is approximately A$37,500–A$60,000. The figure gives homeowners, investors, and families a practical test for whether the proposed scope fits the property and its surrounding market. A renovation that pushes well beyond that range needs a clear reason, such as a poor existing layout, a long-term plan to stay, or a standard of finish expected in comparable homes.

A Highett kitchen should look appropriate to the house and perform reliably every day. Buyers usually respond to useful storage, clear circulation, dependable appliances, durable benchtops, effective lighting, and workmanship that needs no immediate correction. Distinctive design can help, but an expensive feature earns its place only when it improves the room without narrowing buyer appeal.

Where the premium usually earns its place

Mid-range upgrades usually balance daily benefit and resale sense better than highly specialised statements. Soft-close drawers, planned pantry storage, integrated handles, induction cooking, quality lighting, and a durable benchtop improve use without making every component bespoke.

Bathrooms follow the same resale logic. New bathroom ideas may look compelling in an inspiration gallery, but assess whether they improve storage, cleaning, ventilation, lighting, and access. Australian trend coverage identifies pink marble, pale blue, brick-look tiles, neutral terrazzo, and small square tiles among current style directions, as shown in Australian bathroom design trend coverage. Use trends on replaceable finishes, not in the room's layout or core services.

Luxury imported materials, unusual appliances, and commercial-scale features can suit a particular household, yet they rarely guarantee an equivalent resale gain. Ask what the next dollar improves: function, durability, or buyer confidence. If it mainly signals expense, remove it from the core kitchen renovation budget. Protect the layout and workmanship first.

Putting It Together and Requesting a Detailed Quote

The quote in your inbox should be your starting point. Work backwards from each line item to test whether the scope, finish level, site conditions, and design decisions justify the total. Before inviting builders to price the work, measure the room, photograph every wall and service point, record ceiling height, and note access limits. Include adjoining rooms if flooring, walls, doorways, or electrical circuits could be affected.

Prepare the brief before the site visit

Record the decisions that determine the project category:

  1. Document existing conditions. Photograph cabinetry, flooring, plumbing points, electrical outlets, windows, doors, ceilings, and visible damage.
  2. Set the layout direction. State whether you will retain the footprint, change the arrangement, or investigate structural work.
  3. List required functions. Cover storage, cooking equipment, seating, pantry capacity, waste sorting, ventilation, and appliance integration.
  4. Set the finish level. Identify the preferred cabinetry finish, benchtop category, splashback, handles, sink, tapware, flooring, and lighting.
  5. Provide the appliance schedule. Supply exact model dimensions where possible, rather than broad product categories.
  6. Separate kitchen and wet-area scopes. If the project includes bathroom renovations, laundry work, or new bathroom ideas, document and price each area independently.

Request itemised proposals from at least three suitably registered builders. Confirm who handles design, demolition, services, cabinetry, relevant waterproofing, permits, certification, waste, and final connections. In Victoria, check that the contractor's registration, insurance arrangements, and contracting entity align with the work. DBU and DBL requirements can affect which builder is suitable for the job.

A quote from SitePro Bathrooms can be structured as a line-by-line proposal around the selected scope, finish tier, site conditions, and design requirements. Test it like any other quote. Ask how it addresses access, heritage overlays where applicable, service discoveries, selections, variations, and the contingency.

A person taking photos and measuring kitchen countertops to prepare for a home renovation project estimate.

Use this guide to hiring a contractor for a kitchen remodel to compare registration, scope, documentation, communication, and contract terms.

Before signing, identify waterproofing and plumbing certification separately where wet areas are involved. Keep the 15%–20% contingency in available funds, not only in a spreadsheet. Then book a 30-minute scoping call, prepare a one-page brief with photos and selections, and request a detailed proposal within ten business days. This process turns a vague kitchen renovation budget into a buildable decision.

Measure the room, assemble the brief, and contact SitePro Bathrooms to book the scoping call. Bring your preferred layout, appliance list, finish direction, and budget tier so the Highett site and proposed work can be assessed accurately.

  • siteprobathrooms

Bathroom Waterproofing Services: The Complete Guide

Australian construction reporting estimates that 20% to 40% of modern multi-unit residential buildings have some form of waterproofing defect, while a 2023 NSW survey identified serious waterproofing issues in 42% of new strata apartment buildings. The reported annual economic cost of waterproofing defects in new residential apartment construction reaches $121 million to $314 million across Australia. Australian industry reporting on waterproofing failures

Those figures change how a Victorian homeowner should view bathroom waterproofing services. Waterproofing isn't a quick coat of sealant hidden behind tiles. It's a controlled system that manages water at junctions, penetrations, floors, walls, thresholds and drains before moisture can reach framing or adjoining rooms. A beautiful bathroom renovation can still become a costly failure if that invisible work is rushed.

The Hidden Reality of Bathroom Waterproofing Defects

A tiled surface looks watertight, but tiles and grout aren't the primary waterproof barrier. Water can pass through grout joints, movement cracks, poorly sealed pipe penetrations and gaps around fixtures. Once it reaches the substrate, the damage may remain hidden until paint lifts, skirtings swell, flooring moves or mould appears on the other side of a wall.

The defect figures are particularly relevant to landlords, body corporates and owners of apartments, where water can travel into neighbouring rooms or units. In a detached home, a failed shower may damage wall framing and flooring. In a strata building, the same failure can create disputes over responsibility, access and remediation.

What professional waterproofing includes

A proper service begins before any membrane is applied. The contractor needs to inspect the substrate, confirm that surfaces are sound and clean, check falls towards the waste, and identify movement joints, corners, pipe penetrations and changes in material. Dust, loose adhesive, moisture, contamination and uneven surfaces can all compromise adhesion.

The work normally involves:

  • Substrate preparation: Remove weak material, repair defects and create a stable surface.
  • Junction treatment: Reinforce wall-to-floor corners, internal corners and movement-prone transitions.
  • Penetration sealing: Seal around wastes, pipes, mixer bodies and other openings.
  • Membrane installation: Apply a compatible liquid or sheet system to the specified areas.
  • Inspection and records: Retain product details, photographs and compliance documentation before tiling conceals the work.

Practical rule: If the membrane is being treated as an afterthought, the renovation is already being managed in the wrong order.

Cheap shortcuts usually involve one of three failures: applying membrane over an unsuitable surface, omitting reinforcement at transitions, or allowing tiling to start before the system has cured. A small saving at this stage can leave the owner paying for demolition, drying, replacement materials and coordination between several trades.

Professional bathroom waterproofing services protect more than the shower. They protect the subfloor, wall structure, finishes in adjoining rooms and the owner's ability to demonstrate that the work was completed properly. That's why waterproofing belongs in the risk plan for every serious bathroom renovation, not just in the tiler's checklist.

Navigating Australian Standards and Compliance Requirements

In Victoria, bathroom waterproofing is a code-governed risk-control task, not just a final coating beneath the tiles. The National Construction Code and AS 3740:2021 set the framework for wet-area design and installation. Victorian Building Authority guidance identifies shower walls as waterproofed to 1,800 mm above the floor substrate. For an unenclosed shower, the waterproofed area must extend 1.5 metres from the shower rose connection. Victorian Building Authority guidance on wet-area waterproofing

The NCC also controls how water is contained beneath and around the shower. Where a shower has a hob, step-down or level threshold, the shower floor must be waterproof. A wet-area floor with a timber-based substrate must be fully waterproofed. NCC wet-area waterproofing provisions

A female construction engineer in a hard hat reviewing blueprints with compliance manuals and a laptop.

The measurements that affect your layout

The shower carries the highest water load, so its wall height and surrounding coverage must be resolved before finishes are selected. Australian guidance based on AS 3740 commonly specifies shower walls to 1,800 mm, bathroom wet-area walls to 150 mm, and wider floor coverage where the bathroom sits on an upper storey or includes timber flooring. Australian guidance on bathroom waterproofing requirements

AS 3740-based requirements also identify shower wall height as 1,800 mm above the floor substrate or 50 mm above the shower rose, whichever is higher. That requirement affects layouts with a high-mounted rose or multiple outlets. It should be resolved on the drawings, not left for the installer to interpret after the walls are lined.

A level-entry shower provides a clean, accessible layout, but removes the containment offered by a raised hob. Frameless glass, open showering and large-format finishes place greater pressure on falls, floor coverage, thresholds and drainage. These design choices make compliant detailing part of the room's overall risk plan.

What homeowners should request

Before work starts, ask the builder or waterproofer to mark the waterproofed zones on the plan, identify the membrane system, explain treatment of corners and penetrations, and confirm when tiling can begin. This Australian waterproofing standards guide can help prepare questions before a renovation scope is signed.

Keep the evidence. Photograph the membrane before it is covered, retain product information and obtain the relevant completion documentation. The records do not compensate for poor workmanship, but they provide a clear trail for inspections, future repairs and questions about how the work was completed. Compliance affects more than paperwork. Incomplete or non-compliant waterproofing can disrupt inspection timing, delay tiling sign-off and leave defects exposed long after the bathroom appears finished.

Waterproofing Systems and Materials for Modern Bathrooms

The right membrane system depends on the substrate, room configuration, movement risk and finish. There isn't one material that suits every bathroom, and a product choice made without considering the whole assembly can create problems at the corners, drains or thresholds.

Liquid-applied membranes

Liquid membranes are brushed or rolled onto prepared surfaces and built to the manufacturer's required thickness. They work well around irregular shapes, niches, junctions and penetrations because the installer can form a continuous coating around complicated geometry.

Their weakness is application discipline. A thin patch, missed corner or contaminated surface can undermine the system. The installer must respect recoat and curing requirements, and shouldn't assume that a surface looks ready just because it has changed colour.

Sheet membranes and bonded systems

Sheet membranes provide a manufactured layer with consistent thickness. They can be useful where the design calls for a highly controlled waterproofing build-up, particularly around prefabricated components and planned junctions. The seams, corners and penetrations still need careful treatment, however. A sheet system is only as reliable as its overlaps, bonds and connections to the drain.

Some waterproof backer panels combine a stable tile substrate with waterproofing. These systems can simplify wall construction, but they don't eliminate the need to seal every joint, corner and service penetration. The complete assembly matters more than the label on one component.

Bond-breakers and movement zones

Wall-to-floor junctions, internal corners and changes between different substrates deserve special treatment. Bond-breakers and reinforcing materials help manage movement and reduce the chance that a rigid coating will crack at a vulnerable transition.

The design itself dictates the waterproofing footprint. New bathroom ideas featuring a level threshold, open shower or frameless screen leave less room for water to be contained. Upper-floor bathrooms and rooms with timber-based floors also require broader protection under the relevant provisions. A conventional enclosed shower may have a more limited exposure pattern, while modern bathrooms often distribute water across a larger area.

A designer finish doesn't reduce technical risk. It usually makes accurate falls, concealed junctions and documented waterproofing more important.

Current Australian renovation media is also promoting natural materials and a shift from glossy finishes towards matte surfaces in modern bathroom design. Contemporary bathroom design ideas can help with the visual direction, but the waterproofing design must come first. Porcelain, stone-look surfaces, textured finishes and dark matte fittings still depend on a sound substrate and correctly managed moisture beneath them.

For homeowners considering bathroom waterproofing paint and membrane options, the key question isn't whether a coating appears thick or impressive. Ask whether the proposed system is compatible with the substrate, suitable for the wet-area design and installed with the required reinforcement, coverage and curing.

The Professional Waterproofing Process and Timeline

A well-run bathroom renovation moves through waterproofing in a deliberate sequence. The plumber, builder, waterproofer and tiler each have a defined handover point, and the next trade shouldn't proceed merely because the room looks close to finished.

Preparation comes before product

The first visit to the stripped room should reveal the condition of the substrate. The team checks for loose material, contamination, damaged sheeting, movement, inadequate falls and openings around plumbing. If the surface isn't stable, membrane application only hides the problem.

The plumber completes the relevant rough-in work before waterproofing. Wastes, pipe penetrations and mixer positions need to be settled, because each penetration must connect properly with the membrane. Changing a fitting after waterproofing can mean cutting into the system and creating a new vulnerability.

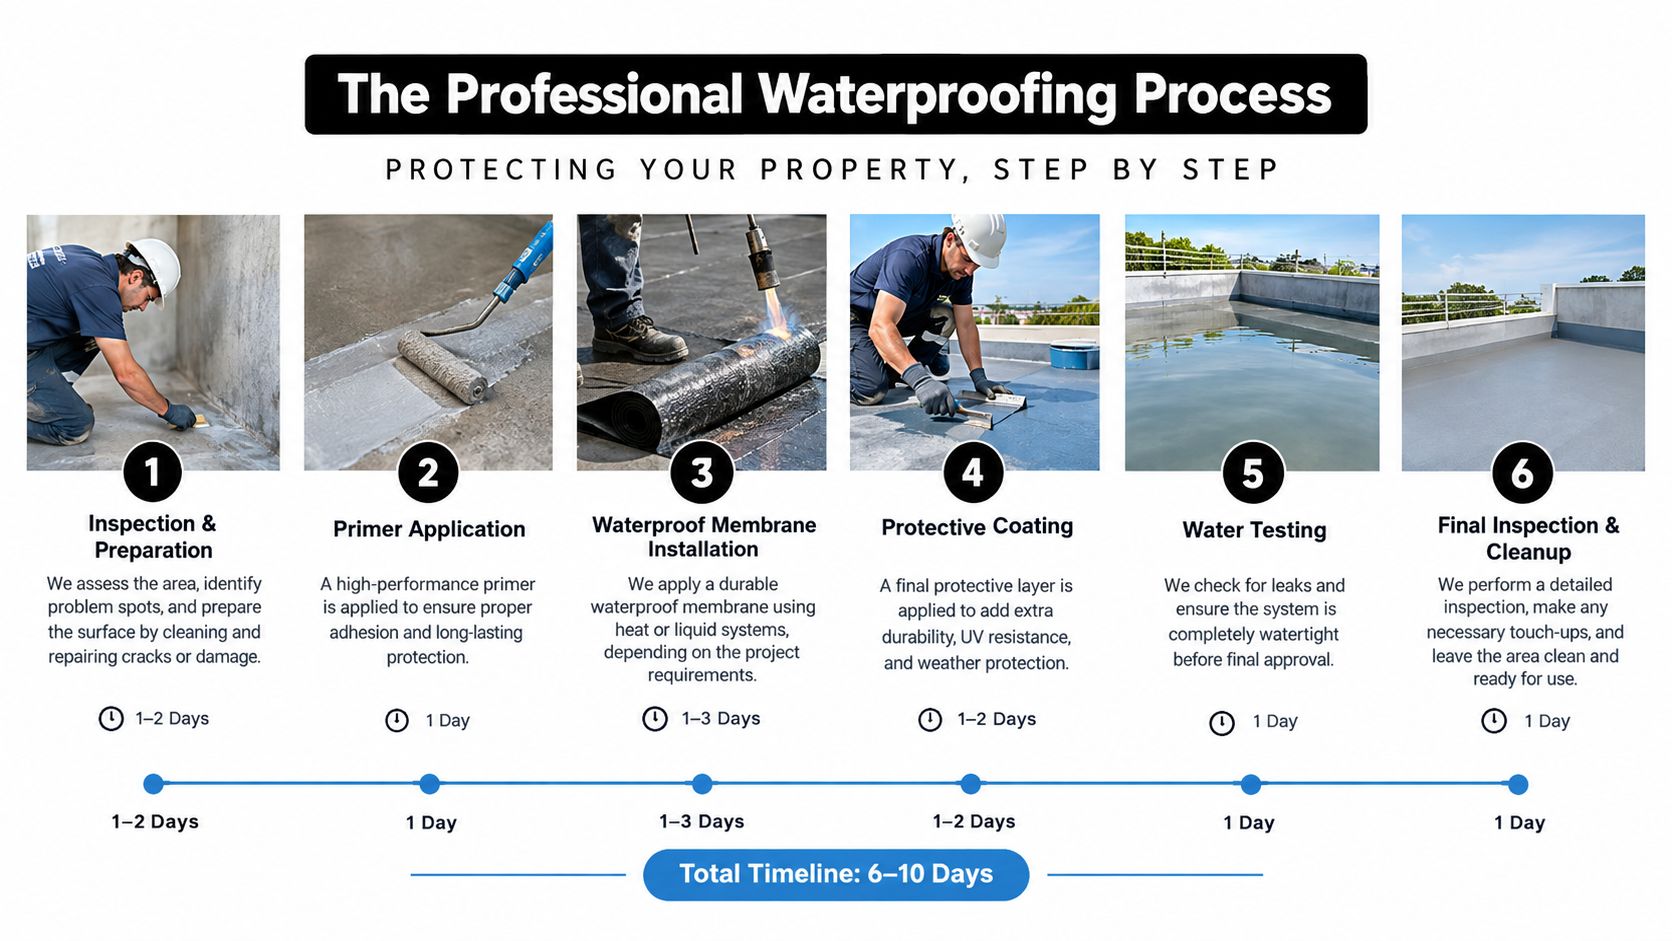
A step-by-step professional waterproofing process infographic showing inspection, primer application, membrane installation, coating, and testing stages.

The membrane sequence

Once the substrate is ready, the installer applies the compatible primer where required. Corners, wall-to-floor junctions and penetrations receive the specified reinforcement or seal treatment. The membrane then goes on in the required coats or sheets, with attention to coverage and transitions rather than just the centre of the room.

The shower floor needs correct falls to the waste, and a level threshold demands careful coordination between the floor build-up, screen and adjacent finishes. The installer should inspect the completed membrane for pinholes, thin areas, missed edges and damage caused by later access.

Curing controls the programme

Membranes need time to cure before tiling. The exact waiting period depends on the system, conditions and manufacturer's instructions, so a responsible builder builds that allowance into the renovation schedule rather than promising an arbitrary fast handover.

During the curing phase, other trades shouldn't store materials on the membrane, drag tools across it or drill through it. The tiler begins only after the waterproofing has been inspected, documented and released for covering. Rushing this handover can trap moisture, weaken adhesion or damage the membrane beneath a finished surface.

The final stage includes careful tiling, flexible sealing at movement-prone junctions and installation of fixtures without puncturing protected zones. A professional process may feel slower during the invisible stages, but it reduces the chance that a completed bathroom will need to be dismantled to find a leak.

Cost Factors and Warning Signs of Water Damage

A waterproofing quote should reflect the actual condition and design of the room, not just its floor area. Two bathrooms with similar dimensions can require very different preparation, detailing and coordination. An upper-floor renovation, a level-entry shower and a damaged timber substrate all change the work involved.

Key Cost Drivers in Bathroom Waterproofing

Cost Factor Impact on Price Why It Matters
Room size and coverage More surface area increases preparation and membrane application work Larger or more exposed wet areas require broader, consistent coverage
Substrate condition Repairs and removal add labour and materials Membrane can't compensate for rotten, unstable or contaminated surfaces
Layout complexity Open showers, niches, thresholds and multiple penetrations require more detailing Each transition creates another point that must be sealed correctly
Floor construction Timber-based or upper-storey floors may require full-floor waterproofing The substrate and location affect the required protection
Trade coordination Extra planning can increase project management effort Plumbing changes, inspections and curing affect the renovation sequence

A low quote may exclude preparation, junction reinforcement, documentation or return visits. Before comparing prices, ask whether the estimate includes demolition of failed materials, substrate repairs, primer, membrane coats, detailing around drains and penetrations, inspection and protection before tiling. Bathroom waterproofing cost considerations can help you understand the questions behind a quote.

Signs that moisture has already travelled

Look beyond the shower itself. Peeling paint on an adjacent wall, swollen skirting, a musty smell, mould growth, staining below a bathroom or a floor that feels spongy can indicate moisture ingress. Loose tiles and failed grout may be cosmetic, but they can also signal movement or water behind the finish.

Don't cover these signs with fresh paint or new silicone. A targeted repair may be appropriate where the membrane remains continuous and the damage is localised. If the substrate has softened, framing has deteriorated or the waterproofing path is unknown, removing the affected wall and floor areas may be the safer approach.

Early warning: A dry-looking surface doesn't prove that the structure beneath it is dry. Investigate the source before choosing a cosmetic fix.

The financial decision should account for access and repeat work. Replacing a visible finish is disruptive. Removing a newly tiled bathroom because the membrane was never properly connected to the drain is far more disruptive. A detailed initial scope is usually easier to defend than a cheap allowance followed by variations once the room is open.

Choosing SitePro Bathrooms for Your Renovation

Waterproofing quality depends on the person applying the system, but it also depends on who coordinates the complete renovation. Plumbing, substrate work, waterproofing, tiling, cabinetry, glazing and final fixtures must meet in the same room without one trade undoing another's work.

A Domestic Builder Unlimited is a Victorian practitioner category that can cover all components of domestic building work on Class 1, 2, 4 and 10 buildings. Victorian domestic building licensing information also distinguishes broader building coordination from isolated tasks. Tiling or plumbing performed on its own may not require registration with the Building Practitioners Board, so the value of the registered builder is the accountable management of the wider renovation scope.

Questions worth asking before appointment

A serious contractor should answer practical questions clearly:

  • Who coordinates the wet-area sequence? Confirm who manages the plumber, waterproofer, tiler and inspection points.
  • What documentation will you receive? Ask about product details, photographs, compliance records and completion paperwork.
  • How are variations handled? Clarify what happens if demolition reveals damaged substrate or altered plumbing.
  • What does the design include? If you want new bathroom ideas, modern bathrooms or designer bathrooms, ask for drawings or 3D visualisation before construction.
  • How is the programme protected? Confirm that curing and inspection allowances are included rather than treated as avoidable delays.

A contractor who discusses only tiles and tapware is missing the risk beneath the finish. The better conversation covers falls, penetrations, thresholds, substrate condition, membrane compatibility and the handover between waterproofing and tiling.

SitePro Bathrooms operates from Highett and provides coordinated bathroom renovation services that include concept development, 3D design, construction and finishing. Its renovation scope includes floor and wall waterproofing, sealing membranes, treating critical junctions, and sealing to drains and edges before tiling.

That approach suits homeowners who want one organised renovation pathway rather than a chain of disconnected appointments. It also gives landlords, investors and body corporates a clearer point of responsibility when the project involves access planning, compliance records and durable finishes.

The right choice isn't based on the lowest waterproofing allowance. Choose a builder who can explain the system, document the work and protect the design from shortcuts. For homeowners in Highett and greater Victoria, contact SitePro Bathrooms to discuss your bathroom layout, substrate, waterproofing requirements and preferred finish, then request a customized renovation consultation before construction begins.


If you're planning bathroom renovations in Highett or elsewhere in Victoria, contact SitePro Bathrooms today to arrange a consultation and develop a code-conscious plan for a durable, well-designed bathroom.

  • siteprobathrooms

Modern Cabinets Kitchen Ideas for Stylish Homes

You're standing in a dated kitchen with a crowded benchtop, awkward cupboards and nowhere sensible to put the appliances. The room may still look serviceable, but every meal involves extra steps, doors collide, and the visual noise makes the whole home feel less organised. That's the point at which many homeowners search for modern cabinets kitchen ideas, expecting a colour recommendation when decision is much broader.

Modern cabinetry is a coordinated system of storage, workflow, materials, hardware and installation. The finish matters, but so do the board inside the doors, the way drawers carry weight, the sealing around exposed edges and the accuracy of the installation. Those choices also influence nearby spaces, including bathroom renovations, because a whole-home renovation looks more deliberate when kitchens and bathrooms share a practical design language.

Introduction to Modern Kitchen Cabinets Today

Leah begins her renovation with a familiar problem. Her old kitchen has timber doors, a few deep cupboards and a benchtop buried under mail, small appliances and food containers. She first asks for white slab doors because she likes the calm look of modern kitchens. After the layout is mapped, the issue becomes clear: plates, pans and cleaning products are competing for the same storage zones.

That shift changes the brief. Modern doesn't mean white, handleless or expensive. It means every cabinet has a clear role, the fronts create orderly lines, and the room supports daily movement. A modern cabinets kitchen can use warm timber veneer, soft neutral laminate or a deeper colour. The finish needs to suit the household, while the overall arrangement remains purposeful.

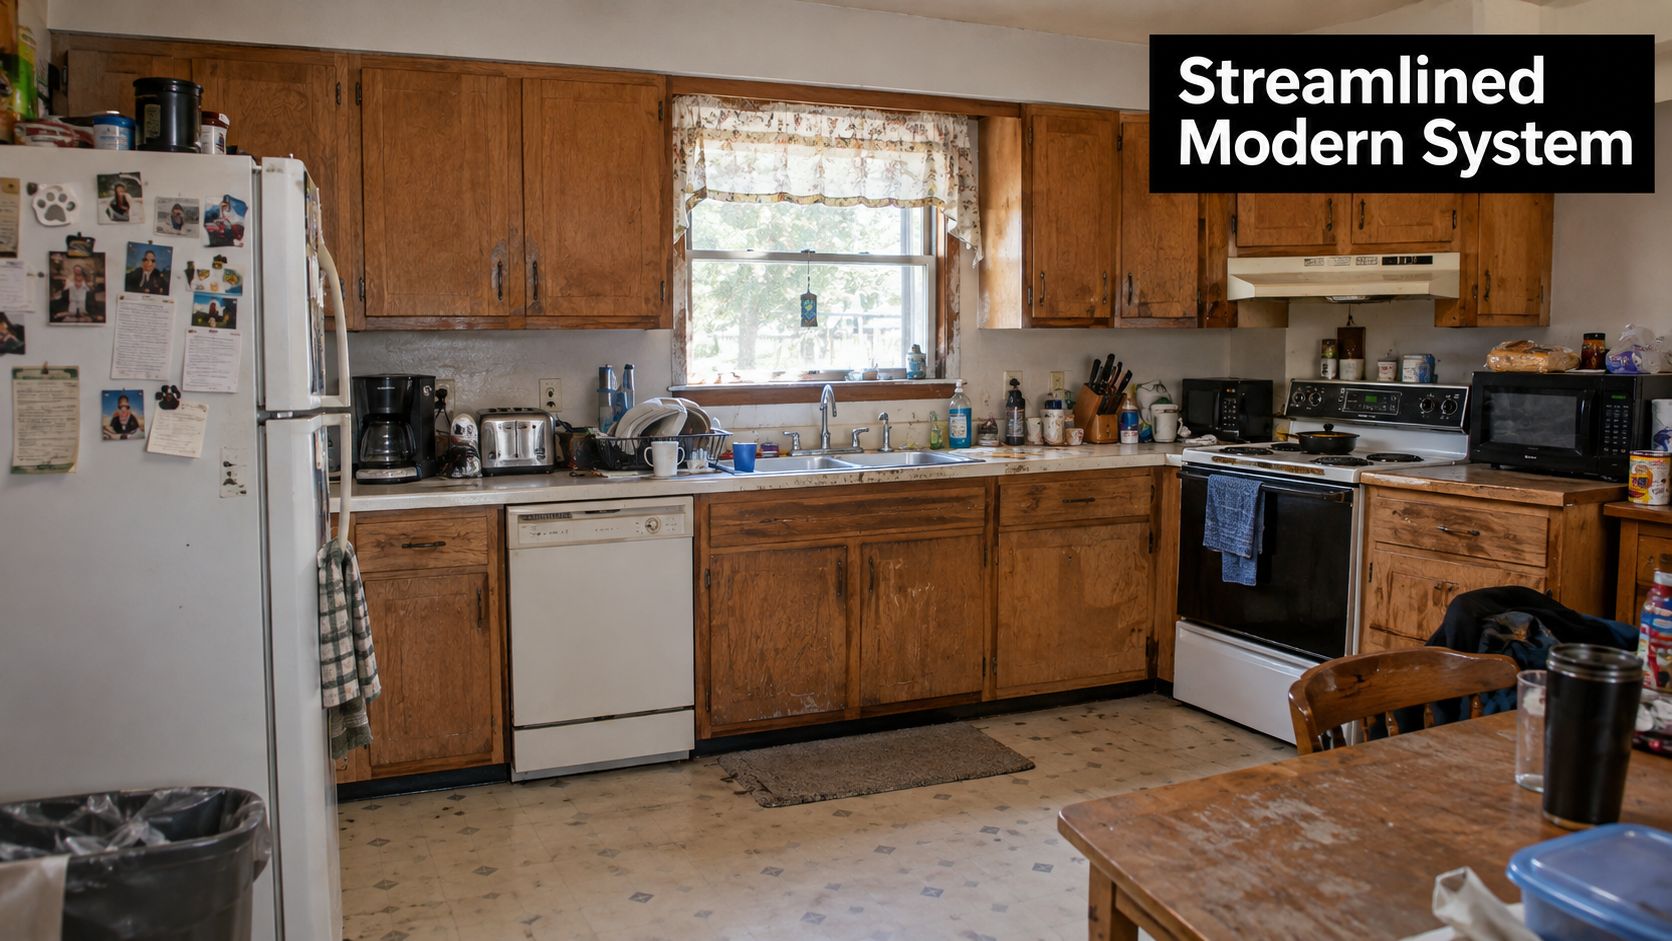
A dated residential kitchen featuring wooden cabinetry, white appliances, and a cluttered countertop in a home setting.

Cabinets deserve attention early because they occupy much of the room's visual field and represent a major part of the project value. Australia's kitchen cabinets market was estimated at USD 83 million in 2025 and projected to reach USD 98 million by 2032, with growth of about 2.4% CAGR, according to the Australia kitchen cabinets market outlook. The same source reported that cabinets represented 53.74% of value in 2025 within the broader Australian kitchen furniture market, making them its largest product category.

Modern means coordinated, not merely minimal

A strong result joins appearance with construction. A clean door profile can make a compact room feel calmer, while a well-planned drawer stack removes the frustration that prompted the renovation. Cabinet decisions also set a useful design direction for bathroom vanities, laundry storage and other built-in joinery. Matching every room is unnecessary, but consistent colours, proportions and durability expectations help the whole-home renovation feel planned rather than pieced together.

Practical rule: Choose the cabinet system around your routines first, then use colour and finish to express your style.

Australian renovation choices show why white remains a practical reference point. Houzz Australia reported that 59% of Australian renovators chose white kitchen cabinets, while the average kitchen renovation spend was $19,300. Its Australian renovation findings placed average spending at $22,600 for large kitchens over 10 square metres and $14,600 for small kitchens under 10 square metres. These figures do not set your budget, but they show why cabinet planning belongs near the start of the renovation, before decorative decisions and before bathroom work is coordinated around the same practical priorities.

What Makes Cabinets Modern and How They Work

Modern cabinetry usually starts with the door. Flat-panel, or slab, fronts remove the raised profiles and decorative grooves associated with traditional joinery. The result resembles a custom suit rather than an off-the-rack outfit. The individual pieces may be modular, but consistent gaps, aligned rails and carefully selected proportions make the finished wall feel custom.

Handleless rails, recessed pulls and small horizontal handles keep the eye moving across the room. Visible hardware can still work, particularly when it repeats elsewhere, but it should look intentional rather than added as an afterthought. Integrated appliances extend the same idea by allowing the refrigerator, dishwasher or rangehood to sit behind matching panels where the layout and appliance specifications permit it.

Start with proportion and ergonomics

A modern kitchen can look elegant in a drawing and still feel uncomfortable in use. Work through these practical checks:

  1. Measure the room accurately. Record wall lengths, ceiling height, window positions, door swings, service points and any changes in floor level.
  2. Map appliance clearances. Cabinet doors, drawer fronts and appliance doors need room to open without blocking a passage or another work zone.
  3. Review working height. Australian kitchens commonly use base cabinet bodies around 720 mm high and 560 mm deep, with a plinth and benchtop bringing the working height to roughly 900 mm, as outlined in guidance on standard Australian kitchen cabinet sizes.
  4. Coordinate the installation. A level benchtop depends on more than the cabinet box. Floor conditions, wall alignment, fixing points and the final benchtop thickness all interact.

The relevant Australian standard is AS 4386:2018, which sets minimum requirements for the design, manufacture and installation of cabinetry in the built environment, including kitchens and built-in furniture. The AS 4386:2018 standard information matters because cabinet performance depends on construction and installation tolerances, not just the selected dimensions.

Know which style you're naming

Modern refers to a defined design language built around simplicity, function and clean lines. Contemporary describes what feels current, so it can combine modern slab fronts with warm timber, patterned surfaces or details borrowed from other styles. Hamptons kitchens usually introduce more traditional cues, such as framed or panelled doors, stronger moulding and a lighter coastal character.

You don't need to use the labels perfectly when briefing a designer. Bring examples and describe what you want to feel, such as quiet, warm, or family-friendly. Then ask how those preferences will affect maintenance, storage and cost.

Materials Finishes and Hardware That Last

The cabinet door is the visible part, but the substrate and edge treatment often decide how the kitchen copes with moisture, heat and daily impact. A useful specification separates four layers: the carcass, the door or drawer front, the surface finish and the hardware. Judging only the colour is like choosing a car by its paint while ignoring the engine.

Engineered board is common in modern cabinetry because it creates stable, consistent panels. In wet-prone parts of a home, ask for a moisture-resistant grade and check where exposed edges are sealed. Poorly sealed edges can allow moisture to reach the board, particularly beneath sinks, beside dishwashers or near a bathroom vanity.

Compare the visible finishes

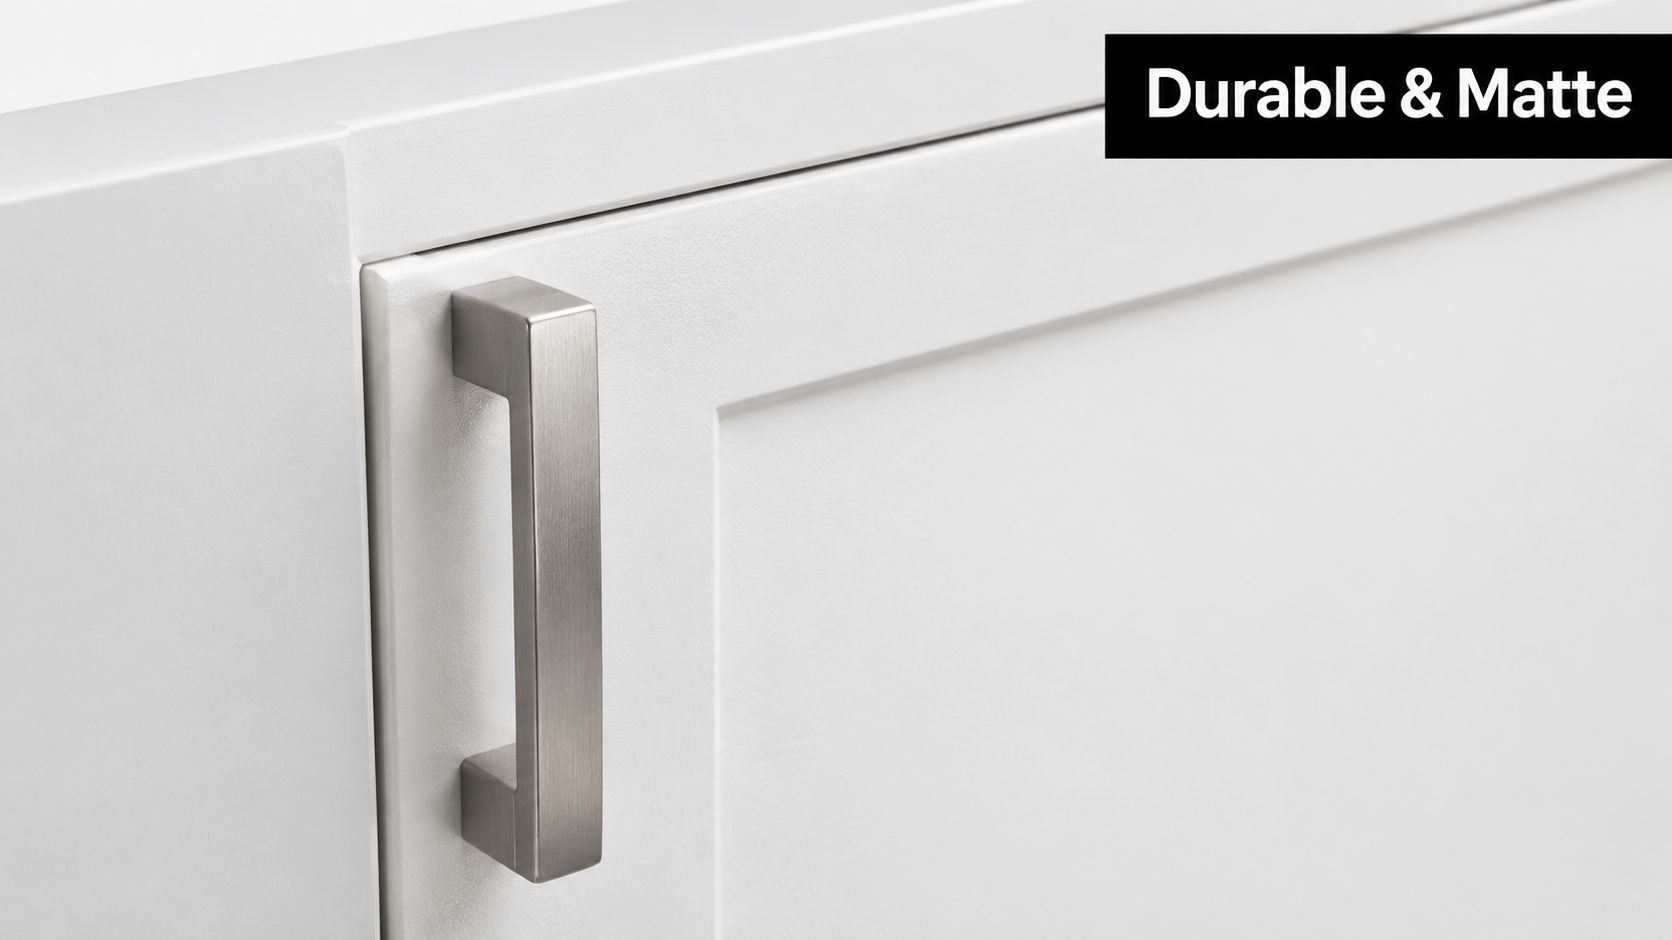
  • Matte laminate hides some fingerprints and gives a soft, low-glare appearance. It's often forgiving in busy family kitchens, although textured surfaces can hold dust in their pattern.
  • Gloss surfaces reflect light and can brighten a compact room. They also reveal smudges, fine scratches and unevenness more readily, so cleaning becomes part of the visual maintenance.
  • Textured laminate adds warmth and tactile interest without requiring natural timber. Check the grain direction and cleanability before using it across large areas.
  • Timber veneer offers natural variation and can connect a kitchen with flooring, shelving or bathroom joinery. It needs a compatible protective finish and careful control of moisture.
  • Two-pack painted finishes allow a broad colour range and a refined appearance. They can create a beautiful result, but the specification should address touch-up expectations and the risk of impact damage.

Modern materials also need an indoor-air-quality conversation. A 2023 technical data sheet for moisture-resistant MDF reported a total VOC emission rate below 0.005 mg/m²/hr and a formaldehyde emission rate of 0.017 mg/m²/hr. The MR MDF technical data sheet provides those reported emission figures. For a Victorian home or compact apartment, specify low-emission board, seal exposed edges fully and confirm that adhesives and coatings are compatible.

A close up view of a sleek, matte white cabinet door with a modern brushed metal handle.

Hardware controls the daily experience

A door that looks simple still depends on accurate hinges. Soft-close hinges reduce slamming, while full-extension drawer runners let you reach the back of a drawer instead of unloading the front first. Heavy cookware calls for a drawer system designed for the load, not a lightweight runner selected only because it costs less.

Handle choice also affects cleaning. Recessed profiles create a clean appearance, but crumbs can collect in the channel. Small pulls are easy to replace and can provide a clearer grip for wet hands. Before approving the sample, open the doors with one hand, test the drawer reach and wipe the surface with the cleaning products you already use.

For a fuller comparison of board types and surface options, review this guide to kitchen cabinet materials. Ask the renovator to identify the board grade, edge sealing method, hinge adjustment range, drawer load specification and care instructions in writing.

Layout and Storage That Fits How You Cook

A kitchen can look impressive in a showroom yet feel awkward at home. If the fridge, preparation area, cooktop, oven and sink sit in the wrong sequence, every meal creates extra walking and crossing paths. Plan storage around the way food moves through the room, from bringing ingredients in to preparing, cooking, washing and putting items away.

Watch your current kitchen during a normal week. Note where parcels land, where chopping happens, which cupboard becomes a dumping zone and which appliance remains on the benchtop. These observations reveal more than copying a display kitchen designed for another household.

Match the plan to the room

An L-shaped kitchen can separate preparation and cleaning while leaving one side open to a dining or living area. A galley kitchen places storage and work surfaces opposite each other, so passage width, door swings and appliance clearances need careful checking. An island adds preparation space and drawers, but its footprint should improve the workflow rather than narrow the room. A peninsula can provide a useful landing zone where a freestanding island would make movement feel cramped.

Integrated zones keep visual clutter under control because the cabinet plan gives common objects a specific home. A tall pantry can hold dry goods, a drawer near the cooktop can keep utensils within reach, and an appliance garage can store smaller equipment between uses. Storage works like a well-organised toolkit. Each item is easiest to use when it sits beside the task that needs it.

Use the storage type as a decision

Storage Feature Best For Cost and Maintenance Trade-off
Wide drawer stacks Pots, pans, plates and everyday cookware Usually increases hardware and cabinet cost, but improves visibility and access
Pull-out pantry Narrow wall spaces and organised dry-goods storage Makes contents easier to reach, though runners add moving parts to maintain
Corner drawers or carousel systems Recovering difficult corner space Can improve access, but complex mechanisms require careful installation
Appliance garage Concealing small appliances on the benchtop Keeps the room visually calm, but needs ventilation and suitable power planning
Tall utility cabinet Brooms, cleaning products and household supplies Uses vertical space efficiently, but should include secure, moisture-aware storage
Integrated bin drawers Sorting waste close to preparation and cleaning zones Convenient for daily use, but needs regular cleaning and accurate clearance planning

Keep access ahead of appearance

Concealed storage only helps when you can reach it without moving several other items. Keep frequently used cookware and ingredients within comfortable reach, reserve high or deep cupboards for occasional equipment, and separate cleaning products from food storage. A designer can also check whether your preferred kitchen cabinet sizes suit the room before you commit to a front style.

Cabinet decisions also affect later rooms. The clearances, moisture planning and storage habits established in the kitchen can guide bathroom upgrades, where vanity depth, drawer access and cleaning space must work together. Discussing both rooms with a registered builder can help coordinate plumbing, electrical work and cabinetry, reducing the risk that one renovation creates problems for another.

A quiet kitchen isn't an empty kitchen. It's a room where necessary items have a planned place and can be retrieved without disrupting the next task.

Budgeting Costs and Value for Modern Cabinets

Cabinet budgeting becomes clearer when you separate what you see from the work that makes it operate properly. The final price can change with the kitchen's size, drawer quantity, board and finish specifications, hardware grade, integrated appliances, benchtop coordination, and plumbing or electrical changes. Installation also matters. A cheaper cabinet package loses value if doors need repeated adjustment or the benchtop cannot be fitted neatly.

For a practical breakdown of the factors behind cabinet pricing, see this guide to the cost of kitchen cabinets. Use it to build a realistic allowance, then ask each contractor which parts are included. Cabinetry, installation, preparation and related trades may appear as separate costs, so comparing only the cabinet figure can give a misleading impression.

Divide the brief before comparing quotes

Start with must-haves: safe installation, suitable moisture resistance, enough drawer capacity, appliance clearances, and a layout that supports the way you cook. Nice-to-haves may include an appliance garage, interior organisers, feature lighting, or a specialised corner mechanism. Long-term priorities include durable runners, replaceable hardware, sealed edges, and finishes that match your tolerance for cleaning.

A useful test is to ask which features affect daily work and which mainly affect appearance. A well-installed carcass and dependable runners can improve the kitchen every day, while a decorative detail may have less practical value.

Request quotes that list cabinetry, hardware, installation, demolition, plumbing, electrical work, benchtops, splashbacks, and finishing separately. Ask what assumptions sit behind each allowance, especially where walls or floors may need preparation. A clear quote lets you compare different solutions without mistaking a lower starting figure for a lower final cost.

Budget the whole home intelligently

Kitchen decisions often happen alongside bathroom renovations, laundry work, or flooring upgrades. The broader Australian full bathroom renovation spend is estimated at $10,221 to $20,443, with a midpoint of $15,332, and the same scope is reported as about 28% more expensive in Darwin than Hobart, according to the Australian renovation market cost report. Location, access, and service changes can affect how you distribute the renovation budget.

This is why whole-home planning matters. Kitchen plumbing routes, electrical capacity, moisture management, and cabinetry decisions can influence a later bathroom upgrade. Working with a registered builder helps coordinate these trades, much like arranging the pieces of one plan instead of solving each room in isolation.

Choose the cabinet elements you will touch every day before paying for decorative features that may date quickly. A calm finish, sound hardware, and careful installation can keep contributing long after a short-lived colour trend loses its appeal.

Small Kitchens Visual Inspiration and Bathroom Crossover

A compact kitchen doesn't need more visual activity. It needs stronger hierarchy. Light cabinet colours can reflect available light, while slim profiles and uninterrupted runs reduce the number of lines competing for attention. Warm neutrals are useful when a stark white room feels cold, and a carefully chosen two-tone arrangement can separate tall storage from the lower work zone without making the room feel divided.

A clean, modern white galley kitchen with glossy cabinets, sleek countertops, and a reflective mirrored backsplash.

Make the walls work harder

Use vertical storage for items that don't need daily access, and reserve the most convenient drawers for cooking essentials. A mirrored or reflective splashback can visually extend a narrow room, while integrated lighting under wall cabinets removes shadows from the preparation surface. If you're renovating a rental property, a restrained palette and replaceable handles can deliver a polished result without making future repairs unnecessarily complicated.

Two-tone cabinetry can also solve a practical problem. A durable, darker finish on the lower cabinets may tolerate busy foot traffic, while a lighter upper run keeps the eye lifted. The transition should align with a real architectural or functional boundary, such as the benchtop, appliance bank or ceiling line.

Carry the logic into bathrooms

The same principles apply to modern bathrooms. A flat-panel vanity echoes the kitchen's slab-front simplicity, and a wall-hung cabinet can make the floor easier to clean where the construction allows it. Designer bathrooms don't have to rely on elaborate decoration. They can feel considered through consistent hardware, warm neutral tones, concealed storage and lighting placed for real routines.

Australian inspiration galleries reflect that range. Houzz Australia lists 164,479 contemporary bathroom photos and includes ideas such as flat-panel cabinets, curbless showers, vessel sinks, open showers and double vanities in its bathroom design ideas. Australian House & Garden also presents more than 40 bathroom design ideas spanning small, modern, coastal and farmhouse styles in its bathroom inspiration collection.

A cohesive home doesn't require identical rooms. Repeat one or two decisions, such as a warm timber note, brushed metal hardware or a low-clutter cabinet profile, then adapt the materials to each room's moisture and cleaning demands.

Working With a Renovator From 3D Design to Handover

A cabinet renovation runs more smoothly when the design is resolved before demolition begins. Start with a measured site visit, then review the proposed layout, appliance locations, storage types, finishes, lighting and service changes together. A detailed 3D design can reveal a crowded passage, an awkward door swing or an island that blocks the cooking route before those issues become expensive site changes.

Check the working process

Ask how the quote describes materials, installation, preparation work, variations and exclusions. Confirm who coordinates the cabinet installer, plumber, electrician, benchtop fabricator and finishing trades. These people work to connected dimensions, so a change to the sink position or cabinet depth can affect several later tasks.

A practical renovation sequence usually includes:

  1. Concept development, based on your household routines, property constraints and whole-home priorities.
  2. Detailed design, with cabinet elevations, appliance positions, finishes and service locations resolved.
  3. Pre-construction checks, including site measurements, product confirmation and access planning.
  4. Construction and installation, with plumbing, electrical work, cabinetry and surfaces coordinated in the correct order.
  5. Finishing and handover, including adjustments, cleaning, defect review and care instructions.

In Victoria, understand what registration means before signing a building contract. The Building and Plumbing Commission registers individual builders, not businesses or companies, and one key category is Domestic Builder, Unlimited. Victorian guidance explains that registered builders unlimited can personally carry out, manage or arrange subcontractors for all components of domestic building work. Verify the relevant registration details and confirm which person holds responsibility for the work.

Look at completed projects, read testimonials and ask how communication works when a site condition changes. SitePro Bathrooms provides concept development, detailed 3D design, construction and finishing for kitchen and bathroom projects, so it can be one option to discuss when you want a coordinated renovation process. Request a quote that reflects your actual room, storage needs and preferred level of finish, rather than accepting a generic allowance.

A well-managed handover should leave you with adjusted doors, aligned drawers, documented care instructions and a clear process for raising any outstanding items. That final attention is what turns an attractive cabinet plan into a kitchen that works reliably every day.


If your kitchen feels cluttered, uncomfortable or dated, start with a practical design review rather than choosing a door colour in isolation. Explore completed renovation projects, prepare a list of your storage and workflow problems, then contact SitePro Bathrooms to request a quote for a coordinated kitchen or bathroom renovation in Highett and greater Victoria.

  • siteprobathrooms

Kitchen Renovation Timeline: Victorian Home Guide

A typical kitchen renovation timeline in Victoria is usually 8 to 14 weeks for a standard suburban project, not a simple 4-week turnaround. If you're planning structural changes, custom joinery, or premium finishes, that timeline can stretch further, and in some cases much further.

That's the part many homeowners only realise after they've already started collecting tile samples and appliance screenshots. On paper, a renovation can look straightforward. In practice, kitchens move through design decisions, approvals, ordering, demolition, rough-ins, installation, fit-off, and final handover, and every one of those steps has its own dependencies. In Victoria, that process has become even more sensitive to permit timing and material lead times.

If you're in Highett, Melbourne, or elsewhere across greater Victoria, the most useful thing you can do early is stop thinking about the project as one big event and start seeing it as a sequence. Once you understand that sequence, the timeline becomes far less stressful. You can plan meals, work around access issues, decide where to spend money, and avoid the changes that cause the most pain later.

A kitchen project also rarely sits in isolation. Many households planning kitchens are also weighing up bathroom renovations, comparing layouts, and saving inspiration for new bathroom ideas, modern bathrooms, and designer bathrooms at the same time. The planning principles are similar. Good design takes time. Clear decisions save rework. And the right team, including a registered builders unlimited mindset around capability and coordination, makes the job smoother from start to finish.

The Critical Pre-Construction Phase From Ideas to Approvals

The part clients most often underestimate is the phase before construction starts. For a mid-range project, planning commonly takes 4 to 6 weeks, and that timing matters because it sits inside a broader 10 to 18 week renovation window tied to the project's scope, selections, cabinetry lead time, and on-site works, as noted in the HIA Kitchens and Bathrooms Report 2025 summary on kitchen renovation costs and timelines. The same source states that the median cost of a kitchen renovation in Australia is $35,000.

A professional interior designer reviews kitchen renovation plans with a couple in their bright, modern home kitchen.

Start with function, not finishes

Most delays start with decisions that were left too loose. A client might know they want a warm white kitchen, timber accents, and a better island. That's a style direction, not a buildable plan.

Before contracts are signed, these points need to be settled:

  • Layout decisions: Are you keeping the sink, cooktop, and fridge in roughly the same places, or changing the room's working pattern?
  • Storage priorities: Do you need deeper drawers, overhead cupboards to the ceiling, appliance storage, or a better pantry arrangement?
  • Appliance specifications: Cabinet sizes depend on exact appliance models, not estimates.
  • Finish selections: Cabinet profile, benchtop material, handles, splashback, flooring, tapware, and lighting all affect sequencing.

If you're exploring layout options, a practical starting point is to review how an L-shaped kitchen layout can improve flow and storage before locking in cabinetry plans.

Practical rule: If a decision affects cabinet size, plumbing location, electrical points, or stone cut-outs, it must be final before ordering begins.

Approvals, drawings, and what actually keeps a job moving

The strongest planning phase has less to do with colour boards and more to do with coordination. That means measured drawings, realistic specifications, and one clear scope of work that every trade can follow.

A reliable pre-construction checklist includes:

  1. Site measure completed with confirmed wall, window, and service positions.
  2. Design signed off so everyone is building the same kitchen.
  3. Appliances selected with model numbers confirmed.
  4. Joinery drawings approved before manufacturing.
  5. Materials ordered early for any custom or slower lead-time items.
  6. Permits checked if structural work or regulated changes are involved.
  7. Contract and build schedule finalised so the site sequence is clear.

This is also where clients benefit from an experienced builder who can spot trade-offs early. A larger island might look excellent in a rendering, but if it narrows circulation or forces expensive service relocation, it may not be the right choice. A stone splashback can look sharp, but if a tiled finish gives you faster turnaround and easier replacement later, that can be the more practical call.

Well-run projects don't happen because people move fast. They happen because the important decisions are made early, documented properly, and protected from late changes.

Weeks 1-2 The Kick-Off Demolition and Service Rough-In

The first fortnight is when the house starts feeling like a worksite. Cabinets come out, old splashbacks disappear, walls open up, and the hidden condition of the room becomes visible. It's noisy, dusty, and disruptive, but it's also where the project starts earning momentum.

In Melbourne, a standard suburban kitchen renovation commonly has a 4 to 8 week construction timeline, with the most common breakdown allowing 1 week for demolition and 1 to 2 weeks for rough-in plumbing and electrical, according to Melbourne kitchen renovation timeline guidance.

A construction worker wearing a white hard hat and gloves performing kitchen demolition on wooden cabinets.

What demolition should look like

Good demolition is controlled, not chaotic. The goal isn't just to rip out the old kitchen. The goal is to remove it without damaging parts of the home that are staying, and without creating avoidable delays for the next trades.

A well-managed demolition phase usually includes:

  • Protection first: Floor coverings, dust barriers, and pathway protection through adjoining rooms.
  • Utility disconnection: Water, power, and gas are managed before any removal starts.
  • Careful strip-out: Existing cabinets, benchtops, appliances, and sometimes wall linings are removed in a sequence.
  • Waste management: Debris is cleared regularly so the site stays safe and accessible.

If your household includes children, pets, or people working from home, site safety matters from day one. It helps to understand standard construction site safety practices for workers and households before the first trade arrives.

Rough-in is the hidden stage that determines whether the kitchen works

Once the room is stripped back, plumbers and electricians do the first fix. This is the part clients don't see once the kitchen is complete, but it's one of the most important stages in the entire kitchen renovation timeline.

Rough-in work can include relocating or preparing for:

  • sink waste and water lines
  • dishwasher connection points
  • power for ovens, cooktops, rangehoods, fridges, and microwaves
  • lighting circuits and switch positions
  • island services where required

During planning, practical decisions beat trendy ones. Moving plumbing across the room may be possible, but it adds complexity. Adding feature lighting can lift the room, but only if those points are coordinated with cabinetry and ceiling work early.

The kitchen has to function long after the styling fades into the background. Rough-in work is where functionality is locked in.

If there's a mistake here, it usually shows up later as rework. A power point lands behind an appliance where it can't be accessed. A waste line sits too high for the new cabinet design. A pendant location looks centred in the room but off-centre over the island. None of those are dramatic design failures. They're coordination failures, and they cost time.

The first two weeks feel messy because they are. But if demolition is clean and rough-in is accurate, the rest of the build has a stable base.

Weeks 3-5 Building the Bones Walls Floors and Cabinetry

This is the stage where clients stop seeing a stripped shell and start seeing a kitchen again. The heavy disruption settles down, the room gets rebuilt, and the visual transformation becomes obvious. It's also the phase where precision matters most, because every finish that follows depends on the room being straight, level, and properly prepared.

Closing the room back up

After rough-in, the room needs to be made ready for finishes. That often means patching or replacing wall linings, setting corners properly, sanding surfaces, and applying the first coats of paint where needed. If the walls are uneven, cabinetry installation becomes harder and small alignment issues become more visible later.

Flooring decisions also affect sequencing. Some floors are best installed before major joinery goes in, while others are installed around the cabinetry depending on the material and build approach. What matters most is that the builder and installer are working to one coordinated plan.

A polished renovation doesn't come from expensive materials alone. It comes from a room that's been prepared properly so the final lines look clean.

Screenshot from https://siteprobathrooms.com.au

Cabinetry is where planning becomes visible

Cabinet installation is one of the most satisfying milestones in the whole job. You can finally read the layout in full scale. Walkways make sense. Storage starts to feel real. The island, pantry, and work zones become tangible.

What good cabinet installation involves:

  • Levelling every run: If the base cabinets aren't level, benchtops and appliance integration suffer.
  • Checking clearances: Doors, drawers, appliances, and traffic paths all need practical clearance.
  • Aligning bulkheads and panels: Small discrepancies become obvious once the kitchen is lit and finished.
  • Protecting surfaces immediately: New joinery can be damaged quickly if other trades aren't careful.

This is the stage where clients sometimes feel tempted to tweak things. A shelf might seem too high. A drawer stack might look different from what they imagined. Small concerns should absolutely be raised, but this is also why earlier design approval matters so much. Late changes to manufactured joinery aren't simple.

What works and what usually doesn't

Some choices consistently help the project move well. Others create friction.

Decision area What tends to work What often causes trouble
Layout Keeping key services close to original positions where practical Large late-stage layout changes after joinery is ordered
Storage Prioritising drawers and accessible pantry storage Designing around looks alone without daily-use habits
Installation Protecting new cabinetry from the next trades Treating installed joinery as if the room is already finished

Many homeowners planning kitchens are also comparing ideas for bathrooms at the same time. The same lesson applies across kitchens, bathroom renovations, modern bathrooms, and more bespoke designer bathrooms. The most impressive result usually comes from restraint and coordination, not from trying to include every idea at once.

Weeks 6-7 The Finishing Straight Benchtops Splashbacks and Fit-Off

By this point, the room already looks close to complete, but the last stages demand accuracy. A kitchen can feel nearly done while still needing multiple trades to return in the right order. Benchtops, splashbacks, tapware, appliances, and electrical accessories all rely on final measurements and careful installation.

Benchtops are measured after cabinetry for a reason

Stone and many other benchtop materials aren't finalised until the cabinets are installed and checked. That allows the fabricator to template the actual site conditions rather than relying on drawings alone. Even a well-built room can have small tolerances, and templating picks those up before the final surface is cut.

This stage usually involves:

  • Site measure after joinery install
  • Fabrication period
  • Benchtop installation
  • Cut-out confirmation for sinks, taps, and cooktops

If a project has custom edges, unusual shapes, or waterfall ends, precision becomes even more important. Rushing this part often leads to visible issues, and those are the kinds of issues clients notice every day.

Splashbacks and fit-off bring the kitchen to life

Once benchtops are in, the splashback can proceed. Tiled splashbacks remain popular because they're versatile, repairable, and can suit both minimalist and more detailed designs. If you're weighing the terminology or style approach, it helps to read a practical guide on splashback or backsplash and how the choice fits Australian renovations.

A professional construction worker carefully installing white subway tiles as a backsplash in a modern kitchen.

At the same time, second fix trades return to complete the fit-off. That often includes connecting the sink and tapware, finalising appliance hookups, installing switches and power points, fitting lights, and testing services.

A kitchen doesn't become usable when the cabinets go in. It becomes usable when every service is connected, every finish is sealed, and every trade has completed their final detail work.

The trade-offs homeowners should understand

This final phase is where material choices show their practical side.

  • Stone look versus flexibility: A full-height hard finish can look smooth and continuous, but tiled splashbacks often allow easier future repair.
  • Integrated features versus lead time: The more customised the detailing, the more tightly sequencing needs to be managed.
  • Statement finishes versus maintenance: Some finishes photograph beautifully but need more regular cleaning or careful use.

Clients often ask whether this is the “easy” part because the room already looks close to finished. It is, in fact, one of the tighter coordination phases. Several trades may need access in a short window, and one delay can push the next booking. That's why realistic scheduling matters right to the end of the kitchen renovation timeline.

Managing Delays and Final Handover

Most frustration in a renovation comes from not understanding where delays come from. In Victoria, two issues stand out. The first is approvals for structural or regulated work. The second is material timing, especially when the project depends on custom joinery, stone, or imported finishes.

For major structural kitchen changes, homeowners in Victoria now face an average 6 to 9 week administrative lag before construction can begin, and 42% of Melbourne kitchen renovations exceeded their projected timeline due solely to material delays, according to the Master Builders Association Victoria reference on permit delays and material overruns. That's why generic national advice often feels too optimistic for Melbourne and greater Victoria.

The permit-to-begin gap

A lot of published renovation advice starts the clock at demolition. That's useful only if your project doesn't need approvals. If walls are moving, structure is changing, or regulated work triggers extra documentation, your practical start date can shift well before any trade sets foot on site.

What this means in real terms:

  • You can't assume “builder booked” means “build starts now”.
  • Selections may need to be final earlier so drawings and approvals line up.
  • Temporary living arrangements may need a later start date than you first expected.

This delay isn't dramatic because anyone is doing something wrong. It happens because administration, documentation, and compliance now take longer on the kinds of projects that materially alter the space.

Melbourne supply chain pressure

The second issue is procurement. A kitchen can be ready for installation on paper and still stall because a key item hasn't arrived. In Melbourne's current market, that pressure is often felt most sharply in custom cabinetry and benchtop-related materials.

The jobs that stay on track usually have one thing in common. The builder and client commit to selections early enough to order long-lead items during the design phase, not after demolition.

Ordering late doesn't just delay delivery. It breaks the sequencing for everyone else on the job.

A simple risk check before construction should ask:

Risk area Why it delays projects Better approach
Permits Construction can't start until approvals are in place Confirm approval pathway before locking dates
Custom joinery Manufacturing doesn't happen instantly Finalise drawings and sign off early
Stone and specialty finishes Fabrication and delivery slots can shift Book templates and production windows in advance
Client changes Trades and materials have to be re-coordinated Freeze the scope before site works start

Final handover without loose ends

A proper handover is more than a quick walkthrough. The final stage should include touch-ups, sealant checks, appliance testing, adjustments to doors and drawers if needed, and a clear list of any remaining minor items.

Clients should expect to review:

  • Cabinet operation: drawers, hinges, and alignments
  • Benchtop and splashback finish: joins, edges, grout, and sealant
  • Services: lights, switches, outlets, plumbing fixtures, and appliance connections
  • Presentation: cleaning, waste removal, and protection removal

This is the point where patience pays off. A job that runs to a realistic timeline and closes with a proper defects check is almost always less stressful than a rushed project that technically finishes earlier but leaves unresolved problems behind.

Frequently Asked Questions About Renovations

A kitchen timeline becomes real the first morning you have no sink, no cooktop, and trades arriving before 8am. That is usually when Victorian homeowners stop asking abstract design questions and start asking practical ones about access, approvals, deliveries, and how long daily life will stay disrupted.

In Victoria, the right answer often depends on where the property is and what type of work is involved. A weatherboard home in regional Victoria, a unit in Bayside, and an apartment in inner Melbourne can all follow different timelines because council requirements, owners corporation rules, parking access, and supplier lead times are different.

Common questions from Victorian homeowners

Question Answer
How long will my kitchen be out of action? For most full renovations, expect several weeks where proper cooking and washing up are limited or not possible. In Melbourne homes, the disruption often starts as soon as demolition begins and continues until plumbing, electrical fit-off, and appliances are complete. Set up a temporary kitchenette before work starts, not after the cabinets come out.
Are apartment kitchens quicker than house renovations? Sometimes, but not automatically. Apartments are usually smaller, which helps, but Melbourne apartment projects often lose time through lift bookings, restricted delivery hours, protection requirements for common areas, and owners corporation approvals. A smaller room can still be slower if access is tight.
Is a cosmetic update on the same timeline as a full renovation? No. Keeping the existing layout usually shortens the program because plumbing and electrical points stay where they are. Once you start moving services, altering walls, or ordering made-to-order joinery, the timeline changes and the coordination load goes up.
Should appliances be chosen before work starts? Yes. Exact model numbers matter. We use appliance specifications to confirm cabinet sizes, power locations, ventilation requirements, and stone cut-outs. In Victoria, replacement stock can also vary by supplier and port delays still affect some lines, so late appliance decisions can hold up fit-off.
What causes the most avoidable delay? Client selections made too late. Benchtop stone, handles, tapware, tiles, appliances, and paint colours all affect ordering and sequencing. The other common problem in Melbourne is assuming a supplier can deliver "next week" during a busy period. Often they cannot.
Do kitchens in older Victorian homes take longer? Often, yes. In older Melbourne and regional homes, once demolition starts we sometimes find uneven floors, dated wiring, damaged plaster, or plumbing that needs bringing up to standard. Those issues are manageable, but they add time because they must be fixed properly before finishes go in.
Do permits or approvals affect kitchen timelines in Victoria? They can. A straightforward internal renovation may not need the same approval pathway as structural work, but once walls, windows, or building elements change, the approval process can extend the lead-up. Local council timing also varies across Victoria, so it is smart to confirm the pathway before booking trades.
Do kitchen and bathroom renovations follow similar planning rules? Yes. Both rely on accurate documentation, early selections, and disciplined sequencing. The room changes, but the project logic does not. Wet area compliance, service coordination, and access planning still need careful management.
Do I need a registered builder for a kitchen renovation? If the project includes structural work, regulated building work, or multiple trades that need close coordination, the right qualified team matters. Good management is what keeps the electrician, plumber, cabinetmaker, stone supplier, and installer working in the right order instead of waiting on each other.

Practical steps that reduce stress during the build

These are the habits that make a renovation easier to live with in a real Victorian home:

  • Set up a temporary kitchen properly: Use a kettle, microwave, toaster, bar fridge, and a simple washing-up station in another room.
  • Clear access paths early: In many Melbourne suburbs, tight driveways, limited street parking, and narrow side access slow deliveries if the site is cluttered.
  • Make selections before they are needed on site: If the tile shop is still waiting on your final choice when waterproofing or cabinetry is ready, the program starts slipping.
  • Check body corporate or apartment rules in advance: Delivery windows, noise limits, and lift bookings can affect the daily schedule.
  • Reply to site queries quickly: A same-day answer can save a day of delay.

The jobs that finish well are usually the jobs with fewer late decisions, fewer surprises, and clearer expectations from day one.

If you are still comparing ideas, start with the scope of work, the condition of the home, and any approval risks specific to your suburb or building type. That gives you a much more reliable timeline than a generic national estimate.

If you're planning a kitchen or bathroom project in Highett or across greater Victoria, SitePro Bathrooms can help you move from early concepts to final handover with clear planning, detailed design, and coordinated construction. If you'd like a custom quote or advice on your renovation timeline, get in touch through the SitePro Bathrooms contact page.

  • siteprobathrooms

Ensuite Renovation Cost: A 2026 VIC Price Guide

A professional ensuite renovation in Victoria typically lands between $25,000 and $35,000. A light cosmetic update can come in lower, while a luxury project with layout changes, structural work, and premium finishes can rise well beyond that.

If you're pricing an ensuite right now, you've probably already noticed how wide the numbers are. One guide says it's straightforward, another makes it sound cheap, and then the first real quote arrives and the budget shifts fast. That gap usually comes down to two things generic guides miss. Victoria's labour rates are high, and apartment or townhouse projects often carry approval costs and delays that don't show up in headline pricing.

That's why the smartest way to look at ensuite renovation cost isn't as one average figure. It's to understand the renovation tier you're planning, where your money goes, and which choices increase cost without always increasing value.

Ensuite Renovation Costs in 2026 What to Expect in Victoria

For Victorian homeowners, the biggest budgeting mistake is treating an ensuite like a small room that should have a small price tag. In practice, compact bathrooms are often expensive rooms to renovate because they still need the same licensed trades, waterproofing, demolition, tiling precision, and fixture installation as larger bathroom renovations.

Market data and contractor quotes for smaller ensuites in 2025 and 2026 indicate that a realistic budget starts between $25,000 and $30,000 for a standard renovation with professional trades in Victoria, according to Victorian ensuite pricing guidance for standard professional renovations. That starting point catches many homeowners off guard, especially if they've only seen broad national guides.

Cosmetic refresh

A cosmetic refresh is the lower-cost end of the spectrum. It usually means keeping the layout, keeping much of the existing structure, and focusing on surface-level improvement. Think updated tapware, fresh lighting, paint, mirrors, and selective replacement of fittings that are worn but not failing.

This type of work can sit closer to the lower renovation tiers seen across Australia, where basic ensuite renovations are often placed between $12,000 and $15,000 when the work is limited to fixture replacement and minor tiling, based on Australian ensuite tier ranges by scope. In Victoria, though, that figure is only realistic when the scope stays tight and avoids hidden rectification work.

Mid-range renovation

Most homeowners gravitate towards this choice. It usually includes new wall and floor tiling, a new vanity, updated lighting, fresh shower screen, and selected plumbing upgrades without a major relocation of services. For an average-sized ensuite, this is often the sweet spot between visual improvement and sensible spending.

At a broader national level, the most common spend for an average-sized bathroom sits between $25,000 and $30,000 for a standard quality upgrade that includes new tiling, vanity, and tapware, according to Canstar's bathroom renovation cost guide. That aligns closely with what many Victorian homeowners face for a properly managed ensuite.

Practical rule: If you want a genuinely new ensuite, not just a few swapped fittings, budget for a proper renovation rather than a patch-up.

Full-gut and high-end renovation

A full-gut renovation strips the room back and rebuilds it. This is the category for layout changes, larger showers, recessed storage, premium tiles, custom joinery, upgraded ventilation, and the finishes people often associate with modern bathrooms or designer bathrooms.

Builders also sometimes cost bathroom renovations by area, with rates ranging from $2,300 to $4,600 per square metre, while tiling labour alone can sit between $35 and $120 per square metre, according to bathroom renovation pricing by square metre and tiling rates. Once you start adding premium surfaces and detailed installation, the cost rises quickly.

For homeowners collecting new bathroom ideas, the key trade-off is simple. Keeping the existing layout protects the budget. Changing plumbing positions, chasing a more custom look, and specifying higher-end finishes is what pushes an ensuite from standard into premium.

Itemised Breakdown Where Your Renovation Budget Goes

Once homeowners move past the headline number, the next question is usually more useful. Where does the money go?

In Victoria, labour typically accounts for 40% to 50% of the total ensuite renovation budget, and that has a direct effect on the full quote. Plumbers charge about $100 to $150 per hour, while electricians charge about $70 to $95 per hour plus a service fee, according to Victorian ensuite labour and trade rate benchmarks. That's why an ensuite can feel expensive even before you've selected feature tiles or upgraded tapware.

Typical Ensuite Renovation Cost Allocation Victoria

Expense Item Percentage of Budget Estimated Cost Range
Labour and licensed trades 40% to 50% Qualitatively, this is often the largest single share of the budget
Plumbing work Included within labour-led costs Affected by plumber rates of $100 to $150 per hour
Electrical work Included within labour-led costs Affected by electrician rates of $70 to $95 per hour plus service fee
Tiling labour Varies by scope $35 to $120 per square metre
Tile materials Varies by specification $20 to $28/m² for standard white ceramic wall tiles, $86 to $159/m² for handmade or artisan ceramic tiles
Contingency 10% to 20% Reserved for hidden issues and changes

That table doesn't show every single line item because quotes are assembled differently from builder to builder. Some package demolition, waterproofing, installation, and site management together. Others split them out. What matters is understanding which costs are fixed necessities and which are driven by your selections.

The parts homeowners underestimate

The first is preparation. Demolition sounds simple, but careful strip-out matters in a wet area. If the existing substrate is damaged or the framing needs rectification, the job can't move straight into finishes.

The second is waterproofing and tiling. These are not cosmetic extras. They are core performance items. Cheap work here can undo the whole renovation.

A common issue in budget conversations is the DIY assumption. Some homeowners see broad estimates suggesting a tiny ensuite can be completed cheaply if they source a few trades themselves. In Victoria, that usually falls apart at the waterproofing and tiling stage, where compliance requirements and labour pricing are much harder to compress than online guides suggest.

Good ensuite budgets don't start with the tile colour. They start with the non-negotiables: demolition, substrate prep, waterproofing, plumbing, electrical, and installation.

What a solid quote should make clear

When reviewing quotes from registered builders unlimited or specialist renovation teams, look for clarity around:

  • Scope of demolition: What's being removed, protected, and disposed of.
  • Plumbing extent: Whether the quote allows for like-for-like replacement or actual service relocation.
  • Electrical inclusions: Lighting, exhaust, power points, heated mirrors, and switch positions.
  • Waterproofing responsibility: Who performs it and how it's documented.
  • Tile specification: Labour range changes sharply depending on tile size, cuts, and pattern.
  • Joinery detail: Off-the-shelf vanity pricing is very different from custom cabinetry.

The reason detailed quotes matter is simple. A vague low quote often becomes an expensive project later.

Key Factors That Drive Your Renovation Cost

Two ensuites can be almost the same size and finish at very different prices. The room size matters, but it isn't the main driver. Scope, access, product selection, and site conditions are what usually decide whether a project stays sensible or drifts.

Layout changes versus like-for-like replacement

The cheapest version of a renovation is usually the one that respects the existing plumbing and electrical locations. If the shower stays where it is, the toilet stays where it is, and the vanity remains on the same wall, the job is simpler to sequence and easier to control.

Once you start moving services, your ensuite renovation cost changes direction. Wall chasing, new pipe runs, changed wastes, revised lighting positions, and more detailed patching all add labour. If you're still shaping the room, it helps to review practical ensuite design planning ideas before locking in a layout that costs more than it gives back.

Material grade and finish level

Style decisions create the biggest spread. Standard ceramic finishes, simple framed mirrors, and stock vanities can deliver clean modern bathrooms without overloading the budget. Imported tiles, artisan surfaces, custom shower screens, and bespoke joinery move the project toward designer bathrooms.

The difference isn't only the purchase price. Premium products often take longer to install, need more careful handling, or require supporting trades to alter walls, fixings, or lighting around them. That means the finish selection affects both materials and labour.

Why contingency matters

Bathroom renovations expose what the old room has been hiding. Damaged sheeting, past leaks, uneven floors, outdated wiring, and messy previous repairs often only become obvious after demolition.

Across Australia, renovators are advised to allow a 10% to 20% buffer for hidden plumbing, electrical, and structural issues, and labour commonly makes up 40% to 50% of the total renovation budget, according to this bathroom renovation cost breakdown and contingency advice.

Budget test: If removing one upgrade would make you nervous about the total, the allowance is too tight.

A contingency isn't there to encourage overspending. It protects the decision-making process. Without one, homeowners often end up compromising the wrong things. They keep the statement tile and cut back on practical items like storage, ventilation, or proper preparation.

For most projects, the best value comes from a balanced specification. Keep the layout sensible, choose one or two visual features you care about, and spend confidently on the parts you'll never want to reopen later.

Budgeting in Action Three Ensuite Renovation Examples

Real budgeting becomes easier when you stop thinking in categories and start thinking in outcomes. Most homeowners aren't buying “mid-range”. They're buying a cleaner daily routine, better storage, less maintenance, or a more attractive home for future sale or leasing.

A modern bathroom ensuite with a light wood vanity, white countertop, walk-in glass shower, and framed botanical art.

Cosmetic update for a tired ensuite

The owner doesn't hate the room. They hate how dated and worn it feels. The waterproofing isn't being opened up, the layout remains untouched, and the goal is presentation rather than transformation.

This sort of project usually focuses on selective replacement. New tapware, refreshed lighting, updated mirror, painting, resealing, and a few finish upgrades can lift the room sharply. It works best when the original bones are sound. It doesn't work when there's hidden water damage, poor ventilation, cracked tiling, or old shower issues that need proper rectification.

Standard family ensuite renovation

This is the most common practical brief. The owners want a room that feels new, functions better, and looks current without drifting into luxury for luxury's sake. The old vanity is gone, the shower is rebuilt, the room is retiled, storage improves, and the lighting is upgraded.

Many professional Victorian projects attain this standard. The result often looks like the kind of modern bathrooms people save to their inspiration boards, but the successful versions don't chase every trend. They use durable finishes, maintain sensible plumbing positions, and choose fittings that are easy to service later.

A family ensuite at this level usually gives the best value because the money goes into daily use. Better drawer storage. A larger mirror. Easier-clean shower glazing. Better lighting over the vanity. A cleaner tile palette that won't date too quickly.

If you want a room that still feels right in a few years, prioritise function first and style second. The best-looking bathrooms usually follow that order.

High-spec custom ensuite

This brief is different from the start. The owners want a stronger design statement and they're prepared to spend for it. The room may be reconfigured for a larger shower, double vanity, custom niches, frameless glass, feature lighting, and selected premium tiles.

Designer bathrooms earn their cost only if the detailing is handled properly. A beautiful render means very little if storage is awkward, mirror lighting is harsh, cleaning is difficult, or custom pieces crowd a compact room. The projects that justify a higher spend combine custom joinery, disciplined material choices, and proper construction sequencing.

For homeowners collecting new bathroom ideas, the lesson from all three examples is straightforward. Spend according to the problem you're solving. If the room is structurally sound and only looks tired, a cosmetic update may be enough. If the room fails functionally every day, a full rebuild is usually better value than repeated patching.

Beyond the Quote Timeline Contingency and ROI

One of the most misleading assumptions in renovation planning is that the quote tells you the whole story. It doesn't. Price matters, but timing, approvals, and risk planning often decide whether the project feels smooth or stressful.

A renovation project timeline chart printed on paper with architectural blueprints and a ruler on a wooden table.

The timeline isn't just construction

Homeowners often think in terms of demolition to handover. In reality, the process starts earlier with selections, final scope confirmation, trade scheduling, and access planning. For apartments and some townhouse settings, there's another layer before work even begins.

In Victoria, strata approvals can add 2 to 4 weeks and 15% to 25% in administrative fees to the total budget, and a 2025 Housing Industry Association report noted that “strata approvals add cost and time”, with 60% of 2024 Melbourne renovations facing delays due to approval processes, according to this Victorian strata approval and renovation delay report. That's a major issue for owners in buildings where water, noise, common property access, and waste removal all need formal approval.

A useful reality check is to treat the timeline as two separate clocks:

  • Pre-construction clock: approvals, selections, documentation, ordering, and scheduling
  • On-site clock: demolition, rough-in work, waterproofing, tiling, installation, finishing, and defects

If you want a clearer sense of what affects project duration, this guide on how long a bathroom remodel should take breaks down the moving parts.

Where the hidden spend shows up

The quote can be accurate and the project can still cost more than expected if the owner hasn't allowed for surrounding decisions. Temporary access arrangements, building rules, longer lead times for selected fixtures, and surprise substrate repairs can all affect the final cost path.

A renovation runs best when the budget covers the room itself and the process around the room.

What value actually looks like

Return on investment isn't only resale maths. A strong ensuite renovation improves daily use, presentation, and maintenance. It can also support rental appeal and property positioning, especially when the old room is clearly dragging down the rest of the home.

The highest ROI usually doesn't come from the flashiest room. It comes from a well-resolved one. Good waterproofing, durable finishes, smart storage, proper lighting, and a layout that works every morning are what hold value longest.

Get an Accurate Quote for Your Dream Ensuite

By the time you've compared ranges, scopes, approvals, and finish levels, the main takeaway is simple. Ensuite renovation cost is only predictable when the scope is documented properly. Loose allowances create stress. Clear selections and a fixed process create control.

That's where a specialist project team makes the difference. SitePro Bathrooms starts with a proper consultation, not a guess. The first step is understanding how you use the room, what isn't working, and which new bathroom ideas are worth pursuing in your space rather than just looking good online.

Screenshot from https://siteprobathrooms.com.au

From there, the process moves into detailed planning and 3D design so you can see the layout, storage, fixtures, and finish direction before construction begins. That's especially useful for compact ensuites where every decision affects movement, cleaning, and storage. It also reduces the risk of expensive late changes.

A professionally managed renovation should also cover the practical side homeowners often dread. Trade coordination, ordering, permits, sequencing, site management, and quality control all need one point of accountability. That's why many owners prefer working with a specialist team backed by registered builders unlimited, rather than trying to stitch trades together themselves.

If you want a customized starting point for your own project, use the SitePro Bathrooms renovation cost calculator to estimate a realistic budget range. Once the scope is clear, it becomes much easier to decide what to keep, what to upgrade, and where the value really sits.


A good ensuite doesn't happen because the room is small. It happens because the planning is disciplined, the pricing is honest, and the build quality holds up long after the handover. If you're ready to move from rough figures to a quote that reflects your home, your building conditions, and your design goals, SitePro Bathrooms can help map it properly from day one.

  • siteprobathrooms

Victoria Full Bathroom Renovation Cost Guide 2026

A full bathroom renovation cost in Australia now sits at around $26,000, and a real project can fall anywhere from about $8,000 to more than $35,000 depending on scope, finishes, and how much work sits behind the walls. For Victorian homeowners, that headline number is only the starting point, because older homes, compliance requirements, and demolition surprises can shift the budget fast.

That's the part many national guides gloss over. They give you an average, but they don't tell you what happens when an older bathroom in Victoria is opened up and the existing waterproofing has failed, the walls aren't straight, or asbestos testing suddenly becomes part of the discussion. Good bathroom renovations aren't priced by guesswork. They're priced by scope, trade requirements, materials, and risk.

A proper budget also needs to reflect the kind of result you want. A functional family bathroom, one of the many modern bathrooms built for day-to-day use, and a higher-end space with custom detailing all sit in different cost brackets. The same goes for projects driven by practical resale goals versus clients chasing new bathroom ideas or fully realised designer bathrooms.

Understanding the Average Bathroom Renovation Cost in 2026

The clearest benchmark available is still the national average. According to 2023 Housing Industry Association data, the average cost of a full bathroom renovation in Australia is approximately $26,000, up from $21,000 previously, with projects ranging from around $8,000 for a basic cosmetic update to more than $35,000 for a high-end renovation, as summarised by Canstar's bathroom renovation cost guide.

That figure is useful, but only if you understand what it includes. A full renovation isn't just new taps, a vanity, and fresh tiles. It usually means demolition, preparation, waterproofing, plumbing work, electrical work, tiling, fitting off fixtures, and final finishes. Once you're stripping a bathroom back and rebuilding it properly, the budget starts reflecting both visible selections and hidden construction work.

Why the average can mislead

A homeowner might start with the idea that their room is small, so the price should be modest. In practice, a smaller bathroom can still carry a substantial full bathroom renovation cost because the same core trades are required whether the room is compact or generous. You still need compliant waterproofing. You still need licensed plumbing and electrical work. You still need demolition and waste removal.

National averages help with first-pass budgeting. They don't replace a site-specific assessment, especially in Victoria where existing conditions often shape the final price more than floor area alone.

What the benchmark is actually good for

Use the $26,000 average as a reality check, not as a promise. If your expectations sit well above a standard specification, or if you're planning structural changes, premium finishes, or a complete redesign, your budget may move beyond the average quickly. If your scope is simpler and the layout stays put, you may remain closer to the lower end of the broader range.

The smartest way to read that national number is this: it tells you what a full renovation commonly costs, but it doesn't tell you what your bathroom will cost until the site conditions, scope, and selections are properly defined.

The Anatomy of a Renovation Quote Where Your Money Goes

A renovation quote should tell you more than a lump sum. It should show where the money is being spent and why. That's how homeowners separate a realistic proposal from one that looks cheap only because key items haven't been properly allowed for.

A hand pointing to an itemized cost estimate document for a professional bathroom renovation project on a desk.

One of the biggest budget drivers is labour. In Australia, labour typically accounts for 40% to 50% of a full bathroom renovation budget, with the work carried out by specialised trades including plumbing, tiling, and electrical, and hourly rates often sitting between $100 and $150, according to this Australian bathroom renovation cost breakdown.

Labour is usually the largest line item

Homeowners sometimes focus on fixtures because they're easy to compare. Labour is harder to see, but it's where quality and compliance live. A bathroom has very little tolerance for shortcuts. If waterproofing fails or plumbing has to be redone, the cost of rectification usually outweighs any saving made upfront.

Here's what labour generally covers in a full renovation:

  • Demolition and strip-out. Removing old fixtures, wall linings, floor finishes, and preparing the space for rebuilding.
  • Plumbing rough-in and fit-off. Adjusting services, installing wastes, connecting fixtures, and making sure the room functions properly.
  • Electrical work. Lighting, power points, exhausts, and any required upgrades within the room.
  • Waterproofing and tiling installation. Critical stages that affect durability, maintenance, and long-term performance.
  • Carpentry and finishing. Framing adjustments, wall preparation, trim work, and setting everything up so the finished room looks clean and square.

Materials can climb fast once selections change

The visible side of the quote usually includes tiles, tapware, vanity, shower fittings, screens, bath if included, mirror, accessories, and paint. This is where many projects shift from standard to premium.

Technical benchmarks from Hipages' bathroom renovation pricing guide put builders at $2,300 to $4,600 per square metre, tilers at $35 to $120 per square metre with an average of $60 per square metre, and waterproofing at $500 to $750. The same source notes installation benchmarks such as $350 for a bath and $275 to $450 for a vitreous china toilet, with premium tile selections like handmade Spanish white gloss subway tiles at $86 per square metre and artisan ceramic wall tiles at $159 per square metre.

A quote usually shifts upward for one of three reasons:

Cost area What keeps it controlled What pushes it up
Layout Existing plumbing positions stay in place Fixtures move and services need rerouting
Finishes Standard, readily available selections Imported, handmade, or artisan materials
Construction Straightforward replacement Corrective work, access issues, or wall and floor remediation

Practical rule: Spend carefully on the things that are hard to replace later, such as waterproofing, tile installation, and in-wall plumbing work. Save money on items that can be upgraded later, such as mirrors or accessories.

Permits and compliance aren't optional extras

Not every bathroom project needs the same approvals, but where permits apply, they need to be budgeted accurately. Permit costs can range from $500 to $1,000 for basic renovations and can increase for more extensive structural changes, as noted in the earlier cost breakdown source. If a quote looks lean, check whether these items are included, excluded, or still subject to confirmation.

A good quote doesn't just tell you the price. It shows the logic behind the price.

Key Factors That Influence Your Final Renovation Quote

Two bathrooms can look similar on a plan and still land at very different price points. The final number is shaped by choices you can control, plus site conditions you often can't see until demolition begins.

Scope changes everything

The biggest pricing fork in the road is whether you're replacing like for like or reworking the room. Keeping the same layout is usually the cleaner path because existing plumbing and drainage points remain where they are. Once the toilet shifts, the shower expands, or the vanity wall changes, the build becomes more involved.

Material selection has the next biggest impact. Standard finishes can produce a clean, polished result. Premium surfaces, feature tiles, custom joinery, and bespoke detailing move the project into the realm of designer bathrooms. That can be worthwhile, but it needs to be intentional.

A larger room doesn't just use more tile. It often encourages more features, more fixtures, and more visual detailing. That's why bathroom size and specification tend to rise together.

The hidden Victorian cost many guides skip

For Victorian homes, especially older stock, demolition risk needs to be part of the budget from the start. A broad national average won't capture what happens when a bathroom is opened up and hidden issues are discovered.

According to this cost analysis focused on Australian renovation risks, a 12% to 25% contingency is often required for Melbourne homes where asbestos or structural issues appear after demolition, and asbestos testing alone can cost $300 to $500 for pre-1990 homes.

That matters because many Victorian suburbs have exactly that housing profile. Older sheet linings, underlay, backing materials, and patched-over renovation layers can all change the job once the strip-out starts.

If your home was built before 1990, treat demolition as an investigation phase as much as a construction phase. The room you see today may not reflect the work needed underneath.

What usually catches homeowners off guard

These are the issues that commonly alter the quote after the initial concept stage:

  • Older substrates. Walls and floors may need levelling or replacement before waterproofing and tiling can begin.
  • Past poor workmanship. Hidden leaks, patch repairs, and non-compliant previous work often only show up after removal.
  • Access constraints. Tight hallways, upper-storey locations, and difficult parking or material handling can affect labour time.
  • Selection creep. A project starts with tidy, practical goals, then shifts toward premium surfaces and upgraded fixtures.

What works and what doesn't

What works is making major decisions early. Lock the layout, confirm fixture types, choose tile ranges, and allow for demolition risk before construction starts. What doesn't work is beginning with a low headline budget and hoping the details sort themselves out later.

That's where many budget blowouts start. Not with one big mistake, but with several smaller assumptions that weren't tested properly at the beginning.

Sample Bathroom Renovation Budgets for Victoria

A budget range becomes easier to understand when it's attached to a real type of room. The examples below aren't fixed quotes. They're planning scenarios that help frame what different investment levels usually achieve in Victoria.

What each budget tier tends to buy

Bathroom Size Budget Tier (Functional & Tidy) Standard Tier (Quality & Style) Premium Tier (Designer Finishes)
Small bathroom or ensuite Best suited to a straightforward update with practical fixtures, simple tiles, and minimal layout change Allows better fixture quality, more polished detailing, and a stronger finish selection Supports custom detailing, statement surfaces, and a more tailored look
Medium family bathroom Works when the layout remains efficient and the brief is focused on function Often the sweet spot for owner-occupiers wanting durability and style Suits feature lighting, premium tile choices, and refined joinery
Large bathroom or main suite Requires disciplined scope to stay economical Gives room for a balanced design with stronger visual impact Most likely to support high-spec modern bathrooms with layered materials and a luxury feel

For homeowners trying to map out likely ranges before briefing a builder, a bathroom renovation cost calculator can help organise early assumptions around scope and finish level.

Small bathroom scenario

A compact ensuite usually rewards restraint. The strongest budget outcomes come from retaining the existing footprint and choosing easy-to-maintain finishes. For practical bathroom renovations, these approaches often yield the best results. Good lighting, a clean vanity, and well-laid tiles can make a small room feel far more expensive than it is.

The mistake is trying to force too many features into a tight space. Oversized niches, bulky vanities, or complicated tile patterns can make the room feel crowded and increase labour at the same time.

Medium bathroom scenario

A mid-sized family bathroom tends to be the most balanced project type. There's enough room to improve storage, shower comfort, and circulation without every design move becoming expensive. Many homeowners pursue new bathroom ideas in these situations, but the projects that hold the budget best are the ones where those ideas are filtered through practical use.

A strong standard-tier renovation here often beats a stretched premium brief. Better planning, coherent finishes, and smart fixture choices usually deliver more value than scattered luxury upgrades.

Large bathroom scenario

A larger bathroom can justify bolder design choices, but only if the room will use them well. Double vanities, freestanding baths, layered lighting, and feature tiling can all work beautifully when the layout supports them.

Big bathrooms don't automatically need big spending. They need proportion, function, and finishes that suit the home rather than overpower it.

The most successful premium projects aren't just expensive. They're edited. That's what separates a polished result from a room full of costly decisions that don't quite connect.

Smart Ways to Manage Your Budget and Increase Value

The goal isn't to spend the least. It's to spend where the money will hold its value. Cheap bathrooms often cost more later through repairs, dated finishes, or rework. Well-planned bathrooms usually feel better to use and stand up better over time.

A woman holding two different stone tile samples while deciding on materials for a bathroom renovation project.

A useful rule of thumb from this Australian renovation value guide is to keep renovation spending at no more than 5% to 10% of your home's total value to avoid overcapitalisation. The same source notes that, for investors, a functional and modern bathroom upgrade can increase rental value by 15% to 20%.

Spend on the hard-to-fix items first

If the budget is under pressure, protect the parts of the renovation that affect performance and longevity:

  • Waterproofing and installation quality. These aren't glamour items, but they determine whether the bathroom lasts.
  • Good layout decisions. A room that works properly every day gives more value than an expensive fixture in the wrong spot.
  • Durable surfaces. Mid-range tiles and fixtures with solid everyday performance often outlast cheaper options and avoid the premium surcharge of highly specialised selections.

Save where upgrades are easier later

There are also places where restraint usually makes sense:

  • Accessory choices. Mirrors, towel rails, and styling elements can often be upgraded later.
  • Vanity complexity. A clean standard vanity can look sharp if the proportions are right.
  • Feature overload. Too many statement elements can make the room feel busy and drive labour costs up.

For a more practical planning approach, this guide on how to budget a bathroom remodel is a useful way to think through trade-offs before committing to selections.

Value depends on the property, not just the bathroom

Owner-occupiers and investors should think differently. If you're renovating your own long-term home, comfort and daily function matter as much as pure return. If the property is an investment, the best spending usually sits in durable, broad-appeal upgrades that photograph well, rent well, and don't introduce maintenance headaches.

What doesn't work is chasing high-end finishes in a property that won't support them. What does work is matching the bathroom standard to the home, the suburb, and the likely buyer or tenant.

The SitePro Process A Clear Path to Your New Bathroom

Most renovation stress comes from uncertainty. Not knowing what's included, not knowing who is coordinating trades, and not knowing how many decisions are still unresolved once demolition starts. A structured process reduces that uncertainty before it turns into cost variation.

Screenshot from https://siteprobathrooms.com.au

An end-to-end model works best because one team carries the job from concept through construction and finishing. That means the layout, materials, buildability, and sequencing are considered together rather than passed between disconnected trades. It's also why working with registered builders unlimited matters for full-scale renovation work where accountability and compliance need to stay clear from start to finish.

Why the process affects cost certainty

A professional process usually includes early site assessment, measured planning, design development, selection review, clear quoting, and coordinated delivery. Each step removes guesswork. If a client wants modern bathrooms with cleaner lines, more storage, or stronger material contrast, those decisions are easier and cheaper to resolve before construction begins.

3D design also has practical value. It's not just for presentation. It helps homeowners test new bathroom ideas, understand proportions, and avoid expensive mid-project changes once waterproofing, tiling, and fit-off are underway.

The cheapest variation is the one that never happens because the decision was resolved properly before work started.

What de-risks a renovation

A dependable renovation pathway usually includes:

  • Defined scope early. Fewer assumptions mean fewer disputes and fewer surprises.
  • Selections made before demolition. That reduces rushed decisions and availability issues.
  • One point of responsibility. Coordination stays tighter when one builder manages the whole sequence.
  • Transparent allowances. Homeowners can see what's fixed, what's excluded, and where genuine risk sits.

That's how a new bathroom moves from idea to finished room without the process becoming harder than it needs to be.

Frequently Asked Questions About Bathroom Renovations

What's the difference between a cosmetic update and a full renovation

A cosmetic update changes the visible finishes without rebuilding the room in a major way. A full renovation strips out the old bathroom and rebuilds it with new construction work, services, waterproofing, and fixtures. If you're comparing prices, make sure you're comparing the same scope. A cheap refresh and a full strip-out aren't the same project.

Do I need council approval in Victoria

Some bathroom projects won't need the same level of approval, while others may trigger permit requirements, especially if structural changes are involved. The safest approach is to confirm this before work starts and make sure any permit-related costs are clarified in the quote rather than assumed away.

Why do quotes vary so much between builders

The gap usually comes down to scope clarity, labour assumptions, material allowances, compliance inclusions, and how demolition risk has been addressed. A lower quote isn't always a better quote. It may exclude things that another builder has priced properly.

When should I lock in fixtures and finishes

As early as possible. Selections made before construction help avoid delays, rushed substitutions, and cost variations. That's particularly important when the design includes feature tiles, custom joinery, or more detailed finish requirements.

What's the best way to avoid a budget blowout

Start with a realistic scope, keep layout changes disciplined, allow for hidden conditions in older Victorian homes, and don't make major design decisions after the build is underway. Most blowouts don't happen because bathrooms are impossible to price. They happen because too much is left unresolved.

If you're planning a bathroom renovation in Highett or across Victoria and want a clearer path from concept to completion, SitePro Bathrooms can help you scope the work properly, visualise the outcome, and build with confidence.

  • siteprobathrooms

Cost of Kitchen Cabinets: A 2026 Price Guide for VIC

Kitchen cabinets usually take up about 29% of a kitchen renovation budget, and a full set in Australia can start at $2,800 for budget flat-pack options and go to $15,000+ for high-end 2-pac or timber cabinetry. If you're pricing a renovation in Victoria right now, that range is wide enough to feel confusing, especially once installation, hardware, and layout decisions start affecting the final number.

Most homeowners reach this point with the same question. They've looked at a few cabinet prices online, maybe saved some inspiration for clean-lined kitchens, shaker fronts, or full-height pantries, and now they're trying to work out what the actual installed figure will be in a Victorian home. That's where the numbers often stop being useful.

The core issue isn't just the sticker price of cabinets. It's the gap between a product cost and an installed cost that functions in your house, sits level on old floors, fits awkward walls, carries stone safely, and still looks right years later. In Melbourne homes, especially older ones, those details matter.

Planning Your Kitchen Renovation Budget

A kitchen budget usually starts with optimism and ends with trade-offs. You might begin with a rough figure in mind, then realise the cabinetry decision affects almost everything else, from benchtop support to appliance placement to how much room you keep for splashbacks, flooring, and electrical work.

Cabinetry is often the biggest single moving part because it's both visual and structural. It has to look right, but it also has to carry weight, open properly, survive steam, spills, and daily use, and suit the way your household functions. If you're still shaping your overall numbers, it's worth reviewing a broader cost of a new kitchen guide for Victorian homes before locking in cabinet choices.

Start with the realistic cabinet range

At the low end, a basic flat-pack setup can suit a rental, a compact unit, or a tight cosmetic refresh. At the upper end, fully custom joinery suits homes where layout efficiency, finish quality, and a more resolved design matter.

That wide spread exists for good reason:

  • Budget flat-pack works when sizes are standard, the layout is simple, and you're willing to compromise on fit and finish.
  • Mid-range cabinetry usually gives better materials, more consistent finishes, and stronger day-to-day usability.
  • High-end custom joinery makes sense when the kitchen has awkward dimensions, premium finishes, or you want every millimetre used properly.

Practical rule: If your kitchen has uneven walls, unusual ceiling heights, tight circulation zones, or you want an island and full-height storage to work cleanly together, the cheapest cabinet option often stops being the cheapest once installation starts.

Victorian homeowners also tend to think about the house as a whole. A kitchen upgrade often sits alongside bathroom renovations, or at least alongside planning for them later, so the better approach is to budget for consistency rather than treat every room as a separate problem. That's especially true if you're aiming for a finish language that carries across modern bathrooms, designer bathrooms, and the kitchen without looking pieced together.

The Anatomy of Cabinet Costs

Most quotes look simple until you break them apart. The cost of kitchen cabinets is really a bundle of four things: carcass materials, hardware, labour, and finish. Once you understand those parts, quotes become much easier to read.

According to Australian kitchen cabinetry cost benchmarks, cabinetry makes up about 29% of the total kitchen renovation cost, with a typical average spend of $7,250. The same pricing guide puts budget flat-pack options from $2,800, mid-range melamine at $4,500, and high-end 2-pac or timber finishes starting from $15,000, with cabinet maker labour commonly ranging from $50 to $75 per hour for standard work and $100+ per hour for more complex joinery.

A custom wooden kitchen cabinet frame with hardware and components sitting on a workbench during assembly.

Materials affect more than appearance

Base cabinets usually need more from the material than overheads do. They carry benchtops, absorb daily knocks, and deal with the hardest wear. That's why lower cabinets often end up being the costlier part of the run in practical terms, even before you add drawers or pull-out systems.

A cheaper board can still be serviceable in the right project. But in a family kitchen, the internal build quality matters more than people expect. Shelves sagging, hinges pulling loose, and swollen edges around the sink area aren't styling issues. They're material and construction issues.

If you're weighing finish against substrate, a good starting point is this guide to kitchen cabinet materials in 2026, which helps separate cosmetic upgrades from structural value.

Hardware is small on paper, big in use

Handles, drawer runners, hinges, soft-close systems, corner mechanisms, and integrated bins don't always dominate the quote line by line, but they change how the kitchen feels every day.

Here's what usually happens in real projects:

  • Standard hinges and runners keep the budget controlled, but the kitchen can feel more basic in use.
  • Soft-close hardware improves noise, wear, and day-to-day comfort.
  • Internal storage upgrades help in compact kitchens, though they can push costs up quickly if added everywhere.

Labour and finish are where quotes split apart

Two cabinet quotes can look similar until you compare how much skilled labour is built into them. Straight runs with standard sizes are faster to manufacture and install. Detailed profiles, tight tolerances, filler panels, appliance integration, and site scribing take more time.

Finish selection drives a lot of that labour. Melamine is usually more budget-friendly because it's efficient to produce and install. A painted 2-pac finish costs more because the process is more exacting and the standard for visible surfaces is higher.

A kitchen quote makes more sense once you stop asking, “How much are the cabinets?” and start asking, “How much build quality, finish quality, and fitting accuracy are included in that number?”

How Cabinet Prices Are Calculated

Cabinet pricing in Melbourne usually appears in one of two ways. You'll either see a per linear metre rate, or you'll see the job broken down by individual units and components. If you don't know which method a quote is using, comparisons get messy fast.

The most useful benchmark for local planning comes from Melbourne 2026 kitchen cabinet cost benchmarks, which place budget cabinetry at $1,000 to $1,500 per linear metre, mid-range at $1,500 to $2,500, and premium custom at $2,500 to $3,500+. That same source notes a mid-range new kitchen with custom cabinetry typically totals $20,000 to $45,000, with trades and installation making up 15% to 30% of the total.

Per linear metre pricing

Linear metre pricing gives you a fast planning tool. It's commonly used early in budgeting because it gives a broad estimate before every cabinet detail has been finalised.

In practical terms, the metre total is worked out by measuring the runs of:

  • Under-bench cabinetry
  • Overhead cabinetry
  • Full-height pantry or utility units
  • Island cabinetry where applicable

That method is useful, but it can also hide detail. A metre of simple cupboards isn't the same as a metre filled with deep drawers, integrated bins, appliance housing, and premium fronts.

Per unit pricing

Per unit pricing is usually clearer once drawings are developed. It shows how much each cabinet type contributes to the quote, which matters because not all units cost the same to build.

Base cabinets usually attract more cost than simpler overheads because they do more work structurally and often include drawers, pull-outs, and heavier hardware. If you're planning cabinet runs and trying to make sense of standard widths before requesting a quote, this kitchen cabinet sizes guide helps frame what's standard and where custom sizing starts to matter.

A simple Melbourne benchmark table

Cabinet Tier Estimated Cost per Linear Metre Common Materials & Finishes
Budget $1,000 to $1,500 Basic flat-pack style cabinetry, simple finishes
Mid-range $1,500 to $2,500 Melamine fronts, improved hardware, more tailored layout
Premium custom $2,500 to $3,500+ Custom joinery, higher-end finishes, more detailed integration

What to check in a quote: Ask whether the metre rate includes overheads, panels, fillers, kickboards, handles, soft-close hardware, delivery, and installation. If it doesn't, the “cheap” rate can shift quickly.

Choosing Between Stock Semi-Custom and Custom

The cabinet choice buyers often prioritize is style. The underlying decision, however, pertains to fit, flexibility, and installation risk.

Stock cabinets suit straightforward spaces. Semi-custom works well when you want some flexibility without going fully bespoke. Custom joinery is the right move when the room needs precision, especially in Victorian homes where walls, floors, and corners rarely behave like showroom dimensions.

Stock cabinets

Stock cabinetry is the fastest path to a kitchen that looks new. It's typically based on fixed sizes, standard colours, and limited configuration options.

That can work well in:

  • Investment properties where durability matters more than bespoke fit
  • Simple apartment layouts with conventional dimensions
  • Budget-led updates where the existing plan is mostly staying put

The weakness is wasted space. Fillers get larger, awkward gaps appear, and appliance integration can feel patched together if the room isn't forgiving.

Semi-custom cabinetry

Semi-custom tends to sit in the practical middle. You get more flexibility in dimensions, finishes, and internal configuration, but without the full price of bespoke joinery across every element.

This option often suits family homes where the layout is mostly settled, but storage needs are specific. You might want deeper drawers in one zone, a more resolved pantry, or fronts that tie in with other spaces in the home. That's often enough to lift the kitchen without stepping into full custom pricing.

Custom joinery

Custom work makes the most sense when precision creates real value. That includes older homes, compact kitchens, unusual ceiling heights, feature islands, integrated appliances, or projects where the kitchen finish needs to sit comfortably beside high-quality bathroom renovations and other upgraded spaces.

For homeowners wanting one coordinated renovation partner, SitePro Bathrooms handles kitchen and bathroom projects from design through construction, which is useful when the brief spans cabinetry, layout, finishes, and new bathroom ideas across more than one room.

The DIY flat-pack trap in Victoria

The hidden issue in many cabinet guides is installation. Product pricing gets all the attention, but installed pricing is where the decision becomes real.

According to Victoria-focused cabinet cost guidance, flat-pack cabinets are priced from $2,800 to $8,000, and professional installation adds $2,000 to $5,000. That same source notes this often narrows the difference with professionally installed custom joinery, particularly against an average 2026 Melbourne kitchen renovation cost of $42,630.

That's the part many homeowners miss. DIY can save money if the room is square, the walls are true, the assembly is accurate, and nothing goes wrong. But Melbourne homes often aren't that cooperative. Floors fall out of level. Walls bow. Services are slightly off. Panels need scribing. Tall units need careful packing and fixing. Stone tolerances matter.

If a cabinet system is cheap to buy but expensive to correct, it wasn't cheap.

There's also a quality issue that isn't visible on day one. Poorly aligned doors, weak fixing into walls, or incorrect support under benchtops often show up later. In homes where owners want a refined finish, or where they're already using registered builders unlimited to manage broader works, professional joinery and installation usually give a cleaner result and fewer downstream problems.

What Really Drives Your Cabinet Cost Up

Two kitchens can have the same footprint and land in very different price brackets. The jump usually comes from design decisions, not just kitchen size.

The biggest cost drivers are profile complexity, finish type, hardware level, and how much custom fitting the room requires. None of those are automatically bad choices. They just need to earn their place in the budget.

Close-up view of ornate vintage-style brass cabinet handles installed on dark wood kitchen cabinet doors.

Door style and finish

A flat-profile door is usually more economical to make and finish. It suits cleaner, more contemporary kitchens and can work very well in homes aiming for a restrained look.

A more detailed front, such as a shaker-style or routed profile, takes more work. The manufacturing is more involved, and the finishing standard becomes more noticeable because every line and edge is visible.

Finish choice matters just as much:

  • Melamine is practical and cost-conscious.
  • Two-pack painted finishes give a more refined result, especially in lighter colours or detailed profiles.
  • Timber and timber-look choices can add warmth, but they need to be chosen carefully so they don't dominate the space.

Hardware and internal fit-out

Handles seem minor until they're multiplied across the whole kitchen. The same goes for soft-close hinges, premium runners, hidden bins, drawer inserts, and lift-up systems.

Some upgrades are worth paying for because they improve how the kitchen functions every single day. Others are better used sparingly.

A sensible approach: Spend on drawers, hinges, and runners in the most-used zones first. Save the decorative upgrades for the places people actually see.

Room conditions and customisation

Older Victorian homes often need more site adjustment than new builds. That affects labour. A quote rises when installers need to pack cabinets off uneven floors, scribe panels to wandering walls, or resolve out-of-square corners so the finished kitchen still reads as straight and intentional.

People often overspend on visible luxuries while underspending on fit. In practice, a kitchen with simpler fronts and excellent installation often looks better than a heavily upgraded kitchen that doesn't sit cleanly in the room.

That principle carries across the home too. If you're designing a cohesive renovation language between the kitchen, modern bathrooms, and designer bathrooms, consistency in materials and joinery detailing usually gives better value than chasing expensive statement features in every room.

Sample Kitchen Cabinet Budgets in 2026

People don't want theory. They want to know what different budget levels look like in a real home.

Australian spending patterns show where the middle of the market sits. According to 2024 Australian kitchen renovation spending data, 38% of homeowners who renovated their kitchens spent between $20,000 and $40,000, and 23% spent upwards of $40,000. Those figures line up with what many Victorian homeowners experience once cabinetry, finishes, and trade coordination are all included.

Screenshot from https://siteprobathrooms.com.au

Smaller kitchen with a tighter budget

This type of project is common in units, smaller homes, or investor updates. The priorities are usually serviceable storage, a clean finish, and avoiding expensive layout changes.

A realistic approach here is:

  • Use flat-pack or simple semi-custom cabinetry
  • Keep cabinet sizes standard where possible
  • Limit specialty storage
  • Choose durable but straightforward finishes

This level can work well when expectations are clear. It usually isn't the place for heavy customisation, highly detailed profiles, or trying to make a budget product perform like bespoke joinery.

Mid-size family kitchen

This is the range where many owner-occupiers land. The kitchen has to function hard, look considered, and justify the spend over time.

The cabinet budget usually goes into better internals and better planning, not just prettier fronts. You might combine standard carcasses with improved door finishes, add more drawers where they matter, and invest in a pantry layout that reduces clutter.

This is also the budget band where continuity across the home starts to matter. Homeowners often borrow from kitchen selections when exploring new bathroom ideas, using related colours, joinery tones, or hardware styles to create a more coherent renovation.

Larger or premium renovation

This category suits projects where the kitchen is central to the home and the owner wants a more resolved result. Full-height joinery, integrated appliances, statement islands, customized storage, and higher-end finishes are more common here.

The extra spend usually goes into three areas:

  1. Precision fit in more demanding layouts
  2. Higher finish quality on visible surfaces
  3. A better overall experience of use, especially in drawers, pantry access, and appliance integration

What doesn't work in premium projects is mixing expensive visual finishes with weak planning. A large budget can still be wasted if the kitchen flow is poor, the storage is generic, or the installation quality isn't there.

Getting an Accurate Quote and Saving Smartly

A cabinet quote should be detailed enough that you can see what you're paying for. If it isn't itemised, it's hard to know whether one quote is better value or just missing important pieces.

Ask for clarity on:

  • Cabinet construction including carcass material and door finish
  • Hardware specification including hinges, runners, and soft-close inclusions
  • Installation scope including fillers, end panels, kickboards, and site adjustments
  • Exclusions so you know what still sits outside the price

The smartest way to save isn't stripping the kitchen back to the cheapest version. It's choosing where precision matters and where standardisation is perfectly fine. Standard cabinet sizes, simpler door profiles, and disciplined hardware selections usually save more than cutting corners on installation.

A good kitchen doesn't just photograph well on handover day. It fits the house, works properly, and holds up under daily use. That's the difference between a low cabinet price and a sound installed result.


If you're planning a kitchen in Highett or elsewhere in Victoria, the next step is to get a quote that separates cabinet supply from installation, finish choices, and site-specific labour so you can compare options properly.

  • siteprobathrooms

10 Modern Kitchen Design Ideas for Victorian Homes

Your kitchen is the heart of your home, but it only works well when the layout, storage and finishes suit the way you live now. In Highett and across greater Victoria, a lot of homes still have kitchens built for another era. Tight walkways, poor lighting, bulky overhead cupboards and awkward corners make daily use harder than it needs to be.

Good modern kitchen design ideas aren't about copying an online showroom. They need to fit Victorian homes, local block sizes, family routines and the realities of construction. A terrace, a post-war brick veneer and a newer townhouse all need different answers, even if the look you want is similar.

From what we see on local renovation projects, the best kitchens balance three things. They look calm, they work hard, and they stay practical once real life moves in. That means thinking beyond colours and splashbacks. Ventilation, storage depth, appliance placement, lighting layers and traffic flow matter just as much.

Below are 10 modern kitchen design ideas that work well in Victorian homes, especially when you want a space that feels current without becoming difficult to maintain. These are the approaches that consistently hold up on site, not just in glossy photos.

1. Open-Plan Kitchen Design

Open-plan kitchens remain one of the most requested moves in Highett renovations because they solve more than one problem at once. They can bring light deeper into the house, improve sightlines to the backyard, and make family life easier when cooking, dining and living all happen in the same zone.

That said, removing a wall doesn't automatically create a better kitchen. In older Victorian homes and brick veneers, the mistake is opening everything up without planning where mess, noise and smells will go. If the kitchen is always on show, clutter control becomes part of the design brief.

A modern open plan kitchen and living room featuring white cabinetry, a marble island, and floor-to-ceiling glass doors.

What works in Victorian homes

In Melbourne terraces and family homes around Highett, the strongest open-plan kitchens usually have one clear anchor. That might be an island, a peninsula, or a change in ceiling detail. You need something to define the kitchen without putting the wall back.

If your room is narrower, an L-shaped kitchen layout often gives a better result than forcing in an oversized island. It keeps circulation cleaner and leaves more usable floor area for dining.

Practical rule: Open-plan only works when the kitchen still has boundaries. Use joinery, lighting and flooring alignment to define the zone.

A few details make a big difference:

  • Keep flooring consistent: Running the same floor finish through kitchen, dining and living areas helps the whole space feel deliberate.
  • Choose ventilation early: A stronger rangehood matters more in open-plan spaces because cooking odours travel further.
  • Build in hidden storage: The more visible the kitchen is, the less forgiving it is of bench clutter.

Done well, open-plan feels generous and social. Done badly, it turns the whole house into a workspace you can't escape.

2. Minimalist Kitchen with Hidden Storage

Minimalist kitchens aren't about having less stuff. They're about hiding the everyday items that make a kitchen look busy. For compact homes, apartments and townhouses, that's often the difference between a kitchen that feels spacious and one that feels crowded.

This is an area where mainstream inspiration often falls short. Hidden modern kitchens for small homes are still underexplained, even though demand is clearly there. The verified brief notes that a 2025 Master Builders Australia survey found 72% of renovators in Melbourne want “invisible kitchens” to maximise visual space, yet only 15% of published articles cover this niche.

A modern kitchen interior featuring seamless cabinetry with a hidden pantry door and elegant light stone countertops.

Concealment that still works day to day

The best minimalist kitchens use full-height joinery, appliance garages, integrated fridges and pantries that disappear into the cabinetry line. In smaller Victorian homes, this approach makes the room feel calmer because your eye reads fewer interruptions.

Blind corners are where many minimalist kitchens fail. If you hide too much behind awkward doors, the kitchen looks neat but works poorly. A proper blind corner pantry solution can recover storage that would otherwise become dead space.

What tends to work best:

  • Tall cabinetry on one wall: It creates a clean visual block and keeps bulk away from windows.
  • Pocket or retractable appliance storage: Ideal for kettles, toasters and coffee machines that are used daily but don't need to stay visible.
  • Simple door profiles: Flat or lightly detailed fronts read cleaner than heavily profiled doors in compact spaces.

What usually doesn't work is copying a showroom look with no allowance for bins, chargers, lunchboxes and small appliances. Minimalism only holds up when the inside of the cabinetry is as well planned as the outside.

A hidden kitchen still needs to be easy to open, clean and service. If every cupboard becomes a puzzle, the design has gone too far.

3. Kitchen Islands and Peninsulas

People often ask for an island first, before we've even confirmed whether the room should have one. Sometimes it's the right move. Sometimes a peninsula does the job better and wastes less space.

In Highett family homes, an island earns its place when it improves workflow and becomes a genuine gathering point. If it's just there because it looks modern, it can block circulation and create pinch points around the fridge, dishwasher or oven.

A modern kitchen interior featuring light wood cabinets, a marble waterfall island, and three leather bar stools.

Island or peninsula

An island suits wider rooms where you can move comfortably around all sides. It works well in larger extensions, open-plan reconfigurations and homes where the island doubles as prep space, casual dining and storage.

A peninsula is often the smarter choice in narrower homes. It gives you seating and separation without demanding the same clearance on every side. That can be a much better fit in older houses where every millimetre matters.

Use this as a reality check:

  • Choose an island when: you need a social hub, extra storage and uninterrupted circulation around it.
  • Choose a peninsula when: the room is tighter, one side can connect to existing cabinetry, or you want to zone the space economically.
  • Avoid either when: the result leaves appliance doors clashing or walkways feeling cramped.

Waterfall stone edges, power points and under-bench storage all add value when they're tied to how you use the kitchen. A breakfast overhang sounds great until stools block the main path to the backyard.

The strongest island designs feel effortless because the planning is tight. The weak ones look impressive on day one and become annoying by week two.

4. Smart Kitchen Technology Integration

Smart features can improve a kitchen, but it's a common issue that homeowners frequently misspend money on them. The priority shouldn't be novelty. It should be convenience, reliability and ease of maintenance.

In practical terms, smart kitchen design usually means better lighting control, charging points in the right places, quality appliances with useful functions, and electrical planning that supports how the room is used. It doesn't have to mean turning every task into an app.

Choose the tech you'll still use in two years

The most successful smart kitchens keep the technology quiet. Under-cabinet lighting on sensors, a boiling or filtered water unit, integrated charging drawers and programmable ovens are all easier to live with than flashy features that become dated fast.

For busy households, I'd prioritise these first:

  • Lighting control: Separate switches for task, ambient and feature lighting.
  • Charging zones: Inside drawers or appliance cupboards to keep benches clear.
  • Appliance selection: Pick brands with dependable local service and clear manual override options.

The problem with overloading a kitchen with smart products is simple. Software changes. Devices get replaced. If the joinery and services are too tightly built around one system, future updates become expensive.

A kitchen should still work perfectly when the Wi-Fi drops out. That sounds obvious, but plenty of high-spec designs forget it.

5. Natural Materials and Organic Textures

Warmth has come back strongly into kitchen design, and timber is leading that shift. According to the 2026 Houzz Kitchen Trends Study summary, surveyed homeowners renovating kitchens chose wood-toned cabinetry at 29%, ahead of white at 28%. The same summary notes medium wood tones at 15% and light wood tones at 11%, with species such as white oak, maple, ash and walnut driving the look.

That trend makes sense in Victorian homes. Older houses already have texture, variation and character. Timber, stone and tactile finishes sit more comfortably in those settings than a flat, clinical all-white scheme.

Warm materials that age well

White oak veneer, natural stone-look surfaces, brushed metal accents and handmade tiles work particularly well when you want a kitchen to feel modern without looking sterile. In Highett, I've seen timber islands soften open-plan rooms that would otherwise feel too hard and reflective.

Good use of natural materials depends on restraint. You don't need timber everywhere. Often one strong material, used consistently, gives a better result than mixing too many feature finishes.

  • Use timber where hands and eyes land often: island panels, tall pantry fronts or open niche details.
  • Balance movement with plain surfaces: heavily veined stone needs calmer cabinetry around it.
  • Expect variation: natural grain, tone shifts and texture are part of the point, not a defect.

The warmest kitchens usually mix clean lines with materials that don't feel factory-perfect.

What doesn't age as well is chasing a rustic look without enough discipline. If every finish is textured, the room loses clarity. Modern kitchens still need clean composition, even when the materials are natural.

6. Two-Tone and Contrasting Kitchen Cabinetry

Two-tone cabinetry is one of the easiest ways to add depth to a kitchen without making it feel busy. It can help define zones, break up long walls of joinery and stop a full kitchen of one colour from feeling heavy.

This works especially well in Victorian homes where you're blending old and new. A timber island paired with painted perimeter cabinetry, or darker lowers with lighter uppers, can connect modern joinery to the character of the rest of the house.

Contrast with control

The key is to keep the contrast intentional. You want clear hierarchy, not a patchwork. Usually that means one dominant finish, one secondary finish, and simple hardware tying the whole lot together.

A useful starting point is to compare likely kitchen cabinet materials before locking in colour. The same shade can look completely different on laminate, polyurethane, veneer or textured board.

Here's where two-tone designs usually succeed:

  • Dark lower, light upper: grounds the room and keeps eye level open.
  • Timber island, painted perimeter: gives the island more presence without overwhelming the space.
  • Full-height pantry in one tone: helps large storage walls read as one neat block.

And here's where they usually go wrong:

  • Too many colours: once a third major finish enters, the kitchen can start to feel unresolved.
  • Ignoring natural light: a deep colour that looks rich in a showroom can feel flat in a dim room.
  • No connection to the rest of the home: cabinetry should relate to flooring, wall colour and nearby furniture.

If you're uncertain, 3D visualisation is worth doing before ordering joinery. It's far cheaper to adjust colours on a screen than after fabrication.

7. Integrated Appliance Concealment

If minimalist storage hides the small stuff, integrated appliance concealment deals with the big visual interruptions. Fridges, dishwashers and even rangehoods can disappear into the joinery line, which gives the kitchen a more architectural feel.

This approach is particularly effective in open-plan homes because the kitchen reads more like furniture and less like a work zone. In compact homes, that visual quiet can make the room feel larger than it is.

Where concealed appliances make sense

Panel-ready fridges and dishwashers are the most common starting point. In larger projects, concealed pantry runs, integrated microwave towers and hidden utility cupboards can take the idea further.

The trade-off is that integrated appliances require tighter planning than standard installations. Service access, ventilation, hinge clearance and future replacement all need to be considered before the cabinetry is built.

A few practical points matter here:

  • Match panel thickness carefully: poor alignment is obvious straight away.
  • Allow for servicing: don't trap appliances behind joinery that can't be removed without damage.
  • Plan replacements in advance: some custom panel setups become difficult when an appliance model changes later.

This look suits premium, pared-back kitchens. But if the budget is tighter, it's often better to integrate a few key items well than try to hide everything and compromise elsewhere.

The hidden result should still be reliable. A panelled fridge that never quite closes properly isn't a luxury detail. It's a daily annoyance.

8. Statement Lighting and Fixtures

Lighting does more than finish a kitchen. It changes how the space performs. Bench tasks, family dinners, early morning routines and evening entertaining all need different kinds of light.

That's why layered lighting matters so much in modern kitchen design ideas. The NKBA 2026 Kitchen Trends Report says homeowner priorities centre on natural lighting (95%), quality lighting (93%) and task lighting for work zones (92%), while common specified features include under-cabinet lighting (82%), interior cabinet lighting (72%) and pendant lighting (63%).

Layer the light, then choose the feature

In practice, pendants should be the last lighting decision, not the first. First solve visibility at the benches, cooktop and sink. Then add feature lighting that suits the scale of the island or dining zone.

A reliable lighting mix usually includes:

  • Task lighting: under-cabinet LED strips or targeted downlights over prep areas.
  • Ambient lighting: general ceiling lighting that fills the room evenly.
  • Feature lighting: pendants or decorative fixtures that give the room personality.

Lighting should let the kitchen work hard at 7 am and feel softer at 7 pm.

A common mistake is relying on downlights alone. They create shadows where you need light most, especially when you're standing at the bench. Another is choosing pendants that are too small for the island, or too low for comfortable sightlines.

Good lighting feels invisible when it's doing its job. You notice the room, not the effort behind it.

9. Sustainable and Eco-Friendly Kitchen Design

Sustainable kitchens aren't just about product labels. In real renovation work, sustainability usually comes from durability, efficient planning and avoiding short-lived choices that need replacing too soon.

That might mean keeping part of an existing layout if the structure still works, reusing sound materials where possible, choosing low-maintenance finishes and improving daylight so you rely less on artificial light through the day. In Victorian homes, retention often matters as much as replacement.

Build for long life, not short trends

The most sustainable kitchen is often one that won't need another major overhaul because the basics were done properly. Strong carcasses, quality hardware, sensible storage and timeless materials beat fashionable details that date quickly.

When clients want a more environmentally aware kitchen, these moves usually make the most practical sense:

  • Maximise natural light: skylights, glazed doors and better room openings reduce reliance on daytime lighting.
  • Choose durable surfaces: hard-wearing benchtops and cabinetry last longer under daily use.
  • Include waste sorting: built-in recycling and compost zones make good habits easier to maintain.
  • Use low-VOC finishes where possible: especially in tightly sealed homes.

There's no point specifying eco-friendly materials if the design itself is frustrating to use. When a kitchen works well, people keep it longer. That's one of the most effective sustainability outcomes you can get.

10. Curved and Organic Kitchen Shapes

Curves are showing up more often in premium kitchen design, but they need to be used carefully. In the right home, a curved island end, rounded shelf return or softened joinery edge can take the hardness out of a very linear room.

This is especially useful in open-plan spaces where straight runs of cabinetry, stone and glazing can feel severe. A curved element can make movement through the space feel more natural and soften the transition to living areas.

Use curves where they improve movement

Curves work best when they solve something practical as well as aesthetic. A rounded island corner can reduce bump points in a busy family kitchen. A curved end panel can open up a walkway near a doorway. A soft radius on joinery can make a compact room feel less boxed in.

They're less successful when they're added as decoration without considering fabrication and storage. Curved cabinetry is more specialised, often more expensive, and not every joiner handles it equally well.

A sensible approach is:

  • Keep the main layout simple: let one curved feature carry the idea.
  • Use curves where people walk past often: island corners and passage edges are good candidates.
  • Balance with straight cabinetry: too many curved forms can make the room feel vague rather than refined.

Curves can add polish and individuality, especially in custom renovations. But they need discipline. One well-placed curve does more than a room full of them.

Modern Kitchen Design Ideas: 10-Point Comparison

Design Implementation complexity Resource requirements Expected outcomes Ideal use cases Key advantages
Open-Plan Kitchen Design Moderate–High (structural removals, zoning) Structural work, high-performance ventilation, consistent finishes, professional design Greater sense of space, improved light, social connectivity, higher resale value Family homes, entertaining spaces, renovations merging living zones Openness, sightlines, natural light, social supervision
Minimalist Kitchen with Hidden Storage Moderate–High (custom joinery) Bespoke cabinetry, integrated appliances, internal organisers, quality materials Clutter-free appearance, perceived spaciousness, easy maintenance Small apartments, contemporary homes, those valuing calm aesthetics Streamlined look, efficient storage, timeless simplicity
Kitchen Islands and Peninsulas Moderate (plumbing/electrical/clearances) Sufficient floor area, plumbing/electrical work, durable benchtops, joinery Additional workspace, seating, social hub, improved workflow Large kitchens, open-plan homes, family entertaining Multifunctional surface, seating, added storage
Smart Kitchen Technology Integration High (systems integration, network) Wi‑Fi infrastructure, smart appliances, electrical upgrades, ongoing support Automation, energy monitoring, convenience, modern market appeal Tech-forward homes, energy-conscious households, smart-home ecosystems Remote control, efficiency gains, real-time monitoring
Natural Materials and Organic Textures Moderate (sourcing, finishing) Timber, stone, concrete, skilled trades, sealers/maintenance Warm, tactile aesthetic that improves with age; authentic luxury Restorations, luxury renovations, biophilic designs Warmth, durability, sustainable/aged patina
Two-Tone and Contrasting Cabinetry Low–Moderate (colour coordination) Multiple finishes/paints, possible bespoke cabinetry, 3D colour checks Visual depth, zone definition, personalised character Kitchens needing visual interest, islands that act as focal points Adds depth, defines zones, flexible update options
Integrated Appliance Concealment High (precise cabinetry & service access) Panel-ready appliances, bespoke panels, ventilation/service planning Seamless, uncluttered appearance with high-end finish Luxury renovations, minimalist schemes, showpiece kitchens Streamlined aesthetic, perceived spaciousness, organised look
Statement Lighting and Fixtures Low–Moderate (electrical planning, layering) Designer fixtures, layered lighting plan, dimmers, wiring Strong focal points, improved task lighting, enhanced ambiance Islands, dining-integrated kitchens, style-focused renovations High visual impact, better task illumination, mood control
Sustainable and Eco-Friendly Kitchen Design Moderate–High (material/system choices) Energy‑efficient appliances, sustainable materials, water-saving fixtures, insulation Lower running costs, reduced environmental impact, healthier indoor air Eco-conscious homeowners, long-term value projects, certification targets Energy/water savings, sustainability credentials, incentives
Curved and Organic Kitchen Shapes High (custom fabrication, design precision) Skilled joinery, custom benchtops, longer lead times, specialised fittings Inviting, ergonomic flow and sculptural interest, distinctive look High-end bespoke projects, biophilic schemes, statement renovations Improved flow and safety, unique sculptural aesthetics

From Idea to Installation Your Dream Renovation Starts Here

You've saved a dozen kitchen images, but your Highett weatherboard still has a tight footprint, an uneven floor and a wall you may not be able to move. That's the point where inspiration needs to become a buildable plan.

In older Victorian homes across Highett and greater Melbourne, good kitchen design is rarely about copying a gallery image. It comes from measuring the room properly, checking structure early, and matching the layout to how the household lives. A family kitchen near the bay has different pressures from an investor update or a compact unit renovation, and the design needs to reflect that from day one.

Start with the floor plan. Then sort out storage, lighting and finishes. In practice, that sequence prevents expensive backtracking. I've seen plenty of projects stall because someone chose a stone colour and door profile before resolving circulation, appliance positions or service runs. It looks like progress, but it usually creates joinery compromises later.

For rental properties, the brief shifts a little. Presentation still matters, but so do durability, easy maintenance and a layout that suits a broad range of tenants. Hard-wearing cabinetry, practical benchtops and full-height storage often make more sense than highly personalised details, especially if you want the kitchen to hold up well over several leasing cycles.

SitePro handles more than kitchens. As registered builders unlimited, the team also completes bathroom renovations, including modern bathrooms, designer bathrooms and projects where clients want finishes and detailing carried consistently across multiple rooms. If a kitchen upgrade sits alongside new bathroom ideas, it often pays to plan both spaces together so trades, timelines and selections line up properly.

A proper consultation with 3D design helps answer the questions that matter on site. Can the room carry an island without squeezing walkways. Is a peninsula the better use of space. Will darker timber joinery work in your natural light. Is concealed appliance joinery worth the extra cost and maintenance access planning.

If you're ready to turn ideas into a workable scope, SitePro Bathrooms in Highett offers kitchen and bathroom renovation services, including 3D design visualisation and customized quotes. Start with your home as it is, your budget as it stands, and a layout that can be built.

  • siteprobathrooms

Kitchen Benchtop Materials A Complete Guide (2026)

If you're planning a kitchen renovation in Victoria right now, the benchtop decision probably feels bigger than it used to. It isn't just about colour, edge profile, or whether you prefer a stone look over timber. You also need to think about safety, compliance, how the material will be fabricated, and whether it still makes sense for the way your household lives.

That shift has caught plenty of homeowners off guard. A material that was once the default upgrade path is no longer an option in the same way, so people are reassessing what they want from their kitchen benchtop materials. In practice, that's not a bad thing. It forces better questions. Will this surface cope with family cooking? Will it stain? Will it scorch? Will it suit the rest of the house if you later tackle bathroom renovations or start collecting new bathroom ideas for the next project?

The right benchtop isn't the one that looks best in a showroom sample. It's the one that still works after school lunches, hot pans, red sauce, clutter, cleaning, and years of use.

Choosing Your Perfect Kitchen Benchtop in 2026

Most kitchen renovations start the same way. You save a few inspiration photos, narrow down your cabinet colour, then realise the benchtop will drive half the final look and a lot of the budget. That's why this choice needs more than a style-first approach.

A person standing in a bright kitchen viewing various marble and wooden rectangular benchtop material samples.

For Australian homeowners, the biggest change has already happened. A nationwide ban on the manufacture, supply, processing, and installation of engineered stone products took effect in Australia in 2024, following concerns about respirable crystalline silica exposure for workers, and that changed the benchtop market immediately for renovation clients who now need alternatives (Australian engineered stone ban overview).

What that means in a real renovation

In Victoria, that change affects more than product selection. It affects quoting, lead times, fabrication methods, and how your builder plans the job. A benchtop now has to be assessed through four lenses at once:

  • Daily performance. Can it handle spills, prep work, and regular cleaning without becoming high-maintenance?
  • Heat and impact tolerance. Some surfaces cope well with rough treatment, others need more discipline.
  • Visual fit. Your benchtop has to work with cabinetry, flooring, splashbacks, and the overall tone of the home.
  • Compliance and installation risk. A good-looking material isn't a good choice if it creates avoidable safety issues during fabrication.

The practical upside is that homeowners are looking harder at materials they might once have dismissed. Porcelain, laminate, stainless steel, natural stone, solid surface, and timber all have a place. The best option depends less on trends and more on how you cook, who uses the kitchen, and how much maintenance you're prepared to accept.

Practical rule: Start with function, then narrow by appearance. Renovations run more smoothly when the material suits the household before it tries to impress guests.

Get the basics right before choosing the surface

Benchtop material and benchtop layout should be decided together. Height, overhang, sink type, appliance positions, and junctions with tall cabinetry all affect what's practical. If you're still sorting proportions, it helps to understand standard benchtop height before locking in a material that may need a particular thickness or edge detail.

A smart benchtop choice in 2026 isn't just stylish. It's compliant, durable, and realistic for the way Victorian homes are renovated now.

A Practical Comparison of Modern Benchtop Materials

The fastest way to narrow kitchen benchtop materials is to stop asking which one is “best” and start asking what each one does well. Every material asks for a trade-off. Some give you low maintenance. Some give you warmth. Some handle heat better. Some look expensive without being expensive.

Before the 2024 ban, engineered stone was a dominant choice in Australia because of its consistency and low maintenance, and its removal has accelerated the adoption of alternatives with similar or stronger performance profiles (Australian benchtop market context). That's why Victorian homeowners are now seeing a much wider field of viable options.

Benchtop materials at a glance

Material Cost Guide Durability Maintenance Best For
Porcelain $$$ High, especially against stains and scratches Low Busy family kitchens, modern homes, indoor-outdoor links
Laminate $ Good for general use, less forgiving with heat and impact Low Budget-conscious renovations, rentals, fast updates
Natural stone $$$ Strong, but depends on stone type and finish Medium to high Premium kitchens, feature islands, timeless designs
Timber $$ Moderate, can mark and move with use High Warm, character-led kitchens
Solid surface $$ to $$$ Good, but can mark and react to heat Low to medium Seamless contemporary designs
Stainless steel $$$ Very high in working kitchens Low Serious cooks, utility-focused kitchens, minimalist spaces

Where each material fits

Porcelain has become one of the strongest post-ban choices because it suits modern design and doesn't ask for much day to day. It works especially well in homes where the island is a visual focal point and the kitchen opens into living space.

Laminate remains one of the most practical materials on the market. It won't give you the same slab feel as porcelain or natural stone, but good design can make it look far better than people expect. It's often the right answer for investment properties or staged renovations.

Natural stone still has a place when the brief is texture, variation, and a more premium feel. The catch is that natural stone asks for acceptance of movement, marking, or maintenance depending on the exact stone and finish.

Timber brings warmth that hard surfaces can't replicate. It softens white joinery, works beautifully in coastal and character homes, and feels welcoming. It also shows life quickly, which some people love and others regret.

Solid surface sits in a useful middle ground. It suits curved details, integrated looks, and cleaner contemporary lines. It's often chosen by homeowners who want a sleek finish without the visual weight of stone.

Stainless steel is about function first. In the right kitchen, it looks sharp and intentional. In the wrong one, it can feel cold. This is a material for people who value hygiene, heat tolerance, and utility over softness.

The strongest benchtop choice is usually the one that solves your daily frustrations, not the one that wins the showroom lighting test.

A quick filter for decision-making

If you're comparing options, use this shortlist approach:

  • Choose porcelain if you want a refined look with low daily fuss.
  • Choose laminate if budget discipline matters and you still want style flexibility.
  • Choose natural stone if unique pattern and premium character matter more than perfect uniformity.
  • Choose timber if warmth is essential and you don't mind upkeep.
  • Choose stainless steel if performance and hygiene come first.
  • Choose solid surface if you like a smooth, contemporary finish.

That usually narrows the field from six options to two.

Deep Dive Into Leading Benchtop Choices

Once a shortlist is in place, the actual decision-making starts. At this stage, broad preferences need to meet daily reality. A benchtop can look ideal on a sample board and still be wrong for the household using it.

The most important technical trade-offs are porosity and heat tolerance. Non-porous materials such as porcelain and stainless steel resist stains and bacteria, while stainless steel has the highest heat tolerance. Laminate and solid surface need more care around hot cookware.

A hand touches a polished green slab next to a rolled material and a blue marble block.

Porcelain for low fuss and clean lines

Porcelain is one of the easiest materials to recommend when a homeowner wants a crisp, modern kitchen that's simple to live with. Because it's low-porosity, it handles everyday spills well and suits households where the kitchen gets used properly, not just admired.

It also works nicely in Victorian homes with indoor-outdoor flow. If the benchtop extends visually toward an alfresco zone or large rear opening, porcelain usually holds that clean visual line better than softer, more reactive surfaces.

What doesn't work so well is careless impact on exposed edges. Thin-profile designs look sharp, but they need sensible detailing and careful installation. On family jobs, I often steer clients toward edge treatments that look refined without creating a fragile corner at every busy point of the kitchen.

Porcelain suits you if:

  • You want low maintenance and don't want to think much about sealing or special cleaning.
  • Your kitchen gets heavy use from kids, cooking, and regular traffic.
  • You like a contemporary finish with minimal visual noise.
  • You want continuity between benchtop, splashback, and sometimes island cladding.

Laminate for smart value

Laminate is often underestimated because people remember older products that looked flat or dated. Current laminate options can work very well when the joinery design is strong and the kitchen layout is well resolved.

Its biggest advantage is value. If you want to direct more of the renovation budget into cabinetry, appliances, layout changes, or another stage of work later, laminate keeps pressure off the benchtop allowance. That can matter a lot in a whole-home plan where the kitchen is only one part of the spending.

The limits are straightforward. Laminate is less forgiving with heat, and once it's badly damaged, repairs are rarely invisible. It's a material that performs best when the household uses trivets, chopping boards, and a bit of common sense.

If your renovation budget has to stretch across several priorities, laminate can be the material that makes the rest of the project possible.

Natural stone for character and visual depth

Natural stone appeals to homeowners who don't want a perfectly uniform surface. Every slab has movement, variation, and a more organic look. In a kitchen with simple cabinetry, that can be exactly what gives the room personality.

This is also where expectations need to be mature. Natural stone isn't for people who want a surface to look untouched forever. Depending on the stone you choose and the finish you prefer, there may be more maintenance, more visible change over time, or a greater need for prompt cleaning after spills.

That doesn't make it impractical. It just means it suits a homeowner who values natural variation enough to accept that the benchtop may develop some history.

Stainless steel for serious function

Stainless steel is still unmatched if your first question is, “Can I put hot cookware down without worrying?” It's highly practical, hygienic, and honest. There's no pretending it's precious.

The design challenge is balance. Full stainless can feel hard in some homes, especially if the rest of the kitchen is stark. It usually works best when paired with warmer joinery, softer flooring, or a more restrained palette elsewhere.

Best uses for stainless steel include:

  • Cooking-focused kitchens where heat and cleanup matter more than softness
  • Butler's pantries and secondary prep zones
  • Minimalist renovations where a professional look suits the architecture

A well-chosen benchtop should feel right on Monday morning, not just on handover day.

Budgeting Your Kitchen Benchtop in Victoria

Most homeowners ask about cost early, but the better question is where the benchtop sits in the whole renovation budget. A cheap surface that doesn't last is poor value. An expensive surface that forces compromises everywhere else can also be the wrong move.

In Victorian projects, benchtop pricing usually rises or falls based on more than the material itself. Fabrication complexity, cut-outs, edge details, slab handling, access to the property, splashback returns, and installation conditions all affect the final figure. That's why two kitchens with the same footprint can still price very differently.

Think in total project terms

When reviewing quotes, look beyond the slab or sheet cost. The useful figure is the all-in installed cost. That typically includes site check, measure, template, fabrication, delivery, installation, cut-outs, and finishing around sinks, cooktops, and joins.

A practical budgeting approach is to split benchtop thinking into three bands:

  • Value-first choices such as laminate, where the material helps control overall spend.
  • Balanced mid-range choices such as some solid surface or timber applications, where appearance and function sit in the middle.
  • Premium choices such as porcelain, natural stone, or stainless steel in custom applications, where fabrication and handling often add complexity.

Where to spend and where to hold back

If the kitchen layout already works well, a benchtop upgrade can deliver a major visual change without rewriting the whole room. But if you're changing cabinetry, plumbing points, appliances, and flooring, the benchtop has to compete with bigger structural priorities.

That's where discipline matters. A cleaner, cost-effective benchtop choice can free up budget for items that affect daily use more than people expect, such as better drawer hardware, improved storage, lighting, or a stronger ventilation setup. It can also leave room for later works elsewhere in the home, including modern bathrooms or future designer bathrooms that carry the same finish language.

A renovation budget works best when every surface earns its place. Benchtops shouldn't consume money that the layout or storage needs more.

Use the kitchen budget as part of a broader plan

Many clients don't renovate one room in isolation. They stage work over time. If that sounds familiar, it helps to understand the wider cost of a new kitchen before deciding whether the benchtop should be the hero item or just one solid, sensible part of the package.

The best budgeting decisions usually come from clearly ranking priorities. If you cook constantly, spend more on performance. If you're preparing a rental or resale update, durability and visual neatness may matter more than premium material prestige.

Matching Your Benchtop to Your Lifestyle and Design

The right benchtop should match the way the kitchen is used, not the way it looks in a photo. Households live very differently. Some kitchens cop school bags, meal prep, and constant wiping. Others are calmer, more design-led spaces used mainly for entertaining. The material has to suit that rhythm.

Best matches by household type

A busy family kitchen usually benefits from low-maintenance, lower-porosity materials and edge details that don't chip easily. Consequently, porcelain often earns its place, while some natural stones can become frustrating if the household expects a no-fuss surface.

A keen entertainer's kitchen can justify a more expressive material if the owner values visual impact and is willing to maintain it properly. Feature islands, bolder veining, and waterfall ends make sense when the kitchen is part workspace, part social centre.

A rental property or investment update usually needs a different mindset. Here, visual neatness, replacement simplicity, and manageable cost often matter more than statement finishes. Laminate frequently performs well in this category because it keeps the renovation practical.

A design-led home renovation might use the benchtop as one element in a much bigger palette. In those homes, the material has to relate to joinery colour, floor tone, handles, lighting, and adjacent rooms.

Design decisions that matter more than people think

Material is only half the story. The way it's detailed changes the result.

  • Waterfall ends make a kitchen feel more architectural, but they increase the importance of good edge selection and visual alignment.
  • Splashback continuity can create a calm, premium feel when the benchtop material carries upward in a controlled way.
  • Thickness and profile influence whether the kitchen feels refined, chunky, minimal, or heavy.
  • Colour temperature matters. Warm benchtops can soften white joinery, while cooler surfaces can sharpen a more contemporary palette.

If you're still selecting joinery finishes, it helps to look at kitchen cabinets materials alongside the benchtop so the whole composition works together.

A well-designed kitchen rarely relies on one expensive surface. It succeeds because all the materials agree with each other.

Think beyond the kitchen

A kitchen renovation often sets the tone for the next part of the house. If bathroom renovations are on your longer-term list, keep that in mind now. You don't need to match rooms exactly, but there should be some relationship in tone, texture, or finish quality.

That's how homes feel consistent. A porcelain-look kitchen with sharp black details may lead naturally into modern bathrooms. A warmer timber-and-stone kitchen may point you towards softer, more layered designer bathrooms later on. Good design continuity doesn't happen by accident. It starts with material choices that have range.

Installation Renovation and Compliance Considerations

The benchtop selection isn't finished when you choose the material. The installation pathway matters just as much. A good result depends on measure, fabrication, transport, fitting, and the way trades manage risk inside an occupied home.

In Australian kitchens, fabrication can raise serious safety issues because some materials generate hazardous dust such as respirable crystalline silica during cutting. Professional installers use controlled methods including wet-cutting and on-tool extraction, which is why choosing a qualified, compliant builder is critical for health and safety during a renovation.

What the process usually looks like

For most renovations, the sequence is fairly consistent:

  1. Final cabinet installation happens first, because benchtops are measured to the finished base units.
  2. Check measure or templating confirms exact dimensions, cut-outs, wall irregularities, and overhangs.
  3. Fabrication takes place off site where material handling and cutting can be controlled properly.
  4. Delivery and installation follow once the benchtop is ready and the room is prepared.
  5. Final fitting includes sinks, taps, sealing at junctions, and clean-up.

The key point is that benchtops are not a loose item that can be guessed early and dropped in later. They depend on precision.

Why builder choice matters

This part of the job is where professionalism shows. A compliant renovation team plans access, protects finishes, coordinates trades, and understands the fabrication limits of each material. That's especially important in occupied Victorian homes where dust control and staging affect the whole household.

If you're comparing renovation providers, ask practical questions:

  • How do they handle templating and site tolerances
  • What fabrication controls apply to the chosen material
  • Who manages the sequencing between cabinets, plumbing, and benchtop install
  • Are they operating to an appropriate professional standard, such as registered builders unlimited where the project scope requires it

For homeowners who want a single company to manage design, documentation, and renovation coordination, SitePro Bathrooms provides end-to-end kitchen and bathroom renovation services, including 3D design and construction management, which can simplify benchtop planning within a larger project.

A benchtop install should feel organised from the client side. If the process feels vague before work starts, it usually gets harder once the room is out of action.

Your Benchtop Questions Answered

Can I replace just the benchtop and keep the existing cabinets

Sometimes, yes. It depends on cabinet condition, level, layout, and whether the new material requires different support or creates issues around sinks, cooktops, or wall lines. Older cabinets can make a benchtop-only upgrade less straightforward than it sounds.

If the joinery is structurally sound and the kitchen layout still works, replacing only the benchtop can be a sensible refresh. If the cabinets are tired, out of square, or poorly configured, it often makes more sense to treat the benchtop as part of a broader kitchen renovation.

Which benchtop is best for a family that cooks every day

In most cases, low-maintenance and low-porosity materials are the safest starting point. They tend to be easier to clean and less stressful to live with. For a busy family, the wrong benchtop is usually one that demands too much care or punishes minor mistakes.

The better question is what kind of household discipline you have. If no one reliably uses trivets or cutting boards, don't pick a material that depends on perfect behaviour.

Is timber a good idea in a kitchen

It can be, but only for the right owner. Timber looks warm and inviting, and it works beautifully in certain homes, especially where the kitchen needs softness. It also needs ongoing care and is less forgiving around water and wear.

Many homeowners like timber in smaller applications, such as an island accent or a seating section, rather than across every work surface.

How do I make the kitchen feel consistent with future bathroom renovations

Focus on finish language, not direct matching. Repeat the same overall temperature and mood. If the kitchen is clean-lined and restrained, your future bathroom renovations will usually feel more coherent if they follow that same approach. That's where new bathroom ideas often become clearer. You're not starting from scratch. You're extending an existing design direction.

Are designer bathrooms and kitchens supposed to match exactly

No. Exact matching can feel forced. Good homes share a common thread instead. That might be a preference for soft neutrals, warm timber notes, brushed metal finishes, or a sharper modern look. Designer bathrooms often feel connected to the kitchen because the material choices belong to the same house, not because they copy each other.

What's the safest way to future-proof my benchtop choice

Keep the design simple enough to age well and practical enough to suit changing needs. Highly specific trends date faster than balanced material selections. Future-proofing usually comes from three things:

  • Choose a material you can live with, not one you'll baby.
  • Keep edge details and colours disciplined, so the kitchen doesn't age too quickly.
  • Think whole-home, especially if modern bathrooms or other updates are likely later.

Start Your Transformation with a 3D Design

A good benchtop choice balances performance, maintenance, visual fit, budget, and compliance. In Victoria, that decision now needs even more care because material selection and safe installation are closely linked.

The smartest renovations don't rely on guesswork. They test proportions, finishes, layout, and practical use before construction starts. That's why a 3D design stage is so useful. It lets you see how the benchtop works with cabinetry, splashbacks, flooring, and the rest of the room before anything is ordered.

If you're weighing kitchen benchtop materials and want clarity before committing, the next step is a personalized renovation quote and a detailed 3D concept. That gives you a realistic view of what will work in your home, what should be avoided, and how to build a kitchen that still feels right years from now.