• siteprobathrooms

Highett Homeowners: Your Bath and Kitchen Renovation Guide

You're probably standing in one of two places right now.

Either you're in a kitchen that no longer works for the way your household lives, with awkward storage, dated finishes, poor lighting and appliances that feel bolted on rather than planned in. Or you're in a bathroom that looks tired, feels cramped, and has started raising the kind of questions no homeowner enjoys asking, especially around waterproofing, drainage, ventilation and whether that old layout is worth keeping.

That's normal in Highett. A lot of homes across this pocket of Melbourne sit in the middle ground. They're not untouched originals, but they're not fully modern either. They often need more than a cosmetic update. A good bath and kitchen renovation usually means making smarter decisions about layout, services, compliance, storage, and how the space will perform day after day, not just how it will look in photos.

The homeowners who get the best result usually don't start with tile colours. They start by getting clear on scope, budget, technical constraints, and who's responsible for what. That's even more important in Victoria, where apartment and strata rules, trade sequencing, and builder registration all affect how smoothly the project runs.

Your Renovation Journey Starts Here

A first major renovation can feel bigger than it should. You look at the room every day, so it seems familiar, but once work begins, every decision suddenly affects another one. Move a vanity and you may need new plumbing positions. Shift a cooktop and you may change cabinetry, electrical, ventilation and splashback dimensions at the same time.

That's why I tell Highett homeowners to stop thinking about renovation as one giant event. It works better when you break it into a chain of linked decisions. Scope first. Design second. Selections third. Construction only after those pieces are properly aligned.

This isn't a niche category or a small household upgrade. Bathroom and kitchen work sits inside a very large, mature renovation market. The global bathroom remodelling market was valued at USD 200.2 billion in 2025 and is projected to reach USD 315.9 billion by 2035, according to the 2025 bathroom remodelling market figures published here. That scale matters because it reflects something practical. These rooms are expensive to build, technically dense, and worth planning properly.

Why these rooms matter more than others

Bathrooms and kitchens absorb more services, more materials, and more coordination than most other rooms in a home. They also carry more downside when they go wrong.

A bedroom with a poor paint choice is frustrating. A bathroom with poor falls or weak waterproofing can become a demolition job. A kitchen with unresolved service conflicts can delay cabinetry, appliances and handover.

Practical rule: The earlier you resolve layout, services and approvals, the fewer expensive surprises you'll face once trades are on site.

What a strong renovation feels like

A good renovation doesn't feel rushed. It feels organised.

You know what's staying and what's changing. You know whether you're aiming for modern bathrooms, designer bathrooms, or a simpler functional upgrade. You know whether the kitchen needs reconfiguration or just better storage and finishes. Most of all, you know why you're spending the money.

That clarity is what turns a stressful project into a manageable one.

Phase 1 Planning Your Renovation and Defining Scope

Most problems in a bath and kitchen renovation start before demolition. They start when the brief is vague.

Homeowners often arrive with saved images, a few new bathroom ideas, and a broad sense that the current room isn't working. That's a useful starting point, but it isn't yet a scope. Scope means defining what must change, what can stay, and what future decisions need to be made now rather than later.

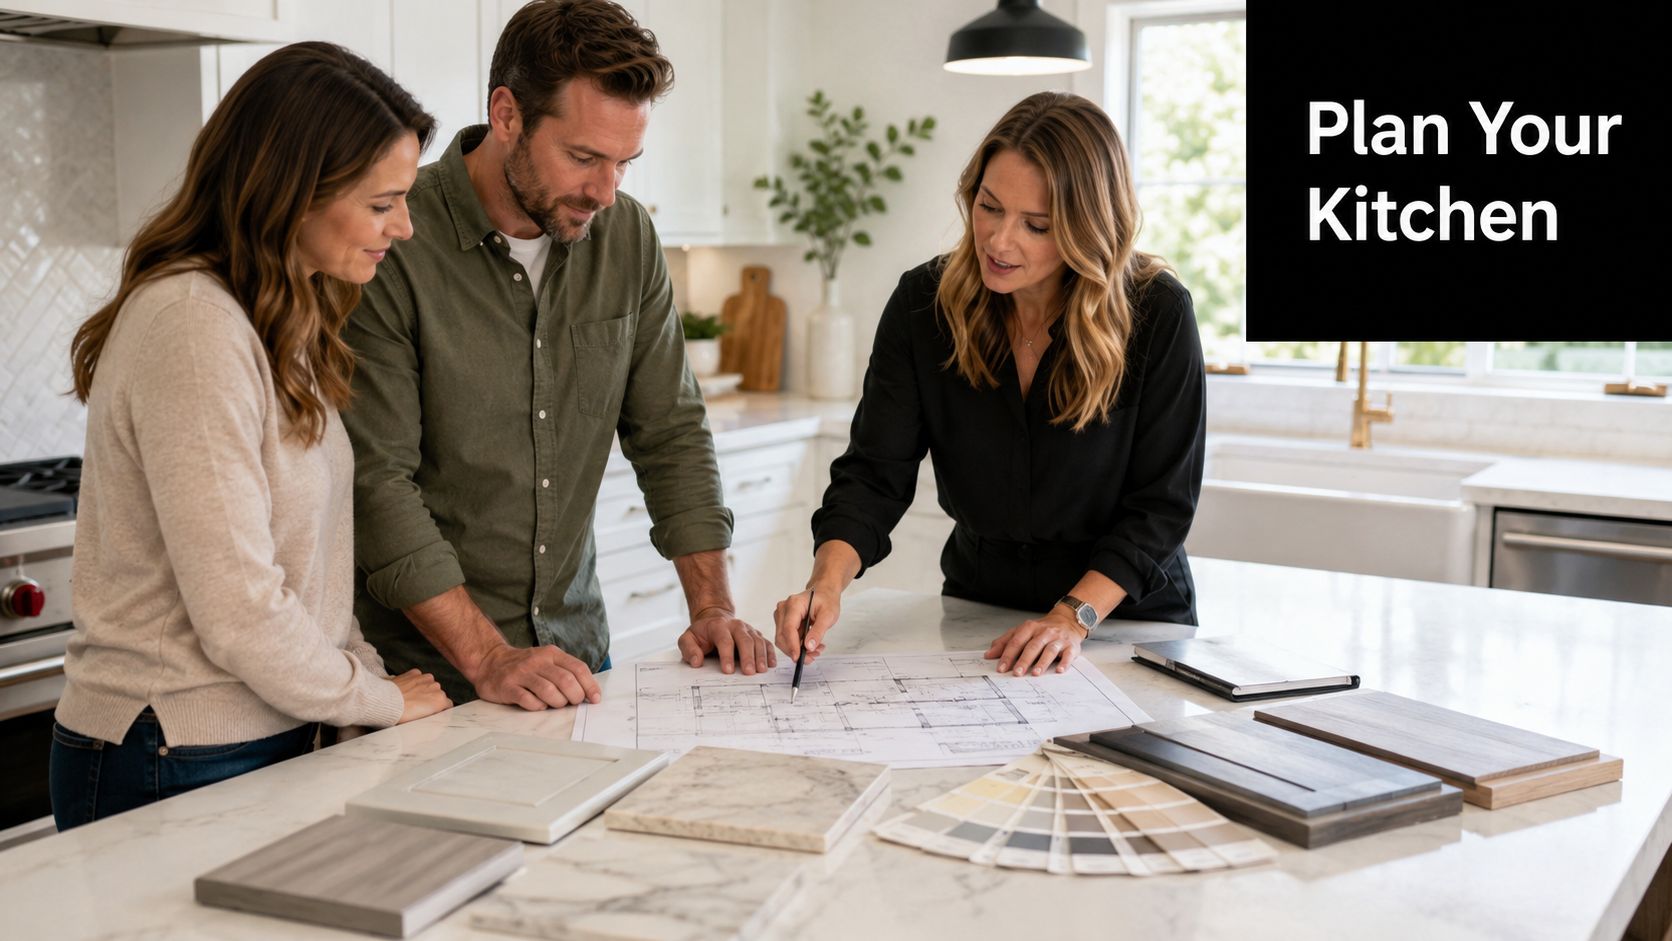
A professional interior designer reviews architectural floor plans and fabric swatches on a tablet and paper.

Start with the reason, not the finishes

A renovation brief is stronger when it answers a few hard questions directly:

  • Daily function: Is the room difficult to use, short on storage, badly lit, or awkward for more than one person?
  • Property stage: Are you renovating for long-term living, to prepare for sale, or to improve a rental property?
  • Performance issues: Are you seeing signs of moisture trouble, poor ventilation, damaged joinery, or service problems?
  • Lifestyle fit: Does the layout suit how you cook, clean, bathe, store items and move through the room?

A family home in Highett often needs durability and routine-friendly planning. An investor may prioritise durable finishes and easier maintenance. A downsizer might value step-free access, simpler cleaning and stronger lighting more than statement materials.

Audit the room like a builder would

Before choosing tapware or door profiles, walk the room and assess it practically.

Check where doors clash. Look at how much bench space you regularly use. Notice whether drawers would outperform cupboards. In bathrooms, look at shower position, natural ventilation, towel placement, and whether the room feels tight because it is small or because the layout wastes space.

This stage is also where hidden constraints usually reveal themselves. Older homes may have uneven walls, non-standard framing, legacy plumbing positions, or electrical limitations. Apartments may involve access issues, waste stack constraints, noise restrictions and approval processes.

A beautiful plan that ignores existing services is still a bad plan.

Plan for electrification while the room is open

One decision many homeowners overlook is whether this renovation is the right time to update how the home runs, not just how it looks.

In Victoria, policy shifts are pushing household electrification forward, and that makes a renovation the right moment to assess switching from gas to electric appliances such as induction cooking or more efficient hot water systems, as discussed in this overview of Victorian gas reduction and electrification considerations. Once walls, floors and cabinetry are open, it's far easier to review power supply, appliance choice and switchboard implications than it is after the room is complete.

That doesn't mean every project should convert immediately. It does mean every project should ask the question.

Define what success looks like

For bathrooms, success may mean a better shower, stronger storage, cleaner lines and a room that's easier to maintain. For kitchens, it may mean a more efficient working layout, proper appliance integration and improved family flow.

Write the brief in plain language. For example:

  • Bathroom priority: larger shower, more vanity storage, warmer lighting, easier cleaning
  • Kitchen priority: better prep zone, wider drawers, integrated appliances, stronger ventilation
  • Non-negotiables: no layout change, or full layout change if the current one has inherent flaws
  • Nice-to-haves: feature tiling, recessed niches, custom joinery details, upgraded hardware

That document keeps the project grounded when choices multiply later.

Budgeting and Costs for Your Victorian Renovation

The budget question gets asked early because it should. Renovations go off track when homeowners commit to design ideas without understanding how quickly money gets absorbed by labour, services, joinery, waterproofing, finishes and site conditions.

The most useful way to think about budget isn't as one headline number. It's as a set of cost groups that shift depending on complexity. A simple refresh and a full reconfiguration might look similar on a mood board, but they are very different jobs on site.

Use benchmarks as a starting point, not a promise

As a planning benchmark, the median spend for a primary bathroom renovation in Australia is around AUD 15,000, while a kitchen renovation has a median spend of about AUD 24,000, based on these Australian renovation benchmark figures. Those figures are useful because they give homeowners a realistic entry point for thinking about scope.

They are not fixed prices for your home.

A Highett bathroom with layout retention, straightforward tiling and standard fixtures sits in a different category from a bathroom that needs drainage correction, substrate repair, custom joinery and premium fittings. The same goes for kitchens. Once you move plumbing, alter electrical locations, add custom cabinetry or solve structural issues, the budget changes with it.

Where the money usually goes

Most renovation budgets spread across a familiar set of categories. The exact split varies, but the categories don't.

Cost Category Typical Allocation (%)
Demolition and site preparation 5 to 10
Plumbing and drainage works 10 to 20
Electrical and lighting 8 to 15
Waterproofing and substrate preparation 5 to 12
Cabinetry and joinery 15 to 30
Benchtops or vanity tops 5 to 12
Tiling and surface finishes 10 to 20
Fixtures, fittings and appliances 10 to 20
Painting, fit-off and finishing 3 to 8
Project management and coordination 5 to 15

This table is illustrative. It helps you understand budget shape, not lock in a quote.

The biggest cost drivers in real projects

The jobs that push budget hardest in Victoria are rarely the decorative ones alone. They're usually tied to complexity.

  • Layout changes: Moving plumbing points, waste lines, gas points or major electrical locations often expands labour and coordination.
  • Custom joinery: Bespoke cabinetry improves fit and function, but it also increases design time, fabrication detail and lead time.
  • Existing condition issues: Once demolition begins, rotten substrates, out-of-level surfaces, non-compliant previous work or concealed damage can appear.
  • Access constraints: Apartments, narrow access, parking limitations and strata work rules can affect labour planning and delivery.
  • Finish level: Large-format tiling, detailed niches, feature lighting and premium fixtures all increase installation care.

A lot of homeowners underestimate how much hidden work sits behind a clean finished room. The visible surfaces matter, but they rest on preparation, coordination and compliance.

Keep a contingency, or expect stress

For kitchen projects in particular, practical renovation guidance recommends allowing a 10 to 20% contingency for latent conditions or scope changes, as outlined in this kitchen and bath planning guidance. That range exists for a reason. Once walls and floors are opened, some decisions can't be made from drawings alone.

If you budget to the last dollar, every surprise becomes a crisis. If you build in room, you can solve problems properly instead of patching over them.

Budget discipline works best before selections are finalised. The expensive version of almost every mistake is changing your mind after orders are placed or installation has begun.

Price the project in layers

I prefer homeowners to think in three layers rather than one total:

  1. Base build cost
    Demolition, rough-ins, waterproofing, substrate work, standard trade labour, installation.

  2. Selection cost
    Tiles, fixtures, cabinetry finishes, benchtops, appliances, lighting, mirrors, accessories.

  3. Risk allowance
    Contingency for what the room reveals once work begins, or for changes you may choose as design evolves.

That approach gives you better control. It also helps you decide where to spend. Some households choose to put more into cabinetry and less into feature tiles. Others prioritise better plumbing fixtures or stronger appliance integration.

If you want a rough early planning tool before obtaining a formal quote, a bathroom renovation cost calculator for initial budgeting can help frame the discussion. It won't replace site inspection or detailed scope, but it can stop the common mistake of designing a project far beyond the intended spend.

What works and what doesn't

What works is matching the brief to the budget. If the room needs full technical correction, spend there first. If the layout already performs well, preserve it and invest in better finish quality.

What doesn't work is trying to disguise a major rebuild as a cosmetic update. Those projects often cost more in the long run because the underlying issues were never properly addressed.

Designing Your Dream Space Layouts Materials and 3D Visualisation

Design gets more enjoyable once the practical groundwork is done. This is the point where new bathroom ideas stop being saved images and start becoming a room that fits your home, your routines and the way the space is built.

The strongest designer bathrooms and kitchens don't come from adding more features. They come from resolving the right details in the right order. First the layout. Then the service positions. Then the materials. Then the visual refinement.

A clear visual planning process helps with that.

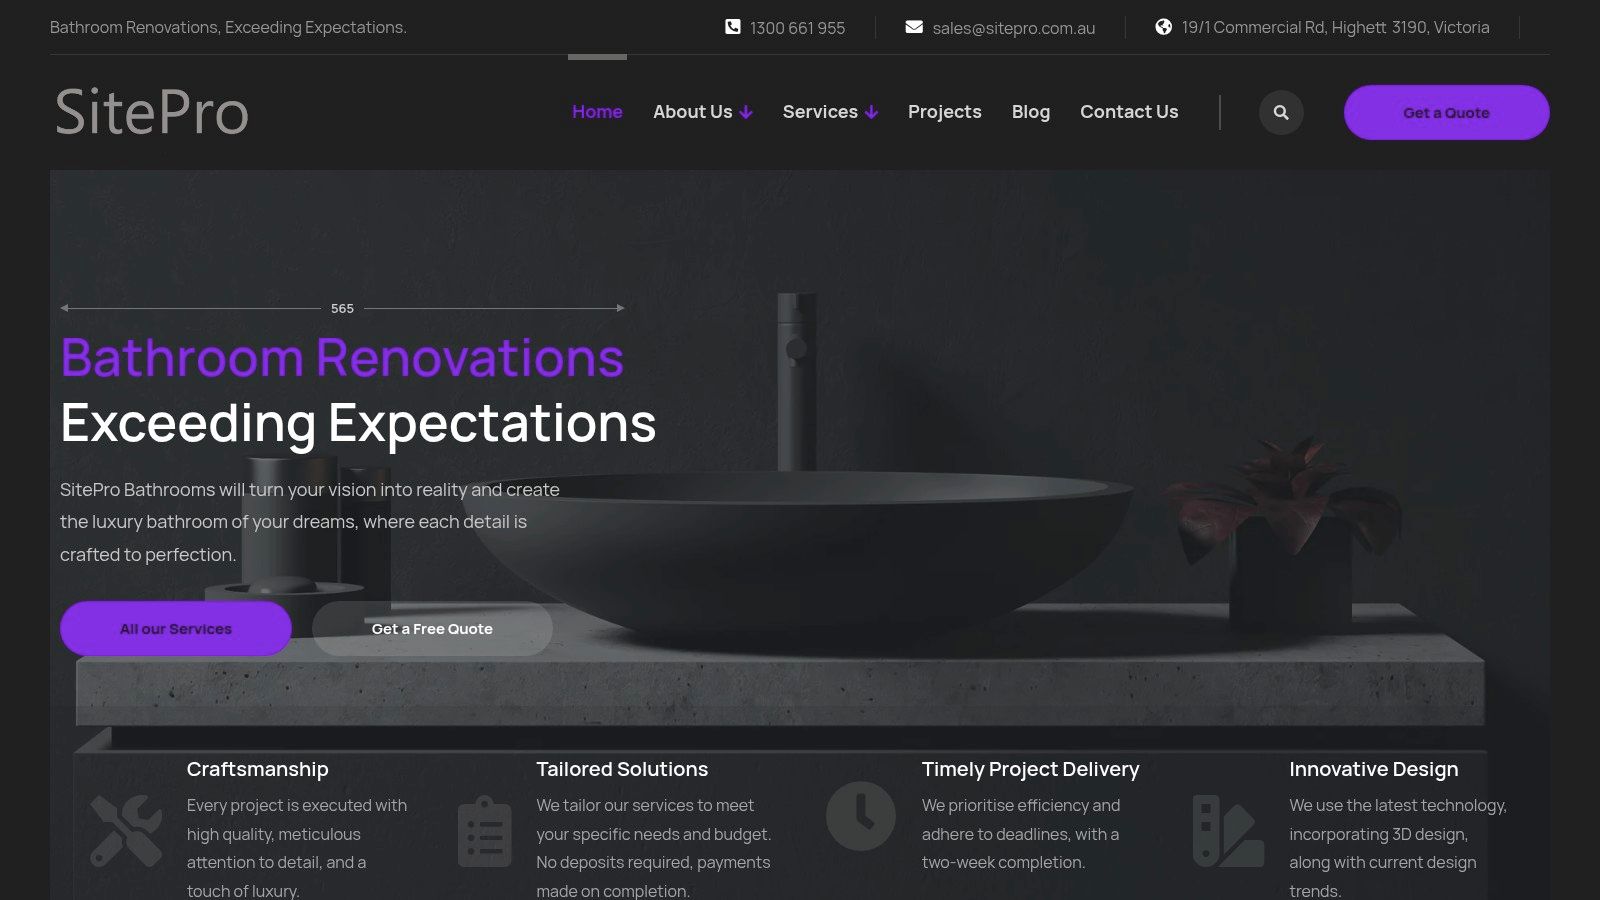
Screenshot from https://siteprobathrooms.com.au

When the layout starts solving the room

A bathroom often changes dramatically from one smart move. That may be shifting the shower to free the vanity wall, recessing storage into a better position, or changing the door swing so the room opens cleanly. In kitchens, the breakthrough usually comes when circulation improves and appliances stop competing with prep space.

Good modern bathrooms aren't just minimal-looking. They're easier to use because the room has been zoned properly. Wet areas contain water better. Dry zones feel calmer. Storage lands where people naturally reach for it.

In a kitchen, the equivalent is service coordination and sequence of use. Prep, wash-up, cooking and storage should support each other rather than collide.

Materials should match the way you live

Some material choices look excellent on a board and become annoying in everyday use. Others seem modest at selection stage and turn out to be the best decision in the room.

A practical material review usually includes:

  • Joinery finishes: Will fingerprints show easily, and can the finish handle regular cleaning?
  • Benchtop surfaces: Does the household need impact resistance, stain resistance, or a lower-maintenance surface?
  • Tiles: Are you choosing a format and finish that suits both the room size and the cleaning reality?
  • Hardware and fixtures: Will the selected pieces feel solid and age well with repeated use?
  • Lighting: Does the plan include task light, ambient light and mirror lighting where needed?

The best material is rarely the one that shouts the loudest. It's the one that still feels right after years of use.

Why 3D design prevents expensive regret

Effective planning allows for the avoidance of many costly mistakes. A 2D plan is necessary, but for most homeowners it isn't enough. They can't easily judge depth, alignment, sightlines, bulk, colour balance or whether a niche, vanity, island or overhead cabinet will feel right in the room.

That's why 3D design matters. It lets you test the room before construction starts.

You can assess whether the vanity is too dominant, whether a nib wall makes sense, whether the shower screen feels intrusive, whether the splashback should run higher, or whether the kitchen island is making circulation tighter than expected. Those are exactly the sorts of issues that are cheap to fix on a screen and expensive to fix after framing, tiling or joinery production.

If you want to explore how that visual planning process works before build stage, a free 3D bathroom planner for layout visualisation is a useful starting point.

A simple example of design decisions that pay off

Consider a common Highett bathroom scenario. The existing room has a small shower, a bulky vanity, and wall tiles chosen more for trend than light reflection. On paper, the homeowner initially wants a larger vanity, feature wall tile, a recessed niche and a freestanding bath.

Once the room is tested properly in 3D, a few things become obvious. The bath crowds circulation. The larger vanity visually closes the room. The niche lands awkwardly against grout lines. The feature tile darkens the wet zone. A revised scheme with a better-proportioned vanity, lighter wall finish, integrated storage and a cleaner shower layout performs better and often looks more expensive because it feels resolved.

That's what good design does. It removes wrong choices early.

Staging the Project Timelines and Managing Expectations

A renovation runs smoothly when each trade arrives to complete work that the previous trade has properly prepared. That sounds simple, but it's where many projects drift into frustration. The problem usually isn't that work takes effort. It's that people expect visible progress every day, when some of the most important stages are hidden inside walls, floors and substrate preparation.

The sequence matters because the room is layered

Bathrooms and kitchens are built in layers, and each layer depends on the one beneath it. If rough-ins are wrong, cabinetry won't land properly. If substrate isn't right, waterproofing and tiles won't perform. If cabinetry is installed before services are confirmed, rework becomes painful and expensive.

A typical project usually moves through a sequence like this:

  1. Site preparation and protection
    Access planning, dust control, floor protection, delivery coordination and isolation of work areas.

  2. Demolition and strip-out
    Removal of fixtures, finishes, joinery and selected wall or floor elements.

  3. Structural or framing adjustments
    Only where required, including openings, support changes or corrections to existing construction.

  4. Rough-in stage
    Plumbing, drainage, electrical, ventilation and appliance service positions are set.

  5. Substrate preparation
    Wall and floor surfaces are corrected and prepared for waterproofing, tiling or cabinetry.

  6. Waterproofing and enclosed technical works
    Especially critical in bathrooms before finishes are installed.

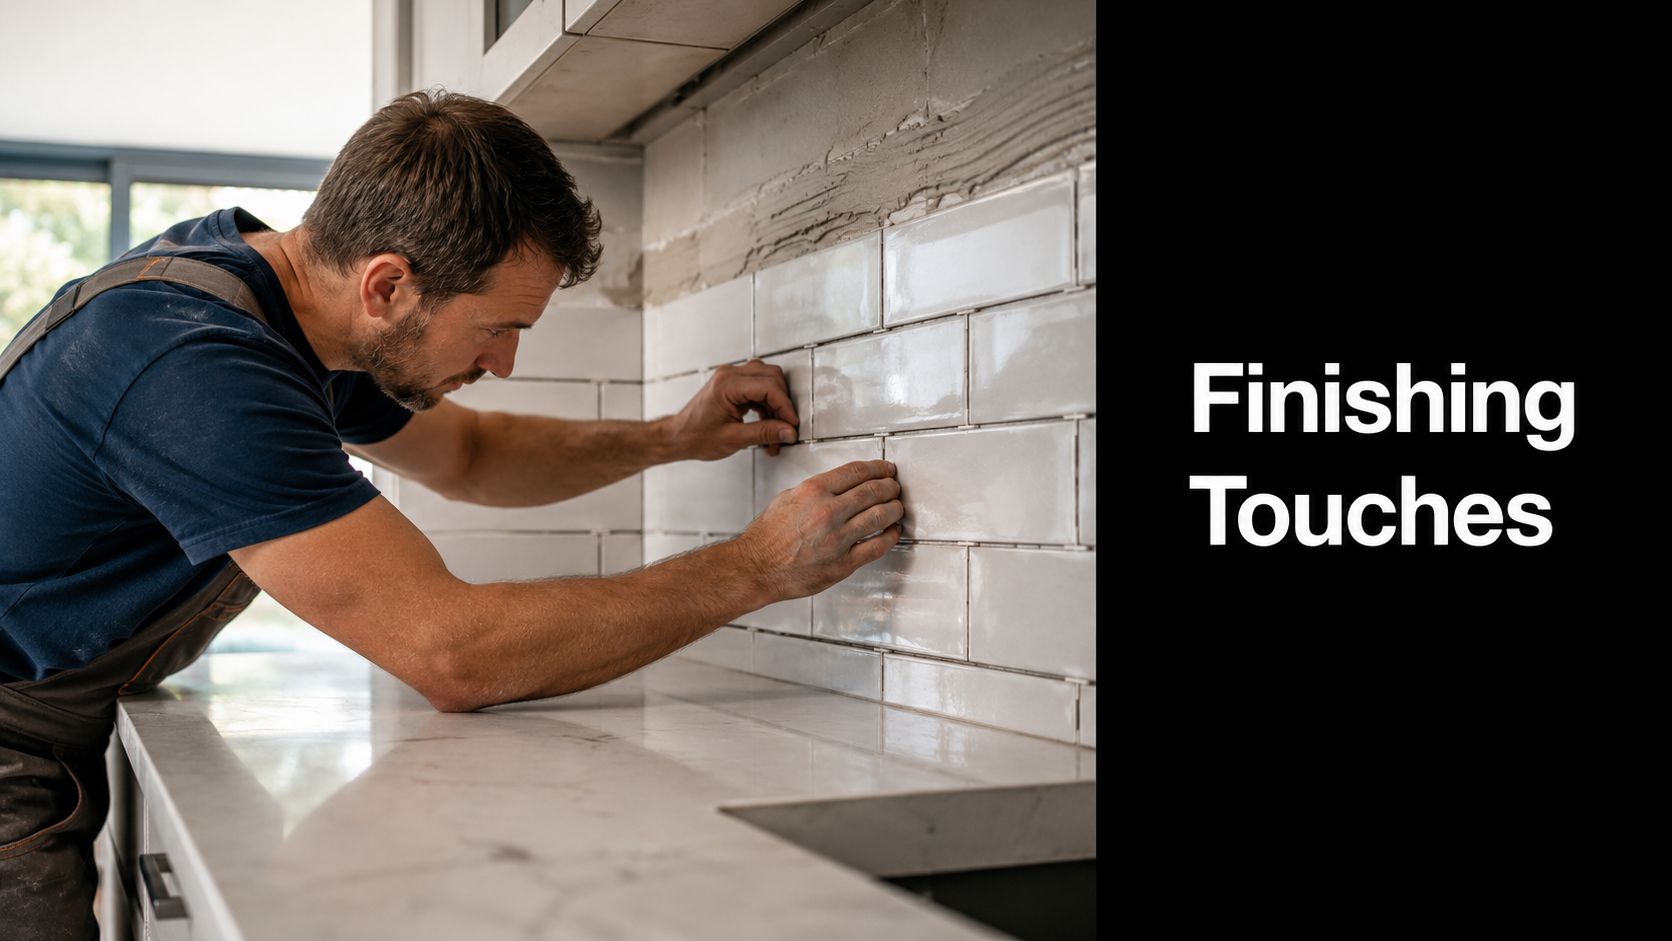
  7. Tiling, plastering, cabinetry and fixed installations
    The visible shape of the room starts to return here.

  8. Benchtops, fit-off and finishing
    Fixtures, tapware, appliances, screens, mirrors, paint and final connections.

  9. Final clean and handover
    Defects are checked, adjustments are made and the space is prepared for use.

What homeowners often underestimate

The slowest-looking days can be the most important days. A room may appear unchanged while trades are correcting falls, setting service points, checking levels, waiting on custom fabrication or allowing materials to cure.

That isn't inactivity. It's part of building the room properly.

Kitchen projects need especially careful coordination before the decorative items arrive. Cabinetry, appliances, plumbing, electrical and ventilation have to be aligned before benchtops and splashbacks are ordered. Once those fixed elements are in production or installed, changes become disruptive.

How to make the timeline less stressful

A homeowner can't remove disruption completely, but they can reduce uncertainty.

  • Finalise selections early: Late fixture or tile decisions often create avoidable pauses.
  • Freeze the layout before rough-ins: Mid-stream layout changes usually affect several trades at once.
  • Allow for lead times: Custom joinery, stone and specialised finishes need planning room.
  • Plan household logistics: Temporary cooking, bathroom access, deliveries and parking should be considered before work starts.

Renovation stress usually comes from uncertainty, not from the existence of work itself.

The best timeline is not the fastest-looking one. It's the one that keeps the sequence intact.

Choosing Your Team Selecting a Registered Builder in Victoria

The builder you choose will shape almost everything that follows. Good design can be undermined by poor supervision, weak sequencing and inconsistent trade quality. A modest design can perform beautifully when the builder is organised, technically sound and realistic from the start.

That's why, in Victoria, registration matters. For kitchen and bathroom work, you want someone who understands renovation conditions, not just new build logic. Existing homes are less forgiving. Walls aren't always straight. Services aren't always where the old drawings suggest. Apartments add another layer of rules and access planning.

A professional builder in a black shirt shaking hands with a client during a home renovation project.

Why a specialist matters

A bath and kitchen renovation compresses a lot of work into a small footprint. The room may be compact, but the coordination is not. You need someone who can manage waterproofing, drainage, joinery tolerances, appliance integration, tiling logic, ventilation and final fit-off in the correct order.

That's where a renovation specialist has an edge over a generalist.

The phrase registered builder unlimited matters to many homeowners because it signals a formal level of builder registration in Victoria. Still, it should spark further questions. Registration is part of the screening process, not the whole process. You still need to assess whether the builder is structured, experienced in occupied homes, and clear about who manages each stage.

For a practical explanation of why this matters, see why using a registered builder matters for your bathroom renovation.

Questions worth asking before signing anything

Some questions sound basic, but they reveal a lot very quickly.

  • Who manages the project day to day: Will you deal with the quoting person, a site supervisor, or rotating trades?
  • How are trade stages sequenced: Ask how they handle rough-ins, waterproofing, cabinetry and fit-off coordination.
  • How are variations managed: You want a clear process before any changes occur.
  • What information is required before construction starts: A serious builder should want selections, drawings and scope clarity.
  • How is communication handled: Regular updates matter, especially if you're living in the home during works.
  • What experience do they have with similar properties: Highett houses, townhouses and apartment projects each present different constraints.

Signs of a builder who will make life easier

You're not only looking for technical competence. You're looking for steadiness.

A good builder usually does a few things consistently. They ask detailed questions early. They identify risks without dramatics. They don't promise that everything will be easy. They explain the order of operations clearly. And they're comfortable discussing approvals, responsibilities and site limitations before the contract is signed.

The right builder doesn't just tell you what you want to hear. They tell you what the room needs.

What to avoid

Be careful with anyone who prices quickly from limited information, shrugs off technical issues, or treats waterproofing and service coordination like minor details. Also be wary of vague answers around approvals, scheduling or who exactly will be on site.

The cheapest number on paper can become the most expensive job in practice if the scope is weak or the supervision is poor.

Avoiding Common Pitfalls and Highett Specific Considerations

The most expensive renovation mistakes are often the ones homeowners assume will sort themselves out on site. They won't.

Bathrooms and kitchens are unforgiving rooms because so much of the critical work disappears behind finishes. By the time a problem becomes visible, the rectification path is usually disruptive and costly.

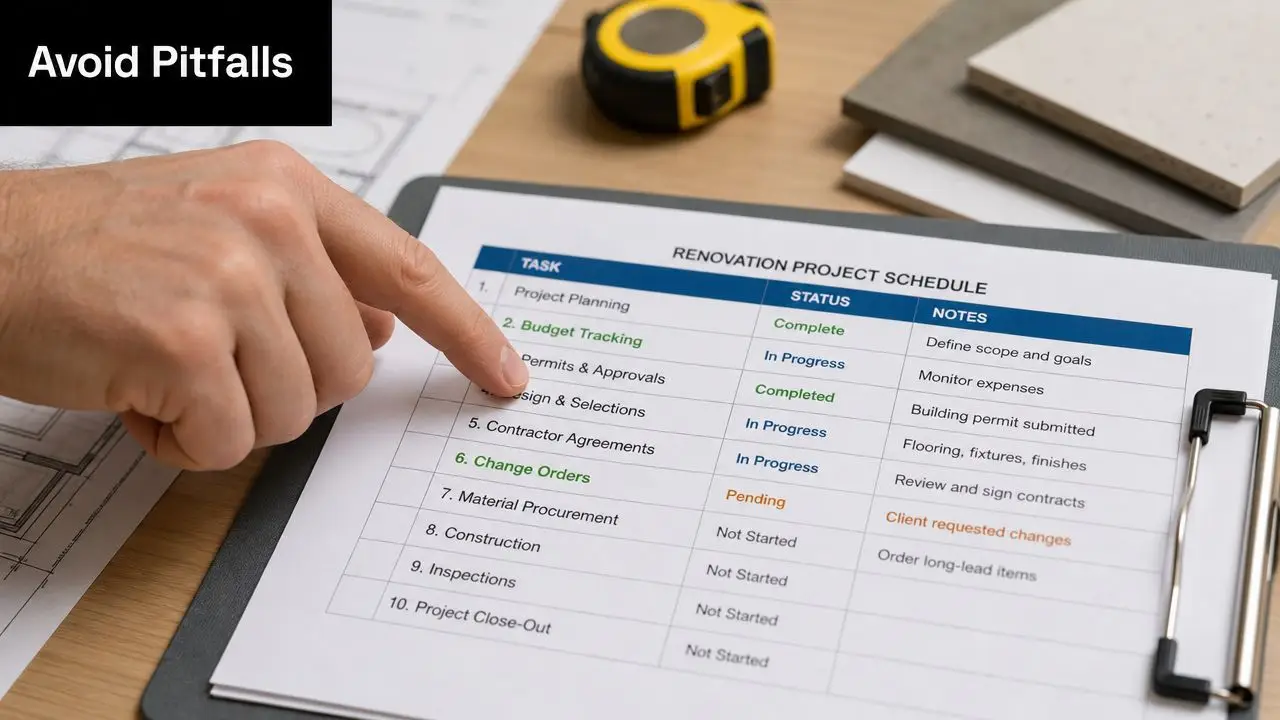
A hand pointing to a renovation project schedule list on a clipboard on a wooden desk.

Bathroom failures usually start with hidden technical work

In bathroom renovations, waterproofing and drainage detailing are the highest-risk controls. Shower bases should fall at about 1:100 to 1:80 towards the waste, according to this bathroom remodelling guidance covering slope and drainage detail. That sounds minor until you see what happens when falls are wrong. Water sits in corners, loads the membrane, stresses grout lines and creates failure points that can't be properly corrected without removing finishes.

That's why sequence matters so much in bathrooms. Substrate preparation comes first. Then membrane installation and penetration sealing. Then tiling. Not the other way around.

Kitchen mistakes are usually coordination mistakes

A kitchen can look well designed and still fail in daily use if services weren't coordinated early enough. Appliance locations, cabinetry internals, power points, lighting, plumbing, ventilation and splashback dimensions all need to be resolved before production begins.

Common trouble points include:

  • Late appliance changes: Cabinet dimensions and service points may no longer match.
  • Unplanned power needs: Lighting and appliance use can outgrow the original electrical plan.
  • Poor ventilation planning: A kitchen that looks clean on day one may age poorly if steam and grease handling are weak.
  • Overdesigned layouts: More features don't always improve function.

Strata and apartment work in Victoria needs special care

This is one area too many renovation guides ignore. For apartment renovations in Victoria, compliance with body corporate rules is a major factor. Questions around who pays for shared-services damage, when committee approval is needed, and how to sequence noise-sensitive works without breaching by-laws are critical, as outlined in this guide to apartment renovation body corporate considerations.

In Highett and surrounding areas, that matters more than many owners expect. A straightforward bathroom renovation in a freestanding house can become a much more procedural job in a strata building. Access windows, lift protection, delivery rules, waste removal, working hours and waterproofing sign-off all need to be considered early.

If you're renovating in an apartment, treat approvals and access planning as part of the build, not paperwork to deal with later.

The biggest practical mistake of all

Changing your mind after work is underway.

Some changes are unavoidable. Many are not. Once layout, services and materials are committed, late design revisions have a ripple effect through labour, cost and timing. That's why proper planning, clear drawings and 3D review are so valuable. They don't remove every decision. They move the critical ones forward to the point where they're still cheap to make.

A successful bath and kitchen renovation in Highett doesn't come from luck. It comes from choosing the right scope, solving the technical risks early, and working with a team that understands both the design and the build reality in Victoria.


If you're ready to turn ideas into a buildable plan, SitePro Bathrooms in Highett can help with concept development, 3D design, construction and handover for bathrooms and kitchens across Victoria.

  • siteprobathrooms

Standard Australian Kitchen Cabinet Sizes

You're probably looking at a floor plan, a rough sketch on the back of an envelope, or a pile of screenshots saved from overseas websites, trying to work out what cabinet sizes make sense for an Australian renovation. That confusion is normal. Most homeowners start with the right question, then get fed the wrong answers.

In Melbourne homes, especially older Victorian layouts, cabinet planning isn't just about what's “standard”. It's about what will fit real walls, real appliances, real ceiling heights, and real movement through the room. A cabinet size that looks fine in a generic online diagram can create awkward fillers, unusable corners, cramped walkways, or a benchtop height that feels wrong the moment you start cooking.

The same thinking applies beyond the kitchen. In bathroom renovations, vanity depth, drawer projection, mirror placement, and storage reach all follow the same principle. Standard modules help, but the room always has the final say. That's why getting clear on kitchen cabinet sizes early makes the rest of the renovation easier, whether you're planning a compact unit update or a full family home remodel.

Understanding Cabinet Standards in Australia

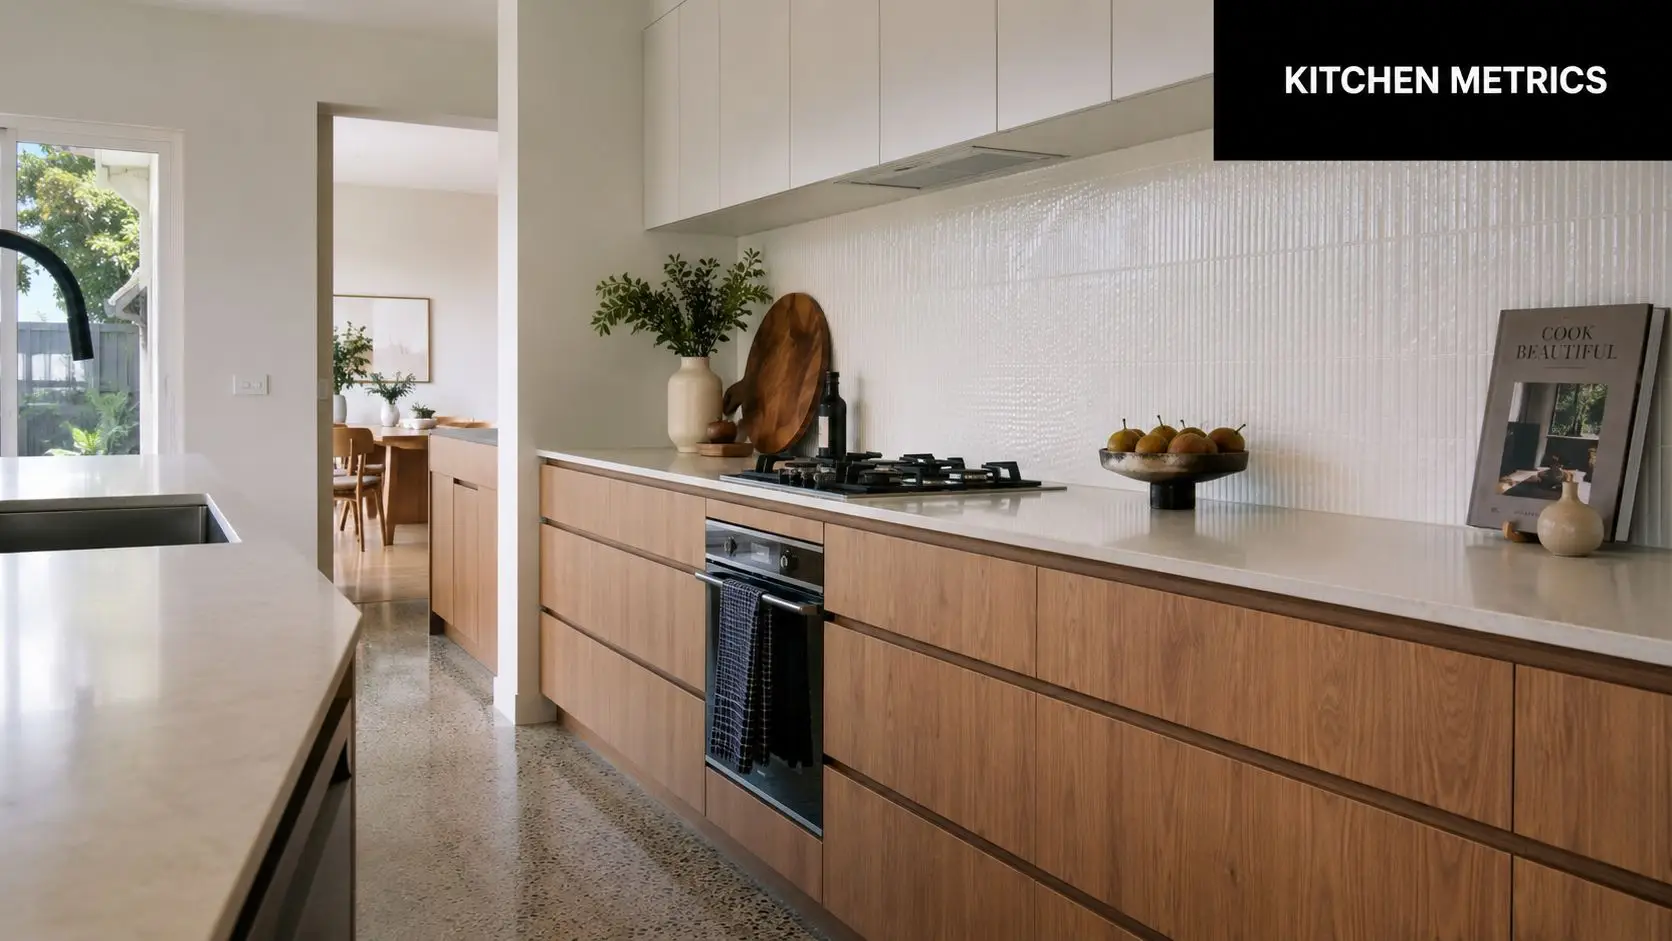
A modern minimalist kitchen featuring wood grain cabinets, white countertops, and a sleek built-in oven design.

A lot of online advice about kitchen cabinet sizes comes from imperial systems. That's where homeowners get tripped up. The cabinet itself might be workable in theory, but once you try to fit that thinking into a Melbourne renovation with metric walls, local appliances, bulkheads, and fixed service points, the layout starts fighting you.

One of the clearest summaries of the problem comes from this Australian-focused discussion of standard cabinet planning, which notes that many “standard size” articles use US dimensions and miss the practical Australian issue of lining cabinets up to metric wall spaces, appliance cut-outs, and finished floor-to-ceiling constraints. That's exactly what happens on site.

What “standard” really means

In practice, standard doesn't mean there's one legally fixed cabinet size for every kitchen. It means cabinet makers and manufacturers tend to work from common module ranges that make planning, production, and installation more efficient.

That matters because a homeowner often hears “standard” and assumes “drop-in perfect”. It isn't. Standard modules are a starting point. The finished kitchen still has to absorb wall variation, appliance sizes, splashback set-out, and how square the room is.

Practical rule: If a layout only works on paper with no tolerance for fillers, scribes, or service access, it usually doesn't work on site.

The language worth knowing

Before you approve drawings or compare quotes, understand the basic terms:

  • Carcass means the cabinet box itself, before doors, panels, and benchtops.
  • Toe-kick is the recessed section at floor level that gives your feet room while you stand at the bench.
  • Finished height means the full installed height, not just the cabinet box.
  • Depth is the front-to-back dimension of the cabinet box, usually discussed separately from door thickness or benchtop overhang.
  • Module means a repeating cabinet width used to keep the joinery clean and reduce odd gaps.

Why Victorian homes need a more careful approach

Older Melbourne homes rarely give you a perfectly blank shell. Chimneys, narrow room widths, shifted walls, old plaster, and uneven floors all affect how standard kitchen cabinet sizes perform in reality.

That's why good planning starts with the room, not the catalogue. A neat modular kitchen in a new build can often be laid out quickly. A Victorian terrace kitchen usually needs more adjustment, especially where you're trying to preserve walkway space, fit modern appliances, and avoid ending up with filler strips that look like afterthoughts.

Base Cabinet Dimensions A Complete Guide

Base cabinets do the heavy lifting. They support the benchtop, carry the sink, house appliances, and take the brunt of everyday use. If these dimensions are wrong, everything above them suffers.

A long-standing benchmark in Australian kitchen planning is the 900 mm finished benchtop height, typically built from a 720 mm base cabinet carcass, a 150 mm toe-kick, and a 30 mm benchtop, with base cabinets generally 600 mm deep, as outlined in this cabinet sizing reference. That combination has lasted because it works well as a practical everyday working height.

How the parts add up

Homeowners often measure to the top of the benchtop and think that's the cabinet size. It isn't. The finished working height is made up of multiple parts, and each one affects the feel of the kitchen.

Component Typical benchmark
Base cabinet carcass 720 mm
Toe-kick 150 mm
Benchtop 30 mm
Finished benchtop height 900 mm
Base cabinet depth 600 mm

The important point isn't just memorising those figures. It's understanding that if one part changes, the others may need to move as well. A thicker top, a raised floor finish, or a design adjustment for user comfort can alter the final result.

Widths and module planning

In Australian work, base cabinet widths are often planned in clean module increments rather than random custom sizing. That keeps doors aligned, drawer fronts balanced, and appliance panels easier to coordinate.

A practical way to think about widths is by function:

  • Narrow units suit trays, oils, spice pull-outs, or filler-sensitive spaces.
  • Mid-width cabinets work well for general storage, bins, or single-door cupboards.
  • Wider drawer banks are usually the most useful storage in a family kitchen because pots, pans, and plates are easier to access from above.
  • Sink cabinets need to allow for bowl size, tap placement, and plumbing, not just external width.

Most kitchen problems blamed on “not enough storage” are really access problems. Deep, badly planned cupboards often store less usable gear than a well-sized drawer unit.

What works and what doesn't

What works is a base cabinet layout that matches how you live. If you cook often, prioritise drawers near prep areas. If the kitchen is compact, don't waste width on decorative panel breaks that reduce usable storage. If appliances are fixed, build the run around them rather than forcing them into a module that looks tidy on paper but creates installation headaches.

What doesn't work is overcomplicating the lower run with too many narrow cabinets, oversized decorative end panels, or cupboard-only layouts where everything ends up stacked behind everything else.

In older homes, I'd rather see a simpler, cleaner base cabinet plan with better access than a busy layout trying to squeeze in every possible unit type.

Wall Cabinet Sizes and Optimal Placement

Wall cabinets affect both function and visual weight. Get them right and the kitchen feels organised. Get them wrong and the room feels top-heavy, cramped, or awkward to use every day.

The key relationship isn't just wall cabinet to wall. It's wall cabinet to benchtop. If that spacing feels wrong, the whole kitchen feels wrong.

The clearance that matters most

A widely used reference point is setting wall cabinets about 450 mm above the benchtop, with wall cabinets commonly around 300 mm deep, as noted in the earlier sizing guidance. That spacing usually gives enough practical work area below while keeping upper storage within comfortable reach for many users.

Depth matters more than people expect. A very deep wall cabinet can loom over the bench and make prep feel boxed in. In some layouts, especially around a fridge surround, extra depth can help create a more integrated look. In many everyday kitchens, though, a shallower wall cabinet is easier to use and less visually heavy.

Choosing height with the room, not against it

Wall cabinet height should respond to ceiling height, cornices, bulkheads, and the overall elevation. A cabinet that technically fits can still look wrong if it leaves an awkward strip at the top or cuts across a window line.

Use these checks before locking in the wall cabinet height:

  • Look at the ceiling line. In older homes, ceilings and cornices often dictate the visual stopping point.
  • Check appliance relationships. The rangehood, fridge surround, and tall pantry all need to sit comfortably with the upper run.
  • Think about actual reach. High storage is fine for occasional items. Daily-use items shouldn't be pushed so high that you need to stretch every morning.
  • Watch visual bulk. In a smaller kitchen, lighter-looking upper cabinets can make the room feel less crowded.

A simple planning reference

Wall cabinet factor Practical benchmark
Typical depth 300 mm
Typical gap above benchtop 450 mm
Best use Everyday crockery, pantry overflow, glasses, lighter items

Some clients want to run wall cabinets as high as possible for maximum storage. Sometimes that's the right call. Sometimes it just creates upper cupboards that are annoying to reach and a kitchen that feels more compressed than it needs to.

A better result usually comes from balancing storage with comfort. The upper run should support the way you use the room, not dominate it.

Sizing Tall Pantry and Appliance Cabinets

Tall cabinets are where a kitchen starts to feel built-in rather than pieced together. They also create some of the biggest planning mistakes, because they deal with full-height visual lines, appliance housing, and deep storage all at once.

Pantries, oven towers, and integrated utility cabinets need more discipline in the planning stage than standard base units. If the widths, depths, and adjoining panels aren't coordinated, the whole run looks unsettled.

Pantry cabinet depth and alignment

Pantry cabinets are often built at 600 mm depth so they align with adjoining base cabinet runs, as noted in the earlier Australian sizing guidance. That consistency matters. It lets the tall joinery read as part of the kitchen, rather than as an added cupboard stuck on the side.

The decision isn't only about depth. You also need to think about door swing, handle clearance, shelf reach, and what the pantry is storing. A very deep pantry can hold a lot, but if everything disappears behind the front row, access gets worse instead of better.

Appliance towers need exact coordination

Oven and microwave towers look tidy when they're done properly. They're unforgiving when they're not. A tower cabinet has to work with the appliance housing requirements, ventilation needs, adjacent panel thickness, and the user's comfortable reach height.

That means the right process is usually:

  1. Choose the appliances early so the cabinet can be built around real dimensions.
  2. Confirm the finished position of the oven relative to surrounding benchtops and drawers.
  3. Check door and drawer interaction so handles don't clash and doors can open cleanly.
  4. Match the elevation with nearby pantry and fridge panels so the run feels intentional.

Typical tall cabinet planning logic

Tall cabinet type Common use Practical note
Pantry cabinet Food storage, small appliances Best when shelves and internal accessories match household habits
Oven tower Built-in oven and microwave Needs appliance-led planning, not guesswork
Utility tall unit Brooms, cleaning gear, overflow storage Useful near laundry links or secondary prep zones

If you're considering a corner pantry arrangement, the storage concept matters just as much as the dimensions. This guide to a blind corner pantry layout is useful because it shows why corner storage has to be judged by access, not just raw cupboard size.

Tall cabinets should solve clutter, not create dark storage where things disappear for six months.

In many Melbourne kitchens, one well-planned tall run performs better than scattering storage across too many disconnected cupboards.

Designing Your Kitchen Island with Correct Dimensions

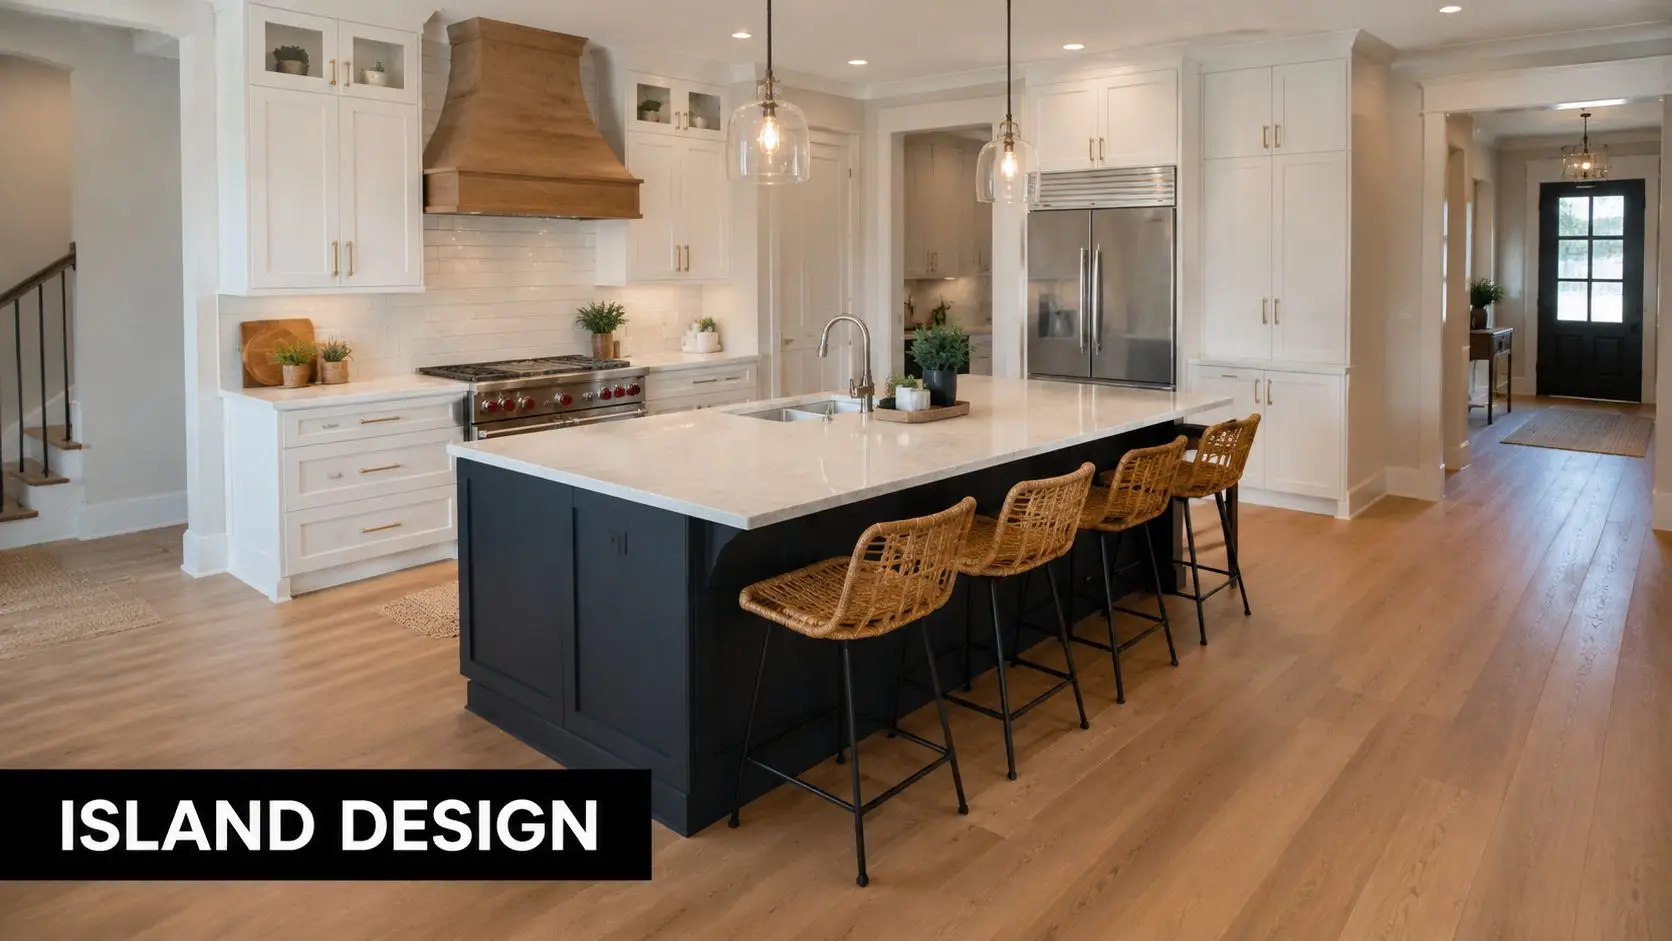
A modern kitchen interior featuring a blue central island with rattan bar stools and white cabinetry.

An island only works when the room can afford it. I've seen plenty of kitchens where the island looked impressive in the render and felt annoying the moment people started moving around it.

The first question isn't what island cabinet sizes are available. It's whether the surrounding clearances will still let the kitchen function properly. In a Victorian home with tighter widths, a peninsula often performs better than a forced island.

Start with the purpose

Not every island needs to do everything. Some are best kept as prep and storage only. Others combine bins, drawers, seating, or a sink. The more jobs you load into the island, the more carefully the cabinet plan has to be resolved.

A useful way to decide is to rank the island's role:

  • Prep-first island needs practical storage and enough uninterrupted bench space.
  • Seating-first island needs comfortable knee space and sensible overhang design.
  • Storage-first island works best with drawers on the working side and clean panel treatment on the outer face.
  • Feature island needs proportion. Oversized decorative ends and heavy bulk can make a moderate room feel smaller.

Depth, overhang, and visual balance

Island cabinets often begin from standard base cabinet logic, but the visible result depends on what happens at the back and top. If seating is included, the overhang has to feel comfortable in use and visually balanced from the side.

The common mistakes are easy to spot:

  • Too shallow overall and the island looks mean and doesn't support practical prep.
  • Too deep without purpose and the centre becomes wasted space.
  • Too much seating emphasis and storage disappears.
  • Too many panel breaks and the island starts looking fussy.

What tends to work in Melbourne homes

A successful island usually has a clear front and back. One side does the hard work. The other side presents neatly to the living zone. That sounds simple, but it requires cabinet choices that support both views.

Here's the approach I prefer on real projects:

Island decision Better approach
Storage Use the working side for drawers where possible
Seating Add it only if circulation still feels easy
Ends Keep end panels clean and proportional
Services Avoid loading the island with too many service demands unless the room supports it

A well-sized island should make the kitchen calmer to use. If it turns opening appliances, carrying groceries, or passing another person into a daily obstacle course, it's the wrong size no matter how good it looks.

Ergonomics and Essential Kitchen Clearances

Cabinet dimensions matter, but the gaps between cabinets matter just as much. A kitchen can be built from sensible modules and still feel poor to use because the movement paths, reach zones, and landing areas weren't thought through.

Australian design guidance for accessible or adaptable kitchen layouts commonly places more critical items within the 750–1200 mm reach zone, uses bench heights around 850–900 mm, and notes that base cabinet depth is about 600 mm with widths often planned in 150 mm module increments, as set out in this guide to kitchen and dining area standards. That guidance is useful because it reminds people that function isn't just about fitting cabinets in. It's about making the kitchen usable for the people living there.

Reach matters more than raw storage

A kitchen can have a lot of cupboards and still be inconvenient. That usually happens when daily-use items end up too high, too low, or buried at the back of deep storage.

The reach zone principle is practical. Put the things used every day where hands naturally go. Push occasional-use items into the less convenient storage. That's a better design move than adding more cabinetry.

Good ergonomics usually looks ordinary on paper. You notice it later, when the kitchen feels easy every single day.

Clearances make or break the layout

When I review a plan, I'm looking for moments of conflict. Can someone unload the dishwasher while another person works at the sink? Does the fridge door interrupt the prep zone? Will a drawer bank open comfortably near a passage point?

These are the questions worth asking:

  • Appliance opening. A door or drawer needs room not just to open, but to be used.
  • Passing space. Two people should be able to move without one having to step backwards every time.
  • Landing space. Hot trays, groceries, and washed dishes need nearby surfaces.
  • Reach comfort. Daily crockery and pantry items should sit where household members can access them without strain.

A related issue is benchtop height. If you're comparing options for household comfort, this article on standard benchtop height is a useful reference because it frames height as a usability decision, not just a convention.

The work triangle is helpful, but not sacred

The classic work triangle still has value. Sink, fridge, and cooktop should relate sensibly to one another. But in many modern renovations, especially open-plan homes, the kitchen is doing more than one job. It's a prep zone, storage wall, family hub, and sometimes a study overflow.

That means rigid triangle thinking can miss what matters. I'd rather see:

Layout priority Why it matters
Prep space near sink Most daily tasks happen here
Easy path from fridge to bench Grocery unpacking becomes simpler
Safe cooking zone Reduces crossing and congestion
Accessible daily storage Cuts repetitive bending and stretching

The best ergonomic kitchens don't chase theory for its own sake. They respond to who cooks, who cleans, who reaches what, and how the room is used on a normal Tuesday night.

How to Accurately Measure for New Cabinets

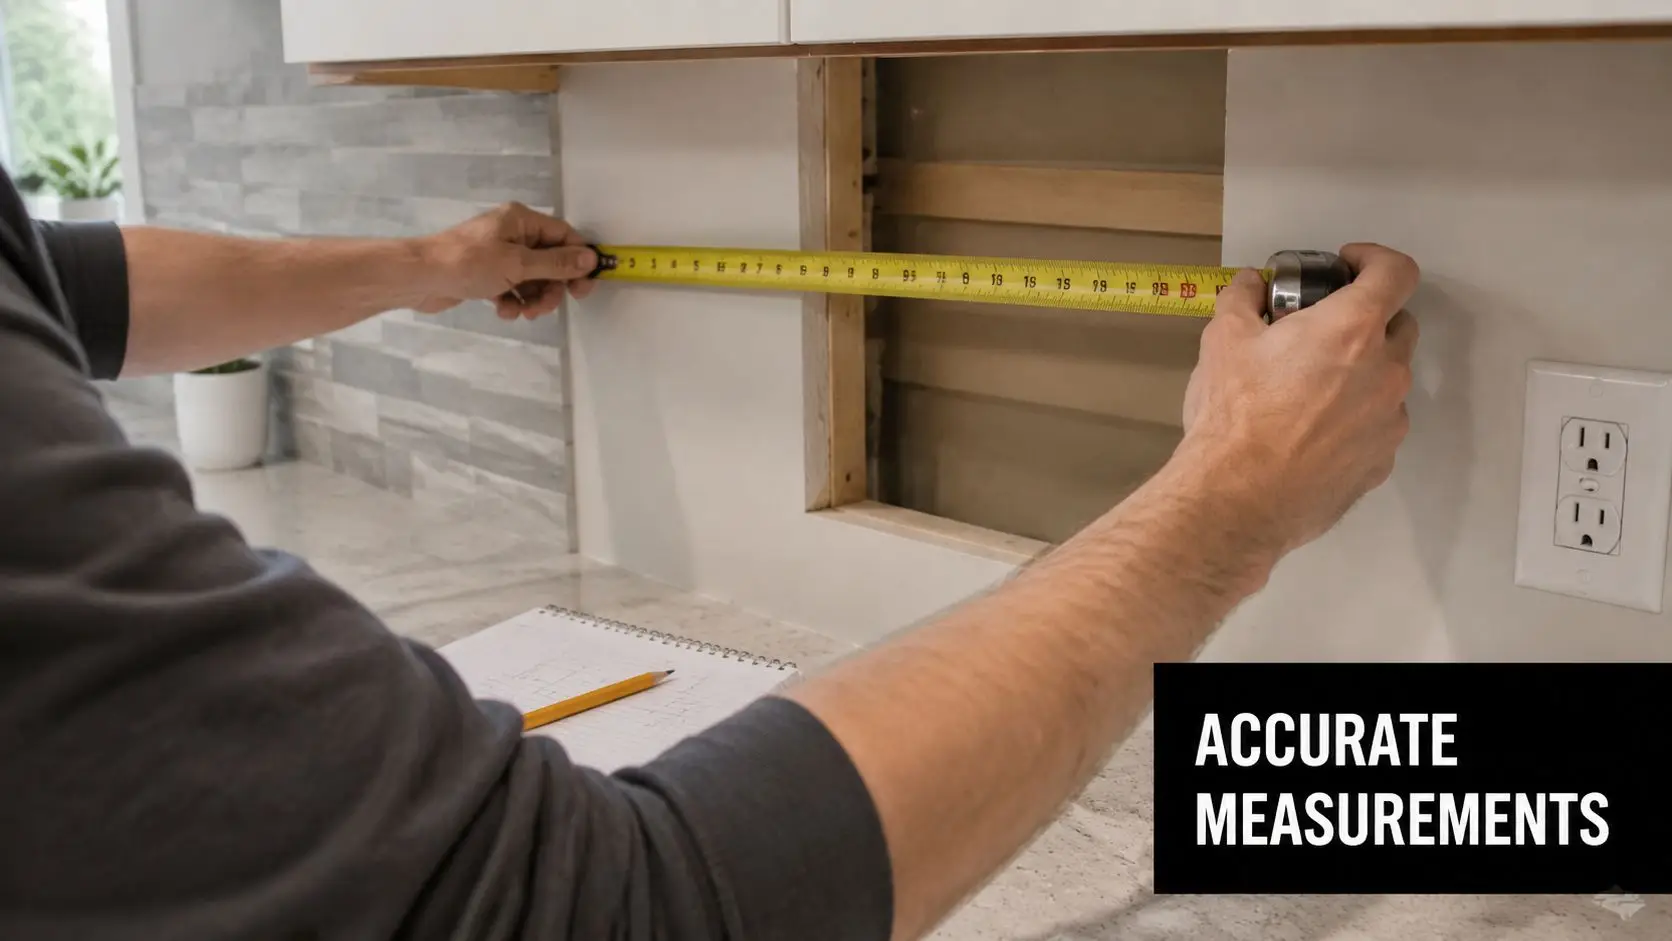
A person using a yellow tape measure to record dimensions of a wall cutout in a kitchen.

Most cabinet mistakes begin before the joinery is built. They start with bad measuring. A room that looks square often isn't. A wall that seems straight often bows. In older Melbourne homes, assuming accuracy instead of checking it is where the trouble begins.

If you're measuring for a design handover, take more information than you think you need. Good cabinet planning depends on complete site data, not a single wall-to-wall figure.

The measurements that matter

Use a consistent measuring method and record everything clearly.

  1. Measure each wall in more than one place. Take dimensions low, mid, and high if possible.
  2. Mark windows and doors. Record widths, heights, sill positions, architraves, and opening direction.
  3. Note ceiling changes. Bulkheads, dropped sections, beams, and cornices affect tall cabinets and wall units.
  4. Locate services. Plumbing, waste points, gas, power, switches, and vents all influence cabinet choices.
  5. Check floor and wall variation. Out-of-level floors and out-of-plumb walls are common in renovation work.

What homeowners often miss

The easiest mistakes to make are the least dramatic ones. A missed powerpoint. A window reveal not measured properly. A skirting profile that interferes with a panel return. None of those sound major until the cabinet install starts.

Watch for these common problems:

  • Out-of-square corners that change cabinet set-out across a run
  • Hidden bulkheads above existing cabinetry
  • Door swings that affect handle clearance
  • Finished floor build-up that changes final heights
  • Appliance allowances that weren't confirmed before joinery drawings

Measure the room you have, not the room you assume is there.

How to hand measurements over properly

A clean handover saves time. Label each wall. Add rough sketches. Mark fixed points clearly. Include photos from several angles, especially around services and corners.

If the renovation is moving into formal design, a measured plan and site check usually become part of the process anyway. Some renovation firms, including SitePro Bathrooms, use measured information as part of a broader 3D kitchen design workflow so cabinet dimensions can be tested against the physical room before construction starts.

That step catches problems early, which is when you want to catch them.

Custom Cabinets for Kitchens and Bathrooms

Standard sizes are useful because they keep planning efficient and usually offer better value. But some homes don't fit cleanly into standard modules, and some renovation goals need a more customized result.

That's common in both kitchens and bathrooms. In a Victorian kitchen, custom cabinetry might solve a chimney breast return, a tight corner, or an uneven room width. In bathroom renovations, custom vanities often do the same job around nib walls, plumbing constraints, shaving cabinets, and awkward circulation.

When custom sizing is worth it

Custom cabinets make sense when the room has a problem that standard modules can't solve neatly.

Typical examples include:

  • Awkward wall lengths where standard units would create oversized fillers
  • Older homes with uneven surfaces or unusual openings
  • Specific storage needs such as internal drawers, hamper sections, or appliance concealment
  • Higher-end finishes where alignment and symmetry matter more visibly
  • Bathroom layouts where vanity depth and door clearance need tighter control

That doesn't mean custom is always better. Sometimes a mostly modular kitchen with a few custom infills is the smartest balance of cost, appearance, and function.

Bigger isn't always better

One of the most useful practical observations in cabinet design is that depth has to match use. This guide to cabinet dimension trade-offs notes that base cabinets are typically 24 inches deep because anything deeper makes items harder to reach, and that wall cabinets are usually 18–20 inches above the countertop. It also points out that deeper wall cabinets can create a built-in look around fridges, while shallower 12-inch wall cabinets can improve access and reduce visual bulk.

That same principle carries into bathrooms. A vanity that's too deep can tighten the room and make movement around the basin awkward. A shallower vanity can sometimes make a small ensuite work far better, even if it gives away some internal volume.

Applying kitchen thinking to modern bathrooms

The best designer bathrooms use the same logic as a well-planned kitchen. Storage should be easy to reach. Drawer depth should suit the items being stored. Doors shouldn't clash with movement paths. The vanity should fit the user, not just the wall.

If you're weighing finish and construction choices, this overview of kitchen cabinets materials is useful because material selection affects how custom joinery performs over time, especially in wet areas and high-use family spaces.

For homeowners exploring new bathroom ideas, the key is not treating cabinetry as an afterthought. Modern bathrooms and kitchens both rely on disciplined sizing. Registered builders unlimited who work across both spaces tend to approach joinery more holistically, because the same planning habits apply in each room.

A good renovation doesn't begin with colour. It begins with dimensions that make daily use easier.


If you're planning a kitchen or bathroom renovation in Victoria, start with the room's real measurements, your household habits, and the cabinet sizes that suit both. That approach avoids expensive adjustments later and leads to a result that looks right because it works right.

  • siteprobathrooms

Kitchen Benchtop Materials A Complete Guide (2026)

If you're planning a kitchen renovation in Victoria right now, the benchtop decision probably feels bigger than it used to. It isn't just about colour, edge profile, or whether you prefer a stone look over timber. You also need to think about safety, compliance, how the material will be fabricated, and whether it still makes sense for the way your household lives.

That shift has caught plenty of homeowners off guard. A material that was once the default upgrade path is no longer an option in the same way, so people are reassessing what they want from their kitchen benchtop materials. In practice, that's not a bad thing. It forces better questions. Will this surface cope with family cooking? Will it stain? Will it scorch? Will it suit the rest of the house if you later tackle bathroom renovations or start collecting new bathroom ideas for the next project?

The right benchtop isn't the one that looks best in a showroom sample. It's the one that still works after school lunches, hot pans, red sauce, clutter, cleaning, and years of use.

Choosing Your Perfect Kitchen Benchtop in 2026

Most kitchen renovations start the same way. You save a few inspiration photos, narrow down your cabinet colour, then realise the benchtop will drive half the final look and a lot of the budget. That's why this choice needs more than a style-first approach.

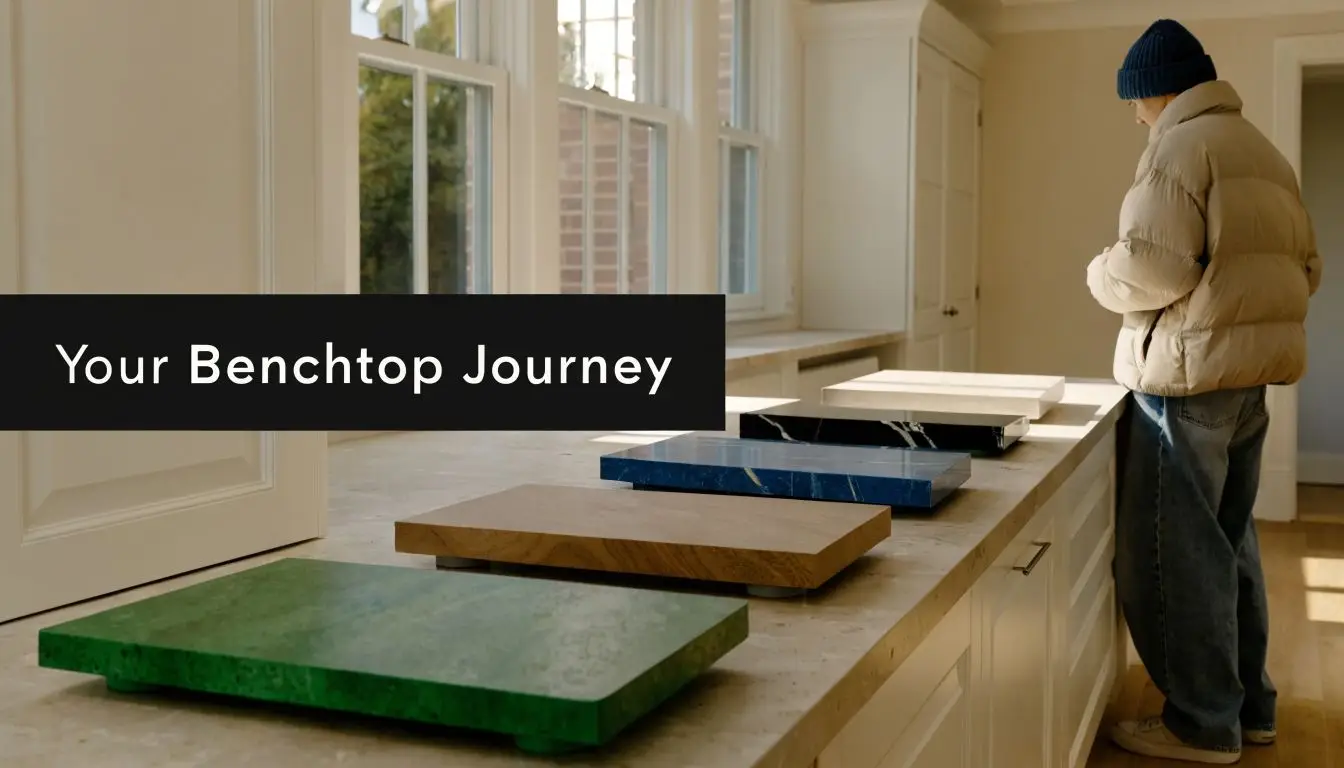
A person standing in a bright kitchen viewing various marble and wooden rectangular benchtop material samples.

For Australian homeowners, the biggest change has already happened. A nationwide ban on the manufacture, supply, processing, and installation of engineered stone products took effect in Australia in 2024, following concerns about respirable crystalline silica exposure for workers, and that changed the benchtop market immediately for renovation clients who now need alternatives (Australian engineered stone ban overview).

What that means in a real renovation

In Victoria, that change affects more than product selection. It affects quoting, lead times, fabrication methods, and how your builder plans the job. A benchtop now has to be assessed through four lenses at once:

  • Daily performance. Can it handle spills, prep work, and regular cleaning without becoming high-maintenance?
  • Heat and impact tolerance. Some surfaces cope well with rough treatment, others need more discipline.
  • Visual fit. Your benchtop has to work with cabinetry, flooring, splashbacks, and the overall tone of the home.
  • Compliance and installation risk. A good-looking material isn't a good choice if it creates avoidable safety issues during fabrication.

The practical upside is that homeowners are looking harder at materials they might once have dismissed. Porcelain, laminate, stainless steel, natural stone, solid surface, and timber all have a place. The best option depends less on trends and more on how you cook, who uses the kitchen, and how much maintenance you're prepared to accept.

Practical rule: Start with function, then narrow by appearance. Renovations run more smoothly when the material suits the household before it tries to impress guests.

Get the basics right before choosing the surface

Benchtop material and benchtop layout should be decided together. Height, overhang, sink type, appliance positions, and junctions with tall cabinetry all affect what's practical. If you're still sorting proportions, it helps to understand standard benchtop height before locking in a material that may need a particular thickness or edge detail.

A smart benchtop choice in 2026 isn't just stylish. It's compliant, durable, and realistic for the way Victorian homes are renovated now.

A Practical Comparison of Modern Benchtop Materials

The fastest way to narrow kitchen benchtop materials is to stop asking which one is “best” and start asking what each one does well. Every material asks for a trade-off. Some give you low maintenance. Some give you warmth. Some handle heat better. Some look expensive without being expensive.

Before the 2024 ban, engineered stone was a dominant choice in Australia because of its consistency and low maintenance, and its removal has accelerated the adoption of alternatives with similar or stronger performance profiles (Australian benchtop market context). That's why Victorian homeowners are now seeing a much wider field of viable options.

Benchtop materials at a glance

Material Cost Guide Durability Maintenance Best For
Porcelain $$$ High, especially against stains and scratches Low Busy family kitchens, modern homes, indoor-outdoor links
Laminate $ Good for general use, less forgiving with heat and impact Low Budget-conscious renovations, rentals, fast updates
Natural stone $$$ Strong, but depends on stone type and finish Medium to high Premium kitchens, feature islands, timeless designs
Timber $$ Moderate, can mark and move with use High Warm, character-led kitchens
Solid surface $$ to $$$ Good, but can mark and react to heat Low to medium Seamless contemporary designs
Stainless steel $$$ Very high in working kitchens Low Serious cooks, utility-focused kitchens, minimalist spaces

Where each material fits

Porcelain has become one of the strongest post-ban choices because it suits modern design and doesn't ask for much day to day. It works especially well in homes where the island is a visual focal point and the kitchen opens into living space.

Laminate remains one of the most practical materials on the market. It won't give you the same slab feel as porcelain or natural stone, but good design can make it look far better than people expect. It's often the right answer for investment properties or staged renovations.

Natural stone still has a place when the brief is texture, variation, and a more premium feel. The catch is that natural stone asks for acceptance of movement, marking, or maintenance depending on the exact stone and finish.

Timber brings warmth that hard surfaces can't replicate. It softens white joinery, works beautifully in coastal and character homes, and feels welcoming. It also shows life quickly, which some people love and others regret.

Solid surface sits in a useful middle ground. It suits curved details, integrated looks, and cleaner contemporary lines. It's often chosen by homeowners who want a sleek finish without the visual weight of stone.

Stainless steel is about function first. In the right kitchen, it looks sharp and intentional. In the wrong one, it can feel cold. This is a material for people who value hygiene, heat tolerance, and utility over softness.

The strongest benchtop choice is usually the one that solves your daily frustrations, not the one that wins the showroom lighting test.

A quick filter for decision-making

If you're comparing options, use this shortlist approach:

  • Choose porcelain if you want a refined look with low daily fuss.
  • Choose laminate if budget discipline matters and you still want style flexibility.
  • Choose natural stone if unique pattern and premium character matter more than perfect uniformity.
  • Choose timber if warmth is essential and you don't mind upkeep.
  • Choose stainless steel if performance and hygiene come first.
  • Choose solid surface if you like a smooth, contemporary finish.

That usually narrows the field from six options to two.

Deep Dive Into Leading Benchtop Choices

Once a shortlist is in place, the actual decision-making starts. At this stage, broad preferences need to meet daily reality. A benchtop can look ideal on a sample board and still be wrong for the household using it.

The most important technical trade-offs are porosity and heat tolerance. Non-porous materials such as porcelain and stainless steel resist stains and bacteria, while stainless steel has the highest heat tolerance. Laminate and solid surface need more care around hot cookware.

A hand touches a polished green slab next to a rolled material and a blue marble block.

Porcelain for low fuss and clean lines

Porcelain is one of the easiest materials to recommend when a homeowner wants a crisp, modern kitchen that's simple to live with. Because it's low-porosity, it handles everyday spills well and suits households where the kitchen gets used properly, not just admired.

It also works nicely in Victorian homes with indoor-outdoor flow. If the benchtop extends visually toward an alfresco zone or large rear opening, porcelain usually holds that clean visual line better than softer, more reactive surfaces.

What doesn't work so well is careless impact on exposed edges. Thin-profile designs look sharp, but they need sensible detailing and careful installation. On family jobs, I often steer clients toward edge treatments that look refined without creating a fragile corner at every busy point of the kitchen.

Porcelain suits you if:

  • You want low maintenance and don't want to think much about sealing or special cleaning.
  • Your kitchen gets heavy use from kids, cooking, and regular traffic.
  • You like a contemporary finish with minimal visual noise.
  • You want continuity between benchtop, splashback, and sometimes island cladding.

Laminate for smart value

Laminate is often underestimated because people remember older products that looked flat or dated. Current laminate options can work very well when the joinery design is strong and the kitchen layout is well resolved.

Its biggest advantage is value. If you want to direct more of the renovation budget into cabinetry, appliances, layout changes, or another stage of work later, laminate keeps pressure off the benchtop allowance. That can matter a lot in a whole-home plan where the kitchen is only one part of the spending.

The limits are straightforward. Laminate is less forgiving with heat, and once it's badly damaged, repairs are rarely invisible. It's a material that performs best when the household uses trivets, chopping boards, and a bit of common sense.

If your renovation budget has to stretch across several priorities, laminate can be the material that makes the rest of the project possible.

Natural stone for character and visual depth

Natural stone appeals to homeowners who don't want a perfectly uniform surface. Every slab has movement, variation, and a more organic look. In a kitchen with simple cabinetry, that can be exactly what gives the room personality.

This is also where expectations need to be mature. Natural stone isn't for people who want a surface to look untouched forever. Depending on the stone you choose and the finish you prefer, there may be more maintenance, more visible change over time, or a greater need for prompt cleaning after spills.

That doesn't make it impractical. It just means it suits a homeowner who values natural variation enough to accept that the benchtop may develop some history.

Stainless steel for serious function

Stainless steel is still unmatched if your first question is, “Can I put hot cookware down without worrying?” It's highly practical, hygienic, and honest. There's no pretending it's precious.

The design challenge is balance. Full stainless can feel hard in some homes, especially if the rest of the kitchen is stark. It usually works best when paired with warmer joinery, softer flooring, or a more restrained palette elsewhere.

Best uses for stainless steel include:

  • Cooking-focused kitchens where heat and cleanup matter more than softness
  • Butler's pantries and secondary prep zones
  • Minimalist renovations where a professional look suits the architecture

A well-chosen benchtop should feel right on Monday morning, not just on handover day.

Budgeting Your Kitchen Benchtop in Victoria

Most homeowners ask about cost early, but the better question is where the benchtop sits in the whole renovation budget. A cheap surface that doesn't last is poor value. An expensive surface that forces compromises everywhere else can also be the wrong move.

In Victorian projects, benchtop pricing usually rises or falls based on more than the material itself. Fabrication complexity, cut-outs, edge details, slab handling, access to the property, splashback returns, and installation conditions all affect the final figure. That's why two kitchens with the same footprint can still price very differently.

Think in total project terms

When reviewing quotes, look beyond the slab or sheet cost. The useful figure is the all-in installed cost. That typically includes site check, measure, template, fabrication, delivery, installation, cut-outs, and finishing around sinks, cooktops, and joins.

A practical budgeting approach is to split benchtop thinking into three bands:

  • Value-first choices such as laminate, where the material helps control overall spend.
  • Balanced mid-range choices such as some solid surface or timber applications, where appearance and function sit in the middle.
  • Premium choices such as porcelain, natural stone, or stainless steel in custom applications, where fabrication and handling often add complexity.

Where to spend and where to hold back

If the kitchen layout already works well, a benchtop upgrade can deliver a major visual change without rewriting the whole room. But if you're changing cabinetry, plumbing points, appliances, and flooring, the benchtop has to compete with bigger structural priorities.

That's where discipline matters. A cleaner, cost-effective benchtop choice can free up budget for items that affect daily use more than people expect, such as better drawer hardware, improved storage, lighting, or a stronger ventilation setup. It can also leave room for later works elsewhere in the home, including modern bathrooms or future designer bathrooms that carry the same finish language.

A renovation budget works best when every surface earns its place. Benchtops shouldn't consume money that the layout or storage needs more.

Use the kitchen budget as part of a broader plan

Many clients don't renovate one room in isolation. They stage work over time. If that sounds familiar, it helps to understand the wider cost of a new kitchen before deciding whether the benchtop should be the hero item or just one solid, sensible part of the package.

The best budgeting decisions usually come from clearly ranking priorities. If you cook constantly, spend more on performance. If you're preparing a rental or resale update, durability and visual neatness may matter more than premium material prestige.

Matching Your Benchtop to Your Lifestyle and Design

The right benchtop should match the way the kitchen is used, not the way it looks in a photo. Households live very differently. Some kitchens cop school bags, meal prep, and constant wiping. Others are calmer, more design-led spaces used mainly for entertaining. The material has to suit that rhythm.

Best matches by household type

A busy family kitchen usually benefits from low-maintenance, lower-porosity materials and edge details that don't chip easily. Consequently, porcelain often earns its place, while some natural stones can become frustrating if the household expects a no-fuss surface.

A keen entertainer's kitchen can justify a more expressive material if the owner values visual impact and is willing to maintain it properly. Feature islands, bolder veining, and waterfall ends make sense when the kitchen is part workspace, part social centre.

A rental property or investment update usually needs a different mindset. Here, visual neatness, replacement simplicity, and manageable cost often matter more than statement finishes. Laminate frequently performs well in this category because it keeps the renovation practical.

A design-led home renovation might use the benchtop as one element in a much bigger palette. In those homes, the material has to relate to joinery colour, floor tone, handles, lighting, and adjacent rooms.

Design decisions that matter more than people think

Material is only half the story. The way it's detailed changes the result.

  • Waterfall ends make a kitchen feel more architectural, but they increase the importance of good edge selection and visual alignment.
  • Splashback continuity can create a calm, premium feel when the benchtop material carries upward in a controlled way.
  • Thickness and profile influence whether the kitchen feels refined, chunky, minimal, or heavy.
  • Colour temperature matters. Warm benchtops can soften white joinery, while cooler surfaces can sharpen a more contemporary palette.

If you're still selecting joinery finishes, it helps to look at kitchen cabinets materials alongside the benchtop so the whole composition works together.

A well-designed kitchen rarely relies on one expensive surface. It succeeds because all the materials agree with each other.

Think beyond the kitchen

A kitchen renovation often sets the tone for the next part of the house. If bathroom renovations are on your longer-term list, keep that in mind now. You don't need to match rooms exactly, but there should be some relationship in tone, texture, or finish quality.

That's how homes feel consistent. A porcelain-look kitchen with sharp black details may lead naturally into modern bathrooms. A warmer timber-and-stone kitchen may point you towards softer, more layered designer bathrooms later on. Good design continuity doesn't happen by accident. It starts with material choices that have range.

Installation Renovation and Compliance Considerations

The benchtop selection isn't finished when you choose the material. The installation pathway matters just as much. A good result depends on measure, fabrication, transport, fitting, and the way trades manage risk inside an occupied home.

In Australian kitchens, fabrication can raise serious safety issues because some materials generate hazardous dust such as respirable crystalline silica during cutting. Professional installers use controlled methods including wet-cutting and on-tool extraction, which is why choosing a qualified, compliant builder is critical for health and safety during a renovation.

What the process usually looks like

For most renovations, the sequence is fairly consistent:

  1. Final cabinet installation happens first, because benchtops are measured to the finished base units.
  2. Check measure or templating confirms exact dimensions, cut-outs, wall irregularities, and overhangs.
  3. Fabrication takes place off site where material handling and cutting can be controlled properly.
  4. Delivery and installation follow once the benchtop is ready and the room is prepared.
  5. Final fitting includes sinks, taps, sealing at junctions, and clean-up.

The key point is that benchtops are not a loose item that can be guessed early and dropped in later. They depend on precision.

Why builder choice matters

This part of the job is where professionalism shows. A compliant renovation team plans access, protects finishes, coordinates trades, and understands the fabrication limits of each material. That's especially important in occupied Victorian homes where dust control and staging affect the whole household.

If you're comparing renovation providers, ask practical questions:

  • How do they handle templating and site tolerances
  • What fabrication controls apply to the chosen material
  • Who manages the sequencing between cabinets, plumbing, and benchtop install
  • Are they operating to an appropriate professional standard, such as registered builders unlimited where the project scope requires it

For homeowners who want a single company to manage design, documentation, and renovation coordination, SitePro Bathrooms provides end-to-end kitchen and bathroom renovation services, including 3D design and construction management, which can simplify benchtop planning within a larger project.

A benchtop install should feel organised from the client side. If the process feels vague before work starts, it usually gets harder once the room is out of action.

Your Benchtop Questions Answered

Can I replace just the benchtop and keep the existing cabinets

Sometimes, yes. It depends on cabinet condition, level, layout, and whether the new material requires different support or creates issues around sinks, cooktops, or wall lines. Older cabinets can make a benchtop-only upgrade less straightforward than it sounds.

If the joinery is structurally sound and the kitchen layout still works, replacing only the benchtop can be a sensible refresh. If the cabinets are tired, out of square, or poorly configured, it often makes more sense to treat the benchtop as part of a broader kitchen renovation.

Which benchtop is best for a family that cooks every day

In most cases, low-maintenance and low-porosity materials are the safest starting point. They tend to be easier to clean and less stressful to live with. For a busy family, the wrong benchtop is usually one that demands too much care or punishes minor mistakes.

The better question is what kind of household discipline you have. If no one reliably uses trivets or cutting boards, don't pick a material that depends on perfect behaviour.

Is timber a good idea in a kitchen

It can be, but only for the right owner. Timber looks warm and inviting, and it works beautifully in certain homes, especially where the kitchen needs softness. It also needs ongoing care and is less forgiving around water and wear.

Many homeowners like timber in smaller applications, such as an island accent or a seating section, rather than across every work surface.

How do I make the kitchen feel consistent with future bathroom renovations

Focus on finish language, not direct matching. Repeat the same overall temperature and mood. If the kitchen is clean-lined and restrained, your future bathroom renovations will usually feel more coherent if they follow that same approach. That's where new bathroom ideas often become clearer. You're not starting from scratch. You're extending an existing design direction.

Are designer bathrooms and kitchens supposed to match exactly

No. Exact matching can feel forced. Good homes share a common thread instead. That might be a preference for soft neutrals, warm timber notes, brushed metal finishes, or a sharper modern look. Designer bathrooms often feel connected to the kitchen because the material choices belong to the same house, not because they copy each other.

What's the safest way to future-proof my benchtop choice

Keep the design simple enough to age well and practical enough to suit changing needs. Highly specific trends date faster than balanced material selections. Future-proofing usually comes from three things:

  • Choose a material you can live with, not one you'll baby.
  • Keep edge details and colours disciplined, so the kitchen doesn't age too quickly.
  • Think whole-home, especially if modern bathrooms or other updates are likely later.

Start Your Transformation with a 3D Design

A good benchtop choice balances performance, maintenance, visual fit, budget, and compliance. In Victoria, that decision now needs even more care because material selection and safe installation are closely linked.

The smartest renovations don't rely on guesswork. They test proportions, finishes, layout, and practical use before construction starts. That's why a 3D design stage is so useful. It lets you see how the benchtop works with cabinetry, splashbacks, flooring, and the rest of the room before anything is ordered.

If you're weighing kitchen benchtop materials and want clarity before committing, the next step is a personalized renovation quote and a detailed 3D concept. That gives you a realistic view of what will work in your home, what should be avoided, and how to build a kitchen that still feels right years from now.

  • siteprobathrooms

L-Shaped Kitchen Layout: The Ultimate Victorian Guide

You probably know the feeling already. One person is at the cooktop, someone else opens the fridge behind them, a third drops school bags on the only clear bench, and the sink somehow ends up being both the prep zone and the clean-up zone. The kitchen isn’t small enough to excuse the chaos, but it still doesn’t work.

That’s usually the moment homeowners start looking at the l-shaped kitchen layout properly. Not because it’s fashionable, but because it solves a practical problem. It opens the room up, creates clearer movement paths, and gives you two connected runs of bench space without boxing the kitchen in.

In Victorian homes, that matters. Many layouts need to support family life, entertaining, working from home, and long-term liveability all at once. The best renovation outcomes come from treating the kitchen the same way we approach bathroom renovations. Start with movement, storage, lighting, safety, and how the room gets used every day. The finish selections come after that.

Why Your Current Kitchen Isn't Working

A lot of kitchens fail in predictable ways.

The fridge sits in the wrong place, so anyone grabbing milk cuts straight through the cooking zone. The sink and cooktop are too close, so prep becomes cramped. The corner cupboards turn into dead storage. You end up with plenty of cabinetry on paper and nowhere useful to put the things you reach for every day.

The daily friction points

Most homeowners don’t complain about the room in technical terms. They say things like:

  • There’s nowhere to land groceries
  • Two people can’t cook at once
  • The benches are always cluttered
  • The kitchen feels shut off from the rest of the house
  • The space looks dated even after minor updates

Those complaints usually point to layout problems first, not just finish problems.

A kitchen can have nice joinery and still be frustrating to use. We see the same thing in bathrooms. A room can look modern, but if the vanity blocks movement or the shower entry is awkward, the renovation hasn’t done its job. Good planning fixes the room at the circulation level, not just the styling level.

A kitchen that slows down the household will still feel wrong, even with expensive finishes.

Why the L shape solves so many of these issues

The strength of an l-shape is simple. It uses two adjoining walls to create connected work zones while keeping the centre of the room open. That open zone can stay clear, take a small dining setting, or support an island or peninsula if the room allows it.

For Highett homeowners, this is often the most balanced answer. It suits older homes being reworked for open-plan living, compact townhouses where every square metre matters, and family homes that need better day-to-day flow without pushing into overbuilt territory.

It’s also one of the easiest layouts to coordinate with a full home update. If you’re planning a kitchen and bathroom project together, consistency in joinery lines, material tones, lighting, and accessibility decisions can make the whole renovation feel intentional instead of pieced together.

The L-Shaped Kitchen Explained

An l-shaped kitchen layout places cabinets, benchtops, and appliances along two adjoining walls, forming a right angle. That sounds basic, but it creates a layout that’s efficient without feeling crowded.

A modern kitchen with an L-shaped green marble countertop, wooden cabinetry, and stylish bar stools.

Why it has lasted

This layout isn’t a trend. It has been part of Australian residential design for decades. The Commonwealth Housing Commission’s 1944 report recommended the l-shaped kitchen for efficiency, and by 1950 over 60% of new suburban homes in Victoria used it as standard, reflecting a shift away from older galley styles for growing families, as noted in this post-war design history of l-shaped kitchens.

That long history matters because it shows the layout solves a real planning problem. It’s adaptable. It works in modest footprints. It supports family use better than many tighter, single-run arrangements.

How it works in real homes

Think of the layout as a working corner with breathing room. One leg usually handles a heavier utility role, such as fridge and pantry storage. The other leg usually carries a mix of prep and cooking functions. The open side keeps the room visually lighter and easier to move through.

In practical terms, an l-shape tends to work well when you want to:

  • Open the kitchen to living areas without fully losing definition
  • Keep traffic out of the cooking zone as much as possible
  • Preserve bench space on two sides
  • Create flexibility for future changes such as a peninsula, island, or improved accessibility

Where it works best

This layout is especially strong in homes that need to do several things at once. Family kitchens, investor updates, and homes being renovated for ageing in place all benefit from a plan that is easy to read and easy to move through.

It also gives you cleaner zoning than many people expect. The kitchen still feels connected to the living room or dining area, but the right-angle shape naturally creates a working corner. That’s useful in the same way a good bathroom layout separates wet and dry areas without making the room feel chopped up.

The best l-shaped kitchens don’t just look open. They direct movement so the room feels calmer during busy parts of the day.

Planning Your Dimensions and Work Triangle

An l-shape only performs well when the distances are right. If the room is too tight, it becomes awkward. If the main appliances are too far apart, the kitchen feels tiring to use.

A top-down view showing an L-shaped kitchen layout with a designated work triangle connecting the major appliances.

The work triangle that actually works

For family kitchens, the work triangle perimeter should sit between 4 and 8 metres, and ergonomic standards show that this can reduce cooking time by up to 20% in multi-user scenarios, with aisle clearances of at least 1.07 metres helping prevent bottlenecks, according to these l-shape kitchen dimensions and workflow guidelines.

That triangle links the three key points:

  1. Fridge
  2. Sink
  3. Cooktop or stove

The point isn’t to force a perfect triangle drawing on a floor plan. The point is to stop the room from making basic tasks harder than they need to be.

Practical spacing rules

In a workable l-shaped kitchen layout, these principles matter most:

  • Keep the triangle compact, not cramped. Too short and users collide. Too long and every meal involves extra walking.
  • Protect the aisle width. That 1.07 metre minimum is a real usability line, not a nice-to-have.
  • Give each appliance breathing room. Fridges need door swing space. Sinks need landing space. Cooktops need safe separation from adjacent zones.

Homeowners often focus on cabinet sizes before they understand the body movement in the room. That’s backwards. In both kitchens and bathrooms, circulation comes first. Joinery is fitted around that, not the other way around.

For bench ergonomics, it also helps to understand how height affects comfort during prep and clean-up. A practical starting point is this guide to standard benchtop height for Australian renovations, especially if more than one household member uses the kitchen heavily.

Common planning mistakes

A room can meet the minimums and still feel wrong. These are the issues that cause most problems:

  • The fridge is buried in the corner so the door blocks movement.
  • The sink and cooktop are pushed together to save space, which makes prep and cleaning overlap.
  • The aisle is technically passable but not comfortable, especially once handles, stools, or appliance doors are in use.
  • The layout ignores through-traffic, so family members cut across the work zone on the way to another room.

Practical rule: If someone can unload shopping, rinse vegetables, and reach the cooktop without crossing another person’s path, the plan is usually on the right track.

Measuring the room properly

When reviewing your own space, don’t just measure wall lengths. Check:

  • Window positions, because they affect sink placement and upper cabinetry
  • Door swings and openings, especially in compact homes
  • Bulkheads and service points, which can limit relocation options
  • Natural walking paths, not just the paths shown on paper

A good plan looks efficient on the drawing and feels easy once people start using it. That’s the standard to aim for.

Optimising Cabinetry and Appliance Placement

The l-shape gives you a strong framework, but the success of the room comes from what happens inside that framework. Appliance placement, corner hardware, drawer selection, and cabinet sequencing all affect whether the kitchen feels effortless or annoying.

Put appliances where people use them

A practical arrangement usually works like this:

  • Fridge near the end of the longer run so someone can access it without stepping through the main cooking zone
  • Sink on a useful prep stretch, often where lighting is strongest
  • Cooktop on the shorter leg or a dedicated run so heat stays away from the highest traffic point

That sequence separates food retrieval, preparation, and cooking in a way that reduces interference. It also makes the kitchen easier for more than one person to use at once.

The same thinking applies in bathroom renovations. Towel storage belongs near the shower. Vanity drawers should suit the morning routine. Good layouts place functions where they naturally belong.

The corner is where good plans separate from average ones

The main weakness of an l-shaped kitchen layout is the inside corner. If you leave it as a basic cupboard with a fixed shelf, it becomes wasted volume very quickly.

Australian standards require a minimum 60cm separation between sink and hob, and in the corner junction, magic corner or LeMans units can extend usable storage by 40% over fixed shelves, according to this guide to l-shaped kitchen corner optimisation.

That’s why corner planning shouldn’t be left to the cabinet order stage. It needs to be part of the layout decision from the start.

Kitchen Corner Storage Solutions

Solution Accessibility Storage Capacity Typical Cost
Fixed shelf corner cabinet Low. Items at the back are hard to reach Moderate, but inefficient in daily use Lower
Lazy-style rotating system Better than fixed shelving for general items Moderate Moderate
Magic corner pull-out High. Good for heavier or awkward items High Higher
LeMans pull-out High. Smooth access and strong usability High Higher
Corner drawers Very good when the joinery allows for them High Higher

The cheapest corner option often becomes the most frustrating one. That doesn’t mean every project needs premium hardware everywhere. It does mean the corner deserves budget priority if the kitchen is compact or heavily used.

For homeowners weighing finishes and carcass choices at the same time, this guide to kitchen cabinet materials for renovation projects is a useful companion to the storage conversation.

What works and what doesn’t

What works:

  • Drawers for everyday cookware
  • Pull-outs for corners and narrow gaps
  • A clear landing space beside the sink
  • Appliance locations that don’t force people to cross paths

What doesn’t work:

  • Deep cupboards for frequently used items
  • A corner with no retrieval system
  • The cooktop jammed too close to the sink
  • Tall units placed where they visually close the room off

If the layout is right but the cabinetry is wrong, the kitchen still underperforms. Joinery isn’t just storage. It’s how the layout becomes usable.

Adding an Island or Peninsula

Most homeowners like the idea of adding a central feature to an l-shaped kitchen layout. The question isn’t whether an island or peninsula looks good. The question is whether the room can carry it without losing the openness that made the l-shape appealing in the first place.

A modern kitchen island with a green marble countertop and a wooden breakfast bar in an open space.

When an island makes sense

In Melbourne suburb renovations, l-shaped kitchens make up 62% of kitchen layouts, and data shows they can boost resale values by up to 15% compared to galley layouts, but an island is only feasible in kitchens over 12sqm if proper clearances are to be maintained, according to this review of l-shaped kitchen pros, cons, and resale impact.

That last point matters most. An island shouldn’t be forced in because the room seems almost large enough. “Almost” is where projects go wrong.

Island versus peninsula

Here’s the practical difference.

Option Best for Main advantage Main drawback
Island Larger open-plan kitchens Better circulation around all sides Needs more floor area
Peninsula Smaller or medium spaces Adds bench space and casual seating with less floor demand Can make the kitchen feel more enclosed

A peninsula often suits Victorian homes better than people expect. It can define the kitchen from the living area, add storage, and create a breakfast bar without requiring the same open clearance as an island.

The decision test

Choose an island if:

  • The kitchen is over 12sqm
  • You want walk-around access
  • You need extra prep space without attaching another run to the wall line

Choose a peninsula if:

  • The room is tighter
  • You want to zone the open-plan area
  • You need seating or extra bench space but can’t sacrifice circulation

A central feature should improve movement, not interrupt it.

A lot of homeowners also overestimate how much seating they need. In practice, a short breakfast ledge or compact peninsula often gets used more consistently than a large island with too many stools. The right choice depends less on trends and more on how your household uses the room.

Designing for Family Life and Accessibility

A kitchen layout can be technically correct and still fail the household. Family use, ageing in place, storage reach, lighting, and finish choices all affect whether the room stays useful over time.

Family use changes the brief

In a busy home, the kitchen usually serves several roles at once. It’s a cooking space, a drop zone, a homework spot, and a social room. That means the layout needs more than a neat appliance triangle. It needs durable surfaces, sensible lighting, and storage that doesn’t make daily tasks harder.

A few practical choices improve family use straight away:

  • Task lighting over benches so prep work is clear and safe
  • Drawers instead of low shelves for easier access
  • A dedicated landing zone for bags, lunchboxes, or groceries
  • Finishes that clean easily and don’t show every mark immediately

These are the same decisions that separate ordinary bathroom updates from successful modern bathrooms. A designer bathroom isn’t just attractive. It works cleanly for the people using it morning and night. Kitchens need the same mindset.

Accessibility needs to be planned early

One of the biggest gaps in generic kitchen advice is accessibility. In Victoria, that matters more every year. A strong l-shaped kitchen layout can still create tight turning points or awkward reaches if it isn’t planned carefully.

A key gap in current advice is adapting l-shaped kitchens for accessibility. With Victoria’s ageing population, demand is rising, yet few guides cover National Construction Code requirements such as 1200mm circulation spaces or AS 1428.1 reach ranges, which are essential for a safe, liveable home, as outlined in this accessibility-focused discussion of l-shaped kitchen planning.

That means homeowners should consider:

  • Wider circulation paths
  • Easier-to-grip handles
  • Drawers and pull-outs instead of deep cupboards
  • Appliance heights that reduce bending
  • Bench segments that allow seated use where needed

Why qualified builders matter

Accessibility and compliance aren’t styling extras. They affect approvals, safety, and long-term usability. That’s why it’s worth engaging registered builders unlimited where the project scope requires it, especially when structural changes, service relocations, or broader kitchen and bathroom renovations are involved.

Good renovation planning also keeps your design language consistent across spaces. If you’re exploring new bathroom ideas, designer bathrooms, and a kitchen at the same time, materials, joinery profiles, lighting temperatures, hardware, and circulation principles should all speak the same language.

The most future-proof kitchens aren’t over-designed. They’re easier to move through, easier to reach into, and easier to live with.

Examples Costs and Getting Started with Your Renovation

Costs depend on scope, finishes, structural changes, service relocations, and appliance choices. It’s better to think in project types than generic one-price-fits-all figures.

An L-shaped kitchen featuring wooden cabinets, a green marble countertop, and fresh produce sitting on the counter.

Example renovation scenarios

Compact Highett unit
An older unit often suits a clean l-shape with improved corner storage, better lighting, integrated laundry coordination, and a simple material palette. The focus is usually on gaining bench space and making the room feel larger without changing the footprint.

Family home with open-plan living
This type of project often involves removing visual barriers, improving the appliance sequence, and adding a peninsula or island if the room supports it. Storage becomes more detailed because the kitchen has to handle school routines, entertaining, and bulk grocery use.

Accessibility-focused update
In this version, the l-shape remains, but the detailing changes. Drawer systems replace hard-to-reach cupboards, circulation is opened up, and appliance and bench heights are reviewed carefully. Often, these projects are paired with modern bathrooms designed for long-term liveability.

What affects cost and timing

The biggest cost drivers usually include:

  • Structural work such as wall changes or bulkhead alterations
  • Plumbing and electrical relocation
  • Cabinetry complexity, especially corner hardware and custom storage
  • Stone selection and edge detailing
  • Appliance upgrades
  • Whether the kitchen is part of a larger renovation, such as bathrooms, laundry, or full interior updates

Timelines also shift depending on whether materials are standard or custom, whether approvals are needed, and whether the home is occupied during the works. The most accurate starting point is a measured design and scope, not a rough verbal allowance.

If you’re trying to set expectations before starting, this breakdown of the cost of a new kitchen in Australia is a practical place to begin.

How to start well

The best first step isn’t choosing colours. It’s defining the problems the new kitchen must solve.

Write down:

  1. What frustrates you most in the current room
  2. How many people use the kitchen at once
  3. What must be stored near the main work area
  4. Whether long-term accessibility matters
  5. Whether the kitchen needs to align with bathroom renovations or a broader home update

That list gives the project direction.


If you’re planning a kitchen update in Highett or greater Victoria, SitePro Bathrooms can help with the full process, from concept planning and 3D design through to construction and finishing. That includes kitchens, bathroom renovations, modern bathrooms, and complete renovation packages designed to work as one coordinated project. If you want a practical l-shaped kitchen layout that looks sharp, functions properly, and fits the way your household lives, book a consultation and start with a measured plan.

  • siteprobathrooms

Cost of a New Kitchen: A 2026 Highett & VIC Guide

A new kitchen in Victoria usually starts around AUD $20,000 to $50,000 for a standard mid-range renovation, while higher-end custom kitchens can exceed AUD $100,000. For many Highett homeowners, a realistic working range is enough to cover a proper renovation, but the final figure moves quickly depending on layout changes, labour, finishes, and compliance.

Many homeowners begin in the same place. They know the existing kitchen is tired, awkward, or no longer works for the way the household lives. What they usually don’t know is whether they’re looking at a cosmetic update, a full rebuild, or a renovation that expands once trades open walls and see what’s really there.

That’s where kitchen budgeting in Victoria gets different from the generic advice you’ll find online. Local labour, council conditions, licensed trade requirements, and the age of homes around Highett all affect the cost of a new kitchen. If you’re planning carefully, it helps to understand not just the number, but what drives it.

Your Guide to Kitchen Renovation Costs in Victoria

A kitchen renovation is one of the easiest projects to underestimate. A homeowner might think they’re replacing cabinets and benchtops, then realise the old layout wastes space, the appliances need new services, and the electrical setup doesn’t suit a modern kitchen.

Across Australia, the average cost of a new kitchen renovation in 2023 ranged from AUD $20,000 to $50,000 for a standard mid-range project, with high-end custom kitchens exceeding AUD $100,000, according to the Housing Industry Association kitchen cost data. That broad range is useful because it tells you one thing straight away. Kitchens don’t have one price. They have a price band tied to scope.

In Highett and nearby Victorian suburbs, the most reliable starting point is to decide which of these three paths you’re on:

  • Refresh the existing footprint. Keep services where they are, update cabinetry, benchtops, splashback, and finishes.
  • Improve the layout. Rework storage, circulation, and appliance positions without turning it into a major structural project.
  • Rebuild for long-term value. Treat the kitchen as part of a larger home upgrade and design it properly from the start.

Practical rule: The cheapest kitchen on paper often becomes the expensive one if the quote ignores electrical upgrades, service relocations, or the condition of an older Victorian home.

A registered builder gives you a more realistic number because the quote isn’t built around cabinetry alone. It reflects demolition, preparation, compliance, coordination of licensed trades, installation quality, and the details that determine whether the room still performs well in ten years.

If you want to review what a full-service local approach looks like, the kitchen renovation service in Highett by SitePro Bathrooms shows the kind of end-to-end scope that helps keep planning grounded.

Budget Brackets What Your New Kitchen Could Cost

Most homeowners don’t need a perfect number on day one. They need the right bracket. That’s what makes decisions easier, because the cost of a new kitchen is usually shaped less by floor area alone and more by what level of finish and disruption you’re aiming for.

In Victoria, a mid-range renovation for a 15 to 20 square metre kitchen typically costs between AUD 50,000 and AUD 80,000, with licensed trade labour making up 40 to 50% of the total expenditure, according to Victorian kitchen renovation cost guidance. That labour component matters because it explains why even a modest room can cost more than expected once plumbing, electrical, and compliant installation are involved.

Kitchen Renovation Budget Tiers in Victoria 2026 Estimates

Feature Budget-Friendly (approx. $15k – $30k) Mid-Range (approx. $30k – $60k) Premium (approx. $60k+)
Cabinetry Stock or simple flat-pack style joinery, limited internal storage features Semi-custom joinery with better storage planning and cleaner finishes Fully tailored joinery, detailed finishes, integrated storage, strong design focus
Benchtops Laminate or simple entry-level surface selections Durable engineered stone-look or other mid-market finish options Premium benchtop selections with feature detailing and matching returns
Splashback Basic tiled splashback or painted wall where suitable Full tiled splashback with more considered layout and finish Full-height feature splashback with a designer look
Appliances Reuse some existing appliances or select standard replacements New matched appliance package with better function and finish Higher-spec appliance package chosen to suit cooking habits and layout
Layout changes Best kept minimal Some reworking possible, depending on services and structure Greater freedom for reconfiguration, subject to budget and compliance
Lighting and power Basic replacements Improved lighting plan and additional practical power points Layered lighting, statement fittings, refined electrical planning
Best for Rentals, resale tidy-up, functional refresh Family homes wanting durability and a noticeably better kitchen Long-term homes, high-finish projects, designer kitchens

What works in each bracket

A budget-friendly kitchen works best when the existing layout is already decent. If the sink, cooktop, and major appliances stay where they are, you avoid a lot of cost that doesn’t show in the finished photos. This bracket is often about making the room cleaner, more usable, and easier to maintain.

Mid-range is where most family kitchens land. This is the range where you can improve storage, replace tired finishes, update services where needed, and end up with a room that feels properly resolved rather than patched together.

Premium projects are usually not expensive because of one single item. They cost more because every decision pushes upward at the same time. Better joinery, more detailed installation, layout reworking, higher-spec appliances, upgraded lighting, and a tighter finish standard all stack together.

A premium result isn’t only about expensive materials. It’s about the amount of coordination required to make the whole room look and function as one design.

The common mistake

The biggest budgeting mistake is expecting a mid-range outcome on a budget-friendly scope. Homeowners often want a new island, relocated sink, integrated appliances, better pantry storage, cleaner sightlines, and refined finishes, but they still benchmark the project against a cosmetic refresh.

That mismatch causes friction early. A solid builder will call it out straight away, because a realistic brief saves time, avoids redraws, and stops the quote process turning into guesswork.

The 6 Biggest Drivers of Your Kitchen Renovation Cost

Victorian homeowners spent an average of AUD $35,000 on full kitchen makeovers in 2024, and 62% of projects involved layout changes that can inflate costs by up to 40% due to plumbing relocations under Victorian Building Authority regulations, according to this Victorian renovation cost breakdown. That aligns with what happens on site. The fastest way to increase cost is to move services.

An unfinished kitchen construction site with exposed framing, concrete block walls, and tiled flooring in progress.

Layout changes and structural work

If you keep the footprint, pricing stays more controlled. Shift the sink, oven, or island and the job starts involving more demolition, rerouting, patching, certification, and coordination.

That’s why some kitchens with a modest finish still cost plenty. The room itself may look simple when complete, but the work behind the walls wasn’t.

Cabinetry and joinery

Cabinetry is where design intent becomes real. Cheap joinery can look acceptable on handover day, but poor internal layout, weak hardware, and rough installation show up quickly in everyday use.

Good joinery isn’t only about door fronts. It’s about how the pantry opens, how corner storage works, how bin storage is handled, and whether appliance positions make sense. Those practical decisions do more for a family kitchen than chasing a fashionable finish.

Benchtops and splashbacks

Benchtops and splashbacks influence both price and labour. Large-format, full-height, or highly detailed selections require more precise installation and often tighter sequencing with cabinets, electrical, and final fit-off.

If you’re still deciding proportions, this guide to standard benchtop height in Australian kitchens is worth reviewing before locking in cabinetry and appliance positions.

On site, this is the usual rule: if a finish needs everything around it to be perfect, the labour cost will rise with it.

Appliances and fittings

Appliances can either support the design or force awkward compromises. A project often runs more smoothly when appliance dimensions, ventilation needs, and service points are confirmed early.

The same applies to taps, sinks, lighting, and power. Small upgrades don’t look like budget-breakers in isolation, but they often trigger adjustments to cabinetry, stone cut-outs, or electrical rough-in.

Labour and trade coordination

Using a registered builder is vital. Kitchens aren’t one trade. They’re a chain of dependent trades that need to arrive in the right order and work to the same plan.

For larger residential scopes, homeowners often ask about “registered builders unlimited” because they want one accountable party managing structural, plumbing, electrical, and finishing work under one roof. That’s the right instinct. When trades are fragmented, rework usually follows.

Compliance and older-home conditions

Victorian homes often bring hidden cost drivers. Older walls may not be straight. Floors may need levelling. Existing wiring or plumbing may not suit the new layout. Pre-1980s homes can also carry hazardous material issues, which need proper handling rather than shortcuts.

This is the part homeowners can’t judge from a showroom sample. It’s why an experienced local builder prices more carefully than someone who only looks at the visible finishes.

Real Highett Kitchens Two Budgets Two Stories

The numbers make more sense when you attach them to actual decisions. In Highett, two kitchens can sit on the same street and land in very different brackets for good reasons.

A warm, traditional kitchen interior featuring oak wood cabinetry, blue countertops, and bright green window trim.

The practical family kitchen

One common brief is straightforward. The household wants more bench space, better pantry storage, easier cleaning, and stronger day-to-day function. They don’t want the kitchen to become a design exercise. They want it to work.

In that type of project, the best cost control usually comes from respecting the existing services. Keep the sink close to where it is, avoid unnecessary wall changes, and put the budget into joinery layout, drawer storage, durable surfaces, and lighting that improves how the room feels at night.

This kind of kitchen usually performs well because the money goes into practical gains:

  • Storage that makes sense. Deep drawers where pots are stored, pantry shelves that are easy to reach, and bin storage that doesn’t waste space.
  • Finishes that wear well. Selections that don’t require delicate treatment from a busy household.
  • Layout discipline. Enough change to improve flow, not so much that the project turns into a services-heavy rebuild.

The end result isn’t flashy. It’s the kitchen people enjoy six months later because it works every morning.

The higher-finish whole-home update

A different brief comes from owners renovating more broadly and wanting the kitchen to match updated bathrooms and the rest of the house. That’s where designer kitchens and designer bathrooms often start to connect. The project isn’t only about replacing one room. It’s about making the whole home feel coherent.

This is also where new bathroom ideas often get discussed in parallel, especially if the owners want the same palette, joinery language, or fixtures carried across the home. Modern bathrooms and kitchens don’t need to match exactly, but they should look like they belong to the same renovation.

A strong renovation feels consistent without feeling repetitive. That comes from proportion, finish balance, and clear planning, not from copying the same detail into every room.

In these higher-finish kitchen projects, 3D design is useful because it helps resolve details before construction begins. It becomes much easier to judge bulkheads, appliance panels, aisle widths, and visual balance before trades start.

What usually doesn’t work is trying to build a designer result from a vague brief. If the owners want refined joinery lines, stronger feature lighting, and a cleaner integrated look, those decisions need to be settled early. Otherwise the project ends up paying premium rates for rushed choices.

Maximising Your Return on Investment and Financing

A kitchen renovation isn’t only a spending decision. In many homes, it’s a value decision. The kitchen is one of the first spaces buyers and tenants judge, and it shapes how people read the condition of the whole property.

Earlier market data referenced in the source set shows kitchen upgrades in Victoria and Melbourne can recoup a meaningful share of their cost on resale, particularly when the work improves function as well as appearance. The key point isn’t to chase every trend. It’s to renovate in a way that suits the property, the suburb, and the likely buyer.

What adds value

The best return usually comes from improvements that are obvious in daily use:

  • A layout that flows. Better circulation, clearer prep zones, and less crowding.
  • Storage that feels generous. Buyers notice drawer storage and pantry planning straight away.
  • A finish level that matches the home. An overbuilt kitchen in an otherwise modest house doesn’t always make financial sense.
  • Quality installation. Crooked lines, weak detailing, and rushed finishing are easy to spot.

A kitchen also supports value indirectly. When the room feels settled and complete, buyers assume the home has been cared for properly. That confidence matters.

What doesn’t always pay back

Not every premium choice improves resale. Highly specific design statements can limit broad appeal. Overly delicate finishes can also work against family buyers who want something durable.

There’s a difference between a kitchen that photographs well and a kitchen that sells well. Usually the best-performing projects are balanced. They feel current, but not so personalised that the next owner feels they need to start again.

Paying for the project

Most homeowners fund a kitchen renovation through savings, home equity, or a personal lending facility arranged independently. The right option depends on your broader plans for the property and whether the kitchen is being renovated on its own or alongside bathroom renovations and other works.

If the renovation is part of a larger home plan, budget the whole sequence first. A kitchen can absorb funds quickly and leave the remaining rooms compromised if the order of works isn’t thought through.

The smart move is to decide your priorities early. Spend on the things that are hard to change later, such as layout, joinery quality, and compliant building work. Decorative upgrades are easier to phase than structural or service-related corrections.

Understanding the Renovation Timeline and Process

The kitchen doesn’t start when demolition starts. It starts when the decisions stop moving. That’s why the planning phase matters so much.

A person interacting with a kitchen renovation design project on a computer monitor in an office.

Post-2024 supply chain issues have inflated cabinetry prices by 15 to 25% in Victoria, and 30% of recent projects in Highett used 3D visualisation for cost optimisation, reducing budget overruns by an average of 15% according to a 2026 kitchen planning survey summary. That reflects something practical. The more decisions you resolve before ordering, the fewer mistakes you pay for later.

The usual project flow

A typical kitchen renovation follows a sequence like this:

  1. Consultation and site measure
    The room is assessed properly, including access, existing services, and any likely constraints.

  2. Design and selections
    Layout, joinery, finishes, appliances, and functional details are resolved before construction starts.

  3. Quoting and scope confirmation
    At this stage, the budget becomes real. Clear inclusions matter more than low headline pricing.

  4. Demolition and preparation
    The old kitchen comes out, and the site is prepared for rough-in work.

  5. Rough-in and installation
    Plumbing, electrical, cabinetry, benchtops, splashback, and fit-off happen in sequence.

  6. Final handover
    Defects are checked, finishes are reviewed, and the kitchen is completed for use.

Why one builder-led process helps

A kitchen is easier to deliver when one party manages the order of works. That becomes even more important if the kitchen is being renovated alongside bathroom renovations, because access, trade timing, and household disruption all need tighter control.

For homeowners trying to understand how scheduling affects cost, this article on staying on schedule and under budget during renovation projects is a useful companion.

Delays don’t only waste time. They often create extra site visits, repeated trade call-outs, and rushed decisions that weaken the final result.

What homeowners can do to keep the project moving

  • Finalise selections early. Appliance changes and late finish swaps often affect cabinetry and services.
  • Be honest about your budget. It saves redesigning a project that was never aligned.
  • Treat temporary kitchen arrangements seriously. Renovation fatigue sets in fast when household routines aren’t planned.
  • Leave compliance to licensed professionals. DIY enthusiasm has limits in kitchens.

Frequently Asked Questions About Kitchen Costs

Are there hidden costs in older Highett homes

Yes, especially in older properties. In Victorian suburbs like Highett, asbestos abatement can add AUD 5,000 to 15,000 to a renovation project, and approximately 40% of homes built before 1980 contain asbestos materials, according to Safe Work Australia figures cited here. If the home is older, assume investigation and proper handling are part of responsible planning.

Can I save money by doing part of the work myself

Sometimes, but only at the edges of the project. Simple prep or painting may be manageable for some owners, but kitchens rely on sequencing. If owner-supplied or DIY work holds up cabinetry, electrical fit-off, or final installation, the savings can disappear quickly.

Is a small kitchen always cheaper

Not necessarily. Small kitchens can still be expensive because they need the same core trades, careful joinery planning, and compliant installation. A compact room often gives you less room for error, not less complexity.

How does a kitchen compare with modern bathrooms on cost pressure

Kitchens usually carry more joinery and appliance coordination. Bathrooms often concentrate cost into waterproofing, tiling, fixtures, and drainage details. Both need licensed trades and disciplined sequencing, which is why homeowners planning modern bathrooms and kitchens together should budget the projects as one coordinated program rather than as isolated rooms.

What’s the best first step if I want a realistic number

Get the scope right before chasing prices. That means site measure, layout thinking, finish level, appliance intent, and an honest discussion about what stays and what moves.

If you’re planning a kitchen, bathroom renovations, or a whole-home update in Highett, the best next step is to request a custom quote and design consultation through SitePro Bathrooms. A clear plan, proper 3D design, and builder-led coordination will give you a far more reliable cost of a new kitchen than any generic online calculator ever will.