• siteprobathrooms

Best Bathroom Heated Towel Rail: 2026 Buyer’s Guide

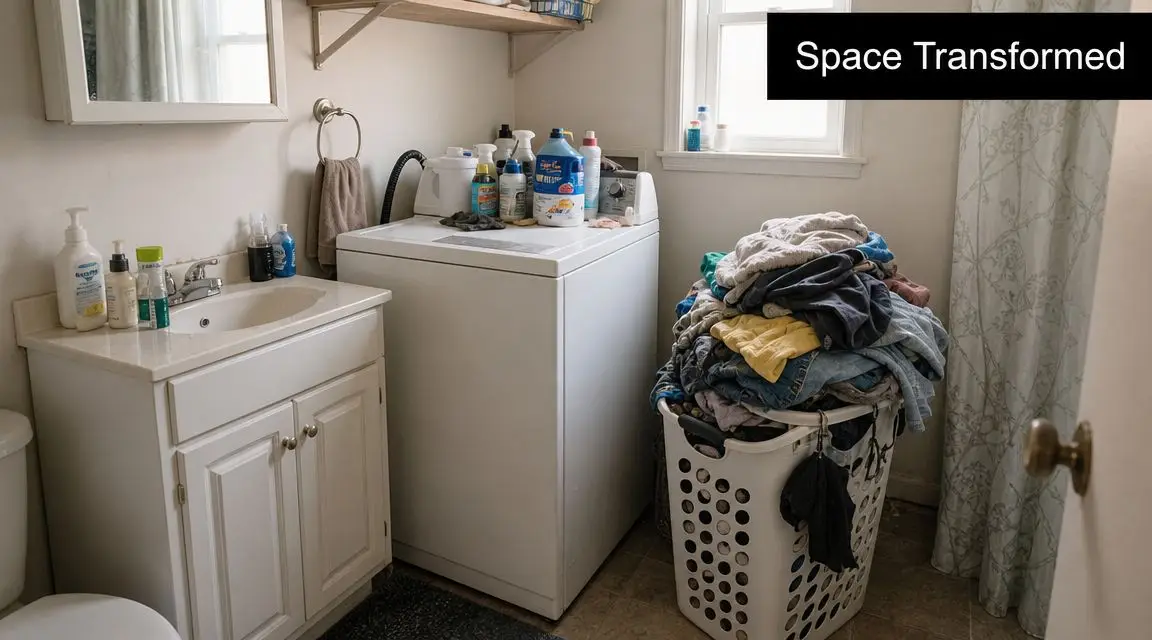
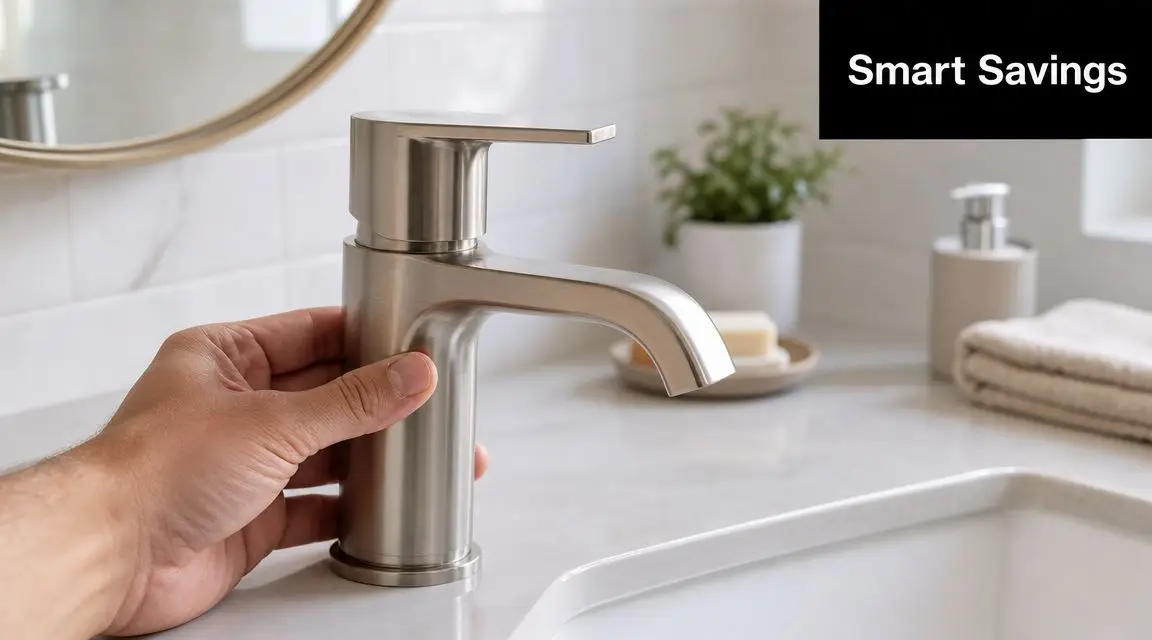
A lot of people start looking at a bathroom heated towel rail after the same moment. It's a cold Highett morning, the shower's done its job, and the towel hasn't. It's still damp from yesterday, the room feels chilly, and what was meant to be a fresh start feels a bit second-rate.

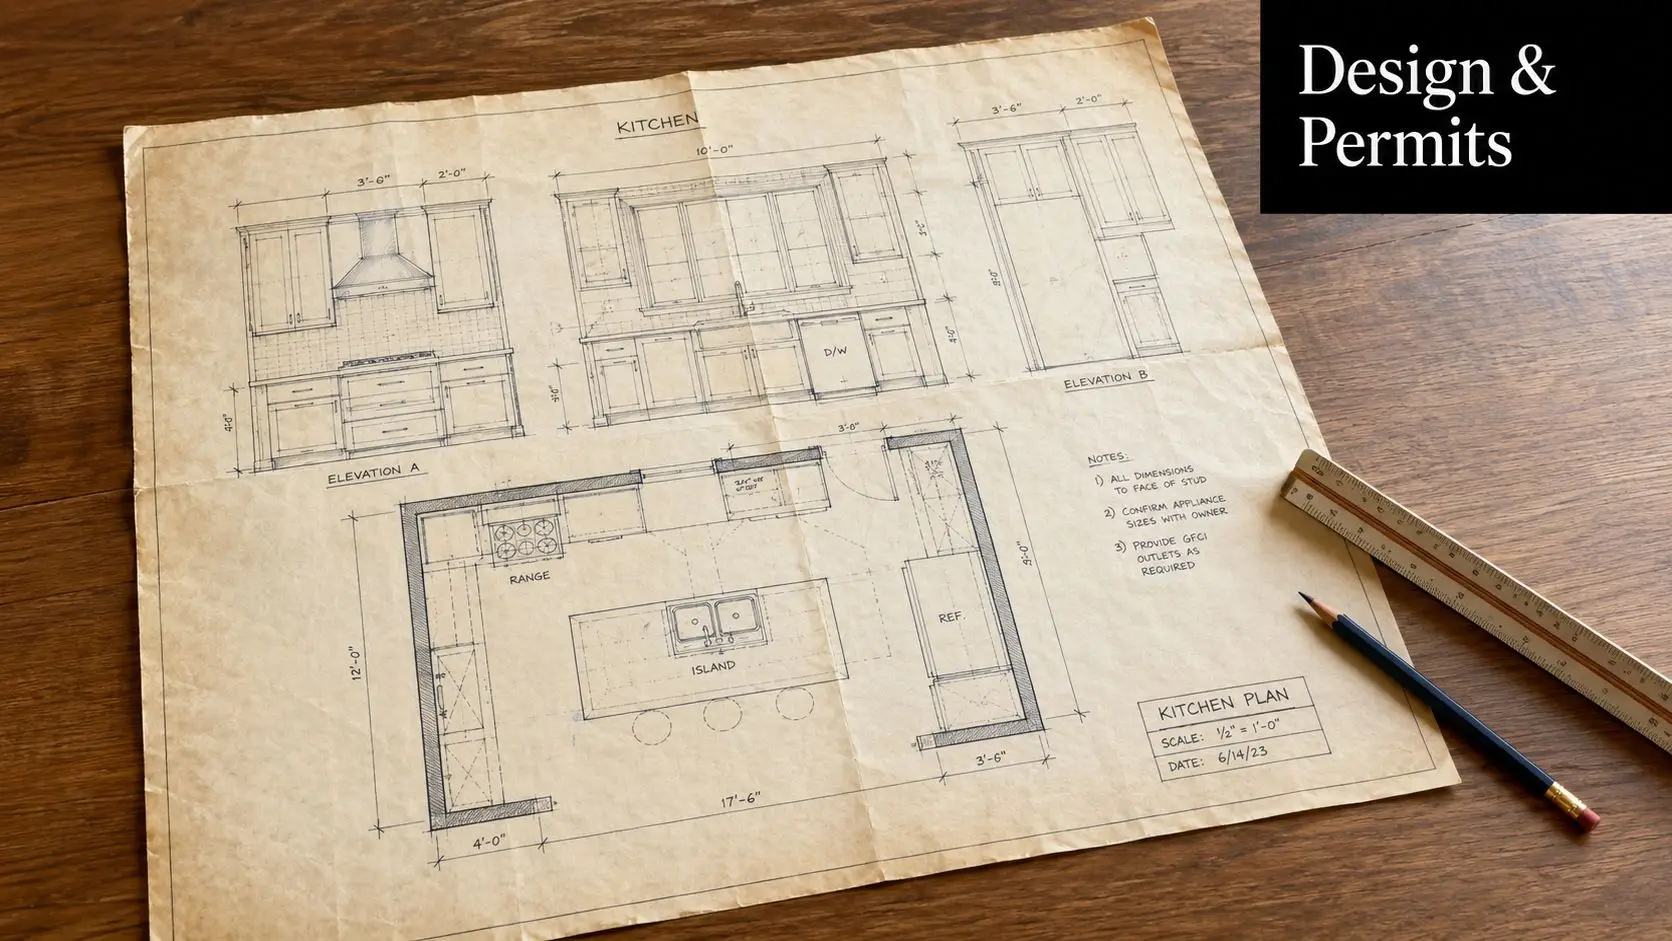
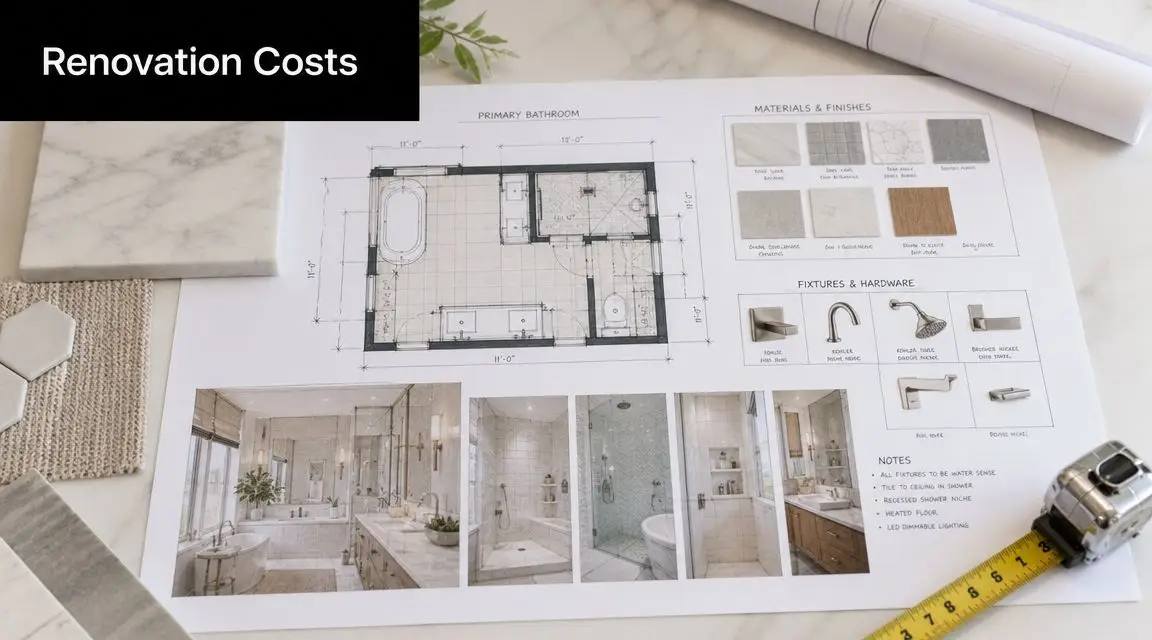
That's why this choice matters more than it first appears to. In real bathroom renovations, a heated towel rail affects layout, electrical rough-in, wall framing, tile set-out, and how the room feels to use every day. It sits right at the intersection of comfort, compliance, and design. If you get it right, it feels effortless. If you get it wrong, you end up with a rail that looks good on the wall but doesn't suit the room, costs more to run than expected, or lands in the wrong spot for Victorian installation rules.

Why a Heated Towel Rail Is More Than Just a Luxury

The idea that a heated towel rail is just a decorative extra is fairly modern. Its roots go back to the early 20th century, when central heating became more common and bathrooms started using heated pipework and radiator-style forms as part of the room's actual heating setup. By the 1920s, cast-iron water-heated towel warmers, often called bath radiators, were already established, which is why they still make the most sense when they're treated as part of the bathroom plan rather than an afterthought, as outlined in this history of towel radiators and bath radiators.

That history still shows up in renovation work now. The homeowners who are happiest with the result usually aren't the ones chasing a “luxury item”. They're the ones solving a practical problem. They want towels to dry properly, less lingering dampness in the room, and a bathroom that feels considered rather than pieced together.

What changes in day-to-day use

A good rail improves the routine in small but noticeable ways:

  • Towels dry between uses so they don't sit heavy and cold on the hook.
  • The room feels more finished because the rail becomes part of the wall layout, not just another accessory.
  • Storage pressure can ease in compact bathrooms because towels can hang and dry where they're used.

A bathroom heated towel rail works best when it solves a daily annoyance, not when it's chosen purely because it looks high-end in a showroom.

That's especially true in bathroom renovations where wall space is limited. In many modern bathrooms and designer bathrooms, every fitting has to earn its place. A rail can do that, but only if it matches the room, the power plan, and the way your household uses the bathroom.

Understanding the Types of Heated Towel Rails

Most homeowners are really choosing between electric and hydronic. The right answer depends less on fashion and more on what's happening behind the walls.

Electric rails

Electric rails are the most straightforward fit for many renovations. They're commonly used when you want a dedicated bathroom heated towel rail without tying it into a larger whole-home heating setup.

In practice, there are a few versions you'll come across:

  • Hardwired electric rails are fixed into the electrical system and give the cleanest finish because there's no visible lead.
  • Plug-in styles can suit some situations, but they're often less elegant in a fully renovated bathroom and can create placement limits.
  • Dry-element and liquid-filled designs behave a bit differently in how they warm up and hold heat, but from a renovation point of view the bigger issue is usually safe location, cable planning, and access for installation.

Electric rails are also often chosen because they can be controlled independently. That matters if you only want heat in the bathroom at certain times rather than running a broader heating system.

Hydronic rails

Hydronic rails connect into a plumbing-based heating system. They make the most sense when the house already uses hydronic heating or the renovation includes a broader services upgrade.

For most standard bathroom renovations, hydronic introduces more coordination. You're dealing with pipe runs, plumbing access, and how that rail ties into the rest of the heating design. It can be a very tidy solution in the right home, but it isn't usually the simplest retrofit.

Heated towel rail comparison

Feature Electric (Hardwired) Hydronic
Heat source Mains electrical connection Hot water from a hydronic system
Best fit Renovations, retrofits, apartments, single-bathroom upgrades Homes already using or adding hydronic heating
Installation trade-off Requires electrical planning and compliant placement Requires plumbing integration and broader system coordination
Control Usually easier to run independently Usually linked to the wider heating setup
Design flexibility Often simpler to position where wall space allows Depends on pipe routing and system layout
What can go wrong Wrong location, visible cabling, poor wall prep Overcomplicated install for a bathroom-only need

What works in real renovations

If the project is a standard Victorian bathroom renovation, electric is often the more practical path because it's easier to integrate into the room without redesigning other services. If the rail is being included in a larger, high-spec project with coordinated heating throughout the home, hydronic can make sense.

The mistake is choosing the technology first and asking how to make it fit later. Start with the house, the bathroom layout, and the way the room will actually be used.

That's where a lot of new bathroom ideas either become practical or fall apart. A finish sample on a display wall doesn't tell you whether the system suits your renovation.

Choosing the Right Size and Heat Output

A rail that looks right on the wall can still disappoint on a cold Highett morning. I see that often in renovations where the homeowner expects one slim rail to dry two towels and warm the whole bathroom. Sometimes it will. Often it will not.

The first decision is the job you want the rail to do. If the goal is warm, dry towels, a smaller unit can be perfectly reasonable. If you want it to help heat the room as well, size needs to be based on the bathroom itself, not just the available wall space or the look of the rail.

Room volume matters, but so does heat loss. A compact ensuite with good insulation, no large window, and an internal wall position will usually need far less output than a larger family bathroom with an external wall, older glazing, and higher ceilings. That trade-off gets missed in a lot of showroom decisions.

In many Victorian homes, especially older ones, a heated towel rail is best treated as a comfort add-on rather than the primary room heater. That is the sensible expectation to set from the start.

What changes the result

A rail's real performance depends on the room around it:

  • External walls lose heat faster in winter.
  • Windows make a noticeable difference, especially if the glazing is older.
  • Ceiling height increases the volume of air that needs warming.
  • Insulation and draught sealing affect whether the warmth stays in the room.
  • Towel load matters too. A rail carrying thick, folded towels will feel less effective than one with lighter towels spaced properly.

A larger rail is not always the better answer. Bigger units need enough clear wall area, need to suit the proportions of the room, and can push up running costs if they are used for long periods. In a tight bathroom, an oversized rail can also create practical issues around reach, cleaning, and the placement of mirrors, vanities, or shower screens.

That is why I usually weigh three things together:

  1. How many towels need to hang properly
  2. Whether the rail is expected to assist with room heating
  3. What the wall and bathroom layout can realistically accommodate

For homeowners planning modern bathroom renovations, style and practicality must align. A narrow designer rail may suit the palette and proportions, but if the room runs cold and the rail only holds one towel comfortably, the choice will feel wrong after the first winter.

Victorian compliance also affects the decision indirectly. If the rail is electric, the final position and wiring method have to work with bathroom electrical safety rules, which can limit where a larger unit can go. So the right size is not only about heat output. It also has to fit the room, the use case, and the installation rules without forcing compromises later.

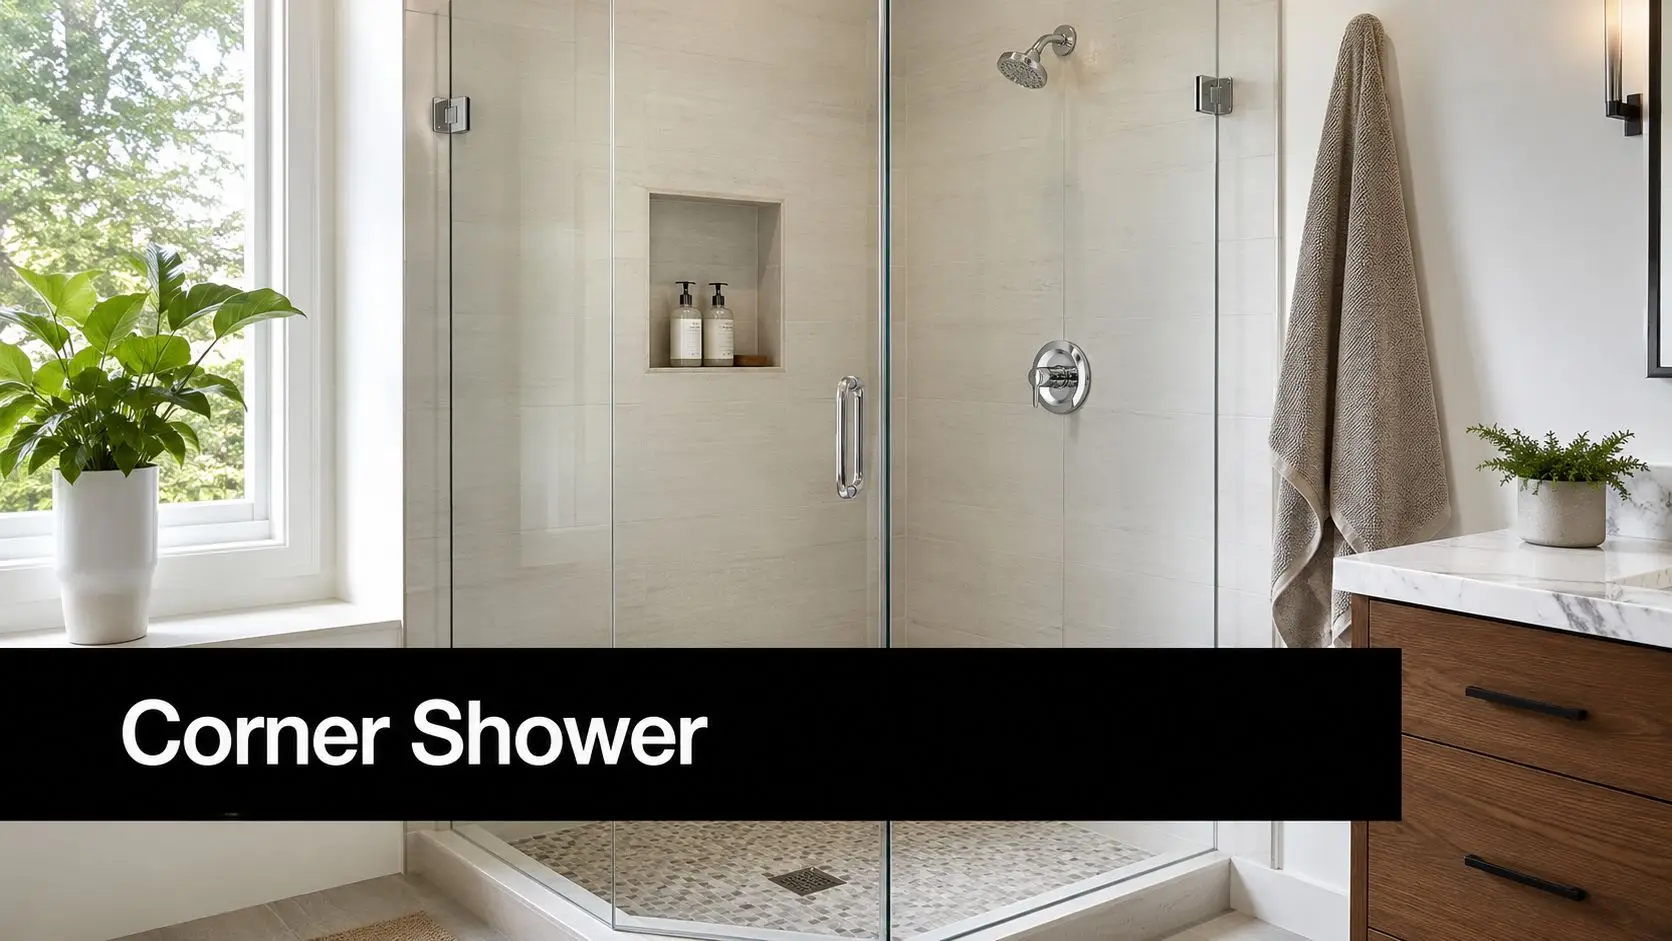
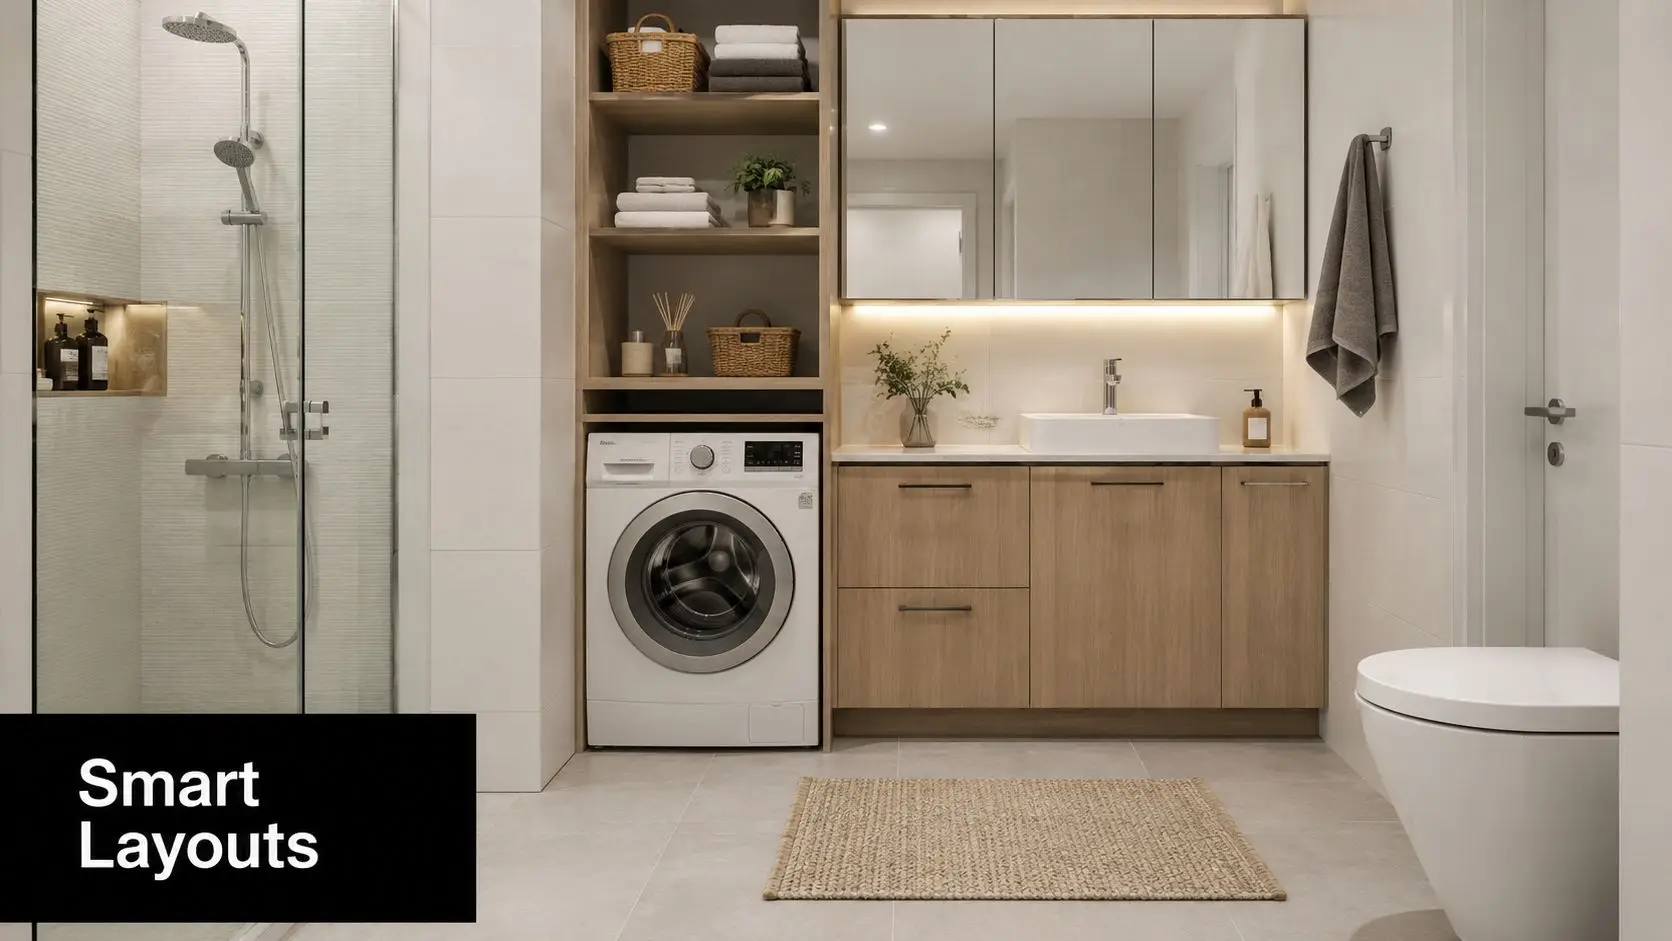
Design and Placement in Modern Bathrooms

A bathroom heated towel rail shouldn't feel bolted on. In well-resolved modern bathrooms, it looks like it belonged there from the first sketch.

A modern, minimalist bathroom design featuring a floating wooden vanity, walk-in glass shower, and elegant ambient lighting.

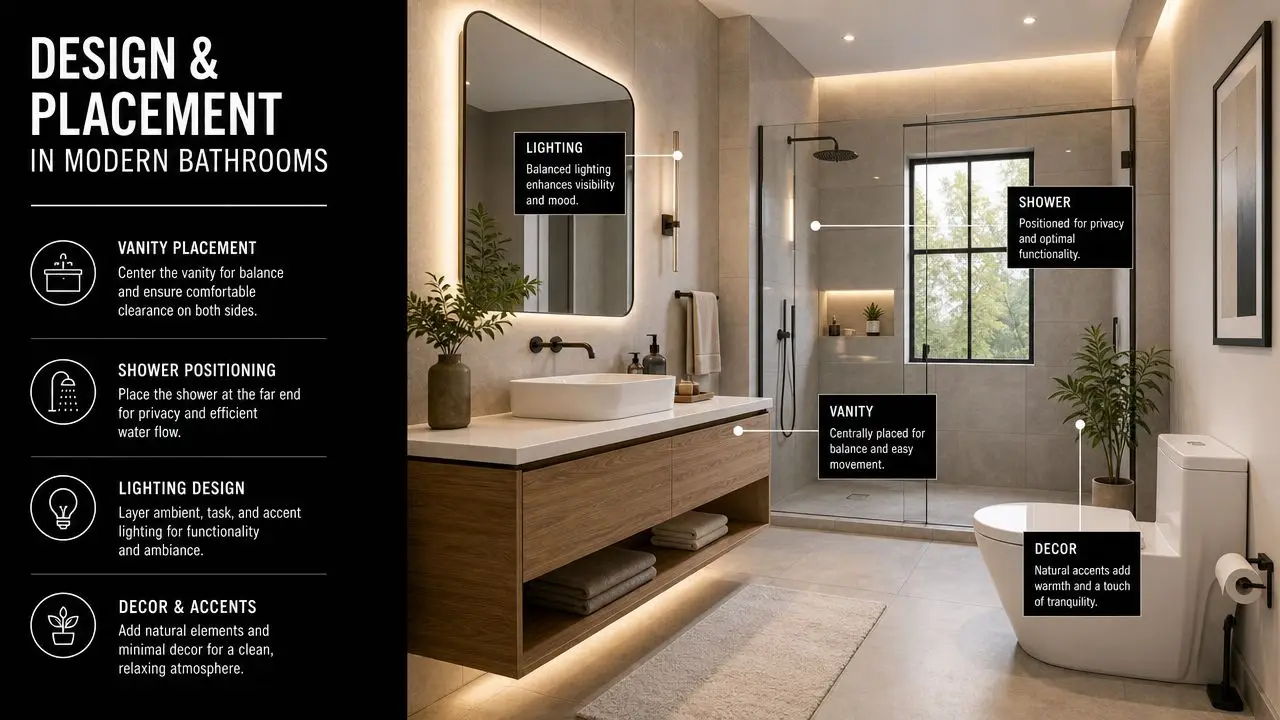
The design decision usually starts with shape and finish. Ladder styles remain popular because they're practical and easy to use. Vertical rails can work beautifully in tighter layouts where horizontal wall space is limited. Chrome stays versatile, while matte black and brushed brass often suit newer palettes and more obviously designer bathrooms.

If you're collecting inspiration for modern bathroom renovations, the rail should be considered alongside tapware, shower frame finish, vanity hardware, mirror lighting, and robe hooks. It's part of the composition, not a separate layer.

Placement that feels natural

The best position is usually close enough to the shower or bath that the towel is easy to grab, but not so close that it compromises safety, crowding, or overall wall balance.

Good placement often follows these principles:

  • Reach matters. You want the towel close to the wet area, but not where it interferes with entry, exit, or cleaning.
  • Sightlines matter. A rail can anchor a wall, but it shouldn't fight with the vanity, mirror, niche, or feature tile.
  • Towel drop matters. Make sure the towel can hang freely without brushing the toilet, vanity edge, or floor.

What tends to work best

In practical terms, these placements usually age well:

  • Near the shower return wall where towels are easy to access but the rail isn't the first thing you see.
  • Adjacent to the vanity zone when the room needs balanced vertical elements.
  • On a clear wall opposite the wet area in tighter bathrooms where circulation is more important than direct reach.

In small bathrooms, the right rail often does double duty. It warms the towel, fills an otherwise awkward section of wall, and reduces the need for separate towel storage.

Design mistakes worth avoiding

Some choices look good on a plan and disappoint in person:

  • Overly wide rails on narrow walls can make the room feel cramped.
  • Dark finishes in low-light bathrooms can disappear unless they connect with other fixtures.
  • Rails behind doors often end up inconvenient, even if they technically fit.
  • One tiny rail in a busy family bathroom can create more frustration than comfort.

A strong result comes from treating the rail as part of the joinery, lighting, and tile set-out discussion. That's how new bathroom ideas become rooms that still work properly once people are living with them.

Installation Rules for Victorian Bathroom Renovations

Generic advice usually becomes unhelpful. In Victoria, the rail can't just go wherever it looks good. Location, wiring method, wall preparation, and bathroom zoning all matter.

A luxurious victorian style bathroom interior displayed next to six essential installation rules for renovation projects.

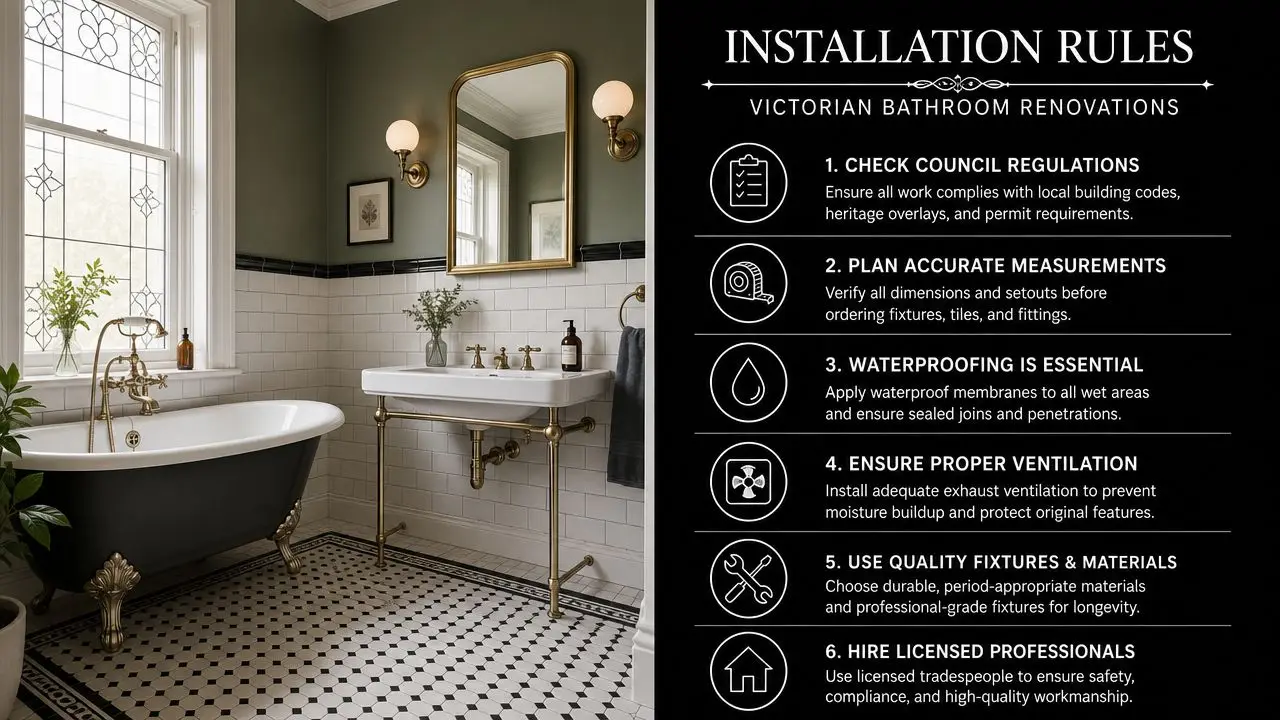
For electric heated towel rails, independent guidance recommends keeping them at least 60 cm away from water-contact areas such as bathtubs and showers, with placement preferably in zone 3, as explained in this electric towel rail installation and zoning guide. In practical renovation work, that single siting decision can affect tile layout, switch position, cable route, and whether the chosen rail is even suitable for the wall you had in mind.

The compliance mindset

Homeowners often ask whether a rail can sit “just next to” the shower or vanity. The answer depends on the exact room layout, the product, and the installation details. What matters is that the decision gets made before waterproofing and tiling are locked in.

The safe approach is simple:

  • Keep electric rails away from direct water exposure.
  • Plan the exact fixing point early so the electrician and builder can coordinate rough-in.
  • Check the product's rating and installation method against the intended location.
  • Don't assume a stylish product is suitable for every bathroom zone.

This is not a styling question first. It's a compliance question first.

Why pre-tiling planning matters

Once the wall is sheeted, waterproofed, and tiled, moving the rail becomes expensive. If the original position doesn't comply, you may need rework that affects finished surfaces and other fixtures.

Pre-tiling planning should cover:

  1. Cable path for a hardwired unit.
  2. Wall support so fixings land properly and don't rely on guesswork after tiling.
  3. Clearance from shower, bath, and vanity based on the actual site dimensions.
  4. Switching and control location so operation is convenient and compliant.

If the design also includes extra electrical work, details like downlights in a bathroom should be considered at the same time. Wet-area electrical planning works best when it's coordinated, not handled as a series of isolated decisions.

Who should do the work

A hardwired electric rail needs to be handled as part of a properly managed renovation. That means the electrical connection should be completed by a licensed electrician, while the overall works should be coordinated within the renovation by the appropriate qualified professionals.

For homeowners comparing bathroom renovations, this is one of the reasons working with registered builders unlimited or another suitably registered and appropriately licensed renovation team matters. The rail itself may look like a small fixture, but it crosses into bigger project issues: compliance, sequencing, and accountability.

Common installation mistakes

These are the problems that cause frustration most often:

  • Choosing the wall before checking the zone.
  • Leaving the decision until after tiles are selected.
  • Forgetting wall depth and fixing points for concealed installations.
  • Expecting the rail to sit right beside the shower because it seems convenient.
  • Assuming any electrician can solve a poor layout decision after the room is finished.

A bathroom heated towel rail should never be the item that forces compromise late in the build. If the placement is right on paper and right on site, the room comes together cleanly.

Comparing Energy Use and Running Costs

A heated towel rail usually costs less to run than many homeowners expect, but only if it is chosen for the job it can do. In Highett bathrooms, the mistake I see most often is treating the rail like a room heater when it was really bought to dry towels and take the edge off a cold space.

A comparison chart showing energy consumption and monthly costs for a portable air conditioner versus a window fan.

Cost depends on wattage, how many hours it runs, and whether the bathroom already has decent heating and extraction. A low-watt rail on a timer can be a sensible addition. A larger rail left on all day, in a bathroom that already has other heating, is where the value starts to fall away.

What you are really paying for

Most households are not buying a heated towel rail to heat the whole bathroom. They are paying for three practical benefits:

  • Drier towels between uses
  • Less damp smell in cooler months
  • A bit more comfort after showering

That can be worth it, especially in winter, but only if expectations are realistic. If the room itself feels cold because of poor ventilation, no ceiling heat, or a generally underpowered heating setup, the rail will not fix the bigger problem.

Where running costs get pushed up

Usage habits matter more than the product brochure.

Costs usually climb when:

  • the rail runs for long periods without a timer
  • the wattage is higher than the household needs
  • the rail is used as the main heat source for the room
  • towels are draped so heavily that drying is slow and the rail stays on longer

In practical terms, timed control is often the difference between a rail that feels worthwhile and one that becomes an annoyance on the power bill. For many Victorian renovations, I recommend deciding on the control method early, because a hardwired setup with the right switching arrangement is usually a better long-term result than relying on people to remember to turn it off.

The Victorian renovation angle that gets missed

Running cost should never be looked at in isolation from compliance and installation method. In Victoria, if the rail is hardwired, it needs to be planned and installed properly as part of the bathroom works. That affects not just safety and legal compliance, but also how easy it is to control the rail efficiently once the room is finished.

This is also one of the practical reasons to understand why using a registered builder matters for your bathroom renovation. Good coordination leads to better placement, proper rough-in, and controls that suit how the household will use the bathroom.

When a heated towel rail is good value

A rail generally makes sense when the household reuses towels, wants them dry by the next use, and does not want to rely on the rail to warm the entire room.

It makes less sense where:

  • the bathroom already performs well without it
  • the choice is driven only by appearance
  • another heating or ventilation upgrade would solve the problem more effectively

That is the trade-off many design-focused articles skip. A bathroom heated towel rail can be stylish and useful, but in a Highett renovation it should still earn its place through sensible running costs, proper controls, and a compliant installation.

Key Questions to Ask Your Bathroom Renovator

The right conversation with your renovator will usually tell you more than a product display ever will. If they can answer these clearly, the project is probably being thought through properly.

Questions that reveal whether the planning is solid

  • How will you confirm the rail location is suitable for the bathroom layout and wet-area rules?
  • Will the wall need extra framing or fixing support before sheeting and tiling?
  • Is this rail being chosen mainly for towel drying, room heating, or both?
  • What controls will be used so it isn't left running unnecessarily?

Questions about sequencing

Some of the most expensive errors happen because the rail gets considered too late. Ask:

  • When does the final rail position need to be locked in?
  • Will the electrician rough in before waterproofing and tiling?
  • How will the rail position affect tile set-out and other fittings on that wall?
  • If the chosen model doesn't suit the location, when will that be picked up?

Questions about who is responsible

A bathroom renovation runs better when responsibilities are clear from the start.

A bathroom heated towel rail is a small item with oversized consequences. Ask the right questions early, and it becomes one of the most satisfying details in the room. Ask them too late, and it can turn into an avoidable compromise.


If you're planning a bathroom renovation in Highett or elsewhere in Victoria, the right heated towel rail choice comes down to three things: compliant placement, realistic performance, and a design that suits how you live.

  • siteprobathrooms

Blind Corner Pantry: A Modern Renovation Guide

You're probably looking at a kitchen plan right now and circling the same awkward spot everyone struggles with. The corner. It's where good layouts can become clumsy, where storage looks generous on paper but feels frustrating in daily use, and where one wrong choice can affect the whole renovation.

That's why a blind corner pantry matters more than people expect. It isn't just a cabinet detail. It's a planning decision that affects storage, movement, accessibility, and how the kitchen will feel years from now. In renovation work, that kind of decision sits in the same category as shower placement in bathroom renovations, vanity depth in modern bathrooms, or storage layout in designer bathrooms. Small move, big consequence.

Tackling the Dreaded Corner Cabinet

Most homeowners describe the problem before they know the name for the solution. They talk about the “black hole” cabinet. The shelf where roasting dishes disappear. The back corner where the slow cooker lives until Christmas. In older L-shaped kitchens, that space often becomes a compromise rather than useful storage.

The reason is simple. Corners are geometrically awkward. When two cabinet runs meet, they create a zone that's hard to access cleanly from either side. Historically, the blind corner became a standard response to that problem in L-shaped and U-shaped kitchens, and modern guidance still positions it as the higher-capacity alternative to a Lazy Susan in compact homes where every millimetre matters, as outlined in this corner cabinet design overview.

Why the corner becomes a design issue

A blind corner pantry works by pushing storage into that hard-to-use zone while keeping a clean cabinet line across the kitchen. That can be a smart move, especially if your priority is fitting more into a modest footprint. It can also be the wrong move if you value instant access over hidden capacity.

Renovation experience matters. A good designer doesn't ask only, “Can we fit storage here?” They ask how you cook, who uses the kitchen, and what the adjacent cabinetry needs to do.

Practical rule: If a corner solution looks efficient on a floor plan but creates awkward reaching, blocked doors, or poor drawer access, it isn't efficient in real life.

The same thinking applies across the home. In bathrooms, the most successful plans don't just chase features. They organise movement, storage and access so the space works every day. The same principle sits behind smart L-shaped kitchen layout planning.

When the blind corner starts to make sense

A blind corner pantry tends to suit homeowners who need to reclaim hidden volume without breaking up the overall layout. It's often chosen when the kitchen has to work harder, not just look better.

That's why this isn't a styling decision. It's a functional one. If you get it right, the corner becomes useful. If you get it wrong, you've built an expensive place to lose things.

What Is a Blind Corner Pantry System

A blind corner pantry system is a cabinet arrangement that reaches into the corner but is accessed from one visible opening. Part of the storage sits behind the front cabinet line, which is why it's called “blind”. You can't see the full interior from the doorway, even though that hidden section is where much of the storage sits.

In practical terms, it's a way to capture more corner volume than many rotating shelf options. In kitchen design guidance, these layouts are commonly built around 24-inch-deep base units and widths of about 33 to 42 inches, and they're valued for storing bulky items such as large cookware, roasting trays, stand mixers, and small appliances, as explained in this blind corner base cabinet dimensions guide.

A modern kitchen corner cabinet featuring a pull-out carousel shelf used as a blind corner pantry solution.

How the system works in plain language

Think of the cabinet as having a front room and a back room. The front opening gives you entry, but some of the storage sits deeper into the corner return. Without internal hardware, that back section can be awkward. With the right mechanism, it becomes much more practical.

The three common approaches are easy to picture:

  • Lazy Susan style trays
    These use rotating shelves. They suit homeowners who want quick visual access to lighter items. You spin the shelf and bring contents forward rather than reaching into the corner.

  • Swing-out systems
    These move in two stages. The front baskets come out first, then the rear section follows into view. They're useful when you want more of the corner volume without leaving everything buried at the back.

  • Pull-out shelves
    These behave more like internal drawers. Shelves or baskets slide forward so you can load and unload items without bending deep into the cabinet. For many households, this feels the most intuitive day to day.

What works well and what doesn't

The cabinet itself isn't the whole story. The success of a blind corner pantry depends on what you put in it and how often you need it.

It tends to work well for:

  • Bulky equipment like mixers, platters, and appliances you use weekly or seasonally
  • Secondary pantry overflow rather than your most-used breakfast or lunch items
  • Families who want volume and are happy to use hardware to improve access

It tends to work poorly for:

  • Tiny loose items that get lost in deep storage
  • Daily essentials you need in a hurry
  • Households needing very easy reach access with minimal bending or twisting

A blind corner pantry can be excellent storage, but it's rarely effortless storage unless the hardware matches the way the kitchen is actually used.

Comparing Your Pantry Solution Options

The key question isn't whether a blind corner pantry is good or bad. The better question is whether it suits your kitchen habits. That matters even more in smaller homes, where losing usable access can hurt more than gaining extra volume helps. The broader planning issue is especially relevant as smaller kitchens become more common and “dead” corner space becomes more consequential, as discussed in this blind corner storage planning article.

Some households need every bit of capacity they can get. Others are better served by simpler, easier-access cabinetry around the corner. The right answer changes with the brief.

Side by side trade-offs

Here's the practical comparison most homeowners need.

Blind Corner Hardware Comparison
Mechanism Type Best For Accessibility Capacity Typical Cost
Basic blind shelf Bulky, occasional-use items Lower, requires reaching Higher Budget-friendly
Rotating shelf system Smaller, lighter everyday items Higher Moderate Mid-range
Swing-out organiser Mixed pantry and cookware storage Good Good Mid-range to premium
Pull-out shelf system Households wanting easier retrieval Good to very good Good Premium
Voided corner with adjacent drawers Simplicity and easy use Very high Lower in the corner itself, often stronger in nearby cabinets Varies by joinery design

Which option suits which household

A basic blind corner gives you raw storage volume, but it asks more of the user. You need to bend, reach, and remember what's at the back. That's acceptable for platters or appliances. It's frustrating for food items you use constantly.

A rotating shelf system is often easier to understand and easier to live with if convenience comes first. The trade-off is shape. Round trays don't always use the full cabinet footprint cleanly.

A swing-out system is a middle-ground choice. It improves access without fully giving up the hidden volume that makes a blind corner attractive in the first place.

A pull-out solution usually feels the most premium in use. If the mechanism is well chosen and correctly installed, it can make a difficult corner feel organised rather than compromised.

If your corner will store everyday pantry goods, prioritise access. If it will store the big awkward items that otherwise clutter benches, prioritise capacity.

Don't ignore the alternative

Sometimes the best corner cabinet is no corner cabinet at all. Voiding the corner and giving more width to adjacent drawers can produce a kitchen that functions better overall. This option is especially strong when the surrounding cabinets can do the heavy lifting more effectively than a specialised corner unit.

That is the primary trade-off. A blind corner pantry can win on storage. It doesn't automatically win on usability.

Design and Planning Considerations

Blind corner pantries reward precise planning and punish assumptions. A drawing can look neat while an actual cabinet door clips a handle, fouls a return wall, or opens only halfway. This is one of those details that has to be resolved before joinery is ordered, not after installation begins.

A common mistake is measuring only the cabinet face. A blind corner tall unit often needs more room than its nominal width suggests. One listed European-made unit is 1150 mm wide, 2220 mm high, and 608 mm deep, but it requires 1250 mm x 608 mm of installation space to allow for practical clearance, as shown in this blind corner pantry size specification.

A person holding a printed kitchen design layout sketch featuring cabinet dimensions and appliance placement on marble.

The measurements that matter most

The opening isn't the whole story. You also have to account for:

  • Door swing clearance so the cabinet can open fully without clashing with nearby handles, walls or appliances
  • Return wall depth because the blind section depends on what's happening around the corner
  • Hardware movement path since internal trays and baskets need room to operate cleanly
  • User standing space so someone can open, step, and unload the cabinet comfortably

A few centimetres can decide whether the pantry feels slick or annoying.

Why 3D planning helps

This is where detailed design earns its keep. In renovation work, I'd much rather solve a corner issue on screen than on site. Three-dimensional planning lets you test door arcs, benchtop overhangs, appliance handles, and circulation before anyone cuts material.

That level of planning isn't unique to kitchens. It's the same discipline behind well-resolved ensuites, compact powder rooms, and polished family bathroom layouts. If you've ever looked through different kitchen cabinet material options, you'll know the finish matters, but the geometry decides whether the space works.

The best renovation plans don't rely on “it should fit”. They prove it fits.

Practical layout checks

Before signing off on a blind corner pantry, check these points:

  • Open the nearby appliances on the plan and see what happens when the pantry door is also open
  • Map your storage categories so the corner isn't asked to perform a role it doesn't suit
  • Confirm handedness early because corner systems are often left or right oriented
  • Review handle choices since oversized hardware can create clearance conflicts in tight corners

Good planning gives you a pantry that feels intentional, not improvised.

Installation Durability and Cost

A blind corner pantry does more work than a standard cabinet. The door geometry puts stress where people grab, swing and load repeatedly, and that means cheap materials show their weaknesses quickly. If the cabinet swells, drops out of alignment, or develops sticky movement, the corner becomes irritating fast.

That's why build quality matters. In local cabinetry practice, these units are commonly made with 16 mm HMR board and 16 mm or 18 mm doors, often paired with premium soft-closing hinges because the concentrated door stress makes durability more important than it might be in a simpler cabinet, as described in this blind corner pantry construction detail.

A close-up of a person installing a wooden pull-out drawer in a modern kitchen pantry cabinet.

What to pay for

You don't need every premium upgrade. You do need the right ones.

Focus on these first:

  • Moisture-resistant board because kitchens deal with steam, spills and cleaning products
  • Reliable soft-close hardware to reduce impact on doors and hinges
  • Accurate installation so the door sits square and the mechanism runs smoothly
  • Proper adjustment after install because corner hardware often needs fine tuning once loaded

A blind corner pantry is not a good place to save money on workmanship. If the cabinet sits out of square, even quality hardware can feel poor in use.

Cost expectations without guesswork

Costs vary widely depending on whether you choose a simple cabinet box, internal organisers, custom joinery, and the level of finish across the rest of the kitchen. Rather than pretend there's one universal figure, it's more honest to think in tiers:

  • Budget-friendly usually means a basic blind corner cabinet with minimal internal hardware
  • Mid-range often includes better access mechanisms and upgraded joinery finishes
  • Premium typically means custom internal storage, higher-spec hardware, and tighter detailing across the full renovation

If you're budgeting across a larger project, it helps to compare the pantry decision against the wider kitchen spend. This overview of the cost of a new kitchen is a useful starting point.

Who should install it

For work that affects cabinetry, layout, services, and broader renovation sequencing, use appropriately registered builders and qualified trades. If the kitchen upgrade forms part of a larger reconfiguration, then registered builders unlimited and an experienced renovation team make a real difference.

The same is true in bathroom renovations. The finish you see at handover depends on what was set out accurately at the start.

Is a Blind Corner Pantry Right for You

The final decision comes down to how you want the kitchen to behave. Not just how you want it to look on handover day. A blind corner pantry can be a strong choice for storage-heavy households, but long-term success depends on access, maintenance, and who'll be using the kitchen over time.

That wider view matters. Beyond hardware, the core issue is renovation performance. Accessibility, maintenance, and long-term appeal often matter just as much as raw capacity, especially as Australia's ageing population makes easy daily function more relevant for homeowners and landlords, as discussed in this blind corner accessibility perspective.

A modern kitchen corner featuring light grey cabinets, marble countertops, and an open workspace area.

When it's a good fit

A blind corner pantry usually makes sense if:

  • You need hidden capacity for large appliances, platters, or occasional-use cookware
  • Your layout benefits from a continuous cabinet run rather than a more angular corner treatment
  • You're willing to invest in access hardware instead of relying on a plain deep shelf
  • The pantry won't be asked to serve your fastest daily routines

When another solution may be better

It may be the wrong choice if:

  • You want quick grab-and-go access to everyday pantry items
  • You're planning for ageing in place and want easier reach lines
  • The kitchen is very tight and open doors will interrupt circulation
  • Simple drawers nearby can do the job better

Other options include voiding the corner, using an angled cabinet, or reorganising adjacent storage so the corner doesn't have to work so hard.

A corner solution should reduce frustration, not formalise it in joinery.

A short decision checklist

Ask yourself these questions before locking in the design:

  1. What will live there
    Bulky appliances and seasonal items suit a blind corner better than small everyday goods.

  2. Who uses the kitchen most
    A young family, an older couple, and a rental household all use storage differently.

  3. How often will the corner be opened
    Occasional use supports deeper storage. Constant use demands easier access.

  4. Would better drawers elsewhere outperform the corner unit
    Sometimes the smartest corner is the one you stop trying to over-engineer.

  5. Does the pantry align with the whole renovation brief
    The best kitchens, like the best modern bathrooms and designer bathrooms, support the life of the home over time, not just the styling mood of the moment.

If you're weighing up a blind corner pantry as part of a broader renovation, get the layout tested properly before you commit. SitePro Bathrooms can help with customized kitchen and bathroom renovations, detailed 3D design, practical new bathroom ideas, and end-to-end construction delivered by an experienced team of registered builders. If you want clarity before work begins, book a consultation and get a plan that fits the way you live.

  • siteprobathrooms

8 Small Ensuite Bathroom Ideas for a Stunning Renovation

You notice the problems the first week you live with a small ensuite properly. The door fights the vanity, the shower entry feels tighter than it did in the showroom, and every bottle, towel, and charger seems to end up on display. A compact ensuite can still work well, but only if the layout has been resolved with precision rather than guesswork.

That is why small ensuites reward disciplined planning. In tight footprints, a few centimetres taken by the wrong vanity depth, door swing, or shower screen can make the room awkward to use and harder to waterproof, ventilate, and clean properly. I see the same pattern in renovation consults across Victoria. Homeowners often come in thinking they need more room, when what they really need is a better plan.

Good small ensuite bathroom ideas are practical before they are decorative. The best ones improve circulation, protect sightlines, reduce visual clutter, and make storage part of the layout instead of an afterthought. If you are still shaping the floor plan, this guide to designing an ensuite that works in real homes is a useful starting point.

The ideas below focus on what holds up on site, not just what looks good in inspiration photos. They also include real trade-offs, common mistakes, and three SitePro before-and-after mini case studies with notes on cost, timeline, and final result, so the advice stays grounded in actual renovation outcomes.

1. Space-Saving Wall-Mounted Fixtures

A modern bathroom featuring a floating vanity, wall-mounted toilet, and minimalist neutral decor with wooden accents.

Wall-mounted fixtures earn their place early in a small ensuite plan because they solve two problems at once. They clear the floor visually, and they reduce the bulky feel that floor-mounted units create around the entry, vanity, and toilet zone.

The gain is not just visual. A floating vanity usually makes daily cleaning easier, and a wall-hung toilet removes the hard-to-reach edges around the pan. In a tight room, that matters. Small ensuites get messy faster, and awkward corners become a maintenance problem within weeks.

Standard basins can be deeper than many homeowners expect, which is why slimline basins, shorter-projection vanities, and wall-hung options show up repeatedly in well-resolved compact layouts. The right fixture depth often decides whether the room feels usable or frustrating.

Where wall-mounted fixtures work best

Use them where circulation is tight or where the room needs to feel calmer on entry. I specify them most often in ensuites with a narrow doorway approach, a toilet opposite the vanity, or limited clear floor area between fixtures.

A few combinations tend to hold up well on site:

  • Floating vanity with drawers: Better storage efficiency than hinged doors in shallow cabinetry.
  • Wall-hung basin: Useful where vanity depth needs to be kept to a minimum.
  • Concealed-cistern toilet: Cleaner sightlines, but only if the framing and plumbing set-out are resolved early.
  • Recessed mirror cabinet: Better than a deep surface-mounted cabinet when shoulder room is already tight.

Practical rule: Confirm wall structure, waste locations, cistern access, and waterproofing details before you commit to wall-mounted fixtures.

There is a trade-off. Wall-hung fittings usually cost more to install than standard floor-mounted pieces because the wall has to do more work. The frame needs to be solid, the plumbing tolerances need to be tighter, and service access cannot be treated as an afterthought. If the wall build-up is handled badly, the room can lose some of the depth you were trying to protect in the first place.

One SitePro before-and-after project made that clear. The original ensuite had a full-depth vanity that pinched the entry and left the toilet wall feeling crowded. We replaced it with a floating vanity, tightened the storage into the wall line, and simplified the toilet area so the room read as one cleaner plane. The budget impact was moderate rather than dramatic, the work stayed within a standard renovation timeline, and the finished room felt easier to move through even though the footprint did not change.

If you are still testing fixture positions, SitePro's guide to planning an ensuite layout that works in real homes will help you sort out clearances before selections are locked in.

2. Compact Corner Showers with Frameless Glass Enclosures

A sleek modern corner shower with glass enclosure in a bright, clean ensuite bathroom featuring wood cabinetry.

Most cramped ensuites suffer from one of two problems. The shower enclosure is too bulky, or the shower door steals valuable circulation space every time it opens. A compact corner shower with frameless glass solves both.

Frameless glass keeps the eye moving across the room instead of stopping at a heavy frame or frosted panel. Corner positioning also uses difficult real estate well, especially in narrow ensuites where a full-width shower can dominate the layout.

The trade-off most people miss

Frameless glass looks light, but it needs disciplined waterproofing and detailing. If the floor falls are poor, the seals are cheap, or the shower entry is too open for the way the room is used, you'll feel that decision every day. Good-looking glass doesn't compensate for bad drainage.

That's why I usually steer people towards one of these approaches:

  • Quadrant enclosure: Softens corners and can improve movement in very tight rooms.
  • Frameless corner screen: Best when you want the room to read as one open space.
  • Wet-room style shower zone: Strong option where floor grading and waterproofing can be handled properly.

A SitePro before-and-after project in a tight ensuite replaced a dated shower with a cleaner corner layout and frameless glass screen. The old room felt shut in because the enclosure visually chopped the space in half. After the renovation, the shower read as part of the whole room rather than a separate cubicle, which is exactly what compact modern bathrooms need.

Good small showers don't feel small because of fancy fittings. They feel generous because the entry is easy, the glass disappears, and the floor flows properly.

If you're weighing a corner shower against a full wet-room setup, think about maintenance as much as aesthetics. Frameless glass is easier on the eye, but you still need practical details like a recessed niche, dependable water sealing, and tile selection that won't make soap residue look worse than it is.

3. Strategic Mirror Placement and Oversized Mirrors

A modern minimalist ensuite bathroom featuring a wooden vanity, floating sink, and a large wall mirror.

If you want one of the fastest visual upgrades in a small ensuite, make the mirror bigger. Not fancier. Bigger. In compact rooms, an undersized mirror makes the wall feel chopped up and meaner than it needs to.

An oversized mirror reflects light, repeats finishes, and gives the room more visual depth. Full-width vanity mirrors work especially well when the ensuite doesn't have much natural light. They also make slim vanities and floating joinery look more intentional.

Where mirror placement helps and where it doesn't

Place the mirror where it reflects the brightest part of the room. That might be a window, a pale tiled wall, or the main lighting source over the basin. Don't use a mirror just because there's an empty wall. In a bad position, it can double visual clutter or reflect the toilet directly from the doorway, which never improves an ensuite.

For practical performance, I like to combine:

  • Full-width vanity mirrors: Best for broadening the room visually.
  • Demisting mirrors: Worth considering in ensuites that get heavy daily use.
  • Integrated lighting: Clean solution where wall space is limited.

One SitePro update used an oversized mirror to fix a common problem. The previous ensuite had a standard mirror with dark edges, a chunky cabinet, and poor side lighting. The new layout replaced that visual interruption with a broader mirror plane and simpler lighting arrangement. The room immediately felt brighter and less pinched, even before the rest of the finishes were taken in.

This is one of those new bathroom ideas that looks decorative but is really about proportion. In small rooms, scale matters more than ornament. A large mirror with clean edges almost always beats a small feature mirror with a heavy frame.

4. Neutral Colour Palettes with Strategic Accent Elements

A small ensuite doesn't need to be all white, but it does need restraint. The easiest way to make a compact bathroom feel busy is to combine too many feature tiles, too many metals, and too many colour changes in a room that already has a lot going on.

Neutral palettes work because they calm the background. Warm white, soft beige, pale greige, and light stone tones let the layout and materials do the work. Then you add one accent direction, not five. That could be brushed brass, matte black, fluted timber, or a feature tile in a controlled area.

The right way to add personality

Accent elements should sharpen the scheme, not dominate it. Good places to use them include the vanity joinery, tapware finish, niche tile, or mirror detail. Bad places include every wall, every fitting, and every accessory bought in a burst of enthusiasm after tile selections are done.

A practical approach is:

  • Choose one metal finish: Keep taps, handles, shower fittings, and hooks consistent.
  • Use texture instead of extra colour: Timber grain, stone-look porcelain, and matte surfaces add warmth without crowding the room.
  • Keep feature tiles contained: Inside a niche, on a vanity splashback, or on one wall only.

I've seen plenty of ensuites where owners wanted “designer bathrooms” and ended up with a mix of trends that dated the room before the grout cured. The more compact the room, the more disciplined the palette needs to be.

One SitePro ensuite transformation leaned into warm neutrals with subtle timber detail and restrained hardware. The previous room had several competing finishes and looked smaller because every surface demanded attention. Once those choices were edited back, the bathroom felt more expensive, even though the improvement came from design discipline rather than visual excess.

5. Integrated Storage Solutions and Recessed Niches

A small ensuite starts to feel cramped the moment everyday items end up on display. One shampoo bottle on the floor turns into six. The vanity top disappears under skincare, razors, chargers, and spare toilet rolls. Good storage planning stops that slide early.

Integrated storage works because it uses wall depth and joinery layout instead of stealing usable floor area. In practical terms, that means recessed shower niches, mirrored shaving cabinets, vanity drawers with proper internal divisions, and tall storage only where the wall can carry it without tightening the room. In compact ensuites, the goal is simple. Keep necessities close at hand and keep surfaces clear.

A useful way to plan it is to treat the room as a movement problem, not a furniture problem. Storage should support the path through the room, not interrupt it. That usually leads to choices like:

  • Recessed shower niches: Better access than wire caddies, with a cleaner finish and fewer visual distractions.
  • Drawer-based vanities: Easier to use than deep cupboards, especially for small items that otherwise vanish at the back.
  • Mirror cabinets: They add storage at eye level without increasing the vanity footprint.
  • Tall joinery on one controlled wall: Effective for linen and bulk items, but only if door swings and entry clearance still work.

The trade-off is that integrated storage has to be resolved early. A recessed niche affects framing, waterproofing, tile set-out, and sometimes plumbing positions. Get it wrong and the niche lands in an awkward spot, cuts across tile lines, or ends up too shallow for the products the household uses. If you are still weighing up tile sizes and layout, SitePro's guide on how to choose bathroom tiles for a small bathroom helps with the planning side of that decision.

One SitePro before-and-after ensuite in Highett shows the difference clearly. The original room had almost no useful storage, so everything sat out on the vanity and shower floor. The renovation added a recessed niche, a custom vanity with full-extension drawers, and a mirrored cabinet sized to the wall rather than picked off the shelf. The build cost stayed controlled because these items were designed into the renovation from the start, not added late as fixes. The result was a bathroom that looked calmer and worked better every morning.

Hidden storage is often what makes a compact ensuite feel complete.

I usually tell clients to be honest about what needs to live in the room. Two people using an ensuite need different storage from a guest bathroom. If one person uses large pump bottles, electric grooming tools, or backup toiletries, the joinery has to allow for that. Storage that suits real habits will keep the room tidy long after the renovation is finished.

6. Large-Format Tiles for Visual Continuity

Large-format tiles do something small mosaics and busy patterns can't. They reduce visual interruption. In a compact ensuite, fewer grout lines usually means a calmer room, and a calmer room almost always feels larger.

That doesn't mean large tiles are always easier. They demand a flatter substrate, more careful set-out, and a tiler who knows how to manage lippage and pattern alignment. But when they're done properly, they give compact ensuites a clean, architectural finish that suits modern bathrooms especially well.

Where they work best

I like large-format tiles on walls first, then on floors if the room proportions and falls allow for them. Matching or closely related floor and wall tones can make the room read as one envelope rather than a patchwork of separate surfaces.

A few practical rules help:

  • Use restrained grout colour: Contrasting grout can make a small room busier than it needs to be.
  • Think about slip resistance: Floor selection still has to suit a wet area, no matter how refined the tile looks.
  • Set out around niches and edges: Poor tile planning around fixtures ruins the clean effect quickly.

One of the reasons large-format porcelain works so well in designer bathrooms is that it supports visual quiet. The eye reads more surface and fewer breaks. In a compact ensuite, that's a real advantage.

If you're comparing finishes, sizes, and layouts, SitePro's guide on how to choose bathroom tiles helps narrow the decision before you commit to samples.

7. Smart Lighting Design with Layered Illumination

Lighting is where many ensuite renovations fall short. A single centre downlight might technically illuminate the room, but it won't flatter faces at the mirror, soften the shower zone, or make the space feel considered. In a compact bathroom, lighting has to work harder because there's nowhere for poor placement to hide.

Layered lighting is the answer. You want ambient light for the whole room, task lighting where grooming happens, and a small amount of accent light if you want depth and atmosphere. That combination makes a practical ensuite feel more like a private retreat.

A better lighting mix

Vanity lighting matters most because that's where people use the room in detail. Side lighting or well-placed mirror lighting reduces harsh facial shadows better than relying only on ceiling fittings. Then ceiling lights can do the background work without trying to solve every lighting need at once.

A strong setup often includes:

  • Task lighting at the vanity: Better for shaving, makeup, and everyday grooming.
  • General ceiling lighting: Keeps the room evenly usable.
  • Accent LED lighting: Works under floating vanities, inside niches, or behind mirrors when done with restraint.
  • Dimmers where possible: Helpful for shifting from bright mornings to softer evening use.

One SitePro after-shot that stood out to me used simple layered light rather than flashy fittings. The original ensuite felt flat and slightly gloomy despite having enough wattage. Once the vanity lighting, mirror reflection, and general room lighting were coordinated, the same footprint felt more spacious and far more polished.

For wet-area lighting basics and placement ideas, SitePro's article on downlights in a bathroom is worth reading before the electrical plan is finalised.

8. Efficient Ventilation and Moisture Management Systems

A beautiful ensuite won't stay beautiful if moisture isn't controlled. This is the least glamorous part of bathroom renovations, but it's one of the most important. Small ensuites trap steam quickly, and once condensation settles into paint, grout lines, cabinetry, or silicone joints, the room starts ageing faster than it should.

Ventilation needs to be designed, not assumed. A weak fan, poor duct run, or exhaust that doesn't vent properly to the outside will leave you with recurring moisture issues no matter how good the finishes look on day one.

What holds up over time

Ducted extraction is usually the smarter option for enclosed ensuites, especially where showers are used daily. Humidity-sensing controls can also help because they keep ventilation running based on actual moisture, not guesswork. And any complicated ducting or structural coordination should be handled by properly qualified trades and registered builders unlimited where the project scope requires it.

Focus on these details:

  • External discharge: Exhaust air must leave the building properly, not dump into the ceiling cavity.
  • Short, efficient duct paths: Long or awkward runs reduce fan performance.
  • Moisture-resistant materials: Cabinet finishes, paint systems, and joinery selections all matter in steamy rooms.
  • Ongoing access for maintenance: Fans need cleaning and servicing to keep working well.

Ventilation doesn't sell the renovation in the showroom. It protects the renovation after handover.

The best new bathroom ideas aren't only the visible ones. Good moisture management keeps your tiles, paint, joinery, and air quality in better condition, and it helps your ensuite feel fresh every day instead of damp by mid-winter.

8-Point Comparison: Small Ensuite Bathroom Ideas

Design Option Implementation Complexity Resource Requirements Expected Outcomes Ideal Use Cases Key Advantages
Space-Saving Wall-Mounted Fixtures Medium–High: requires wall reinforcement and concealed plumbing Structural reinforcement, concealed cisterns, professional plumber/joiner, higher-cost fixtures Frees floor space, cleaner lines, easier floor cleaning Small ensuites, modern renovations where floor area and hygiene matter Maximises usable floor area, contemporary look, easier cleaning
Compact Corner Showers with Frameless Glass Enclosures Medium: precise glass fitting and waterproofing needed Frameless glass panels, skilled glazier/tiler, quality seals and drainage Visual openness, better light flow, efficient corner use Tight bathrooms with unused corners, projects seeking premium aesthetic Opens space visually, easy-to-clean surfaces, flexible sizing
Strategic Mirror Placement and Oversized Mirrors Low–Medium: anchoring, moisture protection and safety considerations Large mirror panels, moisture-resistant backing, fixings, optional demister Increased perceived space and brightness, improved grooming functionality Cost-conscious updates, rooms with natural light, quick refurbishments Very cost-effective, multiplies light, fast visual impact
Neutral Colour Palettes with Strategic Accent Elements Low: material and finish selection, simple application Paint/tiles, trim, hardware finishes, textured materials Visually expands space, timeless calming aesthetic, resale-friendly Full-suite refreshes, resale-focused projects, minimal structural work Timeless look, visually enlarges space, flexible for future updates
Integrated Storage Solutions and Recessed Niches High: requires careful planning, custom joinery and waterproofing Custom cabinetry, joinery labour, design time, moisture-resistant materials Eliminates clutter, maximises storage without using floor area Small ensuites lacking storage, bespoke renovations, long-term solutions Maximises hidden storage, premium integrated appearance, efficient use of space
Large-Format Tiles for Visual Continuity Medium–High: skilled tiling, precise subfloor preparation Oversized porcelain tiles, specialised cutting tools, experienced tiler Seamless visual flow, fewer grout lines, premium modern finish Projects aiming for high-end look and visual continuity Creates spacious feel, durable and easier to clean, modern aesthetic
Smart Lighting Design with Layered Illumination Medium: electrical planning and correct fixture placement LED fixtures, dimmers, wiring, electrician, IP-rated fittings Improved functionality, depth and mood control, reduced shadows Low-natural-light ensuites, high-use bathrooms, luxury upgrades Enhances function and ambience, energy-efficient, adaptable lighting scenes
Efficient Ventilation and Moisture Management Systems Medium: ducting planning and correct installation required Ducted exhaust fan, humidity sensors, external venting, insulation Prevents mould, improves air quality, protects finishes and structure Small enclosed ensuites, older homes, high-humidity bathrooms Protects structure and finishes, improves health and longevity of fittings

Ready to Start Your Bathroom Renovation?

These small ensuite bathroom ideas prove that a compact space isn't a limitation. It's a design test. If the planning is right, even a tight ensuite can feel calm, functional, and polished. If the planning is poor, no amount of expensive tapware or trendy tiles will rescue it.

The most successful ensuites all share the same logic. They protect circulation, reduce visual clutter, and make every fixture earn its place. That's why wall-mounted fittings, frameless corner showers, oversized mirrors, integrated storage, and disciplined lighting keep showing up in strong results. They're not just stylish choices. They solve the problems that make small bathrooms frustrating to live with.

The trade-offs matter too. Frameless glass looks great, but only if drainage and waterproofing are done properly. Large-format tiles can enhance a room, but they expose poor substrate preparation. Floating vanities make the floor feel larger, but they need proper wall support and plumbing coordination. Good renovation advice doesn't pretend every idea is effortless. It helps you choose the right compromises before construction starts.

For homeowners planning bathroom renovations in Highett and greater Victoria, that early planning stage holds the most value. A compact ensuite leaves very little room for guesswork. Layout, storage, tile set-out, lighting, ventilation, and fixture depth all need to work together from the start. That's how modern bathrooms feel easy to use instead of carefully squeezed in.

SitePro Bathrooms approaches this with detailed 3D design, practical renovation experience, and an end-to-end process that helps clients see the room clearly before work begins. That matters in small ensuites because a few centimetres in the wrong place can change how the whole room functions. It also matters if you're balancing aesthetics with buildability and want designer bathrooms that still stand up to everyday use.

Whether you're refining a tired ensuite, collecting new bathroom ideas, or planning a full renovation with registered builders and trusted trades, the goal is the same. Build a room that looks better, works better, and stays that way.

Contact SitePro Bathrooms to discuss your ensuite renovation and turn a cramped, awkward room into a space that feels considered from every angle.

  • siteprobathrooms

Bathroom Tiling Cost in 2026: A Highett & VIC Guide

You pick a tile at the showroom, multiply it by the floor and wall area, and the number looks manageable. Then the quote comes back higher than expected because bathroom tiling in Victoria is priced as a wet-area system, not just a tile supply rate.

That catches plenty of Highett homeowners out.

The visible tile is only one part of the cost. A proper bathroom tiling price can also include substrate correction, sheet or liquid waterproofing, screeding to falls, corner detailing, trims, movement joints, and the labour to cut neatly around wastes, tapware, niches, and fixtures. If the room is out of plumb, the floor is uneven, or there is damage from a previous leak, the work increases before the first tile goes down.

This is the part generic online calculators usually miss. They often start and finish with square metres and tile grade. Real bathroom quotes in Victoria need to account for compliance, the condition of the existing surfaces, and whether the bathroom can be tiled as-is or needs rectification first.

In practice, the cheaper quote is not always the cheaper job. If waterproofing is skimmed over, falls are poor, or the substrate is not prepared properly, the repair cost later is usually far higher than the saving upfront.

The useful way to assess bathroom tiling cost is to look at the full installed result. You are paying for a surface that bonds properly, drains properly, meets wet-area requirements, and still looks right years after handover.

Your 2026 Guide to Bathroom Tiling Costs in Highett

A homeowner in Highett picks a tile at the showroom, works out the wall and floor area, and expects the tiling cost to sit close to that number. Then the quote arrives with waterproofing, screeding, substrate repair, trims, and labour for detailed cuts around fixtures. That gap is where a lot of budget blowouts start.

Bathroom tiling cost is rarely just about tile selection. In Victoria, the all-in price depends on whether the room is ready to tile, whether the wet area needs new waterproofing, and how much prep is required to get a straight, durable finish. A bathroom with uneven walls, poor falls, or damage from an old leak will cost more to tile properly than a room with sound, tile-ready surfaces.

That is why tiling can shift the whole renovation budget.

A proper tiling allowance needs to cover more than visible finishes. It often includes:

  • Wet-area preparation to suit Victorian compliance requirements
  • Waterproofing and detailing at junctions, corners, penetrations, and shower areas
  • Substrate correction where walls are bowed, floors are uneven, or sheeting needs replacement
  • Screeding to falls so water drains correctly to the waste
  • Labour for layout and cutting around niches, tapware, toilets, vanities, and floor wastes
  • Trims, movement joints, grout, and adhesives suited to the tile type and room conditions

The tile is the part you see. The preparation and installation standard are what determine whether the bathroom performs properly.

Early budgeting gets easier once three decisions are clear.

  1. How much of the room is being tiled
    Floor-only tiling, shower-only tiling, and full-height wall tiling sit in very different cost ranges.

  2. Whether this is a full renovation or a retile over corrected surfaces
    Demolition, rectification, and new waterproofing add scope before tiling starts.

  3. What finish standard you expect
    A simple stacked layout with standard-size tiles is priced differently from large-format porcelain, herringbone patterns, mitred edges, or feature niches.

For Highett homeowners, the useful question is not “what do tiles cost per square metre?” The better question is “what will it cost to supply and install a compliant, long-lasting tiled bathroom in the condition my room is in?” That is the number that lets you budget properly.

Understanding Tiling Prices Per Square Metre

A budgeting guide for tiling costs featuring tiles, a tape measure, a calculator, and a notebook.

A Highett homeowner might walk into a tile showroom, choose a tile at a sharp retail price, then assume the bathroom budget is largely sorted. It rarely works that way. Per-square-metre pricing is useful for comparing tile products, but it does not tell you the all-in cost of getting a bathroom tiled properly in Victoria.

The first split to make is simple. There is a supply rate for the tile itself, and there is an installed rate for a finished bathroom surface. Those numbers are not close once you allow for cutting, setting out, adhesives, trims, grout, wastage, and the extra labour that bathrooms always involve.

Supply cost versus installed cost

Supply-only pricing usually follows the tile category and finish:

Tile choice What it usually means for budget
Basic ceramic Lower material cost and often suitable for straightforward wall applications
Porcelain Higher material cost in many cases, with better suitability for floors and wet areas
Large-format or specialty finishes Higher product cost, plus more handling, more care during install, and tighter substrate tolerances

Installed pricing changes for a different reason. It reflects how much labour and site work the tile choice creates.

A low-cost tile can still be expensive to install if it needs a lot of cuts, chips easily, or has shade variation that slows the set-out. A more expensive tile can sometimes install faster if the room is simple and the format suits the space.

That trade-off catches people out.

Why square metre rates can mislead in bathrooms

Open floor areas are one thing. Bathrooms are full of interruptions.

A tiler is working around tap penetrations, wastes, corners, nib walls, toilet pans, vanities, shower screens, niches, and often out-of-square walls. Two bathrooms with the same tile area can price very differently because one is a clean rectangle and the other is a tighter room with more detailing.

Large-format tiles are a good example. They can give a clean, high-end finish with fewer grout joints, but they also demand flatter walls and floors, careful handling, and cleaner layout decisions. If you are considering that look, it helps to understand the practical side of installing large-format porcelain tiles before you compare rates by square metre alone.

A practical way to use per-metre pricing

Use square metre rates as a screening tool, not as the final budget.

They are helpful for comparing one tile product against another and for getting an early feel for whether you are shopping in an entry-level, mid-range, or premium bracket. They are less useful for working out the full cost of a compliant bathroom tiling job, because bathrooms are priced by area and by complexity.

In real quotes, the labour rate per square metre tends to rise when the job includes:

  • More cuts and edge detailing
  • Smaller rooms with more fixtures packed in
  • Patterned layouts or feature walls
  • Large-format tiles that need flatter substrates
  • Mitred corners, niches, or trimless finishes
  • Higher wastage from layout matching or tile variation

The better budgeting question

The useful question is not the retail tile rate on the box. The useful question is what each square metre will cost once the tile is installed straight, drained properly, finished neatly, and backed by the preparation the room needs.

That is why online tile calculators regularly understate bathroom costs for Victorian homeowners. They measure area. They do not measure condition, detailing, access, compliance, or finish standard.

What a Professional Tiling Quote Actually Includes

A homeowner in Highett gets three tiling quotes for the same bathroom and the prices are miles apart. In most cases, the gap is not just margin. It is scope. One quote allows for demolition, substrate correction, waterproofing, trims, silicones, waste, and final detailing. Another may only cover laying tiles onto whatever surface is already there.

That is why a proper quote needs to show the full installed scope, not just a square metre rate and a total.

The line items that should be there

A bathroom tiling quote should break the work into clear parts so you can see what is being supplied, what is being prepared, and what is being installed. In Victoria, that matters because a wet area is not priced properly unless the quote deals with both finish and compliance.

A professional quote will usually include:

  • Demolition and waste removal
    Removing old tiles, adhesives, bedding, damaged sheet substrate, and site rubbish. Disposal costs are real, especially where access is tight or the home is occupied.

  • Substrate preparation
    Floors and walls need to be flat, sound, and suitable for tiling. That can mean levelling, patching, replacing sheet substrate, correcting falls, or straightening walls before any waterproofing or tile laying starts.

  • Waterproofing scope
    This should be listed clearly, not buried inside a vague labour line. A proper quote identifies the wet areas being treated, the system being used, and who is responsible for that work.

  • Tile laying labour
    Set-out, cuts, alignment, junctions, penetrations, edges, and finishing around fixtures all sit in this part of the price. The quality of these tasks highlights a tiler's experience.

  • Adhesives, grout, trims, and sealants
    These materials affect performance and finish. Cheap quotes often leave trims or silicone work unclear, then add them later as variations.

  • Final clean and finishing
    Grout clean-up, silicone joints, checking edges, and leaving the bathroom ready for the next trade or handover.

If the quote is too brief, ask for it to be broken down. A one-line allowance makes it hard to compare one contractor with another, and it gives you very little protection if the scope shifts once work begins.

What cheap quotes often leave out

The lowest number can still become the highest final cost if the missing work appears later as variations.

The most common omissions are:

  1. Rectification of uneven or unsuitable surfaces
  2. A defined waterproofing allowance
  3. Tile trims, mitres, or exposed edge treatment
  4. Waste removal and disposal
  5. Responsibility for tile supply, breakage, and wastage
  6. Silicone sealing to corners and junctions
  7. Detailing around niches, floor wastes, and tap penetrations

These details matter more with larger tiles. Flatness tolerances are tighter, lippage is harder to hide, and the set-out needs more care around fixtures and corners. If you are considering installing large-format porcelain tiles, the quote should allow for the extra preparation and handling time rather than pricing them like a standard small-format wall tile.

A good bathroom tiling quote shows where the money is going, what condition the room is assumed to be in, and what happens if that assumption is wrong.

What to check before you accept the price

Read the quote as if you are checking for gaps, not just totals.

A useful quote answers these questions clearly:

Quote question Why it matters
Who supplies the tiles Avoids disputes about lead times, breakage, shade variation, and wastage
What condition the quote assumes Stops surprises if demolition reveals rotten sheeting, poor falls, or movement
What preparation is included Shows whether flattening, patching, or substrate replacement has been allowed for
How waterproofing is handled Confirms the wet-area work has been priced and assigned properly
What finish standard is included Edge trims, mitred corners, niches, feature patterns, and layout centring all affect labour
What is excluded Helps you compare quotes on a like-for-like basis before signing

In practice, the best quote is usually the clearest one. It gives you an all-in picture of the tiling cost for your bathroom, including the hidden work that generic calculators skip and Victorian wet areas regularly need.

Key Factors That Raise or Lower Your Tiling Budget

An infographic listing key factors that raise or lower the overall budget for professional bathroom tiling projects.

A bathroom can look straightforward on paper, then cost more once the old finishes come off. In Highett and across older Melbourne homes, the swing factor is often the condition underneath the tiles, not the tile you picked in the showroom.

That is why online tile calculators regularly miss the mark. They tend to price visible area. A real bathroom tiling budget in Victoria also has to allow for substrate correction, wet-area preparation, waterproofing, set-out, and the detailing needed to leave the room compliant and usable.

The biggest budget movers

If the price changes after inspection or demolition, these are usually the reasons.

Surface condition

Tiling goes faster, and gives a better result, when the room is straight, solid, and dry. If the floor is out of level, the falls are wrong, the walls are bowed, or the sheeting is not suitable, those issues need to be fixed before tiling starts.

This is one of the biggest cost variables because prep work is hard to see in a finished bathroom, but it controls the finish. Poor surfaces lead to lipping, bad drainage, cracked grout lines, and ongoing movement.

Waterproofing scope

Waterproofing is part of the job, not an optional extra. In a Victorian bathroom renovation, the quote needs to reflect the wet-area requirements, the number of junctions and penetrations, and how much area is being treated.

A simple room with standard shower detailing is quicker to handle than one with recessed niches, an awkward hob, multiple tap penetrations, or transitions into adjoining flooring.

Bathroom size and layout

Small bathrooms often cost more per square metre than larger ones. There is less room to work, more cutting around fixtures, and less tolerance for set-out mistakes. A compact room can still carry the fixed labour involved in protection, preparation, waterproofing, and clean-up.

That is one reason a small bathroom remodel cost in Melbourne can surprise homeowners during early budgeting.

Tile format and finish quality

Standard ceramic or porcelain in a practical size is usually quicker to install than large-format tiles, rectified edges, mosaics, or patterned layouts. The tighter the joints and the more visible the alignment, the more labour goes into the set-out and installation.

Finish expectations matter too. Centre lines, niche alignment, balanced cuts at corners, and tidy edge treatment all take time. Good tiling is not just sticking tiles to a wall. It is planning the layout so the room looks right when everything is in.

Features that add labour quickly

Area alone does not set the price. Detailing does.

These common items can lift the tiling budget even when the room size stays the same:

  • Shower niches with internal falls, waterproof detailing, and clean edge finishing
  • Feature walls where pattern alignment and cut placement are obvious at eye level
  • Strip drains and custom falls that require tighter floor-setting accuracy
  • Boxed services, nib walls, and hob walls that create extra corners and edge work
  • Decorative patterns or mixed tile sizes that slow the set-out and increase cutting

If the room needs correction before tiling, the preparation work will often drive the cost more than the tile selection.

What helps keep tiling costs under control

The most cost-effective bathrooms are usually the ones that work with the room, not against it. Simple choices often produce the best value.

Budget-friendly factor Why it helps
Straightforward layout Reduces difficult cuts and speeds up set-out
Standard tile sizes Makes handling, cutting, and spacing more predictable
Sound, suitable substrate Cuts down on rectification before waterproofing and tiling
Fewer custom details Reduces labour on trims, corners, returns, and alignment
Practical fixture locations Avoids extra penetrations and awkward finishing around fittings

The cheapest quote is not always the lower-cost outcome. If preparation, waterproofing, or substrate repairs are underallowed, the room still needs that work done. A clear all-in quote usually gives a better picture of what the bathroom will cost to tile properly in Victoria.

Sample Tiling Budgets for Common Bathroom Sizes

Homeowners usually want a working number, even if it's only a planning range. The safest way to treat any early estimate is as a budgeting guide, not a fixed quote, because the final scope depends on what demolition and site inspection reveal.

The table below uses broad Victorian planning logic based on common bathroom types and the installed bathroom tiling cost ranges already discussed for standard work. It's intended to help you think in terms of project scale, not to replace a measured quote.

Estimated Tiling Budgets for Highett Bathroom Renovations 2026

Bathroom Type Tiled Area (Approx.) Estimated Tiling Cost Range
Small powder room Small floor area with limited wall tiling Often toward the lower end of standard installed rates, but small-job labour premiums can make the effective rate feel higher
Standard family bathroom Moderate floor area plus shower walls and selected full-height walls Often sits in the middle of the standard installed range, depending on preparation and tile format
Master ensuite with premium detailing Larger wall-and-floor coverage, more features, higher finish expectations Often pushes above standard ranges once complex detailing, premium tiles, or extra prep are involved

How to use these examples properly

A powder room can surprise people. It looks small, but fixed setup time still applies. Protection, cutting, transport, mixing, cleanup, and finishing don't shrink in proportion to the floor area.

A family bathroom is where many modern bathrooms sit. If the layout is straightforward and the tile choice is sensible, this is often the easiest room to budget with some confidence.

An ensuite with niches, feature walls, large-format tiles, or high-end trims moves closer to a custom installation. That's where the bathroom tiling cost starts to follow detail level more than room size.

The better way to estimate your own bathroom

If you're trying to plan your budget before requesting quotes, use these checks:

  • Measure likely tiled surfaces, not just floor area
  • Decide whether walls are full height or part height
  • List every feature such as niches, benches, hobs, and feature patterns
  • Assume older bathrooms may need more prep
  • Compare the tiling spend to the full renovation spend, not in isolation

For very compact spaces, it also helps to look at how layout choices affect the whole renovation budget, not just the tiling package. This guide to small bathroom remodel cost is useful when the room is tight and every decision has a bigger cost impact.

How to Achieve a Designer Look Without Overspending

A stylishly decorated living room featuring a sofa, coffee table, and bookshelves, demonstrating budget-friendly interior design tips.

A common mistake is spending heavily on the tile you can see, then being forced to cut corners on the work underneath it. In Victoria, the better result usually comes from the reverse. Keep the waterproofing, preparation, falls, and finishing to a proper standard, then use tile selection and placement to create the visual impact.

That is how bathrooms stay on budget without looking cheap.

Spend in the areas that do the visual work

Most bathrooms do not need a premium tile on every surface. They need a clear focal point and a consistent background around it.

Good value choices often include:

  • One feature wall behind the vanity or in the shower, instead of wrapping the full room
  • A statement tile in a niche while the main wall tile stays simple and easier to lay
  • A clean floor tile that supports the rest of the room rather than competing with it
  • Matching field tiles in larger wall areas where repetition helps the room feel calm and more expensive

This approach controls both supply cost and labour time. It also reduces the risk of the room feeling busy once fittings, mirrors, lighting, and joinery go in.

Choose tile formats with the installation in mind

Homeowners often focus on the tile price per box. The labour side can shift the total just as much.

Small tiles, mosaics, and patterned layouts usually mean more set-out time, more joints, more cuts, and more finishing. Large-format tiles can create a cleaner look, but only if the walls are prepared properly and the tile size suits the room. A cheap quote can ignore that reality. A proper quote allows for the substrate work needed to get a flat, lasting finish.

If you are still weighing up style against practicality, this guide on how to choose bathroom tiles will help you narrow down finishes that suit both the room and the budget.

Where to simplify without losing the designer feel

These are the trade-offs I recommend most often:

  1. Use one hero tile
    Let one tile carry the look, then support it with a simpler wall or floor tile.

  2. Be selective with patterns
    Herringbone, kit-kat, and mosaic finishes can look excellent, but they should be used in small areas where the detail earns its cost.

  3. Keep trims and edges neat
    Straight lines, tidy junctions, and well-finished corners usually make a bathroom look more expensive than an extra feature tile does.

  4. Choose consistency over novelty
    A restrained colour palette and repeatable tile size are easier to execute well and easier to live with long term.

  5. Do not cut the compliance items
    The waterproofing system, screed falls, sheet preparation, and movement joints are part of the finished bathroom cost. They are not optional extras you remove to afford a better-looking tile.

A designer result usually comes from restraint, not from loading the room with costly materials and complicated patterns. In real projects around Highett, the bathrooms that age best are the ones with a solid base, a simple layout, and a few smart feature decisions.

How We Calculate Your Tiling Cost and Next Steps

The most useful tiling quote starts on site, not from a message with rough room dimensions. Bathroom tiling cost depends on what's being tiled, what sits underneath it, and what standard of finish you want.

A proper process usually starts with an inspection of the existing bathroom. The measurements matter, but so does everything around them. The condition of the substrate, access into the home, whether the room is occupied, the tile format you prefer, and whether the job is part of a full renovation all affect the final scope.

What should happen before you get a price

A transparent quoting process should include:

  • Site measure and inspection so the quote reflects the actual room
  • Discussion of finish level from practical family bathroom to high-detail modern bathroom
  • Clarification of supply responsibilities so there's no confusion about owner-supplied tiles
  • Itemised inclusions covering preparation, waterproofing, tiling, and finishing

If the project is a full renovation rather than a re-tile, the quote should also reflect builder coordination, sequencing, and compliance responsibilities. That matters when plumbing, electrical, carpentry, waterproofing, and final fit-off all interact.

Why itemised quotes matter

Homeowners don't need a long quote because they enjoy paperwork. They need it because hidden gaps create disputes and budget blowouts.

The clearest quote usually creates the smoothest renovation. Everyone knows what's included, what isn't, and what standard is being priced.

If you're planning bathroom renovations in Highett and want a measured, itemised proposal from a local team, SitePro Bathrooms can help. As a specialist renovation company and registered builders unlimited service provider for end-to-end bathroom projects, the team works through design, scope, construction, and finish with a clear quoting process. You can contact SitePro Bathrooms to arrange a consultation and get a personalized estimate for your space.


Your Bathroom Tiling Questions Answered

Is bathroom tiling usually charged by the square metre

Often, yes, but that only tells part of the story. Square-metre pricing is useful for broad budgeting, yet bathrooms also carry fixed labour, setup, compliance, and detailing costs that don't scale neatly with area. That's why two bathrooms with similar coverage can still price differently.

Why is the tile shop total so different from the renovation quote

Because the tile shop total is usually only the material purchase. A renovation quote may also include demolition, waste removal, substrate correction, waterproofing, adhesives, trims, grout, sealants, laying labour, and final finishing. In wet areas, that difference is normal.

Can I save money by supplying my own tiles

Sometimes, but only if the tile is selected properly and ordered correctly. Owner-supplied tiles can create delays if there are shortages, shade variation, damaged boxes, or the wrong format for the intended area. If you do supply your own tiles, confirm lead times, edge trims, slip suitability, and whether extra pieces are available if breakage occurs.

Is a small bathroom always cheaper to tile

Not necessarily. A small bathroom can have more cuts, tighter access, and more concentrated detailing around fixtures. Small jobs also still need setup, protection, waterproofing, and finishing. The room may be compact, but the trade sequence is still substantial.

Is it risky to tile over existing tiles

It can be. Sometimes the old surface isn't sound, sometimes levels become problematic, and sometimes the existing substrate or waterproofing is already the issue. Tiling over failed or suspect work doesn't remove the problem. It hides it. In many bathroom renovations, removal and proper rebuild is the safer path.

Do large tiles always cost more to install

Not always. Large-format tiles can require better substrate preparation and more careful handling, but they may also reduce grout joints and simplify the visual finish. Whether they save or cost more depends on the room shape, access, and how flat the surfaces are.

Should I choose mosaics for the shower floor

They can work well in the right application, especially where more joints help follow falls, but they are also more labour-intensive. They create more grout lines and usually take longer to install neatly. They should be chosen because they suit the floor and the design, not because they seem like a simple decorative add-on.

Why does waterproofing matter so much in the quote

Because bathroom tiling is only as good as the wet-area build-up underneath it. If the substrate and membrane aren't right, the finished tile surface won't protect the room properly. Waterproofing is not the place to trim the scope.

Do I need a registered builder or just a tiler

If you're doing isolated tiling work, a tiler may be the main trade you engage. If you're doing a full bathroom renovation, a registered builder matters because the project usually involves coordination across demolition, carpentry, waterproofing, plumbing, electrical, and final fit-off. For homeowners wanting one accountable party managing the full result, that builder-led approach is often the safer path.

How do I keep costs under control without ending up with a plain bathroom

Be selective, not cheap. Use a feature tile in a focused area. Keep the main field tile simple. Avoid patterns that add labour unless they genuinely improve the design. Prioritise clean set-out, good lighting, and proper detailing. That combination usually delivers a better result than spending heavily on every surface.

What's the best first step if I'm still in the ideas stage

Start with the room you have. Measure it, list what you want changed, and separate must-haves from nice-to-haves. Then get a site-based, itemised quote that reflects your specific bathroom, not a generic calculator result. That's when the bathroom tiling cost becomes clear and manageable.

  • siteprobathrooms

Splashback or Backsplash: Expert Guide for 2026

You're probably here because you've started collecting ideas for a kitchen or bathroom renovation and hit an annoying language snag. One supplier says backsplash, your Pinterest saves say backsplash, but every local tradesperson, showroom, and renovation quote in Victoria seems to say splashback. Then questions follow. Which material offers lasting durability? Where should it stop? Will a patterned tile look polished or chaotic once it hits a corner, power point, or vanity mirror?

That confusion is normal. The term is simple. The decision isn't.

In real renovation work, the splashback is one of those details that looks easy from a distance and becomes technical the moment you need it measured, cut, aligned, sealed, and installed neatly around fixtures. In kitchens, it deals with water, grease, heat, and daily cleaning. In bathroom renovations, it can shape the whole look of a vanity wall while also protecting plaster and paint in high-moisture areas. Get it right and the room feels finished. Get it wrong and even expensive materials can look poorly planned.

Splashback vs Backsplash Decoding the Renovation Lingo

The short answer is this. In Australia, splashback is the standard local term. Backsplash is the North American term. The Cambridge Dictionary entry for “backsplash” labels it as US usage, which lines up with how Australians speak and specify the item on renovation projects.

So if you're asking about splashback or backsplash, you're asking about the same thing.

In practical renovation terms, a splashback is the protective wall surface behind work areas. In kitchens, that usually means behind the cooktop, sink, and benchtop run. In bathrooms, it often means the wall finish behind a vanity or basin where regular splashing would otherwise mark or damage the wall.

Term Common region What it means Typical use
Splashback Australia, UK usage Protective wall surface behind wet or messy work areas Kitchens, bathrooms, laundries
Backsplash North America Same function, different regional wording Kitchens, bathrooms

The wording matters less than the function. The surface needs to do three jobs well:

  • Protect the wall: It stops water, grease, and day-to-day mess from reaching painted plaster or other less durable finishes.
  • Support cleaning: A good splashback makes wipe-down easier, especially around sinks, vanities, and cooktops.
  • Finish the design: It can either blend into the room or become the visual feature.

A lot of renovation mistakes start before installation. People choose a look first and only later ask how it ends at a shelf, window, or power point.

That's why this decision sits early in project planning. For modern bathrooms, new bathroom ideas, and kitchen upgrades alike, the splashback isn't a styling afterthought. It affects layout, material ordering, labour, and how tidy the finished room feels.

Key Considerations Before Choosing Your Material

Before comparing tile, glass, or stone, step back and look at the job the splashback needs to do in your home. A material that looks perfect in a showroom can become frustrating in a busy family kitchen or a compact ensuite if it doesn't match how the room is used.

Key Considerations Before Choosing Your Material

Start with the layout, not the finish

Homeowners often begin with colour. Project managers begin with edges, heights, returns, outlets, and joins.

A splashback across a simple straight run is one thing. A splashback that has to turn a corner, finish under open shelving, stop at a window reveal, or wrap around a shaving cabinet in a bathroom needs more planning. The more interruptions in the wall, the more important the installation detail becomes.

One reason this matters is material quantity. A standard kitchen splashback over a 3-metre run at 600 mm high covers about 1.8 m², while a full-height wall over that same width reaches about 7.2 m², which is roughly a 300% increase in coverage according to this measurement guide on splashback area calculation. That change affects how much tile, glass, or stone you need, and how much cutting and labour the installer takes on.

Use three filters before you choose

A quick decision framework helps.

  • Budget: Full-height features look strong, but they use more material and usually create more labour. If budget is tight, choose where to spend for impact.
  • Lifestyle: If you cook often, use oils, or have kids leaving toothpaste and soap marks everywhere, pick a finish that's easy to wipe and forgiving in daily use.
  • Aesthetic: Decide whether the splashback should be quiet or prominent. In designer bathrooms, a splashback can frame the vanity and mirror beautifully. In a minimal kitchen, it may need to recede.

Practical rule: Measure the wall you need to protect before choosing the material you want to admire.

Think like a builder for five minutes

If you want the room to feel organised, ask these questions early:

  1. Where does the splashback start and stop?
  2. Will the edge align with cabinetry, shelving, mirrors, or tall joinery?
  3. Are there outlets, tap penetrations, or trims that will interrupt the pattern?
  4. Is this a wet-prone bathroom zone that needs tougher detailing?

Many strong-looking new bathroom ideas either become refined or begin to fail at this stage. The best result usually comes from planning the shape and boundaries first, then selecting the finish.

A Detailed Comparison of Popular Splashback Materials

Some materials look good in photos but become annoying to live with. Others don't scream for attention, yet perform better year after year. The right choice usually comes down to how much mess the room sees, how much visual detail you want, and how precise the installation needs to be.

Splashback Material Comparison Guide

Material Average Cost Durability Maintenance Best For
Ceramic or porcelain tile $ to $$ Good Moderate, grout needs attention Most kitchens, bathroom renovations, feature patterns
Mosaic tile $$ Good Higher maintenance due to more grout lines Feature areas, designer bathrooms, niche detailing
Toughened glass $$ to $$$ High Easy Busy kitchens, clean modern finishes, areas behind gas hobs
Natural or engineered stone $$$ High Low to moderate depending on finish Premium kitchens, seamless luxury looks, modern bathrooms
Stainless steel $$ to $$$ High Easy Utility-focused kitchens, contemporary or industrial styling

Tiles suit the widest range of projects

Tiles remain the most flexible option because they can be subtle, bold, classic, or strongly contemporary without forcing the whole renovation in one direction. They work in kitchens and in bathroom renovations, especially where you want colour, texture, or pattern.

Ceramic and porcelain tiles are often the easiest entry point because they offer plenty of variation in shape and scale. Subway layouts feel familiar. Large-format tiles reduce grout lines and can look cleaner. Mosaic tiles create texture but also add many more joints, which means more visual busyness and more cleaning effort.

Tiles work well when you want:

  • Design flexibility: Easy to match with timber, stone-look joinery, or painted cabinetry.
  • Controlled spending: You can keep the field simple and spend more on trims or a feature section.
  • Bathroom detail: Vanity splashbacks, recessed shelving, and small wall areas often suit tile very well.

What doesn't work as well is choosing a busy patterned tile and treating installation as an afterthought. Patterns need a layout plan, not just a tile selection.

Toughened glass is hard to beat for easy cleaning

If low maintenance is high on your list, glass has a strong case. In a busy kitchen, toughened glass splashbacks are noted as highly heat-resistant and suitable behind gas hobs, while also being easy to clean because the surface is seamless and non-porous.

That combination matters. No grout lines means wipe-downs are quicker. The finish also reflects light well, which can help a tighter kitchen feel brighter.

Glass usually suits:

  • Minimal kitchens: Clean lines, little visual interruption.
  • Family use: Less scrubbing around joints and corners.
  • Simple colour statements: One consistent tone across the whole wall.

Its trade-off is aesthetic warmth. In some homes, glass can feel a little flat unless the cabinetry, benchtop, and lighting are doing enough around it.

Stone gives a premium, integrated look

Stone, whether natural or engineered, is usually chosen for visual continuity and a more architectural finish. If the benchtop continues up the wall, the room often feels calmer and more expensive-looking because there are fewer competing materials.

This can work beautifully in modern bathrooms too. A stone splashback behind the vanity can tie together basin, cabinetry, and mirror lighting in a very controlled way. That's often why designer bathrooms feel resolved. The material palette is disciplined.

Stone tends to suit homeowners who want:

  • A continuous appearance
  • Fewer joins
  • A premium feel without decorative fuss

The challenge is planning. Slab materials need accurate templates, clean cut-outs, and careful handling around taps, outlets, and edges. They don't forgive casual measurement.

If you're also comparing surfaces more broadly, this guide to kitchen benchtop materials helps frame how the splashback should relate to the rest of the kitchen.

Stainless steel is practical first, decorative second

Stainless steel is chosen for performance. It handles cooking zones well, wipes down easily, and gives a crisp, functional finish. In some homes that's exactly the right look. In others, it can feel too commercial unless balanced with softer elements like timber, warmer stone, or textured joinery.

It works best where function leads the design brief.

If the cooking zone gets heavy daily use, choose the material you'll still like after the fifth wipe-down of the day, not just the one that looked best under showroom lights.

Style Guide Matching Your Splashback to Your Home

A splashback doesn't need to shout to matter. Some of the best-looking rooms use it subtly. Others rely on it to carry the whole design. The difference is whether you want the wall finish to lead the room or support it.

Style Guide Matching Your Splashback to Your Home

When a quiet splashback works best

In a kitchen with strong cabinetry colour, a veined benchtop, or open shelving, the smartest move is often restraint. A plain tile, simple glass panel, or matching stone return can give the room breathing space. That approach works especially well in modern bathrooms too, where the vanity, tapware, and lighting already carry enough detail.

A restrained splashback usually suits:

  • Minimal interiors
  • Small rooms that need visual calm
  • Projects where the benchtop or vanity is already the hero

This is often the better route for homeowners chasing elegant rather than trendy.

When the splashback should become the feature

There are rooms that need a focal point. A bathroom vanity wall with soft joinery and simple fittings can come alive with a textured tile. A compact kitchen with plain cabinetry can get character from shape, tone, and grout contrast.

That's where new bathroom ideas often become more than mood-board styling. The trick isn't choosing a bold tile. It's making sure the boldness survives contact with the wall.

A patterned splashback near corners or returns needs a decision before installation starts. This tile layout guide notes that the pattern should be planned before the first tile is set, with installers choosing whether to wrap the pattern around corners or mirror it for symmetry. That single choice can be the difference between a designer finish and a result that looks accidental.

For broader visual inspiration, this collection of bathroom décor ideas in Australia is useful for seeing how splashback finishes can support the rest of the room.

The details that decide whether it looks premium

A feature splashback fails most often at the cut points.

Think about these trouble spots early:

  • Corners: The pattern needs to continue intentionally, not just stop and restart.
  • Power points: Poor placement can break a nice tile rhythm.
  • Tap fittings and spouts: In bathrooms, penetrations through feature tiles need exact setting out.
  • Edge trims: The wrong trim can cheapen a premium material very quickly.

Good design isn't only the material choice. It's how the lines land at the end of the wall.

If you want a feature look, keep the supporting elements disciplined. Busy tiles, loud stone, strong tapware finishes, and dramatic joinery all competing together rarely improve the room. The most polished designer bathrooms usually have one clear lead element, then everything else steps back.

Installation and Long-Term Practicality

Choosing the material is only half the job. The finish you live with depends just as much on how it's installed, how it ends, and whether the detailing matches the room's moisture and heat demands.

Installation and Long-Term Practicality

Where many installations go wrong

The common failures aren't always dramatic. More often, they're visual and practical problems that become obvious once the room is in use. Uneven tile cuts around outlets. A splashback height that feels arbitrary. Silicone lines that draw attention. Stone or glass panels that don't align neatly with cabinetry.

In kitchens without upper cabinets, this is especially important. Guidance for open kitchen layouts notes that the splashback should be at least 450 mm high from the countertop, and extend higher behind the cooktop for full wall protection. That's a functional rule, but it also affects how balanced the wall looks.

Kitchen and bathroom practicality aren't the same

A kitchen splashback deals with grease, steam, heat, and food prep. A bathroom splashback deals more with regular water contact, cleaning products, and how the finish sits against mirrors, vanities, and basin tapware.

That difference changes what matters on site.

  • In kitchens: Heat exposure, cooktop protection, and cleaning ease become the main issues.
  • In bathrooms: Moisture management, neat penetrations, and clean junctions around vanities matter more.
  • In both spaces: Alignment is everything. If the splashback doesn't line up with joinery or fixtures, it looks unresolved.

Why professional installation pays off

This is one of those parts of renovation where “close enough” is visible from across the room. Large panels need exact templates. Feature tiles need careful set-out. Bathroom walls need sound substrate preparation. None of that is glamorous, but all of it shows in the final result.

If you're planning a tiled finish, there's a useful breakdown here on installing large-format porcelain tiles, especially for understanding why flat walls, accurate spacing, and sequencing matter so much.

For Victorian homeowners, there's also a compliance mindset worth keeping. Waterproofing, substrate suitability, fixture penetrations, and finish durability shouldn't be guessed; working with experienced trades and registered builders unlimited becomes valuable, particularly on larger kitchen and bathroom renovations where multiple trades need to coordinate cleanly.

The nicest splashback in the showroom still fails on site if no one has properly resolved the edge, the outlet cut, and the transition to the next surface.

Long-term practicality comes from those decisions. Not from the sample board.

Your Perfect Splashback SitePro Bathrooms Can Help

The best splashback choice depends on the room, not the trend.

For a busy family kitchen, a low-maintenance surface with simple cleaning is usually the safest call. Glass often suits that brief well, especially if you want a clean modern look with minimal fuss. For a feature-led kitchen, tile or stone can work beautifully, but only if the wall layout has been planned properly around edges, outlets, and terminations.

For bathroom renovations, the decision is often more about balance than drama. A vanity splashback should protect the wall, suit the joinery, and support the rest of the material palette. In modern bathrooms, a subtle slab or restrained tile can feel more expensive than a louder feature that fights the mirror, lighting, and tapware. In designer bathrooms, the best outcome usually comes from one strong move executed cleanly.

For investment properties or practical updates, keep the finish durable, easy to maintain, and visually simple. That usually ages better and creates fewer maintenance headaches later.

SitePro Bathrooms helps homeowners across Highett and greater Victoria plan these decisions properly, from early layout thinking through to design, construction, and final installation. If you want a renovation team that can weigh design, durability, and budget without overcomplicating the process, contact SitePro Bathrooms to discuss your kitchen or bathroom project.

Frequently Asked Questions About Splashbacks

Is splashback the right term in Australia?

Yes. In Australia, splashback is the standard local term. Backsplash means the same thing, but it's the North American wording.

Does a splashback need to go full height?

Not always. The right height depends on the wall layout, nearby cabinetry, and how much protection the area needs. In some kitchens, full height gives a cleaner result. In others, a shorter run is enough if it ends neatly.

Are splashbacks only for kitchens?

No. They're common in kitchens and bathrooms. In bathrooms, they're especially useful behind vanities and basins where regular water splashing would otherwise mark painted walls.

What's the biggest mistake homeowners make?

Choosing the material before resolving the layout. Corners, outlets, trims, mirrors, and wall endings need to be planned first or the final result can look awkward.

Is professional installation worth it?

Usually, yes. Splashbacks look simple, but neat set-out, accurate cuts, substrate preparation, and clean finishing are what make the job last and look premium.

  • siteprobathrooms

Bathroom and Laundry Renovation

If you're in Highett looking at a tired bathroom on one side and a cramped laundry on the other, you're probably already feeling the same frustration most homeowners describe. The bathroom doesn't function well, the laundry steals circulation space, storage is poor, and every quick fix seems to make the whole area feel more awkward.

A combined renovation can solve that, but only when it's approached as a practical building project, not just a style exercise. The best outcomes come from getting the layout right, locking in selections early, and planning the build so your home stays as workable as possible while trades are on site.

Envisioning Your New Combined Bathroom and Laundry

A Highett homeowner usually gets to this point after years of working around the room. The washing machine blocks access. The bathroom feels tired. Damp towels, detergents, baskets, and daily traffic all compete for the same few square metres. In many older Victorian homes and weatherboard renovations, the problem is not total floor area. The problem is how that area was divided in the first place.

A combined bathroom and laundry renovation gives you a chance to reset the room around how your household lives. That matters in local homes where wet areas were often added to over time, with little thought given to storage, ventilation, circulation, or appliance depth. I see this often in Highett projects. The original layout may have worked for an earlier version of the house, but it falls short once you add modern appliances, family routines, and the expectation that the room should be easy to clean and pleasant to use.

Envisioning Your New Combined Bathroom and Laundry

Done well, a combined space can feel calmer and more useful than two separate rooms.

The key is to treat it as a practical redesign, not a simple update of tiles and tapware. One room needs to handle moisture, noise, storage, washing, drying, movement, and cleaning without becoming cramped. That means making early decisions about where the appliances sit, how the door swings, where the tall storage goes, and whether the room needs to serve family bathing, guest use, or both. Those choices affect everything that follows, including plumbing changes, waterproofing detail, joinery design, and the way you live through the build.

Homeowners usually want a few outcomes from this type of project:

  • Better use of limited space, with enough room to move around appliances and bathroom fixtures
  • Storage that keeps detergents, linen, hampers, and cleaning products out of sight
  • Strong ventilation and durable finishes that suit heavy moisture and daily wear
  • A room that feels visually ordered, even when the laundry is in use
  • A layout that suits the house, rather than forcing a generic showroom design into an older floorplan

There is also a Victorian trade-off that many guides skip over. Combining the spaces can free up area elsewhere in the home, but only if the new room is properly planned for noise, moisture control, and day-to-day access. If you have one main bathroom and no second toilet, the renovation sequence and temporary living arrangements matter. If the house has a narrow side passage, a rear extension, or an older timber floor, those site conditions can influence what layout changes are sensible and what should stay close to existing services.

That is why the best early vision is usually a practical one. Start by picturing a room that works on a rushed weekday morning, on a winter night with washing indoors, and on a weekend when guests are over. If the new space can handle those moments well, the style choices will sit on a much stronger foundation.

Defining Your Scope and Renovation Priorities

Once you decide to combine the bathroom and laundry, the next job is drawing a hard line between what the room needs to do and what you would like it to look like. That sounds simple, but many Highett renovations start drifting at this point. Homeowners choose tiles, tapware, and vanity styles early, then discover the washing machine door clashes with the vanity drawer, or there is nowhere practical to store linen, baskets, and cleaning products.

A clear scope prevents that. It also protects your budget when older Victorian homes throw up the usual surprises, such as uneven floors, dated plumbing locations, or walls that are not as straight as they looked before demolition.

Start with the essentials

Ask these questions before you request drawings or pricing:

  1. Who needs to use the room, and at what times
    A couple with staggered work hours will use the space differently from a family getting children ready for school. If grandparents visit often, or if this is the only bathroom in the house, access and ease of use matter even more.

  2. What is failing in the current setup
    Be specific. Poor exhaust, nowhere to fold clothes, tight clearance at the toilet, weak storage, an awkward shower entry, or a laundry zone that always looks messy are all different problems with different design responses.

  3. What items are required in the finished room
    This could be a walk-in shower, full-height storage, concealed appliances, a broom cupboard, a second basin, or room for a heat pump dryer. If it must be there for the room to work, put it in this category.

  4. What would improve the result if the budget allows
    Feature tiling, upgraded tapware finishes, custom shaving cabinets, underfloor heating, or higher-spec lighting usually sit here.

Clients who skip this exercise often spend too much on visible finishes and too little on the parts they use every day.

Build your brief before selections begin

The easiest way to define scope is to split your brief into two lists before you lock in products.

Required for the room to work Worth adding if budget allows
Waterproofing and detailing suited to a wet, high-use room Statement tiles
Storage for laundry items, linen, and cleaning products Feature lighting
Appliance access, ventilation, and serviceable joinery Premium mirrors or styling upgrades
Durable surfaces that clean up easily More custom decorative finishes
A layout that suits your daily routine Higher-end tapware or accessories

This sounds basic. It saves money.

It also gives your builder and designer something practical to price against. In a combined renovation, vague requests create the biggest variation risk. "Make it feel premium" is not a scope item. "Include a benchtop over the front-loader, a tall cupboard for the vacuum, and enough clearance to open the shower without blocking the machine" is.

For homeowners weighing up whether the combination will work in their floorplan, our guide to laundries in bathrooms and what makes them practical helps clarify what should be settled before design starts.

Match priorities to the house and the way you live

This matters more in Melbourne's older housing stock than many guides admit. A period home or mid-century home in Highett often has service locations, wall positions, and access constraints that make some ideas expensive for very little gain. Shifting every plumbing point can be done, but it only makes sense when the new layout fixes a real daily problem.

If you are living in the house during works, priorities need another filter. A room that looks polished in photos may still be wrong for your household if it leaves no place to sort washing, no backup storage, or no realistic plan for how everyone manages while the room is offline. For a one-bathroom home, I usually advise clients to protect function first, then spend on finish where it has lasting value.

Different households usually land in different places:

  • Families often need hard-wearing finishes, concealed storage, and enough bench or hamper space to stop the room looking cluttered by midday
  • Downsizers often care more about easy access, lower maintenance, and strong lighting
  • Owners preparing for sale usually benefit from broad appeal, simple styling, and a laundry zone that disappears neatly behind joinery

Lock the scope before demolition

One of the fastest ways to lose time and money is changing the plan after the room is stripped out. Once walls are open, every adjustment can affect plumbing, electrical rough-in, waterproofing setout, cabinetry sizes, and tile quantities.

The practical rule is straightforward. Finalise the layout, storage plan, fixture positions, and key selections before demolition begins. That does not mean every accessory has to be chosen on day one. It means the decisions that affect build sequence and service locations need to be settled early.

That discipline gives the project a far better chance of staying on budget and running to schedule. It also makes the build less stressful when you are trying to live around it.

Designing Smart Layouts for Combined Spaces

You notice layout mistakes fast in a combined bathroom and laundry. The washing machine door clips the vanity. Damp towels end up near clean clothes. One person steps out of the shower into the only spot where someone else can sort a load. On paper, the room looked efficient. In daily use, it becomes frustrating.

Designing Smart Layouts for Combined Spaces

A good combined layout fixes circulation, storage, and service placement at the same time. In many Highett homes, especially older brick veneers and weatherboards, the footprint is tight and the original wet areas were never designed for modern storage or larger appliances. Combining the spaces can work well, but only if the room is planned around how the household moves through it.

The first rule is simple. Protect clear floor area.

Every fitting competes for the same footprint. Appliance doors, shower screens, vanity drawers, towel reach, hamper access, and the path to the toilet all need room to operate without conflict. If two actions cannot happen comfortably at once, the layout still needs work.

When combining the rooms makes sense

A combined bathroom and laundry usually suits homes where the existing wet areas are undersized, awkwardly shaped, or wasting wall length on poor storage. It can also be a smart move in Victorian renovation work where keeping plumbing closer to its original location helps control complexity and preserves more of the surrounding structure.

It tends to work best when:

  • The room can be zoned clearly, with bathing on one side and laundry tasks on the other
  • Appliances can be screened by joinery, so the room still feels calm and intentional
  • There is enough bench or landing space for sorting, folding, or putting down a basket
  • The household routine is predictable, so bathroom use and laundry use do not clash morning and night

It works less well in homes with heavy overlap in daily routines, especially one-bathroom houses where multiple people need access at the same time. In those cases, a compact separate laundry often serves the household better than forcing two high-demand functions into one room.

The layout choices that matter most

Some decisions have an outsized effect on how the room feels.

  • Stacked appliances
    Stacking often gives back valuable width. That extra width can improve circulation, allow a better vanity, or create space for a tall linen cabinet.

  • Concealed appliance joinery
    Cabinetry around the washer and dryer keeps the room visually ordered and protects storage from looking like an afterthought. It also helps separate clean bathroom lines from the utility side of the room.

  • A proper bench
    Even a narrow surface changes how the room works. Without one, baskets end up on the floor, the vanity becomes a sorting table, and the room feels messy by default.

  • Wet and dry separation
    Keep laundry handling out of the shower exit path and away from the main splash zone. This matters for comfort, cleaning, and the life of your joinery.

  • Door and drawer clearances
    I check these carefully in every final setout. A layout can look fine in plan and still fail once the washer door, vanity drawer, and entry door are all opened in real life.

For practical examples of laundries in bathrooms, the useful question is not whether the room looks tidy in a photo. It is whether each task has a clear place to happen.

If the shower exit, appliance access, and vanity use overlap, the room will feel cramped no matter how good the finishes are.

Smart planning for Victorian homes

Victorian homes around Melbourne often come with quirks that affect layout decisions. Narrow rooms, off-square walls, raised floors, old window placements, and limited natural ventilation all change what will fit comfortably. In these houses, the best layout is usually the one that makes fewer ambitious moves and solves more daily problems.

That might mean keeping the toilet where it is and using the savings to build better joinery. It might mean recessing a shaving cabinet, switching to a cavity slider, or choosing a shower screen that keeps the walkway clearer. It might also mean accepting that side-by-side appliances are the wrong call if they steal too much circulation space.

A quick filter before you commit

Question Good sign Warning sign
Does the room feel easier to move through? Clear path between entry, vanity, toilet, and shower Appliances or doors interrupt the main path
Can storage be concealed and useful? Linen, detergents, hampers, and cleaning items all have a home Open shelves and bench tops carry the overflow
Can two tasks happen without conflict? Someone can shower while another person accesses storage or the toilet Daily routines regularly collide
Are the appliances visually controlled? Joinery or placement keeps the room balanced The machines dominate the view
Will the room be manageable during winter and heavy use? Ventilation, drying, and access have been planned properly Moisture and laundry handling are competing in the same corner

The strongest layouts usually look restrained because each decision is doing real work. Good proportions, disciplined storage, sensible fixture positions, and enough breathing room matter more than trying to fit every idea into one small footprint.

Budgeting Realistically for Your Renovation

Budgeting gets easier once you understand what you're paying for. In a combined renovation, cost isn't driven by one single item. It comes from a collection of decisions about scope, access, services, joinery, finishes, and how much reconfiguration the room needs.

The first budgeting mistake is thinking visually. Homeowners often focus on tiles, tapware, and vanity style because those items are easy to picture. The larger financial impact often sits behind the walls, especially when plumbing changes, waterproofing requirements, electrical work, and custom cabinetry are part of the job.

The main cost drivers

Some projects stay relatively controlled because the layout remains close to the original. Others rise quickly because the room is being significantly reworked.

The usual pressure points are:

  • Service relocation
    Moving plumbing or electrical positions can add complexity, especially in a tight footprint.

  • Joinery level
    Off-the-shelf solutions and fully custom cabinetry don't land in the same budget range.

  • Tile scope and installation complexity
    Large-format tiles, full-height wall tiling, niches, and detailed set-outs take more labour planning.

  • Room condition
    Older rooms sometimes reveal substrate or framing issues once demolition begins.

  • Fixture and finish selection
    The look of designer bathrooms often comes from layered choices, not one feature item.

Where it's smart to spend

Not every line item deserves equal priority. Some elements should never be value-engineered too aggressively.

Spend to protect the structure first. Waterproofing, proper preparation, and compliant trade work matter more than prestige finishes.

A practical priority order looks like this:

  1. Waterproofing and substrate preparation
  2. Plumbing and electrical done properly
  3. Layout and joinery that improve function
  4. Durable fixtures used every day
  5. Decorative upgrades after the core build is resolved

Sample Budget Allocation for a Mid-Range Bathroom & Laundry Renovation

Because every home differs, percentages are more useful than pretending one fixed figure suits all projects.

Expense Category Estimated Percentage of Total Budget
Demolition and site preparation 5 to 10
Plumbing and electrical works 15 to 25
Waterproofing and preparation 10 to 15
Tiling and installation labour 20 to 30
Fixtures, fittings, and appliances 15 to 25
Joinery, storage, and finishing items 10 to 20

These ranges aren't a quote. They're a planning tool that helps homeowners see where the budget typically gets distributed in a combined wet-area project.

How to compare quotes properly

A cheaper quote isn't always better value. The important question is whether you're comparing the same scope.

Check for:

  • Demolition clarity so existing removal is properly defined
  • Service work detail including plumbing and electrical allowances
  • Waterproofing inclusion rather than vague wording
  • Tile labour assumptions especially if patterns, niches, or full-height walls are involved
  • Joinery detail so storage scope isn't left open-ended
  • Fit-off and final finishing including who installs what

If you're trying to sense-check your likely spend before getting formal pricing, a bathroom renovation cost calculator can help you frame the conversation with more confidence.

What causes financial surprises

Most budget blowouts come from one of three things. The scope wasn't properly defined. Selections were made too late. Existing conditions were assumed rather than checked.

That's why experienced project planning matters so much. A room that combines bathroom and laundry functions has more moving parts than a cosmetic update. If the decisions are made early and documented clearly, the budget becomes far more manageable.

Navigating the Build from Demolition to Handover

For many Highett homeowners, the hard part starts once the drawings are approved and the room is out of action. A combined bathroom and laundry renovation affects daily routines fast. Showers, washing, storage, and access all tighten up at once, especially in older Victorian homes where space is already working hard.

That is why the build phase needs clear sequencing, realistic timing, and close supervision on site. In this kind of renovation, small mistakes early can create expensive rework later. A waste in the wrong spot, a wall out of square, or late tile changes can hold up several trades and make living through the job far harder than it needs to be.

Navigating the Build from Demolition to Handover

The correct build sequence

A well-run project follows a set order because each stage relies on the last one being finished properly.

  1. Final selections and confirmed scope
    Layout, fixtures, tiles, cabinetry, appliances, and measurements need to be signed off before site work begins. This matters even more in combined rooms, where a 20mm change can affect appliance clearance, vanity depth, or circulation space.

  2. Demolition
    Existing fixtures, wall linings, floor finishes, and redundant services are removed. In many Melbourne homes, this is also the point where hidden issues show up, such as water damage, uneven framing, or outdated plumbing that was never visible during planning.

  3. Rough-in plumbing and electrical
    Services are relocated and set to the approved plan. If the design includes moving the laundry zone, changing drainage falls, or adding extra power for appliances and heated rails, during this stage, those decisions either prove viable on site or necessitate adjustment.

  4. Waterproofing
    Wet areas are prepared and waterproofed to the required standard. For a bathroom-laundry combination, this stage needs careful attention because water exposure is coming from more than one source.

  5. Tiling and surface installation
    Set-out is checked before tiles go down. Good set-out avoids awkward cuts, keeps floor wastes where they should be, and makes the room look balanced rather than patched together.

  6. Fit-off
    Cabinetry, benchtops, screens, tapware, sanitary fixtures, mirrors, accessories, and appliances are installed. This is where early planning pays off. If measurements were checked properly, everything fits. If they were guessed, problems usually appear here.

  7. Final quality checks and handover
    The room is cleaned, tested, inspected, and prepared for use. We look at function as well as finish. Doors need to clear properly, drawers need to open past appliances, falls need to drain, and every fixture needs to do its job without compromise.

What often slows a combined renovation

Bathroom-only advice often misses this point. A combined renovation has more interfaces between trades, and that means more chances for delays if the job is not tightly managed.

The usual causes are practical. Appliances arrive late. Joinery is fabricated before final site measure. A tile selection changes after waterproofing details are set. In older brick veneer and weatherboard homes around Highett, we also regularly see walls and floors that are not straight enough for off-the-shelf assumptions. That does not stop the job, but it does mean the builder needs to pick up issues early and adjust before they affect the next trade.

Living through the renovation is part of the planning too. Some households can stay in the home if there is another toilet or shower available. Others are better off arranging temporary alternatives for part of the build. Speed and convenience do not always align. A faster program can mean fuller site access and less flexibility day to day. A staged approach can make family life easier, but it usually stretches the timeline.

If you want a clearer sense of what the construction program typically looks like, this guide on how long a bathroom remodel should take gives a practical breakdown.

Why oversight matters in Victoria

In Victoria, a combined wet-area renovation is more than a cosmetic update. It can involve waterproofing compliance, plumbing changes, electrical work, ventilation, and sometimes structural alteration if the layout is being improved.

Good oversight keeps those moving parts coordinated. It also protects the finish. I have seen projects where the design was fine, but the execution slipped because one trade worked from an old plan, selections were still changing mid-build, or defects were left for the next person to solve. That is how budgets drift and deadlines move.

The calmer projects are the ones where decisions are locked in early, site conditions are checked properly, and someone is responsible for the whole sequence from demolition to handover.

Your Renovation Questions Answered

A combined bathroom and laundry renovation in Highett usually raises the same practical questions once the dust starts. The better time to answer them is before the room is stripped out, while the layout, schedule, and day-to-day living plan can still be adjusted without cost blowouts.

Can we stay in the house during the renovation

Often, yes, if the house can still function.

A primary concern is access to basics. If this room includes your main shower, toilet, or laundry setup, you need a plan for every day of the build, not just the demolition week. In many Victorian homes, especially older brick veneer and weatherboard layouts, there is limited spare wet-area capacity. That makes staging attractive, but staging also extends the program and can increase labour time.

Before work starts, sort out:

  • Whether another toilet and shower are available
  • Whether a temporary laundry setup can work elsewhere
  • How children, shift workers, or older family members will manage access
  • Whether a shorter, more intensive build suits you better than a longer staged one

I usually tell clients to decide this early. Families cope better when they choose their trade-off upfront, rather than trying to change the construction sequence mid-build.

Why does 3D design matter so much

Because combined rooms punish guesswork.

A plan that looks fine on paper can still fail in use. Washing machine door swings, vanity depth, circulation space, towel access, and where you stand to sort clothes all matter more in a dual-purpose room. In many Victorian homes, the room is narrow, the walls are not perfectly square, and existing services limit where fixtures can move. That is why detailed design work before demolition saves money later.

Good 3D design helps test the room properly. You can see whether the layout feels cramped, whether storage is in the right spot, and whether the bathroom still reads as a bathroom rather than a laundry with a shower pushed into it.

How is dust and disruption managed

Occupied-home renovations are disruptive. Good site management keeps that disruption controlled.

The basics matter most:

  • Floor and access protection to adjacent rooms
  • Dust control during demolition and cutting
  • A clear plan for rubbish removal
  • Notice before water or power shut-downs
  • Trade timing that avoids long idle gaps

Homeowners do not need perfection. They need order, clear communication, and a site that is being managed properly from day to day.

Why work with a Registered Builder Unlimited

For a more involved wet-area renovation, proper oversight matters because several parts of the job are tied together. Plumbing rough-in affects cabinetry. Electrical locations affect mirror and storage choices. Waterproofing has to suit the final set-out, not a rough sketch that changed on site.

In Victoria, that coordination also matters for compliance and accountability. If the room is being reworked, as distinct from a tiling update within the existing footprint, you want one party responsible for the sequence, the trades, and the final result.

What should you do next

Start with the problems the room needs to solve. That usually means storage, circulation, drying space, appliance placement, and whether the room can support family life during the week without feeling cramped.

Then test the layout before anyone starts demolition. That is where smart decisions get made in a combined renovation.

If you want practical guidance specific to your Highett home, SitePro Bathrooms can help you shape the brief, refine the layout, and map out a buildable plan before construction begins.

  • siteprobathrooms

How to Remodel a Kitchen: Expert Guide

If you're staring at an ageing kitchen in Highett and wondering where to start, you're not alone. Most homeowners don't get stuck on tiles or tapware first. They get stuck on the bigger questions. How much should this cost, what needs approval, how long will the house be disrupted, and what mistakes turn a straightforward upgrade into an expensive mess?

That's the main effort in learning how to remodel a kitchen. It isn't choosing pretty finishes in isolation. It's getting the scope right, locking the design before demolition, understanding Victorian compliance, and building the room in the right order so the result works every day.

In this part of Melbourne, that local detail matters. Trades are often booked ahead, older homes can hide service issues, and changes made mid-build usually cost more than people expect. The best kitchen renovations don't start with demolition. They start with decisions.

Planning Your Perfect Kitchen Goals and Budget

The first question isn't what colour cabinets you want. It's why you're renovating.

A kitchen built for resale looks different from one built for a family of five. An investor usually wants durability, easy cleaning, strong storage and a layout that appeals broadly. A homeowner planning to stay put may care more about workflow, entertaining, appliance integration and the feel of the room at night. If you want a designer finish, that choice needs to be visible in the budget from day one.

Start with the job the kitchen needs to do

Most kitchen projects fall into one of three categories:

  • Cosmetic update. Keep the layout, improve surfaces, and freshen the space without moving major services.
  • Functional reconfiguration. Adjust storage, improve circulation, replace cabinetry and appliances, and make the room work better.
  • Full strip-out. Rebuild the kitchen with service changes, structural considerations, and a new layout.

That distinction matters because scope drives cost more than style does. A simple-looking kitchen can become expensive fast if the sink moves, extra power is added, or walls need changing.

Practical rule: If the renovation changes plumbing or wiring, treat it as a coordinated building project, not a surface makeover.

National Australian trade guidance places kitchen renovations in broad cost bands. A basic refresh often sits around AUD $10,000 to $20,000, a mid-range renovation around AUD $20,000 to $45,000, and a high-end transformation commonly exceeds AUD $50,000, according to Australian kitchen renovation cost guidance.

What those budget bands usually mean

A basic refresh generally suits owners keeping the footprint similar. Think new cabinetry fronts or replacement cabinetry in the same general layout, updated benchtops, splashback changes, and selected appliance swaps.

A mid-range renovation is where many Highett homeowners land. This is usually enough for a proper layout improvement, better storage, stronger finishes, and a cleaner result overall.

A high-end kitchen usually means more joinery detail, premium surfaces, custom storage, integrated appliances, and often some level of service relocation or opening the space to adjoining living zones.

For a more detailed local breakdown, see this guide to the cost of a new kitchen.

Budget for what you don't see straight away

The expensive decisions are rarely the decorative ones. Budget pressure usually comes from:

  • Service changes. Moving plumbing, waste, gas or electrical points.
  • Joinery complexity. Corner solutions, appliance housing, overheads to bulkheads, and custom pantry storage.
  • Site conditions. Uneven walls, damaged subfloors, hidden water issues, or dated wiring in older homes.
  • Late changes. A new appliance size after cabinetry is ordered can ripple through the whole job.

That's why realistic budgeting starts with measured drawings and a locked scope, not showroom browsing.

Sample Kitchen Renovation Cost Breakdown in Victoria (2026)

Expense Category Percentage of Budget Example Cost
Cabinetry and joinery 35% $14,000 on a $40,000 renovation
Benchtops 15% $6,000 on a $40,000 renovation
Appliances 15% $6,000 on a $40,000 renovation
Plumbing and electrical labour 15% $6,000 on a $40,000 renovation
Splashback, flooring, painting and finishes 10% $4,000 on a $40,000 renovation
Project management and contingencies 10% $4,000 on a $40,000 renovation

That table is a sample allocation, not a fixed pricing rule. In practice, one project will spend more on joinery, another on appliances, another on service changes. The point is to build the budget around priorities instead of hoping everything fits.

Where homeowners usually get it right

The smoothest projects start with a short written brief. It doesn't need to be fancy. It just needs to answer a few things clearly:

  1. Who uses the kitchen every day
  2. What isn't working now
  3. What must stay
  4. What must change
  5. What the spending ceiling is

That brief becomes the filter for every later decision. If your goal is family function, spending heavily on decorative extras while leaving poor storage unresolved doesn't make sense. If resale is the goal, broad appeal and durable finishes usually beat highly specific design moves.

A good kitchen budget isn't just a number. It's a decision-making tool. If that's solid, the rest of the project gets far easier.

Designing Your Space and Navigating Victorian Permits

A kitchen design only works when it solves movement, storage and service locations at the same time. Plenty of layouts look good on paper and fail the moment someone opens the dishwasher door, tries to carry groceries in, or realises the pantry blocks circulation.

That's why detailed design needs to happen before anyone lifts a hammer.

Detailed architectural kitchen floor plan blueprints with dimensions displayed on a wooden table with a pencil.

Build the layout around work zones

Forget chasing trends first. Start with the way the room is used.

A practical kitchen in Victoria should account for prep space, cooking access, cleaning space, storage reach, appliance swing, and clear walking paths. In older Highett homes, kitchens often need more attention to storage and circulation than people expect. A room can have enough square metres and still feel awkward because the joinery isn't planned around actual use.

Key design checks include:

  • Prep near the sink so food can move from washing to chopping without crossing the room.
  • Cooktop clearance so handles, heat and movement don't clash with walkways.
  • Pantry placement where groceries can be put away quickly.
  • Bin storage close to prep, not across the kitchen.
  • Lighting layers that cover task areas, not just the centre of the ceiling.

If you're refining shape and circulation, this overview of an L-shaped kitchen layout is a useful starting point.

Good design removes friction. You notice it in the first week of use, not just in the photos after handover.

Use drawings to prevent expensive assumptions

A proper design package should show more than cabinet faces. It should confirm dimensions, appliance locations, service points, clearances, and how the room ties into adjoining floors, walls and openings.

This is also where 3D design earns its keep. It lets you test the island size, check whether overheads feel too heavy, and see if the walkway beside the fridge will feel cramped. That's far cheaper than discovering the problem once cabinetry is on site.

In practical terms, a locked design should answer these questions before demolition:

  • Where exactly do power points go?
  • Are appliances integrated, freestanding, or semi-integrated?
  • Does the flooring run under cabinetry or stop at the kitchen line?
  • Will the splashback finish affect power point placement?
  • Are there bulkheads, beams, or ceiling inconsistencies to resolve?

Permits and compliance in Victoria

This is the part generic renovation guides often skip, and it's where budgets can unravel.

In Victoria, kitchen work can require licensed trades and may need building approval depending on the scope, especially when structural changes, plumbing, or electrical modifications are involved, as noted in Victorian kitchen renovation guidance. That matters in Highett because many homes involve some mix of older services, altered floor plans, and renovation layering from previous owners.

The practical takeaway is simple. If your kitchen project involves any of the following, pause and confirm compliance requirements early:

  • Structural work such as removing or altering walls
  • Plumbing changes involving sink moves or new appliance connections
  • Electrical changes such as added circuits, relocated power, or new lighting layouts
  • Ventilation upgrades where the exhaust path changes
  • Building fabric changes that affect surrounding works

A cheap quote that ignores compliance isn't cheap. It's incomplete.

What works in Highett homes

The best kitchen plans in this area usually respect the house rather than fighting it. In weatherboard homes, space planning often needs careful thought around wall alignment and hidden services. In brick homes and unit renovations, access, body corporate requirements and service limitations often affect what's practical.

That's why the design phase should produce two things. A kitchen that looks right, and a scope that can be built under Victorian requirements. If either one is missing, the job isn't ready.

Choosing Your Team Materials and Appliances

People often spend more time choosing splashbacks than choosing who will run the project. That's backwards. A strong team protects the build, the program, the compliance side, and the finish quality. Materials and appliances matter, but they only perform as well as the planning and installation behind them.

Choose the builder before you fall in love with finishes

For kitchen renovations that involve broader building scope, many owners want the protection of working with registered builders unlimited. In Victoria, that matters because project complexity can move quickly from cosmetic to structural. Once walls, services and approvals enter the picture, you want a builder who understands the whole chain, not just the cabinet line.

Ask direct questions when reviewing builders:

  • What's included in the quote. Is demolition included, rubbish removal included, disconnect and reconnect included?
  • Who coordinates licensed trades. You don't want finger-pointing between trades mid-job.
  • How are variations handled. Changes happen, but they should be documented clearly.
  • What information is needed before ordering joinery. This tells you how disciplined the process is.
  • Who is responsible for sequencing and site supervision. Kitchens fail when no one owns the critical path.

A polished estimate isn't enough. Look for scope clarity. If one quote seems much lower, check whether it has left things out.

Durable beats fashionable in the long run

Australian housing data consistently shows kitchens are one of the most important rooms for buyer appeal, and renovation decisions should prioritise layout efficiency, ventilation, and durable finishes handled by licensed trades for maximum value, according to Australian kitchen buyer-appeal guidance.

That's why material selection should start with wear, maintenance and fit for purpose.

A flat lay of interior design samples including wood veneer, stone countertop, white cabinet door, and handle.

For a deeper look at finish options, browse these kitchen cabinets materials.

What works well and what tends to disappoint

A practical way to assess materials is to ask what daily life will do to them.

Benchtops
Laminate can work well in tighter budgets and rental properties when the goal is durability and easy replacement. Engineered stone style surfaces are often chosen for consistency and low upkeep. Natural stone gives strong visual character but needs an owner who accepts variation and maintenance.

Cabinet finishes
Two-pack painted finishes can look sharp, especially in cleaner modern kitchens, but they need careful handling to stay pristine. Laminates and melamine-based options often perform better where impact resistance matters. Timber-look finishes can soften a modern kitchen and work particularly well in homes that also feature warm, modern bathrooms.

Splashbacks
Large-format splashbacks reduce grout lines and can make cleaning easier. Tiled splashbacks can add texture and detail, but they need to be chosen with restraint if the rest of the room is already busy.

On site, the best material choice is usually the one that still looks good after years of heat, steam, cleaning, and family traffic.

Appliances should match the way you live

Appliance mistakes are common because buyers focus on brands and forget the plan. The better approach is to decide what the kitchen needs to support.

Consider:

  • Cooking habits. A serious home cook needs stronger prep zones and ventilation planning than someone who mainly reheats and assembles.
  • Household size. Fridge volume and dishwasher capacity should match actual use.
  • Cleaning tolerance. Some finishes and appliance types show fingerprints and grime faster than others.
  • Energy use and practicality. Efficient, straightforward appliances often make more sense than feature-heavy models that don't get used.

The lessons from bathroom renovations carry across neatly. Whether you're planning kitchens, new bathroom ideas, modern bathrooms, or more detailed designer bathrooms, the same principle holds. Buy once for function first, then layer in style. The room will age better.

The Construction Timeline From Demolition to Completion

Once the design is signed off and selections are locked, the project becomes a sequencing exercise. Good kitchen renovations don't move forward because demolition starts fast. They move forward because each trade arrives to a site that's ready for them.

A standard kitchen remodel is often 6 to 12 weeks once construction starts, but planning, approvals and ordering can add several more weeks before that, according to kitchen remodel timeline guidance. The same guidance also warns against starting demolition before all material and design choices are finalised.

What happens first and why it matters

Demolition feels like progress, but it's only safe progress if the pre-construction work is complete. Before demo begins, the joinery should be approved, appliance sizes confirmed, service locations finalised, and key materials ordered.

If those decisions are still floating, the build usually stalls in one of three places. Rough-in changes, delayed cabinetry, or benchtop hold-ups.

The usual site sequence

Most kitchen builds follow a logical chain. The exact details vary by house, but the order matters.

  1. Site protection and demolition
    Existing cabinets, splashbacks, appliances and affected finishes are removed. Waste is cleared and hidden conditions are assessed.

  2. Preparation and rough-in
    Plumbers and electricians complete the service changes. If walls are being altered, this stage also deals with framing and related building work.

  3. Subfloor and surface readiness
    Floors and walls need to be true enough for joinery and finishes. Shortcuts taken will later manifest as crooked lines and awkward gaps.

  4. Flooring where required
    Depending on the design, flooring may go in before or after cabinetry. What matters is that the sequence matches the documented plan.

  5. Cabinet installation
    Base cabinets, tall units, wall cabinets and panels are set in place and aligned.

  6. Template and benchtops
    Once cabinets are fixed, benchtops are measured and then installed.

  7. Splashback, painting and fit-off
    Final finishes go on, appliances are installed, plumbing fixtures are connected, electrical fittings are completed, and defects are checked.

Living through the renovation

Homeowners often underestimate the temporary disruption. Even a well-run project changes your daily routine. You may need a temporary food prep area, a separate kettle and microwave setup, and a plan for meals when water or power is interrupted.

In occupied homes around Highett, the smoother projects usually have a site access plan from the start. That includes delivery timing, rubbish removal, parking for trades, and a clear decision on whether the family is staying in the house the whole time.

Set up a temporary kitchenette before demolition day. It sounds simple, but it makes the first two weeks much easier.

Where delays usually begin

Most delays don't come from one dramatic failure. They come from small decisions left unresolved too long.

Common examples include:

  • Appliances ordered after cabinet drawings are approved
  • Tiles selected after power point positions are already set
  • Late changes to island size
  • Stone selections made after cabinetry is installed
  • Unclear responsibility for trade coordination

If you want to know how to remodel a kitchen without turning the process into a rolling variation list, the answer is discipline before demo. Once the room is stripped out, every undecided item gets more expensive.

Inspiring Kitchen Transformations in Victoria

The most useful renovation examples aren't fantasy projects. They're ordinary Victorian homes with ordinary constraints. Tight footprints, dated layouts, awkward service locations, and clients trying to balance style with practical use.

Those are the projects that show what a kitchen renovation can really achieve.

A sophisticated white and navy blue kitchen featuring a large marble island with bar stool seating.

A family kitchen opened up for daily life

One common Highett scenario is the older family home where the kitchen feels cut off from the living area. The room itself may not be tiny, but the wall placement makes it feel separated and cramped.

In that kind of project, the problem usually isn't just dated finishes. It's poor flow. Parents cook facing a wall, kids crowd narrow walkways, and storage ends up scattered across adjoining rooms.

The solution is often less about adding luxury and more about reorganising function. A better island position, stronger pantry joinery, and a layout that opens sightlines into the living space can change the way the whole home works. Once the kitchen becomes part of the social zone, lighting, appliance placement and circulation all need to support that broader use.

The result is a room that handles weekday traffic better and feels more natural for entertaining. That's a stronger upgrade than surface-level styling alone.

A compact kitchen made to feel larger

At the other end of the market is the apartment or unit kitchen with very little margin for error. In smaller homes, one oversized appliance, one badly placed pantry, or one heavy run of overheads can make the room feel boxed in.

These projects reward restraint.

A successful compact kitchen usually relies on cleaner lines, careful storage planning, and finishes that reflect light without becoming sterile. Tall cabinetry can add serious utility, but only when balanced against visual weight. Integrated bins, considered drawer storage, and a splashback with minimal visual clutter often do more for the room than flashy details.

There's also a strong crossover here with bathroom design thinking. The same choices that lift compact ensuites often lift small kitchens too. Consistent tones, low-maintenance surfaces, neat junctions, and hardware that doesn't dominate the eye. That's why clients looking at kitchen work are often also thinking about bathroom renovations. The aim in both spaces is similar. Better function, a more refined feel, and fewer compromises in everyday use.

What these projects have in common

Different homes, different budgets, same core pattern.

  • The old problem was functional first. Bad storage, poor movement, weak layout.
  • The best fix came from planning, not decoration. Once the plan improved, the room looked better as a by-product.
  • The final result felt calmer. Better kitchens aren't just prettier. They reduce daily friction.

That's also why “before and after” photos can be misleading without context. The dramatic change usually didn't come from one hero feature. It came from dozens of decisions made properly in sequence.

The kitchens people remember most aren't always the biggest. They're the ones that feel easy to use from the first morning.

Common Kitchen Remodel Questions Answered

The questions below come up on almost every project, especially with homeowners trying to balance family life, budget, and compliance.

How long should I spend planning before work starts

Kitchen remodeling timelines often exceed initial expectations. A 2020 Houzz & Home study found the average kitchen remodeling project involved 8.3 months of planning time and 4.5 months of actual construction time, which underlines how important the pre-construction phase is, according to BLANCO's summary of the Houzz & Home study.

That doesn't mean every Highett kitchen will take exactly that long. It does mean rushed planning usually creates slower building.

Can I live at home during the renovation

Usually, yes, but it depends on your tolerance for disruption and the project scope. If the kitchen is your main food prep area, set up a temporary station elsewhere before demolition starts. If the work involves broader structural change or multiple wet areas at once, staying elsewhere may be more practical.

Is it cheaper to keep the existing layout

Often, yes. Keeping the sink, cooktop and major appliances in similar locations can reduce service work. But a cheap layout that stays awkward can be poor value if the kitchen still doesn't function properly at the end.

What causes the biggest budget surprises

The most common problems are hidden services, late design changes, and scope that looked cosmetic at first but turns into compliance-heavy work once walls open up. That's why proper investigation and a locked design matter so much.

Should my kitchen match my bathrooms

They don't need to match exactly, but they should feel related. Repeated tones, similar hardware language, and a shared approach to materials help the home feel more resolved. If you're planning both a kitchen and bathroom renovations, it's smart to consider them together so one space doesn't date the other.

Are high-end finishes always worth it

Not always. In many homes, practical layout improvements, durable cabinetry and better ventilation outperform expensive decorative upgrades. Premium finishes can be worth it, but only after the essentials are right.

What's the best first step if I'm serious about renovating

Get the existing kitchen measured properly and write a brief that states your priorities clearly. Include what isn't working, what you want to improve, and where you won't compromise. That gives the design and quoting process something solid to respond to.


If you're planning how to remodel a kitchen in Highett or greater Victoria, the smartest move is to begin with measured advice, not guesses. SitePro Bathrooms helps homeowners plan and deliver kitchens and bathroom renovations with clear design, coordinated construction, and local renovation experience managing the job from concept to handover.

  • siteprobathrooms

Bathroom Renovation Cost Melbourne: 2026 Price Guide

A standard full bathroom renovation in Melbourne typically lands between $20,000 and $40,000. Cosmetic updates can come in under $20,000, while premium projects regularly push past $40,000 once layout changes, higher-end finishes, and custom work enter the scope.

That's usually the point where homeowners get stuck. The ideas are clear enough. You want a bathroom that feels cleaner, works better, and doesn't date the property. What's harder is working out why one quote sits near the lower end and another climbs fast. In Melbourne, the gap usually comes down to scope control, material choices, and whether you're renovating for daily living, rental return, or long-term resale.

The most useful way to look at bathroom renovation cost Melbourne isn't just by broad price bands. It's by the decisions that push a project from budget to standard to premium. That's where value engineering matters. If you know which choices preserve function and appearance without adding unnecessary build complexity, you can get a far better result for the money.

What Is the Real Cost of a Melbourne Bathroom Renovation

A Melbourne bathroom renovation usually starts the same way. The room looks dated, storage does not work, the shower has seen better days, and the first quote feels manageable until the second and third arrive much higher. The gap is rarely random. It usually comes back to scope, product selections, site conditions, and how much of the existing bathroom can stay.

Bathrooms are small rooms with expensive trade density. Waterproofing, plumbing, electrical, tiling, glazing, joinery, demolition, waste removal, and fit-off all sit in a tight footprint, and each decision affects labour as much as materials. In Melbourne, access can add another layer. A ground-floor home in the suburbs is simpler to price than an apartment in Southbank with lift bookings, restricted delivery windows, and strata rules.

A conceptual design plan for a luxury bathroom renovation displayed on a desk with material samples.

For an early budget check, a bathroom renovation cost calculator for Melbourne projects helps narrow the likely range before you start comparing builder quotes.

The number clients ask for first

Clients usually want one figure. The more useful answer is a cost range tied to the decisions that change the build.

A bathroom that keeps the existing layout, uses standard-size fixtures, and avoids structural or service changes will usually stay in a more controlled price bracket. A bathroom that moves the shower, relocates the toilet, increases tile coverage to full height, or brings in custom joinery and premium fittings can shift upward fast. On paper, both are called a bathroom renovation. On site, they are very different jobs.

The practical Melbourne view

Cost planning works better when you look at value engineering, not just headline numbers. The question is not only what the renovation costs. The question is which choices improve function, presentation, and resale without adding build complexity that the property will never pay back.

For example, replacing a 1500mm custom vanity with a standard modular vanity often saves both joinery cost and installation time. Keeping floor waste and plumbing points where they are can avoid a chain of extra work under the floor and behind the walls. Using a reliable porcelain tile in a common size can cut labour compared with a handmade feature tile that needs slower setting-out and more wastage.

One choice can move the whole budget.

That is why two bathrooms of the same size can land at very different prices. One is a disciplined upgrade aimed at long-term use or rental return. The other is a full redesign with more labour, more risk, and more finish detail.

Understanding Average Costs for Different Bathroom Types

A Fitzroy investor and a family in Glen Waverley can both ask for “a new bathroom” and get quotes that are nowhere near each other. The reason is not just room size. It is the level of rebuild, the finish standard, and how many decisions add labour behind the walls as well as in front of them.

For cost planning, I break bathroom projects into three practical types. That makes it easier to value-engineer the job before selections start pushing the budget into the wrong tier.

Budget and cosmetic refresh

This tier suits bathrooms that still work but look tired, dated, or hard to lease. It is common in rental properties, first-home updates, and homes being prepared for sale where the goal is presentation and reliability rather than a full redesign.

Typical work at this level includes:

  • Keeping the existing layout so plumbing and drainage stay in place
  • Using standard-size fixtures such as modular vanities and stocked shower screens
  • Reducing finish complexity with simpler tile patterns, less custom joinery, and fewer special-order items
  • Targeting visible improvements like new tapware, vanity, shower screen, mirror, lighting, and repainting where full retiling is not justified

In small rooms, the smartest choice is not always a full strip-out. This small bathroom remodel cost guide is useful when you are weighing up whether a compact bathroom needs a complete renovation or a tighter, high-impact refresh.

A cosmetic bathroom can still add value if the scope is disciplined. The mistake is spending on premium fittings while leaving the room functionally unchanged.

Standard full renovation

This is the tier that suits most owner-occupiers who want the bathroom rebuilt properly and expect it to last. The room is stripped back, waterproofed, retiled, and fitted out with new fixtures and finishes that feel current without pushing into custom-builder territory.

A standard renovation usually keeps the project efficient in a few key ways. Layout changes are limited or avoided. Fixtures are good quality but still commercially available. Tile selection stays practical enough that labour does not blow out on cutting, set-out, or slow installation.

This level often gives the best value per dollar in Melbourne. It improves daily use, presents well at resale, and avoids many of the cost jumps that come with chasing a magazine-style finish in a mid-range property.

Premium designer overhaul

Premium bathrooms cost more because the build is more demanding, not because the tapware is expensive. Once a project includes structural changes, custom joinery, full-height feature tiling, frameless glazing, recessed niches, underfloor heating, stone surfaces, or detailed lighting plans, trade coordination gets tighter and labour increases.

These projects often include:

  1. Layout reworking to improve movement, storage, or access
  2. Higher-spec finishes that require more careful installation
  3. Custom-built elements such as bespoke vanities, shaving cabinets, or feature walls
  4. Extra service work for lighting, heating, ventilation, or relocated plumbing points

This is also where overcapitalising becomes a real risk. A premium bathroom can make sense in a long-term family home or a higher-value suburb. In an investment property or a modest resale market, the better decision is often to hold the layout, simplify the palette, and spend on durability where tenants and buyers will notice it.

As noted earlier, national pricing is often grouped into budget, standard, and premium bands. In Melbourne, those labels only become useful once the scope is honest. A “standard” bathroom with moved plumbing, custom joinery, and full-height feature tiles is no longer standard in build cost.

Where Your Money Goes An Itemised Cost Breakdown

Quotes feel vague when they arrive as one lump sum. They make more sense when you separate the room into trades, materials, and complexity. Bathrooms are expensive because several specialists work in a small footprint, and each stage depends on the last one being done correctly.

The cost drivers that shape most quotes

In Melbourne, builder quotes for bathroom renovations commonly sit around $2,300 to $4,600 per square metre, with waterproofing for an average bathroom often estimated at $500 to $750. Tile pricing also varies sharply, with wall tiles around $20 to $159 per square metre and floor tiles around $35 to $130 per square metre, based on Hipages bathroom renovation cost guidance.

That per-square-metre range matters because small bathrooms aren't automatically cheap. Compact rooms often require just as many trades and fixtures as a larger room, while difficult access, tight working conditions, and detailed tile layouts can still push labour up.

Sample Bathroom Renovation Cost Breakdown Melbourne

Item / Trade Typical Cost Range / % of Budget
Demolition and strip-out Varies by site condition, access, and disposal needs
Plumbing Higher when fixtures move, lower when layout stays the same
Electrical Depends on lighting plan, extraction, and power point changes
Waterproofing $500 to $750 for an average bathroom
Wall tiling $20 to $159 per square metre for tiles, plus labour
Floor tiling $35 to $130 per square metre for tiles, plus labour
Fixtures and fittings Broadly variable depending on specification
Vanity and cabinetry Standard units cost less than custom joinery
Shower screen and glazing Increases with custom sizes and detailed fitting
Builder coordination and project management Reflects scope, sequencing, and trade management
Overall renovation pricing Commonly $2,300 to $4,600 per square metre

The table above doesn't pretend every line can be fixed before inspection. It shows which parts are usually stable and which parts move depending on design choices.

Where projects usually drift upward

The biggest jumps tend to come from a handful of decisions:

  • Layout changes: Moving wastes and water points usually creates extra labour across multiple trades.
  • Heavy tile specification: Larger coverage, feature walls, difficult patterns, and premium materials all raise labour and material costs.
  • Custom vanity work: Off-the-shelf pieces are usually simpler to install than made-to-measure cabinetry.
  • Access problems: Apartments, narrow stair access, restricted parking, and body corporate rules can all slow the build.
  • Late selection changes: Swapping products after waterproofing, tiling, or joinery production has started can be expensive.

A bathroom quote is rarely just about products. It's mostly about how many decisions make the build harder.

This is also where working with a registered builder unlimited can matter in practical terms. When one licensed party coordinates demolition, waterproofing, plumbing, tiling, electrical, and finishing, there's usually better control over sequencing, responsibility, and compliance. That doesn't make every project cheaper. It often makes costs clearer and mistakes less likely.

Key Factors That Increase or Decrease Renovation Costs

Some bathrooms get expensive because the owner chooses expensive finishes. Others get expensive because the build itself becomes harder. Those aren't the same thing, and it helps to separate them before you lock in drawings or selections.

An assortment of interior design materials including marble, tile samples, and faucets displayed on a countertop.

Layout decisions

Keeping the existing layout is usually the strongest cost-control move available. The room may still be fully renovated, but the build stays more predictable when waste points, water lines, and major fixture positions remain where they are.

Moving the toilet, shifting the shower, or reworking the bath location usually triggers added plumbing work and often affects tiling, waterproofing, and floor preparation as well.

Material and finish choices

Not all finish upgrades cost the same. Some give a better visual lift than others without changing the build method much.

Consider the trade-offs:

  • Tile selection: A simpler tile in a clean format can still look high-end if the room is well detailed.
  • Joinery: Custom cabinetry gives flexibility, but standard sizes often work well in practical family bathrooms.
  • Tapware and fixtures: You don't need the most expensive option to get a sharp, modern result. Consistency often matters more than chasing statement pieces.

Design complexity

New bathroom ideas often look straightforward on a mood board but become expensive in construction. Recessed niches, frameless glass in awkward dimensions, full-height tiling everywhere, curved features, and mixed finishes all add labour pressure.

That doesn't mean they're wrong. It means they need to earn their place in the budget.

If a feature adds cost but doesn't improve use, maintenance, or resale appeal, it's usually the first place to review.

Building context

A freestanding house and an apartment can have very different renovation conditions. Apartments often bring stricter access windows, material transport issues, acoustic concerns, and body corporate rules. Older homes can reveal substrate problems, water damage, or non-compliant past work once demolition begins.

Permit and compliance issues

Straight replacement work is usually simpler than a renovation involving structural changes or broader building alterations. Once walls move or construction extends beyond a standard bathroom replacement, approvals and documentation can become part of the job.

That's one reason early planning matters. It's cheaper to identify approval risks before selections are finalised than after products are ordered.

Smart Cost-Saving Tips Without Compromising on Quality

A common Melbourne scenario looks like this. The room is tired, the budget is finite, and the first quote feels higher than expected. The answer is usually not to cheapen the whole job. It is to choose where the money earns its keep.

A hand touching a modern brushed nickel bathroom faucet on a white marble countertop near a sink.

Value engineering works best when it follows a clear order. Keep compliance and waterproof integrity protected. Keep the layout if it already works. Spend selectively on the items people touch, clean, and look at every day. That is how a bathroom stays in the right tier without drifting into unnecessary cost.

The biggest savings usually come from reducing change, not reducing quality. Moving wastes, chasing new pipe runs through a slab, resizing glazing, or ordering custom joinery can push a standard bathroom into a much more expensive bracket. By contrast, a well-planned like-for-like renovation often delivers a stronger result per dollar because the budget goes into better finishes and cleaner installation.

Cost-saving decisions that usually hold up

These are the choices that tend to improve value without creating problems later:

  • Keep plumbing points where they are if the current layout functions well.
  • Choose standard fixture sizes for vanities, screens, mirrors, and toilets to avoid custom labour.
  • Use feature finishes sparingly so one or two better selections carry the room.
  • Tile strategically by using full-height tiling only where it adds a practical or visual benefit.
  • Prioritise easy-clean products in family bathrooms, rentals, and ensuite upgrades.
  • Buy complete fixture ranges so finishes match properly across tapware, wastes, hooks, and shower fittings.

I often see owners save money successfully by pairing a simple tile with one stronger vanity or tapware selection, rather than trying to make every surface a feature. That approach usually looks more resolved, and it is easier to keep on budget.

False savings that become expensive later

The trouble spots are predictable:

  1. Cutting waterproofing or substrate preparation. Repairs after failure are far more expensive than doing it properly the first time.
  2. Mixing products from different ranges without checking finishes in person. "Brushed nickel" is not consistent across suppliers.
  3. Over-designing a small bathroom. Niches, trims, feature tiles, shaving cabinets, wall-hung fixtures, and custom glass all in one room add cost fast.
  4. Ordering purely on sale price. Long lead times, missing components, or poor after-sales support can stall the job.

Contingency also matters. Bathrooms in older Melbourne homes regularly hide water damage, out-of-level floors, or previous non-compliant work. If there is no allowance for that, a sensible renovation can feel like a blowout the moment demolition starts. A clearer view of sequencing helps owners understand where variations tend to arise, especially once walls and floors are opened up. This guide on how long a bathroom remodel should take explains the stages well.

Spend in order. Waterproofing and preparation first. Durable fixtures and finishes next. Visual extras last.

For investors and landlords, that usually means avoiding premium details that do not change rent, resale, or maintenance. For owner-occupiers, it often means putting the better spend into daily-use items such as the vanity, shower, lighting, and storage, while keeping the construction straightforward. That is the difference between a bathroom that looks expensive and a bathroom that delivers value.

Project Timeline Permits and Choosing the Right Builder

A Melbourne bathroom renovation usually goes off track before demolition starts. The common causes are late product selections, unclear scope, apartment access restrictions, and approval questions that were left until the trades were booked.

In practice, the build itself is only one part of the programme. Planning, quoting, ordering, and confirming site conditions often take longer than owners expect. Older homes in suburbs such as Brunswick, Preston, or Camberwell can also add time once demolition exposes floor levelling issues, water damage, or previous work that does not meet current standards.

A typical bathroom job moves through four stages:

  • Pre-construction planning: Site measure, layout confirmation, fixture and finish selections, and final scope approval.
  • Procurement and scheduling: Ordering materials, locking in trades, and confirming delivery dates before the room is stripped out.
  • Construction: Demolition, rough-in, substrate preparation, waterproofing, tiling, fit-off, glazing, painting, and final silicone.
  • Handover: Defect check, cleaning, compliance documents, and practical completion.

For a clearer breakdown of the sequence, this guide on how long a bathroom remodel should take shows where time is usually spent and where delays tend to happen.

Permits are not the same on every project. If you are replacing fixtures within the existing footprint, the path is usually simpler. If the work affects structure, changes openings, relocates major services, or sits inside an apartment with owners corporation rules, the approval process can become part of the critical path. That needs to be checked before products are ordered.

This is also where value engineering matters. Keeping the layout largely where it is does not just reduce plumbing cost. It can shorten decision-making, reduce approval risk, and make scheduling easier because fewer variables are introduced. On investor jobs, that often delivers better value than spending the same money on custom details that add complexity without improving rent or resale.

Choosing the builder has a direct effect on cost control. A good quote is not just a price. It should spell out what is included, what is excluded, who is supplying fixtures, how variations are handled, and what happens if concealed issues are found after demolition.

Ask direct questions:

  • Are licence and insurance current?
  • Do they handle bathroom renovations regularly, or only general building work?
  • Is waterproofing and compliance documentation included?
  • Are allowances realistic, or are provisional sums being used to make the quote look cheaper?
  • Who manages the schedule and client communication once work starts?

The cheapest quote often becomes the expensive one if key items were omitted at tender stage. We see that with disposal, floor preparation, electrical upgrades, and supplied-by-owner fixtures that arrive late or do not match the set-out.

If you want one team to manage design, planning, and construction, SitePro Bathrooms offers an end-to-end bathroom renovation service that includes 3D design, build coordination, and finishing.

Your Bathroom Renovation Questions Answered

What gives the best return for a Melbourne investment property

The best return usually comes from a controlled upgrade, not a luxury rebuild. Keep the plumbing layout where it is, choose durable fixtures in standard sizes, and aim for a clean, neutral finish that suits a broad tenant or buyer pool. Investors usually do better when the bathroom feels fresh, practical, and low-maintenance rather than overly personalised.

How do body corporate approvals affect an apartment bathroom renovation

Apartment renovations often involve more than your own lot. Access times, waste removal, waterproofing compliance, noise rules, lift protection, and notice periods can all affect the job. Get those conditions clarified before materials are ordered. If approvals are needed, treat them as part of the project programme, not as an afterthought.

Are designer bathrooms always worth the extra spend

Not always. Designer bathrooms can absolutely be worth it in the right home, especially when the rest of the property supports that finish level. They're less compelling when the renovation cost overtakes what the property can reasonably carry. A good design brief should separate must-haves from nice-to-haves before pricing starts.

How do you avoid costly mid-project changes

Lock the layout early. Finalise tile, vanity, tapware, glazing, and lighting selections before construction starts. Most expensive changes happen when clients decide on details after waterproofing, tiling, or joinery is already underway.

Can 3D design help with new bathroom ideas

Yes. It helps clients test layout, storage, and finish combinations before trades begin. That's especially useful when you're trying to balance modern bathrooms with practical limitations like tight footprints, awkward doors, or existing plumbing positions.


If you're comparing options for your own bathroom renovation cost Melbourne project, the most useful next step is to price the room based on scope, not guesswork. A clear brief, disciplined selections, and realistic allowances will tell you very quickly whether the plan is budget, standard, or premium.

  • siteprobathrooms

How to Renovate a Bathroom: Stress-Free Guide

A bathroom renovation typically begins with a consistent approach. This involves saving a few photos, picking a preferred tile, and assuming the most challenging work starts with demolition.

In Victoria, that's backwards.

The hard part is getting the decisions right before anyone lifts a tool. Bathrooms pack plumbing, electrical, waterproofing, drainage, ventilation, and finish work into one small room. That density is exactly why a bathroom that looks simple on paper can become expensive, slow, and stressful if the layout, fixtures, approvals, and trade order aren't locked in early.

If you're figuring out how to renovate a bathroom, think like a project manager first and a stylist second. Good results come from clear scope, disciplined sequencing, and realistic choices about where to spend and where to hold back. That's how you get bathroom renovations that look sharp, perform properly, and don't come back to haunt you with defects or rework.

The Pre-Renovation Playbook Planning Your Vision and Budget

A bathroom project usually goes off course before demolition starts.

I see it when a client says they want a simple refresh, then the first site check shows a tired subfloor, poor ventilation, old plumbing positions, and a layout that never worked properly in the first place. In Victoria, those early findings matter because they affect waterproofing, trade scope, timing, and sometimes whether extra approvals are needed. Good planning protects the budget long before tiles or tapware are chosen.

A woman sketching bathroom renovation floor plans in a notebook with a budget spreadsheet open on a tablet.

Start with the reason for renovating

Every strong brief starts with the problem, not the products.

A bathroom for a growing family needs durability, storage, and easy cleaning. An ensuite may prioritise comfort and better use of space. An older home may need the hidden work fixed first, especially if there are signs of movement, damp, or previous poor-quality renovations. Those are very different jobs, and they should not share the same budget logic.

Set the brief around decisions that affect the build:

  • Primary goal: better day-to-day function, updated appearance, accessibility, rental durability, or sale preparation
  • Must-haves: a bath, walk-in shower, more storage, better lighting, easier cleaning, or a double vanity
  • What stays and what changes: layout, plumbing locations, windows, doorway position, and wall locations
  • Property type: house, apartment, investment property, or period home with a higher chance of hidden issues

That last point matters in Victoria. Apartments can bring body corporate constraints. Older homes often uncover substrate damage, out-of-square walls, or outdated services once the room is stripped. If the brief ignores that risk, the budget usually wears the hit later.

Budget for the room you are actually building

Bathroom budgets are driven more by construction detail than by visible finishes.

Clients often focus on tile selection and tapware, but significant cost pressure usually comes from rectification, service changes, and labour-heavy work. Moving a toilet, changing shower falls, replacing damaged sheeting, correcting framing, or bringing old work up to current standards can shift a project from straightforward to complex very quickly.

A realistic budget should allow for:

  • Demolition and disposal: strip-out, protection of adjacent areas, and waste removal
  • Plumbing and electrical work: rough-in changes, new points, drainage adjustments, and fit-off
  • Substrate preparation and waterproofing: getting the room ready for finishes and wet-area compliance
  • Tiling and installation labour: often one of the biggest cost components in the room
  • Fixtures, joinery, and glazing: vanity, toilet, shower screen, tapware, mirrors, and accessories
  • A contingency: especially in older properties where defects are often hidden until demolition

One practical rule holds up on almost every job. If you keep the layout, you usually keep the budget under better control. Once plumbing points move, the labour, coordination, and risk all increase.

If you need to reduce costs without stripping the project back too far, our guide on how to renovate a bathroom on a budget sets out where to save and where it is smarter to hold the line.

Turn ideas into a buildable scope

Vague language costs money.

“Modern,” “luxury,” and “hotel feel” might help with inspiration, but trades cannot price or build from broad styling terms. They need clear selections and fixed decisions. Vanity width. Tile size. Tile height. Niche position. Shower screen type. Lighting layout. Door swing. Heated towel rail or not. These details affect material quantities, set-out, labour time, and the order each trade works in.

A buildable scope should record the room in plain terms:

  • the final layout
  • the fixtures being installed
  • the extent of tiling
  • storage requirements
  • lighting and power needs
  • items being retained
  • known issues that may need rectification once the room is opened up

That level of planning is what keeps a bathroom renovation under control. It gives the builder something clear to price, gives the trades something clear to execute, and gives the client a far better chance of avoiding budget creep halfway through the job.

Designing Your Dream Bathroom and Visualising the Result

A good bathroom design isn't a collection of nice products. It's a room where layout, light, storage, and finish selection all support each other.

That's the difference between bathrooms that photograph well and bathrooms that work well. The first impresses for a minute. The second still feels right years later.

A hand selecting interior design materials including marble tiles and stone samples for a home renovation project.

Layout does more work than style

Most new bathroom ideas live or die on layout. You can spend heavily on finishes, but if the vanity crowds the entry, the shower feels cramped, or storage is missing, the room won't feel resolved.

In compact bathrooms, every line matters. Door swing, vanity depth, shower screen placement, and the visual weight of tile all affect how open the room feels. In larger rooms, the risk is different. Too much empty space can make the bathroom feel cold unless the design creates zones and balance.

A few layout choices consistently hold up:

  • Keep movement clear: You should be able to enter and use the room without weaving around fixtures.
  • Place storage where it's needed: Vanity drawers, recessed niches, and mirrored cabinets reduce clutter.
  • Give the eye a focal point: Often that's the vanity wall, a feature tile, or a freestanding bath.
  • Design for maintenance: Tight gaps, awkward corners, and overly fussy detailing don't age well.

Materials must suit the way the room is used

Bathrooms are wet rooms, not showrooms. That changes how materials should be chosen.

A polished stone look might suit the brief, but the room still needs practical slip resistance, easy cleaning, moisture tolerance, and a tile format that works with the scale of the room. Large tiles can make a small room feel calmer. Smaller mosaics can help on floors where falls matter. Matte finishes often hide water marks better than glossy surfaces.

If you're choosing finishes, this practical guide on how to choose bathroom tiles helps narrow the options sensibly.

The best designer bathrooms don't look overloaded. They look edited. Every finish has a job, and nothing fights for attention.

Why 3D design saves real money

Clients often think visualisation is a luxury. It isn't. It's one of the cheapest forms of risk control in a bathroom renovation.

A 3D design exposes problems before demolition. You can test vanity width, mirror proportions, lighting placement, tile transitions, recesses, and fixture alignment while changes are still easy. That matters because on-site changes are rarely isolated. Move one item late and you may also affect rough-in positions, tiling, waterproofing details, and timing.

Here, modern bathrooms become buildable instead of aspirational. You stop guessing and start approving exact decisions. That's especially useful when more than one person is signing off on the room.

Navigating Permits and Hiring Your Renovation Team in Victoria

A bathroom can look like a straightforward room upgrade on paper. In Victoria, it often stops being simple the moment work affects plumbing, drainage, waterproofing, electrical services, ventilation, or any part of the structure. That is usually where budget risk starts, because approval requirements, trade licensing, and documentation are easy to underestimate until the job is already underway.

I tell clients the same thing early. Tile choices are the easy part. The harder part is making sure the work is lawful, properly sequenced, and signed off by the right people.

Know where approval risk actually sits

The approval path depends on the property type and the scope of work.

In a detached home, the process is often more direct, but structural changes, altered windows, moved drainage points, or major service changes can still trigger extra checks. In apartments, units, and other shared-title properties, you also need to deal with ownership boundaries, access rules, noise restrictions, waste removal, and body corporate or owners corporation approval where required.

That paperwork matters for a practical reason. If waterproofing fails in a house, the damage may stay within your lot. If it fails in an apartment, it can affect the ceiling below, common property, neighbouring walls, and an insurance claim that quickly turns into an argument about who approved what.

Victorian guidance for strata and shared-property renovations generally points to the same lesson. Get written approval before works start, and make sure the scope matches what was approved.

Hire for control, not just a lower quote

A bathroom renovation runs better when one party is clearly responsible for buildability, compliance, trade coordination, and defect prevention. Price still matters, but the cheapest quote can become the expensive one if key items are missing, trades are left to sort out conflicts on site, or no one owns the full outcome.

That is why builder selection deserves more than a quick check of gallery photos. Ask who is supervising the job. Ask who books and manages the licensed trades. Ask how variations are handled if demolition exposes rotten framing, damaged sheeting, old pipework, or non-compliant past work. Those are common findings in Victorian bathrooms, especially in older homes.

A good screening checklist is simple:

  • Registration and insurance: Confirm the builder and each trade are properly licensed or registered for the work they carry out.
  • Wet-area knowledge: Ask how the team handles substrate preparation, waterproofing, and required certifications.
  • Clear scope: The quote should state inclusions, exclusions, allowances, and what can trigger a variation.
  • Documentation: Fixtures, finishes, plans, and service locations should be recorded before site work begins.
  • Single-point responsibility: You want one accountable lead when questions arise and decisions need to be made quickly.

If you want a clearer explanation of that accountability model, read why using a registered builder matters for your bathroom renovation.

Watch the apartment and rental traps

Investors and landlords often focus on hard-wearing finishes, easy-clean surfaces, and a layout that tenants will not damage easily. That is sensible, but it is only half the job.

Rental properties and apartments need a clean paper trail. Keep records of approvals, waterproofing documentation, product selections, invoices, compliance certificates, and a clear note of what was changed. If the property is sold, re-let, refinanced, or subject to an insurance query, those records matter far more than people expect.

A bathroom that looks finished can still be poorly documented.

That distinction causes problems later, especially when maintenance issues appear months after handover. Good project management protects the room itself and the decisions behind it.

The Main Event Demolition and Trades Sequencing

A bathroom can look straightforward on the plan, then become complicated the moment demolition starts. In Victoria, that usually happens when old pipework sits where the new shower needs to go, the walls are out of square, or the floor is not suitable for the waterproofing system specified for the job. The room only comes together if the work is staged in the right order and each trade arrives to a site that is ready for them.

That sequence matters more in bathrooms than almost anywhere else in the house. Wet areas leave very little room for guesswork. If one stage is rushed or installed out of order, the trades behind it either stop or inherit a problem that costs more to fix later.

What actually happens once site work begins

Demolition should be controlled, documented, and selective. The job is to remove the old bathroom without damaging structural elements, adjoining finishes, or services that need to remain live elsewhere in the home.

Once the room is stripped back, the actual condition of the space becomes clear.

This is often where we find the issues that were hidden by tiles and plaster. Loose sheeting, previous water damage, patched-over plumbing work, termite damage in older homes, or floors that fall the wrong way all show up at this point. In many Victorian properties, especially older brick homes and apartments, those discoveries affect method, timing, and sometimes scope.

The required order of trades

Bathrooms are built in a strict sequence because every stage relies on the one before it being correct.

  1. Final set-out confirmation
    Fixture positions need to be locked in on site, not just on a concept drawing. Vanity width, toilet clearance, shower screen size, niche height, mixer positions, and tile set-out all need to work together before rough-in starts.

  2. Demolition and make-safe works
    Existing fixtures, linings, floor finishes, and redundant services are removed. The site is then cleaned up so the next trade can work accurately and safely.

  3. Plumbing and electrical rough-in
    New water, waste, power, lighting, and exhaust locations are installed while walls and floors are open. If the layout has changed, this is often where cost moves, because relocating services is labour-heavy and sometimes constrained by structure.

  4. Carpentry and substrate preparation
    Walls are straightened, noggings are added for grab rails or joinery where needed, floors are corrected, and sheet substrates are installed to suit the waterproofing and tile system.

  5. Waterproofing
    This is regulated work, not a finishing step. The substrate, bond breakers, junctions, penetrations, and drying times all matter. In Victoria, paperwork and compliance matter as much as appearance, especially if there is ever an insurance claim or a defect dispute.

  6. Tiling and floor grading
    Good tiling starts with set-out and falls, not tile colour. Shower floors need to drain properly, cuts need to be planned around focal points, and junctions need enough movement allowance to avoid later cracking.

  7. Fit-off and final installation
    Vanity, toilet, tapware, shower screen, mirrors, lighting, accessories, and fans are installed after the wet trades and finishes are complete.

A late change during rough-in rarely stays small. Move one mixer position and you may also be moving framing, waterproofing terminations, tile joints, and the shower screen measurement.

Where Victorian projects often get delayed

The delays are rarely caused by one dramatic problem. They usually come from several smaller issues stacking up. An apartment may need booked access and waste removal windows. A period home may have uneven framing that adds rectification work. A product may arrive late, which holds up measurement for joinery or screens. Waterproofing and curing times can also dictate the pace, regardless of how eager everyone is to push through.

Trade coordination is what keeps the program realistic. Sending the tiler in before the substrate is ready does not save time. It creates rework, arguments about responsibility, and a finish that never looks right.

Timing and cost, in practical terms

Programs vary with scope, access, and what the existing room reveals after strip-out. The table below works as a planning guide.

Phase Typical Duration Approx. Cost %
Planning, selections, approvals Varies by scope and product lead times Moderate early design and admin allocation
Demolition and site preparation Usually short but condition-dependent Smaller share than services and finishes
Plumbing and electrical rough-in Depends on layout complexity Significant technical allocation
Waterproofing and substrate preparation Depends on drying and inspection requirements Compliance-driven allocation
Tiling Labour-intensive and finish-critical One of the larger visible cost areas
Fixture fit-off and final detailing Usually staged near completion Moderate to high depending on fixture specification

Why bathrooms fail when the sequence is wrong

Bathrooms do not fail because one tile line is slightly off. They fail because moisture gets where it should not, drainage was not set correctly, fixtures were forced into a layout that was never resolved properly, or one trade had to guess what another trade intended.

That is why a well-run renovation feels calm on site, even when the room is fully stripped. The builder is not just booking trades. They are checking dependencies, handling site conditions, and making sure each stage is ready before the next one starts. In a Victorian bathroom renovation, that discipline is what turns a messy room into a compliant, durable finish.

The Finishing Touches That Define Your Space

You reach the last stretch of the renovation and the room finally looks close to done. This is also the stage where small specification mistakes become expensive, visible, and hard to ignore.

After waterproofing, tiling, and set-out are complete, fit-off gives the bathroom its finished character. Tapware, joinery, mirrors, shower screens, lighting, and accessories all start working together. If the early selections were disciplined, the room feels resolved. If they were made in isolation, the bathroom can still look disjointed even with quality products.

A modern chrome bathroom faucet sitting on a clean white sink next to a small potted plant.

Where the room gets its character

A good bathroom rarely relies on one standout item. The result comes from proportion, restraint, and consistency.

The vanity usually sets the tone first because it carries both storage and visual weight. From there, mirrors, tapware, towel rails, lighting, and shower framing need to suit the scale of the room. A narrow ensuite can be overwhelmed by chunky fittings. A family bathroom with generous wall space can look underdone if every item is too slight.

A few details have an outsized effect:

  • Tiles and grout: These set the visual pace of the room. Busy tile patterns or high-contrast grout can date faster than people expect.
  • Vanity and storage: Joinery needs to suit how the bathroom is used. Deep drawers often work better than cupboards for daily access.
  • Tapware and hardware: Finishes should relate to each other. Mixing too many metals usually reads as indecision, not design.
  • Lighting and mirrors: Face lighting matters more than decorative fittings. A bathroom that looks good in a showroom can still be poor to use at 6am.
  • Ventilation: In Victoria, this is not a cosmetic extra. Poor extraction shortens the life of paint, sealants, joinery, and even grout lines.

Spend money where changes are hardest later

The smartest budget decisions at this stage are usually practical ones.

If the layout is working, keeping plumbing positions largely in place often protects the budget and reduces risk. Money is often better spent on quality waterproof-compatible substrates, a well-built vanity, decent drawer hardware, effective exhaust ventilation, and fixtures that will still be serviceable years from now. Those items affect daily use and long-term maintenance more than a fashionable feature tile does.

I often warn clients about false economy here. Saving a small amount on the vanity internals, mirror size, screen hardware, or exhaust fan can leave a new bathroom feeling average within months. By contrast, a restrained material palette with better lighting, storage, and ventilation usually performs better and ages better.

Good value comes from protecting the expensive-to-replace elements and improving the parts you touch, clean, and use every day.

What dates a bathroom fastest

Bathrooms usually age poorly for predictable reasons. Oversized niches, overly busy feature walls, blue-white lighting, weak storage, and fixtures that are out of proportion with the room all tend to fall out of favour quickly.

Bathrooms that last well are generally quieter in their base finishes. They use durable surfaces, have enough storage to keep benches clear, and include lighting that is practical rather than purely decorative. The goal is not to make the room plain. The goal is to make sure it still feels balanced after the novelty of the new renovation has worn off.

In Victorian homes, there is another layer to this. Older properties often have walls that are not perfectly straight, tighter footprints, and existing windows or structure that limit ideal fixture placement. Good finishing choices account for those realities instead of fighting them. That is the difference between a bathroom that photographs well on handover day and one that still works properly, and still looks right, years later.

How SitePro Bathrooms Delivers a Smooth Renovation

A bathroom job usually goes off course long before demolition starts.

I see the same pattern across Victoria. Selections are half-made, drainage assumptions are wrong, body corporate approval is treated as an afterthought, and clients are told the room can be worked out on site. In a bathroom, that approach is expensive. The room is small, but every trade is working to tight tolerances, and one missed decision can affect waterproofing, joinery, glazing, tiling, and fit-off.

At SitePro Bathrooms, we run the project as a builder-led process from the beginning. That means the layout, product selections, site constraints, compliance issues, and trade handovers are checked before the room is opened up. It reduces avoidable variation costs and stops the common chain reaction where one late change pushes three other trades off program.

Why builder-led coordination matters

In Victoria, a bathroom renovation can involve more than replacing fixtures and tiles. Apartment work may need owners corporation approval. Older homes can reveal out-of-square walls, damaged subfloors, or legacy plumbing that does not suit the new design. If structural changes, major waterproofing scope, or service relocation are involved, the paperwork and sequencing need to be handled properly.

That is why one controlled workflow matters. The plumber needs confirmed set-out points before rough-in. The waterproofer needs stable substrates and compliant falls. The tiler needs final fixture positions, not guesses. If those decisions are made in the wrong order, the site becomes a problem-solving exercise instead of a planned renovation.

What clients can expect from our process

Our process is built to keep decisions clear and responsibility obvious:

  • Clear scope before work starts: We confirm what is being replaced, what is being retained, and where the risk sits if hidden conditions appear.
  • Selections locked in early: Tapware, vanity dimensions, tile sizes, drainage components, and shower screen details are resolved before rough-in where possible.
  • Permit and approval handling: We identify early if council, building, or owners corporation requirements may affect timing.
  • Trade sequencing with proper handovers: Demolition, plumbing, electrical, carpentry, waterproofing, tiling, painting, glazing, and fit-off are booked in the right order.
  • Single point of accountability: Clients are not left chasing separate trades for answers, delays, or defects.

That last point matters more than many clients realise. Bathrooms fail at the joins between trades. A nice design does not save a project if no one is checking substrate prep, waterproofing extents, tile set-out, or whether the vanity allowance matches the plumbing position.

We also plan for the Victorian realities that DIY articles rarely cover. Access restrictions in inner suburbs, limited parking for trades, apartment working hours, and longer lead times on selected fixtures can all affect the build. A well-run job allows for those constraints early, instead of pretending every bathroom follows the same timeline.

The result is a renovation that feels organised, well supervised, and easier to live through. Clients know what happens next, who is responsible, and where money is being spent. That is usually the difference between a bathroom project that stays under control and one that starts well but unravels once site work begins.

Bathroom Renovation FAQs

How long does a bathroom renovation usually take in Australia

A client will often ask this after seeing a fast before-and-after video online. The answer is that there are two timelines: the work on site, and the full project from first consultation to final handover.

On-site construction for a standard bathroom can be relatively quick if selections are finalised early, trades are booked properly, and there are no hidden surprises once demolition starts. The full process usually takes much longer. In Victoria, time is often lost before site works begin because fixtures are on backorder, apartment access rules limit working hours, owners corporation approvals are still pending, or the design has not been resolved well enough for trades to price and build with confidence.

The practical approach is to plan around the full project, not the shortest possible build window.

Is it cheaper to keep the same layout

Usually, yes.

Keeping the toilet, shower, and vanity in roughly the same positions can reduce plumbing changes, limit drainage work, and avoid unnecessary structural opening-up. That money can then go into better waterproofing details, stronger storage, improved lighting, or higher-quality fixtures.

There are exceptions. If the current layout wastes space, creates a cramped shower, or leaves no room for proper vanity storage, changing it can be money well spent. The question is whether the improvement in function justifies the extra work behind the walls and under the floor.

What's the biggest mistake homeowners make

Late selections cause more trouble than clients expect.

If tapware, vanity specifications, tile sizes, niche positions, shower screen details, or mirror cabinet dimensions are still undecided after demolition, trades start making assumptions. That is where costs creep up. A plumbing rough-in set for one vanity can miss the drawer configuration of the one eventually ordered. A tile set-out can look ordinary if the selected format changes after waterproofing is complete.

The fix is simple. Finalise the major selections before site work starts, and make sure they are documented clearly enough for each trade to work from the same plan.

Do I need approval for a bathroom renovation in Victoria

Sometimes, and in such instances, a simple bathroom upgrade can become more involved than people expect.

In Victoria, the approval path depends on the type of property and the scope of work. Plumbing and electrical work must be carried out by licensed trades. If structural work is involved, building permit requirements may need to be checked before anything is demolished. In apartments, units, and townhouses, owners corporation rules can affect waterproofing responsibilities, working hours, waste removal, and even where materials can be stored during the job.

That is why bathroom renovations should be reviewed at the start, not halfway through. Sorting out compliance early is far cheaper than stopping a job to fix paperwork, access issues, or trade sign-off problems later.

What should I check at handover

Treat handover like an inspection, not a formality.

Run every tap. Fill and drain the basin. Test the shower mixer, exhaust fan, power points, lighting, heated rails, and toilet flush. Look closely at grout lines, silicone joints, paint edges, tile cuts, and the falls to the waste. Open every drawer and door. Ask for the relevant certificates, warranty information, and care guidance for the finishes that have been installed.

A bathroom can look finished in photos and still have details that need attention in person.

Are modern bathrooms always the best choice for resale

No. Better resale usually comes from practical decisions, not trend chasing.

Buyers respond well to bathrooms that feel clean, bright, durable, and easy to maintain. Good storage, sensible lighting, straightforward cleaning lines, and quality wet-area detailing tend to age better than heavily styled rooms built around a short-lived look. In many Victorian homes, the best result is a bathroom that feels updated but still suits the age, scale, and character of the property.

A well-built bathroom outlasts a fashionable one.


If you want a bathroom renovation managed from concept through to handover, with 3D design, coordinated trades, and a registered builder overseeing the process, talk to SitePro Bathrooms.

  • siteprobathrooms

Cost to Renovate Bathroom Sydney: Bathroom Renovation Cost

In Sydney, bathroom renovation costs usually fall into three tiers: about $5,000 to $15,000 for a budget project, $15,000 to $35,000 for a standard full renovation, and $35,000 to $95,000 for a premium bathroom. In practice, many mid-market projects are planned around $15,000 to $18,000, but that number only holds if the scope stays controlled and the hidden work is manageable.

That's the part most homeowners are trying to work out when they search for the cost to renovate bathroom Sydney. You might be looking at sleek modern bathrooms, saving photos of new bathroom ideas, and wondering whether your taste matches your budget or whether the quote is going to jump the moment demolition starts.

That uncertainty is normal. Bathrooms look simple from the outside, but they're one of the most trade-heavy rooms in the house. Tiles, tapware and vanities get all the attention, yet budget pressure often comes from waterproofing, plumbing access, compliance, and whether you're replacing like for like or trying to reshape the room.

Embarking on Your Sydney Bathroom Renovation Journey

A Sydney homeowner often starts in the same place. Good-looking inspiration photos, a rough budget in mind, and the assumption that a bathroom is a small room so the numbers should stay manageable. Then the first site visit happens, the old tiles come off, and the actual cost starts to make sense.

A man holds a tablet displaying various bathroom design options inside a modern renovated bathroom space.

That gap between expectation and quote usually comes down to one thing. Homeowners price the bathroom they want. Builders price the bathroom that exists behind the walls, under the floor, and inside the current plumbing setup.

A new vanity, frameless shower screen and feature tiles are easy to picture. Compliance, waterproofing, floor preparation, waste connections, ventilation and access are not. Yet those are the items that often decide whether a project stays controlled or runs over budget.

This is why an "average cost" can be misleading at the start.

Two bathrooms of the same size can finish with a similar look and land at very different prices. One may be a straightforward like-for-like replacement with decent wall frames, accessible pipework and no sign of water damage. The other may need substrate repairs, updated drainage falls, electrical corrections, or extra work to bring waterproofing and installation up to current standard. On paper they look close. On site they are not.

The biggest cost difference often has nothing to do with the tile you pick. It comes from scope.

A realistic bathroom budget starts with the existing room, the layout you plan to keep or change, and the work needed to rebuild it properly.

Builder choice affects this early. A detailed quote should set out what is included, what is excluded, who is handling waterproofing and certification, and whether any allowance has been made for hidden rectification once demolition starts. Homeowners comparing prices should also understand why using a registered builder matters for your bathroom renovation, because the cheaper quote is not always pricing the same job.

The goal at this stage is not to chase the lowest number. It is to get clear on the actual work involved before selections, layout changes and provisional allowances start stretching the budget.

Understanding Sydney Bathroom Renovation Price Tiers

A homeowner in Sydney gets three quotes for what looks like the same bathroom. One builder prices a quick refresh. Another prices a full strip-out with proper rectification. The third has allowed for layout changes, certification, and higher-end finishes. The room has not changed. The scope has.

That is the right way to read price tiers. They are not just price bands. They reflect how much of the room is being rebuilt, how much risk sits behind the walls, and how far the design moves away from the existing layout.

Budget projects

The lower tier is usually a cosmetic update with strict limits on scope. It suits bathrooms where the layout stays put, the structure is sound, and the goal is to improve presentation rather than rebuild the room from scratch.

In practical terms, this level of project usually means:

  • keeping the toilet, shower and vanity in their current positions
  • choosing standard-size products instead of custom joinery or made-to-order screens
  • using straightforward tile formats that install faster and create less waste
  • limiting demolition so there is less chance of exposing hidden repair work

This tier can work well in an investment property, a secondary bathroom, or a room that is tired but still serviceable. It stops working once owners expect full waterproofing rectification, high-end finishes, custom storage, or a designer layout on a tight figure.

Standard full renovations

The middle tier is where a bathroom starts to be rebuilt properly rather than patched over. This is the bracket many Sydney homeowners are aiming for, even if they do not describe it that way at the start.

A standard full renovation commonly includes demolition, new waterproofing, new tiling, replacement fixtures, electrical and plumbing updates, and a cleaner overall finish. It may also allow for better storage, improved lighting, and a more usable shower arrangement if changes are modest.

This is also the range where professional discipline matters most. A quote can look competitive until you check whether it includes rubbish removal, substrate preparation, waterproofing certification, exhaust upgrades, tile trims, and fit-off of owner-supplied items. Those details are where jobs drift off budget.

Premium renovations

At the top end, cost rises because the work is harder to build, not just because the room looks better in photos.

Premium bathrooms often involve one or more of the following:

  • layout reconfiguration that moves plumbing and drainage points
  • large-format or natural stone tiles that need more careful preparation and installation
  • custom vanities, recessed niches, frameless glass, and detailed lighting plans
  • underfloor heating, upgraded ventilation, or higher-spec brassware and fixtures
  • rectification to older walls or floors so premium finishes can be installed properly

The labour component climbs fast at this level. Tighter tolerances, more product coordination, longer lead times, and a greater chance of custom fabrication all add cost before the room is even finished.

Where many homeowners sit

A lot of Sydney renovations sit between a light refresh and a fully customised bathroom. Owners usually want a room that feels new, functions better, and holds up over time. They do not always want a luxury fit-out, but they do want the job done properly.

That middle ground is where budgets often move. The layout stays mostly the same, then a wall-hung vanity is added. Tile selections step up. The old floor turns out to be out of level. Ventilation needs upgrading to meet current expectations. Each decision is reasonable on its own. Together, they change the tier of the project.

The useful question is not “What is the average bathroom renovation cost in Sydney?” It is “What standard of rebuild am I paying for, and what has the builder allowed for behind the finishes?” That is how you get a quote that reflects the actual job rather than a low number that grows after demolition.

Itemised Cost Breakdown Where Your Money Goes

A Sydney bathroom quote can look straightforward until demolition starts and the hidden work shows up. The visible selections matter, but the actual cost usually sits in labour, compliance, preparation, and the trade coordination needed to rebuild a wet area properly.

That is why two bathrooms with similar tiles and tapware can finish at very different prices.

The costs that are easy to underestimate

The line items that catch homeowners out are usually behind the finished surface. Waterproofing is one of them. It has to be applied to the correct areas, allowed to cure properly, and certified where required. If the substrate is poor or the falls are wrong, the waterproofing cost is not just the membrane. It includes the prep work needed before anyone can apply it.

Plumbing is another area that gets misunderstood. The visible fixture is the cheap part compared with the labour needed to isolate services, alter pipework, set wastes at the right height, and coordinate rough-in and fit-off with the rest of the build. Electrical work follows the same pattern. The final light or fan might look simple, but safe installation, testing, and compliance take time.

Beyond the main contract, there are extra costs homeowners should plan for. Waterproofing can run about $500 to $750, plumbing call-outs are commonly $60 to $100 plus hourly rates, and council permit fees can range from $500 to $1,000 for a basic renovation, as outlined in this Australian bathroom renovation cost breakdown.

In Sydney, approval costs vary by building type and scope. Many bathroom renovations do not need council approval, but strata approvals, waterproofing documentation, engineering advice, or compliance sign-off can still add professional fees that are easy to miss in an early budget.

What a proper quote should make clear

A useful quote should separate product allowances from labour and identify what is fixed, what is provisional, and what is excluded. If demolition, rubbish removal, substrate repairs, waterproofing, tiling, plumbing, electrical, glazing, painting, and certification are bundled into vague headings, the price is harder to trust.

Bathrooms fail at the joins between trades. One contractor finishes late, another returns to redo work, and the cost lands back on the client if the scope was not clear from the start.

If waterproofing, plumbing scope or permits are poorly described, you are not comparing quotes. You are comparing assumptions.

Typical Bathroom Renovation Cost Allocation

The exact split changes from project to project, especially in older Sydney homes where floors are out of level, walls are not square, or previous renovations have left non-compliant work behind. Still, this is a practical way to read where the budget usually goes.

Cost Component Percentage of Total Budget
Labour and trade coordination Largest share
Fixtures and fittings Moderate to high share
Tiles and surface materials Moderate share
Waterproofing and wet area preparation Compliance and substrate-related share
Plumbing and electrical work Technical and service-related share
Demolition, waste removal and site prep Early-stage project share
Permits and approvals where required Variable allowance
Contingency for hidden issues Protected reserve

Labour usually takes the biggest portion because bathrooms are trade-heavy rooms. A small footprint does not make them simple. The work is compressed into one area, and every stage depends on the one before it being done properly.

Where to spend and where to be careful

Spend money where failure is expensive to fix later. That means waterproofing, proper preparation, ventilation, and licensed trade work in NSW. A cheaper tile or standard vanity can still produce a good result. Failed membrane work or poorly set drainage usually means reopening the room.

Be careful with allowances for fixtures and finishes. Prime cost items often look reasonable on paper, then jump once real selections are made. The same applies to provisional sums for rectification work. If an older bathroom has damaged sheeting, rotted timbers, or unstable flooring, that work will not stay theoretical for long.

The value in a licensed builder is not the label itself. It is clear scope control, compliant work, realistic allowances, and enough experience to price the hidden parts of a wet area renovation before they become budget surprises.

How Scope and Layout Changes Affect Your Budget

A Sydney homeowner approves a bathroom quote based on a simple refresh. Then the old room is stripped out, the shower waste is in the wrong spot for the new layout, the toilet needs to shift, and the budget changes fast. That is how many bathroom overruns start.

Scope drives price more than square metres once a layout changes. A bathroom that keeps the same plumbing positions is usually far more predictable to price and build. Once you move services, you add demolition, new pipe runs, more trade hours, fresh set-out, and often extra compliance work before the room can be waterproofed and closed up again.

Broad per-square-metre guides can help with early planning, but they miss the part that catches people out. Industry pricing summaries such as this bathroom renovation cost guide only become useful when you separate a cosmetic update from a true reconfiguration.

Why layout changes cost more than they look

On plan, moving a vanity half a metre can look minor. On site, that can mean opening floors or walls, altering water and waste points, adjusting electrical rough-in, and resetting tile falls so the finished room still drains properly.

The expensive part is rarely the fixture itself.

It is the chain reaction behind it. A relocated shower can affect screed levels, floor waste position, waterproofing details, tile cuts, and shower screen sizing. Moving a toilet can be even more restrictive, especially in apartments or on concrete slabs where waste locations are harder to change without major work.

Changes that usually stay within a controlled budget

These choices tend to keep risk lower if the existing room is sound:

  • Replacing fixtures in the same position
  • Changing the vanity without shifting waste points
  • Upgrading tapware, tiles, mirrors, and screens
  • Improving storage and finishes without altering the room layout

This type of renovation still needs proper trade work, but it avoids the biggest pricing variable. Hidden service relocation.

Changes that often push the job into a higher price tier

These decisions usually increase cost, time, and uncertainty:

  • Moving the toilet, shower, or floor waste
  • Shifting plumbing into a new wall
  • Changing door locations or room boundaries
  • Converting a laundry, powder room, or spare room into a bathroom
  • Choosing fittings first and checking service access later

I tell clients to treat layout changes as construction decisions, not styling decisions. The drawing may look cleaner. The build becomes more complex.

The overlooked costs behind a new layout

A common issue arises when quotes no longer align with expectations. Homeowners often allow for new fixtures and tiles, but the extra spend usually sits in the background work:

  • Plumbing rework and drainage changes
  • Electrical relocation for lighting, power, and exhausts
  • New wall framing or patching after demolition
  • Waterproofing to suit the revised set-out
  • Floor levelling or screed correction to maintain falls
  • Certification, strata approvals, or other professional input where required

Those items are why two bathrooms with the same tapware and tile selection can land at very different totals.

If you are still testing ideas, a bathroom renovation cost calculator for Sydney projects can help you compare a keep-the-layout brief against a redesign brief before you ask for formal quotes.

How to quote a layout change properly

The best way to control cost is to lock the brief before pricing. If the layout is undecided, the quote can only be provisional in the areas most likely to move. That is where surprises start.

A realistic quote for a reconfigured bathroom should show what is included for demolition, service relocation, substrate repairs, waterproofing, and any approvals or consultant input that may be needed. If those items are vague, the total is not fixed in any practical sense.

The layout on the plan is cheap. Making it work on site is where the actual budget gets decided.

Example Sydney Bathroom Renovation Budgets for 2026

Budgets make more sense when tied to real decision-making. These examples show how different homeowners approach the same question and why the final number changes with scope.

A modern, bright bathroom with white cabinets, marble countertops, and a glass-enclosed shower with tiled walls.

If you want to test your own project against a broad planning range, a bathroom renovation cost calculator can help you frame the conversation before getting quotes.

Ensuite update with a controlled brief

A couple wants their tired ensuite to feel cleaner and more current. They don't need a dramatic redesign. They want sharper storage, better finishes, and a room that's easier to keep clean.

They keep the existing plumbing positions, choose standard-size fixtures, and avoid custom joinery. The result sits in the budget to lower mid-range tier, because the room gets a meaningful visual lift without the extra cost of layout rework.

This is the kind of job where discipline matters more than chasing trends. The room can look fresh and resolved if the selections are coherent.

Family bathroom overhaul with practical priorities

A family in an older house wants a full rebuild of the main bathroom. Their priorities are durability, storage, easy cleaning and a layout that works for daily use. They aren't trying to create a luxury showpiece, but they do want a proper renovation.

This type of project usually lands in the standard renovation range, especially when the room is stripped out fully and rebuilt with new finishes, updated plumbing connections, compliant waterproofing and a more practical fixture set. The value comes from balancing good daily function with finish choices that won't date too quickly.

Premium retreat with designer intent

Another homeowner is creating a high-end ensuite with a more refined, hotel-style feel. They want a stronger visual statement, custom detailing, and a reworked layout that feels more generous.

That brief pushes the project into the premium tier. Not because every product is extravagant, but because the room asks for more: layout adjustments, more exacting installation, and tighter coordination between trades to achieve the finish cleanly.

Premium bathrooms are built twice on paper. First in the design decisions, then on site in the technical details.

Often, designer bathrooms separate from standard projects in their specific demands. The room may still include the same core elements, but the labour, detailing and sequencing are less forgiving.

Managing Your Timeline and Renovation Budget

A bathroom budget doesn't fall apart in one dramatic moment. It usually drifts through rushed decisions, unclear inclusions, delayed selections, and hidden conditions discovered too late.

For a complete bathroom overhaul in Sydney, a practical budget often sits around AUD $17,000 to $30,000, and experienced industry guidance recommends a 10 to 20 per cent contingency buffer because demolition regularly exposes waterproofing failure, ageing pipework and other issues that must be fixed before the room can be rebuilt to standard, as noted in this Sydney bathroom renovation budgeting guide.

A person writing on a project Gantt chart timeline with a pen on a construction site office desk.

What helps a project stay on track

The best projects are organised before demolition starts. That means selections are mostly settled, the scope is documented properly, and the builder isn't waiting on basic product decisions while trades are booked.

A realistic process usually includes:

  • Clear early selections: Choose tiles, tapware, vanity style and fittings before work begins where possible.
  • Defined scope: Confirm what stays, what goes, and whether any layout movement is worth the added cost.
  • Allowance for unknowns: Older bathrooms often hide issues that no one can fully confirm until strip-out.
  • Trade sequencing: Waterproofing, plumbing, electrical and tiling each rely on the previous step being done correctly.

Where homeowners can save without cutting quality

Saving money doesn't mean stripping the project back to the point of regret. It means protecting the parts that matter and simplifying the parts that don't.

Useful ways to reduce pressure on the budget:

  • Keep the layout where possible: This is still the cleanest way to avoid major cost escalation.
  • Use standard-size products: Custom work adds labour and often waiting time.
  • Prioritise function over novelty: The rooms that age best usually have practical storage, good lighting and durable finishes.
  • Spend on the things you touch daily: Good tapware, well-designed storage and proper shower function matter more than one-off statement pieces.

For homeowners trying to control spend from the beginning, this guide on how to renovate a bathroom on a budget gives useful planning direction.

The budget line that should never disappear

Contingency often gets treated like optional padding. It isn't. In older properties, it's the part of the budget that keeps the project from stalling once concealed problems appear.

If the room opens up cleanly, great. If it doesn't, that reserve allows the work to be corrected properly instead of patched around.

Frequently Asked Questions about Bathroom Renovations

Do I need council approval for a bathroom renovation in Sydney

Sometimes, but not always. Simple like-for-like work is usually more straightforward than projects involving major changes. Approval needs depend on the scope, the property type, and whether the renovation affects building elements beyond the bathroom fit-out. If you're in an apartment, there may also be strata requirements to deal with before work starts.

Why is waterproofing such a big deal

Because bathrooms fail from behind the tiles, not from what you can see on handover day. Proper waterproofing protects the structure, supports compliance, and reduces the chance of expensive remedial work later. It's one of the areas where trying to save money usually costs more in the long run.

Should I manage individual trades myself

Some homeowners try it, but bathrooms are tightly sequenced jobs. The challenge isn't just booking trades. It's coordinating demolition, plumbing, electrical, waterproofing, tiling and fit-off in the right order while keeping responsibility clear if something goes wrong.

What makes quotes hard to compare

Inclusions. One quote may include demolition, waterproofing, allowances for compliance items and clear trade scope. Another may look cheaper because those items are left vague or excluded. The only useful comparison is line by line.

A successful bathroom renovation starts with realistic expectations, not optimistic pricing. If you want a quote that reflects the actual work, not just the pretty finishes, talk to SitePro Bathrooms for a personalized consultation and a clearer path from idea to build.