• siteprobathrooms

LED Backlit Bathroom Mirrors: The Complete Guide to 2026

You're standing at the vanity before work, the overhead light is flattening your face, the mirror is fogging at the edges, and the whole room still feels half finished. That's the moment most homeowners realise a bathroom doesn't need more decoration, it needs better light, cleaner wiring, and fixtures that suit daily use.

LED backlit bathroom mirrors solve that problem better than old vanity lighting ever did. They bring a softer perimeter glow, reduce visual clutter, and fit the direction most modern bathrooms are already heading in, but the value is deeper than looks. In bathroom renovations, especially across Victoria, the right mirror has to be specified with compliance, servicing access, and long-term maintenance in mind, or it becomes a frustrating hidden fault instead of a durable upgrade.

A woman stands in a dimly lit bathroom looking at her reflection with tired, stressed expressions.

If you're planning new bathroom ideas for a compact ensuite, a family bathroom, or a polished powder room, start with the mirror rather than treating it as an afterthought. The right choice changes the entire room, and it has to work with the rest of the lighting plan, not against it. For broader styling context, see bathroom decor ideas for Australian homes.

Why LED Backlit Bathroom Mirrors Are Transforming Modern Bathrooms

A bathroom with one weak ceiling fitting and a plain mirror feels dated fast. That is why so many renovators are moving toward LED backlit bathroom mirrors, especially when they want a cleaner finish without hanging extra fittings on the wall. The appeal is straightforward. A continuous halo of light makes the room feel calmer, more finished, and less clinical.

The product also makes sense from a practical renovation standpoint. LED lighting uses far less electricity than incandescent lighting for the same brightness, and many LED mirror products are rated for long service life, which can suit homes that need fixtures designed for daily use source. That kind of lifespan matters in designer bathrooms and family homes because no one wants a mirror that turns into a maintenance problem after the renovation dust settles.

What the glow does

Backlighting is not just decorative. It softens the hard edges of the vanity zone, lifts the wall visually, and creates a more expensive-looking finish without adding visual clutter. In a compact bathroom, that can make the room feel less boxed in.

Practical rule: choose backlighting for atmosphere, then add separate task lighting if the room needs serious grooming light.

The category has also matured. A projected LED mirrors market value of USD 17.5 billion by 2032 shows how far this product type has moved from novelty into mainstream bathroom specification source. That matters in Australia because a mature product category usually means better size ranges, more finish options, and easier sourcing during a renovation.

The lighting plan still has to be handled properly. If the mirror is part of a broader vanity scheme, the surrounding fittings need to work with it rather than fight it. See bathroom vanity lighting guidance before you lock in the mirror, and use bathroom decor ideas for Australian homes if you want the mirror to fit the room's overall style.

How Backlit Mirrors Differ from Front-Lit Alternatives

The biggest mistake homeowners make is buying a mirror for appearance and only later finding out it does not suit the room. A backlit LED mirror places LEDs behind the mirror glass so the light washes onto the wall and creates a halo effect. A front-lit mirror places LEDs on the face or edge so the light falls forward onto the user for grooming tasks source. That difference decides how the bathroom feels and how well it works.

Backlit mirrors are built for atmosphere first. Front-lit mirrors are built for clear face-level light first. Backlighting works like architectural cove lighting, while front-lighting behaves like direct task lighting aimed where you need it.

Use case decides the right mirror

In modern bathrooms, backlit mirrors work well when the goal is a calm, finished look. In designer bathrooms, they can become the focal point because the wall glow reads as deliberate rather than cluttered. For shaving, makeup, and other detail work, a front-lit mirror gives meaningful task illumination, while backlit mirrors provide minimal face-level task lighting source. The choice should follow the job the room has to do.

A mirror that looks elegant but leaves your face in shadow is the wrong choice for daily grooming.

For many Victorian homes, the practical answer is layered light. Use the mirror for ambience, then make sure the room has enough separate light for the tasks that matter. If the vanity wall is being redesigned at the same time, bathroom vanity lighting guidance is the right companion reference.

Key Specifications to Compare Before You Buy

The spec sheet tells you whether a mirror is worth the money. Skip the marketing language and check the details that affect comfort, safety, and maintenance.

Start with the performance basics

The most useful baseline is straightforward. LED bathroom mirrors should have IP44 protection, a demister, 2700K to 3000K colour temperature, and CRI 90 or above source. If you're fitting out a master ensuite, extras like a motion sensor and adjustable colour temperature are sensible upgrades, not gimmicks.

Here's a clean comparison framework.

Specification Recommended Threshold Why It Matters Best Suited For
IP rating IP44 Better moisture protection in bathroom conditions Main bathrooms and ensuites
Demister Built in Keeps the mirror usable after hot showers Steamy family bathrooms
Colour temperature 2700K to 3000K Warmer, more flattering light for daily use Renovations prioritising comfort
CRI 90 or above More accurate skin-tone rendering Grooming and makeup areas
Motion sensor Optional upgrade Convenient hands-free operation Master ensuites
Adjustable colour temperature Optional upgrade Lets you shift the mood and function Designer bathrooms

Read the spec in plain English

CRI tells you how truthfully colours appear under the mirror light. If it's too low, skin tones look dull and makeup matching gets harder. Colour temperature controls how warm or cool the light feels, and the range above suits a bathroom that needs both comfort and clarity.

The demister is one of the most underrated features because it stops the post-shower fog routine. Don't treat it as a luxury add-on if the bathroom is used every morning. It's a usability feature.

If a mirror is going into a wet zone, treat moisture protection as a design requirement, not an upgrade.

For buyers comparing mirrors online, a tidy checklist usually works better than trying to decode photos. Ask yourself three things. Is it safe for the room? Will it help with grooming? Will it still be useful in five years?

Sizing and Placement for Different Bathroom Types

The right mirror size depends on the vanity, the wall space, and how the room gets used. A mirror that's too narrow looks awkward. One that's too wide can crowd taps, splashbacks, or wall lights.

Compact ensuites need visual lightness

In a small ensuite, the mirror should feel integrated, not dominant. Leave a little breathing room on each side of the vanity so the composition doesn't feel squeezed, and check that the mirror doesn't clash with wall-mounted tapware or a medicine cabinet. A larger mirror can work well here because it reflects more light and makes the room feel less enclosed.

If the ensuite has limited daylight, don't rely on the mirror alone for grooming. Backlighting helps with ambience, but the room still needs enough light for shaving or makeup. That's where layout matters more than product style.

Family bathrooms need clear hierarchy

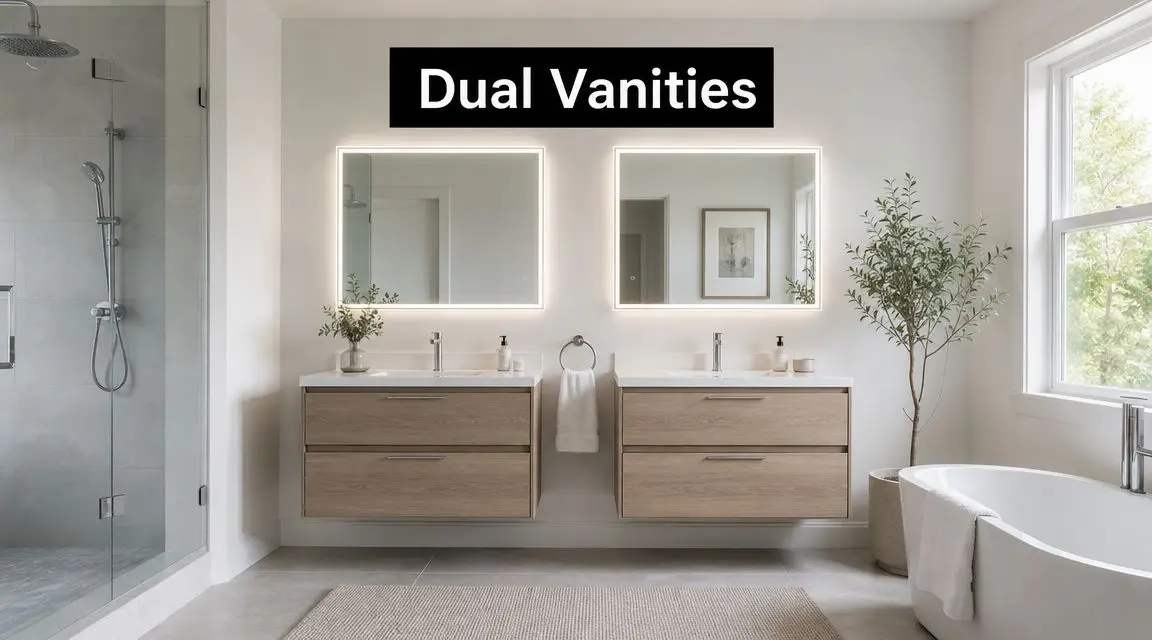
A family bathroom has different demands because multiple people use it in different ways. If you have a double vanity, two separate mirrors usually feel cleaner and more practical than one oversized sheet of glass, especially when children and adults share the space. It also gives each basin its own visual zone.

Powder rooms can go bolder

Powder rooms are where you can make a statement. Oversized mirrors, round shapes, or more sculptural forms work well because the room doesn't need to do the same heavy-duty grooming work as a main bathroom. That gives you more freedom to focus on impact.

For sizing, the rule is to proportion the mirror to the vanity rather than the wall. If the vanity is small, keep the mirror disciplined. If the room is spacious, the mirror can be more dramatic without feeling out of place.

Good placement beats expensive glass. A well-positioned mirror makes an average bathroom feel planned, while a poorly placed one makes even a costly renovation feel off.

If you're combining the mirror with a larger repaint, tile update, or cabinetry change, the overall room layout should be decided before ordering. In renovation work, that order saves money and avoids rework.

Electrical Compliance and Installation Realities in Australia

A backlit mirror looks simple once it is on the wall, but the electrical work behind it is where renovation mistakes show up. In Australia, an illuminated mirror is not just wall décor. Australian electrical safety for LED bathroom mirrors is governed by AS/NZS 3000 wiring rules and state electrical licensing requirements, so any mirror with integral lighting should be installed as a fixed electrical appliance by a licensed electrician rather than treated like a DIY wall accessory source. That is the standard you should insist on.

Bathroom zones change what is allowed and what is sensible, because shock risk rises in damp areas. IP ratings and RCD protection belong in the initial electrical plan, not as afterthoughts. If the mirror is going into a bathroom renovation, the wiring layout needs to be decided before tiles go up, not after. this bathroom downlight guide covers the same sort of rough-in planning that keeps bathroom lighting safe and practical.

Driver access is the hidden failure point

The part most buyers never think about is the driver and junction box. If you do not leave room behind the mirror, servicing becomes a mess later. A hidden driver that cannot be reached can turn a simple fault into a destructive repair.

That is why rough-in planning matters. Leave clearance for the electrical components, allow access where the electrician needs it, and do not assume the mirror will sit flush against any wall without consequences. In compact Victorian bathrooms, wall cavities are often tight, which makes poor planning more expensive than the mirror itself.

Builder registration also matters in Victoria

There is a separate compliance issue for the wider job around the mirror. Under the Victorian Building Regulations, a registered domestic builder with limited registration can carry out domestic building work up to a maximum value of $10,000, while a registered domestic builder with unlimited registration can carry out any domestic building work. That distinction matters once the project stops being a mirror swap and becomes a broader renovation.

If you are coordinating tiling, lighting, waterproofing, and cabinetry together, you need the right builder category and the right electrician working from the same plan. That is how you avoid holes being cut twice, waterproofing being disturbed, or the mirror ending up in the wrong place.

Plan the electrical access first, then order the mirror. That approach keeps maintenance straightforward and stops a cosmetic feature from becoming a costly fault later.

If you want the mirror supplied as part of a broader bathroom renovation, request a quote from SitePro Bathrooms before the rough-in is locked in.

Energy Efficiency and Long-Term Renovation Value

The value of an LED mirror in a renovation is not the purchase price, it is the total cost of ownership over a decade. A well-chosen mirror reduces ongoing electricity use, avoids frequent globe changes, and cuts down on the small maintenance jobs that become annoying in a finished bathroom. For homeowners renovating Victorian properties, that matters because every future access issue costs more once the wall is tiled and painted.

LED lighting uses far less electricity than older incandescent fittings, and the mirror itself can act as a durable fixed feature rather than a short-life decorative item. Independent guidance from Energy.gov explains why LED technology is efficient and long lasting, which is the reason these mirrors make financial sense in a renovation. You pay for a cleaner fit-out once, then avoid the repeat spending that comes with older lighting setups.

Don't oversell the mirror as the only light source

A backlit mirror improves appearance and task lighting, but it should not carry the bathroom on its own. In a dark or windowless room, relying on the mirror alone usually leaves the space feeling uneven, especially around the shower, vanity edges, and general circulation area. The correct approach is to treat it as one part of the lighting plan, not the entire plan.

That is where renovation value becomes practical. A mirror that looks sharp but leaves the room awkward to use is a poor upgrade, especially in a rental or resale context. Buyers and tenants respond to bathrooms that feel complete, easy to use, and properly lit, not just visually clever.

Long-term value also depends on what happens after the project is finished. If the driver is buried where nobody can reach it, or the fitting is installed in a way that makes future servicing difficult, the mirror becomes a maintenance problem instead of an asset. The right installation keeps access sensible, protects the wall finish, and gives you a fixture that still makes sense years after the renovation dust has gone.

How SitePro Bathrooms Delivers Your Complete Bathroom Transformation

The best mirror decision usually happens inside a full renovation plan, not as a standalone purchase. SitePro Bathrooms handles that kind of coordinated work in Highett and across Victoria, from concept development and 3D design through construction and finishing, so the mirror, lighting, cabinetry, and waterproofing are all resolved together. That approach suits homeowners who want their new bathroom ideas turned into a finished room without juggling trades and suppliers.

If you're planning bathroom renovations, the practical path is clear. Work with a team that can align the mirror choice with the wiring plan, confirm the placement before tiling, and keep the whole project compliant from start to finish. SitePro Bathrooms is one option for that kind of coordinated renovation, particularly where the project needs careful design, builder oversight, and a clean handover.


If you're ready to renovate a Victorian bathroom properly, start with a design consultation that treats the mirror, lighting, and electrical layout as one job. Review completed projects, check client feedback, and request a tailored quote so your bathroom upgrade is planned around real compliance, not guesswork.

  • siteprobathrooms

Scandinavian Bathroom Design: A Highett Homeowner’s Guide

You're probably standing in a bathroom that technically works, but never feels good to use. The vanity is bulky, the storage spills onto the bench, the lighting is flat, and the whole room feels smaller at 7 am than it did the night before. That's a common starting point in Highett homes, especially where an older layout is still doing all the heavy lifting.

A strong Scandinavian bathroom design solves that problem by stripping the room back to what matters. Better light. Cleaner lines. Smarter storage. Materials that feel calm rather than busy. It suits bathroom renovations in Victoria because it isn't trend-driven in the throwaway sense. It's practical, restrained, and adaptable to compact ensuites, family bathrooms, and higher-end designer bathrooms alike.

From Cluttered to Calm Your Bathroom Sanctuary

A lot of clients start in the same place. They've lived with a bathroom that feels cramped, dim, and harder to clean than it should be. The bench fills up with daily products, the vanity feels too heavy for the room, and the finishes date the whole house even after other areas have been updated.

The appeal of Scandinavian bathroom design is that it changes the feeling of the room first. A bathroom can still be modest in size and feel calm if the layout is clear, the colours are light, and every fitting has a reason to be there. That's why the style works so well in Victorian homes. It doesn't ask for excess. It asks for discipline.

In practical terms, that usually means removing visual weight, opening floor area, and choosing materials that look honest rather than decorative. The result isn't cold if it's done properly. It feels settled.

A calm bathroom isn't created by adding luxury items. It comes from taking away the things that interrupt the room.

That shift is why Scandinavian-inspired spaces remain one of the strongest new bathroom ideas for homeowners who want modern bathrooms that still feel liveable every day.

The Philosophy of Scandinavian Bathroom Design

Scandinavian bathroom design is often reduced to white tiles and pale timber. That misses the point. The style lasts because it's built on a simple idea. The room should support daily life without noise, clutter, or awkwardness.

Two ideas sit behind that. Hygge is about comfort and ease. Lagom is about having just enough. In a bathroom, that means the room should feel warm and settled, but never overloaded. It should be useful without becoming harshly utilitarian.

Light first, decoration second

In Australia, Scandinavian bathroom design is strongly tied to light. Australian bathroom design guidance on Scandinavian style describes it as a look built around whites and soft greys chosen to increase openness and brightness, with large windows and skylights used to pull the outdoors in and keep the room feeling fresh and serene.

That matters in Victorian homes because many bathrooms weren't originally designed as generous spaces. Some are narrow. Some rely on limited natural light. Some sit in the middle of the floor plan and need every reflective surface to work harder. A Scandinavian approach responds well to those constraints because it uses brightness as part of the design, not as an afterthought.

For homeowners who like the pared-back end of the style, there's a close relationship with minimalist bathroom design principles. The difference is that Scandinavian rooms usually soften minimalism with timber, texture, and a more lived-in sense of warmth.

What the style gets right

A proper Scandinavian bathroom should do these things well:

  • Keep the palette restrained so the room feels larger and calmer.
  • Use honest materials that look like what they are, rather than imitations trying to create drama.
  • Prioritise function so movement, cleaning, and storage all improve.
  • Connect to nature through light, timber, stone, and simple texture.

What doesn't work

Some rooms miss the mark because they copy the surface look without the underlying logic. The most common mistakes are easy to spot:

  • Dark feature walls that absorb light and shrink the room.
  • Chunky vanities that sit heavily on the floor and block visual flow.
  • Too many finishes competing for attention.
  • Decorative clutter replacing proper storage.

The best designer bathrooms in this style don't feel styled for a photo. They feel resolved. Every fitting supports the room, and nothing fights for attention.

Core Elements and Essential Materials

The materials decide whether a Scandinavian bathroom feels refined or forced. Consequently, many bathroom renovations either settle into something timeless or drift into a generic white bathroom with a few timber accents.

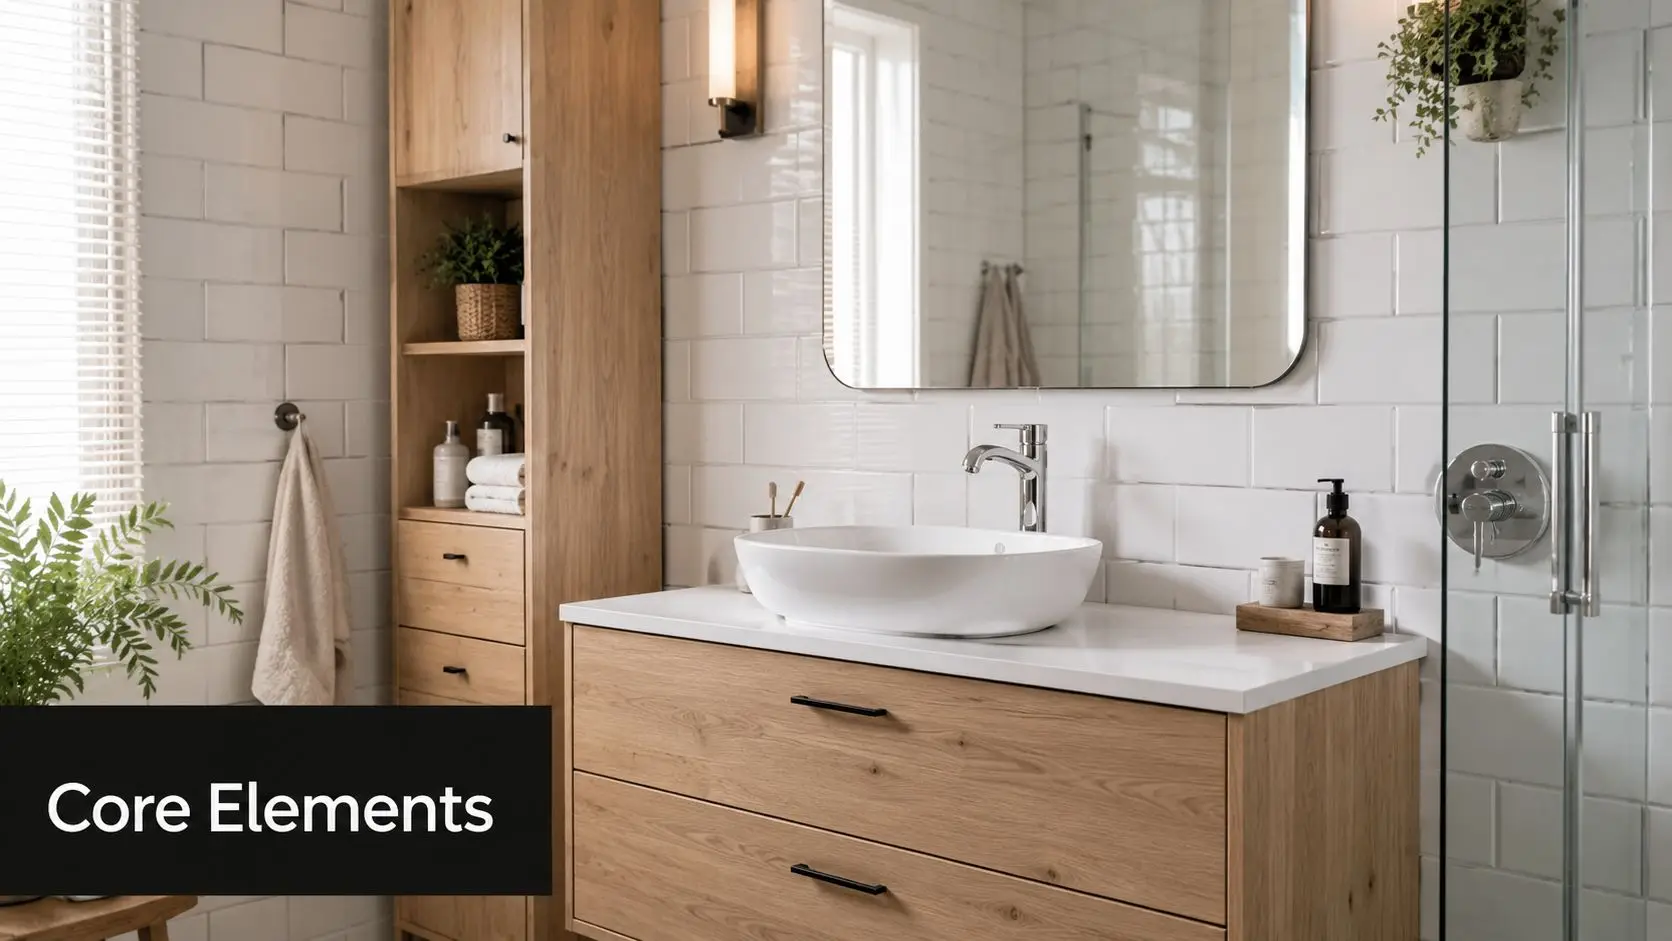
A modern Scandinavian bathroom featuring a wooden vanity, vessel sink, white subway tiles, and natural decor elements.

The palette has to carry the room

The base is usually crisp white, warm white, soft grey, or a muted stone tone. Those colours give the room its openness. They also let texture do the work. In a Scandinavian scheme, texture matters more than contrast. Matte tile, pale timber grain, brushed metal, and woven accessories create depth without making the room feel busy.

One useful way to assess tile direction is to focus on consistency rather than novelty. If you're weighing tile formats and finishes, this guide on how to choose bathroom tiles helps sort out what will age well and what may date quickly.

Timber should lighten the room, not burden it

In Australian bathroom renovations, guidance on Scandinavian-inspired bathroom materials notes that floating vanities in pale oak or blonde timber are a popular choice because they make the space feel more open and support the uncluttered flow the style depends on. The same source points to light woods such as birch and ash wood counters as part of that natural material language.

That doesn't mean every timber look is right. In Highett homes, very yellow timber can feel dated, and very rustic timber can pull the room away from the clean Nordic line. Pale oak tones usually sit best because they warm the room without taking over.

Practical rule: If the vanity is the first thing you notice when you enter, it's probably too heavy for a Scandinavian scheme.

Fixtures should stay simple

The fittings should read as clean and quiet. That usually means:

  • Tapware with straightforward geometry rather than ornate profiles.
  • Wall-hung pieces where possible to keep the floor reading open.
  • Simple mirrors that enlarge the room without introducing visual clutter.
  • Stone or ceramic surfaces that feel durable and easy to maintain.

There's also a practical material trade-off in Australia. Some Nordic-inspired timbers need more protection in our conditions. Australian guidance on Scandinavian bathroom ideas from IKEA notes that over 60% of Australian bathroom timber fittings require specialised marine-grade sealing or alternative moisture-resistant materials to maintain the look in Victoria's climate. That's one reason good designer bathrooms balance natural finishes with durability rather than chasing a pure showroom version of the style.

A Scandinavian bathroom should feel light, but it still has to survive daily use.

Layout Ideas for Small and Large Bathrooms

Layout is where Scandinavian bathroom design either becomes convincing or falls apart. The style looks effortless, but it depends on careful planning. In Highett, that matters because room sizes vary wildly. One home has a tight ensuite carved out of an existing plan, while the next has enough space for a full family layout.

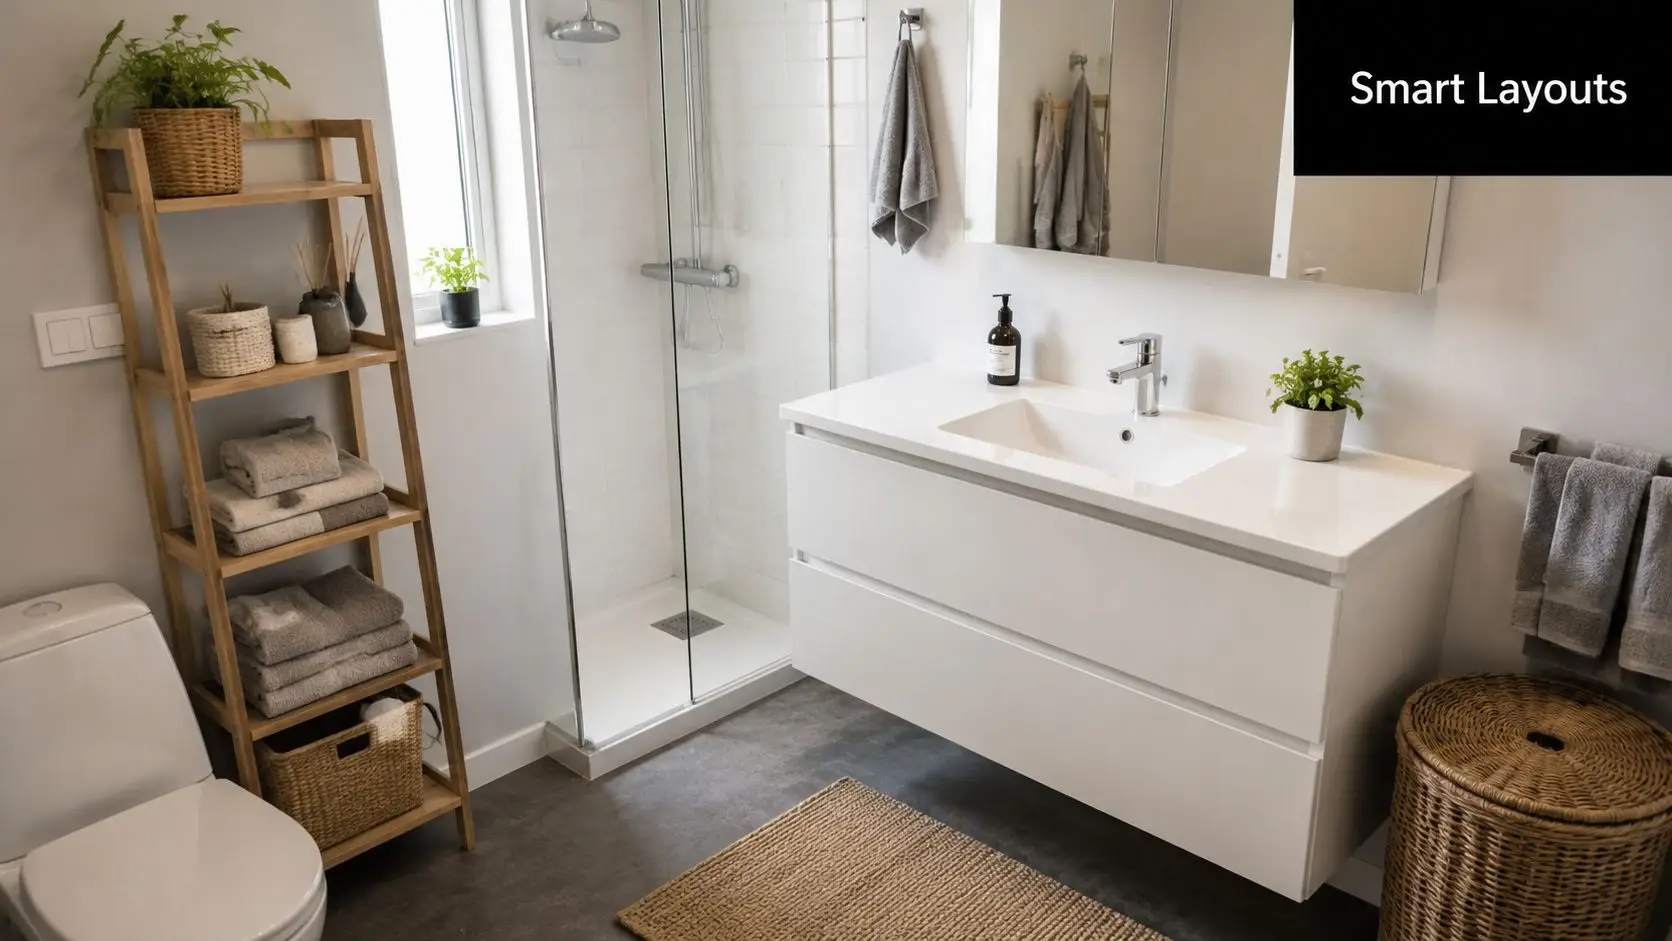
A modern Scandinavian bathroom featuring a white vanity, glass shower, wooden shelving unit, and natural woven accents.

Small bathrooms need visual discipline

In a compact room, the brief is simple. Keep the floor visible, reduce interruptions, and avoid anything that chops the space into pieces.

The strongest new bathroom ideas for smaller rooms usually include:

  • Wall-hung vanities so more floor area stays visible.
  • Mirrors sized to work hard rather than acting as decoration only.
  • Minimal framing around showers to preserve open sightlines.
  • Built-in storage so the bench stays clear.

For the walk-in shower look that many people associate with Scandinavian bathrooms, dimensions matter. Guidance on small bathroom dimensions for hobless showers states that a minimum shower footprint of 1200 x 900 mm is required to achieve the Scandinavian hobless aesthetic properly. That footprint allows for a frameless glass screen and proper circulation while keeping the tile plane visually uninterrupted.

If the room can't comfortably give up that area, forcing the issue often backfires. A shower that's too tight loses the airy quality the style relies on.

Larger bathrooms need restraint

A bigger room gives you more options, but it also creates more chances to over-design. Scandinavian layout planning in a larger bathroom works best when the room is divided into quiet zones rather than packed with features.

A practical arrangement often follows this order:

Area Best approach
Vanity zone Keep the joinery long and simple, with clean wall space around it
Shower zone Use clear glass and continuous wall finishes to avoid visual breaks
Bath zone Give the tub breathing room instead of crowding it with ledges and décor

Comparing what works and what doesn't

A small room benefits from compression and clarity. A larger room benefits from editing.

In a small bathroom, every extra object makes the room feel tighter. In a large bathroom, every unnecessary feature makes the room feel less resolved.

For both sizes, the same rule applies. Let circulation stay easy. If you need to twist past a vanity corner, step around a freestanding item, or squeeze into a shower opening, the layout isn't doing its job. The best modern bathrooms feel obvious to use because every element sits where it should.

Illuminating a Scandinavian Bathroom

Lighting carries more responsibility in this style than many homeowners expect. If the room has the right palette but poor lighting, it won't read as Scandinavian. It will just look flat. Good lighting gives the bathroom softness, function, and depth at different times of day.

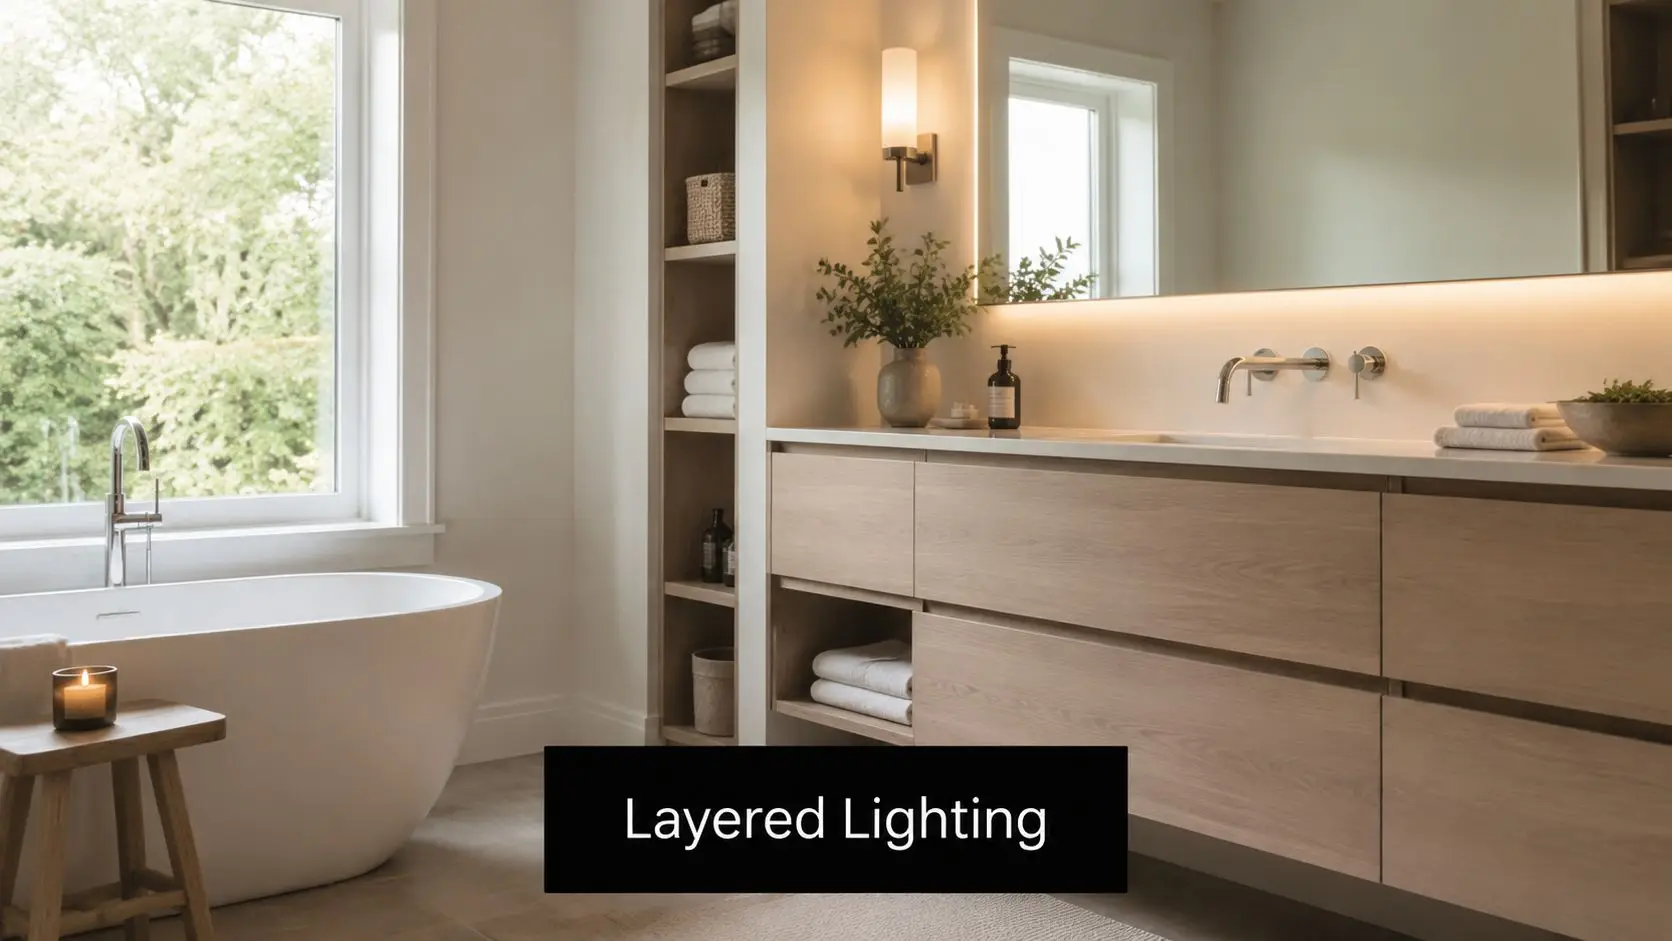
A minimalist Scandinavian bathroom featuring a freestanding tub, natural wood vanity, and warm layered lighting.

Layer the light properly

One ceiling light in the middle of the room rarely does enough. Scandinavian bathrooms work better when lighting is layered with purpose.

A practical setup usually includes:

  • Ambient light for overall illumination.
  • Task lighting at the mirror for shaving, skincare, and makeup.
  • Accent lighting to add warmth around niches, joinery, or the bath area.

For homeowners sorting through fitting placement and practical ceiling options, this article on downlights in a bathroom is a useful reference point.

Let reflection do some of the work

In Victorian conditions, natural light can be inconsistent through the year. A technical discussion of Nordic bathroom lighting choices points to crisp white tiles with reflectance value greater than 85% paired with light oak or cream-toned fixtures as a way to maximise luminous reflectance. It also notes that dark blinds or heavy window coverings run against the principles of the style.

That has a very practical effect. Surfaces bounce available light around the room, and the bathroom stays brighter without relying on a harder, colder artificial setup.

Storage has to disappear into the design

A Scandinavian bathroom can't stay calm if daily items are permanently on display. The room needs places for everything people use.

Good storage usually comes from a combination of:

  • Vanity drawers with internal organisers
  • Mirror cabinets that don't look bulky
  • Recessed niches in the shower
  • Shelving used sparingly for items worth seeing

The common mistake is assuming open shelves will solve storage. They don't. They create styling pressure and visual clutter unless the household is unusually disciplined. Closed storage does more for the room, and it's easier to keep clean.

Budgeting Your Bathroom Renovation in Victoria

A Scandinavian bathroom often looks restrained, but the build rarely is. In Highett and across Victoria, the budget is shaped less by the minimalist look and more by what sits behind it: substrate repairs, waterproofing, ventilation, electrical work, plumbing access, and joinery sized to the room.

That matters even more in older Victorian homes. Once walls or floors are opened, it is common to find uneven surfaces, tired plumbing, or framing that needs correction before the new finish can go in. A simple-looking room can still be a detailed renovation.

For bathroom renovations in Australia, Canstar's summary of HIA renovation cost data states the average cost is $26,000 as of 2023, with a typical range from $8,000 for basic projects to over $35,000 for high-end or complex renovations. In practice, Scandinavian bathrooms often sit in the middle or upper part of that range when clients want custom joinery, better lighting, cleaner tile set-out, and durable natural finishes that suit the style.

Where the money usually goes

Labour usually takes a large share because clean design needs precise execution. Straight tile lines, neat junctions, flush transitions, recessed storage, and carefully placed lighting all take time on site. If the plan also includes moving plumbing or correcting an out-of-level floor, costs rise quickly.

If you're comparing proposals from a team operating as registered builders unlimited or from specialised renovation contractors, read the inclusions line by line. A lower quote can still cost more later if it carries light allowances, skips surface preparation, or leaves out items like demolition, disposal, waterproof certification, or electrical upgrades.

A practical budget usually includes these categories:

Expense Category Estimated Cost Percentage
Labour 40% to 50%
Fixtures, finishes and fittings Varies by project
Permit fees Small but necessary project cost
Contingency 10% to 20%

The contingency matters in Victorian homes. On a newer build, it covers minor adjustments. In an older home, it often covers the kind of work no one can confirm until demolition starts.

Where to save and where not to

Good savings keep the room calm and durable. Bad savings show up in six months.

Save carefully in these areas:

  • Layout retention: Keeping the toilet, shower, and vanity close to existing plumbing points usually reduces labour and risk.
  • Tile format: Standard tile sizes are often cheaper to buy, faster to lay, and easier to match later if repairs are needed.
  • Feature count: One well-resolved focal point, such as a timber vanity or quality wall light, usually does more than several expensive statements competing in a small room.

Spend carefully in these areas:

  • Waterproofing and substrate preparation: This work protects the room from failure and is expensive to rectify later.
  • Ventilation: Victorian winters and cooler coastal conditions around Highett make moisture control a practical issue, not a styling extra.
  • Tapware, runners, hinges, and shower hardware: Daily-use components need to hold up under constant use.
  • Joinery finish and construction: Scandinavian design relies on quiet detail. Poorly built cabinetry stands out immediately because there is nowhere for it to hide.

A Scandinavian bathroom does not cost more because it has less in it. It costs more when every visible line needs to be clean, every material change needs to be deliberate, and the hidden work has been done properly.

Sustainable choices can still make sense on budget, but they need to be selected with care. Water-efficient fixtures, durable porcelain in place of higher-maintenance natural stone, and locally available finishes often suit the Scandinavian approach while keeping the project grounded in Victorian building realities. The aim is not to copy a Nordic showroom. The aim is to build a bathroom that feels calm, wears well, and makes financial sense in the home you have.

A Highett Homeowner's Renovation Checklist

A Scandinavian bathroom comes together best when the renovation process is organised from the start. In Highett, that means balancing the look you want with the practical limits of the home you already have.

Screenshot from https://siteprobathrooms.com.au

Start with the non-negotiables

Before choosing tapware or tiles, lock in the fundamentals:

  1. Define how the room needs to work. A family bathroom needs different storage and circulation than an ensuite.
  2. Set the budget range early. That keeps layout and finish decisions realistic.
  3. Identify what must stay and what can move. Plumbing relocation, structural constraints, and window positions shape the project more than mood boards do.

Check the Victorian building realities

Not every Scandinavian feature transfers neatly into every Victorian home. That's especially true with curbless showers. Yahoo's discussion of Scandinavian bathroom design challenges in Australian homes notes that curbless showers can be difficult in Victoria's heritage homes, particularly where concrete slabs can't be easily lowered without structural engineering approval.

That's a serious point in Highett renovations. The look may be desirable, but the subfloor has the final say. If the structure won't allow the recess you need, the room may need an alternative shower detail that still feels clean and open.

Use a practical selection process

Avoid selecting everything at once. Work in order:

  • Layout first: Decide where the shower, vanity, toilet, and bath belong.
  • Surfaces second: Lock in the main tile and timber direction.
  • Fixtures third: Choose pieces that support the room rather than dominate it.
  • Lighting and storage last: Fine-tune the daily function once the framework is fixed.

Choose a renovation team that can see the whole room

The best results come from teams that understand both design intent and construction limits. That matters if you want one of those modern bathrooms that feels effortless when finished. It matters even more if you're dealing with an older floor, hidden services, or a room that needs reworking rather than simple replacement.

A good process should include:

  • Clear scope documentation
  • Realistic allowances
  • Thoughtful design development
  • Attention to waterproofing, ventilation, and joinery detail
  • A clean handover without unresolved finishing issues

The smoothest bathroom renovations aren't the ones without decisions. They're the ones where the right decisions are made in the right order.

If you're planning a Scandinavian bathroom design project in Highett or elsewhere in Victoria, working with a specialist can make the difference between a room that merely looks the part and one that lives well. SitePro Bathrooms provides end-to-end renovation support, from design development through construction and finishing, for homeowners who want a bathroom that's calm, durable, and built properly from day one.

  • siteprobathrooms

Start Your Simple Bathroom Renovation in 2026

You're probably looking at a bathroom that still works, but doesn't feel good to use. The tiles look tired, the vanity has seen better days, and every online gallery seems to jump straight from “cheap refresh” to full luxury rebuild with very little practical advice in between.

That middle ground is where most homeowners in Victoria start. They want a simple bathroom renovation that lifts the room, controls costs, and avoids the kind of hidden mistakes that turn a modest project into a frustrating one. The trick is knowing where a refresh is enough, where it isn't, and which parts of the job need licensed trades and proper sequencing.

A simple renovation isn't about doing the bare minimum. It's about making smart decisions on layout, waterproofing, finishes, and scope so the bathroom looks better, works better, and holds up in a wet environment.

Is a Simple Refresh Enough for Your Bathroom

A lot of bathrooms don't need a full strip-out. Some need better lighting, a new mirror, updated tapware, or a cleaner vanity line. But the common mistake is assuming cosmetic change fixes a wet-area problem.

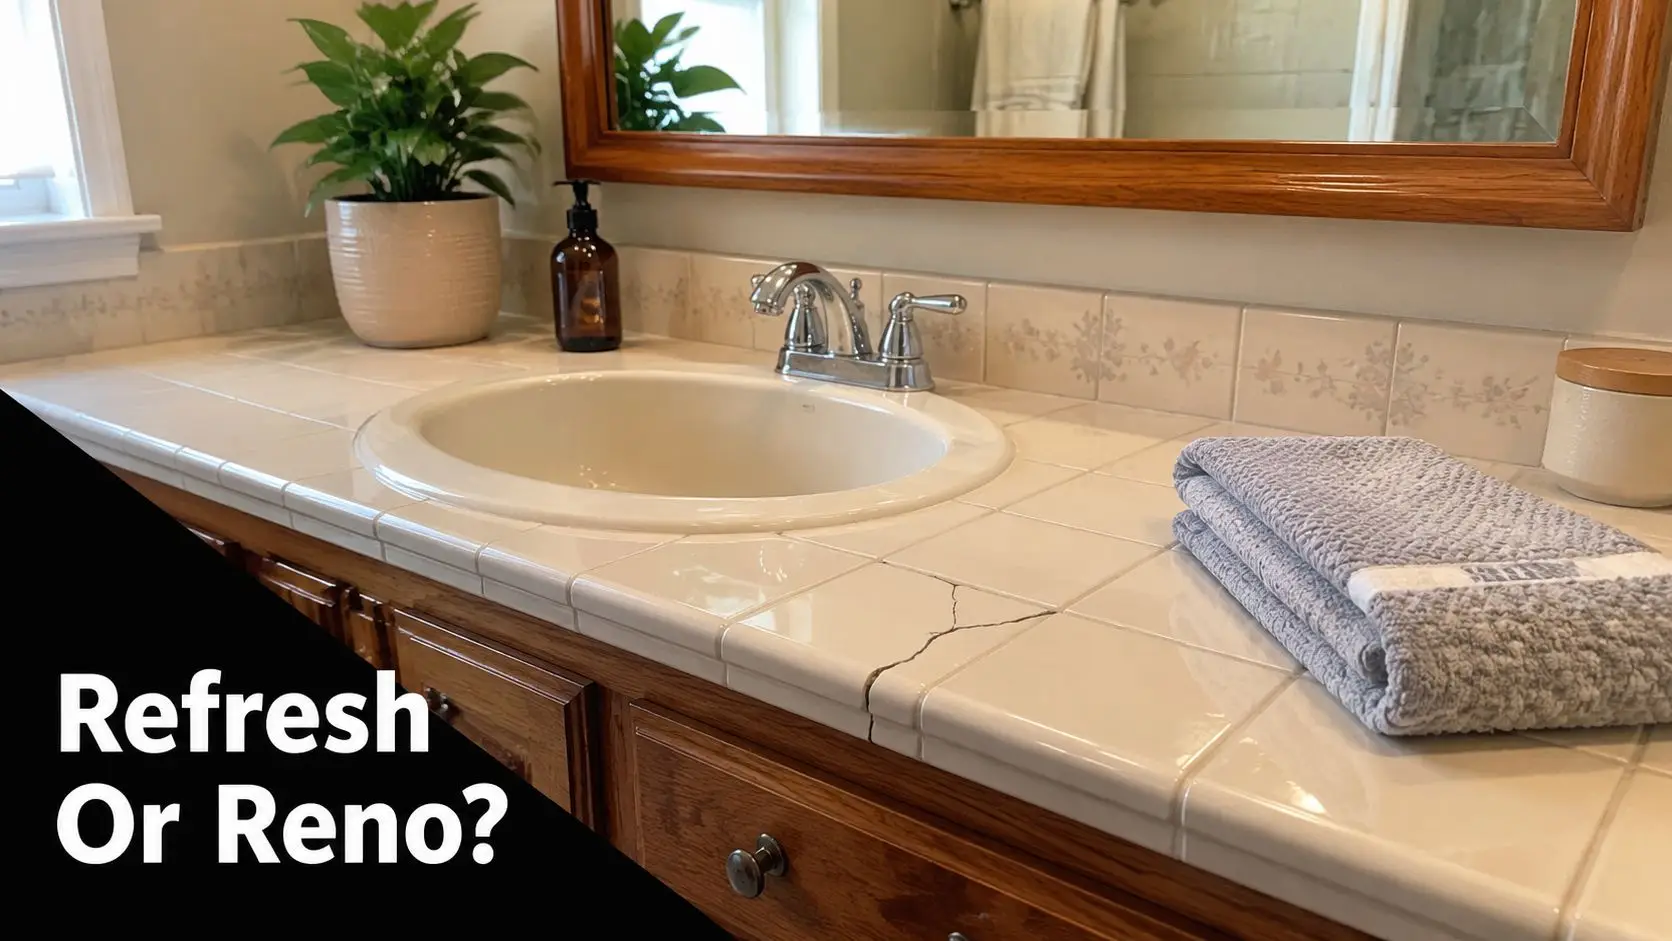
A bathroom vanity with cracked ceramic tiles around the sink questioning whether to renovate the space.

In Australian bathrooms, especially in a humid setting, the bigger issue is often behind the surface. Advice that focuses only on paint, hardware, mirrors, and lighting often skips moisture control, ventilation, and substrate condition. That matters because wet-area construction and waterproofing have to manage moisture intrusion, and a cosmetic-only makeover won't solve failed grout lines, deteriorated backing, or hidden waterproofing defects, as noted in this Australian bathroom refresh discussion.

When a refresh can work

A lighter-touch update can make sense if the room is dry, the layout functions well, and there's no sign of movement or water damage. In those cases, you might keep the footprint and focus on visible elements that improve daily use.

A refresh is usually worth considering when:

  • The layout already works: The shower, vanity and toilet are in sensible positions and there's no need to improve circulation.
  • Surfaces are tired, not failing: The room looks dated, but tiles are sound and there's no evidence of moisture getting behind them.
  • Storage is the main issue: Replacing a bulky vanity or mirror cabinet may solve the frustration without major building work.

When a simple renovation is the safer choice

If the bathroom smells damp, grout keeps cracking, silicone has failed repeatedly, or the room never seems to dry out properly, painting over the problem is false economy. A cheap update can become the expensive option when it ignores the wet-area basics.

Practical rule: If water management is in doubt, treat the job as a building issue first and a styling issue second.

That's where a proper renovation scope matters more than a cosmetic shopping list. If you're deciding between a touch-up and a more complete rebuild, this guide to a complete bathroom renovation process helps frame what's involved when the room needs more than surface changes.

Defining Your Scope and Setting a Realistic Budget

Most budget blowouts start before demolition. They start when the scope is fuzzy. Homeowners mix must-haves with nice-to-haves, assume every fitting can stay, or decide halfway through that the shower should move to the opposite wall.

For a simple bathroom renovation, scope discipline matters more than almost anything else.

Start with needs before wants

The cleanest way to plan is to separate function from finish. Ask a few direct questions before you choose colours or browse new bathroom ideas:

  • What isn't working now: Is it storage, shower access, cleaning, lighting, ventilation, or all of the above?
  • What can stay in place: If the layout is serviceable, keeping plumbing where it is usually protects your budget.
  • What level of finish suits the home: A family bathroom, investment property, and forever home don't need the same selections.

That last point gets missed often. Designer bathrooms look great in photos, but a practical renovation brief has to match the property and the way you use the room.

What a simple renovation usually costs

The numbers help anchor expectations. In Australia, a simple bathroom renovation typically costs $15,000 to $25,000, according to the 2024 AHURI report, and basic remodels in Victoria average about $18,500. The same data set notes that 68% of homeowners keep existing plumbing locations to reduce costs by up to $4,000, which is one of the most effective cost-control decisions available in a straightforward project. You can use a bathroom renovation cost calculator to test different scope choices against that range.

Another useful reality check comes from pricing trends. The Housing Industry Association 2026 Price Index reports that bathroom renovation costs in Australia have risen 34% since 2018, and simple renovations in Victoria now average $19,200 compared with $14,300 in 2018. The same report attributes much of that movement to labour and materials, while CSCA 2025 data shows skilled labour accounts for 55% of total cost in simple projects, with tile setters and plumbers in Melbourne charging $85 to $110 per hour.

Where the money usually goes

A simple renovation still has technical steps that can't be skipped. Even when the design is restrained, these areas drive cost:

Project element What affects budget most
Labour Licensed plumbing, electrical, tiling, waterproofing, and fit-off
Layout Whether plumbing stays where it is or needs to move
Finishes Tile size, fixture quality, shower screen type, vanity construction
Preparation Demolition complexity, wall condition, subfloor issues, compliance work

Keeping the plumbing layout is often the difference between a controlled renovation and an avoidable one.

A simple way to set your budget ceiling

Set your budget in three layers rather than one figure.

  • Core spend: Demolition, plumbing, electrical, waterproofing, tiling, fixtures.
  • Finish allowance: Vanity, tapware, mirror, lighting, screen, accessories.
  • Decision buffer: A reserve for issues uncovered after strip-out.

That approach keeps the conversation practical. You're not just asking what you want the room to look like. You're asking what the room needs to function properly, and which design choices improve the outcome without dragging the job into a more expensive category.

Simplified Design and New Bathroom Ideas

The best simple bathroom renovation plans don't start with a product list. They start with how the room should feel when you walk in and how easy it should be to use every day.

One common brief sounds like this: “We don't want anything flashy. We just want it to feel cleaner, more modern, and easier to live with.” That's usually the right starting point. Good design for simple bathrooms is less about adding features and more about removing friction.

Screenshot from https://siteprobathrooms.com.au

A practical design story

Take a typical older bathroom in suburban Melbourne. The room is compact. The vanity is too deep, the shower screen chops up the sightline, and the tile pattern makes the space feel busier than it needs to be.

The homeowner starts collecting inspiration for modern bathrooms and designer bathrooms, but most of what they save online isn't directly usable. The room doesn't have the ceiling height for dramatic pendant lighting, and it doesn't need a freestanding bath. What it needs is better proportion.

So the design conversation shifts. Instead of chasing features, we focus on a few moves that carry the room:

  • a floating vanity to open the floor visually
  • larger wall tiles to reduce grout lines
  • a cleaner shower screen profile
  • a restrained material palette that won't date quickly

That's how a simple project starts looking well resolved rather than budget-driven.

New bathroom ideas that usually work well

Some ideas photograph well but create maintenance headaches. Others steadily improve the room every day. These are the choices that tend to hold up:

  • Floating vanities: They make floor cleaning easier and create a lighter look in small rooms.
  • Frameless or minimal-frame shower screens: They reduce visual clutter and help the room feel wider.
  • Large-format tiles: Fewer grout joints usually means a calmer finish and less visual noise.
  • Wall-hung storage or recessed niches: Good storage matters more than extra decoration.
  • Simple colour palettes: Soft neutrals, warm whites, muted stone tones, and timber accents tend to age better than highly specific trends.

Why visualisation matters before demolition

A lot of expensive design regret comes from trying to picture everything in your head. Tile samples on a board rarely tell you how the room will read once the vanity, screen, lighting and sightlines are all in place.

That's where 3D planning earns its keep. It lets you test scale, spacing, storage and finish combinations before anything gets ripped out. SitePro Bathrooms offers design-led planning with 3D visualisation as part of the renovation process, and homeowners can also explore bathroom renovation ideas in Australia to refine their brief before locking in selections.

The smartest design change is often the one that removes a future regret before the job starts.

Keep the room cohesive

A simple bathroom renovation looks expensive when the details agree with each other. It looks patchy when every item tries to be the hero.

A good rule is to choose one feature to carry the room. It might be the vanity finish, the tile, or the shape of the mirror. Then keep the rest supportive. That balance is what gives even modest bathroom renovations a settled, intentional look.

Navigating Permits and Assembling Your Team

Many first-time renovators get uneasy concerning permits, inspections, and trade sequencing. They can picture the tiles and vanity, but these aspects feel harder to judge.

Even though a bathroom may look like a compact room, it combines plumbing, electrical work, wet-area construction, finishes, and compliance in one small footprint. That's why team quality matters so much.

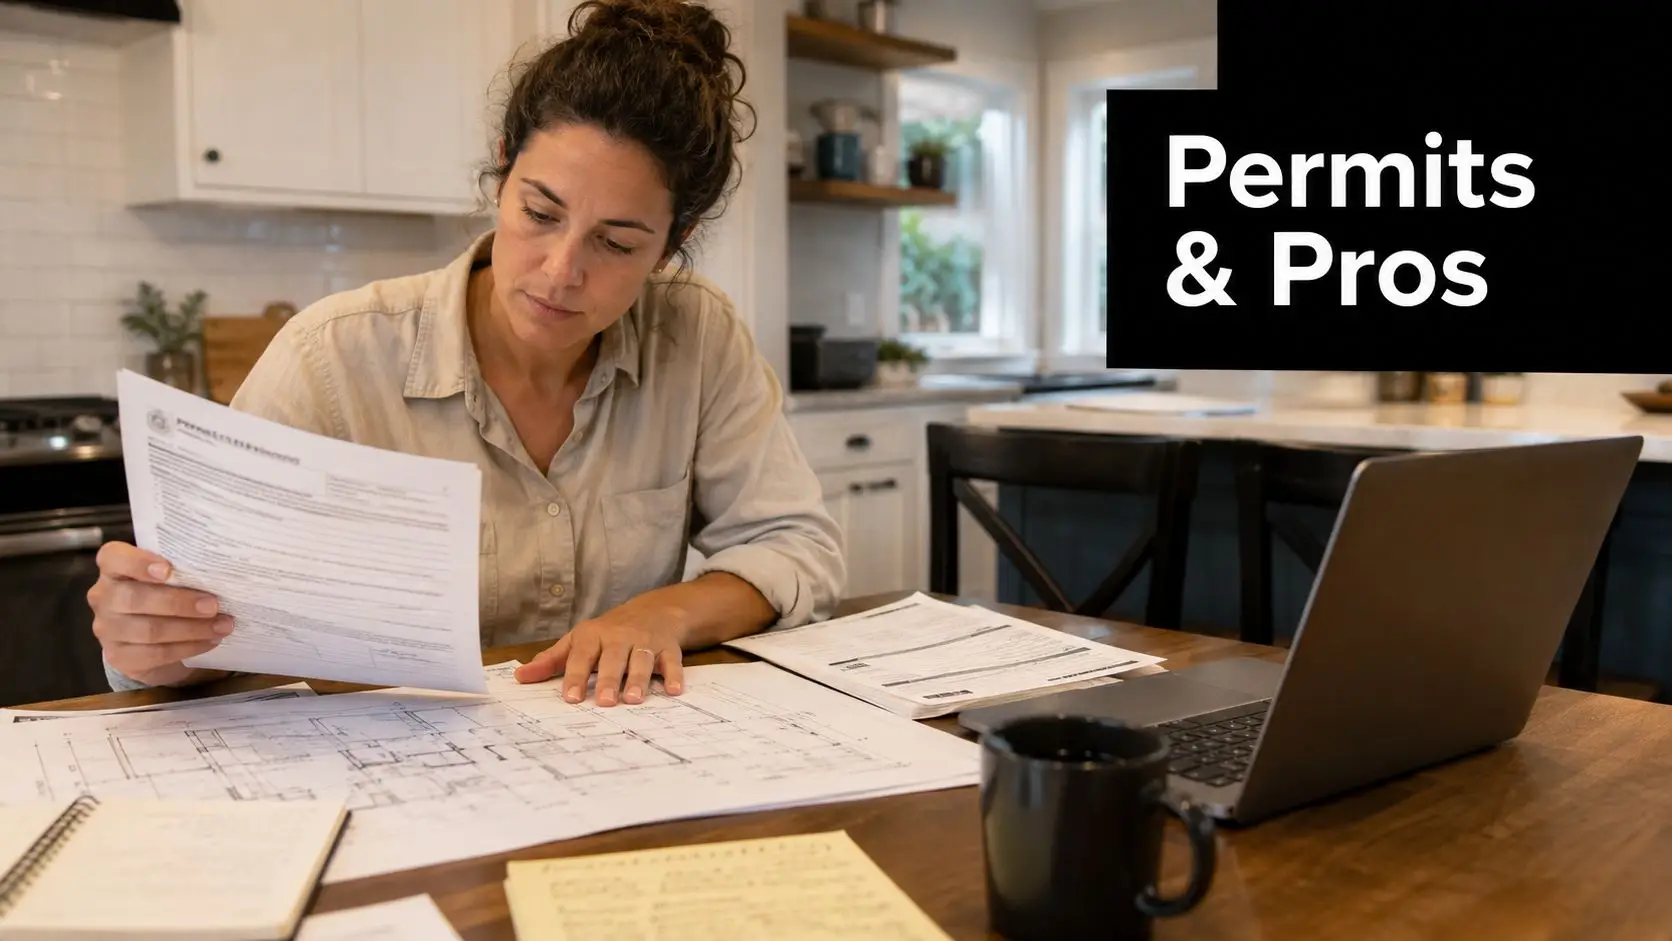
A woman reviewing building permits and architectural floor plans on a wooden table at home.

Where simple jobs become expensive

One of the most common technical mistakes is getting rough-in locations wrong early. In Victoria, misalignment of plumbing rough-in points with the standard shower width can trigger a 29% cost overrun because trades end up rerouting after tiling has effectively boxed them in, according to the 2024 Renovation Cost Report by the Australian Institute of Architects, Victoria branch.

That's not a styling problem. It's a sequencing problem.

The safer method is to lock the layout, confirm plumbing positions before demolition gets too far, complete first-fix work properly, and inspect before closing walls. It sounds procedural because it is procedural. Good bathrooms are built through order, not improvisation.

Who should be on the job

For a straightforward renovation, you need people who can handle licensed work and coordinate handovers cleanly between stages. Depending on the project, homeowners may work with separate trades or engage a specialist renovation company or registered builders unlimited class builder to manage the job end to end.

What matters is not the label alone. It's whether the people on site can do these things properly:

  • Confirm rough-in points before walling starts
  • Carry out licensed plumbing and electrical work
  • Arrange required inspections
  • Install wet-area substrates correctly
  • Sequence waterproofing, tiling, and fit-off without shortcuts

Inspections are not admin for admin's sake

The Victorian Building Authority requires permits and inspections for plumbing and electrical work in the relevant circumstances, and the data makes the point clearly. Renovations that include a permit and inspection phase for those works have 91% higher success rates than projects that skip that step. The same guidance also requires the first-fix electrical stage to be completed and inspected before walls are closed, with outlets set at least 150mm from the shower edge, a code requirement linked to preventing 80% of future electrical safety violations.

Skipping inspection doesn't remove risk. It transfers risk to the homeowner.

Ask these questions before you hire

You don't need to interrogate trades like a building surveyor. But you do need clear answers.

  • Who is responsible for coordination: If one trade finishes late, who resets the sequence?
  • How are inspections handled: Don't assume someone else is lodging or arranging them.
  • What substrate is going into wet zones: Water-resistant backing matters as much as the tile finish.
  • When is first-fix signed off: This should be clear before any board or tile goes on.

A bathroom is one room, but it behaves like a chain. If the first links are weak, every finish that follows is sitting on compromised work.

The Renovation Timeline What to Expect

A bathroom renovation feels messy in the middle because it is. The room gets stripped back, the services are exposed, and for a while it looks worse than it ever did before. That part is normal.

What matters is whether the job moves in the right order, with each stage setting up the next one.

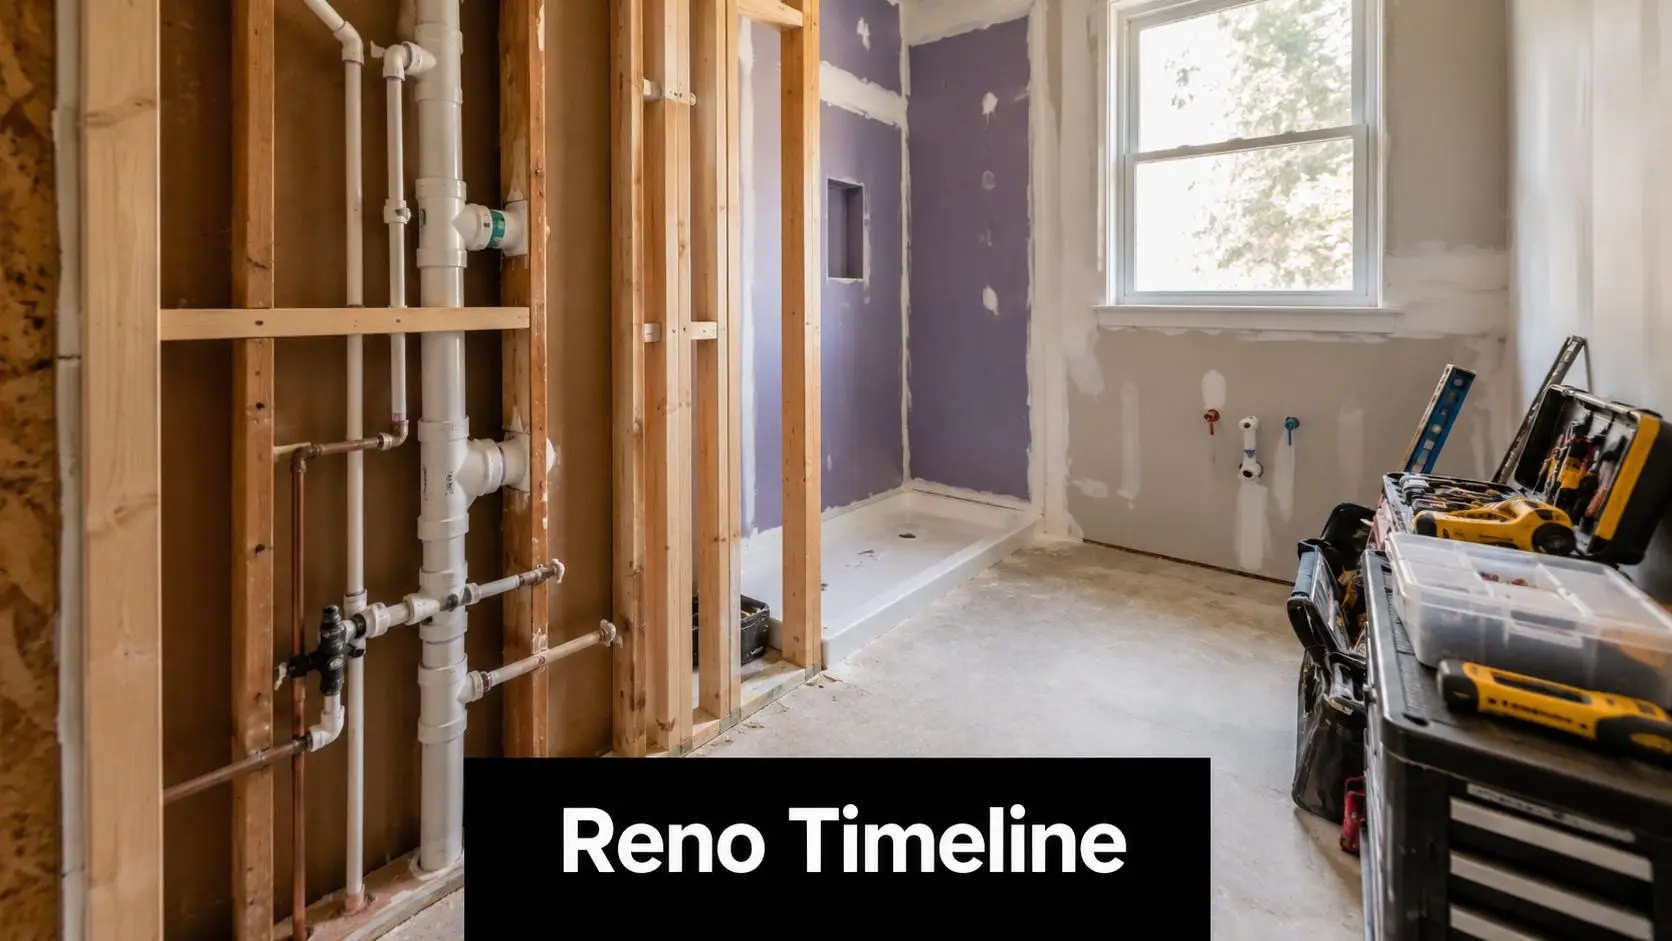
An unfinished bathroom under construction with exposed wooden wall studs, plumbing pipes, and a shower base.

Demolition and strip-out

The first phase is controlled removal. Old fixtures come out, wall and floor finishes are taken back, and the team gets a clear look at the substrate, framing and service locations.

This stage often answers the questions no quote can settle perfectly in advance. You find out whether the walls are sound, whether previous work was done properly, and whether the floor has any surprises that need correction before the rebuild.

First-fix services

Once the room is open, plumbing and electrical first-fix work happens before the bathroom gets closed up again, establishing positions for wastes, supply lines, outlets, switches, lighting and ventilation.

The reason this stage matters so much is simple. If service locations are off, every finish that follows gets harder. Tile set-out suffers, vanity placement becomes awkward, and late changes become expensive.

Walling and waterproofing

After first-fix inspection and substrate preparation, wet-area surfaces are built for tile. Then comes the stage that separates durable bathrooms from short-lived ones.

A critical technical requirement is the 24-hour flood test of the shower pan liner before tiling. According to the Master Builders Association of Victoria, failure rates in non-compliant projects reach 38%, while the Australian Building Codes Board reports that 65% of wet-area failures in Victoria stem from inadequate waterproofing installation. Projects that adhere to the flood-test protocol properly achieve success rates above 94%.

If a shower base isn't tested before tile goes down, the homeowner is being asked to trust work that hasn't been proven.

A properly built shower area also needs the right sequencing. The membrane must be suitable, the falls have to work toward the drain, and the assembly has to be allowed to cure as required before the next layer goes on.

Tiling and fit-off

Once waterproofing is confirmed, the room starts to turn the corner visually. Tiling goes in, grout lines define the surfaces, and the design decisions become real rather than theoretical.

After tiling cures, the fit-off stage brings the bathroom together:

  • Vanity and basin installation: The room starts functioning again.
  • Tapware and shower fittings: Final service points are connected.
  • Screen, mirror and accessories: The visual detail gets completed.
  • Testing and handover: Fixtures are checked and the room is cleaned for use.

What quality looks like on site

The best renovation timelines aren't the fastest looking ones. They're the ones where no one is rushing a wet-area stage just to make the calendar look good.

A good project manager keeps trades moving, but also protects the pauses that matter. Waterproofing has to cure. Inspections have to happen. Tile setting has to respect layout and level. Those are the moments that decide whether your bathroom still performs well years later.

Your Beautiful New Bathroom Awaits

A successful simple bathroom renovation comes down to judgement. Keep the parts that still work. Upgrade the parts that improve function. Don't spend designer-bathroom money on features you won't use, and don't cut corners on the hidden construction that protects the room.

That balance is what gives bathroom renovations long-term value. The budget needs to be realistic, the design needs to suit the home, and the build has to follow the right order with licensed trades handling the technical work. When those pieces line up, even a modest renovation can feel polished, calm and built to last.

For homeowners in Highett and across greater Victoria, the main challenge usually isn't finding inspiration. It's turning ideas into a project that stays controlled from first concept to final handover.

If your current bathroom is tired, cramped, hard to clean, or showing signs that a simple refresh won't solve, it's time to plan properly.


If you're ready to move from ideas to a workable renovation brief, contact SitePro Bathrooms to discuss your space, your layout, and the level of finish that makes sense for your home.

  • siteprobathrooms

Complete Bathroom Renovation: Your Highett Guide 2026

You've probably already saved a folder full of new bathroom ideas. A brushed nickel mixer here, a floating vanity there, maybe a walk-in shower from a photo that looked perfect on your phone. Then reality starts to creep in. Will it fit? What will it cost? What happens if the room is older than it looks?

That's the point where a complete bathroom renovation stops being a style exercise and becomes a building project. In Highett and across Victoria, that distinction matters. Many homes weren't built to current expectations for ventilation, water efficiency, accessibility, or wet-area performance, so a proper renovation often means rebuilding the room from the inside out, not just changing the visible finishes.

The good news is that bathroom renovations become much easier when you approach them in the right order. Start with how the room needs to work. Build a budget that expects a few surprises. Lock the design before demolition. Put the right builder in charge. Then let the sequence unfold properly.

From New Bathroom Ideas to a Concrete Plan

Most homeowners begin with a look. They want one of those clean, calm modern bathrooms with a wall-hung vanity, better lighting, and storage that works. That's a good starting point, but it's not a brief.

A brief answers practical questions. Who uses the bathroom first in the morning? Is this the main family bathroom or an ensuite? Do you need a bath, or are you only keeping one because the current room has one already? Are you planning to stay in the home long term, or do you want a finish level that supports resale?

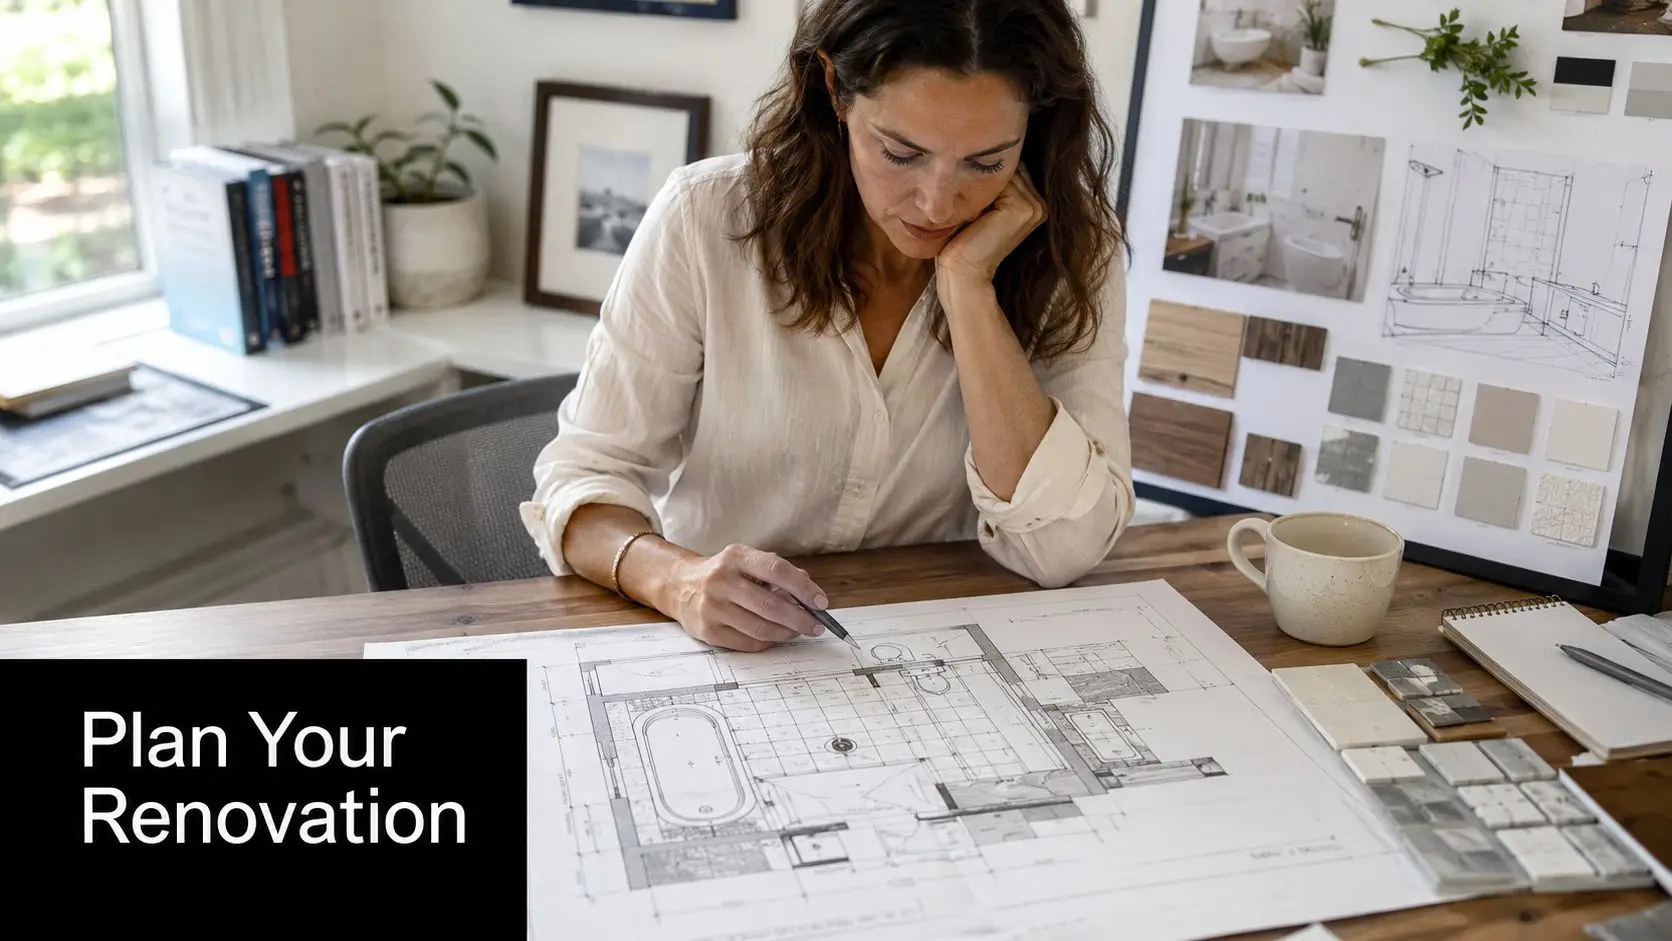
A professional interior designer studies architectural bathroom floor plans while working at her home office desk.

Start with use, not style

A complete bathroom renovation works best when the layout suits your daily routine before any tile or tapware is selected. I've seen plenty of beautiful rooms that looked expensive and felt awkward. A vanity drawer couldn't open fully because the toilet sat too close. A shower screen made the room feel tighter. A freestanding bath looked impressive but made cleaning harder and storage worse.

The better approach is to write down your must-haves first:

  • Morning traffic: If two people use the room at once, prioritise bench space, mirror width, and circulation.
  • Storage needs: Razors, towels, hair tools, cleaning products, kids' bath items. If they need to live in the room, design storage for them.
  • Cleaning tolerance: Open shelves and frameless glass can look sharp, but they also show water spots and clutter fast.
  • Long-term comfort: A step-free shower, wider access, and practical grab-point planning can make the room easier to use later without making it look clinical.

Why Highett homes need a different lens

In Australia, a large share of homes were built before modern water-efficiency and accessibility standards became common. In suburbs like Highett, that means a complete bathroom renovation is often driven by essential infrastructure replacement, like updating waterproofing, pipework, and ventilation, as much as by design preference, as noted in this bathroom remodel planning reference.

That's why the phrase “full renovation” shouldn't be used loosely. In many Victorian homes, a true full renovation means more than taking out tiles and fitting new tapware. It can involve correcting old work, upgrading concealed services, and making sure the rebuilt bathroom suits the home's construction type.

Practical rule: If your idea only covers what you can see, your plan isn't finished yet.

Separate wants from needs

This step saves more stress than people expect. Put your ideas into three columns:

Priority What belongs here
Must have Better ventilation, safer shower access, more storage, improved waterproofing confidence
Nice to have Feature niche, double vanity, under-cabinet lighting, custom mirror
Can live without Oversized bath in a tight room, unnecessary plumbing relocation, hard-to-clean statement finishes

This simple filter stops the budget getting eaten by features that don't improve the room's day-to-day use.

Build a brief you can hand to a builder

A workable brief for bathroom renovations should include:

  • Who uses the room
  • How you want it to feel
  • What must stay or move
  • What problems the current bathroom has
  • What level of finish you expect

That last point matters. There's a big difference between “fresh and durable” and “high-end designer bathrooms with custom joinery and feature lighting”. Neither is wrong. Problems start when expectations sit in one category and the budget sits in another.

Budgeting Your Renovation Without Surprises

A bathroom budget has to do two jobs at once. It has to pay for the room you want, and it has to survive the room you uncover once demolition starts.

That's why broad online estimates often mislead people. A bathroom looks small, so many assume it should be a modest project. In practice, it's one of the most trade-heavy rooms in the house. Plumbing, electrical, waterproofing, tiling, carpentry, glazing, painting, and fit-off all have to line up. If the layout changes, the complexity rises quickly.

What a full renovation usually costs

Industry sources in Australia typically place a full bathroom remodel in the $25,000 to $80,000 range, with pricing often falling around $70 to $250 per square foot, according to this bathroom remodel ROI and cost overview. The same source cites a national average ROI of 80%, while the National Association of REALTORS figure referenced there is 74%. For Victorian homeowners, those figures are best treated as a benchmark rather than a local promise, but they still support the idea that bathroom upgrades are usually long-term asset improvements, not minor cosmetic jobs.

A compact room can still land at the higher end if you move plumbing, choose premium finishes, or need rectification work before the room can be rebuilt.

Sample bathroom renovation budget breakdown

Below is a planning table I'd use to frame expectations. The percentages are indicative only, but they reflect how a complete project is usually distributed.

Sample Bathroom Renovation Budget Breakdown (Victoria)

Expense Category Estimated Cost Percentage of Budget
Demolition and waste removal Qualitative allowance Varies
Plumbing and drainage works Qualitative allowance Varies
Electrical and lighting Qualitative allowance Varies
Waterproofing and wet-area preparation Qualitative allowance Varies
Wall and floor tiling Qualitative allowance Varies
Fixtures and fittings Qualitative allowance Varies
Vanity and joinery Qualitative allowance Varies
Shower screen and glazing Qualitative allowance Varies
Painting and finishing Qualitative allowance Varies
Contingency 10–20% 10–20%

For a rough planning starting point, a bathroom renovation cost calculator can help you sense-check your expectations before you start requesting quotes.

Where budgets blow out

Three decisions tend to move the number fastest:

  • Plumbing relocation: Moving wastes, shower positions, or vanity locations usually adds labour and risk.
  • Finish level: Large-format tiles, niche detailing, custom joinery, and premium fittings push the project up.
  • Existing condition: Older bathrooms often hide the biggest cost drivers behind the walls and under the floor.

A budget only works if it includes the cost of making the room sound before making it attractive.

Why contingency is not optional

A complete bathroom renovation should budget for a 10–20% contingency above planned spend because hidden defects are common once demolition exposes failed waterproofing, subfloor rot, corroded plumbing, or electrical non-compliance, based on this step-by-step bathroom renovation guide.

That contingency isn't for upgrades you suddenly feel like adding. It's there to protect the job when the room reveals something you couldn't reasonably confirm beforehand.

A realistic budget feels less exciting on day one, but it produces a calmer project.

Designing Your Dream Bathroom With 3D Visualisation

A good bathroom design should answer build questions before trades arrive on site. That's where 3D visualisation earns its keep.

Sketches are useful early. Moodboards help refine the feel. But a complete bathroom renovation needs a design process that tests the room in proportion, not just in concept. Homeowners often approve selections individually, then realise too late that the vanity feels bulky, the niche sits awkwardly, or the tile pattern fights the room.

Screenshot from https://siteprobathrooms.com.au

What 3D design solves

The biggest value of 3D planning is clarity. It lets you test choices before they become expensive.

A proper design review can reveal issues such as:

  • A vanity that dominates the room when the walkway is modelled accurately
  • Tile scale that feels wrong once the full wall is visible instead of a sample piece
  • Mirror and lighting conflicts that weren't obvious on a flat plan
  • Storage gaps when drawers, doors, and circulation are shown together

That's especially important when homeowners want designer bathrooms but still need the room to function like a hard-working family space.

How to use 3D visualisation properly

The process works best when you make decisions in layers.

  1. Lock the layout first
    Confirm the positions of the shower, vanity, toilet, and bath before discussing finishes in detail.

  2. Set the main surfaces
    Choose floor tile, wall tile direction, and vanity style. These dominate the room visually.

  3. Add lighting and mirrors
    Lighting changes how every finish reads. It shouldn't be an afterthought.

  4. Refine details last
    Tapware finish, niche trims, handles, shaving cabinets, and accessories should support the main decisions, not compete with them.

A practical way to test options early is to use a 3D bathroom planner to compare layouts and sightlines before construction documents are finalised.

If you can spot a design mistake on a screen, you've saved yourself from fixing it with labour, materials, and time.

Modern bathrooms look simple because the planning isn't

The cleanest bathrooms are usually the most resolved. The grout lines line up. The vanity fits the wall. The lighting feels deliberate. The room has breathing space.

That doesn't happen by luck. It happens when the design is coordinated early enough for every trade to work from the same intent. In practice, that means fewer rushed site decisions, fewer late product swaps, and a much better chance that the finished room looks like the one you approved.

Choosing Your Partner The Role of a Registered Builder

A complete bathroom renovation is not a single trade job. It's a tightly sequenced wet-area build with little room for guesswork. That's why the builder matters so much.

Many homeowners consider managing the project themselves. On paper, it can look straightforward. Hire a plumber, then an electrician, then a waterproofer, then a tiler. The problem is that bathrooms don't fail in neat trade categories. They fail at the joins, in the timing, and where one decision affects three other trades.

Why wet areas need central control

For a full bathroom renovation, the highest-cost and highest-risk technical sequence is the wet-area build-up, which includes subfloor repair, waterproofing, tiling, then fixture fit-off. Standard renovation guidance stresses that waterproofing and moisture-resistant lining must be correctly sequenced before tiling to reduce damage, mould risk, and rework, as outlined in this wet-area renovation sequence guide.

That sequence sounds simple until something changes on site. A floor isn't level. A wall is out. A plumbing penetration lands poorly. The screen measurement has to shift. Someone has to decide what changes, who comes back, and who carries responsibility for the result.

That's the fundamental value of a builder. Coordination, accountability, and control.

What a Registered Builder Unlimited brings

In Victoria, many homeowners specifically look for registered builders unlimited because they want one party responsible for managing the full build pathway, not just isolated trade packages.

A strong renovation partner should be able to:

  • Coordinate all trades: Plumbing, electrical, carpentry, waterproofing, tiling, glazing, painting, and final fit-off.
  • Manage compliance: Wet areas aren't forgiving. Details matter, and so do inspections and documentation.
  • Control sequencing: Trades need to arrive in the right order, with the right information, and with selections already resolved.
  • Carry responsibility: If something isn't right, you shouldn't be left sorting out which subcontractor blames which other subcontractor.

Homeowners wanting to understand that role in more detail can review why using a registered builder matters for your bathroom renovation.

Questions worth asking before you sign

Use the meeting with a builder to test process, not just personality.

  • How do you handle variations? You want a clear method, not vague reassurance.
  • Who manages the schedule day to day? One contact point avoids confusion.
  • How do you deal with hidden defects once demolition starts? The answer should sound organised, not improvised.
  • What's included in the scope? Assumptions create disputes.

The best builder isn't the one who says yes fastest. It's the one who can explain the build clearly, flag risk early, and keep the project moving when the unexpected appears.

The Renovation Sequence Demolition to Finishing

Once the design is locked and selections are organised, the renovation moves into site work. This is the stage most homeowners feel anxious about because the room gets worse before it gets better. That's normal.

A well-run bathroom project follows a disciplined sequence. If trades are rushed or the order gets muddled, the mistakes usually show up later as delays, callbacks, or visible defects.

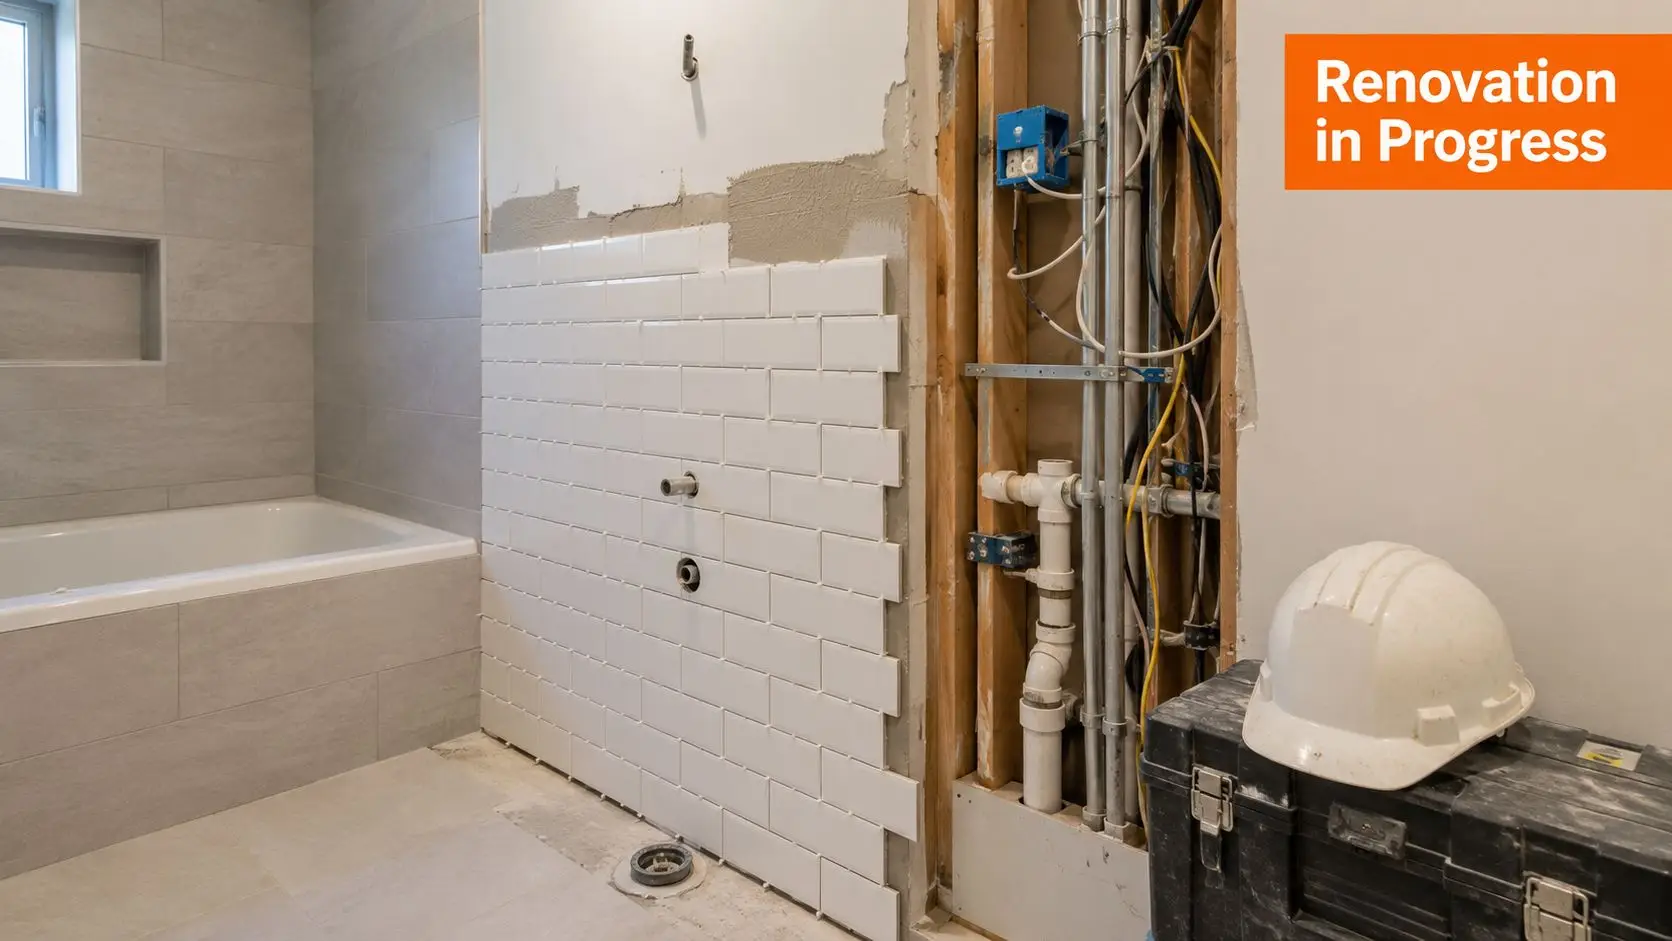
A bathroom interior undergoing renovation with white subway tiles installed on a wall next to exposed plumbing.

Site protection and demolition

Before the old bathroom comes out, the access path should be protected. Floors, corners, and nearby rooms need attention, especially in occupied homes. Good preparation reduces dust spread and prevents damage outside the work zone.

Demolition is controlled, not reckless. The aim is to strip the room back far enough to inspect the actual condition of the substrate, framing, plumbing, and electrical rough-ins.

Common discoveries at this stage include:

  • Water damage around showers and baths
  • Out-of-square walls that affect tiling set-out
  • Old service locations that don't suit the new layout
  • Previous poor workmanship hidden behind finished surfaces

Rough-in and structural preparation

Once the room is open, the builder can complete any necessary framing adjustments and rough-in works. Here, the new layout starts becoming real.

Plumbing and electrical changes happen before the room is closed again. If the design includes niche lighting, mirrored cabinets, a moved vanity, or a relocated shower mixer, this is when those service points are set.

A mistake here tends to echo all the way to fit-off. A mixer set too high, a waste positioned poorly, or a niche framed without regard to tile lines can compromise the final result.

Wall linings and waterproofing

After the rough-in, the room is lined and prepared as a wet area. This part needs patience. It's not visually exciting, but it determines how the bathroom performs over time.

The builder should verify that the substrate is suitable before waterproofing proceeds. Flatness, junction treatment, penetrations, and transitions all matter. Waterproofing should be applied only when the room is ready for it, not because the schedule is tight.

Good bathrooms aren't built by hiding problems neatly. They're built by correcting the base before the finish goes on.

Tiling and set-out

Tiling is where planning either pays off or gets exposed. The tile set-out should feel intentional. Cuts should be balanced. Niches should align with grout lines where possible. Feature walls shouldn't look accidental.

This is also where some “new bathroom ideas” fall apart. A tile that looked excellent on a sample board may overwhelm a compact room. A pattern can become busy once repeated across full walls. The strongest outcomes usually come from restraint, not from loading every surface with a statement.

Painting, glazing, and fit-off

Once tiling is complete and cured, the room moves toward the visible finish line. Painting, glazing, vanity installation, screen fitting, mirror placement, tapware, toilet, lighting, and accessories all happen in the closing phase.

This stage feels quick compared with the earlier work, but it still needs discipline. Final fit-off should not be treated as a race. Fixtures need correct alignment, screens need accurate measurement, and sealant work needs to be neat and deliberate.

A complete bathroom renovation feels smooth to the homeowner when this entire chain has been organised well from the start. The clean handover at the end is the last visible sign of good planning.

Common Renovation Pitfalls and How to Avoid Them

A bathroom renovation usually goes off track before the first tile is laid. The trouble starts in the decisions made at quoting, selections, and site investigation. In older Victorian homes, especially in established suburbs with ageing housing stock such as Highett, hidden defects and compliance gaps are common enough that a loose plan can become an expensive one very quickly.

The pattern is familiar. A homeowner accepts a sharp quote, assumes the room is straightforward, then discovers the floor is out, the wiring is dated, or previous waterproofing has failed. By that point, choices are narrower and costs are harder to control. A Registered Builder Unlimited helps reduce that risk because the job is assessed as a building project, not just a cosmetic update.

A man working on his laptop reviewing a renovation budget and project timeline for home improvements.

Pitfall one: comparing quotes that don't match

The cheapest quote is often the least detailed quote. One builder may have allowed for floor correction, compliant waterproofing, disposal, protection of adjoining areas, and proper supervision. Another may have priced only the visible items, then relies on variations once the room is open.

That is where budget blowouts begin.

Ask for a scope that is specific enough to compare properly:

  • A detailed inclusions list that spells out labour, materials, fixtures, and site works
  • Clear exclusions so you can see what has not been allowed for
  • A written variation process before the contract is signed

If two quotes are far apart, the answer is rarely “one builder is just cheaper”. Usually, the scope is different.

Pitfall two: changing selections after work starts

Late changes ripple through the whole room. A different vanity can alter plumbing positions. A different tile size can affect set-out and waste. A different screen configuration can change measurements and lead times.

Clients sometimes treat selections as flexible until mid-build. On site, that flexibility costs time and money. The safer approach is to finalise fittings, finishes, and dimensions before demolition starts. If a key item is still undecided, delay the start date rather than forcing the site team to guess and adjust later.

Pitfall three: underestimating the existing room

Older bathrooms hide problems well. In Victorian homes, we regularly find water damage around showers, subfloors that need repair, inadequate ventilation, and electrical work that no longer meets current expectations. None of that appears on a mood board, but it affects cost, sequence, and the final standard of the room.

This is one reason older-home bathroom work should be led by the right class of builder. A Registered Builder Unlimited is better placed to manage structural rectification and coordinate licensed trades if the room turns out to need more than a surface replacement.

Pitfall four: treating compliance as an afterthought

Homeowners usually focus on tiles, tapware, and layout. The costly mistakes are more often in the parts you do not see once the room is finished. Waterproofing, ventilation, falls, substrate preparation, and trade sequencing all need to be right the first time.

Fixing non-compliant work after completion is far more expensive than doing it correctly from day one.

The practical way to avoid most renovation problems is simple. Start with a realistic scope, lock your selections early, allow for the age of the house, and use a builder who can manage both the visible finish and the hidden building work underneath it.

FAQ for Victorian Bathroom Renovations

Do I need a contingency for a complete bathroom renovation?

Yes. Include a contingency for concealed building issues, especially in older Victorian homes around suburbs like Highett where bathrooms often sit over tired subfloors, patched plumbing, or outdated wiring. Once demolition begins, the actual condition of the room becomes clear, and that can change the scope fast.

Is it worth moving the plumbing?

Sometimes. The question is whether the improved layout justifies the added plumbing work, floor alterations, and approval requirements that can come with it. In many projects, keeping fixtures close to existing waste and water points gives a better balance of cost, buildability, and long-term reliability.

Can small bathrooms still feel high-end?

Yes, if the layout is disciplined. A compact bathroom usually benefits more from clear circulation space, good lighting, recessed storage, and consistent finishes than from squeezing in extra features. I have seen small rooms outperform larger ones because every decision served the way the space would be used.

What makes a bathroom feel dated fastest?

Short-lived trends usually date a bathroom before the room has even had time to wear in. Feature tiles used too heavily, fashionable colours that dominate the space, and busy material changes tend to age poorly. In Victorian renovations, a simpler palette often works better because it sits more comfortably with the character of the house.

Should I choose a bath or a larger shower?

Choose based on the household first. A main family bathroom often benefits from a bath, while an ensuite or smaller room usually gets more daily value from a generous shower and better storage. If resale matters, consider the broader house as well. One bath somewhere in the home is often enough.

What's the smartest first step?

Start with a brief that covers function, constraints, and the age of the property. In Victoria, that means looking beyond finishes and asking what the existing structure, services, and ventilation will allow. If the home is older, a Registered Builder Unlimited can assess whether the project is a straight replacement or whether hidden building work is likely to sit behind the cosmetic upgrade.

If you're planning a complete bathroom renovation in Highett or anywhere across Victoria and want a coordinated path from design through construction, SitePro Bathrooms can help you plan your renovation.

  • siteprobathrooms

Your Ultimate Bathroom Renovation Checklist

Dreaming of a new bathroom usually starts the same way. You've saved a folder of new bathroom ideas, shortlisted tiles, and pictured a calmer morning routine. Then the practical questions show up. What comes first, who needs to be booked, what can go wrong behind the walls, and how do you get that polished designer bathroom look without running into costly surprises halfway through?

That's where a proper bathroom renovation checklist earns its keep. The best renovations aren't driven by finishes alone. They're driven by sequence, documentation, and quality control at each stage. In Australia, that matters because bathroom work sits inside a regulated building framework. The strongest starting point is compliance with the National Construction Code and wet-area waterproofing requirements under AS 3740, with approvals, licensed trades, and final compliance paperwork treated as mandatory parts of the job, especially in Victoria where structural or plumbing changes can trigger permits, as noted in this Australian bathroom remodel checklist guide.

A well-built bathroom renovation checklist does more than keep a project organised. It protects the home from hidden moisture issues, poor drainage, bad ventilation, and rushed trade sequencing. It also gives you a clearer path from concept to handover, whether you're planning modern bathrooms, family bathrooms, or a more customized designer finish.

Use the list below like a registered builder would use a project plan. It's not just about what to choose. It's about when to decide, what to verify, and where not to cut corners.

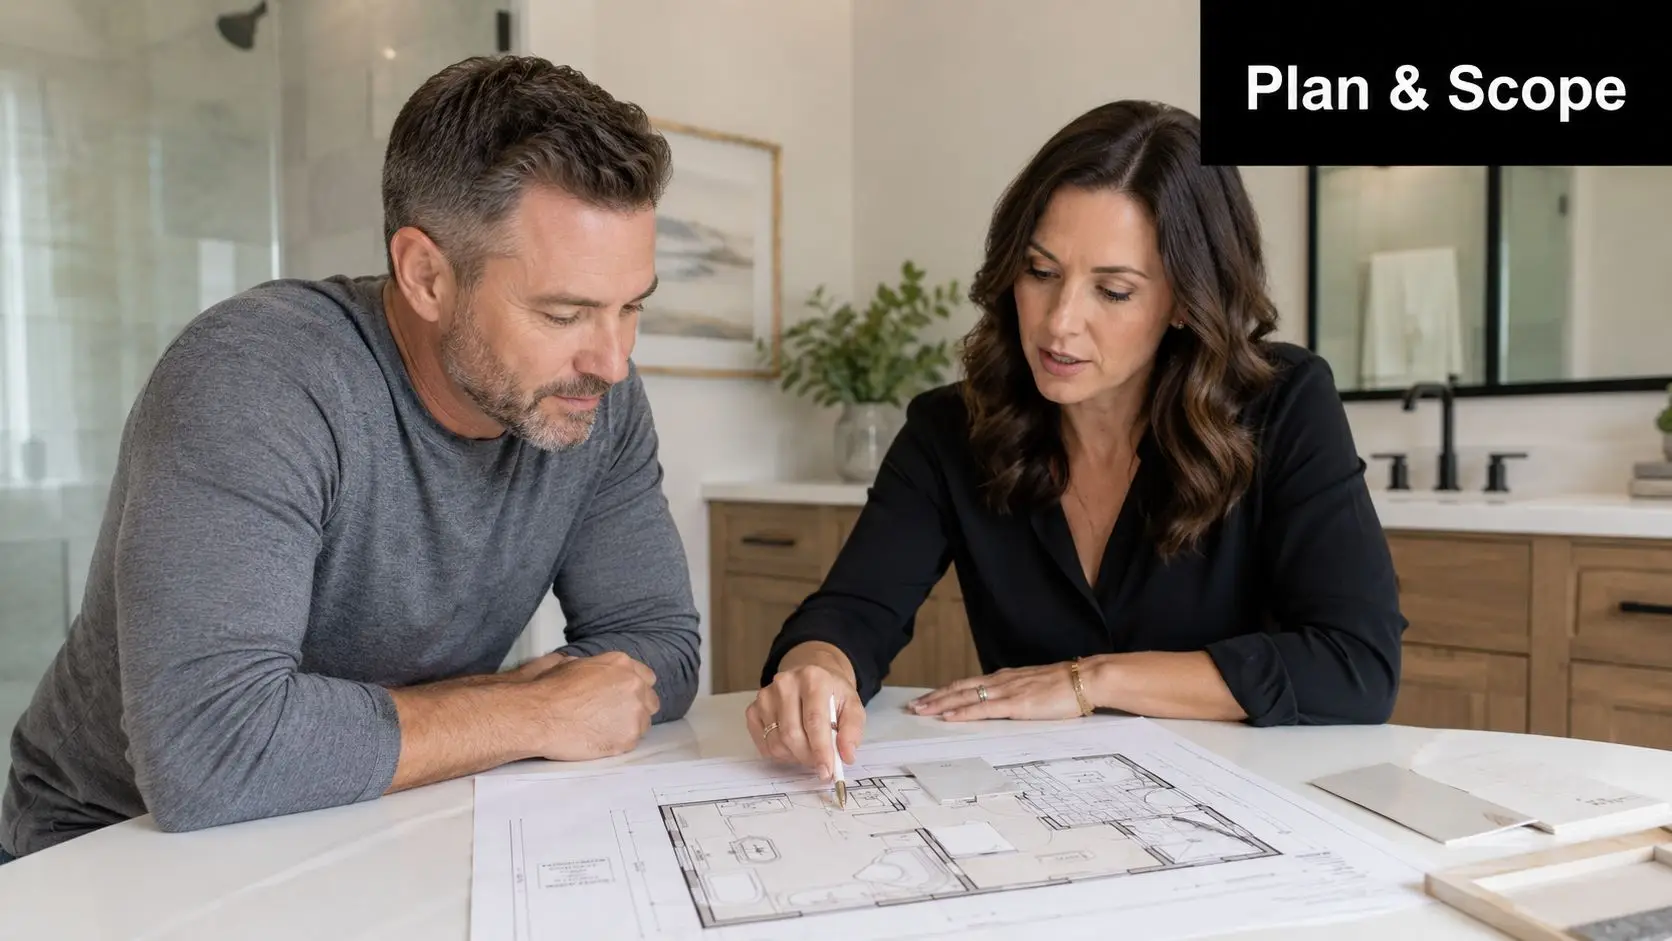
1. Planning and Design Consultation

Start before you choose tapware, tiles, or colours. The first conversation should focus on how the bathroom needs to function. A family bathroom used by school-aged kids has different priorities from an ensuite designed for easy cleaning, quiet lighting, and more storage around the vanity.

Bring visual references, but don't stop there. Share your daily routine, the storage you're missing, who uses the room, and what frustrates you about the current layout. Good design consultation is partly about style and mostly about identifying constraints early. If the toilet location is awkward, the shower feels cramped, or the vanity blocks circulation, those issues need to be solved on paper first.

A man and woman review bathroom renovation blueprints while sitting at a table together.

What to bring into the first meeting

  • Style references: Save photos of bathrooms you like, but explain what you like about them. It might be the wall-hung vanity, not the colour scheme.
  • Non-negotiables: List what must stay or be added, such as a bathtub, extra power points, or shaving storage.
  • Household reality: Mention if it's the only bathroom, if kids use it, or if an older family member needs easy access.

One of the most useful things you can do before that meeting is read a practical guide on how to plan a bathroom renovation. It helps you arrive with better questions and fewer assumptions.

Practical rule: If you can't describe how the room should function on a rushed weekday morning, the design brief still isn't finished.

Ask about warranty coverage, after-sales support, previous projects similar to yours, and how design decisions get recorded. Verbal agreements are where many renovation misunderstandings start.

2. 3D Design Visualisation and Technical Drawings

A lot of expensive mistakes look obvious in a 3D model and invisible in your head. That's why proper visualisation matters. It's the difference between liking the idea of a floating vanity and seeing that it leaves the room feeling too stark once the wall tiles, mirror, and lighting are all in place.

3D design is useful for more than aesthetics. It helps test sightlines, door swings, clearances, and fixture proportions. In small bathrooms, this is especially important. A freestanding bath may look perfect in a photo, but in a tight room it can make cleaning harder and crowd access to the shower zone.

A person pointing at a laptop screen showing a modern 3D interior design bathroom renovation project.

What the drawings must show

Technical drawings shouldn't be decorative. They should clearly mark plumbing points, floor wastes, power points, lighting, switch positions, niche heights, vanity depth, and tile set-out intentions. If those details aren't documented, trades will end up making judgement calls on site.

Use a proper 3D bathroom planner to test alternatives before demolition starts. Ask to see the room from the doorway, from vanity height, and from inside the shower looking out. Those views often reveal issues the hero render hides.

A practical example. In one compact ensuite layout, shifting the shower screen by a small amount on the drawing can be the difference between a towel rail fitting properly or colliding with the door arc. That's the sort of problem you want solved before materials are ordered.

A strong render sells the vision. A strong technical drawing protects the build.

If you're aiming for modern bathrooms or high-end designer bathrooms, insist on both. The visual should guide the finish. The documentation should guide the trades.

3. Budget Development and Cost Planning

Discipline matters. A bathroom renovation checklist that skips budget structure usually leads to rushed compromises later. The budget should reflect the build sequence, not just a shopping list of fixtures.

Break costs into categories that make sense on site. Demolition, disposal, carpentry, plumbing, electrical, waterproofing, tiling, glazing, cabinetry, stone, painting, fit-off, and final clean should all be visible. When a quote is too broad, it's harder to see what's included, what's been assumed, and where variations are likely to appear.

For procurement, one of the smartest moves is to plan around lead-time risk, not just taste. Industry forecasts indicate sustained demand pressure in bathroom remodelling, with one projection putting the global market at USD 315.9 billion by 2035 and another at USD 615.61 billion by 2036, as discussed in this bathroom remodelling market analysis. For homeowners, the practical takeaway is simple. Order long-lead items early.

Where to spend and where to stay practical

  • Spend on hidden performance: Waterproofing products, plumbing quality, drainage details, and ventilation hardware matter more than a fashionable basin shape.
  • Be selective on statement pieces: A feature mirror or premium mixer can lift the room without forcing every finish into the top tier.
  • Keep a buffer: Older bathrooms can reveal damaged framing, uneven floors, or outdated services once demolition begins.

The most common budget mistake isn't choosing expensive tiles. It's approving a design before checking whether the chosen layout requires major plumbing relocation, custom joinery, or extra electrical work.

If you want a stress-free build, tie payment stages to completed milestones, not vague calendar dates. A well-planned budget should support good sequencing, not pressure trades to rush.

4. Permits and Building Code Compliance

Plenty of homeowners think compliance is paperwork at the end. It isn't. It starts before the first wall sheet comes off. In Victoria, bathroom renovations can involve permit-triggering structural or plumbing changes, so approvals, licensed trades, and final compliance documentation should sit inside the project plan from day one.

Australian bathroom guidance consistently treats bathroom work as a regulated building process, not a styling exercise. That's because moisture control, drainage, and safe plumbing integration aren't optional finish details. They're core performance requirements. If the job changes wall structure, alters plumbing, or affects waterproofed areas, the compliance path needs to be confirmed early.

A professional construction worker applying blue waterproof coating to shower floor and walls using a paint roller.

Compliance documents worth asking for

  • Trade licences and insurance: Check them before work begins, not after a problem appears.
  • Certificates for plumbing and electrical work: Keep copies with your home records.
  • Waterproofing records and sign-off: These matter because waterproofing is a controlled construction stage, not a casual add-on.

A simple example. If you add underfloor heating, extra power points near wet areas, or a heated towel rail, electrical safety expectations become part of the planning conversation. If you relocate a shower recess or move a floor waste, wet-area compliance moves with it.

What works is early confirmation with the right professionals. What doesn't work is assuming approval can be sorted out once the room is half-built.

5. Structural Assessment and Preparation

The nicest tile in the showroom won't save a bad substrate. Before any new bathroom ideas get locked in, the room needs to be assessed for the conditions that can undermine the whole renovation. That means checking framing, floors, wall straightness, previous leak damage, ventilation performance, and the condition of the existing plumbing penetrations.

In practice, this stage often separates cosmetic jobs from proper bathroom renovations. A room may look tired but sound. Another may look fine until demolition reveals swollen sheet linings, loose subfloor sections, or mould around the old shower area. If you build over those problems, they don't disappear. They stay hidden until they become expensive.

What to inspect before rebuilding

Look closely at wet-area transitions, floor levels, and where water has likely travelled before. Around old shower screens, behind vanities, and near poorly sealed bath edges are common trouble spots. Uneven floors also matter because they affect drainage falls and tile finish.

A typical real-world scenario is an older bathroom where the floor appears level to the eye but drops away in the wrong direction. The tiles might still sit nicely, yet the shower won't drain properly and water lingers outside the wet zone. That issue needs correction before waterproofing starts.

If the room isn't straight, dry, and solid before the membrane goes on, the finish quality won't last.

Preparation also includes practical site setup. Protect nearby flooring, define rubbish removal access, and isolate dust paths. A tidy prep stage saves a lot of frustration later, especially in occupied homes.

6. Fixture and Material Selection

Homeowners often get pulled too far toward looks alone. Style matters, but a successful bathroom renovation checklist treats fixture and material selection as a balance between appearance, durability, maintenance, and lead time.

Porcelain tiles, for example, are a practical choice in busy bathrooms because they're hard-wearing and easy to maintain. Natural stone can look excellent, but it usually asks more from the owner in sealing and cleaning. Matte black tapware can suit modern bathrooms, yet it tends to show water spotting differently from brushed metal finishes. None of these choices are wrong. They just need to fit the way the bathroom will be used.

Choose materials with the room in mind

  • Tiles: Think about slip resistance, grout maintenance, tile size, and how they'll sit with floor falls.
  • Vanities: Prioritise storage depth, drawer function, moisture-resistant construction, and cleaning access underneath or around the base.
  • Screens and fittings: Frameless glass looks sharp, but make sure it suits the room size and cleaning expectations.

For tile selection, it helps to review practical advice on how to choose bathroom tiles. Samples should always be checked in the bathroom's likely lighting conditions, not only under showroom lighting.

A good example is a homeowner choosing a pale stone-look tile for a designer bathroom, then discovering the room doesn't get enough natural light to show its texture properly. In that case, a slightly warmer tile or different finish can deliver a better result without changing the overall style.

Keep fixture finishes consistent. Mixing brushed brass, chrome, and matte black in one compact space usually looks less intentional than people expect.

7. Plumbing and Electrical Planning

Most layout changes are really plumbing and electrical decisions in disguise. Moving a vanity sounds simple until it affects mirror lighting, power point placement, and where the waste line can realistically run. The same goes for replacing a standard shower with a larger recess, adding a niche, or shifting the toilet for a cleaner plan.

Licensed trades should map this properly before rough-in starts. The room needs suitable water supply, drainage falls, safe electrical placement, switching logic, and service access for future maintenance. Planning for heated towel rails, underfloor heating, illuminated mirrors, or extra charging points is worth doing now because retrofitting later is messy and expensive.

Details that deserve more attention

Think beyond where fixtures go. Ask where isolation valves will sit, how the exhaust fan will be ducted, whether the lighting will flatter the mirror zone, and whether cleaning access has been considered around wall-hung fixtures.

Australian renovation guidance continues to stress the importance of ventilation, waterproofing, and electrical safety decisions in bathrooms, especially when adding powered features near water, as discussed in this bathroom remodel checklist commentary on Australian standards and moisture control. In plain terms, a beautiful room can still be a poor renovation if the fan, wiring, and wet-area detailing are under-specified.

One practical scenario. A homeowner selects a mirrored shaving cabinet late in the job and only then realises there's no planned recessed cavity, no dedicated light feed, and no convenient GPO location. That's not a design problem. It's a planning problem.

8. Waterproofing and Moisture Management

If there's one stage that should never be treated as routine, it's this one. In Australia, wet-area waterproofing is a compliance-critical part of the build. The National Construction Code requires wet-area waterproofing to resist moisture penetration, and AS 3740 is the referenced standard for domestic wet areas, as outlined in this discussion of waterproofing and wet-area standards.

That has practical consequences for your bathroom renovation checklist. The membrane system, substrate preparation, junctions, penetrations, floor falls, and inspection points should all be confirmed before tiling begins. Once tiles are laid, many failures become hidden.

The checks that matter before tiles go down

  • Substrate condition: Surfaces must be clean, stable, and suitable for the chosen membrane system.
  • Wet-area definition: Shower recesses, transitions, niches, and penetrations all need clear treatment.
  • Drainage logic: Falls should move water to the waste, not into corners or outside the shower line.

Australian guidance also consistently puts ventilation, leak prevention, shower recess waterproofing, substrate checks, and plumbing pressure or leak testing near the front of the process, with inspection points staged between rough-in, waterproofing, tiling, and fit-off, according to this Australian planning guide for bathroom remodel sequencing. That sequencing is what keeps hidden moisture damage from becoming a post-handover surprise.

Waterproofing isn't the part you notice on reveal day. It's the part you'll appreciate years later if it was done properly.

Don't sign off this stage on trust alone. Ask what system is being used, how the substrate was prepared, and when inspection occurred.

9. Installation and Construction Execution

This is the stage everyone pictures, but the visible progress only works when sequencing is tight. Good construction execution is mostly coordination. Demolition has to leave the right surfaces exposed. Rough-in has to happen before wall closure. Waterproofing must be completed before tiling. Fit-off needs finished surfaces ready, not nearly ready.

The practical challenge isn't just the build. It's living through it. That's especially true in smaller homes and apartments where there may be only one bathroom. Independent renovation guidance increasingly points out that temporary bathroom continuity, dust control, and circulation planning are often missing from mainstream checklists, even though they're central to how households cope during works, as explained in this guide on living through a bathroom renovation.

How to keep the build manageable

  • Set access rules early: Confirm start times, parking, site entry, and who locks up.
  • Protect the rest of the home: Use floor coverings, dust barriers, and a clear path for waste removal.
  • Plan household routines: If the only shower is offline, decide in advance how bathing, toileting, laundry, and storage will work.

A real-world trade-off appears here. The fastest build sequence isn't always the best one for an occupied home. Sometimes a slightly different order of works causes less disruption, keeps circulation safer, and reduces stress for the household.

If you have a project manager, use them. Ask for progress photos, milestone updates, and immediate communication when something unexpected appears behind walls or under floors.

10. Final Inspections, Adjustments, and Handover

Handover isn't a quick look at the tiles and a final invoice. It's a detailed quality-control stage. Every fixture should be tested. Every drain should be run. Every switch, fan, hinge, drawer, seal, and silicone joint should be checked with the same care that went into selecting the finishes.

Walk through the bathroom slowly. Look at grout consistency, tile cuts around fittings, alignment of accessories, door clearances, vanity drawer operation, and whether water drains where it should. Turn the shower on and watch where splash goes. Run the basin and inspect underneath. Use the exhaust fan and make sure it operates as intended.

Your handover list

  • Create a snag list: Note any cosmetic or functional issues while the trades are still engaged.
  • Collect documents: Keep warranties, care instructions, and compliance certificates together.
  • Ask for maintenance advice: Different surfaces need different cleaning methods, especially stone, glass coatings, and specialty finishes.

One common example is a bathroom that looks finished but still needs adjustment to a shower screen seal, vanity door alignment, or mixer temperature setting. Those aren't major faults, but they should be resolved before the project is closed out.

“Don't judge the room only when it's dry and spotless. Test it as a working bathroom.”

Photograph the completed space for your records. Keep all documentation in one folder. If you ever sell, lease, or need warranty support, organised records make life much easier.

Bathroom Renovation: 10-Point Comparison

Item Implementation Complexity Resource Requirements Expected Outcomes Ideal Use Cases Key Advantages
Planning and Design Consultation Low–Medium – meetings and revisions Designer/consultant time, homeowner input, site measurements Clear scope, timeline, budget and initial layout Project start, scope definition, feasibility checks Prevents scope creep; identifies issues early; aligns expectations
3D Design Visualisation and Technical Drawings Medium–High – technical modelling and drafting 3D designer/software, technical drafts, client review sessions Photoreal renders, technical plans and material palettes Complex layouts, visual decision-making, client approvals Reduces design regret; improves trade communication; tests options
Budget Development and Cost Planning Medium – detailed costing and contingency planning Estimator, supplier quotes, financial schedules, contingency funds Itemised budget, payment schedule and cost control measures Cost-sensitive projects, financing, prioritisation of features Prevents overruns; prioritises spending; enables financing arrangements
Permits and Building Code Compliance Medium–High – regulatory submissions and inspections Permit applications, licensed trades, council liaison Approved permits, compliance certificates and legal protection Projects requiring council approval or safety-critical changes Ensures safety and legality; protects insurance and resale value
Structural Assessment and Preparation High – expert inspection and remedial work Structural inspector, testing equipment, remedial trades Structural report, required repairs and accurate cost estimates Older homes, suspected damage, major layout or load changes Identifies hidden issues; prevents future failures; enables accurate quoting
Fixture and Material Selection Medium – specification and sourcing decisions Suppliers, samples, showrooms, lead-time planning Finalised fixtures/materials with warranties and delivery timelines Finish specification, longevity-focused upgrades, style choices Improves durability and value; personalises design; offers efficiency gains
Plumbing and Electrical Planning High – technical system design and compliance Licensed plumbers/electricians, schematics, compliance checks Code-compliant water and electrical systems sized for design Layout changes, new fixtures, heated elements and safety upgrades Ensures reliable function and safety; avoids costly future rework
Waterproofing and Moisture Management High – specialist application and ventilation design Waterproof membranes, qualified applicators, ventilation systems Protected wet zones, reduced mould risk and longer asset life Showers, wet rooms, humid climates or wet-area renovations Protects structure; prevents mould; extends bathroom longevity
Installation and Construction Execution High – multi-trade coordination and site management Project manager, coordinated trades, materials and logistics Completed bathroom built to spec with quality oversight Full renovations, complex installations, multi-trade projects Professional coordination; quality workmanship; warranty coverage
Final Inspections, Adjustments, and Handover Medium – testing, snagging and documentation Inspectors/project manager, testing tools, handover documents Certified completion, resolved snags and maintenance/warranty info Project closeout, warranty activation, documentation for resale Confirms compliance and function; provides documentation; protects owner

Your Renovation Success Starts with the Right Partner

A strong bathroom renovation checklist does more than keep you organised. It helps you make better decisions in the right order. That's what separates a renovation that merely looks good on completion from one that performs properly for years. If you want modern bathrooms, refined designer bathrooms, or practical family spaces, the path is the same. Plan thoroughly, document everything, use licensed trades, and treat waterproofing, ventilation, drainage, and compliance as core build issues.

The biggest mistakes usually happen when homeowners rush from inspiration into selection. They choose tiles before confirming substrate condition. They commit to a layout before checking plumbing implications. They fall in love with a showroom display before asking how the room will function on a busy weekday morning. Good bathroom renovations don't work that way. They move from consultation to design, from design to technical planning, from planning to procurement, and from there into controlled construction and careful handover.

That's also why the right renovation partner matters so much. You want a team that can connect the creative side of the job with the technical side. A polished finish means very little if the exhaust fan is underdone, the drainage is poor, or the waterproofing stage was rushed. The best results come from builders and renovation specialists who understand sequence, communicate clearly, and manage the project like a professional build rather than a collection of disconnected trade visits.

For homeowners in Highett and across greater Victoria, that matters even more when the home is occupied, the bathroom is the only one in the house, or the project includes structural, plumbing, or electrical changes. Those jobs need coordination, not guesswork.

If you're ready to turn new bathroom ideas into a finished space that looks sharp and holds up, work with a team that approaches the project like registered builders unlimited in their commitment to detail, compliance, and workmanship. SitePro Bathrooms offers the kind of end-to-end process that helps turn plans into completed bathrooms with less stress and fewer surprises. From design consultation and 3D visualisation through to construction and final handover, the right partner can turn a bathroom renovation checklist into a bathroom you're glad to live with every day.

  • siteprobathrooms

Integrated Bathroom Sink: Renovation Guide 2026

You're probably in the same spot as a lot of Melbourne homeowners. You've saved a folder of modern bathrooms, you've compared vanity styles, and you keep coming back to the same clean, cohesive look. No raised basin. No visible join. Just one crisp surface that makes the whole room feel calmer and more expensive.

That look usually comes from an integrated bathroom sink.

It's easy to see why people like them. In designer bathrooms, an integrated sink often becomes the visual anchor of the vanity wall. It reads as tidy, contemporary, and well resolved. But after years of working around bathroom renovations, I can tell you this is one of those choices that shouldn't be made on looks alone. The ultimate decision involves the day-to-day use of the bathroom, how careful the household is, how likely staining is, and what happens if the basin gets damaged.

That matters whether you're planning a family bathroom, an ensuite refresh, or a full renovation with a professional team. The best sink isn't always the one that photographs best. It's the one that still works for your home years after handover.

The Centrepiece of Modern Bathroom Renovations

A typical renovation starts with photos. Then the practical questions show up. How hard is this to keep clean, what happens if it chips, and will I be replacing the whole top in eight years because one basin cracked?

That is why integrated sinks get so much attention. They give a bathroom a cleaner, more resolved vanity wall, and they often become the feature people notice first. In a modern renovation, the vanity usually sits in direct view from the doorway, so the sink has a bigger visual job than many homeowners expect.

The appeal is real, but so are the trade-offs. An integrated sink can make a modest bathroom look more considered without adding extra fittings or visual bulk. It can also lock you into a more expensive repair path later, because the basin is part of the top rather than a separate piece you can swap out.

Why people keep choosing it

In real projects, homeowners usually choose an integrated sink for a few practical reasons:

  • Cleaner presentation: The vanity reads as one finished surface, which suits contemporary bathrooms.
  • Less fuss around the basin edge: There is no raised rim where grime often builds up.
  • A more bespoke result: Even a standard-size vanity can look like it was custom made for the room.

Those are good reasons. They just should not be the only reasons.

I usually tell clients the same thing. People rarely regret a sink that is easy to wipe down. They do regret choosing one that is expensive to repair without knowing it upfront.

That long-term ownership side gets missed in a lot of design-led advice. For a main family bathroom, an integrated sink can work well if the material is forgiving and the household will treat it reasonably carefully. For rentals, kids' bathrooms, or homes where easy replacement matters, a separate basin often gives you a simpler and cheaper path if something goes wrong later.

Understanding the Integrated Sink Concept

An integrated sink is exactly what it sounds like. The basin and benchtop are made as one continuous unit, rather than a separate bowl being dropped into or mounted under a vanity top.

A modern bathroom vanity featuring a seamless integrated white sink and a brushed nickel faucet on wood cabinetry.

An integrated sink employs a unibody design. Instead of separate parts meeting at an edge, the sink and top are formed together. That's why the surface looks so clean. It also explains why these sinks are often chosen for bathrooms where low visual noise is part of the design brief.

According to this integrated sink overview, integrated bathroom sinks are specified as a single continuous assembly where the basin is fabricated from the same material as the countertop, eliminating the joint line where water, soap residue, and biofilm typically accumulate.

What that means in everyday use

In practical terms, the missing joint line is the whole story.

With many standard sink setups, the trouble spot is the perimeter where one element meets another. That edge can trap residue, hold moisture, and become the bit that always looks tired first. An integrated sink removes that weak visual and cleaning point.

That usually gives you:

  • Less edge grime: No lip for soap scum to sit against.
  • Simpler wiping down: You can clean the top and basin as one surface.
  • A neater finish: The vanity reads as one object, not several parts fitted together.

For busy homes, that's a genuine benefit. If the bathroom gets used hard before school, before work, and before sport on weekends, fewer joins usually means less fuss.

Where people get caught out

The same feature that makes an integrated sink neat also makes it less flexible.

Because the bowl is part of the top, you can't treat it like a separate item later. The shape, slope, and proportions are set by the fabrication. If you decide you don't like the basin profile, or if the top suffers localised damage, your options are narrower than they would be with a stand-alone basin.

Practical rule: If you want the least maintenance in daily cleaning, integrated usually performs well. If you want the easiest future replacement, it usually doesn't.

That's why this choice needs to be matched to the household, not just the style board.

Exploring Materials and Design Styles

Once you've decided you like the integrated look, the next question is material. The selected material can make the bathroom feel refined or overly delicate. Material choice changes the appearance, the feel under hand, and how forgiving the sink will be in daily use.

Screenshot from https://siteprobathrooms.com.au

The most common options homeowners look at are solid surface, stone-based tops, porcelain-style finishes, and concrete-look forms. Each one suits a different brief.

How each material tends to behave

Material Best for What usually works well What often needs caution
Solid surface Contemporary family bathrooms Soft seamless shapes, matte finish, easy visual integration Can show wear depending on use and cleaning habits
Stone-based finishes Premium vanity designs Crisp edges, refined appearance, suits high-end schemes Fabrication accuracy matters, repairs can be less simple
Porcelain-style integrated tops Clean, bright bathrooms Smooth finish, sharp modern look Hard impacts can be a concern
Concrete-look or cast finishes Architectural or earthy bathrooms Strong design presence, texture, warmth Needs a client who accepts patina and variation

Solid surface often appeals to people who want that sculpted one-piece feel. It suits minimalist vanities, curved corners, and softer matte palettes. In many new bathroom ideas, it's the material that gives an integrated sink its “hotel” look without making the room feel cold.

Stone-based integrated tops tend to suit more custom projects. They can look excellent in modern bathrooms where the vanity is designed as a central feature rather than a basic cabinet with a basin on top.

Design style matters as much as material

A mistake I see is choosing the sink style before the vanity style is settled. An integrated sink should work with the room's whole language.

For example:

  • Warm timber vanity plus white integrated top: Good for a softer contemporary look.
  • Flat two-pack cabinetry plus integrated basin: Strong choice for sharper designer bathrooms.
  • Floating vanity with fine edges: Helps smaller rooms feel less heavy.
  • Wall-to-wall vanity top: Useful when storage and bench space matter as much as looks.

If you're still comparing finishes, it's worth looking at how benchtop materials affect the broader renovation feel. This guide to kitchen benchtop materials is kitchen-focused, but the material logic carries over well to bathroom vanity planning.

Match the material to the household

The right material isn't the one with the best showroom impression. It's the one that fits the way your bathroom gets used.

A tidy ensuite used by two adults can support a more design-led choice. A family bathroom with kids, skincare products, colour treatments, and fast morning routines needs a more forgiving specification. Those are very different jobs for one vanity.

Weighing the Pros and Cons for Your Home

Integrated sinks do a lot right. They also ask for a bit more honesty during planning. If you're deciding between a standard basin setup and an integrated one, this is the point where aesthetics have to compete with ownership reality.

A modern bathroom vanity with a white integrated sink, wood cabinets, and minimalist accessories on a countertop.

What works well

The best argument for an integrated sink is simple. It makes the vanity easier to keep presentable.

There's no separate basin rim to clean around, and the top-to-bowl transition is visually quieter. In homes where people want less visual clutter, that alone can justify the choice. It also helps in bathrooms where every line counts, especially if the room is compact and you don't want a sink shape dominating the vanity.

The other strong advantage is the custom feel. Even straightforward bathroom renovations can look more resolved when the sink is integrated into the vanity top rather than selected as an afterthought.

Where the trade-offs become real

The downside isn't that integrated sinks are bad. It's that they can be unforgiving when something goes wrong.

According to this maintenance-focused guide, a key gap in most advice is how integrated sinks handle hard water buildup, staining from products like hair dye, or localised damage, as the one-piece design complicates repairs compared to a simple basin swap-out.

That issue matters far more in lived-in bathrooms than in showroom displays.

Here's the practical split:

  • If the household is careful, an integrated sink can stay looking excellent for a long time.
  • If the bathroom sees hard use, staining and surface wear need to be considered early.
  • If damage occurs, the repair path can be more involved than replacing a separate bowl.

The sleekest vanity in the room can become the most annoying one to own if the basin is damaged and the top can't be dealt with simply.

A quick decision view

Pro Why it matters
Seamless cleaning Fewer edges where residue collects
Refined appearance Strong fit for modern bathrooms and minimalist layouts
Custom visual result Makes the vanity feel purpose-designed
Con Why it matters
Repair complexity Damage can affect the whole vanity top, not just the bowl
Staining concerns Product use and water quality can influence long-term appearance
Less future flexibility You can't easily change just the basin style later

For owner-occupiers who want a polished primary bathroom, the pros often outweigh the cons. For rentals, teenagers' bathrooms, or heavily used family spaces, I'd slow down and assess whether the visual gain is worth the added replacement risk.

Design and Layout for Any Bathroom Size

An integrated sink isn't only for large statement bathrooms. In smaller rooms, it can solve problems, provided the vanity is sized properly and the basin shape suits the way the room is used.

A modern small bathroom featuring a floating wooden vanity, an integrated white sink, and a glass shower stall.

Integrated sinks commonly measure 24 to 36 inches wide and 16 to 24 inches front-to-back, according to this sizing guide on integrated versus undermount sinks. Those proportions are useful in Australian renovations because vanity depth often becomes the limiting factor, especially in ensuites, apartments, and older homes.

How to size one properly

Start with movement, not the vanity catalogue. You need enough clearance to stand comfortably, open drawers, and move past the vanity without the room feeling pinched.

Then look at three things:

  • Depth first: In many Victorian bathrooms, depth creates the biggest problem. A vanity that projects too far can tighten the walkway quickly.
  • Bench landing space: Even a small integrated top should leave some usable area for soap, toothbrushes, or handwash.
  • Basin position: A centred basin looks neat, but an offset bowl can improve function if storage or shared use matters more.

Small bathrooms often benefit most

Because integrated sinks remove visual interruption, they can help a compact room feel calmer. That doesn't mean the unit should be oversized. It means the vanity should be proportioned so the room still breathes.

A floating vanity helps. So does limiting heavy side panels and choosing a basin shape that contains splashing rather than spreading water across the top.

For smaller layouts, this collection of small bathroom ideas in Australia is useful for thinking through spacing, storage, and visual weight.

Don't ignore tapware and drainage

The sink isn't just a shape on a vanity drawing. The faucet reach, spout height, and basin slope all affect whether the vanity feels effortless or annoying.

A beautiful sink that splashes every morning isn't well designed. It's just well photographed.

If accessibility is part of the brief, integrated systems can also be a sensible option because the top and bowl can be planned as one coordinated surface. That makes it easier to think through user reach, vanity depth, and how much room the person needs at the basin.

Your Decision Checklist Before You Commit

The best way to choose an integrated sink is to stop asking, “Do I like the look?” and start asking, “Will I still like owning it in a few years?”

That shifts the decision from style alone to lifecycle value.

Ask these questions honestly

  • Who uses this bathroom every day?
    A calm ensuite used by adults is very different from a busy family bathroom or a guest bathroom that doubles as the kids' zone.

  • How careful are the users really?
    If the room gets rushed use, dropped items, product spills, and rough cleaning, the sink needs to cope with that reality.

  • Would replacement be simple if something went wrong?
    For renovators, landlords, and body corporates, the key issue is lifecycle cost. If a basin is damaged, an integrated unit often means replacing the entire countertop, as noted in this discussion of practical replacement cost.

  • Am I choosing this for resale, personal enjoyment, or tenancy durability?
    Those goals can point to different sink types.

When an integrated sink makes sense

An integrated sink is usually a strong choice when you want:

  1. A clean vanity line with minimal visual clutter.
  2. Easier wiping and fewer grime-catching edges.
  3. A bathroom that feels more custom than standard.

It can be a weaker choice when the room is exposed to hard wear, frequent product staining, or users who won't treat the surface gently.

Why professional planning matters

Bathroom renovations in Victoria sit inside a compliance-heavy process. The vanity choice doesn't exist in isolation. It interacts with waterproofing, plumbing set-out, wall finishes, storage needs, and who is responsible for the build outcome.

That's why it helps to work with a team that can resolve the whole room before construction starts. If you're weighing layout, durability, and compliance obligations, it's worth understanding why using a registered builder matters for your bathroom renovation. For more complex projects, a registered builders unlimited approach can provide the confidence that design intent and build responsibility stay aligned.

A good 3D design process also helps here. It lets you see whether the integrated sink improves the room, or whether a different basin format would give you a better result in use.

Frequently Asked Questions About Integrated Sinks

Can a chipped or cracked integrated sink be repaired

Sometimes.

The repair outcome depends on the material, how deep the damage runs, and whether it sits on a flat surface or inside the bowl where water and cleaning products hit it every day. Small chips in some solid-surface products can often be filled and refined to a reasonable standard. Hairline cracks, impact damage near the waste, and larger fractures are a different story. Those jobs are harder to hide and harder to trust long term.

The practical issue is replacement. With a separate basin, you can often swap the bowl and keep the vanity top. With an integrated unit, damage can turn into a full top replacement.

Are integrated sinks a good choice for rental properties

They suit some rentals, not all.

For a higher-end property where presentation matters and the vanity is unlikely to cop rough treatment, an integrated sink can work well. In a hard-use rental, student property, or home with frequent tenant turnover, I usually tell owners to look closely at repair risk first. One bad chip, a hair dye stain, or a burn mark can cost more to sort out than people expect.

If the main goal is low replacement cost over ten or fifteen years, a standard vanity with a separate basin is often the safer ownership decision.

What's the difference between an integrated sink and an undermount sink

An integrated sink is made as one continuous piece with the vanity top. An undermount sink is a separate basin fixed below the benchtop.

From normal standing height, both can give a clean result. The difference shows up later. Integrated sinks remove the join, so there is less edge detail to clean. Undermount sinks usually give you more flexibility if the basin gets damaged or if you want to change the look without replacing the whole top.

Are integrated sinks becoming more popular

Yes, especially in bathrooms where owners want a cleaner vanity line and a more custom look.

That said, popularity should not decide the purchase. In Australian homes, the better question is whether the sink suits the way the bathroom will be used, cleaned, and maintained over time. A product can be fashionable and still be the wrong choice for a busy family bathroom or a rental.

Are they only for large or luxury bathrooms

No.

They can work very well in smaller bathrooms because the continuous top can make the vanity look less cluttered. The catch is scale. If the bowl shape eats too far into the bench area, you lose the little bit of landing space that small bathrooms need for soap, toothbrushes, and day-to-day use.

Are integrated sinks hard to keep clean

Daily cleaning is usually easier because there are fewer joins, rims, and silicone lines catching grime.

Long-term maintenance depends more on the material than the format. Matte white finishes can mark up faster in some homes. Gloss surfaces show water spots less in others. In parts of Melbourne with harder water, mineral build-up around the waste and tap zone becomes a bigger issue than the integrated design itself. Use mild cleaners, avoid abrasive pads, and check what the manufacturer allows before assuming every stain can be scrubbed out.

Do integrated sinks cost more in the long run

They can.

Up front, they often sit above basic vanity-and-basin combinations. The bigger cost question is what happens if something goes wrong in year five or year eight. If the top and bowl are one piece, a repair may be limited and a replacement can involve the whole vanity top, plus plumbing labour to disconnect and refit. That is where lifecycle cost starts to matter more than showroom price.

For homeowners planning to stay put, the cleaner look may be worth it. For owners who want the simplest future repairs, a separate basin usually gives more flexibility.

  • siteprobathrooms

8 Small Ensuite Bathroom Ideas for a Stunning Renovation

You notice the problems the first week you live with a small ensuite properly. The door fights the vanity, the shower entry feels tighter than it did in the showroom, and every bottle, towel, and charger seems to end up on display. A compact ensuite can still work well, but only if the layout has been resolved with precision rather than guesswork.

That is why small ensuites reward disciplined planning. In tight footprints, a few centimetres taken by the wrong vanity depth, door swing, or shower screen can make the room awkward to use and harder to waterproof, ventilate, and clean properly. I see the same pattern in renovation consults across Victoria. Homeowners often come in thinking they need more room, when what they really need is a better plan.

Good small ensuite bathroom ideas are practical before they are decorative. The best ones improve circulation, protect sightlines, reduce visual clutter, and make storage part of the layout instead of an afterthought. If you are still shaping the floor plan, this guide to designing an ensuite that works in real homes is a useful starting point.

The ideas below focus on what holds up on site, not just what looks good in inspiration photos. They also include real trade-offs, common mistakes, and three SitePro before-and-after mini case studies with notes on cost, timeline, and final result, so the advice stays grounded in actual renovation outcomes.

1. Space-Saving Wall-Mounted Fixtures

A modern bathroom featuring a floating vanity, wall-mounted toilet, and minimalist neutral decor with wooden accents.

Wall-mounted fixtures earn their place early in a small ensuite plan because they solve two problems at once. They clear the floor visually, and they reduce the bulky feel that floor-mounted units create around the entry, vanity, and toilet zone.

The gain is not just visual. A floating vanity usually makes daily cleaning easier, and a wall-hung toilet removes the hard-to-reach edges around the pan. In a tight room, that matters. Small ensuites get messy faster, and awkward corners become a maintenance problem within weeks.

Standard basins can be deeper than many homeowners expect, which is why slimline basins, shorter-projection vanities, and wall-hung options show up repeatedly in well-resolved compact layouts. The right fixture depth often decides whether the room feels usable or frustrating.

Where wall-mounted fixtures work best

Use them where circulation is tight or where the room needs to feel calmer on entry. I specify them most often in ensuites with a narrow doorway approach, a toilet opposite the vanity, or limited clear floor area between fixtures.

A few combinations tend to hold up well on site:

  • Floating vanity with drawers: Better storage efficiency than hinged doors in shallow cabinetry.
  • Wall-hung basin: Useful where vanity depth needs to be kept to a minimum.
  • Concealed-cistern toilet: Cleaner sightlines, but only if the framing and plumbing set-out are resolved early.
  • Recessed mirror cabinet: Better than a deep surface-mounted cabinet when shoulder room is already tight.

Practical rule: Confirm wall structure, waste locations, cistern access, and waterproofing details before you commit to wall-mounted fixtures.

There is a trade-off. Wall-hung fittings usually cost more to install than standard floor-mounted pieces because the wall has to do more work. The frame needs to be solid, the plumbing tolerances need to be tighter, and service access cannot be treated as an afterthought. If the wall build-up is handled badly, the room can lose some of the depth you were trying to protect in the first place.

One SitePro before-and-after project made that clear. The original ensuite had a full-depth vanity that pinched the entry and left the toilet wall feeling crowded. We replaced it with a floating vanity, tightened the storage into the wall line, and simplified the toilet area so the room read as one cleaner plane. The budget impact was moderate rather than dramatic, the work stayed within a standard renovation timeline, and the finished room felt easier to move through even though the footprint did not change.

If you are still testing fixture positions, SitePro's guide to planning an ensuite layout that works in real homes will help you sort out clearances before selections are locked in.

2. Compact Corner Showers with Frameless Glass Enclosures

A sleek modern corner shower with glass enclosure in a bright, clean ensuite bathroom featuring wood cabinetry.

Most cramped ensuites suffer from one of two problems. The shower enclosure is too bulky, or the shower door steals valuable circulation space every time it opens. A compact corner shower with frameless glass solves both.

Frameless glass keeps the eye moving across the room instead of stopping at a heavy frame or frosted panel. Corner positioning also uses difficult real estate well, especially in narrow ensuites where a full-width shower can dominate the layout.

The trade-off most people miss

Frameless glass looks light, but it needs disciplined waterproofing and detailing. If the floor falls are poor, the seals are cheap, or the shower entry is too open for the way the room is used, you'll feel that decision every day. Good-looking glass doesn't compensate for bad drainage.

That's why I usually steer people towards one of these approaches:

  • Quadrant enclosure: Softens corners and can improve movement in very tight rooms.
  • Frameless corner screen: Best when you want the room to read as one open space.
  • Wet-room style shower zone: Strong option where floor grading and waterproofing can be handled properly.

A SitePro before-and-after project in a tight ensuite replaced a dated shower with a cleaner corner layout and frameless glass screen. The old room felt shut in because the enclosure visually chopped the space in half. After the renovation, the shower read as part of the whole room rather than a separate cubicle, which is exactly what compact modern bathrooms need.

Good small showers don't feel small because of fancy fittings. They feel generous because the entry is easy, the glass disappears, and the floor flows properly.

If you're weighing a corner shower against a full wet-room setup, think about maintenance as much as aesthetics. Frameless glass is easier on the eye, but you still need practical details like a recessed niche, dependable water sealing, and tile selection that won't make soap residue look worse than it is.

3. Strategic Mirror Placement and Oversized Mirrors

A modern minimalist ensuite bathroom featuring a wooden vanity, floating sink, and a large wall mirror.

If you want one of the fastest visual upgrades in a small ensuite, make the mirror bigger. Not fancier. Bigger. In compact rooms, an undersized mirror makes the wall feel chopped up and meaner than it needs to.

An oversized mirror reflects light, repeats finishes, and gives the room more visual depth. Full-width vanity mirrors work especially well when the ensuite doesn't have much natural light. They also make slim vanities and floating joinery look more intentional.

Where mirror placement helps and where it doesn't

Place the mirror where it reflects the brightest part of the room. That might be a window, a pale tiled wall, or the main lighting source over the basin. Don't use a mirror just because there's an empty wall. In a bad position, it can double visual clutter or reflect the toilet directly from the doorway, which never improves an ensuite.

For practical performance, I like to combine:

  • Full-width vanity mirrors: Best for broadening the room visually.
  • Demisting mirrors: Worth considering in ensuites that get heavy daily use.
  • Integrated lighting: Clean solution where wall space is limited.

One SitePro update used an oversized mirror to fix a common problem. The previous ensuite had a standard mirror with dark edges, a chunky cabinet, and poor side lighting. The new layout replaced that visual interruption with a broader mirror plane and simpler lighting arrangement. The room immediately felt brighter and less pinched, even before the rest of the finishes were taken in.

This is one of those new bathroom ideas that looks decorative but is really about proportion. In small rooms, scale matters more than ornament. A large mirror with clean edges almost always beats a small feature mirror with a heavy frame.

4. Neutral Colour Palettes with Strategic Accent Elements

A small ensuite doesn't need to be all white, but it does need restraint. The easiest way to make a compact bathroom feel busy is to combine too many feature tiles, too many metals, and too many colour changes in a room that already has a lot going on.

Neutral palettes work because they calm the background. Warm white, soft beige, pale greige, and light stone tones let the layout and materials do the work. Then you add one accent direction, not five. That could be brushed brass, matte black, fluted timber, or a feature tile in a controlled area.

The right way to add personality

Accent elements should sharpen the scheme, not dominate it. Good places to use them include the vanity joinery, tapware finish, niche tile, or mirror detail. Bad places include every wall, every fitting, and every accessory bought in a burst of enthusiasm after tile selections are done.

A practical approach is:

  • Choose one metal finish: Keep taps, handles, shower fittings, and hooks consistent.
  • Use texture instead of extra colour: Timber grain, stone-look porcelain, and matte surfaces add warmth without crowding the room.
  • Keep feature tiles contained: Inside a niche, on a vanity splashback, or on one wall only.

I've seen plenty of ensuites where owners wanted “designer bathrooms” and ended up with a mix of trends that dated the room before the grout cured. The more compact the room, the more disciplined the palette needs to be.

One SitePro ensuite transformation leaned into warm neutrals with subtle timber detail and restrained hardware. The previous room had several competing finishes and looked smaller because every surface demanded attention. Once those choices were edited back, the bathroom felt more expensive, even though the improvement came from design discipline rather than visual excess.

5. Integrated Storage Solutions and Recessed Niches

A small ensuite starts to feel cramped the moment everyday items end up on display. One shampoo bottle on the floor turns into six. The vanity top disappears under skincare, razors, chargers, and spare toilet rolls. Good storage planning stops that slide early.

Integrated storage works because it uses wall depth and joinery layout instead of stealing usable floor area. In practical terms, that means recessed shower niches, mirrored shaving cabinets, vanity drawers with proper internal divisions, and tall storage only where the wall can carry it without tightening the room. In compact ensuites, the goal is simple. Keep necessities close at hand and keep surfaces clear.

A useful way to plan it is to treat the room as a movement problem, not a furniture problem. Storage should support the path through the room, not interrupt it. That usually leads to choices like:

  • Recessed shower niches: Better access than wire caddies, with a cleaner finish and fewer visual distractions.
  • Drawer-based vanities: Easier to use than deep cupboards, especially for small items that otherwise vanish at the back.
  • Mirror cabinets: They add storage at eye level without increasing the vanity footprint.
  • Tall joinery on one controlled wall: Effective for linen and bulk items, but only if door swings and entry clearance still work.

The trade-off is that integrated storage has to be resolved early. A recessed niche affects framing, waterproofing, tile set-out, and sometimes plumbing positions. Get it wrong and the niche lands in an awkward spot, cuts across tile lines, or ends up too shallow for the products the household uses. If you are still weighing up tile sizes and layout, SitePro's guide on how to choose bathroom tiles for a small bathroom helps with the planning side of that decision.

One SitePro before-and-after ensuite in Highett shows the difference clearly. The original room had almost no useful storage, so everything sat out on the vanity and shower floor. The renovation added a recessed niche, a custom vanity with full-extension drawers, and a mirrored cabinet sized to the wall rather than picked off the shelf. The build cost stayed controlled because these items were designed into the renovation from the start, not added late as fixes. The result was a bathroom that looked calmer and worked better every morning.

Hidden storage is often what makes a compact ensuite feel complete.

I usually tell clients to be honest about what needs to live in the room. Two people using an ensuite need different storage from a guest bathroom. If one person uses large pump bottles, electric grooming tools, or backup toiletries, the joinery has to allow for that. Storage that suits real habits will keep the room tidy long after the renovation is finished.

6. Large-Format Tiles for Visual Continuity

Large-format tiles do something small mosaics and busy patterns can't. They reduce visual interruption. In a compact ensuite, fewer grout lines usually means a calmer room, and a calmer room almost always feels larger.

That doesn't mean large tiles are always easier. They demand a flatter substrate, more careful set-out, and a tiler who knows how to manage lippage and pattern alignment. But when they're done properly, they give compact ensuites a clean, architectural finish that suits modern bathrooms especially well.

Where they work best

I like large-format tiles on walls first, then on floors if the room proportions and falls allow for them. Matching or closely related floor and wall tones can make the room read as one envelope rather than a patchwork of separate surfaces.

A few practical rules help:

  • Use restrained grout colour: Contrasting grout can make a small room busier than it needs to be.
  • Think about slip resistance: Floor selection still has to suit a wet area, no matter how refined the tile looks.
  • Set out around niches and edges: Poor tile planning around fixtures ruins the clean effect quickly.

One of the reasons large-format porcelain works so well in designer bathrooms is that it supports visual quiet. The eye reads more surface and fewer breaks. In a compact ensuite, that's a real advantage.

If you're comparing finishes, sizes, and layouts, SitePro's guide on how to choose bathroom tiles helps narrow the decision before you commit to samples.

7. Smart Lighting Design with Layered Illumination

Lighting is where many ensuite renovations fall short. A single centre downlight might technically illuminate the room, but it won't flatter faces at the mirror, soften the shower zone, or make the space feel considered. In a compact bathroom, lighting has to work harder because there's nowhere for poor placement to hide.

Layered lighting is the answer. You want ambient light for the whole room, task lighting where grooming happens, and a small amount of accent light if you want depth and atmosphere. That combination makes a practical ensuite feel more like a private retreat.

A better lighting mix

Vanity lighting matters most because that's where people use the room in detail. Side lighting or well-placed mirror lighting reduces harsh facial shadows better than relying only on ceiling fittings. Then ceiling lights can do the background work without trying to solve every lighting need at once.

A strong setup often includes:

  • Task lighting at the vanity: Better for shaving, makeup, and everyday grooming.
  • General ceiling lighting: Keeps the room evenly usable.
  • Accent LED lighting: Works under floating vanities, inside niches, or behind mirrors when done with restraint.
  • Dimmers where possible: Helpful for shifting from bright mornings to softer evening use.

One SitePro after-shot that stood out to me used simple layered light rather than flashy fittings. The original ensuite felt flat and slightly gloomy despite having enough wattage. Once the vanity lighting, mirror reflection, and general room lighting were coordinated, the same footprint felt more spacious and far more polished.

For wet-area lighting basics and placement ideas, SitePro's article on downlights in a bathroom is worth reading before the electrical plan is finalised.

8. Efficient Ventilation and Moisture Management Systems

A beautiful ensuite won't stay beautiful if moisture isn't controlled. This is the least glamorous part of bathroom renovations, but it's one of the most important. Small ensuites trap steam quickly, and once condensation settles into paint, grout lines, cabinetry, or silicone joints, the room starts ageing faster than it should.

Ventilation needs to be designed, not assumed. A weak fan, poor duct run, or exhaust that doesn't vent properly to the outside will leave you with recurring moisture issues no matter how good the finishes look on day one.

What holds up over time

Ducted extraction is usually the smarter option for enclosed ensuites, especially where showers are used daily. Humidity-sensing controls can also help because they keep ventilation running based on actual moisture, not guesswork. And any complicated ducting or structural coordination should be handled by properly qualified trades and registered builders unlimited where the project scope requires it.
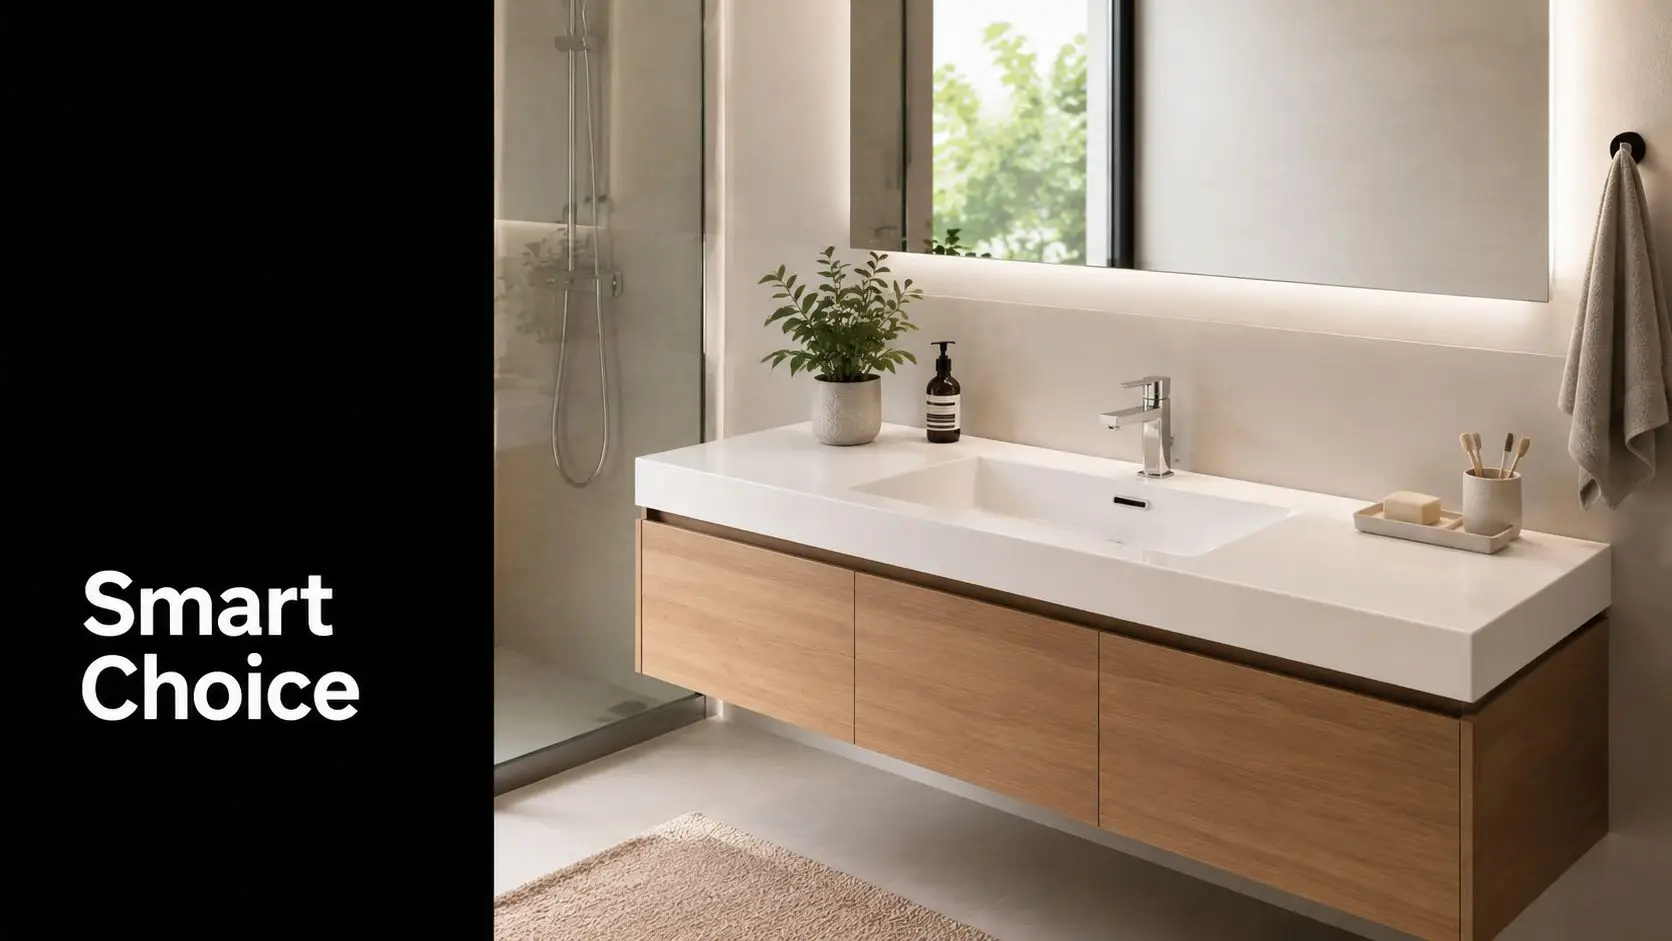
Focus on these details:

  • External discharge: Exhaust air must leave the building properly, not dump into the ceiling cavity.
  • Short, efficient duct paths: Long or awkward runs reduce fan performance.
  • Moisture-resistant materials: Cabinet finishes, paint systems, and joinery selections all matter in steamy rooms.
  • Ongoing access for maintenance: Fans need cleaning and servicing to keep working well.

Ventilation doesn't sell the renovation in the showroom. It protects the renovation after handover.

The best new bathroom ideas aren't only the visible ones. Good moisture management keeps your tiles, paint, joinery, and air quality in better condition, and it helps your ensuite feel fresh every day instead of damp by mid-winter.

8-Point Comparison: Small Ensuite Bathroom Ideas

Design Option Implementation Complexity Resource Requirements Expected Outcomes Ideal Use Cases Key Advantages
Space-Saving Wall-Mounted Fixtures Medium–High: requires wall reinforcement and concealed plumbing Structural reinforcement, concealed cisterns, professional plumber/joiner, higher-cost fixtures Frees floor space, cleaner lines, easier floor cleaning Small ensuites, modern renovations where floor area and hygiene matter Maximises usable floor area, contemporary look, easier cleaning
Compact Corner Showers with Frameless Glass Enclosures Medium: precise glass fitting and waterproofing needed Frameless glass panels, skilled glazier/tiler, quality seals and drainage Visual openness, better light flow, efficient corner use Tight bathrooms with unused corners, projects seeking premium aesthetic Opens space visually, easy-to-clean surfaces, flexible sizing
Strategic Mirror Placement and Oversized Mirrors Low–Medium: anchoring, moisture protection and safety considerations Large mirror panels, moisture-resistant backing, fixings, optional demister Increased perceived space and brightness, improved grooming functionality Cost-conscious updates, rooms with natural light, quick refurbishments Very cost-effective, multiplies light, fast visual impact
Neutral Colour Palettes with Strategic Accent Elements Low: material and finish selection, simple application Paint/tiles, trim, hardware finishes, textured materials Visually expands space, timeless calming aesthetic, resale-friendly Full-suite refreshes, resale-focused projects, minimal structural work Timeless look, visually enlarges space, flexible for future updates
Integrated Storage Solutions and Recessed Niches High: requires careful planning, custom joinery and waterproofing Custom cabinetry, joinery labour, design time, moisture-resistant materials Eliminates clutter, maximises storage without using floor area Small ensuites lacking storage, bespoke renovations, long-term solutions Maximises hidden storage, premium integrated appearance, efficient use of space
Large-Format Tiles for Visual Continuity Medium–High: skilled tiling, precise subfloor preparation Oversized porcelain tiles, specialised cutting tools, experienced tiler Seamless visual flow, fewer grout lines, premium modern finish Projects aiming for high-end look and visual continuity Creates spacious feel, durable and easier to clean, modern aesthetic
Smart Lighting Design with Layered Illumination Medium: electrical planning and correct fixture placement LED fixtures, dimmers, wiring, electrician, IP-rated fittings Improved functionality, depth and mood control, reduced shadows Low-natural-light ensuites, high-use bathrooms, luxury upgrades Enhances function and ambience, energy-efficient, adaptable lighting scenes
Efficient Ventilation and Moisture Management Systems Medium: ducting planning and correct installation required Ducted exhaust fan, humidity sensors, external venting, insulation Prevents mould, improves air quality, protects finishes and structure Small enclosed ensuites, older homes, high-humidity bathrooms Protects structure and finishes, improves health and longevity of fittings

Ready to Start Your Bathroom Renovation?

These small ensuite bathroom ideas prove that a compact space isn't a limitation. It's a design test. If the planning is right, even a tight ensuite can feel calm, functional, and polished. If the planning is poor, no amount of expensive tapware or trendy tiles will rescue it.

The most successful ensuites all share the same logic. They protect circulation, reduce visual clutter, and make every fixture earn its place. That's why wall-mounted fittings, frameless corner showers, oversized mirrors, integrated storage, and disciplined lighting keep showing up in strong results. They're not just stylish choices. They solve the problems that make small bathrooms frustrating to live with.

The trade-offs matter too. Frameless glass looks great, but only if drainage and waterproofing are done properly. Large-format tiles can enhance a room, but they expose poor substrate preparation. Floating vanities make the floor feel larger, but they need proper wall support and plumbing coordination. Good renovation advice doesn't pretend every idea is effortless. It helps you choose the right compromises before construction starts.

For homeowners planning bathroom renovations in Highett and greater Victoria, that early planning stage holds the most value. A compact ensuite leaves very little room for guesswork. Layout, storage, tile set-out, lighting, ventilation, and fixture depth all need to work together from the start. That's how modern bathrooms feel easy to use instead of carefully squeezed in.
SitePro Bathrooms approaches this with detailed 3D design, practical renovation experience, and an end-to-end process that helps clients see the room clearly before work begins. That matters in small ensuites because a few centimetres in the wrong place can change how the whole room functions. It also matters if you're balancing aesthetics with buildability and want designer bathrooms that still stand up to everyday use.

Whether you're refining a tired ensuite, collecting new bathroom ideas, or planning a full renovation with registered builders and trusted trades, the goal is the same. Build a room that looks better, works better, and stays that way.

Contact SitePro Bathrooms to discuss your ensuite renovation and turn a cramped, awkward room into a space that feels considered from every angle.

  • siteprobathrooms

9 Bathroom Renovation Ideas Australia for 2026

Is your morning routine a cramped shuffle in a dated bathroom? You're not alone. Plenty of Australian homes still have bathrooms that work on paper but feel awkward in daily life. Storage is tight, ventilation is poor, and the layout often reflects an older way of living rather than how families use the space now.

That's why good bathroom renovations start with function, not just finishes. The best results come from choosing new bathroom ideas that suit the room size, the people using it, and the budget you're comfortable with. In Australia, renovation guidance commonly groups projects into three broad tiers: about $8,000 to $15,000 for a cosmetic refresh, $15,000 to $35,000 for a mid-range renovation, and $35,000+ for a high-end bathroom. One Australian industry source also cites the Housing Industry Association's average bathroom renovation cost at around $26,000, which is a useful benchmark when weighing a refresh against a full redesign (Australian bathroom renovation cost guide).

For homeowners in Victoria, that matters because labour, waterproofing, plumbing compliance, demolition, and tiling can take a bigger share of the budget than people expect. A small room doesn't always mean a cheap renovation. Fixed trade costs still apply, especially when the work needs to meet Australian Standards and local requirements, as noted in this Australian bathroom ideas guide for Victoria-focused planning.

If you're planning bathroom renovation ideas australia style, with a mix of practicality and design, these are the approaches that consistently deliver.

1. Spa-Inspired Wet Room Design

A luxurious modern walk-in shower with stone walls, a bench, and a rainfall showerhead in a spa-like bathroom.

A wet room can make a bathroom feel bigger, calmer, and more architectural. Instead of breaking the room into small zones with a shower base and bulky framing, the space reads as one continuous surface. That's why this style works well in contemporary Melbourne homes, coastal renovations, and designer bathrooms where the brief is clean and minimal.

It only works when the construction is right. In Victoria, where winter mornings are cold and bathrooms stay damp for longer, poor drainage and weak ventilation show up fast. If the falls aren't correct or the waterproofing is rushed, the room won't feel luxurious for long.

What makes it work

The most successful wet rooms keep the layout simple. A frameless glass panel, a linear drain, and one consistent floor tile usually give the best result. Moroccan-inspired feature tiles, stone-look porcelain, or textured neutral finishes can add character without making the room feel busy.

Practical rule: Treat a wet room as a technical build first and a style decision second.

A few trade-offs matter here:

  • Open feel: A wet room removes visual barriers and helps small or medium bathrooms feel more generous.
  • Higher build precision: The waterproofing, floor preparation, and drainage have to be planned early.
  • Better for low-clutter households: If everyone leaves products on the floor, the clean spa look disappears quickly.

In homes around Highett and Bayside, this style often suits clients who want a calm retreat rather than a family bathroom packed with storage.

Where people get caught out

The mistake is assuming a wet room is easier because it looks simpler. It isn't. It needs proper moisture management, a fan that clears humidity effectively, and materials that won't become slippery or tired-looking after heavy use.

Heated towel rails are worth considering in Melbourne conditions because they improve comfort and help towels dry faster. And before the floor tile is chosen, the plumbing and drainage positions need to be locked in. A 3D design process can assist with this, allowing you to sort out screen lines, drain placement, and circulation before the build starts.

2. Dual Vanities with Under-Mount Storage

A modern bathroom featuring sleek dual floating vanities, illuminated mirrors, a glass walk-in shower, and a freestanding tub.

If two people use the bathroom at the same time every morning, a dual vanity can remove a lot of friction from daily life. This isn't only about luxury. In family homes, it's one of the most practical modern bathrooms upgrades you can make when the room width allows it.

The best setups don't just duplicate basins. They build in storage underneath so the bench stays clear and each person has their own zone. Floating vanities in white oak, walnut, or a smooth painted finish work well because they keep the floor visible and make cleaning easier.

Better for families than oversized single vanities

A long single vanity with one basin can look tidy in photos, but it often underperforms in a busy house. Two stations usually function better than one oversized centre basin because both users get mirror access, power access, and bench space without crowding.

In Victorian homes, this is especially useful in larger family bathrooms and main ensuites where the room needs to do more than look good.

  • Cleaner routines: Separate stations reduce product sprawl and elbow clashes.
  • Smarter storage: Deep drawers below each basin are usually more useful than a mix of shallow cupboards.
  • Better lighting control: Motion-sensor vanity lighting can improve convenience during early starts and night use.

If the room can't comfortably support two users standing side by side, forcing in a double vanity often makes the whole bathroom feel compromised.

What to specify properly

Countertops need to be durable. Engineered stone alternatives, porcelain surfaces, and other hard-wearing benchtop materials are usually the safer choice in a busy bathroom than softer finishes that mark easily. Hardware should match the rest of the room, but function comes first. Soft-close drawers, practical divider inserts, and mirror positions matter more than decorative handles.

This layout also benefits from proper ventilation around the vanity zone. In humid bathrooms, mirrors fog, drawers hold moisture, and joinery ages faster when the air doesn't clear properly. That's one of those details clients rarely notice in the showroom but definitely notice after handover.

3. Sustainable and Water-Efficient Fixtures

A modern walk-in shower with a marble bench, glass partition, and pebble stone floor in a bathroom.

Water-efficient bathrooms used to look like a compromise. That's changed. Current Australian bathroom design guidance for 2026 points to practical specification choices that support performance without making the room feel stripped back, including 5-star WELS-rated taps and showerheads, smart exhaust fans, sensor lighting, touchless taps, and digital showers with preset temperatures.

That's a strong direction for bathroom renovations in Victoria, where efficiency and moisture control both matter. A bathroom should feel easy to use day after day. It shouldn't rely on wasteful fittings or poor ventilation to seem comfortable.

Where sustainable choices actually help

Good sustainable selections do more than save water. They can improve hygiene, reduce condensation problems, and make the bathroom easier to maintain. Touchless taps are useful in powder rooms and family homes. Smart exhaust fans help remove humid air before it turns into mould around silicone joints and ceilings.

For clients thinking long term, materials matter too. SitePro Bathrooms' guide to sustainable construction and eco-friendly materials is a useful starting point when you want the renovation to balance finish, durability, and environmental impact.

A practical specification list often includes:

  • Water-efficient tapware: Choose fittings that perform well under everyday use, not just on a product sheet.
  • Moisture control upgrades: Smart fans and well-placed ventilation are as important as the tile selection.
  • Hands-free convenience: Touchless fixtures can improve cleanliness in high-use bathrooms.

The trade-off to understand

Some homeowners focus heavily on visible eco features and ignore the basics. That's backwards. If the waterproofing, extraction, and product quality aren't sound, the renovation won't age well no matter how efficient the fixtures are.

The better approach is to build sustainability into the whole room. Efficient tapware, responsible materials, and strong ventilation should be part of the concept from the beginning, not extra items added right at the end.

4. Heated Floors and Towel Rails

A modern bathroom featuring a timber vanity, a stone vessel sink, and a walk-in glass shower.

Melbourne bathrooms can look polished and still feel miserable in winter. Cold tiles, damp towels, and a room that never quite dries out can ruin an otherwise good renovation. Underfloor heating and heated towel rails solve a real comfort problem, not just a design one.

This is one of the easiest upgrades to justify in a Victorian climate because you notice it every day. Clients usually think of it as a luxury item at first. Once they've lived with it, they tend to treat it as part of the bathroom's basic usability.

A comfort upgrade that earns its place

Electric under-tile heating suits many bathroom-only renovations because it can be installed within a standard bathroom build sequence. Hydronic systems can make sense when they're part of a wider whole-home heating strategy. Which route works best depends on the house and the scope of works.

Heated towel rails are even simpler. In compact bathrooms and apartments, they do double duty by warming towels and helping the room feel drier between uses.

A bathroom that looks high-end but stays cold and damp isn't finished properly for Melbourne living.

What to consider before you commit

These systems need planning with the electrician and tiler early in the project. Thermostat location, wall space for rails, and the tile layout all affect the final result. It's also worth thinking about how the room is insulated. Heat added to a poorly detailed bathroom won't perform as well as heat added to one that's been planned properly.

This idea works particularly well in:

  • Family bathrooms: Better comfort during early starts and winter school mornings.
  • Ensuites: Warm floors add noticeable comfort in smaller footprints.
  • Apartments: Towel rails can improve drying in rooms with less natural airflow.

For modern bathrooms, it's one of those additions that doesn't dominate the aesthetic but lifts the whole experience.

5. Large-Format Tiles and Minimal Grout Lines

Step into a small Melbourne bathroom with too many grout joints and the room can feel busy before you even turn the light on. Large-format tiles fix that fast. They give the eye fewer breaks, make walls and floors read as broader surfaces, and cut down the amount of grout that needs ongoing cleaning.

This look suits a lot of Australian homes, especially where bathrooms are compact and every visual decision affects how spacious the room feels. In Victoria, it also has a practical upside. Less grout means fewer joints holding moisture, soap residue, and mould in a damp room.

Bigger tiles look simple, but they need tighter planning

Large-format tiles only work well when the set-out is resolved early. Tile joints should line up with the vanity, shower niche, tapware, and screen edges where possible. If that planning is missed, the finished bathroom ends up with thin tile slivers, awkward cuts, and a layout that looks unsettled.

I usually advise clients to choose the tile after the room layout is close to locked in, not before. That gives the builder and tiler room to set out the space properly instead of forcing the room to suit a tile size that fights the design.

A strong result usually comes from a few clear choices:

  • Matte or low-sheen floor tiles: Better underfoot grip and a quieter finish visually.
  • Porcelain in light or mid tones: Helps the room feel brighter without showing every mark.
  • Consistent joint lines: Cleaner sightlines across the floor, walls, and shower area.
  • Full-height waterproofing and substrate prep: Larger tiles show defects quickly, so the base has to be true.

The trade-off is installation tolerance

Bigger tiles are less forgiving than standard formats. If a wall is out, you see it. If the floor falls poorly, you feel it. Lippage stands out more because the surface is cleaner and the grout joints are tighter.

That matters in older Victorian homes, where walls and floors are rarely perfectly straight once demolition starts. We often find that the best-looking large-format bathroom is the one that allowed extra time for screeding, straightening, and set-out before a single tile went down.

For homeowners considering this finish, our guide to installing large-format porcelain tiles explains what needs to happen behind the scenes for the result to look sharp and last well. It's also the kind of detail we test early in our 3D design process, because tile size affects everything from niche proportions to drain placement.

6. Statement Lighting and Mirror Features

Lighting changes how every bathroom finish reads. A tile that looks flat under harsh downlights can look warm and textured under layered lighting. A vanity that feels ordinary can become a focal point when the mirror and lighting are planned together.

Many bathroom renovations often fall short. The joinery and tapware get all the attention, but the lighting ends up being generic. That's a missed opportunity, especially in designer bathrooms where atmosphere matters as much as function.

Layer the light, don't rely on one fitting

A bathroom needs ambient light for the room overall, task light at the vanity, and a little accent lighting if you want depth. Backlit mirrors, wall sconces, and carefully placed ceiling lights usually give a much better result than one bright fitting trying to do everything.

Large framed mirrors also help compact rooms feel larger. Black-framed mirrors suit sharper contemporary schemes. Brass-rimmed arches and soft-edged mirrors work well in warmer interiors with timber, stone, or brushed metals.

The mirror isn't just a reflective surface. In many bathrooms, it's the visual anchor above the vanity.

Common wins and common mistakes

The biggest win is placing light where people need it most. Vanity lighting should flatter the face and reduce shadows. Warm white lighting usually feels more comfortable in bathrooms designed as retreat spaces.

The common mistakes are predictable:

  • Too much overhead glare: Bright ceiling-only lighting makes the room feel clinical.
  • Mirror too small for the vanity: The proportions look off immediately.
  • No night-time lighting option: A softer circuit or integrated mirror light makes a bathroom easier to use after dark.

For Australian homes chasing modern bathrooms that still feel warm, this is one of the most cost-effective upgrades in visual terms. Good lighting makes every other material look better.

7. Walk-In Showers with Niche Storage and Seating

A walk-in shower is one of the safest bets in bathroom renovation ideas australia searches because it solves both style and function in one move. It looks contemporary, improves access, and removes the visual heaviness of a boxed-in shower enclosure.

The version that performs best includes built-in storage and somewhere to pause. A niche keeps bottles off the floor. A compact bench or ledge adds comfort and can make the shower more practical for different ages and mobility needs.

Build storage into the structure

Freestanding caddies and corner baskets usually spoil a clean shower design. They collect grime and make a new build feel temporary. Recessed niches look more integrated and are easier to keep tidy when they're positioned to suit the plumbing and tile layout.

A seat can be subtle too. It doesn't have to turn the room into an accessibility fit-out. In many family and main bathrooms, a simple built-in bench makes shaving, washing children, or just using the space more comfortably much easier.

Useful details to get right include:

  • Tile selection underfoot: Slip resistance matters more in a walk-in shower because the floor zone reads as open.
  • Niche placement: It should be easy to reach without sitting directly in the water line.
  • Ventilation nearby: Open showers release more moisture into the room, so extraction needs proper attention.

Why this works well in Victoria

Bathrooms in Melbourne often need to balance compact footprints with daily practicality. A walk-in shower helps circulation, especially when paired with wall-hung vanities and frameless glass. It also suits the current move toward simpler layouts in smaller family bathrooms and ensuites.

The only caution is splash control. Open designs need enough room and the right screen placement, otherwise the floor outside the shower gets wetter than it should. In such scenarios, layout experience matters more than inspiration photos.

8. Timber Accents and Natural Materials

Bathrooms can become too hard-edged if every surface is glossy, cold, and uniform. Timber accents fix that. They add warmth, soften the acoustics a little, and stop a modern bathroom from feeling sterile.

This works especially well in Victoria, where many homeowners want a space that feels calm and residential rather than overly commercial. Timber-look finishes, natural stone, and textured materials suit both contemporary homes and period renovations that need a modern update without losing character.

Warmth without making the room high-maintenance

Timber vanities, timber-framed mirrors, and shelving details are often enough. You don't need to cover the whole room in timber to get the effect. Blackbutt tones, Tasmanian oak looks, and darker walnut finishes all work, depending on whether the palette is coastal, minimalist, or more dramatic.

Natural stone can also bring depth, but it requires realistic expectations. Stone needs care. Some clients love that. Others are better off with porcelain that gives a similar look with less maintenance.

A balanced material palette often looks like this:

  • Timber on joinery: Adds warmth where people see and touch it most.
  • Stone or stone-look surfaces: Good for texture and visual weight.
  • Modern fixtures in contrast: Matte black, brushed nickel, or warm metallic finishes stop the room feeling rustic.

What doesn't work

The common mistake is choosing beautiful natural finishes without planning for moisture. In bathrooms, every material needs to cope with steam, splashes, and cleaning products. Timber vanities should be properly sealed. Stone should be chosen with maintenance in mind. Floors often work better in timber-look porcelain than real timber because they're more stable and practical.

This style suits homeowners who want designer bathrooms with a more grounded, liveable feel. It's less about trend-chasing and more about creating a room that still feels inviting years later.

9. Compact Ensuite Design and Space Optimisation

A compact ensuite usually fails for one reason. The room is drawn to fit fixtures, instead of being planned around how people move.

In Victorian homes, that problem shows up all the time. Period renovations often inherit awkward door swings, narrow wall lengths, and plumbing positions that limit what can go where. Newer townhouses have a different issue. The footprint is tighter from the start, so every choice has to earn its place.

The best small ensuites feel calm because the layout is disciplined. Keep circulation clear from the door to the shower. Reduce visual interruptions. Choose fittings that suit the room instead of forcing full-size products into a space that cannot carry them well.

The layout carries the room

A corner or walk-in shower often gives better movement than a bulky rectangular enclosure. Wall-hung vanities can help, but only if the depth is controlled. I often see vanities selected for storage first, then regretted because they pinch the walkway and make the room feel cramped every day.

Door planning matters just as much. A cavity slider or an outward-opening door can recover usable space, but it needs to be resolved early with framing, services, and privacy in mind. In older Melbourne homes, that early coordination also helps avoid expensive rework once walls are opened up.

Storage should be built into the plan, not added as an afterthought. Recessed shaving cabinets, in-wall niches, and joinery above the toilet usually work harder than extra freestanding pieces.

In a tight ensuite, 20 or 30 millimetres in the wrong place can be the difference between a room that feels efficient and one that feels irritating.

Practical choices that hold up in small spaces

These are the moves that usually deliver the best result:

  • Use one clear focal line: Align the vanity, mirror, and shower screen so the room appears uncluttered when you enter.
  • Keep fixture projections tight: Shorter-depth vanities, toilets, and tapware placements improve movement.
  • Build storage upward: Vertical joinery adds function without taking up valuable floor area.
  • Use large mirrors carefully: They can improve light and apparent width, especially in ensuites with limited natural light.
  • Limit material changes: Too many tile breaks, trims, and feature finishes can make a small room feel chopped up.

Material selection still matters, but practicality comes first here. In Victoria's cooler months and humid periods, compact ensuites need reliable extraction and moisture-resistant finishes because steam builds up faster in a smaller volume of space. That is one reason I prefer simple detailing and easy-to-clean surfaces in these rooms. They age better and are easier to maintain.

For homeowners working through ensuite design ideas for Australian homes, 3D design is especially useful in compact layouts. A plan can look workable on paper and still feel wrong once you account for body movement, mirror position, towel reach, and how the room feels with the door open.

9-Point Comparison of Australian Bathroom Renovation Ideas

A comparison table is useful at this stage because good bathroom ideas can look equally appealing on Pinterest and still perform very differently once budget, layout, ventilation, and day-to-day use come into play. In Victoria, I'd also weigh each option against winter comfort, moisture load, and how much construction work the room can realistically accommodate.

Design Implementation complexity Resource requirements Expected outcomes Ideal use cases Key advantages
Spa-Inspired Wet Room Design High, requires professional waterproofing and drainage work Skilled trades, waterproof membranes, sloped substrates, ventilation Spa-like, open-plan bathroom, improved accessibility and perceived space Modern homes, compact bathrooms seeking luxury, aging-in-place conversions Unified look, easy cleaning, adds property value
Dual Vanities with Under-Mount Storage Medium, plumbing complexity and wider layout needed Two vanity units, additional plumbing runs, cabinetry hardware Improved morning flow and organisation, balanced symmetrical look Family bathrooms, master ensuites with sufficient width Reduces bottlenecks, increases storage, strong resale appeal
Sustainable & Water-Efficient Fixtures Low to Medium, mostly fixture upgrades, some plumbing rework WELS-rated taps and showers, dual-flush toilets, optional rainwater or greywater systems Lower water usage and bills, regulatory compliance and eco appeal Drought-prone regions, eco-conscious homes, cost-saving renovations Significant water savings, rebates may apply, market differentiator
Heated Floors & Towel Rails (Climate Comfort) Medium to High, electrical or hydronic installation and controls Heating mats or pipes, thermostats, electrician or plumber, insulation Consistent warmth, reduced condensation, improved comfort and luxury feel Cold climates, high-end bathrooms, homes with elderly or young children Improved comfort, helps reduce mould risk, feels like a premium upgrade
Large-Format Tiles & Minimal Grout Lines Medium, requires expert tiling to avoid lippage Oversized porcelain or ceramic tiles, precise substrate prep, skilled installers Continuous contemporary look, easier cleaning, visually larger rooms Contemporary renovations, open-plan bathrooms, bathrooms with underfloor heating Fewer grout lines, lower maintenance, polished professional finish
Statement Lighting & Mirror Features Medium, strategic wiring and fixture placement required Quality LED fixtures, smart mirrors, electrician, dimming controls Better ambience, stronger task lighting, clear visual focal points Luxury designs, hotel-style bathrooms, small spaces needing depth Mood control, energy-efficient options, improves design impact
Walk-In Showers with Niche Storage & Seating Medium to High, waterproofing, bench and niche construction Frameless glass, drainage upgrades, tiling, integrated seating, optional jets More comfortable showering, built-in storage, improved accessibility Master bathrooms, accessible designs, spa-like renovations Integrated storage, seating for safety, simpler cleaning
Timber Accents & Natural Materials Medium, careful material selection and sealing required Sustainably sourced timber, natural stone, sealants, skilled joinery Warm, natural finish with tactile quality and a more premium feel Transitional and contemporary homes, high-end renovations, local sourcing Natural warmth, sustainability signal, premium sensory appeal
Compact Ensuite Design & Space Optimisation Low to Medium, careful planning and bespoke solutions Compact fixtures, wall-hung systems, vertical storage, frameless glass Functional small bathrooms that feel more spacious and organised Apartments, rental properties, small ensuites and guest bathrooms Cost-effective, efficient use of space, improves market competitiveness

On site, the right choice usually comes down to what problem needs solving first. If the bathroom feels cold for half the year, heating may deliver more day-to-day value than an expensive feature wall. If the room is tight and hard to clean, larger tiles, a walk-in shower, or better storage will often outperform more decorative upgrades.

This is also where 3D design helps. At SitePro Bathrooms, we use it to test whether an idea that looks good in isolation still works once clearances, door swings, vanity depth, shower set-out, and storage access are all accounted for.

Bring Your Designer Bathroom to Life

A good bathroom renovation isn't only about choosing attractive finishes. It's about making sure the room works every day, in every season, for the people who use it. That means thinking carefully about layout, storage, ventilation, waterproofing, heating, and materials before any tile goes on the wall.

For Victorian homeowners, that practical side matters even more. Melbourne's cooler months and humid bathrooms can expose weak detailing quickly. A room that's poorly ventilated, awkwardly planned, or built around the wrong priorities can look impressive at handover and still become frustrating to live with. The opposite is also true. A well-planned bathroom, even without extravagant finishes, usually feels better because the basics are right.

That's where realistic budgeting matters. As noted earlier, Australian renovation costs are often grouped by clear tiers, from cosmetic updates through to high-end projects, and the final figure depends heavily on scope. In real bathroom renovations, a substantial part of the spend often goes into demolition, waterproofing, plumbing, tiling, electrical work, and compliance, not just the vanity, tapware, and tiles people first notice. That's one reason planning needs to start with what the room must do, then move into how it should look.

If you're weighing new bathroom ideas, start by being honest about the room you have. Is the issue storage, layout, ventilation, comfort, or all of the above? Do you want a family bathroom that handles daily traffic better, a compact ensuite that feels larger, or one of those designer bathrooms that balances warmth with clean lines? The right answer usually isn't the most dramatic one. It's the one that fits the house, the users, and the budget.

Registered builders unlimited who specialise in bathroom renovations bring value here because they can connect the design decisions to the construction detail. That's the gap many homeowners run into. The inspiration is easy to find. The hard part is knowing what will work in your room, in your home, and in Victoria's conditions.

SitePro Bathrooms is one option for homeowners who want that process handled end to end, from concept development and 3D design through to construction and finishing. A 3D design service is especially useful because it helps test layout, storage, tile set-out, and circulation before work begins. That reduces guesswork and gives you something more practical than a mood board.

If you're ready to move from inspiration to a workable plan, the next step is simple. Get the room assessed properly, define the scope clearly, and build the design around how you live. That's how modern bathrooms stop being ideas and become spaces that add comfort, function, and long-term value.

  • siteprobathrooms

Stunning Bathroom Renovation Before and After Gallery

You're probably standing in a bathroom that no longer works for the way you live. The shower sprays where it shouldn't. Storage is never enough. The tiles date the whole room, and every morning starts with some version of compromise.

That's why bathroom renovation before and after stories are so compelling. The change is immediate. You can see what's possible in one glance. In Australia, the renovation boom accelerated from 2020, and bathroom upgrades became one of the most common projects as homeowners focused on comfort, functionality, liveability and property value, as noted in this renovation trend summary.

The problem is that most galleries stop at the pretty photo. They rarely show why the room worked better afterwards, what had to be fixed behind the walls, or how the owners managed the disruption while the work was underway.

Beyond the Pinterest Board Real Bathroom Transformations

A good before-and-after project starts with frustration, not styling. In older Victorian homes, that frustration usually looks familiar. A cramped ensuite where the door collides with the vanity. A family bathroom with nowhere to put towels. A shower recess that has been resealed three times and still smells damp in winter.

The after photo matters because it proves the room can change. But the transformation usually comes from decisions you can't spot at first glance. Better layout. Better storage. Better lighting placement. Correct falls. Cleaner junctions. A room that's easier to clean and easier to use.

One of the easiest ways to judge whether a transformation feels real is to look at projects from homes like yours, in suburbs like yours. A local example such as this Sandringham bathroom renovation project is often more useful than a polished overseas image because it reflects the room sizes, housing stock and practical constraints Victorian homeowners face.

What the best after photos don't hide

The strongest modern bathrooms aren't just visually lighter and more refined. They solve a specific daily problem.

  • Small rooms need visual relief: Wall-hung joinery, clear shower screens and large-format tiles can reduce visual clutter.
  • Busy households need order: Storage has to be designed around what people keep in the room.
  • Older bathrooms need technical correction: If moisture damage, failed membranes or poor ventilation exist, finishes alone won't fix the problem.

A bathroom can look expensive and still perform badly. The rooms that age well are the ones planned from the substrate out.

That's the standard worth aiming for. Not just a nicer bathroom, but a room that feels calm at 7 am and still holds up years later.

Case Study The Compact Ensuite Makeover

The brief for this ensuite was simple on paper and hard in practice. The owners wanted it to feel larger, cleaner and easier to use, without the room physically becoming bigger. That's a common request in ensuite bathroom renovations, because the footprint is usually fixed and every millimetre matters.

A modern, compact ensuite bathroom featuring grey stone tiles, a wall-mounted vanity, and a glass shower enclosure.

Before the renovation, the room felt boxed in. The vanity sat heavily on the floor, the shower framing chopped up the sightlines, and the storage solution was really just a collection of products trying to compensate for a weak layout. Nothing was catastrophic. It was just frustrating, every day.

What changed in the layout

The most effective move was not adding more items. It was removing visual obstacles.

We shifted the room toward a simpler composition with a wall-mounted vanity, a more open shower enclosure and finishes that reflected light rather than absorbing it. In small ensuites, that combination does a lot of work. The floor area reads more clearly, cleaning becomes easier, and the room feels less busy even when the footprint stays the same.
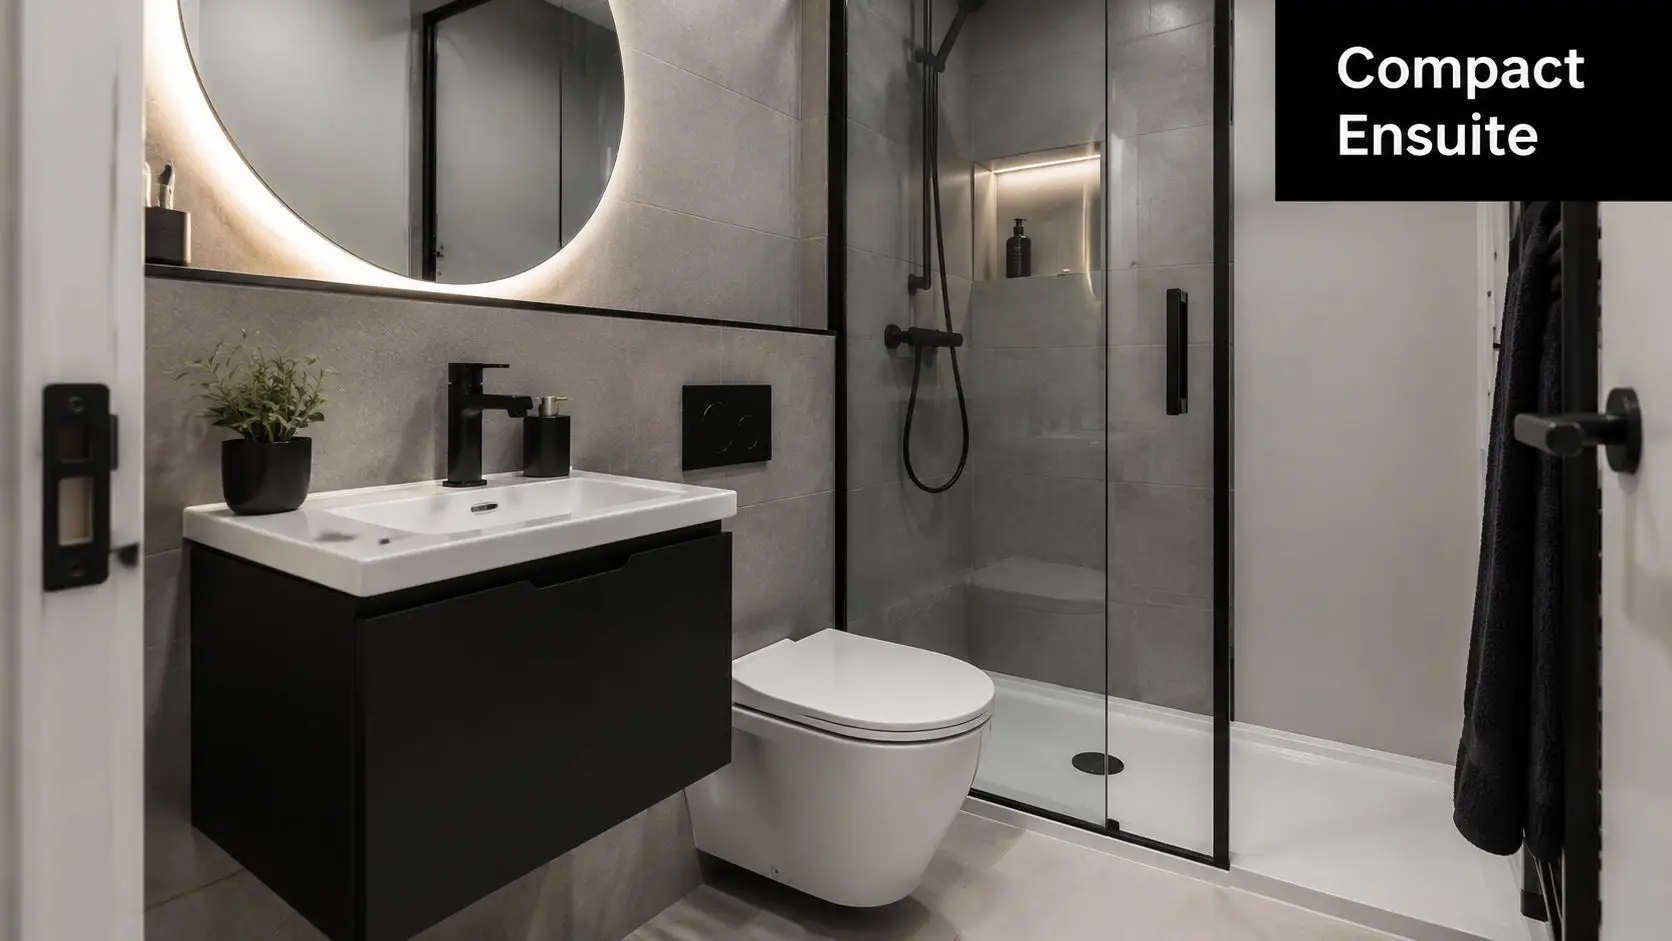
A proper design phase is where these gains happen. Before any demolition, we tested placement, clearances and proportions so the owners could see how the room would function, not just how it would look. If you're planning a compact space, this guide to designing an ensuite is useful because the success of an ensuite almost always comes down to layout discipline.

The trade-offs that mattered

This project involved the kind of choices that separate a nice image from a good renovation result.

Decision What worked What didn't
Vanity style Wall-hung design opened up the room visually Bulky cabinetry would have made the room feel tighter
Shower screen Frameless or low-visual-weight glazing kept sightlines open Heavy framing would have segmented the room
Tile selection Calm, consistent finishes reduced visual noise Too many feature surfaces would have shrunk the space
Storage Drawers and mirrored storage kept essentials hidden Open shelves would have looked cluttered quickly

The owners were living in the home during the works, and that changed the planning conversation. In Melbourne homes, disruption is often the question that matters most. Guidance around bathroom makeovers regularly misses this point, but for lived-in homes, clear scheduling and communication with your builder are critical when you'll be without a usable ensuite, as discussed in this article on bathroom makeover disruption.

Practical rule: If the room is small, don't try to make it interesting by adding more. Make it better by removing friction.

Why the after feels different

The finished room didn't rely on a dramatic colour statement. Its strength was restraint. Better proportions, cleaner lines and hidden storage made the ensuite feel composed instead of cramped.

That's often the most satisfying kind of bathroom renovation before and after. The owners don't walk in and think about a feature tile first. They notice that the room finally works.

Case Study Reimagining the Family Bathroom

A family bathroom carries a different kind of pressure. It doesn't just have to look good after handover. It has to survive school mornings, late-night baths, wet floors, forgotten towels and constant use by people with different routines.

In this project, the original room had the usual signs of strain. The bath-shower combo was doing too much. Bench space was limited. Storage overflowed into nearby cupboards because the bathroom couldn't hold what the household used every day. The room wasn't short on fittings. It was short on logic.

A modern bathroom renovation featuring a double vanity, a glass walk-in shower, and a soaking tub.

Designing for traffic, not just style

The central problem was congestion. Two people couldn't comfortably use the room at once, and the cleaning burden was higher than it needed to be because the room had too many awkward surfaces and not enough integrated storage.

The redesign focused on separation of functions. A double vanity gave the room a proper preparation zone. A walk-in shower reduced the visual and practical clumsiness of climbing into a bath for daily use. A freestanding bath gave the family a dedicated place for bathing children or winding down, instead of forcing one fixture to cover every need.

Those choices only work when they suit the household. In some family homes, keeping a shower-over-bath arrangement is still the smart move if the room is tight and the users need flexibility. In this case, the space allowed for clearer zoning, so it made sense to divide those functions.

Materials that earn their keep

Family bathrooms need materials that can handle repetition. The right selection isn't always the most ornate one.

We leaned into finishes that were easy to wipe down, durable under regular use and unlikely to date quickly. Joinery had to conceal the visual noise of family life. Fixtures had to feel solid in the hand. Ventilation had to be treated as part of the design, not an afterthought, because a beautiful bathroom loses its appeal quickly if moisture lingers.

The design priorities looked like this:

  • Storage near the point of use: Drawers near the vanity, not linen stored elsewhere.
  • Surfaces with simple upkeep: Cleaner lines meant fewer grime traps.
  • Comfort under pressure: Enough room for more than one person to move without collision.
  • Lighting with purpose: Task lighting at the vanity, softer ambient light elsewhere.

When a family bathroom works well, people stop talking about it. The morning routine becomes smoother, and that's the real luxury.

The before-and-after shift

The most noticeable change after completion wasn't just visual scale. It was rhythm. The room no longer forced everyone into the same narrow corner of the plan.

A key distinction separates designer bathrooms from decorative bathrooms. Design isn't about adding a fashionable object and hoping it lifts the room. It's about matching the room to behaviour. In family bathroom renovations, that means understanding how people queue, where clutter builds up, what gets wet, and which surfaces become annoying to clean after the novelty wears off.

For homeowners collecting new bathroom ideas, this type of project is worth studying because it shows a principle that applies well beyond one house. The right family bathroom isn't the one with the most features. It's the one where every feature has a job.

Case Study The Luxury Master Bathroom Retreat

Luxury bathrooms fail when they confuse cost with atmosphere. A premium room isn't memorable because every finish is expensive. It's memorable because the room feels deliberate from the first step inside.

This master bathroom started as a standard, serviceable space with little sense of hierarchy. The layout was conventional, the lighting was flat, and the room didn't feel like a retreat. It did the basics, but it didn't create any experience around them.

A luxurious modern bathroom featuring a black freestanding bathtub and elegant marble wall tiles.

What makes a bathroom feel high-end

In this renovation, the mood came from composition. The bath was given presence, not just placement. Joinery was treated as furniture, not storage boxes. Lighting was layered so the room could feel bright during the morning routine and softer at night.

Natural stone, brushed brass tones, generous mirrors and custom cabinetry all played a part, but the key move was how those elements related to each other. Good luxury design doesn't rely on one statement piece. It relies on consistency.

A few principles guided the room:

  1. One focal point should lead the room
    In this case, the bath anchored the view and established the tone immediately.

  2. Texture should do more than colour
    Richness often comes from surface quality, depth and reflectivity rather than strong colour contrast.

  3. Storage must disappear into the architecture
    Nothing breaks a spa-like mood faster than visible clutter.

The details clients remember later

The most valued parts of a luxury bathroom are often not the ones people mention at the start of planning. They're the details they discover in daily use.

A well-positioned niche that doesn't interrupt the wall pattern. Joinery that operates silently and fits the room perfectly. Lighting that flatters rather than glares. Warmth underfoot. A vanity area where grooming feels composed instead of rushed.

Those are the moves that turn modern bathrooms into personal retreats.

Luxury is rarely about adding more items. It's about reducing compromise.

Where premium bathrooms can go wrong

There are a few repeat mistakes in high-end projects.

Common mistake Better approach
Prioritising statement finishes over layout Resolve circulation and fixture placement first
Overloading the palette Keep materials restrained and let texture carry the room
Treating lighting as a late selection Plan task, ambient and accent lighting together
Forgetting maintenance Choose premium materials that suit how the room will be cleaned and used

That's why the strongest bathroom renovation before and after results in this category don't feel theatrical. They feel settled. The room becomes quieter, more customized and more restorative.

For clients seeking designer bathrooms, that's usually the brief. Not to impress guests for ten seconds, but to create a room that supports slower, better moments every day.

Bringing Your New Bathroom Ideas to Life

The difference between a renovation that photographs well and one that performs well comes down to planning. New bathroom ideas are easy to collect. The hard part is filtering them through your room size, your building type and the way you live.

A professional interior designer sketching a modern bathroom layout plan on paper at a desk.

Start with the non-negotiables

Before choosing tiles, tapware or mirror shapes, define what the bathroom must do better than it does now.

Maybe the room needs safer access. Maybe storage is the problem. Maybe the shower leaks, the ventilation is poor, or the layout wastes space. Those are design issues, not just construction issues, and they need to be solved first.

For Victorian homeowners, there's also a compliance layer that can't be treated casually. Any bathroom renovation involving changes to plumbing, drainage or waterproofing is considered building work and requires a registered building practitioner. Waterproofing must comply with the National Construction Code and AS 3740, as explained in this summary of bathroom renovation compliance.

That requirement shapes the whole project. It affects who should do the work, how the work is sequenced and what should be documented during the build.

Think like a designer, not a shopper

Most problems in bathrooms don't come from bad products. They come from disconnected decisions.

Use this sequence instead:

  • Define the room's job: Ensuite, family bathroom, investment property or master retreat all demand different choices.
  • Map movement first: Doors, vanity depth, shower entry and circulation should be resolved before finishes.
  • Build storage into the plan: Don't assume baskets and accessories will solve poor joinery.
  • Choose finishes by maintenance level: The right surface depends on who will clean it and how often.
  • Protect the invisible layer: Membranes, substrate preparation, falls and ventilation are not optional upgrades.

If you're weighing delivery options, one practical route is an end-to-end service that includes design visualisation and coordinated construction. For example, why using a registered builder matters for your bathroom renovation sets out the compliance and accountability side of that decision, and SitePro Bathrooms also offers a 3D design stage that helps homeowners test layout ideas before construction begins.

What works in modern bathrooms right now

The most successful modern bathrooms aren't trend-heavy. They're edited.

Current preferences lean toward calmer palettes, integrated storage, generous mirrors, walk-in showers, cleaner junctions and fittings that feel refined without being fussy. But style only delivers lasting value when the room is durable.

A practical planning checklist helps:

Priority Why it matters
Waterproofing and substrate condition Protects the room from hidden failure
Ventilation Helps control moisture and maintenance issues
Layout clarity Improves everyday use more than any finish upgrade
Storage design Keeps the after photo looking good in real life
Fixture quality and fit Supports durability and comfortable use

Good bathroom renovations don't start with colour. They start with performance, then turn that performance into a room that looks effortless.

Your Bathroom Renovation Questions Answered

Most homeowners don't need more inspiration by this point. They need straight answers. These are the questions that come up in real consultations, usually after people have saved dozens of modern bathrooms and started wondering how the process works.

How long does a bathroom renovation take

The honest answer is that it depends on the scope, access, product selections and the condition of the room once demolition begins. A cosmetic update is very different from a full rebuild that changes layout, plumbing positions or fixes hidden defects.

The mistake people make is planning only for the best-case scenario. Older bathrooms can reveal damaged substrate, failed waterproofing or ventilation issues once opened up. That's why the build program should include sequencing, approvals where needed and clear communication about decision points.

A realistic program is more valuable than an optimistic one. It gives you a better chance of managing the disruption without frustration.

Can we stay at home during the works

Often, yes. But staying in the home and staying comfortable are not the same thing.

If the bathroom being renovated is your only bathroom, living through the works becomes much harder. If it's an ensuite and there's a second bathroom available, the disruption is more manageable. The right answer depends on who lives in the home, whether there are children, whether anyone works from home, and how much site activity the household can absorb.

A few practical considerations help:

  • Access to another bathroom: This is the first question to settle.
  • Dust and noise tolerance: Demolition, cutting and deliveries affect the home beyond the bathroom itself.
  • Daily routines: School mornings and work calls rarely pair well with unpredictable site access.
  • Decision availability: Someone needs to be reachable if an on-site issue requires fast approval.

Do I need a registered builder

If the renovation changes plumbing, drainage or waterproofing, this is not optional in Victoria. The registered practitioner requirement exists for a reason. Bathrooms fail most often in the hidden layers, not at the vanity top.

Homeowners sometimes focus heavily on finishes because they're visible and enjoyable to choose. But the long-term success of the room sits underneath them. If the technical work is weak, the after photo has a short shelf life.

What should I spend money on first

Start with the items that affect durability and daily use. Structure, waterproofing, drainage performance, ventilation and layout all come before decorative upgrades.

After that, spend where touch and repetition matter. Vanity storage, quality tapware, lighting placement and shower function will shape your experience of the room more than a fashionable accent ever will.

Will the renovation improve value beyond appearance

Yes, but the strongest gains usually come from function, not just styling. The best bathroom renovations improve water and energy efficiency as well as aesthetics. Choosing WELS-rated taps, showerheads and toilets can reduce household water consumption, while better ventilation can lower moisture-related maintenance. Those choices support lower running costs and can strengthen resale appeal, as outlined in this discussion of efficient bathroom upgrades.

What should I have ready before requesting a quote

You don't need a perfect brief. But you do need clarity on a few basics.

  • Know the main problem: Lack of storage, poor layout, leaks, dated finishes or all of the above.
  • Save examples with a reason: Don't just save images you like. Note what you like about them.
  • List who uses the room: A guest bathroom and a family bathroom should not be designed the same way.
  • Be honest about priorities: If durability matters more than visual drama, say so early.

The best consultation starts with a real conversation about how the room is failing now and what the new one has to do better.


If you're comparing bathroom renovation before and after ideas, look past the styling first. Ask what changed in the layout, what was fixed behind the walls, how the disruption was managed, and whether the finished room will still perform years from now. That's where the real value sits.

  • siteprobathrooms

Designer Bathrooms Melbourne: 2026 Trends and Cost Guide

You've probably already saved a folder full of inspiration shots. Floating vanities. Oversized tiles. Brushed tapware. Maybe a wet-room layout that makes a small space look like a boutique hotel. Then reality hits. Your current bathroom has awkward plumbing, limited storage, an old window in the wrong spot, and no room for error once demolition starts.

That's where most Melbourne bathroom projects either sharpen up or drift off course.

A good designer bathroom isn't just a pretty room. It has to work every morning, survive steam and moisture, meet local requirements, and still feel current years after the renovation is finished. That's why the strongest bathroom renovations don't begin with a tile sample. They begin with layout, compliance, sequencing, and a clear idea of where the money should go.

Across Australia, homeowners are clearly putting money into fitted bathroom upgrades, not just surface changes. The Australia bathroom furniture market generated USD 1,141.5 million in 2024 and is projected to reach USD 1,749.4 million by 2030, with a 7.8% CAGR from 2025 to 2030. In that same market, bathroom cabinets were the largest category in 2024, and vanities were identified as the fastest-growing segment. That lines up with what adds value on site. Better storage, better joinery, and better planning usually outperform decorative upgrades on their own.

Embarking on Your Melbourne Bathroom Renovation

Starting with style is common. This involves thinking about modern bathrooms in terms of colour, texture, and fittings. That's natural, but it's only part of the job.

In Melbourne, the better starting point is function. How many people use the room? Does the bathroom need to handle a school-morning rush, a compact apartment footprint, or an ageing-in-place brief for the future? The answers shape everything that follows, from vanity width to tile selection to where the shower screen should stop.

What designer really means on a renovation site

A lot of homeowners hear “designer bathroom” and picture something high-end but fragile. In practice, the best designer bathrooms melbourne projects are usually the opposite. They're organised, durable, and specific to the way the home is used.

That usually means:

  • Storage that disappears into the design: drawers where dead space used to be, mirrored cabinets that don't dominate the room, and joinery that fits the wall properly.
  • Materials that suit the household: easy-clean surfaces for family bathrooms, more expressive finishes in powder rooms, and less maintenance around splash zones.
  • A layout that solves a problem: better circulation, a larger shower, or a vanity that finally gives two people enough working room.

A bathroom can look luxurious in photos and still be frustrating to live with. Layout is what separates a showroom idea from a successful renovation.

Why Melbourne homeowners are upgrading differently

The strongest projects now aren't driven by fashion alone. They're driven by a mix of comfort, resale, maintenance, and smarter use of space. That's why bathroom renovations in older Melbourne homes often involve more than replacing fixtures like-for-like. They usually need rethinking.

In period homes, the room may be undersized or arranged around old plumbing locations. In apartments, access, drainage, ventilation, and strata conditions can all limit what's achievable. In family homes, the issue is often storage and durability rather than floor area.

That's why the practical side matters early. Before you commit to new bathroom ideas, make sure the room can support them. If it can, the result is far more convincing than a trend-led update that ignores how the room will perform.

New Bathroom Ideas Shaping Melbourne Homes in 2026

Once you approve a beautiful bathroom scheme and construction begins, the actual questions arrive. Will the floor fall work with a curbless shower. Can the vanity drawers open fully past the door swing. Is that feature tile still practical once lighting, grout lines, and cleaning are factored in. In Melbourne projects, the strongest ideas are the ones that survive those questions.

Design in 2026 is becoming more individual, but the better projects are also more disciplined. Homeowners are asking for richer colour, textured finishes, warmer timber tones, and less predictable material pairings. The difference now is that these choices are being judged against compliance, maintenance, and day-to-day use, not just a mood board.

A luxurious marble bowl sink and a twisted pedestal stand displayed in a modern bathroom interior.

Wet rooms that feel bigger

Wet-room layouts are still one of the smartest options for compact bathrooms, especially in older Melbourne homes where every visual break makes the room feel smaller. Keeping the floor finish continuous and reducing heavy partitions can make the space read more clearly and improve movement through the room.

The catch is technical. Wet rooms rely on correct falls, careful drainage placement, and waterproofing detail that suits the room, not just the look. A local planning guide connects successful wet-room design with AS 3740-2021 waterproofing compliance, particularly around falls, drainage, and junctions (wet-room planning and waterproofing guidance).

What tends to work well:

  • A clear drainage plan: water has to move quickly to the waste without ponding near the entry or vanity.
  • Controlled glazing: enough glass to manage splash, without carving the room into smaller pieces.
  • Consistent surface selection: fewer changes in tile and trim help the room feel larger.

Common mistakes:

  • Treating a wet room as a styling move first: it is a construction and waterproofing decision.
  • Ignoring cleaning and servicing: wastes, channels, and junctions need to stay accessible.
  • Using the layout in the wrong room: some bathrooms are better served by a defined shower zone.

Vanities are getting more considered

Vanity design is doing more work than it used to. It sets the storage capacity, affects circulation, and often determines whether the bathroom feels resolved or cramped.

Industry guidance on standard bathroom dimensions and vanity clearances shows why this matters. In a typical main bathroom footprint, clear space in front of the vanity and sensible side clearances around the basin have a direct effect on comfort. On site, I look at drawer projection, mirror cabinet depth, towel placement, and how two people will move through the room during a rushed weekday morning. Plans can hide a lot.

Practical rule: if you have to turn sideways to use the vanity comfortably, the layout isn't finished.

Wall-hung vanities remain popular because they open up floor area visually and make cleaning easier. They are not always the right answer. In a family bathroom, a floor-mounted unit can offer more storage and a sturdier feel. The right choice depends on who uses the room and how much joinery the layout can carry without becoming bulky.

Style ideas worth borrowing carefully

The ideas with the best staying power usually solve a practical problem at the same time. Recessed niches reduce clutter around the shower. Mirror lighting improves grooming more than a decorative pendant ever will. A restrained material palette with one stronger element often ages better than trying to make every surface a statement.

For inspiration that still fits Australian homes, this guide to bathroom décor in Australia is a useful starting point.

In Melbourne, the best designer bathrooms in 2026 are less about chasing a trend and more about making deliberate choices that hold up under real use, local building requirements, and the budget needed to build them properly.

How to Budget for a Designer Bathroom in Melbourne

Budgeting for a designer bathroom isn't about chasing a single figure. Price moves with scope. A room that keeps the plumbing where it is will budget very differently from one that shifts walls, relocates waste points, or adds custom joinery.

That's why homeowners get into trouble when they compare their project to a generic online estimate. Two bathrooms can look similar in photos and be completely different jobs behind the walls.

What drives the price up

The biggest cost drivers are usually layout changes, labour complexity, waterproofing detail, tile format, and joinery. Large-format tiles can reduce grout lines and look excellent, but they often demand flatter substrates, cleaner set-out, and more careful cutting. Concealed plumbing can sharpen the visual result, but it can also make future access harder if it isn't planned sensibly.

Custom joinery is another major lever. It's often worth it because vanities and mirrored cabinets do so much of the visual and functional work in designer bathrooms. But once you move from off-the-shelf pieces to made-to-measure cabinetry, you're paying for design resolution as well as the product itself.

Here's a practical way to think about budget tiers.

Melbourne Designer Bathroom Budget Ranges 2026 Estimates

Budget Tier Estimated Cost Range Typical Inclusions
Cosmetic refresh Lower end of the market Retaining much of the existing layout, replacing selected fixtures and finishes, limited joinery changes
Mid-range full renovation Mid-market investment Full strip-out, new tiling, upgraded fixtures, improved storage, revised lighting, better layout within the existing footprint
Premium designer renovation Upper end of the market Structural or layout reconfiguration, custom vanity and cabinetry, higher-end finishes, detailed lighting, more complex waterproofing and plumbing coordination

This table is intentionally qualitative. Real pricing depends on access, apartment conditions, structural constraints, and the finish schedule you choose.

Where smart savings actually sit

Trying to save money by stripping quality out of waterproofing, prep, or labour usually backfires. Better savings tend to come from controlled selections and disciplined scope.

Good examples include:

  • Keep plumbing points where practical: moving every fixture can turn a tidy renovation into a complex rebuild.
  • Use feature finishes selectively: one hero wall or statement vanity often lands better than expensive material on every surface.
  • Spend on joinery before novelty items: storage usually improves daily use more than decorative extras.
  • Choose fixtures with operating costs in mind: efficiency matters after handover.

Long-term cost matters more than many cost guides admit. Products covered by Australia's Water Efficiency Labelling and Standards scheme let homeowners compare the efficiency of common bathroom fixtures, and that can influence ongoing household water and energy use. A Melbourne bathroom trends article notes that specifying fixtures with stronger WELS ratings can improve long-term operating efficiency over the life of the bathroom (WELS-focused bathroom planning insight).

Cheap to install and expensive to live with is still expensive.

If you want to sense-check project scope before requesting quotes, a bathroom renovation cost calculator can help frame the conversation. It won't replace a site inspection, but it can help you separate a cosmetic update from a full renovation budget.

Your Bathroom Renovation Process From Start to Finish

You approve a layout, order the tiles, and expect demolition to start the following week. Then the site inspection picks up a fall issue in the floor, the vanity lead time blows out, and access rules in your apartment building limit when materials can come in. That is a normal bathroom renovation in Melbourne. The projects that run well are not the ones without constraints. They are the ones where those constraints are found early and managed in the right order.

A bathroom is a small room with very little margin for error. Every trade works on top of someone else's work, and hidden mistakes become expensive once surfaces are closed up. Good process protects budget, programme, and finish quality at the same time.

A collection of plumbing tools and equipment arranged on a floor for a bathroom renovation project.

The planning phase

The quiet part of the renovation does the heavy lifting. Before any strip-out starts, the room needs to be measured properly, the layout tested, fixtures selected, and trade sequencing sorted out. If those decisions are left loose, the site pays for it later.

In Melbourne homes, early planning often exposes conditions that design inspiration boards never show. Older houses can have uneven walls, dated plumbing positions, or timber floors that need correction before tiling. Apartments add another layer. Lift bookings, waste removal, delivery windows, parking, and strata rules can all affect how the job is staged.

A sound planning sequence usually includes:

  1. Initial brief and site inspection
    The project manager reviews how you use the bathroom now, what needs to change, and what the room will realistically allow.

  2. Existing-condition checks
    Levels, wall condition, service locations, ventilation, and access are reviewed before final decisions are made.

  3. Layout development
    Shower size, vanity depth, door swing, storage, and circulation are resolved before finishes distract from the fundamentals.

  4. Selections and procurement
    Tiles, tapware, lighting, joinery, and glazing are chosen with lead times in mind, not just appearance.

  5. Documentation and trade booking
    Clear set-outs and confirmed selections let trades price accurately and arrive prepared.

One decision at this stage affects the whole job. Builder selection. Working with a team that understands sequencing, trade coordination, and compliance reduces avoidable delays and rework. It also helps to understand why using a registered builder matters for your bathroom renovation before contracts are signed.
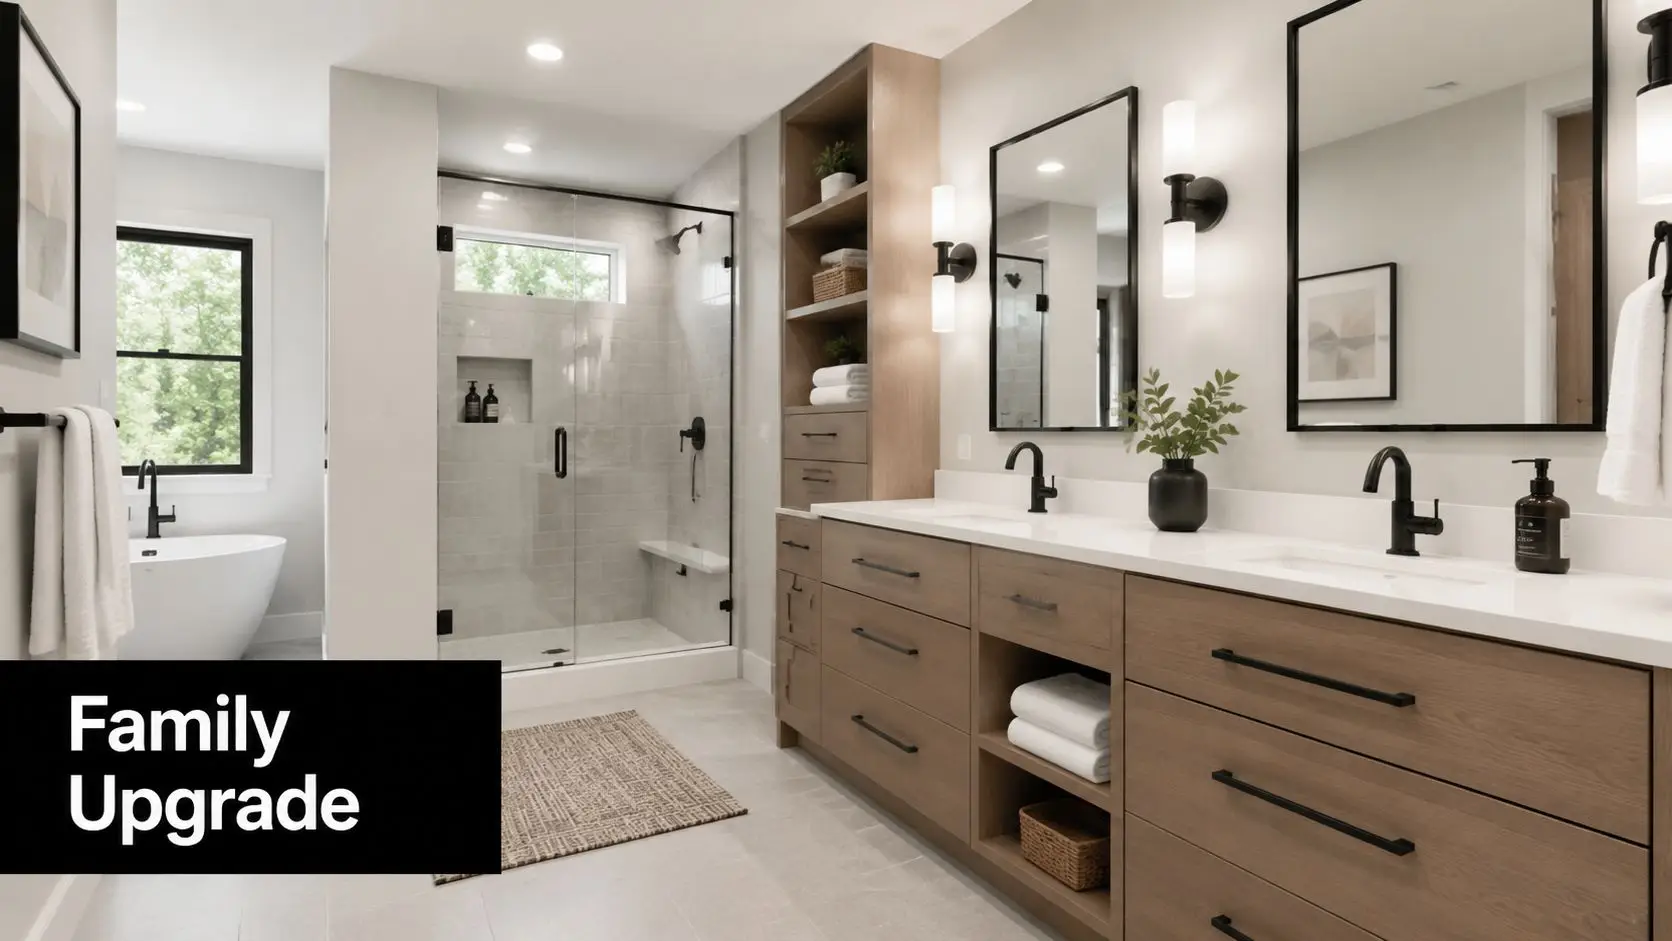
Construction in the right order

Once demolition starts, the best projects have already made the hard decisions. Changes can still happen, but they usually trigger extra labour, material waste, and delays because completed work has to be reopened.

The site sequence is usually straightforward, even if the coordination behind it is not:

  • Demolition and strip-out: remove fixtures, wall linings, floor finishes, and any damaged substrate.
  • Rough-in work: set plumbing and electrical points to suit the approved layout.
  • Carpentry and substrate preparation: straighten walls, correct floors, and build any framing needed for niches, in-wall cisterns, or joinery support.
  • Waterproofing: apply the system to the prepared surfaces before any finish goes over the top.
  • Tiling: install floor and wall tiles to the agreed set-out.
  • Fit-off: complete cabinetry, plumbing fixtures, electrical fittings, mirrors, shower screens, and accessories.
  • Final checks and handover: test fixtures, review defects, and close out the last details before sign-off.

The visible finish gets the attention. The hidden layer decides whether the bathroom lasts.

Where projects slow down

Homeowners often judge bathroom timelines by room size. That is misleading. Bathrooms concentrate more trades, services, and wet-area risk into one footprint than almost any other room in the house.

Delays usually come from a short list of causes. Late selections. Products that arrive damaged or out of stock. Site conditions that only become clear after demolition. Custom items that were approved without checking lead times. In apartments, access restrictions can stretch what would be a simple delivery in a house into a booked and managed exercise.
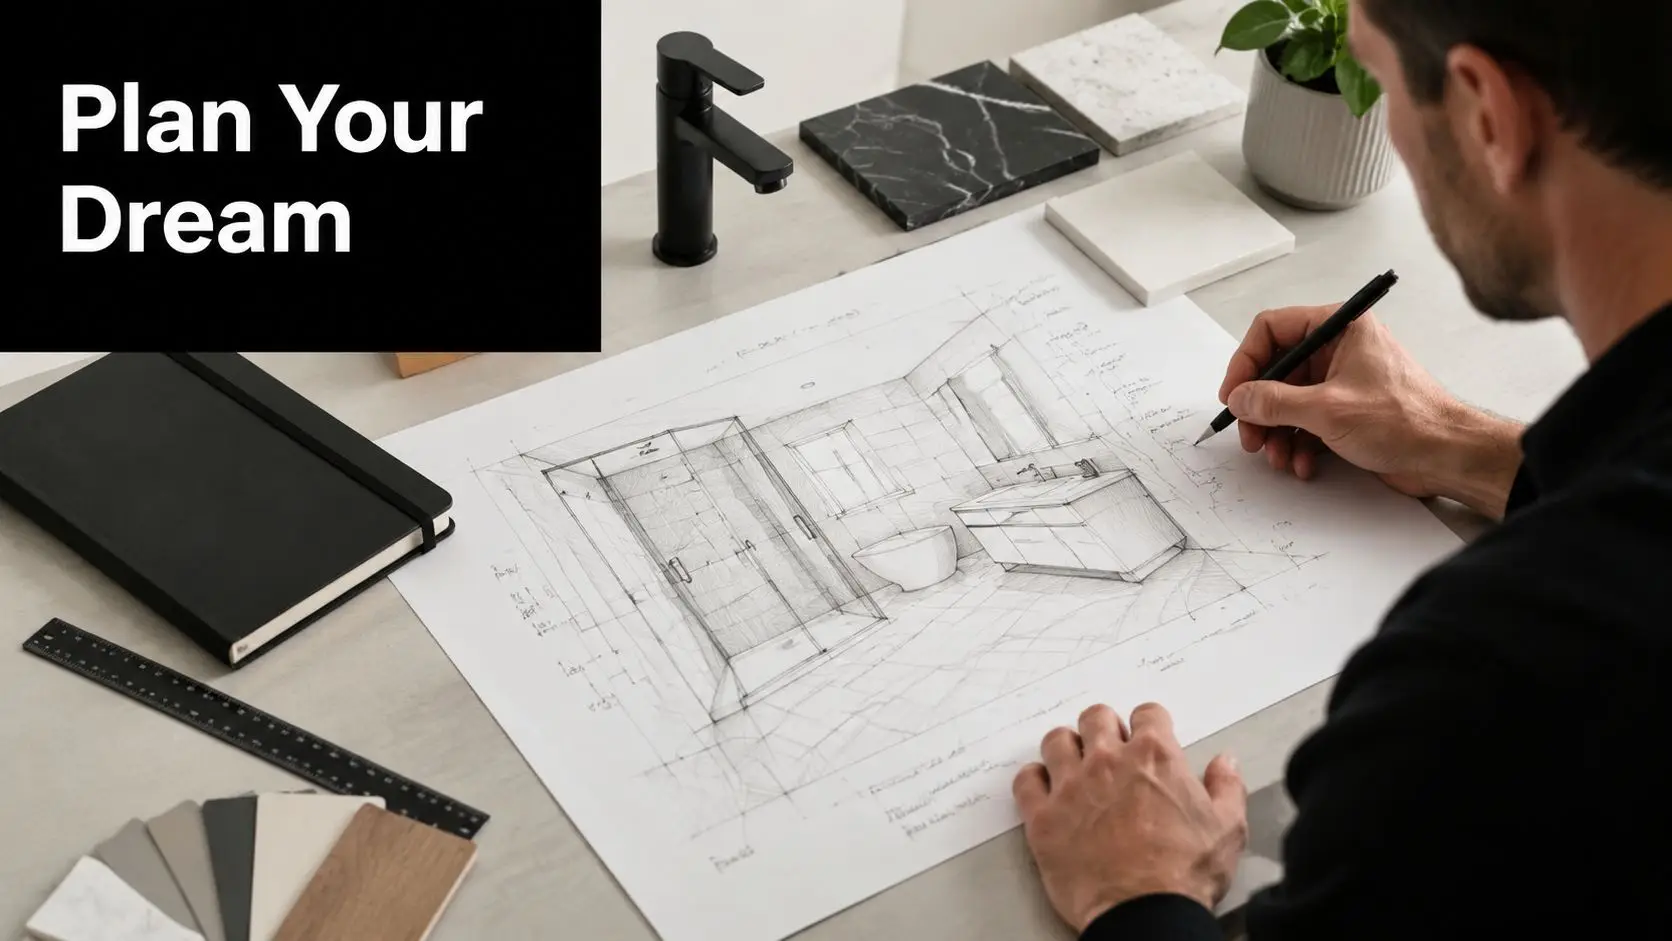
The trade-off is simple. Customisation gives you a more bespoke result, but it also reduces flexibility if anything shifts. Off-the-shelf items are often easier to replace quickly, though they may limit layout or storage options. Good project management is largely the work of balancing those trade-offs before they become site problems.

A well-run bathroom renovation rarely looks dramatic day to day. It looks organised. Materials arrive when they should, trades know what they are walking into, and decisions are made early enough to keep the programme intact. That is how a designer bathroom gets built properly in Melbourne.

Navigating Melbourne's Building Codes and Regulations

A bathroom renovation only counts as successful if it's compliant. That isn't paperwork for its own sake. It's what protects the room from leaks, trapped moisture, poor ventilation, and expensive failures that show up after the project is paid for.

This matters even more in established Melbourne homes and apartments, where old conditions don't automatically line up with current standards.

Why compliance belongs at the centre of design

The Victorian Building Authority enforces mandatory requirements around building work, and bathroom waterproofing is one of the areas where standards are especially important. A Melbourne bathroom article highlights that, for older homes and apartments, compliance is critical and points directly to the VBA's role and the importance of AS 3740 waterproofing standards in avoiding defects and supporting durability (registered builder and waterproofing compliance context).

That changes the conversation. The key question isn't just whether a detail looks clean. It's whether the room can be built cleanly, ventilated properly, drained correctly, and serviced later if anything goes wrong.

The common trouble spots are predictable:

  • Waterproofing failures: often hidden until damage appears outside the bathroom.
  • Poor ventilation planning: moisture lingers, finishes deteriorate, and mould risk rises.
  • Overly concealed services: sleek on day one, frustrating when maintenance is needed.
  • Apartment-specific constraints: access, penetrations, and approvals can all affect what's feasible.

What registered builders unlimited means in practice

Homeowners often hear the phrase registered builders unlimited without a clear explanation of why it matters. In practical terms, registration is about accountability, licensing, and working within the proper framework for the project. “Unlimited” relates to the class and scope of building work a builder is permitted to undertake.

For a homeowner, the key point is simpler. You want a builder whose registration suits the scale and nature of the work, and who understands how bathroom renovations intersect with waterproofing, drainage, ventilation, and coordination across trades.

If you want a more detailed explanation of the renovation implications, this article on why using a registered builder matters for your bathroom renovation is a helpful starting point.

A non-compliant bathroom can still look polished on completion day. The problem is that defects don't care how good the photos look.

Visualise Your New Bathroom with 3D Design

A lot of bathroom mistakes happen before construction starts. The homeowner thinks the vanity will look lighter. The niche seemed bigger on paper. The tile felt subtle in the showroom, then overwhelms the room once it covers every wall.

That's where 3D design earns its place. It doesn't just help you imagine the bathroom. It helps you test the decisions before they become expensive.

A digital tablet displaying a luxurious bathroom interior featuring marble textures and artistic wall decor.

What a good 3D render actually solves

A flat plan can show measurements, but it won't tell most homeowners how the room will feel. A 3D view can.

It helps answer practical questions like:

  • Does the vanity dominate the entry view
  • Will the mirror cabinet feel bulky
  • Are the tile proportions right for the wall height
  • Does the lighting land where people need it

Those are not cosmetic questions. They affect cost, comfort, and whether mid-project changes are likely.

Why it reduces risk

The best reason to use 3D design isn't presentation. It's change control. When homeowners can see the room more clearly, they make better decisions before materials are ordered and trades are booked.

That matters especially in designer bathrooms melbourne projects, where multiple finishes interact in a compact space. If a room includes custom joinery, feature lighting, large-format tiles, and a wet-zone detail, even a small change can ripple through several trades.

One practical example is vanity sizing. On plan, a longer vanity often seems like an obvious upgrade. In 3D, you may realise it tightens the entry too much, crowds the toilet zone, or throws the wall lighting off balance. That's the kind of adjustment you want to make before rough-in, not after tiles arrive.

SitePro Bathrooms offers bathroom renovation planning that includes detailed 3D design as part of an end-to-end process. That kind of visual planning is useful when the goal is to lock in layout and material decisions before construction begins.

Your Bathroom Renovation Questions Answered

A few questions come up on almost every first bathroom project. The answers usually determine whether you're planning a quick upgrade or a full renovation with proper design and compliance built in.

A professional interior designer posing in a modern bathroom with gold fixtures and a marble countertop.

Is a cosmetic update enough

Sometimes, yes. If the layout works, the substrate is sound, and the room mainly needs visual improvement, a cosmetic update can make sense.

It's not enough when the bathroom has poor storage, dated plumbing positions, waterproofing concerns, weak ventilation, or a layout that frustrates daily use. In those cases, resurfacing the room usually postpones a proper renovation rather than replacing it.

How do I choose between modern bathrooms styles

Start with the house and the household. A sleek apartment ensuite can carry stronger finishes than a hard-working family bathroom. A period home often benefits from contrast, but not if the bathroom starts fighting the rest of the house.

Use this filter:

  • Choose one main statement such as the vanity, tile, or lighting.
  • Keep the background finishes quieter so the room doesn't feel crowded.
  • Prioritise cleaning and maintenance in splash zones and corners.
  • Think long-term rather than choosing a finish just because it's prominent right now.

Are bold new bathroom ideas risky

They can be, but usually only when they ignore the room's structure or daily use. A bold tile colour isn't the risky part. A hard-to-maintain surface, a poor layout, or inaccessible plumbing is.

That's why the strongest designer bathrooms combine expression with restraint. They're memorable because the room is resolved, not because every surface is competing for attention.

What should I ask a builder before signing

Ask direct questions.

  • Who manages the project day to day
  • How are waterproofing and trade sequencing handled
  • What selections need to be locked in before work starts
  • How are variations dealt with if site conditions change
  • What level of registration suits this scope of work

What's the next practical step

Shortlist your must-haves, your nice-to-haves, and the features you're willing to drop if the room or budget pushes back. Then get the space measured properly and have the layout tested before you become attached to specific finishes.

That approach gives you a far better outcome than selecting products first and hoping they fit later.


If you're planning designer bathrooms melbourne homeowners can live with comfortably, start with the room's constraints, not just the mood board. A clear brief, realistic budget, sound compliance, and resolved design will do more for the final result than any trend on its own. For customized advice on bathroom renovations, project scope, and 3D planning, contact SitePro Bathrooms for a personalised quote.