• siteprobathrooms

10 Kitchen Cabinet Storage Ideas for Renovations

You've got plenty of cabinetry, yet the kitchen still feels short on storage. Baking trays are stacked behind one another, the back of the corner cupboard has become a graveyard for jars, and the space beneath the sink is difficult to use because plumbing takes up the most convenient area. Meanwhile, the benchtop fills with appliances because putting them away is inconvenient.

The strongest kitchen cabinet storage ideas start before cabinet doors are chosen. Measure the room, map plumbing and power, note what your household reaches for every day, and decide which items should stay visible versus concealed. In compact Victorian kitchens, an extra cabinet isn't always the answer. Better access, sensible zoning, and storage that suits the way you cook often deliver more value.

Australian renovators are already prioritising practical storage. The 2023 Houzz Australia Kitchen Trends Study reports that 53% of kitchen updaters are installing pantry cabinets, while 27% are allowing space for a walk-in pantry. The same study identifies pull-out waste and recycling cabinets, cutlery organisers, deep drawer organisers, and similar built-in features among the most requested additions.

SitePro Bathrooms is relevant when a kitchen renovation forms part of a broader home upgrade. Its Highett team provides concept development, 3D design, construction, and finishing for coordinated kitchen and bathroom renovations. The storage decisions below will help you have a more useful design conversation.

1. Pull-Out Pantry Systems

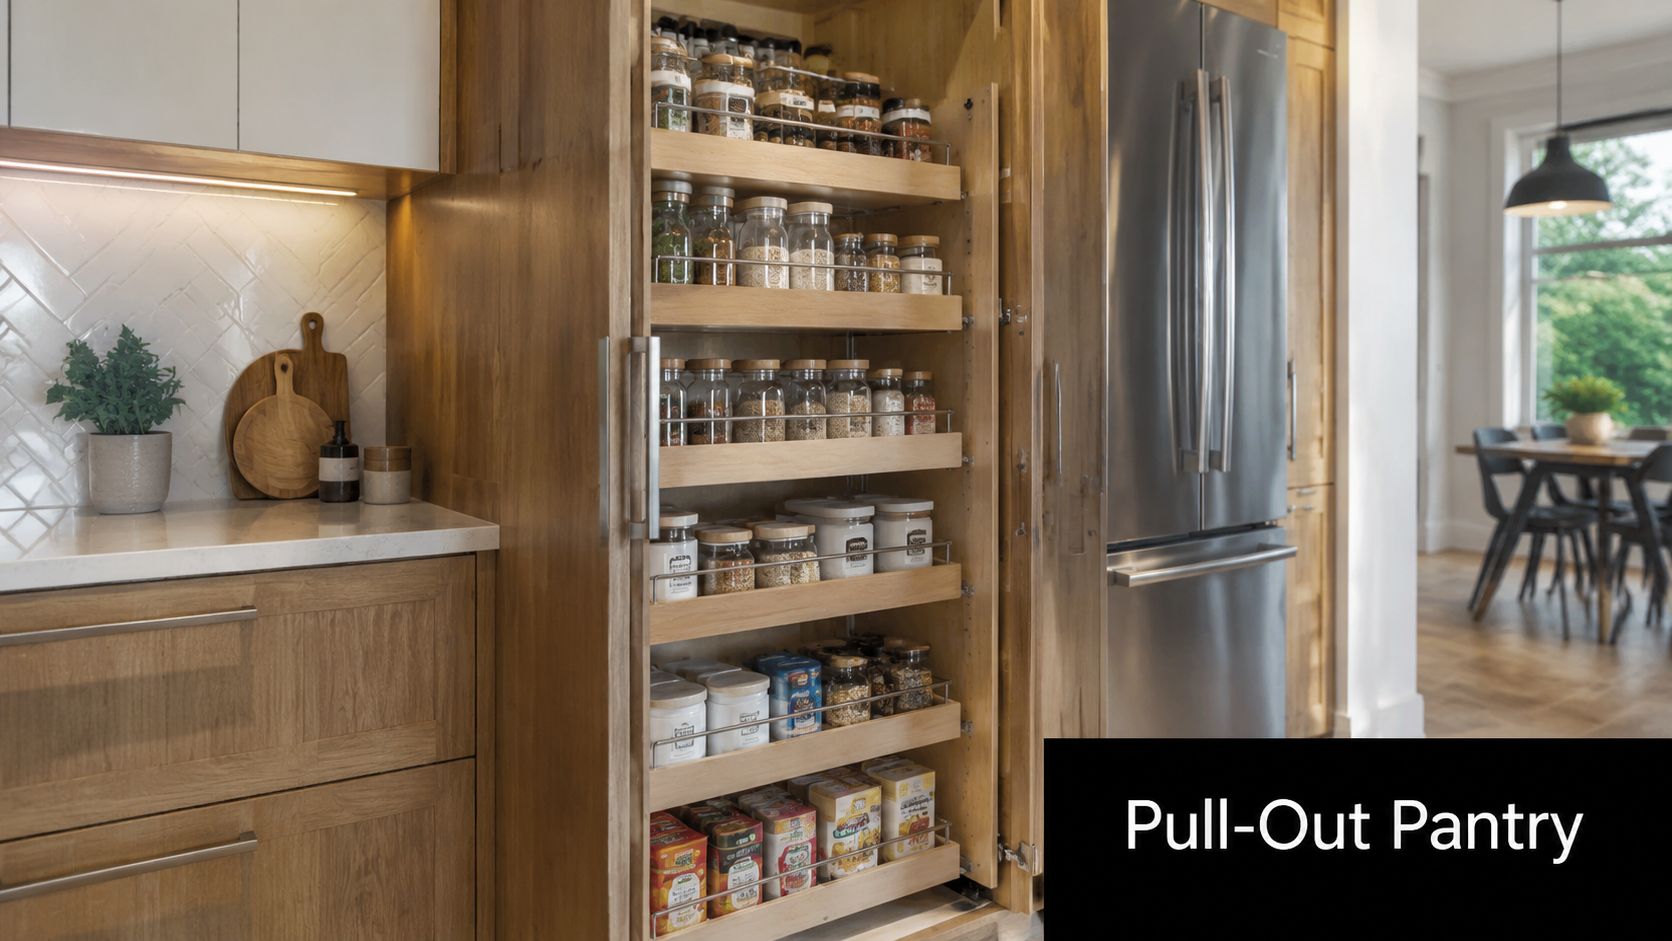
Deep cabinets hold a surprising amount, but fixed shelves often make the rear space impractical. A pull-out pantry solves that access problem by bringing the entire shelf forward, so bottles, packets, jars, and small appliances can be seen without emptying the cabinet first.

This option suits narrow vertical cabinets, deep base cabinets, and carefully planned corner zones. It works particularly well in compact kitchens where floor area is limited, but it isn't automatically the best choice for every pantry. A narrow mechanism can limit what you store, and a fully loaded pull-out places considerable demand on its runners. Choose quality hardware, distribute weight sensibly, and don't treat the cabinet as a dumping zone.

Practical rule: Measure the finished internal width, depth, and height, not just the rough opening. Hinges, door thickness, fillers, and adjacent handles can affect the usable clearance.

Plan access before ordering

Use a pull-out for items you reach for frequently, such as oils, sauces, cereals, or spices. A full-height unit is less useful if it sits beside a wall or appliance that prevents the door from opening properly. Soft-close runners can reduce slamming and wear, while shelf lips and dividers help stop containers moving when the unit travels.

A 3D layout makes it easier to test the relationship between the pantry, refrigerator, preparation zone, and cooktop. Include the mechanism during the renovation design phase rather than trying to force a proprietary insert into a finished cabinet. SitePro Bathrooms' online kitchen planner can help frame those layout discussions before construction details are finalised.

A wooden pull-out pantry cabinet stocked with various dry goods, spices, and jars in a modern kitchen.

2. Vertical Dividers for Baking Sheets and Trays

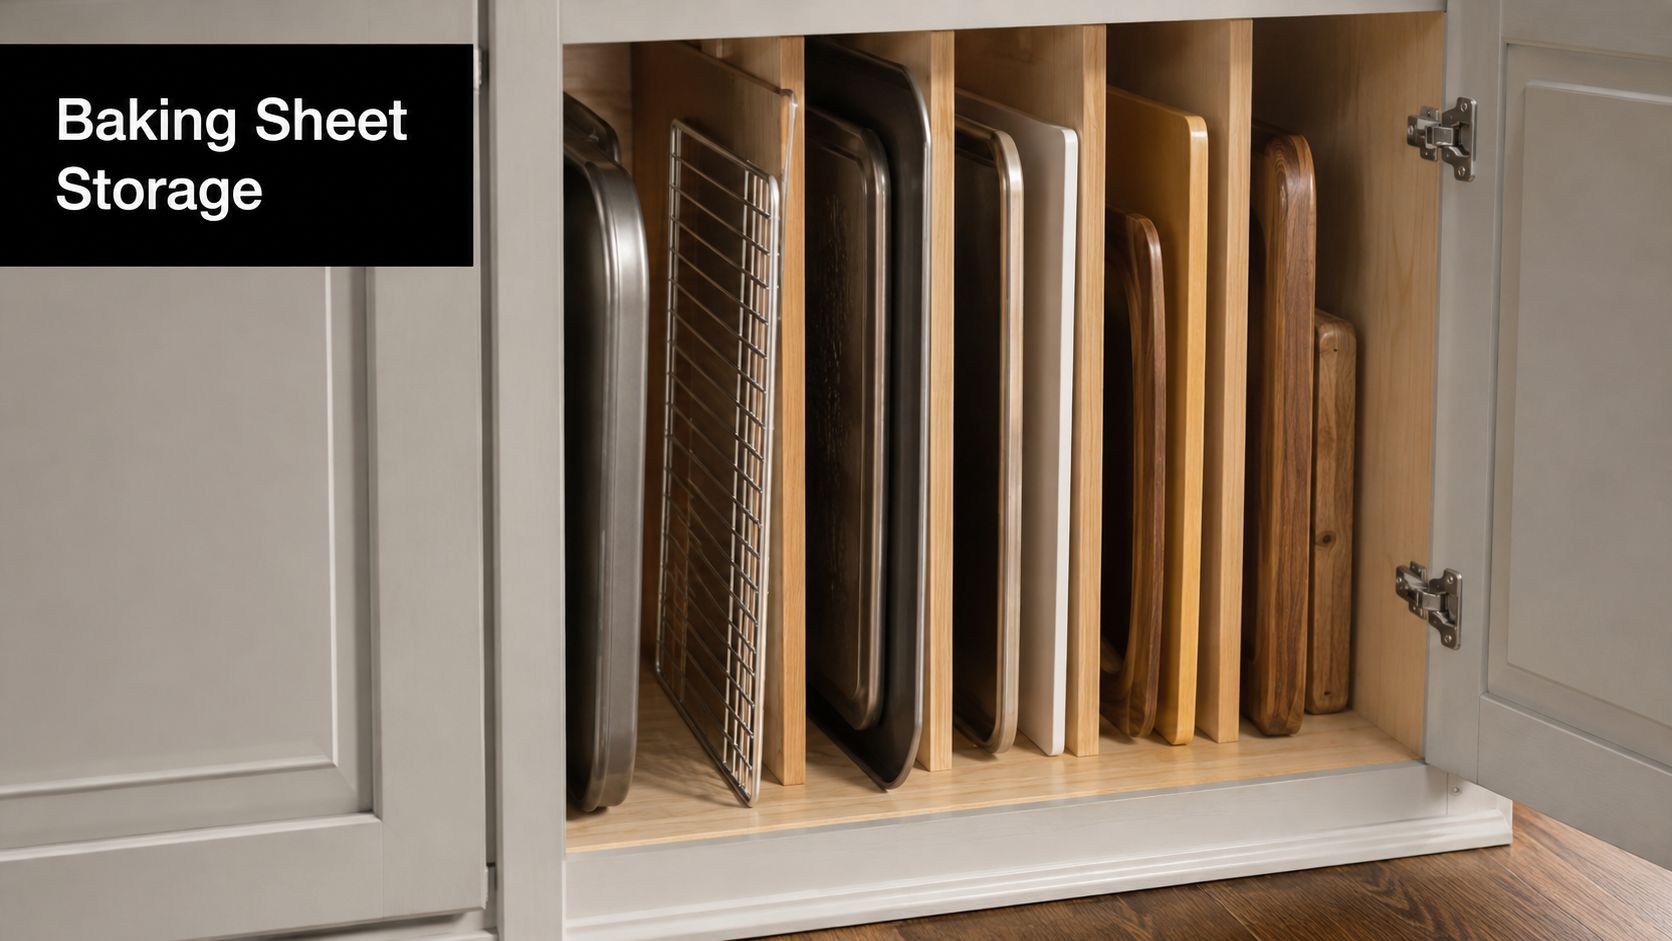
Flat cookware becomes difficult to manage when it's stacked horizontally. A vertical divider cabinet turns baking sheets, cooling racks, chopping boards, serving trays, and pan lids into a file-like arrangement. You can pull out one item without disturbing the rest.

This is one of the simplest storage decisions to build into a new cabinet run. It suits family kitchens that use several trays regularly, as well as entertaining-focused homes with large serving pieces. It can also work in a narrow cabinet beside an oven, provided the opening is wide enough for comfortable removal.

Build the divider around the collection

Start by measuring the largest tray, including its handles or rim. Fixed timber slots create a custom appearance, while adjustable metal dividers provide more flexibility if your cookware changes. Leave enough space for fingers to grip each item, but don't make the slots so generous that trays lean into one another.

Moisture deserves attention. Damp boards or recently washed racks shouldn't be pushed tightly together, so slight separation and ventilation matter. A divider near the dishwasher may be convenient, but confirm that steam and splashes won't create a maintenance problem.

For a renovation, specify the divider location alongside the oven, preparation bench, or pantry. A cabinet that opens directly onto the main work zone will be used more often than one placed across a traffic path. In designer kitchens, the storage can remain completely concealed while still supporting a highly practical workflow.

A kitchen cabinet organised with vertical dividers storing baking sheets, cooling racks, and wooden cutting boards.

3. Soft-Close Drawer Inserts and Organisers

A drawer without internal organisation usually becomes a shallow pile of utensils. Inserts divide that space into working categories, keeping cutlery, peelers, measuring tools, tongs, and gadgets visible at a glance. The improvement comes from arranging the contents around use, not from adding compartments for their own sake.

Place everyday knives, forks, spoons, and cooking tools in the easiest drawers to reach. Less-used items can share a deeper drawer or a second tier. A two-level insert can increase access in a compact kitchen, but check that the upper tray clears the drawer front and doesn't force you to remove items before reaching the lower level.

Design drawers by task

A family kitchen might group school-lunch tools, food clips, and reusable containers near the preparation area. A keen home cook may prefer separate zones for knives, scales, thermometers, and measuring equipment. The right arrangement depends on who uses the kitchen and whether several people need access at the same time.

  • Measure first: Check the drawer box, internal height, runners, and front clearance before purchasing an insert.
  • Group by frequency: Keep the tools used at every meal in the most accessible drawer.
  • Allow for change: Adjustable dividers are more useful than rigid compartments when utensils vary in size.
  • Coordinate hardware: Soft-close runners should be selected with the cabinetmaker, not added as an afterthought.

Bamboo organisers can suit a warm contemporary palette, while removable plastic inserts may be easier to clean. Don't overfill every section. A drawer that technically stores more but requires careful stacking won't provide better daily access.

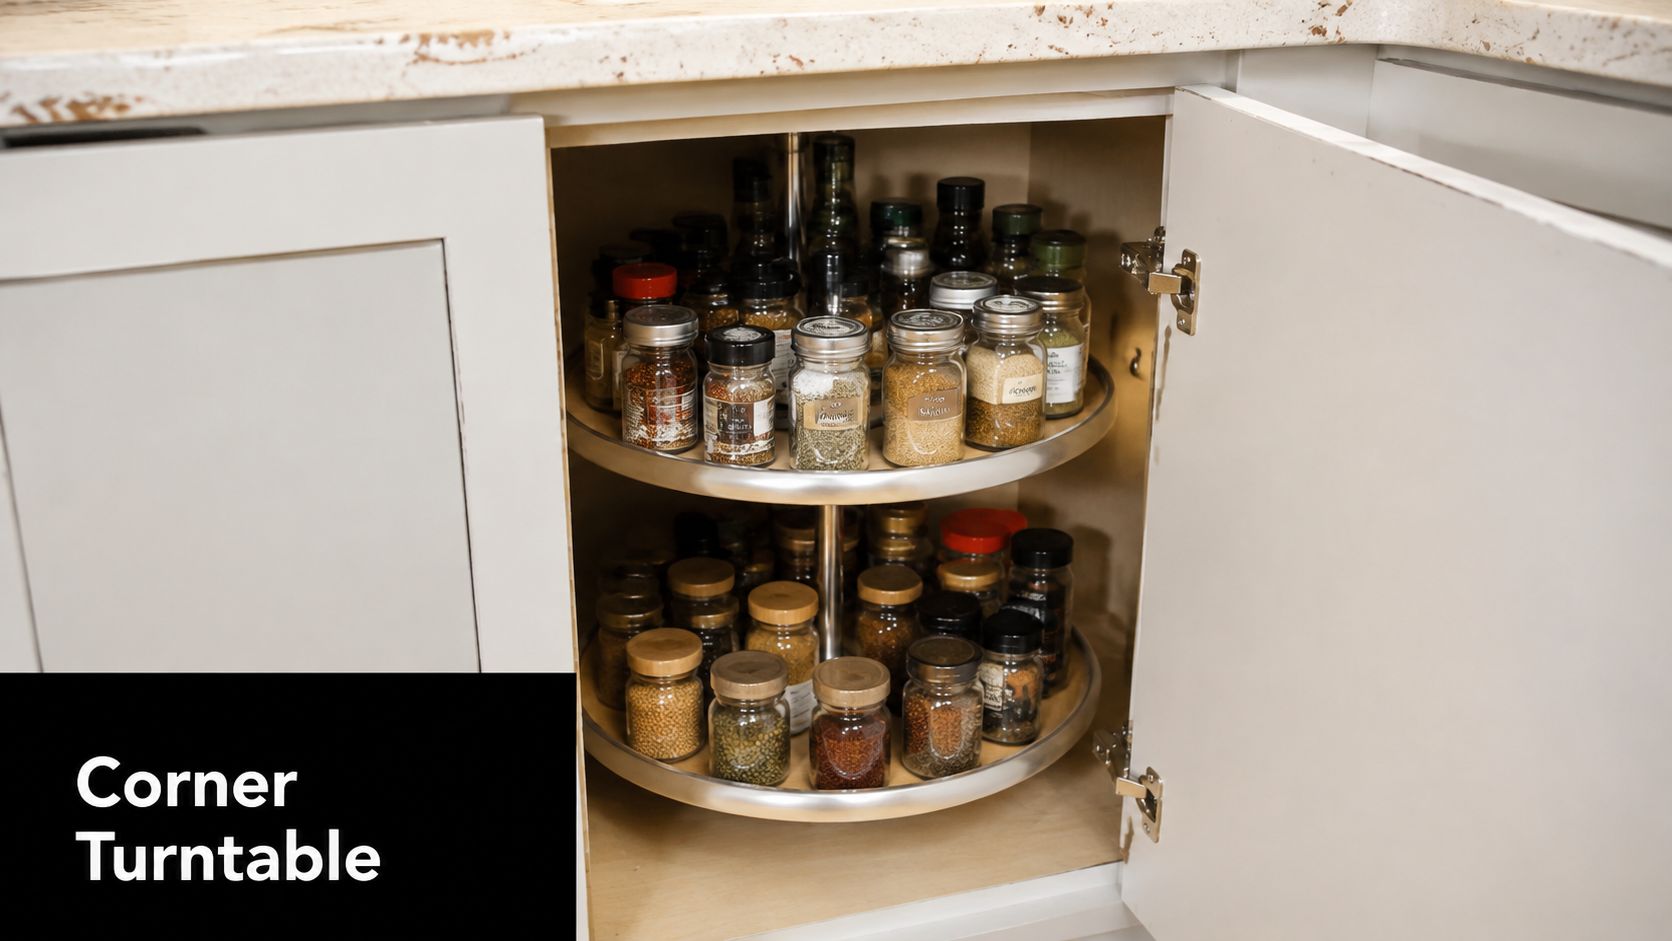
A two-tier corner lazy Susan turntable inside a kitchen cabinet filled with various spice jars.

4. Lazy Susan Turntables for Corner Cabinets

Corner cabinets fail when their depth exceeds your reach. A lazy Susan gives that dead space a moving surface, allowing jars, condiments, cookware, or small appliances to rotate towards the opening. It's a practical alternative to leaving the rear of the cabinet unused.

A turntable suits households that want to retain a corner cabinet without installing a more complex custom mechanism. It works best when the cabinet's internal shape leaves sufficient clearance for the rotating shelves and the door can open fully. Measure the cabinet carefully, including obstructions, hinges, shelf pins, and the thickness of the door.

Choose the right corner mechanism

Use a two-tier system where the cabinet has enough vertical space for both shelves. Keep heavy items low and distribute weight evenly. Non-slip liners help prevent jars and bottles from sliding as the shelf turns, but they won't compensate for overloading or poorly fitted hardware.

Some corner spaces are better served by a blind-corner pantry or a full-extension system. The choice depends on the opening, available depth, and the items you need to store. A turntable is convenient for smaller items that benefit from visibility. It can be frustrating for irregular cookware that catches against neighbouring pieces.

Install the mechanism during the renovation so the cabinet, doors, and shelves are designed together. SitePro Bathrooms' blind-corner pantry guidance is useful when comparing a rotating solution with a pull-out arrangement.

5. Overhead Cabinet Hanging Systems

The underside of an upper cabinet or the inside top of a cabinet often contains unused vertical space. Small hooks, rails, or hanging racks can use that area for mugs, measuring spoons, aprons, tea towels, or lightweight decorative objects. This can keep frequently handled items accessible without occupying another shelf.

The system works best for light items that you use regularly. Hanging mugs beneath a cabinet near the coffee station can be convenient, while storing heavy cookware from a door or upper shelf creates unnecessary strain. Adhesive hooks avoid drilling, but they still need a clean, suitable surface and a realistic weight limit.

Protect door clearance and sightlines

Before fitting anything, close the door and check the hinge movement. A mug or utensil that sits too low can collide with the contents below or prevent the door from sealing. Keep hanging storage away from heat, steam, and areas where splashes are common.

In a farmhouse renovation, a rail for tea towels may add useful character. In modern bathrooms and kitchens with a restrained finish, concealed hooks inside a cabinet can provide the same function without visual noise. Lighting also matters. An item may be technically stored but practically forgotten if the cabinet interior is dark.

Use this idea selectively. Too many hooks turn a tidy cabinet into another crowded display, and adhesive products can fail when exposed to grease or moisture. Plan the location in the 3D design stage, especially if upper cabinets include integrated lighting or unusual door heights.

6. Tiered Shelf Risers and Stackable Shelving

A fixed shelf often leaves unused space above plates, bowls, cans, or packets. A shelf riser divides that vertical void into separate levels, helping you see and reach items without creating unstable towers. Stackable shelving is especially effective in cabinets where shelf positions can't easily be changed.

This solution fits renters, smaller kitchens, and renovation clients who want flexible organisation rather than permanently built-in hardware. It also lets you test a storage arrangement before committing to custom cabinetry. The trade-off is that freestanding risers can shift, collect crumbs, or fail under heavy loads if they aren't designed for the job.

Match each tier to the contents

Use a sturdy riser for plates and bowls, and lighter units for packets or small pantry goods. Non-slip mats can reduce movement. Group similar items by size so you don't create an awkward overhang, and leave enough room for the cabinet door to close without catching the front edge.

Start with the cabinet that causes the most frustration rather than buying organisers for every shelf. If the lower level becomes overloaded, the riser hasn't solved the access problem. It has created another obstacle.

In modern kitchen renovations, built-in adjustable shelving may be the better long-term answer where storage needs are stable. Freestanding risers remain useful for testing heights, accommodating changing crockery, or organising a pantry that needs regular reconfiguration.

7. Specialised Spice Rack Cabinets

Spices disappear when they're stored in a deep drawer or behind tall bottles. A narrow cabinet with tiered shelves keeps labels facing forward and places seasonings close to the preparation or cooking zone. It can be concealed behind a standard door or integrated into a wider pantry arrangement.

Position the rack away from direct cooktop heat and strong sunlight. Heat and light can affect the condition of spices, while a cabinet beside the cooktop may collect grease. If the rack is near the preparation bench, you'll gain access without placing every jar on the benchtop.

Make the collection manageable

Standardising jar sizes creates a cleaner arrangement and makes shelf spacing easier to plan. Label containers clearly, then organise them alphabetically, by cuisine, or by how often you use them. The best system is the one everyone in the household will maintain.

Interior LED lighting can improve visibility, but the electrician and cabinetmaker need to coordinate wiring, switching, and heat management. Include those details before the cabinet is manufactured. A spice rack that blocks a drawer, reduces a landing area, or sits too far from the cooking workflow may look elegant while performing poorly.

For a minimalist kitchen, concealed spice storage protects a clear visual line. In a more expressive designer kitchen, an open display can work if the jars remain orderly and the location doesn't expose them to cooking residue. Review the collection periodically rather than allowing rarely used jars to occupy the most accessible positions.

8. Under-Sink Organisers and Drawer Systems

The cabinet beneath the sink has to house pipes, waste fittings, cleaning products, bins, and sometimes a filtration unit. A fixed shelf often leaves a dark, awkward cavity. Shallow pull-outs, sliding drawers, and split-level organisers give each item a defined position while keeping the plumbing accessible.

Photograph the existing plumbing before demolition. During design, mark the trap, isolation valves, filters, waste connections, and the space needed for future repairs. Ask the cabinetmaker to create removable drawer sections or shaped components around the pipework. A storage layout that cannot be taken out for servicing will cause trouble later.

Keep the zone safe and serviceable

Choose moisture-resistant cabinet finishes and allow some ventilation. Store bottles and cleaning products in leak-contained trays, with child-safety latches where children may reach hazardous supplies. Keep the plumbing exposed enough for inspection. The plumber should be able to reach valves, connections, and filters without dismantling permanent storage.

A pull-out bin can separate general waste and recycling while keeping containers off the benchtop. Its usefulness depends on capacity, liner removal, odour control, and how easily the door opens. Separate compartments need enough width for real household waste, not just a tidy showroom arrangement.

Check the bin position against the preparation area and the dishwasher. A short route can improve cleanup, while a bin beside stored food or clean dishes may create an avoidable hygiene concern. In a compact kitchen, under-sink drawers can recover valuable access, but leave room to spot leaks and wipe the cabinet floor. The same service-first approach helps when planning bathroom renovations, new bathroom ideas, or modern bathrooms, where concealed plumbing also needs practical access. Registered builders unlimited can help coordinate these details across a broader home renovation, including designer bathrooms.

9. Integrated Wine and Beverage Coolers

A built-in beverage cooler gives drinks a defined home and can keep the main refrigerator available for food. It suits households that entertain often, collect wine, or want a dedicated coffee and drinks station. Integrated cabinetry can make the appliance appear intentional rather than added to the end of a run.

This is a premium choice, so planning errors are expensive. Confirm electrical requirements, ventilation, door swing, service access, and the appliance manufacturer's installation clearances. A cooler enclosed without adequate ventilation may perform poorly or require premature servicing.

Decide whether it earns the space

Place the unit away from direct sunlight and heat-producing appliances. A drinks station near the dining area can reduce traffic through the cooking zone, while a cooler beside the cooktop may be convenient but less suitable for temperature-sensitive storage. Capacity should reflect actual entertaining habits, not an idealised lifestyle.

In a designer kitchen, panelled integration can preserve a consistent cabinet finish. In a more informal renovation, a visible appliance may be easier to replace or maintain. Either approach needs a clear plan for power and ventilation before the cabinetmaker finalises the opening.

A beverage cooler also competes with drawers, pantry storage, and bins. Compare the benefit against the cabinet space it consumes. If drinks are rarely stored separately, deep drawers or a better pantry may solve a more pressing problem.

10. Custom Pantry Cabinet Systems

A custom pantry earns its cabinet space when the household needs separate zones for bulk goods, baking supplies, small appliances, lunch items, or specialist ingredients. Choose between a full-height cabinet, walk-in pantry, or butler's pantry according to available floor area, daily routines, and whether appliances should stay hidden from the main room.

Pantry storage is widely included in kitchen renovations, but adoption alone does not make a walk-in pantry suitable for every Victorian home. A full-height cabinet may provide better access in a compact layout, while a walk-in pantry needs practical entry clearance, lighting, ventilation, and enough width to avoid becoming a narrow storage corridor. The choice also affects the wider renovation plan, including circulation between the kitchen, modern bathrooms, and other living areas.

Design around volume and frequency

Separate everyday items from reserve stock. Keep frequently used goods between comfortable reach heights, place occasional supplies higher, and use adjustable shelves so the arrangement can change. A baker may need broad shelves for flour and mixers, while a family may prioritise lunchboxes, cereals, and quick-access snacks.

A pantry should solve a clear access problem, not just add volume. Deep shelves can hold more, but they also hide older supplies. Shallower shelves improve visibility and replenishment, although they may reduce capacity. Include task lighting, durable surfaces, and a surface that can be wiped clean after spills. Labels and categories help, but the layout should remain usable without perfect organisation.

Plan power outlets before installation if appliances will sit inside the pantry. Confirm door swing, shelf depths, ventilation, and clearance for carrying stock into the space. These details matter in designer bathrooms and broader home renovations too, where registered builders unlimited can coordinate services, cabinetry, and changing room requirements.

Before committing, check dimensions and clearances with SitePro Bathrooms' kitchen cabinet sizes guide. The practical test is simple: each zone should be easy to reach, replenish, clean, and justify against the floor area it occupies.

Top 10 Kitchen Cabinet Storage Ideas: Side-by-Side Comparison

Storage Solution Implementation Complexity Resource Requirements Expected Outcomes Ideal Use Cases Key Advantages
Pull-Out Pantry Systems High, custom cabinetry or deep-cabinet retrofit Moderate–high cost; requires ≥12" depth and quality slides Maximizes deep storage; full-extension access and visibility Renovations with deep or awkward cabinets; compact kitchens Full-access vertical storage; adjustable shelving
Vertical Dividers for Baking Sheets and Trays Medium, dedicated slot or retrofit inserts Low–moderate cost; precise interior measurements Upright organization; prevents warping and stacking damage Baking sheet, cutting board, and tray storage Keeps flat items visible and easy to retrieve
Soft-Close Drawer Inserts and Organizers Medium, drawer sizing and possible reinforcement Low–moderate cost; soft-close slides and modular inserts Reduced clutter; protected utensils; quieter drawers Utensil/cutlery organization in everyday kitchens Customizable compartments; improved workflow
Lazy Susan Turntables for Corner Cabinets Low–Medium, simple retrofit or install Low cost; correct diameter and quality bearings Converts corner dead space to accessible storage Corner cabinets for spices, small appliances, pantry items 360° access; affordable corner solution
Overhead Cabinet Hanging Systems Low, simple hooks/rails (adhesive or screw) Very low cost; minimal tools; limited weight capacity Utilizes unused vertical interior space; frees counters Small kitchens, mug and small-item storage Inexpensive; easy to install and customize
Tiered Shelf Risers and Stackable Shelving Very Low, plug-and-play setup Low cost; measure shelf height for fit Increases usable shelf levels; organized displays Dishware, bowls, pantry tiering; renters and quick upgrades Affordable; reconfigurable; works in existing cabinets
Specialized Spice Rack Cabinets Medium–High, custom narrow/angled shelving Moderate cost; optional lighting; dedicated cabinet space High visibility and protection for spices; improved workflow Gourmet cooks, frequent-seasoning users, display kitchens Optimized spice visibility; tailored storage
Under-Sink Organizers and Drawer Systems Medium–High, plumbing-aware customization Moderate cost; moisture-resistant materials; precise fit Organized under-sink area; safer hazardous-item storage Cleaning supplies, trash/recycling, compact sinks Maximizes awkward space around plumbing; pull-out access
Integrated Wine and Beverage Coolers High, built-in integration, electrical and ventilation High cost; dedicated power and ventilation; cabinet space Climate-controlled beverage preservation; frees fridge space Entertaining homes, collectors, luxury renovations Preserves wine quality; attractive built-in feature
Custom Pantry Cabinet Systems Very High, full custom design and installation Very high cost; dedicated wall space; 3D planning Maximum bulk storage and tailored organization Large families, entertainers, luxury home builds Fully customizable; substantial storage and resale value

Choose Storage That Earns Its Cabinet Space

Good storage solves a specific problem. Pull-outs improve access to deep cabinets, vertical dividers stop baking trays and boards becoming a leaning stack, and drawer inserts give small tools a defined place. Turntables make corners more usable, while shelf risers add levels where fixed shelves leave empty height. Custom pantry systems handle higher-volume storage, but they require more planning and can consume valuable floor area.

Australian renovation research shows why this approach matters. HIA's Reno Revolution coverage says 29% of renovators cite inadequate storage as a key issue, behind outdated or small spaces at 44% and old finishes at 43%. The same source also underlines that storage is a real renovation pain point, not merely a preference for a cleaner-looking kitchen.

Budget should shape the decision without reducing it to the cheapest hardware. Houzz AU reports an average kitchen renovation spend of $19,300, with larger kitchens over 10 square metres averaging $22,600 and smaller kitchens under 10 square metres averaging $14,600, as reported in the Houzz Australia kitchen renovation coverage. A compact kitchen may gain more from deep drawers, internal organisers, and a carefully located pantry cabinet than from an oversized feature pantry.

Test the layout before construction

Before finalising drawings, check:

  • Cabinet dimensions: Confirm internal width, depth, height, shelf clearances, and mechanism requirements.
  • Daily reach: Put frequent-use items near the preparation, cooking, and cleaning zones.
  • Plumbing: Allow inspection and repair access beneath sinks and around filtration equipment.
  • Electrical planning: Coordinate outlets and dedicated circuits for integrated coolers and pantry appliances.
  • Ventilation: Protect enclosed appliances and moisture-prone storage with appropriate airflow.
  • Door clearance: Check handles, walls, appliances, and adjacent drawers at full opening.
  • Future flexibility: Prefer adjustable shelves and adaptable compartments where household needs may change.

A broader renovation plan can also connect kitchen storage with bathroom renovations. Modern bathrooms and new bathroom ideas often rely on floating vanities, flat-panel cabinetry, neutral finishes, and concealed storage, while designer bathrooms demand the same attention to access, moisture, lighting, and service zones as a kitchen. If one project covers several rooms, coordination matters more than selecting isolated features.

Homeowners may also search for registered builders unlimited when comparing renovation coordination options in Victoria. A Domestic Builder, Unlimited registration allows a builder to personally carry out, manage, or arrange subcontractors for all components of domestic building work, and to handle functions such as plan examination, tendering, building surveyor submissions, and inspection organisation. The Australian Institute of Building licensing guidance also states that this registration doesn't permit total demolition of an existing building.

For a coordinated project in Highett or greater Victoria, discuss the storage brief before finishes are locked in. Homeowners planning kitchen or bathroom renovations can explore SitePro Bathrooms' consultation, 3D design, construction, and finishing services, then request a personalised conversation about cabinet access, plumbing, appliances, and the way each room needs to work.

  • siteprobathrooms

Kitchen Renovation Before After: Real Transformations

You've probably seen the pattern online. A dated kitchen appears in one photograph, then the next image shows clean cabinetry, a generous island and carefully styled benchtops. The transformation looks simple until you stand in your own kitchen and notice the uneven floor, crowded work triangle, ageing wiring and benchtop material that may no longer suit current requirements.

A credible kitchen renovation before and after comparison needs to show more than colour changes. It should explain what stayed, what moved, what compliance work was required and why the final cost changed. In Highett and greater Victoria, that distinction separates a useful renovation plan from an attractive photograph that gives you unrealistic expectations.

What a Kitchen Renovation Before After Really Shows

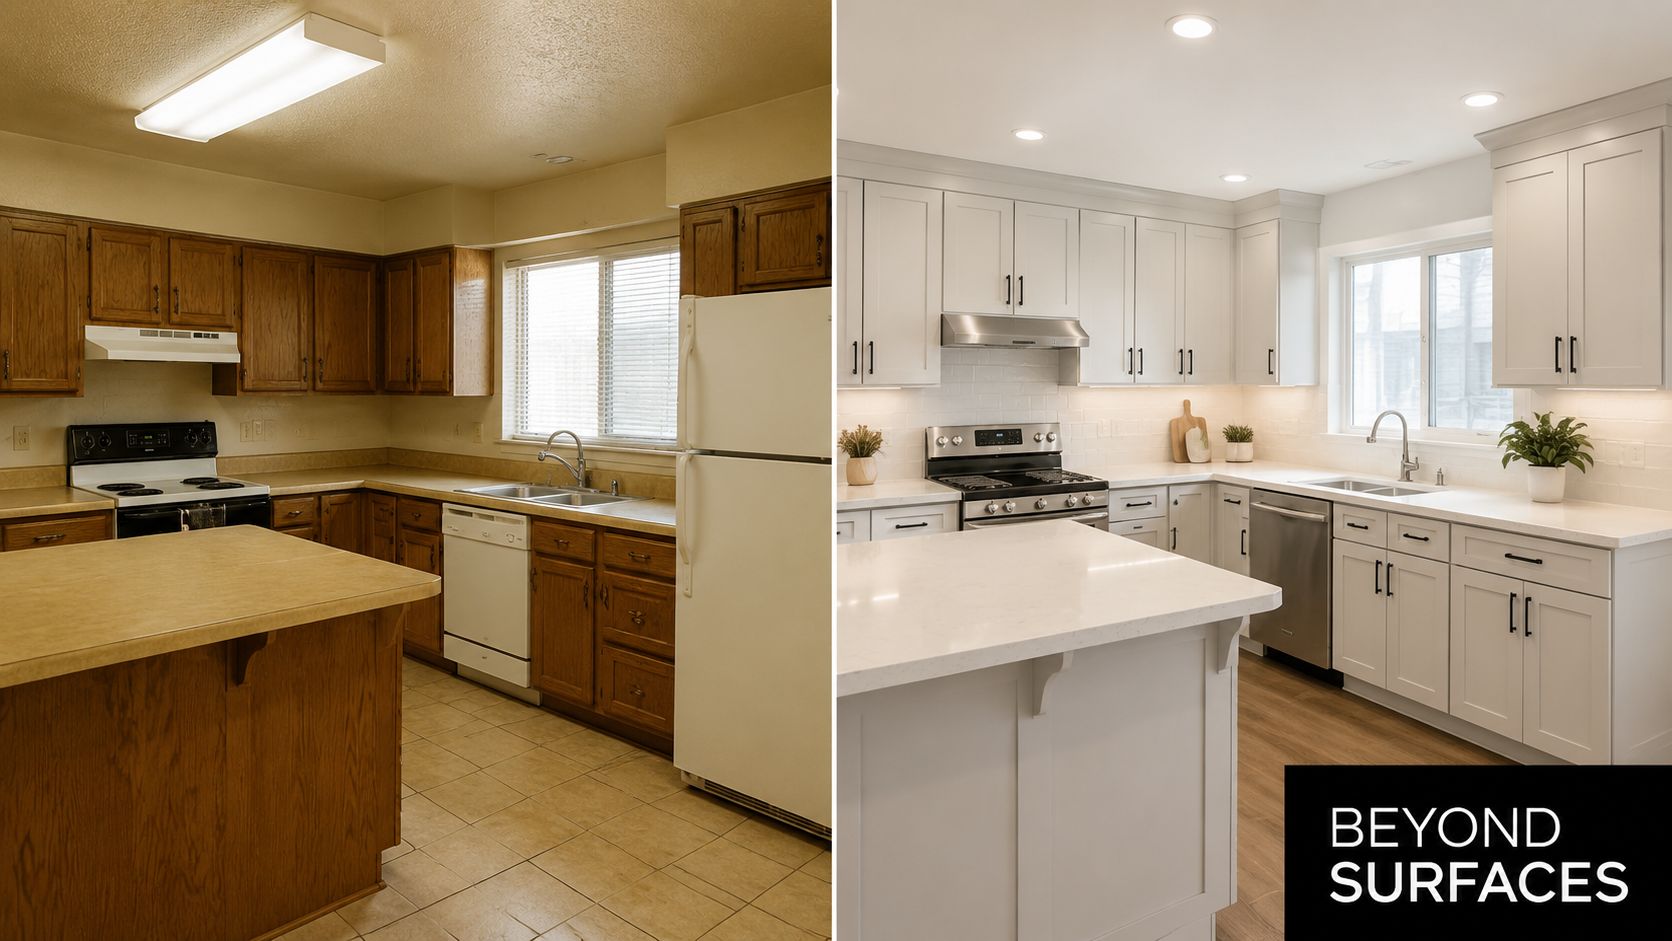
A homeowner standing in front of a dated timber kitchen usually sees the obvious problems first: dark doors, tired handles, poor lighting and a benchtop that has lost its appeal. Those items can create a striking visual improvement without changing the room's footprint. Repainting, replacing handles, updating lighting and fitting new surfaces may produce a strong after image while retaining the existing plumbing, electrical points and cabinetry carcasses.

That's the first important distinction. A cosmetic refresh changes what you see. A reconfiguration changes how the kitchen works. Moving a sink, widening an opening, removing a wall or creating a new island can affect flooring, services, structural elements and approvals. The photograph might show only a brighter room, but the construction process may involve several trades working in sequence.

A side-by-side comparison of a kitchen renovation showing the transformation from dated wood to modern white.

The visible result hides the scope

A compact apartment kitchen in Highett might retain its sink, cooktop and waste connections while gaining better storage, lighter finishes and integrated appliances. The room can look substantially larger even though no wall has moved. That approach usually limits disruption and makes the existing layout work harder, but it won't solve a poor workflow.

A family kitchen with a closed-off dining area presents a different decision. Removing a dividing wall and introducing an island can improve sightlines and casual dining, yet the project may require structural advice, revised electrical planning, new flooring and more extensive joinery. The island also needs enough circulation around it. A beautiful oversized island that restricts cupboard access isn't a successful after state.

Victoria's renovation market includes both extremes. A 2024 Australian national survey found kitchens and bathrooms were the two most popular rooms to renovate, while over 30% of respondents set budgets between A$5,000 and A$15,000. The same survey estimated typical kitchen projects at 2 to 9 weeks, depending heavily on scope and retained services, as reported in Australian renovation cost and timing research.

Practical rule: Compare your kitchen with online examples by scope, not by appearance. Ask whether the project retained the layout, replaced the cabinetry or altered the building itself.

What changed in 2026

The strongest contemporary results aren't stark white rooms. Australian design coverage points towards warm minimalism, timber tones, earthy neutrals, concealed appliances and larger islands. These choices can make a kitchen feel calm and integrated, but they still need to reflect the home's architecture and the way the household cooks.

Before signing off a design, mark the changes in three groups:

  • Surface changes: doors, handles, paint, splashback, lighting and selected appliances.
  • Functional changes: drawer configuration, pantry storage, appliance placement and task lighting.
  • Building changes: walls, plumbing, electrical circuits, flooring levels, ventilation and structural work.

That record makes the before-and-after comparison honest. It also gives your builder a clearer brief and helps you decide whether your priority is presentation, storage, entertaining space or long-term practicality. For a broader comparison of renovation outcomes, see this guide to bathroom renovation before and after projects.

Real Project Budgets and Timelines Explained

A kitchen budget is only useful when it shows the work behind the finished photograph. Demolition, rubbish removal, electrical changes, plumbing, installation, benchtops, splashbacks, floor repairs and compliance decisions can each change the final price. Ask the builder to mark every item as included, provisional or excluded before comparing quotes.

The scope matters more than the finish at the start. The ranges below are Australian benchmarks, not promises for a Highett property. Existing conditions, site access, joinery specifications and structural changes will determine the contract value.

Compare scope before finishes

Scope level Typical cost range Timeline Expected ROI
Cosmetic refresh Qualitative range, generally below a full remodel when services and cabinetry are retained Shorter programme, subject to product availability Often strongest when the existing layout already works
Mid-range renovation Around A$35,000 Often within the broader 2 to 9 week Australian kitchen project context Estimated resale uplift of A$20,000 to A$28,000, or 57% to 80% ROI in the cited benchmark
Extensive renovation Around A$65,000 Longer programme because structural and service work add sequencing Reported return of 62% to 75%, with estimated value of roughly A$40,000 to A$48,750

The mid-range benchmark and resale figures come from Australian renovation value guidance. The broader timeline context is reported in the national renovation survey. The extensive-renovation return comes from the same Australian value benchmark.

A mid-range renovation can suit a home where the layout is basically sound but storage, lighting and finishes are tired. New drawers may improve everyday use, task lighting can correct poor visibility, and appropriately selected appliances can support the way the household cooks. An extensive renovation has a stronger case when the plan wastes space or services are poorly positioned. Structural work still does not guarantee an equivalent increase in resale value.

Melbourne renovation guidance describes well-executed projects as capable of returning 1.5x to 2x the spend in suitable conditions. On that benchmark, a A$50,000 renovation could add about A$75,000 to A$100,000 to sale value. The same advice warns against over-capitalising, recommending a tired kitchen be raised to a solid 7/10 to 8/10 finish instead of receiving costly upgrades that buyers may not value. See Melbourne kitchen renovation ROI advice for that guidance.

Why the quote changes after design

Engineered-stone changes have made benchtop selection a compliance and budget decision, not just a styling choice. Australian renovation coverage describes increased use of zero-silica engineered stone and advanced porcelain surfaces. It also places complete kitchen renovation benchmarks around $35,000 nationally in 2026, with HIA-linked estimates closer to $42,000 including installation. The material, fabrication method and installation requirements need to be confirmed before the quote is accepted. Further context is available in Australian kitchen trends and renovation costs.

Your quote should identify:

  • Benchtop material and fabrication: Confirm the surface, edge profile, cut-outs, installation method and disposal of the old benchtop.
  • Service relocation: Check whether plumbing, electrical circuits, ventilation and appliance connections are included.
  • Making good: Allow for walls, floors, plaster, paint and splashback areas exposed during demolition.
  • Access and waste: Apartment access, parking, stairs and rubbish removal can increase labour without changing the design.
  • Lead times: Cabinetry, appliances and custom surfaces can delay the programme when orders are placed late.

A workable schedule begins with design confirmation and site checks, then moves through demolition and rough-in work before cabinetry, benchtops, splashbacks and final fit-off. Hidden conditions, split deliveries and unresolved selections are common sources of delay. Compare quotes by their inclusions and exclusions, using this guide to the cost of a new kitchen as a practical reference.

Detailed Case Studies from Victorian Homes

Before-and-after photographs rarely show the decisions that control the budget. In Highett and nearby Victorian suburbs, apartment access, existing services, structural walls and changing benchtop requirements can matter as much as the new cabinetry. The following profiles are practical project patterns, not reported client case studies, so they include no invented final costs or homeowner feedback.

A compact apartment refresh

A small apartment kitchen may have service points in sensible locations yet still suffer from poor storage, dark finishes and limited bench space. Relocating plumbing would add disruption without addressing the main problem, so the sink and cooking zone remain in place.

Storage planning delivers the visible improvement. Deep drawers replace awkward lower cupboards, overhead cabinetry reaches usable heights, and a tall pantry uses the available vertical space. Lighter doors, a reflective splashback and layered lighting make the room feel less enclosed. Integrated appliances reduce visual noise, although they can cost more and may be harder to replace if future appliance dimensions change.

Retaining services usually limits disruption and makes the existing layout work harder, but it won't solve a poor workflow. The risk is filling the room with too much joinery. A large island or excessive cabinetry can reduce working clearance and make an apartment kitchen less practical.

A family home opened to daily life

The second project starts with a kitchen separated from the living and dining areas. The owners want better supervision of children, casual meals at an island and a clearer connection to the backyard. Removing the visual barrier may achieve that result, subject to structural assessment, with the island positioned between preparation and living zones.

An island needs careful planning beyond its finish. Movement around it must remain comfortable, storage should sit on the useful side, and seating must stay clear of the main cooking path. Electrical planning also needs to happen before surfaces close up, because outlets, lighting and appliance circuits must be resolved early.

The hidden cost can sit behind the walls or under the floor. Outdated wiring, uneven flooring or a load-bearing wall may change the scope after demolition begins. Investigate those conditions first, record the findings and price the required work rather than treating it as an unavoidable surprise.

A detailed three-dimensional design helps homeowners assess whether the proposed opening, cabinetry and circulation work together. For further planning guidance, review these modern kitchen design ideas.

A premium joinery project

The third profile suits a larger home where the owners want concealed appliances, custom timber joinery and an organised entertaining zone. The finished design may include a full-height pantry wall, appliance garage, timber detailing and a carefully selected alternative to engineered stone. Changes to engineered-stone use and fabrication requirements can affect material selection, edge details, lead times and coordination, so the surface decision belongs in the scope review, not only the styling stage.

Premium joinery depends on accurate site measurements and a firm decision schedule. Custom panels must align with adjoining doors, appliance clearances need checking before manufacture, and timber tones should be assessed in the actual light. A late design change can delay several trades rather than one isolated item.

The common lesson is straightforward. A successful renovation matches the property, the household's routine and the amount of building work the owners are prepared to fund. The most expensive finish cannot rescue a poor layout, unresolved compliance work or a budget that ignored the conditions behind the before photograph.

Design Choices That Age Well Versus Those That Date Quickly

Following the latest kitchen trend doesn't guarantee a durable result. A photograph taken on handover day rewards visual novelty, while a household lives with cleaning requirements, storage limitations, damaged edges and changing tastes for years. The better question is whether the design will still feel proportionate and practical after the styling has disappeared.

Australian trend coverage describes a move from stark white towards warm minimalism, timber, earthy neutrals, hidden appliances and larger islands. Those elements can age well when they're used as a restrained palette and supported by a sound layout. They date more quickly when every surface, fitting and joinery detail repeats the same trend.

Keep the permanent decisions quiet

Cabinet proportions, work zones and storage deserve more attention than decorative fashion. Shaker, flat-panel and subtly profiled doors can all work when the scale suits the home. A neutral base also gives future owners, tenants or your own changing preferences room to add personality through paint, stools, artwork and movable lighting.

Timber brings warmth, but tone and finish matter. A small amount of timber can soften a neutral kitchen, while heavily matching timber across doors, flooring and furniture may make the room feel tied to a specific period. Earthy colours can provide character without demanding that every future choice coordinate with a strong feature colour.

The safest trend is a layout that works. Finishes can change later. Poor circulation and inadequate storage are expensive to correct.

Large islands need particular discipline. They support preparation, gathering and casual dining only when there's enough space to move around them and open nearby doors. If an island blocks the refrigerator, narrows the cooking route or becomes a dumping surface, its visual impact won't compensate for its daily inconvenience.

Treat surfaces as working materials

Benchtop selection involves maintenance as well as appearance. Some surfaces may need more care around heat, staining, impact or edge damage, while others may offer a more forgiving routine at the expense of a particular look. Ask the fabricator what cleaning, sealing and repair practices apply to the material under consideration, especially when comparing natural stone, porcelain and compliant alternatives.

Hidden appliances can create a beautifully quiet room, but access must remain practical. An appliance garage needs ventilation, usable power and enough clearance for the items you operate. Concealing everything can also make a kitchen feel less accessible if doors are heavy or storage is positioned above comfortable reach.

Hardware and tapware are easier to change than cabinetry, so they're useful places for controlled personality. Choose finishes that tolerate fingerprints, moisture and regular handling. Before committing, place samples beside the floor, wall colour and benchtop under both daylight and artificial light. A finish that looks balanced in a showroom can appear much stronger in a smaller Victorian room.

Working with Registered Builders and Understanding Compliance

A kitchen renovation becomes riskier when homeowners treat registration as a box-ticking exercise. In Victoria, the consumer regulator says a person carrying out domestic building work must register when handling a contract worth more than AUD 10,000. The requirement applies to individual practitioners rather than businesses, so you need to understand who is responsible for the work and contract.

Registered practitioners must hold the required qualifications, knowledge and expertise, and have domestic building insurance where applicable under the regulator's guidance. Registration doesn't guarantee that a particular design will suit your home, but it gives you a formal credential to verify before you sign.

Check the person behind the business

Ask for the practitioner's registration details and confirm that the registered individual matches the person named in the contract. Review the written scope, payment stages, variations process, start conditions and practical completion requirements. A polished showroom or website isn't a substitute for checking the contractual party.

Some single-trade work, including tiling, painting, plumbing and glazing, may not require registration when performed as isolated jobs. The regulator's position is different when those trades form part of a broader domestic building project, so don't assume that splitting a renovation into separate invoices removes the registration or insurance issues. The reference supplied for Victoria's registration guidance is available through this domestic building registration information.

Put compliance into the quote

Engineered-stone changes affect both product selection and the way a benchtop is discussed. Ask your builder and fabricator to identify the proposed material, confirm its suitability for the project and explain fabrication, handling and installation requirements. If the quote says “stone benchtop”, it hasn't given you enough information to compare options properly.

Use a written clarification list before accepting a price:

  1. Confirm inclusions: Demolition, disposal, rough-ins, cabinetry, surfaces, splashback, painting and final cleaning should be identified.
  2. Separate allowances: Provisional sums should state what they cover and what could cause them to change.
  3. Record existing conditions: Ask how the quote treats concealed wiring, uneven floors, moisture damage or structural discoveries.
  4. Set variation controls: Require changes to be priced and approved in writing before the work proceeds.
  5. Check handover: Include testing, defect recording, appliance fit-off and final inspection.

A cheap quote isn't a saving if it leaves the expensive work undefined. Clarity protects the budget before demolition starts.

Coordinating Kitchen and Bathroom Renovations for Maximum Value

Kitchen and bathroom renovations often become linked once work begins. Both rooms may require plumbing, electrical coordination, cabinetry, tiling, waterproofing or careful sequencing, and both can disrupt the household when trades need repeated access. Planning them together can reduce duplicated design conversations and help organise the overall construction period, although it still requires a realistic cash-flow plan.

The design language can connect without making the rooms identical. A kitchen with warm timber and earthy neutral tones can sit comfortably beside a bathroom using a floating vanity, restrained wall colour and tactile finishes. Modern bathrooms commonly use flat-panel cabinetry, floating vanities, open showers and curbless showers, while Australian bathroom guidance also highlights natural textures, hazy greens and sunbaked neutrals. See these new bathroom ideas and modern bathroom examples.

Decide what should happen first

If funds are limited, prioritise failures before decoration. In the kitchen, poor storage, unsafe or unsuitable surfaces, defective services and water damage deserve attention before premium handles or statement lighting. In the bathroom, waterproofing, drainage, ventilation and damaged substrates should lead the programme.

A coordinated plan should show:

  • Shared decisions: Confirm colours, hardware families and timber or neutral tones together.
  • Trade sequencing: Schedule demolition, service rough-ins, wall preparation, cabinetry, surfaces and fit-off to avoid clashes.
  • Household access: Decide which room must return to service first and protect areas that remain occupied.
  • Budget boundaries: Keep separate allowances for each room so one project doesn't absorb the other.

Independent 2026 Australian renovation-market reporting estimates total home renovation spending at more than AUD 50 billion, with kitchen and bathroom work together accounting for over 60% of that spend. The same reporting places a complete bathroom renovation nationally between AUD 10,221 and AUD 20,443, with a midpoint of AUD 15,332, and gives Melbourne a range of AUD 10,500 to AUD 21,000. These figures are summarised in Australian bathroom renovation cost reporting.

For homeowners comparing bathroom renovations, registered builders unlimited and smaller specialist teams, the deciding factor should be scope control, communication and documented responsibility. SitePro Bathrooms is one local option that combines concept development, 3D design, construction and finishing for kitchen and bathroom projects. Request a detailed consultation, insist on a written inclusions schedule and judge the finished design by how well it works after the before-and-after photographs are forgotten.


If your Highett or greater Victorian kitchen is ready for a realistic transformation, start by documenting the current layout, photographing services and listing the problems you want solved. Then contact SitePro Bathrooms to discuss your priorities, review a tailored 3D concept and request a quote that separates cosmetic work, structural changes, compliant surface choices and every necessary finishing trade.

  • siteprobathrooms

Blind Corner Pantry: A Modern Renovation Guide

You're probably looking at a kitchen plan right now and circling the same awkward spot everyone struggles with. The corner. It's where good layouts can become clumsy, where storage looks generous on paper but feels frustrating in daily use, and where one wrong choice can affect the whole renovation.

That's why a blind corner pantry matters more than people expect. It isn't just a cabinet detail. It's a planning decision that affects storage, movement, accessibility, and how the kitchen will feel years from now. In renovation work, that kind of decision sits in the same category as shower placement in bathroom renovations, vanity depth in modern bathrooms, or storage layout in designer bathrooms. Small move, big consequence.

Tackling the Dreaded Corner Cabinet

Most homeowners describe the problem before they know the name for the solution. They talk about the “black hole” cabinet. The shelf where roasting dishes disappear. The back corner where the slow cooker lives until Christmas. In older L-shaped kitchens, that space often becomes a compromise rather than useful storage.

The reason is simple. Corners are geometrically awkward. When two cabinet runs meet, they create a zone that's hard to access cleanly from either side. Historically, the blind corner became a standard response to that problem in L-shaped and U-shaped kitchens, and modern guidance still positions it as the higher-capacity alternative to a Lazy Susan in compact homes where every millimetre matters, as outlined in this corner cabinet design overview.

Why the corner becomes a design issue

A blind corner pantry works by pushing storage into that hard-to-use zone while keeping a clean cabinet line across the kitchen. That can be a smart move, especially if your priority is fitting more into a modest footprint. It can also be the wrong move if you value instant access over hidden capacity.

Renovation experience matters. A good designer doesn't ask only, “Can we fit storage here?” They ask how you cook, who uses the kitchen, and what the adjacent cabinetry needs to do.

Practical rule: If a corner solution looks efficient on a floor plan but creates awkward reaching, blocked doors, or poor drawer access, it isn't efficient in real life.

The same thinking applies across the home. In bathrooms, the most successful plans don't just chase features. They organise movement, storage and access so the space works every day. The same principle sits behind smart L-shaped kitchen layout planning.

When the blind corner starts to make sense

A blind corner pantry tends to suit homeowners who need to reclaim hidden volume without breaking up the overall layout. It's often chosen when the kitchen has to work harder, not just look better.

That's why this isn't a styling decision. It's a functional one. If you get it right, the corner becomes useful. If you get it wrong, you've built an expensive place to lose things.

What Is a Blind Corner Pantry System

A blind corner pantry system is a cabinet arrangement that reaches into the corner but is accessed from one visible opening. Part of the storage sits behind the front cabinet line, which is why it's called “blind”. You can't see the full interior from the doorway, even though that hidden section is where much of the storage sits.

In practical terms, it's a way to capture more corner volume than many rotating shelf options. In kitchen design guidance, these layouts are commonly built around 24-inch-deep base units and widths of about 33 to 42 inches, and they're valued for storing bulky items such as large cookware, roasting trays, stand mixers, and small appliances, as explained in this blind corner base cabinet dimensions guide.

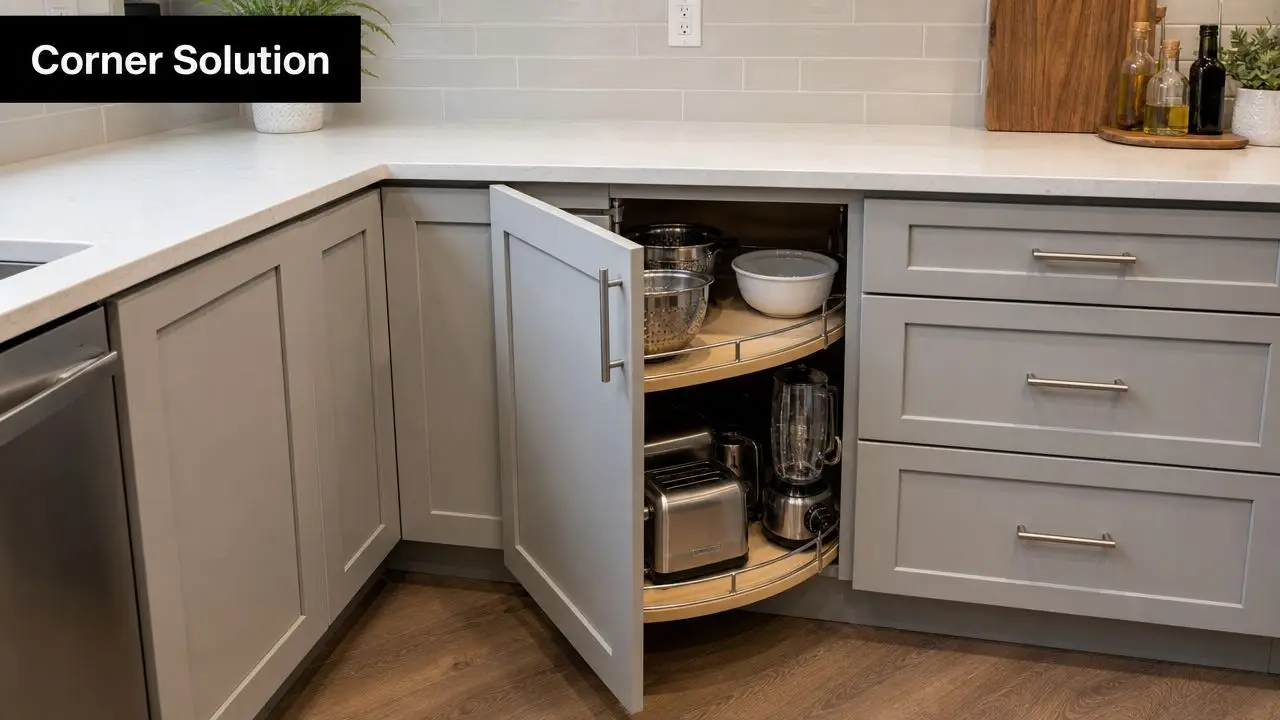
A modern kitchen corner cabinet featuring a pull-out carousel shelf used as a blind corner pantry solution.

How the system works in plain language

Think of the cabinet as having a front room and a back room. The front opening gives you entry, but some of the storage sits deeper into the corner return. Without internal hardware, that back section can be awkward. With the right mechanism, it becomes much more practical.

The three common approaches are easy to picture:

  • Lazy Susan style trays
    These use rotating shelves. They suit homeowners who want quick visual access to lighter items. You spin the shelf and bring contents forward rather than reaching into the corner.

  • Swing-out systems
    These move in two stages. The front baskets come out first, then the rear section follows into view. They're useful when you want more of the corner volume without leaving everything buried at the back.

  • Pull-out shelves
    These behave more like internal drawers. Shelves or baskets slide forward so you can load and unload items without bending deep into the cabinet. For many households, this feels the most intuitive day to day.

What works well and what doesn't

The cabinet itself isn't the whole story. The success of a blind corner pantry depends on what you put in it and how often you need it.

It tends to work well for:

  • Bulky equipment like mixers, platters, and appliances you use weekly or seasonally
  • Secondary pantry overflow rather than your most-used breakfast or lunch items
  • Families who want volume and are happy to use hardware to improve access

It tends to work poorly for:

  • Tiny loose items that get lost in deep storage
  • Daily essentials you need in a hurry
  • Households needing very easy reach access with minimal bending or twisting

A blind corner pantry can be excellent storage, but it's rarely effortless storage unless the hardware matches the way the kitchen is actually used.

Comparing Your Pantry Solution Options

The key question isn't whether a blind corner pantry is good or bad. The better question is whether it suits your kitchen habits. That matters even more in smaller homes, where losing usable access can hurt more than gaining extra volume helps. The broader planning issue is especially relevant as smaller kitchens become more common and “dead” corner space becomes more consequential, as discussed in this blind corner storage planning article.

Some households need every bit of capacity they can get. Others are better served by simpler, easier-access cabinetry around the corner. The right answer changes with the brief.

Side by side trade-offs

Here's the practical comparison most homeowners need.

Blind Corner Hardware Comparison
Mechanism Type Best For Accessibility Capacity Typical Cost
Basic blind shelf Bulky, occasional-use items Lower, requires reaching Higher Budget-friendly
Rotating shelf system Smaller, lighter everyday items Higher Moderate Mid-range
Swing-out organiser Mixed pantry and cookware storage Good Good Mid-range to premium
Pull-out shelf system Households wanting easier retrieval Good to very good Good Premium
Voided corner with adjacent drawers Simplicity and easy use Very high Lower in the corner itself, often stronger in nearby cabinets Varies by joinery design

Which option suits which household

A basic blind corner gives you raw storage volume, but it asks more of the user. You need to bend, reach, and remember what's at the back. That's acceptable for platters or appliances. It's frustrating for food items you use constantly.

A rotating shelf system is often easier to understand and easier to live with if convenience comes first. The trade-off is shape. Round trays don't always use the full cabinet footprint cleanly.

A swing-out system is a middle-ground choice. It improves access without fully giving up the hidden volume that makes a blind corner attractive in the first place.

A pull-out solution usually feels the most premium in use. If the mechanism is well chosen and correctly installed, it can make a difficult corner feel organised rather than compromised.

If your corner will store everyday pantry goods, prioritise access. If it will store the big awkward items that otherwise clutter benches, prioritise capacity.

Don't ignore the alternative

Sometimes the best corner cabinet is no corner cabinet at all. Voiding the corner and giving more width to adjacent drawers can produce a kitchen that functions better overall. This option is especially strong when the surrounding cabinets can do the heavy lifting more effectively than a specialised corner unit.

That is the primary trade-off. A blind corner pantry can win on storage. It doesn't automatically win on usability.

Design and Planning Considerations

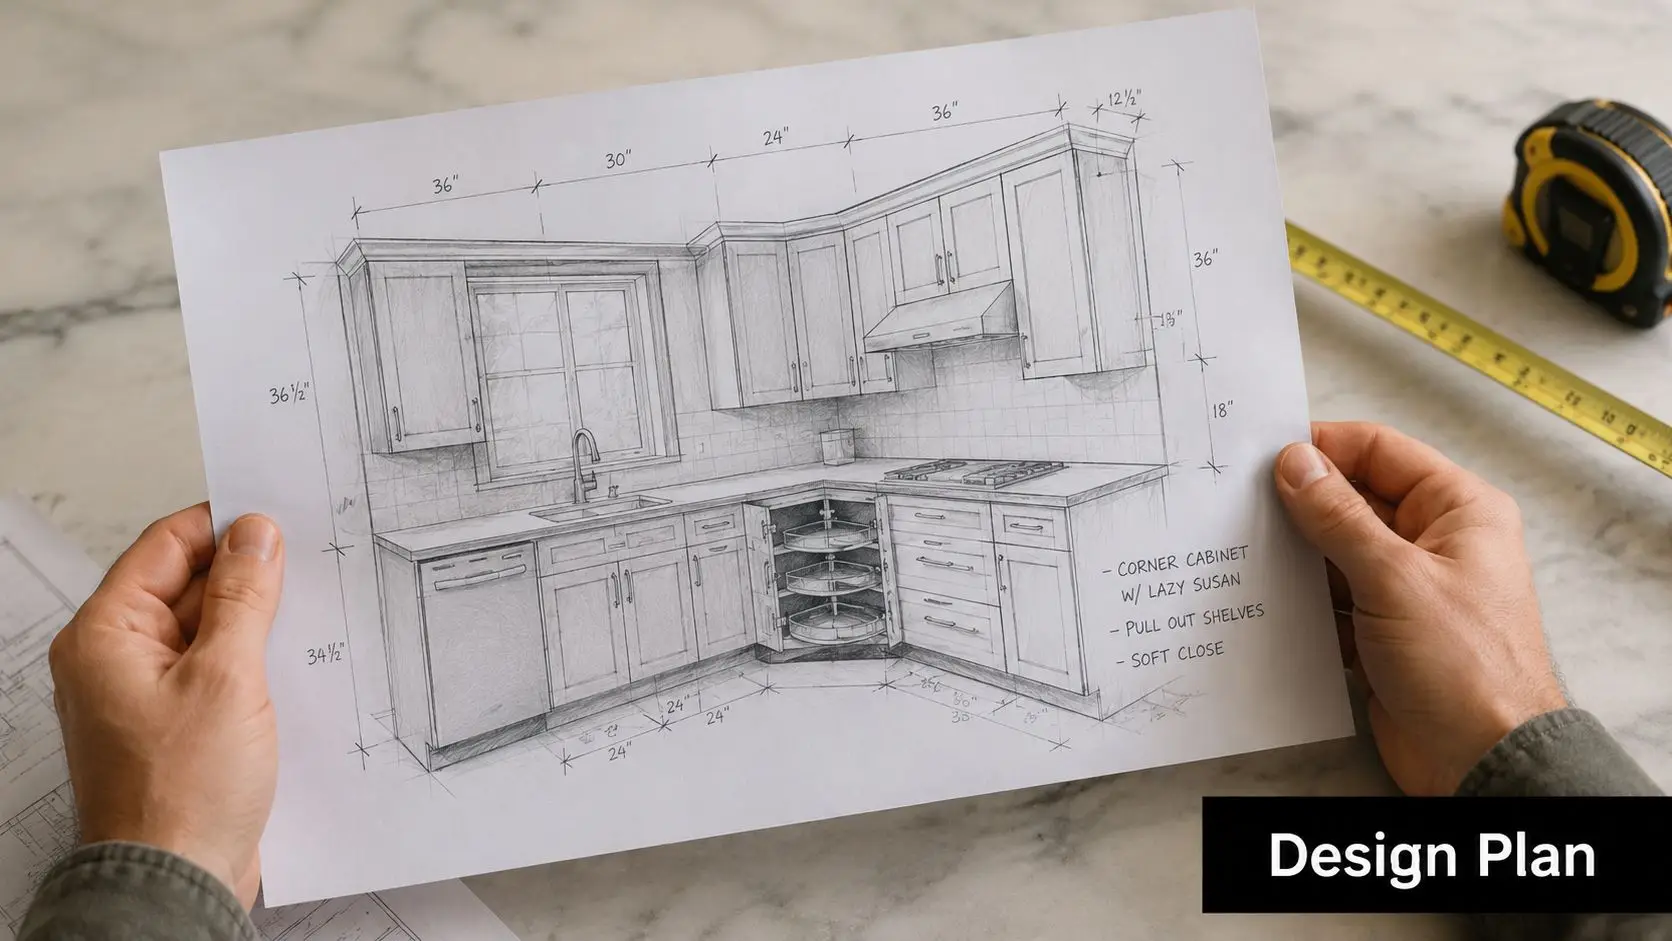
Blind corner pantries reward precise planning and punish assumptions. A drawing can look neat while an actual cabinet door clips a handle, fouls a return wall, or opens only halfway. This is one of those details that has to be resolved before joinery is ordered, not after installation begins.

A common mistake is measuring only the cabinet face. A blind corner tall unit often needs more room than its nominal width suggests. One listed European-made unit is 1150 mm wide, 2220 mm high, and 608 mm deep, but it requires 1250 mm x 608 mm of installation space to allow for practical clearance, as shown in this blind corner pantry size specification.

A person holding a printed kitchen design layout sketch featuring cabinet dimensions and appliance placement on marble.

The measurements that matter most

The opening isn't the whole story. You also have to account for:

  • Door swing clearance so the cabinet can open fully without clashing with nearby handles, walls or appliances
  • Return wall depth because the blind section depends on what's happening around the corner
  • Hardware movement path since internal trays and baskets need room to operate cleanly
  • User standing space so someone can open, step, and unload the cabinet comfortably

A few centimetres can decide whether the pantry feels slick or annoying.

Why 3D planning helps

This is where detailed design earns its keep. In renovation work, I'd much rather solve a corner issue on screen than on site. Three-dimensional planning lets you test door arcs, benchtop overhangs, appliance handles, and circulation before anyone cuts material.

That level of planning isn't unique to kitchens. It's the same discipline behind well-resolved ensuites, compact powder rooms, and polished family bathroom layouts. If you've ever looked through different kitchen cabinet material options, you'll know the finish matters, but the geometry decides whether the space works.

The best renovation plans don't rely on “it should fit”. They prove it fits.

Practical layout checks

Before signing off on a blind corner pantry, check these points:

  • Open the nearby appliances on the plan and see what happens when the pantry door is also open
  • Map your storage categories so the corner isn't asked to perform a role it doesn't suit
  • Confirm handedness early because corner systems are often left or right oriented
  • Review handle choices since oversized hardware can create clearance conflicts in tight corners

Good planning gives you a pantry that feels intentional, not improvised.

Installation Durability and Cost

A blind corner pantry does more work than a standard cabinet. The door geometry puts stress where people grab, swing and load repeatedly, and that means cheap materials show their weaknesses quickly. If the cabinet swells, drops out of alignment, or develops sticky movement, the corner becomes irritating fast.

That's why build quality matters. In local cabinetry practice, these units are commonly made with 16 mm HMR board and 16 mm or 18 mm doors, often paired with premium soft-closing hinges because the concentrated door stress makes durability more important than it might be in a simpler cabinet, as described in this blind corner pantry construction detail.

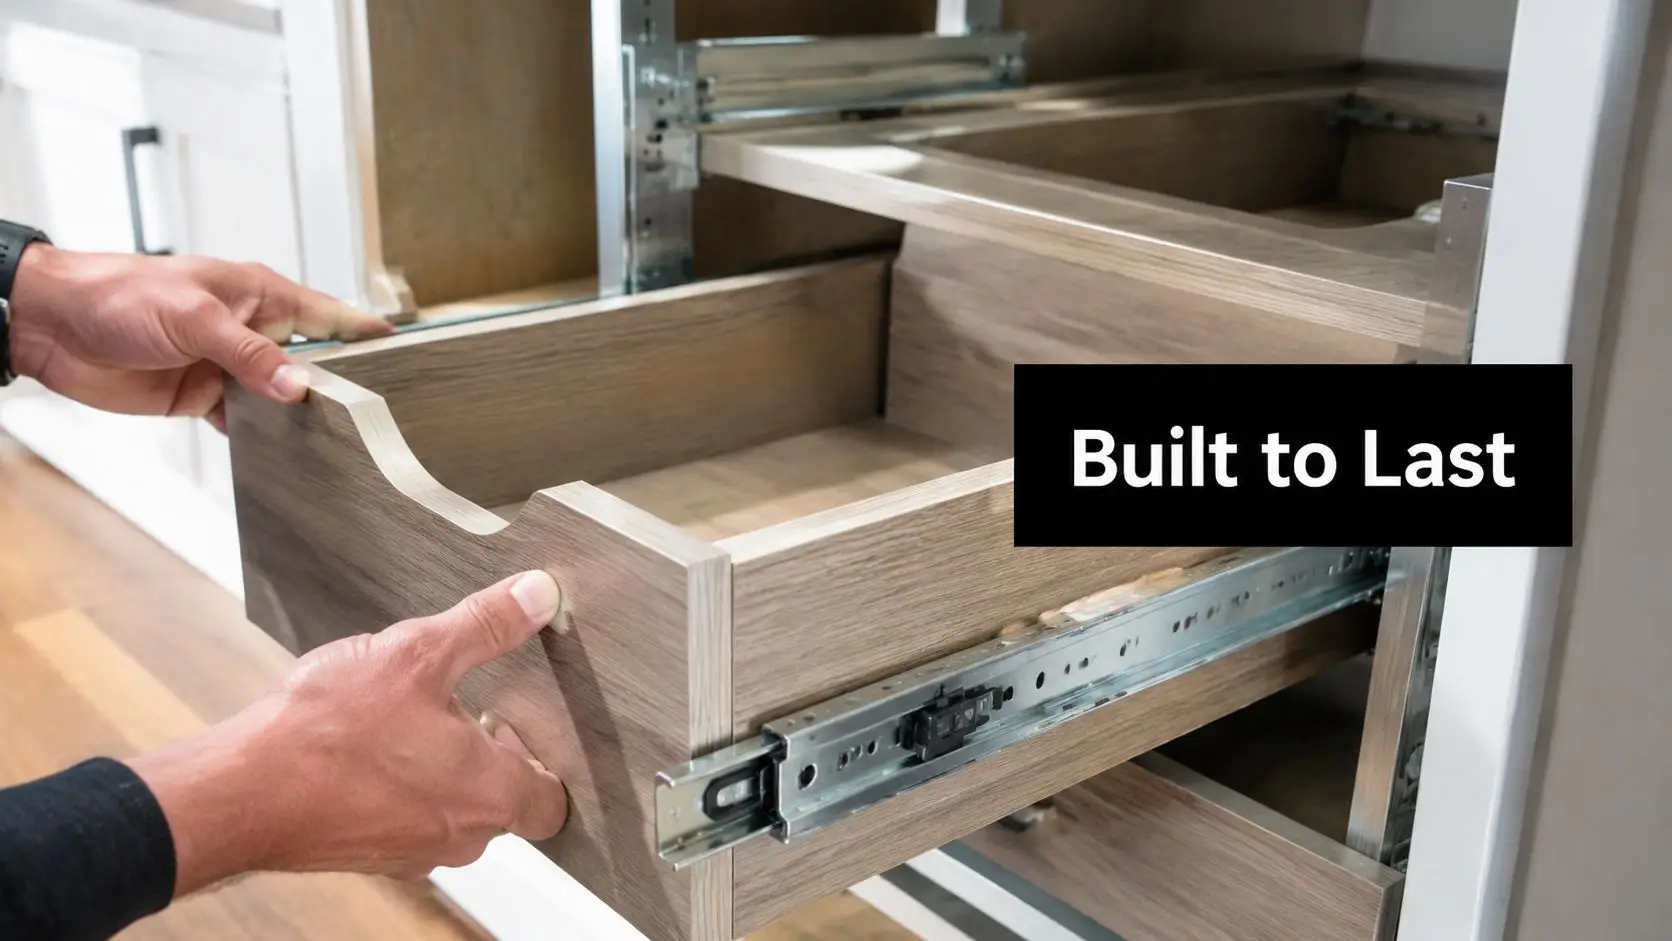
A close-up of a person installing a wooden pull-out drawer in a modern kitchen pantry cabinet.

What to pay for

You don't need every premium upgrade. You do need the right ones.

Focus on these first:

  • Moisture-resistant board because kitchens deal with steam, spills and cleaning products
  • Reliable soft-close hardware to reduce impact on doors and hinges
  • Accurate installation so the door sits square and the mechanism runs smoothly
  • Proper adjustment after install because corner hardware often needs fine tuning once loaded

A blind corner pantry is not a good place to save money on workmanship. If the cabinet sits out of square, even quality hardware can feel poor in use.

Cost expectations without guesswork

Costs vary widely depending on whether you choose a simple cabinet box, internal organisers, custom joinery, and the level of finish across the rest of the kitchen. Rather than pretend there's one universal figure, it's more honest to think in tiers:

  • Budget-friendly usually means a basic blind corner cabinet with minimal internal hardware
  • Mid-range often includes better access mechanisms and upgraded joinery finishes
  • Premium typically means custom internal storage, higher-spec hardware, and tighter detailing across the full renovation

If you're budgeting across a larger project, it helps to compare the pantry decision against the wider kitchen spend. This overview of the cost of a new kitchen is a useful starting point.

Who should install it

For work that affects cabinetry, layout, services, and broader renovation sequencing, use appropriately registered builders and qualified trades. If the kitchen upgrade forms part of a larger reconfiguration, then registered builders unlimited and an experienced renovation team make a real difference.

The same is true in bathroom renovations. The finish you see at handover depends on what was set out accurately at the start.

Is a Blind Corner Pantry Right for You

The final decision comes down to how you want the kitchen to behave. Not just how you want it to look on handover day. A blind corner pantry can be a strong choice for storage-heavy households, but long-term success depends on access, maintenance, and who'll be using the kitchen over time.

That wider view matters. Beyond hardware, the core issue is renovation performance. Accessibility, maintenance, and long-term appeal often matter just as much as raw capacity, especially as Australia's ageing population makes easy daily function more relevant for homeowners and landlords, as discussed in this blind corner accessibility perspective.

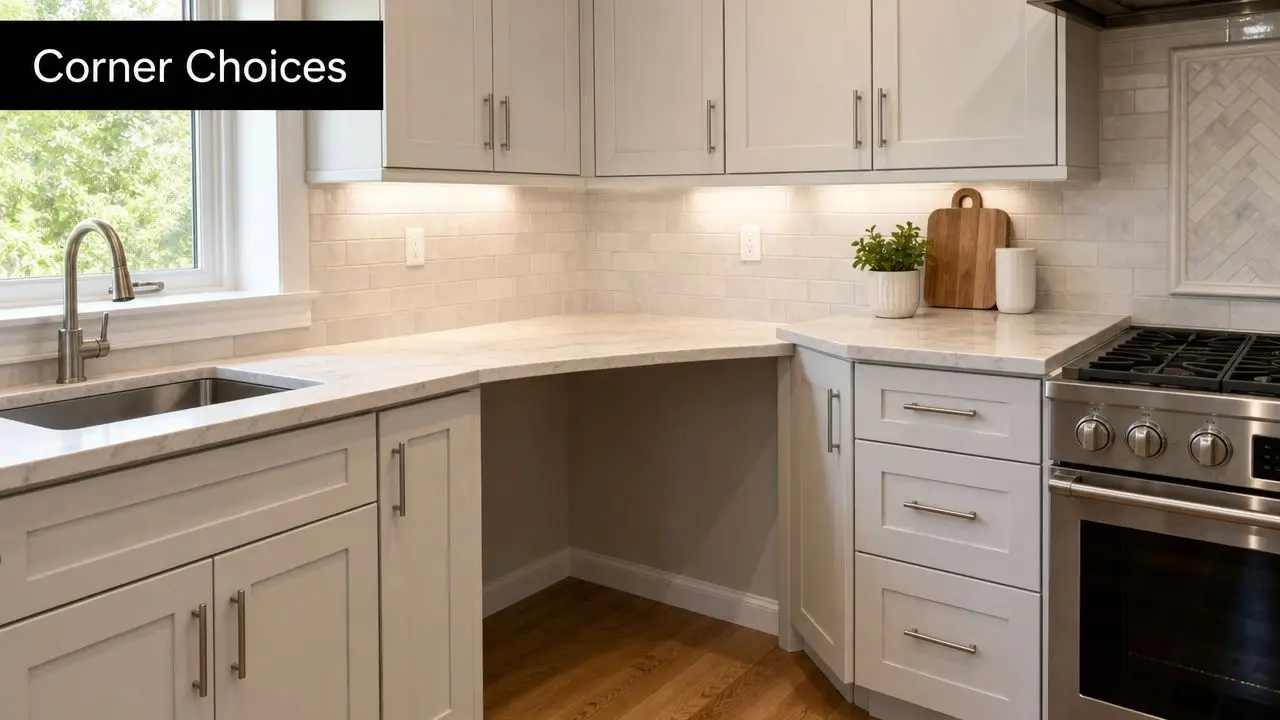
A modern kitchen corner featuring light grey cabinets, marble countertops, and an open workspace area.

When it's a good fit

A blind corner pantry usually makes sense if:

  • You need hidden capacity for large appliances, platters, or occasional-use cookware
  • Your layout benefits from a continuous cabinet run rather than a more angular corner treatment
  • You're willing to invest in access hardware instead of relying on a plain deep shelf
  • The pantry won't be asked to serve your fastest daily routines

When another solution may be better

It may be the wrong choice if:

  • You want quick grab-and-go access to everyday pantry items
  • You're planning for ageing in place and want easier reach lines
  • The kitchen is very tight and open doors will interrupt circulation
  • Simple drawers nearby can do the job better

Other options include voiding the corner, using an angled cabinet, or reorganising adjacent storage so the corner doesn't have to work so hard.

A corner solution should reduce frustration, not formalise it in joinery.

A short decision checklist

Ask yourself these questions before locking in the design:

  1. What will live there
    Bulky appliances and seasonal items suit a blind corner better than small everyday goods.

  2. Who uses the kitchen most
    A young family, an older couple, and a rental household all use storage differently.

  3. How often will the corner be opened
    Occasional use supports deeper storage. Constant use demands easier access.

  4. Would better drawers elsewhere outperform the corner unit
    Sometimes the smartest corner is the one you stop trying to over-engineer.

  5. Does the pantry align with the whole renovation brief
    The best kitchens, like the best modern bathrooms and designer bathrooms, support the life of the home over time, not just the styling mood of the moment.

If you're weighing up a blind corner pantry as part of a broader renovation, get the layout tested properly before you commit. SitePro Bathrooms can help with customized kitchen and bathroom renovations, detailed 3D design, practical new bathroom ideas, and end-to-end construction delivered by an experienced team of registered builders. If you want clarity before work begins, book a consultation and get a plan that fits the way you live.

  • siteprobathrooms

L-Shaped Kitchen Layout: The Ultimate Victorian Guide

You probably know the feeling already. One person is at the cooktop, someone else opens the fridge behind them, a third drops school bags on the only clear bench, and the sink somehow ends up being both the prep zone and the clean-up zone. The kitchen isn’t small enough to excuse the chaos, but it still doesn’t work.

That’s usually the moment homeowners start looking at the l-shaped kitchen layout properly. Not because it’s fashionable, but because it solves a practical problem. It opens the room up, creates clearer movement paths, and gives you two connected runs of bench space without boxing the kitchen in.

In Victorian homes, that matters. Many layouts need to support family life, entertaining, working from home, and long-term liveability all at once. The best renovation outcomes come from treating the kitchen the same way we approach bathroom renovations. Start with movement, storage, lighting, safety, and how the room gets used every day. The finish selections come after that.

Why Your Current Kitchen Isn't Working

A lot of kitchens fail in predictable ways.

The fridge sits in the wrong place, so anyone grabbing milk cuts straight through the cooking zone. The sink and cooktop are too close, so prep becomes cramped. The corner cupboards turn into dead storage. You end up with plenty of cabinetry on paper and nowhere useful to put the things you reach for every day.

The daily friction points

Most homeowners don’t complain about the room in technical terms. They say things like:

  • There’s nowhere to land groceries
  • Two people can’t cook at once
  • The benches are always cluttered
  • The kitchen feels shut off from the rest of the house
  • The space looks dated even after minor updates

Those complaints usually point to layout problems first, not just finish problems.

A kitchen can have nice joinery and still be frustrating to use. We see the same thing in bathrooms. A room can look modern, but if the vanity blocks movement or the shower entry is awkward, the renovation hasn’t done its job. Good planning fixes the room at the circulation level, not just the styling level.

A kitchen that slows down the household will still feel wrong, even with expensive finishes.

Why the L shape solves so many of these issues

The strength of an l-shape is simple. It uses two adjoining walls to create connected work zones while keeping the centre of the room open. That open zone can stay clear, take a small dining setting, or support an island or peninsula if the room allows it.

For Highett homeowners, this is often the most balanced answer. It suits older homes being reworked for open-plan living, compact townhouses where every square metre matters, and family homes that need better day-to-day flow without pushing into overbuilt territory.

It’s also one of the easiest layouts to coordinate with a full home update. If you’re planning a kitchen and bathroom project together, consistency in joinery lines, material tones, lighting, and accessibility decisions can make the whole renovation feel intentional instead of pieced together.

The L-Shaped Kitchen Explained

An l-shaped kitchen layout places cabinets, benchtops, and appliances along two adjoining walls, forming a right angle. That sounds basic, but it creates a layout that’s efficient without feeling crowded.

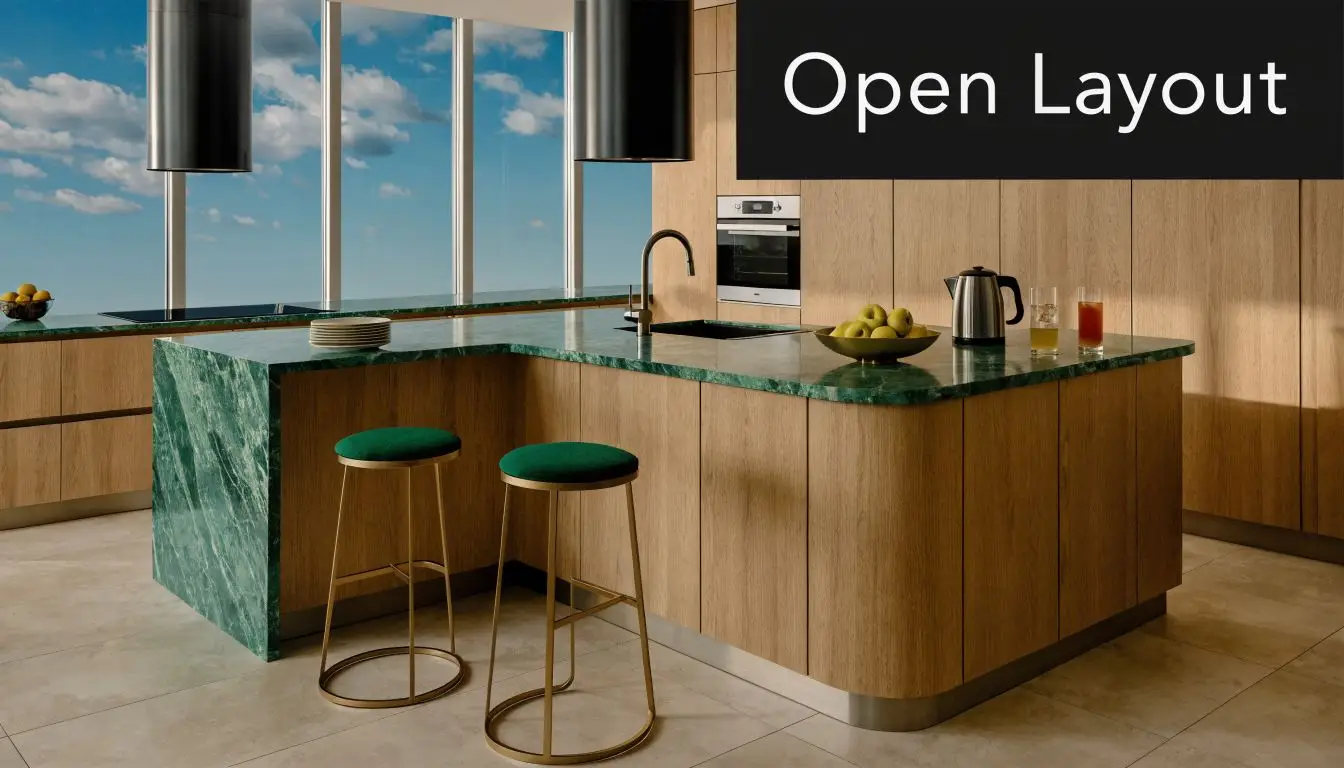
A modern kitchen with an L-shaped green marble countertop, wooden cabinetry, and stylish bar stools.

Why it has lasted

This layout isn’t a trend. It has been part of Australian residential design for decades. The Commonwealth Housing Commission’s 1944 report recommended the l-shaped kitchen for efficiency, and by 1950 over 60% of new suburban homes in Victoria used it as standard, reflecting a shift away from older galley styles for growing families, as noted in this post-war design history of l-shaped kitchens.

That long history matters because it shows the layout solves a real planning problem. It’s adaptable. It works in modest footprints. It supports family use better than many tighter, single-run arrangements.

How it works in real homes

Think of the layout as a working corner with breathing room. One leg usually handles a heavier utility role, such as fridge and pantry storage. The other leg usually carries a mix of prep and cooking functions. The open side keeps the room visually lighter and easier to move through.

In practical terms, an l-shape tends to work well when you want to:

  • Open the kitchen to living areas without fully losing definition
  • Keep traffic out of the cooking zone as much as possible
  • Preserve bench space on two sides
  • Create flexibility for future changes such as a peninsula, island, or improved accessibility

Where it works best

This layout is especially strong in homes that need to do several things at once. Family kitchens, investor updates, and homes being renovated for ageing in place all benefit from a plan that is easy to read and easy to move through.

It also gives you cleaner zoning than many people expect. The kitchen still feels connected to the living room or dining area, but the right-angle shape naturally creates a working corner. That’s useful in the same way a good bathroom layout separates wet and dry areas without making the room feel chopped up.

The best l-shaped kitchens don’t just look open. They direct movement so the room feels calmer during busy parts of the day.

Planning Your Dimensions and Work Triangle

An l-shape only performs well when the distances are right. If the room is too tight, it becomes awkward. If the main appliances are too far apart, the kitchen feels tiring to use.

A top-down view showing an L-shaped kitchen layout with a designated work triangle connecting the major appliances.

The work triangle that actually works

For family kitchens, the work triangle perimeter should sit between 4 and 8 metres, and ergonomic standards show that this can reduce cooking time by up to 20% in multi-user scenarios, with aisle clearances of at least 1.07 metres helping prevent bottlenecks, according to these l-shape kitchen dimensions and workflow guidelines.

That triangle links the three key points:

  1. Fridge
  2. Sink
  3. Cooktop or stove

The point isn’t to force a perfect triangle drawing on a floor plan. The point is to stop the room from making basic tasks harder than they need to be.

Practical spacing rules

In a workable l-shaped kitchen layout, these principles matter most:

  • Keep the triangle compact, not cramped. Too short and users collide. Too long and every meal involves extra walking.
  • Protect the aisle width. That 1.07 metre minimum is a real usability line, not a nice-to-have.
  • Give each appliance breathing room. Fridges need door swing space. Sinks need landing space. Cooktops need safe separation from adjacent zones.

Homeowners often focus on cabinet sizes before they understand the body movement in the room. That’s backwards. In both kitchens and bathrooms, circulation comes first. Joinery is fitted around that, not the other way around.

For bench ergonomics, it also helps to understand how height affects comfort during prep and clean-up. A practical starting point is this guide to standard benchtop height for Australian renovations, especially if more than one household member uses the kitchen heavily.

Common planning mistakes

A room can meet the minimums and still feel wrong. These are the issues that cause most problems:

  • The fridge is buried in the corner so the door blocks movement.
  • The sink and cooktop are pushed together to save space, which makes prep and cleaning overlap.
  • The aisle is technically passable but not comfortable, especially once handles, stools, or appliance doors are in use.
  • The layout ignores through-traffic, so family members cut across the work zone on the way to another room.

Practical rule: If someone can unload shopping, rinse vegetables, and reach the cooktop without crossing another person’s path, the plan is usually on the right track.

Measuring the room properly

When reviewing your own space, don’t just measure wall lengths. Check:

  • Window positions, because they affect sink placement and upper cabinetry
  • Door swings and openings, especially in compact homes
  • Bulkheads and service points, which can limit relocation options
  • Natural walking paths, not just the paths shown on paper

A good plan looks efficient on the drawing and feels easy once people start using it. That’s the standard to aim for.

Optimising Cabinetry and Appliance Placement

The l-shape gives you a strong framework, but the success of the room comes from what happens inside that framework. Appliance placement, corner hardware, drawer selection, and cabinet sequencing all affect whether the kitchen feels effortless or annoying.

Put appliances where people use them

A practical arrangement usually works like this:

  • Fridge near the end of the longer run so someone can access it without stepping through the main cooking zone
  • Sink on a useful prep stretch, often where lighting is strongest
  • Cooktop on the shorter leg or a dedicated run so heat stays away from the highest traffic point

That sequence separates food retrieval, preparation, and cooking in a way that reduces interference. It also makes the kitchen easier for more than one person to use at once.

The same thinking applies in bathroom renovations. Towel storage belongs near the shower. Vanity drawers should suit the morning routine. Good layouts place functions where they naturally belong.

The corner is where good plans separate from average ones

The main weakness of an l-shaped kitchen layout is the inside corner. If you leave it as a basic cupboard with a fixed shelf, it becomes wasted volume very quickly.

Australian standards require a minimum 60cm separation between sink and hob, and in the corner junction, magic corner or LeMans units can extend usable storage by 40% over fixed shelves, according to this guide to l-shaped kitchen corner optimisation.

That’s why corner planning shouldn’t be left to the cabinet order stage. It needs to be part of the layout decision from the start.

Kitchen Corner Storage Solutions

Solution Accessibility Storage Capacity Typical Cost
Fixed shelf corner cabinet Low. Items at the back are hard to reach Moderate, but inefficient in daily use Lower
Lazy-style rotating system Better than fixed shelving for general items Moderate Moderate
Magic corner pull-out High. Good for heavier or awkward items High Higher
LeMans pull-out High. Smooth access and strong usability High Higher
Corner drawers Very good when the joinery allows for them High Higher

The cheapest corner option often becomes the most frustrating one. That doesn’t mean every project needs premium hardware everywhere. It does mean the corner deserves budget priority if the kitchen is compact or heavily used.

For homeowners weighing finishes and carcass choices at the same time, this guide to kitchen cabinet materials for renovation projects is a useful companion to the storage conversation.

What works and what doesn’t

What works:

  • Drawers for everyday cookware
  • Pull-outs for corners and narrow gaps
  • A clear landing space beside the sink
  • Appliance locations that don’t force people to cross paths

What doesn’t work:

  • Deep cupboards for frequently used items
  • A corner with no retrieval system
  • The cooktop jammed too close to the sink
  • Tall units placed where they visually close the room off

If the layout is right but the cabinetry is wrong, the kitchen still underperforms. Joinery isn’t just storage. It’s how the layout becomes usable.

Adding an Island or Peninsula

Most homeowners like the idea of adding a central feature to an l-shaped kitchen layout. The question isn’t whether an island or peninsula looks good. The question is whether the room can carry it without losing the openness that made the l-shape appealing in the first place.

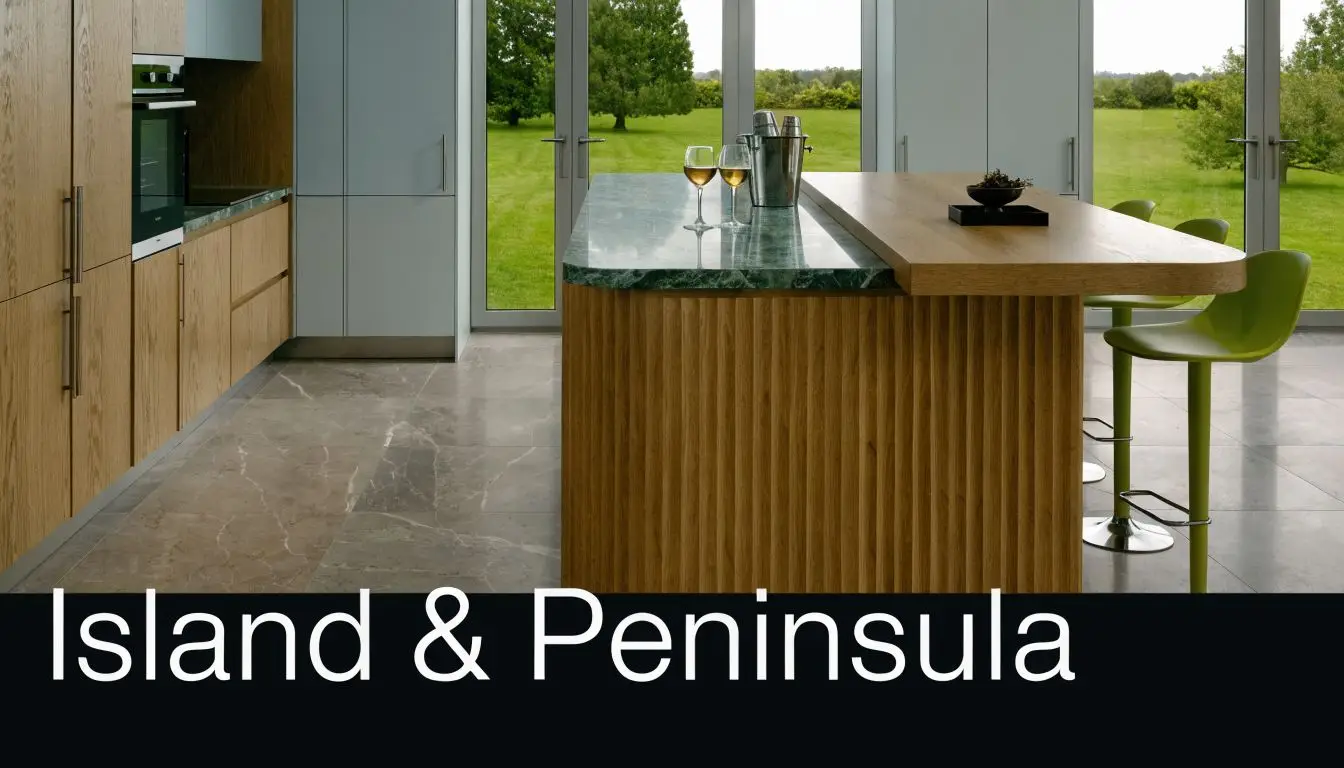
A modern kitchen island with a green marble countertop and a wooden breakfast bar in an open space.

When an island makes sense

In Melbourne suburb renovations, l-shaped kitchens make up 62% of kitchen layouts, and data shows they can boost resale values by up to 15% compared to galley layouts, but an island is only feasible in kitchens over 12sqm if proper clearances are to be maintained, according to this review of l-shaped kitchen pros, cons, and resale impact.

That last point matters most. An island shouldn’t be forced in because the room seems almost large enough. “Almost” is where projects go wrong.

Island versus peninsula

Here’s the practical difference.

Option Best for Main advantage Main drawback
Island Larger open-plan kitchens Better circulation around all sides Needs more floor area
Peninsula Smaller or medium spaces Adds bench space and casual seating with less floor demand Can make the kitchen feel more enclosed

A peninsula often suits Victorian homes better than people expect. It can define the kitchen from the living area, add storage, and create a breakfast bar without requiring the same open clearance as an island.

The decision test

Choose an island if:

  • The kitchen is over 12sqm
  • You want walk-around access
  • You need extra prep space without attaching another run to the wall line

Choose a peninsula if:

  • The room is tighter
  • You want to zone the open-plan area
  • You need seating or extra bench space but can’t sacrifice circulation

A central feature should improve movement, not interrupt it.

A lot of homeowners also overestimate how much seating they need. In practice, a short breakfast ledge or compact peninsula often gets used more consistently than a large island with too many stools. The right choice depends less on trends and more on how your household uses the room.

Designing for Family Life and Accessibility

A kitchen layout can be technically correct and still fail the household. Family use, ageing in place, storage reach, lighting, and finish choices all affect whether the room stays useful over time.

Family use changes the brief

In a busy home, the kitchen usually serves several roles at once. It’s a cooking space, a drop zone, a homework spot, and a social room. That means the layout needs more than a neat appliance triangle. It needs durable surfaces, sensible lighting, and storage that doesn’t make daily tasks harder.

A few practical choices improve family use straight away:

  • Task lighting over benches so prep work is clear and safe
  • Drawers instead of low shelves for easier access
  • A dedicated landing zone for bags, lunchboxes, or groceries
  • Finishes that clean easily and don’t show every mark immediately

These are the same decisions that separate ordinary bathroom updates from successful modern bathrooms. A designer bathroom isn’t just attractive. It works cleanly for the people using it morning and night. Kitchens need the same mindset.

Accessibility needs to be planned early

One of the biggest gaps in generic kitchen advice is accessibility. In Victoria, that matters more every year. A strong l-shaped kitchen layout can still create tight turning points or awkward reaches if it isn’t planned carefully.

A key gap in current advice is adapting l-shaped kitchens for accessibility. With Victoria’s ageing population, demand is rising, yet few guides cover National Construction Code requirements such as 1200mm circulation spaces or AS 1428.1 reach ranges, which are essential for a safe, liveable home, as outlined in this accessibility-focused discussion of l-shaped kitchen planning.

That means homeowners should consider:

  • Wider circulation paths
  • Easier-to-grip handles
  • Drawers and pull-outs instead of deep cupboards
  • Appliance heights that reduce bending
  • Bench segments that allow seated use where needed

Why qualified builders matter

Accessibility and compliance aren’t styling extras. They affect approvals, safety, and long-term usability. That’s why it’s worth engaging registered builders unlimited where the project scope requires it, especially when structural changes, service relocations, or broader kitchen and bathroom renovations are involved.

Good renovation planning also keeps your design language consistent across spaces. If you’re exploring new bathroom ideas, designer bathrooms, and a kitchen at the same time, materials, joinery profiles, lighting temperatures, hardware, and circulation principles should all speak the same language.

The most future-proof kitchens aren’t over-designed. They’re easier to move through, easier to reach into, and easier to live with.

Examples Costs and Getting Started with Your Renovation

Costs depend on scope, finishes, structural changes, service relocations, and appliance choices. It’s better to think in project types than generic one-price-fits-all figures.

An L-shaped kitchen featuring wooden cabinets, a green marble countertop, and fresh produce sitting on the counter.

Example renovation scenarios

Compact Highett unit
An older unit often suits a clean l-shape with improved corner storage, better lighting, integrated laundry coordination, and a simple material palette. The focus is usually on gaining bench space and making the room feel larger without changing the footprint.

Family home with open-plan living
This type of project often involves removing visual barriers, improving the appliance sequence, and adding a peninsula or island if the room supports it. Storage becomes more detailed because the kitchen has to handle school routines, entertaining, and bulk grocery use.

Accessibility-focused update
In this version, the l-shape remains, but the detailing changes. Drawer systems replace hard-to-reach cupboards, circulation is opened up, and appliance and bench heights are reviewed carefully. Often, these projects are paired with modern bathrooms designed for long-term liveability.

What affects cost and timing

The biggest cost drivers usually include:

  • Structural work such as wall changes or bulkhead alterations
  • Plumbing and electrical relocation
  • Cabinetry complexity, especially corner hardware and custom storage
  • Stone selection and edge detailing
  • Appliance upgrades
  • Whether the kitchen is part of a larger renovation, such as bathrooms, laundry, or full interior updates

Timelines also shift depending on whether materials are standard or custom, whether approvals are needed, and whether the home is occupied during the works. The most accurate starting point is a measured design and scope, not a rough verbal allowance.

If you’re trying to set expectations before starting, this breakdown of the cost of a new kitchen in Australia is a practical place to begin.

How to start well

The best first step isn’t choosing colours. It’s defining the problems the new kitchen must solve.

Write down:

  1. What frustrates you most in the current room
  2. How many people use the kitchen at once
  3. What must be stored near the main work area
  4. Whether long-term accessibility matters
  5. Whether the kitchen needs to align with bathroom renovations or a broader home update

That list gives the project direction.


If you’re planning a kitchen update in Highett or greater Victoria, SitePro Bathrooms can help with the full process, from concept planning and 3D design through to construction and finishing. That includes kitchens, bathroom renovations, modern bathrooms, and complete renovation packages designed to work as one coordinated project. If you want a practical l-shaped kitchen layout that looks sharp, functions properly, and fits the way your household lives, book a consultation and start with a measured plan.