• siteprobathrooms

Kitchen Renovation Before After: Real Transformations

You've probably seen the pattern online. A dated kitchen appears in one photograph, then the next image shows clean cabinetry, a generous island and carefully styled benchtops. The transformation looks simple until you stand in your own kitchen and notice the uneven floor, crowded work triangle, ageing wiring and benchtop material that may no longer suit current requirements.

A credible kitchen renovation before and after comparison needs to show more than colour changes. It should explain what stayed, what moved, what compliance work was required and why the final cost changed. In Highett and greater Victoria, that distinction separates a useful renovation plan from an attractive photograph that gives you unrealistic expectations.

What a Kitchen Renovation Before After Really Shows

A homeowner standing in front of a dated timber kitchen usually sees the obvious problems first: dark doors, tired handles, poor lighting and a benchtop that has lost its appeal. Those items can create a striking visual improvement without changing the room's footprint. Repainting, replacing handles, updating lighting and fitting new surfaces may produce a strong after image while retaining the existing plumbing, electrical points and cabinetry carcasses.

That's the first important distinction. A cosmetic refresh changes what you see. A reconfiguration changes how the kitchen works. Moving a sink, widening an opening, removing a wall or creating a new island can affect flooring, services, structural elements and approvals. The photograph might show only a brighter room, but the construction process may involve several trades working in sequence.

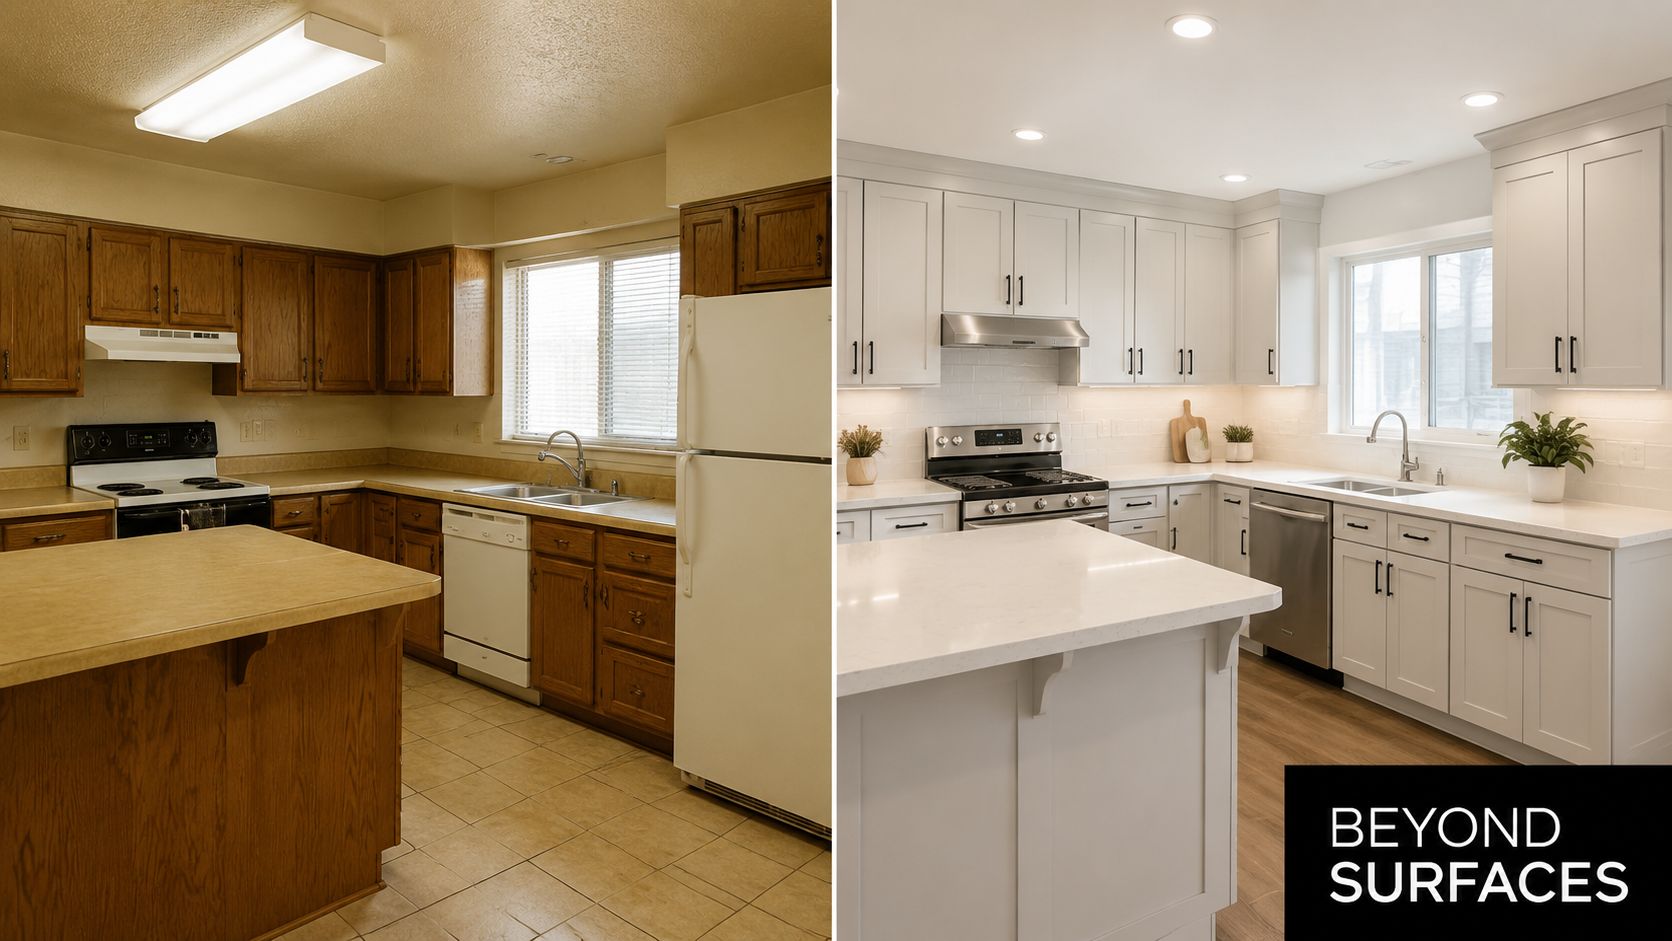
A side-by-side comparison of a kitchen renovation showing the transformation from dated wood to modern white.

The visible result hides the scope

A compact apartment kitchen in Highett might retain its sink, cooktop and waste connections while gaining better storage, lighter finishes and integrated appliances. The room can look substantially larger even though no wall has moved. That approach usually limits disruption and makes the existing layout work harder, but it won't solve a poor workflow.

A family kitchen with a closed-off dining area presents a different decision. Removing a dividing wall and introducing an island can improve sightlines and casual dining, yet the project may require structural advice, revised electrical planning, new flooring and more extensive joinery. The island also needs enough circulation around it. A beautiful oversized island that restricts cupboard access isn't a successful after state.

Victoria's renovation market includes both extremes. A 2024 Australian national survey found kitchens and bathrooms were the two most popular rooms to renovate, while over 30% of respondents set budgets between A$5,000 and A$15,000. The same survey estimated typical kitchen projects at 2 to 9 weeks, depending heavily on scope and retained services, as reported in Australian renovation cost and timing research.

Practical rule: Compare your kitchen with online examples by scope, not by appearance. Ask whether the project retained the layout, replaced the cabinetry or altered the building itself.

What changed in 2026

The strongest contemporary results aren't stark white rooms. Australian design coverage points towards warm minimalism, timber tones, earthy neutrals, concealed appliances and larger islands. These choices can make a kitchen feel calm and integrated, but they still need to reflect the home's architecture and the way the household cooks.

Before signing off a design, mark the changes in three groups:

  • Surface changes: doors, handles, paint, splashback, lighting and selected appliances.
  • Functional changes: drawer configuration, pantry storage, appliance placement and task lighting.
  • Building changes: walls, plumbing, electrical circuits, flooring levels, ventilation and structural work.

That record makes the before-and-after comparison honest. It also gives your builder a clearer brief and helps you decide whether your priority is presentation, storage, entertaining space or long-term practicality. For a broader comparison of renovation outcomes, see this guide to bathroom renovation before and after projects.

Real Project Budgets and Timelines Explained

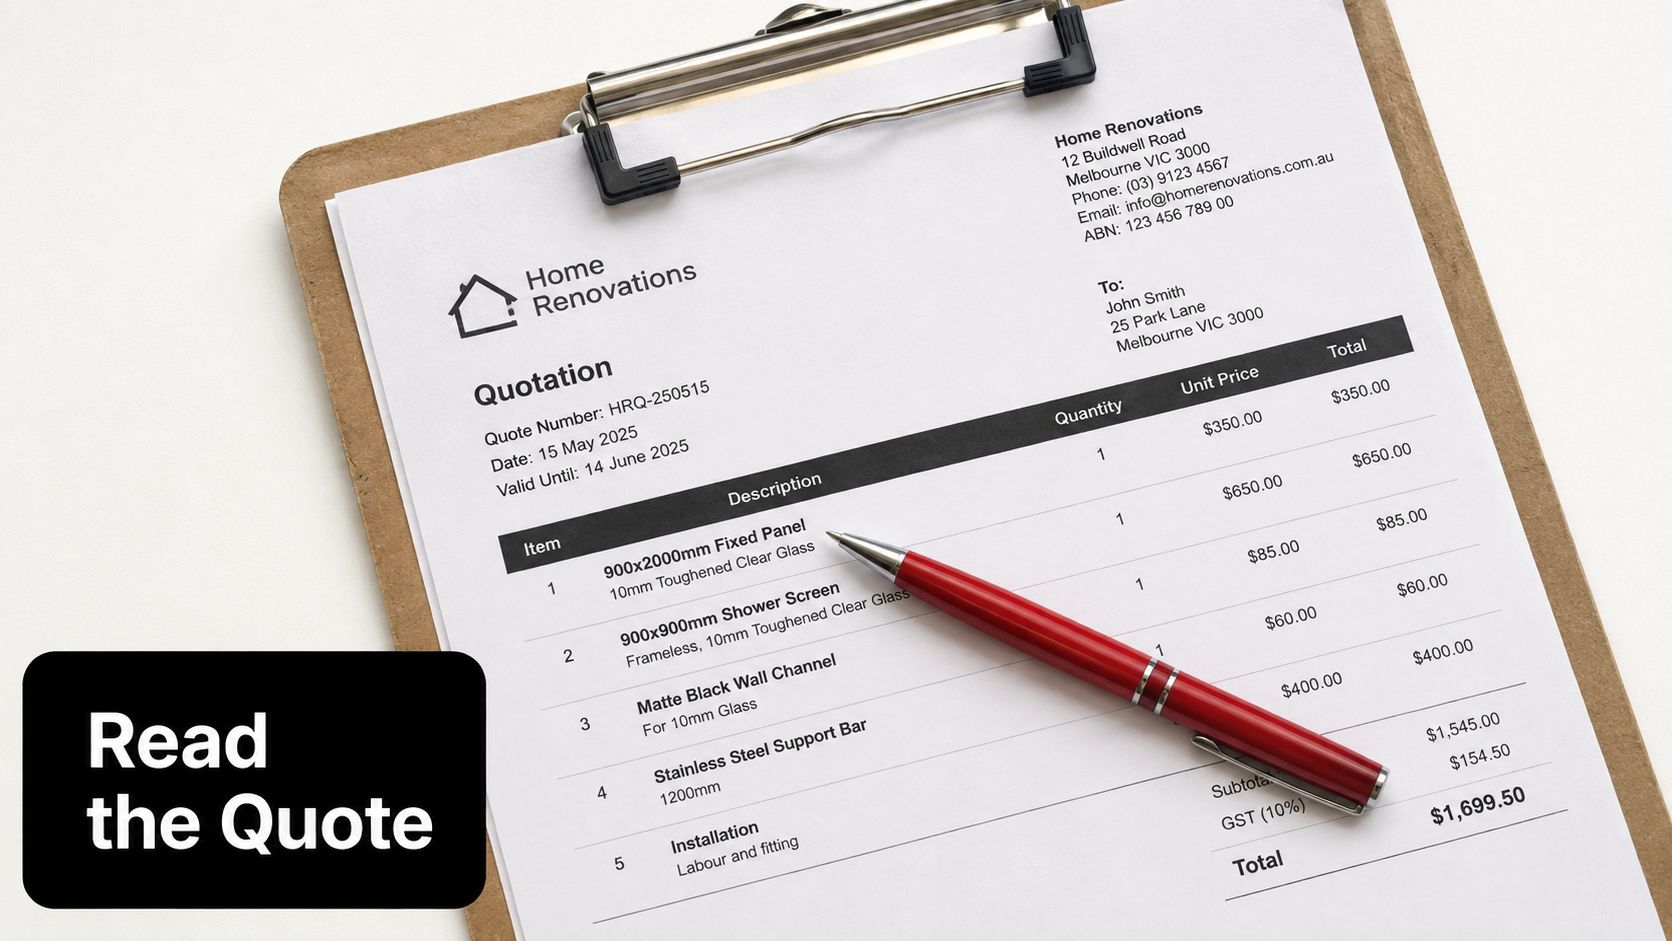
A kitchen budget is only useful when it shows the work behind the finished photograph. Demolition, rubbish removal, electrical changes, plumbing, installation, benchtops, splashbacks, floor repairs and compliance decisions can each change the final price. Ask the builder to mark every item as included, provisional or excluded before comparing quotes.

The scope matters more than the finish at the start. The ranges below are Australian benchmarks, not promises for a Highett property. Existing conditions, site access, joinery specifications and structural changes will determine the contract value.

Compare scope before finishes

Scope level Typical cost range Timeline Expected ROI
Cosmetic refresh Qualitative range, generally below a full remodel when services and cabinetry are retained Shorter programme, subject to product availability Often strongest when the existing layout already works
Mid-range renovation Around A$35,000 Often within the broader 2 to 9 week Australian kitchen project context Estimated resale uplift of A$20,000 to A$28,000, or 57% to 80% ROI in the cited benchmark
Extensive renovation Around A$65,000 Longer programme because structural and service work add sequencing Reported return of 62% to 75%, with estimated value of roughly A$40,000 to A$48,750

The mid-range benchmark and resale figures come from Australian renovation value guidance. The broader timeline context is reported in the national renovation survey. The extensive-renovation return comes from the same Australian value benchmark.

A mid-range renovation can suit a home where the layout is basically sound but storage, lighting and finishes are tired. New drawers may improve everyday use, task lighting can correct poor visibility, and appropriately selected appliances can support the way the household cooks. An extensive renovation has a stronger case when the plan wastes space or services are poorly positioned. Structural work still does not guarantee an equivalent increase in resale value.

Melbourne renovation guidance describes well-executed projects as capable of returning 1.5x to 2x the spend in suitable conditions. On that benchmark, a A$50,000 renovation could add about A$75,000 to A$100,000 to sale value. The same advice warns against over-capitalising, recommending a tired kitchen be raised to a solid 7/10 to 8/10 finish instead of receiving costly upgrades that buyers may not value. See Melbourne kitchen renovation ROI advice for that guidance.

Why the quote changes after design

Engineered-stone changes have made benchtop selection a compliance and budget decision, not just a styling choice. Australian renovation coverage describes increased use of zero-silica engineered stone and advanced porcelain surfaces. It also places complete kitchen renovation benchmarks around $35,000 nationally in 2026, with HIA-linked estimates closer to $42,000 including installation. The material, fabrication method and installation requirements need to be confirmed before the quote is accepted. Further context is available in Australian kitchen trends and renovation costs.

Your quote should identify:

  • Benchtop material and fabrication: Confirm the surface, edge profile, cut-outs, installation method and disposal of the old benchtop.
  • Service relocation: Check whether plumbing, electrical circuits, ventilation and appliance connections are included.
  • Making good: Allow for walls, floors, plaster, paint and splashback areas exposed during demolition.
  • Access and waste: Apartment access, parking, stairs and rubbish removal can increase labour without changing the design.
  • Lead times: Cabinetry, appliances and custom surfaces can delay the programme when orders are placed late.

A workable schedule begins with design confirmation and site checks, then moves through demolition and rough-in work before cabinetry, benchtops, splashbacks and final fit-off. Hidden conditions, split deliveries and unresolved selections are common sources of delay. Compare quotes by their inclusions and exclusions, using this guide to the cost of a new kitchen as a practical reference.

Detailed Case Studies from Victorian Homes

Before-and-after photographs rarely show the decisions that control the budget. In Highett and nearby Victorian suburbs, apartment access, existing services, structural walls and changing benchtop requirements can matter as much as the new cabinetry. The following profiles are practical project patterns, not reported client case studies, so they include no invented final costs or homeowner feedback.

A compact apartment refresh

A small apartment kitchen may have service points in sensible locations yet still suffer from poor storage, dark finishes and limited bench space. Relocating plumbing would add disruption without addressing the main problem, so the sink and cooking zone remain in place.

Storage planning delivers the visible improvement. Deep drawers replace awkward lower cupboards, overhead cabinetry reaches usable heights, and a tall pantry uses the available vertical space. Lighter doors, a reflective splashback and layered lighting make the room feel less enclosed. Integrated appliances reduce visual noise, although they can cost more and may be harder to replace if future appliance dimensions change.

Retaining services usually limits disruption and makes the existing layout work harder, but it won't solve a poor workflow. The risk is filling the room with too much joinery. A large island or excessive cabinetry can reduce working clearance and make an apartment kitchen less practical.

A family home opened to daily life

The second project starts with a kitchen separated from the living and dining areas. The owners want better supervision of children, casual meals at an island and a clearer connection to the backyard. Removing the visual barrier may achieve that result, subject to structural assessment, with the island positioned between preparation and living zones.

An island needs careful planning beyond its finish. Movement around it must remain comfortable, storage should sit on the useful side, and seating must stay clear of the main cooking path. Electrical planning also needs to happen before surfaces close up, because outlets, lighting and appliance circuits must be resolved early.

The hidden cost can sit behind the walls or under the floor. Outdated wiring, uneven flooring or a load-bearing wall may change the scope after demolition begins. Investigate those conditions first, record the findings and price the required work rather than treating it as an unavoidable surprise.

A detailed three-dimensional design helps homeowners assess whether the proposed opening, cabinetry and circulation work together. For further planning guidance, review these modern kitchen design ideas.

A premium joinery project

The third profile suits a larger home where the owners want concealed appliances, custom timber joinery and an organised entertaining zone. The finished design may include a full-height pantry wall, appliance garage, timber detailing and a carefully selected alternative to engineered stone. Changes to engineered-stone use and fabrication requirements can affect material selection, edge details, lead times and coordination, so the surface decision belongs in the scope review, not only the styling stage.

Premium joinery depends on accurate site measurements and a firm decision schedule. Custom panels must align with adjoining doors, appliance clearances need checking before manufacture, and timber tones should be assessed in the actual light. A late design change can delay several trades rather than one isolated item.

The common lesson is straightforward. A successful renovation matches the property, the household's routine and the amount of building work the owners are prepared to fund. The most expensive finish cannot rescue a poor layout, unresolved compliance work or a budget that ignored the conditions behind the before photograph.

Design Choices That Age Well Versus Those That Date Quickly

Following the latest kitchen trend doesn't guarantee a durable result. A photograph taken on handover day rewards visual novelty, while a household lives with cleaning requirements, storage limitations, damaged edges and changing tastes for years. The better question is whether the design will still feel proportionate and practical after the styling has disappeared.

Australian trend coverage describes a move from stark white towards warm minimalism, timber, earthy neutrals, hidden appliances and larger islands. Those elements can age well when they're used as a restrained palette and supported by a sound layout. They date more quickly when every surface, fitting and joinery detail repeats the same trend.

Keep the permanent decisions quiet

Cabinet proportions, work zones and storage deserve more attention than decorative fashion. Shaker, flat-panel and subtly profiled doors can all work when the scale suits the home. A neutral base also gives future owners, tenants or your own changing preferences room to add personality through paint, stools, artwork and movable lighting.

Timber brings warmth, but tone and finish matter. A small amount of timber can soften a neutral kitchen, while heavily matching timber across doors, flooring and furniture may make the room feel tied to a specific period. Earthy colours can provide character without demanding that every future choice coordinate with a strong feature colour.

The safest trend is a layout that works. Finishes can change later. Poor circulation and inadequate storage are expensive to correct.

Large islands need particular discipline. They support preparation, gathering and casual dining only when there's enough space to move around them and open nearby doors. If an island blocks the refrigerator, narrows the cooking route or becomes a dumping surface, its visual impact won't compensate for its daily inconvenience.

Treat surfaces as working materials

Benchtop selection involves maintenance as well as appearance. Some surfaces may need more care around heat, staining, impact or edge damage, while others may offer a more forgiving routine at the expense of a particular look. Ask the fabricator what cleaning, sealing and repair practices apply to the material under consideration, especially when comparing natural stone, porcelain and compliant alternatives.

Hidden appliances can create a beautifully quiet room, but access must remain practical. An appliance garage needs ventilation, usable power and enough clearance for the items you operate. Concealing everything can also make a kitchen feel less accessible if doors are heavy or storage is positioned above comfortable reach.

Hardware and tapware are easier to change than cabinetry, so they're useful places for controlled personality. Choose finishes that tolerate fingerprints, moisture and regular handling. Before committing, place samples beside the floor, wall colour and benchtop under both daylight and artificial light. A finish that looks balanced in a showroom can appear much stronger in a smaller Victorian room.

Working with Registered Builders and Understanding Compliance

A kitchen renovation becomes riskier when homeowners treat registration as a box-ticking exercise. In Victoria, the consumer regulator says a person carrying out domestic building work must register when handling a contract worth more than AUD 10,000. The requirement applies to individual practitioners rather than businesses, so you need to understand who is responsible for the work and contract.

Registered practitioners must hold the required qualifications, knowledge and expertise, and have domestic building insurance where applicable under the regulator's guidance. Registration doesn't guarantee that a particular design will suit your home, but it gives you a formal credential to verify before you sign.

Check the person behind the business

Ask for the practitioner's registration details and confirm that the registered individual matches the person named in the contract. Review the written scope, payment stages, variations process, start conditions and practical completion requirements. A polished showroom or website isn't a substitute for checking the contractual party.

Some single-trade work, including tiling, painting, plumbing and glazing, may not require registration when performed as isolated jobs. The regulator's position is different when those trades form part of a broader domestic building project, so don't assume that splitting a renovation into separate invoices removes the registration or insurance issues. The reference supplied for Victoria's registration guidance is available through this domestic building registration information.

Put compliance into the quote

Engineered-stone changes affect both product selection and the way a benchtop is discussed. Ask your builder and fabricator to identify the proposed material, confirm its suitability for the project and explain fabrication, handling and installation requirements. If the quote says “stone benchtop”, it hasn't given you enough information to compare options properly.

Use a written clarification list before accepting a price:

  1. Confirm inclusions: Demolition, disposal, rough-ins, cabinetry, surfaces, splashback, painting and final cleaning should be identified.
  2. Separate allowances: Provisional sums should state what they cover and what could cause them to change.
  3. Record existing conditions: Ask how the quote treats concealed wiring, uneven floors, moisture damage or structural discoveries.
  4. Set variation controls: Require changes to be priced and approved in writing before the work proceeds.
  5. Check handover: Include testing, defect recording, appliance fit-off and final inspection.

A cheap quote isn't a saving if it leaves the expensive work undefined. Clarity protects the budget before demolition starts.

Coordinating Kitchen and Bathroom Renovations for Maximum Value

Kitchen and bathroom renovations often become linked once work begins. Both rooms may require plumbing, electrical coordination, cabinetry, tiling, waterproofing or careful sequencing, and both can disrupt the household when trades need repeated access. Planning them together can reduce duplicated design conversations and help organise the overall construction period, although it still requires a realistic cash-flow plan.

The design language can connect without making the rooms identical. A kitchen with warm timber and earthy neutral tones can sit comfortably beside a bathroom using a floating vanity, restrained wall colour and tactile finishes. Modern bathrooms commonly use flat-panel cabinetry, floating vanities, open showers and curbless showers, while Australian bathroom guidance also highlights natural textures, hazy greens and sunbaked neutrals. See these new bathroom ideas and modern bathroom examples.

Decide what should happen first

If funds are limited, prioritise failures before decoration. In the kitchen, poor storage, unsafe or unsuitable surfaces, defective services and water damage deserve attention before premium handles or statement lighting. In the bathroom, waterproofing, drainage, ventilation and damaged substrates should lead the programme.

A coordinated plan should show:

  • Shared decisions: Confirm colours, hardware families and timber or neutral tones together.
  • Trade sequencing: Schedule demolition, service rough-ins, wall preparation, cabinetry, surfaces and fit-off to avoid clashes.
  • Household access: Decide which room must return to service first and protect areas that remain occupied.
  • Budget boundaries: Keep separate allowances for each room so one project doesn't absorb the other.

Independent 2026 Australian renovation-market reporting estimates total home renovation spending at more than AUD 50 billion, with kitchen and bathroom work together accounting for over 60% of that spend. The same reporting places a complete bathroom renovation nationally between AUD 10,221 and AUD 20,443, with a midpoint of AUD 15,332, and gives Melbourne a range of AUD 10,500 to AUD 21,000. These figures are summarised in Australian bathroom renovation cost reporting.

For homeowners comparing bathroom renovations, registered builders unlimited and smaller specialist teams, the deciding factor should be scope control, communication and documented responsibility. SitePro Bathrooms is one local option that combines concept development, 3D design, construction and finishing for kitchen and bathroom projects. Request a detailed consultation, insist on a written inclusions schedule and judge the finished design by how well it works after the before-and-after photographs are forgotten.


If your Highett or greater Victorian kitchen is ready for a realistic transformation, start by documenting the current layout, photographing services and listing the problems you want solved. Then contact SitePro Bathrooms to discuss your priorities, review a tailored 3D concept and request a quote that separates cosmetic work, structural changes, compliant surface choices and every necessary finishing trade.

  • siteprobathrooms

How to Hire a Contractor for Kitchen Remodel

You've saved kitchen images, compared colours, and started imagining where the coffee machine will sit. Then the practical questions arrive. Which contractor can manage the carpentry, plumbing, electrical work, cabinetry and tiling? Is the quote complete? Does the project need a permit? What happens if the scope changes after demolition?

Learning how to hire a contractor for kitchen remodel work in Victoria means looking beyond attractive portfolios and low prices. Your contractor must understand the legal requirements, explain the scope clearly, coordinate the trades, and handle problems professionally. The right hiring decision protects your home, money and time before construction begins.

Your Kitchen Dream Starts with the Right Partner

A kitchen renovation often begins with excitement. You might have a folder full of warm timber finishes, stone surfaces, clever storage and open-plan layouts. The mood changes when three quotes arrive with different inclusions, unfamiliar contract terms and no obvious explanation for why one price is lower than the others.

That uncertainty is normal, but it shouldn't control the project. A kitchen remodel isn't just a collection of cabinets. It can involve demolition, carpentry, plumbing, electrical work, appliance connections, splashback installation, flooring, painting and final adjustments. When several trades are involved, one person needs to own the coordination instead of leaving you to resolve gaps between subcontractors.

The first contractor meeting should therefore be more than a conversation about style. It should reveal how the contractor thinks. Do they ask about the existing layout, walls, services, access and finish quality? Do they identify approval questions early? Do they explain what they manage directly and what they subcontract? A contractor who focuses only on the finished photograph may not be prepared for the conditions behind the walls.

Practical rule: Choose the contractor who makes the project clearer, not the one who makes the promise sound easiest.

Victoria adds a legal layer that generic renovation advice often misses. Consumer Affairs Victoria says a written contract is essential for building works, and a major domestic building contract is required before work starts when the project involves more than one trade and is worth more than $10,000. The paperwork must describe the work, identify the parties, include the builder's registration number and state the contract price, as explained in Consumer Affairs Victoria's building contract guidance.

That means hiring starts with compliance, not with a handshake. A contractor who can't provide the required registration and contract information shouldn't be invited to solve the rest of the renovation.

Laying the Groundwork Before You Search

The best contractor can't produce a reliable quote from a vague wish list. Before contacting builders, decide what the kitchen must achieve, what can wait and which choices are still open.

Define the work before discussing price

Write a short project brief covering:

  • Layout: State whether you want to retain the current footprint, move appliances, remove cabinetry or alter walls.
  • Services: Note any planned changes to plumbing, electrical circuits, lighting, gas, ventilation or appliance locations.
  • Cabinetry: Record whether you expect standard modules, custom cabinetry, pantry storage, an island or integrated appliances.
  • Finishes: List preferred benchtop, splashback, flooring, handles, tapware and paint finishes.
  • Practical constraints: Mention access, parking, working hours, household occupancy and protection for adjoining rooms.
  • Non-negotiables: Separate essential outcomes from features you can remove if the price or construction complexity rises.

Use design references to identify patterns rather than copy a photograph blindly. Looking at new bathroom ideas, modern bathrooms and designer bathrooms can help you create a consistent style across the home, particularly when a kitchen renovation forms part of a broader upgrade. Warm tactile finishes, timber, natural stone, curved details and softer neutral palettes are also appearing in contemporary bathroom design coverage, which can inform a cohesive material direction without forcing the kitchen to look like a showroom. See examples of these warmer bathroom design directions for inspiration.

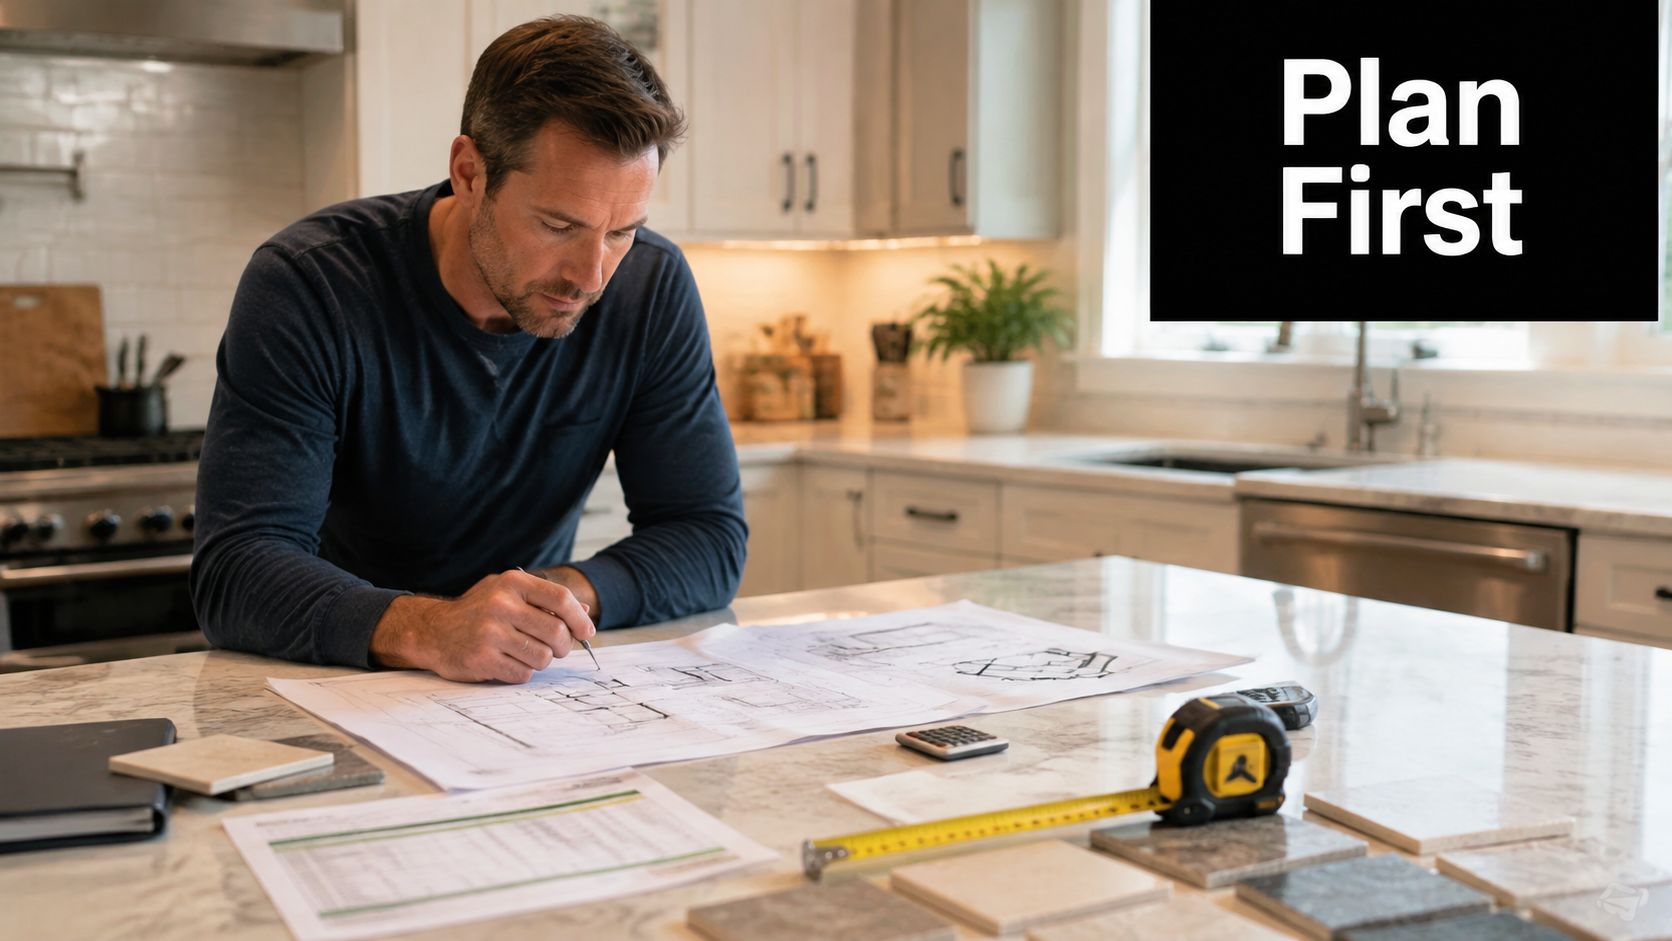
A man studying architectural blueprints on a kitchen island while planning a home renovation project.

Understand the Victorian approval question

Many kitchen remodels in Victoria don't automatically require a building permit. Ordinary work often avoids a permit when it doesn't affect the building's structural soundness, but that isn't permission to assume the project is exempt. A registered building surveyor provides written approval where a permit is required, and building work generally must not begin until the necessary approval is in place, subject to an exemption.

Ask each contractor to assess the scope against the existing building. The conversation should cover:

  • whether walls are being removed, opened or altered
  • whether plumbing is moving or being newly installed
  • whether electrical systems or safety-critical elements are changing
  • whether the floor area, structure, fire safety or heritage controls are affected
  • who will confirm the permit position and arrange approvals if they apply

The local Victorian building permit guidance explains why the scope needs to be checked rather than guessed. A contractor who says, “No permit needed,” without asking what you're changing hasn't completed a meaningful assessment.

Before requesting proposals, read a practical guide to kitchen renovation costs and use it to organise your priorities. It won't replace a project-specific quote, but it will help you identify whether a contractor has omitted a trade, finish or preparation task.

Decide whether you need one coordinator

You can manage separate trades yourself, but that shifts responsibility for sequencing, access, measurements, defects and communication onto you. A coordinated contractor is usually more suitable when the project combines several trades or when you can't supervise the site closely. DIY can still work for selected tasks, provided the contract clearly states who supplies, installs and guarantees each part.

Finding and Vetting Potential Contractors

A polished kitchen portfolio can hide weak administration, unclear responsibilities and poor defect follow-up. Start with contractors who regularly complete kitchen renovations in your area, then test how they work before requesting a final quote. Referrals and local industry contacts are useful starting points, but every candidate still needs independent verification.

Use a verification checklist

Complete these checks before shortlisting a contractor:

  • Confirm registration: For Victorian domestic building work valued at more than $10,000, a registered builder is required. Verify the contractor's registration using the official details they provide and the applicable Victorian register. The legal threshold and contract expectations are set out in Consumer Affairs Victoria's building contract checklist.
  • Match the legal entity: Check that the business name, registration details and name proposed for the contract refer to the same responsible party. Ask who will be legally accountable for the work.
  • Check insurance evidence: Request current documents showing the cover that applies, including public liability and any domestic building insurance required for the project. Confirm exclusions and who is insured.
  • Review comparable work: Look for kitchens with similar access conditions, layouts, cabinetry requirements and service changes. Prioritise construction details and consistent workmanship, not only staged photographs.
  • Ask for references: Speak with recent clients about communication, site care, variations, defects and whether the contractor returned after handover when problems arose.
  • Test the process: Ask who will be your regular contact, how progress is reported, how changes are approved and how delays are communicated.
  • Confirm trade coordination: Establish which work the contractor's team performs and which work is assigned to other trades. Responsibility for each task should be clear.

Screenshot from https://siteprobathrooms.com.au

Ask questions that expose risk

A serious contractor will inspect the existing kitchen rather than prepare the entire proposal from photographs. Ask what they need to confirm before ordering materials, how they protect an occupied home, how demolition and installation will be sequenced, and how they handle uncertainty discovered after work begins.

Listen for specific answers. “We'll sort it out on site” might describe a minor detail, but it should not replace a documented scope. “The price includes everything” is incomplete unless the contractor defines what that includes.

Use this contractor selection criteria checklist to organise your comparisons. Look for a contractor who identifies unknowns, records decisions and gives you time to approve changes. Renovation work can expose concealed conditions, so the quality of the response matters as much as the initial promise.

Also ask for evidence of how the contractor manages occupied properties. Confirm working hours, dust control, protection for nearby rooms, temporary access arrangements and the process for reporting damage. These details affect daily disruption and often reveal whether the contractor has a controlled site process.

Before accepting a candidate, compare what each person has agreed to do, who will perform regulated trade work and how decisions will be recorded. Keep those answers with your project notes so they can be checked against the written proposal and contract.

Decoding Quotes and Signing the Contract

A quote becomes useful when its assumptions are visible. Two contractors can offer the same total while treating demolition, waste removal, cabinetry hardware, appliance installation, electrical upgrades, painting and final cleaning differently. Those differences often appear later as variations.

Request a detailed written proposal from each contractor and compare the documents line by line. The lowest figure is not automatically the best choice. The stronger proposal is the one that matches your agreed scope, identifies exclusions and shows where costs could change.

Compare like with like

Use a comparison table while reviewing proposals. The entries are prompts for your own quotes, not market prices.

Item / Phase Contractor A Quote Contractor B Quote Contractor C Quote
Site preparation and protection Included or excluded Included or excluded Included or excluded
Demolition and waste removal Scope and allowance Scope and allowance Scope and allowance
Cabinetry and hardware Specification and allowance Specification and allowance Specification and allowance
Benchtop and splashback Material and installation Material and installation Material and installation
Plumbing and electrical work Trades and inclusions Trades and inclusions Trades and inclusions
Flooring, painting and finishing Areas covered Areas covered Areas covered
Appliances and connections Supply or install responsibility Supply or install responsibility Supply or install responsibility
Variations and provisional sums Process and assumptions Process and assumptions Process and assumptions
Programme and milestones Stated dates or stages Stated dates or stages Stated dates or stages

A low quote may reflect a narrower scope rather than better efficiency. Check whether each contractor has allowed for the same materials, quantities, preparation and installation standards. Confirm whether allowances are realistic, fixed, or subject to later selection.

Provisional sums require particular care. If one proposal lists several allowances while another names products, quantities and labour, the totals cannot be compared fairly until those assumptions are clarified.

Read the contract as a risk-control document

Once you have chosen a contractor, examine the contract details that control decisions and payments. The scope should identify the work covered, the specifications to be used, exclusions, drawings and any allowances. Confirm that these documents are attached or clearly incorporated, rather than relying on a separate conversation or an informal quote.

Use the official contract requirements checklist to check the document before signing. Pay close attention to the payment schedule, start conditions, expected completion arrangements and the procedure for approving changes.

The variation clause should state how a change is requested, priced and approved, and whether it changes the programme. It should also identify who can authorise the work. Keep approval in writing. A message or signed variation should record the revised scope, cost and timing before the contractor proceeds.

Check allowances and concealed conditions

Ask what happens if demolition reveals damaged framing, unsuitable plumbing or electrical work that requires attention. The contract should provide a method for documenting the issue, obtaining a price and deciding whether the additional work proceeds. This gives you a clear choice instead of an unexplained invoice at the end.

Review each allowance before signing. Ask when the amount will be replaced by an actual product or trade price, who pays any difference, and whether installation is included. Appliance connections, benchtop cut-outs, splashback preparation and cabinetry adjustments are common areas for unclear responsibility.

Check payment staging and defects

Payments should follow the agreed stages and the work completed. Ask what evidence marks each milestone, which materials are being ordered, and how incomplete or defective work affects the next payment. Do not pay for a stage that has not been delivered to support the contractor's cash flow.

The contract should also explain how defects are reported, inspected and rectified, including the applicable defect liability period. Record problems promptly with photographs and written descriptions. Keep the signed contract, approved variations, invoices and payment receipts together so the agreed position remains clear if a dispute develops.

Managing the Renovation from Start to Finish

Signing the contract doesn't remove your role. It changes your role from selecting a contractor to managing decisions, records and approvals. Homeowners who establish a simple communication routine usually have a better chance of identifying small problems before they become expensive disagreements.

Set one communication system

Nominate one primary contact and agree how updates will be sent. A short weekly meeting, written progress summary or shared decision record can cover completed work, upcoming activities, required selections, variations, access issues and payments. Keep important approvals in writing, even if the initial discussion happens on site.

The contractor should also explain how the home will be protected. Agree on dust control, floor protection, temporary access, material storage, rubbish removal and daily site security. These details affect your experience of the renovation and should not be left to assumptions.

A professional contractor and a female homeowner discussing kitchen remodeling progress using a tablet in a construction zone.

Control decisions and payments

Kitchen projects contain many decisions, including handles, tapware, lighting positions, appliance dimensions, splashback materials and paint colours. Set dates for those selections so the contractor can order materials and coordinate trades. Late decisions can affect both availability and sequencing, even when the original design is sound.

Use a simple variation record with:

  • the requested change
  • the reason for it
  • the additional or reduced cost
  • the effect on the schedule
  • the approval date and names of both parties

Pay according to the signed schedule, not according to pressure. If a milestone is incomplete, ask the contractor to identify what remains and record the agreed path to completion. A clear record protects both sides and keeps payment discussions tied to delivered work.

For a more detailed operating framework, use these project management essentials for staying on schedule and under budget.

Deal with defects promptly

Don't wait until the final day to mention a defect. Photograph the issue, describe where it appears, state what you believe needs correction and send the notice formally to the builder. Consumer Affairs Victoria advises homeowners to document defects, write formally to the builder and escalate to the Building and Plumbing Commission if the matter remains unresolved, as described in its guidance on disputes, defects and delays.

That process also explains why communication should be a hiring benchmark. Ask prospective contractors how they record defects, who returns to rectify them and how they close out unresolved items. A contractor's response before you hire often tells you more than a polished portfolio.

Red Flags and Frequently Asked Questions

A contractor doesn't need to have an answer for every unknown at the first meeting. They do need to be open about uncertainty, scope, approvals and responsibility. Walk away when the commercial pressure is stronger than the documentation.

Red flags worth taking seriously

  • Pressure to sign immediately: A contractor who discourages independent review may be trying to prevent comparison.
  • Unclear registration details: Don't proceed while the legal identity or registration information remains vague.
  • A fragmented contract: Splitting one multi-trade project into smaller packages can create responsibility gaps and may be intended to avoid the applicable threshold.
  • A vague quote: “Complete kitchen renovation” isn't enough. You need materials, labour, exclusions and assumptions.
  • Large unexplained upfront demands: Ask what the payment covers, when materials are ordered and which contract stage authorises it.
  • Verbal-only changes: If the contractor won't document variations, you won't have a reliable cost or scope record.
  • No defect process: A contractor who becomes defensive when asked about callbacks and rectification is creating avoidable risk.
  • Permit certainty without inspection: A confident answer given without understanding the walls, services or safety impacts isn't a proper assessment.

Frequently asked questions

How long does a typical kitchen remodel take?
There isn't a reliable single duration for every kitchen. The programme depends on design readiness, approvals, product availability, demolition findings, trade sequencing and how quickly you make selections. Ask for a staged programme rather than an optimistic start and finish promise.

Do the same hiring principles apply to bathroom renovations?
Yes. Bathrooms also combine building, plumbing, waterproofing, electrical and finishing work. Victorian bathroom renovations over $10,000 require a Registered Builder, while plumbing must be completed by a registered or licensed plumber, so the same registration, scope and contract discipline applies.

Are new bathroom ideas relevant when planning a kitchen?
They can be useful for establishing a whole-home material language. Warmer finishes, tactile surfaces, curved forms, floating vanities and softer neutral palettes are associated with current modern bathrooms, while larger-format tiles and features such as double vanities, heated towel rails, in-floor heating and rainfall showers are highlighted in Australian bathroom trend coverage. Use those references to guide your broader style, not to substitute for a kitchen-specific plan.

What protections should Victorian homeowners ask about now?
From 1 July 2026, Victorian builders must have domestic building insurance for work over $20,000. New domestic building contract laws passed in 2025 are due to take effect by 1 December 2026, so ask the contractor how the current and upcoming requirements affect insurance, payment staging and contract terms. Confirm the position applicable to your project before signing, using Consumer Affairs Victoria's practitioner guidance.

Your next step is simple. Write the scope, identify the decisions you've already made, and ask vetted Victorian contractors to inspect the kitchen and respond in writing. If you want a coordinated design and construction conversation, SitePro Bathrooms provides kitchen renovation consultations, detailed design and quotations covering the planned scope, materials, fixtures, finishes and programme. Contact the team to arrange a site assessment and ask the questions that need answering before you commit.

  • siteprobathrooms

7 Smart Storage Solution Ideas for Modern Bathrooms

A compact bathroom can look calm in a showroom and chaotic by the end of a normal morning. Toiletries collect around the basin, towels lose their place, cleaning products disappear beneath the sink, and every exposed item competes with the room's finishes. The best smart storage solution isn't just the cabinet with the most compartments. It's planned around the room's dimensions, plumbing, electrical work, waterproofing and the way people use the space.

That approach works across bathroom renovations, kitchens, new bathroom ideas and modern bathrooms, especially where floor area is limited. Structural changes, waterproofing and electrical integration also need coordinated planning by appropriately qualified trades, including registered builders unlimited where the scope and registration pathway require it. For Highett renovation projects, SitePro Bathrooms provides a useful example of how concept development and 3D design can connect practical storage with modern, designer bathrooms finishes. Get to the list quickly, then test each option against your layout, maintenance expectations and budget.

1. Smart Vanity Storage with Integrated Lighting and Organisation Systems

The vanity is usually the hardest-working storage zone in a bathroom. A well-planned drawer stack can keep toothbrushes, skincare, hair tools and spare products accessible without covering the benchtop. Pull-out drawers are generally more useful than a deep cupboard because you can see the contents from above and reach the back without kneeling.

Integrated lighting adds another layer of convenience. An LED strip that comes on when a drawer opens can help with early mornings and reduce the need to turn on every fitting. Soft-close runners also reduce slamming and help protect the cabinet, plumbing connections and stored items.

Design the drawer stack before the finishes

Storage should be resolved during the 3D design phase, before the vanity dimensions and electrical points are locked in. SitePro Bathrooms' guidance on lighting for bathroom vanities is relevant here because lighting needs to be coordinated with the cabinet construction rather than added as an afterthought.

  • Measure by routine: Allocate shallow drawers for daily products and taller compartments for bottles or appliances.
  • Check access: Confirm that doors and drawers won't clash with the shower screen, toilet or nearby wall.
  • Choose the light deliberately: Warm or cooler LED tones should suit the overall modern bathroom lighting plan.
  • Specify resilient finishes: Moisture-resistant board, sealed edges and suitable hardware matter in a humid bathroom.

Blum and Hettich systems can support organised drawer layouts, while Villeroy & Boch, Duravit and Keuco offer vanity options that suit designer bathrooms. The trade-off is that integrated lighting and premium drawer hardware add installation complexity. They're worthwhile when the vanity is a central storage hub, but unnecessary if a simple, well-sized drawer stack will meet the household's needs.

A modern floating bathroom vanity with illuminated drawers featuring organized storage and marble countertop

2. Wall-Mounted Recessed Storage Cabinets and Niches

Recessed storage gives a compact bathroom more usable capacity without adding another object to the room. A cabinet set into the wall can sit behind a mirror or above the basin, while a tiled niche can hold toiletries inside the shower zone. Both approaches preserve circulation space and create the clean lines associated with modern bathrooms.

This is particularly effective in a small ensuite where a projecting cabinet would narrow the room. A mirrored recessed cabinet can combine storage and reflection, while adjustable shelves allow the interior to change as household routines change. Solid doors may suit a calmer, more concealed look, whereas open niches make frequently used products easy to grab.

Resolve the cavity before construction

Recessed storage must be planned before wall linings, tiling and services are installed. The available cavity, wall structure, pipes and electrical routes all affect where a cabinet can safely go. A shallow cabinet may be enough for medicines and toiletries, but forcing a deeper unit into a service wall can create avoidable complications.

Practical rule: Never choose the cabinet location from the elevation alone. Confirm what's inside the wall before finalising the recess.

A shower niche needs particular care. Its backing, membrane detailing, tile falls and junctions must work as one waterproofing system. Outside the shower, a mirrored cabinet still needs protected materials, cleanable shelves and access for hinges, lighting components or future repairs.

A Highett bathroom renovation might use a recessed cabinet behind the mirror above the sink, then reserve a separate tiled niche for shower products. That division makes sense because the two zones have different moisture and access conditions. The trade-off is that recessed storage can be difficult to retrofit once the wall is finished. It's most efficient when included in the original concept and 3D design rather than treated as a late addition.

A modern recessed medicine cabinet with built-in LED lighting and organized shelves inside a tiled bathroom.

3. Under-Sink Pull-Out Drawers and Soft-Close Storage Systems

The space beneath a basin often collects travel toiletries, spare toothbrush heads and cleaning spray bottles that do not fit on the benchtop. Pull-out baskets, tiered shelves and drawers turn this awkward zone into usable storage, provided the layout follows the waste pipe, water connections and basin shape.

Measure the cabinet interior before choosing hardware. External width can be misleading because the trap, isolation valves, flexible hoses and drawer components all reduce the available space. A custom drawer may need a cut-out around the plumbing, while a pull-out basket can use the clear space without requiring pipework to move.

A useful arrangement keeps daily toiletries in the upper drawer, spare paper products or towels in a lower compartment, and cleaning products in a removable basket. Dividers stop separate categories from becoming one cluttered mass. The drawer fronts can still maintain a clean, modern finish while the internal fittings handle the practical work.

  • Map the plumbing: Photograph and measure the trap, isolation valves and flexible hoses before ordering hardware.
  • Use suitable materials: Stainless steel, treated timber and sealed cabinet components handle splash-prone conditions better than unprotected materials.
  • Specify controlled movement: Soft-close runners prevent slamming and reduce disturbance around concealed plumbing.
  • Keep repairs possible: Leave the isolation valve and trap accessible for future servicing.

A standard pull-out insert suits a regular cabinet, but custom tiered shelving can make better use of an irregular one. The decision depends on the service layout, not the hardware catalogue. A highly engineered insert adds little if it blocks a plumber's access or leaves dead space beside the basin.

SitePro Bathrooms can resolve these constraints during concept development and 3D design, testing drawer clearances, plumbing access and finishes before construction. That process connects practical storage with the cabinetry style selected for the renovation.

The same approach suits kitchen work, where the under-sink cabinet may hold bins, cloths and cleaning products. Visibility and access matter more than filling the cabinet with hardware.

A modern kitchen sink cabinet featuring organized pull-out drawers filled with cleaning supplies and household items.

4. Smart Shower Storage Niches with Integrated Shelving and Drainage

Shower storage has to survive constant water exposure, regular cleaning and the impact of bottles being moved around. A properly built niche keeps shampoo and soap off the floor, removes the need for a hanging caddy and gives the tiled wall a deliberate architectural detail.

The strongest result comes from planning the niche with the shower layout. Its position should be reachable without stepping out of the water, while its size should suit the products the household buys. A family bathroom may need storage at more than one height, while a minimalist ensuite may only need one compact recess.

Waterproofing determines whether the idea succeeds

A niche isn't just a hole lined with tiles. The substrate, membrane, corners, shelf falls and sealant joints all need to form a durable wet-area detail. Specialist pre-formed systems from Schlüter or Wedi can make the geometry more consistent, but they still require correct installation and compatible waterproofing.

The shelf should fall slightly towards the shower so water doesn't sit against the rear edge. A practical shelf surface should also be easy to clean and provide secure footing for bottles. Rounded or carefully finished tile edges reduce sharp corners, while good silicone detailing helps protect junctions.

For a renovation in Victoria, discuss the niche with the waterproofing installer before the tile layout is approved. SitePro Bathrooms' information on waterproofing in bathrooms reinforces why wet-area storage needs to be treated as part of the waterproofing plan, not as decorative joinery.

A niche that looks elegant on handover can become a maintenance problem if water remains trapped on its shelves or behind poorly sealed joints.

The trade-off is straightforward. A recessed niche gives the cleanest finish but requires early coordination. A corner-mounted unit may be less integrated, yet it can suit an existing bathroom where opening the wall would create unnecessary work.

A modern smart bathroom mirror cabinet with integrated LED lighting and a built-in digital clock display.

5. Over-Toilet Storage Cabinets and Shelving Units

A toilet wall can become useful storage without narrowing the room. A shallow cabinet above the cistern holds spare toilet rolls, towels and occasional-use products while keeping the floor clear. In a compact ensuite, this can reduce pressure on the vanity and avoid adding a separate linen cupboard.

Choose the storage format around daily access. Open shelves keep towels and baskets visible, making them quick to reach and helping a small room feel lighter. Closed doors hide packaging, protect contents from dust and create a quieter visual field. A cabinet that matches the vanity can read as part of the joinery, while a contrasting finish can add a deliberate designer detail.

Start with the toilet, not the cabinet

Set out the unit from the finished floor, cistern, seat and flush controls. Allow room to sit, clean and service the toilet. A deep cabinet can make the area feel confined, and a low shelf may interfere with head clearance or everyday use.

Fixing deserves the same attention as appearance. Identify studs or use anchors suited to the wall construction, then confirm that the fixing can support folded towels, bottles and baskets. Adhesive alone is not an appropriate strategy for a loaded cabinet.

Use the upper section for occasional items and keep daily products within comfortable reach. Moisture-resistant board, sealed edges and a finish suited to bathroom humidity help the joinery last. Open shelves need baskets or trays to contain small items, while doors reduce dust and visual clutter.

SitePro Bathrooms' concept development and 3D design process can test the cabinet's depth, door swing and relationship with the vanity before installation. Their guide to small bathroom storage ideas is also useful when planning limited wall and floor area.

The practical balance is capacity with breathing space. A slim, well-fixed unit can add storage to Highett modern bathrooms. An oversized one can dominate the toilet zone, so the final design should follow the room's clearances rather than maximum cabinet volume.

6. Smart Medicine Cabinet Systems with Integrated Mirrors and Lighting

A mirrored medicine cabinet combines three functions in one wall element: reflection, concealed storage and task lighting. That makes it valuable above a vanity, where a separate mirror and wall cabinet could otherwise compete for space.

The interior should be organised around real routines. A family may need separate shelves for prescriptions, first-aid items and daily products, while a couple might prefer adjustable compartments for grooming equipment and skincare. Demister pads and integrated lighting can improve usability, but they introduce electrical components that need appropriate installation and future service access.

Coordinate the cabinet with the vanity

The mirror should relate to the vanity width, basin position and wall lighting. A cabinet that's too small may look lost above a broad vanity, while one that's too large can dominate a narrow wall. Touchless controls can help in a busy household or accessible bathroom, but a simple switch may be easier to maintain and replace.

Electrical planning belongs in the initial bathroom renovation design. The installer needs to confirm cable routes, switching, ventilation around the cabinet and the location of any power points. This is also where registered builders unlimited and appropriately licensed electrical trades become relevant to the project scope, particularly where several services are being coordinated.

Villeroy & Boch, Duravit, Keuco and Sprinz offer systems that can suit contemporary and designer bathrooms. The practical drawback is repair complexity. If lighting or demisting hardware fails, the cabinet may need a specialist component rather than a straightforward mirror replacement.

Use a neutral frame and restrained internal finishes if the bathroom needs to remain adaptable. That keeps the storage useful if the vanity, tapware or wall colour changes later. It's a strong choice when the room has limited wall area, but less compelling where a generous recessed cabinet already provides enough concealed storage.

7. Modular Bathroom Storage Systems with Customisable Components

Modular storage suits bathrooms that may need to change. Interchangeable cabinets, open shelves, drawers and tall units can be combined around the available wall, then adjusted as children grow, routines shift or different occupants use the room.

The strongest use case is a larger renovation where one custom cabinet would solve the immediate problem but limit future changes. A practical arrangement could place daily products in closed drawers, towels on an open shelf and backup supplies in a tall cabinet. Coordinated handles, finishes and proportions keep those separate components looking like one planned system.

Design the system around daily use

Start with the storage categories, not the modules. Match each category to a suitable compartment: heavy items need stable support, wet products need surfaces that are easy to clean, and frequently used objects should remain accessible without an awkward door swing.

Use these checks before ordering:

  • Check expansion options: Confirm whether extra modules and replacement hardware can be sourced later.
  • Keep the palette adaptable: Neutral finishes can remain suitable as paint, tile and tapware choices change.
  • Record the layout: Save product details, fixing positions and the final configuration for maintenance.
  • Allow service access: Keep plumbing, ventilation and electrical components reachable after installation.

A modular system can also establish a shared storage language between a bathroom and kitchen. Matching proportions or finishes helps the renovation feel deliberately designed rather than assembled from unrelated pieces.

The main trade-off is fit. Standard modules may leave irregular corners unused, while fully custom joinery can follow every change in the wall. Modular units can also appear generic when their height, spacing and depth are poorly matched to the room.
SitePro Bathrooms' concept development and 3D design process helps test those decisions before construction. The layout can be reviewed against door swings, circulation, wall irregularities and storage access, then refined with modern finishes that suit the broader renovation. That process is particularly useful for Highett homes with unusual walls, compact ensuites or combined bathroom and laundry layouts.

7-Point Smart Bathroom Storage Comparison

Item Implementation complexity Resource requirements Expected outcomes Ideal use cases Key advantages
Smart Vanity Storage with Integrated Lighting and Organization Systems Moderate–High, cabinetry + electrical integration, professional install High, custom cabinetry, LEDs, moisture‑resistant finishes, electrician Better organization, enhanced aesthetics, higher property value Full bathroom renovations; families; busy professionals Integrated lighting, customizable compartments, soft‑close, maximizes counter/vertical space
Wall-Mounted Recessed Storage Cabinets and Niches High, structural planning during renovation, built‑in work Moderate–High, registered builder, waterproofing, custom doors/mirrors Seamless, space‑saving storage; cleaner minimalist look Compact ensuites; small bathrooms; remodels No floor footprint, minimalist integration, mirrored options enlarge visual space
Under-Sink Pull-Out Drawers and Soft-Close Storage Systems Low–Moderate, plumbing-aware fitment, simpler installation Low–Moderate, pull‑out hardware, tiered shelving, water‑resistant materials Converts wasted space to accessible storage, conceals plumbing Retrofits; budget‑conscious upgrades; family bathrooms Easy access, cost‑effective, soft‑close, works with existing plumbing
Smart Shower Storage Niches with Integrated Shelving and Drainage High, requires waterproofing, correct slope and tile integration Moderate–High, waterproof membranes, builder, tile work, drainage details Organized shower storage, reduced pooling/mold risk, seamless aesthetic New showers or major remodels; family bathrooms Built‑in drainage, tile‑integrated look, anti‑mold design, non‑slip shelves
Over-Toilet Storage Cabinets and Shelving Units Low, simple wall‑mount or freestanding install Low, shelving/cabinet unit, anchors Quick vertical storage gain with low disruption Small bathrooms; rentals; quick budget renovations Uses unused vertical space, affordable, easy to install, no plumbing changes
Smart Medicine Cabinet Systems with Integrated Mirrors and Lighting Moderate–High, electrical and ventilation integration needed High, LED/demister components, electrician, specialized parts Combined mirror + storage, improved grooming visibility, premium finish High‑end remodels; busy professionals; ensuites Defogging, adjustable lighting, touchless options, space‑efficient
Modular Bathroom Storage Systems with Customizable Components High, professional design & custom installation High, modular components, design consultation, longer lead times Fully customizable, scalable storage with cohesive finishes Comprehensive renovations; evolving family needs; luxury projects Highly customizable, expandable, coordinated hardware/finishes, long‑term value

Turn Storage Planning Into a Better Renovation

The right storage approach depends on the room's constraints and the household's routines. If floor area is tight, start with recessed cabinets, wall niches and carefully planned vertical storage. If the shower is the main source of clutter, prioritise a waterproof niche with proper falls, sealed joints and accessible placement. If several people share the room, illuminated vanity drawers, mirrored cabinets and adaptable modules can make daily use easier without leaving products across the benchtop.

A storage plan should be checked against the whole renovation, not selected as a collection of attractive products. Before construction, confirm:

  • Measurements: Record finished wall lengths, ceiling height, basin dimensions, toilet clearance and door swings.
  • Services: Coordinate plumbing, electrical wiring, ventilation and lighting before cabinetry and wall linings are finalised.
  • Waterproofing: Detail shower niches, wet-area penetrations, backing and sealant joints with the waterproofing installer.
  • Materials: Choose moisture-resistant boards, sealed edges, corrosion-aware hardware and surfaces that can be wiped clean.
  • Access: Leave room to remove traps, reach isolation valves, service lighting and adjust hinges or runners.
  • Visual cohesion: Match vanity, mirror cabinet, tall storage and shelving finishes across the bathroom and, where relevant, the kitchen.

Cost also needs to reflect the level of work. Australian bathroom renovation guides commonly place a budget refresh at AUD 8,000 to 15,000, a mid-range renovation at AUD 15,000 to 35,000, and premium work at AUD 35,000 or more, while a typical project is often described as taking 3 to 5 weeks from demolition to completion. These figures are broad planning tiers, not a quote, and custom storage, service relocation, waterproofing requirements and selected finishes can change the final scope. See the Australian bathroom renovation guide for that budgeting context.

For new bathroom ideas, modern bathrooms or designer bathrooms in Highett and greater Victoria, SitePro Bathrooms can take storage from an early concept through detailed 3D design, construction and finishing. Review your room measurements, list what needs to be stored and request a custom quote through SitePro Bathrooms before choosing the cabinetry or hardware.

  • siteprobathrooms

Renovation Project Management: A 2026 Guide

You're standing in a stripped bathroom in Highett. The tiles are stacked in the hallway, the delivery date has moved, the plumber can't return until Thursday, and someone has just asked whether the council paperwork was ever lodged. The renovation looked straightforward when you chose the vanity. Now the household is sharing one working bathroom, every delay affects the next trade, and the original price no longer feels secure.

That's the point at which renovation project management stops being administrative overhead and becomes the job itself. A successful project aligns the brief, budget, approvals, materials, trades, decisions and inspections into one controlled sequence. In Victorian homes, that sequence has to account for existing construction, permit pathways, licensing and the realities of living through the work.

The method below is designed for Highett homeowners planning bathroom renovations, kitchen upgrades and broader home improvements. It also suits families, landlords and body corporates that need a clear process rather than a collection of attractive ideas.

Why Highett Renovations Need Real Project Management

A Highett home can look straightforward from the street and still hide old plumbing, uneven framing, limited service access or previous alterations. A 1960s brick veneer or weatherboard house may require careful investigation before anyone prices the work. A knockdown-rebuild has different risks, but it still depends on close coordination between design, approvals, procurement and construction.

That local context matters. Victoria remains one of Australia's largest renovation markets. KPMG found that renovations rose from 34.2% of total residential construction expenditure in 2018–19 to 40% in 2023–24, while inflation-adjusted renovation spending increased 6.5% and new private residential construction fell 14% over the same period, as detailed in KPMG's analysis of Australia's renovation market. In Victoria, renovations or rebuilds represented 41% of construction spending in 2023–24, slightly above the national average.

The coordination problem

A bathroom renovation puts demolition, plumbing, electrical work, waterproofing, tiling, cabinetry, glazing, painting and fixture installation into one confined sequence. Each trade relies on the previous trade completing the correct work, at the agreed time and to the approved design. A missed decision can delay several people, not just one task.

Project management creates a clear decision chain:

  1. The brief defines the outcome.
  2. The design turns that outcome into drawings and selections.
  3. The scope lets builders price the same work.
  4. The contract sets responsibilities, timing and variation rules.
  5. The schedule coordinates approvals, deliveries and trades.
  6. Inspections check hidden work before it is covered.

That chain is more useful than disconnected quotes. The practical principles in this project management guide for staying on schedule and under budget suit Highett renovations because existing homes rarely provide perfect conditions behind their finishes.

Practical rule: If nobody can explain what happens next, who owns the decision and what it costs, the project isn't being managed.

Why Victorian requirements change the timeline

Approvals belong in the programme from the start, not at the end of design. Victorian building-permit activity is recorded in monthly and yearly summaries, giving renovators a useful reference for approval activity and pipeline volatility through the Victorian building-permit data published by Data Vic.

For a Highett bathroom or kitchen, management means coordinating the designer, registered builder, engineer where required, council pathway, suppliers and trades before demolition begins. It also means allowing for problems hidden inside existing walls. Good planning does not remove surprises. It sets a controlled process to assess, price and approve them without losing sight of the brief, budget or sequence.

Building the Project Brief Before You Talk to Anyone

A Pinterest board isn't a project brief. It shows what you like, but it doesn't tell a designer or builder what must be built, what can be removed, or what you're prepared to compromise.

Start with one page. Keep it practical, specific and easy to price.

Six blocks for a useful brief

Room function comes first. Record who uses the room, when they use it and what currently frustrates them. A family bathroom may need two people to prepare at once, durable storage and a bath for younger children. An ensuite may prioritise a generous shower, discreet storage and fast cleaning.

Separate must-haves from preferences. Mark every item as essential, preferred or optional. If the budget tightens, this hierarchy tells the builder what can change without reopening the entire design.

Describe the finish level. “Modern” isn't enough. State whether you want standard, upgraded or custom cabinetry, simple or feature tiles, off-the-shelf or bespoke fittings, and painted or natural timber finishes. For modern bathrooms and designer bathrooms, name the visual direction and the products that define it.

Record the existing dwelling. Note likely structural changes, access limitations, ceiling conditions, window positions, heritage considerations and any known water damage. Don't assume a new layout can use the old service paths.

Map plumbing and electrical constraints. Identify the location of existing wastes, water points, hot-water lines, switches, exhaust paths and power outlets. Moving fixtures may improve the layout, but it can also expand demolition, drainage and permit requirements.

Plan liveability. Decide whether the family can leave during disruptive stages, where laundry will operate, which bathroom remains available and how children and pets will move around the site.

Turn inspiration into buildable information

Your brief should include:

  • An annotated plan: Mark fixture locations, storage zones, door swings, windows and circulation.
  • A named selection list: Identify tile ranges, tapware, vanity dimensions, appliances and hardware. Mystery tiles create pricing gaps.
  • A mood board with purpose: Use colour, texture and material references to communicate the atmosphere, not just attractive images.
  • A constraints page: List access, parking, working hours, body corporate requirements and known neighbour concerns.
  • A decision register: Record what has been approved, what remains open and who can authorise a change.

Australian construction-delay research identifies owner-driven changes, slow owner decisions, design drawing preparation and approval, underestimated complexity and unrealistic durations among the leading delay risks. The Australian Building Codes Board report on building confidence and construction quality supports a firm approach: freeze the scope early and coordinate the design before procurement.

Before booking a consultation, answer three questions clearly. Where will the laundry go during a bathroom renovation? Can the kitchen remain operational during the disruptive phase? What outcome is essential? Those answers make the first meeting productive and reduce the chance that a vague wish list becomes an expensive variation.

Budgeting and Cost Tracking That Holds

Renovation budgets fail when homeowners follow the headline quote and ignore the decisions behind it. Your budget must show what the quote includes, what it excludes, what has been paid, and what has changed.

Renovation activity across Victoria shows why cost discipline matters. Nationally, renovations represented 40% of total residential construction expenditure in 2023–24, compared with 34.2% in 2018–19, as noted earlier. HIA figures reported by Domain's coverage of the Australian renovation market show Australians spent $59.8 billion updating their homes at the renovation peak in 2021 and 2022. In Victoria, the typical kitchen renovation reached $33,600, compared with $25,500 in 2020.

That market rewards disciplined coordination. A Highett project can involve Victorian permit requirements, older-home conditions, restricted access and live-in staging. Your tracker must connect each cost to a scope decision, approval or site condition.

Build one live cost register

Use four core columns:

Line item Quote price Actual spend Variance
Demolition and disposal Agreed amount Paid amount Difference
Plumbing and drainage Agreed amount Paid amount Difference
Tiles and adhesives Selected allowance Invoiced amount Difference
Cabinetry and joinery Quoted amount Paid amount Difference
Fixtures and fittings Allowance Invoiced amount Difference
Design, permits and temporary costs Estimated amount Actual amount Difference

Separate hard costs, such as cabinetry, tiles, labour, plumbing and electrical work, from soft costs, including design fees, permits, temporary accommodation, skip bins and upgrades selected after the contract.

For Highett homes, record access constraints beside the relevant allowance. A narrow side path, limited parking, protection for occupied rooms or staged plumbing work can affect labour and temporary costs. If a permit or inspection changes the sequence, record that impact rather than hiding it in a general allowance.

Highett Renovation Cost Benchmarks

Project Type Budget Band (AUD) Hard Costs % Soft Costs % Recommended Contingency
Bathroom renovation A$28,000 to A$45,000 Varies by scope Varies by scope Ring-fence a contingency
Kitchen renovation A$55,000 to A$95,000 Varies by scope Varies by scope Ring-fence a contingency
Premium renovation Above A$120,000 Varies by scope Varies by scope Ring-fence a contingency

Treat these bands as planning ranges, not promises. Access, design, structural work, selections and existing conditions can shift the final cost.

Do not assign hard and soft cost percentages before the scope is known. Ask for a cost plan that lists every allowance and states who carries the risk when an allowance is exceeded. For a bathroom, use this bathroom-remodelling budgeting guide to structure a room-by-room cost discussion.

Keep contingency separate from the working budget. Review the register weekly. Before work proceeds, require a written variation that states the reason, cost and schedule effect. No verbal approval on site. That rule protects both the budget and the sequence.

Choosing the Right Team for Your Project

The delivery model determines how much coordination you carry personally. There isn't one correct structure for every Highett renovation, but there is a wrong structure for every homeowner who underestimates their available time and tolerance for risk.

Three workable models

Model Best For Owner Workload Cost Control Risk Level
Design-build A coordinated brief with one accountable contract Lower Strong when scope is fixed Lower coordination risk
Owner-coordinator Custom design, complex constraints or strong aesthetic control High Detailed but owner-dependent Higher coordination risk
Specialist renovation firm A focused kitchen or bathroom scope Moderate Strong within a defined specialty Moderate

A design-build firm suits homeowners who want the designer, draftsperson and builder coordinated under one contract. It works best when access is straightforward, the brief is settled and decisions can be made quickly.

An owner-coordinator model gives you more direct control over the architect or designer and the tender process. It can suit custom joinery or heritage constraints, but you become the person chasing drawings, quotes, approvals, selections and trade interfaces.

A specialist renovation firm sits between those models. For a single bathroom or kitchen, an in-house design process and renovation-focused builder can reduce handovers between separate consultants and trades. Confirm exactly what the firm manages, because “full service” can mean different things.

Verify before you sign

Check the builder through the Victorian practitioner register, confirm the correct VBA registration class, request evidence of public liability cover and speak with recent references close to Highett. For larger domestic work, the registration class matters. Victoria recognises a Domestic Builder, Unlimited class, and the current registration example for a Domestic Builder, Unlimited demonstrates a registration without a contract-value cap for that class of domestic building work.

Bathroom renovations also have a clear compliance threshold. Victorian industry guidance states that domestic renovation work over A$10,000 must be carried out by a registered builder, while plumbing must be completed by a registered or licensed plumber, as outlined in this Victorian bathroom renovation licensing guidance.

Use a written selection process. The contractor selection criteria for renovation work should help you test communication, documentation, warranty handling and trade coordination, not just the lowest price.

Creating a Realistic Timeline and Milestone Schedule

A renovation schedule should run backwards from approvals and key procurement dates. It shouldn't begin with the demolition date printed on a sales brochure.

Permit timing can vary sharply. Victorian government review material cited in Consumer Victoria's guidance on building disputes, defects and delays found building-permit timing ranging from 10 business days to 8 months, with council-related delays considered unreasonable in 19% of projects. Consumer Victoria also says contracts must state the number of days allowed for each type of delay.

Use freeze points as decision gates

Set these gates in writing:

  1. Brief freeze: The room function, priorities and exclusions are approved.
  2. Design freeze: Drawings, layout and major construction details are settled.
  3. Pricing freeze: Quotes, allowances and exclusions are reconciled.
  4. Selections freeze: Tiles, fittings, appliances, colours and joinery are ordered.
  5. Lock-up: The concealed structure and services are ready for inspection.
  6. Fit-out: Visible finishes and fixtures are installed.
  7. Practical completion: The agreed work is complete, subject to documented defects.

After a freeze, a change needs a written variation. That variation should state the price, delay, affected trade and revised completion date. This keeps a late preference from becoming an unpriced instruction.

A bathroom renovation project in progress with framing, plumbing, and orange waterproof underlayment visible.

Build the programme from the critical path

For a typical Highett kitchen, a practical sequence includes 4 weeks for design, 8 weeks for permits, 1 week for demolition, 4 weeks for rough-in, 5 weeks for joinery and fit-out, and 2 weeks for snagging, followed by 2 buffer weeks. A shorter programme usually removes a decision gate or assumes every delivery and inspection happens perfectly.

Bathroom renovations need the same discipline. Waterproofing, tile delivery, vanity manufacture, glazing and fixture availability can control the critical path. Design changes after waterproofing begins are particularly dangerous because they can trigger rework inside a concealed wet-area assembly. Defect research in Australia identifies rework and widespread defects as significant construction concerns, so the freeze points protect both quality and your warranty position.

Communication and Site Management on a Live Job

A live renovation needs a rhythm that everyone follows. Set a weekly site meeting for the same day and time, with the builder's project manager and lead tradesperson present. Walk the site, compare progress with the schedule, photograph completed work and record decisions before the meeting closes.

The written decision log is the authority. Record the date, decision, responsible person, cost effect, programme effect and approval status. Both parties should confirm the entry by the end of the week.

Email can carry information, but it shouldn't carry an unrecorded variation.

Use a dedicated project-chat channel for urgent questions, delivery updates and access issues. Keep cost and scope approvals inside the formal meeting and variation process. A quick message can alert the team that a decision is needed, but it shouldn't replace a signed instruction.

Plan the household around disruption

Australian consumer research found that 49% of intended renovators were delaying work because of rising living costs, while 28% were reducing renovation scope, according to Domain's Australian bathroom renovation coverage. That makes liveability and cashflow part of the project brief, not an afterthought.

Decide where the household will cook, wash clothes and use the toilet during each phase. Establish:

  • Dust boundaries: Identify sealed work zones and the route trades will use.
  • Temporary facilities: Confirm the location of a temporary kitchen, laundry sink or portable toilet.
  • Safety controls: Keep children and pets away from tools, demolition waste and open services.
  • Daily limits: Agree start, finish and quiet hours with the site team.
  • Access rules: Set arrangements for keys, deliveries, parking and neighbour communication.

If the renovation affects a shared building or common property, obtain body corporate approval before ordering materials. A clear phasing plan protects the family from making rushed decisions because the household is uncomfortable.

A construction manager reviews a project plan with a client at a home renovation site.

SitePro Bathrooms is one example of a specialist renovation company that coordinates bathroom work from consultation and design through construction and handover. Whether you use a specialist firm or assemble your own team, insist on the same evidence: current schedule, documented decisions, clear variations and photographed progress.

Quality Checks, Compliance and the Defect Punch

Handover doesn't mean the project is finished. It means the work has reached a stage where you can inspect it against the contract, identify defects and confirm which documents remain outstanding.

Quality control should happen at four points, not only on the final day.

Inspect before the work disappears

Project Stage Inspection Focus Required Documentation Owner Sign-Off Trigger
Lock-up Framing, openings, insulation, service routes and concealed structure Approved drawings, engineering details and inspection records Layout and concealed works match the approved scope
Waterproofing Falls, junctions, penetrations, puddle flanges and membrane coverage Waterproofing records and relevant compliance documentation Wet-area preparation is accepted before tiling
Fit-off Fixture position, cabinetry, electrical points, drainage, doors and finishes Product warranties, certificates and updated selections Visible installation matches the design and selections
Practical completion Operation, finish quality, cleaning, access and outstanding items Final inspection documents, manuals, warranties and defect list Contract work is complete apart from listed defects

For bathroom renovations, don't let tile installation cover waterproofing before the required inspection and documentation are complete. Confirm the builder's responsibilities for Victorian Building Authority inspections, the certificate of final inspection where applicable and any documents needed for future sale or insurance records.

Check the VBA practitioner register before paying the final draw. Confirm that the registered builder's class suits the work, especially where the renovation includes structural changes or several coordinated trades. Keep permits, engineering information, waterproofing records, plumbing documentation and electrical certificates together in a digital project folder.

Create a disciplined defect punch

Walk the room in a fixed direction. Start at the door and inspect every surface, junction, fitting and function. Test doors, drawers, exhaust fans, lights, taps, waste flow, shower screens and appliances. Look at grout lines, silicone joints, paint edges, tile alignment, cabinetry gaps and damage to adjacent rooms.

Photograph each defect with a wide image showing its location and a close image showing the problem. Name the file with the room, item and date, then match it to the original scope or drawing. A defect list without a location and reference becomes an argument. A photographed list tied to the contract becomes a close-out tool.

Include a defect liability period clause in the contract. The applicable period depends on the agreement, but contractor obligations commonly sit within a 90-day to 6-month range. Don't rely on a verbal promise that the builder will return. State the response process, access arrangements, responsibility for consequential damage and the date by which defects must be addressed.

A delay can also have a contract consequence. Suppose the builder misses an agreed defect-response date, the bathroom remains unusable, and the contract applies liquidated damages or another documented delay mechanism. The owner's cost can then include the contractual amount, temporary accommodation and repeated trade visits. The exact result depends on the contract and facts, so have the agreement reviewed before signing rather than trying to calculate the loss after the dispute begins.

Downloadable pre-renovation checklist

Copy this checklist into a document and print the pages you'll use during site meetings. Keep the master version digital so you can update selections, approvals, costs and decisions without creating conflicting paper copies.

Brief and scope

  • Room use: Record users, routines, storage needs and liveability limits.
  • Must-haves: Mark essential items separately from preferences.
  • Existing conditions: Note structure, plumbing, electrical access, windows and known damage.
  • Selections: Name products, dimensions, colours and finish levels.
  • Exclusions: Write down work that isn't included.

Budget tracker

  • Line item: Use one row for every trade, material, fee and temporary cost.
  • Quote price: Enter the accepted quote or allowance.
  • Actual spend: Update when invoices are approved or paid.
  • Variance: Investigate every difference before the next weekly meeting.
  • Contingency: Keep the reserve separate and authorise its use in writing.

Designer interview questions

  • Existing-home experience: Ask how the designer investigates concealed conditions.
  • Documentation: Confirm what drawings, schedules and specifications you'll receive.
  • Selections: Ask who checks product availability and lead times.
  • Coordination: Clarify who manages engineering, permits and trade queries.
  • Revisions: Establish the cost and timing of changes after design approval.

Builder shortlist criteria

  • Registration: Verify the VBA registration and correct class.
  • Insurance: Request current public liability evidence.
  • References: Speak with recent clients and inspect comparable work near Highett.
  • Programme: Ask for the critical path, approval assumptions and buffer.
  • Communication: Confirm the meeting rhythm, decision log and variation method.

Contract clauses to verify

  • Scope: Check drawings, specifications, allowances and exclusions.
  • Payment: Match progress claims to measurable stages.
  • Variations: Require written price and time approval before changed work.
  • Delays: Check the stated allowance for each delay type.
  • Defects: Confirm the liability period, response process and close-out standard.
  • Documents: Require permits, certificates, warranties and manuals at completion.

Week-of-handover tasks

  • Punch walk: Inspect every room and record defects with timestamped photographs.
  • Functional testing: Operate every tap, drain, light, fan, door, drawer and appliance.
  • Document collection: Save certificates, warranties, manuals and final inspection records.
  • Payment review: Match the final claim to completed work and unresolved defects.
  • Access check: Collect keys, remotes, codes and maintenance instructions.

Sample 14-week bathroom timeline

Week Milestone
Week 1 Design brief
Weeks 2 to 3 Concept and quote
Week 4 Design freeze
Weeks 5 to 7 Council and VBA permit lead-time
Weeks 8 to 9 Demolition and rough-in
Week 10 Waterproofing inspection
Weeks 11 to 12 Tiling and fit-off
Week 13 Punch walk
Week 14 Defects close-out

Treat this as a living document. Print the checklist for the site folder, keep the timeline in the digital project record and update it during every weekly meeting. Two local variables can stretch the programme: heritage overlay consultations may add 2 to 3 weeks, while Caesarstone or other stone benchtop lead-times can run 4 to 5 weeks from template. Confirm those dates before locking the selections freeze.

Current design direction is also more specific than “make it modern”. Australian bathroom coverage points to warmer, textured, spa-like spaces using materials such as hand-cut tiles, marble, timber and concrete, alongside richer colours, curves, bench seats, steam showers and infrared saunas, as outlined in current Australian bathroom design coverage. Reece identifies five local directions, Art Deco, Day Spa, Hamptons, Hotel Experience and Modern Australian, in its Australian bathroom design reference. Use those names to sharpen the brief, then price the actual products and construction required.

The homeowner who controls decisions, documents approvals and inspects concealed work has a far better chance of receiving the room they approved, rather than a late approximation assembled under pressure.


Start your Highett renovation with a one-page brief, a live cost tracker and a permit-led schedule. If you're planning bathroom renovations, modern bathrooms or designer bathrooms and want the trades, selections, approvals and handover coordinated through one process, contact SitePro Bathrooms to arrange a consultation and measure-up for your project.

  • siteprobathrooms

How to Increase Rental Value with Strategic Renovations

Australian rents increased 2.1% in the March 2026 quarter and 5.7% year on year, but that movement doesn't mean every renovation will support a higher asking rent. The national housing system evidence points to a market where rent growth is becoming more common, so Victorian landlords need to make a sharper decision: should a renovation create rent uplift, shorten the time needed to secure a tenant, or recover its capital expenditure within the holding period?

The answer is often a combination of all three, but the weighting changes from property to property. A dated bathroom may not support a dramatic weekly increase, yet it can help the property lease faster, reduce maintenance complaints and compete with better-presented homes. Strategic renovation isn't about making a rental look like a private residence. It's about improving the features tenants notice, use and value while keeping the project legally compliant and financially disciplined.

Why Strategic Renovations Drive Rental Returns

The market is moving, but renovation quality still matters

A landlord can follow broader market growth and capture existing demand. A carefully specified upgrade can also position the property for a stronger rental segment. In Victoria, nearby comparable homes still set the practical ceiling, so the work must offer tenants a clear reason to choose the property.

Ask what the upgraded home provides that nearby alternatives lack. Better storage, a usable layout, durable surfaces, reliable fittings and effective lighting usually influence inspections more consistently than decorative details that photograph well but add little daily convenience.

Practical rule: Renovate for the tenant's routine, not for your personal design preference.

Use three tests before approving work

Assess the project against three separate outcomes:

  1. Rent uplift: Can the completed property justify a higher weekly rent compared with comparable upgraded homes?
  2. Lease-up speed: Will better presentation and functionality reduce the vacancy period between tenancies?
  3. Capex recovery: Can extra income, fewer vacant days or a lower repair burden recover the renovation cost within the expected holding period?

This prevents a common budgeting error. A renovation may improve sale appeal without supporting the same increase in rent. It may also produce a modest weekly uplift while helping the property lease faster and reducing repair calls. That can be a sound result when vacancy is expensive, provided the specification remains appropriate for the local market and meets Victorian rental requirements.

Specification beats decoration

The strongest rental upgrades are visible, practical and durable. In a bathroom, prioritise a sound waterproofing system, sensible storage, quality cabinetry, bright task lighting and fittings that can withstand regular use. In a kitchen, functional cabinetry, coordinated appliances, hard-wearing benchtops and effective preparation lighting generally matter more than premium finishes tenants cannot justify in the rent.

Victorian landlords also need to check the compliance consequences before approving work. Waterproofing, electrical changes, ventilation, plumbing and other regulated alterations may require qualified trades, inspections, permits or certificates. A cheaper design that creates rectification work can delay leasing and weaken capex recovery.

Australian rental guidance commonly places smart renovations around a 2:1 value relationship, meaning about A$2 of added value for every A$1 spent, while also describing kitchen and bathroom returns in the 75% to 100% range. That renovation return guidance is a screening benchmark, not a promise. Local rent, property condition, compliance costs and tenant demand determine whether the project works.

A modern single-story residential house for rent with a sign on the front lawn.

Kitchen Versus Bathroom Upgrades for Maximum Impact

Kitchen and bathroom renovations remain the clearest value-add candidates because tenants use them every day and assess them quickly during inspections. Australian renovation guidance places a typical kitchen renovation at A$15,000 to A$25,000, with an estimated A$25,000 to A$40,000 added to property value and a possible rent increase of A$40 to A$80 per week. The same Australian renovation guide places bathroom renovation costs at A$12,000 to A$18,000, with estimated added value of A$20,000 to A$30,000.

Industry reporting suggests a well-executed kitchen renovation can lift property value by up to 15%, while bathroom improvements can add around 10% and may return roughly 75% of spend in resale value. The Australian renovation-value commentary supports a kitchen-first sequence where the kitchen is clearly dated or dysfunctional, followed by the bathroom once cash flow allows.

Metric Kitchen Renovation Bathroom Renovation
Typical cost A$15,000 to A$25,000 A$12,000 to A$18,000
Estimated added property value A$25,000 to A$40,000 A$20,000 to A$30,000
Indicative value return 75% to 100% Around 75% in resale value
Typical rent uplift A$40 to A$80 per week Varies by local comparable stock
Strategic role Often the first priority when layout and usability are weak Strong second priority when function, presentation or maintenance are concerns

Why kitchens often come first

The kitchen usually occupies more visual space and affects the way tenants judge the whole home. A poor layout, inadequate storage or mismatched appliances can make an otherwise sound property feel inconvenient. In those circumstances, replacing a few handles won't solve the underlying problem.

A landlord doesn't always need a full demolition. Reworking cabinetry, improving task lighting, replacing worn benchtops, coordinating appliances and adding a durable splashback may deliver the practical change tenants notice. The project should be scoped around what limits the property's rent, not around the most elaborate version of the renovation.

For detailed planning around kitchen costs, landlords can review the new kitchen cost guide, then test any estimate against local trades, site conditions and the intended specification.

When bathrooms deserve priority

A bathroom should move ahead of the kitchen when it has water damage, poor ventilation, failing finishes, inadequate storage or a layout that makes the room difficult to use. These defects create more than a styling issue. They can generate maintenance work, tenant dissatisfaction and inspection concerns.

Bathroom renovations also allow landlords to target durability. A straightforward, well-built bathroom with moisture-resistant finishes may outperform a visually dramatic room that uses fragile or difficult-to-replace materials. The best sequence is therefore conditional: kitchen first when it holds back rent and usability, bathroom first when it presents a functional or maintenance risk.

Bathroom Renovation Ideas That Tenants Value

The strongest new bathroom ideas for rentals begin with the features tenants use every day. A bathroom earns its renovation budget through easy cleaning, reliable ventilation, practical storage and lighting that works at the mirror. Attractive finishes help lease presentation, while durable specifications protect the capex recovery case through fewer maintenance issues.

Start with the room's weaknesses

Inspect the layout before choosing tiles or tapware. Check whether the shower feels cramped, the vanity stores enough toiletries, the door interrupts movement and the mirror has adequate light. In a small bathroom, improving circulation can support rent and lease-up speed more effectively than paying for premium surfaces.

Prioritise:

  • Moisture resistance: Use finishes and construction methods suited to wet areas, especially around shower walls, floors and vanity zones.
  • Storage: Select cabinetry with useful capacity that keeps toiletries off the floor without restricting circulation.
  • Lighting: Combine general illumination with clear mirror lighting for daily grooming and inspections.
  • High-visibility fixtures: Replace worn toilets, shower fittings, taps and vanity hardware before funding decorative details.
  • Cleaning simplicity: Choose surfaces, screens and fittings that tolerate regular use without delicate treatment or excessive upkeep.

A neutral palette gives landlords more flexibility at the next tenancy change. Strong colour and highly personalised styling can narrow the audience, slow leasing and make the extra spend harder to recover.

A modern bathroom featuring gray stone shower tiles, a wooden vanity, and a backlit wall mirror.

Match the scope to the rental opportunity

Bathroom renovation pricing is commonly grouped into three levels. A 2026 Australian bathroom cost guide lists budget refreshes at A$5,000 to A$15,000, mid-range renovations at A$15,000 to A$40,000, and premium overhauls at A$40,000 and above. The guide places Victoria's typical range at A$18,000 to A$40,000 and reports the HIA national average at about A$26,000 in 2023.

A budget refresh suits a sound layout without significant waterproofing or structural concerns. It may cover fittings, hardware, lighting, paint and selected surface work. A mid-range renovation fits a room requiring coordinated cabinetry, new finishes, improved storage or a meaningful layout adjustment.

Premium designer bathrooms need a strict return test. Independent Australian property guidance reports an average return of around 62% for a renovated bathroom and identifies about 1.5% of property value as a practical budgeting guide. Landlords should connect any premium spend to a clear outcome, such as higher rent, faster leasing, stronger sale appeal or lower maintenance.

Money trap: Paying for imported feature finishes while poor storage, weak lighting or an inefficient layout remains unresolved.

The rental winner is a cohesive room where practicality and affordability combine. Tenants may notice a striking tile during an inspection, then judge the bathroom by shower performance, storage, cleanliness and durability after moving in. Those details influence lease-up speed and help determine whether the renovation recovers its capex.

Victorian Building Compliance and Registered Builder Requirements

Bathroom renovations in Victoria need a compliance plan before demolition begins. A full upgrade often crosses the thresholds that trigger formal contracting, builder registration and insurance obligations, particularly where the work includes waterproofing, structural changes, plumbing or a complete redesign.

Know the A$10,000 contract trigger

From 1 August 2017, a domestic building contract becomes a major domestic building contract when the work is worth more than A$10,000. Registered builders must use a written major domestic building contract for that work. Consumer Affairs Victoria's contract guidance explains the threshold and the written-contract requirement.

For landlords, this means the scope should be priced before work starts, with the parties, work description, price basis, plans, variations and responsibilities recorded properly. A verbal agreement or a loose collection of trade invoices isn't an adequate substitute for a contract when the project falls within the major-work threshold.

Registration and insurance are separate checks

For work worth more than A$10,000, Consumer Affairs Victoria says the builder must be registered with the Building and Plumbing Commission, subject to specific trade exclusions. A landlord looking for registered builders unlimited should confirm the builder's actual registration category and whether it covers the proposed work, rather than treating a general online claim as proof.

Domestic building insurance is required for work worth more than A$16,000. From 1 July 2026, home warranty insurance applies for work worth more than A$20,000. Consumer Affairs Victoria's building-project guidance sets out these insurance thresholds and also notes that cost-plus contracts are only permitted above A$1 million.

Those figures should influence the project brief from the beginning. If the proposed bathroom sits near a threshold, confirm how variations, provisional items and related trade work affect the total contract value.

Put compliance into the programme

Before signing, ask for:

  • Registration evidence: Confirm the builder's registration and scope of authority.
  • Written contract: Check that the contract describes the work and sets out how changes will be approved.
  • Insurance confirmation: Verify the required cover before construction begins.
  • Trade coordination: Establish who manages plumbing, electrical, waterproofing and inspections.
  • Variation control: Require written approval before extra work changes the cost or programme.

The cheapest quote can become the most expensive choice if it leaves the owner managing defects, delays or missing documentation. Compliance isn't administration added after design. It is part of the renovation's value proposition because a legally structured project protects the asset and supports a cleaner handover.

For a practical explanation of the role and obligations of using a registered builder for a bathroom renovation, landlords should assess the builder before accepting a price.

Targeting the Right Tenant Segment Through Specification Upgrades

Melbourne rents rose 3.5% over the quarter, while Victoria's rental market remained tight. Recent Australian rental-renovation commentary notes that a bathroom upgrade may create value through faster leasing, fewer vacant days and fewer repair calls, rather than rent alone.

A renovation should therefore match the tenant most likely to choose the property. Professional tenants, families, sharers and downsizers inspect different details, and each group accepts different trade-offs between finish quality, practicality and price. The question that matters is whether the feature solves a problem for that tenant segment.

Benchmark the property before choosing finishes

Review upgraded comparable properties in the same suburb or local area. Record asking rents, bathroom condition, storage, parking, outdoor space, appliance provision and presentation quality. A basic rental should not be compared with a premium renovation and treated as though every price difference comes from the bathroom.

Then identify the clearest gap. If competing homes have similar finishes but better storage, additional cabinetry may produce more leasing value than feature tiles. If clean, durable bathrooms with strong lighting are leasing quickly, matching that specification may recover capex sooner than commissioning a luxury redesign.

Measure three forms of return

Assess the project through three separate outcomes:

  • Higher rent: The completed property supports a premium that comparable listings can justify.
  • Faster leasing: Better presentation attracts suitable applicants sooner and limits vacancy exposure.
  • Lower operating friction: Durable fixtures and sound construction reduce avoidable maintenance requests.

The benchmarks for value-add relationships and budget sizing are outlined earlier in this article. Apply them alongside local evidence, expected holding period and the time required to recover the renovation cost.

Decision test: If the proposed upgrade cannot be linked to a rent gap, a vacancy risk or a maintenance problem, place it in the “nice to have” column.

Design for the segment, not the mood board

Inner- and middle-ring Victorian rentals often benefit from practical specification choices. Families may value a durable vanity and generous storage. Professional tenants may respond to clean lines, effective lighting and a low-maintenance shower. Shared households may place greater weight on bench space, ventilation and reliable fittings.

Compliance can affect the return calculation. A specification that triggers more extensive plumbing, electrical or waterproofing work may improve the finished result while delaying the next lease and increasing capex. Confirm the required work before choosing premium finishes, especially where the existing layout or services are poor.

Fresh appraisals after completion matter because the market may shift during construction. Ask more than one qualified property professional to assess the finished home, then compare the suggested rent with current upgraded listings. This gives the leasing decision a stronger basis than the renovation invoice or a designer's aesthetic judgement.

A luxurious apartment balcony overlooking a vibrant city skyline at sunset with comfortable outdoor seating.

Your Renovation Action Plan and Budget Framework

A renovation should earn its place in the budget through three tests: potential rent uplift, faster leasing and reasonable capex recovery. Victorian landlords should confirm the scope and compliance implications before trades begin.

Build the decision file

  1. Benchmark local rent: Compare the property with upgraded listings in the same suburb, dwelling category and tenant segment. Record the features that help comparable homes lease at stronger rents, then identify the gap your property can realistically close.
  2. Prioritise visible function: Allocate funds to storage, cabinetry, lighting, ventilation, moisture-resistant finishes and reliable fixtures. These items affect daily use and inspection impressions more consistently than decorative upgrades.
  3. Test the return: Estimate the likely extra weekly rent, the cost of an empty week and any maintenance savings. The improvement should support cost recovery within the expected holding period and look attractive on completion. If the rent uplift is modest but the work could shorten vacancy, include that leasing benefit in the assessment.
  4. Check compliance before pricing finishes: Confirm whether plumbing, electrical, waterproofing or structural work requires additional inspections, qualified trades or a registered builder. A compliant, simpler scope can outperform a premium specification that delays the next lease.
  5. Reappraise after construction: Arrange fresh rental appraisals after practical completion. Update photographs and the listing copy to match the finished home, then compare the suggested rent with current upgraded stock.

Keep a written scope, approval record and contingency allowance. Victorian requirements and the existing condition can change the budget quickly, particularly where services or waterproofing are defective.

Protect the leasing window

Plan demolition, ordering, inspections, practical completion and cleaning before the current tenant leaves where possible. Confirm long-lead items early, document variations and schedule photography after final cleaning. A finished bathroom produces little financial benefit if defects or incomplete touch-ups delay advertising.

For projects involving design, several trades and handover, use project management essentials for staying on schedule and under budget to assess whether end-to-end coordination is appropriate. SitePro Bathrooms is one local option offering concept development, 3D design, construction coordination and finishing for bathroom and kitchen projects.

Set the final listing around measurable convenience: storage, lighting, ventilation, durable finishes, layout and the condition of the wider home. Describe premium materials only when they improve tenant use or help the property compete with comparable upgraded rentals.

If you are choosing between bathroom and kitchen work, begin with a local rent benchmark and written scope. A focused discussion with SitePro Bathrooms can help compare practical new bathroom ideas with modern and designer bathrooms, then judge whether the proposal is more likely to raise rent, shorten vacancy or recover capex through stronger leasing performance.

  • siteprobathrooms

How Long Does a Kitchen Remodel Take in Australia

A mid-range kitchen remodel in Australia typically takes 14 to 22 weeks from project brief to final sign-off, with 4 to 8 weeks of active construction inside that window. If you're in Highett and still cooking every night in the existing kitchen, the important question isn't just when demolition starts, but how the whole calendar fits around design, approvals, procurement and handover.

You might be comparing stone samples at the dining table, trying to decide whether a wall can move, while also wondering how your family will manage without a working sink. Investors have a different pressure, rental downtime. Body Corporate stakeholders have another, approvals and coordination. The answer to how long does a kitchen remodel take changes sharply once the scope is clear.

Kitchen Remodel Timeline in Australia

A Highett homeowner may have trades booked for a short installation window, yet still wait months before that window begins. For a mid-range Australian renovation, allow 14 to 22 weeks from the project brief to final sign-off, with 4 to 8 weeks of active construction within that period. The calendar includes design decisions, specifications, cabinetry production, approvals and delivery coordination, not only work inside the room.

A professional kitchen contractor reviewing a checklist on a clipboard in a kitchen under renovation.

On-site time is not the project timeline

On-site work begins with floor and surface protection, demolition and trade preparation. It covers plumbing and electrical rough-ins, wall repairs, flooring, cabinetry, benchtops, splashbacks, appliance fit-off and final cleaning. This is the portion often quoted as the renovation duration.

The total project calendar starts earlier. A measured brief, confirmed layout, drawings, finishes, appliances, approvals, cabinetry manufacture and delivery planning must be settled before trades can work without avoidable pauses. Keeping services in their existing positions can compress construction. Moving a sink, cooktop or dishwasher may improve the layout, but it adds coordination and can extend approvals and rough-in work.

A short build does not necessarily mean a short renovation.

Practical rule: Treat the demolition date as a construction milestone, not the renovation start date.

Plan for an unusable kitchen

Demolition, rough-in and installation can make the room difficult or impossible to use. The broader Australian benchmark allows for 3 to 5 weeks when the household cannot cook in the kitchen, so set up a temporary food station before the sink is disconnected. Plan where appliances, food and washing-up supplies will go, particularly if children or tenants remain in the property.

A “two-week kitchen” usually describes a tightly managed cabinetry installation after the room has been measured, approved, demolished and prepared. It does not usually cover the journey from first consultation to final sign-off.

For a Highett project, the trades may finish their on-site sequence efficiently. The parts that stretch are usually decisions, approvals, manufacture and missing deliveries. Planning around those calendar risks gives a more useful answer to how long does a kitchen remodel take than counting demolition days alone.

The Five Stages That Shape Every Kitchen Remodel

A kitchen can look like a two-week installation on site and still occupy the calendar for months. In Highett and across Melbourne's bayside suburbs, the schedule is shaped by five connected stages. Some overlap, but each must be resolved before the next trade can work reliably.

Planning and consultation

The first stage defines the work and tests whether the room can support it. A site consultation records existing services, walls, windows, floor levels, access and appliance requirements. It also separates a cosmetic update from a layout change or structural alteration.

Decisions about function matter early. Retaining the sink, cooktop and dishwasher near their current services can shorten coordination. Relocating them may produce a better layout, but it adds design work, trade coordination and possible approval requirements.

Design and visualisation

Detailed design turns preferences into instructions trades can build from. Plans, elevations, finishes, storage, lighting positions and appliance specifications must agree before cabinetry is ordered.

Three-dimensional visualisation can expose conflicts before they reach site. A pantry door that strikes a refrigerator or a pendant positioned over the wrong work zone is inexpensive to correct on screen, but disruptive after installation.

Approvals and procurement

Approvals and ordering frequently determine the start date. Cabinetry, appliances, hardware, benchtops, tiles and plumbing fixtures need to align with the final design. One missing item can stop a trade, force a return visit and create a gap that the program cannot easily recover.

Australian guidance places active construction at about 4 to 8 weeks, while the complete journey is around 10 to 18 weeks once design, specifications, cabinetry lead times and coordination are included, as explained in this construction versus total-calendar guide. Those measures describe different parts of the job, so demolition-to-handover should not be confused with the total calendar period.

Demolition and construction

Demolition is often brief compared with planning, yet it can expose damaged subfloors, unsuitable walls or services that differ from the drawings. Once the old kitchen is removed, trades complete rough-ins, repairs and surface preparation before cabinet installation.

The order is practical, not cosmetic. Plumbing and electrical positions must be set before walls close. Floors and walls need to be ready before cabinets arrive, and benchtops should be measured after the cabinets are accurately installed. On-site work can compress when the scope is clear, access is good and materials arrive together. It stretches when discovery work or rework interrupts that sequence.

Finishes and sign-off

The final stage covers benchtops, splashbacks, handles, appliances, lighting, sealants, adjustments and cleaning. Handover should check doors, drawers, water connections, waste outlets and appliance operation, rather than treating installation as complete when the cabinets are merely in place.

A coordinated renovation service such as SitePro Bathrooms can manage concept development, 3D design, construction and finishing through one workflow. The homeowner still needs to make selections on time, but fewer hand-offs reduce the chance of one contractor waiting for another.

How Renovation Scope Changes the Timeline

A Highett kitchen with new doors and benchtops follows a very different calendar from one involving a wall removal, relocated window and rerouted plumbing. Scope sets the number of drawings, trades, approvals and inspections, while also determining how much work can happen on site.

Scope Total Weeks On-Site Build Weeks Common Triggers
Cosmetic refresh 8 to 12 weeks Shorter, limited site disruption No layout change, no plumbing relocation
Mid-range remodel 14 to 22 weeks 6 to 10 weeks within the broader project window New cabinetry, services coordination, finishing work
Full custom renovation 26 weeks or more Extended construction period Wall removal, window relocation, structural work or plumbing reroutes

The comparison uses the Australian kitchen renovation scope benchmarks. A separate Australian survey places kitchen renovation construction at 2 to 9 weeks, with most projects generally taking less than three months, in this Australian kitchen renovation survey summary. Those ranges differ because one may measure the full calendar period, while the other focuses more closely on construction.

Cosmetic work

A cosmetic refresh is the easiest scope to compress when the existing layout works. New doors, handles, paint, selected surfaces and limited fixture replacement avoid much service relocation and structural approval work. The cost of a new kitchen guide is useful when comparing this limited approach with a broader replacement.

Material availability still matters. A delayed benchtop or appliance can extend the calendar even when the site work is simple.

Mid-range work

A mid-range remodel usually combines new cabinetry, benchtops, appliances, lighting and coordinated trade work. The room can retain its basic geometry, but electrical positions, plumbing connections, flooring and cabinet measurements must align. These projects often compress during demolition and installation, then stretch around manufacturing, delivery and final adjustments.

Full custom work

Full custom renovations take longer because the design changes the building, not only the joinery. Wall removal, window relocation and plumbing reroutes may require engineering, documentation and approval before construction can proceed. For an investor, the result may improve the long-term layout, but it also increases rental disruption and makes a short completion promise harder to defend. On-site build time is only part of the answer. The larger scope determines how many weeks pass before work can start and after trades leave.

Permits and Builder Registration in Victoria

A kitchen can look like a contained interior job and still trigger Victorian approval requirements. Before setting a start date, confirm whether the design affects structure, plumbing, electrical services, external openings, heritage controls or other regulated building elements. A building permit can add 2 to 4 weeks, while a planning permit can add 4 to 12 or more weeks, according to this Victoria renovation permit guide.

Planning approval may apply when walls move, windows change, heritage overlays affect the property or the proposal conflicts with local planning controls. The quality of the documents also affects the calendar. Missing dimensions, incomplete drawings or unclear ownership details can lead to review requests and resubmission before work begins.

A man wearing a cap reviews official building permit documents on a kitchen counter.

Use the relevant registration category

“Registered builders unlimited” does not describe every domestic kitchen project. Victoria has a registration class for a domestic builder limited to bathroom, kitchen and laundry renovations. Its application process considers qualifications, project evidence, referee reports and a criminal history check, as shown in the VBA registration application.

Check the contractor's registration on the Victorian Building Authority's public register before signing. If the work requires a building permit, a registered building practitioner must complete it or supervise it. The same check applies when a bathroom is delivered with the kitchen, particularly where the work changes services or involves more than cosmetic replacement.

Understand the contract threshold

For Victorian bathroom renovations, guidance states that work valued over AUD 16,000 must be completed by a builder registered with the Victorian Building Authority under a major domestic building contract. Domestic building insurance also applies above that threshold, as set out in this Victorian renovation guidance.

These checks affect total calendar time, not just days on site. Confirm the permit pathway, registration category, contract requirements and insurance before demolition. If approvals are raised after work starts, the schedule becomes reactive and the build can pause while documents are corrected or reviewed.

Common Misconceptions About Kitchen Renovation Speed

Fast renovation videos usually remove the waiting periods. They show demolition, a dramatic reveal and a clean handover, while skipping the design decisions, cabinetry production, approvals and supplier coordination that determine whether work can continue.

“A two-week kitchen is standard”

A two-week promise generally describes a limited installation window, not a complete remodel. The room may already be empty, services may stay in place and every component may be on site. New plumbing positions, wall changes or custom storage place the project in a different category.

“Demolition is the longest stage”

Demolition causes the most visible disruption, but it is rarely the main calendar burden. Procurement, approvals and trade sequencing create more waiting. Time can be lost before the first cabinet is removed, particularly if an appliance changes size or a custom item needs revised drawings.

“Supply delays will sort themselves out”

They will not. A missing sink, appliance or stone slab can stop the next trade from completing its work. Confirm selections early, check delivery status and delay demolition until materials and decisions are aligned.

“The start date is the finish date”

A builder's start date indicates when site activity should begin. It does not confirm that every downstream trade can attend without interruption. Ask for the sequence from demolition through final fit-off, then identify the items that could move handover.

A renovation may have only a short period of visible building work but a much longer total calendar time. Permit requirements, builder registration and ordered materials can stretch the programme before or between site activities.

The right question isn't “How fast can the renovation be done?” It's “Which parts of this schedule cannot be compressed without creating rework?”

A kitchen that appears simple but needs plumbing relocation belongs in a more involved planning category. Genuine speed comes from removing uncertainty early, not from rushing measurements, compliance work or trade handovers. JSImport

A Real Highett Kitchen Project Walkthrough

A Highett family recently planned a kitchen with new cabinetry, a custom pantry, updated appliances and a relocated window. They wanted more daylight and storage, yet the window change meant the work could not follow a simple cabinet replacement programme.

The project started with the brief, site measurements and service locations. Several 3D design reviews settled the pantry configuration, appliance positions and finishes before cabinetry was ordered. That early clarity shortened the pre-construction period because the joinery specification stayed stable.

Where the calendar moved

The window relocation required further documentation and approval coordination. This moved the project beyond the shorter renovation pathway. Cabinetry could be ordered only after the revised layout and construction information were sufficiently resolved.

On site, the sequence followed a practical order. The team protected access areas, removed the old kitchen, completed plumbing and electrical rough-ins, repaired surfaces, installed flooring and fitted the cabinetry. Stone measurement came after the cabinets were fixed in place. Benchtops, splashback, appliances, lighting and final adjustments followed.

The family also scheduled an adjacent bathroom upgrade during the same renovation period. Coordinating both areas reduced repeated disruption, although the household needed a room-by-room sequence showing which facilities remained available.

Bathroom work still required its own service and compliance checks, particularly where the scope extended beyond cosmetic finishes.

The lesson for investors

A similar Highett kitchen with a fixed layout and no window relocation could sit near the shorter end of its applicable timeline. This project took longer because the custom pantry and window change created extra design, approval and coordination work.

The calendar therefore included two different measures: active building time on site and the full period from design decisions to handover. The visible construction sequence can be relatively compact, while approvals, documentation and ordered joinery extend the total programme.

For an investor, the decision involves a clear trade-off. A custom layout may strengthen the property's long-term appeal, while a cosmetic refresh can return the kitchen to service sooner. Neither approach is automatically better. The right choice depends on the rental brief, building constraints and tolerance for vacancy. In this project, the window change delivered a stronger result, but it also carried the longer calendar.

Practical Ways to Speed Up Your Kitchen Remodel

Speed comes from decisions made before demolition, not from pushing trades to work faster. On a Highett project, the build may compress when the scope is fixed, while approvals, joinery production and late selections usually stretch the total calendar.

  • Freeze the brief early: Confirm whether the layout, plumbing points, windows and walls will change. A late revision can require updated drawings, trade coordination and approvals.
  • Confirm appliances before stone measurement: Cabinet dimensions, power requirements and cut-outs depend on the selected models.
  • Release cabinetry only from final information: Pantry widths, fillers and appliance clearances must be settled before joinery production.
  • Complete selections in one review: Record doors, handles, benchtops, splashbacks, sinks, taps, lighting and flooring together. This lets the builder check compatibility before orders are placed.
  • Protect the trade sequence: Finish plumbing and electrical rough-ins before walls and finishes close. Rushing this stage commonly creates rework.
  • Set one coordination point: One team overseeing design, construction and finishing can reduce handover gaps between separate trades.

The household's setup also affects progress. Review this guide to living in your house during renovation before work starts, especially if the kitchen is the only cooking area. Temporary cooking, food storage and washing-up arrangements should be ready before demolition.

A contractor and a homeowner reviewing a project schedule on a tablet inside a kitchen remodel.

Do not gain speed by omitting permit documentation, waterproofing checks or final testing. Those shortcuts often move time into defects, rectification and disputes. The contract should state the scope, allowance process, approval responsibilities, material selections and conditions that may change completion. A registered builder and clear approval path can shorten uncertainty, but they cannot remove required checks.

Planning Your Renovation With Confidence

A dependable kitchen programme begins with decisions that can be priced, approved and ordered. Before requesting quotes, document the layout, appliances, storage, finishes, site access and any bathroom or laundry work planned at the same time. This separates total calendar time from the on-site build period, which may be shorter than the wait for approvals, fabrication or deliveries.

Use this checklist:

  1. Define the brief and budget band: Separate layout and service changes from finish upgrades, so scope changes are visible.
  2. Complete the site review: Check walls, windows, plumbing, electrical access and Body Corporate requirements before drawings are finalised.
  3. Approve the design: Settle clearances, storage and finishes in the drawings and 3D visualisation.
  4. Confirm permits and registration: Identify who prepares documents, lodges applications and supervises regulated work in Victoria.
  5. Order long-lead items: Coordinate cabinetry, appliances, benchtops, fixtures and tiles before demolition is booked.
  6. Prepare for the unusable period: Arrange temporary cooking, food storage, washing-up and family meals.
  7. Set handover checks: Test appliances, cabinet adjustments, plumbing connections and lighting, then record cleaning and project documentation.

The same schedule needs to account for adjacent bathroom renovations, laundry work or new bathroom ideas. Shared access and overlapping trades can extend the calendar, even when each room's construction time appears manageable. A single programme gives the household, landlord or Body Corporate committee one sequence to review.

Screenshot from https://siteprobathrooms.com.au

For a kitchen-specific planning reference, review this guide to how to remodel a kitchen. Then request a consultation with your Highett property details, scope, appliance schedule and target date. A measured quote should identify approvals, procurement, site conditions and the period the kitchen will be unavailable.

Contact SitePro Bathrooms for an on-site consultation in Highett or greater Victoria. Ask for a written scope and timeline based on the actual home, not a generic two-month estimate.

  • siteprobathrooms

7 Contractor Selection Criteria for Bathroom Renovations

The cheapest quote isn't the safest choice. A bathroom or kitchen contractor should be judged by evidence, legal protection and risk controls, not by the lowest headline price or the most polished sales presentation. In Victoria, the decision should follow a fixed order: confirm registration and insurance, test specialist capability, examine commercial clarity, assess delivery discipline, then establish accountability after handover.

That approach matters whether you're planning compact bathroom renovations, a family bathroom, a kitchen refurbishment or one of the more ambitious designer bathrooms appearing in contemporary homes. It also gives you a fair way to compare contractors before personal preference takes over. A beautiful portfolio can't compensate for missing compliance documents, and a low price can't explain hidden exclusions.

The seven contractor selection criteria below are designed for homeowners, families, property investors and body corporate decision-makers across Highett and greater Victoria. You'll also find practical interview questions, warning signs and a printable checklist. SitePro Bathrooms is one local example of a business offering concept development, 3D design, construction and finishing for bathroom and kitchen renovations. Treat that as a reference point, not a reason to skip your own verification.

1. Licensing, Registration, and Builder Credentials

A polished quote proves nothing about legal protection. Start by confirming that the contractor is registered for the work you are commissioning, then verify insurance and the contracting entity before discussing finishes or new bathroom ideas.

In Victoria, domestic building work above A$10,000 requires registration with the Building and Plumbing Commission. For work above A$16,000, domestic building insurance must be provided before the contractor accepts a deposit or begins work. From 1 July 2026, the Home Warranty cover threshold rises to A$20,000. Confirm which rule applies when your contract is signed.

Use the official register to check the contractor's name, registration details, class and category. A business describing itself as a registered builder unlimited should provide credentials that match the actual scope of your bathroom or kitchen renovation. The registration should support the work being promised, not merely reflect a broad marketing label.

Bathroom projects often involve demolition, plumbing, electrical work, waterproofing, tiling and cabinetry. Ask who is responsible for each trade, whether subcontractors are registered where required, and who will provide the relevant compliance documents. For a clearer explanation of why registration matters, review registered builder protection for bathroom renovations before your first meeting.

Practical rule: Match the registered entity, registration class, insurance document and contract entity before paying a deposit. A logo, verbal assurance or old certificate is not evidence.

Documents to request before signing

  • Registration evidence: Request current details and verify them independently with the BPC.
  • Insurance confirmation: Obtain the applicable domestic building insurance documentation.
  • Scope alignment: Confirm that the registration class and category cover the proposed bathroom or kitchen work.
  • Contract identity: Check that the legal entity named in the quote also appears on the registration and insurance documents.
  • Responsibility schedule: Identify who handles each trade, inspection and compliance document.
  • Warranty explanation: Ask which statutory protections apply and what additional workmanship commitments the contractor offers.

Keep this stage separate from design preference. Whether you want modern bathrooms or designer bathrooms, legal credentials come first. Only after those documents check out should you compare portfolios, pricing, programme and communication. A contractor who cannot provide clear records should not receive your deposit.

2. Portfolio of Previous Work and Project References

A portfolio should prove that the contractor can deliver your type of project, not merely show attractive rooms. Ask to see completed bathroom renovations with similar constraints, such as compact layouts, old Victorian homes, difficult access, unusual plumbing positions or a kitchen and bathroom being coordinated together.

Look beyond the final photographs. Request before-and-after images, the original design concept, the materials selected and a short description of the work completed. A contractor who can explain why a layout changed, how storage was resolved and which waterproofing or ventilation decisions were made is giving you more useful evidence than someone showing only styled images.

Match the evidence to your brief

If your preference is clean-lined modern bathrooms, review projects with comparable fixtures, tile formats, storage requirements and lighting conditions. If you're pursuing designer bathrooms, ask for examples involving custom vanities, natural stone, curved details or complex finishes. The point isn't to copy another room. It's to test whether the contractor can convert a design direction into buildable, durable work.

Current Australian bathroom design coverage points towards warmer, more natural interiors, including earthy greens, rich browns, terracotta, timber, marble, biophilic elements and colour-drenching. Australian bathroom design coverage can help you identify new bathroom ideas, but the contractor must show how those materials will perform in a wet environment.

Contact recent clients directly where possible. Ask whether the contractor communicated changes, protected the home, coordinated trades, kept the site orderly and returned to resolve defects. A testimonial saying the room looks beautiful is useful, but a reference describing how problems were handled is more revealing. You can also review bathroom renovation before-and-after examples to assess how concepts translate into finished spaces.

3. Communication Skills and Project Management Approach

A renovation can be technically sound and still become miserable if nobody explains what's happening. Test communication before you sign by observing how the contractor handles your initial questions, documents decisions and responds when your brief contains uncertainty.

Ask who will be your day-to-day contact, who supervises the site and who coordinates subcontractors. A polished designer may not be the person managing waterproofing, delivery access or compliance paperwork. You need the names and responsibilities of the people who'll make those decisions.

Put the communication system in writing

Agree on the preferred channel, update frequency and process for approvals. Important decisions shouldn't live only in text messages or memory. Record tile selections, fixture changes, revised drawings, variation prices and approval dates in a shared document or project system.

A practical project schedule should identify demolition, rough-ins, waterproofing, inspections, tiling, cabinetry, fixture installation and handover. It won't eliminate every delay, but it gives both sides a reference point. If the contractor can't explain how a design change affects cost or timing, don't approve it yet.

Clear communication isn't simply being pleasant. It means the right person gives you the right information early enough for you to make a decision.

Before construction, ask these questions:

  • Who supervises the site: Will the nominated supervisor remain involved throughout the project?
  • How are changes approved: Will you receive written descriptions and prices before work proceeds?
  • How are emergencies handled: Who should you call if a leak, access issue or safety concern appears?
  • What updates are provided: Will progress be reported through meetings, email, photographs or project software?
  • How are 3D designs controlled: Will the approved design, finishes and dimensions be attached to the contract?

Busy professionals and property investors often need coordinated, end-to-end service rather than a series of disconnected trade visits. A contractor should be able to explain how the work is sequenced, how subcontractors are briefed and how decisions are tracked. Use this project management guidance for staying on schedule and under budget as a prompt for your interview.

4. Experience with Bathroom-Specific Expertise and Modern Design Trends

Bathroom work demands more than general building experience. The contractor must coordinate waterproofing, plumbing, ventilation, electrical services, drainage, falls, wall preparation, tile installation and fixture tolerances inside a confined space. A builder who mostly constructs other types of work may not have the same practical control over these details.

Ask for evidence from bathroom projects, then question the decisions behind the images. How was moisture managed? Where were access panels placed? How were existing walls assessed? What happens if the substrate is damaged after demolition? Who inspects waterproofing before it's covered?

The registration category also matters. In Victoria, bathroom, kitchen and laundry renovation work is recognised as a specific limited-builder category when it remains within the home's existing external walls, floor or ceiling. The Victorian Building Regulations category for limited bathroom, kitchen and laundry work makes the scope boundary a concrete selection issue. If your project extends beyond those limits, confirm that the contractor's registration and project team can cover the broader work.

Test design judgement, not trend fluency

Australian design reporting highlights warm neutrals, layered textures, rounded forms, natural stone, organic finishes, smart storage and modern Australian styling. Contemporary bathroom trend guidance can help shape your brief, but trends shouldn't dictate poor technical choices.

Ask the contractor to explain how your new bathroom ideas affect cleaning, maintenance, ventilation, storage and future repairs. A curved vanity, textured tile or timber-look finish may suit modern bathrooms, but the details must remain practical. Designer bathrooms still need accessible isolation points, sound waterproofing and finishes appropriate for regular moisture.

Request waterproofing training or certification evidence, relevant trade qualifications and references specifically from bathroom projects. Don't accept “we've done plenty” as proof. Ask to see what was done, who did it and how the work was documented.

5. Transparent Pricing, Cost Breakdown, and Contract Terms

A cheap quote can be the most expensive choice if it hides missing work. Compare proposals by scope first, then by price. Check whether each quote includes demolition, rubbish removal, preparation, fixtures, painting, permits, compliance documents and realistic material allowances.

Use written quotes and compare their assumptions. The guidance on choosing a building team helps identify gaps when two proposals appear similar. Ask the contractor to explain every allowance rather than accepting a polished total.

Make every allowance visible

Request separate amounts for labour, demolition, plumbing, electrical work, waterproofing, tiling, cabinetry, fixtures, painting, design, approvals, cleaning and waste removal. The document should name brands or product ranges where known, state quantities, assign installation responsibilities and list exclusions.

For new bathroom ideas, modern bathrooms and designer bathrooms, pricing must reflect the evidence behind the design. Confirm that quoted finishes, fittings and cabinetry match your selections. A low allowance can create a variation later when the chosen products cost more.

Two quotes are comparable only when they describe the same work, quality level and responsibility for unknowns.

The contract should state the deposit, progress payments and completion conditions. It must also explain how variations work. Require a written description of any change, its price impact and its effect on the agreed work before the contractor proceeds. A phone agreement leaves you arguing about scope later.

For projects exceeding A$20,000, check the contract and Home Warranty requirements that apply from 1 July 2026. Don't treat a fixed-price label as proof that every risk is included. Identify provisional sums, prime-cost items, owner-supplied products and conditions that can trigger additional charges.

Before signing, check:

  • Scope: Every room, trade and finish is described.
  • Exclusions: Missing work is listed clearly.
  • Variations: Written approval is required before additional work.
  • Payments: Instalments relate to identifiable progress.
  • Approvals: Responsibility for permits, inspections and certificates is assigned.
  • Handover: Defects, manuals, keys and final documentation are addressed.

6. Timeline Delivery and Project Scheduling Reliability

A bathroom renovation affects daily routines, household access and, for investors, the availability of a property. Choose a contractor who can explain the sequence of work rather than offering an attractive completion promise without a plan.

Request a schedule that shows the major stages and dependencies. Demolition may reveal damaged materials. Plumbing and electrical rough-ins may depend on the final layout. Waterproofing and tiling require preparation and curing time. Fixtures, cabinetry or specialist finishes can also affect the order of installation.

Ask how delays are controlled

The best answer isn't “nothing will go wrong.” It's a clear process for identifying risks, communicating changes and protecting quality when conditions shift. Ask how the contractor handles late products, unavailable trades, site access problems and unexpected conditions behind walls or under floors.

References should address actual schedule performance, not just the contractor's intentions. Ask former clients whether the agreed start date was respected, whether the site was left safe, whether updates arrived when promised and whether delays were explained promptly.

For a kitchen and bathroom renovation, request one integrated programme. Separate schedules can create clashes between cabinetry, plumbing, electrical work, tiling and finishing. Confirm who owns the master schedule and who has authority to resequence trades.

Working hours also matter, particularly in occupied homes and apartment buildings. Clarify noise, dust, access, parking, material storage and protection of shared areas. Body corporate projects require additional attention to building rules and approval pathways, so include those responsibilities in the written scope.

A contractor may use scheduling software, spreadsheets or another system. The tool matters less than whether the schedule is current, visible and linked to real decisions. Ask for milestone updates and a documented process for revising dates. Reliability means managing the programme openly while maintaining workmanship, not rushing the final installation to preserve an arbitrary promise.

7. Warranty Coverage, After-Sales Support, and Workmanship Guarantees

The relationship shouldn't end when the final fixture is installed. Bathroom renovations involve concealed work, including waterproofing, drainage connections, electrical services and wall preparation. Your contractor must explain what protection applies if a defect, leak or finish failure appears after handover.

Request warranty documents before signing, not after a problem occurs. Separate statutory protections from any additional workmanship promise, manufacturer warranty or extended coverage. Ask who is responsible for each component and whether you should contact the contractor, supplier, installer or manufacturer.

Define the handover standard

A proper handover should include a practical inspection, outstanding-items list, product information, maintenance guidance, certificates and warranty records. Photograph the completed work and retain invoices, approved variations, drawings and product details. These documents can help if you need to maintain a finish, replace a part or demonstrate the installation history to a future owner.

Ask specifically about waterproofing, tiles, grout, sealants, cabinetry, tapware, toilets, ventilation equipment, heated floors and feature materials. High-end finishes can have different care requirements from standard products. A contractor should tell you what cleaning products, ventilation habits and maintenance procedures protect the installation.

A warranty is only useful when you know who responds, what evidence they require and how the problem will be assessed.

Good after-sales support has a defined contact path. Ask how defects are reported, who investigates them, how urgent water-related problems are prioritised and how completed repairs are recorded. Clarify whether warranty obligations transfer if the property is sold, and keep receipts for owner-supplied products.

Registered builders must meet Victorian legal obligations, but legal minimums shouldn't be your only benchmark. Compare contractors on the clarity of their warranty wording, their willingness to explain exclusions and their record of resolving issues after completion. A confident contractor won't treat handover as the end of responsibility.

Contractor Selection: 7-Criteria Comparison

Criterion Implementation complexity Resource requirements Expected outcomes Ideal use cases Key advantages
Licensing, Registration, and Builder Credentials Low–Medium, verification steps and record checks Time to verify licenses/insurance, access to Building Commission records Legal compliance, insurance protection, dispute recourse Major renovations, investors, families seeking regulatory protection Legal protection, warranty eligibility, contractor accountability
Portfolio of Previous Work and Project References Low, review and site visits Time to review photos/case studies, contact references, possible site visits Visual confirmation of quality and style fit Design-led projects, homeowners wanting specific aesthetic outcomes Demonstrates capability, style match, quality evidence
Communication Skills and Project Management Approach Medium, set protocols and reporting cadence Project manager or coordinator, communication tools/software, scheduled updates Fewer misunderstandings, clearer decisions, better timeline control Complex projects, clients requiring frequent updates, multi‑trade jobs Improved coordination, transparent updates, quicker issue resolution
Experience with Bathroom-Specific Expertise and Modern Design Trends High, specialized technical knowledge required Skilled trades, waterproofing/plumbing expertise, specialist materials Correct technical execution, durable wet‑area solutions, contemporary finishes Designer bathrooms, compact Victorian bathrooms, high‑end specifications Fewer technical errors, creative space solutions, up‑to‑date design knowledge
Transparent Pricing, Cost Breakdown, and Contract Terms Medium, detailed estimating and contract drafting Estimating tools, time for itemised quotes, legal/contract review Predictable budgets, reduced cost surprises, clear payment terms Large projects (> $20k), budget‑sensitive clients, comparison shopping Financial clarity, legal protection, easier contractor comparison
Timeline Delivery and Project Scheduling Reliability Medium, coordination and contingency planning Scheduling software, supplier relationships, buffer planning Predictable completion dates, reduced household disruption Busy households, rental turnovers, coordinated multi‑room renovations Reliability, reduced downtime, better planning for clients
Warranty Coverage, After-Sales Support, and Workmanship Guarantees Low–Medium, documentation and service process Insurance, manufacturer warranties, documented handover materials Long‑term defect protection, structured claims process, maintenance guidance Property investors, families seeking long‑term assurance Defect protection, manufacturer backing, post‑completion support

Make the Evidence Do the Choosing

Compare every contractor against the same written criteria. Don't let one impressive portfolio, friendly consultation or low quote outweigh missing registration evidence, vague scope or weak answers about waterproofing. Consumer Victoria advises comparing at least three written quotes, but the useful comparison begins only after you confirm that each quote describes equivalent work.

Independent trust evidence has become a practical selection criterion in Australia. Equifax reported that 76% of Australians likely to buy, build or renovate in the next five years wanted independent due diligence and ratings, while 72% said they'd pay more for trustworthy professionals. The same research recorded concerns about corner-cutting, rushed delivery, defects and construction insolvencies, which is why reputation must sit beside compliance and commercial evidence, not replace it. Equifax's Australian construction trust research provides the relevant context.

Use this interview script and write down the answers:

  • Are you registered for this exact scope of work?
  • Can you provide current insurance and explain which threshold applies?
  • Who supervises the site and coordinates subcontractors?
  • Who completes and documents waterproofing?
  • Can I contact recent clients with similar bathroom or kitchen projects?
  • What's included, excluded and treated as an allowance?
  • How are variations priced and approved?
  • What schedule and milestone updates will I receive?
  • Which local approvals, inspections and certificates are required?
  • What warranty applies to workmanship, waterproofing, fixtures and finishes?
  • How are post-handover defects reported and resolved?

Red flags that should stop the process

  • Pressure to sign: The contractor insists you commit before reviewing the contract.
  • Vague allowances: The quote uses broad base-rate amounts without product or scope detail.
  • Unverifiable credentials: Registration, insurance or references can't be independently confirmed.
  • Cash-only demands: The payment arrangement avoids a proper written contract or receipt.
  • Unnamed trades: The contractor won't identify who will perform specialist work.
  • Undocumented changes: The contractor wants to proceed on verbal approvals.
  • Unclear responsibility: Nobody can explain who handles permits, compliance documents or inspections.
  • No after-sales process: Warranty promises exist only in conversation.

Printable contractor selection checklist

[ ] Registration checked with the BPC
[ ] Registration class matches the project scope
[ ] Current insurance documents received and checked
[ ] At least three written, scope-matched quotes requested
[ ] Exclusions, allowances and owner-supplied items listed
[ ] Bathroom-specific portfolio reviewed
[ ] Recent references contacted
[ ] Waterproofing responsibility and documentation confirmed
[ ] Subcontractors and site supervisor identified
[ ] Communication method and update frequency agreed
[ ] Project schedule and delay process explained
[ ] Variations require written approval
[ ] Local approvals, inspections and certificates assigned
[ ] Warranty terms received in writing
[ ] Handover and post-completion support explained

If you're comparing local options, review SitePro Bathrooms' past projects, testimonials and renovation services against this checklist, then request a detailed quote only after your scope and evidence requirements are clear. Take the same documents and questions to every contractor, record the answers and choose the builder who can prove control of the work, not merely promise a beautiful result.

  • siteprobathrooms

Bathroom Waterproofing Paint Guide for Renovations

1800 mm is the minimum height for waterproofing shower walls above the floor substrate in Victoria, and an unenclosed shower requires waterproofing extending 1.5 metres from the shower rose connection. Bathroom waterproofing paint isn't automatically a compliant waterproofing system, because suitability depends on the documented system, protected zone, substrate, detailing, installation and verification.

The popular advice is simple: buy a paint labelled waterproof, roll it across the bathroom, and tile over it. That advice confuses a surface coating with a wet-area protection system. A bathroom can have immaculate tiles, carefully chosen grout and a modern colour palette, yet still leak if the membrane stops at a corner, misses a penetration or isn't compatible with the substrate.

For bathroom renovations in Highett and greater Victoria, the practical question isn't whether a product sounds waterproof. It's whether the complete installed system is appropriate for the wet zone and documented for the required Australian compliance framework.

What Bathroom Waterproofing Paint Really Does

Bathroom waterproofing paint is usually discussed as a liquid-applied membrane, but the word “paint” can create the wrong expectation. Ordinary paint is selected for colour, sheen and washability. A waterproofing membrane is selected for its role within a designed assembly, including its compatibility with the substrate, reinforcement, sealants, tile adhesive and the conditions of the wet area.

A useful comparison is a raincoat with faulty seams. The fabric may cover most of the body, but water still gets through where the seams are open. In a bathroom, those seams are the corners, wall-to-floor junctions, changes of plane, floor wastes, pipe penetrations and fixture interfaces. A broad painted area can't compensate for a discontinuity at one of these locations.

A cross-section showing bathroom wall layers including insulation, cement board, waterproof membrane, thin-set mortar, and tiles.

The label isn't the system

Australian wet-area guidance treats waterproofing as a coordinated construction layer, not a decorative finish. AS 3740:2021 sets minimum requirements for the design and installation of waterproofing in domestic wet areas, including Class 1, Class 2 and Class 4 buildings, with application to wet areas in other building classes as specified by the standard. The Australian Standards Store summary for AS 3740:2021 establishes why product preference alone isn't enough.

The membrane has to work with the surface below it. Dust, movement, unsuitable backing materials or an unsealed penetration can interrupt the protection even when the visible field looks continuous. That's why a professional reviews the proposed build-up before choosing a product.

Practical rule: Treat bathroom waterproofing paint as one component in a documented wet-area system, never as a shortcut around system design.

A product may be suitable for a particular wall, floor or renovation detail, but that doesn't make it universal. The intended finish matters too. Tile thickness, adhesive selection, falls, junction movement and access around fixtures all influence how the membrane must be detailed. A stylish finish only stays durable when the concealed work receives the same attention as the visible design.

Comparing Waterproofing Systems for Bathrooms

The terms waterproofing paint, liquid-applied membrane and paint-on membrane can overlap in product language, so a comparison should focus on the system rather than the label. A cementitious membrane uses a cement-based material approach, while a liquid membrane is supplied as a spreadable coating that forms a continuous layer after application. Neither category removes the need for correct preparation and detailing.

The right selection depends on the substrate, wet-zone arrangement, tile system, movement risk and evidence supplied by the manufacturer. Australian guidance focuses on performance and installation requirements, so a contractor should be able to explain how the proposed system meets the relevant wet-area obligations rather than relying on a generic claim printed on a bucket.

System Core Difference Key Selection Question Primary Risk to Check
Paint-on membrane Applied as a liquid coating within a compatible membrane system Is the product documented for this substrate and wet zone? Treating it as ordinary paint and missing required build or detailing
Cementitious membrane Uses a cement-based waterproofing material approach Does it suit the backing surface, movement conditions and finish? Assuming the material category removes the need for junction treatment
Liquid membrane Forms a continuous cured layer from a liquid-applied product What application, thickness, reinforcement and curing criteria apply? Choosing a product without checking system-specific documentation

What to ask before approval

A useful conversation should cover:

  • System identity: What exact membrane, primer, reinforcement and sealant combination is proposed?
  • Substrate compatibility: Is the existing surface stable and suitable, or does it need removal or repair?
  • Wet-zone coverage: Which walls, floors, junctions and penetrations are included?
  • Verification: What records, checks or testing will be completed before tiling?

For a practical overview of how a bathroom membrane fits into the wider build, review bathroom waterproofing system considerations. The point isn't to rank systems. It's to make the selection accountable.

Cementitious systems aren't automatically better, and liquid systems aren't automatically easier. Paint-on application can be efficient where the specification suits it, but convenience becomes a liability when it encourages a contractor to skip reinforcement, cure time, sealant compatibility or evidence of coverage.

Mapping Protected Zones in a Bathroom

Waterproofing should be planned from the water's path, not from the surfaces that happen to be visible after demolition. Start at the shower rose, follow the spray to the walls and floor, then trace the water toward the floor waste. Every change in direction creates a detailing question.

Victoria's wet-area guidance provides important benchmarks. The Victorian Building Authority guidance on waterproofing wet areas states that shower floors must be waterproofed and shower walls must be waterproofed to at least 1800 mm above the floor substrate. Where a floor waste is installed, the floor plane must fall continuously to that waste at a minimum gradient of 1:80.

A top-down view of a bathroom shower showing waterproof blue paint applied to walls and floor.

A contained shower zone

Consider a shower beside a vanity, with a fixed screen separating the splash area. The screen may reduce direct spray, but it doesn't turn the area outside the glass into a dry room. Water still reaches the floor, screen junctions, wall corners and fixture penetrations, so the membrane layout must follow the actual construction and drainage arrangement.

The minimum shower-wall height is a planning benchmark, not permission to stop thinking at a convenient line. The installer must also consider the wall substrate, shower fittings, niche, screen fixings and any joints where different materials meet.

An unenclosed shower

An open shower spreads the risk because the water isn't contained by a traditional enclosure. Victorian guidance notes that an unenclosed shower requires waterproofing extending 1.5 metres from the shower rose connection. That affects the floor, adjoining walls, door position, vanity placement and the location of storage.

A wet-room design can be attractive, especially in modern bathrooms and designer bathrooms, but it demands early coordination. A freestanding bath, wall-hung basin or open glass partition may alter where water travels and where penetrations occur.

Floors, baths and junctions

Bath edges deserve deliberate treatment, particularly where the bath meets a wall or where taps and plumbing penetrate the surrounding surface. The wall-to-floor junction must be treated as part of the system, not painted as an isolated strip after the main field coat.

Where a floor waste exists, the finished floor must direct water continuously toward it. A coating can't correct a poorly formed fall. It may cover the surface, but it won't make stagnant water move to the drain.

The protected zone is a layout decision. It should be resolved before the membrane is applied, not discovered while someone is holding a roller.

Preparing Surfaces for Reliable Application

A membrane can't turn an unstable substrate into a reliable one. Before application, the surface needs to be clean, sound, suitably dry and compatible with the selected system. Dust, loose material, contamination, sharp irregularities and uncontrolled movement all threaten adhesion or continuity.

Think of the membrane as a continuous film stretched across a hinge. If the hinge is damaged, loose or moving unpredictably, the film may split even though the coating itself is sound. That's why surface assessment usually matters more than the colour or brand language on the container.

A professional construction worker uses a metal trowel to smooth wet waterproof mortar on a floor.

The pre-application conversation

A homeowner doesn't need to direct regulated installation, but should ask how the installer will deal with the following:

  • Contamination: What happens to dust, adhesive residue, paint, grease or loose material?
  • Stability: Has the substrate been checked for movement, cracking, deflection or damaged backing?
  • Compatibility: Is the proposed primer and membrane suitable for the actual wall and floor materials?
  • Irregularities: Will sharp edges, holes, depressions and damaged areas be repaired before coating?
  • Interfaces: How will corners, changes of plane, floor wastes, pipe penetrations and fixture connections be treated?

Timber-based floors need particular care. Australian compliance guidance requires the entire wet-area floor to be waterproofed on timber-based floors, which makes substrate movement and system compatibility central to the decision. An older Victorian home may also contain uneven backing materials, previous repairs or existing tiles that conceal the condition below.

Existing tiles and older homes

Applying bathroom waterproofing paint over existing tiles isn't a universal renovation solution. The installer has to establish whether the tiles are firmly bonded, whether the surface can accept the proposed system and whether the altered floor height affects wastes, thresholds, doors and falls. A coating can't safely bridge every crack or compensate for movement in the structure.

Primer, reinforcement, bond breakers and sealants must come from the selected system documentation. Mixing components because they appear similar can create an interface that nobody has properly assessed.

A responsible pre-start record should identify the substrate, repairs, selected system, protected zones and treatment of penetrations. If those decisions aren't clear before work begins, the project is relying on assumptions hidden behind the finished tiles.

Application and Verification Essentials

A professional waterproofing system follows a quality-control chain. The chain starts with selecting a documented system for the actual bathroom, then confirming substrate compatibility, preparing the surface and detailing the locations where water and movement create the greatest risk.

The broad sequence normally includes compatible preparation, primer where specified, treatment of corners and junctions, sealing around penetrations and wastes, membrane coats at the required build, reinforcement where the system calls for it, and adequate curing before following trades proceed. The exact products, coverage and timing belong to the system documentation, not to a generic article.

Why shortcuts fail

A label such as “one-coat” or “fast-drying” doesn't erase requirements for coverage, thickness, reinforcement or curing. A roller may spread material quickly across an open wall, but it can't decide whether a corner has received the correct detail or whether a sealant is compatible with the membrane.

The NCC recognises waterproof sealant as a waterproofing material, which reinforces the point that joint treatment is part of the strategy. The NCC wet-area waterproofing provisions identify why changes of plane, floor waste interfaces and fixture penetrations need coordinated treatment rather than a final bead added as an afterthought.

Verification before tiling

The finished surface is difficult to inspect once tiles cover it, so professional handover should preserve evidence of the concealed stage. Depending on the system and project requirements, that may include photographs, product records, installation details, dry film thickness checks, flood testing or other specified verification.

The Australian wet-area waterproofing standards overview is useful context for understanding why testing, cure and installation records matter. Verification doesn't replace good workmanship, but it gives the builder and homeowner a clearer record of what was installed before the finish concealed it.

Handover standard: A waterproofing job should leave more than a tiled surface. It should leave a traceable system record, clear detailing and evidence that the membrane was ready for tiling.

The weakest interface controls the outcome. A sound field membrane won't protect a bathroom if a waste connection, corner or fixture penetration bypasses it.

Design Choices That Affect Waterproofing

A bathroom layout is a waterproofing decision, not only a styling exercise. A compact ensuite, family bathroom and open-plan wet room may share the same visual language, yet the shower position, enclosure, floor waste, wall construction and fixture arrangement create different demands on the wet-area system.

Design trends evolve, but the underlying construction responsibility remains unchanged regardless of visual direction. Warm neutrals, organic textures and large-format surfaces can produce a considered finish, but they also leave less room to hide poor falls, uneven substrates or a waste positioned outside the practical drainage path. The selected bathroom waterproofing paint remains one component of the system. It cannot correct a layout that makes compliant detailing difficult.

Three renovation scenarios

A compact ensuite often places the shower, toilet and vanity within a tight footprint. Relocating the shower can alter plumbing routes, floor falls and wall penetrations. Those effects should be resolved before construction, while the membrane extent and junction details are still being coordinated.

A family bathroom may combine a bath, separate shower and substantial storage. Replacing an enclosed bath unit with a freestanding bath changes the exposed floor and wall edges. It can also alter which surfaces need protection and where plumbing penetrations require coordinated detailing.

An open wet room or highly detailed bathroom introduces further site decisions. Glass partitions, integrated seating, recessed storage and layered lighting can each affect junctions, penetrations, access and drainage. The more features placed within the wet area, the more carefully the layout must preserve workable membrane detailing and inspection access.

Style and construction can be resolved together

Travertine-inspired textures, limestone references, warm neutral tiles and large-format porcelain do not determine waterproofing performance by themselves. Substrate stability, drainage falls, changes of plane, fixture coordination and room access still control the result. Large tiles may reduce visible grout, but they do not compensate for movement or water directed toward the wrong point.

SitePro Bathrooms provides concept development, 3D design, construction and finishing within its renovation service. A coordinated process can help test a feature wall, screen, niche or bath position before the selected arrangement creates rework around waterproofing and plumbing.

Test every design idea against the wet-area plan early. A layout that leaves no practical route for membrane application, detailing or verification remains an unresolved construction risk, regardless of how polished the finished room appears.

Common Waterproofing Problems and Remedies

Most waterproofing failures don't announce themselves as a dramatic coating failure. They may appear as peeling, blisters, pinholes, damp smells, staining, mould growth or water marks on a neighbouring ceiling. Each sign needs investigation because the visible symptom may sit far from the concealed entry point.

Possible causes include thin or interrupted coverage, missed corners, incompatible sealants, blocked drainage, poor falls and movement at interfaces. A tiled wall can look perfect while water travels behind it through a junction or penetration.

A practical diagnostic sequence

  1. Trace the water path: Establish when the moisture appears, which fixture is operating and where the first visible sign occurs.
  2. Inspect interfaces: Focus on corners, changes of plane, wastes, pipe penetrations, screen connections and bath edges.
  3. Review records: Check the proposed system, installation photographs, product information and any testing or thickness records.
  4. Obtain assessment: Have a suitably experienced professional identify whether the issue is surface maintenance, plumbing, drainage or concealed waterproofing.
  5. Correct the cause: Remove and rebuild failed details where necessary instead of applying another cosmetic coat.

A musty area or persistent dampness shouldn't be covered with bathroom waterproofing paint as a first response. Painting may hide a mark, but it doesn't restore a membrane that has been bypassed or a fall that sends water away from the waste.

The same distinction applies to maintenance. Cleaning, ventilation and replacing a deteriorated visible sealant can be reasonable maintenance, but concealed membrane failure requires a construction response. The remedy must match the failure mechanism.

When to Hire a Waterproofing Professional

Professional involvement is proportionate when the project includes complex falls, numerous penetrations, timber-based floors, existing tiles, older building fabric, a wet room, integrated fixtures or a complete bathroom renovation. These conditions increase the importance of assessment, coordination and documented detailing.

Victoria distinguishes between a registered building practitioner and builders who can contract for unlimited domestic building work. The VBA explains that an unlimited domestic builder licence permits a builder to contract for any domestic building work, while limited categories restrict the work they can contract for. That licensing question is separate from confirming that waterproofing work is performed by appropriately qualified and authorised specialists.

Ask the quote to identify the proposed membrane system, protected zones, substrate repairs, compatible sealants, cure arrangements, verification, documentation and coordination with tiling. You can also use bathroom waterproofing cost considerations to frame a realistic conversation about scope rather than treating waterproofing paint as a standalone purchase.

SitePro Bathrooms is one local option offering coordinated concept, 3D design, construction and finishing for bathroom renovations. Request a project-specific assessment before approving any waterproofing system, and ask the contractor to document how the wet-area details will be installed and verified.


If you're planning bathroom renovations in Highett or greater Victoria, contact SitePro Bathrooms to discuss your layout, substrate, wet zones and finish selections before construction begins. Request a coordinated design and renovation quote that treats waterproofing as part of the complete build, not as a last-minute coat of paint.

  • siteprobathrooms

Complete Bathroom Solutions: Your Guide for 2026

You've chosen the tiles, saved a few new bathroom ideas, and perhaps even ordered a vanity. Then the plumber asks where the waste will run, the electrician needs a lighting plan, and the tiler discovers that the wall isn't as straight as it looked. Suddenly, a simple bathroom update has become a coordination problem.

That's the point at which most Highett homeowners realise they don't need a catalogue of fixtures. They need one accountable process, a realistic schedule, and a contractor who understands Victorian compliance as well as design. Complete bathroom solutions should make the renovation easier to manage, not merely give the room a coordinated colour palette.

What Complete Bathroom Solutions Actually Cover

For a Highett homeowner, the value of a complete bathroom solution appears before demolition. An in-home consultation should establish accurate measurements, household routines, access needs, and the condition of plumbing, ventilation, structure, and storage. The contractor then turns those findings into a workable concept, detailed selections, a construction scope, and an ordered decision process.

A complete service means one accountable process from consultation to handover. It should cover concept development, detailed 3D design, demolition, structural work, plumbing, electrical work, waterproofing, tiling, fixture installation, cabinetry, painting, final finishes, defect review, and a warranty pack. Victorian registration requirements, waterproofing records, and accessibility decisions also need to shape the scope early. These obligations affect both the budget and the programme, so treating them as late paperwork creates avoidable risk.

A professional contractor reviewing renovation plans with a female homeowner inside a bathroom under construction.

What the single point of contact changes

A handyman may replace a fitting, and a tiler may retile a wall. Neither role necessarily owns the relationship between layout, waterproofing, cabinetry, plumbing, electrical work, accessibility, and final inspection.

A coordinated builder should make decisions in the right order:

  • Measure first: Confirm room dimensions, wall conditions, window positions, door swings, and existing service locations.
  • Design before ordering: Resolve the layout, product clearances, shower access, and storage before materials arrive on site.
  • Sequence trades properly: Arrange demolition, rough-ins, carpentry, waterproofing, tiling, electrical finishing, plumbing fit-off, and cabinetry around one another.
  • Document the result: Keep approvals, product information, waterproofing records, warranties, and handover notes together.

That organisation matters in a compact Highett ensuite, a family bathroom, a rental property, or a body corporate project. Busy households avoid chasing multiple trades. Investors gain clearer control over access and scheduling. Committees receive a defined responsibility path when shared-building work requires coordination.

Practical rule: If nobody can explain who owns a defect caused by a clash between trades, the project isn't genuinely end to end.

Good complete bathroom solutions give style decisions and technical decisions equal attention. A warm modern palette, concealed storage, or a statement basin can improve the room, while planned falls, membrane coverage, ventilation, accessible circulation, and service locations protect its performance. A coordinated builder connects those choices before construction starts, rather than asking trades to solve conflicts on site.

The End-to-End Renovation Process

A smooth bathroom renovation starts before demolition. In a Highett home, the first site visit should establish the room's dimensions, existing conditions, household priorities, access limits, and likely service changes. Ask direct questions early: Is the bath used? Where will toiletries be stored? Who needs clear movement through the room? How will the household manage while the bathroom is unavailable?

From the first sketch to a buildable brief

Concept development turns preferences into construction decisions. Resolve the layout, sanitaryware, cabinetry, finishes, lighting, ventilation, storage, heating, and cleaning requirements together. Flag cost and timing risks at this stage, including plumbing relocation, wall changes, damaged substrates, custom joinery, and accessibility requirements.

A detailed 3D design connects the concept to the existing room. Review sightlines, vanity proportions, tile direction, shower access, niche locations, and circulation clearances before demolition. This process exposes conflicts while they are still drawings, rather than leaving trades to solve them after walls and floors are open.

For practical background on the order of work, use this guide to how to renovate a bathroom. Demolition should follow resolved design. It should not be used to discover what the design should have addressed.

A professional tradesperson installing a modern wooden floating vanity cabinet against a tiled bathroom wall.

What happens on site

After approval, the site team protects access routes, removes existing fixtures, and inspects the exposed structure. Plumbers and electricians complete rough-ins. Carpenters correct framing or substrate problems, while the waterproofing contractor prepares the wet areas. Waterproofing must be completed, checked, and documented before tiling conceals the work.

The sequence then runs through tiling, grouting, cabinetry, mirrors, lighting, plumbing fit-off, accessories, painting, cleaning, and final inspection. Victorian building registration requirements, waterproofing compliance, and accessibility decisions can alter both the order and duration of these stages. Confirm who holds each responsibility before work begins.

Late selections and missing products interrupt the chain quickly. Keep agreed finishes, delivery dates, change approvals, inspection records, and site updates in one project file. That record gives the homeowner a clear basis for resolving defects and approving variations.

A typical bathroom renovation may take 2 to 3 weeks, according to the Australian renovation market summary. Treat that as a planning reference, not a promise for every Highett property. Hidden damage, access restrictions, registration requirements, or a household remaining in the home can extend the programme.

Timelines, Costs, and the Disruption Trade-Off

A bathroom renovation becomes expensive when the quote covers the visible finishes but leaves the coordination work unclear. Demolition, waste removal, waterproofing preparation, electrical upgrades, painting, cabinetry, compliance tasks, and substrate repairs can all sit outside a low initial figure. Ask for a room-by-room scope before comparing prices.

Use national figures only as broad planning context. The final cost for a Highett bathroom depends on the layout, access, existing structure, service changes, waterproofing requirements, accessibility decisions, and the standard of the selected finishes. Victorian registration and inspection obligations can also add work that a product-only quote overlooks.

Match the budget to the scope

A cosmetic refresh may cover paint, accessories, selected fixtures, or surface finishes. A full-strip renovation removes the existing room and may involve service changes, wall or floor repairs, new waterproofing, replacement cabinetry, and a complete rebuild. Those options carry different risks, timeframes, and disruption.

Use the quote to test exactly what you are buying.

  • Demolition and disposal: Confirm removal, protection, skip fees, cartage, and cleaning.
  • Services: Check allowances for plumbing, electrical work, ventilation, lighting, and relocations.
  • Waterproofing: Require details for preparation, membrane installation, penetrations, junctions, and inspection records.
  • Finishes: Look for clear allowances for tile, grout, sealant, cabinetry, tapware, sanitaryware, mirrors, and painting.
  • Changes: Approve variations in writing before extra work starts.

Staging suits a bathroom with sound waterproofing, layout, and substrates. It becomes poor value when new finishes cover failing membranes, incorrect falls, damaged framing, or incompatible junctions. A proper inspection should settle that decision before the budget is fixed.

Schedule around real life

A bathroom remodel commonly runs for several weeks, but the household's routine can make the programme longer. Shared bathrooms, restricted access, daily protection and cleanup, delayed selections, and the need to keep the home operating all increase coordination pressure. Use this bathroom remodel timeframe guide to understand the sequence, then ask the contractor to apply it to your property.

Request a start window, milestone sequence, decision deadlines, inspection points, and a written process for unexpected conditions. Plan temporary washing arrangements before demolition begins. If accessibility is part of the brief, allow time for circulation clearances, fixture heights, shower entry, and compliant waterproofing details rather than treating those decisions as late additions.

A credible programme explains who coordinates each trade, what must be approved before ordering, and how changes affect handover. That clarity protects the budget and makes the disruption manageable.

Modern Bathroom Ideas That Are Also Accessibility Wins

In a Highett renovation, accessibility must shape the layout before finishes are selected. The best modern bathroom ideas improve movement, safety, storage, and future adaptability while keeping the room residential rather than institutional.

A curbless shower removes a trip edge and creates a continuous floor line, but it also demands accurate falls, a suitable waste position, and carefully coordinated waterproofing. A wall-hung vanity exposes more floor area and makes cleaning easier, provided the wall framing can support it. Concealed storage controls clutter, while large-format surfaces can reduce grout lines and simplify maintenance. These features belong in contemporary designer bathrooms because they improve daily use, not just appearance.

A modern bathroom with light wood vanity, stone wall shower enclosure, and glass partition for a spa-like feel.

Compare the look with the lived experience

Start with movement, reach, stability, and future use. Then choose colours, tiles, tapware, and lighting that make those requirements look intentional.

Design choice Visual effect Practical benefit
Curbless shower Open, uninterrupted floor line Easier entry and reduced trip risk
Wall-hung vanity Lighter, less bulky appearance More visible floor area and easier cleaning
Concealed storage Calmer wall surfaces Toiletries stay organised and accessible
Non-slip flooring Subtle, low-sheen finish Better footing in a wet environment
Reinforced walls No visible change when planned well Grab rails can be added later

The technical brief should address step-free entry, clear circulation, reachable controls, stable surfaces, shower seating where appropriate, and wall reinforcement for future grab rails. This planning protects the room's usefulness as needs change without forcing every accessibility feature into the initial design.

The issue matters for ageing in place and multi-generational households. Future-friendly bathroom planning is also discussed in Australian bathroom trend coverage focused on future-friendly features.

Make the brief attractive and durable

A warm, nature-inspired palette can soften practical features. Timber-look cabinetry, restrained stone tones, lightly framed glass, concealed niches, and well-placed lighting support a Modern Australian direction while preserving clear movement paths. Coverage of local bathroom styles also discusses warmer palettes, nature-based interiors, and glass shower elements in local bathroom style coverage.

Specify grip before gloss. Preserve circulation before adding a freestanding bath. In a tight Highett floorplan, storage, moisture control, easy-clean materials, and adaptable access usually provide more lasting value than a dramatic feature with little daily benefit. Each choice should work with the waterproofing details and the intended users, because an attractive concept that cannot be built or adapted smoothly is a costly design failure.

Compliance, Waterproofing, and Builder Credentials in Victoria

A complete bathroom solution succeeds or fails on coordination. The layout, demolition, plumbing, electrical work, cabinetry, tiling, and waterproofing must align with Victorian requirements and the conditions of the existing Highett home. Attractive finishes cannot repair poor documentation or an unqualified contractor.

For broad renovation work, check whether the builder holds Domestic Builder, Unlimited, commonly called DB-U. This registration class covers personally carrying out, managing, or arranging subcontractors for domestic building work across the project. Its scope suits renovations involving demolition, construction, improvement, maintenance, and coordination between several trades. The relevant Victorian registration description appears in the Domestic Builder, Unlimited classification.

Confirm credentials before accepting a quote

Victorian guidance states that domestic building work generally requires registration when the work costs more than $10,000 including labour and materials. Check the threshold and registration guidance in this Victorian domestic building licensing summary.

Before signing, request:

  • Registration details: Verify the builder's current category and identity.
  • Written scope: Confirm that demolition, structural work, services, waterproofing, finishes, and cleanup are included.
  • Insurance evidence: Ask which policies apply and what protection they provide.
  • Waterproofing documentation: Establish who installs the membrane, which system is specified, and how the work is recorded.
  • Variation procedure: Require written approval before extra work begins.
  • Handover records: Collect certificates, warranties, manuals, and care instructions.

These records control more than paperwork. They show who owns each decision, reduce disputes between trades, and make defects easier to investigate after handover.

Check the shower zone in detail

The National Construction Code requires a shower floor to be waterproof, including areas with a hob or step-down. Shower walls must be waterproofed to at least 1,800 mm above the floor substrate or 50 mm above the shower rose, whichever is higher, according to the National Construction Code wet-area waterproofing provisions.

AS 3740:2021 sets design and installation requirements for waterproofing domestic wet areas. It affects floors, junctions, penetrations, upstands, and substrate preparation. Timber floors generally require whole-floor waterproofing, while concrete or fibre-cement floors may permit more targeted coverage, depending on the shower arrangement. The standard is available through AS 3740:2021 waterproofing requirements.

For a practical explanation of bathroom membrane work, read these Australian waterproofing standards for bathrooms. Ask who is responsible, which system is being used, when inspections occur, and what evidence you will receive. “The tiler handles it” is not a sufficient compliance plan.

How to Choose the Right Contractor in Highett

For a Highett family with one bathroom, two children, and limited time, the contractor's coordination method matters more than the lowest estimate. Choose someone who can define the scope early, assign responsibility for each decision, and manage trades without turning the household into the site supervisor.

Compare two first visits. Contractor A takes a few measurements, gives a quick figure, shows attractive images, and promises an early start. Contractor B examines how the room is used, checks ventilation and storage, discusses accessibility and clearances, explains the waterproofing plan, and uses 3D design to test the layout before demolition.

The second approach gives you more than a design preview. It reveals whether the contractor understands Victorian registration requirements, compliance records, and the practical effect of unresolved choices on cost and timing. A low initial quote can become expensive when allowances, access problems, design changes, or missing trade scopes appear later.

Screenshot from https://siteprobathrooms.com.au

Judge the process before the price

Use the first call to test the contractor's method. Do they ask about users, storage, ventilation, mobility needs, and the existing structure, or do they jump straight to a per-room figure? During the consultation, check the measurements and ask how design decisions, variations, access, delays, inspections, and progress updates will be recorded.

A credible shortlist should include:

  • Relevant registration: Confirm that the contractor's Victorian registration suits the complete domestic building scope.
  • Detailed design: Require a genuine 3D review showing layout, clearances, storage, and fixture positions, not only finishes or product images.
  • Clear communication: Ask who approves selections, prices variations, coordinates trades, and reports progress.
  • Local evidence: Review comparable completed bathrooms and testimonials from Highett or the wider Bayside area.
  • Site ownership: Identify the person supervising trades and handling questions once work begins.
  • Compliance control: Ask who arranges inspections and supplies waterproofing and other required records.

Visit a completed or near-completed project where possible. Inspect tile lines, silicone joints, ventilation, cabinetry fit, door clearances, storage access, and the quality of the handover. Accessibility details should work in daily use, not merely appear on a plan.

Walk away from pressure to approve before the design is resolved, unexplained allowances, reluctance to discuss registration or insurance, quotes that exclude core trades, and vague answers about waterproofing documentation. Defensive responses before signing usually signal harder communication after work starts. Choose the contractor who makes responsibilities visible and decisions traceable.

Warranties, Maintenance, and After-Handover Support

A bathroom isn't finished when the last fitting is installed. It's finished when the room has been inspected, cleaned, documented, and handed over with a clear path for resolving defects.

A credible workmanship guarantee should explain what the builder stands behind, how you report an issue, who assesses it, and what happens next. It should distinguish the installer's responsibility for workmanship from a manufacturer's warranty on a tap, toilet, fan, basin, or other fixture. Those are different obligations, and homeowners shouldn't be left to determine the difference after a problem appears.

Keep the handover file usable

Ask for a digital and physical record containing:

  • Contract and variations: Keep the agreed scope and every approved change together.
  • Waterproofing records: Retain certificates, product details, and inspection information.
  • Fixture documents: Store manufacturer warranties and care instructions.
  • Compliance records: Keep relevant certificates and approvals supplied for the work.
  • Maintenance guidance: Note cleaning products, sealant care, ventilation use, and service requirements.
  • Defect process: Record the contact person and the steps for lodging a concern.

Routine care is straightforward but shouldn't be ignored. Keep shower surfaces clean, remove standing water where practical, use ventilation during and after showers, and inspect sealant and grout for changes. Clean the extractor fan cover and arrange servicing when performance drops or moisture lingers.

A builder who explains maintenance at handover is showing you how the room is expected to perform, not simply closing the file.

Contact the original builder when you see movement, persistent dampness, recurring mould, loose fittings, failed sealant at important junctions, or water escaping the shower area. Don't cover a suspected waterproofing problem with fresh silicone and hope it disappears. Early investigation can prevent a small visible symptom from becoming a larger concealed repair.

Aftercare should influence your contractor choice as much as the tile selection. Builders who manage their own defect process tend to understand where quality is won or lost, from substrate preparation to final fit-off.

Your Next Step and a Local Call to Action

A smooth Highett bathroom renovation starts with decisions made in sequence. Begin by defining the room's job. Consider children, guests, tenants, ageing household members, or a busy couple, then set the layout, storage, shower access, ventilation, and bath requirements before selecting finishes.

Set a budget for the full scope. Use the national cost range as a planning reference, then require each contractor to identify allowances, exclusions, likely service changes, and conditions that may create variations. These details expose the coordination work behind the quoted figure.

Shortlist Registered Builders Unlimited contractors able to manage the domestic building scope in Victoria. Verify registration and insurance, then ask who controls design, supervision, waterproofing records, compliance documentation, and after-handover support. Victorian registration requirements and waterproofing compliance can affect both programme and cost, so resolve them before comparing final prices.

Approve a detailed 3D design before demolition. Review the layout, cabinetry, shower enclosure, lighting, tile direction, storage, and access while the existing bathroom is still intact. Accessibility decisions are cheaper and clearer at this stage than after construction begins.

SitePro Bathrooms is based in Highett and offers consultation, concept development, practical 3D design, construction, and finishing through a coordinated process. It is one local option for homeowners who want a single point of responsibility instead of disconnected trade appointments.

This week, measure the room, photograph problem areas, list the outcomes you need, and plan how the household will manage without the bathroom during construction. Then contact SitePro Bathrooms for a custom quote or in-home consultation. Review past projects, testimonials, and renovation guidance on the SitePro Bathrooms website before finalising your shortlist.

Book your Highett consultation, bring your priorities and budget questions, and request a clear design, construction, waterproofing, and handover plan before demolition.

  • siteprobathrooms

Timeless Bathroom Design Guide for Victorian Homes

The worst advice about a bathroom is that timeless means beige, safe, and forgettable. In real Australian homes, especially where humidity, hard water, and daily wear are part of the job, a bathroom stays current because it's easy to clean, structurally sound, and built from finishes that don't age badly. Trendy tiles can look sharp for a season. A room that wipes down quickly, drains properly, and doesn't grow mould in the corners lasts for years.

That's the practical test. A timeless bathroom design isn't a style mood, it's a maintenance outcome, backed by choices that still make sense when the novelty wears off and the cleaning starts getting real.

What Timeless Bathroom Design Actually Means

Timelessness gets reduced to neutral colour and a few polite fittings, but that's too shallow for a room that lives in steam, soap residue, and constant traffic. A bathroom isn't a living room with a sink in it. It's a wet working space, and the things that last are the things that resist wear, clean easily, and don't depend on a passing style to look intentional.

A luxurious, modern bathroom with a minimalist stone bathtub, warm lighting, and natural wood accents.

Cleanability beats decoration

A bathroom that stays attractive over time is usually the one with fewer places for grime to settle. That means simple junctions, low-porosity surfaces, and details that don't trap soap scum in decorative grooves. In practice, a room with visual restraint also tends to have less maintenance, which is why it reads as timeless long after trend-led rooms start looking tired.

Practical rule: if a feature makes weekly cleaning harder, it's probably working against timelessness.

The 2023 U.S. Houzz Bathroom Trends Study found 44% of renovators chose a timeless design, which is a useful directional benchmark. The more relevant point for Victoria is that bathrooms are among the most frequently renovated rooms because they wear hard, and durable, neutral choices usually age better than highly specific styling.

That's why a timeless bathroom design in Australian homes should be judged by service life, not just by colour chart restraint. If the room still feels sensible after years of humidity, hard water, and regular use, it's timeless. If it only looks good in a render, it isn't.

Navigating Australian Climate and Water Standards

Australian bathrooms don't age in a vacuum. Water quality, humidity, and product standards all shape what survives, what stains, and what starts looking scruffy long before the rest of the house does. In Victoria, that matters even more because homes often need to bridge older stock, modern compliance, and the realities of everyday cleaning.

The WELS scheme has been operating in Australia since 2005. That's important because efficient fittings are no longer an exotic choice or a compromise on appearance. They're part of the normal product range, and they've pushed the market toward taps, showers, and toilets that can be selected for performance without forcing a visual gimmick.

Choose for the water you actually have

Hard water changes the way a bathroom ages. Mineral buildup shows up on glass, tapware, and shower surfaces, and humidity pushes mould risk into corners, seals, and poorly ventilated areas. That means the smartest finish is often the one that's least fussy to maintain, not the one that photographs best on day one.

Timelessness in Victoria should be built around three questions:

  1. Will this surface show mineral deposits quickly?
  2. Can it be wiped down without special products?
  3. Does the detailing leave any traps for moisture?

If the answer to any of those is no, the finish probably won't stay elegant for long.

The national water-efficiency framework has also normalised low-flow fixtures, so homeowners can choose restrained, durable-looking fittings without stepping outside the mainstream. That pairing matters. Efficient fixtures with simple geometry, white or stone-like surfaces, and clean linework usually survive changing tastes better than anything overly sculpted or decorative.

Bathrooms don't need to look “eco”. They need to perform well, then keep looking calm after years of use.

Selecting Durable Materials and Fixtures

Material selection is where most bathroom projects either settle into long-term ease or drift straight into maintenance pain. People often obsess over tile patterns and forget the bigger question, which is how the room will clean, dry, and wear over a decade. In a humid climate, the materials that look modest at first often outlast the louder options.

A useful rule is to keep the room to three dominant materials, which helps avoid visual clutter and keeps the design coherent. One material can carry the floor, one can define vanity or cabinetry, and one can handle the shower or wall surface. That's enough variety to feel finished without creating a patchwork that dates quickly.

Build the room around fewer transitions

Every extra grout joint, trim change, or decorative seam gives moisture another place to settle. Larger-format surfaces and integrated fixtures reduce that burden, which is why they're so useful in real bathrooms. The result isn't just a neater look, it's a room that ages more evenly.

There's a practical sizing benchmark in compact Australian bathrooms too. Premium acrylic bath forms often follow classic local proportions such as 59 3/4 in (1514 mm) long and 30 in (762 mm) wide (product reference). Those proportions matter because they fit traditional bathroom layouts without forcing awkward circulation or oversized fittings.

For showers, low-profile detailing helps a lot. A 65 mm-deep shower base is a useful market benchmark (shower reference), because the low step height supports simpler geometry and easier cleaning. That kind of detail reads as contemporary now, but it doesn't lock the room into a fad.

If you're choosing tiles, focus on the practical role they play rather than the fashion label attached to them. See the material logic in how to choose bathroom tiles.

A good bathroom doesn't need to shout. It needs to hold its shape visually while staying easy to wash, dry, and repair.

Planning Layouts and Essential Lighting

A bathroom can have excellent finishes and still feel tired if the layout fights daily use. Poor circulation, bad mirror light, and cramped fixture placement make a room feel old long before the materials fail. That's why layout and lighting are not decorative extras, they're the backbone of whether the room still feels right in five or ten years.

Separate functions so the room works harder

Where space allows, separating the bath and shower keeps the room calmer and more flexible. It also reduces the feeling that every use of the room has to happen in the same cramped corner. In smaller homes, that separation doesn't always mean fully distinct zones, but it does mean avoiding arrangements where one fixture blocks another.

The best layouts are honest about how people move. If the vanity door clashes with the shower screen, or if the toilet is the first thing you see from the entry, the room can still be stylish and yet feel awkward every day. That friction gets read as “dated” fast, even when the surfaces are brand new.

Lighting deserves the same discipline. A timeless bathroom uses natural light, task lighting, and ambient light together so the room works in the morning, at night, and under cloudy conditions. Sconces or mirror lighting help with grooming, while softer ambient light keeps the room usable without turning it into a harsh box.

Good bathroom lighting isn't about drama. It's about seeing your face, your finishes, and your floor clearly enough that the room stays useful.

The design guidance for timeless bathrooms consistently recommends keeping the palette to a few materials and balancing them with lighting that supports both function and calm (Homes & Gardens). That aligns with the practical reality on site. The cleaner the layout, the less visual correction the space needs later.

For a tighter layout, the planning logic behind designing an ensuite is especially relevant. A small room doesn't forgive bad spacing, and it definitely doesn't forgive bad light.

Building to Code and Using Registered Builders

A bathroom that looks good but fails on compliance isn't timeless. It's a repair job waiting to happen. Moisture control, drainage, and safe construction aren't optional details in Australian bathrooms, because the room is treated as a wet area under the National Construction Code (NCC context).

That classification matters. It means the room has to be designed and built to manage water properly, which pulls waterproofing, surface detailing, and slip considerations into the centre of the job. You can't fix those after the tiles go down.

Why licensing matters in real renovations

Bathroom renovations in Victoria can trigger building and trade obligations depending on scope. Once the job includes structural work, waterproofing, plumbing, or substantial alteration, it stops being a simple cosmetic refresh and starts requiring the right registrations and permits. The builder and tradesperson have to match the class of work.

That's why working with registered builders unlimited is not bureaucratic fussiness, it's risk management. If the room leaks, the damage doesn't stay neatly inside the bathroom. It spreads into framing, adjoining rooms, and insurance headaches.

Here's the blunt version. If someone wants to skip compliance to save time, they're usually borrowing trouble from the future.

A timeless bathroom is built on structure first, then finish. The best tile in the world won't rescue poor waterproofing, bad drainage falls, or sloppy penetrations around fixtures. Licensed, scope-appropriate trades are the invisible part of a renovation that makes the visible part last.

If the wet-area work is wrong, the style won't matter for long.

Maximising Value and Avoiding Costly Mistakes

A lot of bathroom budgets get wasted on decisions that look expensive but don't improve the room's life. Boutique tile, special finishes, and novelty shapes can all consume money without improving resale or day-to-day comfort. The smarter spend is usually on layout efficiency, storage, and components that can be repaired or cleaned easily.

Bathroom upgrades remain one of the more common renovation projects in Australian housing, and the market keeps rewarding function over decoration. That doesn't mean luxury details have no place. It means they need to earn it by making the room better to use.

Compare the decisions that hold value

A budget-conscious, resale-focused bathroom often wins when it gives the owner a sensible layout, enough storage, and finishes that don't look fragile. A designer bathroom can still work, but only when the detail is disciplined and the materials don't create upkeep problems. The expensive mistake is paying for style that forces future replacement.

Common missteps are easy to spot:

  • Overly specific tile choices, which date quickly and are harder to match later.
  • Poor storage planning, which makes the vanity area look cluttered even when the room is new.
  • Feature-heavy finishes, which can be harder to clean in hard-water or humid conditions.
  • Ignoring repairability, which turns a small fault into a bigger renovation later.

A bathroom can stay timeless on a sensible budget if the bones are right. That means a layout that flows, storage that hides daily clutter, and surfaces that don't punish the owner for living in the house.

The planning logic behind how to plan a bathroom renovation is strongest when it starts with function, not finish order. If the room works on paper, the styling has room to breathe. If it doesn't, no tile choice will save it.

Working with SitePro Bathrooms in Victoria

Most bathroom failures start with the same pattern. The homeowner chooses finishes first, then discovers the room needs structural changes, better ventilation, better storage, or a different layout entirely. By the time the problem is obvious, the budget is already stretched and the design has lost coherence.

That's why a design-to-build process matters. A local team that handles concept development, detailed 3D drawings, construction, and finishing can keep the room aligned from the first measure-up to the final handover. In practice, that reduces the usual disconnect between what looks good on screen and what works once plumbing, waterproofing, and circulation are all in play.

Screenshot from https://siteprobathrooms.com.au

A firm like SitePro Bathrooms works in Highett and greater Victoria, which makes it a practical option for homeowners who want a coordinated renovation rather than a collection of disconnected trades. That matters most in bathrooms, where the order of operations is just as important as the finish selection.

The people who get the best result usually aren't chasing the flashiest concept. They're choosing a builder who can turn clean lines, efficient planning, and durable detailing into a room that still feels calm after years of use. That's the promise of timelessness. Not perfection on day one, but a bathroom that keeps working without asking for constant apology.

If you're planning bathroom renovations in Victoria, book a consultation with SitePro Bathrooms, review recent project examples, and ask for a 3D layout before anything gets ordered. That's the fastest way to test whether your idea is timeless or just temporarily attractive.