• siteprobathrooms

Luxury Bathroom Renovations Melbourne: A 2026 Guide

You're standing in a Melbourne kitchen, looking at a bathroom that still works but doesn't feel worth keeping. The tiles are tired, the shower's awkward, and the vanity looks like it belongs in a different decade. If you're weighing luxury bathroom renovations Melbourne homeowners live with every day, the first question isn't which tapware looks nicest. It's whether your brief is a genuine premium renovation, or a standard bathroom renovation dressed up with expensive finishes.

That distinction matters because the numbers change fast. In Melbourne, premium and luxury bathrooms are commonly priced around A$35,000 to A$50,000+, with some guides extending to A$36,750–A$57,750 and even A$68,250–A$84,000 at the top end, depending on layout changes and specification (luxury bathroom renovation cost guide). The national average sits at about A$26,000, so a luxury brief is usually well above a standard fit-out (Australian renovation market report 2026).

What a Luxury Bathroom Renovation Really Means in Melbourne

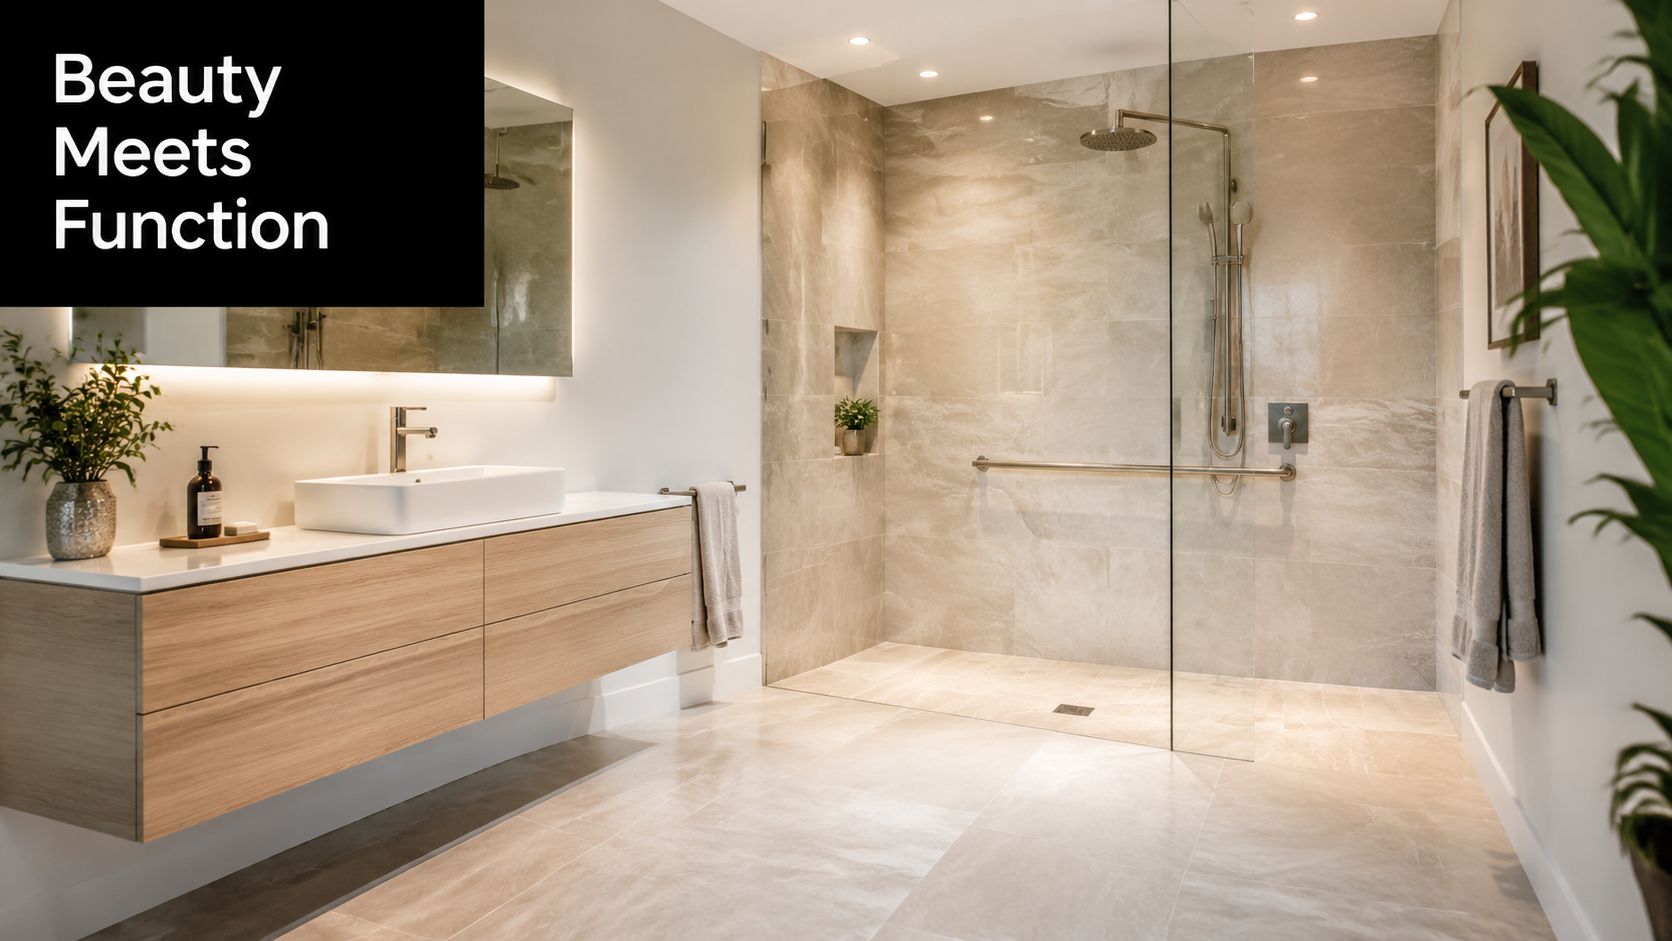
A luxury bathroom in Melbourne is not just a prettier bathroom. It's a room where the layout has been considered properly, the wet zones are larger, the storage is built in, and the finish level is high enough that the room still feels deliberate five years later. If you're keeping the same plumbing footprint and upgrading the vanity, tiles, and tapware, that's a refresh. If you're changing how the room works, that's a premium renovation.

For a lot of couples in Bayside or the inner suburbs, the decision starts with one simple frustration. The bathroom may be functional, but it's cramped, dark, or badly zoned. That's where luxury bathroom renovations Melbourne homeowners usually go beyond cosmetic work, they reconfigure the room so the shower, bath, vanity, and circulation all make sense together.

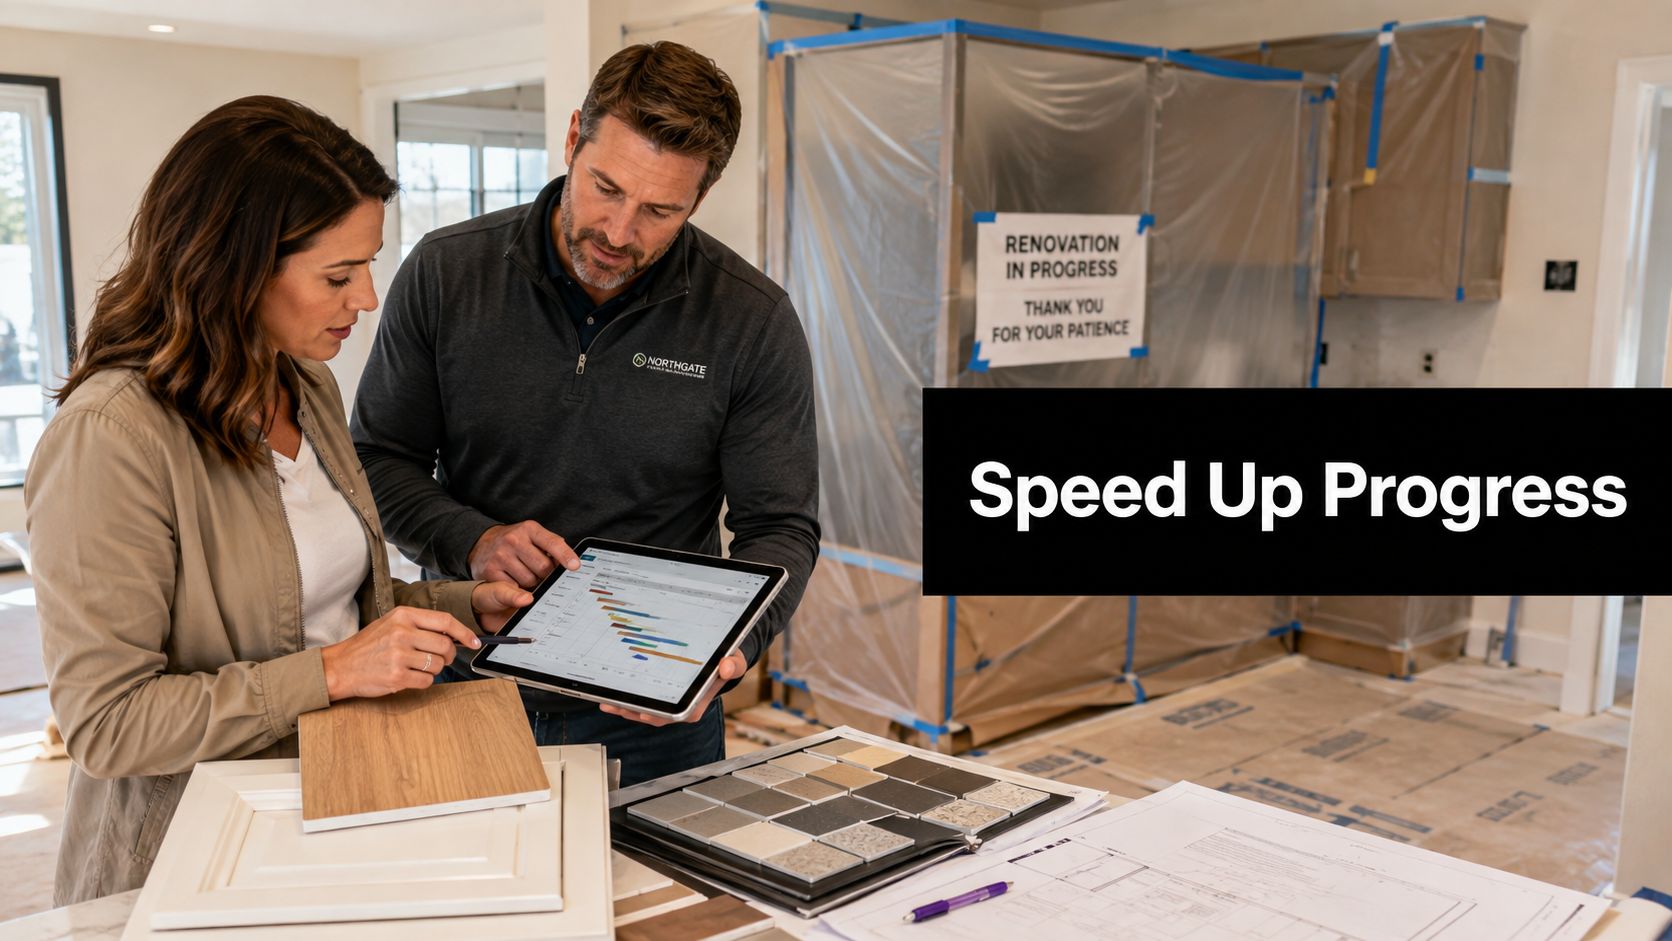
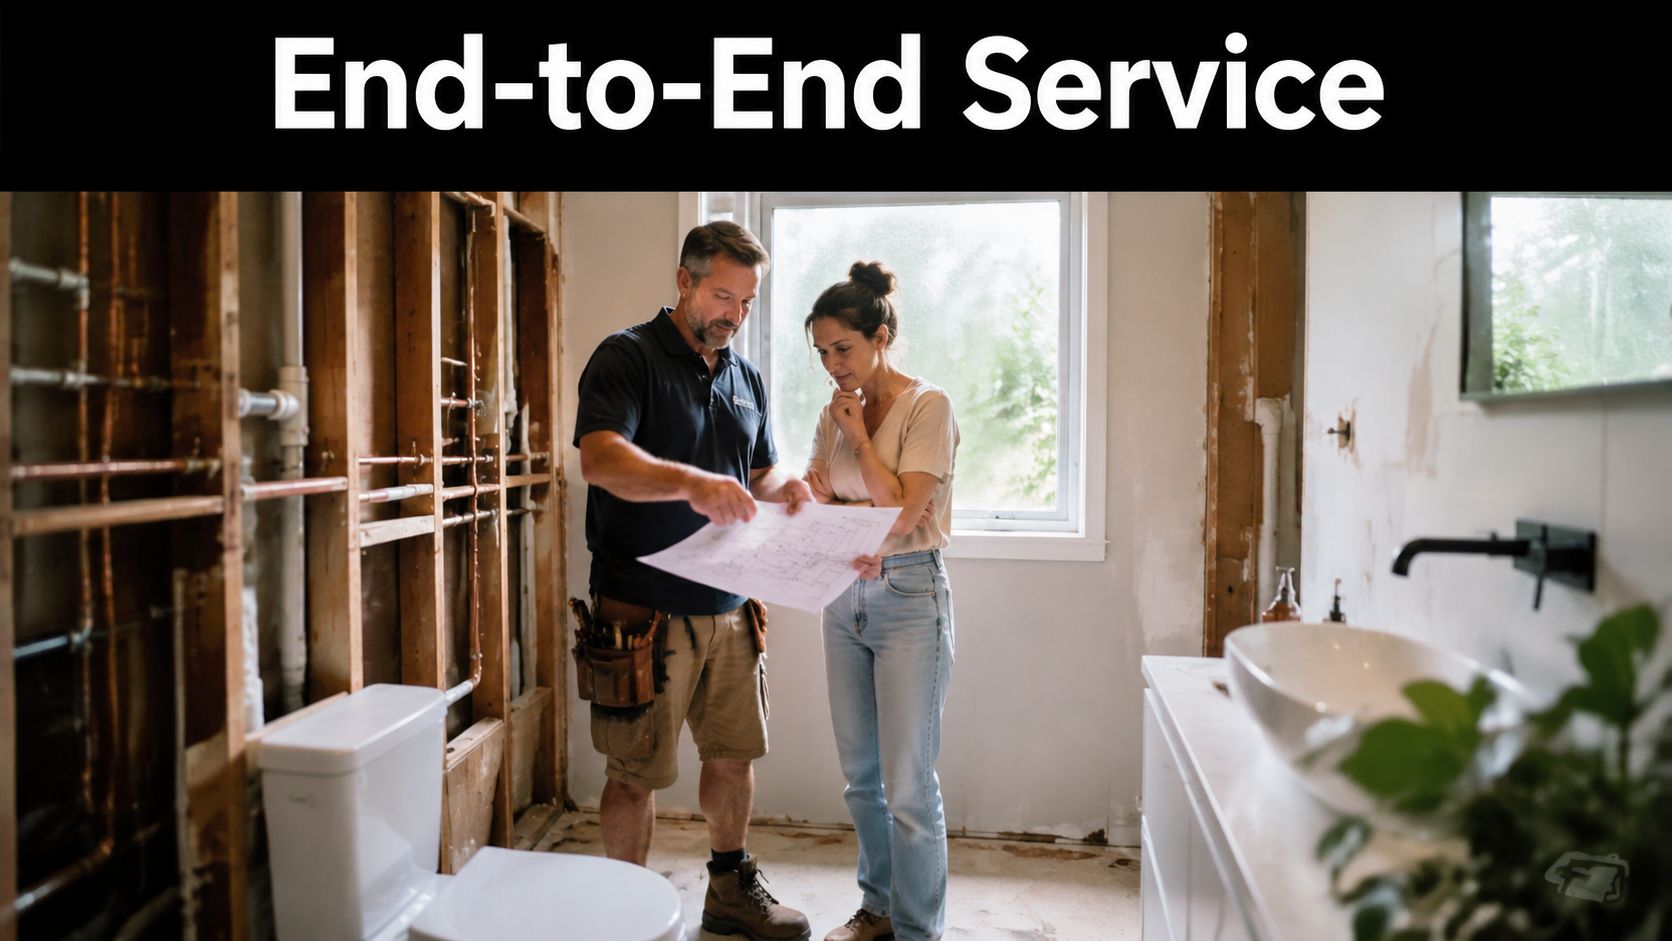
A professional couple reviews architectural blueprints for a modern luxury bathroom renovation project in a home.

The difference between a refresh and a luxury brief

A refresh keeps the structure intact. You swap finishes, update fittings, and leave the bones alone. That keeps cost and disruption down, but it also means you're living with the same layout problems.

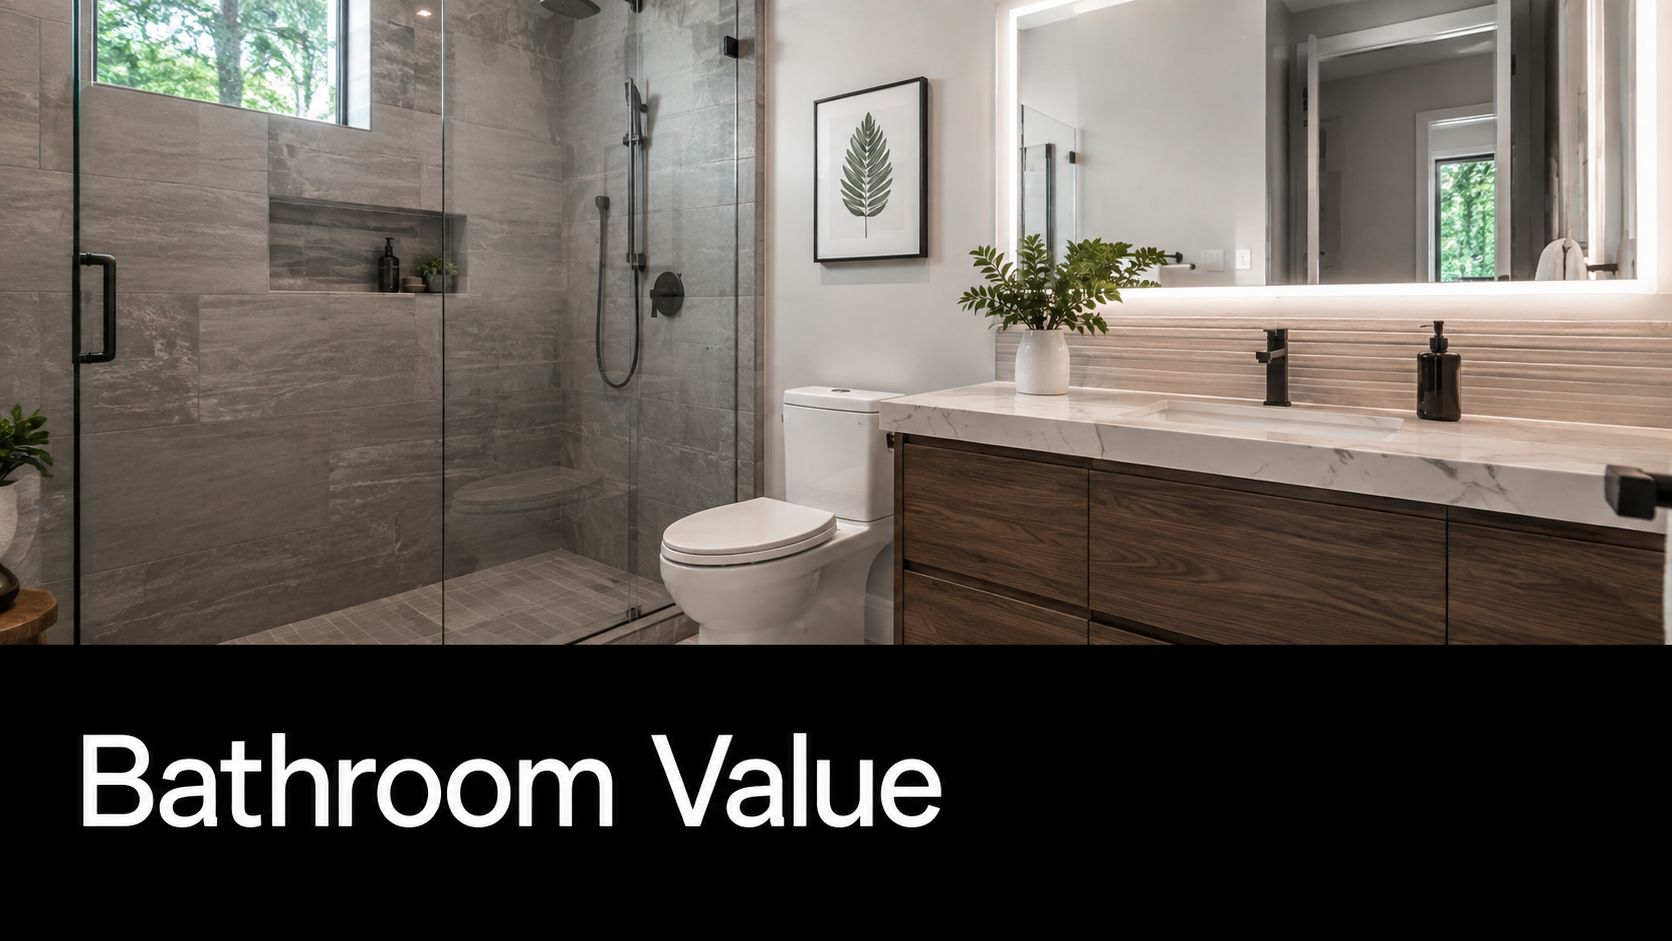
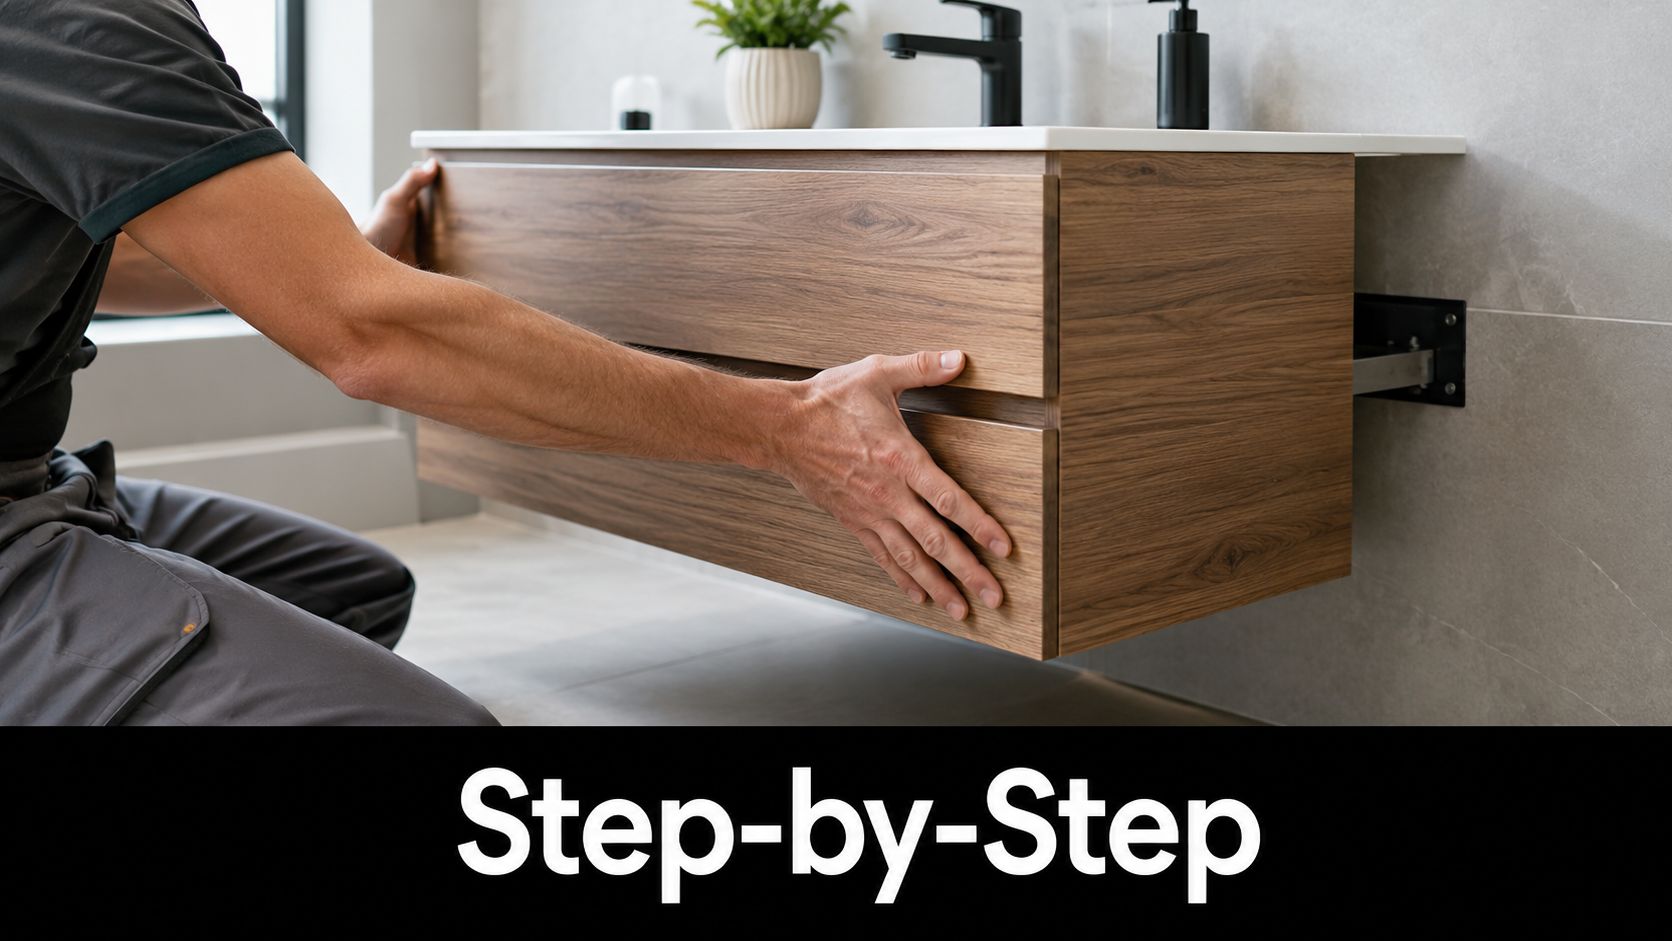
A luxury brief changes the bones. That can mean a walk-in shower, a freestanding bath, architectural joinery, floor-to-ceiling storage, or a wider vanity that finally gives two people enough room to get ready without elbowing each other. In practice, luxury is about the room doing more work and looking calmer while it does it.

Practical rule: if you're moving plumbing, changing the shower size, or adding custom joinery, you're not in cosmetic territory anymore.

The right way to judge your brief is simple. Ask yourself whether you want the bathroom to look better, or whether you want it to function better as well. Luxury work usually does both. That's why it costs more, and that's why the contractor conversation has to start with layout, not finishes.

Design Styles and Trends Shaping New Bathroom Ideas

Melbourne buyers don't all want the same bathroom, but the strongest briefs usually fall into a few clear styles. Hotel-style ensuites are common because they make a home feel more polished. Minimalist modern bathrooms stay popular because they're easy to live with. Spa-inspired wet rooms suit homeowners who want a softer, more relaxed mood. Period homes need a more careful hand, because the bathroom has to respect the house rather than fight it.

The style you choose changes the specification immediately. A minimalist room might use large-format tile, a pared-back vanity, and a limited palette. A more expressive designer bathroom usually adds custom joinery, bespoke lighting, feature tile cuts, and stronger architectural detailing. Those choices are not just aesthetic, they affect labour, sequencing, and cost.

Match style to the room you actually have

Small ensuites usually work best when you keep the design clean and disciplined. Large-format surfaces, wall-hung storage, and simple detailing help the room feel bigger without pretending it's larger than it is. Family bathrooms can take more visual weight, so a freestanding bath or a bolder vanity feels natural instead of crowded.

For period homes, the safest move is restraint. Keep the room sympathetic to the house, then lift the specification through quality materials and sharp execution. That gives you a bathroom that feels luxurious without looking disconnected from the rest of the property.

A good way to think about new bathroom ideas is to separate trend from durability. Matte finishes, natural stone looks, and concealed storage have staying power. Overly decorative tile patterns and highly fashionable colours date faster. Use the trend in one controlled place, then keep the rest of the room timeless.

Luxury should feel calm, not loud. If every surface is competing for attention, the room will age badly.

If you're choosing between styles, start with use case. An ensuite for two busy adults should prioritise routine and storage. A family bathroom needs durability and easy cleaning. A Bayside or inner-suburb showpiece can afford a little more drama, but only if the room still works on Monday morning.

Realistic Cost Ranges and Budgets for Melbourne Projects

Luxury bathroom pricing in Melbourne is where wishful thinking stops. If you want a room that feels properly high-end, budget like a serious homeowner, not like someone hoping to get away with a cosmetic refresh. Melbourne luxury bathroom work is commonly priced at about A$35,000 to A$50,000+, with some breakdowns running to A$36,750–A$57,750 and top-end projects reaching A$68,250–A$84,000. That sits well above the Australian average bathroom renovation of about A$26,000 (Australian renovation market report 2026). A luxury bathroom is a different tier altogether.

The reason is simple. High-end bathrooms absorb more labour, more coordination, and more specification-sensitive materials. In luxury cost breakdowns, labour and project management commonly consume 30% to 35% of the budget. After that, the money goes into waterproofing, tiling, custom joinery, tapware, and glazing, the parts of the room that make it feel expensive because they are expensive.

Use the home-value rule before you get carried away

The safest budgeting rule is plain enough. Keep the renovation within 5% to 10% of a home's value if you want to avoid overcapitalisation. Using the cited average home value of AUD 1,045,400, that points to roughly AUD 52,270 to AUD 104,540 as a broad ceiling for a sensible renovation budget. That is a ceiling, not a target. Start there, then decide what the room needs.

This matters most in Melbourne's higher-value suburbs. People overspend when they confuse luxury with excess. A bathroom does not need every premium feature to feel high-end. It needs a tight brief, good execution, and finishes that suit the property.

Indicative Melbourne Luxury Bathroom Budgets Typical Scope Best Fit
A$35,000 to A$45,000 Premium finishes, considered layout, quality fixtures, minimal structural change Homeowners wanting a strong upgrade without overreaching
A$45,000 to A$60,000 More custom joinery, better stone or tile specification, upgraded glazing, more complex detailing Homes where the bathroom needs to feel bespoke
A$60,000+ Structural changes, top-end finishes, larger wet zones, more bespoke fabrication Higher-value homes where the bathroom is part of the property's presentation

For a local starting point, the Melbourne bathroom cost guide is useful before you sit down with a builder. The question is not whether you can spend more. It is whether the extra spend changes the room in a way that justifies the cost.

Project Stages and Timelines From Demolition to Handover

A luxury bathroom in Melbourne runs on order, not optimism. Once demolition starts, every trade depends on the one before it, and that is why a proper program matters as much as the finishes. If a builder promises a high-end result on a squeezed timeline, expect rushed coordination, poor sequencing, or both.

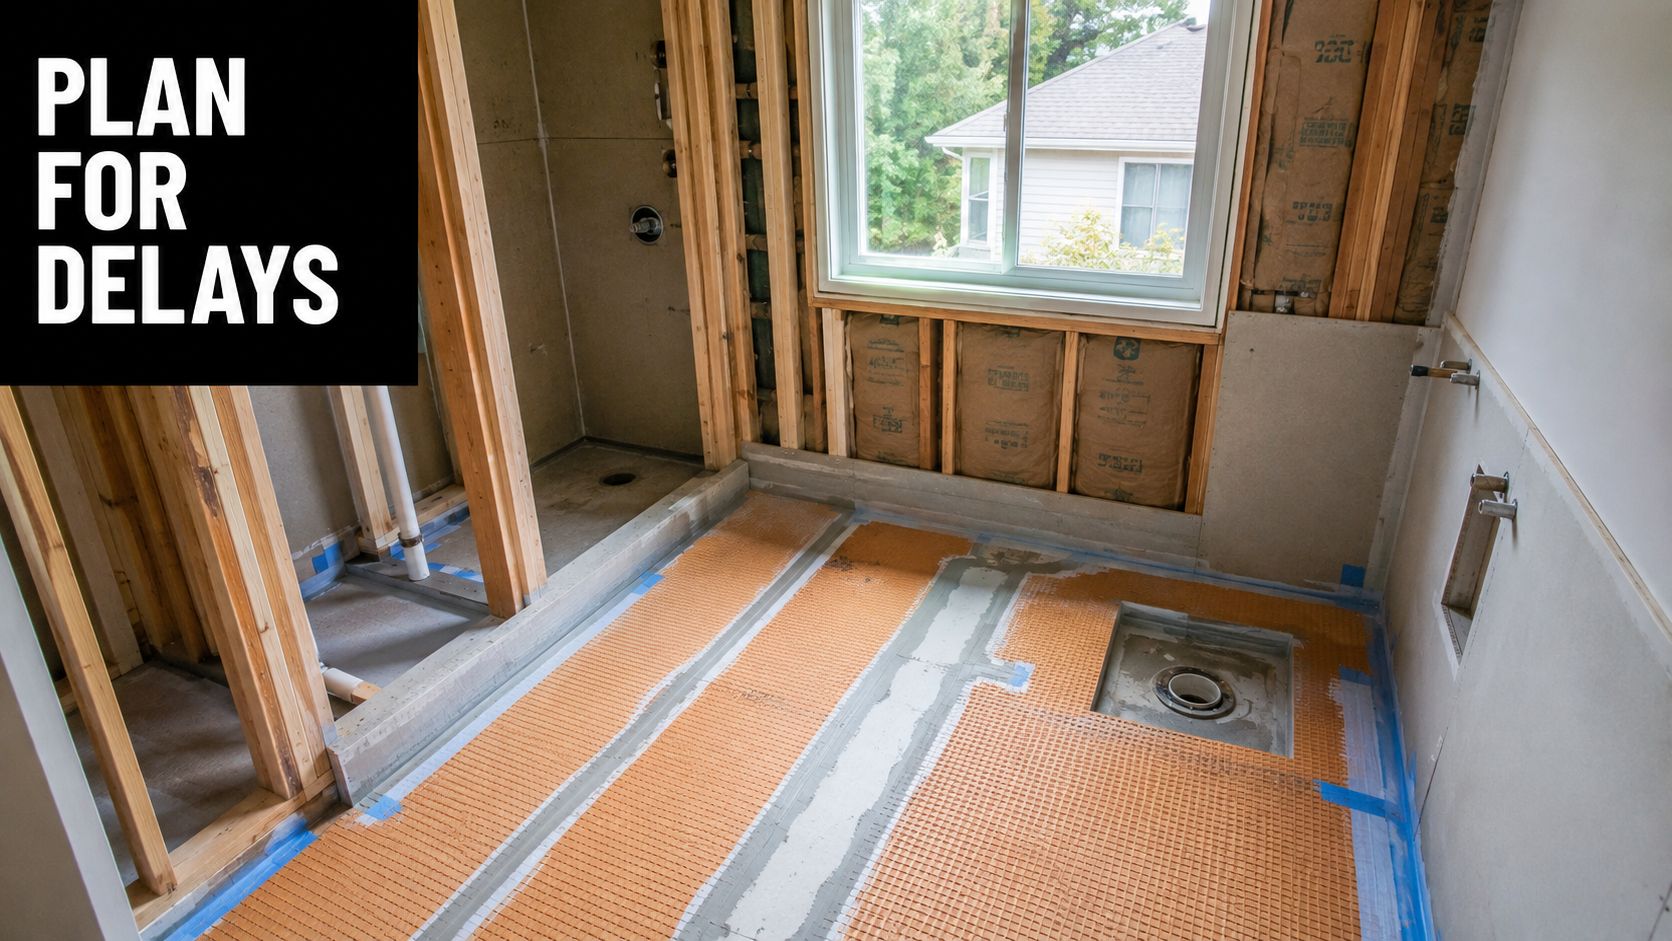
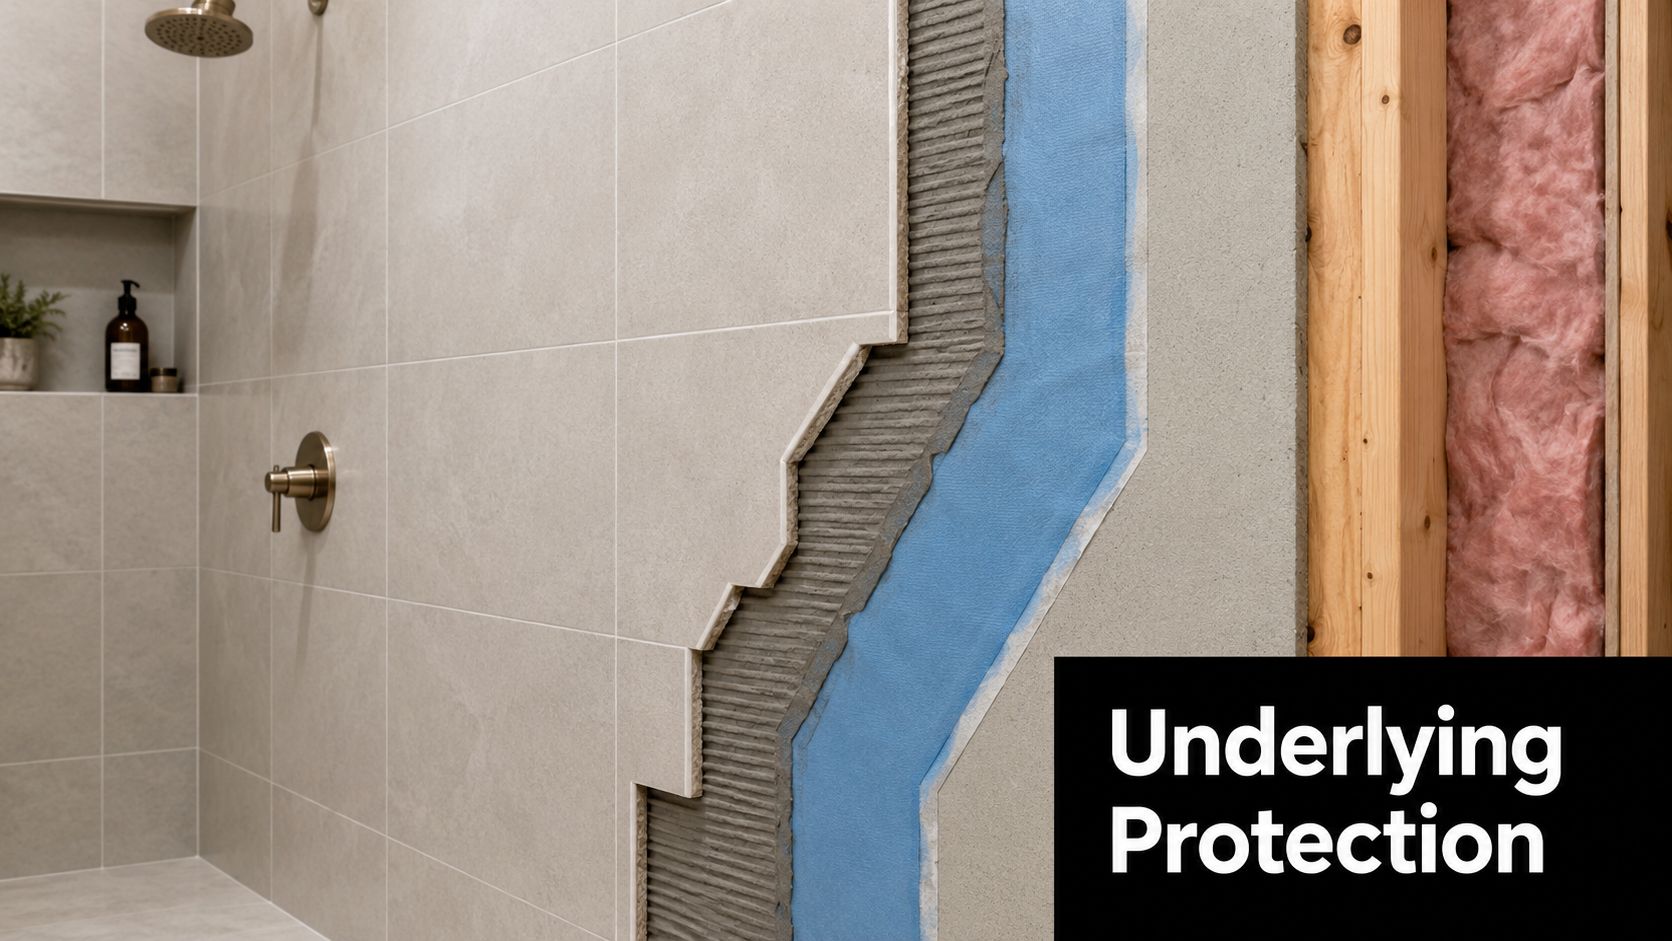
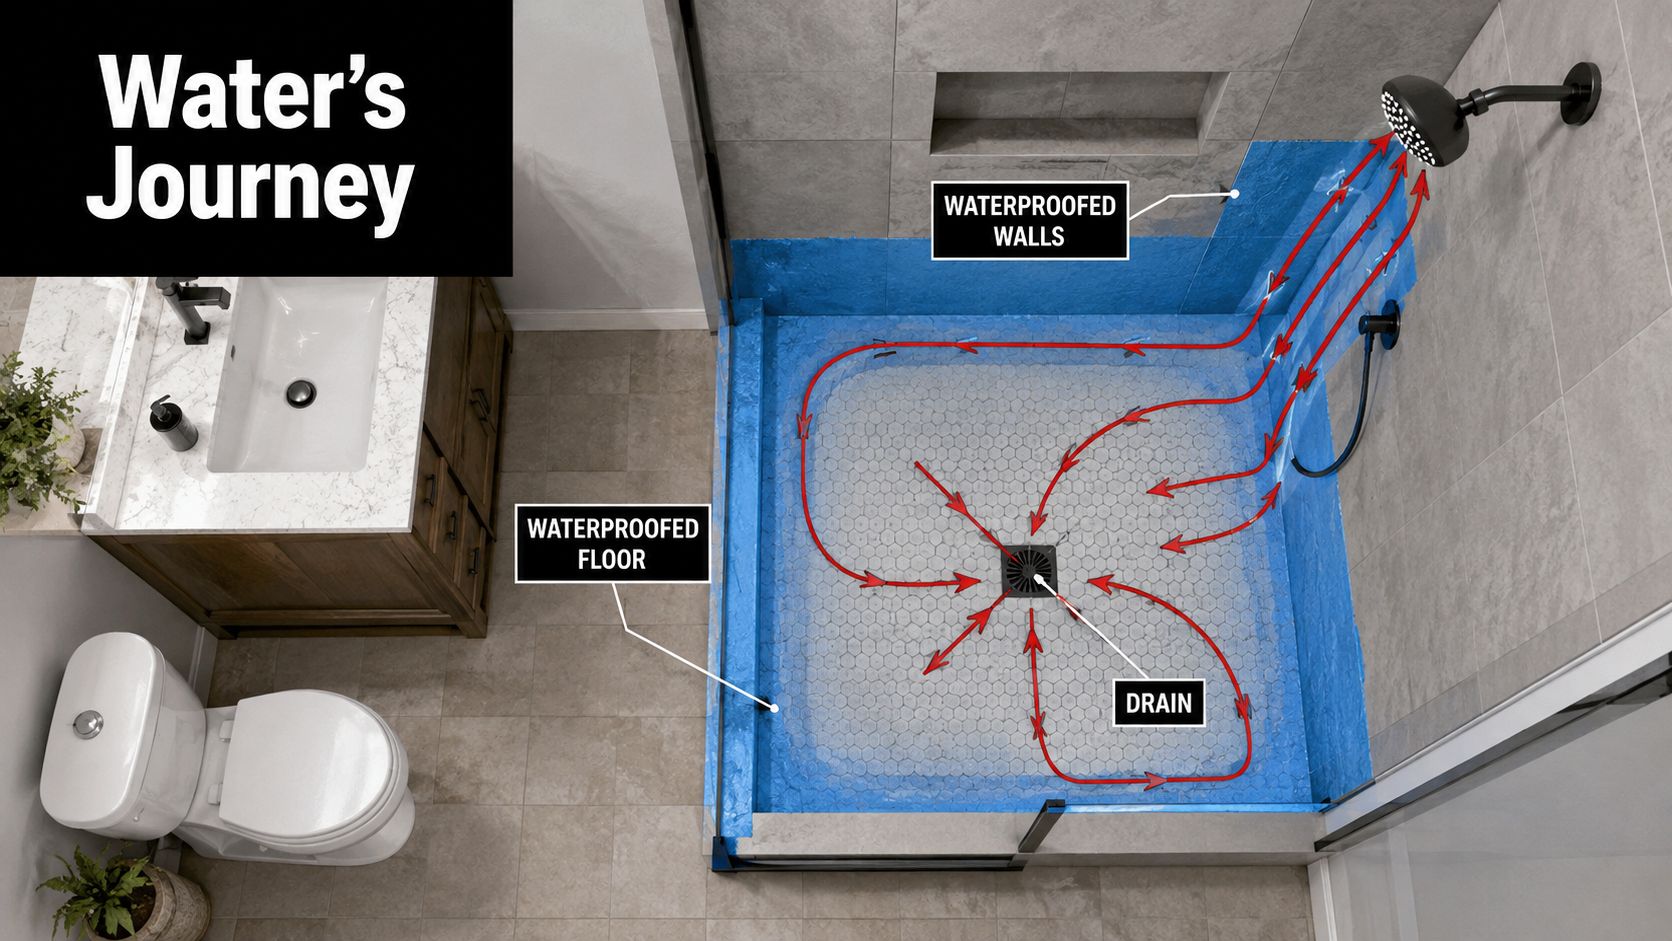
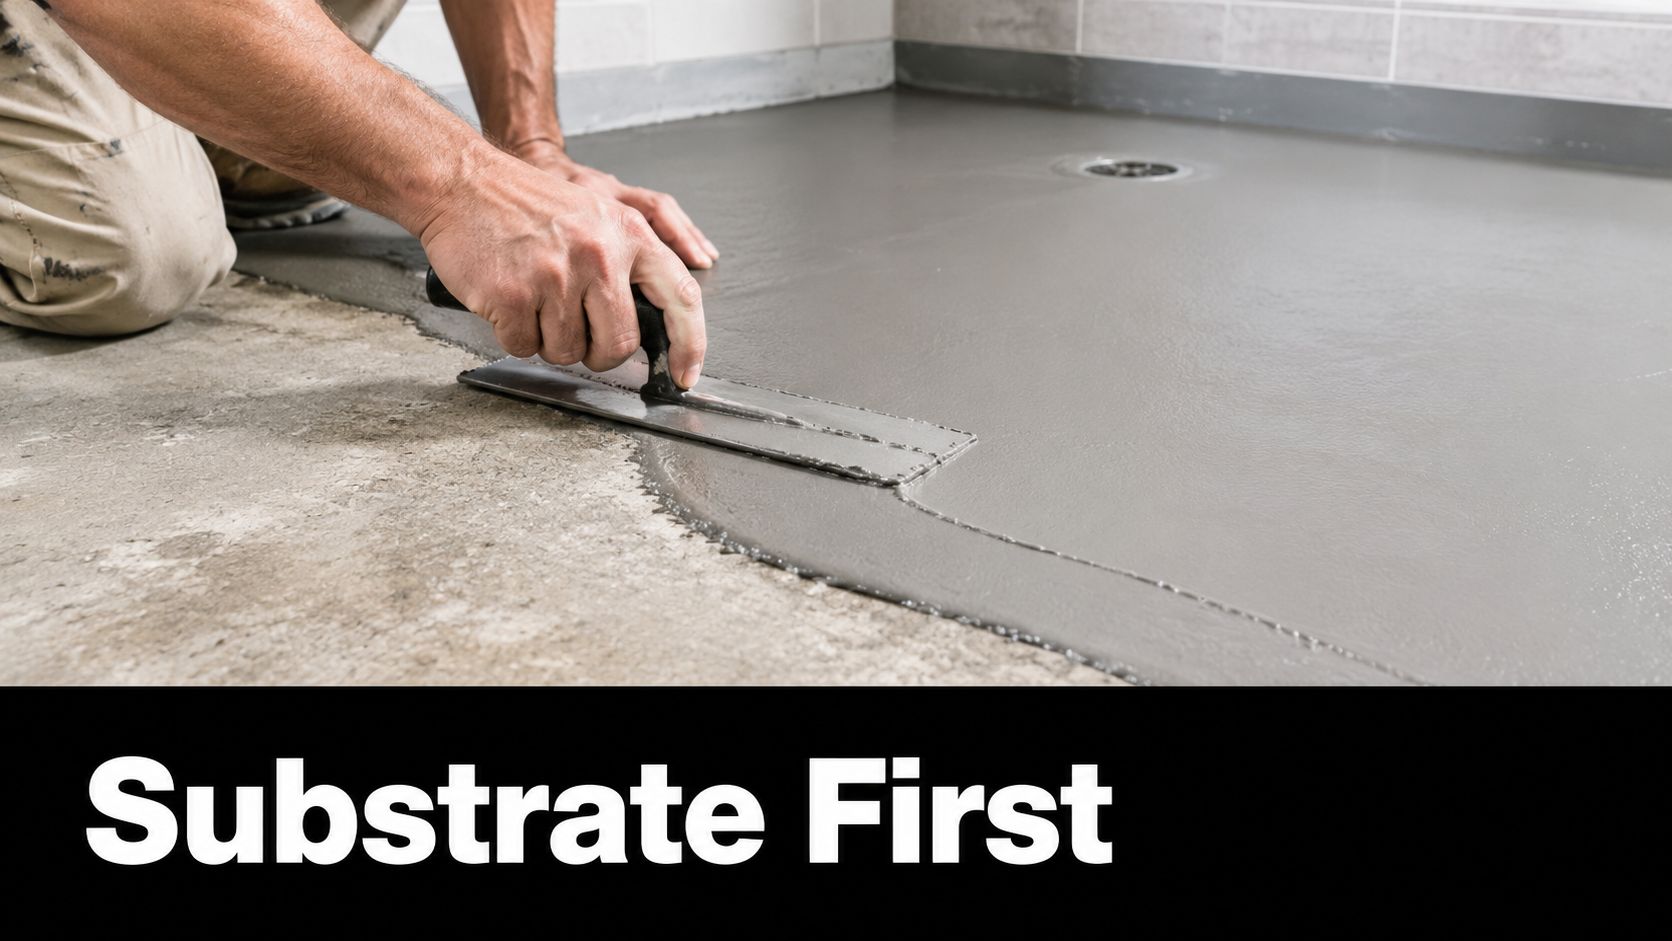
The work begins with strip-out and site protection. After that comes substrate preparation, any framing changes, rough-in plumbing, and electrical. Waterproofing sits in the middle of the job, not the end, and it has to be checked before tiling starts. Upper-storey bathrooms and bathrooms built over timber or particleboard substrates need the entire bathroom floor waterproofed under AS 3740 guidance, while shower wall waterproofing must run to at least 1800 mm above the finished floor or 50 mm above the shower rose, whichever is higher (waterproofing compliance guide).

That sequence is where a lot of Melbourne homeowners get caught out. They focus on the look, then discover the timing problems come from the hidden work, not the visible finishes. Stone has to be measured, cut, and delivered. Glass needs lead time. Tapware and other fit-off items can hold up the finish if they are ordered late.

Where schedules usually slip

The delays are usually predictable. Custom glass takes time. Stone fabrication takes time. Specific tapware can sit in transit longer than expected. If those items are not locked in early, the crew finishes the messy work and then waits for final fit-off pieces.

That is why a coordinated builder matters. A design-and-build approach keeps the program tighter because one team is managing measurements, lead times, trades, and inspection points. SitePro Bathrooms uses that kind of end-to-end process, including 3D design before demolition, which helps resolve layout decisions before anyone starts stripping tiles off the wall.

Lock in the layout, cabinetry, and fixtures before strip-out. Changing your mind mid-build is the fastest way to add cost and delay.

For a practical sense of how long a full bathroom project usually takes, the bathroom remodel timeline guide is worth reading before you sign anything. The straight answer is simple. Luxury bathrooms take time because each stage depends on the one before it, and the best results come from disciplined sequencing, not a rushed finish.

Council and Permit Rules Across Victoria

A luxury bathroom can run cleanly on paper and still turn messy fast if the permit side is ignored. The line between a simple refresh and regulated building work is easy to cross in Melbourne. Replace fixtures like for like and keep the structure, plumbing layout, and waterproofing scope unchanged, and you may avoid a building permit. Start changing walls, shifting pipes, or working over a suspended or timber floor, and you are into permit territory.

Waterproofing sits at the centre of the compliance and cost conversation. AS 3740 requires the shower wall to be waterproofed to at least 1800 mm above the finished floor or 50 mm above the shower rose, whichever is higher, and bathrooms on upper levels or over timber substrates need full bathroom floor waterproofing. That extra scope is not just paperwork. It adds prep time, more labour, and more room for mistakes if the work is rushed.

Who needs a registered builder

Once the job includes structural changes, load-bearing walls, or major layout work, you want a registered builder unlimited on the job, not a tradesperson managing it from the side. That credential matters because the structural work, waterproofing continuity, and final sign-off all have to line up.

A practical checklist keeps the decision clear:

  • Probably no permit: like-for-like replacement, cosmetic updates, straightforward fixture swaps.
  • Definitely check first: plumbing moves, wall changes, suspended floors, timber substrates, or anything affecting structural components.
  • Definitely needs a registered builder and permit process: structural alterations, load-bearing work, or full premium reconstructions that go beyond a simple refit.

Do the checking before demolition starts. Once walls are open, every oversight costs more. In higher-value Melbourne suburbs, that matters even more, because the wrong compliance call can push a bathroom past the point where it adds value. A luxury bathroom should sit comfortably inside the usual 5 to 10 percent home-value rule, not blow through it because the permit side was handled late.

Choosing the Right Contractor and Avoiding Common Pitfalls

The contractor you choose will decide whether your luxury bathroom feels calm or chaotic. A good shortlist starts with one basic filter, real experience in high-end bathroom renovations, not just general building work. From there, insist on a written scope, a proper timeline, and a contract that spells out exclusions instead of hiding them.

A registered builder unlimited is the right conversation when the job touches structure or load-bearing changes. You also want clarity on who handles waterproofing inspection, who orders long-lead items, and who signs off the final fit-off. If the answer to those questions is vague, keep looking.

Questions worth asking in the first meeting

  • How do you manage long-lead items? You're listening for a plan, not a shrug.
  • Who coordinates waterproofing and inspection? The answer should be named, not implied.
  • What happens if something hidden turns up after strip-out? Good builders explain variation handling upfront.
  • Can I see recent local work? You want completed bathrooms, not just polished marketing photos.
  • What warranty terms are included? If they dodge this, that's a warning sign.

Red flags are easy to spot once you know what to look for. Vague quotes, large upfront demands, no written contract, and reluctance to share references usually mean trouble later. If the builder can't explain why a particular fixture choice affects cost, they probably don't have control over the job.

Use online reviews as a starting point, not the final word. Then visit a completed bathroom in person if you can. You'll learn more from the grout lines, the edge details, and the way the cabinetry sits than you will from a dozen glowing comments. If you want a working checklist for this stage, the bathroom remodel contractor guide is worth having open while you compare quotes.

Local Project Examples That Bring the Brief to Life

A compact inner-city ensuite usually starts with a cramped footprint and ends with a cleaner routine. The right move is often to keep the layout controlled, use a wall-hung vanity, and choose finishes that visually open the room without crowding it. Luxury isn't about scale, it's about discipline.

A suburban weatherboard family bathroom often needs a different answer. The brief usually includes better storage, a more practical shower zone, and a layout that stops people queueing in the hallway every morning. That kind of project sits in the middle of the premium band because the room has to work hard, not just look polished.

A higher-value Bayside home can justify a more expressive designer bathroom. A freestanding bath, bespoke joinery, stronger material selection, and more refined lighting can all make sense when the bathroom is part of the property's broader presentation. The risk is overdoing it, so the design still needs restraint.

Here's the useful takeaway. Compact ensuite, family bathroom, and designer makeover are three different jobs. They should not be priced, specified, or judged the same way. If you're speaking to a builder, describe your room as one of those three archetypes before you talk about fixtures. You'll get a far better quote.

Screenshot from https://siteprobathrooms.com.au

The best project brief is the one that names the room's job before it names the tiles.

If you're comparing options, treat each quote as a test of understanding. A builder who immediately jumps to finishes without asking how the room is used hasn't understood the brief yet.

Your Next Step Toward a Tailored Quote

Before you ask for pricing, make four decisions. First, whether this is a luxury brief or a standard bathroom renovation. Second, your realistic budget band. Third, whether permit or registered-builder involvement is likely. Fourth, which two or three builders are worth speaking to.

Come to the first conversation prepared. Bring measurements or a floor plan, photos of the existing bathroom, a clear list of must-haves and nice-to-haves, and a straight answer on timing. If you want a smoother process, ask for end-to-end design and construction with 3D visualisation so the room is resolved before demolition starts.

Luxury bathroom renovations in Melbourne reward good planning and punish vague thinking. Get the brief right, and the room changes the way the home feels every day. If you're ready to move from ideas to numbers, request a quote from a specialist renovation team and give them the facts upfront, because that's how you get a design that fits the house, the budget, and the way you live.

  • siteprobathrooms

Terracotta Bathroom Tiles: A Practical Australian Guide

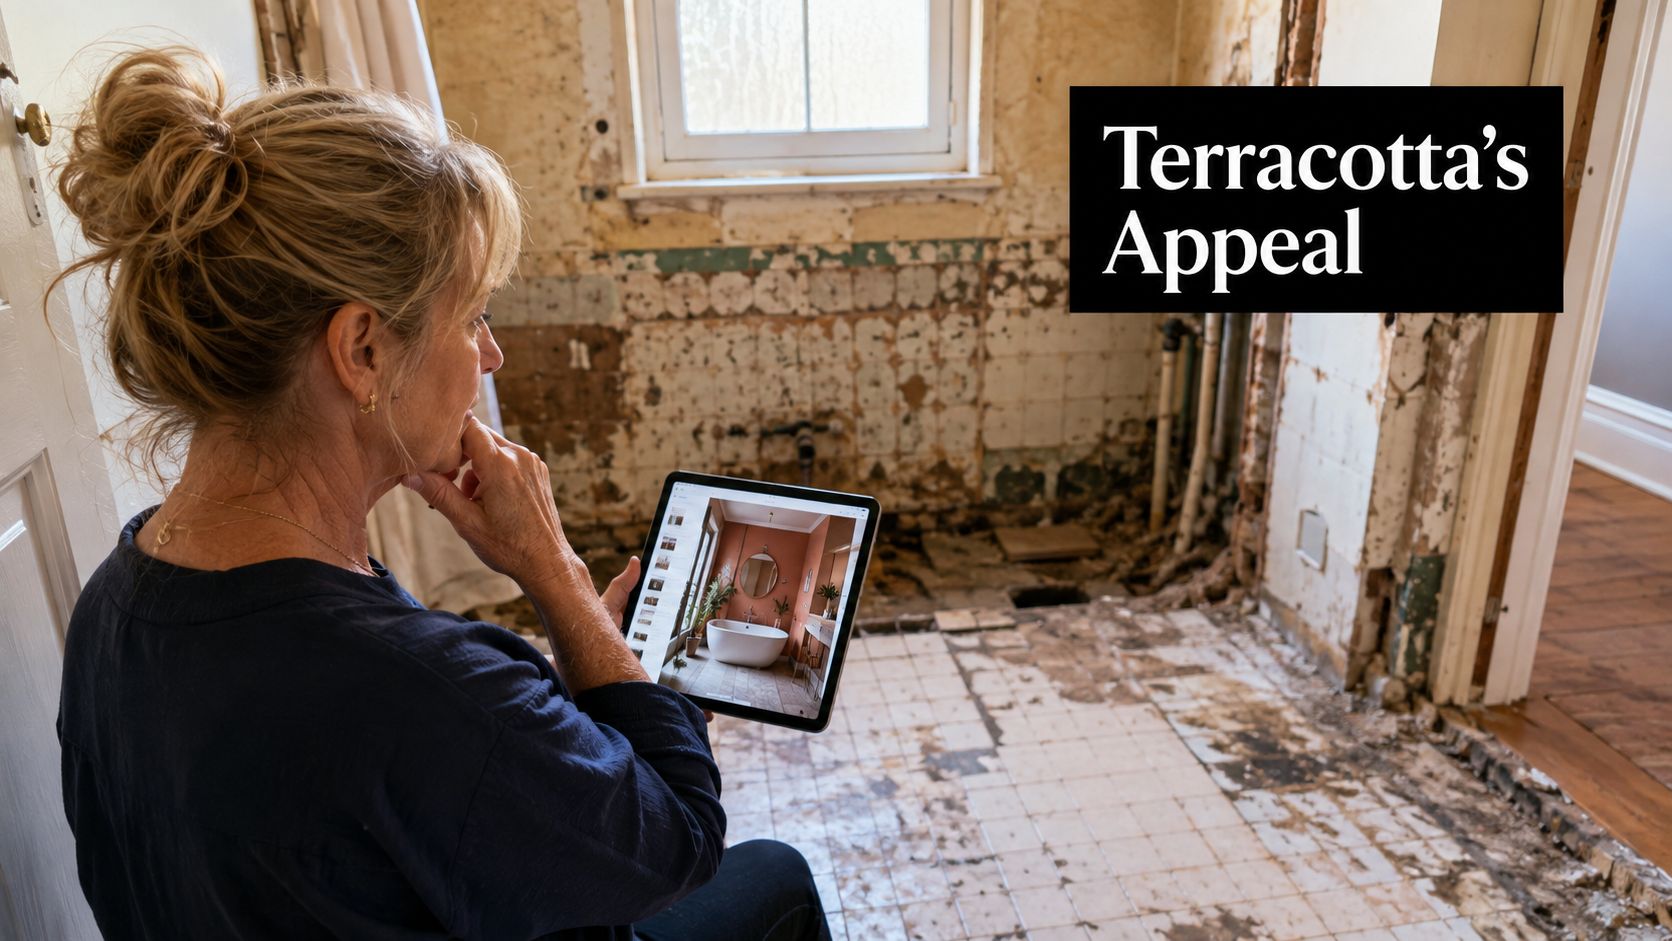
You're standing in a half-finished bathroom in Highett, staring at a pile of dust, old adhesive, and a mood board full of warm terracotta rooms that look calm, expensive, and easy to live with. Then your mate says hers stained, the builder says “depends where you use it,” and suddenly the decision stops being about colour and starts being about waterproofing, sealing, and maintenance.

That's the honest way to look at terracotta bathroom tiles. They can be beautiful in bathroom renovations, especially in heritage homes and earthy, contemporary spaces, but they're not a carefree surface. If you want the warm, grounded look without creating a cleaning headache, you need a wet-zone versus dry-zone rule, not a style mood board.

A woman holding a tablet displaying a modern bathroom design while sitting in a room under renovation.

Why Terracotta Tiles Are on the Radar for Bathroom Renovations

A lot of Victorian homeowners reach this point the same way. The bathroom is stripped back, the framing is visible, and the next decision is whether to go safe and plain or lean into a warmer, more characterful finish that suits the house. Terracotta keeps landing on the shortlist because it feels at home in older properties and still works in modern bathrooms that want something softer than cold grey.

That appeal isn't new. Terracotta has a long architectural history, and by the 3rd century BCE it was already being used in bath buildings for fire- and moisture-proof ceilings before concrete was available, which tells you something important about its original purpose in wet spaces (academic reference). Its later spread was tied to the 18th and 19th century Industrial Revolution, when mechanisation enabled mass production, standardised sizing, and lower costs for fired clay products (terracotta history reference).

For a homeowner in Victoria, that history matters because terracotta isn't a novelty finish. It belongs to the long line of building materials that combine utility with character. That's why it keeps showing up in renovation conversations, especially where period authenticity matters.

Practical rule: if you like terracotta because it feels warm and grounded, treat that as a material decision first, not just a colour choice.

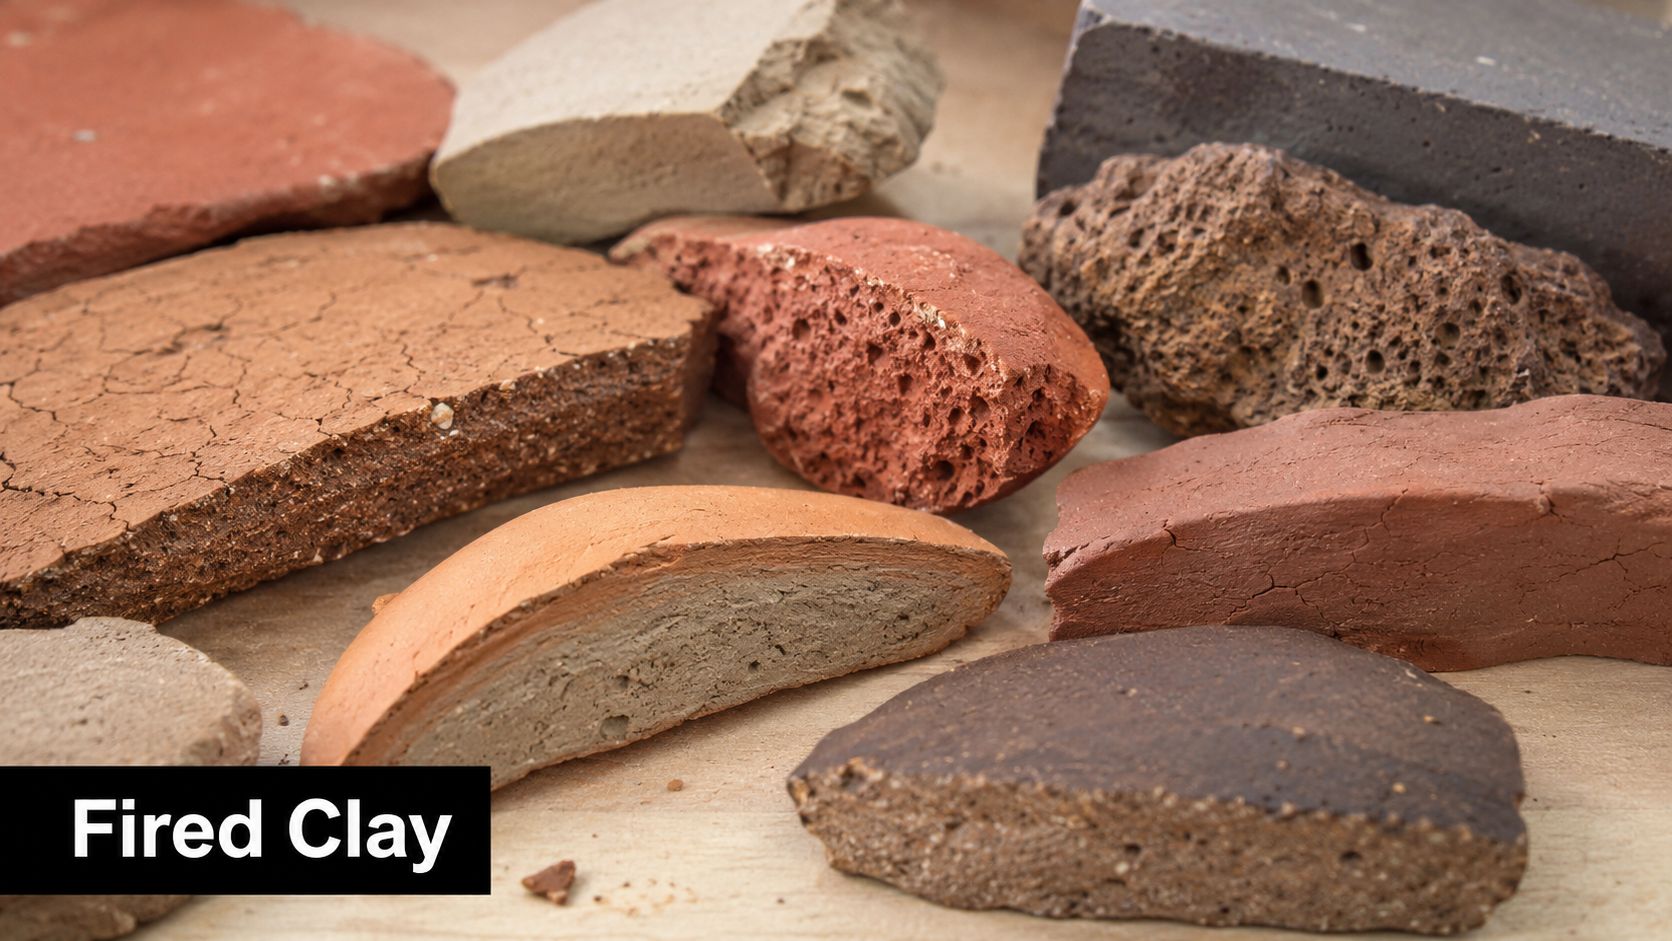
Various samples of fired clay and ceramic materials displayed on a light wooden background surface.

What Terracotta Actually Is and Why It Behaves the Way It Does

Terracotta is fired clay, not porcelain and not a generic “rustic tile” label. The clay body is shaped, dried, and fired, and that firing process is what gives it the warm red, orange, brown, and ochre range people recognise immediately. Because the body stays more porous than porcelain, its beauty and its problems come from the same place.

The material tells you what the bathroom can tolerate

The old appeal of terracotta is tied to craft, but the modern supply chain changed everything. The Industrial Revolution pushed terracotta from rare handmade work into a more standardised building product, so today you'll see real variation between reclaimed rustic tiles, machine-made pressed tiles, and extruded tiles. That variation affects thickness, consistency, and how much sealing discipline you'll need once the tiles are on the wall or floor.

There's also a reason terracotta gets respect in wet-area conversations. Its architectural use in bath buildings goes back centuries because it answered a real moisture problem, not just a decorative one. That doesn't make it automatically suitable for every Australian bathroom, but it does explain why people still trust the material's character in heritage-style projects.

A simple way to think about it is this, terracotta is a material with memory. It carries heat well, wears in rather than looking sterile, and gives you a surface that feels honest. It also asks more from the installer and the homeowner than porcelain does.

Use the finish, not the fantasy, as your guide. If the tile's porous body is part of the appeal, you need to plan for sealing and maintenance from day one.

How Tile Specs Tell You Whether Terracotta Will Survive a Bathroom

The data sheet is where the romance stops and the decision starts. For bathroom use, the most useful number is water absorption. A terracotta-bodied tile in the 3% to 6% range sits in ISO 13006/EN 14411 BIIa territory, and one product spec lists ≥1000 N breaking strength and MOR >22 N/mm² (product spec). That tells you the tile body can handle floor loading, but it doesn't remove the need for careful sealing and edge protection in a wet room.

The higher the absorption, the less forgiving the tile becomes in showers and splash zones. A terracotta guide also notes that terracotta commonly sits in AIIb/AIII groups with 6% to 15% water absorption, which is exactly why porous clay finishes need a stronger membrane, a flatter substrate, and a tighter maintenance plan (terracotta technical guide). That's a key difference between a feature tile and a shower-ready tile.

Reading tile specs for bathroom use

Spec Acceptable range Why it matters in a bathroom
Water absorption Lower is better, terracotta often sits at 3% to 6% or higher Higher absorption means more sealing and more stain risk
Strength ≥1000 N breaking strength is a solid signal Helps the tile cope with floor loading
Modulus of rupture >22 N/mm² in the cited product spec Indicates body strength under bending stress
Slip resistance Look for an explicit wet-area rating Matters most on bathroom floors and shower-adjacent areas
Tile group BIIa, or higher-absorption AIIb/AIII groupings for terracotta Helps you judge how moisture-sensitive the tile is

A terracotta-look tile with the right spec can also be engineered differently from genuine clay, which is why the product label matters as much as the colour. If you're choosing for a family bathroom, read the spec first and the mood board second. For a broader tile-selection process, see how to choose bathroom tiles.

Where Terracotta Works and Where It Causes Headaches

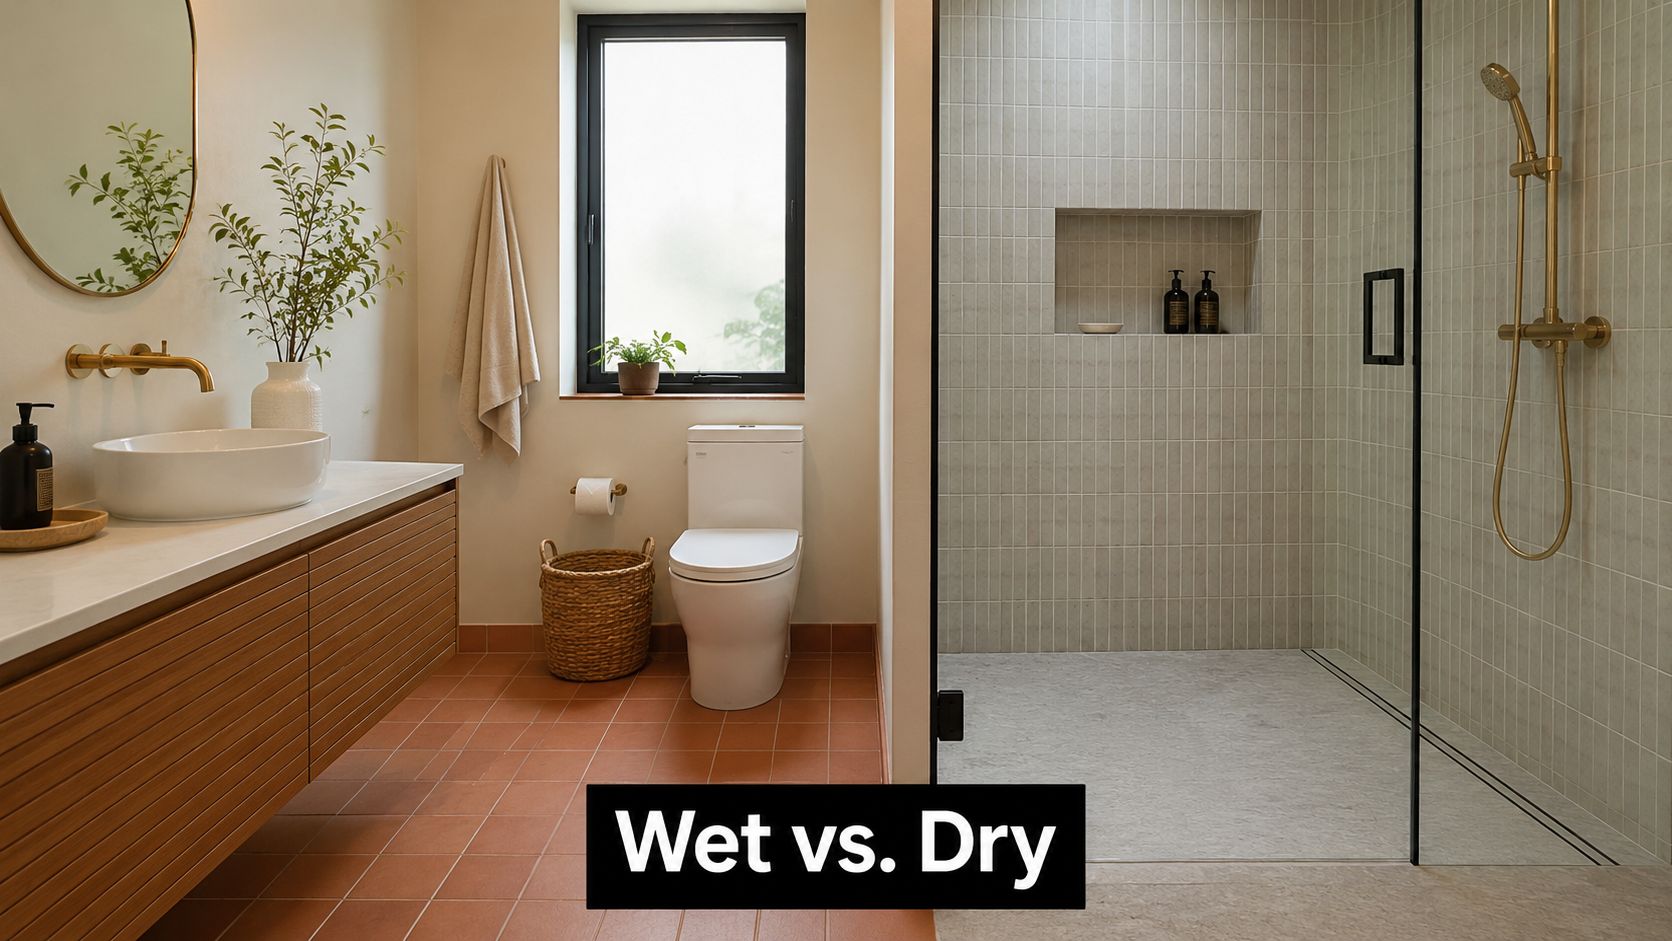
Use this rule and you'll avoid most of the regrets I see on site. Real terracotta belongs in dry or semi-dry zones. Put it on bathroom floors outside the shower screen, on vanity splashbacks, and on feature walls where the membrane, grout, and detailing are under control. Keep it out of shower floors if you want low drama and low maintenance.

Wet areas need proper waterproofing before a single tile goes down. The Victorian Building Authority says shower floors, shower hobs, and the bathroom floor adjacent to the shower must be waterproofed in line with AS 3740, and the membrane goes in before tiling starts. With porous finishes, that backing layer does the hard work. The tile is surface finish, not waterproofing. For the base requirements, start with waterproofing in bathroom projects.

The placement map I'd use in a real renovation

  • Shower floor: use a terracotta-look porcelain tile instead of genuine clay.
  • Inside the shower walls: porcelain again, unless you have specialist detailing and a maintenance plan.
  • Outside the shower screen: genuine terracotta can work if the membrane is right.
  • Vanity splashback: a good place for texture, warmth, and less water exposure.
  • Full bathroom floor: possible, but only if you're prepared for sealing and resealing.

A lot of designer bathrooms try to force one material to do everything. That is the wrong call with terracotta. Use it where splash risk is lower, then switch to a more forgiving product in the shower zone.

If you're planning a bathroom renovation in Highett or greater Melbourne, bring in a builder who understands wet-area detailing, not just tile layout. Get the waterproofing right first, then choose the terracotta finish around that decision.

Sealing, Cleaning, and the Real Maintenance Routine

This is the part most glossy articles dodge. Terracotta is porous, so the first seal matters, and the maintenance after that matters just as much. The sensible approach is to seal before grouting, then keep a repeat schedule instead of waiting for the surface to look tired.

A routine worth living with

For a high-use family bathroom, I'd plan on annual resealing. For a guest bathroom, every two to three years is a more realistic rhythm. In a low-exposure area, every three to five years can be enough if the surface is protected and well looked after. Those intervals are practical guidance, not magic numbers, and they depend on traffic, splash exposure, and how often the room gets cleaned.

Daily care should stay simple. Use a pH-neutral cleaner, keep grit off the floor, and stay away from vinegar, bleach, and acidic cleaners. Those products can strip the seal and leave the clay more exposed to staining. If you want a deeper clean around grout lines, use a method that suits sealed surfaces rather than reaching for the harshest bottle in the cupboard. Grout cleaning guidance is worth following closely because dirty grout can make a well-chosen tile look neglected.

Signs the seal is failing

  • Water stops beading. That's the easiest early warning.
  • Grout lines darken unevenly. Moisture is getting in somewhere.
  • The surface looks patchy after mopping. The sealer has likely thinned.
  • Stains linger longer than they used to. The tile is no longer protected as well.

If you're the sort of homeowner who wants a bathroom that can be cleaned fast and ignored for months, terracotta isn't your best friend. If you're willing to keep up a simple routine, it can age beautifully.

Terracotta Compared to Terracotta-Look Porcelain

A bathroom renovation forces the choice fast. Genuine terracotta gives you real clay texture, natural variation, and a softer feel underfoot. Terracotta-look porcelain gives you the same warm colour family without the sealing burden, and that matters the moment water starts hitting the surface.

For wet zones, porcelain is the cleaner decision. A terracotta-look porcelain can be specified with a DCOF rating of at least 0.42, rectified edges, and bathroom, shower, and shower-floor suitability on the product data, like the product listing example shows. That is the kind of specification I'd trust in a shower or on a bathroom floor. Porous clay is a different story, even if the colour looks close.

Side by side

Decision factor Genuine terracotta Terracotta-look porcelain
Water absorption Higher, porous, needs sealing Lower, designed for wet zones
Sealing burden Ongoing Minimal compared with clay
Slip and wet-zone confidence Depends heavily on finish and detailing Better suited to showers and bathroom floors
Material character Strong, natural, variable Controlled, consistent, easier to live with
Lifespan Good if maintained Usually the safer long-term choice in wet rooms

My view is straightforward. Use genuine terracotta where you want material character, not where water is constant. Use terracotta-look porcelain in showers and on floors if you want the look without signing up for repeated maintenance. That trade-off suits most family homes, and it makes sense when cleaning effort and resale both matter.

Design Ideas That Make Terracotta Sing in Australian Bathrooms

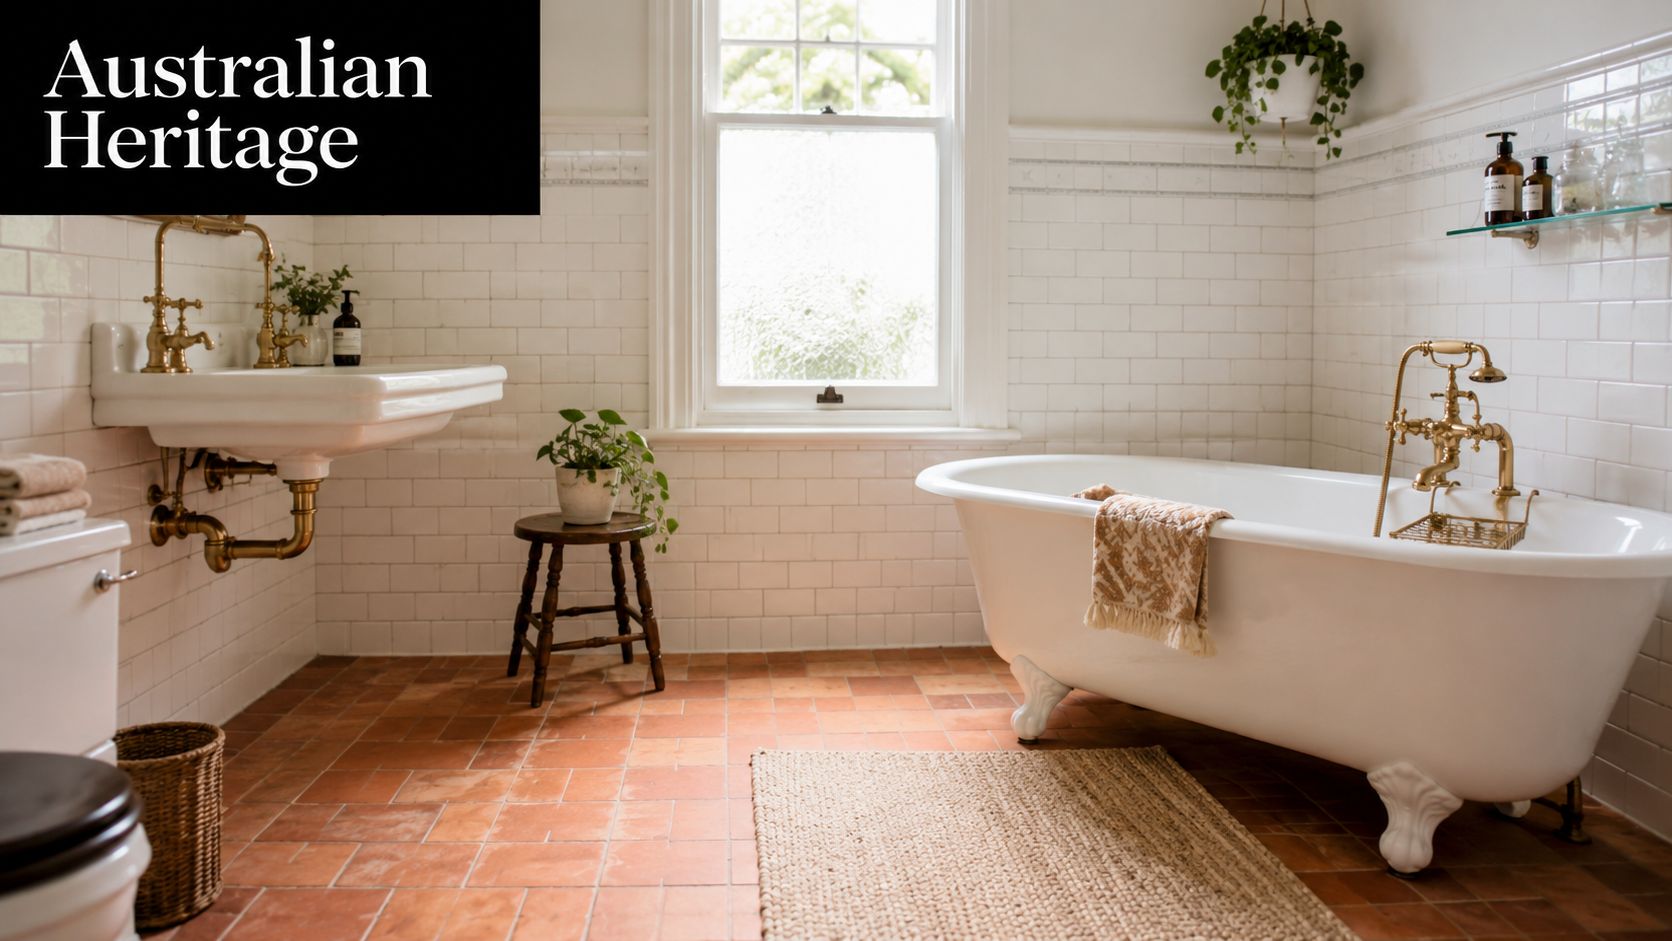
The best terracotta rooms don't use it everywhere. They use it with restraint, then let the warmth do the work. In a Highett weatherboard with a heritage feel, terracotta floor tiles can sit comfortably under a rolled-top bath, subway wall tiles, and brushed brass tapware. That combination suits older homes because the tile reads as part of the architecture, not an afterthought.

A modern bathroom design featuring terracotta tiles in the dry area and a minimalist walk-in glass shower.

In a modern bathroom, I'd use large-format terracotta-look porcelain inside a walk-in shower, then pair it with concrete-look walls and matte black fittings. That keeps the room calm and avoids the visual clutter that can happen when too many warm tones compete. It also gives you a cleaner maintenance path, which matters more than trend language ever will.

A compact ensuite needs discipline. One terracotta herringbone feature wall can carry the warmth without closing the room in, especially if the rest of the surfaces stay light and simple. That's a far better move than trying to tile every face in the same material.

Here's the one styling rule I'd stick to:

Limit terracotta to one focal zone. The room looks richer, not busier, when the clay has space to breathe.

Underfloor heating also makes sense with genuine clay because of its thermal inertia. It stores and releases heat well, so the room feels comfortable without needing the tile to carry the whole design by itself.

A vintage-style bathroom featuring a classic clawfoot tub, pedestal sink, and beautiful terracotta floor tiles.

Common Questions and How to Move Forward with SitePro Bathrooms

The first question is always the same. Can terracotta go in a shower? My answer is no, not as a casual choice. If you want that look in the wettest zone, use terracotta-look porcelain or have a specialist engineer the system around very careful detailing.

The second question is about cost in Victoria. Terracotta usually asks for more care in installation and maintenance than a straightforward porcelain bathroom, so the total cost difference isn't just purchase price. It's the time, sealing, and ongoing upkeep that change the equation. That's why I tell homeowners to price the whole lifecycle, not just the tile per square metre.

The third question is resale. In a heritage home, terracotta can support the character of the property if it's used well and kept in good condition. In a plain, generic bathroom, it can also look like a maintenance problem if the finish is tired. The material helps when it suits the house.

The fourth question is lifespan. A properly sealed terracotta bathroom can last well, but only if the waterproofing, substrate, grout care, and resealing are all taken seriously. Skip those parts and the room will show it fast.

If you're planning new bathroom ideas and want a layout that balances design with waterproofing, talk to SitePro Bathrooms about bathroom renovations in Highett or greater Melbourne. They handle concept development, 3D design, construction, and finishing, so you can test whether terracotta belongs in the dry zone, the shower zone, or not at all before work starts.


If you're weighing terracotta against porcelain for a Victorian bathroom, don't guess. Book a consultation, ask for a 3D concept, and get a customized renovation quote that shows exactly where real terracotta makes sense and where porcelain is the smarter call.

  • siteprobathrooms

Best Bathroom Ventilation Fans for Aussie Homes

The most common bathroom mistake I see in Highett bathroom renovations is simple. The tiles get chosen, the vanity gets signed off, and the fan is left until the last minute, as if it were just another fitting. Then the room looks finished on day one, but months later the ceiling stains, mirrors fog up, and paint around the door edge starts to suffer.

That's why the best bathroom ventilation fans are never just about airflow. They're a system choice, tied to the room size, the duct route, the ceiling void, the noise you'll live with every morning, and how much moisture the bathroom will throw at the home over time. In Australian homes, bathroom exhaust sits inside the National Construction Code and AS/NZS 1668.2 ventilation practice, so this is a compliance issue as much as a comfort upgrade. For practical planning, many installers still use the long-standing 1 CFM per square foot rule, while a 5 ft × 8 ft bathroom often lands somewhere around 50 to 80 CFM depending on layout and moisture load, as noted in the historical sizing guidance for bathroom exhaust fans.

Quick comparison What it means in a renovation
Too small Runs hard, clears moisture slowly, leaves condensation behind
Too large Can be noisier than needed and may be poorly matched to the duct system
Poor ducting Undercuts even a strong fan, especially in older Victorian homes
Better control Timer or humidity sensing helps the fan run long enough to do its job

In cooler southern climates, especially Victoria, that moisture control matters because persistent humidity is what drives mould and condensation. I've seen plenty of bathrooms where the finishes were chosen carefully, only to be undermined by a weak extractor or a bad duct run. The right fan protects the whole room, from cabinetry to paint system, and it should be specified early, alongside lighting, waterproofing and layout.

A bathroom renovation in progress showing exposed ceiling beams, unfinished drywall, and a new tiled shower area.

Why Your Next Renovation Starts with the Right Fan

A Highett ensuite can look resolved on the drawings and still fall short in daily use if the fan is treated like a small accessory. That pattern shows up often in modern bathrooms and designer bathrooms, especially when the room is being refreshed around tile selection, a feature vanity, or new lighting. The fan is usually cheaper than the tapware, yet it has a longer reach into how the room ages.

Start with the bathroom as a moisture system

Bathroom ventilation goes beyond removing visible steam. It reduces the humidity that settles into plaster, paint, mirrors and joinery after every shower. Independent product guidance notes that properly sized exhaust fans can reduce indoor humidity by 30 to 40%, which is why a decent fan matters so much in renovation work, especially where finishes need to hold up over years, not months.

Practical rule: if the room traps moisture after a shower, the fan has not been chosen, or installed, as a complete system.

That is the point many homeowners miss. A fan with a big airflow rating still performs badly if the duct is long, crushed, uninsulated, or vented poorly. A smaller unit with a clean route to outside often does a better real-world job than a bigger badge on the grille.

Why this belongs in the design phase

I specify fans early because their placement affects ceiling framing, lighting layout and even how a shower niche gets detailed. That is especially true in bathroom renovations where the ceiling void is tight, the home is older, or the exhaust path has to work around beams and bulkheads. In those cases, the “best” fan is the one that suits the room geometry, not the one that looks strongest in a brochure.

The compliance side matters too. The Australian framework treats bathroom ventilation as a building-performance issue, not a decorative upgrade. That means you should think about capacity, ducting quality and noise before the waterproofing is locked in, not after the plasterboard is already back on.

A good renovation brief answers three questions at once. How much air needs moving, where will that air go, and how much noise will the household accept every day? Once those are clear, the fan choice becomes much easier, and the whole room benefits.

Sizing Your Fan Correctly with CFM and Air Changes

The fastest way to size a bathroom fan is still the one many installers use, about 1 CFM per square foot of floor area. For a straightforward bathroom, that gives a workable starting point, especially in compact rooms and standard family bathrooms. A room around 5 ft × 8 ft often lands in the 50 to 80 CFM range depending on fixtures, layout and moisture load.

Floor area gets you a quick target

If you are replacing a fan in a small ensuite, floor area gets you close quickly. A compact room under the usual threshold often points to a 50 CFM minimum, while larger rooms can need more capacity once showers, toilets or baths are part of the space. The point is not to chase the biggest number, but to match the room's actual moisture output.

For a family bathroom, I read the floor area rule as a starting point, then adjust for how the room is used. An enclosed shower used every morning creates a different load from a powder room that sees quick handwashing and little else. The same applies when a busy household runs back-to-back showers and the fan has to clear repeated bursts of steam.

Room volume is the better fit for Victorian homes

For AU-region selection, the more precise method is to size the fan by room volume, using length × width × height and then applying the recommended air changes per hour. The Manrose NZ selection guide used in the Australasian market uses this approach because ceiling height changes the amount of air that needs clearing. That matters in older Victorian homes, renovated apartments and spaces with bulkheads or taller ceilings.

Use volume when the bathroom isn't a simple box. Higher ceilings, enclosed showers and awkward layouts all change the target.

A jetted tub changes the picture again. The HVI bathroom exhaust guidance notes that standard sizing assumptions shift once you add fixtures, with larger bathrooms adding capacity per toilet, shower or bathtub, and a 100 CFM requirement for a jetted tub. That is the kind of detail that matters in a family bathroom or a bigger new bathroom ideas concept where the layout is doing more than a basic ensuite ever would.

The best practical move is to write down the room dimensions, the fixture count and the ceiling height before shopping. Once you have those, you are no longer guessing between “quiet”, “powerful” and “premium”. You have a real target.

Ceiling, Wall, Inline and Combo Fans Compared

Different bathrooms ask for different fan formats. The right choice often comes down to the structure around the room, not just the airflow you want. In Victorian renovations, that means thinking about ceiling void depth, access to an external wall, roof-space routing and whether the room needs extra heat in winter.

Bathroom Fan Types at a Glance
Fan type Best for Key advantage Watch out for
Ceiling fan Standard bathrooms with decent roof access Simple, familiar, usually the easiest to source Needs enough ceiling void and a sensible duct route
Wall fan Rooms with direct external wall access Shorter exhaust path when the wall is available Not every layout has a suitable wall location
Inline fan Tight ceilings, awkward routing, upstairs bathrooms The motor can be positioned away from the room More planning, more duct coordination, more install detail
Combo fan Colder bathrooms that need heat and light as well as exhaust Fewer fixtures in one ceiling footprint Can raise circuit and installation complexity

Match the fan to the structure, not the shopping cart

A ceiling unit is often the default because it's familiar and usually cost-effective. It works well when the ceiling void has enough depth, the duct can run cleanly, and the roof space is accessible. In a lot of registered builders unlimited projects, that's still the cleanest specification because it keeps the build straightforward.

A wall-mounted model makes sense when the room has a direct external wall and the ceiling route is awkward. That can be useful in older homes where roof access is limited or where the bathroom sits against a boundary wall. If the wall is available, the duct path may be shorter and easier to commission correctly.

Inline fans are the answer when the ceiling itself is the problem. They help in apartments, upper-storey bathrooms and renovations where beams, services or a shallow cavity make a standard housing difficult. The motor sits elsewhere, which helps with noise and placement, but the install has to be planned carefully.

When the combo unit earns its place

Heat-light-exhaust combinations make sense when the bathroom is cold enough that users avoid running the fan properly because the room feels unpleasant. In cooler Victorian winters, that comfort can matter. The trade-off is obvious, though. More features mean more wiring and more coordination, so I only recommend them when they solve a room problem.

The decision usually comes down to one question, what is the room fighting against? If it's a shallow cavity, choose around the cavity. If it's a cold bathroom, decide whether heat belongs in the same ceiling footprint. If it's a shared wall or an awkward roof space, keep the duct run simple and direct.

Noise, Energy Use and Smart Humidity Controls

A fan can hit the airflow target and still feel wrong if it sounds harsh or runs wastefully. In a renovation, I look at airflow, sound and power draw together, because the installed system only works if people will use it. Recent product testing has shown a clear spread between older units and newer efficient models, with small fans delivering low noise and lower power demand in the 2025 ventilation fan ranking review.

Quiet use changes how often the fan gets used

That matters in lived-in bathrooms because a quieter fan gets switched on more often. A low-sone unit suits a master ensuite, a nursery-adjacent bathroom, or any room close to bedrooms where noise carries through the house. A louder fan may still move air, but it gets ignored, and once that happens the room stays damp for longer.

The energy side matters too. The same review notes that a fan running 20 minutes a day at 18 W uses about 5.2 kWh per year, while a 40 W unit uses 11.7 kWh per year, which means the older fan wastes about 6.5 kWh annually. That is not a headline figure, but it does show that ventilation is also an efficiency decision, not just a moisture fix.

Controls only help if they suit the household

Humidity sensors and timers can help, but only if they match how the room is used. They reduce the chance that the fan gets switched off too early, which is one of the main reasons moisture lingers after showers. The Lowe's buying guide on bathroom fans commonly advises running the fan for around 20 minutes after showers, or using a humidity sensor or timer so the room dries properly without relying on memory.

That matters in smaller renovated bathrooms, where the room seals better than older stock but the shower still throws off a quick burst of moisture. In that setting, a timer is often enough. A humidity sensor becomes more useful when the bathroom is used by different people at different times and nobody wants to remember the switch.

A smart control is only smart if it gets used. If the household ignores the button or hates the noise, the feature has not solved the underlying problem.

For a guest bathroom, a basic timer can be enough. For a family ensuite or a bath used every day, humidity sensing is easier to justify because the fan can respond to actual moisture instead of habits. The right choice is usually the one that makes regular operation feel effortless, not fiddly.

A modern white wall-mounted smart bathroom ventilation fan controller with a digital humidity display and knobs.

If moisture is already showing up on walls or around the mirror, the fan is only one part of the fix. The rest is getting the room details right, including airflow paths, sealing, and how the bath gets used day to day. This guide to preventing bathroom mould is useful if you are trying to understand why the issue keeps returning.

Ducting, Roof Space and Retrofit Realities

A fan can move air well and still leave moisture behind if the duct route is poor. The duct system decides how much of that airflow reaches the outside, and in older Highett homes and apartment bathrooms that route is often shaped by ceiling depth, roof access, or awkward framing.

Why the duct often matters more than the badge

A high-capacity fan can underperform when the duct run is long, full of sharp bends, or left uninsulated through a cold roof space. That is the installation problem most buying guides skip. In practice, a shorter, cleaner exhaust path often does more for condensation control than a louder or more expensive unit tied to a bad route.

Commissioning matters just as much. Manufacturer guidance generally points to direct ducting, insulation where needed, and proper termination so moisture is not dumped into roof cavities or hidden voids. That matters even more in Victorian renovations, where roof spaces can be tight and cold, because condensation inside the duct can become part of the problem instead of the fix. See the practical retrofit guidance in this bathroom exhaust fan installation resource.

What I check on site

The first question is whether the fan can vent outdoors without compromise. If the path has to snake around services, I want to know how much friction the run will add and whether the room will still clear reliably. If the ceiling void is shallow, I would rather choose a fan type that suits the available space than force a standard housing into a poor position.

A few details matter every time:

  • Direct exhaust path: shorter is better, because every extra turn makes the system less efficient.
  • Insulated ducting where needed: this reduces condensation risk in colder roof spaces.
  • Backdraft control: the system should prevent outside air from pushing back into the room.
  • Service access: if nobody can inspect the duct later, small problems become hidden ones.
  • Roof-space moisture management: exhaust must leave the home properly, not sit in cavities.

If the ducting is compromised, the best fan in the catalogue won't rescue the install.

That is why I treat retrofit jobs differently from new builds. In a new bathroom, the route can be planned from the start. In an older home, the best result often comes from choosing a fan that suits the available path instead of trying to force the path around the fan.

Compliance, Maintenance and When to Call a Specialist

A bathroom fan only does its job if the whole system is compliant and the duct path works. In Australia, bathroom exhaust is governed by building performance expectations, not casual preference. NCC 2022 allows bathroom exhaust fans to be ductless or ducted, but the bathroom still has to satisfy the ventilation performance requirements under the NCC framework. That is why the room needs to be treated as a compliance item during a renovation, not a decorative afterthought, and why AS/NZS 1668.2 sits behind the practical ventilation conversation.

The other part of compliance is how the fan sits with the rest of the bathroom build. I like to see the ventilation decisions made alongside waterproofing and framing, not bolted on later, and I also check the waterproofing standards in Australia at the same time. A specialist renovation team can fold the fan into the concept design, check the ceiling void during planning, and coordinate the build so the exhaust path, lighting and waterproofing details all line up. That reduces rework and avoids the common problem of a finished bathroom that looks good but still struggles with moisture control.

Keep the system working after handover

Once the fan is installed, upkeep is simple but it still matters. Grilles collect dust, motors work harder when airflow is restricted, and a neglected system slowly becomes weaker. Regular cleaning is not glamorous, but it keeps the fan doing the work it was specified to do.

Replacement makes more sense than repair when the fan is noisy, underpowered, or clearly mismatched to the room. If the housing is wrong for the ceiling space, or the duct route is poor, changing the motor alone will not fix the issue. In those cases, the whole setup needs to be reconsidered, because the problem is often in the installed system rather than the fan body itself.

When a job looks simple from the outside but has a shallow void, a tight apartment ceiling, or a complicated duct path, it is worth bringing in specialists early. Ventilation is one of those details that looks minor until it fails. Then the repair work becomes harder, and the moisture problem usually reaches more parts of the bathroom before anyone notices.

Matching the Right Fan to Your Renovation

A compact ensuite refresh usually suits a 50 CFM ceiling fan with a timer and a clean duct path. That gives you enough extraction for a small room without overcomplicating the ceiling layout. If the ceiling is shallow, a slim-profile unit becomes the smarter choice than forcing in a standard housing.

A family bathroom reconfiguration usually needs more thought. I'd look for 80 to 110 CFM depending on the room size and fixture count, then decide whether a humidity sensor is worthwhile because the room sees repeated use. If the bathroom is part of a colder Victorian home, a combo unit can make sense when heat and lighting are already being redesigned together.

An apartment retrofit with limited ceiling access is a different case again. That's where the duct route and cavity depth decide the outcome before airflow does. An inline or shallow housing may beat a more powerful ceiling fan if it can be installed and ducted properly.

The best result comes from specifying the fan during concept design, not after the finishes are locked in. If you're planning bathroom renovations, new bathroom ideas, or a full redesign in modern bathrooms or designer bathrooms, ask for the fan to be selected with the ceiling layout and duct route at the same time. For a renovation quote and a ventilation plan that fits your room rather than fighting it, contact SitePro Bathrooms and get the fan specified properly before the plaster goes up.

  • siteprobathrooms

Natural Stone Bathroom Tiles: A 2026 Highett Guide

You can stand in a tired old bathroom in Highett and still feel the pull of something better. The vanity's chipped, the tiles look flat, and the room doesn't suit the house anymore, yet one sample of stone on the benchtop changes the whole mood. That's the appeal of natural stone bathroom tiles, they bring warmth, depth, and a sense of permanence that manufactured finishes often struggle to match.

A professional interior designer reviews natural stone bathroom tiles and marble samples for a room renovation project.

The catch is simple, stone rewards good decisions and punishes lazy ones. In bathroom renovations, the right tile choice has to suit water exposure, cleaning habits, slip risk, and the way the room will be used every day. In Victoria, that practical side matters just as much as the look, because a beautiful bathroom still has to be built, waterproofed, and maintained properly if it's going to add value rather than become a headache.

From Dream to Design A Homeowner's Introduction

A lot of first-time renovators start in exactly the same place. They've outgrown the old bathroom, they want something calmer and more refined, and they're drawn to stone because it doesn't feel generic. That instinct is sound, because natural stone has a premium presence that suits both compact ensuites and larger family bathrooms.

What separates a strong project from an expensive regret is how quickly the conversation moves from “What looks good?” to “What will work here?”. In Victoria, bathrooms often need to earn their keep in busy households, rental properties, or ageing homes that are being brought up to modern standards. That means the tile choice has to suit wet areas, the build has to suit compliance, and the finish has to suit the way the room will be cleaned and used.

Practical rule: pick the stone after you've thought about the room's traffic, moisture, and cleaning routine, not before.

For homeowners comparing new bathroom ideas, natural stone usually makes sense when the goal is a room that feels more permanent and more refined, not just freshly decorated. The material can lift modern bathrooms through large, quiet surfaces, or support designer bathrooms through veining, texture, and contrast. It also fits the Victorian market well, where stone is often treated as a value-adding finish rather than a quick cosmetic update, especially in homes where long-term appeal matters.

If you're weighing up whether stone belongs in your own project, the smartest next step is to look at layout, family habits, and maintenance tolerance together. A powder room can handle a bolder choice than a shower floor. A main bathroom needs a harder-edged decision. The design dream is still the starting point, but the finished room only works when the material suits the way real life happens.

Choosing Your Stone A Practical Comparison

The five stones most homeowners ask about each bring a different personality to a bathroom. Some are strong and forgiving, some are striking but maintenance-hungry, and some sit in the middle with a good balance of looks and upkeep. For wet areas, the details matter more than the label on the sample.

Here's the practical comparison I'd want a neighbour to have before ordering anything.

Stone Type Best For Porosity and Maintenance Hardness, Mohs Typical Look
Marble Feature walls, vanities, low-splash zones Porous, needs careful sealing and gentle cleaning 3 to 4 Classic, veined, elegant
Travertine Feature surfaces, warm designer bathrooms Highly porous, needs more sealing and care Lower than granite and quartzite in practical bathroom use Soft, earthy, textured
Slate Shower walls, floors, family bathrooms Low absorption, still needs sealing and care at joints Hard-wearing in bathroom use Dark, layered, textured
Granite Shower floors, vanities, high-use rooms Low absorption, durable and easier to maintain 6 to 7 Speckled, dense, polished or honed
Limestone Calm, natural-looking bathrooms, feature areas Porous, more maintenance, pH-neutral cleaning Softer than granite, more vulnerable to acids Soft, muted, contemporary or classic

Water absorption is where the distinction becomes clear. Quartzite absorbs only 0.05% to 0.2%, granite under 0.4%, and slate under 0.4%, which is why low-absorption stones suit high-moisture areas better. By contrast, marble typically absorbs 0.5% to 2.0%, and travertine can absorb over 10%, so both need much more disciplined sealing and cleaning, especially in showers and family bathrooms. Those figures come from the stone-water-resistance guidance used by suppliers and renovators working with wet areas, and they're the best clue to how the material will behave in a real bathroom setting. Water-resistance data for natural stone bathroom tiles

Marble is the easy one to fall for. It gives a bathroom that unmistakable refined look, but it belongs in projects where the owner accepts patina and regular care. Travertine has a softer, more relaxed feel, though it asks for even more attention because of its porosity.

Slate and granite are the safer bathroom workhorses. Slate brings texture and grip, which suits wet floors better than glossy finishes, while granite offers strong durability for family use. Limestone sits in the elegant middle. It can look beautiful, but it's still a softer, more reactive stone than granite, so it needs more discipline from the person living with it.

Choose the stone for the room you have, not the bathroom you wish you had.

If you want a deeper planning checklist for tile selection, this guide is useful alongside the decision process, how to choose bathroom tiles. The right answer usually isn't the most dramatic slab, it's the one that fits the bathroom's job.

Beyond Beauty Sealing Maintenance and Longevity

A person applying a protective sealant to natural stone floor tiles using a professional paint brush.

Natural stone is not a fit-and-forget material. It can last beautifully, but only if the surface is protected and the cleaning routine is sensible from day one. That's the part many people underestimate when they fall in love with the sample board.

All natural stone in wet areas should be sealed, and the timing depends on how hard the bathroom works. In high-traffic family bathrooms, resealing is often needed every 1 to 2 years, while lower-traffic spaces may last 3 to 5 years between applications, according to Australian-facing stone-care guidance. That difference matters because a main bathroom with kids, guests, and daily showers behaves very differently from a guest ensuite that's used lightly. Australian sealing guidance for stone bathroom tiles

The cleaner matters just as much as the sealer. Acidic products can etch reactive stones, especially marble and limestone, and that damage doesn't always look dramatic at first. It often shows up as dull patches, roughness, or surfaces that lose their crisp finish too soon.

A simple maintenance routine works better than complicated products:

  • Use pH-neutral cleaners: They're kinder to the stone surface and safer for regular use.
  • Wipe standing water early: Less puddling means less chance for staining and mineral build-up.
  • Check grout and sealant together: If one fails, moisture usually finds a path through the other.
  • Keep vinegar and bleach off the stone: They can damage the finish and shorten the life of the surface.
  • Treat resealing like a scheduled task: Bathrooms drift quickly from “fine” to “tired” if the protection lapses.

Practical rule: if a cleaner is strong enough to strip soap scum fast, it's usually too harsh for marble or limestone.

For grout upkeep, this practical guide helps with the detail work that gets missed during the honeymoon period of a new bathroom, how to clean floor tile grout. Good maintenance isn't glamorous, but it's the difference between stone that ages well and stone that looks neglected after a few seasons.

Safety and Installation Essentials

A professional construction worker installing large natural stone tiles on a bathroom wall.

A stone bathroom can look beautiful and still fail in daily use if the surface is too slippery or the installation is careless. I've seen polished stone look right in a showroom, then feel awkward the first time water reaches the floor. The finish has to be judged by how it behaves in a wet room, not just by how it photographs.

Polished stone can suit walls or vanity fronts because it throws back light and gives a crisp result, but it is rarely the first choice for a family bathroom floor. Honed finishes are easier to live with underfoot, and textured surfaces can give more grip where showers and splash zones get heavy use. Australian renovation guidance also notes that polished finishes absorb less water than honed or cleft surfaces, which helps, but lower absorption does not remove slip risk. Texture and drainage still matter. Stone finish and bathroom performance guidance

The floor build matters just as much as the stone itself. Wet-room guidance says the floor should fall continuously to the drain at a minimum gradient of 1:80, and many installers work closer to 1:50 to 1:40 so water clears faster and does not sit in pockets. That fall affects tile selection, grout spacing, and where stone is safest to use. Wet-room slope and waterproofing guidance

Waterproofing sits at the centre of that work. If the membrane, junctions, or penetrations are wrong, the room can look finished while moisture slowly works behind the tiles, so waterproofing in the bathroom has to be planned before the first tile goes down.

Victoria adds another layer. For bathroom renovations in Victoria, any project involving structural changes, waterproofing, or significant plumbing alterations often requires a registered domestic builder. The unlimited registration category allows a builder to manage work of any value, which matters when the renovation is more than cosmetic. Victorian domestic building and builder registration guidance

That is not paperwork for the sake of paperwork. A proper bathroom build depends on substrate preparation, waterproofing, fall to waste, and trade coordination. A tile installer can lay stone neatly, but they cannot correct a base that was not built properly.

A compliant project should be planned with the whole room in mind:

  • Substrate first: The surface below the tile has to be level, stable, and ready for wet-area use.
  • Waterproofing second: Membranes and junctions need to be right before the tile goes down.
  • Drainage third: The room needs to shed water, not trap it.
  • Builder coordination last: Plumbing, waterproofing, and tiling must line up cleanly.

For Victorian homeowners who want one team to manage that flow, SitePro Bathrooms is one local option that covers design, construction, and finishing. In this kind of project, the tile is only one part of the system.

Designing with Natural Stone Modern and Timeless Ideas

Stone works best when it shapes the room, not just decorates it. In a small bathroom, that might mean using one calm, continuous surface to reduce visual clutter. In a larger room, it can mean letting veining, texture, or contrast become the feature.

For modern bathrooms, large-format stone tiles are a strong move because they create fewer grout lines and a cleaner visual field. That suits bathrooms where the aim is calm rather than busy. A pale stone with minimal movement can make the room feel more open, while darker slate or granite can anchor a more grounded look.

For designer bathrooms, natural stone brings character that factory-made surfaces can't fully copy. Porous stones such as travertine and limestone create a distinct mood, but they also come with a care commitment that needs to be accepted upfront. Their look is part of the maintenance equation, not separate from it. Natural stone bathrooms and designer upkeep guidance

A few combinations work well in real homes:

  • Marble with brushed metal tapware: This keeps the room elegant without making it feel fussy.
  • Slate with warm timber vanities: The contrast softens the stone and suits family bathrooms.
  • Granite with simple white walls: This helps the stone feel intentional rather than heavy.
  • Feature stone around the vanity: A strong slab can do more work here than across every surface.
  • Textured stone in the shower: It gives visual depth and can improve confidence underfoot.

Lighting changes the result more than many owners expect. Cool, shadowless light can make stone look flat. Warmer layered lighting tends to bring out veining, grain, and surface texture more naturally. Accessories should stay quiet if the stone is already doing the talking, especially in a compact bathroom.

If you're collecting new bathroom ideas, think in terms of balance. A bold stone needs simpler cabinetry. A busy room needs calmer tile movement. A premium bathroom doesn't have to be loud, it just has to feel coherent from the entry to the shower niche.

Screenshot from https://siteprobathrooms.com.au

Budgeting Your Project and Sourcing Your Tiles

The tile price is only the headline. A stone bathroom budget has several moving parts, and the hidden costs are usually the ones that surprise first-time renovators. Substrate preparation, waterproofing, labour, sealing products, waste removal, and any special detailing all add up before the room is finished.

That's why stone projects need a realistic allowance rather than a guess. Dense, low-porosity stones often cost more to source and more to cut neatly, while softer or more porous stones may need extra care during installation and maintenance. The true budget also depends on the bathroom layout, because a shower-heavy room asks more of the build than a simple vanity wall.

Budget pressure usually shows up in three places:

  • Preparation work: If the existing floor or wall isn't sound, the fix comes before any stone is installed.
  • Waterproofing and setting out: Wet areas need careful treatment, and bad planning here is expensive to undo.
  • Installation labour: Natural stone usually asks for a more experienced hand than basic ceramic tile.

If underfloor heating is part of the plan, that needs to be considered early because it affects the floor build-up and the installation sequence. The same goes for feature cuts, niches, and mitred edges, which all take more time than standard tile runs.

Sourcing should be local where possible, because you want to see the actual batch, not just a photo. Ask about the stone's origin, variation between pieces, and whether the finish you like is suitable for wet areas in an Australian bathroom. Consistency matters, but so does knowing how the stone was handled before it arrived on site. Melbourne and Bayside homeowners usually get better results when the supplier and installer are talking before the order is locked in.

For a local bathroom renovation, the best stone isn't always the most dramatic one in the yard. It's the one that fits the room, the budget, and the people who'll live with it.

Your Highett Bathroom Renovation Partner

Natural stone gives a bathroom real presence, but the right result comes from balancing beauty, maintenance, cost, and durability. Marble can look unforgettable, granite and slate can work harder in wet areas, and travertine or limestone can be worth it when the owner accepts the upkeep. The material choice is only the start, the build has to carry it.

For homeowners in Highett and across Melbourne's bayside suburbs, SitePro Bathrooms is set up to handle that full process, from concept and 3D planning through to construction and final handover. That matters in a stone project because the tile, waterproofing, plumbing, and finish all need to line up properly.

If you're planning a bathroom renovation and want a room that looks considered rather than overdone, get in touch with SitePro Bathrooms for a consultation and measure. Bring your ideas, your budget, and the bathroom problems you want solved. Then turn the samples into a room that works every day, not just on the day it's finished.

  • siteprobathrooms

Freestanding Bath Installation Guide for Modern Bathrooms

You've picked the bath first, then realised the room has to bend around it. That's the normal moment when a bathroom renovation stops being a mood board exercise and turns into a real site decision, especially in older Victorian homes where the floor, the waste line, and the available clearance all start speaking back. In bathroom renovations, a freestanding bath can look simple from the outside and still become the part that decides whether the rest of the room works.

That's why freestanding bath installation should be planned as a structural and plumbing job first, then a styling choice second. The tub itself can be the feature in modern bathrooms and designer bathrooms, but only if the floor can carry it, the waste can route cleanly, and the tapware lands where hands and bodies use it. In Victoria, that matters because many homes are being upgraded for the second or third time, and the best-looking bath is useless if it forces awkward plumbing, ugly access panels, or a compromised layout.

A modern freestanding white bathtub installed in a bathroom currently undergoing renovation with construction tools nearby.

Why a Freestanding Bath Changes Your Renovation Plan

A homeowner in Highett points to a freestanding bath sample, and the room starts shifting around it straight away. The vanity moves. The tap position changes. The shower screen may need to shorten or move across the room. One choice affects flooring, waterproofing, plumbing rough-in, and the way the room feels underfoot as you move through it.

That change is not a setback. It means the bath has become the room's anchor, which is why it appears so often in new bathroom ideas and premium refurbishments where the bath is meant to be part of the room, not tucked away after everything else is decided.

The Australian housing stock keeps that reality front and centre. The national dwelling base is large, and Victoria has a substantial number of separate houses in the 2021 ABS Census of Population and Housing. That points to a lot of bathroom work happening in existing homes rather than new builds, the kind of setting where the right bath choice can refresh a tired room without stripping out every wall.

Practical rule: if the bath choice changes the position of the waste, taps, or walking path, treat it as a layout decision, not a shopping decision.

For homeowners, the first draft should cover the install workflow, the hidden trade-offs, and the questions that matter before anyone orders tile or plumbing fittings. If you're comparing registered builders, designers, or plumbers, the better ones will talk about structure, access, and rough-in reality before they promise a clean finish.

Site Assessment and Placement Before You Order

The smartest time to measure a freestanding bath is before you fall in love with one. Tape out the footprint on the floor, then stand back and check what the bath does to the room's circulation, the vanity door swing, and the entry path from the doorway. A bath can fit on paper and still feel wrong when it sits in the room.

The next step is to mark the waste position and see whether it lines up with the existing rough-in. If the planned waste falls outside the practical plumbing path, you're not choosing a bath anymore, you're choosing a plumbing job. That's why a pre-order check should include room width, usable clearances, and the route from the waste outlet to where the trap and connector can sit.

Photographs matter more than many realize. Take clear shots of the floor surface, wall substrate, skirting, and any visible service access point, because those images help a designer or plumber judge whether the room is ready for a straightforward install or whether extra carpentry and plumbing work is likely.

View a mid-century bathroom layout example

What to verify before anyone orders the bath

  • Floor condition: Check whether the floor feels level and solid underfoot, because the bath shell has to sit stable from the start.
  • Clearance around the bath: Leave room for cleaning, safe entry and exit, and the tap position you're planning to use.
  • Access route into the house: Measure door widths, narrow hallways, and any turns that could make delivery awkward.
  • Ceiling and handling space: Large baths can be difficult to manoeuvre, so the path from the truck to the bathroom matters.
  • Plumbing proximity: Note how close the existing waste and water points are to the proposed bath position.

A bath that fits the room but not the access path can still become a problem on delivery day.

If you bring those measurements, photos, and a rough sketch to the first conversation, the installer can talk solutions instead of discovering problems on site. That usually saves time, and it often saves money too, because the hidden adjustments get discussed before demolition starts.

Structural Checks and Floor Reinforcement

The load question is where many freestanding bath installation plans get vague, and that's a mistake. A filled bath adds serious weight to the floor system, and that matters even more in upper-storey bathrooms and older Victorian homes with mixed-age construction. The shell might look elegant, but the floor underneath has to behave like a proper support structure.

Start with the timber frame if the home has one. You need to know joist direction, spacing, span, and condition before the bath is permanently placed. If the joists are undersized, damaged, or running in a direction that makes the chosen position awkward, the floor may need reinforcement before the bath goes in. That's the point where a registered builder or structural engineer stops being optional and becomes part of sensible renovation scope.

Floor type changes the risk profile

Timber subfloors usually give you more room to inspect and reinforce, but they also reveal hidden weaknesses fast. Particleboard can be fine in some settings, yet it needs proper assessment because surface appearance tells you very little about load behaviour. Slab floors remove the joist question, but they introduce other constraints around waste routing and access.

Practical rule: if you can't confidently explain how the bath load reaches the structure below, the bath shouldn't be ordered as a simple fit-off.

Bathroom renovations in older homes can drift from cosmetic work into building work. Extra framing, nogging, or localized reinforcement may be needed to spread the load. In some jobs, the bath position changes because the structure is sound in one area and marginal in another.

That's also why a licensed professional should be involved early when the bathroom sits above living space, where the consequences of a poor support decision are bigger and harder to correct later. A good site assessment doesn't just ask whether the bath will fit. It asks whether the floor will still behave properly once the tub is filled and used regularly.

Plumbing and Waste Connections That Actually Work

A freestanding bath can look simple from above and still fail at the waste connection if the underfloor path has not been checked properly. The cleanest installs start with a dry-fit, where the bath is set in place, the waste position is marked, and the trap line is checked against the rough-in before any pipe is cut. That step catches the common mistake of committing to a bath location before the plumbing route has been proven.

Once the position is confirmed, the bath base should sit slightly clear of the floor so the shell is not sitting in standing water and the unit can drain properly. Foot hardware is tightened only after the height and level are right, because locking it down too early can trap a bad set or leave the bath rocking. The aim is a stable shell that drains cleanly and stays steady when someone steps in.

Why the waste path makes or breaks the job

The waste connector has to meet the trap without stress, kinks, or an upward bend. Installation manuals for freestanding baths consistently warn against forcing the waste run out of line, and the reason is plain on site, drainage suffers when the connector is pushed into an awkward curve. Where access is tight, a flexible waste connector can be the workable choice, but flexible still means tidy. It needs a clear route and enough access to inspect it later.

Manufacturer installation guidelines also call for a clean, dry, stable base, then silicone sealing once the bath is level and seated correctly, with the seal left to cure before use. The usual site error is forcing fittings together just to make the bath fit. That usually leads to leaks at the joints or slow drainage that shows up after handover.

The plumbing test that matters is simple. Fill the bath, then check every joint below the floor before the seal is treated as final.

That leak test is the quality-control step you do not skip. If the underfloor joints stay dry during a fill-and-hold check, the waste alignment, trap seating, and connector route are working properly before the room is handed over.

Choosing and Positioning Mixers and Wastes

Tapware changes how the bath is used every day, not just how it looks in a photo. A wall-mounted mixer keeps the floor clear and suits tighter visual lines, but it depends on the wall being in the right place and the rough-in being set accurately before finishes go on. A floor-mounted filler gives the strongest visual statement, yet it needs floor plumbing and enough room around the bath for safe movement and easy cleaning. A deck-mounted tap can work when the bath design supports it, but it brings its own layout constraints and usually suits surrounds or baths designed for that style.

The decision isn't just aesthetic. It affects service access, cleaning, and whether the spout reaches into the bowl without splashing across the room. If a hand-held shower is being added nearby, you also need to check that it won't crowd the entry side or create a cluttered user zone.

Tapware Options for Freestanding Baths

Tapware type Rough-in location Best for Access consideration
Wall-mounted mixer Concealed in the wall Compact layouts and clean sightlines Service access can be harder once the wall is closed
Floor-mounted filler Concealed below the floor Statement bathrooms with open space around the bath Requires room for plumbing and cleaning around the base
Deck-mounted tap On the bath rim or surrounding surface Baths designed with a rim or surround for fittings Easier access than concealed options, but only if the bath allows it

Waste finishes matter too. Pop-up, click-clack, and cable-driven wastes all work, but each changes how easy it is to clean and service after the bath is sealed in place. A minimalist finish can look tidy, yet the question is whether the waste remains practical once the room is finished and used every week.

For homeowners planning designer bathrooms, the right answer usually depends on the room size, the position of the bath, and how much access you want to preserve for maintenance. If the layout is still in flux, the tapware decision should happen alongside the rough-in, not after tiling.

Tiling, Waterproofing, and Finishing Touches

The finish sequence decides whether the bath looks built in or dropped into the room at the end. Substrate preparation comes first, then waterproofing in the bath zone, then tile layout, then silicone. If that order gets reversed, the bath can look awkward and the edges are harder to protect properly over time.

Waterproofing around the bath needs to suit the wet zone, not just the visible edge. The floor and wall junctions must be treated carefully, and tile layout should be planned so the ugly cuts disappear behind or beside the bath rather than landing in the direct line of sight. If you want a deeper look at the room preparation side, this waterproofing guide is worth reading before finishes are locked in.

Open base or skirted base

An open-base bath leaves the underside visible, which can make the room feel lighter and gives easier access for cleaning and inspection. A skirted bath hides more of the support structure, which can suit a more polished room but can also reduce the visual sense of space.

Silicone should be used where the bath meets the finished surface in a way that controls moisture without trapping the bath in a rigid, hard-to-service setup. The seal has to look neat, but it also has to respect future access if the waste or fittings ever need attention.

Finishing rule: if the tile pattern and bath edge don't agree, the room will always look slightly unresolved, even when the plumbing is perfect.

A good finish is subtle. The bath should feel integrated into the room, not placed there after the hard work was done.

Costs, Timelines, Pitfalls, and When to Hire a Licensed Installer

The budget for a freestanding bath project usually expands in layers. There's the bath itself, then tapware, then plumbing rerouting if the rough-in doesn't suit the chosen position, then waterproofing, tiling, sealing, and labour. The cost pressure usually comes from the parts the homeowner doesn't see at selection time, especially when the waste needs to move or the floor needs reinforcement.

Timelines also stretch where the room depends on access, inspection, or structural work. A straightforward fit-off is much quicker than a bathroom where the plumber, builder, and waterproofer all need to coordinate around a changed layout. If you want a general remodel timing reference, this bathroom remodel timeline guide is useful for understanding how one trade delay can push everything else back.

Pitfalls that show up again and again

  • Kinked flexible connectors: These create drainage problems and often happen when the bath position is chosen before rough-in reality is checked.
  • Over-tightened fasteners: These can crack waste fittings or lock the bath into a bad height.
  • Assuming the floor is level: Many rooms look level until the bath is dry-fitted and the shell rocks.
  • Choosing the bath too early: The selected model might not suit the available waste route, access space, or structural capacity.

The right people need to be involved at the right time. A licensed plumber is essential for waste and water connections. A registered builder with unlimited registration becomes important when structural reinforcement, altered framing, or broader bathroom scope sits inside the same project. If waterproofing certification is part of the job, that also needs to be handled by the right trade in the right sequence.

SitePro Bathrooms also offers bathroom design and renovation planning, which suits projects where the bath position needs to be resolved before construction begins. That kind of coordination matters when the bathroom design, rough-in, and final fit-off all have to agree before a single tile is cut.

If you're planning a freestanding bath in Victoria, get the floor checked, the waste route confirmed, and the tapware position locked before you order. Then book a licensed installer who can coordinate the plumbing, structural, and finishing work as one job, because that's what keeps a premium bath from becoming an expensive layout compromise.

  • siteprobathrooms

Water Saving Shower Heads: The Complete Guide for 2026

Your shower is probably the last fixture you think about when the water bill lands, yet it's often the one that gives the biggest payback when you renovate. In a Victorian home, that matters even more. Old bathrooms can hide thirsty fittings, uneven pressure, and hot-water waste that adds up fast, so a smarter shower head isn't a gimmick, it's a practical upgrade that belongs near the top of any bathroom renovation list.

The mistake most homeowners make is assuming water saving shower heads mean a weak, miserable rinse. They don't have to. The right model is a balance of flow rate, nozzle engineering, and pressure compensation, and that balance is exactly what separates a satisfying bathroom from one people complain about every morning.

Why Water Saving Shower Heads Matter for Your Bathroom

A lot of homeowners notice the problem in the same way. The bill rises, the bathroom feels dated, and suddenly the shower becomes the obvious place where water is disappearing. That's not a bad instinct. Showering is one of the largest indoor uses of household water, so a fixture swap can make a real difference without tearing the whole bathroom apart.

A woman dressed in vintage clothing stands in a bathroom looking concerned at her high water bill.

For Victorian homeowners planning bathroom renovations, this is one of the cleanest wins. A better shower head can reduce shower water use by around 20% or more when you move from a standard fixture to an efficient model, with bigger savings as the rating rises, according to Australian guidance tied to the WELS framework. That's why the upgrade belongs in the same conversation as tiles, vanities, and waterproofing, not as an afterthought.

The other reason it matters is simple. You don't need a full plumbing overhaul to start seeing the benefit. In many homes, the right replacement is a focused change that improves the bathroom's water-efficiency profile immediately, while also setting the tone for modern bathrooms that feel considered instead of wasteful.

Practical rule: If the shower is old, inconsistent, or obviously over-delivering water, fix that first. It's one of the fastest ways to improve daily comfort and lower consumption at the same time.

For homeowners exploring new bathroom ideas, that makes the shower head a design decision as much as a utility decision. A remodel that ignores flow rate is leaving money and water on the table. A remodel that gets it right starts with the fixture that gets used every day.

If you're thinking about broader sustainability choices across a renovation, this overview on eco-friendly materials and sustainable construction fits neatly beside the plumbing decisions.

Understanding WELS Ratings and Flow Rate Standards

The benchmark that matters in Australia is the Water Efficiency Labelling and Standards, or WELS, framework. Shower heads sold in the market are rated from 0 to 6 stars, and the scheme uses a maximum flow-rate threshold of 9 litres per minute for standard showerheads, with higher-star products delivering progressively lower consumption, according to the technical reference in the WELS material. That's the number homeowners should use to compare products, not the glossy wording on the box.

Think of WELS the way you'd think about the star rating on an appliance. More stars mean less water use, and the label gives you a simple, local comparison point that's useful during a renovation. In practice, it turns shower-head selection into a measurable decision, because flow rate, star rating, and expected water use can all be weighed before you buy.

WELS Star Ratings and Flow Rates
WELS Star Rating Flow Rate (L/min) Estimated Water Savings
0 to 6 stars Up to 9 Higher stars mean lower consumption

That table is intentionally simple, because the label itself is the point. You're not guessing whether a product is efficient. You're checking the rating and the flow rate, then deciding whether it suits the bathroom you're building.

WELS matters even more in Victoria because it gives homeowners a locally recognised standard during renovations. Marketing language is cheap. A label tied to tested flow performance is not. When you're specifying fixtures for modern bathrooms, WELS lets you compare options with confidence rather than buying a product because the packaging says “eco” in large letters.

The smart move is to treat the label as the starting point, not the whole story. A good shower head should earn its rating and still feel right in daily use.

For anyone planning bathroom renovations, that's the benefit. WELS takes the shower head out of the world of vague claims and puts it into the world of design criteria. Once you start choosing fixtures that way, the whole bathroom gets easier to plan.

Shower Head Technologies and How They Perform

Not every water-saving shower head works the same way, and that's why pressure complaints are so common after a retrofit. The trick is to match the technology to the way your home behaves, especially in older Victorian houses where supply pressure can vary. A good low-flow head doesn't just reduce water. It manages how water leaves the nozzles.

Aerating, laminar, and restrictor designs

Aerating models mix air into the water stream. That can make the spray feel fuller even when the actual flow is lower, which is why they're often a solid choice when the homeowner wants a softer but still satisfying shower. Laminar-flow designs send out individual streams, which can reduce heat loss and feel more direct. Low-flow restrictor models reduce volume, which is the bluntest approach and often the easiest to get wrong.

The best choice depends on how the bathroom is supplied. Gravity-fed systems, mains-pressurised systems, and older pipework won't all react the same way. A head that feels fine in one house can feel thin in another if the internals aren't designed for pressure variation.

Why comfort comes down to nozzle design

People often have the big fear wrong. Low-flow does not automatically mean weak spray. Nozzle size, the number of holes, and pressure-compensated internals all affect how the shower feels. Research on showerhead testing in other markets found that models with more, smaller holes and a higher resistance factor performed better for comfort while still saving energy, which is exactly the sort of engineering Victorian homeowners should care about.

The logic is straightforward. If the showerhead maintains spray coverage and force across changing pressure, the experience stays usable. If it doesn't, people notice immediately, and the retrofit gets blamed instead of the bad product choice.

Choose for spray quality first, then check the efficiency label. If a head saves water but makes the shower feel erratic, it's the wrong fixture for the room.

If you're refining the layout of an ensuite, this piece on designing an ensuite pairs well with the technical side, because style and performance need to line up in the same room.

For designer bathrooms, I'd be blunt. Don't buy by appearance alone. A polished finish is nice, but the internals are what decide whether the shower feels premium or cheap after installation. In real homes, that's the difference that matters.

Real Water and Energy Savings You Can Expect

The savings are not abstract. Flow rate reduction scales directly with water use, so when you cut output at the showerhead, you cut what has to be heated too. That's the part many homeowners miss. A shower upgrade is not just a water bill decision, it's an energy decision because hot water is part of every minute spent under the spray.

A useful technical reference is simple. Reducing flow from a conventional 2.5 GPM to 2.0 GPM cuts water use by 20%, and lower-flow products often operate around 1.5 to 1.8 GPM while still being designed for spray force and coverage, according to the EPA WaterSense showerhead specification. That matters because lower flow only helps if the shower still works properly in daily use.

The same WaterSense material is clear that high-performing low-flow heads aren't just restricted devices. They have to be independently certified for spray force, spray coverage, and pressure compensation, with a minimum spray-force requirement of 2.0 oz (0.56 N) at 20 psi and testing at 20, 45, and 80 psi. That's why a well-chosen head can save water without turning every shower into a compromise.

Behaviour matters too. A peer-reviewed study found that shortening a shower from 20 to 10 minutes saves 70 to 200 litres each time, depending on showerhead flow rate, and shortening from 10 to 5 minutes saves 35 to 100 litres each time. The same study estimated that reducing shower frequency by one shower per week can cut annual water use by 3,640 litres with a 7 L/min showerhead, 5,200 litres with a 10 L/min showerhead, and 10,400 litres with a 20 L/min showerhead. Those are behavioural savings, but they show how quickly shower habits multiply.

Shower change Water effect
20 to 10 minutes 70 to 200 litres saved each time
10 to 5 minutes 35 to 100 litres saved each time
One fewer shower per week 3,640 to 10,400 litres saved per year, depending on flow rate

A better shower head and a shorter shower are a strong combination. One changes the fixture, the other changes the routine, and both pull in the same direction.

For homeowners budgeting bathroom renovations, that matters because it helps justify the upgrade in practical terms. The right head can reduce hot-water demand enough to matter for bills, especially in households where showering is frequent and the hot-water system is working hard.

Choosing the Right Shower Head for Your Victorian Home

Start with pressure, not style. If your home has inconsistent pressure, or the shower feels uneven now, you need a head with pressure-compensated internals. That's the feature that protects you from the common “it looks efficient, but it feels rubbish” problem. In older Victorian homes, that one detail is often the difference between a successful retrofit and a regret.

What to check before you buy

  • WELS label first: Use the star rating and flow rate as your baseline, not the packaging claims.
  • Spray performance: Look for evidence that the head has been tested for spray force and coverage, not just restricted flow.
  • Pressure compatibility: Make sure the design suits gravity-fed or mains-pressurised conditions if your home is sensitive to pressure changes.
  • Nozzle engineering: Favour heads with thoughtful hole layout and pressure-compensated internals over simple flow restriction.
  • Visual fit: Pick a finish and shape that suits the room, whether you're aiming for modern bathrooms or more refined designer bathrooms.

The goal is to stop thinking about shower heads as one-size-fits-all items. They aren't. A good product in one home can be the wrong choice in another if the plumbing, pressure, and shower habits don't match.

A useful filter is this. If the shower head is only marketed as “water saving” but doesn't give clear performance information, leave it on the shelf. If the specification shows the flow rate, pressure behaviour, and certification logic, you've got something worth considering.

For homeowners sketching new bathroom ideas, design and engineering meet. The fixture needs to look right, but it also needs to rinse properly, feel comfortable, and suit the household's daily routine. That's the test, not the showroom pitch.

Installation and Retrofit Considerations for Renovations

A simple shower-head swap can be straightforward, but don't treat every job as DIY if the rest of the bathroom is being changed too. If you're only replacing the head and the thread matches the existing arm, the work is usually simple. If the renovation includes pipework changes, pressure regulation adjustments, or a broader rework of the shower plumbing, bring in a licensed plumber and, where relevant to the project scope, registered builders unlimited.

A person installing a new water saving shower head onto a shower pipe in a bathroom.

The first check is physical compatibility. Confirm the shower arm thread matches, make sure the new head seats properly, and seal it correctly so you don't end up with leaks that cancel out the water-saving benefit. After installation, test the spray pattern, check for drips, and stand under the shower long enough to judge whether the coverage feels even, not just whether water is coming out.

Fit the fixture into the renovation, not the other way around

The best renovation outcomes come from coordination. A shower head shouldn't be chosen in isolation, then forced into the room after the tiles and tapware are set. It should be part of the wider visual and functional plan, which is why many homeowners use bathroom renovation planning guidance before buying fixtures.

That matters for sequencing too. If you're coordinating 3D design, tile selection, and tapware finish, the shower head needs to sit comfortably inside that palette. A chrome head in one room, a brushed finish in another, or a bulkier profile in a compact ensuite can change the whole feel of the space.

Install it, test it, then judge it in the room it will live in. A shower head that looks ideal on paper still has to work in the actual bathroom.

For a retrofit, my advice is simple. If the job is only a head swap, keep it tight and clean. If the renovation touches the plumbing, treat the shower head as one element in a complete system, because that's how you avoid pressure problems later.

Transform Your Bathroom with SitePro Bathrooms

If you're serious about a better bathroom, treat the shower head as part of the whole renovation, not a bolt-on purchase. That's where a coordinated team makes a real difference. SitePro Bathrooms works end-to-end, from concept development and 3D design through construction and finishing, so the fixture choices, layout, and style all land together instead of fighting each other.

That approach suits Victorian homeowners who want a bathroom that's practical every day and polished in the final result. It also suits compact ensuites, family bathrooms, and designer bathrooms where the details matter just as much as the main finishes. A good renovation doesn't just look new, it feels better to use, and the shower is one of the first places you notice that.

SitePro Bathrooms is based in Highett and focuses on turning bathrooms into functional, beautiful spaces that add value and comfort. If you're comparing new bathroom ideas, refining a renovation brief, or trying to decide whether a water-saving upgrade belongs in the plan, their process gives you a clear path from idea to completed room.

Explore past projects, read client testimonials, and request a quote if you're ready to move. Whether you're updating a compact ensuite or undertaking a full bathroom transformation, a well-planned renovation should deliver clear communication, reliable timelines, and workmanship that exceeds expectations.

  • siteprobathrooms

Bathroom Renovations Hobart: Essential Guide

You know the feeling. The bathroom still works, but it's tired, cold on winter mornings, and every time you look at the half-worn vanity or the yellowing grout, you wonder whether to patch it up or finally do it properly. In Hobart, that decision isn't as simple as choosing tiles and tapping into a generic national budget guide. Local climate, older housing stock, heritage approvals, and a smaller trade pool all change the way bathroom renovations Hobart projects should be planned.

A man stands in an unfinished, dated bathroom contemplating a renovation project during his home improvement planning.

If you're standing in a Sandy Bay unit, a Glenorchy family home, or a Battery Point terrace trying to work out whether this is a cosmetic job or a full strip-out, the right answer starts with local conditions, not wishful thinking. Hobart is also the cheapest capital across 15+ trades in an annual pricing report, yet bathroom pricing still spans a wide band because scope, compliance, and finishes matter just as much as labour rates Hobart 2026 tradie pricing report. That's the Hobart story, not just “it's cheaper here”.

Practical rule: In Hobart, the cheapest quote isn't the smartest quote if it ignores waterproofing, electrical zoning, or heritage constraints.

Why Hobart Bathroom Renovations Deserve Their Own Plan

A Hobart homeowner needs a plan that fits the house in front of them. A tired bathroom in a 1940s weatherboard behaves differently from a new-build ensuite, and a terrace in Battery Point brings a different approval burden again. Generic bathroom advice misses those differences, and that is where projects start to slip.

Hobart's homes don't all behave the same

Cold mornings, damp air, and condensation are part of Tasmania. That pushes ventilation, waterproofing, and fixture placement higher up the priority list than they would be in a milder climate. A bathroom that looks fine in summer can become annoying, or expensive, once winter exposes weak extraction or poorly sealed wet areas.

The older suburbs add another layer. In places like Battery Point and Glebe, older walls, older plumbing, and conservation expectations can change what is possible without opening up a much bigger project. Hobart also has a smaller trade market than the mainland capitals, so sequencing matters. If you lose a trade slot because selections were not ready, you may wait longer than expected.

Why lower capital-city pricing still doesn't mean simple

Independent 2026 pricing data puts Hobart below the national capital-city average for full bathroom renovation costs, but the range still depends on scope, finishes, and compliance. A Hobart bathroom renovation cost guide shows a wider standard market spread, with premium work sitting much higher. Those ranges tell you one thing clearly, Hobart is competitive, but it is not uniform.

That is the point. A Hobart renovation is not a cheaper Sydney job copied locally. It has its own approval rhythm, its own buildability problems, and its own trade coordination quirks. If you plan around that from day one, the project runs cleaner and the result lasts longer.

For a practical starting point, use a bathroom budget planning guide that ties your budget to the actual scope, not to wishful thinking.

Setting a Realistic Hobart Renovation Budget

Start with scope, not wishful thinking. A bathroom budget in Hobart can still move from a light refresh to a full premium rebuild, because the work may stop at cosmetic upgrades or extend into plumbing, waterproofing, electrical, and layout changes. The right budget is the one that matches the room's condition and the way you use it.

Match the budget to the work, not the finish

A budget refresh in Hobart usually sits around $6,000 to $12,000 and focuses on visible change, not structural change Hobart renovation guide. A standard full renovation often sits around $10,000 to $25,000, while a mid-range renovation commonly sits around $25,000 to $32,000 Hobart renovation guide. Premium or luxury work starts around $32,000 to $45,000+ and moves into custom cabinetry, heated floors, and high-spec finishes Hobart renovation guide.

That spread exists because every layer costs money. Demolition, plumbing rough-in, waterproofing, tiling, electrical, fit-off, and waste removal all land in the final number. Keep the existing layout and you usually spend less. Move the shower, toilet, or vanity and the price climbs. Choose standard fixtures and you keep control of the quote. Ask for designer tapware and custom joinery, and the budget moves fast.

A sensible Hobart contingency is 10 to 15% of the budget. Older walls, hidden leaks, and subfloor issues do not show themselves before demolition. They turn up once the room is open, and that is when weak budgets fall apart.

Tier Typical Hobart Price Band What's Included Best For
Budget refresh $6,000 to $12,000 Cosmetic updates, fixture swaps, surface improvements Investors, quick makeovers, tight budgets
Standard full renovation $10,000 to $25,000 Full strip-out, new tiles, new fittings, basic reconfiguration Family bathrooms, owner-occupiers
Mid-range renovation $25,000 to $32,000 Better finishes, layout refinement, stronger ventilation Homes needing durability and comfort
Premium or luxury $32,000 to $45,000+ Structural work, custom cabinetry, heated floors, high-spec fixtures Heritage homes, designer bathrooms

For a simple planning exercise, use the budget tier to decide what you are changing, then build the quote from there. If you want a clearer framework for setting allowances, this bathroom budgeting guide is a useful starting point.

Council Rules, Heritage Constraints and Waterproofing Standards

In Hobart, the permit question cannot sit at the end of the quote. A straightforward bathroom job in a newer suburban home usually stays simple. Heritage streets, conservation overlays, and older building fabric change the process fast. They affect timing, product selection, and sometimes the layout you can build.

Heritage homes need more than a pretty design

Battery Point is the clear example. Even if a property is not individually listed, council approval may still apply, and that moves the job from a basic refresh into a managed compliance process. A Hobart specialist notes that Battery Point renovations can take 4 to 6 weeks after council approval and typically cost $35,000 to $75,000, which is a very different brief from a simple replacement bathroom Battery Point heritage bathroom guide. That is not red tape for its own sake; it is the nature of working inside an older urban streetscape.

The technical rules need to be locked in early

Electrical zoning under AS/NZS 3000 has to be set before the room is opened up. Bathrooms are divided into Zones 0 to 3. Zone 0 allows only low-voltage lighting with an IPX7 rating, Zone 1 requires IPX4 lighting up to 2.5 metres above water sources, and power points and switches generally belong in Zones 2 to 3 with RCD protection. That is the kind of detail that belongs in the plan, not in a late-site argument bathroom electrical zoning guidance.

Required step: decide lighting, fan, and outlet positions before demolition. Once tiling starts, any change pushes up cost and slows the whole room.

Waterproofing is even less forgiving. Under AS 3740, shower recesses typically need waterproofing to at least 1,800 mm on all walls, and 2,100 mm where the recess is under 1,000 mm wide, with sealed penetrations and inspection before tiling waterproofing standards guidance. In Hobart's cold, damp conditions, a rushed membrane job is a false economy. Once the tile is on, defects are expensive to chase. For a plain-language reference on the standard itself, these waterproofing standards notes are worth reading before anyone starts demolition.

New Bathroom Ideas and Modern Design Choices for Hobart Homes

Good design in Hobart isn't about chasing trends for their own sake. It's about choosing finishes and layouts that work in cold weather, fit the house, and don't force rework when the walls come down. That means locking the design before demolition, especially in older homes where plumbing is rarely as tidy as the visible room suggests.

Use the design process to freeze the layout early

A proper 3D design process usually starts with mood boards and rough layout ideas, then moves into rendered views, fixture selection, and final sign-off before the first hammer swings. That matters in Hobart because older plumbing runs, tight floor plans, and slab construction can make late changes expensive and slow. If you decide to move the vanity after rough-in, you're not making a small tweak, you're creating extra plumbing, extra labour, and often a knock-on effect through tiling and waterproofing.

The smartest renovation brief starts with the layout, not the vanity colour. Once the room is dimensioned and the services are fixed, the rest becomes a selection exercise rather than a guessing game. That's how you keep new bathroom ideas practical instead of decorative.

The modern choices that actually make sense here

For modern bathrooms, walk-in showers are usually the strongest move in compact or medium Hobart spaces. They visually open the room and reduce visual clutter. Frameless glass, large-format tiles, and stone-look porcelain also suit a clean, low-maintenance finish without forcing you into fragile materials.

For designer bathrooms, the upgrades that make sense in Hobart are the ones that improve comfort as well as style. Brushed brass or matte black tapware, smart mirrors, heated towel rails, underfloor heating, and stronger extraction all work well in colder months and in homes that fight condensation. Premium and luxury tiers are where those features belong, while budget refreshes should stay focused on surfaces and fixtures.

A quick rule helps with selection:

  • Compact units: Keep the palette tight, use a walk-in shower, and avoid oversized cabinetry.
  • Family homes: Prioritise storage, durable tiles, and easy-clean finishes.
  • Heritage properties: Use finishes that respect the age of the house without mimicking it badly.

A designer views a modern bathroom renovation concept on a tablet surrounded by material samples and fixtures.

The right design brief turns style choices into buildable decisions. That's what separates a bathroom that photographs well from one that performs well through Hobart winter after Hobart winter.

Project Timeline and the Stages of a Hobart Bathroom Build

A bathroom renovation does not move in a straight line. It runs through consultation, design, quoting, approvals, ordering, demolition, rough-in, waterproofing, tiling, fit-off, and clean-up. Miss one step or sequence them badly, and the whole job slows down.

The realistic timeline is longer than the optimistic one

National renovation survey data puts bathroom projects in a short delivery window, but that only suits simple jobs with clean access and off-the-shelf finishes. Hobart full bathrooms usually need more time once approvals, ordering, and trade timing are factored in. A standard Hobart full bathroom is usually more realistic at 4 to 8 weeks total, especially if the home needs heritage input, special-order finishes, or careful trade coordination.

The delays that hurt most are predictable. Heritage approvals add waiting time, especially in places like Battery Point. Custom imports slow fit-off. The small labour pool in peak summer means one missed trade window can push everything back. None of that is unusual, it is just how a smaller market works.

The stages that matter most

  1. Consultation and measure-up. The room gets measured, the problem points are photographed, and the broad scope is decided.
  2. Design and quoting. Layouts, fixture choices, and material allowances are locked in before pricing is finalised.
  3. Approvals and procurement. If council or heritage input is needed, it happens here, along with ordering tiles, screens, vanities, and fittings.
  4. Demolition and rough-in. Old finishes come out, then plumbing and electrical rough-ins go in before surfaces are closed.
  5. Waterproofing, tiling, and fit-off. The room starts to look finished, but the inspection sequence still matters before handover.

A bathroom that looks simple on paper can still take the full schedule if the sequencing is wrong. Good builders protect the program by locking selections early and keeping trades stacked correctly.

The best Hobart programs are ordered correctly. They respect the approval process, they allow for cold-climate waterproofing, and they do not assume every trade can be called in at short notice. That is what keeps a four-week bathroom from turning into a long, messy one.

Choosing the Right Hobart Builder or Renovation Specialist

There isn't one correct contractor type for every bathroom. There are three workable paths, and the right one depends on how much coordination you want and how much of the job sits inside compliance territory. Pick the wrong setup and you'll spend the project managing confusion instead of the build.

Match the contractor to the project type

A registered builder with unlimited registration is the right choice when the bathroom is part of a bigger scope, especially if structural or complex coordination is involved. That option usually gives you broader project control, clearer compliance handling, and one point of responsibility. For a deeper look at why that matters, this note on registered builders covers the practical side well.

A specialist bathroom renovation company makes sense when you want a design-and-construct process with a tighter bathroom focus. They often handle layout, 3D design, sequencing, and the usual trade coordination under one roof. That suits owners who want a single team driving the whole room.

A small owner-operator team can work well for straightforward bathrooms where the scope is clear and the homeowner is comfortable with a more hands-on process. The trade-off is that you need to be very sure about coordination, timing, and who is responsible for each step.

What to check before you sign anything

  • Licence and insurance: Ask for the builder's registration details and confirm the work is covered properly.
  • Recent Hobart references: Local references matter because older homes and suburb-specific issues change the job.
  • Written scope: A vague bathroom quote is a warning sign, not a bargain.
  • Pricing model: Fixed-price gives more certainty, while cost-plus can suit complex work if you trust the process.
  • Permit responsibility: You need to know who pulls the building permit and who manages inspections.
  • Timeline accountability: The quote should show how delays are handled.

SitePro Bathrooms offers end-to-end bathroom renovation services, including consultation, 3D design, demolition, plumbing and electrical rough-in, waterproofing, tiling, fit-off, and final handover. That's the kind of scope that suits homeowners who want one team coordinating the full sequence rather than piecing it together themselves.

The best Hobart contractor isn't the one with the flashiest brochure. It's the one who can explain what happens when the room opens up and still give you a clean paper trail.

Before and After Real-World Hobart Outcomes

The quickest way to make sense of budget and design is to compare real project shapes, not abstract price bands. A compact ensuite, a family bathroom, and a heritage terrace bathroom all follow the same basic process, but they live in completely different cost and compliance worlds.

A compact ensuite in a newer Kingston townhouse

This kind of room usually sits in the budget refresh zone. The brief is simple, replace dated fixtures, improve the look, and keep the layout stable. The homeowner usually wants a cleaner, lighter space without paying for structural changes that the current room doesn't need.

The finish choices here are restrained. A straightforward vanity, a new shower screen, updated tapware, and fresh wall and floor finishes do most of the work. The result is a faster turnaround and a room that feels much newer without being overbuilt.

A family bathroom in a 1990s Moonah home

The job becomes more serious. The old room often needs a full strip-out, better ventilation, and a layout that works harder for kids and daily use. The brief shifts from cosmetic improvement to durability and practical storage.

Mid-range materials usually make sense here. You're paying for better tiles, stronger waterproofing decisions, and a layout that reduces daily friction. The outcome is less about luxury and more about a bathroom that can absorb constant use without feeling worn out quickly.

A heritage-sensitive terrace bathroom in Battery Point

This is the project that proves why Hobart needs its own playbook. The brief usually includes council approval, conservative material choices where required, and a budget that sits well above a basic suburban refresh. Older plumbing, tricky access, and conservation expectations mean the build has to be managed carefully from the start.

A bright, modern ensuite bathroom featuring a light wood vanity, matte black fixtures, and a glass-enclosed shower.

The lesson across all three cases is the same. Don't budget by fantasy. Budget by the room's condition, the home's age, and the level of compliance the job needs.

Your Next Steps and How to Brief a Hobart Bathroom Quote

Start with facts from your own bathroom. Measure the room, photograph the problem areas, and write down what must change versus what would just be nice to have. If you can't explain the brief clearly in two minutes, the quote stage will be messy.

Give the first enquiry enough detail to be useful

Send a short scope note with the room size, the current layout, the fixtures you want to keep or replace, and any known issues such as leaks, poor ventilation, or cracked tiles. Add your timing expectations and whether the property has heritage or strata considerations. That gives the contractor a real basis for pricing instead of a guess.

When you shortlist local renovation companies, look for one that can walk the room, discuss layout options, and show a path to a detailed written quote. A good first meeting should leave you with clearer decisions, not more confusion. If the builder can't explain the sequence from demolition to handover, keep looking.

A strong brief usually includes:

  • Must-haves: The items that are essential.
  • Nice-to-haves: The features you'd add only if the budget allows.
  • Current problems: Water damage, poor ventilation, awkward storage, or layout pain points.
  • Finish direction: Basic, mid-range, or premium.
  • Approval issues: Heritage, council, or strata matters.

If you're at the point where the bathroom is annoying you every day, don't keep sketching ideas forever. Lock in the scope, choose the budget tier, and ask for a proper quote from a local specialist who can plan, design, and build around Hobart conditions.


If you're ready to turn a tired bathroom into a buildable plan, contact SitePro Bathrooms and request a customised quote. Bring your measurements, photos, and a clear list of must-haves, and you'll get a far better starting point for a Hobart renovation that's priced properly and designed to last.

  • siteprobathrooms

Bathroom Waterproofing Cost: A 2026 Homeowner Guide

A standard Victorian bathroom waterproofing job is usually $1,500 to $3,000, and Melbourne shower-area work often sits around $400 to $900 for a shower enclosure and wet area. If the membrane has failed and the bathroom needs to be stripped, re-waterproofed, and retiled, the same project can jump to $3,000 to $8,000+.

That's the part most homeowners only learn after the tiles come off. The line item on a bathroom renovation quote looks small until you realise you're not just paying for a coating, you're paying for a system that protects the whole room from hidden water damage.

What Most Homeowners Get Wrong About Waterproofing Quotes

A homeowner stands in a stripped bathroom, staring at three waterproofing quotes, and one of them is nearly double the others. The easy reaction is to assume the highest price is padding, or the lowest price is a bargain. In reality, the quotes are often pricing different scopes of work.

The figure itself can look simple. In Australia, bathroom waterproofing is commonly priced at about $40 per square metre, with broader guides placing a standard bathroom at roughly $500 to $1,000 and larger projects up to $4,000 (Yellow Pages pricing guide). That number helps, but it does not explain substrate repairs, corners, penetrations, inspection, or whether the job is part of a clean renovation or a remedial rebuild.

What changes the quote

A quote for bathroom renovations is rarely just membrane application. One builder might be pricing a neat new wet area with sound surfaces, while another is allowing for patching, priming, extra detailing, and sign-off. Those are not minor differences, they're the difference between a straightforward scope and a fragile one.

Practical rule: if two quotes look close only on the headline number, compare the inclusions line by line, not the price tag.

This is why waterproofing is a budget control item, not a commodity purchase. A cheap quote can be expensive later if it leaves out the work that prevents leaks in the first place. The rest of this guide gives you a way to read the quote the way a project manager does, not the way a brochure does.

Why Waterproofing Is a System, Not a Tin of Goo

A detailed 3D cutaway diagram demonstrating the multiple layers of a professional roofing and deck waterproofing system.

Think of a shower recess like a raincoat worn over a deck. The membrane is only one layer. Beneath it sits the substrate, then the primer or prep work, then the membrane itself, then the detailing around corners, joints, drains, and pipes, and finally the tile finish on top.

If one of those layers is rushed, the whole system gets weaker. That's why a bathroom can look perfect for months and still fail where the water pressure is highest, usually at corners, junctions, and penetrations. Those are the points that take the punishment, not the middle of a flat wall.

What you can actually point at

In a typical shower, the vulnerable spots are easy to spot once you know what to look for. Corners need careful treatment. Junctions between wall and floor need continuity. Drain connections need exact fit-up. Every pipe penetration needs sealing that matches the membrane system.

The visual shortcut is simple. If water can sit there, move through there, or collect there, it needs more than a quick brush-on coat. That's why complex modern bathrooms and designer bathrooms cost more than plain square rooms, even when the area in square metres looks similar.

For homeowners comparing new bathroom ideas, this is the useful takeaway. A cleaner layout with fewer penetrations is usually easier to waterproof well than a heavily detailed shower with shelves, niches, and multiple transitions. The room design affects the job before a product even goes on the wall.

Water doesn't fail in the middle of a perfectly flat surface as often as it fails at the details.

Inside a Waterproofing Quote Materials Labour and Compliance

A proper quote usually breaks into three parts, even if the paper does not label them that way. The membrane product is only one slice of the total. The cost sits in the time needed to prepare the surface, apply the system correctly, and document the work.

Typical Australian Waterproofing Cost Split

Cost component Per m² range Per job range What drives the cost
Materials $15 to $30/m² varies by room size membrane product, primers, tapes, sealants, detailing parts
Labour $35 to $55/m² varies by room size prep, priming, multi-coat application, corners, junctions, penetrations
Compliance and inspection not usually priced per m² $150 to $300 certification, inspection, paperwork, sign-off

That split reflects how the work gets done on site. Labour dominates because the trade spends time preparing the substrate, masking transitions, building up coats, and detailing the awkward parts homeowners never see once tiling starts. A flat room is one thing, a room with niches, multiple pipe points, or a tired substrate is another.

The labour-heavy reality matters for registered builders unlimited and for homeowners hiring a tiler or waterproofing trade under renovation supervision. A quote that looks high on product cost may still be fair if it includes the work that prevents callbacks. A quote that looks cheap can be hiding the expensive part, which is usually the labour that should have been priced in from the start.

Project manager's note: the membrane is the visible line item, but the labour is where quality usually gets won or lost.

For broader bathroom planning, the waterproofing allowance often sits inside the bigger tiling and fit-off budget. If you are comparing it against your overall tile scope, it helps to read it alongside bathroom tiling cost and a full bathroom renovation cost breakdown.

Membrane Types and When Each One Is Used

The right membrane depends on the room, not the brochure. A complex shower with niches and curved transitions asks a different question than a simple family bathroom with a straight floor run. The product choice follows the geometry.

Matching the membrane to the job

A sheet membrane suits large, open areas where consistency matters and the layout is relatively clean. It gives a controlled layer under the tile and works well when the installer can keep seams disciplined. A liquid polyurethane system is often easier to work into awkward corners, niches, and penetrations because it conforms to irregular shapes.

An acrylic system usually sits in the lower-complexity, more budget-conscious end of the market. It can suit standard bathrooms where the design is simple and the substrate is sound. A cementitious system is often chosen where build-up is needed and the trade wants a durable coating method on appropriate surfaces.

The practical rule is straightforward. If the bathroom has lots of detailing, you want a system that handles transitions cleanly. If it's a broad, simpler wet area, the trade can often work faster and more predictably with a more uniform approach. The wrong choice isn't always a failure on day one, but it can make the job harder to finish neatly.

For designer bathrooms, the membrane choice often follows the room's visual ambition. Curbless transitions, custom niches, and multiple shower features need more care because every extra interruption is another place for the waterproofing to be detailed properly. The cheap answer is rarely the elegant answer.

Victorian Rules Warranties and What Your Tradie Must Hand Over

In Victoria, waterproofing is a compliance step, not an optional extra. The standard homeowners should expect is AS 3740, and a renovation quote should state who is responsible for meeting it and documenting it. If the waterproofing sits inside a larger renovation, it needs to be part of the build plan with a clear paper trail, not a separate line item with no follow-through.

The paperwork matters because tiling should not begin until the waterproofing stage has been inspected and signed off. For a Victorian bathroom, that usually means asking who is inspecting the work, who is issuing the certificate, and whether the quote includes the full wet-area detail, penetrations, and junctions before any finish goes down. If the quote does not mention certification, ask why.

What to expect in the handover folder

  • Waterproofing certificate: proof that the wet-area work was completed and inspected before tiling.
  • Product and installer warranty details: the product warranty and workmanship warranty are separate.
  • Scope notes: what was waterproofed, what was excluded, and whether the substrate was repaired first.
  • Photo record: useful for future maintenance, insurance discussions, and resale questions.

The standards themselves matter as much as the price. Review bathroom waterproofing standards in Australia if you want to check whether a quote sounds like a proper wet-area build or just a coating line item.

For homeowners comparing Victoria quotes, the pricing picture still gives a useful guide. A shower recess can sit around AUD $800 to $1,500, a full bathroom floor and shower around AUD $1,500 to $3,000, and larger or more complex bathrooms around AUD $3,000 to $5,000+. That spread makes sense once you factor in compliance, detailing, and the extra labour that comes with a proper renovation scope.

Three Realistic Quote Scenarios for a Victorian Bathroom

A quote only makes sense once you know which job it covers. A shower recess, a full bathroom waterproofing package, and a remedial strip-out all sit in different price buckets, even though each one gets called “waterproofing”.

A graphic showing three different renovation pricing levels for a Victorian style bathroom, including budget, mid-range, and luxury options.

Scenario one, shower-only

A Melbourne shower enclosure and wet area can come in at $400 to $900 (Melbourne waterproofing guide). That is usually the cleanest scope because the work is confined to a smaller area with fewer junctions and fewer trade interfaces. It suits a straight, uncomplicated shower where the substrate is already in decent shape and the detailing does not need a lot of corrective work.

Scenario two, full bathroom in a renovation

A full bathroom waterproofing package in Victoria is commonly $1,500 to $3,000. That range reflects the amount of detail in the room, not just the size of the floor. Wall junctions, floor area, penetrations, and the fit-out sequence all start to matter here, which is why a proper quote for a full-room job needs to sit alongside broader planning for full bathroom renovation costs.

This is the bucket most homeowners land in when they are renovating the whole room. It covers the actual wet area work, but it also has to fit around the rest of the bathroom build, so timing and coordination push the quote up or down.

Scenario three, remedial strip-out

When a membrane has failed, the bathroom has to be stripped, re-waterproofed, and retiled, and the cost can run $3,000 to $8,000+ in Melbourne. That lift in price is not about a fancier membrane. It comes from the labour, waste removal, substrate repairs, and finish restoration involved in taking a damaged room back to bare structure and building it again.

A clean renovation quote and a remedial quote are not competing versions of the same job. One prices a planned wet-area build, the other prices a repair job that starts after the room has already failed.

If you are comparing Victorian quotes, these three buckets are the ones that matter. The useful question is not what waterproofing costs in the abstract, it is which of these jobs the quote covers.

Why the Cheapest Quote Is Often the Most Expensive

The cheapest quote is often cheap because it excludes the hard parts. Substrate repair, detailed corner treatment, pipe penetrations, certification, and re-tiling after a failed membrane are the items that make a real difference, and they're also the items a cut-price quote is most likely to trim.

That's how a $1,500 number can turn into a $5,000 surprise in practice. The homeowner accepts the low quote, then discovers the bathroom needs prep work before the membrane can go on, or that the job doesn't include the paperwork required before tiling. In remedial work, the hidden cost is usually diagnosis and restoration, not the membrane itself.

Questions worth asking before you sign

  • Is substrate preparation included? If not, the quote may be incomplete.
  • Which membrane system is named? A vague “waterproofing” line item tells you very little.
  • Who handles certification? If no one can answer that, the scope is too loose.
  • What happens if a leak appears inside the warranty period? You want the answer in writing.

A quote that is clear on those points is easier to trust than one that just looks low. For modern bathrooms and designer bathrooms, the cheapest path can become the most expensive when the room has multiple details and the installer has budgeted for only the simplest version of the job.

For practical planning, the right question isn't “who's cheapest?”, it's “who has allowed for the full wet-area scope without hiding the risk in variations?”

Your Next Steps and How to Get a Tailored Quote

Measure the wet area, photograph every corner and penetration, and gather any existing paperwork before you ask for quotes. Write down whether you want the bathroom to feel family-friendly, investor-grade, modern, or designer so the scope matches the finish you want.

Screenshot from https://siteprobathrooms.com.au

If you're in Victoria and want a coordinated renovation quote, SitePro Bathrooms handles concept development, 3D design, construction, and handover as one scope. Bring the room dimensions, photos, and your finish priorities, then ask for a waterproofing allowance that clearly states what's included and what isn't.

  • siteprobathrooms

Renovation Cost Per M2 Australia: 2026 Breakdown

A good-quality renovation in Australia usually sits around A$3,000–A$5,000 per m². But a bathroom renovation often lands at A$15,000–A$30,000, and that's why small rooms can make cost per square metre look much higher than a whole-house average.

That gap catches homeowners out all the time. A compact bathroom can look expensive on paper even when the actual spend is still in the normal range for bathrooms, kitchens, and other wet areas.

Understanding the Australian Renovation Cost Range

The first mistake most homeowners make is treating renovation cost per m2 Australia as if it were one fixed national number. It isn't. A practical starting point is the broad Australian range of about A$3,000–A$5,000 per m² for a good-quality renovation, with basic cosmetic work often closer to A$1,000–A$2,500 per m² and high-end or luxury work able to exceed A$7,000 per m² (Custom Homes Online).

That range matters because the figure shifts with scope, finish level, and the type of room you're renovating. A whole-house quote spreads costs across larger areas and softer trades, while a bathroom or kitchen concentrates labour, compliance, waterproofing, tiling, and fixtures into a very small footprint.

Why a small bathroom skews the maths

A 6-square-metre bathroom in Highett can still need the same specialist trades as a much larger wet area. The floor area is tiny, but the fixed costs are not. Demolition, waterproofing, plumbing, electrical work, tiling, and fixtures all have to happen whether the room is 4 m² or 14 m².

That is why homeowners often see a per-m² number for a bathroom that looks far above the national average. The room is not overpriced just because the ratio is high. It usually means the project has fixed trade costs that do not shrink just because the room is small.

The trend from 2024 to 2026 supports that reading. Earlier guidance often sat closer to the lower thousands per square metre, but recent Australian guides place standard work in the A$3,000–A$5,000 per m² band and higher-end work above that, reflecting pressure from labour, materials, and trade availability.

Practical rule: use per-m² pricing to sanity-check a whole-home budget, but use room-specific budgeting for bathrooms and kitchens. That is where the numbers actually hold up.

For homeowners planning bathroom renovations, the better question is not “what's the average per m²?”. It is “what finish level am I buying, and what work is hidden inside that room?”

For kitchen planning, a room-by-room budget is more reliable than a blanket m² estimate. A useful starting point is the cost of a new kitchen guide, then adjust for joinery, appliance quality, plumbing moves, and how much structural work the room needs.

How Room Type Changes Your Cost Per Square Metre

Bathrooms and kitchens sit at the top of the cost stack because they're packed with trades and compliance work. A dry room, like a bedroom or living area, is mostly about surfaces. A wet area needs waterproofing, drainage, plumbing, electrical coordination, tiling, and joinery that must all line up properly.

That's why a cost per square metre figure can be useful for some rooms and misleading for others. A bedroom renovation can look relatively modest on a per-m² basis, while a bathroom can look shockingly expensive even when the absolute spend is still quite normal.

Room Type Per-Project Range Per-m² Range
Bathroom A$10,221–A$20,443 Best estimated from scope rather than area
Kitchen A$8,179–A$20,443 Best estimated from scope rather than area
Tiling A$36–A$92 per m² A$36–A$92 per m²
Flooring A$46–A$112 per m² A$46–A$112 per m²

Those project-level bathroom and kitchen benchmarks come straight from national Australian renovation market guidance, which also notes that tiling in Melbourne runs A$37–A$94 per m² (What's the Damage). That regional lift is modest on paper, but it still matters when you're comparing Highett, Melbourne, and broader national averages.

For a kitchen planning reference, a room-by-room approach is more reliable than a blanket m² estimate. If you want a useful comparison point, see the structure of a new kitchen cost breakdown and compare it with your actual scope.

What pushes wet areas higher

Bathrooms and kitchens are expensive because the cost drivers are stacked. Waterproofing is not optional. Plumbing relocations are rarely cheap. Electrical upgrades, extra cabinetry, and specialty finishes all add weight to the quote.

Wet-area pricing is built from fixed trade work first, and floor area second.

That's why modern bathrooms and designer bathrooms often sit at the upper end of the market. The room might be small, but the service load is dense.

The Finish Level Multiplier and What Your Budget Buys

Finish level is the main multiplier. Two bathrooms can share the same footprint and still sit in very different budget bands, because one is a basic cosmetic refresh and the other is a full rebuild with upgraded services and premium finishes.

In Victoria, a standard renovation benchmark sits at A$3,500–A$5,100 per m², cosmetic work is A$2,200–A$3,400 per m², and high-end work rises to A$4,800–A$7,200 per m² (CO-Architecture). That spread shows why “renovation” is not one product, and why bathroom and kitchen owners get the most misleading answers from a simple per-m² figure.

A woman looks concerned while reviewing a digital home budget spreadsheet on her laptop computer screen.

Cosmetic, standard, and high-end are not the same job

A cosmetic bathroom update usually keeps the layout, refreshes the finishes, and replaces tired visible items. That can deliver a clean result without opening the slab, moving plumbing, or redesigning the whole room.

A standard renovation goes further. It usually means a more complete reset, with better fixtures, smarter layout choices, and a stronger finish across the room. High-end work moves into custom joinery, premium surfaces, more design time, and tighter detailing.

The trade-off is simple. A homeowner can lift a room sharply with proper waterproofing, well-chosen tiles, and durable fixtures, without paying for luxury where it will not return value. A careful standard finish often looks more balanced than a flashy mix of expensive items dropped into a poor layout.

Spend on the parts you cannot easily change later, then keep the decorative layers disciplined.

That matters most in bathrooms, where layout and services are expensive to redo. If you are planning new bathroom ideas, use finish level to decide how far to go, not just what looks impressive in a showroom.

For reference, the national renovation benchmark also sits in a similar middle band, with quality projects commonly around A$3,000–A$5,000 per m² and high-end work able to reach A$5,000–A$7,000+ per m² (Three Birds Renovations).

Hidden Cost Drivers That Catch Homeowners by Surprise

Most budget blowouts don't come from the visible items. They come from what's under the old bathroom, behind the walls, or built into the way the house was originally constructed. In older Victorian homes, that's where the quote can change fast.

A stressed homeowner reviewing financial paperwork in a construction zone with a list of unexpected renovation costs.

The work that rarely looks expensive at the start

Old waterproofing is the big one. If the membrane has failed, the room often needs a more thorough rebuild than the homeowner expected. That can force extra demolition, more labour, and a deeper reset before the new finishes even go in.

Access is another hidden issue. Tight hallways, awkward staircases, and older building layouts make materials harder to move and labour slower to complete. Waste removal also gets more expensive when the site is constrained and skips can't be placed conveniently.

Then there's the planning layer. Renovation cost indicators for broader Australian projects say to estimate by adding the structural cost of new construction, the fit-out cost of the kitchen, bathrooms and laundry, the cost of upgrades to the existing home, and costs for decks, verandas, garages, and carports (Caulfield Krivanek). That framework matters because bathrooms are rarely just “a bathroom”. They're a fit-out line item sitting inside a bigger structural reality.

Questions to ask before you sign

  • Does the quote include demolition and rubbish removal? If not, that cost often lands later.
  • Is waterproofing included as a complete system? Partial wording can hide extra work.
  • Are plumbing relocations priced, or only like-for-like replacement? That difference changes the budget quickly.
  • Do permits, certifications, and final inspections sit inside the quote? They shouldn't be an afterthought.
  • Are electrical upgrades included, or allowed for separately? Bathrooms often need more than a surface refresh.

A 1960s Highett bathroom is a classic case where the room looks simple but the quote grows once the old structure is exposed. That doesn't mean the builder has padded the job. It usually means the room needed more than the surface plan suggested.

Sample Budgeting Calculations for a Highett Bathroom

A 5-square-metre bathroom is small enough to distort per-m² thinking and big enough to carry real costs. That makes it a useful planning example for Highett homeowners who want a realistic budget before seeking quotes.

For a room like this, a cosmetic refresh can plausibly sit around A$12,000–A$18,000. A standard renovation may land around A$18,000–A$28,000. A modern bathroom or designer bathrooms project can move into A$28,000–A$40,000+ once better fixtures, more complex finishes, and extra coordination are added.

The national bathroom benchmark helps frame that range. Hipages lists a typical Australian bathroom renovation at A$15,000–A$30,000 in 2026, which lines up with the idea that bathrooms are a defined room category, not a generic home-wide average.

A simple working budget

For a 5 m² bathroom, a practical scope might look like this in broad terms.

  • Demolition and removal, if the old room needs stripping back properly.
  • Waterproofing and tiling, which usually take a meaningful share of the budget.
  • Plumbing relocations, if the layout is changing rather than staying put.
  • Cabinetry and fixtures, including vanity, toilet, shower fittings, and tapware.
  • Electrical upgrades, especially where lighting or power needs updating.
  • Permits and certifications, where required.
  • Contingency, because old bathrooms often reveal more than they promise.

For a structured budgeting workflow, use the bathroom renovation cost calculator to test different finish levels before you commit to a builder's quote.

The budgeting discipline that actually works

Start with the room layout, then price the waterproofing and services, then layer finishes on top. That order matters because the hidden trades are what make a bathroom expensive, not the tapware alone.

If you want to avoid underquoting, set your budget around the likely room level first, then trim finishes if you need to. Do not start with the cheapest decorative items and hope the rest will somehow fit.

Smart Cost Reduction Strategies That Do Not Compromise Quality

The quickest way to save money is to cut scope early. Every plumbing move, structural change, and layout change adds trades, time, and coordination. Real savings usually come from disciplined decisions, not from chasing the cheapest item on every line.

Start by matching the finish level to the room's job and the property's value. A bathroom does not need luxury in every detail to work well. It needs a sound shell, a practical layout, and finishes that can cope with daily use without constant maintenance.

Where to save and where not to

Keep the plumbing where it already makes sense. Reusing the existing layout often removes a lot of complexity, especially in older homes where moving services starts a chain reaction across the room.

Put money into waterproofing, substrates, and anything that protects the structure. Those are poor places to bargain hunt. Save on decorative items that can be changed later, such as accessories or lighter styling choices.

Design detail also reduces change orders. 3D design visualisation helps the client and builder agree on the layout before demolition starts, which lowers the risk of expensive mid-build decisions. It is not a flashy step, but it often saves money by avoiding rework.

The cheapest renovation is usually the one that gets designed properly before the first wall comes down.

Three Birds Renovations notes that renovation pricing can vary widely by finish level and scope. That spread is the point. It shows why a bathroom or kitchen budget should be built around the room's likely workload first, then adjusted through finish choices rather than hope.

For homeowners considering whether to bring in SitePro Bathrooms, the practical question is whether the project needs coordinated design, quoting, and construction instead of piecemeal management. In a wet area, that coordination can mean the difference between a clean handover and weeks of avoidable rework.

The budgeting discipline that works

Price the room in this order, layout first, waterproofing and services next, finishes last. That sequence reflects how bathroom costs are built. The hidden trades drive the budget more than the visible fittings, and the small room format makes that even more obvious.

For kitchens and bathrooms, this approach matters because per-m² pricing can mislead. A compact room can look expensive on paper while still sitting inside a sensible room-level budget. The better method is to set a realistic allowance for the room, then decide where higher-grade finishes earn their place and where a standard spec is enough.

Keep one contingency line in the budget. Older bathrooms rarely open up exactly as planned once the walls or floor are exposed. If the room needs extra rectification, that reserve protects the quality of the final result without forcing cuts in the wrong places.

When to Engage a Registered Builder for Your Renovation

Bathroom projects are where compliance risk climbs fastest. Waterproofing, plumbing, electrical work, and finishing all need to line up properly, and a missed detail can turn into a costly fix later. That's why a registered builder often makes sense when the room is more than a cosmetic refresh.

What to check before you hire

Look for registered builder status first. Then check whether the builder can show completed wet-area work, not just general renovation photos. A portfolio with new bathroom ideas, modern bathrooms, and designer bathrooms gives you a much better sense of real experience than a polished sales pitch.

You should also confirm the service scope. Some builders only price construction. Others handle concept development, 3D design, build coordination, and finishing as one integrated process. That broader scope is usually more useful for homeowners who want one accountable team.

A specialist option in Highett is SitePro Bathrooms' guide on why using a registered builder matters. The point isn't the brand name, it's the model. Wet-area renovation works best when design, quoting, and construction are coordinated from the start.

Why the upfront fee isn't the whole story

A professional team can cost more at the quote stage, but that doesn't automatically mean a higher final spend. Better scope definition reduces variations. Proper sequencing reduces delays. Accurate quoting reduces the shock of missing items that reappear halfway through the build.

The test is net value. If a builder prevents waterproofing errors, rework, and scope drift, the job often ends up better controlled than a cheaper quote that leaves too many gaps.

Screenshot from https://siteprobathrooms.com.au

Frequently Asked Questions About Renovation Cost Per m²

Is per-m² pricing reliable for bathrooms?

Only as a rough guide. Per-m² pricing is useful for broad budgeting, but bathrooms distort the figure because a small room carries the same fixed trade costs as a larger area. Waterproofing, plumbing, electrical work, demolition, and fit-off all get squeezed into a compact footprint, so the cost per square metre can look inflated even when the actual room budget is normal for a quality renovation.

Why do Melbourne and Highett quotes often feel higher than national averages?

Victorian jobs usually carry firmer labour costs, tighter compliance requirements, and stronger expectations around finish quality. A standard renovation in Victoria commonly sits around A$3,500–A$5,100 per m² (CO-Architecture). That is one reason Melbourne quotes often sit near the upper side of national guidance, especially for kitchens and bathrooms where labour density is high.

What should be included in a proper bathroom quote?

A proper quote should clearly cover demolition, waterproofing, tiling, plumbing, electrical, fixtures, cabinetry, and any certification or permit work that applies to the job. If those items are left vague, the final price is still moving. Homeowners usually feel that gap only after work starts.

A detailed scope also makes the comparison fair. Two quotes can look close on paper while one is missing demolition disposal, licensed trades, or finish items that the other has already allowed for.

How do I tell whether a quote is underdone?

Check for broad allowances, missing trade categories, and wording that only covers like-for-like replacement. Bathrooms rarely stay like-for-like once the wall linings come off. Hidden damage, old services, and out-of-square framing can all push the job beyond the first number.

If the quote reads clean but the scope is thin, it is probably light on reality. That is where budgets get strained, because the missing work arrives later as variations.

Has renovation cost per m² Australia changed much in 2026?

The pressure is clearer at the top end. Recent guidance still places standard work around A$3,000–A$5,000 per m², with high-end work higher again, and the pressure is strongest where kitchens and bathrooms absorb more labour and specialist trades (Shaf Build, Three Birds Renovations). The main shift is not the idea of per-m² pricing itself, it is how fast the number climbs once finish level and hidden scope are included.

The safest approach has not changed. Set the room scope first, choose the finish level second, and price the hidden work before you get attached to the decorative details.

If you are planning a bathroom or kitchen renovation in Highett or greater Victoria, start with a room-level budget, not a broad m² assumption. Then ask for a detailed, scope-based quote so you can compare like with like and avoid the surprises that usually surface after demolition.

  • siteprobathrooms

Kitchen Makeovers Melbourne: Your 2026 Planning Guide

You're standing in a Melbourne kitchen that's done its time. The benchtop is tired, the layout feels cramped, and every cabinet door reminds you that a quick patch-up might only delay the inevitable. That's the decision most homeowners face, a cosmetic refresh that buys time, or a proper kitchen makeover that fixes the way the room works.

In kitchen makeovers Melbourne, the wrong move is usually spending on finishes before the structure, services, and layout are clear. The right move is blunt, staged, and practical. Know what category your job sits in, lock the technical decisions early, and spend where function and durability justify it.

What a Melbourne Kitchen Makeover Actually Involves

A tired Melbourne kitchen usually forces a blunt choice. Keep the room's bones and improve the surfaces, or strip it back and fix the layout, services, and storage at the same time. That decision sets the scope, the timeline, and the budget.

A pensive woman standing in a cluttered, aged kitchen while looking down at the worn countertops.

Scope decides everything

A cosmetic refresh can start around $8,400, while premium custom-joinery renovations reach $47,250 to $84,000+ in the 2026 city cost guide, with a standard 11 to 14m² full remodel commonly sitting at $26,250 to $55,000+. For a clearer breakdown of what sits behind those figures, see the new kitchen cost guide for Melbourne.

That spread makes the point. A kitchen makeover is not one fixed job.

If you keep the carcasses, leave plumbing where it is, and mainly change surfaces, you are in refresh territory. Once you start moving services, changing the layout, or replacing joinery, you are into proper renovation work. In older eastern-suburb homes, that line blurs quickly because the room often hides old framing, awkward service locations, and patchwork repairs from earlier work.

Practical rule: if you have not measured the room, mapped the services, and checked what can actually move, you do not have a design brief yet. You have a wish list.

Melbourne homes are not all the same job

An inner-city apartment is usually about circulation, compliance, and limited service movement. A terrace in an older suburb can give you more character, and more surprises behind the plaster. A townhouse in a growth corridor may be simpler structurally, but it can still be tight on storage and service coordination.

That is why owner-occupiers and investors need different thinking. An owner-occupier usually wants long-term comfort and a better workflow. An investor wants durable finishes, controlled vacancy, and a scope that does not overcapitalise for the rental market.

Know which bucket you are in

If your current kitchen has decent bones, a targeted makeover can be the right call. If the layout fights you every day, the room is undersized for how you live, or the services are all in the wrong place, a bigger scope is justified. The point is to name the category before you get distracted by samples and showroom lighting.

In Melbourne kitchen makeovers, the wrong move is spending on finishes before the structure, services, and layout are clear. The right move is blunt, staged, and practical. Lock the technical decisions early, then spend where function and durability justify it.

Real Cost Ranges for Kitchen Makeovers in Melbourne

Melbourne pricing makes sense once you stop treating a paint-and-swap refresh like the same job as a full kitchen rebuild. The market moves in clear tiers, and homeowners who ignore that usually end up forcing a mid-range finish onto a budget scope, or underfunding a job that plainly needs more than cosmetic work.

The current price bands

A 2026 Melbourne kitchen renovation guide breaks projects into practical tiers, a cosmetic refresh from $8,400, a full budget renovation with flat-pack cabinetry from $12,600 to $26,250, mid-range work from $26,250 to $47,250, and premium custom-joinery jobs from $47,250 to $84,000+ (Melbourne cost tiers). The same guide says a standard 11 to 14m² full remodel commonly costs $26,250 to $55,000+.

That sits alongside broader Victorian benchmarking. The average kitchen renovation cost in Victoria is reported at $42,630 in the HIA Kitchens and Bathrooms Report 2024/25, and Melbourne-focused guidance treats that as a fair current benchmark for kitchen makeovers.

Melbourne tiers at a glance

Tier Indicative spend Typical scope Best for
Cosmetic refresh From $8,400 Surface updates, selective replacement, limited disruption Tired kitchens with good bones
Budget renovation $12,600 to $26,250 Flat-pack cabinetry, tighter material choices, restrained layout changes Owners wanting function without full custom joinery
Mid-range renovation $26,250 to $47,250 Better finishes, more custom storage, more capable layout work Most family kitchens that need real improvement
Premium custom renovation $47,250 to $84,000+ Custom joinery, more complex detailing, higher finish level Homes where design, fit, and longevity matter most

A useful cross-check is the broader Australian spend pattern. One renovation spend study shows the most common kitchen budget sits in the $20,001 to $40,000 band, with sizeable groups spending $10,001 to $20,000 and above $40,001, while fewer projects stay under $10,000. That points to the same practical reality, serious kitchen work usually lands in the middle, not at the bottom.

The hidden budget killers in Melbourne are usually not the pretty items. It is the old wall behind the cabinets, the electrical upgrade needed for a different appliance set, the body corporate process in an apartment, or the heritage restriction that turns a simple change into a harder and more expensive one.

See how kitchen pricing breaks down in more detail

Reading Your Existing Kitchen Before You Design Anything

Before anyone sketches a new layout, you need to read the room like a surveyor. Measure the space properly, locate every service point, and work out what the kitchen is already telling you about what can stay and what has to change. Skip that, and you're designing on assumptions.

Start with the fixed points

Map the plumbing, gas, and electrical positions first. Check whether the walls are stud or brick, because that changes what can be altered without turning the job into a structural exercise. In apartments, body corporate rules can limit what happens to flooring, wet areas, penetrations, or exhaust paths, so don't assume the same scope applies across every Melbourne building type.

Then identify the immovable constraints. Load-bearing walls, waste stacks, gas mains, and building rules all outrank wishful thinking. In heritage areas, exterior-facing changes can also trigger extra scrutiny, especially when windows, façade elements, or visible alterations are involved.

Check the stuff that hides the delay

Pre-1990s kitchens can carry asbestos risk, so that needs checking before demolition starts. Apartment waterproofing membranes matter too, because layout changes that shift wet-zone pressure or service locations can complicate the works in ways homeowners don't see until late. Even ceiling height can become a problem if bulkheads or uneven services eat into the room.

If the floor is out, the walls are crooked, or the ceiling line is compromised, fix that before joinery goes in. Cabinets are not supposed to solve bad substrate work.

Lock the service plan early

The cleanest renovation sequence is simple, decide appliance positions, then confirm plumbing and electrical locations before demolition. That lets the rough-in happen once, while the walls are open. Late changes after cabinetry is ordered are expensive because they force resequencing, not just small edits.

A kitchen that looks like a candidate for a simple refresh can become a full renovation once the measurements are checked against what's behind the plaster. That's normal, and it's exactly why this stage matters. You're not overthinking it. You're preventing the usual Melbourne surprises that turn a neat plan into a messy one.

The Build Sequence That Prevents Costly Rework

A kitchen build goes wrong when trades arrive in the wrong order. The result is predictable, crooked finishes, gaps around cabinets, appliances that sit badly, and extra labour to undo work that should never have been done twice.

A professional construction worker installing a base cabinet in a kitchen undergoing renovation in Melbourne.

The order that actually works

Start with site protection and demolition. Then disconnect services, complete plumbing and electrical rough-in, correct the substrate, install the cabinetry, template the benchtop once the cabinets are fixed, then finish with splashback, fit-off, and defect checks. That technical sequence is the one that keeps the job under control.

The order matters because each step locks in the next one. Benchtops must be templated after the cabinets are level and secured. Do it earlier and you inherit out-of-square walls, uneven reveals, and clearance problems around appliances. Those errors usually surface late, when changes cost more and the room is already half finished.

Timelines are driven by coordination, not optimism

A clear renovation timeline helps here. Australian guidance for kitchen projects generally puts demolition at 1 to 3 days, rough-in at 1 to 2 weeks, cabinets and floors at 1 to 2 weeks, and countertops and tiling at up to a week plus fabrication lead time (timeline benchmark). That is a planning guide, not a promise. The actual schedule depends on how well the trades are lined up and how much correction the room needs once it is opened up.

A modest kitchen can still run for several weeks before fabrication is even counted. If a builder sells speed but does not talk about substrate prep, cabinet level, or lead times, the programme is weak. In Melbourne, older terraces, apartment jobs, and tired family homes all create the same risk, hidden defects that only show once the demolition dust settles.

Builder check: ask who handles templating, who signs off on level and square, and what happens if the substrate needs correction after demolition. If that answer is vague, the sequence is already exposed.

Where projects slip

The usual failure point is preparation. Floors and walls that are not true make fit-off harder, and the defects only show at the end when the budget is already committed and the team is tired. In older Melbourne housing stock, that problem is common because the room can look fine until demolition exposes the actual line of the structure.

Keep the sequence disciplined and the job gets cleaner. Skip it and you pay for the same work twice.

Choosing Styles, Finishes and Materials for Melbourne Conditions

Melbourne kitchens need to work hard in homes that range from terraces to apartments to family houses in the eastern suburbs. The right finish is not the fanciest one on a sample board, it's the one that suits the building, the usage pattern, and the amount of maintenance you're willing to tolerate.

Screenshot from https://siteprobathrooms.com.au

Benchtops should be chosen for use, not aspiration

Laminate usually wins on cost discipline and is often enough for a refresh where the structure is staying put. Engineered stone and natural stone step the project up visually and materially, but they need to be justified by the rest of the scope. Solid surface can make sense where a uniform look matters more than dramatic patterning.

If you're planning to connect the kitchen with modern bathrooms, designer bathrooms, or new bathroom ideas, keep the material language consistent across the home. That doesn't mean matching everything exactly. It means using a restrained palette so the rooms feel intentional together, not like separate ideas from different years.

Cabinetry and splashbacks need to survive daily wear

Cabinetry finishes in Australian kitchens have to handle heat, moisture, traffic, and the odd careless knock. That's why a finish that looks impressive under showroom lights can age badly if the room gets a lot of use. Splashbacks are similar. Tiles give you joints and texture, slabs reduce visual interruption, and glass gives a clean line, but each one changes the maintenance and detailing load.

The right call depends on how compact the kitchen is. In a small apartment kitchen, a quieter finish often makes the room feel larger and less busy. In a larger family kitchen, a more grounded, durable finish can carry the space without looking overdesigned.

3D visualisation is worth it in Melbourne

3D design is not a vanity step. In tight kitchens, it catches clearance problems, bulkhead clashes, and awkward transitions before anything is ordered. That matters more in Melbourne apartments and compact townhouses than in larger homes, because fitting errors are less forgiving.

Material choice gets easier when you compare the options side by side, especially before you lock cabinetry and appliance positions. I'd rather see a homeowner spend on good design clarity than on a flash finish that doesn't fit the room.

When a Smaller Scope Beats a Full Renovation

Bigger isn't always smarter. In a compact apartment galley, a unit with hard-to-move services, or a rental where vacancy cost matters, a full gut reno can be the wrong answer. You don't get extra value just because more trades showed up.

The best small-scope jobs are targeted

A focused upgrade can do a lot if the room is workable. New benchtops, a better splashback, re-faced or replaced cabinet fronts, updated hardware, refreshed lighting, and a few joinery tweaks inside the existing footprint can transform how the kitchen feels without rewriting the whole room.

That matters in inner-Melbourne housing, where small kitchens are common and storage, circulation, and compliance are the primary challenges. Generic makeover content often skips that reality. It treats every kitchen like a blank canvas, which is useless when the room is hemmed in by walls, services, and apartment rules.

Investors should think differently

For landlords, the right question is whether the kitchen needs to be nicer, or more durable and more usable. If the existing layout works and the finishes are just worn, a limited refresh can reduce downtime and keep tenant appeal strong without the disruption of a full rebuild.

Good enough is not a weak plan when the property is a rental. It's a commercial decision. Overspending on a kitchen that doesn't change the rent story is how investors burn money on pride instead of yield.

Choose scope to match the asset

A full renovation makes sense when the layout is wrong, the services are compromised, or the kitchen is dragging down the whole home. A smaller scope wins when the room already functions and the core issue is age, wear, or visual fatigue.

That's the honest answer most homeowners need. The right project is the one that solves the problem in front of you, not the biggest one you can imagine.

Working With Your Renovation Company and Locking In the Job

By the time you're ready to appoint a builder, the work is about control. You want a renovation partner who can price the scope properly, sequence the trades, and keep the handover tidy enough that you're not discovering unfinished edges after the money is spent. That starts with the right paperwork and the right expectations.

What should be in the contract

The contract should state the fixed scope, the allowances, the prime cost items, the milestone payment schedule, the defect liability period, and a realistic program with some float. If those pieces aren't explicit, you're leaving room for arguments later. Good documentation protects both sides, but it protects the homeowner more.

A registered builder with unlimited cover is the safer choice when structural scope, service changes, or more complex coordination are on the table. A kitchen can look simple on the surface and still involve multiple trades, approvals, and sequencing risks underneath.

Ask how the design phase works

A proper 3D design phase should show you where appliances sit, how the joinery fits the room, and where the trouble spots are before anything is ordered. That's especially important if you're combining kitchen and bathroom works or planning a broader home refresh, because one consistent plan saves rework later.

A specialist renovation company that handles concept, 3D design, construction, and finishing tends to reduce handover surprises because the same team is accountable from start to finish. SitePro Bathrooms operates that kind of end-to-end model in Victoria, including kitchen and bathroom renovations, which suits homeowners who want the design and construction stages tied together under one process.

Melbourne admin is not optional

If structural work or plumbing changes are involved, you should expect a building permit conversation, not an afterthought. Apartment owners also need to factor in body corporate approvals, access rules, and any limits on noise, waste removal, or service changes.

Before you sign, make the builder answer four questions plainly, what's included, what's excluded, what can shift the programme, and who fixes defects after handover. If they can't answer that without fluff, keep looking.

The right next step is simple. Review completed local kitchen makeovers, compare the actual scope against your own room, then request a custom quote so the conversation starts with real numbers, not guesswork.