

• siteprobathrooms

Designing a Kitchen Island That Works for Real Life

You're standing in the kitchen with a tape measure, trying to decide whether an island will improve the room or leave everyone squeezing sideways between the cooktop and fridge. The plan looks simple. Draw a rectangle, add stools, choose a stone top. In a Victorian home, less forgiving.

A kitchen island affects floor structure, plumbing, electrical work, appliance access, stone fabrication, cabinetry delivery and the way the rest of the renovation is sequenced. It can also compete with bathroom renovations for the same trades, budget and working space. Good designing a kitchen island starts with buildability and budget, then moves to storage, seating and finishes.

Why Your Kitchen Island Is Bigger Than a Bench

A long island can look excellent on a plan and still fail on site. I have seen layouts with generous stools, useful storage and a broad preparation surface become awkward once the dishwasher door, refrigerator swing and route to the dining area were marked on the floor. The island fitted dimensionally, but two people could no longer move through the kitchen without getting in each other's way.

An island becomes part of the room's structure, services and circulation. Its footprint affects safe appliance access, clear movement and the installer's ability to bring cabinetry and stone into position without damaging completed floors, walls or joinery.

Its size also creates work beyond the kitchen:

  • The floor carries new loads: Cabinetry, appliances, stone and people leaning on a seating edge concentrate weight in one area. Older Victorian floors may need checking before the layout is fixed.
  • Services need a route: A sink, dishwasher, cooktop, power point or gas connection must be planned before flooring and cabinetry are closed.
  • The benchtop controls logistics: A large slab requires accurate measuring, delivery planning and, where sheet dimensions cannot cover the run, a carefully positioned joint.
  • The renovation sequence changes: Demolition, rough-ins, flooring, cabinetry, stone templating and final fit-off need to follow the correct order.

Practical rule: If the island only works after you ignore door swings and traffic paths, it does not work.

Australian planning guidance generally allows at least 900 mm around an island, with 1,000 to 1,200 mm preferred where two people cook, unload a dishwasher or pass each other regularly. A seating zone also needs roughly 900 mm behind stools when someone must walk past, particularly in a family kitchen or shared preparation area. The Australian kitchen-island planning guide provides useful guidance for checking whether an island will fit.

These clearances are only the beginning. The island must also suit the floor structure, service routes, slab handling and the wider renovation program.

If an adjoining bathroom is being stripped at the same time, the builder may be coordinating demolition, electrical work, plumbing, plastering and floor protection across both rooms. A rushed island decision can send trades back to completed areas, increase disruption and make the connected renovation harder to control. Plan the island while those adjacent works are still being drawn, not after the finishes have been chosen.

Getting the Size and Clearance Right

The island should be drawn around the room's fixed conditions, not around a photograph. Measure walls, windows, doors, bulkheads, existing cabinetry and appliance positions. Then draw the island at full size, including handles, open doors, stools and the standing space needed to work safely.

Use clearance as a behaviour test

Keep at least 900 mm around the island. Allow 1,000 to 1,200 mm preferred where two people cook, unload a dishwasher or pass each other regularly. The Australian guide to island sizes and layouts outlines these planning considerations. The wider clearance is working space, not decoration. It lets one person prepare food while another opens a drawer or carries a dish past.

Test the plan in this order:

  1. Map appliance door swings and traffic paths.
  2. Set the island footprint.
  3. Check working-side clearance.
  4. Check seating-side clearance.
  5. Run through the busiest daily routines before ordering cabinetry.

A standard Australian island bench is commonly 900 mm deep overall, using 600 mm cabinetry and a 300 mm seating overhang. Bench-to-bench spacing of about 1,200 mm is widely used, while comfortable stool use needs at least 300 mm of legroom beneath the top. The Australian kitchen dimensions guide explains these dimensions and their structural implications.

An outdoor air conditioning unit with labeled clearance measurements for optimal airflow, maintenance, and system longevity.

Size for the people who use it

A compact prep island may suit one cook. A family island needs separate areas for preparation, serving, seating and movement. If one person is chopping, another is carrying a hot tray and a child is eating at the end, a clearance that looked acceptable on paper can become restrictive.

Do not extend the island to fill the room. Extra length can provide more storage and clearer work zones, but it can also introduce a slab joint, complicate installation and make the centre harder to clean. Select the largest footprint that protects safe movement and matches the household's routines.

The room shape still sets the limits. Compare the island's relationship with an L-shaped kitchen layout before finalising the plan. Adjacent cabinetry, door swings and the route through the renovation should determine the island, including how it will work alongside any bathroom being renovated at the same time.

Planning Services and Structure Before You Fall in Love with Stone

The stone sample is easy to choose. The difficult decisions sit below the benchtop, inside the walls and across the renovation schedule. A Victorian home may need floor strengthening, new service routes and careful coordination with bathroom works before the island footprint is fixed.

Start with the floor structure. A timber floor may support a modest island, but a long stone top, integrated sink, heavy appliance or deep seating overhang can concentrate weight in one area. Confirm the joist direction and condition early. Depending on the house, the work may require a reinforced bearer, added supports or another method of spreading the load. Concrete slabs remove some structural questions, but they still need checking for plumbing, electrical conduits and existing services.

Put services on the drawing first

An island sink needs a waste route back to the main drainage connection. That route may run beneath the floor, through framing or along another planned path, with enough fall and access for future maintenance. The dishwasher should sit close enough to the sink for practical connections, while cabinetry must leave room to isolate, inspect or replace appliances.

An island cooktop or oven creates more coordination:

  • Electrical supply: Dedicated circuits and appliance locations must be confirmed before cabinetry is made.
  • Power points: GPOs need safe positions away from splash-prone areas.
  • Lighting: Pendant wiring should be planned before the ceiling is closed or painted.
  • Gas: If gas remains, a licensed fitter must install it to a compliant isolation point.
  • Ventilation: The cooktop position can affect extraction, ceiling penetrations and the room's visual balance.

Bathroom renovations can share this access. A single demolition period may expose floors and walls for several service routes, reducing duplicated work and patching. The sequence must be drawn and documented, however. If the island changes after first fix, the trades may need to reopen finished areas, adding cost and delay to the wider renovation.

Confirm the slab before finalising the footprint

Standard engineered stone slab sizes in Australia are typically around 3,060 mm by 1,440 mm. That dimension constrains the maximum continuous island run without a visible joint, particularly with a waterfall edge or generous overhang. If the proposed top exceeds the available sheet, revise the island length, accept a joint or choose a different material layout before fabrication.

A measured plan should record the appliance positions, waste points, power, lighting, ventilation, floor structure and access routes. It should also show how kitchen work will be sequenced with adjacent bathroom demolition and installation. Resolve those buildability decisions first, then select stone as a finish that fits the plan rather than forcing the renovation to fit the stone.

Choosing Materials and Finishes That Earn Their Place

A kitchen island earns its finish through daily use, not showroom photography. A family island may face hot cookware, spills, chair contact, cleaning products and constant handling, while a decorative island without a sink or cooktop carries less exposure. Choose the surface and joinery around those conditions first.

Compare the benchtop options

Material Durability Stain/Heat Resistance Typical Cost (per m², AUD) Slab Length Limit Best For
Engineered stone Hard-wearing for everyday use, subject to manufacturer care requirements Good everyday resistance, hot cookware still needs protection Varies by specification and supplier Depends on available sheet size Contemporary family kitchens
Natural stone Can be highly durable, with variation between stone types Resistance varies, sealing and care may be required Varies by stone and fabrication Depends on selected slab Kitchens where natural variation is part of the design
Solid timber Repairable and warm, but can mark and move with moisture More vulnerable to heat, staining and standing water Varies by species and finish Depends on board construction Warm, tactile interiors
Stainless steel Durable and hygienic, though it can scratch and show fingerprints Strong heat and moisture performance Varies by fabrication Fabricated to project requirements Hard-working or commercial-inspired zones
Laminate Practical and economical, with quality dependent on construction Good for general use, but vulnerable at damaged edges and prolonged heat Varies by range and profile Determined by manufactured sheets Budget-conscious renovations

The island should also belong to the wider home. Warm timber in the kitchen can make a cool benchtop feel disconnected, unless the cabinetry, flooring or lighting provides a clear link. If adjacent bathroom works use stone, tile or timber-look finishes, repeating a related tone can make both rooms feel considered without matching every surface.

Spend where the island takes punishment

Painted polyurethane gives cabinetry a smooth, controlled colour, but busy ends can show knocks readily. Timber veneer brings grain and warmth. Laminate is often a practical choice for panels exposed to chair scuffs, bags and family traffic. Deep colours may show marks more clearly, so assess samples in the room's natural light and against the household's cleaning habits.

Edge treatment changes both appearance and performance. A sharp profile suits a crisp contemporary kitchen, but a softer edge handles everyday contact more comfortably. A waterfall end uses extra material and requires accurate fabrication, with the slab pattern aligned across the return.

Review the complete surface choice with this kitchen benchtop materials guide before treating the island as a standalone feature. Confirm the finish works with the floor, cabinetry, adjacent bathroom selections and the level of maintenance the household will provide. A beautiful material that needs constant protection can become an expensive irritation once the renovation is complete.

Seating, Storage and How the Island Handles Real Workflows

An island earns its footprint when it supports the way the household cooks, eats and moves. A backless stool suits a modest overhang, while a broad upholstered chair needs more clearance behind it and makes the island feel larger from the circulation side. The comfortable option for one household can obstruct another, particularly in a Victorian home where walls, doorways and existing floor structure already limit movement.

Start with the daily scenes

Map the ordinary moments before choosing the seating layout. On a school morning, one person may prepare breakfast while another opens the refrigerator and a child sits at the island. During dinner preparation, the surface may carry ingredients, chopping boards and serving dishes. After school, several people may gather at the same edge while the cook still needs access to drawers and the sink.

Seating areas need about 900 mm behind stools for passing, particularly where the island shares space with the main kitchen route. Beneath the benchtop, allow at least 300 mm of legroom. Overhangs beyond 300 mm require additional structural support, especially with stone tops. Confirm the support detail with the cabinetmaker and stone fabricator before the slab is ordered.

A single-height island keeps the surface visually calm and preserves flexible preparation space. A stepped breakfast bar separates food from seating, but reduces usable surface and creates a junction that collects crumbs. A multi-tier design can hide mess from the dining area, yet adds edges and may make conversation less natural.

A kitchen island design showing organized storage, counter seating, and functional pull-out drawers in a luxury home.

Give every drawer a job

Storage should follow the workflow rather than fill every available cavity.

  • Large drawers suit pots, pans and mixing bowls near the preparation zone.
  • Narrow pull-outs keep oils, trays and frequently used ingredients visible and reachable.
  • Waste storage belongs close to preparation and clean-up, not at the far end of the room.
  • Open shelving can display cookbooks or serving pieces, but needs disciplined organisation.
  • Seating ends should not take the best storage location from the working side.

Drawer heights also need to match their contents. A shallow drawer wastes space for pans, while an oversized drawer can become difficult to organise and heavy to open. Check corner access, handle clearances and the relationship between island storage and nearby bathroom works, especially if shared plumbing routes or flooring are being coordinated.

A sink keeps the cook connected to guests and family, but puts dishes in the room's most visible position. A clean-up zone on the perimeter can keep the island clearer, particularly where entertaining is frequent. Review drawer depth, corner access and appliance placement with these kitchen cabinet storage ideas before approving the final elevations.

Budgeting, Timelines and the Bigger Renovation Picture

A kitchen island becomes expensive when its design ignores the work beneath it. Cabinetry and a benchtop are only the visible parts. Plumbing, new electrical circuits, gas, ventilation, floor repairs, custom seating, stone joins and difficult access through a Victorian home can all change the final cost.

Start with a measured allowance, then separate island costs from work already included in the wider renovation. Cabinetry and hardware form the base. Benchtop fabrication can become the largest finish cost when the island is long, has a thick edge or requires a premium slab. Services and labour determine how much floor, wall or ceiling access is needed.

Build the allowance around complexity

A standalone custom island typically ranges from $3,000 to $9,000 before major services are added. A plumbed, powered or highly customised island needs its own allowance, rather than being squeezed into a furniture-style budget.

Island Type Typical Cost Range (AUD) Kitchen Share of Renovation Budget Lead Time (Measure to Install) Key Cost Drivers
Base cabinetry-and-benchtop island Project-specific quotation Depends on the wider scope Depends on cabinetry and stone availability Cabinetry, hardware, benchtop, delivery and installation
Plumbed and powered island Project-specific quotation, with services added Higher than a furniture-style island Requires early rough-in coordination Sink, waste, dishwasher, circuits, lighting and floor access
Full custom island with stone and integrated seating Project-specific quotation Determined by fabrication and structural complexity Longer where custom fabrication and slab joints are involved Custom cabinetry, stone profile, support frame, seating, access and finishing

The table is a planning framework, not a measured quotation. Confirm slab dimensions, support requirements and access before approving a finish that may need joins or specialist handling.

Coordinate it with the rest of the house

In Victoria, kitchen and bathroom renovations often share demolition, electrical, plastering, tiling, waterproofing coordination and site access. Running adjacent bathroom work at the same time can help organise trades, but only when both scopes are fixed early. A bathroom renovation may also alter walls, doors or service routes, reducing the kitchen footprint available for the island.

Set aside money for coordination and building work before choosing decorative upgrades. The kitchen budget may need to cover floor repairs, structural checks, temporary protection and reinstatement after services are installed. An island that crosses a shared plumbing route can also affect the bathroom sequence, particularly where flooring or access panels are involved.

Allow time for the measure-up, design approval, demolition, first fix, cabinetry manufacture, installation, stone templating, fabrication and final fit-off. Stone and cabinetry should be ordered only after site dimensions, appliance specifications and service locations are confirmed.

Ask the renovation specialist to list provisional allowances, exclusions, lead times, site responsibilities and the process for approving variations. That paperwork protects the programme as much as it protects the budget. A clear decision about what the island must do is usually more valuable than spending early on a finish that later needs redesigning.

Common Mistakes That Derail Island Designs

The expensive island mistakes usually start with assumptions made on paper. A plan can look generous until someone stands at the dishwasher. A slab can appear achievable until the fabricator checks sheet dimensions and the route into the house. A sink can seem simple until the waste path has to cross the floor.

Mistake one is trusting the plan without testing the room

Mark the island perimeter on the floor with tape and place temporary boxes where the cabinetry will sit. Open the oven, dishwasher, bin and refrigerator doors. Put stools behind the seating edge, then walk through the room while another person prepares food.

This practical test exposes conflicts that a clean drawing hides:

  • Appliance overlap: A door may open into the main working aisle.
  • Traffic pressure: The route to the dining room may cut through the preparation zone.
  • Stool congestion: Chairs may reduce the passage behind the seating side.
  • Reach problems: A deep island can leave the centre difficult to clean or use.
  • Corner dead space: Cabinetry may create storage that looks generous but is awkward to access.

The fix may involve a different orientation, fewer seats, relocated appliances or a simpler preparation station. Shrinking the island is only one option.

Mistake two is ordering an oversized slab too early

Large islands look impressive in drawings, but fabrication depends on sheet dimensions, transport access, handling and support. A standard Australian slab reference gives 3,060 mm by 1,440 mm as a common slab size. A longer or deeper design may therefore require a joint, a revised layout or more material planning.

Check the slab before the cabinetry order. Confirm where joins will fall, whether a waterfall end can be handled safely and how the stone will enter the home. A centred joint can look deliberate. One forced into the busiest preparation area reads as a late compromise.

Stone also needs enough room for templating and fabrication. Walls, panels, appliance positions and finished floor levels should be settled before the final measure.

Mistake three is leaving services until after cabinetry

A sink, dishwasher or cooktop is part of the island's construction plan, not a late accessory. Waste needs a workable route and fall. Power needs the correct circuit and a safe outlet position. Gas work requires a licensed fitter and a compliant isolation point. Pendant lights need wiring before the ceiling is closed.

Start with a services drawing that identifies:

  1. Existing waste points and likely connection routes.
  2. Floor joists, slab penetrations and structural constraints.
  3. Appliance loads and electrical locations.
  4. Lighting, extraction and ventilation requirements.
  5. Access for future maintenance.

A bathroom renovation beside the kitchen makes this coordination more important. Shared access, demolition and service routes can help the programme when both rooms are planned together. If the bathroom scope changes later, it may affect walls, flooring, doors or the space available for the island.

Mistake four is assuming the floor will cope

Cabinetry may be relatively light compared with stone, but the load becomes concentrated along the island footprint. Long tops, integrated appliances and unsupported overhangs increase the need to check the substrate before installation.

Resolve reinforcement before the joiner arrives. Waiting until stone is on site can mean removing finished work, delaying fabrication or accepting a support detail that weakens the design. For stone overhangs beyond 300 mm, additional structural support is recommended to reduce cracking or deflection risk, particularly with stone tops. Confirm the support detail with the relevant trade and structural professional before fabrication.

Floor levels matter as well. An island installed over an uneven or recently repaired surface can show gaps at the panels, affect appliance alignment and create problems where the kitchen meets adjacent bathroom works.

Mistake five is designing storage for appearance

Deep cupboards often look efficient in an elevation. In daily use, the back corners become storage graveyards. Drawers usually give better access to heavy cookware, while narrow pull-outs can suit oils and trays. Open shelves work only when the household is comfortable maintaining a visible display.

Assign storage according to the person using it. Pots belong near the preparation or cooktop zone. Everyday dishes should sit close to clean-up. Bins should support the movement from chopping board to waste. Seating should not consume the best drawer bank because it photographs well.

Check door swings and drawer pulls against nearby appliances. A beautiful storage plan fails if two drawers cannot open together or if the dishwasher blocks access to the cutlery drawer.

Mistake six is treating seating as decoration

A stool needs knee room, a comfortable seat height and enough space for the person beside it. The overhang must suit the stool and the support detail, rather than being chosen after the cabinetry and stone are fixed. A family using the island for meals needs a different arrangement from a household wanting one perch for morning coffee.

Keep the working side clear. If seating forces people to cross behind the cook, the island becomes a bottleneck. If a raised breakfast bar blocks the cook's view or interrupts serving, it may add visual layering without improving the workflow.

Seating also changes how the island handles spills, heat and cleaning. Place it away from the busiest appliance openings and avoid creating a narrow passage between stools and a bathroom access route.

Mistake seven is forgetting light, heat and air

An island can become a dark obstacle when the lighting plan is left until the end. Pendants should illuminate preparation without producing glare across the seating side. A cooktop requires careful consideration of extraction and the relationship between heat, traffic and nearby seating.

The construction scope should state who is responsible for cabinetry, stone templating, plumbing, electrical work, structural checks, appliance connections and final fit-off. It should also list provisional allowances, exclusions, lead times and the variation process. Regular site checks keep the plan aligned with what the builder finds inside the walls and floor.

Measured drawings and a 3D review can expose a conflict before construction. SitePro Bathrooms offers a kitchen planner that lets homeowners enter room dimensions, position cabinets and appliances, and compare layouts in 2D and 3D, including island sizes and appliance positions.

A convincing render is not proof that an island can be built. It helps when it exposes a problem before the trades arrive.

The same planning discipline applies when the renovation includes a bathroom. Industry data shows bathroom renovations account for a significant share of Australian home improvement spend, so kitchen and bathroom scopes need their own allowances, sequencing and trade responsibilities. Treating the island as a separate decorative purchase can create conflicts with waterproofing, flooring, access and service installation next door.

In Victoria, domestic builders registered in the DB-U class may carry out, manage or arrange subcontractors for all components of domestic building work. Confirm the builder's registration before signing, then define the actual scope and responsibilities in the contract. The registration category does not replace clear documentation.

A buildable island comes from connected decisions. Measure the room, test the clearances, confirm the floor and services, check the slab, allocate storage by workflow and settle the colour and edge profile last. If you're planning a kitchen island in Highett or greater Victoria, SitePro Bathrooms can provide a measured renovation consultation with a coordinated 3D layout, services review and itemised quotation before cabinetry or stone is ordered.

  • siteprobathrooms

Renovation Project Management: A 2026 Guide

You're standing in a stripped bathroom in Highett. The tiles are stacked in the hallway, the delivery date has moved, the plumber can't return until Thursday, and someone has just asked whether the council paperwork was ever lodged. The renovation looked straightforward when you chose the vanity. Now the household is sharing one working bathroom, every delay affects the next trade, and the original price no longer feels secure.

That's the point at which renovation project management stops being administrative overhead and becomes the job itself. A successful project aligns the brief, budget, approvals, materials, trades, decisions and inspections into one controlled sequence. In Victorian homes, that sequence has to account for existing construction, permit pathways, licensing and the realities of living through the work.

The method below is designed for Highett homeowners planning bathroom renovations, kitchen upgrades and broader home improvements. It also suits families, landlords and body corporates that need a clear process rather than a collection of attractive ideas.

Why Highett Renovations Need Real Project Management

A Highett home can look straightforward from the street and still hide old plumbing, uneven framing, limited service access or previous alterations. A 1960s brick veneer or weatherboard house may require careful investigation before anyone prices the work. A knockdown-rebuild has different risks, but it still depends on close coordination between design, approvals, procurement and construction.

That local context matters. Victoria remains one of Australia's largest renovation markets. KPMG found that renovations rose from 34.2% of total residential construction expenditure in 2018–19 to 40% in 2023–24, while inflation-adjusted renovation spending increased 6.5% and new private residential construction fell 14% over the same period, as detailed in KPMG's analysis of Australia's renovation market. In Victoria, renovations or rebuilds represented 41% of construction spending in 2023–24, slightly above the national average.

The coordination problem

A bathroom renovation puts demolition, plumbing, electrical work, waterproofing, tiling, cabinetry, glazing, painting and fixture installation into one confined sequence. Each trade relies on the previous trade completing the correct work, at the agreed time and to the approved design. A missed decision can delay several people, not just one task.

Project management creates a clear decision chain:

  1. The brief defines the outcome.
  2. The design turns that outcome into drawings and selections.
  3. The scope lets builders price the same work.
  4. The contract sets responsibilities, timing and variation rules.
  5. The schedule coordinates approvals, deliveries and trades.
  6. Inspections check hidden work before it is covered.

That chain is more useful than disconnected quotes. The practical principles in this project management guide for staying on schedule and under budget suit Highett renovations because existing homes rarely provide perfect conditions behind their finishes.

Practical rule: If nobody can explain what happens next, who owns the decision and what it costs, the project isn't being managed.

Why Victorian requirements change the timeline

Approvals belong in the programme from the start, not at the end of design. Victorian building-permit activity is recorded in monthly and yearly summaries, giving renovators a useful reference for approval activity and pipeline volatility through the Victorian building-permit data published by Data Vic.

For a Highett bathroom or kitchen, management means coordinating the designer, registered builder, engineer where required, council pathway, suppliers and trades before demolition begins. It also means allowing for problems hidden inside existing walls. Good planning does not remove surprises. It sets a controlled process to assess, price and approve them without losing sight of the brief, budget or sequence.

Building the Project Brief Before You Talk to Anyone

A Pinterest board isn't a project brief. It shows what you like, but it doesn't tell a designer or builder what must be built, what can be removed, or what you're prepared to compromise.

Start with one page. Keep it practical, specific and easy to price.

Six blocks for a useful brief

Room function comes first. Record who uses the room, when they use it and what currently frustrates them. A family bathroom may need two people to prepare at once, durable storage and a bath for younger children. An ensuite may prioritise a generous shower, discreet storage and fast cleaning.

Separate must-haves from preferences. Mark every item as essential, preferred or optional. If the budget tightens, this hierarchy tells the builder what can change without reopening the entire design.

Describe the finish level. “Modern” isn't enough. State whether you want standard, upgraded or custom cabinetry, simple or feature tiles, off-the-shelf or bespoke fittings, and painted or natural timber finishes. For modern bathrooms and designer bathrooms, name the visual direction and the products that define it.

Record the existing dwelling. Note likely structural changes, access limitations, ceiling conditions, window positions, heritage considerations and any known water damage. Don't assume a new layout can use the old service paths.

Map plumbing and electrical constraints. Identify the location of existing wastes, water points, hot-water lines, switches, exhaust paths and power outlets. Moving fixtures may improve the layout, but it can also expand demolition, drainage and permit requirements.

Plan liveability. Decide whether the family can leave during disruptive stages, where laundry will operate, which bathroom remains available and how children and pets will move around the site.

Turn inspiration into buildable information

Your brief should include:

  • An annotated plan: Mark fixture locations, storage zones, door swings, windows and circulation.
  • A named selection list: Identify tile ranges, tapware, vanity dimensions, appliances and hardware. Mystery tiles create pricing gaps.
  • A mood board with purpose: Use colour, texture and material references to communicate the atmosphere, not just attractive images.
  • A constraints page: List access, parking, working hours, body corporate requirements and known neighbour concerns.
  • A decision register: Record what has been approved, what remains open and who can authorise a change.

Australian construction-delay research identifies owner-driven changes, slow owner decisions, design drawing preparation and approval, underestimated complexity and unrealistic durations among the leading delay risks. The Australian Building Codes Board report on building confidence and construction quality supports a firm approach: freeze the scope early and coordinate the design before procurement.

Before booking a consultation, answer three questions clearly. Where will the laundry go during a bathroom renovation? Can the kitchen remain operational during the disruptive phase? What outcome is essential? Those answers make the first meeting productive and reduce the chance that a vague wish list becomes an expensive variation.

Budgeting and Cost Tracking That Holds

Renovation budgets fail when homeowners follow the headline quote and ignore the decisions behind it. Your budget must show what the quote includes, what it excludes, what has been paid, and what has changed.

Renovation activity across Victoria shows why cost discipline matters. Nationally, renovations represented 40% of total residential construction expenditure in 2023–24, compared with 34.2% in 2018–19, as noted earlier. HIA figures reported by Domain's coverage of the Australian renovation market show Australians spent $59.8 billion updating their homes at the renovation peak in 2021 and 2022. In Victoria, the typical kitchen renovation reached $33,600, compared with $25,500 in 2020.

That market rewards disciplined coordination. A Highett project can involve Victorian permit requirements, older-home conditions, restricted access and live-in staging. Your tracker must connect each cost to a scope decision, approval or site condition.

Build one live cost register

Use four core columns:

Line item Quote price Actual spend Variance
Demolition and disposal Agreed amount Paid amount Difference
Plumbing and drainage Agreed amount Paid amount Difference
Tiles and adhesives Selected allowance Invoiced amount Difference
Cabinetry and joinery Quoted amount Paid amount Difference
Fixtures and fittings Allowance Invoiced amount Difference
Design, permits and temporary costs Estimated amount Actual amount Difference

Separate hard costs, such as cabinetry, tiles, labour, plumbing and electrical work, from soft costs, including design fees, permits, temporary accommodation, skip bins and upgrades selected after the contract.

For Highett homes, record access constraints beside the relevant allowance. A narrow side path, limited parking, protection for occupied rooms or staged plumbing work can affect labour and temporary costs. If a permit or inspection changes the sequence, record that impact rather than hiding it in a general allowance.

Highett Renovation Cost Benchmarks

Project Type Budget Band (AUD) Hard Costs % Soft Costs % Recommended Contingency
Bathroom renovation A$28,000 to A$45,000 Varies by scope Varies by scope Ring-fence a contingency
Kitchen renovation A$55,000 to A$95,000 Varies by scope Varies by scope Ring-fence a contingency
Premium renovation Above A$120,000 Varies by scope Varies by scope Ring-fence a contingency

Treat these bands as planning ranges, not promises. Access, design, structural work, selections and existing conditions can shift the final cost.

Do not assign hard and soft cost percentages before the scope is known. Ask for a cost plan that lists every allowance and states who carries the risk when an allowance is exceeded. For a bathroom, use this bathroom-remodelling budgeting guide to structure a room-by-room cost discussion.

Keep contingency separate from the working budget. Review the register weekly. Before work proceeds, require a written variation that states the reason, cost and schedule effect. No verbal approval on site. That rule protects both the budget and the sequence.

Choosing the Right Team for Your Project

The delivery model determines how much coordination you carry personally. There isn't one correct structure for every Highett renovation, but there is a wrong structure for every homeowner who underestimates their available time and tolerance for risk.

Three workable models

Model Best For Owner Workload Cost Control Risk Level
Design-build A coordinated brief with one accountable contract Lower Strong when scope is fixed Lower coordination risk
Owner-coordinator Custom design, complex constraints or strong aesthetic control High Detailed but owner-dependent Higher coordination risk
Specialist renovation firm A focused kitchen or bathroom scope Moderate Strong within a defined specialty Moderate

A design-build firm suits homeowners who want the designer, draftsperson and builder coordinated under one contract. It works best when access is straightforward, the brief is settled and decisions can be made quickly.

An owner-coordinator model gives you more direct control over the architect or designer and the tender process. It can suit custom joinery or heritage constraints, but you become the person chasing drawings, quotes, approvals, selections and trade interfaces.

A specialist renovation firm sits between those models. For a single bathroom or kitchen, an in-house design process and renovation-focused builder can reduce handovers between separate consultants and trades. Confirm exactly what the firm manages, because “full service” can mean different things.

Verify before you sign

Check the builder through the Victorian practitioner register, confirm the correct VBA registration class, request evidence of public liability cover and speak with recent references close to Highett. For larger domestic work, the registration class matters. Victoria recognises a Domestic Builder, Unlimited class, and the current registration example for a Domestic Builder, Unlimited demonstrates a registration without a contract-value cap for that class of domestic building work.

Bathroom renovations also have a clear compliance threshold. Victorian industry guidance states that domestic renovation work over A$10,000 must be carried out by a registered builder, while plumbing must be completed by a registered or licensed plumber, as outlined in this Victorian bathroom renovation licensing guidance.

Use a written selection process. The contractor selection criteria for renovation work should help you test communication, documentation, warranty handling and trade coordination, not just the lowest price.

Creating a Realistic Timeline and Milestone Schedule

A renovation schedule should run backwards from approvals and key procurement dates. It shouldn't begin with the demolition date printed on a sales brochure.

Permit timing can vary sharply. Victorian government review material cited in Consumer Victoria's guidance on building disputes, defects and delays found building-permit timing ranging from 10 business days to 8 months, with council-related delays considered unreasonable in 19% of projects. Consumer Victoria also says contracts must state the number of days allowed for each type of delay.

Use freeze points as decision gates

Set these gates in writing:

  1. Brief freeze: The room function, priorities and exclusions are approved.
  2. Design freeze: Drawings, layout and major construction details are settled.
  3. Pricing freeze: Quotes, allowances and exclusions are reconciled.
  4. Selections freeze: Tiles, fittings, appliances, colours and joinery are ordered.
  5. Lock-up: The concealed structure and services are ready for inspection.
  6. Fit-out: Visible finishes and fixtures are installed.
  7. Practical completion: The agreed work is complete, subject to documented defects.

After a freeze, a change needs a written variation. That variation should state the price, delay, affected trade and revised completion date. This keeps a late preference from becoming an unpriced instruction.

A bathroom renovation project in progress with framing, plumbing, and orange waterproof underlayment visible.

Build the programme from the critical path

For a typical Highett kitchen, a practical sequence includes 4 weeks for design, 8 weeks for permits, 1 week for demolition, 4 weeks for rough-in, 5 weeks for joinery and fit-out, and 2 weeks for snagging, followed by 2 buffer weeks. A shorter programme usually removes a decision gate or assumes every delivery and inspection happens perfectly.

Bathroom renovations need the same discipline. Waterproofing, tile delivery, vanity manufacture, glazing and fixture availability can control the critical path. Design changes after waterproofing begins are particularly dangerous because they can trigger rework inside a concealed wet-area assembly. Defect research in Australia identifies rework and widespread defects as significant construction concerns, so the freeze points protect both quality and your warranty position.

Communication and Site Management on a Live Job

A live renovation needs a rhythm that everyone follows. Set a weekly site meeting for the same day and time, with the builder's project manager and lead tradesperson present. Walk the site, compare progress with the schedule, photograph completed work and record decisions before the meeting closes.

The written decision log is the authority. Record the date, decision, responsible person, cost effect, programme effect and approval status. Both parties should confirm the entry by the end of the week.

Email can carry information, but it shouldn't carry an unrecorded variation.

Use a dedicated project-chat channel for urgent questions, delivery updates and access issues. Keep cost and scope approvals inside the formal meeting and variation process. A quick message can alert the team that a decision is needed, but it shouldn't replace a signed instruction.

Plan the household around disruption

Australian consumer research found that 49% of intended renovators were delaying work because of rising living costs, while 28% were reducing renovation scope, according to Domain's Australian bathroom renovation coverage. That makes liveability and cashflow part of the project brief, not an afterthought.

Decide where the household will cook, wash clothes and use the toilet during each phase. Establish:

  • Dust boundaries: Identify sealed work zones and the route trades will use.
  • Temporary facilities: Confirm the location of a temporary kitchen, laundry sink or portable toilet.
  • Safety controls: Keep children and pets away from tools, demolition waste and open services.
  • Daily limits: Agree start, finish and quiet hours with the site team.
  • Access rules: Set arrangements for keys, deliveries, parking and neighbour communication.

If the renovation affects a shared building or common property, obtain body corporate approval before ordering materials. A clear phasing plan protects the family from making rushed decisions because the household is uncomfortable.

A construction manager reviews a project plan with a client at a home renovation site.

SitePro Bathrooms is one example of a specialist renovation company that coordinates bathroom work from consultation and design through construction and handover. Whether you use a specialist firm or assemble your own team, insist on the same evidence: current schedule, documented decisions, clear variations and photographed progress.

Quality Checks, Compliance and the Defect Punch

Handover doesn't mean the project is finished. It means the work has reached a stage where you can inspect it against the contract, identify defects and confirm which documents remain outstanding.

Quality control should happen at four points, not only on the final day.

Inspect before the work disappears

Project Stage Inspection Focus Required Documentation Owner Sign-Off Trigger
Lock-up Framing, openings, insulation, service routes and concealed structure Approved drawings, engineering details and inspection records Layout and concealed works match the approved scope
Waterproofing Falls, junctions, penetrations, puddle flanges and membrane coverage Waterproofing records and relevant compliance documentation Wet-area preparation is accepted before tiling
Fit-off Fixture position, cabinetry, electrical points, drainage, doors and finishes Product warranties, certificates and updated selections Visible installation matches the design and selections
Practical completion Operation, finish quality, cleaning, access and outstanding items Final inspection documents, manuals, warranties and defect list Contract work is complete apart from listed defects

For bathroom renovations, don't let tile installation cover waterproofing before the required inspection and documentation are complete. Confirm the builder's responsibilities for Victorian Building Authority inspections, the certificate of final inspection where applicable and any documents needed for future sale or insurance records.

Check the VBA practitioner register before paying the final draw. Confirm that the registered builder's class suits the work, especially where the renovation includes structural changes or several coordinated trades. Keep permits, engineering information, waterproofing records, plumbing documentation and electrical certificates together in a digital project folder.

Create a disciplined defect punch

Walk the room in a fixed direction. Start at the door and inspect every surface, junction, fitting and function. Test doors, drawers, exhaust fans, lights, taps, waste flow, shower screens and appliances. Look at grout lines, silicone joints, paint edges, tile alignment, cabinetry gaps and damage to adjacent rooms.

Photograph each defect with a wide image showing its location and a close image showing the problem. Name the file with the room, item and date, then match it to the original scope or drawing. A defect list without a location and reference becomes an argument. A photographed list tied to the contract becomes a close-out tool.

Include a defect liability period clause in the contract. The applicable period depends on the agreement, but contractor obligations commonly sit within a 90-day to 6-month range. Don't rely on a verbal promise that the builder will return. State the response process, access arrangements, responsibility for consequential damage and the date by which defects must be addressed.

A delay can also have a contract consequence. Suppose the builder misses an agreed defect-response date, the bathroom remains unusable, and the contract applies liquidated damages or another documented delay mechanism. The owner's cost can then include the contractual amount, temporary accommodation and repeated trade visits. The exact result depends on the contract and facts, so have the agreement reviewed before signing rather than trying to calculate the loss after the dispute begins.

Downloadable pre-renovation checklist

Copy this checklist into a document and print the pages you'll use during site meetings. Keep the master version digital so you can update selections, approvals, costs and decisions without creating conflicting paper copies.

Brief and scope

  • Room use: Record users, routines, storage needs and liveability limits.
  • Must-haves: Mark essential items separately from preferences.
  • Existing conditions: Note structure, plumbing, electrical access, windows and known damage.
  • Selections: Name products, dimensions, colours and finish levels.
  • Exclusions: Write down work that isn't included.

Budget tracker

  • Line item: Use one row for every trade, material, fee and temporary cost.
  • Quote price: Enter the accepted quote or allowance.
  • Actual spend: Update when invoices are approved or paid.
  • Variance: Investigate every difference before the next weekly meeting.
  • Contingency: Keep the reserve separate and authorise its use in writing.

Designer interview questions

  • Existing-home experience: Ask how the designer investigates concealed conditions.
  • Documentation: Confirm what drawings, schedules and specifications you'll receive.
  • Selections: Ask who checks product availability and lead times.
  • Coordination: Clarify who manages engineering, permits and trade queries.
  • Revisions: Establish the cost and timing of changes after design approval.

Builder shortlist criteria

  • Registration: Verify the VBA registration and correct class.
  • Insurance: Request current public liability evidence.
  • References: Speak with recent clients and inspect comparable work near Highett.
  • Programme: Ask for the critical path, approval assumptions and buffer.
  • Communication: Confirm the meeting rhythm, decision log and variation method.

Contract clauses to verify

  • Scope: Check drawings, specifications, allowances and exclusions.
  • Payment: Match progress claims to measurable stages.
  • Variations: Require written price and time approval before changed work.
  • Delays: Check the stated allowance for each delay type.
  • Defects: Confirm the liability period, response process and close-out standard.
  • Documents: Require permits, certificates, warranties and manuals at completion.

Week-of-handover tasks

  • Punch walk: Inspect every room and record defects with timestamped photographs.
  • Functional testing: Operate every tap, drain, light, fan, door, drawer and appliance.
  • Document collection: Save certificates, warranties, manuals and final inspection records.
  • Payment review: Match the final claim to completed work and unresolved defects.
  • Access check: Collect keys, remotes, codes and maintenance instructions.

Sample 14-week bathroom timeline

Week Milestone
Week 1 Design brief
Weeks 2 to 3 Concept and quote
Week 4 Design freeze
Weeks 5 to 7 Council and VBA permit lead-time
Weeks 8 to 9 Demolition and rough-in
Week 10 Waterproofing inspection
Weeks 11 to 12 Tiling and fit-off
Week 13 Punch walk
Week 14 Defects close-out

Treat this as a living document. Print the checklist for the site folder, keep the timeline in the digital project record and update it during every weekly meeting. Two local variables can stretch the programme: heritage overlay consultations may add 2 to 3 weeks, while Caesarstone or other stone benchtop lead-times can run 4 to 5 weeks from template. Confirm those dates before locking the selections freeze.

Current design direction is also more specific than “make it modern”. Australian bathroom coverage points to warmer, textured, spa-like spaces using materials such as hand-cut tiles, marble, timber and concrete, alongside richer colours, curves, bench seats, steam showers and infrared saunas, as outlined in current Australian bathroom design coverage. Reece identifies five local directions, Art Deco, Day Spa, Hamptons, Hotel Experience and Modern Australian, in its Australian bathroom design reference. Use those names to sharpen the brief, then price the actual products and construction required.

The homeowner who controls decisions, documents approvals and inspects concealed work has a far better chance of receiving the room they approved, rather than a late approximation assembled under pressure.


Start your Highett renovation with a one-page brief, a live cost tracker and a permit-led schedule. If you're planning bathroom renovations, modern bathrooms or designer bathrooms and want the trades, selections, approvals and handover coordinated through one process, contact SitePro Bathrooms to arrange a consultation and measure-up for your project.

  • siteprobathrooms

Modern Kitchen Benchtop Styles for 2026

Most advice about kitchen benchtop styles still starts with colour, veining, or what looks expensive. That's the wrong starting point for a Victorian renovation.

A benchtop isn't just a finish. It's the hardest-working surface in the kitchen, one that has to survive heat, water, cleaning chemicals, dropped items, school lunches, rushed dinners, and years of daily use. In older homes, it also has to fit existing wall lines, legacy cabinetry depths, uneven floors, and layouts that weren't designed for today's appliances.

That matters because Australia is overwhelmingly a renovation market, not a blank-canvas market. The 2021 ABS Census counted 10,852,207 private dwellings nationwide and 2,106,925 in Victoria. In practical terms, most kitchen benchtop decisions are being made inside established homes where space, access, budget, and disruption all affect what works.

Choosing Your Kitchen Benchtop in a New Era

A good benchtop choice balances four things at once. Appearance, durability, maintenance, and fit for the house you own. If one of those gets ignored, the problems usually show up fast.

In renovation work, the benchtop often carries more visual weight than clients expect. Cabinet doors can be changed later. Wall paint can be updated. Splashbacks can be replaced. The benchtop is different. It sets the tone of the kitchen, influences the edge detail, affects sink selection, and often determines whether the room feels current or dated.

Why retrofit realities matter

In a Victorian home, the kitchen rarely behaves like a showroom display. Existing windows lock in bench heights. Old services affect sink position. Tight access can limit slab handling. Some clients want an island look in a room that really needs a more practical galley layout. That's why material choice has to be grounded in construction reality.

The current market has also changed. Homeowners who previously would have defaulted to engineered stone now need to think more carefully about alternatives, compliance, fabrication details, and long-term upkeep.

Practical rule: Choose your benchtop style after you've considered how you cook, how much maintenance you'll tolerate, and how the material will be fabricated in your actual kitchen.

What usually works better than trend chasing

The strongest selections tend to come from a short checklist:

  • Daily use first: A family kitchen needs different performance from a lightly used apartment kitchen.
  • Edge and corner safety: Sharp visual details often look good in photos but wear poorly in busy homes.
  • Repair expectations: Some surfaces age gracefully. Others show every mistake and are harder to restore.
  • Whole-home consistency: Kitchen finishes often set the palette for later updates, including bathroom renovations.

That last point gets missed. Clients planning a staged renovation often start with the kitchen, then carry those material cues into modern bathrooms, new bathroom ideas, and even more polished designer bathrooms later on. When the palette is thought through early, the whole home feels more resolved.

The 2024 Benchtop Shift What It Means for You

The biggest change in benchtops since 2024 has nothing to do with colour, veining, or edge profiles. It is the engineered stone ban.

From 1 July 2024, Australia banned the manufacture, supply, processing and installation of engineered stone. For Victorian homeowners, that changes the selection process straight away. The old default is gone, and the better question now is simple. Which legal alternative gives you the look you want without creating avoidable cost, breakage risk, sealing work, or installation headaches later on?
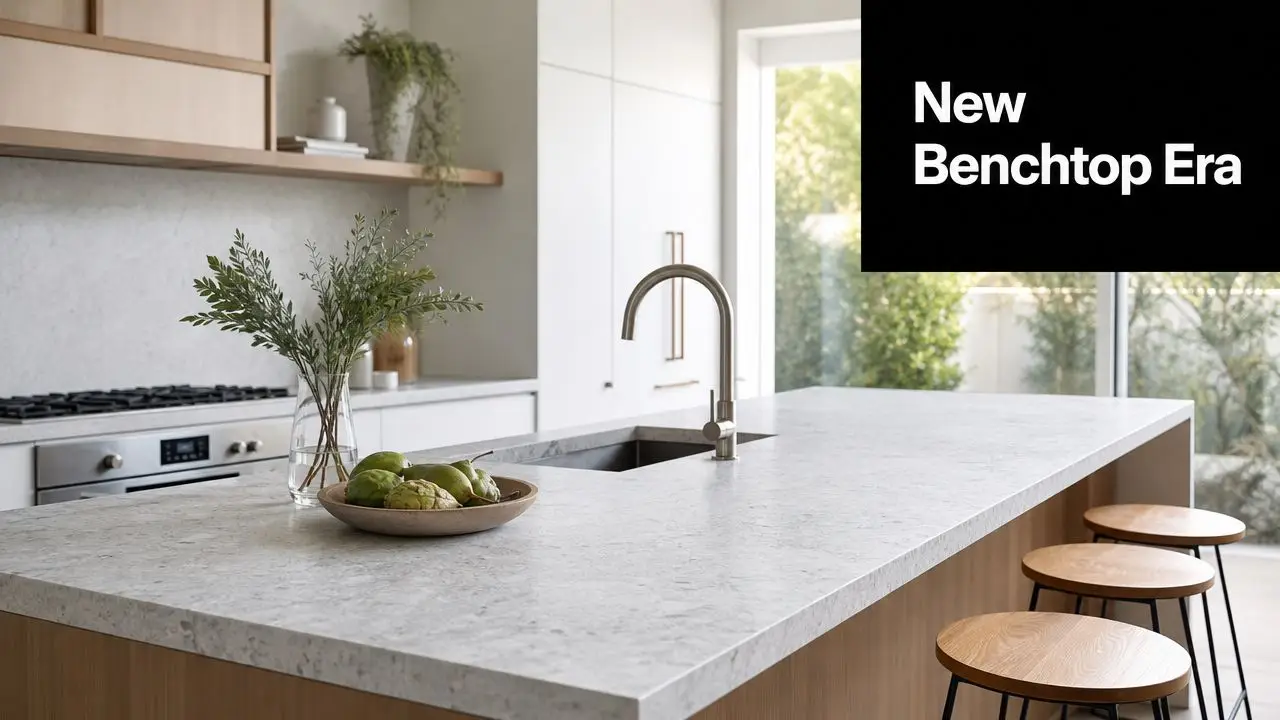
A modern kitchen island with a stone benchtop, wooden stools, and fresh greenery in a bright home.

What changed in practical terms

In real projects, this has shifted attention toward a tighter group of compliant materials:

  • Porcelain and sintered surfaces for sharp, thin stone-look designs
  • Natural stone for genuine variation and a higher-end finish
  • Modern laminates for controlled budgets and solid day-to-day performance
  • Solid surface materials for low-porosity benches with refined joins
  • Timber for warmth and a softer, lived-in look

That does not mean every replacement suits every kitchen.

Porcelain can look excellent, but it needs careful handling and good support at edges and cut-outs. Natural stone brings character, but some stones ask for more sealing and more owner discipline. Laminate still earns its place in many Victorian homes because it is forgiving on budget and easier to replace if the kitchen is likely to be updated again in stages.

Why the shift has improved decisions

This change has forced better conversations early. Clients now ask about scorch marks, chips on external corners, staining around sinks, drainer grooves, slab thickness, and whether a waterfall panel is worth the extra spend.

Those are the questions that save money.

Before the ban, a lot of selections stopped at appearance. Post-2024, benchtops need to be treated as a working surface first and a style feature second. That usually leads to smarter choices in family kitchens, rental properties, and long-term owner-occupier homes where maintenance and repair matter just as much as first impressions.

The best stone-look result now usually comes from choosing the right compliant material for the job, not from trying to copy an old specification detail for detail.

What Victorian homeowners should do now

Keep the decision process tight:

  1. Decide on the finish direction first. Stone-look, timber, or a cleaner solid-colour surface.
  2. Be honest about upkeep. Some materials forgive neglect. Others do not.
  3. Check that your preferred edge, sink detail, overhang, and span suit the material you are pricing.
  4. Confirm the quote includes fabrication complexity, not just the slab itself.

That last point catches people out. A sample can look perfect, then become expensive once cut-outs, exposed ends, polishing, support requirements, appliance clearances, and on-site access are factored in.

In the current Australian market, compliant choice matters. So does buildability. The right benchtop now is not the one that was popular two years ago. It is the one that suits your kitchen plan, your budget, and the way you will live with it.

A Practical Guide to Modern Benchtop Materials

Material choice carries more weight now because the old default of engineered stone is off the table in Australia. That has pushed Victorian homeowners toward a smaller group of compliant options, each with clear trade-offs in fabrication, maintenance, edge durability, and cost once installation is included.

One of the quickest ways to sort them is by porosity. Less porous surfaces usually cope better with food stains, oils, and everyday cleaning. More porous materials can still perform well, but they ask more from the owner, especially around sealing, wiping habits, and sink areas.

Benchtop Material At-a-Glance Comparison

Material Cost Bracket Durability Heat Resistance Stain Resistance Maintenance Level
Porcelain or sintered surface Mid to high Strong for everyday use, but edge impacts need care High Strong Low to moderate
Natural stone High Strong, but depends on stone type and sealing High Variable, depends on sealing Moderate to high
Laminate Low to mid Good for many family kitchens Moderate Good in normal use Low
Timber Mid to high Can wear well, but marks more easily Lower than stone-look options Variable Moderate to high
Stainless steel Mid to high Tough, but dents and scratches show High Strong Low to moderate
Solid surface or acrylic Mid to high Good, with repair potential in some situations Moderate Strong due to non-porous surface Low

Porcelain and sintered surfaces

Porcelain and sintered products are the closest fit for many clients who still want a refined stone-look kitchen after the 2024 ban. They suit slim profiles, resist staining well, and handle heat better than many budget alternatives.

They do have limits. The slab can be very hard, but exposed corners and narrow edge details are still vulnerable to impact. In practical terms, that means a busy family island with sharp external corners needs more thought than a display kitchen in a showroom. I usually steer clients toward softened edges and details that give the fabricator enough material to work with safely.

These surfaces also pair well with full-height wall finishes if you want a cleaner look through the cooking zone. If you are weighing that up, this guide on a kitchen splashback or backsplash decision helps clarify where the spend makes sense.

Natural stone

Natural stone still earns its place, but it should be chosen for its character, not because people assume it is the easiest premium option. It gives variation, depth, and a less uniform finish than most manufactured alternatives.

That variation is also the risk. Some stones are more porous than clients expect, some darken around wet zones if maintenance slips, and some finishes show etching or marks sooner than people were promised at selection stage. In older Victorian homes, natural stone can look excellent with traditional joinery or warmer timber floors, but it is usually a better fit for owners who will keep up the sealing and accept that the surface may age unevenly.

Laminate

Laminate still does a lot of heavy lifting in real renovations. It is cost-effective, predictable to install, and available in finishes that look far better than many people remember.

It also solves practical problems. In budget-conscious projects, it can free up money for better cabinet hardware, improved lighting, or appliance upgrades that clients notice every day. In retrofit work, laminate is often easier to detail around walls that are not perfectly square, and replacement down the track is usually less painful than replacing a brittle slab product.

The compromise is heat and edge wear. Put a hot pan on it or let water work into a damaged seam, and its limits show quickly.

Timber

Timber brings warmth fast. In the right kitchen, that matters more than chasing a cold stone-look finish.

It suits period homes, softer colour palettes, and spaces where a lived-in result is part of the brief. It also works well as a feature zone, such as an island or a breakfast section, rather than across every bench if the owners are nervous about upkeep.

The trade-off is simple. Timber marks, moves, and changes colour over time. Around sinks and dishwashers, poor detailing or missed maintenance will show. Some owners like that patina. Others are frustrated within the first year because they wanted warmth without the care that comes with it.

Timber is a good choice for clients who want texture and accept wear. It is a poor choice for clients who want a surface to stay visually uniform with minimal effort.

Stainless steel and solid surface

These materials solve different problems, and both deserve more attention than they usually get.

Stainless steel suits hard-working kitchens where hygiene, heat tolerance, and easy wipe-down matter more than hiding scratches. It is common in serious cooking spaces for a reason. The downside is visual softness. It dents, it shows abrasion, and it can feel too commercial if the rest of the kitchen is trying to be warm or traditional.

Solid surface or acrylic is often overlooked in the post-ban conversation, but it remains a practical compliant option. It is non-porous, easy to clean, and useful where clients want a continuous look with less obvious joins and integrated sink possibilities. Heat resistance is not at stone level, so it needs sensible use, but in many family homes it offers a good balance of upkeep, repairability, and clean-lined appearance.

Matching Benchtop Style to Your Kitchen Design

A benchtop sample never tells the full story. What matters is how the slab reads at room scale, where the joins fall, how the edge catches light, and whether the finish suits the way a Victorian home is used.

I tell clients to stop asking which benchtop style is fashionable and start asking which one fits the kitchen they are building. That usually leads to better decisions.

In a compact kitchen, visual restraint does more work than a dramatic slab. Pale tones, quiet movement, and a slimmer-looking profile can make a narrow room feel wider and less crowded. Heavy veining, thick edge builds, and strong colour contrast often shrink the space, especially in galley layouts or older homes with limited natural light.

A simple approach usually performs best in smaller rooms:

  • Lighter surfaces help reflect light and keep tight work zones from feeling boxed in.
  • Simple edge profiles keep cabinet lines clean and are less likely to date quickly.
  • Moderate patterning gives interest without turning the benchtop into the only thing you see.

Open-plan kitchens need a different response. Here, the island is often read more like furniture than joinery, so the benchtop has to work from multiple angles. Waterfall ends, a thicker mitred look, or a full-height matching wall finish can all be effective, but only if the material suits the fabrication detail and the budget allows for the extra labour.

That is where poor selections usually show up. A bold stone-look surface may look impressive on a sample or showroom island, then feel overworked once it sits beside timber floors, pendant lights, and a busy splashback. In many Victorian renovations, the better result comes from giving one surface the lead role and keeping the rest quieter.

Detailing matters as much as colour. For stone-look materials and other hard surfaces, eased edges with a small radius are better practice than sharp arrises because they reduce chipping risk at corners and around sink cut-outs. Proper support at undermount sinks and dishwashers matters as well. These are the details that affect whether a benchtop still looks good after years of hard use.
Screenshot from https://siteprobathrooms.com.au

Carrying the palette into bathrooms

The kitchen usually sets the tone for the rest of the renovation. Benchtop colour influences splashbacks, floor tile warmth, tapware finishes, and later vanity selections. If those decisions are made separately, the house can feel pieced together rather than planned.

Homeowners renovating both kitchen and bathroom often get a better result by setting the material direction early. A warm timber or soft beige benchtop can support a more relaxed bathroom palette. A pale mineral or porcelain look often suits cleaner, sharper bathroom joinery. If you are weighing the wall finish at the same time, this guide to splashback or backsplash choices is a practical place to start.

The goal is not perfect matching. It is consistency. In the post-2024 Australian market, with many Victorian homeowners reassessing old engineered stone assumptions, the best kitchens are usually the ones where style, compliance, and day-to-day practicality are resolved together.

Beyond Aesthetics Durability Maintenance and Cost

A benchtop decision usually goes wrong in one of two ways. Homeowners either buy on appearance alone, or they focus so hard on the sticker price that they miss what the surface will cost them over the next ten years.

That matters even more in the post-2024 Australian market. With engineered stone off the table for many projects, Victorian homeowners are now comparing porcelain, sintered stone, stainless steel, timber, laminate, and natural stone more carefully. The better question is simple. Which material will still suit the way your household lives after the novelty wears off?

What long-term cost really means

The purchase price is only the starting point. The total cost includes:

  • Cleaning effort: Some materials wipe down easily every day. Others need more care around staining, sealing, or preserving the finish.
  • Visible wear: Scratches, chips, etching, scorch marks, and edge damage show up differently depending on the material and colour.
  • Repairability: A benchtop that can be repaired in one area often holds its value better than one that needs full replacement after a single bad impact.
  • Disruption: If repairs are difficult, a minor defect can turn into lost kitchen access, extra trade visits, and added labour.

This is why I push clients to compare ownership, not just installation. A cheaper top that stains easily or cannot be repaired cleanly can cost more in frustration and replacement.

Common failure points in real kitchens

Wear is rarely spread evenly.

Sink cut-outs, drainer zones, and the edge beside a dishwasher usually show age first. Island corners take regular knocks from stools, school bags, and trays. Dark matte finishes often show fingerprints, dust, and wipe marks more than expected. Timber can look excellent, but around wet areas it needs consistent care or it starts to age unevenly.

A durable benchtop is one whose weak points are acceptable for your household, not one with the strongest showroom story.

Natural stone still appeals to many owners for its character, but it comes with trade-offs. Some stones etch from acidic spills. Some mark more easily than buyers expect from a polished sample. Porcelain and sintered surfaces are often strong performers for heat and stain resistance, but edge damage can be harder to disguise if it does happen. Laminate remains one of the most cost-effective options for many Victorian renovations, especially where budget discipline matters, but it will not tolerate heat or heavy impact like harder materials.

How value changes from one household to another

A family kitchen usually benefits from a surface that is forgiving, easy to clean, and not precious. An investor or landlord often gets better value from predictable upkeep and straightforward replacement options. An owner-occupier renovating a long-term home may decide that extra maintenance is acceptable if the material gives the right look and can be maintained properly.

There is no universal best choice. There is only the right compromise for the job.

If you are still setting the renovation budget, this guide to the cost of a new kitchen renovation helps put the benchtop decision in context with cabinetry, appliances, plumbing, and labour.

A practical selection method is to rank four things in order: upkeep, resistance to damage, repair options, and appearance. Once clients do that, the shortlist usually becomes much clearer.

Your Renovation with a Registered Builder

Benchtop selection often looks simple until it reaches site. Then the real coordination starts.

A registered builder unlimited doesn't just help choose a material. They manage how that choice affects cabinetry tolerances, sink installation, plumbing set-out, appliance fit, splashback sequencing, access for delivery, and the timing of every trade that follows. In a renovation, those moving parts matter as much as the slab itself.

A builder in a hard hat discusses renovation blueprints with a woman in a modern kitchen.

Why this matters on real jobs

The most expensive mistakes usually happen in translation. A client chooses a benchtop style from a sample. The cabinet layout changes slightly. The sink spec changes later. The overhang becomes larger. The support detail doesn't follow. By install day, the design intent and the build reality no longer match.

That's where builder-led coordination earns its keep.

  • Design intent stays buildable: Edge profiles, thickness build-ups, and joins get reviewed before fabrication.
  • Trades work in sequence: Cabinetmaker, plumber, electrician, tiler, and benchtop installer aren't guessing each other's tolerances.
  • Compliance is tracked: Material choices and installation details stay aligned with current requirements.
  • Variations are controlled: Problems are picked up earlier, when they're cheaper to solve.

The value of end-to-end planning

This is also why 3D design has become so useful in renovation work. It helps clients test proportion, colour temperature, and profile thickness before money is committed to fabrication.

For homeowners planning kitchens and bathroom renovations together, one option is SitePro Bathrooms' registered builder guidance, which outlines how builder-led coordination supports renovation projects from design through handover.

The same process that improves kitchen outcomes also helps with modern bathrooms and more custom designer bathrooms. Services, waterproofing interfaces, cabinetry lines, and finish schedules all benefit when one team is responsible for coordination rather than leaving every trade to interpret drawings independently.

Making Your Final Benchtop Decision

The right benchtop isn't the one that looks best in a showroom. It's the one that still suits your home after daily use, cleaning, and normal wear.

If you're narrowing down kitchen benchtop styles for a Victorian renovation, ask yourself:

  • How much maintenance will I realistically keep up with?
  • Do I want natural character, or do I want consistency?
  • Will this edge detail survive the way my household uses the kitchen?
  • Am I choosing for my own lifestyle, a rental, or future resale?
  • Does this finish work with the rest of the home, including future bathroom renovations?

A durable, cost-effective choice usually comes from being honest about those answers. Some households are happiest with low-fuss laminate or solid surface. Others want the warmth of timber or the depth of natural stone and accept the upkeep that comes with it. There isn't one correct material. There is only the material that fits the job properly.

If you're planning a kitchen update, a full home refresh, or pairing the project with new bathroom ideas, get the benchtop decision resolved early. It influences more of the renovation than is often expected.


For customized advice on layout, materials, and coordinated kitchen or bathroom renovations, speak with a registered builder before you lock in the finish schedule. That's usually the point where style becomes a workable plan.