How to Quote a Kitchen Renovation the Right Way
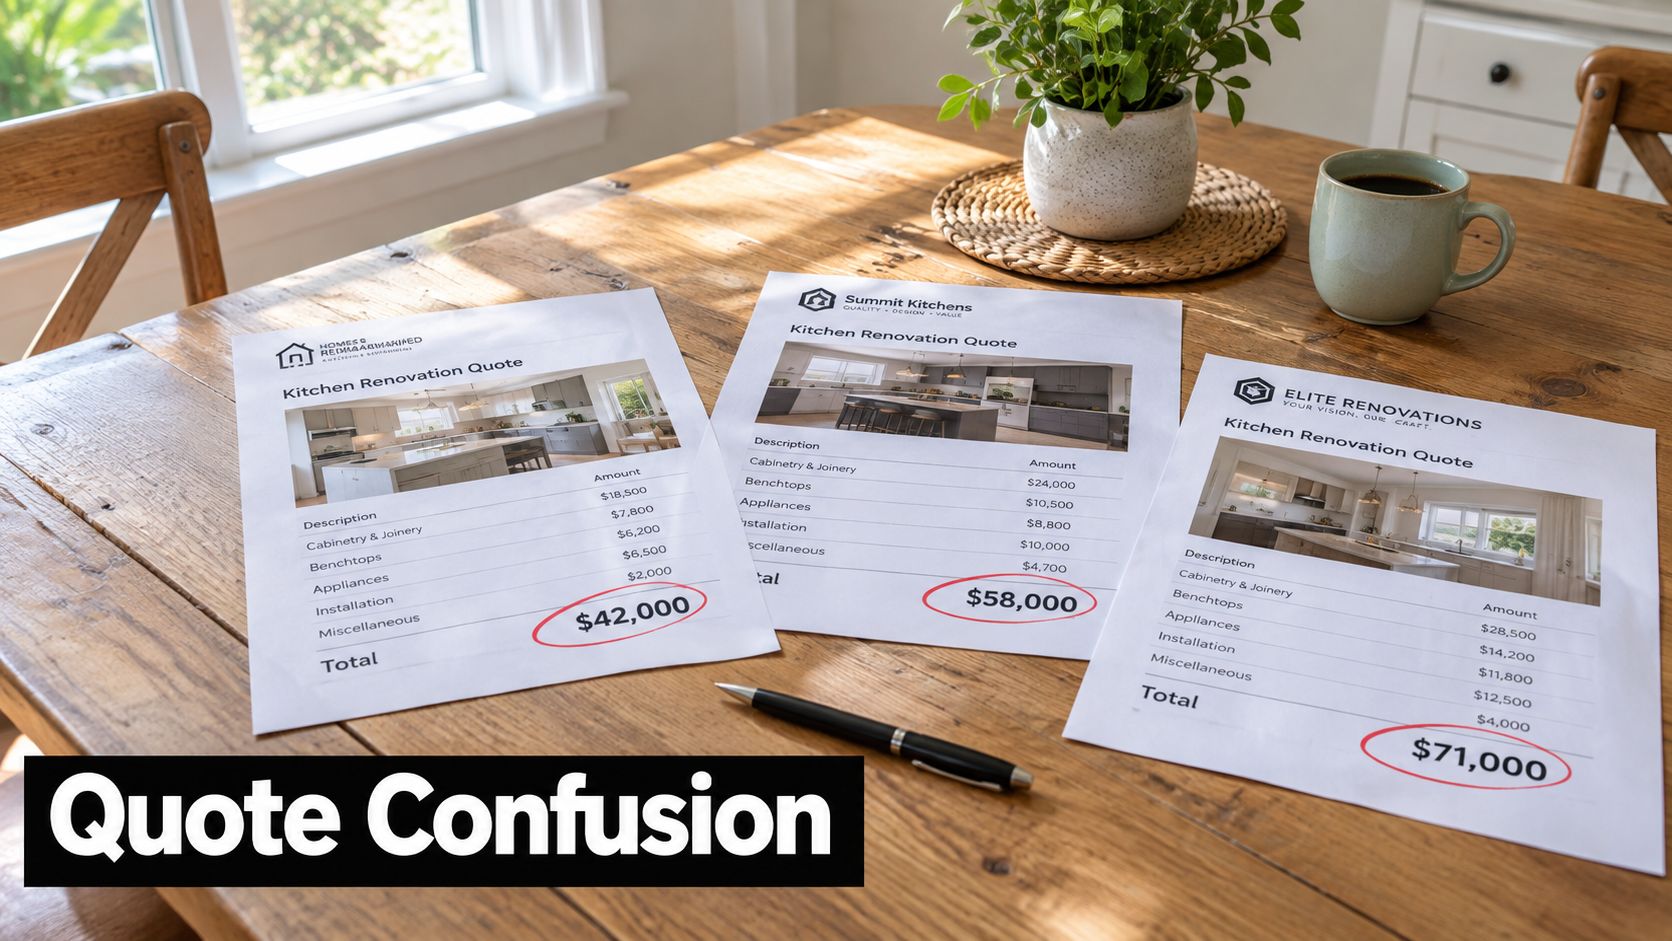
You're standing in a Highett weatherboard kitchen with three renovation quotes on the dining table. The totals look alarming, the cabinetry colour is identical, and you've already measured the room twice. One builder has priced the job at $42,000, another at $58,000, and a third at $71,000. The question isn't which builder is expensive. It's what each document has included.
Learning how to quote a kitchen renovation properly means reading beyond the grand total. A credible quote identifies the work, materials, allowances, exclusions, approvals and payment stages that sit behind the number. Australian renovation data illustrates why this matters: the median renovation spend was reported at $29,155 in 2021, while the average kitchen installed in a new home was $27,944 in the same year, with major components listed separately rather than hidden inside one lump sum (Australian renovation cost breakdown).
Three Quotes on the Bench and No Idea Why They Differ
The first document looks tidy. It has a short description, a completion estimate and a total of $42,000. Then you notice that electrical rough-in is excluded. The quote covers cabinetry installation, but not necessarily the work required to move power points, prepare the rangehood connection or make the existing wiring suitable for the new layout.
The $58,000 quote is harder to read. It says “kitchen fit-out” in one line, with no separation between joinery, installation, plumbing, electrical work or finishing. That wording may represent a complete package, or it may leave important decisions to an allowance hidden in the terms and conditions. You can't compare it with the first quote until the builder explains what that line contains.
The $71,000 document is the most detailed. It lists cabinetry, stone and appliances, but the stone allowance has no square-metre quantity or product specification behind it. A generous-looking allowance can still mislead if the builder has priced a basic material while your selections require more fabrication, thicker edges, cut-outs or a waterfall end.
The total doesn't tell you the scope
A quote is a language game when categories remain vague. “Cabinetry” could mean supply only, assembled units, handles and panels, or a fully installed joinery package. “Plumbing” could mean reconnecting existing services, relocating pipework, supplying tapware or all three.
The price gap isn't automatically evidence of builder greed. Each builder may have made different assumptions about demolition, structural work, waste removal, appliance supply, wall repairs, flooring transitions and finishing. The homeowner has to convert those assumptions into comparable scope before choosing.
Australian guides place kitchen renovation costs across broad bands because the work varies from a flat-pack refresh to a custom rebuild. One 2026 guide gives a national range of $8,179 to $20,443, with a midpoint of $14,311, while warning that projects can range from $5,000 for a flat-pack refit to more than $80,000 for a custom rebuild. Those figures aren't a substitute for a site-specific quote. They demonstrate why the brief must state whether the project is cosmetic, mid-range or a full rebuild.
Practical rule: Never compare totals until every builder has priced the same room, the same products and the same work sequence.
Defining the Renovation Before Any Money Is Spent
The scope document is the foundation of the quote. It turns a wish list into a construction brief that a cabinetmaker, electrician, plumber and builder can interpret in the same way.
Start with the layout. State which walls remain, which are removed and whether the island changes position. Record where the sink, dishwasher, cooktop, oven, refrigerator and rangehood will sit. If the existing gas cooktop is being replaced with induction, say whether the gas service will be capped and whether the electrical supply needs an upgrade. A builder can't price a service change accurately from a mood board.
Lock the decisions that affect labour
Your scope should identify:
- Appliances: List the brand, model number, dimensions and installation requirements for every appliance.
- Cabinetry: Describe the door profile, internal configuration, drawer hardware, panels, fillers, kickboards and finish.
- Benchtops: Name the material, thickness, edge detail, cut-outs, joins and any upstands.
- Splashback: Specify tile, sheet material, grout, pattern, height and the wall preparation required.
- Flooring: State whether existing flooring stays, is repaired, is removed or continues into the renovated area.
- Services: Mark the new positions for power points, switches, lighting, water, waste, gas and ventilation.
- Finishing: Include plaster repairs, painting, tiling, caulking, cleaning and rubbish removal.
This level of detail prevents four common forms of drift. Different trades stop quoting different layouts. Allowances can't substitute a cheaper material without being visible. Variations become easier to assess because the original obligation is written down. “While you're at it” additions can be priced as deliberate changes rather than absorbed informally during a stressful job.
Use a one-page handover brief
A practical scope sheet can fit on one page if it uses direct language. Put the property address, project description, existing conditions, proposed layout, product schedule, service changes, demolition extent, exclusions and required completion standard at the top. Attach the plan, appliance list, elevations and finish schedule.
Ask every builder to return the scope with their quote. If a builder proposes an alternative, require the alternative to be listed beside the specified item rather than replacing it without notice. Victorian guidance on getting quotes also warns that the lowest quote may omit materials and finishes, while missing allowances for demolition, permits, asbestos assessment, structural engineering and hardware can create later budget blowouts (Victorian guidance on building quotes).
The homeowner should own the brief. The builder should price it, challenge unsafe or impractical choices and identify unknowns before signing.
Measuring and Photographing the Existing Kitchen
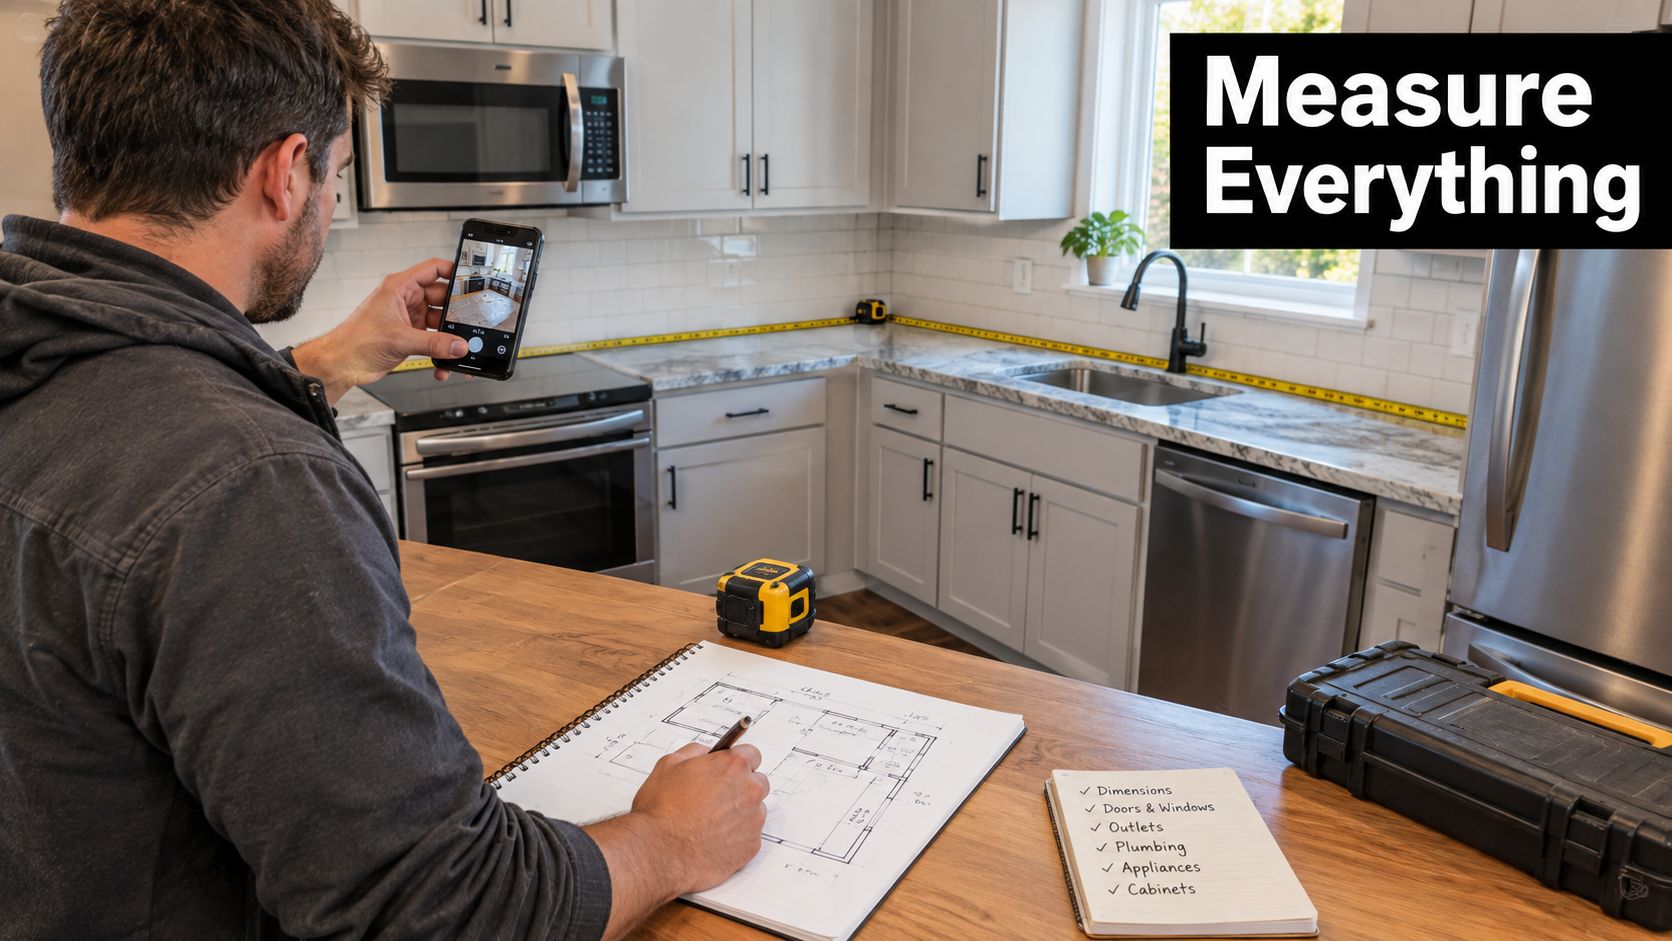
Treat the existing kitchen as a forensic site. A quick tape measure across the longest wall won't reveal whether a new cabinet will collide with a window reveal, whether the floor drops under the toe-kick or whether a waste pipe runs through the proposed drawer bank.
Draw a scaled plan and record every wall length, window, door opening, ceiling height and appliance clearance. Mark the locations of water, gas, waste, power points, switches, the rangehood flue and any visible beams. Note the direction of doors and the distance from corners to services. Measurements should be taken from fixed reference points, not estimated from cabinet edges that may be out of square.
Photograph what the quote can't see
Take wide photographs of every wall, then follow with close-ups of:
- Connections: Existing plumbing, gas points, power points and appliance outlets.
- Low-level conditions: The subfloor behind the toe-kick and any signs of dampness or movement.
- Overhead constraints: Ceiling height, bulkheads, ducting and rangehood paths.
- Structural details: Beams, posts, wall junctions and openings that cabinetry must work around.
- Demolition risks: Original tiles, old vinyl, adhesive, damaged plaster and areas that may contain asbestos-era materials.
Highett's post-war homes can hide surprises beneath flooring and behind original tiling. Photos won't replace a site inspection, but they give every quoting builder the same starting information and make later discussions more precise.
Build a small measurement kit
Use a tape measure, laser measure, graph paper, pencil, camera, torch and a straightedge. Keep the original photographs, annotated plan and appliance specifications in one folder. A homeowner preparing an early layout can also use an online kitchen planner to test cabinet positions before requesting site quotes.
This documentation shifts the conversation from “we allowed for something around there” to “the service is this distance from the corner, the wall is this length and the benchtop has this number of joins”. That doesn't remove uncertainty, but it gives the builder fewer reasons to hide uncertainty inside a broad allowance.
Anatomy of an Itemised Kitchen Quote
A defensible kitchen quote separates the work into cost buckets. The exact amount depends on access, materials, labour availability, site condition and the design, but the structure should remain clear even when the total changes.
Australian renovation reporting itemised major components at $12,868 for cabinetry, $6,600 for benchtops, $6,579 for built-in appliances, $5,138 for labour, $3,407 for flooring and $1,779 for wall finishes and splashbacks in its 2021 breakdown (Australian kitchen renovation component benchmarks). These are benchmarks, not a price list for a Highett property. Their value is that they show how a serious quote should expose the major moving parts.
What each category needs to show
Demolition should state what is removed, who disconnects appliances, how surfaces are protected and whether waste is removed from site. Structural and framing work needs a description of the wall, beam, post, lintel or opening involved, not just “builder's works”.
Cabinetry should show the number and type of units, panels, fillers, internal accessories, hardware, finish and installation. Benchtops need material, thickness, edge profile, cut-outs, joins, support requirements and templating. Appliances should identify whether the builder supplies them or installs owner-supplied products.
Plumbing and electrical work must distinguish rough-in from fit-off. Rough-in covers the concealed service preparation before walls and cabinetry close. Fit-off covers the visible connections, switches, outlets, fixtures and final testing. Flooring, painting, tiling and cleaning should each have their own lines where they form part of the contract.
| Cost Category | Typical Range (AUD) | Notes |
|---|---|---|
| Demolition and waste removal | Varies by site and waste volume | State removal extent, protection, disposal and hazardous-material assumptions |
| Structural and framing changes | Varies by wall and engineering requirements | Identify load-bearing work, beams, posts, temporary support and finishes |
| Cabinetry and joinery | Varies by specification | List units, panels, internals, hardware, finish, delivery and installation |
| Benchtops | Varies by material and fabrication | Include thickness, edge, joins, cut-outs, templating and support |
| Splashbacks and wall finishes | Varies by selected finish | State tile or sheet material, preparation, grout, trims and installation |
| Appliances | Varies by model and installation | Include model numbers, delivery, panels, connections and commissioning |
| Plumbing and electrical rough-in | Varies by service relocation | Separate concealed preparation from final connection |
| Plumbing and electrical fit-off | Varies by fixtures and points | List tapware, sink, outlets, switches, lighting and testing |
| Flooring, painting and tiling | Varies by area and substrate | Give measured areas, preparation, transitions, coats and trims |
| Labour and project coordination | Varies by programme and trades | State supervision, protection, scheduling, cleaning and handover |
A single line reading “kitchen renovation, $45,000” is a warning sign. It may be a legitimate fixed price, but you can't test it, compare it or manage variations without a breakdown. Itemisation also reveals mark-ups and exposes which category inflates fastest between builders.
Allowances Selections Contingency and Permits
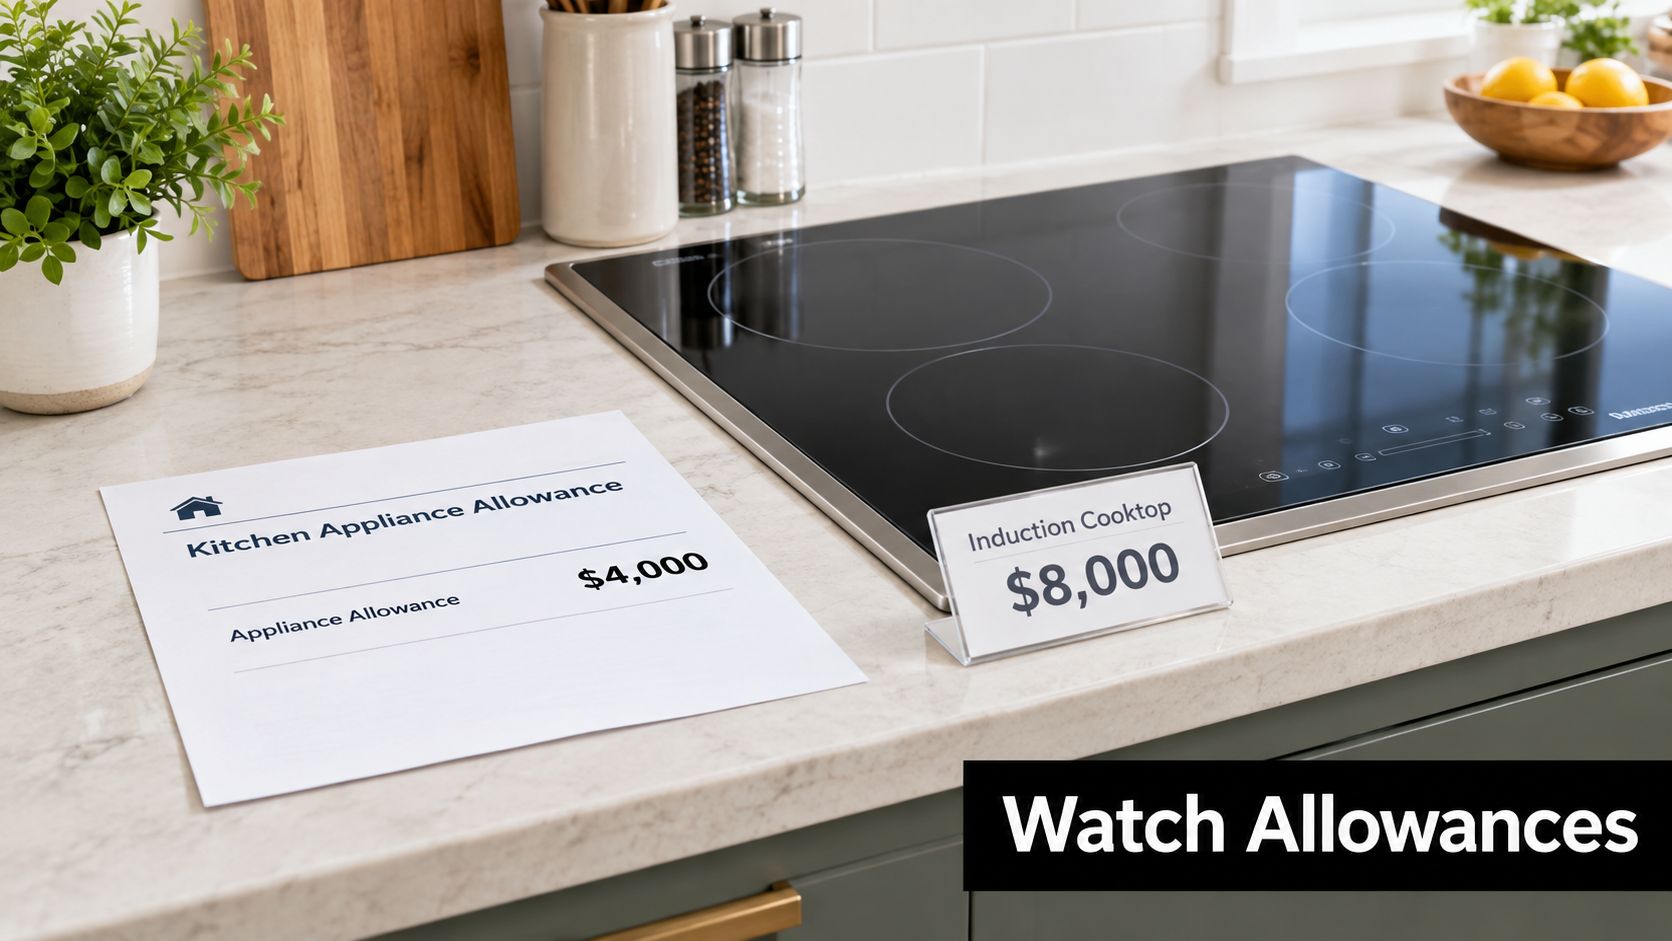
Allowances become expensive when the quote uses a low placeholder and the homeowner chooses a real product later. A $4,000 appliance allowance against an $8,000 induction cooktop creates a $4,000 owner-funded gap before installation or electrical changes are considered. The problem isn't the variation itself. The problem is that the original allowance disguised the likely specification.
A prime cost, or PC, sum generally covers a product that hasn't been selected. A provisional sum covers work whose extent or cost remains uncertain. Both can be legitimate, but the quote should identify the assumed product or scope, the included amount, the labour treatment and the builder's margin on any difference.
Turn selections into fixed decisions
Make a selection schedule for tapware, handles, benchtops, splashback tile, light fittings, sink, waste kit and door hardware. Include a product reference, finish, dimensions and price basis. If the selected item changes, the variation should show the original allowance, the new cost, labour impact, delivery effect and margin.
The same approach applies to modern choices that look standard in a design image but alter fabrication and installation. Handleless joinery can require different profiles and clearances. Integrated appliances need panels, ventilation and careful alignment. Porcelain or sintered-stone benchtops can involve specialised fabrication. A larger multifunctional island affects support, access, electrical planning and installation sequencing. Australian trend coverage also identifies warm minimalism, textured neutrals, layered LED lighting and durable low-maintenance materials as current design directions, all of which can change the specification even when the room layout stays the same.
Allow for the unknown without hiding it
For an established Highett home, carry a contingency of 10% to 15% for concealed conditions, and a project-management buffer of 5% to 10% if you're coordinating trades yourself. These figures are planning allowances, not guaranteed costs. Keep them outside the builder's fixed scope so you can see whether the quote is complete or merely optimistic.
Permits belong in the early scope discussion. Structural work requires a building permit through a private building surveyor, while drainage alterations require a compliance certificate from a licensed plumber. Victoria also requires registration with the Building and Plumbing Commission for domestic building work worth more than AUD 10,000, and structural work requires a registered builder and building permit regardless of cost (Victorian renovation and bathroom compliance guidance).
For practical permit and approval planning, review the building permit requirements guide alongside the quote and ask who lodges each document, pays each fee and supplies the final certificate.
Comparing Quotes the Apples to Apples Way
Put the quotes into one comparison sheet and replace each builder's wording with the scope item you need. The exercise should make omissions visible before price influences your judgement.
Start with the physical work. Each builder should respond to the same demolition extent, cabinetry run, benchtop material, appliance list, tile selection, electrical points, plumbing points and flooring transitions. If one quote includes a new rangehood route and another assumes the existing flue remains, they aren't competing on the same job.
Compare exclusions before inclusions
Inclusions make a quote look generous. Exclusions explain why it may be cheap. Read every exclusion and translate it into a question:
- Is demolition complete, including adhesive and old flooring?
- Is waste removed from site?
- Are wall repairs and painting included?
- Are appliance panels, delivery and installation included?
- Are plumbing and electrical changes priced as rough-in and fit-off?
- Are structural engineering, permits and inspections included?
- Are hardware, fillers, scribes and end panels included?
- Is final cleaning part of the handover?
Normalise allowances by replacing them with the actual specified product price. If a builder has priced a generic sink allowance and another has included the exact sink, use the same product basis for both. The difference that remains is more meaningful.
| Comparison Category | What to Align | Why It Matters |
|---|---|---|
| Scope of works | Layout, demolition, structural work and finishing | Different work descriptions create false price differences |
| Cabinetry | Brand or manufacturing standard, run, internals and hardware | Joinery can look similar while construction and installation differ |
| Benchtops | Material, thickness, edge, joins and cut-outs | Fabrication details affect both supply and labour |
| Appliances | Models, panels, delivery, connections and commissioning | Allowances can conceal major specification gaps |
| Services | Identical plumbing, gas, electrical and lighting points | Relocation work can sit outside a headline price |
| Finishes | Same flooring, paint, tiles, grout and trims | “Complete” doesn't define finish quality |
| Exclusions | Demolition, permits, engineering, waste and repairs | Exclusions transfer risk back to the homeowner |
| Contract terms | Deposit, progress stages, variations and warranty | A low price can carry unfavourable commercial terms |
| Programme | Start date, milestones and handover conditions | Delays affect temporary cooking, trades and accommodation |
| Defects process | Inspection, rectification and liability period | You need a clear route for incomplete work |
Then assess payment stages against completed work rather than calendar dates. A quote that wins on three categories but loses on nine may be cheaper only because the homeowner is carrying the missing scope.
Locking It In with a Pre-Signing Checklist for Highett Homes
The night before signing, put the quote, scope, plans, selections and contract together on the kitchen bench. Read them as one document. Any item that appears in a drawing but not in the quote needs an answer in writing.
Confirm the builder's current Victorian registration and request the relevant warranty insurance certificate. The Victorian Building Authority recognises a limited domestic builder pathway for bathroom, kitchen and laundry renovation, while Domestic Builder, Unlimited is a recognised registration category. A builder quoting major work should have a registration class that matches the scope, not merely general renovation experience.
This matters beyond kitchens. Bathroom renovations, structural alterations and multi-trade projects can involve different compliance responsibilities. If you're considering new bathroom ideas, modern bathrooms or more detailed designer bathrooms, confirm whether the proposed work sits within a limited class or requires a builder with broader registration. Referee guidance for the limited bathroom, kitchen and laundry class refers to a registered Domestic Builder, Unlimited, or a builder registered in the relevant class.
Check the local conditions
Ask whether Bayside Council requires a building permit for your scope and whether nearby heritage overlay controls affect the property. Confirm that splashback and wet-area waterproofing is quoted to NCC 3.8.1 standards, with preparation, membrane work and certification clearly assigned.
The contract should use terms suited to Victorian domestic building work over $16,000, such as an appropriate HIA or Master Builders form. Progress payments should follow completed stages, not dates on a calendar. Record the start milestone, cabinetry measure, demolition, rough-in, installation, fit-off, practical completion and defects inspection.
Use this ten-point final check
- Scope match: The plans, selections and written scope describe the same renovation.
- Layout confirmed: Wall removals, service positions and appliance locations are fixed.
- Allowances locked: Every PC and provisional sum states its basis and adjustment method.
- Contingency disclosed: Unknown conditions and owner-managed buffers are visible.
- Exclusions reviewed: You know what you must supply, organise or pay separately.
- Approvals assigned: Permit applications, fees, inspections and certificates have named owners.
- Timeline milestones: Start, trade stages and handover conditions are written down.
- Payment stages: Payments correspond to completed work and verified progress.
- Defect liability: The inspection process and rectification period are clear.
- Variations clause: No extra work proceeds without written price and approval.
SitePro Bathrooms is one local option that provides kitchen renovation planning with 3D design and an itemised quotation covering labour, materials, fixtures, finishes and a projected timeline. Whether you choose a coordinated renovation company or separate trades, insist on the same written clarity.

A reliable kitchen quote isn't the document with the lowest total. It's the document that tells you exactly what will happen, what materials will arrive, who will do the work, what remains uncertain and how changes will be approved. Before signing, ask each Highett builder to reissue the quote against your final scope and comparison sheet. That one step will give you a defensible price, a clearer contract and far fewer surprises once the old kitchen is removed.
If you're planning a kitchen or bathroom renovation in Highett, prepare your appliance list, existing-room photographs and preferred layout before requesting a specific quote. Contact SitePro Bathrooms to discuss the scope, explore a coordinated design and construction process, and receive a written quotation based on the actual requirements of your home.