• siteprobathrooms

Renovation Project Management: A 2026 Guide

You're standing in a stripped bathroom in Highett. The tiles are stacked in the hallway, the delivery date has moved, the plumber can't return until Thursday, and someone has just asked whether the council paperwork was ever lodged. The renovation looked straightforward when you chose the vanity. Now the household is sharing one working bathroom, every delay affects the next trade, and the original price no longer feels secure.

That's the point at which renovation project management stops being administrative overhead and becomes the job itself. A successful project aligns the brief, budget, approvals, materials, trades, decisions and inspections into one controlled sequence. In Victorian homes, that sequence has to account for existing construction, permit pathways, licensing and the realities of living through the work.

The method below is designed for Highett homeowners planning bathroom renovations, kitchen upgrades and broader home improvements. It also suits families, landlords and body corporates that need a clear process rather than a collection of attractive ideas.

Why Highett Renovations Need Real Project Management

A Highett home can look straightforward from the street and still hide old plumbing, uneven framing, limited service access or previous alterations. A 1960s brick veneer or weatherboard house may require careful investigation before anyone prices the work. A knockdown-rebuild has different risks, but it still depends on close coordination between design, approvals, procurement and construction.

That local context matters. Victoria remains one of Australia's largest renovation markets. KPMG found that renovations rose from 34.2% of total residential construction expenditure in 2018–19 to 40% in 2023–24, while inflation-adjusted renovation spending increased 6.5% and new private residential construction fell 14% over the same period, as detailed in KPMG's analysis of Australia's renovation market. In Victoria, renovations or rebuilds represented 41% of construction spending in 2023–24, slightly above the national average.

The coordination problem

A bathroom renovation puts demolition, plumbing, electrical work, waterproofing, tiling, cabinetry, glazing, painting and fixture installation into one confined sequence. Each trade relies on the previous trade completing the correct work, at the agreed time and to the approved design. A missed decision can delay several people, not just one task.

Project management creates a clear decision chain:

  1. The brief defines the outcome.
  2. The design turns that outcome into drawings and selections.
  3. The scope lets builders price the same work.
  4. The contract sets responsibilities, timing and variation rules.
  5. The schedule coordinates approvals, deliveries and trades.
  6. Inspections check hidden work before it is covered.

That chain is more useful than disconnected quotes. The practical principles in this project management guide for staying on schedule and under budget suit Highett renovations because existing homes rarely provide perfect conditions behind their finishes.

Practical rule: If nobody can explain what happens next, who owns the decision and what it costs, the project isn't being managed.

Why Victorian requirements change the timeline

Approvals belong in the programme from the start, not at the end of design. Victorian building-permit activity is recorded in monthly and yearly summaries, giving renovators a useful reference for approval activity and pipeline volatility through the Victorian building-permit data published by Data Vic.

For a Highett bathroom or kitchen, management means coordinating the designer, registered builder, engineer where required, council pathway, suppliers and trades before demolition begins. It also means allowing for problems hidden inside existing walls. Good planning does not remove surprises. It sets a controlled process to assess, price and approve them without losing sight of the brief, budget or sequence.

Building the Project Brief Before You Talk to Anyone

A Pinterest board isn't a project brief. It shows what you like, but it doesn't tell a designer or builder what must be built, what can be removed, or what you're prepared to compromise.

Start with one page. Keep it practical, specific and easy to price.

Six blocks for a useful brief

Room function comes first. Record who uses the room, when they use it and what currently frustrates them. A family bathroom may need two people to prepare at once, durable storage and a bath for younger children. An ensuite may prioritise a generous shower, discreet storage and fast cleaning.

Separate must-haves from preferences. Mark every item as essential, preferred or optional. If the budget tightens, this hierarchy tells the builder what can change without reopening the entire design.

Describe the finish level. “Modern” isn't enough. State whether you want standard, upgraded or custom cabinetry, simple or feature tiles, off-the-shelf or bespoke fittings, and painted or natural timber finishes. For modern bathrooms and designer bathrooms, name the visual direction and the products that define it.

Record the existing dwelling. Note likely structural changes, access limitations, ceiling conditions, window positions, heritage considerations and any known water damage. Don't assume a new layout can use the old service paths.

Map plumbing and electrical constraints. Identify the location of existing wastes, water points, hot-water lines, switches, exhaust paths and power outlets. Moving fixtures may improve the layout, but it can also expand demolition, drainage and permit requirements.

Plan liveability. Decide whether the family can leave during disruptive stages, where laundry will operate, which bathroom remains available and how children and pets will move around the site.

Turn inspiration into buildable information

Your brief should include:

  • An annotated plan: Mark fixture locations, storage zones, door swings, windows and circulation.
  • A named selection list: Identify tile ranges, tapware, vanity dimensions, appliances and hardware. Mystery tiles create pricing gaps.
  • A mood board with purpose: Use colour, texture and material references to communicate the atmosphere, not just attractive images.
  • A constraints page: List access, parking, working hours, body corporate requirements and known neighbour concerns.
  • A decision register: Record what has been approved, what remains open and who can authorise a change.

Australian construction-delay research identifies owner-driven changes, slow owner decisions, design drawing preparation and approval, underestimated complexity and unrealistic durations among the leading delay risks. The Australian Building Codes Board report on building confidence and construction quality supports a firm approach: freeze the scope early and coordinate the design before procurement.

Before booking a consultation, answer three questions clearly. Where will the laundry go during a bathroom renovation? Can the kitchen remain operational during the disruptive phase? What outcome is essential? Those answers make the first meeting productive and reduce the chance that a vague wish list becomes an expensive variation.

Budgeting and Cost Tracking That Holds

Renovation budgets fail when homeowners follow the headline quote and ignore the decisions behind it. Your budget must show what the quote includes, what it excludes, what has been paid, and what has changed.

Renovation activity across Victoria shows why cost discipline matters. Nationally, renovations represented 40% of total residential construction expenditure in 2023–24, compared with 34.2% in 2018–19, as noted earlier. HIA figures reported by Domain's coverage of the Australian renovation market show Australians spent $59.8 billion updating their homes at the renovation peak in 2021 and 2022. In Victoria, the typical kitchen renovation reached $33,600, compared with $25,500 in 2020.

That market rewards disciplined coordination. A Highett project can involve Victorian permit requirements, older-home conditions, restricted access and live-in staging. Your tracker must connect each cost to a scope decision, approval or site condition.

Build one live cost register

Use four core columns:

Line item Quote price Actual spend Variance
Demolition and disposal Agreed amount Paid amount Difference
Plumbing and drainage Agreed amount Paid amount Difference
Tiles and adhesives Selected allowance Invoiced amount Difference
Cabinetry and joinery Quoted amount Paid amount Difference
Fixtures and fittings Allowance Invoiced amount Difference
Design, permits and temporary costs Estimated amount Actual amount Difference

Separate hard costs, such as cabinetry, tiles, labour, plumbing and electrical work, from soft costs, including design fees, permits, temporary accommodation, skip bins and upgrades selected after the contract.

For Highett homes, record access constraints beside the relevant allowance. A narrow side path, limited parking, protection for occupied rooms or staged plumbing work can affect labour and temporary costs. If a permit or inspection changes the sequence, record that impact rather than hiding it in a general allowance.

Highett Renovation Cost Benchmarks

Project Type Budget Band (AUD) Hard Costs % Soft Costs % Recommended Contingency
Bathroom renovation A$28,000 to A$45,000 Varies by scope Varies by scope Ring-fence a contingency
Kitchen renovation A$55,000 to A$95,000 Varies by scope Varies by scope Ring-fence a contingency
Premium renovation Above A$120,000 Varies by scope Varies by scope Ring-fence a contingency

Treat these bands as planning ranges, not promises. Access, design, structural work, selections and existing conditions can shift the final cost.

Do not assign hard and soft cost percentages before the scope is known. Ask for a cost plan that lists every allowance and states who carries the risk when an allowance is exceeded. For a bathroom, use this bathroom-remodelling budgeting guide to structure a room-by-room cost discussion.

Keep contingency separate from the working budget. Review the register weekly. Before work proceeds, require a written variation that states the reason, cost and schedule effect. No verbal approval on site. That rule protects both the budget and the sequence.

Choosing the Right Team for Your Project

The delivery model determines how much coordination you carry personally. There isn't one correct structure for every Highett renovation, but there is a wrong structure for every homeowner who underestimates their available time and tolerance for risk.

Three workable models

Model Best For Owner Workload Cost Control Risk Level
Design-build A coordinated brief with one accountable contract Lower Strong when scope is fixed Lower coordination risk
Owner-coordinator Custom design, complex constraints or strong aesthetic control High Detailed but owner-dependent Higher coordination risk
Specialist renovation firm A focused kitchen or bathroom scope Moderate Strong within a defined specialty Moderate

A design-build firm suits homeowners who want the designer, draftsperson and builder coordinated under one contract. It works best when access is straightforward, the brief is settled and decisions can be made quickly.

An owner-coordinator model gives you more direct control over the architect or designer and the tender process. It can suit custom joinery or heritage constraints, but you become the person chasing drawings, quotes, approvals, selections and trade interfaces.

A specialist renovation firm sits between those models. For a single bathroom or kitchen, an in-house design process and renovation-focused builder can reduce handovers between separate consultants and trades. Confirm exactly what the firm manages, because “full service” can mean different things.

Verify before you sign

Check the builder through the Victorian practitioner register, confirm the correct VBA registration class, request evidence of public liability cover and speak with recent references close to Highett. For larger domestic work, the registration class matters. Victoria recognises a Domestic Builder, Unlimited class, and the current registration example for a Domestic Builder, Unlimited demonstrates a registration without a contract-value cap for that class of domestic building work.

Bathroom renovations also have a clear compliance threshold. Victorian industry guidance states that domestic renovation work over A$10,000 must be carried out by a registered builder, while plumbing must be completed by a registered or licensed plumber, as outlined in this Victorian bathroom renovation licensing guidance.

Use a written selection process. The contractor selection criteria for renovation work should help you test communication, documentation, warranty handling and trade coordination, not just the lowest price.

Creating a Realistic Timeline and Milestone Schedule

A renovation schedule should run backwards from approvals and key procurement dates. It shouldn't begin with the demolition date printed on a sales brochure.

Permit timing can vary sharply. Victorian government review material cited in Consumer Victoria's guidance on building disputes, defects and delays found building-permit timing ranging from 10 business days to 8 months, with council-related delays considered unreasonable in 19% of projects. Consumer Victoria also says contracts must state the number of days allowed for each type of delay.

Use freeze points as decision gates

Set these gates in writing:

  1. Brief freeze: The room function, priorities and exclusions are approved.
  2. Design freeze: Drawings, layout and major construction details are settled.
  3. Pricing freeze: Quotes, allowances and exclusions are reconciled.
  4. Selections freeze: Tiles, fittings, appliances, colours and joinery are ordered.
  5. Lock-up: The concealed structure and services are ready for inspection.
  6. Fit-out: Visible finishes and fixtures are installed.
  7. Practical completion: The agreed work is complete, subject to documented defects.

After a freeze, a change needs a written variation. That variation should state the price, delay, affected trade and revised completion date. This keeps a late preference from becoming an unpriced instruction.

A bathroom renovation project in progress with framing, plumbing, and orange waterproof underlayment visible.

Build the programme from the critical path

For a typical Highett kitchen, a practical sequence includes 4 weeks for design, 8 weeks for permits, 1 week for demolition, 4 weeks for rough-in, 5 weeks for joinery and fit-out, and 2 weeks for snagging, followed by 2 buffer weeks. A shorter programme usually removes a decision gate or assumes every delivery and inspection happens perfectly.

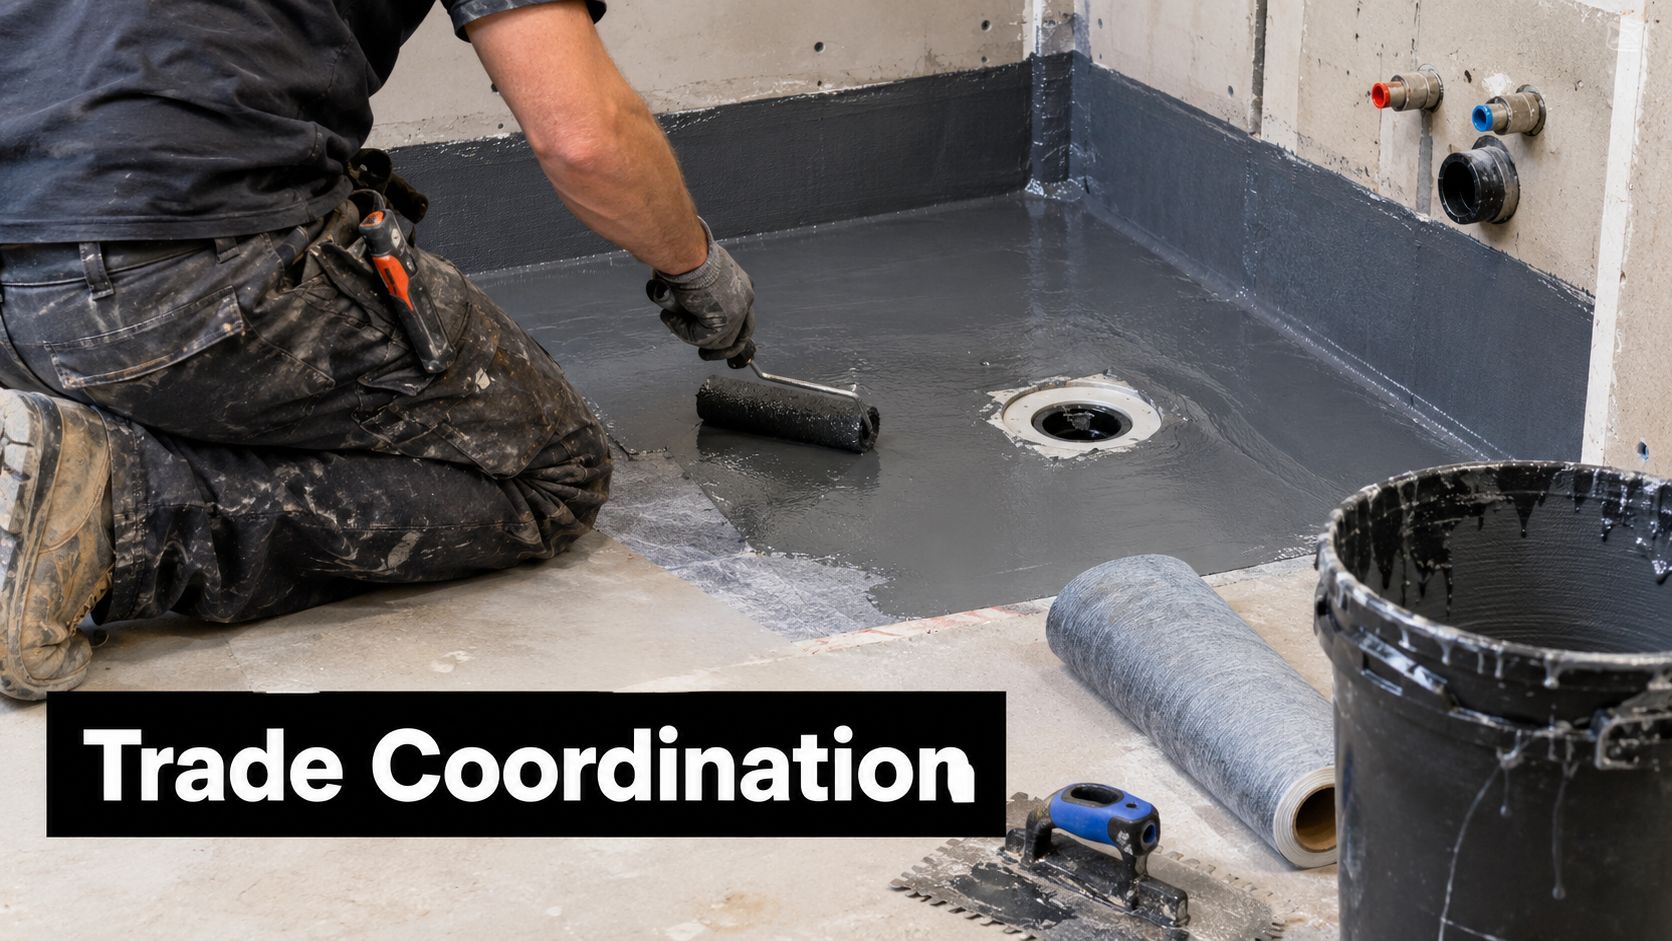
Bathroom renovations need the same discipline. Waterproofing, tile delivery, vanity manufacture, glazing and fixture availability can control the critical path. Design changes after waterproofing begins are particularly dangerous because they can trigger rework inside a concealed wet-area assembly. Defect research in Australia identifies rework and widespread defects as significant construction concerns, so the freeze points protect both quality and your warranty position.

Communication and Site Management on a Live Job

A live renovation needs a rhythm that everyone follows. Set a weekly site meeting for the same day and time, with the builder's project manager and lead tradesperson present. Walk the site, compare progress with the schedule, photograph completed work and record decisions before the meeting closes.

The written decision log is the authority. Record the date, decision, responsible person, cost effect, programme effect and approval status. Both parties should confirm the entry by the end of the week.

Email can carry information, but it shouldn't carry an unrecorded variation.

Use a dedicated project-chat channel for urgent questions, delivery updates and access issues. Keep cost and scope approvals inside the formal meeting and variation process. A quick message can alert the team that a decision is needed, but it shouldn't replace a signed instruction.

Plan the household around disruption

Australian consumer research found that 49% of intended renovators were delaying work because of rising living costs, while 28% were reducing renovation scope, according to Domain's Australian bathroom renovation coverage. That makes liveability and cashflow part of the project brief, not an afterthought.

Decide where the household will cook, wash clothes and use the toilet during each phase. Establish:

  • Dust boundaries: Identify sealed work zones and the route trades will use.
  • Temporary facilities: Confirm the location of a temporary kitchen, laundry sink or portable toilet.
  • Safety controls: Keep children and pets away from tools, demolition waste and open services.
  • Daily limits: Agree start, finish and quiet hours with the site team.
  • Access rules: Set arrangements for keys, deliveries, parking and neighbour communication.

If the renovation affects a shared building or common property, obtain body corporate approval before ordering materials. A clear phasing plan protects the family from making rushed decisions because the household is uncomfortable.

A construction manager reviews a project plan with a client at a home renovation site.

SitePro Bathrooms is one example of a specialist renovation company that coordinates bathroom work from consultation and design through construction and handover. Whether you use a specialist firm or assemble your own team, insist on the same evidence: current schedule, documented decisions, clear variations and photographed progress.

Quality Checks, Compliance and the Defect Punch

Handover doesn't mean the project is finished. It means the work has reached a stage where you can inspect it against the contract, identify defects and confirm which documents remain outstanding.

Quality control should happen at four points, not only on the final day.

Inspect before the work disappears

Project Stage Inspection Focus Required Documentation Owner Sign-Off Trigger
Lock-up Framing, openings, insulation, service routes and concealed structure Approved drawings, engineering details and inspection records Layout and concealed works match the approved scope
Waterproofing Falls, junctions, penetrations, puddle flanges and membrane coverage Waterproofing records and relevant compliance documentation Wet-area preparation is accepted before tiling
Fit-off Fixture position, cabinetry, electrical points, drainage, doors and finishes Product warranties, certificates and updated selections Visible installation matches the design and selections
Practical completion Operation, finish quality, cleaning, access and outstanding items Final inspection documents, manuals, warranties and defect list Contract work is complete apart from listed defects

For bathroom renovations, don't let tile installation cover waterproofing before the required inspection and documentation are complete. Confirm the builder's responsibilities for Victorian Building Authority inspections, the certificate of final inspection where applicable and any documents needed for future sale or insurance records.

Check the VBA practitioner register before paying the final draw. Confirm that the registered builder's class suits the work, especially where the renovation includes structural changes or several coordinated trades. Keep permits, engineering information, waterproofing records, plumbing documentation and electrical certificates together in a digital project folder.

Create a disciplined defect punch

Walk the room in a fixed direction. Start at the door and inspect every surface, junction, fitting and function. Test doors, drawers, exhaust fans, lights, taps, waste flow, shower screens and appliances. Look at grout lines, silicone joints, paint edges, tile alignment, cabinetry gaps and damage to adjacent rooms.

Photograph each defect with a wide image showing its location and a close image showing the problem. Name the file with the room, item and date, then match it to the original scope or drawing. A defect list without a location and reference becomes an argument. A photographed list tied to the contract becomes a close-out tool.

Include a defect liability period clause in the contract. The applicable period depends on the agreement, but contractor obligations commonly sit within a 90-day to 6-month range. Don't rely on a verbal promise that the builder will return. State the response process, access arrangements, responsibility for consequential damage and the date by which defects must be addressed.

A delay can also have a contract consequence. Suppose the builder misses an agreed defect-response date, the bathroom remains unusable, and the contract applies liquidated damages or another documented delay mechanism. The owner's cost can then include the contractual amount, temporary accommodation and repeated trade visits. The exact result depends on the contract and facts, so have the agreement reviewed before signing rather than trying to calculate the loss after the dispute begins.

Downloadable pre-renovation checklist

Copy this checklist into a document and print the pages you'll use during site meetings. Keep the master version digital so you can update selections, approvals, costs and decisions without creating conflicting paper copies.

Brief and scope

  • Room use: Record users, routines, storage needs and liveability limits.
  • Must-haves: Mark essential items separately from preferences.
  • Existing conditions: Note structure, plumbing, electrical access, windows and known damage.
  • Selections: Name products, dimensions, colours and finish levels.
  • Exclusions: Write down work that isn't included.

Budget tracker

  • Line item: Use one row for every trade, material, fee and temporary cost.
  • Quote price: Enter the accepted quote or allowance.
  • Actual spend: Update when invoices are approved or paid.
  • Variance: Investigate every difference before the next weekly meeting.
  • Contingency: Keep the reserve separate and authorise its use in writing.

Designer interview questions

  • Existing-home experience: Ask how the designer investigates concealed conditions.
  • Documentation: Confirm what drawings, schedules and specifications you'll receive.
  • Selections: Ask who checks product availability and lead times.
  • Coordination: Clarify who manages engineering, permits and trade queries.
  • Revisions: Establish the cost and timing of changes after design approval.

Builder shortlist criteria

  • Registration: Verify the VBA registration and correct class.
  • Insurance: Request current public liability evidence.
  • References: Speak with recent clients and inspect comparable work near Highett.
  • Programme: Ask for the critical path, approval assumptions and buffer.
  • Communication: Confirm the meeting rhythm, decision log and variation method.

Contract clauses to verify

  • Scope: Check drawings, specifications, allowances and exclusions.
  • Payment: Match progress claims to measurable stages.
  • Variations: Require written price and time approval before changed work.
  • Delays: Check the stated allowance for each delay type.
  • Defects: Confirm the liability period, response process and close-out standard.
  • Documents: Require permits, certificates, warranties and manuals at completion.

Week-of-handover tasks

  • Punch walk: Inspect every room and record defects with timestamped photographs.
  • Functional testing: Operate every tap, drain, light, fan, door, drawer and appliance.
  • Document collection: Save certificates, warranties, manuals and final inspection records.
  • Payment review: Match the final claim to completed work and unresolved defects.
  • Access check: Collect keys, remotes, codes and maintenance instructions.

Sample 14-week bathroom timeline

Week Milestone
Week 1 Design brief
Weeks 2 to 3 Concept and quote
Week 4 Design freeze
Weeks 5 to 7 Council and VBA permit lead-time
Weeks 8 to 9 Demolition and rough-in
Week 10 Waterproofing inspection
Weeks 11 to 12 Tiling and fit-off
Week 13 Punch walk
Week 14 Defects close-out

Treat this as a living document. Print the checklist for the site folder, keep the timeline in the digital project record and update it during every weekly meeting. Two local variables can stretch the programme: heritage overlay consultations may add 2 to 3 weeks, while Caesarstone or other stone benchtop lead-times can run 4 to 5 weeks from template. Confirm those dates before locking the selections freeze.

Current design direction is also more specific than “make it modern”. Australian bathroom coverage points to warmer, textured, spa-like spaces using materials such as hand-cut tiles, marble, timber and concrete, alongside richer colours, curves, bench seats, steam showers and infrared saunas, as outlined in current Australian bathroom design coverage. Reece identifies five local directions, Art Deco, Day Spa, Hamptons, Hotel Experience and Modern Australian, in its Australian bathroom design reference. Use those names to sharpen the brief, then price the actual products and construction required.

The homeowner who controls decisions, documents approvals and inspects concealed work has a far better chance of receiving the room they approved, rather than a late approximation assembled under pressure.


Start your Highett renovation with a one-page brief, a live cost tracker and a permit-led schedule. If you're planning bathroom renovations, modern bathrooms or designer bathrooms and want the trades, selections, approvals and handover coordinated through one process, contact SitePro Bathrooms to arrange a consultation and measure-up for your project.

  • siteprobathrooms

Terracotta Bathroom Tiles: A Practical Australian Guide

You're standing in a half-finished bathroom in Highett, staring at a pile of dust, old adhesive, and a mood board full of warm terracotta rooms that look calm, expensive, and easy to live with. Then your mate says hers stained, the builder says “depends where you use it,” and suddenly the decision stops being about colour and starts being about waterproofing, sealing, and maintenance.

That's the honest way to look at terracotta bathroom tiles. They can be beautiful in bathroom renovations, especially in heritage homes and earthy, contemporary spaces, but they're not a carefree surface. If you want the warm, grounded look without creating a cleaning headache, you need a wet-zone versus dry-zone rule, not a style mood board.

A woman holding a tablet displaying a modern bathroom design while sitting in a room under renovation.

Why Terracotta Tiles Are on the Radar for Bathroom Renovations

A lot of Victorian homeowners reach this point the same way. The bathroom is stripped back, the framing is visible, and the next decision is whether to go safe and plain or lean into a warmer, more characterful finish that suits the house. Terracotta keeps landing on the shortlist because it feels at home in older properties and still works in modern bathrooms that want something softer than cold grey.

That appeal isn't new. Terracotta has a long architectural history, and by the 3rd century BCE it was already being used in bath buildings for fire- and moisture-proof ceilings before concrete was available, which tells you something important about its original purpose in wet spaces (academic reference). Its later spread was tied to the 18th and 19th century Industrial Revolution, when mechanisation enabled mass production, standardised sizing, and lower costs for fired clay products (terracotta history reference).

For a homeowner in Victoria, that history matters because terracotta isn't a novelty finish. It belongs to the long line of building materials that combine utility with character. That's why it keeps showing up in renovation conversations, especially where period authenticity matters.

Practical rule: if you like terracotta because it feels warm and grounded, treat that as a material decision first, not just a colour choice.

Various samples of fired clay and ceramic materials displayed on a light wooden background surface.

What Terracotta Actually Is and Why It Behaves the Way It Does

Terracotta is fired clay, not porcelain and not a generic “rustic tile” label. The clay body is shaped, dried, and fired, and that firing process is what gives it the warm red, orange, brown, and ochre range people recognise immediately. Because the body stays more porous than porcelain, its beauty and its problems come from the same place.

The material tells you what the bathroom can tolerate

The old appeal of terracotta is tied to craft, but the modern supply chain changed everything. The Industrial Revolution pushed terracotta from rare handmade work into a more standardised building product, so today you'll see real variation between reclaimed rustic tiles, machine-made pressed tiles, and extruded tiles. That variation affects thickness, consistency, and how much sealing discipline you'll need once the tiles are on the wall or floor.

There's also a reason terracotta gets respect in wet-area conversations. Its architectural use in bath buildings goes back centuries because it answered a real moisture problem, not just a decorative one. That doesn't make it automatically suitable for every Australian bathroom, but it does explain why people still trust the material's character in heritage-style projects.

A simple way to think about it is this, terracotta is a material with memory. It carries heat well, wears in rather than looking sterile, and gives you a surface that feels honest. It also asks more from the installer and the homeowner than porcelain does.

Use the finish, not the fantasy, as your guide. If the tile's porous body is part of the appeal, you need to plan for sealing and maintenance from day one.

How Tile Specs Tell You Whether Terracotta Will Survive a Bathroom

The data sheet is where the romance stops and the decision starts. For bathroom use, the most useful number is water absorption. A terracotta-bodied tile in the 3% to 6% range sits in ISO 13006/EN 14411 BIIa territory, and one product spec lists ≥1000 N breaking strength and MOR >22 N/mm² (product spec). That tells you the tile body can handle floor loading, but it doesn't remove the need for careful sealing and edge protection in a wet room.

The higher the absorption, the less forgiving the tile becomes in showers and splash zones. A terracotta guide also notes that terracotta commonly sits in AIIb/AIII groups with 6% to 15% water absorption, which is exactly why porous clay finishes need a stronger membrane, a flatter substrate, and a tighter maintenance plan (terracotta technical guide). That's a key difference between a feature tile and a shower-ready tile.

Reading tile specs for bathroom use

Spec Acceptable range Why it matters in a bathroom
Water absorption Lower is better, terracotta often sits at 3% to 6% or higher Higher absorption means more sealing and more stain risk
Strength ≥1000 N breaking strength is a solid signal Helps the tile cope with floor loading
Modulus of rupture >22 N/mm² in the cited product spec Indicates body strength under bending stress
Slip resistance Look for an explicit wet-area rating Matters most on bathroom floors and shower-adjacent areas
Tile group BIIa, or higher-absorption AIIb/AIII groupings for terracotta Helps you judge how moisture-sensitive the tile is

A terracotta-look tile with the right spec can also be engineered differently from genuine clay, which is why the product label matters as much as the colour. If you're choosing for a family bathroom, read the spec first and the mood board second. For a broader tile-selection process, see how to choose bathroom tiles.

Where Terracotta Works and Where It Causes Headaches

Use this rule and you'll avoid most of the regrets I see on site. Real terracotta belongs in dry or semi-dry zones. Put it on bathroom floors outside the shower screen, on vanity splashbacks, and on feature walls where the membrane, grout, and detailing are under control. Keep it out of shower floors if you want low drama and low maintenance.

Wet areas need proper waterproofing before a single tile goes down. The Victorian Building Authority says shower floors, shower hobs, and the bathroom floor adjacent to the shower must be waterproofed in line with AS 3740, and the membrane goes in before tiling starts. With porous finishes, that backing layer does the hard work. The tile is surface finish, not waterproofing. For the base requirements, start with waterproofing in bathroom projects.

The placement map I'd use in a real renovation

  • Shower floor: use a terracotta-look porcelain tile instead of genuine clay.
  • Inside the shower walls: porcelain again, unless you have specialist detailing and a maintenance plan.
  • Outside the shower screen: genuine terracotta can work if the membrane is right.
  • Vanity splashback: a good place for texture, warmth, and less water exposure.
  • Full bathroom floor: possible, but only if you're prepared for sealing and resealing.

A lot of designer bathrooms try to force one material to do everything. That is the wrong call with terracotta. Use it where splash risk is lower, then switch to a more forgiving product in the shower zone.

If you're planning a bathroom renovation in Highett or greater Melbourne, bring in a builder who understands wet-area detailing, not just tile layout. Get the waterproofing right first, then choose the terracotta finish around that decision.

Sealing, Cleaning, and the Real Maintenance Routine

This is the part most glossy articles dodge. Terracotta is porous, so the first seal matters, and the maintenance after that matters just as much. The sensible approach is to seal before grouting, then keep a repeat schedule instead of waiting for the surface to look tired.

A routine worth living with

For a high-use family bathroom, I'd plan on annual resealing. For a guest bathroom, every two to three years is a more realistic rhythm. In a low-exposure area, every three to five years can be enough if the surface is protected and well looked after. Those intervals are practical guidance, not magic numbers, and they depend on traffic, splash exposure, and how often the room gets cleaned.

Daily care should stay simple. Use a pH-neutral cleaner, keep grit off the floor, and stay away from vinegar, bleach, and acidic cleaners. Those products can strip the seal and leave the clay more exposed to staining. If you want a deeper clean around grout lines, use a method that suits sealed surfaces rather than reaching for the harshest bottle in the cupboard. Grout cleaning guidance is worth following closely because dirty grout can make a well-chosen tile look neglected.

Signs the seal is failing

  • Water stops beading. That's the easiest early warning.
  • Grout lines darken unevenly. Moisture is getting in somewhere.
  • The surface looks patchy after mopping. The sealer has likely thinned.
  • Stains linger longer than they used to. The tile is no longer protected as well.

If you're the sort of homeowner who wants a bathroom that can be cleaned fast and ignored for months, terracotta isn't your best friend. If you're willing to keep up a simple routine, it can age beautifully.

Terracotta Compared to Terracotta-Look Porcelain

A bathroom renovation forces the choice fast. Genuine terracotta gives you real clay texture, natural variation, and a softer feel underfoot. Terracotta-look porcelain gives you the same warm colour family without the sealing burden, and that matters the moment water starts hitting the surface.

For wet zones, porcelain is the cleaner decision. A terracotta-look porcelain can be specified with a DCOF rating of at least 0.42, rectified edges, and bathroom, shower, and shower-floor suitability on the product data, like the product listing example shows. That is the kind of specification I'd trust in a shower or on a bathroom floor. Porous clay is a different story, even if the colour looks close.

Side by side

Decision factor Genuine terracotta Terracotta-look porcelain
Water absorption Higher, porous, needs sealing Lower, designed for wet zones
Sealing burden Ongoing Minimal compared with clay
Slip and wet-zone confidence Depends heavily on finish and detailing Better suited to showers and bathroom floors
Material character Strong, natural, variable Controlled, consistent, easier to live with
Lifespan Good if maintained Usually the safer long-term choice in wet rooms

My view is straightforward. Use genuine terracotta where you want material character, not where water is constant. Use terracotta-look porcelain in showers and on floors if you want the look without signing up for repeated maintenance. That trade-off suits most family homes, and it makes sense when cleaning effort and resale both matter.

Design Ideas That Make Terracotta Sing in Australian Bathrooms

The best terracotta rooms don't use it everywhere. They use it with restraint, then let the warmth do the work. In a Highett weatherboard with a heritage feel, terracotta floor tiles can sit comfortably under a rolled-top bath, subway wall tiles, and brushed brass tapware. That combination suits older homes because the tile reads as part of the architecture, not an afterthought.

A modern bathroom design featuring terracotta tiles in the dry area and a minimalist walk-in glass shower.

In a modern bathroom, I'd use large-format terracotta-look porcelain inside a walk-in shower, then pair it with concrete-look walls and matte black fittings. That keeps the room calm and avoids the visual clutter that can happen when too many warm tones compete. It also gives you a cleaner maintenance path, which matters more than trend language ever will.

A compact ensuite needs discipline. One terracotta herringbone feature wall can carry the warmth without closing the room in, especially if the rest of the surfaces stay light and simple. That's a far better move than trying to tile every face in the same material.

Here's the one styling rule I'd stick to:

Limit terracotta to one focal zone. The room looks richer, not busier, when the clay has space to breathe.

Underfloor heating also makes sense with genuine clay because of its thermal inertia. It stores and releases heat well, so the room feels comfortable without needing the tile to carry the whole design by itself.

A vintage-style bathroom featuring a classic clawfoot tub, pedestal sink, and beautiful terracotta floor tiles.

Common Questions and How to Move Forward with SitePro Bathrooms

The first question is always the same. Can terracotta go in a shower? My answer is no, not as a casual choice. If you want that look in the wettest zone, use terracotta-look porcelain or have a specialist engineer the system around very careful detailing.

The second question is about cost in Victoria. Terracotta usually asks for more care in installation and maintenance than a straightforward porcelain bathroom, so the total cost difference isn't just purchase price. It's the time, sealing, and ongoing upkeep that change the equation. That's why I tell homeowners to price the whole lifecycle, not just the tile per square metre.

The third question is resale. In a heritage home, terracotta can support the character of the property if it's used well and kept in good condition. In a plain, generic bathroom, it can also look like a maintenance problem if the finish is tired. The material helps when it suits the house.

The fourth question is lifespan. A properly sealed terracotta bathroom can last well, but only if the waterproofing, substrate, grout care, and resealing are all taken seriously. Skip those parts and the room will show it fast.

If you're planning new bathroom ideas and want a layout that balances design with waterproofing, talk to SitePro Bathrooms about bathroom renovations in Highett or greater Melbourne. They handle concept development, 3D design, construction, and finishing, so you can test whether terracotta belongs in the dry zone, the shower zone, or not at all before work starts.


If you're weighing terracotta against porcelain for a Victorian bathroom, don't guess. Book a consultation, ask for a 3D concept, and get a customized renovation quote that shows exactly where real terracotta makes sense and where porcelain is the smarter call.

  • siteprobathrooms

How to Install Underfloor Heating in Your Bathroom

You're standing in a stripped-back bathroom in Highett, the vanity's gone, the old tiles are in the skip, and the floor finally looks bigger than it did yesterday. That's usually the moment people ask whether underfloor heating is worth folding into the renovation, or whether it's going to chew up floor height, complicate waterproofing, and turn a straightforward job into a mess of callbacks.

The honest answer is that how to install underfloor heating is never just about laying a mat or pipe. It's a renovation-system decision, because the floor structure, the waterproofing layer, the ceiling height, the subfloor access, and the finish all have to work together. Australia's NCC 2022 moved building requirements into a more explicit energy-efficiency framework, and the 7th Edition of NatHERS now uses a 0–10 star scale as set out in the market background on underfloor heating. In practical terms, that pushes heating decisions earlier, not later.

A professional tradesman kneeling on a hardwood floor, using a crowbar to pry up old wooden planks.

Why Underfloor Heating Is Really a Renovation Decision

A lot of homeowners start with the wrong question. They ask which heating product to buy, when the better question is whether the room can carry it without forcing the rest of the renovation to bend around the floor.

I've seen this most often in bathroom renovations where a Highett homeowner wants a warmer floor, but the room already has tight door clearances, a fixed shower fall, and not much spare height. If the subfloor isn't right, the heating element doesn't become a comfort upgrade, it becomes one more thing the builder has to work around. That's why underfloor heating works best when it's treated as part of the floor build-up, not as a last-minute add-on.

The Australian planning context matters here. The NCC 2022 energy-efficiency direction, together with the NatHERS 0–10 star scale, pushes designers to think about insulation continuity, moisture control, and floor structure before the finish goes down in the underlying market reference. That's not paperwork for its own sake. It changes the order of work on site.

Why the room, not the product, decides the outcome

The system choice has to suit the room's structure. A heated bathroom floor in a slab home behaves differently from one over timber framing, and a renovation in an older Victorian house can have more hidden constraints than the owner expects.

Practical rule: If the floor build-up hasn't been mapped before demolition finishes, the heating system is already at risk of being the wrong choice.

That's the reason good jobs begin with checks on the slab or subfloor, moisture barriers, insulation continuity, and finish height. Once those are settled, the installer can choose the right system and sequence the trades properly. That's also where registered builders unlimited come into the picture on more involved bathroom renovations, especially where structural changes, waterproofing coordination, and multi-trade sequencing all sit on the same floor.

A worker using a spirit level to check the flatness of a concrete subfloor before construction.

Electric Mats Versus Hydronic Pipes in Australian Bathrooms

A bathroom in Highett does not give you much room to hide a poor heating decision. The floor build-up, the subfloor type, the waterproofing sequence, and the finish height all shape whether electric resistance mats or cables will suit the room, or whether hydronic systems with PEX pipe loops make more sense as described in the installation overview. Electric mats warm the floor finish directly. Hydronic systems move heated water through pipe loops set into a screed or slab layer, so the floor itself becomes part of the heat distribution surface.

Australian dwelling types push that decision in different directions. National housing mix varies enough that the same heating method can be a tidy fit in one renovation and a poor fit in the next. The census-linked summary shows a heavy share of detached houses alongside semi-detached homes, townhouses, flats, and apartments in the census-linked summary. Detached homes usually give more scope for access and floor build-up. Apartments and many townhouses often push the job toward electric because depth is tighter and access is harder.

Factor Electric Mats/Cables Hydronic Pipe Systems
Floor depth Usually slimmer and easier in tight bathrooms Usually needs more build-up
Best fit Ensuite, powder room, apartment bathroom, compact renovation Detached homes, larger bathrooms, whole-floor comfort
Installation feel Faster layout, simpler heating layer More trades involved, more coordination
Floor structure impact Suits low-profile retrofits Better where the room can accept a deeper floor build-up
Typical finish pairing Tile and stone are the natural match Tile and stone are also the strongest match

The trade-off is not just comfort. It is whether the room can take the system without hurting ceiling height, thresholds, or waterproofing details. If you are planning a compact ensuite or a quick bathroom refresh, electric often gives the cleaner path. If the renovation is larger and the floor depth can handle it, hydronic can still be the better long-term fit. For a room-by-room planning guide, the bathroom floor heating guide is a useful companion when you are comparing layouts.

Planning the Subfloor and Waterproofing First

The floor has to be ready before any heating goes down. That means clean, dry, level, and free of the kind of defects that can wreck heat transfer or damage the system later. On a concrete slab, uneven patches, cracks, and moisture issues aren't cosmetic. They're the kind of problems that can pin a pipe, distort a mat, or create a failure you won't see until the floor is already finished as set out in the concrete-install guidance.

What has to be checked before the heating layer arrives

The preparation is more than sweeping the dust out. The subfloor needs to suit the system, the insulation needs to be continuous, and the floor build-up has to leave enough room for the waterproofing membrane, heating element, adhesive or screed, and final finish without creating a trip hazard or wrecking door clearances as noted in the floor-construction guidance.

A practical bathroom checklist looks like this:

  • Confirm the base: Check whether the room sits on slab or timber framing, because the fixing method changes with the structure.
  • Check flatness: A level base matters, because lumps and dips are where problems show up first.
  • Handle moisture early: A wet slab or suspect subfloor can't be ignored, because waterproofing and heating both depend on a stable base.
  • Plan the build-up: The finished floor height has to suit the shower entry, vanity kick, and door swing.
  • Coordinate the membrane: In a wet area, the waterproofing layer needs to be planned with the heating layer, not treated as an afterthought.

Victorian waterproofing coordination is where many renovations go sideways, because the membrane, floor level, and tile finish all affect one another. If you're adding insulation or substrate boards, that has to be settled before the heating goes in, not patched around after the electrician or plumber has already been booked.

The cleanest installs happen when the room is still being built in layers, not when trades are trying to squeeze heating into a finished floor plan.

That's especially important in older Victorian homes, where the original subfloor may need adjustment before the bathroom can accept any new heating system. If the floor height hasn't been resolved on paper, it usually becomes an expensive site argument.

Installing an Electric Underfloor Heating Mat

Electric underfloor heating is the compact option, but it still has to be treated as part of the whole bathroom build, not as a quick add-on. Once the subfloor is ready and the insulation boards are down, the mat or loose cable is laid so the heated zones sit where people stand, not under fixed furniture, cabinets, or waste points. In a Highett bathroom on a timber frame, that usually means planning around joists, waste lines, and the finished floor height before anyone starts unrolling cable.

A technician installing an electric underfloor heating mat on a room floor during home renovation.

Laying and testing the mat

Before the mat is fixed down, it gets checked with a multimeter. The measured resistance should sit within the manufacturer's expected range, and in the installation benchmark that range is about -5% to +10% as stated in the installation benchmark. That same resistance check is repeated again before the final covering and again at commissioning. If the reading changes, the fault has to be traced before the floor is buried, because once tile adhesive or leveller goes over the cable, access becomes the problem.

The mat is then embedded in tile adhesive or self-levelling compound, depending on the floor finish and the build-up already allowed for in the room. The floor sensor needs to sit in a sensible position, away from a hot patch and clear of anything that would make the thermostat read the room poorly. In a Victorian bathroom renovation, that often means setting the sensor line before waterproofing and tiling are locked in, so the electrician and tiler are not arguing over a chased groove after the membrane is already in place.

Once the floor is live, the floor limit should be set to 27°C, then brought up gradually by no more than 2°C every 24 hours to reduce thermal shock again, as stated in the installation benchmark. That slow start matters on tiled floors over slab, and it matters even more in older Victorian houses where the subfloor has a bit of movement and the surface build-up is already working hard.

What usually goes wrong

The common mistakes are small, but they cause expensive rework. The mat gets bent too tightly at a corner, the sensor lands in the wrong spot, the resistance is not checked after fixing, or the floor finish goes over the top before the electrician has signed off. A bathroom renovation gets messy when the waterproofing, heating, tiling, and electrical work are left to separate booking schedules instead of one build sequence. On site, that usually shows up as a tiler covering a cable path that still needed testing, or a plumber cutting across a mat because the waste location was never marked before the floor went down.

Good electric installs stay quiet. The cable lies flat, the readings match at each check, the sensor is where it should be, and no one has to open the floor again.

That is why electric underfloor heating suits modern bathrooms and higher-finish tiled rooms so well. It is not simpler because the work is trivial. It is simpler because the footprint is smaller, the sequence is clearer, and a registered builder can keep the renovation moving without the floor build-up turning into a site dispute.

Installing a Hydronic Underfloor Heating System

A hydronic floor is not just another heating product to lay in. On site, it is a plumbing and screeding sequence that has to fit the bathroom rebuild, the floor build-up, and the heating source already chosen for the house.

A professional construction worker installing hydronic underfloor heating pipes on pink insulation boards in a house.

The hydronic sequence on site

The job starts with a cleaned subfloor. From there, the team lays 50 mm rigid foam insulation, then fixes pipe-retaining panels or clips as shown in the hydronic installation guide. The PEX tubing runs in a planned loop pattern, returns to the manifold, and connects back to the heating source. Each loop has to sit flat and stay free of kinks, because bent pipe or uneven spacing will give you patchy floor temperatures later.

The pipe layout also has to suit the room, not just the drawing. On a Victorian bathroom floor with awkward walls, a drain change, or a tight doorway, the loop pattern often needs to be adjusted so the heat lands where people stand, not under fixed fittings or dead corners. That is where hydronic work differs from a simple mat install. The pipe run, manifold position, and floor build-up all have to work together before anyone commits to screed.

Before anything gets buried, the circuit is pressure-tested. The hydronic installation guide notes a test at about 6 bar for 30 minutes in the same hydronic guide. That test catches leaks, poor joints, or damage from handling while the pipes are still exposed and repairable. On a renovation, that is the stage that saves you from finding a problem after the floor has already been closed up.

Curing and commissioning

Once the pipework passes test, the screed goes down and has to cure. The same guide sets out a 4 to 6 week screed cure before commissioning in the same reference. Commissioning is the controlled first run, where the plumber, screeder, and tiler need to have done their work in the right order so the system starts properly without stressing the floor or trapping moisture where it should not be.

That timing matters in a bathroom renovation because the heating system is locked to the rest of the sequence. Waterproofing has to be right before the screed goes in, the screed has to be cured before the floor finish goes down, and the heating source has to be connected and signed off by the right trade. If the room is already short on height, or the bathroom is being rebuilt with little tolerance for a deeper floor, hydronic heating can make the renovation harder to fit than it looks on paper.

For homeowners choosing a warmer floor finish, a guide to timber floors in bathrooms is useful because the floor covering changes the whole build-up and the maintenance expectations around it.

Cost, Timeline, and Flooring Compatibility in Victoria

The cost question isn't really about the heating kit. It's about what the room needs around it.

For a Victorian bathroom renovation, electric underfloor heating usually makes sense when the bathroom is compact, the floor height is tight, and the rest of the room is already being rebuilt for tiles or stone. Hydronic is more involved because it brings pipework, manifold connection, and a screed layer into the mix. On a straight practicality basis, that means more trades, more sequencing, and more opportunities for a clash if the bathroom layout hasn't been settled early.

What the floor finish does to the project

The best-performing finishes are the ones that conduct heat well. Full-surface tile or stone are the natural match, especially in modern bathrooms and designer bathrooms where the goal is even warmth underfoot and a clean visual finish as noted in the flooring guidance. That same guidance also stresses testing before the final covering goes down, which is exactly the point where costly mistakes become hard to fix.

Engineered timber can be used in some bathroom-adjacent applications, but it tightens the decision-making. SitePro Bathrooms' timber-floors-in-bathrooms guide is worth reading if you're trying to understand how a warmer, softer look changes the build-up and why it isn't as forgiving as tile in a wet area.

What the timeline really looks like

On site, the sequence is usually demolition, subfloor correction, waterproofing coordination, heating installation, testing, then floor finish. That order matters because a heated bathroom isn't built as separate trades stacked randomly on top of one another. It's built as one layered floor assembly.

A competent homeowner can sometimes self-install a small electric mat in a simple ensuite or powder room if the slab is flat, the job doesn't need plumbing changes, and the electrical work stays within licensed boundaries. Once the job touches a new electrical circuit, any plumbing alteration, the waterproofing membrane, or structural changes to the subfloor, the line into licensed work has been crossed and a registered builder, licensed electrician, or licensed plumber needs to be involved.

Where DIY makes sense, and where it doesn't

  • Possible DIY territory: Small electric mat, simple room layout, no pipework, no structural correction, no waterproofing alteration.
  • Professional territory: Hydronic systems, slab corrections, any new plumbing connection, electrical circuit changes, and any wet-area rebuild that affects the membrane or floor structure.
  • Best coordination model: A renovation team that handles design, construction, and finishing in-house can keep the floor height, waterproofing, heating, and tiling aligned from the beginning.

If the floor needs to be opened, rebuilt, and signed off by more than one trade, the project has already moved beyond a simple product install.

That's why the cheapest quote is rarely the cheapest project. A tidy install with the right sequence usually costs less than reopening a floor because the heating was buried too early.

Troubleshooting, Maintenance, and Common Questions

When a heated bathroom floor works, you shouldn't have to think about it much. When it doesn't, the clues are usually easy to spot if you know where to look.

Cold strips or patchy warmth usually point to a layout issue, a sensor problem, or damage that happened before the finish went down. On electric systems, the first check is the thermostat and the floor sensor, because a bad reading there can make the floor seem broken when the heating element is fine. On hydronic systems, pressure loss in a loop is the warning sign that needs a plumber's eye, not guesswork.

Annual care is simple. Keep the thermostat settings sensible, avoid drilling or cutting into the finished floor, and ask for the test readings to be handed over at the end of the job so future fault-finding starts with real data rather than assumptions. If the room was installed properly, maintenance is mostly about observation rather than intervention.

Common questions homeowners ask

Is underfloor heating worth retrofitting in a low-ceiling bathroom?
Sometimes, yes, but only when the floor build-up can be managed cleanly. If the insulation, waterproofing, and finish all eat too much height, the job becomes a compromise rather than an upgrade.

What flooring works best?
Tile and stone are the most natural match for heated bathroom floors, because they suit the heat-transfer style and the wet-area finish.

Can a DIYer handle the whole thing?
Not once plumbing, new electrical work, waterproofing changes, or subfloor alterations are involved. At that point, the job belongs with licensed trades and, in larger bathroom renovations, a registered builder.

What should a renovation company hand over at the end?
Clear test results, a clean commissioning process, and a floor that reaches the finish height without disturbing doors, drainage, or waterproofing.

If you're planning bathroom renovations in Highett or anywhere across Victoria and you want the floor heating integrated properly, talk with SitePro Bathrooms about the room layout, the subfloor, and the right install sequence before the demolition starts. The right call early saves a lot of rework later, and it's the difference between a bathroom that merely looks finished and one that performs the way it should.