Bathroom Waterproofing Tape: A 2026 Homeowner Guide
You've noticed a slow drip behind the shower screen, or perhaps a few loose tiles at the bathroom floor. The visible damage may look minor, but water often travels behind the finish before it appears. By the time swollen skirting, mould, or rotten framing becomes obvious, the repair can involve a full strip-out rather than a simple regrout.
Bathroom waterproofing tape helps prevent that chain of events, but it isn't a magic strip you stick over a crack. It belongs inside a complete wet-area system, alongside suitable substrates, primers, liquid membrane, falls, penetrations, curing times, and compliant installation. That distinction matters whether you're planning bathroom renovations in Highett, comparing new bathroom ideas, or deciding whether a registered builder should manage the work.
What Bathroom Waterproofing Tape Actually Does

A shower leak often begins at a place that looks unimportant, such as the wall-to-floor junction, an internal corner, or the opening around a mixer. These locations move more than the broad face of a wall. Timber framing can shift, sheets can expand and contract, and different substrates can respond differently to moisture and temperature.
Bathroom waterproofing tape is a flexible bridging strip installed with liquid waterproofing membrane. The installer beds it into wet membrane, then covers it with further membrane so the tape becomes part of the continuous waterproof layer. It isn't a stand-alone sealer, and it shouldn't be stuck directly to dusty or bare substrate.
Why movement needs reinforcement
Liquid membranes are flexible, but a broad coat of membrane can still fatigue where two surfaces meet. A reinforced strip spreads movement across a wider zone, helping the membrane remain continuous when a joint opens slightly or a substrate shifts.
Consider it similar to reinforcing fabric in a plaster repair. The fabric doesn't replace the plaster. It supports the vulnerable area so the surface is less likely to split along the original fault line.
Practical rule: Tape only works when the membrane manufacturer approves it and the installer beds it fully into the membrane. Dry tape, unsupported edges, and incompatible adhesives create weak points rather than protection.
Inside a complete wet-area build-up, you'll commonly find tape or formed accessories at:
- Internal corners, where walls meet.
- Wall-to-floor junctions, especially in shower recesses.
- Changes between substrates, such as sheet material meeting screed.
- Pipe, mixer, tap, and spout penetrations.
- Floor wastes and drain outlets.
- Hobs, nib walls, shower screen anchor areas, and other movement-prone transitions.
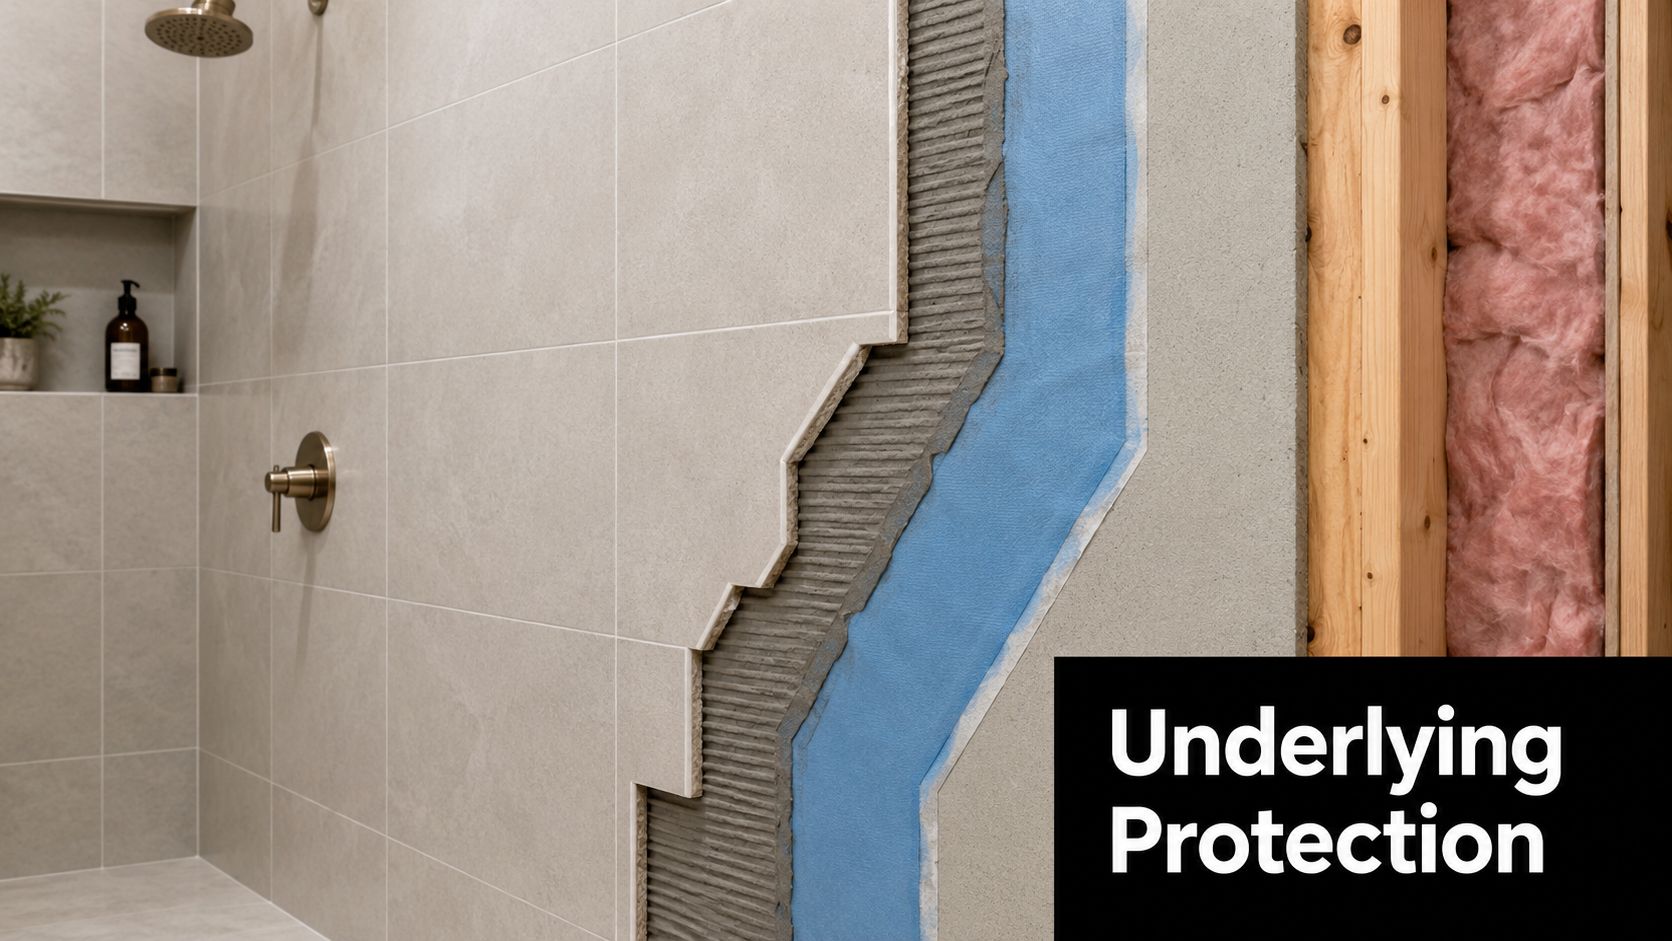
The tape's job is therefore specific. It maintains membrane continuity at the places most likely to move, crack, or allow capillary water travel. The tiles may make the bathroom look finished, but the membrane and its reinforced details do the water-management work underneath.
Where the Australian Standard Requires It
Australian bathroom waterproofing is governed by a system of requirements rather than a single product rule. AS 3740:2021 sets minimum requirements for materials, design, and installation in domestic wet areas in Class 1, Class 2, and Class 4 buildings. The NCC Housing Provisions also set wet-area waterproofing requirements, including treatment of penetrations on horizontal surfaces around baths and spas through suitable sealants or proprietary flange systems. The NCC wet-area waterproofing provisions provide the broader regulatory framework.
For homeowners, the important point is that tape is used at vulnerable junctions, not spread indiscriminately across every surface. Published Australian interpretations refer to a minimum bond-breaker tape width of 35mm for bridging certain joint openings, including openings up to 5mm in some membrane classes. The exact product, width, and installation method still need to match the specified membrane system.
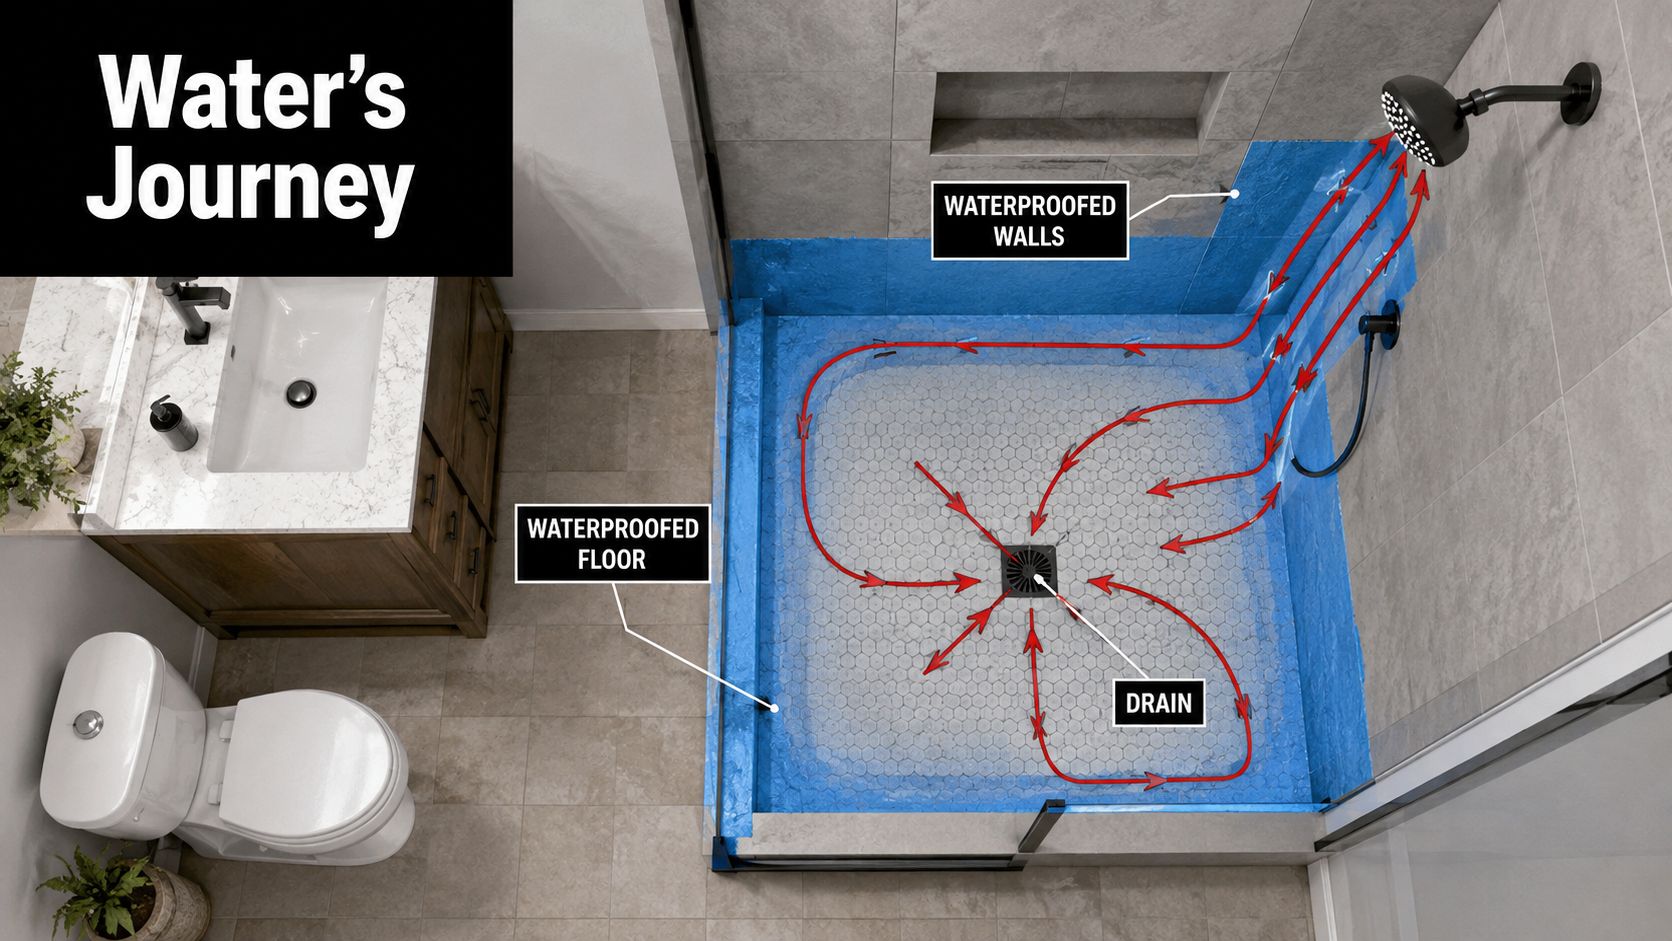
Shower walls must typically be waterproofed to 1800mm, while bathroom walls generally require waterproofing to 150mm. Some floors require full-area waterproofing, particularly where the wet-area layout and drainage create a greater exposure to water. These heights and details are part of the system, not substitutes for correct corner and penetration treatment.
Location-based requirements
| Location | Minimum Membrane Height/Width | Tape or Bond-Breaker Required |
|---|---|---|
| Shower walls | 1800mm | Reinforced corners and relevant junctions |
| General bathroom walls | 150mm | Bond-breaker treatment at applicable junctions |
| Internal corners | 35mm minimum bond-breaker width in relevant applications | Yes, before membrane application |
| Wall-to-floor junctions | System-specific, with compliant wet-area coverage | Yes where required by the system |
| Tap, mixer, spout, and drain penetrations | System-specific | Reinforcing or proprietary collars and seals |
The critical locations include internal corners, wall-to-floor junctions, hob-to-wall transitions, penetrations around taps and shower mixers, bath spouts, floor wastes, and changes between different substrates. A sheet-to-screed transition, for example, deserves more attention than an uninterrupted cement-based wall because the materials can move differently.
The standard doesn't turn every roll of tape into a compliant installation. The tape must be compatible with the membrane, correctly positioned, fully embedded, and covered with the specified coats. For a useful plain-English overview of how these requirements affect Australian work, review this guide to waterproofing standards in Australia.
Types of Tape and How They Pair with Membranes
Australian wet-area systems use several broad tape families, and their names can confuse first-time renovators. The carrier, surface finish, flexibility, thickness, and membrane compatibility all affect the result. A roll that feels strong in your hand may still bond poorly to the liquid product selected for the bathroom.
| Tape Type | Elongation / Flexibility | Compatible Membranes | Best Application |
|---|---|---|---|
| Butyl rubber | Highly flexible, product-specific movement capacity | Often suitable for acrylic and polyurethane systems when approved | Corners, junctions, and movement-prone transitions |
| Polyethylene film | Flexible film carrier, generally smooth-faced | Requires careful compatibility checking, especially with water-based acrylics | Selected junctions where the system specifies a film tape |
| Non-woven fabric-reinforced | Flexible fabric reinforcement with a membrane-friendly face | Commonly suitable for compatible acrylic and polyurethane membranes | Internal corners, wall-floor junctions, and sheet transitions |
| Pre-formed corners and collars | Formed to accommodate local movement and geometry | Must match the nominated membrane system | Pipe penetrations, drains, corners, and shower details |
Surface finish changes the bonding behaviour
A fleece or non-woven face gives liquid membrane a textured surface to wet and lock into. A smooth polyethylene face may repel a water-based acrylic if the manufacturer requires a compatible primer or pre-wetting step. That can produce fish-eyes, unbonded edges, or a membrane film that looks covered but isn't properly attached.
Butyl rubber offers flexibility, although thicker products can raise the finished build-up. That matters beneath large-format tiles, where a raised edge can telegraph through the adhesive bed or make it harder to achieve a flat finish. Thin fabric variants generally create less build-up, but they still need enough membrane beneath and above them to avoid starved edges.
Choose chemistry and accessories as one system
Water-based acrylic membranes are common in domestic renovations and often work well with fabric-backed reinforcement. Moisture-cured polyurethane systems can also accept reinforced tapes, but the product data sheet controls the preparation, primer, curing, and accessory requirements.
Pre-formed internal corners, pipe collars, and drain accessories reduce cutting and folding errors. They're especially useful around mixers, outlets, and floor wastes, where a flat strip can wrinkle or leave a small unsupported gap. The best choice isn't the tape with the most impressive label. It's the accessory that appears on the membrane supplier's approved compatibility list.
For further practical context on junctions, penetrations, drains, and edges, see this guide to waterproofing in bathrooms. Treat the membrane, primer, tape, corners, and collars as one specification, not a collection of unrelated items.
Choosing the Right Tape for Your Renovation
Start with the substrate, then choose the membrane and reinforcement together. Fibre-cement sheet and plasterboard need a tape face that the liquid membrane can wet and grip without peeling. Concrete and screed may need a more movement-tolerant detail, particularly where shrinkage or a change in material creates a joint.
A sound selection process looks like this:
- Identify every substrate transition. Mark where sheet meets sheet, wall meets floor, and a pipe or waste passes through the surface.
- Read the membrane data sheet. Confirm approved tape types, primers, drying conditions, coat sequence, and accessory requirements.
- Select formed accessories for penetrations. A suitable collar usually gives a cleaner result around pipes and wastes than several overlapping flat strips.
- Check the detail dimensions. Relevant applications may require a 35mm minimum bond-breaker width, as described in Australian wet-area guidance. Confirm the required width for your particular system.
- Plan overlaps and corners. Don't assume a generic overlap is compliant. Use the manufacturer's specified overlap and bonding method.
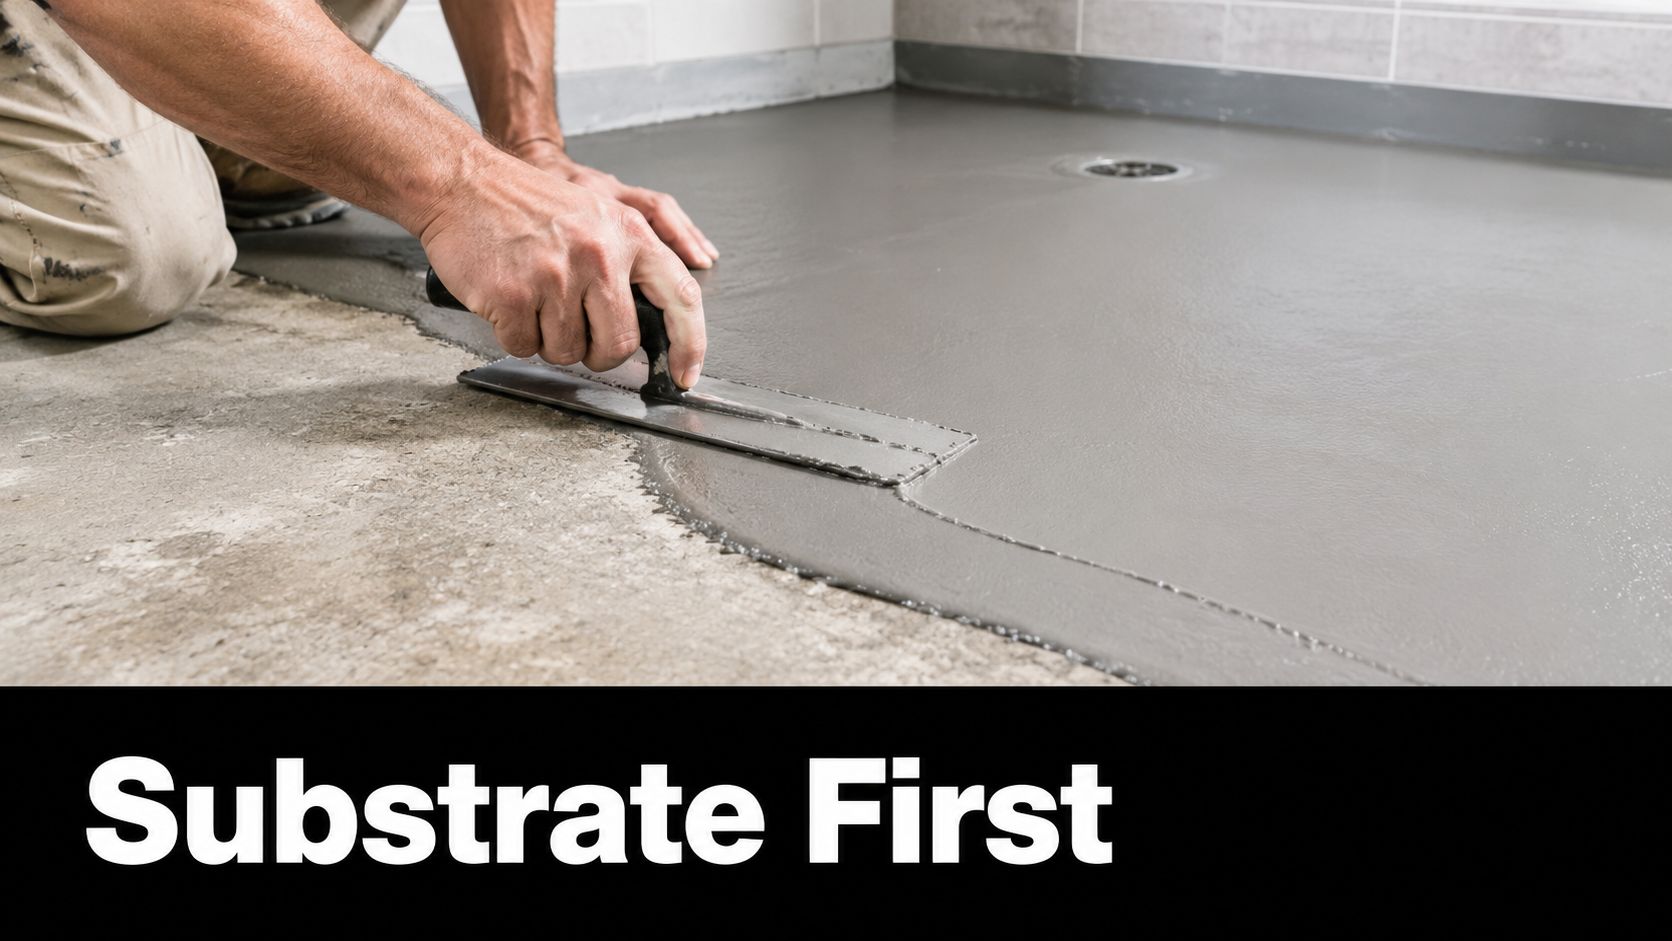
- Prepare before opening the membrane. Remove dust, laitance, loose material, and contaminants. Prime only when the specified system calls for it.
- Bed tape into wet membrane. Press it flat with a brush or suitable tool, remove bubbles, then cover the reinforcement with the next membrane coat.
- Allow the complete system to cure. Tiling over a surface that has only dried at the skin can trap weakness underneath.

Avoid generic cloth strapping. It may reinforce a crack mechanically, but it doesn't automatically provide the waterproof skin, chemical resistance, or membrane bond required in a wet-area system. A product's suitability depends on the complete build-up, including the substrate, primer, membrane chemistry, and tile installation.
Do You Even Need Tape or Just Extra Membrane Coats
This is a genuine point of confusion. One Australian interpretation of AS 3740 argues that tape doesn't need to be embedded into the first membrane coat and that multiple membrane coats may provide better adhesion. Other Australian guidance treats bond-breaker tape as standard practice at internal corners and junctions. The difference often comes from the specific system interpretation and manufacturer instructions, not from a universal rule that applies to every bathroom.
More membrane thickness doesn't automatically replace reinforcement. A third or fourth coat may increase film build, but it doesn't create the same flexible bridge across two substrates that move independently. At an internal corner or wall-to-floor junction, the problem is movement concentration, not just insufficient paint.
For a small repair patch, tape might be omitted if the manufacturer has documented an approved repair method. That exception shouldn't be treated as permission to skip reinforcement throughout a shower or full bathroom rebuild.
Renovator's verdict: For a complete wet-area renovation, include bathroom waterproofing tape in the scope unless the nominated compliant system expressly specifies another detail.
The practical decision should be made before purchasing materials. Confirm the membrane system, identify every required junction, and ask who will document the installation. Guidance on membrane-based bathroom products is available through this overview of bathroom waterproofing paint, but the data sheet for the selected system remains the controlling document.
Common Installation Mistakes and How to Avoid Them
A bathroom can have an expensive membrane and still fail because the tape was installed badly. The most common problems happen before the membrane has cured, when dust, poor adhesion, wrinkles, and unsupported edges become hidden beneath tiles.

The failure is usually visible during preparation
Dust from sanding, gypsum laitance, adhesive residue, and loose particles can prevent the primer or membrane from bonding. Vacuum the surface, remove contamination, and use the specified primer rather than assuming the membrane will grip whatever is underneath.
A dry strip pressed onto a corner is another familiar error. The installer should apply the first membrane coat, bed the tape into that wet coat, flatten bubbles and fish-mouths, then cover the reinforcement with the next coat before the system skins over.
Small shortcuts create large weak points
- Skipping the primer: Follow the membrane data sheet. Some substrates need priming, while some systems specify a different preparation.
- Starving the tape edges: A single thin coat can leave the edges barely bonded. Check that membrane wets the full strip and feathers beyond it.
- Cutting internal corners badly: Fold suitable tape or use a formed corner accessory. Random cuts can leave a gap at the exact point that needs continuity.
- Using an unapproved sealant: Tap and mixer penetrations need the sealant or collar nominated by the system. A familiar silicone product isn't automatically compatible.
- Ignoring overlaps: Butt-joining strips can create a discontinuity. Follow the manufacturer's joining detail and press the overlap fully into wet membrane.
- Tiling too early: Surface dryness isn't the same as complete cure. Respect the specified waiting period and site conditions.
Walk the room before tile installation. Look for pinholes, lifted edges, wrinkles, open overlaps, exposed tape, and areas where membrane coverage changes abruptly. Repair defects using the same approved system, then record product details, preparation, coats, curing, and any inspection or flood-test requirements.
Cost, Warranty and When to Hire a Registered Builder
Waterproofing decisions combine material cost with responsibility. A homeowner may be comfortable rolling membrane in a small ensuite, but a multi-room renovation introduces plumbing changes, substrate repairs, tile sequencing, documentation, and potential insurance consequences.
The verified Australian guidance places bathroom waterproofing broadly around $600 to $3,500, depending on scope and the work included. That range can cover more than tape. It may also involve substrate preparation, reinforcing details, membrane coats, floor falls, inspections, and other wet-area tasks. Get the scope itemised so you can see whether the quote includes penetrations, corners, curing, and records.
In Victoria, a Domestic Builder–Unlimited registration authorises a practitioner to personally carry out, manage, or arrange subcontractors for all domestic building work. That broad registration class is relevant to major bathroom renovations and complete bathroom remodels. The legal position can differ between states and project types, so Victorian homeowners should confirm the current requirements with the relevant authority before signing a contract.
| Factor | DIY Waterproofing | Hire Registered Builder (e.g., SitePro Bathrooms) |
|---|---|---|
| Scope | Suitable only for work within your skill and legal authority | Can coordinate broader domestic building work |
| System selection | Homeowner checks compatibility and instructions | Builder coordinates trades, products, and sequencing |
| Documentation | Must be created and retained by the homeowner | Usually managed as part of the project records |
| Risk | Errors can remain hidden beneath tiles | Professional responsibility and inspection processes may reduce coordination risk |
| Design integration | Requires separate planning for finishes and waterproofing | Can connect design, construction, and finishing decisions |
A licensed waterproofer may be appropriate for the membrane portion, but that doesn't automatically cover structural work, plumbing, electrical changes, or the wider renovation contract. Ask who is licensed, who is responsible for each task, what warranty applies, and what evidence you'll receive at handover.
For homeowners in Highett and greater Victoria, SitePro Bathrooms provides bathroom waterproofing as part of coordinated renovation services, including floor and wall waterproofing completed to Australian Standards. Engage a suitably qualified specialist when the project involves structural changes, several wet areas, complex penetrations, or a finish where removing tiles later would be especially disruptive.
Planning Ahead for Modern Bathroom Designs in 2026
Waterproofing should be selected before the final tile order, not after the mood board is locked. Modern bathrooms increasingly combine large surfaces, open showers, concealed drainage, tactile finishes, and detailed lighting. Those choices make the waterproofing system harder to inspect once construction is complete.
Australian bathroom design coverage published for 2026 describes a move towards bathrooms as places to linger rather than purely functional rooms, with ideas including pink marble, pale blue, brick-look tiles, neutral terrazzo, and small square tiles. Other Australian trend coverage points towards natural textures, earthy tones, hazy greens, sunbaked neutrals, curves, warm neutrals, smart storage, and layered lighting. These directions suit both modern bathrooms and more expressive designer bathrooms, but they still depend on a stable wet-area base.
Match the system to the finish
Large-format porcelain slabs leave fewer grout lines, so the substrate must be flat and the waterproofing beneath the installation must remain continuous. A curbless walk-in shower removes a physical splash barrier, placing more reliance on falls, drainage, junction detailing, and the membrane system.
Fluted feature walls create more edges and recesses. Linear drains add a long floor interface that needs careful integration with the membrane and surrounding surfaces. Back-lit mirrors, niches, and concealed storage also introduce penetrations or changes in the wall build-up that should be resolved before waterproofing begins.
A sound sequence is:
- Check the substrate: Confirm sheets, framing, falls, wastes, and transitions are suitable.
- Specify the wet-area system: Select the membrane, tape, corners, collars, primer, and curing process together.
- Coordinate the design: Resolve niches, screen anchors, fixtures, drain details, and tile thickness before application.
- Choose finishes last: Select porcelain, stone-look surfaces, terrazzo, or feature tiles only after the build-up can support them.
That order protects the design budget. A premium finish can't compensate for a poorly prepared substrate or an incomplete waterproofing detail. Treat the membrane and tape as the quiet infrastructure beneath your new bathroom ideas, then let colour, texture, lighting, and form shape the visible room.
Contact SitePro Bathrooms to discuss your bathroom renovation in Highett or greater Victoria, particularly if you need help coordinating waterproofing, substrate preparation, design, tiling, plumbing, and finishing. Request a project consultation and ask for a clear scope that identifies the membrane system, reinforced junctions, penetrations, curing requirements, and handover documentation.