
Bathroom Waterproofing Paint Guide for Renovations
1800 mm is the minimum height for waterproofing shower walls above the floor substrate in Victoria, and an unenclosed shower requires waterproofing extending 1.5 metres from the shower rose connection. Bathroom waterproofing paint isn't automatically a compliant waterproofing system, because suitability depends on the documented system, protected zone, substrate, detailing, installation and verification.
The popular advice is simple: buy a paint labelled waterproof, roll it across the bathroom, and tile over it. That advice confuses a surface coating with a wet-area protection system. A bathroom can have immaculate tiles, carefully chosen grout and a modern colour palette, yet still leak if the membrane stops at a corner, misses a penetration or isn't compatible with the substrate.
For bathroom renovations in Highett and greater Victoria, the practical question isn't whether a product sounds waterproof. It's whether the complete installed system is appropriate for the wet zone and documented for the required Australian compliance framework.
What Bathroom Waterproofing Paint Really Does
Bathroom waterproofing paint is usually discussed as a liquid-applied membrane, but the word “paint” can create the wrong expectation. Ordinary paint is selected for colour, sheen and washability. A waterproofing membrane is selected for its role within a designed assembly, including its compatibility with the substrate, reinforcement, sealants, tile adhesive and the conditions of the wet area.
A useful comparison is a raincoat with faulty seams. The fabric may cover most of the body, but water still gets through where the seams are open. In a bathroom, those seams are the corners, wall-to-floor junctions, changes of plane, floor wastes, pipe penetrations and fixture interfaces. A broad painted area can't compensate for a discontinuity at one of these locations.
The label isn't the system
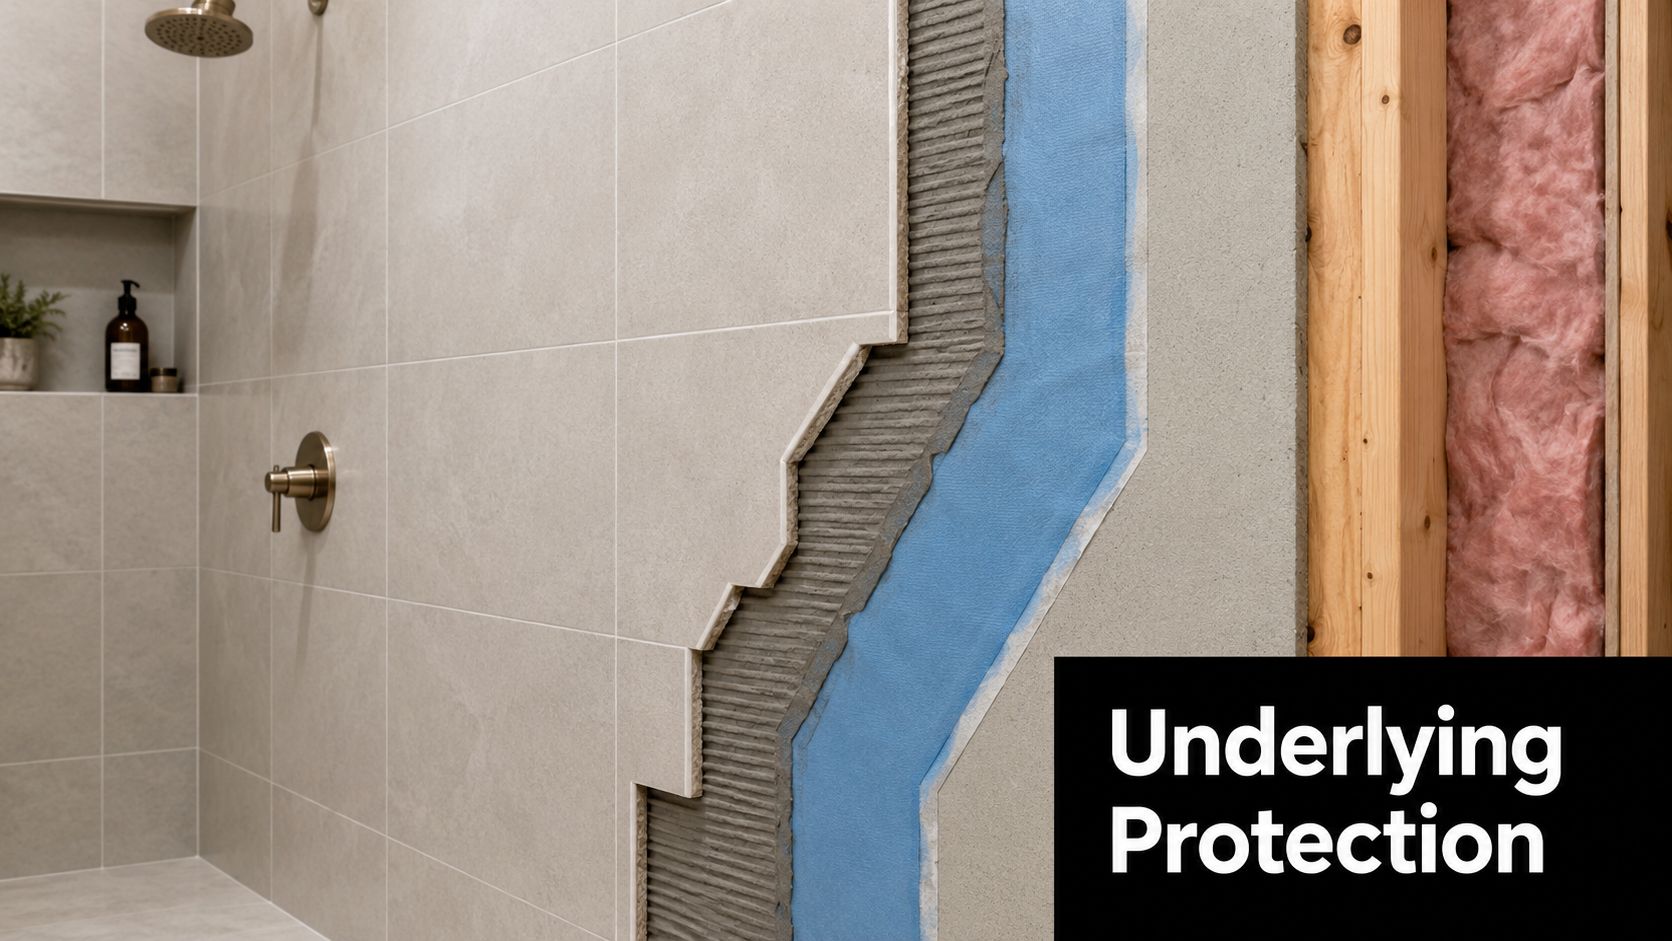
Australian wet-area guidance treats waterproofing as a coordinated construction layer, not a decorative finish. AS 3740:2021 sets minimum requirements for the design and installation of waterproofing in domestic wet areas, including Class 1, Class 2 and Class 4 buildings, with application to wet areas in other building classes as specified by the standard. The Australian Standards Store summary for AS 3740:2021 establishes why product preference alone isn't enough.
The membrane has to work with the surface below it. Dust, movement, unsuitable backing materials or an unsealed penetration can interrupt the protection even when the visible field looks continuous. That's why a professional reviews the proposed build-up before choosing a product.
Practical rule: Treat bathroom waterproofing paint as one component in a documented wet-area system, never as a shortcut around system design.
A product may be suitable for a particular wall, floor or renovation detail, but that doesn't make it universal. The intended finish matters too. Tile thickness, adhesive selection, falls, junction movement and access around fixtures all influence how the membrane must be detailed. A stylish finish only stays durable when the concealed work receives the same attention as the visible design.
Comparing Waterproofing Systems for Bathrooms
The terms waterproofing paint, liquid-applied membrane and paint-on membrane can overlap in product language, so a comparison should focus on the system rather than the label. A cementitious membrane uses a cement-based material approach, while a liquid membrane is supplied as a spreadable coating that forms a continuous layer after application. Neither category removes the need for correct preparation and detailing.
The right selection depends on the substrate, wet-zone arrangement, tile system, movement risk and evidence supplied by the manufacturer. Australian guidance focuses on performance and installation requirements, so a contractor should be able to explain how the proposed system meets the relevant wet-area obligations rather than relying on a generic claim printed on a bucket.
| System | Core Difference | Key Selection Question | Primary Risk to Check |
|---|---|---|---|
| Paint-on membrane | Applied as a liquid coating within a compatible membrane system | Is the product documented for this substrate and wet zone? | Treating it as ordinary paint and missing required build or detailing |
| Cementitious membrane | Uses a cement-based waterproofing material approach | Does it suit the backing surface, movement conditions and finish? | Assuming the material category removes the need for junction treatment |
| Liquid membrane | Forms a continuous cured layer from a liquid-applied product | What application, thickness, reinforcement and curing criteria apply? | Choosing a product without checking system-specific documentation |
What to ask before approval
A useful conversation should cover:
- System identity: What exact membrane, primer, reinforcement and sealant combination is proposed?
- Substrate compatibility: Is the existing surface stable and suitable, or does it need removal or repair?
- Wet-zone coverage: Which walls, floors, junctions and penetrations are included?
- Verification: What records, checks or testing will be completed before tiling?
For a practical overview of how a bathroom membrane fits into the wider build, review bathroom waterproofing system considerations. The point isn't to rank systems. It's to make the selection accountable.
Cementitious systems aren't automatically better, and liquid systems aren't automatically easier. Paint-on application can be efficient where the specification suits it, but convenience becomes a liability when it encourages a contractor to skip reinforcement, cure time, sealant compatibility or evidence of coverage.
Mapping Protected Zones in a Bathroom
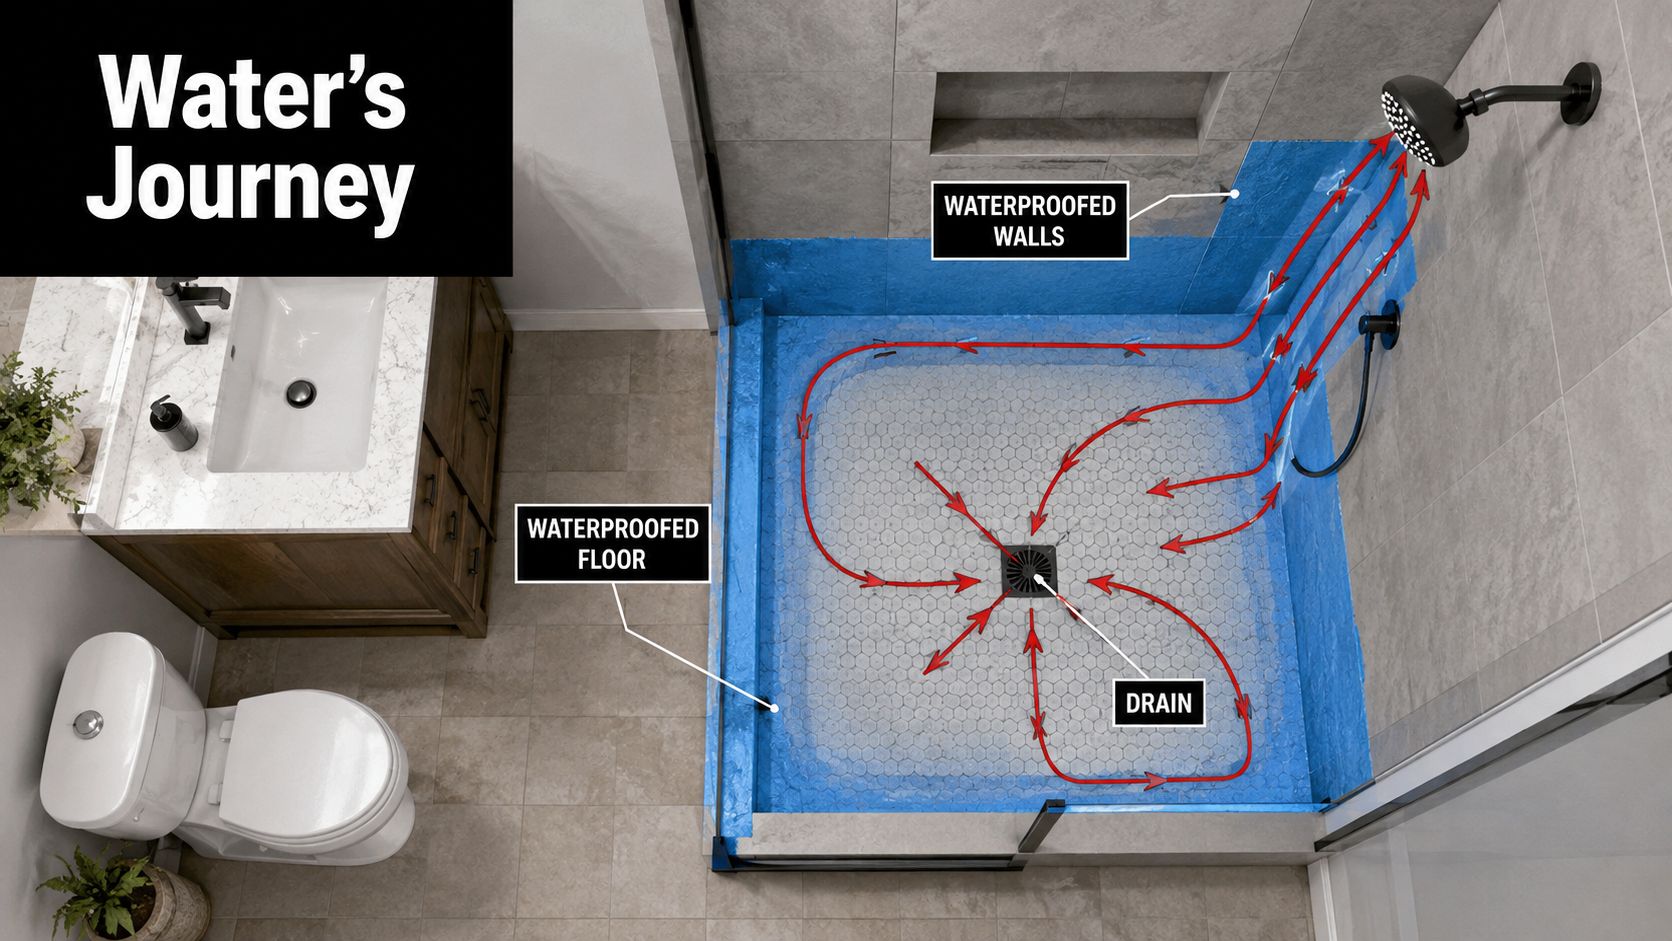
Waterproofing should be planned from the water's path, not from the surfaces that happen to be visible after demolition. Start at the shower rose, follow the spray to the walls and floor, then trace the water toward the floor waste. Every change in direction creates a detailing question.
Victoria's wet-area guidance provides important benchmarks. The Victorian Building Authority guidance on waterproofing wet areas states that shower floors must be waterproofed and shower walls must be waterproofed to at least 1800 mm above the floor substrate. Where a floor waste is installed, the floor plane must fall continuously to that waste at a minimum gradient of 1:80.
A contained shower zone
Consider a shower beside a vanity, with a fixed screen separating the splash area. The screen may reduce direct spray, but it doesn't turn the area outside the glass into a dry room. Water still reaches the floor, screen junctions, wall corners and fixture penetrations, so the membrane layout must follow the actual construction and drainage arrangement.
The minimum shower-wall height is a planning benchmark, not permission to stop thinking at a convenient line. The installer must also consider the wall substrate, shower fittings, niche, screen fixings and any joints where different materials meet.
An unenclosed shower
An open shower spreads the risk because the water isn't contained by a traditional enclosure. Victorian guidance notes that an unenclosed shower requires waterproofing extending 1.5 metres from the shower rose connection. That affects the floor, adjoining walls, door position, vanity placement and the location of storage.
A wet-room design can be attractive, especially in modern bathrooms and designer bathrooms, but it demands early coordination. A freestanding bath, wall-hung basin or open glass partition may alter where water travels and where penetrations occur.
Floors, baths and junctions
Bath edges deserve deliberate treatment, particularly where the bath meets a wall or where taps and plumbing penetrate the surrounding surface. The wall-to-floor junction must be treated as part of the system, not painted as an isolated strip after the main field coat.
Where a floor waste exists, the finished floor must direct water continuously toward it. A coating can't correct a poorly formed fall. It may cover the surface, but it won't make stagnant water move to the drain.
The protected zone is a layout decision. It should be resolved before the membrane is applied, not discovered while someone is holding a roller.
Preparing Surfaces for Reliable Application
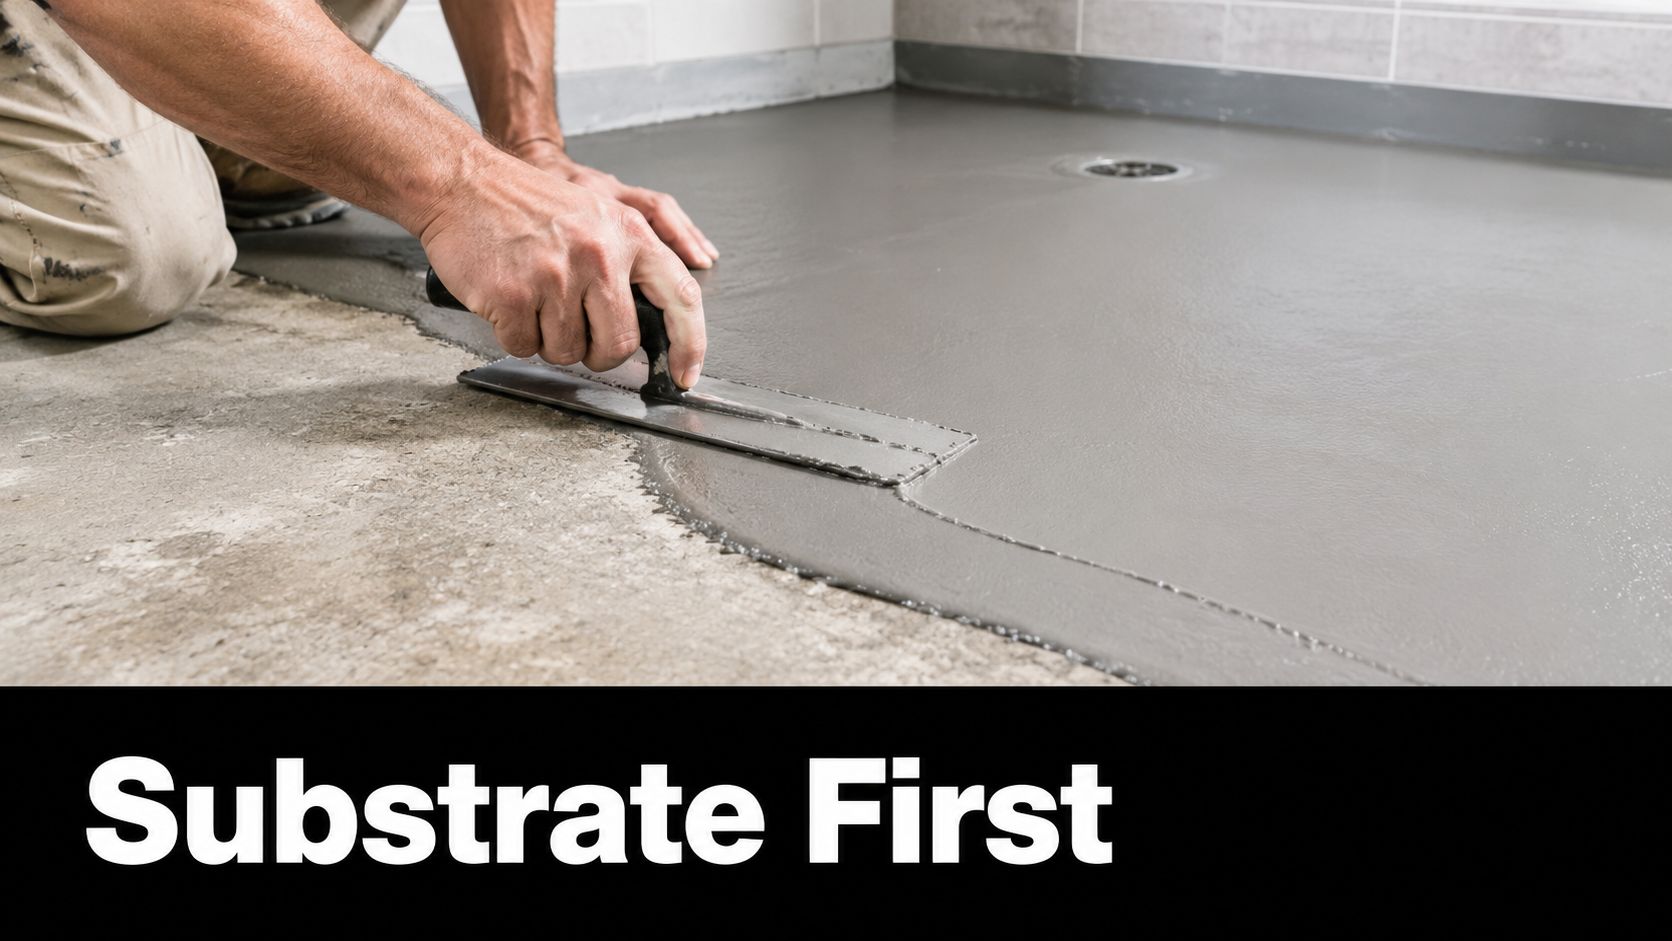
A membrane can't turn an unstable substrate into a reliable one. Before application, the surface needs to be clean, sound, suitably dry and compatible with the selected system. Dust, loose material, contamination, sharp irregularities and uncontrolled movement all threaten adhesion or continuity.
Think of the membrane as a continuous film stretched across a hinge. If the hinge is damaged, loose or moving unpredictably, the film may split even though the coating itself is sound. That's why surface assessment usually matters more than the colour or brand language on the container.
The pre-application conversation
A homeowner doesn't need to direct regulated installation, but should ask how the installer will deal with the following:
- Contamination: What happens to dust, adhesive residue, paint, grease or loose material?
- Stability: Has the substrate been checked for movement, cracking, deflection or damaged backing?
- Compatibility: Is the proposed primer and membrane suitable for the actual wall and floor materials?
- Irregularities: Will sharp edges, holes, depressions and damaged areas be repaired before coating?
- Interfaces: How will corners, changes of plane, floor wastes, pipe penetrations and fixture connections be treated?
Timber-based floors need particular care. Australian compliance guidance requires the entire wet-area floor to be waterproofed on timber-based floors, which makes substrate movement and system compatibility central to the decision. An older Victorian home may also contain uneven backing materials, previous repairs or existing tiles that conceal the condition below.
Existing tiles and older homes
Applying bathroom waterproofing paint over existing tiles isn't a universal renovation solution. The installer has to establish whether the tiles are firmly bonded, whether the surface can accept the proposed system and whether the altered floor height affects wastes, thresholds, doors and falls. A coating can't safely bridge every crack or compensate for movement in the structure.
Primer, reinforcement, bond breakers and sealants must come from the selected system documentation. Mixing components because they appear similar can create an interface that nobody has properly assessed.
A responsible pre-start record should identify the substrate, repairs, selected system, protected zones and treatment of penetrations. If those decisions aren't clear before work begins, the project is relying on assumptions hidden behind the finished tiles.
Application and Verification Essentials
A professional waterproofing system follows a quality-control chain. The chain starts with selecting a documented system for the actual bathroom, then confirming substrate compatibility, preparing the surface and detailing the locations where water and movement create the greatest risk.
The broad sequence normally includes compatible preparation, primer where specified, treatment of corners and junctions, sealing around penetrations and wastes, membrane coats at the required build, reinforcement where the system calls for it, and adequate curing before following trades proceed. The exact products, coverage and timing belong to the system documentation, not to a generic article.
Why shortcuts fail
A label such as “one-coat” or “fast-drying” doesn't erase requirements for coverage, thickness, reinforcement or curing. A roller may spread material quickly across an open wall, but it can't decide whether a corner has received the correct detail or whether a sealant is compatible with the membrane.
The NCC recognises waterproof sealant as a waterproofing material, which reinforces the point that joint treatment is part of the strategy. The NCC wet-area waterproofing provisions identify why changes of plane, floor waste interfaces and fixture penetrations need coordinated treatment rather than a final bead added as an afterthought.
Verification before tiling
The finished surface is difficult to inspect once tiles cover it, so professional handover should preserve evidence of the concealed stage. Depending on the system and project requirements, that may include photographs, product records, installation details, dry film thickness checks, flood testing or other specified verification.
The Australian wet-area waterproofing standards overview is useful context for understanding why testing, cure and installation records matter. Verification doesn't replace good workmanship, but it gives the builder and homeowner a clearer record of what was installed before the finish concealed it.
Handover standard: A waterproofing job should leave more than a tiled surface. It should leave a traceable system record, clear detailing and evidence that the membrane was ready for tiling.
The weakest interface controls the outcome. A sound field membrane won't protect a bathroom if a waste connection, corner or fixture penetration bypasses it.
Design Choices That Affect Waterproofing
A bathroom layout is a waterproofing decision, not only a styling exercise. A compact ensuite, family bathroom and open-plan wet room may share the same visual language, yet the shower position, enclosure, floor waste, wall construction and fixture arrangement create different demands on the wet-area system.
Design trends evolve, but the underlying construction responsibility remains unchanged regardless of visual direction. Warm neutrals, organic textures and large-format surfaces can produce a considered finish, but they also leave less room to hide poor falls, uneven substrates or a waste positioned outside the practical drainage path. The selected bathroom waterproofing paint remains one component of the system. It cannot correct a layout that makes compliant detailing difficult.
Three renovation scenarios
A compact ensuite often places the shower, toilet and vanity within a tight footprint. Relocating the shower can alter plumbing routes, floor falls and wall penetrations. Those effects should be resolved before construction, while the membrane extent and junction details are still being coordinated.
A family bathroom may combine a bath, separate shower and substantial storage. Replacing an enclosed bath unit with a freestanding bath changes the exposed floor and wall edges. It can also alter which surfaces need protection and where plumbing penetrations require coordinated detailing.
An open wet room or highly detailed bathroom introduces further site decisions. Glass partitions, integrated seating, recessed storage and layered lighting can each affect junctions, penetrations, access and drainage. The more features placed within the wet area, the more carefully the layout must preserve workable membrane detailing and inspection access.
Style and construction can be resolved together
Travertine-inspired textures, limestone references, warm neutral tiles and large-format porcelain do not determine waterproofing performance by themselves. Substrate stability, drainage falls, changes of plane, fixture coordination and room access still control the result. Large tiles may reduce visible grout, but they do not compensate for movement or water directed toward the wrong point.
SitePro Bathrooms provides concept development, 3D design, construction and finishing within its renovation service. A coordinated process can help test a feature wall, screen, niche or bath position before the selected arrangement creates rework around waterproofing and plumbing.
Test every design idea against the wet-area plan early. A layout that leaves no practical route for membrane application, detailing or verification remains an unresolved construction risk, regardless of how polished the finished room appears.
Common Waterproofing Problems and Remedies
Most waterproofing failures don't announce themselves as a dramatic coating failure. They may appear as peeling, blisters, pinholes, damp smells, staining, mould growth or water marks on a neighbouring ceiling. Each sign needs investigation because the visible symptom may sit far from the concealed entry point.
Possible causes include thin or interrupted coverage, missed corners, incompatible sealants, blocked drainage, poor falls and movement at interfaces. A tiled wall can look perfect while water travels behind it through a junction or penetration.
A practical diagnostic sequence
- Trace the water path: Establish when the moisture appears, which fixture is operating and where the first visible sign occurs.
- Inspect interfaces: Focus on corners, changes of plane, wastes, pipe penetrations, screen connections and bath edges.
- Review records: Check the proposed system, installation photographs, product information and any testing or thickness records.
- Obtain assessment: Have a suitably experienced professional identify whether the issue is surface maintenance, plumbing, drainage or concealed waterproofing.
- Correct the cause: Remove and rebuild failed details where necessary instead of applying another cosmetic coat.
A musty area or persistent dampness shouldn't be covered with bathroom waterproofing paint as a first response. Painting may hide a mark, but it doesn't restore a membrane that has been bypassed or a fall that sends water away from the waste.
The same distinction applies to maintenance. Cleaning, ventilation and replacing a deteriorated visible sealant can be reasonable maintenance, but concealed membrane failure requires a construction response. The remedy must match the failure mechanism.
When to Hire a Waterproofing Professional
Professional involvement is proportionate when the project includes complex falls, numerous penetrations, timber-based floors, existing tiles, older building fabric, a wet room, integrated fixtures or a complete bathroom renovation. These conditions increase the importance of assessment, coordination and documented detailing.
Victoria distinguishes between a registered building practitioner and builders who can contract for unlimited domestic building work. The VBA explains that an unlimited domestic builder licence permits a builder to contract for any domestic building work, while limited categories restrict the work they can contract for. That licensing question is separate from confirming that waterproofing work is performed by appropriately qualified and authorised specialists.
Ask the quote to identify the proposed membrane system, protected zones, substrate repairs, compatible sealants, cure arrangements, verification, documentation and coordination with tiling. You can also use bathroom waterproofing cost considerations to frame a realistic conversation about scope rather than treating waterproofing paint as a standalone purchase.
SitePro Bathrooms is one local option offering coordinated concept, 3D design, construction and finishing for bathroom renovations. Request a project-specific assessment before approving any waterproofing system, and ask the contractor to document how the wet-area details will be installed and verified.
If you're planning bathroom renovations in Highett or greater Victoria, contact SitePro Bathrooms to discuss your layout, substrate, wet zones and finish selections before construction begins. Request a coordinated design and renovation quote that treats waterproofing as part of the complete build, not as a last-minute coat of paint.