
Standard Australian Kitchen Cabinet Sizes
You're probably looking at a floor plan, a rough sketch on the back of an envelope, or a pile of screenshots saved from overseas websites, trying to work out what cabinet sizes make sense for an Australian renovation. That confusion is normal. Most homeowners start with the right question, then get fed the wrong answers.
In Melbourne homes, especially older Victorian layouts, cabinet planning isn't just about what's “standard”. It's about what will fit real walls, real appliances, real ceiling heights, and real movement through the room. A cabinet size that looks fine in a generic online diagram can create awkward fillers, unusable corners, cramped walkways, or a benchtop height that feels wrong the moment you start cooking.
The same thinking applies beyond the kitchen. In bathroom renovations, vanity depth, drawer projection, mirror placement, and storage reach all follow the same principle. Standard modules help, but the room always has the final say. That's why getting clear on kitchen cabinet sizes early makes the rest of the renovation easier, whether you're planning a compact unit update or a full family home remodel.
Understanding Cabinet Standards in Australia
A lot of online advice about kitchen cabinet sizes comes from imperial systems. That's where homeowners get tripped up. The cabinet itself might be workable in theory, but once you try to fit that thinking into a Melbourne renovation with metric walls, local appliances, bulkheads, and fixed service points, the layout starts fighting you.
One of the clearest summaries of the problem comes from this Australian-focused discussion of standard cabinet planning, which notes that many “standard size” articles use US dimensions and miss the practical Australian issue of lining cabinets up to metric wall spaces, appliance cut-outs, and finished floor-to-ceiling constraints. That's exactly what happens on site.
What “standard” really means
In practice, standard doesn't mean there's one legally fixed cabinet size for every kitchen. It means cabinet makers and manufacturers tend to work from common module ranges that make planning, production, and installation more efficient.
That matters because a homeowner often hears “standard” and assumes “drop-in perfect”. It isn't. Standard modules are a starting point. The finished kitchen still has to absorb wall variation, appliance sizes, splashback set-out, and how square the room is.
Practical rule: If a layout only works on paper with no tolerance for fillers, scribes, or service access, it usually doesn't work on site.
The language worth knowing
Before you approve drawings or compare quotes, understand the basic terms:
- Carcass means the cabinet box itself, before doors, panels, and benchtops.
- Toe-kick is the recessed section at floor level that gives your feet room while you stand at the bench.
- Finished height means the full installed height, not just the cabinet box.
- Depth is the front-to-back dimension of the cabinet box, usually discussed separately from door thickness or benchtop overhang.
- Module means a repeating cabinet width used to keep the joinery clean and reduce odd gaps.
Why Victorian homes need a more careful approach
Older Melbourne homes rarely give you a perfectly blank shell. Chimneys, narrow room widths, shifted walls, old plaster, and uneven floors all affect how standard kitchen cabinet sizes perform in reality.
That's why good planning starts with the room, not the catalogue. A neat modular kitchen in a new build can often be laid out quickly. A Victorian terrace kitchen usually needs more adjustment, especially where you're trying to preserve walkway space, fit modern appliances, and avoid ending up with filler strips that look like afterthoughts.
Base Cabinet Dimensions A Complete Guide
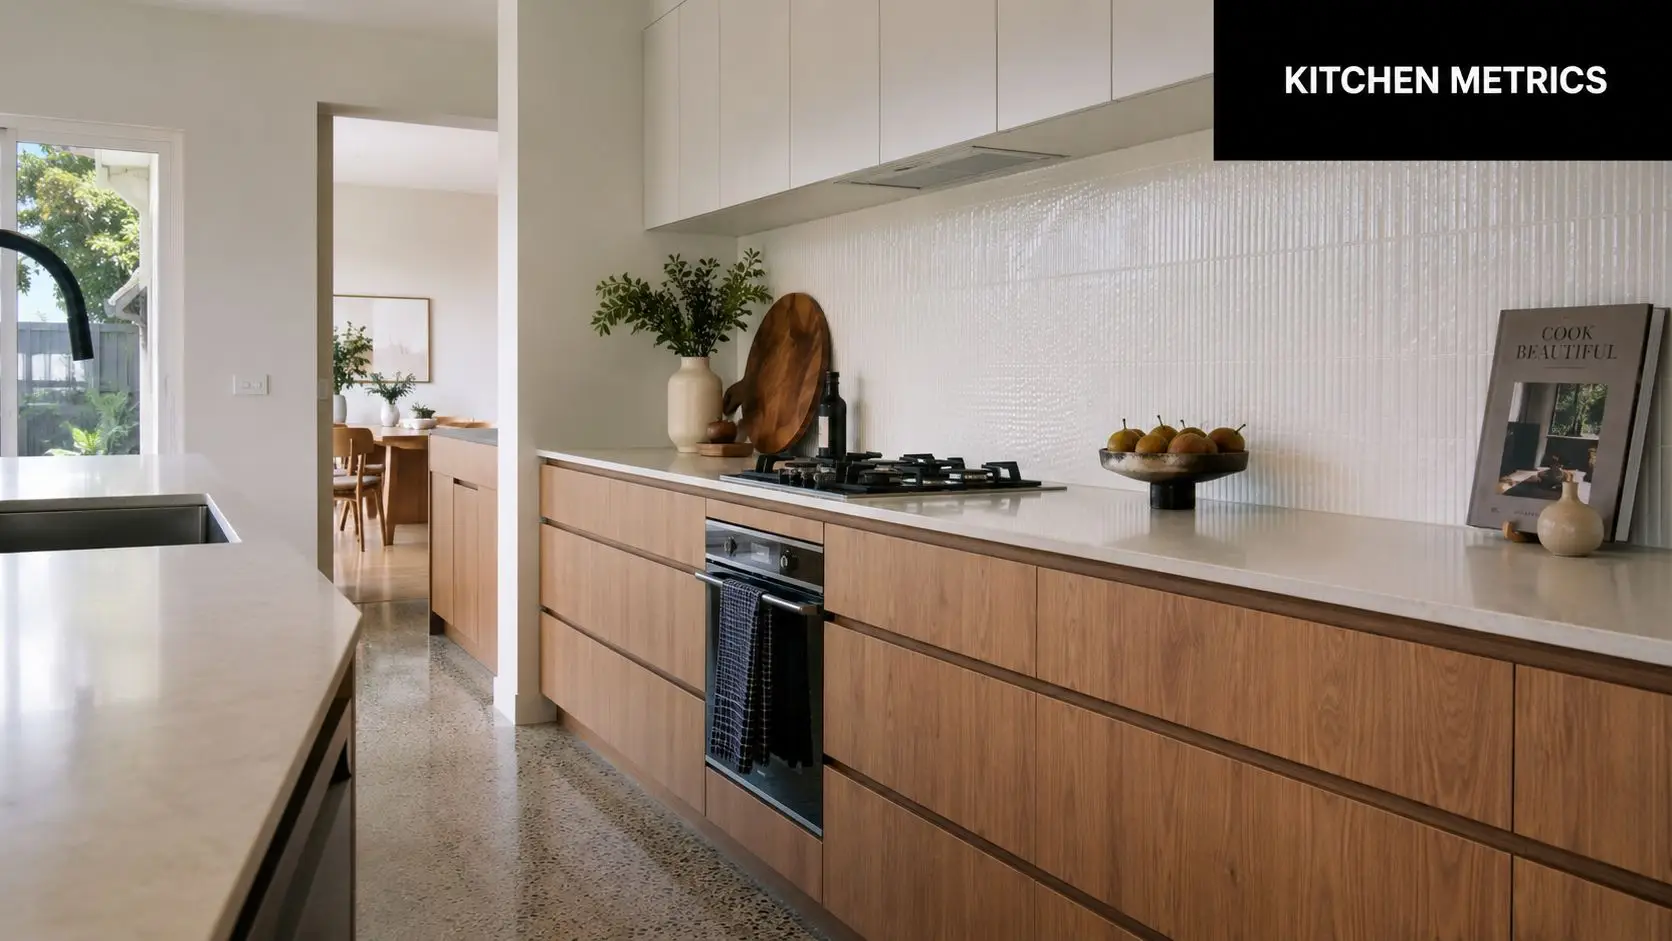
Base cabinets do the heavy lifting. They support the benchtop, carry the sink, house appliances, and take the brunt of everyday use. If these dimensions are wrong, everything above them suffers.
A long-standing benchmark in Australian kitchen planning is the 900 mm finished benchtop height, typically built from a 720 mm base cabinet carcass, a 150 mm toe-kick, and a 30 mm benchtop, with base cabinets generally 600 mm deep, as outlined in this cabinet sizing reference. That combination has lasted because it works well as a practical everyday working height.
How the parts add up
Homeowners often measure to the top of the benchtop and think that's the cabinet size. It isn't. The finished working height is made up of multiple parts, and each one affects the feel of the kitchen.
| Component | Typical benchmark |
|---|---|
| Base cabinet carcass | 720 mm |
| Toe-kick | 150 mm |
| Benchtop | 30 mm |
| Finished benchtop height | 900 mm |
| Base cabinet depth | 600 mm |
The important point isn't just memorising those figures. It's understanding that if one part changes, the others may need to move as well. A thicker top, a raised floor finish, or a design adjustment for user comfort can alter the final result.
Widths and module planning
In Australian work, base cabinet widths are often planned in clean module increments rather than random custom sizing. That keeps doors aligned, drawer fronts balanced, and appliance panels easier to coordinate.
A practical way to think about widths is by function:
- Narrow units suit trays, oils, spice pull-outs, or filler-sensitive spaces.
- Mid-width cabinets work well for general storage, bins, or single-door cupboards.
- Wider drawer banks are usually the most useful storage in a family kitchen because pots, pans, and plates are easier to access from above.
- Sink cabinets need to allow for bowl size, tap placement, and plumbing, not just external width.
Most kitchen problems blamed on “not enough storage” are really access problems. Deep, badly planned cupboards often store less usable gear than a well-sized drawer unit.
What works and what doesn't
What works is a base cabinet layout that matches how you live. If you cook often, prioritise drawers near prep areas. If the kitchen is compact, don't waste width on decorative panel breaks that reduce usable storage. If appliances are fixed, build the run around them rather than forcing them into a module that looks tidy on paper but creates installation headaches.
What doesn't work is overcomplicating the lower run with too many narrow cabinets, oversized decorative end panels, or cupboard-only layouts where everything ends up stacked behind everything else.
In older homes, I'd rather see a simpler, cleaner base cabinet plan with better access than a busy layout trying to squeeze in every possible unit type.
Wall Cabinet Sizes and Optimal Placement
Wall cabinets affect both function and visual weight. Get them right and the kitchen feels organised. Get them wrong and the room feels top-heavy, cramped, or awkward to use every day.
The key relationship isn't just wall cabinet to wall. It's wall cabinet to benchtop. If that spacing feels wrong, the whole kitchen feels wrong.
The clearance that matters most
A widely used reference point is setting wall cabinets about 450 mm above the benchtop, with wall cabinets commonly around 300 mm deep, as noted in the earlier sizing guidance. That spacing usually gives enough practical work area below while keeping upper storage within comfortable reach for many users.
Depth matters more than people expect. A very deep wall cabinet can loom over the bench and make prep feel boxed in. In some layouts, especially around a fridge surround, extra depth can help create a more integrated look. In many everyday kitchens, though, a shallower wall cabinet is easier to use and less visually heavy.
Choosing height with the room, not against it
Wall cabinet height should respond to ceiling height, cornices, bulkheads, and the overall elevation. A cabinet that technically fits can still look wrong if it leaves an awkward strip at the top or cuts across a window line.
Use these checks before locking in the wall cabinet height:
- Look at the ceiling line. In older homes, ceilings and cornices often dictate the visual stopping point.
- Check appliance relationships. The rangehood, fridge surround, and tall pantry all need to sit comfortably with the upper run.
- Think about actual reach. High storage is fine for occasional items. Daily-use items shouldn't be pushed so high that you need to stretch every morning.
- Watch visual bulk. In a smaller kitchen, lighter-looking upper cabinets can make the room feel less crowded.
A simple planning reference
| Wall cabinet factor | Practical benchmark |
|---|---|
| Typical depth | 300 mm |
| Typical gap above benchtop | 450 mm |
| Best use | Everyday crockery, pantry overflow, glasses, lighter items |
Some clients want to run wall cabinets as high as possible for maximum storage. Sometimes that's the right call. Sometimes it just creates upper cupboards that are annoying to reach and a kitchen that feels more compressed than it needs to.
A better result usually comes from balancing storage with comfort. The upper run should support the way you use the room, not dominate it.
Sizing Tall Pantry and Appliance Cabinets
Tall cabinets are where a kitchen starts to feel built-in rather than pieced together. They also create some of the biggest planning mistakes, because they deal with full-height visual lines, appliance housing, and deep storage all at once.
Pantries, oven towers, and integrated utility cabinets need more discipline in the planning stage than standard base units. If the widths, depths, and adjoining panels aren't coordinated, the whole run looks unsettled.
Pantry cabinet depth and alignment
Pantry cabinets are often built at 600 mm depth so they align with adjoining base cabinet runs, as noted in the earlier Australian sizing guidance. That consistency matters. It lets the tall joinery read as part of the kitchen, rather than as an added cupboard stuck on the side.
The decision isn't only about depth. You also need to think about door swing, handle clearance, shelf reach, and what the pantry is storing. A very deep pantry can hold a lot, but if everything disappears behind the front row, access gets worse instead of better.
Appliance towers need exact coordination
Oven and microwave towers look tidy when they're done properly. They're unforgiving when they're not. A tower cabinet has to work with the appliance housing requirements, ventilation needs, adjacent panel thickness, and the user's comfortable reach height.
That means the right process is usually:
- Choose the appliances early so the cabinet can be built around real dimensions.
- Confirm the finished position of the oven relative to surrounding benchtops and drawers.
- Check door and drawer interaction so handles don't clash and doors can open cleanly.
- Match the elevation with nearby pantry and fridge panels so the run feels intentional.
Typical tall cabinet planning logic
| Tall cabinet type | Common use | Practical note |
|---|---|---|
| Pantry cabinet | Food storage, small appliances | Best when shelves and internal accessories match household habits |
| Oven tower | Built-in oven and microwave | Needs appliance-led planning, not guesswork |
| Utility tall unit | Brooms, cleaning gear, overflow storage | Useful near laundry links or secondary prep zones |
If you're considering a corner pantry arrangement, the storage concept matters just as much as the dimensions. This guide to a blind corner pantry layout is useful because it shows why corner storage has to be judged by access, not just raw cupboard size.
Tall cabinets should solve clutter, not create dark storage where things disappear for six months.
In many Melbourne kitchens, one well-planned tall run performs better than scattering storage across too many disconnected cupboards.
Designing Your Kitchen Island with Correct Dimensions
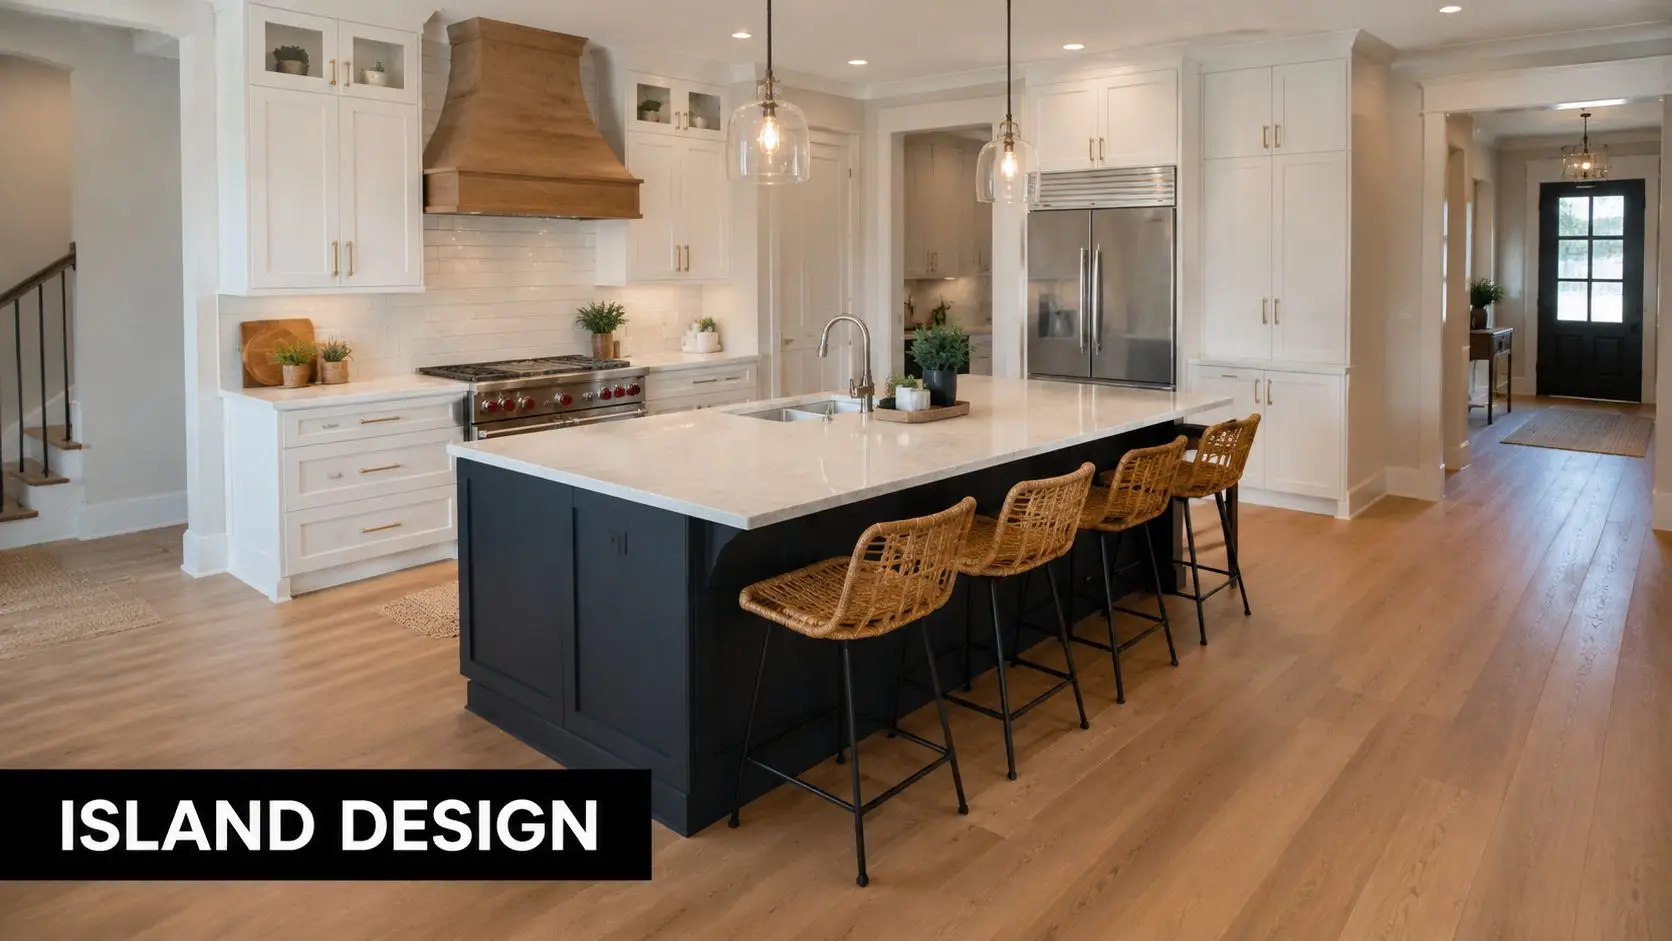
An island only works when the room can afford it. I've seen plenty of kitchens where the island looked impressive in the render and felt annoying the moment people started moving around it.
The first question isn't what island cabinet sizes are available. It's whether the surrounding clearances will still let the kitchen function properly. In a Victorian home with tighter widths, a peninsula often performs better than a forced island.
Start with the purpose
Not every island needs to do everything. Some are best kept as prep and storage only. Others combine bins, drawers, seating, or a sink. The more jobs you load into the island, the more carefully the cabinet plan has to be resolved.
A useful way to decide is to rank the island's role:
- Prep-first island needs practical storage and enough uninterrupted bench space.
- Seating-first island needs comfortable knee space and sensible overhang design.
- Storage-first island works best with drawers on the working side and clean panel treatment on the outer face.
- Feature island needs proportion. Oversized decorative ends and heavy bulk can make a moderate room feel smaller.
Depth, overhang, and visual balance
Island cabinets often begin from standard base cabinet logic, but the visible result depends on what happens at the back and top. If seating is included, the overhang has to feel comfortable in use and visually balanced from the side.
The common mistakes are easy to spot:
- Too shallow overall and the island looks mean and doesn't support practical prep.
- Too deep without purpose and the centre becomes wasted space.
- Too much seating emphasis and storage disappears.
- Too many panel breaks and the island starts looking fussy.
What tends to work in Melbourne homes
A successful island usually has a clear front and back. One side does the hard work. The other side presents neatly to the living zone. That sounds simple, but it requires cabinet choices that support both views.
Here's the approach I prefer on real projects:
| Island decision | Better approach |
|---|---|
| Storage | Use the working side for drawers where possible |
| Seating | Add it only if circulation still feels easy |
| Ends | Keep end panels clean and proportional |
| Services | Avoid loading the island with too many service demands unless the room supports it |
A well-sized island should make the kitchen calmer to use. If it turns opening appliances, carrying groceries, or passing another person into a daily obstacle course, it's the wrong size no matter how good it looks.
Ergonomics and Essential Kitchen Clearances
Cabinet dimensions matter, but the gaps between cabinets matter just as much. A kitchen can be built from sensible modules and still feel poor to use because the movement paths, reach zones, and landing areas weren't thought through.
Australian design guidance for accessible or adaptable kitchen layouts commonly places more critical items within the 750–1200 mm reach zone, uses bench heights around 850–900 mm, and notes that base cabinet depth is about 600 mm with widths often planned in 150 mm module increments, as set out in this guide to kitchen and dining area standards. That guidance is useful because it reminds people that function isn't just about fitting cabinets in. It's about making the kitchen usable for the people living there.
Reach matters more than raw storage
A kitchen can have a lot of cupboards and still be inconvenient. That usually happens when daily-use items end up too high, too low, or buried at the back of deep storage.
The reach zone principle is practical. Put the things used every day where hands naturally go. Push occasional-use items into the less convenient storage. That's a better design move than adding more cabinetry.
Good ergonomics usually looks ordinary on paper. You notice it later, when the kitchen feels easy every single day.
Clearances make or break the layout
When I review a plan, I'm looking for moments of conflict. Can someone unload the dishwasher while another person works at the sink? Does the fridge door interrupt the prep zone? Will a drawer bank open comfortably near a passage point?
These are the questions worth asking:
- Appliance opening. A door or drawer needs room not just to open, but to be used.
- Passing space. Two people should be able to move without one having to step backwards every time.
- Landing space. Hot trays, groceries, and washed dishes need nearby surfaces.
- Reach comfort. Daily crockery and pantry items should sit where household members can access them without strain.
A related issue is benchtop height. If you're comparing options for household comfort, this article on standard benchtop height is a useful reference because it frames height as a usability decision, not just a convention.
The work triangle is helpful, but not sacred
The classic work triangle still has value. Sink, fridge, and cooktop should relate sensibly to one another. But in many modern renovations, especially open-plan homes, the kitchen is doing more than one job. It's a prep zone, storage wall, family hub, and sometimes a study overflow.
That means rigid triangle thinking can miss what matters. I'd rather see:
| Layout priority | Why it matters |
|---|---|
| Prep space near sink | Most daily tasks happen here |
| Easy path from fridge to bench | Grocery unpacking becomes simpler |
| Safe cooking zone | Reduces crossing and congestion |
| Accessible daily storage | Cuts repetitive bending and stretching |
The best ergonomic kitchens don't chase theory for its own sake. They respond to who cooks, who cleans, who reaches what, and how the room is used on a normal Tuesday night.
How to Accurately Measure for New Cabinets
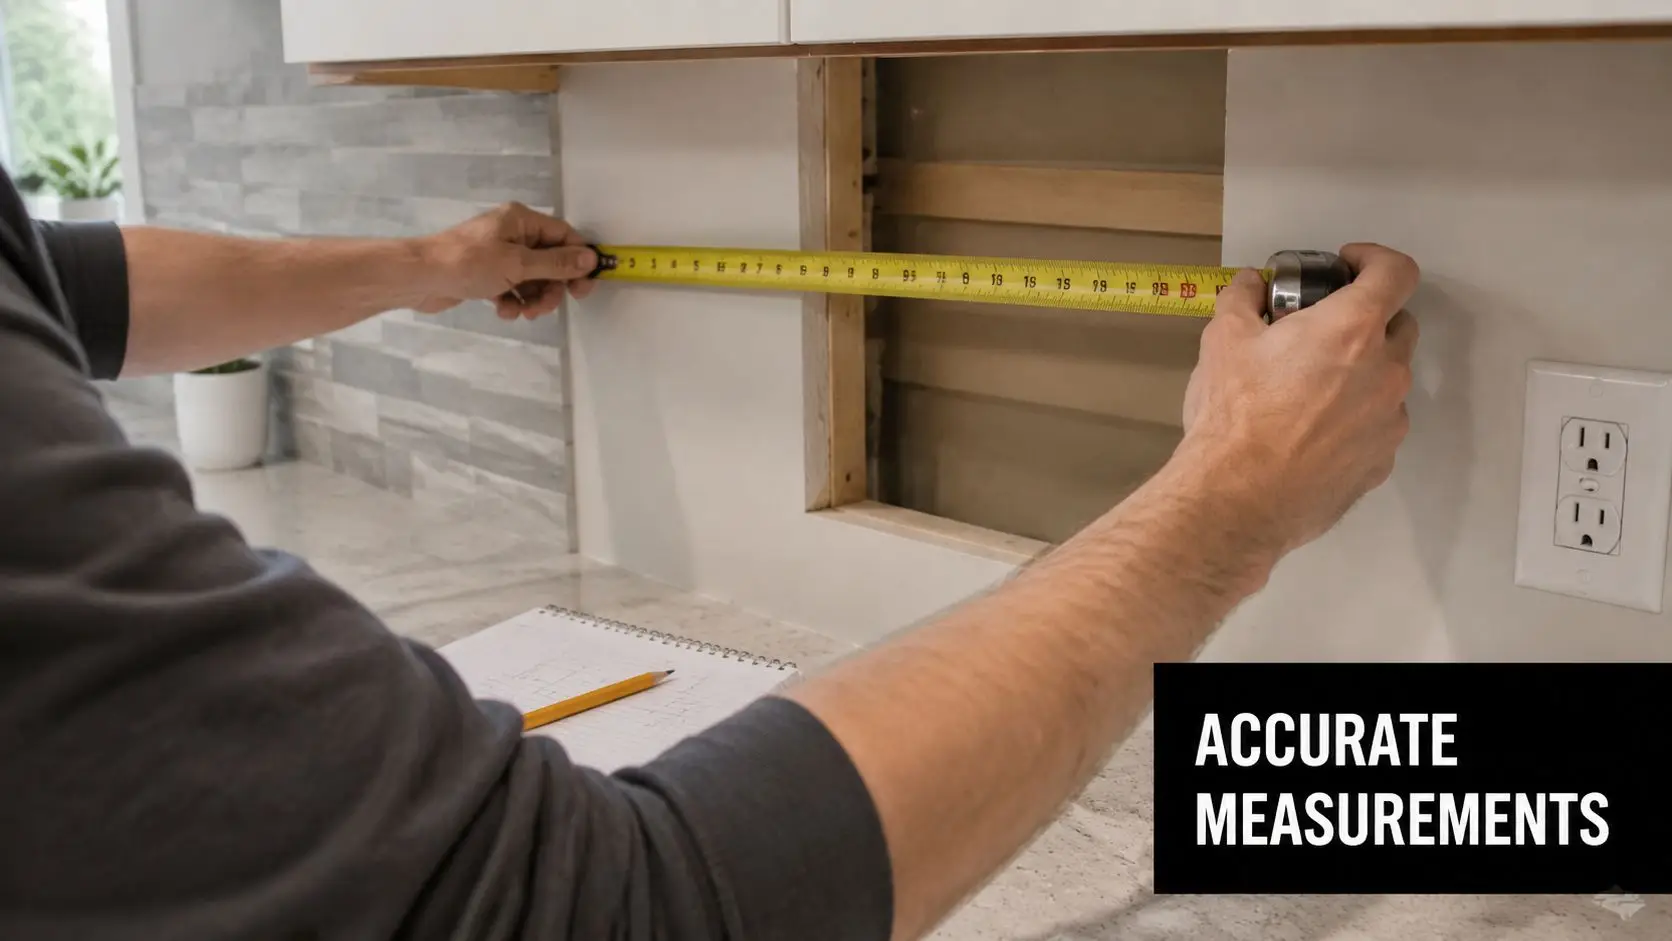
Most cabinet mistakes begin before the joinery is built. They start with bad measuring. A room that looks square often isn't. A wall that seems straight often bows. In older Melbourne homes, assuming accuracy instead of checking it is where the trouble begins.
If you're measuring for a design handover, take more information than you think you need. Good cabinet planning depends on complete site data, not a single wall-to-wall figure.
The measurements that matter
Use a consistent measuring method and record everything clearly.
- Measure each wall in more than one place. Take dimensions low, mid, and high if possible.
- Mark windows and doors. Record widths, heights, sill positions, architraves, and opening direction.
- Note ceiling changes. Bulkheads, dropped sections, beams, and cornices affect tall cabinets and wall units.
- Locate services. Plumbing, waste points, gas, power, switches, and vents all influence cabinet choices.
- Check floor and wall variation. Out-of-level floors and out-of-plumb walls are common in renovation work.
What homeowners often miss
The easiest mistakes to make are the least dramatic ones. A missed powerpoint. A window reveal not measured properly. A skirting profile that interferes with a panel return. None of those sound major until the cabinet install starts.
Watch for these common problems:
- Out-of-square corners that change cabinet set-out across a run
- Hidden bulkheads above existing cabinetry
- Door swings that affect handle clearance
- Finished floor build-up that changes final heights
- Appliance allowances that weren't confirmed before joinery drawings
Measure the room you have, not the room you assume is there.
How to hand measurements over properly
A clean handover saves time. Label each wall. Add rough sketches. Mark fixed points clearly. Include photos from several angles, especially around services and corners.
If the renovation is moving into formal design, a measured plan and site check usually become part of the process anyway. Some renovation firms, including SitePro Bathrooms, use measured information as part of a broader 3D kitchen design workflow so cabinet dimensions can be tested against the physical room before construction starts.
That step catches problems early, which is when you want to catch them.
Custom Cabinets for Kitchens and Bathrooms
Standard sizes are useful because they keep planning efficient and usually offer better value. But some homes don't fit cleanly into standard modules, and some renovation goals need a more customized result.
That's common in both kitchens and bathrooms. In a Victorian kitchen, custom cabinetry might solve a chimney breast return, a tight corner, or an uneven room width. In bathroom renovations, custom vanities often do the same job around nib walls, plumbing constraints, shaving cabinets, and awkward circulation.
When custom sizing is worth it
Custom cabinets make sense when the room has a problem that standard modules can't solve neatly.
Typical examples include:
- Awkward wall lengths where standard units would create oversized fillers
- Older homes with uneven surfaces or unusual openings
- Specific storage needs such as internal drawers, hamper sections, or appliance concealment
- Higher-end finishes where alignment and symmetry matter more visibly
- Bathroom layouts where vanity depth and door clearance need tighter control
That doesn't mean custom is always better. Sometimes a mostly modular kitchen with a few custom infills is the smartest balance of cost, appearance, and function.
Bigger isn't always better
One of the most useful practical observations in cabinet design is that depth has to match use. This guide to cabinet dimension trade-offs notes that base cabinets are typically 24 inches deep because anything deeper makes items harder to reach, and that wall cabinets are usually 18–20 inches above the countertop. It also points out that deeper wall cabinets can create a built-in look around fridges, while shallower 12-inch wall cabinets can improve access and reduce visual bulk.
That same principle carries into bathrooms. A vanity that's too deep can tighten the room and make movement around the basin awkward. A shallower vanity can sometimes make a small ensuite work far better, even if it gives away some internal volume.
Applying kitchen thinking to modern bathrooms
The best designer bathrooms use the same logic as a well-planned kitchen. Storage should be easy to reach. Drawer depth should suit the items being stored. Doors shouldn't clash with movement paths. The vanity should fit the user, not just the wall.
If you're weighing finish and construction choices, this overview of kitchen cabinets materials is useful because material selection affects how custom joinery performs over time, especially in wet areas and high-use family spaces.
For homeowners exploring new bathroom ideas, the key is not treating cabinetry as an afterthought. Modern bathrooms and kitchens both rely on disciplined sizing. Registered builders unlimited who work across both spaces tend to approach joinery more holistically, because the same planning habits apply in each room.
A good renovation doesn't begin with colour. It begins with dimensions that make daily use easier.
If you're planning a kitchen or bathroom renovation in Victoria, start with the room's real measurements, your household habits, and the cabinet sizes that suit both. That approach avoids expensive adjustments later and leads to a result that looks right because it works right.