• siteprobathrooms

Tall Kitchen Cabinets: Sizes, Uses and Planning Tips

You're looking at the gap above your kitchen cupboards, wondering whether a taller pantry would finally give the groceries, serving dishes and small appliances a proper home. Then you start measuring, and the questions multiply. Should the cabinets reach the ceiling? Will the top shelves really get used? Can the fridge still be replaced later?

Tall kitchen cabinets work best when you plan usable storage first and extra height second. The right choice connects the room's dimensions with the people who cook, unpack groceries and reach into the pantry every day.

Standard Tall Kitchen Cabinet Sizes in Australia

Ordering a tall cabinet by catalogue height alone works like buying shoes by length while ignoring the width: the number can be right and the fit still wrong. Read each standard dimension as a question about your room, your ceiling and the person who will reach into the pantry every day.

The figures below reflect standard Australian kitchen cabinet and benchtop sizes alongside common joinery practice, so treat them as a measuring grid rather than a promise that a stock unit will suit your space.

Element Typical size What it affects
Tall unit height, common option 2,133 mm Fit under lower ceilings and bulkheads
Tall unit height, mid option 2,286 mm Balance of storage and installation clearance
Tall unit height, full option 2,438 mm Near-ceiling appearance in roughly 2.4 m ceiling conditions, subject to actual clearance
Pantry unit height range About 1,990 to 2,400 mm Coordination with ceiling, cornice and appliance clearances
Tall unit depth 580 to 600 mm Alignment with the 600 mm base cabinet front plane
Tall unit width 450 to 900 mm Door layout, shelf span and appliance fit
Base cabinet carcass height About 720 mm Base of the 900 mm finished benchtop height
Toe-kick About 150 mm Foot space and the base support arrangement
Benchtop thickness About 30 mm Finished height of the 900 mm work surface

Tall isn't a single fixed size. Every row in that table controls a different part of daily use: height decides what reaches the ceiling, depth decides whether the pantry face sits flush with the base run, and width decides how far shelves span and whether doors clear their swing.

The tape measure comes before the catalogue.

Start by measuring from the finished floor to the underside of the ceiling or bulkhead, and note any cornice projecting into the cabinet zone. Then ask the installer what clearance the unit needs for assembly, positioning and future servicing.

Read the height against the room

Standing a tall unit upright sweeps a diagonal arc longer than the cabinet itself. Installers commonly build the carcass flat and pivot it into place, and that manoeuvre demands room beyond the finished position, so a unit that matches your ceiling height on paper may be impossible to raise in the room. Choose the largest suitable standard height only after allowing for those practical requirements.

The full-height option needs the most care. A cabinet taller than the measured ceiling clearance won't fit, even if both are loosely described as suitable for the same ceiling category. Near-ceiling cabinetry does shrink the dust-catching gap, but the tape measurement governs the order, not the brochure label.

Depth needs a shared reference point too. Confirm whether the quoted figure describes the carcass alone or the finished cabinet including doors, so the pantry face aligns with the adjoining base run and nothing juts past the benchtop edge.

What Makes a Cabinet Tall and Why It Matters

A freestanding bookshelf can be moved to another room. A tall cabinet fixed into a kitchen is more like a built-in wardrobe: once installed, it shares its behaviour with the walls, appliances and joinery around it, so every planning decision has to account for that relationship.

In everyday kitchen language, a tall cabinet extends from the floor well above the benchtop and typically works as a pantry, appliance tower, oven housing or integrated refrigerator surround. It ties the base cabinets, work surface, wall units and ceiling into one coordinated vertical system. That system is why the extra height is a usability decision first: a taller carcass adds shelf lines, but only the lines people can actually reach, load and keep organised count as real storage.
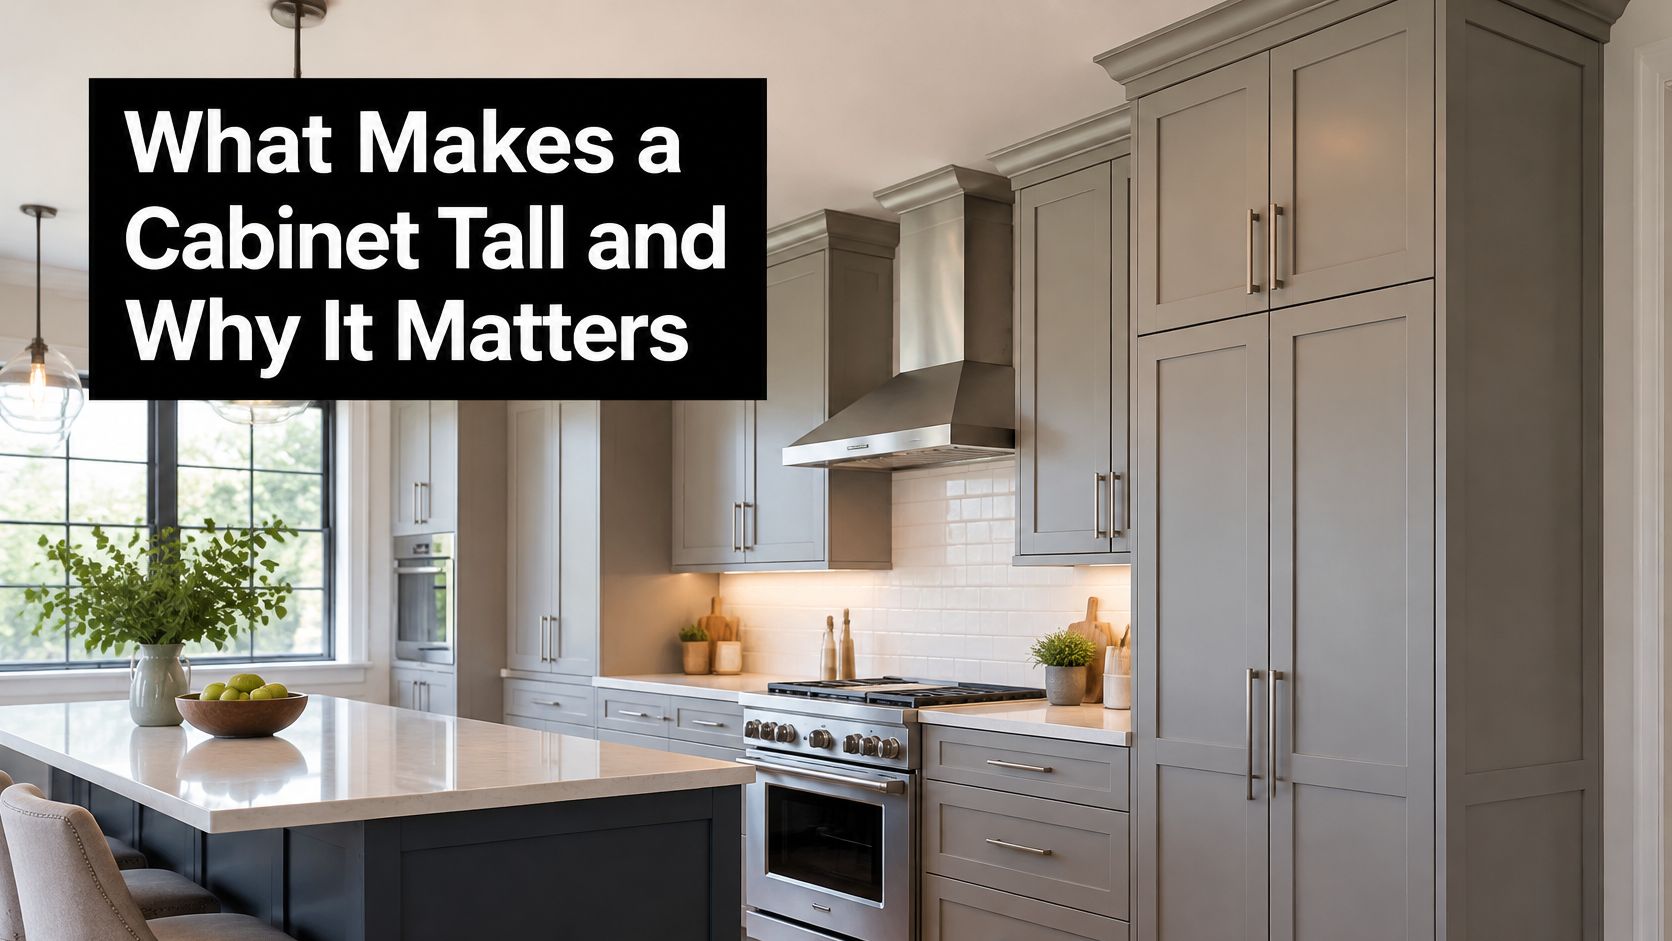
A modern kitchen featuring floor-to-ceiling grey tall cabinets, a stone island, and stainless steel appliances.

A built-in installation needs a technical plan

Australia's national benchmark is AS 4386:2018, which covers cabinetry for domestic and commercial built-in environments. The standard addresses design, manufacture and installation requirements rather than prescribing a single tall-cabinet height, so the project specification carries the greatest weight.

For homeowners in Highett and greater Victoria, that distinction matters. The cabinet specification should document intended loads, materials, anchoring, clearances and ventilation before manufacture begins, rather than leaving those decisions until delivery.

A tall cabinet is part of the building, not furniture placed inside it.

Treat that principle as a prompt for better questions, not a substitute for project-specific technical advice. Ask what loads each shelf is rated for, how the unit anchors to the wall, and whether appliance housings have the ventilation their specifications require. A pantry full of canned food and an appliance tower may look identical externally, but their internal support and access demands differ.

Taller cabinetry also doesn't automatically mean better value. An impressive wall of doors offers little everyday benefit if the household can't comfortably retrieve what's behind them. Useful storage is storage people can see, reach and manage safely.

Reach Zones That Keep Tall Storage Usable

A new pantry arrives, the top shelf fills with cereal and pasta, and within a week someone is dragging a chair over to reach breakfast. Height adds storage only where people can comfortably reach it. Australian kitchen measurement guidance commonly treats approximately 2,100 mm as a preferred tall-cabinet height in many layouts and warns that storage above about 2,300 mm becomes difficult to access without a step stool. The space above that line still earns its keep: it suits rarely used items rather than daily supplies.

A tall cabinet works like a library shelf. The books people borrow constantly sit at eye level, the occasional reads go higher, and the top shelf holds whatever comes out once a year. Use the following storage map as a design starting point, then adjust the bands to the actual users. They are indicative ranges, not universal accessibility limits.

Reach zones for tall cabinet storage

Height band Best for Access note
Lower drawers, floor to about 600 mm Heavy pots, bulk stock, small appliances Full-extension drawers bring contents forward, although bending may still be necessary
Everyday zone, roughly waist to shoulder height Daily foods, cookware, frequently used appliances Comfortable reach depends on the individual
Upper band, about 1,800 to 2,300 mm Seasonal or lightweight goods Repeated reaching increases handling difficulty and fall risk
Top band, above about 2,300 mm Rarely used items only Usually needs a step stool

Choose hardware around the user

Hardware decides how much of each zone stays genuinely usable. Two cabinets of identical height can perform very differently depending on what sits behind the doors.

Fixed shelves provide a straightforward interior, but deep shelves leave items hidden behind other goods. They suit clearly grouped storage better than a crowded assortment of small packets.

Full-extension drawers bring the back row into view. They add runners and fitting requirements, so weigh their usefulness against the extra hardware cost rather than fitting them everywhere automatically.

Pull-out pantry baskets improve visibility in a similar way. Ask the designer to demonstrate how the proposed system feels when loaded, because a mechanism should suit the person using it rather than merely filling the available opening.

Adjustable shelving lets compartments change as storage needs change, which matters for households whose routines will shift over the years. Pull-down mechanisms can bring high storage within reach, though their operating effort, load limits and clearances need checking before selection.

Door width shapes access too. A broad hinged door can obstruct the adjacent preparation area, while narrower doors or internal drawers change how people stand and move when retrieving food. Test those movements against the work-aisle allowance during room planning.

Practical rule: Put the things you use most where you can retrieve them without assistance.

That rule shifts with the household. For children, older residents and people with mobility limitations, the everyday zone may sit well away from the standing-adult example, so plan shelves and mechanisms around the people who will use them in practice, both now and later.

How to Plan Tall Cabinets Around Your Room

Start with the room, not the cabinet order. A pantry wall can add storage while taking away the floor area needed to turn, pass another person or open an appliance. Planning a tall run works like parking a car in a garage: the vehicle may fit inside, but you still need space to open the doors and walk around it. Extra height only counts as useful storage if the room around it keeps working.

As noted earlier, Australian planning guidance calls for a clear central kitchen area with a minimum horizontal dimension of 1,550 mm, free of cabinetry, appliances and furniture. Treat the work aisle as a separate check: a common planning allowance is about 1,200 mm between opposing benches or an island, giving two people room to work or pass at the same time.
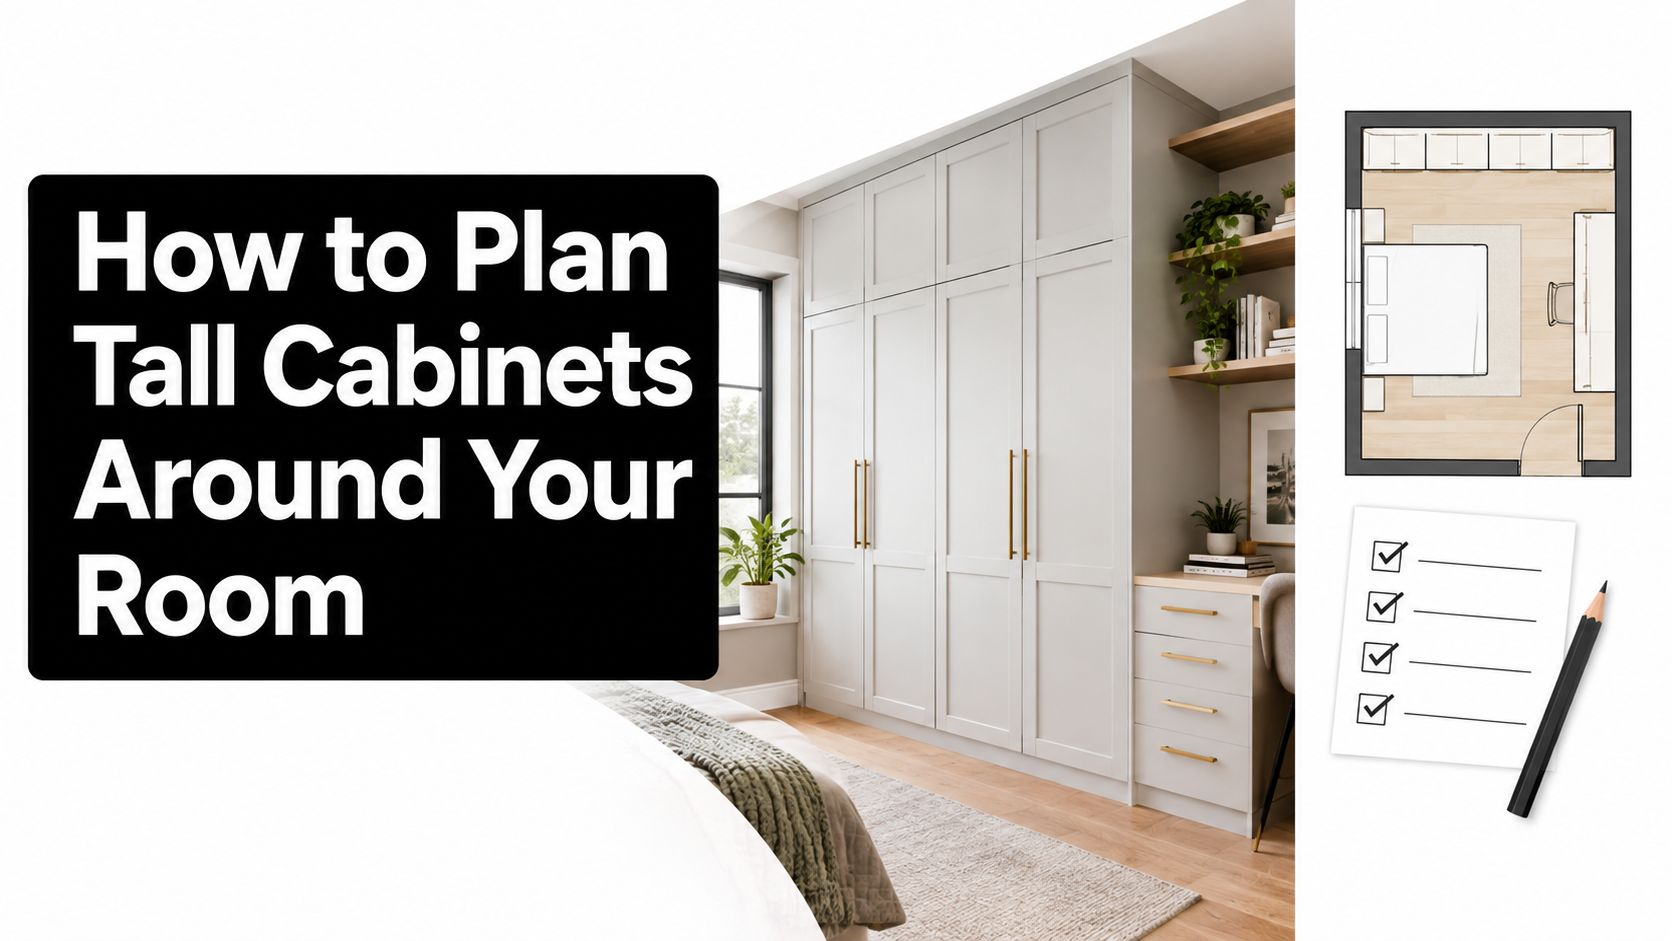
A modern bedroom with floor-to-ceiling gray cabinets, a built-in desk, and a floor plan layout illustration.

A practical measuring routine

  1. Record the available height. Measure along each proposed cabinet wall and mark bulkheads, cornices and service voids. Ceilings are rarely equally high everywhere; the lowest relevant point controls the fit.

  2. Draw the clear floor area. Include furniture and projecting appliances alongside the cabinet outlines. A common mistake is measuring between walls instead of between the finished obstacles people must move around.

  3. Mark appliance requirements. Choose appliance models early and transfer their installation requirements onto the drawing. Required ventilation and access take priority over a nominal cabinet size.

  4. Select a workable cabinet height. Use the size table as a shortlist, then agree the installation allowance with the cabinetmaker. Avoid treating a flush appearance as permission to omit tolerance.

  5. Confirm the finished front alignment. Coordinate the tall-unit depth with the adjoining base run, accounting for doors and panels rather than comparing carcass dimensions alone.

  6. Design shelves around loads. List heavy cookware, bulk groceries and appliances before deciding shelf spacing. Ask how shelf spans, board thickness and supports will be matched to those loads.

  7. Test every moving part. Draw doors, drawers and appliance openings in their open positions. A clear walkway on a closed-door plan can vanish once someone unloads the pantry.

  8. Check fixing and servicing access. Confirm suitable structural fixing points and how service panels or appliances can be reached later.

  9. Check the scaled drawing. Ask the designer or cabinetmaker for a plan showing cabinet fronts, door swings and appliance clearances, then trace your daily tasks across it by hand.

  10. Lay out a floor template. Mark the cabinet footprint with masking tape or cardboard and stand inside the outline. Physical rehearsal catches conflicts that a drawing hides.

  11. Rehearse with a 3D visualisation. If your designer offers a model, use it to test unpacking groceries, opening the oven and passing another person, rather than judging the layout by its appearance.

Run through these checks before ordering, while moving a line on the plan is still cheap.

Tall Cabinets Compared With Other Storage Options

Tall cabinets compared with other kitchen storage options

These are qualitative planning comparisons. Actual capacity, installation effort and access depend on the chosen dimensions, fittings and room.

Option Enclosed storage Access Renovation effort
Tall pantry run High potential capacity, enclosed behind doors Upper storage may need a step stool Built-in; relatively fixed after installation
Standard wall cabinets with a gap above Moderate enclosed capacity; exposed tops collect dust Convenient where shelves fall within reach May suit a like-for-like replacement
Open shelving No enclosed storage; contents remain exposed Visible and direct within reach Simple in concept, but needs suitable fixing and regular tidying
Narrow pull-out pantry in base run Compact, organised enclosed storage Contents come forward at a lower level Requires compatible cabinetry and hardware
Freestanding pantry Varies by model Position and internal arrangement vary Flexible placement, but assess stability and anchoring requirements

Match the option to the household

A family storing bulk groceries and small appliances may benefit from a tall pantry with accessible lower fittings. The important question is whether the proposed compartments fit the actual goods, rather than whether the cabinet merely looks spacious.

In a compact galley, consider base-level pull-outs before committing to a deep pantry wall. Preserving movement space may be more useful than adding upper shelves that rarely get opened.

For a landlord expecting changing tenant needs, fewer fixed tall runs and a suitably secured freestanding unit may offer flexibility. That isn't a reason to ignore stability: freestanding furniture still needs an appropriate safety assessment.

An older resident or someone working from a seated position may gain more from lower storage with pull-out fittings. An open-plan household prioritising visual continuity may instead favour a tall run with coordinated panels, provided access remains comfortable.

Compare the complete storage mix

You don't have to choose a single approach throughout the kitchen. A modest pantry, practical drawers and selected wall storage may work better than allocating every available wall to tall cabinetry.

Use these kitchen cabinet storage ideas to compare arrangements, then return to the measured floor plan. The strongest choice fits the household's routines and leaves room for those routines to change.

Materials, Costs and Installation Factors to Weigh

A tall cabinet asks more of its materials than a base unit does. The carcass spans more height, the doors carry more weight, and a pantry shelf loaded with tinned goods works harder than almost any other shelf in the kitchen. So read the options below as a matching exercise: the right board is the one suited to the job it has to do.

Common tall cabinet materials compared

These broad comparisons are a starting point for specifications, not guarantees. Moisture resistance and price depend on the particular board, finish, edge treatment and construction.

Material Moisture performance Relative cost Best use
Melamine-faced particleboard Moderate; edges need protection Lower Budget pantry interiors and shelving
MDF with painted or laminate finish Moderate; specification and edge protection matter Mid Smooth doors and decorative panels
Plywood carcass Grade-dependent; suitable specification matters Mid to higher Heavy-duty units and appliance housings
Solid timber doors Variable; responds to humidity Higher Feature doors
Laminate or polyurethane faces Finish-dependent; generally wipeable Mid Frequently handled kitchen fronts

Compare the complete construction through this guide to kitchen cabinet materials, rather than selecting on the door sample alone. A decorative finish says nothing about how the shelf supports, joints or edges have been detailed.

What changes the quote

Tall storage can carry substantial loads, especially where shelves hold canned goods or appliances. Shelf span, board thickness and reinforcement need to suit the intended contents. The wider the span and the heavier the load, the more a shelf deflects, which is why a quote specifying thin shelving and one specifying thicker board or added support describe two different cabinets.

Ask for an itemised quote covering:

  • Door count and style: Additional fronts, profiles and finishing work.
  • Internal hardware: Soft-close hinges, full-extension runners, baskets and specialised mechanisms.
  • Custom dimensions: Non-standard fabrication and fitting.
  • Appliance integration: Reinforced compartments, panels and installation detailing.
  • Electrical relocation: Associated trade work where required.
  • Ventilation provisions: Openings, ducts or service arrangements required by the appliance.
  • Making good: Repairs and finishing to affected walls and surrounding surfaces.

Installation is part of the specification

The installer should confirm structural wall or framing fixings, level the unit appropriately and allow for ceiling irregularities. Appliance manufacturers' ventilation clearances must govern appliance compartments, even when they complicate the preferred appearance.

Get itemised quotes built to the same specification, because a price comparison is only meaningful when the scope matches. Two quotes at different totals are often pricing different scopes of work, and height alone tells you nothing about which cabinet will still be working properly in a decade.

Maintaining and Adapting Tall Cabinets Over Time

A tall cabinet works like a car: the parts that move and carry weight are the ones that wear. Hinges open and close every day, runners carry loaded shelves and concealed plumbing can leak unnoticed, so a sensible routine targets those areas before anything else.

  • Check hardware annually: Tighten hinge screws, drawer-runner fixings and accessible wall anchors, and arrange professional attention if a door sags or a shelf shifts out of level.
  • Clean the zones people skip: Upper shelves and exposed cabinet tops collect dust and cooking grease that harden over time.
  • Maintain ventilation: Clean filters and keep grilles and duct openings clear, following the appliance maker's service schedule.
  • Inspect after leaks or plumbing work: Check the cabinet base, plinth and adjoining panels for swelling or staining rather than assuming hidden areas stayed dry.

Treat these as practical starting points. The cabinet and appliance manufacturers' instructions always take precedence.

Design for changes you can't yet predict

The 2023 National Construction Code introduced liveable-housing requirements based on the Silver Level guidelines. Applied to kitchens, that thinking favours modular components that can be altered without rebuilding the entire joinery run, though whether the provisions apply to a given project needs checking before design sign-off.

Before approving a full-height run, ask:

  • Future access: Could the pantry be altered for wheelchair use?
  • Work-zone changes: Could a lower preparation area be created without replacing the whole run?
  • Repair access: Could an appliance, service panel or concealed connection be reached without dismantling neighbouring cabinetry?

Adjustable shelves, removable panels and accessible drawers make these questions easier to answer. Contrasting finishes, task lighting and clear work zones beside appliances can also support a safer, more adaptable kitchen.

A cabinet's long-term usefulness includes how easily you can change or repair it.

For landlords, body corporates and long-term homeowners, adaptability may be worth more than squeezing in the greatest possible initial storage volume. Space you can reach and rearrange keeps working for you; space you can't is only volume on paper.

Confirm Your Tall Cabinet Layout Before Building

A design consultation goes faster when you arrive with measurements already taken. Bring floor-to-ceiling heights, wall widths, bulkhead positions, aisle clearances and photographs showing the whole room, not just the wall where the pantry will sit.

Then list what you will store and who needs to reach it. Separate everyday groceries from bulky appliances and occasional serving pieces, and note appliance models with their ventilation requirements. A designer can only place daily items inside your comfortable reach zone if they know what those items are.

Check the people and the proposal

Verify any builder's registration before engaging them. Search the Victorian Building Authority's online register of practitioners by the person's or company's name, then check two things: that the registration is current, and that the registration class covers the kind of domestic building work you are commissioning. Treat wording in an advertisement as a claim to check, not proof. The register entry is what counts.

For homeowners in Melbourne's south-east, SitePro Bathrooms is one renovation option based in Highett, Victoria, handling kitchen makeovers as part of its renovation work. Its process covers concept development, 3D design, construction and finishing, which gives you a chance to examine door swings, sightlines and proposed reach zones before anything is built.

Keep the consultation practical. Ask the designer to show where daily items will sit, how the tall cabinet will be fixed and which panels can be removed later for servicing. When you request a quote, supply your measurements, photographs, appliance details and storage list, and ask for the proposed cabinet height, internal fittings, fixing method and service access to be documented. You are approving a layout that must work in daily reach, not only on a rendering.
  • siteprobathrooms

Standard Australian Kitchen Cabinet Sizes

You're probably looking at a floor plan, a rough sketch on the back of an envelope, or a pile of screenshots saved from overseas websites, trying to work out what cabinet sizes make sense for an Australian renovation. That confusion is normal. Most homeowners start with the right question, then get fed the wrong answers.

In Melbourne homes, especially older Victorian layouts, cabinet planning isn't just about what's “standard”. It's about what will fit real walls, real appliances, real ceiling heights, and real movement through the room. A cabinet size that looks fine in a generic online diagram can create awkward fillers, unusable corners, cramped walkways, or a benchtop height that feels wrong the moment you start cooking.

The same thinking applies beyond the kitchen. In bathroom renovations, vanity depth, drawer projection, mirror placement, and storage reach all follow the same principle. Standard modules help, but the room always has the final say. That's why getting clear on kitchen cabinet sizes early makes the rest of the renovation easier, whether you're planning a compact unit update or a full family home remodel.

Understanding Cabinet Standards in Australia

A modern minimalist kitchen featuring wood grain cabinets, white countertops, and a sleek built-in oven design.

A lot of online advice about kitchen cabinet sizes comes from imperial systems. That's where homeowners get tripped up. The cabinet itself might be workable in theory, but once you try to fit that thinking into a Melbourne renovation with metric walls, local appliances, bulkheads, and fixed service points, the layout starts fighting you.

One of the clearest summaries of the problem comes from this Australian-focused discussion of standard cabinet planning, which notes that many “standard size” articles use US dimensions and miss the practical Australian issue of lining cabinets up to metric wall spaces, appliance cut-outs, and finished floor-to-ceiling constraints. That's exactly what happens on site.

What “standard” really means

In practice, standard doesn't mean there's one legally fixed cabinet size for every kitchen. It means cabinet makers and manufacturers tend to work from common module ranges that make planning, production, and installation more efficient.

That matters because a homeowner often hears “standard” and assumes “drop-in perfect”. It isn't. Standard modules are a starting point. The finished kitchen still has to absorb wall variation, appliance sizes, splashback set-out, and how square the room is.

Practical rule: If a layout only works on paper with no tolerance for fillers, scribes, or service access, it usually doesn't work on site.

The language worth knowing

Before you approve drawings or compare quotes, understand the basic terms:

  • Carcass means the cabinet box itself, before doors, panels, and benchtops.
  • Toe-kick is the recessed section at floor level that gives your feet room while you stand at the bench.
  • Finished height means the full installed height, not just the cabinet box.
  • Depth is the front-to-back dimension of the cabinet box, usually discussed separately from door thickness or benchtop overhang.
  • Module means a repeating cabinet width used to keep the joinery clean and reduce odd gaps.

Why Victorian homes need a more careful approach

Older Melbourne homes rarely give you a perfectly blank shell. Chimneys, narrow room widths, shifted walls, old plaster, and uneven floors all affect how standard kitchen cabinet sizes perform in reality.

That's why good planning starts with the room, not the catalogue. A neat modular kitchen in a new build can often be laid out quickly. A Victorian terrace kitchen usually needs more adjustment, especially where you're trying to preserve walkway space, fit modern appliances, and avoid ending up with filler strips that look like afterthoughts.

Base Cabinet Dimensions A Complete Guide

Base cabinets do the heavy lifting. They support the benchtop, carry the sink, house appliances, and take the brunt of everyday use. If these dimensions are wrong, everything above them suffers.

A long-standing benchmark in Australian kitchen planning is the 900 mm finished benchtop height, typically built from a 720 mm base cabinet carcass, a 150 mm toe-kick, and a 30 mm benchtop, with base cabinets generally 600 mm deep, as outlined in this cabinet sizing reference. That combination has lasted because it works well as a practical everyday working height.

How the parts add up

Homeowners often measure to the top of the benchtop and think that's the cabinet size. It isn't. The finished working height is made up of multiple parts, and each one affects the feel of the kitchen.

Component Typical benchmark
Base cabinet carcass 720 mm
Toe-kick 150 mm
Benchtop 30 mm
Finished benchtop height 900 mm
Base cabinet depth 600 mm

The important point isn't just memorising those figures. It's understanding that if one part changes, the others may need to move as well. A thicker top, a raised floor finish, or a design adjustment for user comfort can alter the final result.

Widths and module planning

In Australian work, base cabinet widths are often planned in clean module increments rather than random custom sizing. That keeps doors aligned, drawer fronts balanced, and appliance panels easier to coordinate.

A practical way to think about widths is by function:

  • Narrow units suit trays, oils, spice pull-outs, or filler-sensitive spaces.
  • Mid-width cabinets work well for general storage, bins, or single-door cupboards.
  • Wider drawer banks are usually the most useful storage in a family kitchen because pots, pans, and plates are easier to access from above.
  • Sink cabinets need to allow for bowl size, tap placement, and plumbing, not just external width.

Most kitchen problems blamed on “not enough storage” are really access problems. Deep, badly planned cupboards often store less usable gear than a well-sized drawer unit.

What works and what doesn't

What works is a base cabinet layout that matches how you live. If you cook often, prioritise drawers near prep areas. If the kitchen is compact, don't waste width on decorative panel breaks that reduce usable storage. If appliances are fixed, build the run around them rather than forcing them into a module that looks tidy on paper but creates installation headaches.

What doesn't work is overcomplicating the lower run with too many narrow cabinets, oversized decorative end panels, or cupboard-only layouts where everything ends up stacked behind everything else.

In older homes, I'd rather see a simpler, cleaner base cabinet plan with better access than a busy layout trying to squeeze in every possible unit type.

Wall Cabinet Sizes and Optimal Placement

Wall cabinets affect both function and visual weight. Get them right and the kitchen feels organised. Get them wrong and the room feels top-heavy, cramped, or awkward to use every day.

The key relationship isn't just wall cabinet to wall. It's wall cabinet to benchtop. If that spacing feels wrong, the whole kitchen feels wrong.

The clearance that matters most

A widely used reference point is setting wall cabinets about 450 mm above the benchtop, with wall cabinets commonly around 300 mm deep, as noted in the earlier sizing guidance. That spacing usually gives enough practical work area below while keeping upper storage within comfortable reach for many users.

Depth matters more than people expect. A very deep wall cabinet can loom over the bench and make prep feel boxed in. In some layouts, especially around a fridge surround, extra depth can help create a more integrated look. In many everyday kitchens, though, a shallower wall cabinet is easier to use and less visually heavy.

Choosing height with the room, not against it

Wall cabinet height should respond to ceiling height, cornices, bulkheads, and the overall elevation. A cabinet that technically fits can still look wrong if it leaves an awkward strip at the top or cuts across a window line.

Use these checks before locking in the wall cabinet height:

  • Look at the ceiling line. In older homes, ceilings and cornices often dictate the visual stopping point.
  • Check appliance relationships. The rangehood, fridge surround, and tall pantry all need to sit comfortably with the upper run.
  • Think about actual reach. High storage is fine for occasional items. Daily-use items shouldn't be pushed so high that you need to stretch every morning.
  • Watch visual bulk. In a smaller kitchen, lighter-looking upper cabinets can make the room feel less crowded.

A simple planning reference

Wall cabinet factor Practical benchmark
Typical depth 300 mm
Typical gap above benchtop 450 mm
Best use Everyday crockery, pantry overflow, glasses, lighter items

Some clients want to run wall cabinets as high as possible for maximum storage. Sometimes that's the right call. Sometimes it just creates upper cupboards that are annoying to reach and a kitchen that feels more compressed than it needs to.

A better result usually comes from balancing storage with comfort. The upper run should support the way you use the room, not dominate it.

Sizing Tall Pantry and Appliance Cabinets

Tall cabinets are where a kitchen starts to feel built-in rather than pieced together. They also create some of the biggest planning mistakes, because they deal with full-height visual lines, appliance housing, and deep storage all at once.

Pantries, oven towers, and integrated utility cabinets need more discipline in the planning stage than standard base units. If the widths, depths, and adjoining panels aren't coordinated, the whole run looks unsettled.

Pantry cabinet depth and alignment

Pantry cabinets are often built at 600 mm depth so they align with adjoining base cabinet runs, as noted in the earlier Australian sizing guidance. That consistency matters. It lets the tall joinery read as part of the kitchen, rather than as an added cupboard stuck on the side.

The decision isn't only about depth. You also need to think about door swing, handle clearance, shelf reach, and what the pantry is storing. A very deep pantry can hold a lot, but if everything disappears behind the front row, access gets worse instead of better.

Appliance towers need exact coordination

Oven and microwave towers look tidy when they're done properly. They're unforgiving when they're not. A tower cabinet has to work with the appliance housing requirements, ventilation needs, adjacent panel thickness, and the user's comfortable reach height.

That means the right process is usually:

  1. Choose the appliances early so the cabinet can be built around real dimensions.
  2. Confirm the finished position of the oven relative to surrounding benchtops and drawers.
  3. Check door and drawer interaction so handles don't clash and doors can open cleanly.
  4. Match the elevation with nearby pantry and fridge panels so the run feels intentional.

Typical tall cabinet planning logic

Tall cabinet type Common use Practical note
Pantry cabinet Food storage, small appliances Best when shelves and internal accessories match household habits
Oven tower Built-in oven and microwave Needs appliance-led planning, not guesswork
Utility tall unit Brooms, cleaning gear, overflow storage Useful near laundry links or secondary prep zones

If you're considering a corner pantry arrangement, the storage concept matters just as much as the dimensions. This guide to a blind corner pantry layout is useful because it shows why corner storage has to be judged by access, not just raw cupboard size.

Tall cabinets should solve clutter, not create dark storage where things disappear for six months.

In many Melbourne kitchens, one well-planned tall run performs better than scattering storage across too many disconnected cupboards.

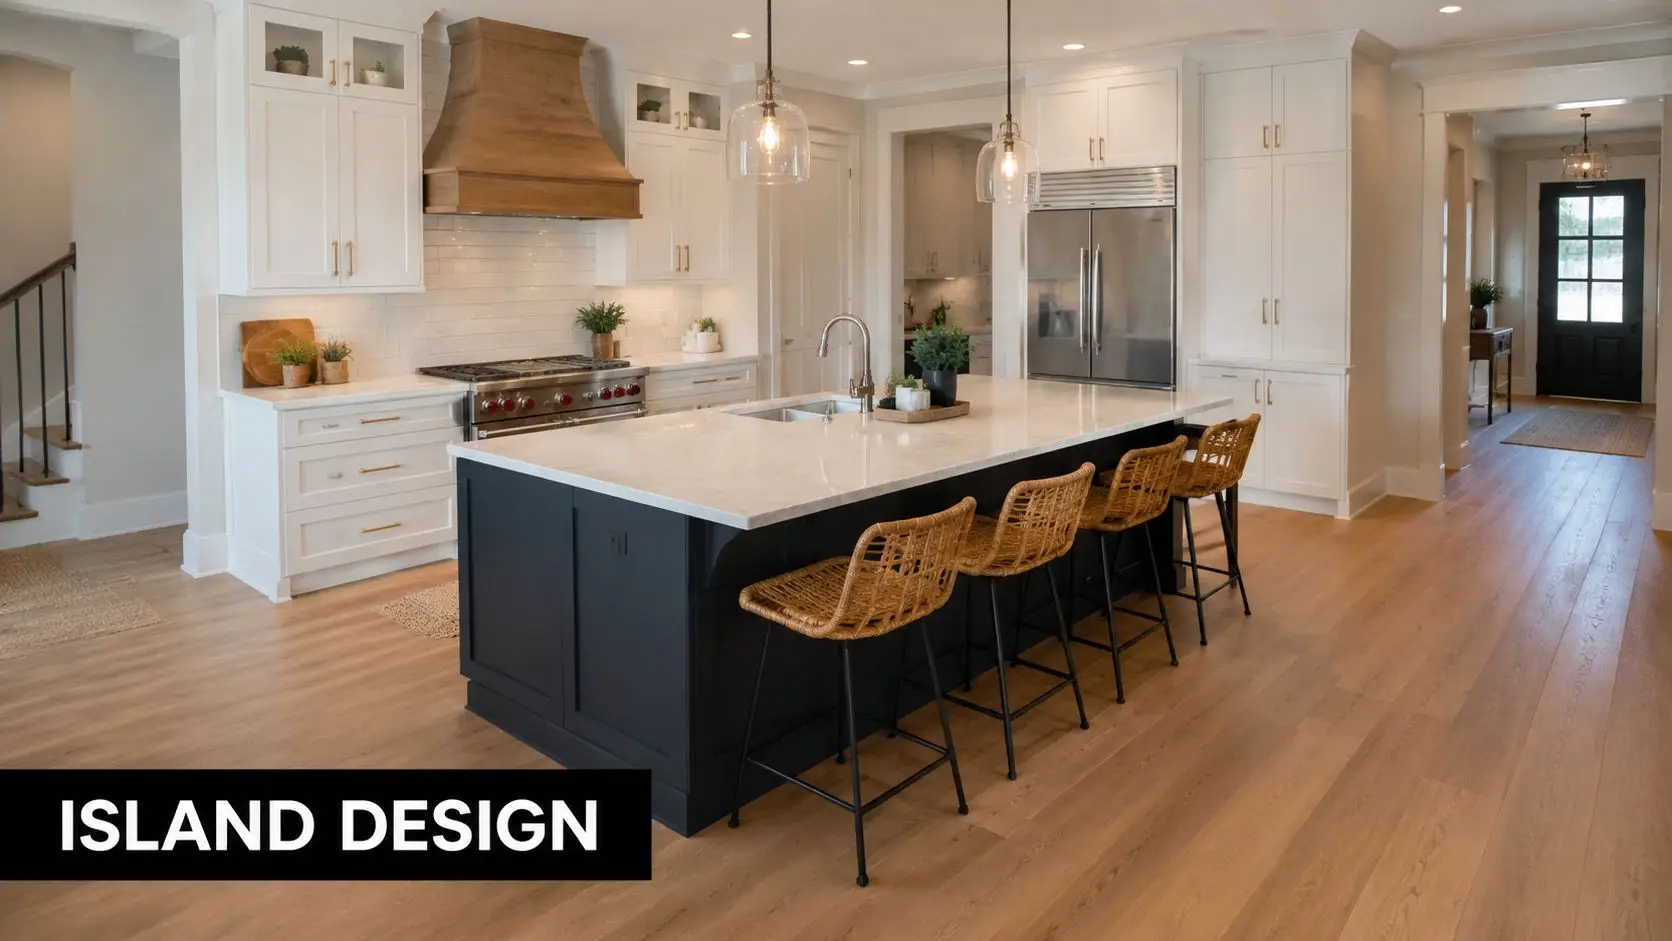
Designing Your Kitchen Island with Correct Dimensions

A modern kitchen interior featuring a blue central island with rattan bar stools and white cabinetry.

An island only works when the room can afford it. I've seen plenty of kitchens where the island looked impressive in the render and felt annoying the moment people started moving around it.

The first question isn't what island cabinet sizes are available. It's whether the surrounding clearances will still let the kitchen function properly. In a Victorian home with tighter widths, a peninsula often performs better than a forced island.

Start with the purpose

Not every island needs to do everything. Some are best kept as prep and storage only. Others combine bins, drawers, seating, or a sink. The more jobs you load into the island, the more carefully the cabinet plan has to be resolved.

A useful way to decide is to rank the island's role:

  • Prep-first island needs practical storage and enough uninterrupted bench space.
  • Seating-first island needs comfortable knee space and sensible overhang design.
  • Storage-first island works best with drawers on the working side and clean panel treatment on the outer face.
  • Feature island needs proportion. Oversized decorative ends and heavy bulk can make a moderate room feel smaller.

Depth, overhang, and visual balance

Island cabinets often begin from standard base cabinet logic, but the visible result depends on what happens at the back and top. If seating is included, the overhang has to feel comfortable in use and visually balanced from the side.

The common mistakes are easy to spot:

  • Too shallow overall and the island looks mean and doesn't support practical prep.
  • Too deep without purpose and the centre becomes wasted space.
  • Too much seating emphasis and storage disappears.
  • Too many panel breaks and the island starts looking fussy.

What tends to work in Melbourne homes

A successful island usually has a clear front and back. One side does the hard work. The other side presents neatly to the living zone. That sounds simple, but it requires cabinet choices that support both views.

Here's the approach I prefer on real projects:

Island decision Better approach
Storage Use the working side for drawers where possible
Seating Add it only if circulation still feels easy
Ends Keep end panels clean and proportional
Services Avoid loading the island with too many service demands unless the room supports it

A well-sized island should make the kitchen calmer to use. If it turns opening appliances, carrying groceries, or passing another person into a daily obstacle course, it's the wrong size no matter how good it looks.

Ergonomics and Essential Kitchen Clearances

Cabinet dimensions matter, but the gaps between cabinets matter just as much. A kitchen can be built from sensible modules and still feel poor to use because the movement paths, reach zones, and landing areas weren't thought through.

Australian design guidance for accessible or adaptable kitchen layouts commonly places more critical items within the 750–1200 mm reach zone, uses bench heights around 850–900 mm, and notes that base cabinet depth is about 600 mm with widths often planned in 150 mm module increments, as set out in this guide to kitchen and dining area standards. That guidance is useful because it reminds people that function isn't just about fitting cabinets in. It's about making the kitchen usable for the people living there.

Reach matters more than raw storage

A kitchen can have a lot of cupboards and still be inconvenient. That usually happens when daily-use items end up too high, too low, or buried at the back of deep storage.

The reach zone principle is practical. Put the things used every day where hands naturally go. Push occasional-use items into the less convenient storage. That's a better design move than adding more cabinetry.

Good ergonomics usually looks ordinary on paper. You notice it later, when the kitchen feels easy every single day.

Clearances make or break the layout

When I review a plan, I'm looking for moments of conflict. Can someone unload the dishwasher while another person works at the sink? Does the fridge door interrupt the prep zone? Will a drawer bank open comfortably near a passage point?

These are the questions worth asking:

  • Appliance opening. A door or drawer needs room not just to open, but to be used.
  • Passing space. Two people should be able to move without one having to step backwards every time.
  • Landing space. Hot trays, groceries, and washed dishes need nearby surfaces.
  • Reach comfort. Daily crockery and pantry items should sit where household members can access them without strain.

A related issue is benchtop height. If you're comparing options for household comfort, this article on standard benchtop height is a useful reference because it frames height as a usability decision, not just a convention.

The work triangle is helpful, but not sacred

The classic work triangle still has value. Sink, fridge, and cooktop should relate sensibly to one another. But in many modern renovations, especially open-plan homes, the kitchen is doing more than one job. It's a prep zone, storage wall, family hub, and sometimes a study overflow.

That means rigid triangle thinking can miss what matters. I'd rather see:

Layout priority Why it matters
Prep space near sink Most daily tasks happen here
Easy path from fridge to bench Grocery unpacking becomes simpler
Safe cooking zone Reduces crossing and congestion
Accessible daily storage Cuts repetitive bending and stretching

The best ergonomic kitchens don't chase theory for its own sake. They respond to who cooks, who cleans, who reaches what, and how the room is used on a normal Tuesday night.

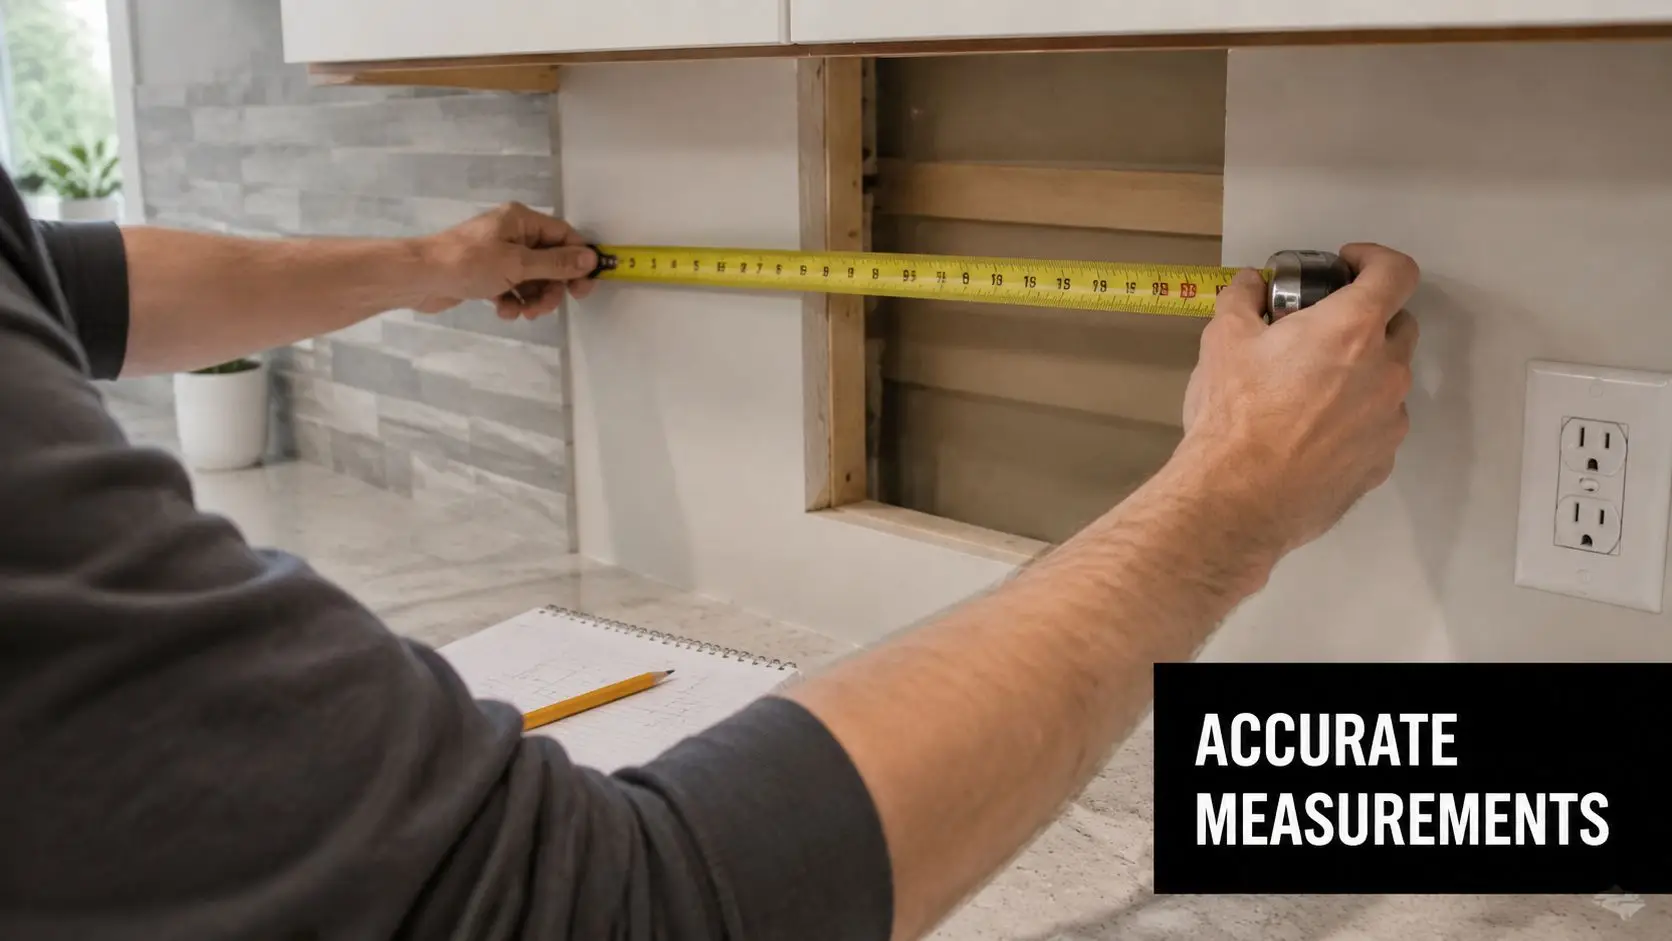
How to Accurately Measure for New Cabinets

A person using a yellow tape measure to record dimensions of a wall cutout in a kitchen.

Most cabinet mistakes begin before the joinery is built. They start with bad measuring. A room that looks square often isn't. A wall that seems straight often bows. In older Melbourne homes, assuming accuracy instead of checking it is where the trouble begins.

If you're measuring for a design handover, take more information than you think you need. Good cabinet planning depends on complete site data, not a single wall-to-wall figure.

The measurements that matter

Use a consistent measuring method and record everything clearly.

  1. Measure each wall in more than one place. Take dimensions low, mid, and high if possible.
  2. Mark windows and doors. Record widths, heights, sill positions, architraves, and opening direction.
  3. Note ceiling changes. Bulkheads, dropped sections, beams, and cornices affect tall cabinets and wall units.
  4. Locate services. Plumbing, waste points, gas, power, switches, and vents all influence cabinet choices.
  5. Check floor and wall variation. Out-of-level floors and out-of-plumb walls are common in renovation work.

What homeowners often miss

The easiest mistakes to make are the least dramatic ones. A missed powerpoint. A window reveal not measured properly. A skirting profile that interferes with a panel return. None of those sound major until the cabinet install starts.

Watch for these common problems:

  • Out-of-square corners that change cabinet set-out across a run
  • Hidden bulkheads above existing cabinetry
  • Door swings that affect handle clearance
  • Finished floor build-up that changes final heights
  • Appliance allowances that weren't confirmed before joinery drawings

Measure the room you have, not the room you assume is there.

How to hand measurements over properly

A clean handover saves time. Label each wall. Add rough sketches. Mark fixed points clearly. Include photos from several angles, especially around services and corners.

If the renovation is moving into formal design, a measured plan and site check usually become part of the process anyway. Some renovation firms, including SitePro Bathrooms, use measured information as part of a broader 3D kitchen design workflow so cabinet dimensions can be tested against the physical room before construction starts.

That step catches problems early, which is when you want to catch them.

Custom Cabinets for Kitchens and Bathrooms

Standard sizes are useful because they keep planning efficient and usually offer better value. But some homes don't fit cleanly into standard modules, and some renovation goals need a more customized result.

That's common in both kitchens and bathrooms. In a Victorian kitchen, custom cabinetry might solve a chimney breast return, a tight corner, or an uneven room width. In bathroom renovations, custom vanities often do the same job around nib walls, plumbing constraints, shaving cabinets, and awkward circulation.

When custom sizing is worth it

Custom cabinets make sense when the room has a problem that standard modules can't solve neatly.

Typical examples include:

  • Awkward wall lengths where standard units would create oversized fillers
  • Older homes with uneven surfaces or unusual openings
  • Specific storage needs such as internal drawers, hamper sections, or appliance concealment
  • Higher-end finishes where alignment and symmetry matter more visibly
  • Bathroom layouts where vanity depth and door clearance need tighter control

That doesn't mean custom is always better. Sometimes a mostly modular kitchen with a few custom infills is the smartest balance of cost, appearance, and function.

Bigger isn't always better

One of the most useful practical observations in cabinet design is that depth has to match use. This guide to cabinet dimension trade-offs notes that base cabinets are typically 24 inches deep because anything deeper makes items harder to reach, and that wall cabinets are usually 18–20 inches above the countertop. It also points out that deeper wall cabinets can create a built-in look around fridges, while shallower 12-inch wall cabinets can improve access and reduce visual bulk.

That same principle carries into bathrooms. A vanity that's too deep can tighten the room and make movement around the basin awkward. A shallower vanity can sometimes make a small ensuite work far better, even if it gives away some internal volume.

Applying kitchen thinking to modern bathrooms

The best designer bathrooms use the same logic as a well-planned kitchen. Storage should be easy to reach. Drawer depth should suit the items being stored. Doors shouldn't clash with movement paths. The vanity should fit the user, not just the wall.

If you're weighing finish and construction choices, this overview of kitchen cabinets materials is useful because material selection affects how custom joinery performs over time, especially in wet areas and high-use family spaces.

For homeowners exploring new bathroom ideas, the key is not treating cabinetry as an afterthought. Modern bathrooms and kitchens both rely on disciplined sizing. Registered builders unlimited who work across both spaces tend to approach joinery more holistically, because the same planning habits apply in each room.

A good renovation doesn't begin with colour. It begins with dimensions that make daily use easier.


If you're planning a kitchen or bathroom renovation in Victoria, start with the room's real measurements, your household habits, and the cabinet sizes that suit both. That approach avoids expensive adjustments later and leads to a result that looks right because it works right.