• siteprobathrooms

Small Bath Renovation Cost in Highett: A Practical Guide

A small bathroom renovation in Highett and greater Victoria usually costs roughly A$8,000 to A$20,000 for a cosmetic-to-mid-range project. A full rebuild regularly crosses A$20,000 once plumbing, waterproofing and tiling are included.

You're probably looking at a tired bathroom that still functions, but no longer feels clean, practical or worth keeping. Perhaps it's a compact 1990s ensuite with dated tiles, a swollen vanity and a shower that wastes space. The temptation is to ask for the cheapest quote. The better question is, what scope does that quote cover?

A small room can need extensive work behind the walls. The footprint may stay unchanged, yet plumbing relocation, substrate repairs, waterproofing, electrical upgrades and premium finishes can turn a modest refresh into a substantial rebuild. Current Australian guides place small bathroom projects in a broad range, from about A$6,000 to A$14,000 in some cases, while the national average bathroom renovation is about A$26,000, with common projects ranging from A$8,000 to A$35,000 or more according to Australian bathroom renovation cost guidance.

What a Small Bathroom Renovation Really Costs in Highett Today

A Highett homeowner comparing a vanity replacement with a complete strip-out must separate room size from project complexity. A four-square-metre bathroom can cost more than a larger room when trades work through narrow access, repair damaged substrates or reroute services.

For a small Highett bathroom, allow approximately A$8,000 to A$20,000 for cosmetic through mid-range work in 2026. A A$6,000 refresh is possible when the layout, services, waterproofed substrate and major fixtures remain sound. Once the scope includes complete waterproofing, plumbing changes, extensive tiling or higher-spec fixtures, the budget commonly reaches A$20,000 to A$28,000-plus. Victorian guidance places full renovations at A$15,000 to A$35,000, standard projects around A$20,000 to A$32,000, and small ensuites around A$12,000 to A$20,000 in Victoria bathroom renovation cost guidance.

Start with the work behind the tiles

A surface-level project can retain the shower position, toilet, waste lines, electrical points and waterproofed substrate. Replacing the vanity, mirror, lighting, screen, paint and fittings can still produce a major visual improvement without paying for a full rebuild.

A complete renovation follows a different cost path. Demolition reveals wall and floor condition, trades adjust services, and a compliant wet-area system is installed before tiling and fit-off. Victorian compliance requirements therefore affect more than the visible finishes. They also add licensed trade time, inspection points and coordination between trades.

Practical rule: Treat the first quote as a scope document, not a price tag. If it does not state what happens to waterproofing, plumbing, electrical work, demolition and waste, you have not compared quotes properly.

Why Highett quotes can exceed cheap national estimates

Highett sits in the Melbourne metropolitan market, and compact bathrooms often demand careful storage, precise fitting and higher finish standards. Older Bayside homes can add access problems, uneven substrates and concealed defects that a short inspection misses.

National figures provide orientation, not a Highett budget. A low-cost estimate may cover a cosmetic update, while a local quotation includes licensed trades, compliant wet-area preparation and a full strip-out. Those scopes produce different prices, even when both are called a small bathroom renovation. Use the scope, Victorian requirements and condition behind the tiles to judge whether a quote belongs closer to A$6,000 or A$20,000-plus.

Price Bands for Small Bathrooms Across Victoria

A small Highett bathroom can sit near A$6,000 or rise beyond A$20,000, depending on what the quote includes. Published Victorian renovation benchmarks place cosmetic or limited refits around A$8,000 to A$15,000, while full renovations commonly reach A$15,000 to A$35,000 and may exceed A$40,000 for higher-spec work. Certified waterproofing is commonly priced around A$600 to A$1,500, tiling supply and installation around A$50 to A$120 per square metre, and licensed plumbing and electrical work around A$2,000 to A$5,000, according to Victorian renovation cost benchmarks.

For Highett planning, use three practical bands. They are not promises. They show what a contractor is offering and help separate a A$6,000 refresh from a A$20,000-plus rebuild.

Small Bathroom Renovation Price Bands in Victoria

Band Price Range (AUD) Typical Inclusions Best For
Cosmetic refresh A$6,000 to A$9,000 Visible fixture replacements, paint, mirror, limited tiling, existing layout retained Sound bathrooms, rentals and sale preparation
Mid-range strip-out A$10,000 to A$18,000 Demolition, new vanity, shower works, substantial tiling, compliant wet-area preparation and limited service updates Homeowners wanting a durable functional upgrade
Full rebuild A$18,000 to A$28,000-plus Full strip-out, renewed waterproofing, plumbing and electrical coordination, extensive tiling and upgraded finishes Older bathrooms, layout problems and long-term homes

The first band applies only when the existing room is sound. Failed waterproofing or damaged wall substrate turns a cosmetic cover-up into false economy. Victorian compliance requirements can push the scope higher once wet-area work, licensed trades and inspection points are involved.

The middle band suits many sensible Highett renovations. Keep the plumbing broadly in place, then improve storage, lighting and shower function without rebuilding every service. This controls disruption while still delivering a durable result.

The upper band describes reconstruction, not decoration. Recent Australian cost guidance also highlights the gap between a basic refresh and a small full renovation, particularly when plumbing relocation, waterproofing, access and older building conditions expand the scope, as outlined in the 2026 Australia bathroom renovation cost guide.

Where Every Dollar Goes in a Small Bathroom Budget

A compact Highett bathroom can look simple on paper, then absorb the budget through work hidden behind the tiles. The difference between a A$6,000 refresh and a A$20,000-plus rebuild usually comes from demolition, waterproofing, substrate repairs, plumbing and Victorian compliance, not the mirror or tap finish.

These planning allowances show where the money goes. They are individual cost centres, so a quotation may combine or overlap them. Access, product choice, room condition and the extent of wet-area work will set the final total.

Line Item Low (AUD) High (AUD) % of Mid-Range Budget
Demolition and disposal A$800 A$1,500 Qualitative allocation
Waterproofing and wet-area preparation A$1,200 A$2,500 Qualitative allocation
Wall and floor tiling, including substrate A$2,500 A$6,000 Qualitative allocation
Plumbing rough-in and fit-off A$2,000 A$5,000 Qualitative allocation
Shower screen A$600 A$1,800 Qualitative allocation
Vanity and basin A$600 A$3,500 Qualitative allocation
Bath if retained A$800 A$2,500 Qualitative allocation
Tapware and fittings A$400 A$2,000 Qualitative allocation
Lighting and electrical A$400 A$1,200 Qualitative allocation

The percentage column stays qualitative because the scope changes the total. Waterproofing, tiling and plumbing routinely consume most of the working budget before a homeowner selects a mirror, towel rail or decorative finish. Licensed trades, required preparation and inspection points can push those costs higher in Victorian wet areas.

The expensive work is mostly invisible

Demolition covers protection, removal, loading, disposal and cleaning. A narrow Highett side passage can make rubble removal and material handling slower, adding labour without changing the finished appearance.

Waterproofing deserves firm scrutiny. Membrane application, junction treatment, falls, penetrations, substrate preparation and curing all affect the result. A cheap allowance may leave out preparation or certification, so ask exactly what the quote includes. Tile size, layout and substrate condition also affect the bathroom tiling costs.

Keep the plumbing close to its existing position when the layout already works. That decision protects the budget while leaving room to improve storage, lighting and shower function.

Fixtures create the visible finish

A standard vanity can keep supply and installation predictable. Bespoke storage, stone surfaces and unusual dimensions add both material cost and fitting time, especially in a tight room.

The same principle applies to the shower screen, tapware and lighting. Spend on components exposed to daily moisture and repeated use. A durable tap cartridge and well-planned basin usually provide more practical value than an expensive decorative fitting. A small bathroom earns its budget through reliable construction first, then through finishes that suit the way the room is used.

Hidden Cost Drivers That Quietly Blow Out Small Bath Budgets

The most dangerous assumption is that a small bathroom has a small risk profile. In older Highett homes, the room can be compact while the work behind it is complex.

Plumbing relocation sits near the top of the list. In a 1960s weatherboard, moving a shower or toilet even 600 millimetres can add approximately A$1,500 to A$3,500 once a licensed plumber reroutes supply and waste lines and the waterproofing is reinstated. That allowance is supported by the Victorian cost guidance referenced earlier, but your contractor still needs to inspect the existing route before confirming it.
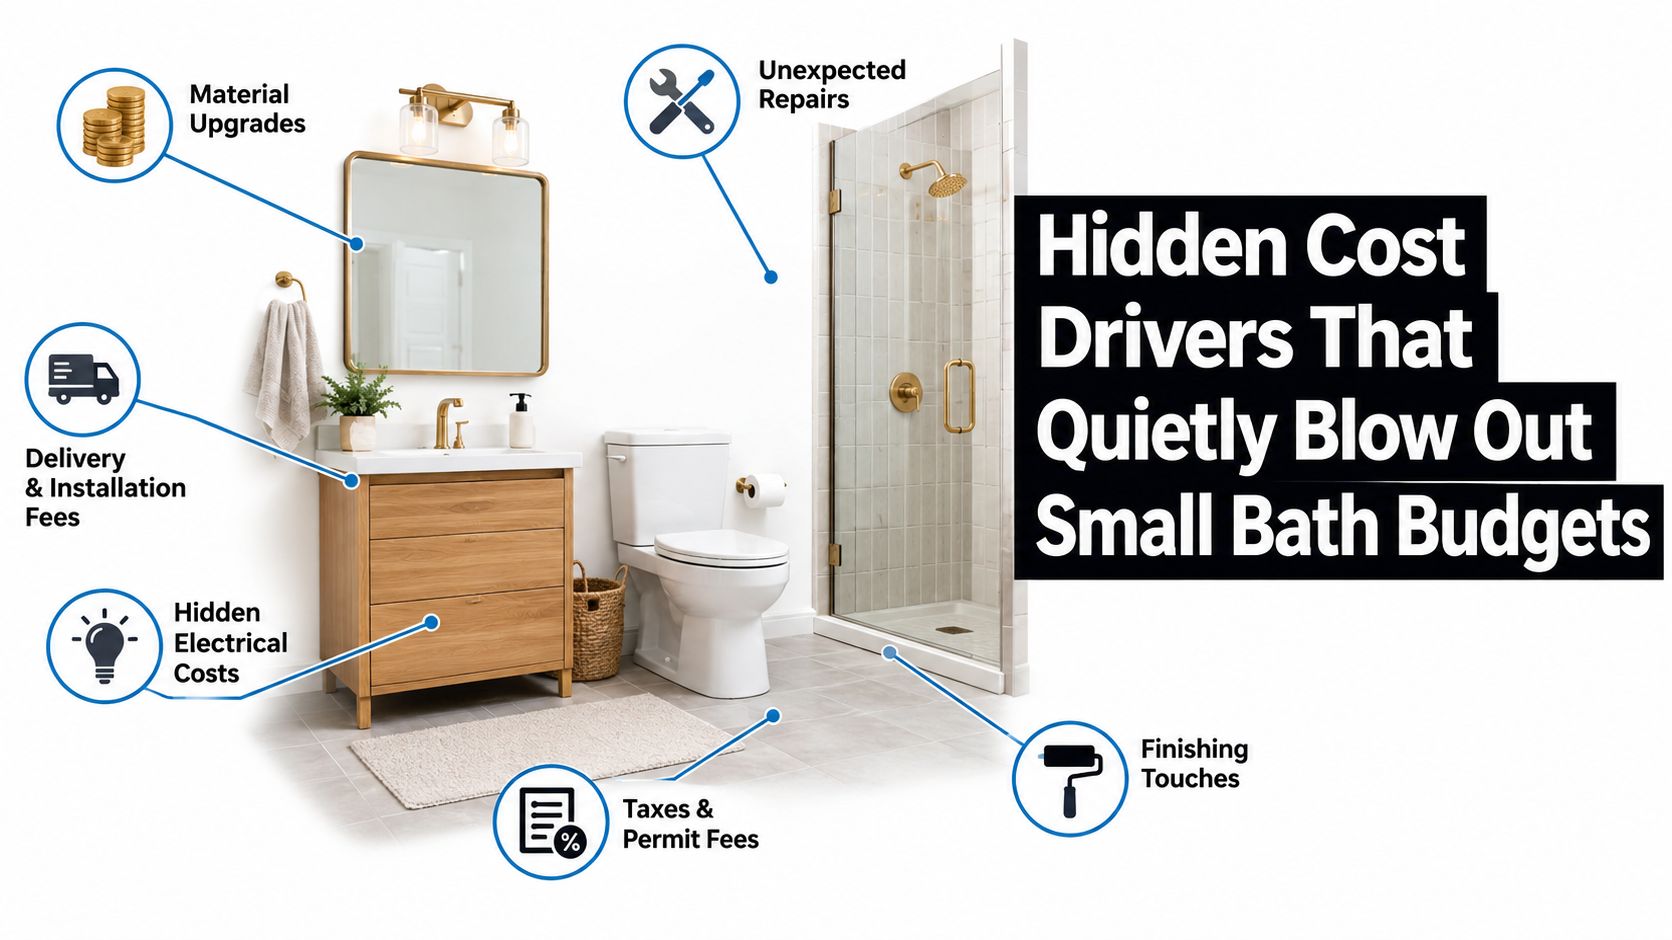
A bathroom renovation infographic highlighting various hidden cost drivers like material upgrades, repairs, and permit fees.

What demolition can reveal

Timber rot under an old bath, corroded copper pipework and concrete slab edges can all change the work sequence. Each issue may add anything from a half-day to two days of labour, depending on how much access the repair requires.

Narrow corridors and side passages create a second problem. Deliveries, protection, material handling and skip access are harder when tradespeople can't move products directly to the work area. A newer estate may offer easier access for the same size bathroom.

The room is small. The risk isn't.

Other warning signs include asbestos sheeting in pre-1990 wet areas, outdated electrical arrangements and failed waterproofing discovered after demolition. These issues aren't reasons to avoid renovation. They are reasons to inspect properly and keep a contingency rather than treating the first visible price as the final budget.

For waterproofing questions, use a contractor who can explain the preparation, membrane system, inspection process and compliance documentation. This bathroom waterproofing cost guide is useful when checking whether a quote has allowed for more than a quick surface application.

I recommend a 15 to 20 percent contingency for a small bathroom where demolition may expose unknown conditions. It protects the schedule and prevents a homeowner from choosing inferior materials or abandoning necessary repairs when the walls come off.

Cosmetic Refresh Versus Full Strip-Out and How to Choose

A cosmetic refresh changes what you see. A full strip-out changes what the room is made of. That distinction matters more than the number of square metres.

A refresh usually retains the existing layout and services. It may replace the vanity, basin, mirror, tapware, screen and lighting, with paint or limited tile work over a sound substrate. For a small Highett bathroom, that type of project generally sits around A$6,000 to A$10,000, depending on product choices and the amount of labour involved.

A full strip-out removes the room back to its underlying structure or slab. It may replace rough-in services, rebuild the wet area, correct falls and retile the whole space. That scope commonly lands around A$14,000 to A$20,000-plus, with premium finishes or hidden damage pushing it higher.

Refresh vs Strip-Out at a Glance

Factor Cosmetic Refresh Full Strip-Out
Existing layout Retained Can be reconfigured
Waterproofing Relied on if sound, or selectively addressed Replaced as part of the rebuild
Plumbing Positions usually remain Rough-in can be renewed or moved
Disruption Lower Higher
Best fit Rental, sale preparation or newer bathroom Long-term home, leaks, mould or poor layout
Design freedom Limited by existing services Broad, subject to budget and compliance

Ask three questions before choosing:

  1. How old is the waterproofing? If its history is unknown and the room shows movement, mould or leaks, a cosmetic cover-up deserves serious suspicion.
  2. Are the plumbing positions working? Keeping them in place saves money. Moving them for a better layout can be worthwhile, but price it before selecting fixtures.
  3. How long will you stay? A rental or sale preparation needs controlled presentation. A home you'll occupy for ten years or more deserves durable wet-area work.

Premium tiles and fittings can push a refresh towards its upper limit without fixing underlying defects. Conversely, a strip-out can remain in the mid-range if you use standard tile formats, an in-stock vanity and restrained tapware while protecting the technical work that keeps the room dry.

Victorian Building Rules Every Highett Homeowner Must Know

A small Highett bathroom can move from a $6,000 refresh to a $20,000-plus rebuild once demolition, waterproofing, tiling, plumbing, electrical work and structural changes enter the scope. Victorian compliance thresholds apply to the total domestic building work, not just the room's floor area.

In Victoria, work costing more than A$10,000 requires a written major domestic building contract, and the builder must be registered with the Building and Plumbing Commission for work above that threshold. If the project exceeds A$16,000, the builder must provide current domestic building insurance before taking a deposit or starting work. These requirements are set out in Victorian domestic building guidance for bathroom renovation contracts and insurance.

Structural work requires a registered builder regardless of cost. That includes altering walls, structural elements or load-bearing components. Confirm whether the proposed layout affects any of these before accepting a low quote.

Documents to request before work starts

  • Written contract: Check the scope, inclusions, exclusions, variation process and payment stages.
  • Builder registration: Confirm the registration of the person or business responsible for the domestic building work.
  • Domestic building insurance: For projects above the relevant threshold, request evidence before paying a deposit or allowing work to begin.
  • Waterproofing documentation: Ask who will perform or supervise the work and which compliance certificate you will receive.
  • Plumbing certificate: A licensed plumber should complete the work and lodge the required compliance certificate.
  • Electrical safety certificate: Wet-area electrical work must be completed by a licensed electrician with the appropriate Certificate of Electrical Safety.

A quote under A$10,000 is not automatically improper. It may cover a limited trade job. If it claims to deliver a complete bathroom rebuild, ask what has been excluded. Common omissions include waterproofing certification, licensed trade work, demolition, waste disposal and written warranty protection.

Review the practical building permit requirements for bathroom renovations before signing. Do not accept a verbal promise that permits, certificates or insurance paperwork will be sorted out later. Get each requirement documented before work begins.

Smart Budgeting Tips and Modern Bathroom Ideas Worth the Spend

A small Highett bathroom can look finished while still hiding expensive defects. Set the technical allowance first, then choose the feature tile. I recommend keeping a 15 percent contingency for problems behind tile and plaster. Confirm the plumbing positions before ordering finishes. This sequence protects the budget because changing services after product selections often means paying for both new materials and extra labour.

Current Australian trend frameworks identify directions such as Contemporary Classics, Modern Australian, Wellness Sanctuary, White On White and Colour Drenching. The Modern Australian direction suits a compact room particularly well, using natural textures, earthy tones, hazy greens and sunbaked neutrals to add warmth without visual clutter. Review published Australian bathroom trend directions for palette ideas, then choose finishes that suit your room, budget and maintenance expectations.

Spend for reliability and save on decoration

Put money into the parts that protect the room and affect daily use. Fluted glass fronts, a considered paint colour and a well-proportioned mirror can give modern bathrooms a stronger visual identity without a fully custom fit-out. Micro-cement-inspired finishes can create a continuous surface, but the installer must specify the substrate and wet-area system. The finish is not a replacement for waterproofing.

Curved shower screens and brushed-brass showers can suit the right design, yet they may add product, fabrication and installation costs without improving function. In a tight bathroom, a standard screen with clear access often gives better value than an elaborate curve. Use the saving on waterproofing, ventilation or storage instead.

Budget Item Recommendation Why
Waterproofing Splurge It protects the structure and is difficult to correct after finishes are installed
Plumbing layout Spend strategically Keeping positions controls cost, but a poor layout affects daily use
Tapware cartridges Buy durable Repeated use exposes weak components quickly
Vanity Save with a quality standard unit In-stock storage can provide function without bespoke fabrication
Tile selection Choose standard formats Reliable supply and simpler installation help control costs
Shower screen Match the space Sliding or standard systems can preserve clearance in compact rooms
Lighting and exhaust Spend where performance matters Good ventilation and lighting affect comfort and maintenance
Decorative finishes Set a limit Premium colour and hardware can absorb budget without solving technical issues

A coordinated renovation service can align design, construction and finishing. SitePro Bathrooms provides concept development, 3D design, construction and finishing for bathroom and kitchen projects in Highett.

Before signing with a Highett tradesperson, ask what happens if demolition reveals failed waterproofing or structural damage. Ask which certificates, registrations and insurance documents you will receive before final payment. Vague answers indicate that the scope and risk allowances are incomplete.

Choose the scope first, lock the services second and select finishes third. That order keeps a small bathroom budget focused on compliance, durability and daily function before decoration.

If your Highett bathroom needs an honest scope review, contact SitePro Bathrooms for a consultation and 3D design discussion. Bring your preferred layout, photos of the existing room and target budget. Request a written quotation that separates cosmetic work, full strip-out items, compliance documentation, allowances and potential variations.
  • siteprobathrooms

Waterproofing in Bathroom: Highett Guide 2026

You're probably at the stage where the tiles are picked, the tapware is saved in a mood board, and the ideas are starting to feel real. Maybe you've been collecting new bathroom ideas for months. Maybe you want one of those clean, modern bathrooms that look simple on the surface but feel expensive and calm to live with.

Then waterproofing comes up, and it sounds like the least exciting part of the whole job.

That's exactly why it gets underestimated. In bathroom renovations, the finishes get the attention, but the waterproofing is what decides whether the room still performs properly years later. A bathroom can look flawless on handover day and still be failing behind the tiles if this stage isn't done properly.

In Highett and across Bayside, I've found most homeowners don't need more jargon. They need a straight explanation of what matters under Victorian rules, what corners can't be cut, and how to tell whether the person quoting the work knows what they're doing.

Why Waterproofing Is the Foundation of Your Bathroom Renovation

A bathroom leak rarely announces itself early. It usually starts subtly. Grout darkens and stays damp. A skirting board swells in the next room. Paint bubbles. The floor feels slightly soft underfoot. By the time the damage is obvious, water has often moved well beyond the shower.

That's why waterproofing in bathroom work isn't a finishing touch. It's the barrier that protects the structure, the linings, the subfloor and the rooms around it. The easiest way to explain it is this. Waterproofing is the raincoat for your house, but it only works if there are no gaps, weak spots or missed seams.

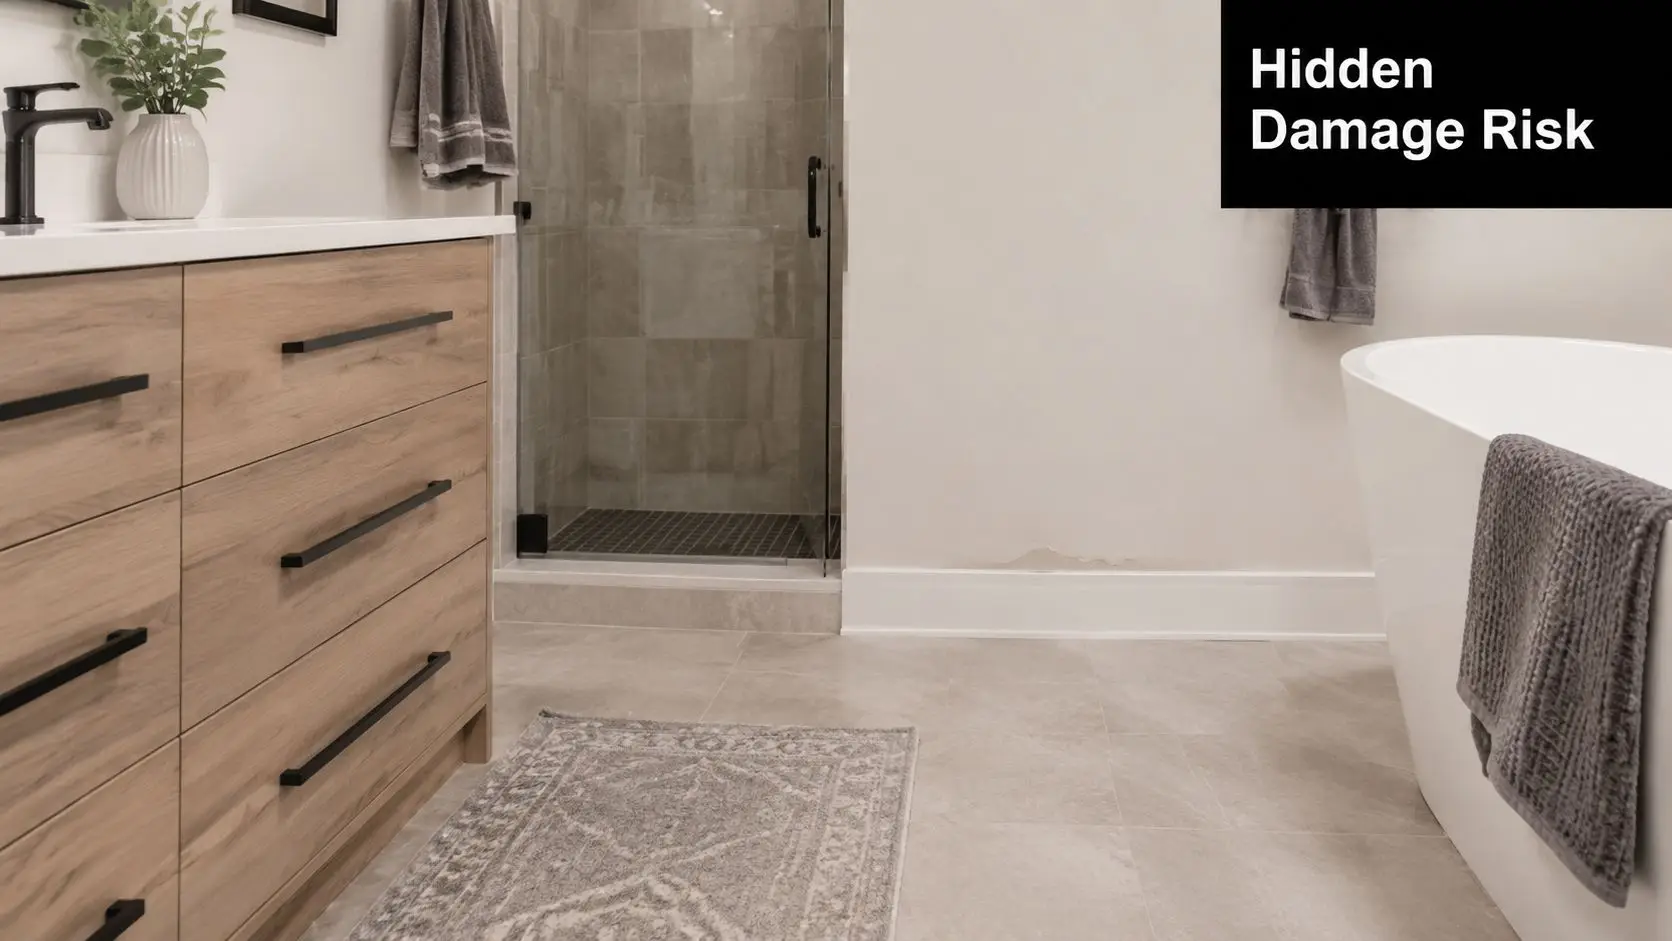
A modern bathroom showing potential moisture damage on the wall above the baseboard near the soaking tub.

Tiles are not the waterproof layer. Grout is not the waterproof layer. Silicone alone is definitely not the waterproof layer. The actual protection sits underneath the surface, and it has to be continuous from floor to wall, around penetrations, and into the waste connection.

What failure really looks like

When waterproofing fails, the problem isn't just cosmetic. The Victorian Building Authority notes that compliant waterproofing helps prevent mould, structural decay and tile delamination. Those are the three outcomes homeowners notice most often when a bathroom has been dressed up well but built badly.

The risk is not small. Bathroom waterproofing failures are a leading cause of renovation defects in Australia, with over 60% of moisture-related building complaints in Victorian residential projects linked to non-compliant waterproofing, often resulting in remedial costs of $5,000–$15,000, according to the Victorian Building Authority waterproofing guidance.

Practical rule: If someone talks more about tile patterns than membrane continuity, they're focused on the wrong layer.

Why homeowners get caught out

The biggest trap is assuming a beautiful finish means a sound build. It doesn't. Some of the nicest designer bathrooms fail because the hidden work was rushed. A bathroom can have premium fixtures, precise tile lines and a polished vanity, but if the substrate wasn't prepared properly or the membrane wasn't applied correctly, water will find the weak point.

This matters even more in homes where the bathroom sits over timber framing or above another room. In those situations, leaks don't stay local. They travel into joists, ceiling voids and adjacent finishes.

A sound renovation starts with the invisible work. The surface layer is what you see. The waterproofing is what protects your investment.

The non-negotiables at a glance

  • Continuous barrier: The membrane has to work as one sealed system, not as a few painted patches.
  • Correct detailing: Corners, wall-floor junctions, pipe penetrations and drains are where failures usually start.
  • Compatible build-up: The substrate, primer, membrane, screed and tiles all need to work together.
  • Patience: Rushed sequencing ruins good materials. If coats don't cure properly, the system is compromised before tiling even begins.

That's the difference between a bathroom that only looks good and one that lasts.

Understanding Victorian Waterproofing Standards and Regulations

Victorian waterproofing rules aren't optional nice-to-haves. They're the baseline for compliant work. If you're renovating in Highett, these rules affect what happens behind every tile in the wet area, especially in showers and on bathroom floors built over timber.

The main standard homeowners should know is AS 3740:2021, which works with the National Construction Code. You don't need to memorise the legal language. You do need to know what it means in practical terms.

The shower walls and floor rules that matter most

In Victoria, AS 3740:2021 mandates shower walls be waterproofed to 1,800 mm high. In homes with timber floors, the entire bathroom floor must be waterproofed to prevent water ingress into structural joists, as outlined in this guide to bathroom waterproofing rules across Australia.

For a homeowner, that translates into a few clear realities:

  • Shower walls need full protection high up the wall: This isn't just a dab around the corners. The waterproofing has to cover the shower wall area to the required height.
  • Timber floors raise the stakes: A lot of older and renovated Melbourne homes include timber-framed sections. In those bathrooms, isolating only the shower recess isn't enough.
  • The wet area design affects the extent: Open showers, hobless showers and compact layouts need careful detailing so water can't migrate into the dry side.

If you're also reworking a separate toilet as part of the job, this practical guide on renovating a toilet helps put the wet area planning into context.

Floor falls are about more than drainage

Homeowners often hear ratios like 1:80 and switch off. Don't. Floor fall is one of the easiest concepts to understand once it's explained properly.

Think of the floor like a very shallow funnel. It should be sloped enough that water naturally heads to the drain, but not so steep that the room feels awkward underfoot or creates lipping issues at edges. Under the NCC 2022 settings referenced in Victorian guidance, shower floors need falls that direct water efficiently to the waste.

A compliant bathroom doesn't rely on hope and a floor mat. It relies on water being directed where it's supposed to go.

Where generic advice falls short in Bayside homes

National articles often talk broadly about wet areas and leave it there. That's not enough for local homes. In Highett and surrounding suburbs, you'll see a mix of older brick homes, weatherboards, upstairs additions and reconfigured family bathrooms. Those conditions affect substrate movement, floor structure and how the waterproofing system should be detailed.

A few practical examples matter:

  • Upper-level bathrooms: Any leak can affect ceilings and rooms below.
  • Timber-framed construction: Movement needs to be managed properly at junctions.
  • Frameless shower designs: Clean lines look great, but they leave less room for sloppy drainage planning.

What these standards mean for your decisions

The standards don't just guide the waterproofer. They influence layout, shower type, waste placement, floor build-up and even the sequencing of trades. If someone is discussing modern bathrooms without talking about drainage, wall extents and floor construction, they're only discussing half the room.

Good waterproofing starts in planning, not after demolition.

Choosing the Right Waterproofing Membrane for Your Project

Most homeowners only hear one sentence about membranes: “We'll waterproof it before tiling.” That doesn't tell you much. In practice, there are two broad approaches commonly discussed on residential projects. Liquid-applied membranes and sheet membranes.

Each can work when it's used correctly. The wrong choice usually isn't about the product category itself. It's about whether it suits the substrate, layout and detailing of the bathroom.

The key difference in plain language

A liquid membrane is applied on site, usually in coats, and cures into a continuous flexible layer. It suits bathrooms with lots of corners, penetrations and custom detailing because the installer can shape it to the room.

A sheet membrane arrives as a formed material and is installed in sections with sealed joins. It can provide a controlled, consistent layer, but the quality of the laps, corners and terminations becomes critical.

On site, what matters most isn't marketing language. It's whether the membrane can be applied continuously and detailed properly around the room you actually have.

Comparison of Waterproofing Membrane Types

Feature Liquid Membrane (Class III) Sheet Membrane (e.g., PVC, Butynol)
Application method Rolled, brushed or otherwise applied in coats over the prepared substrate Laid in sheets with sealed joints and formed details
Best fit Irregular bathroom layouts, multiple penetrations, common residential bathroom renovations Areas where sheet detailing is preferred and the installer can control laps and junctions carefully
Flexibility on site High. Easier to work around corners, niches and mixed geometry Lower in tight detailing unless installation is very precise
Consistency Depends heavily on correct coverage and coat thickness Depends heavily on join quality and proper sealing at overlaps
Common risk Too thin in places, rushed curing, weak detailing at drains and corners Poorly sealed joins, awkward transitions, installation errors at penetrations
Typical homeowner question “Has it been applied to the required thickness?” “How are the seams, corners and drain connection being sealed?”

The thickness issue homeowners should ask about

One of the most overlooked details in waterproofing in bathroom projects is membrane thickness. If the coating is too thin, it may look complete but still perform poorly.

A verified industry data point worth knowing is this. A critical detail often missed is the mandatory 0.5mm dry film thickness for waterproofing membranes. According to ABIS data, failure to achieve this thickness is a factor in 32% of waterproofing inspection failures in Australia, as noted by ABIS waterproofing guidance.

That matters because homeowners usually can't judge thickness by eye. A membrane can appear fully coated and still be underdone.

What works in most residential bathrooms

For many bathroom renovations, liquid-applied flexible systems are popular because they adapt well to typical residential conditions. They're practical around corners, around pipe penetrations, and over the mixed surfaces often found in renovation work.

But “popular” doesn't mean foolproof. Liquid systems only work when the installer respects curing times, coverage rates and reinforcement details where required. Sheet systems can also perform very well, especially where the installer has planned the room around them and the transitions are straightforward.

The better question isn't “Which membrane is best?” It's this:

  • What substrate is being waterproofed
  • How are corners and penetrations being detailed
  • How will the drain connection be sealed
  • How will the installer verify the finished membrane is compliant

That conversation tells you far more than the product label.

A Look Inside the Professional Waterproofing Application Process

Professional waterproofing should look methodical, not hurried. If the room seems to jump from demolition to tiling too quickly, something important has probably been skipped. A proper installation follows a sequence, and every stage supports the one after it.

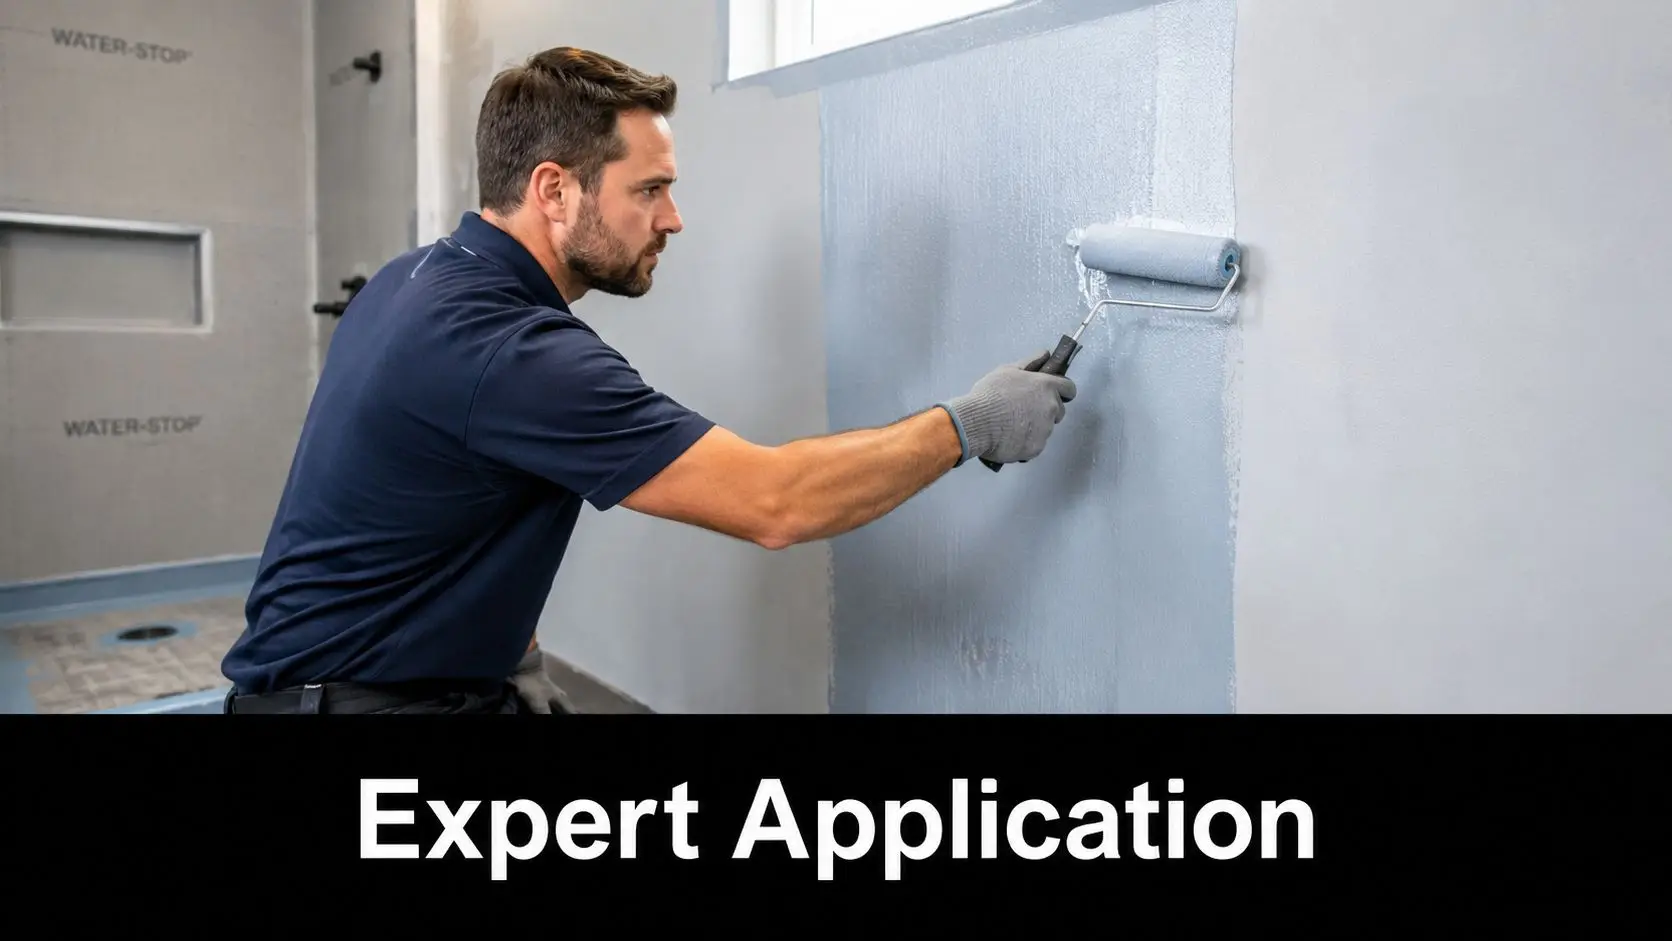
A professional tradesman applying waterproof sealant to a bathroom wall using a paint roller.

Step one starts before any membrane goes down

The substrate has to be clean, sound and ready to receive the system. Dust, loose material, oily residue, crumbling patches and movement cracks all need attention first. If the base is poor, the membrane is only sticking to a problem.

This is also where falls and shower geometry need to make sense. A membrane can't compensate for a badly formed floor. If the drainage plane is wrong underneath, the room may still hold water even with a compliant coating on top.

For homeowners planning tiling finishes, it helps to understand how the waterproof layer and tile layer need to work together. This overview of bathroom tiling in Melbourne is useful because tile appearance and waterproof performance are tied to the same underlying preparation.

The junctions are where discipline shows

Corners and changes in plane matter because buildings move. Walls and floors expand, contract and settle at slightly different rates. That's why proper detailing at junctions isn't fussy overkill. It's what stops cracking later.

Mandatory installation practices under AS 3740 include incorporating bond breakers at all wall/floor junctions to accommodate structural movement and conducting a 24-hour water test upon completion to certify the installation is leak-proof before tiling begins, according to this interpretation guide for internal wet area waterproofing.

A good installer pays close attention to:

  • Wall-floor joints: These need bond breakers so the membrane can handle movement.
  • Pipe penetrations: Every penetration is a leak risk if it's not sealed properly.
  • Drain termination: The membrane has to integrate cleanly with the waste, not just stop nearby.
  • Doorway control points: Water shouldn't be able to migrate out of the wet zone.

How the membrane is built up

Most liquid systems are not one thick slap-on coat. They're built up progressively. Primer may be used where required. Reinforcement and detailing happen at critical areas. Coats are then applied in sequence to achieve the correct cured layer.

That's where rushed work often exposes itself. If one coat hasn't cured properly before the next stage, the system can weaken or trap issues below the surface.

Wet area waterproofing is slow work done on purpose. Fast work is usually rework in disguise.

Testing before tiling is the quality checkpoint

The most reassuring stage for a homeowner is the one nobody sees in finished photos. Testing. Before tiles go on, the membrane should be treated as its own completed system and checked accordingly.

A proper water test tells you whether the room is behaving like a contained wet area, not just looking like one. It's far cheaper to identify a failure before tiling than after the bathroom is complete, grouted, painted and handed over.

What a professional sequence usually looks like

  1. Prepare the substrate: Clean, repair, level and confirm the room is ready.
  2. Prime where needed: Match the substrate requirements of the system being used.
  3. Detail the movement points: Install bond breakers and treat critical junctions.
  4. Apply the membrane system: Build the waterproof layer to the required performance.
  5. Seal to drains and edges: Finish the places where water usually finds a path.
  6. Allow proper curing and test: Confirm integrity before the tiler starts.

If any of those stages sound vague in a quote conversation, ask more questions.

Common Waterproofing Mistakes That Can Derail Your Renovation

Most failed bathrooms don't fail because the homeowner picked the wrong tapware. They fail because someone cut a corner in the hidden work. The frustrating part is that many of these mistakes are avoidable, and they often happen when a contractor treats waterproofing like a quick prep job before the “real” bathroom work starts.

That mindset is expensive.

The common shortcuts that create long-term trouble

The first mistake is poor detailing at the shower and threshold. According to Australian Standard AS 3740, waterproofing must extend 1800mm up vertical angles within the shower and include a water stop at the doorway. Failure to comply with these specific dimensions is a common defect found in failed renovations, as set out in this summary of bathroom water and renovation regulations by state.

A few other mistakes show up regularly in residential work:

  • Relying on tiles as the barrier: Tiles shed surface water, but they are not the waterproof system.
  • Skipping surface preparation: Membranes don't perform well over dusty, unstable or damaged substrates.
  • Underapplying the membrane: A thin coat can look finished and still fail in service.
  • Rushing cure times: If layers are covered too early, the system may never perform as intended.
  • Poor drain detailing: Water heads to the waste. If the connection is weak, that's where problems often start.

Why DIY is riskier than it looks

A lot of homeowners are handy enough to demo a vanity or paint a wall. Waterproofing is different because the failure can stay hidden while affecting adjacent rooms and structural elements. In Victoria, DIY work in wet areas also creates a compliance problem if the installation doesn't meet the standard expected for insurance and future sale.

The issue isn't effort. It's accountability. If the bathroom leaks later, the cost isn't limited to replacing a few tiles. The room often has to be stripped back so the membrane and substrate can be assessed properly.

If a quote is cheap because testing, detailing or compliance paperwork have vanished from the scope, it isn't a bargain. It's a transfer of risk to the homeowner.

The mistakes that show up after handover

Some defects don't become obvious straight away. Watch for warning signs such as:

  • Persistent damp smell: Bathrooms shouldn't smell musty once they're dry.
  • Softness underfoot: Any spongy feel in the floor deserves investigation.
  • Swollen trims or adjoining walls: Water often escapes into nearby finishes first.
  • Loose or drummy tiles: Movement below can be a sign the build-up is compromised.

Modern bathrooms can be misleading. Minimalist finishes hide a lot. Frameless glass, large tiles and recessed details look sharp, but they leave little room for sloppy workmanship. The cleaner the design, the more disciplined the build needs to be.

Your Checklist for Hiring a Waterproofing Pro in Victoria

Choosing a contractor for bathroom renovations isn't just about who gives the fastest quote or the slickest gallery. In Victoria, waterproofing sits inside a compliance framework, and that affects who should manage the work, what documents should exist, and how you protect yourself if something goes wrong.

If the contract value crosses the legal threshold, the “cheap guy who says he can do it all” is not the smart option.

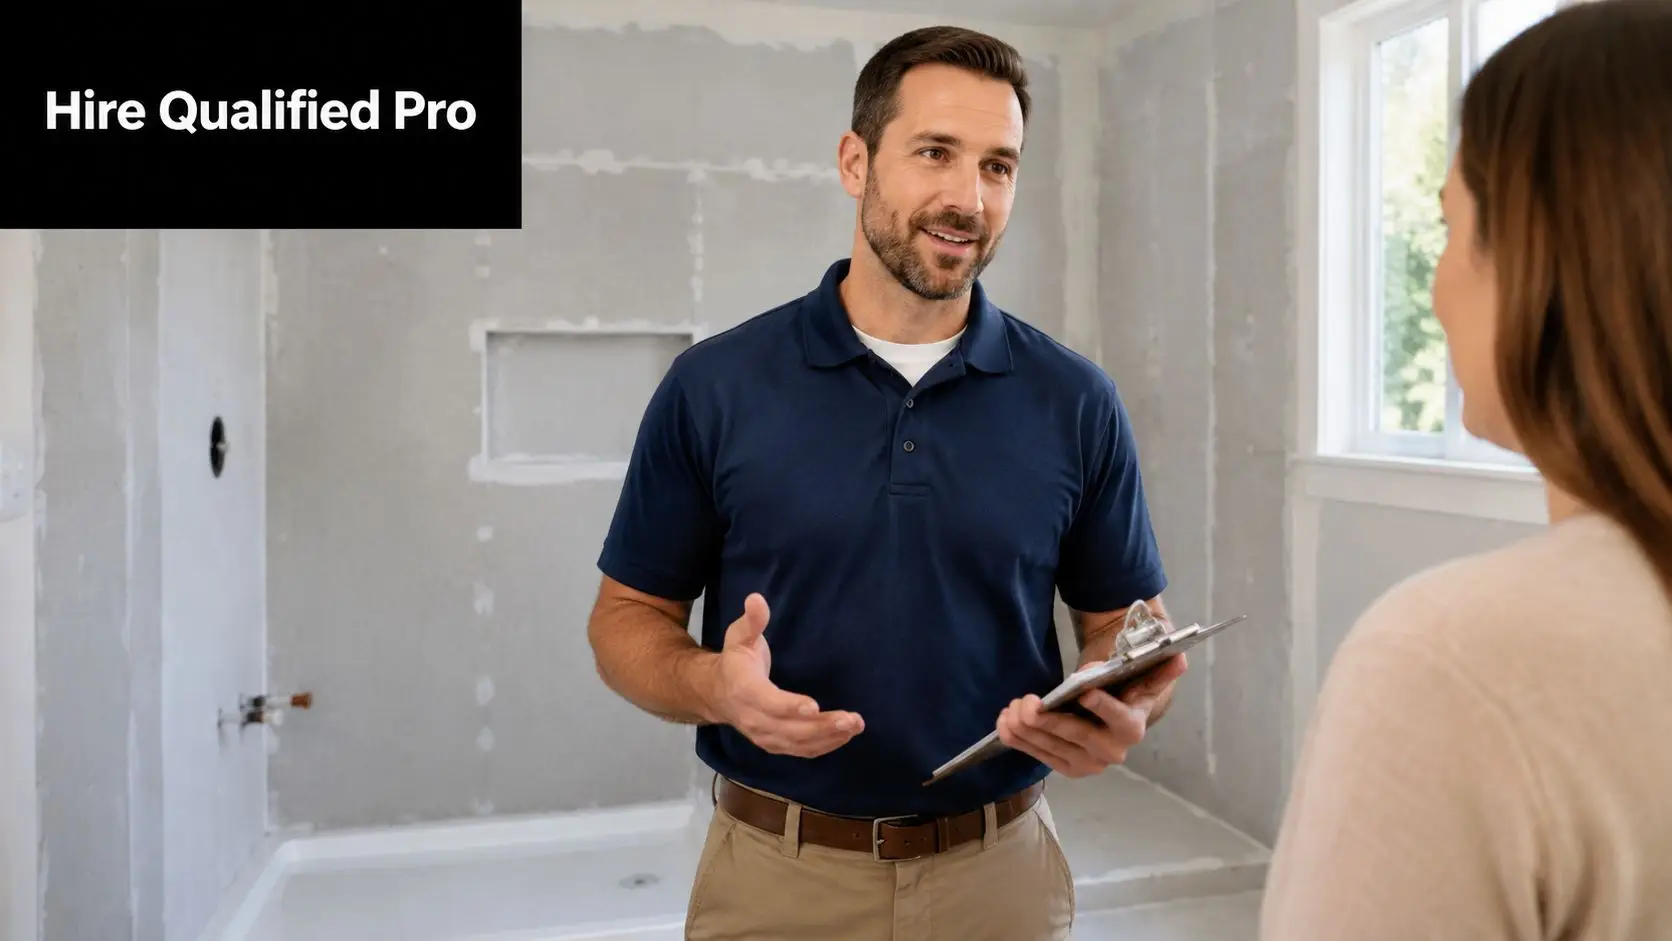
A professional contractor in a navy polo shirt consults with a homeowner inside a bathroom renovation site.

The legal baseline in Victoria

In Victoria, a building permit is required for bathroom renovations involving waterproofing. Furthermore, for any domestic building contract exceeding $10,000, the work must be performed by a registered builder to ensure the project is warrantied and insured, according to the Victorian Building Authority building permit information.

That's the part many generic guides miss. In local terms, homeowners in Highett and Bayside should not only ask whether someone can waterproof a room. They should ask whether the whole project is being managed in a way that stands up legally and practically.

If you want a clearer explanation of why this matters, this article on why using a registered builder matters for your bathroom renovation is worth reading.

Why a registered builder matters in the real world

This isn't just paperwork. A properly managed project is easier to insure, easier to document and easier to defend if a defect appears later. It also means the sequencing between demolition, plumbing, waterproofing, tiling and fit-off is more likely to be controlled rather than improvised.

For homeowners comparing quotes, the phrase registered builders unlimited holds significance. You want to know who is carrying responsibility for the renovation, not just who is turning up with tools.

A practical hiring checklist for Highett homeowners

Take this list into quote meetings and use it exactly as written if you like.

  • Ask who is contractually responsible: Is the bathroom being delivered under a properly structured domestic building contract where required?
  • Confirm registration status: If the project value triggers the threshold, is the work being carried out by a registered builder?
  • Ask about permits early: Will a building permit be required for your scope, and who is handling that process?
  • Request the waterproofing method in writing: What membrane system is proposed, where will it be applied, and how will junctions, drains and penetrations be treated?
  • Check who performs the waterproofing: Is it done by a suitably qualified trade with compliance documentation available where needed?
  • Ask about testing: How is the installation checked before tiling proceeds?
  • Clarify documentation: What certificates, warranties and records will you receive at handover?
  • Review the exclusions: Is anything left out that could affect compliance, such as substrate repairs, floor rectification or threshold detailing?
  • Compare scope, not just price: A cheaper quote often omits prep, testing, or proper supervision.

Questions that reveal whether a builder actually knows wet area work

Some answers tell you a lot very quickly.

Ask how they'll handle a hobless shower. Ask what happens at the doorway. Ask whether the floor structure changes the extent of waterproofing. Ask who signs off the wet area stage before tiles are laid. A capable contractor won't get irritated by those questions. They'll answer them clearly.

Good contractors don't dodge specifics. They explain the build-up, the sequencing and the compliance path in plain English.

Value beats a low number on paper

Homeowners often spend weeks comparing colours and almost no time comparing scope. That's backwards. The cheapest quote can become the most expensive bathroom in the house if it leads to leaks, insurance headaches or rework.

The better way to judge value is simple:

What to compare What a good answer sounds like
Compliance Clear explanation of permits, registration and responsibilities
Method Specific membrane, detailing and testing process
Documentation Written scope, contract clarity and handover records
Supervision One point of accountability across trades
Design practicality Advice that balances designer bathrooms with buildable details

The best bathrooms aren't just stylish. They're controlled from the start. That's what lets modern bathrooms stay functional long after the photos are taken.


If you're planning a bathroom in Highett or nearby and want the work managed properly from design through waterproofing and finish, SitePro Bathrooms can help you turn strong ideas into a compliant, durable result.