• siteprobathrooms

Bathroom Waterproofing Cost: A 2026 Homeowner Guide

A standard Victorian bathroom waterproofing job is usually $1,500 to $3,000, and Melbourne shower-area work often sits around $400 to $900 for a shower enclosure and wet area. If the membrane has failed and the bathroom needs to be stripped, re-waterproofed, and retiled, the same project can jump to $3,000 to $8,000+.

That's the part most homeowners only learn after the tiles come off. The line item on a bathroom renovation quote looks small until you realise you're not just paying for a coating, you're paying for a system that protects the whole room from hidden water damage.

What Most Homeowners Get Wrong About Waterproofing Quotes

A homeowner stands in a stripped bathroom, staring at three waterproofing quotes, and one of them is nearly double the others. The easy reaction is to assume the highest price is padding, or the lowest price is a bargain. In reality, the quotes are often pricing different scopes of work.

The figure itself can look simple. In Australia, bathroom waterproofing is commonly priced at about $40 per square metre, with broader guides placing a standard bathroom at roughly $500 to $1,000 and larger projects up to $4,000 (Yellow Pages pricing guide). That number helps, but it does not explain substrate repairs, corners, penetrations, inspection, or whether the job is part of a clean renovation or a remedial rebuild.

What changes the quote

A quote for bathroom renovations is rarely just membrane application. One builder might be pricing a neat new wet area with sound surfaces, while another is allowing for patching, priming, extra detailing, and sign-off. Those are not minor differences, they're the difference between a straightforward scope and a fragile one.

Practical rule: if two quotes look close only on the headline number, compare the inclusions line by line, not the price tag.

This is why waterproofing is a budget control item, not a commodity purchase. A cheap quote can be expensive later if it leaves out the work that prevents leaks in the first place. The rest of this guide gives you a way to read the quote the way a project manager does, not the way a brochure does.

Why Waterproofing Is a System, Not a Tin of Goo
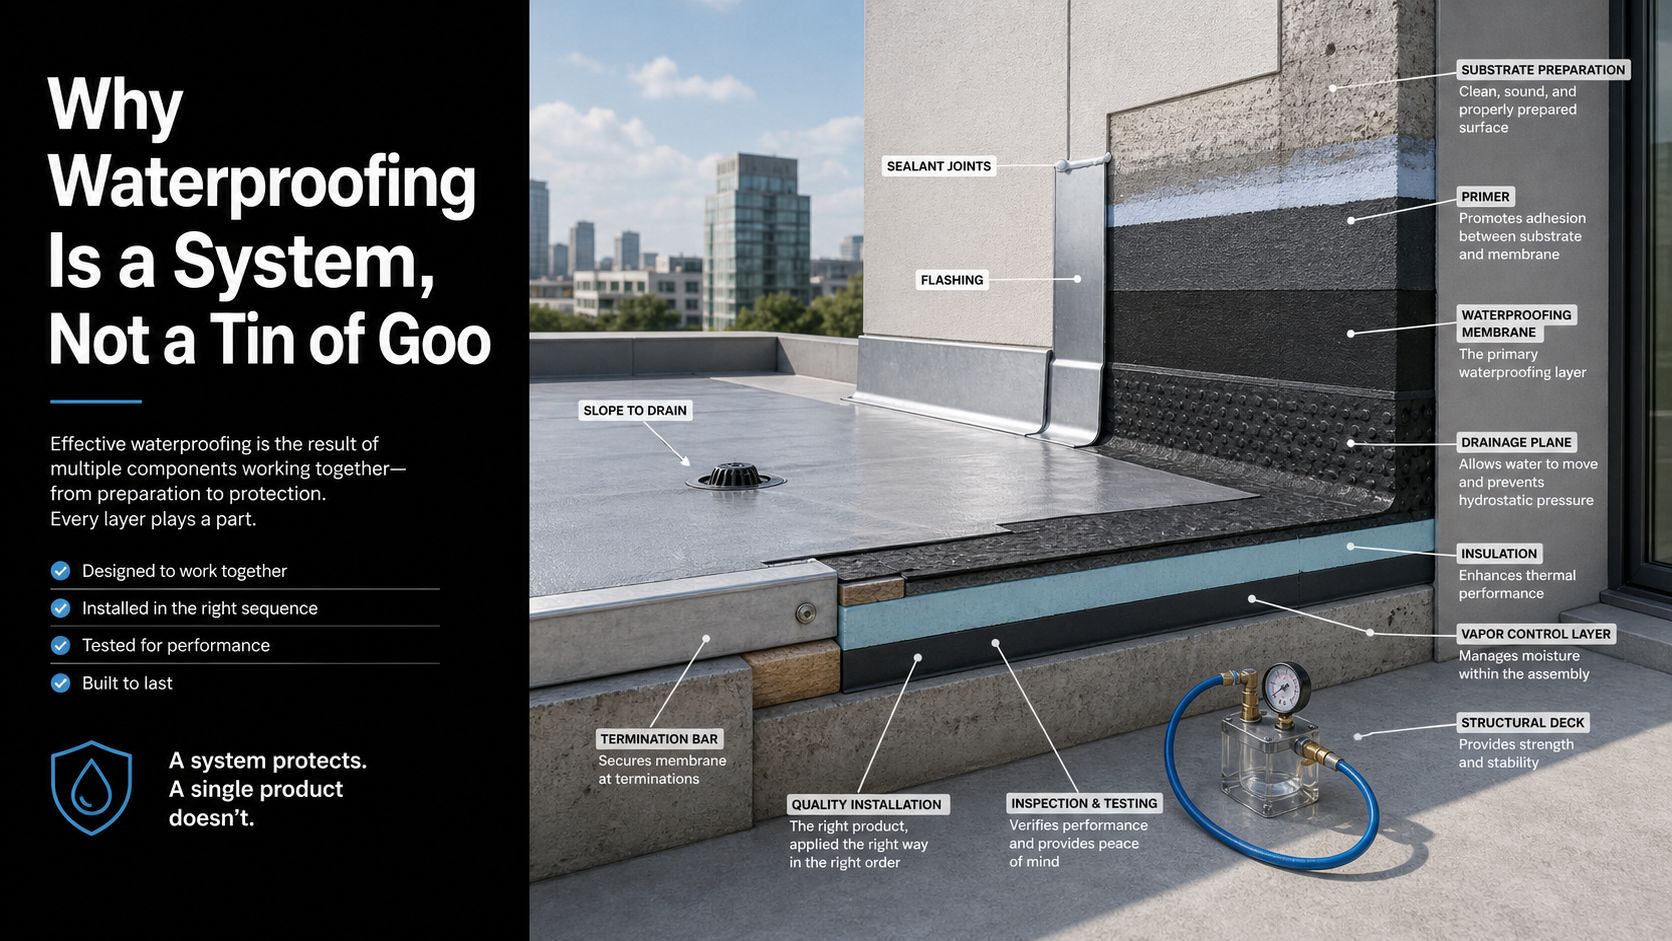
A detailed 3D cutaway diagram demonstrating the multiple layers of a professional roofing and deck waterproofing system.

Think of a shower recess like a raincoat worn over a deck. The membrane is only one layer. Beneath it sits the substrate, then the primer or prep work, then the membrane itself, then the detailing around corners, joints, drains, and pipes, and finally the tile finish on top.

If one of those layers is rushed, the whole system gets weaker. That's why a bathroom can look perfect for months and still fail where the water pressure is highest, usually at corners, junctions, and penetrations. Those are the points that take the punishment, not the middle of a flat wall.

What you can actually point at

In a typical shower, the vulnerable spots are easy to spot once you know what to look for. Corners need careful treatment. Junctions between wall and floor need continuity. Drain connections need exact fit-up. Every pipe penetration needs sealing that matches the membrane system.

The visual shortcut is simple. If water can sit there, move through there, or collect there, it needs more than a quick brush-on coat. That's why complex modern bathrooms and designer bathrooms cost more than plain square rooms, even when the area in square metres looks similar.

For homeowners comparing new bathroom ideas, this is the useful takeaway. A cleaner layout with fewer penetrations is usually easier to waterproof well than a heavily detailed shower with shelves, niches, and multiple transitions. The room design affects the job before a product even goes on the wall.

Water doesn't fail in the middle of a perfectly flat surface as often as it fails at the details.

Inside a Waterproofing Quote Materials Labour and Compliance

A proper quote usually breaks into three parts, even if the paper does not label them that way. The membrane product is only one slice of the total. The cost sits in the time needed to prepare the surface, apply the system correctly, and document the work.

Typical Australian Waterproofing Cost Split

Cost component Per m² range Per job range What drives the cost
Materials $15 to $30/m² varies by room size membrane product, primers, tapes, sealants, detailing parts
Labour $35 to $55/m² varies by room size prep, priming, multi-coat application, corners, junctions, penetrations
Compliance and inspection not usually priced per m² $150 to $300 certification, inspection, paperwork, sign-off

That split reflects how the work gets done on site. Labour dominates because the trade spends time preparing the substrate, masking transitions, building up coats, and detailing the awkward parts homeowners never see once tiling starts. A flat room is one thing, a room with niches, multiple pipe points, or a tired substrate is another.

The labour-heavy reality matters for registered builders unlimited and for homeowners hiring a tiler or waterproofing trade under renovation supervision. A quote that looks high on product cost may still be fair if it includes the work that prevents callbacks. A quote that looks cheap can be hiding the expensive part, which is usually the labour that should have been priced in from the start.

Project manager's note: the membrane is the visible line item, but the labour is where quality usually gets won or lost.

For broader bathroom planning, the waterproofing allowance often sits inside the bigger tiling and fit-off budget. If you are comparing it against your overall tile scope, it helps to read it alongside bathroom tiling cost and a full bathroom renovation cost breakdown.

Membrane Types and When Each One Is Used

The right membrane depends on the room, not the brochure. A complex shower with niches and curved transitions asks a different question than a simple family bathroom with a straight floor run. The product choice follows the geometry.

Matching the membrane to the job

A sheet membrane suits large, open areas where consistency matters and the layout is relatively clean. It gives a controlled layer under the tile and works well when the installer can keep seams disciplined. A liquid polyurethane system is often easier to work into awkward corners, niches, and penetrations because it conforms to irregular shapes.

An acrylic system usually sits in the lower-complexity, more budget-conscious end of the market. It can suit standard bathrooms where the design is simple and the substrate is sound. A cementitious system is often chosen where build-up is needed and the trade wants a durable coating method on appropriate surfaces.

The practical rule is straightforward. If the bathroom has lots of detailing, you want a system that handles transitions cleanly. If it's a broad, simpler wet area, the trade can often work faster and more predictably with a more uniform approach. The wrong choice isn't always a failure on day one, but it can make the job harder to finish neatly.

For designer bathrooms, the membrane choice often follows the room's visual ambition. Curbless transitions, custom niches, and multiple shower features need more care because every extra interruption is another place for the waterproofing to be detailed properly. The cheap answer is rarely the elegant answer.

Victorian Rules Warranties and What Your Tradie Must Hand Over

In Victoria, waterproofing is a compliance step, not an optional extra. The standard homeowners should expect is AS 3740, and a renovation quote should state who is responsible for meeting it and documenting it. If the waterproofing sits inside a larger renovation, it needs to be part of the build plan with a clear paper trail, not a separate line item with no follow-through.

The paperwork matters because tiling should not begin until the waterproofing stage has been inspected and signed off. For a Victorian bathroom, that usually means asking who is inspecting the work, who is issuing the certificate, and whether the quote includes the full wet-area detail, penetrations, and junctions before any finish goes down. If the quote does not mention certification, ask why.

What to expect in the handover folder

  • Waterproofing certificate: proof that the wet-area work was completed and inspected before tiling.
  • Product and installer warranty details: the product warranty and workmanship warranty are separate.
  • Scope notes: what was waterproofed, what was excluded, and whether the substrate was repaired first.
  • Photo record: useful for future maintenance, insurance discussions, and resale questions.

The standards themselves matter as much as the price. Review bathroom waterproofing standards in Australia if you want to check whether a quote sounds like a proper wet-area build or just a coating line item.

For homeowners comparing Victoria quotes, the pricing picture still gives a useful guide. A shower recess can sit around AUD $800 to $1,500, a full bathroom floor and shower around AUD $1,500 to $3,000, and larger or more complex bathrooms around AUD $3,000 to $5,000+. That spread makes sense once you factor in compliance, detailing, and the extra labour that comes with a proper renovation scope.

Three Realistic Quote Scenarios for a Victorian Bathroom

A quote only makes sense once you know which job it covers. A shower recess, a full bathroom waterproofing package, and a remedial strip-out all sit in different price buckets, even though each one gets called “waterproofing”.
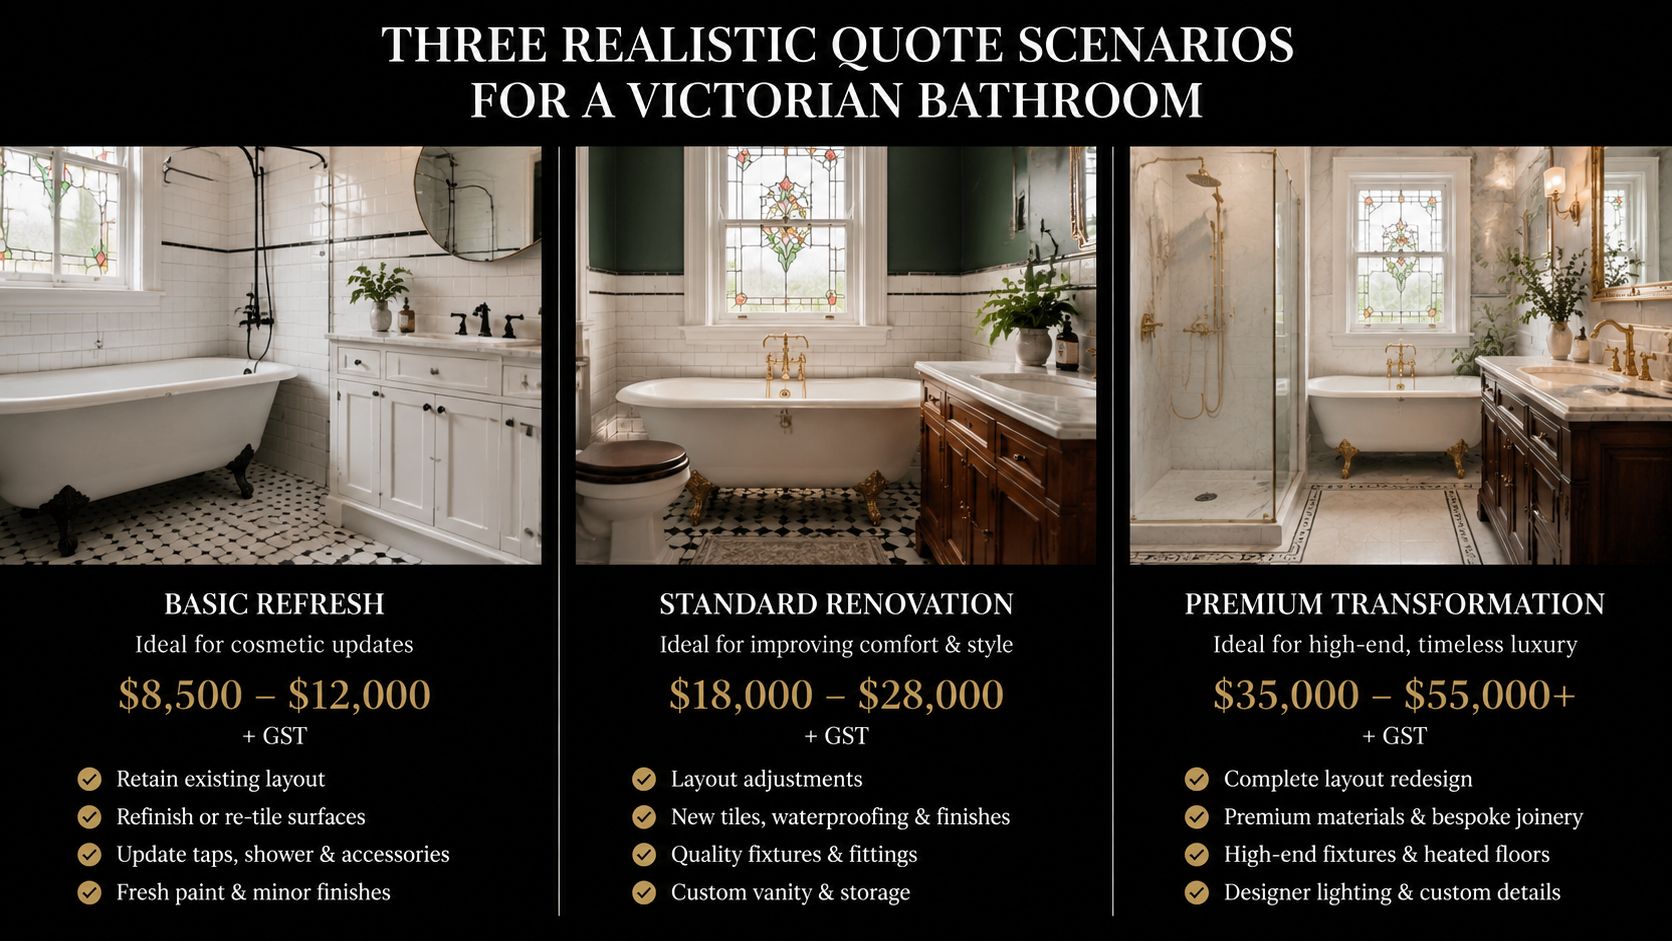
A graphic showing three different renovation pricing levels for a Victorian style bathroom, including budget, mid-range, and luxury options.

Scenario one, shower-only

A Melbourne shower enclosure and wet area can come in at $400 to $900 (Melbourne waterproofing guide). That is usually the cleanest scope because the work is confined to a smaller area with fewer junctions and fewer trade interfaces. It suits a straight, uncomplicated shower where the substrate is already in decent shape and the detailing does not need a lot of corrective work.

Scenario two, full bathroom in a renovation

A full bathroom waterproofing package in Victoria is commonly $1,500 to $3,000. That range reflects the amount of detail in the room, not just the size of the floor. Wall junctions, floor area, penetrations, and the fit-out sequence all start to matter here, which is why a proper quote for a full-room job needs to sit alongside broader planning for full bathroom renovation costs.

This is the bucket most homeowners land in when they are renovating the whole room. It covers the actual wet area work, but it also has to fit around the rest of the bathroom build, so timing and coordination push the quote up or down.

Scenario three, remedial strip-out

When a membrane has failed, the bathroom has to be stripped, re-waterproofed, and retiled, and the cost can run $3,000 to $8,000+ in Melbourne. That lift in price is not about a fancier membrane. It comes from the labour, waste removal, substrate repairs, and finish restoration involved in taking a damaged room back to bare structure and building it again.

A clean renovation quote and a remedial quote are not competing versions of the same job. One prices a planned wet-area build, the other prices a repair job that starts after the room has already failed.

If you are comparing Victorian quotes, these three buckets are the ones that matter. The useful question is not what waterproofing costs in the abstract, it is which of these jobs the quote covers.

Why the Cheapest Quote Is Often the Most Expensive

The cheapest quote is often cheap because it excludes the hard parts. Substrate repair, detailed corner treatment, pipe penetrations, certification, and re-tiling after a failed membrane are the items that make a real difference, and they're also the items a cut-price quote is most likely to trim.

That's how a $1,500 number can turn into a $5,000 surprise in practice. The homeowner accepts the low quote, then discovers the bathroom needs prep work before the membrane can go on, or that the job doesn't include the paperwork required before tiling. In remedial work, the hidden cost is usually diagnosis and restoration, not the membrane itself.

Questions worth asking before you sign

  • Is substrate preparation included? If not, the quote may be incomplete.
  • Which membrane system is named? A vague “waterproofing” line item tells you very little.
  • Who handles certification? If no one can answer that, the scope is too loose.
  • What happens if a leak appears inside the warranty period? You want the answer in writing.

A quote that is clear on those points is easier to trust than one that just looks low. For modern bathrooms and designer bathrooms, the cheapest path can become the most expensive when the room has multiple details and the installer has budgeted for only the simplest version of the job.

For practical planning, the right question isn't “who's cheapest?”, it's “who has allowed for the full wet-area scope without hiding the risk in variations?”

Your Next Steps and How to Get a Tailored Quote

Measure the wet area, photograph every corner and penetration, and gather any existing paperwork before you ask for quotes. Write down whether you want the bathroom to feel family-friendly, investor-grade, modern, or designer so the scope matches the finish you want.
Screenshot from https://siteprobathrooms.com.au

If you're in Victoria and want a coordinated renovation quote, SitePro Bathrooms handles concept development, 3D design, construction, and handover as one scope. Bring the room dimensions, photos, and your finish priorities, then ask for a waterproofing allowance that clearly states what's included and what isn't.
  • siteprobathrooms

Waterproofing in Bathroom: Highett Guide 2026

You're probably at the stage where the tiles are picked, the tapware is saved in a mood board, and the ideas are starting to feel real. Maybe you've been collecting new bathroom ideas for months. Maybe you want one of those clean, modern bathrooms that look simple on the surface but feel expensive and calm to live with.

Then waterproofing comes up, and it sounds like the least exciting part of the whole job.

That's exactly why it gets underestimated. In bathroom renovations, the finishes get the attention, but the waterproofing is what decides whether the room still performs properly years later. A bathroom can look flawless on handover day and still be failing behind the tiles if this stage isn't done properly.

In Highett and across Bayside, I've found most homeowners don't need more jargon. They need a straight explanation of what matters under Victorian rules, what corners can't be cut, and how to tell whether the person quoting the work knows what they're doing.

Why Waterproofing Is the Foundation of Your Bathroom Renovation

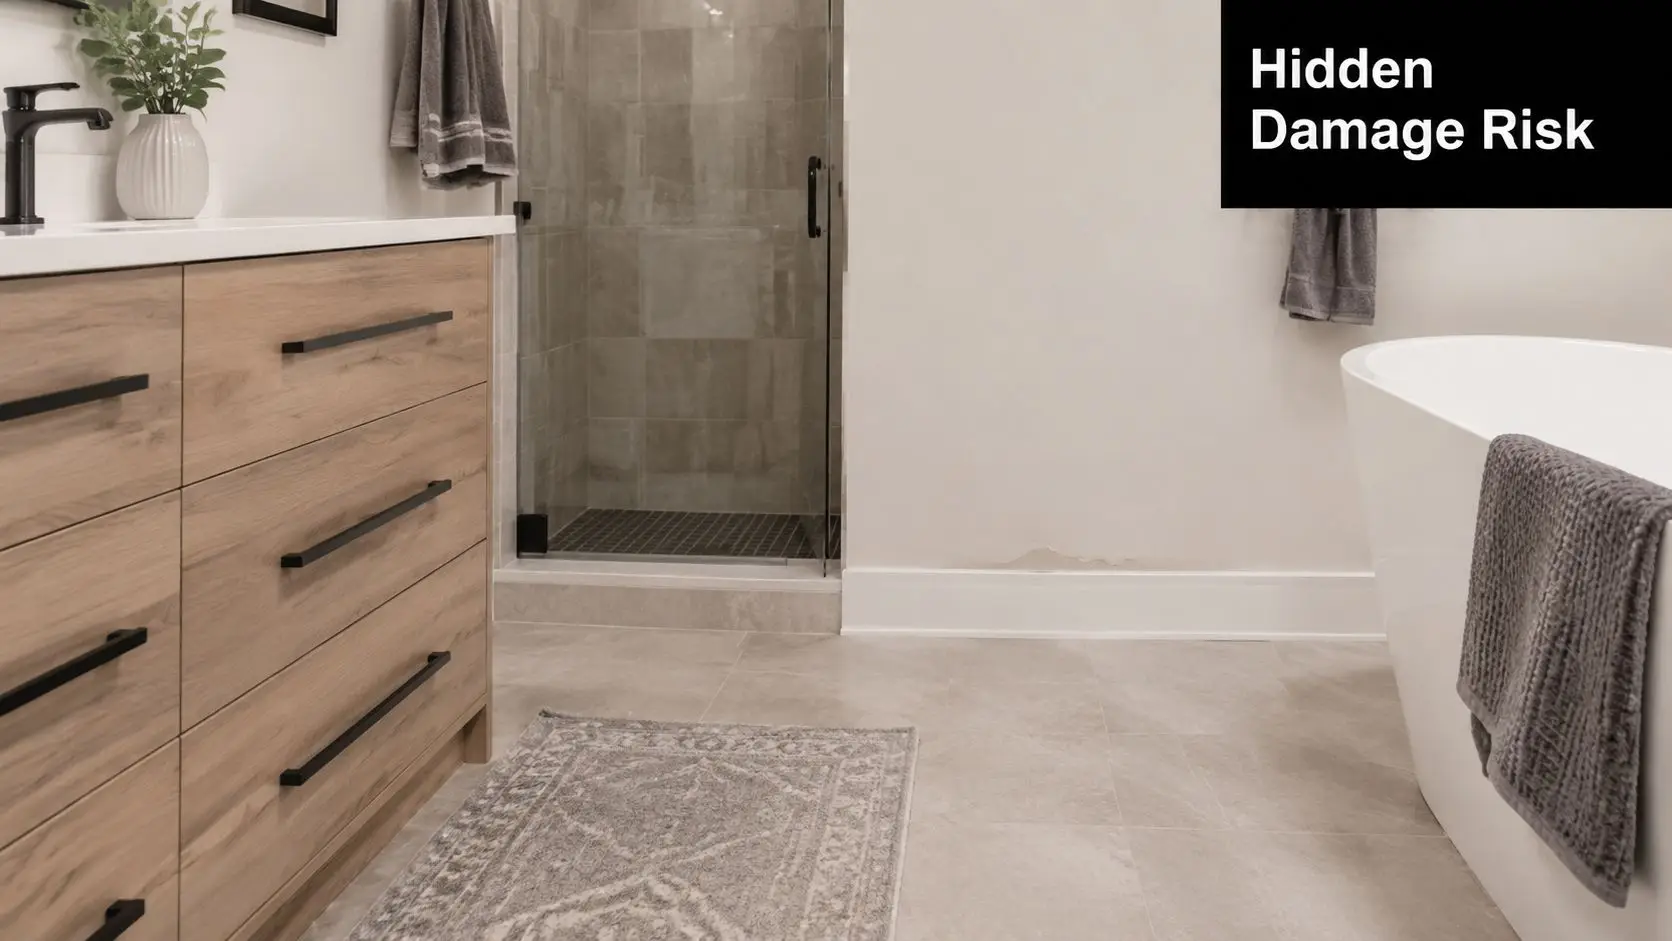
A bathroom leak rarely announces itself early. It usually starts subtly. Grout darkens and stays damp. A skirting board swells in the next room. Paint bubbles. The floor feels slightly soft underfoot. By the time the damage is obvious, water has often moved well beyond the shower.

That's why waterproofing in bathroom work isn't a finishing touch. It's the barrier that protects the structure, the linings, the subfloor and the rooms around it. The easiest way to explain it is this. Waterproofing is the raincoat for your house, but it only works if there are no gaps, weak spots or missed seams.

A modern bathroom showing potential moisture damage on the wall above the baseboard near the soaking tub.

Tiles are not the waterproof layer. Grout is not the waterproof layer. Silicone alone is definitely not the waterproof layer. The actual protection sits underneath the surface, and it has to be continuous from floor to wall, around penetrations, and into the waste connection.

What failure really looks like

When waterproofing fails, the problem isn't just cosmetic. The Victorian Building Authority notes that compliant waterproofing helps prevent mould, structural decay and tile delamination. Those are the three outcomes homeowners notice most often when a bathroom has been dressed up well but built badly.

The risk is not small. Bathroom waterproofing failures are a leading cause of renovation defects in Australia, with over 60% of moisture-related building complaints in Victorian residential projects linked to non-compliant waterproofing, often resulting in remedial costs of $5,000–$15,000, according to the Victorian Building Authority waterproofing guidance.

Practical rule: If someone talks more about tile patterns than membrane continuity, they're focused on the wrong layer.

Why homeowners get caught out

The biggest trap is assuming a beautiful finish means a sound build. It doesn't. Some of the nicest designer bathrooms fail because the hidden work was rushed. A bathroom can have premium fixtures, precise tile lines and a polished vanity, but if the substrate wasn't prepared properly or the membrane wasn't applied correctly, water will find the weak point.

This matters even more in homes where the bathroom sits over timber framing or above another room. In those situations, leaks don't stay local. They travel into joists, ceiling voids and adjacent finishes.

A sound renovation starts with the invisible work. The surface layer is what you see. The waterproofing is what protects your investment.

The non-negotiables at a glance

  • Continuous barrier: The membrane has to work as one sealed system, not as a few painted patches.
  • Correct detailing: Corners, wall-floor junctions, pipe penetrations and drains are where failures usually start.
  • Compatible build-up: The substrate, primer, membrane, screed and tiles all need to work together.
  • Patience: Rushed sequencing ruins good materials. If coats don't cure properly, the system is compromised before tiling even begins.

That's the difference between a bathroom that only looks good and one that lasts.

Understanding Victorian Waterproofing Standards and Regulations

Victorian waterproofing rules aren't optional nice-to-haves. They're the baseline for compliant work. If you're renovating in Highett, these rules affect what happens behind every tile in the wet area, especially in showers and on bathroom floors built over timber.

The main standard homeowners should know is AS 3740:2021, which works with the National Construction Code. You don't need to memorise the legal language. You do need to know what it means in practical terms.

The shower walls and floor rules that matter most

In Victoria, AS 3740:2021 mandates shower walls be waterproofed to 1,800 mm high. In homes with timber floors, the entire bathroom floor must be waterproofed to prevent water ingress into structural joists, as outlined in this guide to bathroom waterproofing rules across Australia.

For a homeowner, that translates into a few clear realities:

  • Shower walls need full protection high up the wall: This isn't just a dab around the corners. The waterproofing has to cover the shower wall area to the required height.
  • Timber floors raise the stakes: A lot of older and renovated Melbourne homes include timber-framed sections. In those bathrooms, isolating only the shower recess isn't enough.
  • The wet area design affects the extent: Open showers, hobless showers and compact layouts need careful detailing so water can't migrate into the dry side.

If you're also reworking a separate toilet as part of the job, this practical guide on renovating a toilet helps put the wet area planning into context.

Floor falls are about more than drainage

Homeowners often hear ratios like 1:80 and switch off. Don't. Floor fall is one of the easiest concepts to understand once it's explained properly.

Think of the floor like a very shallow funnel. It should be sloped enough that water naturally heads to the drain, but not so steep that the room feels awkward underfoot or creates lipping issues at edges. Under the NCC 2022 settings referenced in Victorian guidance, shower floors need falls that direct water efficiently to the waste.

A compliant bathroom doesn't rely on hope and a floor mat. It relies on water being directed where it's supposed to go.

Where generic advice falls short in Bayside homes

National articles often talk broadly about wet areas and leave it there. That's not enough for local homes. In Highett and surrounding suburbs, you'll see a mix of older brick homes, weatherboards, upstairs additions and reconfigured family bathrooms. Those conditions affect substrate movement, floor structure and how the waterproofing system should be detailed.

A few practical examples matter:

  • Upper-level bathrooms: Any leak can affect ceilings and rooms below.
  • Timber-framed construction: Movement needs to be managed properly at junctions.
  • Frameless shower designs: Clean lines look great, but they leave less room for sloppy drainage planning.

What these standards mean for your decisions

The standards don't just guide the waterproofer. They influence layout, shower type, waste placement, floor build-up and even the sequencing of trades. If someone is discussing modern bathrooms without talking about drainage, wall extents and floor construction, they're only discussing half the room.

Good waterproofing starts in planning, not after demolition.

Choosing the Right Waterproofing Membrane for Your Project

Most homeowners only hear one sentence about membranes: “We'll waterproof it before tiling.” That doesn't tell you much. In practice, there are two broad approaches commonly discussed on residential projects. Liquid-applied membranes and sheet membranes.

Each can work when it's used correctly. The wrong choice usually isn't about the product category itself. It's about whether it suits the substrate, layout and detailing of the bathroom.

The key difference in plain language

A liquid membrane is applied on site, usually in coats, and cures into a continuous flexible layer. It suits bathrooms with lots of corners, penetrations and custom detailing because the installer can shape it to the room.

A sheet membrane arrives as a formed material and is installed in sections with sealed joins. It can provide a controlled, consistent layer, but the quality of the laps, corners and terminations becomes critical.

On site, what matters most isn't marketing language. It's whether the membrane can be applied continuously and detailed properly around the room you actually have.

Comparison of Waterproofing Membrane Types

Feature Liquid Membrane (Class III) Sheet Membrane (e.g., PVC, Butynol)
Application method Rolled, brushed or otherwise applied in coats over the prepared substrate Laid in sheets with sealed joints and formed details
Best fit Irregular bathroom layouts, multiple penetrations, common residential bathroom renovations Areas where sheet detailing is preferred and the installer can control laps and junctions carefully
Flexibility on site High. Easier to work around corners, niches and mixed geometry Lower in tight detailing unless installation is very precise
Consistency Depends heavily on correct coverage and coat thickness Depends heavily on join quality and proper sealing at overlaps
Common risk Too thin in places, rushed curing, weak detailing at drains and corners Poorly sealed joins, awkward transitions, installation errors at penetrations
Typical homeowner question “Has it been applied to the required thickness?” “How are the seams, corners and drain connection being sealed?”

The thickness issue homeowners should ask about

One of the most overlooked details in waterproofing in bathroom projects is membrane thickness. If the coating is too thin, it may look complete but still perform poorly.

A verified industry data point worth knowing is this. A critical detail often missed is the mandatory 0.5mm dry film thickness for waterproofing membranes. According to ABIS data, failure to achieve this thickness is a factor in 32% of waterproofing inspection failures in Australia, as noted by ABIS waterproofing guidance.

That matters because homeowners usually can't judge thickness by eye. A membrane can appear fully coated and still be underdone.

What works in most residential bathrooms

For many bathroom renovations, liquid-applied flexible systems are popular because they adapt well to typical residential conditions. They're practical around corners, around pipe penetrations, and over the mixed surfaces often found in renovation work.

But “popular” doesn't mean foolproof. Liquid systems only work when the installer respects curing times, coverage rates and reinforcement details where required. Sheet systems can also perform very well, especially where the installer has planned the room around them and the transitions are straightforward.

The better question isn't “Which membrane is best?” It's this:

  • What substrate is being waterproofed
  • How are corners and penetrations being detailed
  • How will the drain connection be sealed
  • How will the installer verify the finished membrane is compliant

That conversation tells you far more than the product label.

A Look Inside the Professional Waterproofing Application Process

Professional waterproofing should look methodical, not hurried. If the room seems to jump from demolition to tiling too quickly, something important has probably been skipped. A proper installation follows a sequence, and every stage supports the one after it.

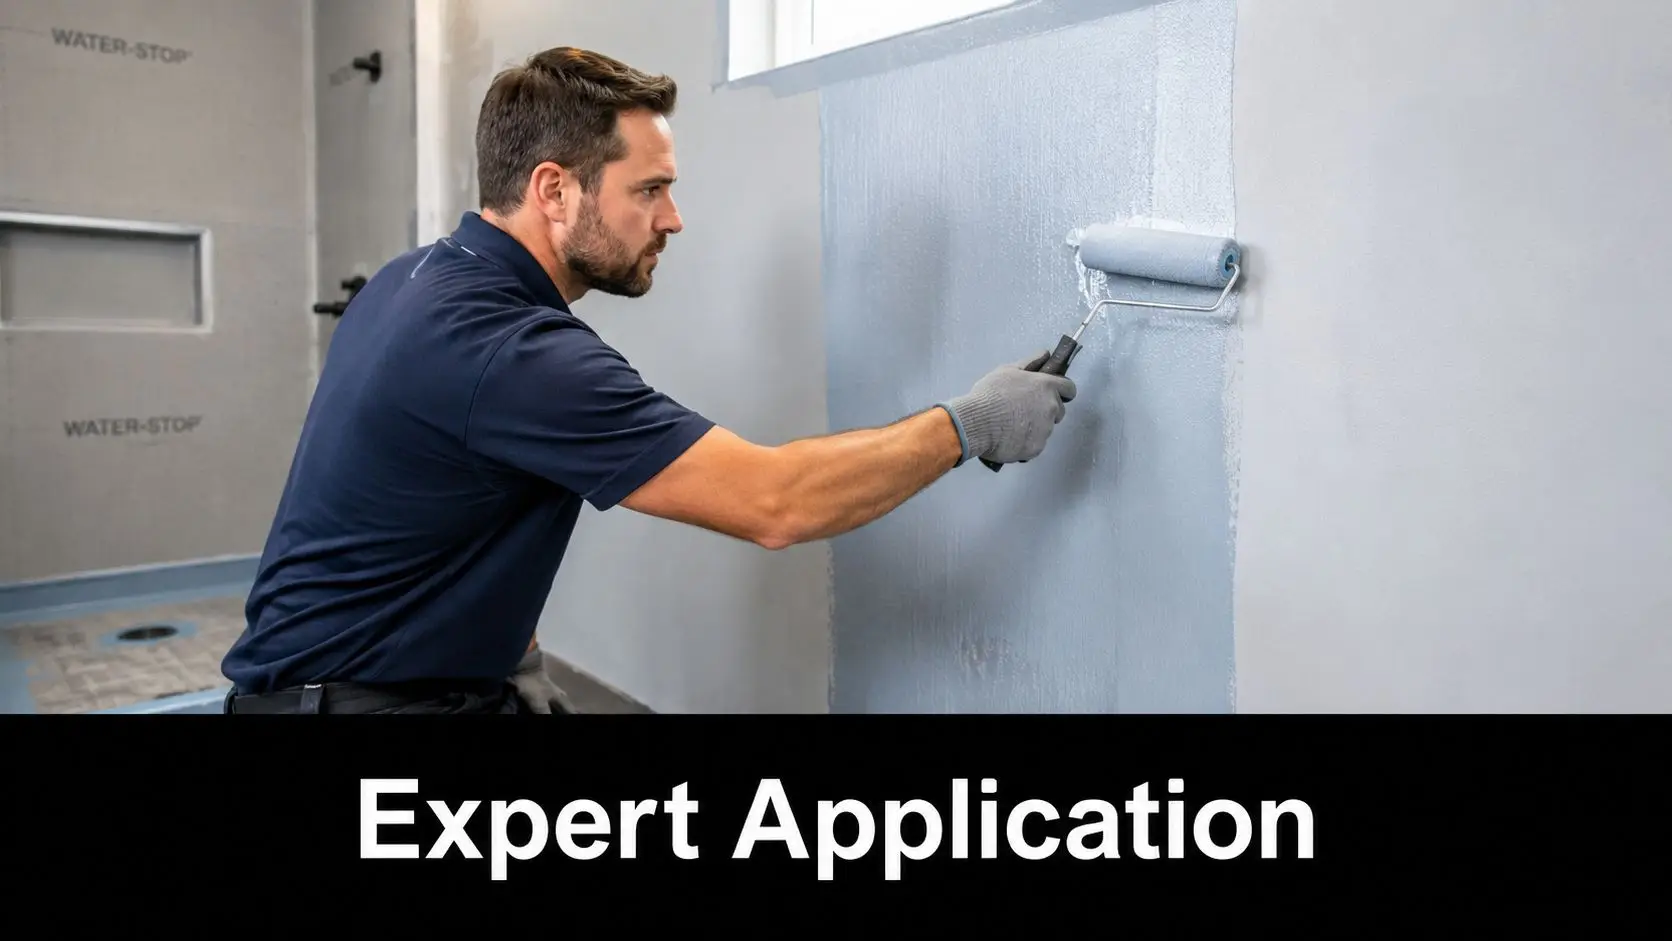
A professional tradesman applying waterproof sealant to a bathroom wall using a paint roller.

Step one starts before any membrane goes down

The substrate has to be clean, sound and ready to receive the system. Dust, loose material, oily residue, crumbling patches and movement cracks all need attention first. If the base is poor, the membrane is only sticking to a problem.

This is also where falls and shower geometry need to make sense. A membrane can't compensate for a badly formed floor. If the drainage plane is wrong underneath, the room may still hold water even with a compliant coating on top.

For homeowners planning tiling finishes, it helps to understand how the waterproof layer and tile layer need to work together. This overview of bathroom tiling in Melbourne is useful because tile appearance and waterproof performance are tied to the same underlying preparation.

The junctions are where discipline shows

Corners and changes in plane matter because buildings move. Walls and floors expand, contract and settle at slightly different rates. That's why proper detailing at junctions isn't fussy overkill. It's what stops cracking later.

Mandatory installation practices under AS 3740 include incorporating bond breakers at all wall/floor junctions to accommodate structural movement and conducting a 24-hour water test upon completion to certify the installation is leak-proof before tiling begins, according to this interpretation guide for internal wet area waterproofing.

A good installer pays close attention to:

  • Wall-floor joints: These need bond breakers so the membrane can handle movement.
  • Pipe penetrations: Every penetration is a leak risk if it's not sealed properly.
  • Drain termination: The membrane has to integrate cleanly with the waste, not just stop nearby.
  • Doorway control points: Water shouldn't be able to migrate out of the wet zone.

How the membrane is built up

Most liquid systems are not one thick slap-on coat. They're built up progressively. Primer may be used where required. Reinforcement and detailing happen at critical areas. Coats are then applied in sequence to achieve the correct cured layer.

That's where rushed work often exposes itself. If one coat hasn't cured properly before the next stage, the system can weaken or trap issues below the surface.

Wet area waterproofing is slow work done on purpose. Fast work is usually rework in disguise.

Testing before tiling is the quality checkpoint

The most reassuring stage for a homeowner is the one nobody sees in finished photos. Testing. Before tiles go on, the membrane should be treated as its own completed system and checked accordingly.

A proper water test tells you whether the room is behaving like a contained wet area, not just looking like one. It's far cheaper to identify a failure before tiling than after the bathroom is complete, grouted, painted and handed over.

What a professional sequence usually looks like

  1. Prepare the substrate: Clean, repair, level and confirm the room is ready.
  2. Prime where needed: Match the substrate requirements of the system being used.
  3. Detail the movement points: Install bond breakers and treat critical junctions.
  4. Apply the membrane system: Build the waterproof layer to the required performance.
  5. Seal to drains and edges: Finish the places where water usually finds a path.
  6. Allow proper curing and test: Confirm integrity before the tiler starts.

If any of those stages sound vague in a quote conversation, ask more questions.

Common Waterproofing Mistakes That Can Derail Your Renovation

Most failed bathrooms don't fail because the homeowner picked the wrong tapware. They fail because someone cut a corner in the hidden work. The frustrating part is that many of these mistakes are avoidable, and they often happen when a contractor treats waterproofing like a quick prep job before the “real” bathroom work starts.

That mindset is expensive.

The common shortcuts that create long-term trouble

The first mistake is poor detailing at the shower and threshold. According to Australian Standard AS 3740, waterproofing must extend 1800mm up vertical angles within the shower and include a water stop at the doorway. Failure to comply with these specific dimensions is a common defect found in failed renovations, as set out in this summary of bathroom water and renovation regulations by state.

A few other mistakes show up regularly in residential work:

  • Relying on tiles as the barrier: Tiles shed surface water, but they are not the waterproof system.
  • Skipping surface preparation: Membranes don't perform well over dusty, unstable or damaged substrates.
  • Underapplying the membrane: A thin coat can look finished and still fail in service.
  • Rushing cure times: If layers are covered too early, the system may never perform as intended.
  • Poor drain detailing: Water heads to the waste. If the connection is weak, that's where problems often start.

Why DIY is riskier than it looks

A lot of homeowners are handy enough to demo a vanity or paint a wall. Waterproofing is different because the failure can stay hidden while affecting adjacent rooms and structural elements. In Victoria, DIY work in wet areas also creates a compliance problem if the installation doesn't meet the standard expected for insurance and future sale.

The issue isn't effort. It's accountability. If the bathroom leaks later, the cost isn't limited to replacing a few tiles. The room often has to be stripped back so the membrane and substrate can be assessed properly.

If a quote is cheap because testing, detailing or compliance paperwork have vanished from the scope, it isn't a bargain. It's a transfer of risk to the homeowner.

The mistakes that show up after handover

Some defects don't become obvious straight away. Watch for warning signs such as:

  • Persistent damp smell: Bathrooms shouldn't smell musty once they're dry.
  • Softness underfoot: Any spongy feel in the floor deserves investigation.
  • Swollen trims or adjoining walls: Water often escapes into nearby finishes first.
  • Loose or drummy tiles: Movement below can be a sign the build-up is compromised.

Modern bathrooms can be misleading. Minimalist finishes hide a lot. Frameless glass, large tiles and recessed details look sharp, but they leave little room for sloppy workmanship. The cleaner the design, the more disciplined the build needs to be.

Your Checklist for Hiring a Waterproofing Pro in Victoria

Choosing a contractor for bathroom renovations isn't just about who gives the fastest quote or the slickest gallery. In Victoria, waterproofing sits inside a compliance framework, and that affects who should manage the work, what documents should exist, and how you protect yourself if something goes wrong.

If the contract value crosses the legal threshold, the “cheap guy who says he can do it all” is not the smart option.

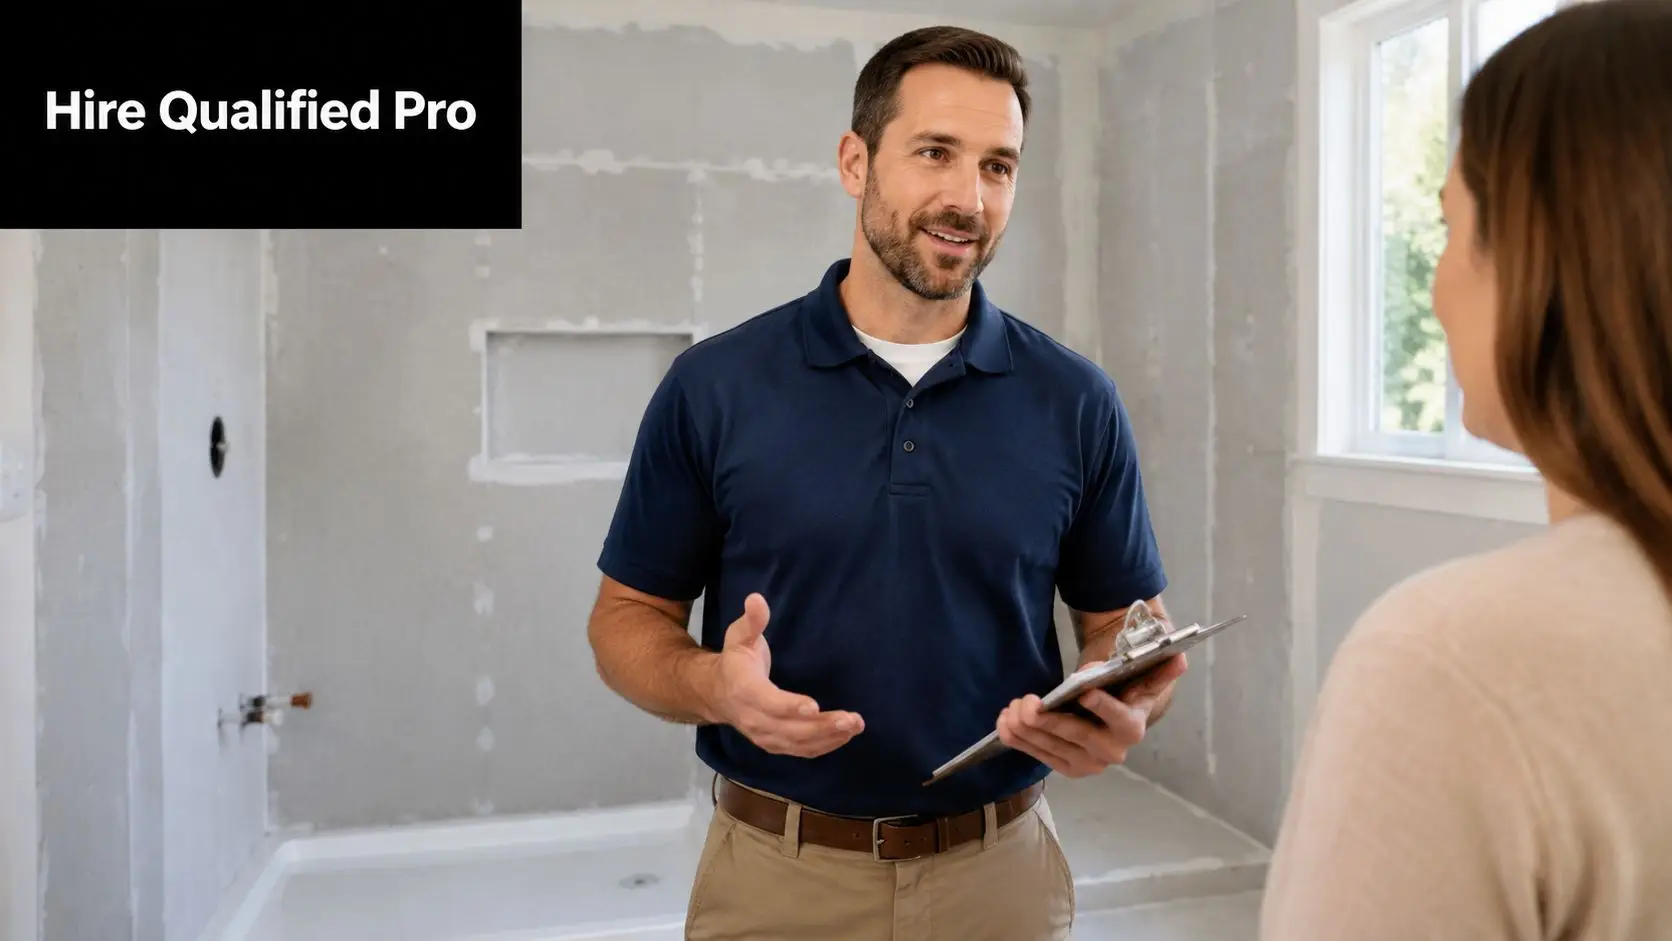
A professional contractor in a navy polo shirt consults with a homeowner inside a bathroom renovation site.

The legal baseline in Victoria

In Victoria, a building permit is required for bathroom renovations involving waterproofing. Furthermore, for any domestic building contract exceeding $10,000, the work must be performed by a registered builder to ensure the project is warrantied and insured, according to the Victorian Building Authority building permit information.

That's the part many generic guides miss. In local terms, homeowners in Highett and Bayside should not only ask whether someone can waterproof a room. They should ask whether the whole project is being managed in a way that stands up legally and practically.

If you want a clearer explanation of why this matters, this article on why using a registered builder matters for your bathroom renovation is worth reading.

Why a registered builder matters in the real world

This isn't just paperwork. A properly managed project is easier to insure, easier to document and easier to defend if a defect appears later. It also means the sequencing between demolition, plumbing, waterproofing, tiling and fit-off is more likely to be controlled rather than improvised.

For homeowners comparing quotes, the phrase registered builders unlimited holds significance. You want to know who is carrying responsibility for the renovation, not just who is turning up with tools.

A practical hiring checklist for Highett homeowners

Take this list into quote meetings and use it exactly as written if you like.

  • Ask who is contractually responsible: Is the bathroom being delivered under a properly structured domestic building contract where required?
  • Confirm registration status: If the project value triggers the threshold, is the work being carried out by a registered builder?
  • Ask about permits early: Will a building permit be required for your scope, and who is handling that process?
  • Request the waterproofing method in writing: What membrane system is proposed, where will it be applied, and how will junctions, drains and penetrations be treated?
  • Check who performs the waterproofing: Is it done by a suitably qualified trade with compliance documentation available where needed?
  • Ask about testing: How is the installation checked before tiling proceeds?
  • Clarify documentation: What certificates, warranties and records will you receive at handover?
  • Review the exclusions: Is anything left out that could affect compliance, such as substrate repairs, floor rectification or threshold detailing?
  • Compare scope, not just price: A cheaper quote often omits prep, testing, or proper supervision.

Questions that reveal whether a builder actually knows wet area work

Some answers tell you a lot very quickly.

Ask how they'll handle a hobless shower. Ask what happens at the doorway. Ask whether the floor structure changes the extent of waterproofing. Ask who signs off the wet area stage before tiles are laid. A capable contractor won't get irritated by those questions. They'll answer them clearly.

Good contractors don't dodge specifics. They explain the build-up, the sequencing and the compliance path in plain English.

Value beats a low number on paper

Homeowners often spend weeks comparing colours and almost no time comparing scope. That's backwards. The cheapest quote can become the most expensive bathroom in the house if it leads to leaks, insurance headaches or rework.

The better way to judge value is simple:

What to compare What a good answer sounds like
Compliance Clear explanation of permits, registration and responsibilities
Method Specific membrane, detailing and testing process
Documentation Written scope, contract clarity and handover records
Supervision One point of accountability across trades
Design practicality Advice that balances designer bathrooms with buildable details

The best bathrooms aren't just stylish. They're controlled from the start. That's what lets modern bathrooms stay functional long after the photos are taken.


If you're planning a bathroom in Highett or nearby and want the work managed properly from design through waterproofing and finish, SitePro Bathrooms can help you turn strong ideas into a compliant, durable result.