• siteprobathrooms

Bathroom Renovation DIY: What to Know Before You Start

You're in Highett, the renovation shows are on, and the existing bathroom looks simple enough to strip out over a weekend. The vanity is dated, the shower screen is tired, and a new tile colour seems capable of solving everything. Then the wall comes open, the floor feels damp, the waste sits in the wrong position, and your “quick” bathroom renovation DIY becomes a compliance problem with tiles waiting on the other side.

The sensible question isn't whether you can renovate a bathroom yourself. It's which stages you can own without compromising legality, insurance, waterproofing or resale. In Victoria, painting and demolition can save real money. Unlicensed plumbing, electrical work and poorly documented waterproofing can erase those savings fast.

Why Most DIY Bathroom Renovations Blow Out

A Victorian bathroom can look manageable until the first wall or floor comes up. Behind a small footprint sit demolition, carpentry, drainage, waterproofing, tiling, electrical connections, ventilation, cabinetry and certification. A mistake hidden behind finished surfaces can damage framing, flooring, adjoining rooms or another apartment. It can also create an insurance and resale problem.

The cost pressure is understandable. Housing Industry Association analysis reported that DIYers and small-scale renovators spent approximately A$14.4 billion at hardware, building and garden-supply retailers between March and September, a 26% rise on the prior year. Total Australian home-improvement expenditure was estimated at A$38.5 billion for the financial year, with bathrooms and kitchens among the areas homeowners commonly considered for renovation. These figures include non-bathroom projects and small professional jobs, so they are context, not a bathroom price guide. They show how much household money is flowing into improvement work. (Australian home-improvement spending analysis)

Renovation participation is broad, but regulated work still belongs with qualified trades. A separate survey reported that approximately 8.4 million Australian homeowners, or 62% of the country's 13.6 million homeowners, had undertaken some form of renovation during the preceding 12 months. The comparison was 7.5 million, or 57%, three years earlier. It also found that 3.4 million homeowners paid for plumbing work and a similar number paid for electrical work. (Australian renovation participation and trade-work findings)

The weekend-budget trap

The same survey of planned Easter DIY activity recorded an average intended spend of A$852, while about 10% expected to spend more than A$2,000 on a significant project. That may suit a short activity, not a coordinated bathroom refurbishment involving services, waterproofing, permits and finishing work.

Set separate budget lines for fixtures, labour, waterproofing materials, substrate preparation, waste removal, tile cutting, ventilation, permits, inspections and unexpected repairs. A list containing only tiles, a vanity, toilet and tapware is a shopping list, not a project budget.

My rule: DIY the visible work you can redo without opening the building. Pay licensed trades for concealed work that determines whether the room stays dry, legal and insurable.

Savings vanish when completed tiling must come out to investigate a leak, electrical work needs redoing, or certificates are missing at sale. A bathroom can photograph well and still have incorrect floor falls, unsealed penetrations or uncertified plumbing. In Victoria, cosmetic work is where DIY earns its keep. Waterproofing, plumbing and electrical work determine whether the renovation remains saleable.

Planning, Budgeting and the $10,000 Permit Threshold

A bathroom that looks like a simple replacement can become a regulated building project as soon as you move a toilet, alter a wall, change drainage or create a walk-in shower. Draw the existing room before visiting a showroom. Mark every fixture, waste, window, door and service point, then decide whether each item stays in place. Cosmetic changes usually carry less risk than concealed work that affects legality, insurance and resale.

Build a budget that reflects the sequence

Use four budget groups:

  • Fixtures and finishes: vanity, basin, toilet, tapware, shower fittings, screen, bath, tiles, grout, trims and accessories.
  • Construction work: demolition, framing, substrate repairs, waterproofing, screeding, tiling, cabinetry installation and painting.
  • Services and approvals: plumbing, electrical work, ventilation, certificates, building-surveyor involvement and applicable permits.
  • Risk allowance: damaged framing, uneven floors, disposal, replacement pipework and materials wasted through incorrect cuts.

For a 5sqm Victorian bathroom, fixtures and finishes can consume a large part of the budget before labour begins. Add demolition and disposal, substrate repairs, waterproofing, tiling, plumbing, electrical work, ventilation and approvals, and a project that began with modest purchases can pass A$10,000 through combined goods and services. Price the complete scope, not only the items you plan to install yourself.

A house model, calculator, money, and a checklist for planning, budgeting, permits, and building a project.

Treat the threshold as a project issue

In Victoria, domestic building work exceeding A$10,000 generally requires the relevant registered practitioner and contract arrangements, subject to exemptions. Splitting invoices does not change the substance of the renovation. Painting, plastering, installation and related work may still be assessed as one project. The threshold is therefore a planning issue from the first quote, not a target to avoid through paperwork.

Check the builder or tradesperson's registration through the Victorian Building and Plumbing Commission register. Request a written scope naming responsibility for demolition, structural work, plumbing, electrical work, waterproofing, substrate preparation, tiling, waste removal, inspections and handover documents. Use the Victorian building permit requirements guide with advice from the relevant building surveyor before committing to the layout.

Keep the signed scope, variations, invoices, product specifications, warranties, permit material, certificates and photographs in one project folder. These records support inspections, future repairs, insurance discussions and a sale.

Set the programme around dependencies: design and ordering, contractor availability, permit checks, demolition, substrate repairs, service rough-ins, waterproofing, curing, inspection, screeding, tiling, grout, fit-off and final testing. If the budget cannot support that sequence, reduce the scope before demolition rather than stopping with an exposed room.

Waterproofing Rules That Shape Every Design Choice

Waterproofing isn't a layer you add after choosing the tiles. It determines the shower footprint, waste location, floor levels, wall build-up, screen position and the viability of an open or hobless entry.

The National Construction Code Housing Provisions generally require shower walls to be waterproof to at least 1,800 mm above the finished floor. An unenclosed shower also requires a waterstop extending at least 1,500 mm horizontally from the shower rose, measured from the rose itself. The same provisions protect shower floors, wall junctions, wall-to-floor junctions and penetrations. (NCC wet-area waterproofing provisions)

For an Australian bathroom, the membrane system must comply with AS 3740. The practical inspection points are straightforward, but none is optional.

Element Requirement
Shower walls Waterproof to at least 1,800 mm above the finished floor
Unenclosed shower Waterstop at least 1,500 mm horizontally from the shower rose
Floor waste falls Between 1:80 and 1:50 toward the drain
Timber floor The room floor must be waterproof
Concrete or fibre-cement floor outside the shower Water-resistant treatment may be permitted under the applicable provisions
Wet-area interfaces Protect junctions, penetrations, wastes and movement joints

Design around water movement

A walk-in shower needs more than a clean glass line. It needs controlled falls, a correctly positioned waste, a compatible waterstop, a membrane that reaches the required zones and a screen arrangement that limits splash. A freestanding bath still needs the surrounding floor and junctions planned for cleaning water and overflow risk.

Timber subfloors deserve particular attention because the room floor requires waterproofing. Concrete and fibre-cement construction can have different treatment outside the shower area, but that distinction doesn't remove the need to protect the shower and all vulnerable interfaces.

The Australian bathroom waterproofing standards guide is useful for translating the technical requirements into a design conversation. Your builder, waterproofing practitioner or building surveyor must still confirm the system and application for the actual building.

Inspect before anything disappears

Check the substrate, floor levels, falls, corners, wall-to-floor junctions, movement joints, pipe penetrations and waste connection before tiling. Photograph each membrane stage, including collars, tapes, corners and transitions, and record the product specification, batch details and curing conditions.

A membrane that looks dry on the surface may not be ready for the next stage. Tiling over uncured material traps defects and makes later inspection impossible. The attractive finish comes last. The dry building envelope comes first.

What Licensed Trades Must Do Versus What You Can Do

A bathroom renovation saves money only when you keep DIY work within your competence. The legal and insurance risk starts when you alter services, seal a wet area or conceal work that nobody can later verify. In Victoria, plan the project around that boundary from the beginning.

Work you can reasonably handle

Take responsibility for visible, removable work if the substrate is sound and you do not disturb regulated services:

  • Demolition: Remove cabinetry, screens, mirrors, accessories and finishes carefully. Protect pipework, wiring and adjoining rooms, and use suitable personal protective equipment.
  • Painting: Prepare surfaces, apply the correct primer and add finish coats after dusty construction is complete.
  • Flat-pack assembly: Build vanity and storage units accurately, leaving clear access for the plumber's connections.
  • Accessory installation: Fit mirrors, shelves and accessories only where fixings will not pierce waterproofing or hit concealed services.
  • Tiling: Lay tiles only after the substrate, falls, membrane and curing have been approved. You must also manage layout, cuts and movement joints correctly.
  • Cleaning and sorting: Organise materials, protect completed surfaces and dispose of waste through the correct route.

Tiling is the highest-risk task in this list because poor cuts, movement joints or coverage can undermine an otherwise compliant wet area. If you cannot check those details, pay a tiler.

Work qualified practitioners must complete

A licensed plumber should handle plumbing alterations, new wastes, pipe relocations and final connections. A licensed electrician should handle wiring, new circuits, lights, switches, exhaust systems and connection work. Keep the plumbing and electrical certificates with your renovation records.

Waterproofing needs a firm handoff. The system must meet AS 3740 and Victorian requirements, with records that a future owner, insurer, building surveyor or body corporate can understand. Treat membrane installation as specialist work unless you hold the required qualifications and documented authority. Photograph the completed stages and retain product and installer details.

Structural changes, wall removal and window alterations may require building approval or building surveyor involvement. A small change inside the bathroom can affect framing, ventilation, drainage or the building envelope. Get the approval pathway confirmed before demolition.

Under A$10,000 does not mean unregulated. Project value can affect practitioner and contract obligations, but it does not authorise a homeowner to perform plumbing or electrical work.

Victorian consumer guidance covers registration and contract requirements for domestic building work above A$10,000, subject to applicable exemptions. Plumbing and electrical work still require appropriately licensed trades. (Victorian consumer guidance on builders and tradespeople)

This division protects more than compliance. If a concealed pipe fails or the wet area leaks, invoices, certificates, photographs and product records show who performed the regulated work and how the system was installed. That evidence supports insurance, resale and future repairs.

Your Demolition, Prep and Tiling Sequence

Own the sequence you can control, and stop before the work becomes regulated or concealed. Rushing demolition is a reliable way to damage pipework, framing or waterproofing zones that would've been cheaper to preserve.

Strip the room without creating a second project

Shut off services through the proper trade process before removing connected fixtures. Protect the doorway and adjoining floors, wear suitable eye, respiratory and hand protection, and separate waste rather than placing every material in one pile. Photograph the room before demolition, then record the exposed framing, subfloor, existing wastes and any moisture staining.

Inspect timber, flooring and wall framing once the finishes are out. Soft timber, swollen sheet material, mould, rusted fixings or persistent dampness are stop signs. Replace damaged material and establish a stable, clean, dry substrate before waterproofing.

On timber floors, use an appropriate wet-area substrate system and confirm sheet joints, movement joints, primers and fixing patterns with the system requirements. The floor must support the tile finish without flexing, and the shower area must accommodate the specified fall toward the waste.

A four-step infographic illustrating the bathroom renovation process including demolition, floor preparation, tiling, and the finished result.

Prepare the tile layout before mixing adhesive

Dry-lay the first rows. Centre the dominant wall, keep narrow slivers out of prominent corners, align grout lines with niches or screens, and check that the floor pattern doesn't create awkward cuts at the waste. Confirm the tile adhesive suits the substrate and tile type, then work in manageable areas.

Do not tile until the waterproofing has cured and been inspected. Use the same discipline for grout and silicone. Grout fills joints, while compatible wet-area sealants handle movement at internal corners, changes of plane and selected junctions. Generic sealant isn't a substitute for a designed wet-area system.

Waterproofing is a serious defect category. One NSW Class 2-building survey identified it as the source of about 42% of serious defects, while other industry estimates place waterproofing defects in 20–40% of modern multi-unit residential buildings. Those figures don't establish a failure rate for detached-house DIY work, but they justify a stricter documentation standard in Victorian apartments and body-corporate properties. (Australian wet-area defect reporting)

Keep photographing the substrate, framing, membrane coats, penetrations, corners, falls, wastes and finished joints. Record dates, products, batch information, curing times and every variation. A complete visual record is particularly valuable when the work will be handed to a surveyor, insurer, purchaser or owners corporation.

Future-Proofing, Water Efficiency and Accessibility Upgrades

A bathroom renovation is the easiest time to prepare for changing mobility. Once tiles and wall linings are finished, adding reinforcement or moving pipework becomes disruptive and expensive.

Put blocking behind the wall lining where future grab rails may be needed. Consider rough-in positions for a handheld shower, shower seating and a low-threshold or hobless shower, then choose slip-resistant flooring, lever taps and circulation clearances that work for the household now. These choices don't require an institutional appearance. They can sit inside a modern bathroom or designer bathroom with restrained fittings, coordinated finishes and concealed preparation.

Australian falls guidance identifies the bathroom as the highest-risk room in the home, accounting for approximately 80% of household falls, and reports that about one in four Australians aged 65 and over experiences a fall each year. The same guidance reports that 40.2% of older adults with repeated falls still lacked adequate bathroom modifications. (Australian accessible-bathroom falls guidance)

Make water efficiency part of the layout

The national WELS scheme gives fixture selection a measurable basis. YourHome recommends choosing the highest available WELS star ratings for toilets, showers and taps, using flow restrictors where taps deliver more water than needed, and considering a two-way or three-way bathroom arrangement where separating the toilet or vanity improves household function. (YourHome renovation and water-efficiency guidance)

A two-way arrangement can let one person use the vanity while another uses the toilet or shower area. That can make a family bathroom more practical without expanding the room. Plan the door swing, storage, ventilation and cleaning access at the same time, rather than adding water-saving fixtures after the layout has been fixed.

Design for ordinary life

Future-proofing also means choosing durable details. Use accessible controls, stable flooring and reachable storage, but keep the visual language consistent with the house. A well-planned bathroom should support a child, an older resident, an injured adult and a future buyer without advertising a narrow use case.

The false economy is spending the renovation budget on decorative upgrades while leaving the walls unprepared for a predictable change in household needs. Preparation is cheap only while the walls are open.

Troubleshooting, When to Stop and Your Handover Pack

Stop work when the membrane is punctured, tiles have been laid before curing, water ponds instead of draining, penetrations remain undocumented, or someone proposes generic sealant in place of the specified wet-area treatment. Don't cover a defect because the tile delivery has arrived.

The fix depends on what failed. A damaged membrane may require removal and reinstatement of the affected system. Incorrect falls may require rebuilding the substrate. Unapproved plumbing or electrical work needs the relevant licensed practitioner to inspect and rectify it. If you can't identify the cause, stop and bring in a qualified person before the defect becomes concealed.

Your handover pack should contain:

  • Certificates: Plumbing certificates and certificates of electrical safety.
  • Approval records: Building permit and surveyor documentation where applicable.
  • Concealed-stage evidence: Photographs of framing, substrate, falls, penetrations, membrane coats and junctions.
  • Product records: Specifications, batch details, curing information, invoices, warranties and approved variations.

Use this bathroom renovation checklist before tiling and again before sign-off. If the project needs structural coordination, regulated services, waterproofing oversight and a coherent 3D design, an end-to-end service such as SitePro Bathrooms can manage concept development, 3D design, construction and handover in one coordinated scope.

Your final test is simple: can you prove what was done, who did the regulated work, which products were installed and whether the concealed stages were inspected? If not, the bathroom isn't finished.


If you're planning a bathroom renovation in Highett or elsewhere in Victoria, decide your DIY boundary before demolition. Keep the painting, removal, assembly and suitable finishing work, then ask a qualified renovation team to price the services, waterproofing, approvals and documentation that protect the result. Contact SitePro Bathrooms through siteprobathrooms.com.au to discuss your layout, design and handover requirements before you commit to the first tile.

  • siteprobathrooms

Planning a Home Renovation in Victoria: A 2026 Guide

You're in Highett, the bathroom has been gutted, the plumbing is exposed, and a tradie is due to start next week. There are no finished drawings, nobody has confirmed whether a permit is required, and the budget is a rough guess based on a few online images. That's not a renovation plan. It's a demolition date attached to a list of unanswered questions.

The expensive problems usually begin before the first hammer. An undeclared change to the layout can alter the permit path. An unverified builder registration can leave you with the wrong person responsible for regulated work. A missing waterproofing inspection can force rework after tiles are installed. Planning a home renovation in Victoria means resolving those risks in the right order, before materials are ordered and trades are booked.

Why Most Renovation Stress Starts Before the First Hammer

A bathroom in Highett can look productive after demolition, with the vanity, tiles, and plaster removed. The exposed room often reveals the opposite. Structural conditions, plumbing routes, waterproofing, ventilation, and compliance decisions are now urgent, yet the drawings and approvals may still be incomplete. Demolition has converted unanswered questions into delays on site.

In Victoria, planning and building permits follow different paths. A planning permit may be required before building, extending, or renovating, particularly where council controls or a heritage overlay apply. A rebuild always needs a building permit. Confirm the planning position with council and review the Victorian guidance on plans and permits before demolition, ordering, or booking trades.

Permit status affects the critical path. It can determine whether drawings need revision, whether a registered building practitioner is required for the work, and whether inspections must be scheduled before walls and floors are closed. Treating approval as paperwork for later is how a planned start becomes a vacant, unusable room.

The four failures that create blowouts

Scope failure is usually the first problem. “Renovate the bathroom” might mean new finishes and fixtures, or it might involve moving walls, relocating plumbing, changing windows, replacing waterproofing, upgrading electrical work, and altering ventilation. Each version requires a different design, trade sequence, approval route, and budget allowance.

Write the scope in physical terms. Identify what stays, what moves, what gets replaced, and what may be exposed once demolition starts. If the work affects structural elements or regulated building work, confirm the practitioner's registration class and experience before accepting a quote.

Budget failure follows when the allowance covers only visible products. Tiles, a vanity, tapware, and a shower screen are selections, not a complete project cost. Labour, waste removal, electrical changes, waterproofing documentation, temporary facilities, delivery, access constraints, and remedial work belong in the same budget.

Ask for assumptions, exclusions, provisional items, and conditions that depend on opening the walls or floor. A low quote with missing scope is not a saving. It is a delayed cost.

Builder failure occurs when availability matters more than capability. Select a practitioner whose registration and experience match the work, especially where the renovation changes plumbing layouts, waterproofing, structural elements, or compliance-related details. A casual handyman is not a substitute for the people required to design, certify, and carry out regulated work.

Sequence failure stalls the site even when each individual decision seems minor. An unavailable basin can hold up installation. A tapware change after rough-in can force plumbing rework. Starting before the permit position is settled can interrupt several trades and push inspections out of order.

Victorian renovation guidance estimates that a building permit can add 2 to 4 weeks, while a planning permit can add 4 to 12 or more weeks. Use those lead times when setting the start date, ordering materials, and arranging accommodation. Review the Victorian permit timing guidance before committing to a demolition date.

Practical rule: If a decision can change the drawings, permit pathway, trade sequence, or purchase list, make it before you commit money.

Write the brief before requesting quotes

Start with one page. Make it specific enough that a designer, builder, or project manager can price the same job without guessing.

For a bathroom, record daily users, storage problems, shower preferences, accessibility needs, cleaning priorities, and whether the room must support children, guests, or ageing in place. For a kitchen, record cooking habits, appliance requirements, pantry storage, entertaining needs, and whether walls or services might move. For whole-home work, identify zones that must be completed together and areas that can wait.

Divide every request into three groups:

  • Must-haves: Changes that solve the current problem, such as a better shower layout, more storage, improved lighting, or a safer floor.
  • Nice-to-haves: Enhancements that can be removed without damaging the project, such as a feature tile, upgraded accessories, or decorative joinery.
  • Hard dealbreakers: Conditions you will not accept, such as losing the only family bathroom, compromising ventilation, exceeding a borrowing limit, or damaging a heritage feature.

Answer three blunt questions. How long will you live with the result? Who uses the room every day? What level of resale value matters in your suburb? A short-term refresh needs a different brief from a long-term home, and an owner-occupier will not always prioritise the same outcomes as an investor.

Use the brief during every quote review and design decision. If a new idea does not support a stated goal, move it to the nice-to-have column or a later stage. This keeps selections tied to the reason for renovating and limits scope changes that disrupt approvals, orders, and trade bookings.

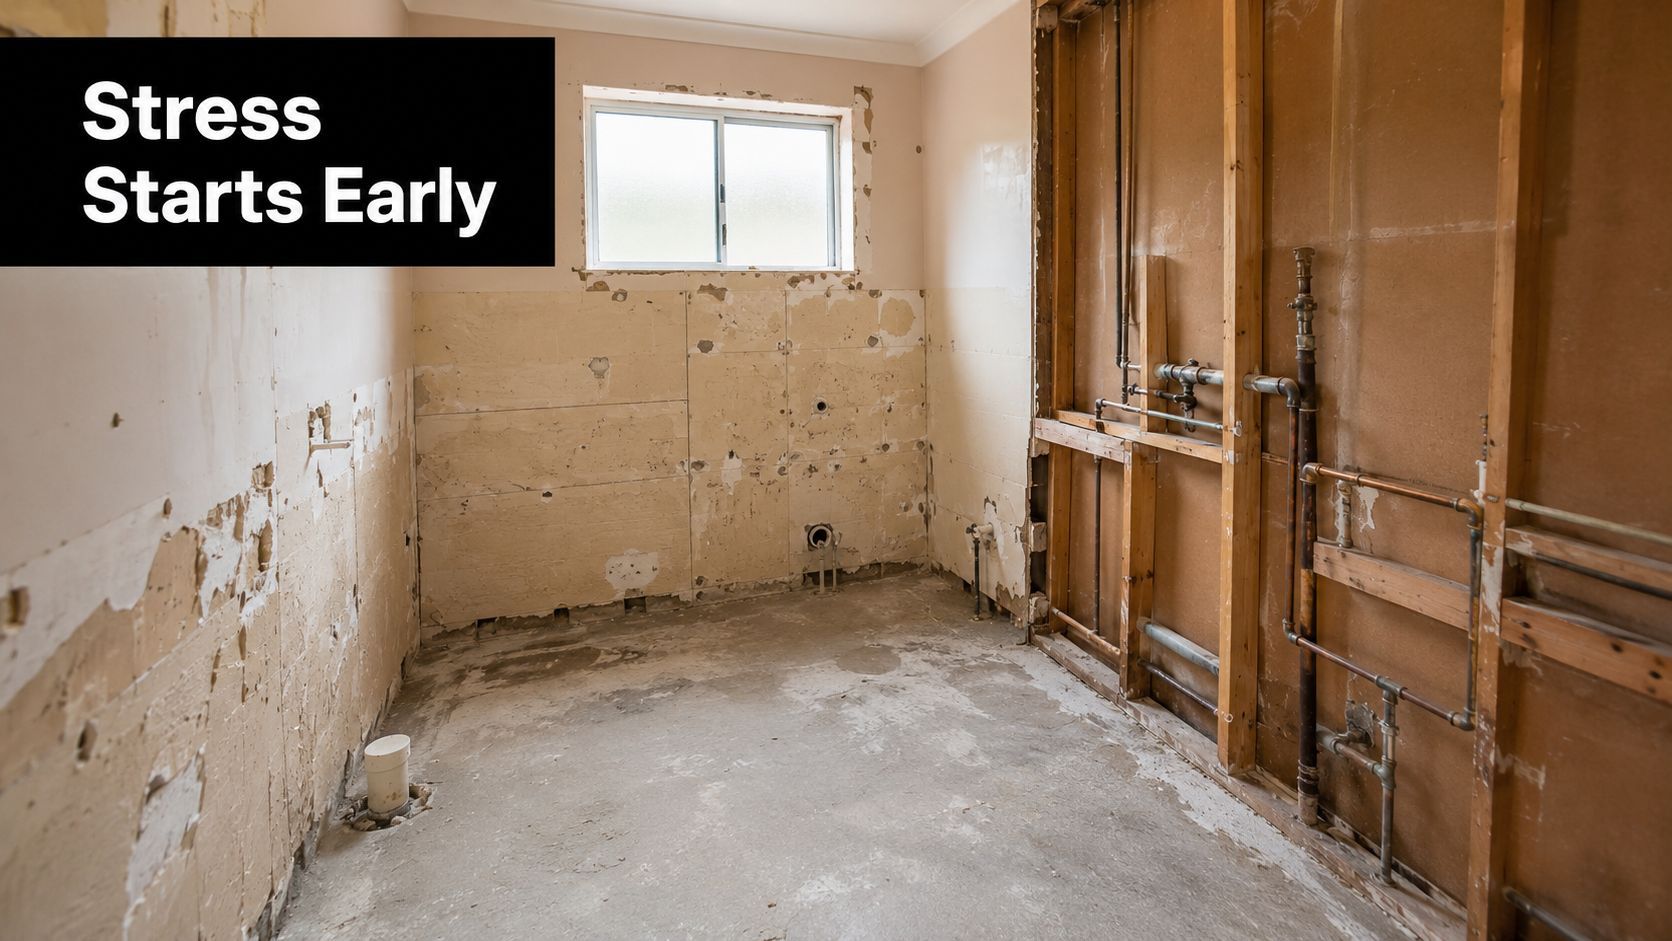
An unfinished room undergoing a home renovation with exposed wooden wall studs and plumbing pipes exposed.

Australia's renovation market makes this front-end discipline more important. KPMG reported that renovation spending reached 40% of total residential construction spending in 2023–24, compared with 34.2% in 2018–19, while renovation spending increased 6.5% across that five-year period. The same release reported that inflation-adjusted spending on new private residential construction was 14% lower in 2023–24 than five years earlier. These figures appear in KPMG's renovation market release.

For homeowners, demand for trades, materials, surveyors, and approvals can affect availability. Your brief controls the decisions that shape the critical path. It is the document that keeps the design, permit route, budget, and construction sequence aligned before the first hammer.

Building a Renovation Budget That Actually Holds

A bathroom budget only holds when it includes the work behind the finishes. Don't treat a product list as a project budget. A cosmetic refresh, a complete wet-area rebuild, and a designer bathroom with layout changes carry different approval, labour, and coordination demands.

I won't publish invented 2026 price bands because no verified cost figures are available here. Instead, use the table below as a planning structure, then replace each tier with written quotes based on your actual room, access conditions, selections, and permit requirements.

2026 Victorian Bathroom Renovation Budget Bands

Project Tier Indicative 2026 Range (AUD) Typical Extras Homeowners Miss
Cosmetic refresh Obtain a project-specific written quote Minor repairs, disposal, painting, accessory changes, and delivery
Standard bathroom rebuild Obtain a project-specific written quote Waterproofing certification, electrical upgrades, tile wastage, skip hire, and temporary bathroom arrangements
Designer bathroom rebuild Obtain a project-specific written quote Detailed design, premium finishes, custom joinery, complex lighting, service relocation, inspections, and snagging

The useful financial discipline is to separate fixed scope from unresolved risk. Ask the builder to identify assumptions, exclusions, provisional items, access restrictions, and any work that depends on opening the walls or floor. Waterproofing certification, electrical upgrades for a new lighting layout, tile wastage, skip hire, temporary bathroom costs, and post-handover snagging should appear explicitly rather than hiding in a vague allowance.

Renovation demand is substantial. KPMG reported that renovation work represented 40% of residential construction spending in 2023–24, and Australian survey data recorded more than $3 billion spent on alterations and additions in the September quarter of 2023, according to the Australian renovation activity data. Those figures don't tell you what your bathroom will cost, but they do reinforce the need to book and budget carefully.

Add a 15 to 20 per cent contingency above fixed-price quotes as a planning recommendation, not as a claimed market statistic. Keep it available for concealed damage, scope decisions, compliance changes, and genuine variations. Track each selection before sign-off, including the item, allowance, supplier confirmation, delivery status, and whether installation is included. A spreadsheet updated weekly is more useful than a budget reviewed after the final invoice.

For a coordinated approach to scope, selections, and construction, review the bathroom renovation project management service, then compare its inclusions against your own brief.

Hiring the Right Builder and Designer in Victoria

A builder's registration class determines which domestic building work they can undertake. For a Victorian bathroom renovation, verify registration before discussing start dates. Check the builder's current details on the Victorian Building Authority public register, then ensure the contract names responsibility for the work, approvals, coordination, and defects.

Registration Class Scope Allowed Typical Project Fit
Unregistered handyperson Minor maintenance and non-regulated tasks only Cosmetic repairs that don't cross into regulated domestic building work
Domestic Builder Limited Work restricted by the conditions of the specific registration Small or narrowly defined projects that fit those limits
Domestic Builder Unlimited Domestic building work without the project-size cap applying to limited categories Larger, complex, structural, or fully coordinated bathroom renovations

A Domestic Builder Unlimited registration suits larger or more complex bathroom projects that extend beyond small repairs, subject to the conditions of the practitioner's registration. Confirm the class and current details through the VBA register before signing. Do not assume a tradesperson who can complete one part of the job can manage the entire renovation.

Questions that expose weak proposals

Request the registration number, recent comparable projects, and addresses you can inspect with the owner's permission. Ask for a written scope that states whether pricing is fixed or cost-plus, lists exclusions, explains variation approval, and identifies who handles the building permit. An unclear approval responsibility can delay the start and force redesign after selections have been made.

Ask how the builder will arrange waterproofing inspections, plumbing compliance, electrical certification, site protection, rubbish removal, and handover documents. Request the proposed programme, decision deadlines, defect process, and delay provisions. Treat “permits are just a formality” as a red flag. Planning and building approvals follow different paths, and an overlooked heritage overlay or structural change can hold up the critical path.

Designers require the same scrutiny. Confirm that their drawings include measured plans, elevations, reflected ceiling plans, lighting locations, tile layouts, fixture specifications, and construction notes. Ask whether they provide 3D design reviews and how they manage design freeze, the point after which changes require a formal variation. Late changes can affect approvals, ordering, labour, and the handover date.

SitePro Bathrooms provides concept development, 3D design, construction, and finishing as a coordinated renovation service. Whether you appoint one provider or separate professionals, choose people who can show how the brief becomes documentation, approvals, procurement, construction, and handover. Get those responsibilities in writing before the first deposit.

Navigating Victorian Planning and Building Permits

A bathroom renovation can stall before demolition if you treat approvals as paperwork to sort out later. Planning permits and building permits follow different paths, and satisfying one does not satisfy the other. Check both before the layout is locked, because an overlooked overlay or structural change can force redesign, delay orders, and extend the critical path.

A planning permit covers land use, neighbourhood amenity, siting, overlays, and development controls. Council assessment may be required for a heritage overlay, façade or window changes, certain siting changes, or two dwellings on one lot. A building permit covers construction compliance under Victoria's building framework, including structural safety, waterproofing, framing, and other Building Code requirements.

Check the pathway before design freeze

Start with the property information available through VicPlan, then contact the relevant council. Do this before design freeze. An internal bathroom may still involve a heritage control, altered window, relocated services, changed floor levels, or structural work. Each can change which approvals and documents are required.

Engage a private building surveyor early when walls, windows, floor levels, waterproofing, or structural elements will change. Ask the surveyor to confirm the required documents, which may include:

  • Measured drawings: Existing and proposed plans, elevations, and relevant sections.
  • Engineering information: Structural calculations and details for changed framing, beams, walls, or loads.
  • Wet-area documentation: Waterproofing details, product information, and inspection arrangements.
  • Specification schedules: Fixtures, materials, construction methods, and compliance details.
  • Site information: Property details, photographs, title or plan information, and relevant overlay or planning information.

Requirements depend on the property and scope. Council and the surveyor must confirm the pathway, rather than a builder relying on an assumption that the work is internal. Victorian consumer guidance advises homeowners to check with council before starting an extension or renovation. Use this Victorian building and renovation permit guidance as a reference for the distinction, but obtain project-specific advice from the appropriate Victorian authorities.

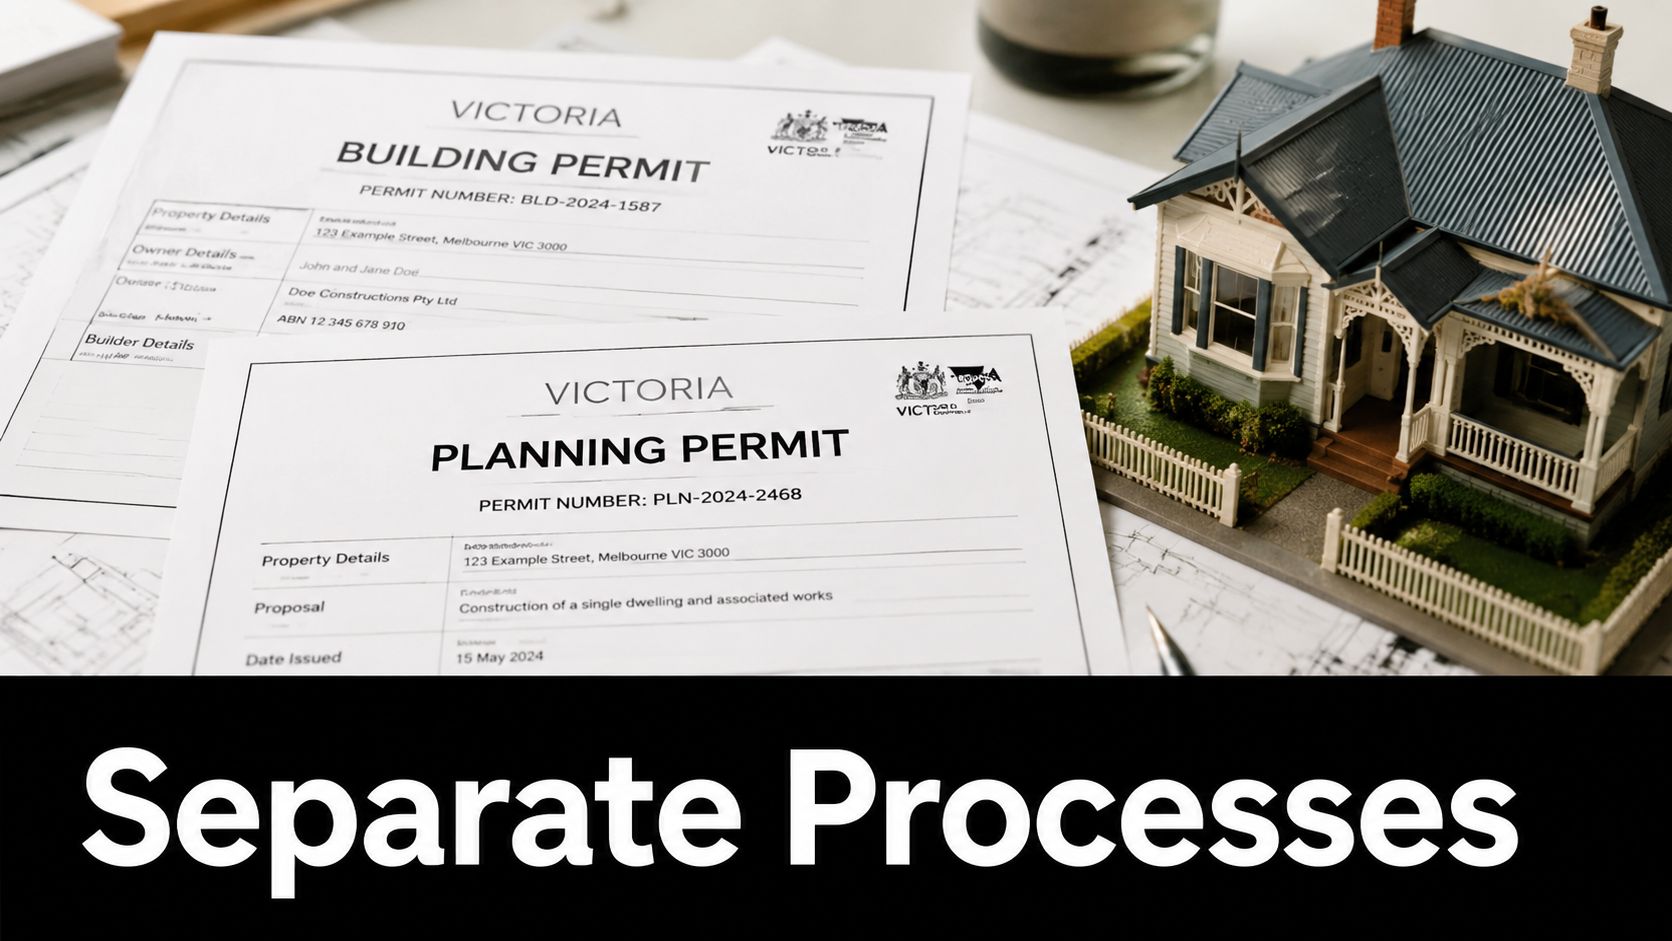
Building and planning permits for a home renovation project with a miniature model house on top of blueprints.

Cosmetic bathroom work can follow a different pathway from moving walls, changing plumbing layouts, altering load-bearing elements, or rebuilding waterproofing. “It's internal” does not mean “it's permit-free.”

Site rule: Never order materials around an unapproved layout. An early check costs less than demolition, redesign, and certification twice.

Timelines, Phasing, and How to Live Through the Works

A realistic Highett bathroom project can take 10 to 14 weeks from concept design to handover when design, approvals, procurement, construction, and rectification are included. That timeframe is a project-planning benchmark, not a promise. Access, scope, approvals, product availability, and inspection timing can move it.

The critical path should run in this order:

  1. Concept design: Confirm the brief, measure the room, test layouts, and identify structural or service changes.
  2. Documentation and permits: Finalise drawings, lodge the relevant applications, and allow the surveyor or council to assess them.
  3. Procurement: Confirm tile, tapware, vanity, shower screen, lighting, and accessories before demolition.
  4. Construction: Sequence demolition, rough-in, framing, waterproofing, tiling, fit-off, testing, and snagging.
  5. Handover: Collect certificates, inspect finishes, record defects, and confirm rectification dates.

Book the 3D review before the permit documentation is final. Changing tapware after waterproofing or moving a shower niche after tiling has started creates avoidable rework. A 3D model should settle clearances, door swings, fixture positions, tile runs, and storage before orders are placed.

Keep the house liveable

For a larger renovation, phase by zone. Complete the ensuite while the family uses the main bathroom, then swap zones. Don't open every wet area at once unless you have suitable temporary facilities and a firm reason to accept the disruption.

Create a weekly schedule with five columns: activity, responsible person, inspection date, delivery window, and homeowner decision deadline. Mark permit milestones, waterproofing inspections, tile delivery, shower-screen measurement, and final electrical and plumbing testing.

Allow extra breathing room around Christmas and Easter, when trade availability and deliveries can change. Before committing to the programme, read the practical advice on living in the house during a renovation. Protect one clean living zone, isolate dust, secure tools, and keep children and pets away from the work area.

A professional bathroom installer working on a shower head fixture during a residential home renovation project.

Locking In Fixtures, Finishes, and 3D Design Early

By demolition week, undecided fixtures are already a programme risk. The builder needs confirmed dimensions, connection points, delivery dates, installation requirements, and approved alternatives before the room is opened. A late selection can hold up a trade, trigger rework, or force a variation.

Use this order:

  • Layout first: Set the vanity, toilet, shower, bath, door swing, storage, and circulation.
  • Services second: Confirm plumbing, electrical, ventilation, heating, lighting, and niche positions.
  • Products third: Specify tile, tapware, vanity, shower screen, lighting, mirrors, and accessories.
  • Documentation fourth: Record product codes, dimensions, finishes, installation notes, and approved substitutions.
  • Procurement last: Order only after checking availability, lead time, damage policy, and delivery access.

Choose a look that suits the house and can be maintained. Warm neutrals, earthy tiles, natural stone, curved forms, tactile finishes, floating vanities, layered lighting, large-format tiles, and smart storage are all useful directions in current Australian bathroom design. Texture and smart features are discussed in 2026 bathroom ideas focused on texture and smart design, while practical Australian bathroom materials and layouts supports choosing materials and arrangements that work in daily use. Do not select a trend before checking cleaning, replacement, and installation requirements.

Use 3D design to test decisions

Review the 3D model after the concept layout and before orders. Test tile runs across each wall, vanity-door clearance at the entry, shower-screen clearance from the towel rail, and niche height against the people using the room.

A render is a decision record. Compare it with the measured room, mark every change, and issue the approved version for documentation. Changes to tile pattern, tapware finish, vanity size, or lighting position after procurement can delay the programme and create a variation.

Physical samples remain necessary. View tile, stone, grout, metal finishes, and cabinetry in the room's daylight and evening lighting. A sample board can expose clashes between warm neutrals, brushed metal, natural stone, and artificial light that a screen conceals.

In Victoria, altered waterproofing, plumbing layouts, structural elements, or compliance details can raise registration and approval questions. Check the work category before the design is final, using Victorian bathroom renovation guidance as a starting point. Confirm the permit pathway and registered trades with the relevant professionals before construction documents and orders are locked.

Your Pre-Renovation Checklist and Sample Schedule

The homeowner controls the information that keeps a project moving. Your builder can coordinate trades, but you must make sure finance, insurance, access, household logistics, selections, and approvals are ready.

Copy this checklist before work starts

  • Finance approval: Confirm the available funds, payment schedule, variation process, and contingency.
  • Insurance notification: Tell your insurer about the planned works before construction starts. Homeowners often forget this.
  • Permit confirmation: Keep written confirmation of the planning and building permit pathway.
  • Contract review: Check scope, exclusions, allowances, start date, completion conditions, variations, and defects.
  • Neighbour notice: Explain noisy work, access needs, deliveries, and any shared-boundary concerns.
  • Temporary facilities: Arrange a temporary bathroom or kitchen setup if the home will lose essential services.
  • Household logistics: Plan for children, pets, work-from-home needs, dust, noise, and safe access.
  • Valuables storage: Remove fragile items, secure documents, and clear paths for deliveries.
  • Meter readings: Record electricity, gas, and water readings before site establishment.
  • Selections register: Confirm every product, finish, quantity, supplier, delivery date, and approved substitute.
  • Inspection dates: Book the final waterproofing inspection before tiling is sealed. This is the second commonly missed item.

For a printable version, use the bathroom renovation checklist and adapt it to the scope in your contract.

Sample project schedule

Phase Indicative allocation Homeowner control point
Brief Early project stage Approve must-haves, nice-to-haves, and dealbreakers
Concept design Following the brief Approve layout and service changes
3D review Before documentation Confirm clearances, finishes, and fixture positions
Documentation After design decisions Check drawings, specifications, and permit documents
Permit lodgement Before procurement lock-in Confirm the approval pathway and outstanding requests
Procurement After selections are frozen Verify availability, delivery, and damage procedures
Build After approvals and deliveries are aligned Attend agreed inspections and approve variations in writing
Handover At practical completion Inspect, collect certificates, and record defects

At handover, check the waterproofing certificate, plumbing compliance documentation, electrical certificate, tile lippage, grout consistency, silicone finish, and silicone cure times. Test doors, drawers, exhaust fans, lights, taps, drainage, and hot water. Record every defect with a location, photograph, responsible party, and rectification date.

Allow a 13-week defects liability window in your project records and contract administration. Don't treat handover as the moment the builder leaves. It's the point where you verify that the promised result has been documented, tested, and completed.

Australian renovation demand continues to support careful scheduling. Roy Morgan reported that 8.4 million, or 62%, of Australia's 13.6 million homeowners had renovated in the previous 12 months, compared with 7.5 million, or 57%, three years earlier, as reported in its renovation activity findings. Start with the brief, confirm the permit path, appoint the right registered builder, and freeze the selections before demolition.


If you're planning bathroom renovations, a kitchen upgrade, or a larger Victorian home renovation in Highett or nearby, book an on-site consultation with SitePro Bathrooms. Bring your wish list, floor plans, and budget boundaries, and ask the team to measure the space, test the layout in 3D, identify the permit questions, and turn the agreed scope into a clear renovation pathway before you commit to demolition or procurement.

  • siteprobathrooms

How Long Does a Kitchen Remodel Take in Australia

A mid-range kitchen remodel in Australia typically takes 14 to 22 weeks from project brief to final sign-off, with 4 to 8 weeks of active construction inside that window. If you're in Highett and still cooking every night in the existing kitchen, the important question isn't just when demolition starts, but how the whole calendar fits around design, approvals, procurement and handover.

You might be comparing stone samples at the dining table, trying to decide whether a wall can move, while also wondering how your family will manage without a working sink. Investors have a different pressure, rental downtime. Body Corporate stakeholders have another, approvals and coordination. The answer to how long does a kitchen remodel take changes sharply once the scope is clear.

Kitchen Remodel Timeline in Australia

A Highett homeowner may have trades booked for a short installation window, yet still wait months before that window begins. For a mid-range Australian renovation, allow 14 to 22 weeks from the project brief to final sign-off, with 4 to 8 weeks of active construction within that period. The calendar includes design decisions, specifications, cabinetry production, approvals and delivery coordination, not only work inside the room.

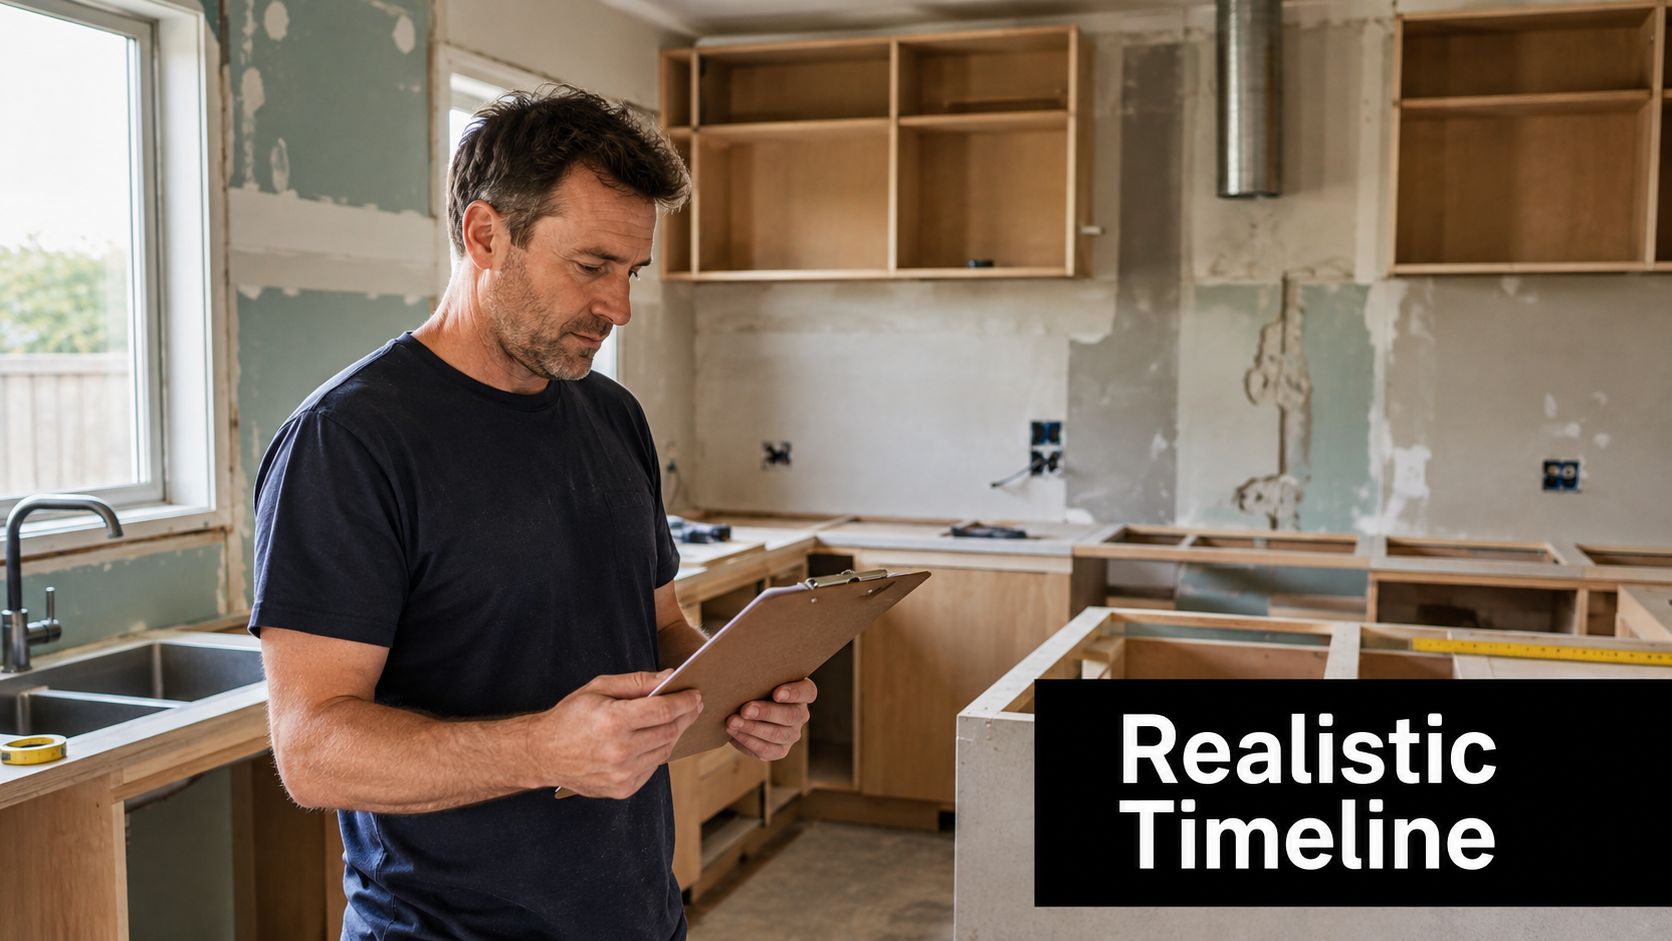
A professional kitchen contractor reviewing a checklist on a clipboard in a kitchen under renovation.

On-site time is not the project timeline

On-site work begins with floor and surface protection, demolition and trade preparation. It covers plumbing and electrical rough-ins, wall repairs, flooring, cabinetry, benchtops, splashbacks, appliance fit-off and final cleaning. This is the portion often quoted as the renovation duration.

The total project calendar starts earlier. A measured brief, confirmed layout, drawings, finishes, appliances, approvals, cabinetry manufacture and delivery planning must be settled before trades can work without avoidable pauses. Keeping services in their existing positions can compress construction. Moving a sink, cooktop or dishwasher may improve the layout, but it adds coordination and can extend approvals and rough-in work.

A short build does not necessarily mean a short renovation.

Practical rule: Treat the demolition date as a construction milestone, not the renovation start date.

Plan for an unusable kitchen

Demolition, rough-in and installation can make the room difficult or impossible to use. The broader Australian benchmark allows for 3 to 5 weeks when the household cannot cook in the kitchen, so set up a temporary food station before the sink is disconnected. Plan where appliances, food and washing-up supplies will go, particularly if children or tenants remain in the property.

A “two-week kitchen” usually describes a tightly managed cabinetry installation after the room has been measured, approved, demolished and prepared. It does not usually cover the journey from first consultation to final sign-off.

For a Highett project, the trades may finish their on-site sequence efficiently. The parts that stretch are usually decisions, approvals, manufacture and missing deliveries. Planning around those calendar risks gives a more useful answer to how long does a kitchen remodel take than counting demolition days alone.

The Five Stages That Shape Every Kitchen Remodel

A kitchen can look like a two-week installation on site and still occupy the calendar for months. In Highett and across Melbourne's bayside suburbs, the schedule is shaped by five connected stages. Some overlap, but each must be resolved before the next trade can work reliably.

Planning and consultation

The first stage defines the work and tests whether the room can support it. A site consultation records existing services, walls, windows, floor levels, access and appliance requirements. It also separates a cosmetic update from a layout change or structural alteration.

Decisions about function matter early. Retaining the sink, cooktop and dishwasher near their current services can shorten coordination. Relocating them may produce a better layout, but it adds design work, trade coordination and possible approval requirements.

Design and visualisation

Detailed design turns preferences into instructions trades can build from. Plans, elevations, finishes, storage, lighting positions and appliance specifications must agree before cabinetry is ordered.

Three-dimensional visualisation can expose conflicts before they reach site. A pantry door that strikes a refrigerator or a pendant positioned over the wrong work zone is inexpensive to correct on screen, but disruptive after installation.

Approvals and procurement

Approvals and ordering frequently determine the start date. Cabinetry, appliances, hardware, benchtops, tiles and plumbing fixtures need to align with the final design. One missing item can stop a trade, force a return visit and create a gap that the program cannot easily recover.

Australian guidance places active construction at about 4 to 8 weeks, while the complete journey is around 10 to 18 weeks once design, specifications, cabinetry lead times and coordination are included, as explained in this construction versus total-calendar guide. Those measures describe different parts of the job, so demolition-to-handover should not be confused with the total calendar period.

Demolition and construction

Demolition is often brief compared with planning, yet it can expose damaged subfloors, unsuitable walls or services that differ from the drawings. Once the old kitchen is removed, trades complete rough-ins, repairs and surface preparation before cabinet installation.

The order is practical, not cosmetic. Plumbing and electrical positions must be set before walls close. Floors and walls need to be ready before cabinets arrive, and benchtops should be measured after the cabinets are accurately installed. On-site work can compress when the scope is clear, access is good and materials arrive together. It stretches when discovery work or rework interrupts that sequence.

Finishes and sign-off

The final stage covers benchtops, splashbacks, handles, appliances, lighting, sealants, adjustments and cleaning. Handover should check doors, drawers, water connections, waste outlets and appliance operation, rather than treating installation as complete when the cabinets are merely in place.

A coordinated renovation service such as SitePro Bathrooms can manage concept development, 3D design, construction and finishing through one workflow. The homeowner still needs to make selections on time, but fewer hand-offs reduce the chance of one contractor waiting for another.

How Renovation Scope Changes the Timeline

A Highett kitchen with new doors and benchtops follows a very different calendar from one involving a wall removal, relocated window and rerouted plumbing. Scope sets the number of drawings, trades, approvals and inspections, while also determining how much work can happen on site.

Scope Total Weeks On-Site Build Weeks Common Triggers
Cosmetic refresh 8 to 12 weeks Shorter, limited site disruption No layout change, no plumbing relocation
Mid-range remodel 14 to 22 weeks 6 to 10 weeks within the broader project window New cabinetry, services coordination, finishing work
Full custom renovation 26 weeks or more Extended construction period Wall removal, window relocation, structural work or plumbing reroutes

The comparison uses the Australian kitchen renovation scope benchmarks. A separate Australian survey places kitchen renovation construction at 2 to 9 weeks, with most projects generally taking less than three months, in this Australian kitchen renovation survey summary. Those ranges differ because one may measure the full calendar period, while the other focuses more closely on construction.

Cosmetic work

A cosmetic refresh is the easiest scope to compress when the existing layout works. New doors, handles, paint, selected surfaces and limited fixture replacement avoid much service relocation and structural approval work. The cost of a new kitchen guide is useful when comparing this limited approach with a broader replacement.

Material availability still matters. A delayed benchtop or appliance can extend the calendar even when the site work is simple.

Mid-range work

A mid-range remodel usually combines new cabinetry, benchtops, appliances, lighting and coordinated trade work. The room can retain its basic geometry, but electrical positions, plumbing connections, flooring and cabinet measurements must align. These projects often compress during demolition and installation, then stretch around manufacturing, delivery and final adjustments.

Full custom work

Full custom renovations take longer because the design changes the building, not only the joinery. Wall removal, window relocation and plumbing reroutes may require engineering, documentation and approval before construction can proceed. For an investor, the result may improve the long-term layout, but it also increases rental disruption and makes a short completion promise harder to defend. On-site build time is only part of the answer. The larger scope determines how many weeks pass before work can start and after trades leave.

Permits and Builder Registration in Victoria

A kitchen can look like a contained interior job and still trigger Victorian approval requirements. Before setting a start date, confirm whether the design affects structure, plumbing, electrical services, external openings, heritage controls or other regulated building elements. A building permit can add 2 to 4 weeks, while a planning permit can add 4 to 12 or more weeks, according to this Victoria renovation permit guide.

Planning approval may apply when walls move, windows change, heritage overlays affect the property or the proposal conflicts with local planning controls. The quality of the documents also affects the calendar. Missing dimensions, incomplete drawings or unclear ownership details can lead to review requests and resubmission before work begins.

A man wearing a cap reviews official building permit documents on a kitchen counter.

Use the relevant registration category

“Registered builders unlimited” does not describe every domestic kitchen project. Victoria has a registration class for a domestic builder limited to bathroom, kitchen and laundry renovations. Its application process considers qualifications, project evidence, referee reports and a criminal history check, as shown in the VBA registration application.

Check the contractor's registration on the Victorian Building Authority's public register before signing. If the work requires a building permit, a registered building practitioner must complete it or supervise it. The same check applies when a bathroom is delivered with the kitchen, particularly where the work changes services or involves more than cosmetic replacement.

Understand the contract threshold

For Victorian bathroom renovations, guidance states that work valued over AUD 16,000 must be completed by a builder registered with the Victorian Building Authority under a major domestic building contract. Domestic building insurance also applies above that threshold, as set out in this Victorian renovation guidance.

These checks affect total calendar time, not just days on site. Confirm the permit pathway, registration category, contract requirements and insurance before demolition. If approvals are raised after work starts, the schedule becomes reactive and the build can pause while documents are corrected or reviewed.

Common Misconceptions About Kitchen Renovation Speed

Fast renovation videos usually remove the waiting periods. They show demolition, a dramatic reveal and a clean handover, while skipping the design decisions, cabinetry production, approvals and supplier coordination that determine whether work can continue.

“A two-week kitchen is standard”

A two-week promise generally describes a limited installation window, not a complete remodel. The room may already be empty, services may stay in place and every component may be on site. New plumbing positions, wall changes or custom storage place the project in a different category.

“Demolition is the longest stage”

Demolition causes the most visible disruption, but it is rarely the main calendar burden. Procurement, approvals and trade sequencing create more waiting. Time can be lost before the first cabinet is removed, particularly if an appliance changes size or a custom item needs revised drawings.

“Supply delays will sort themselves out”

They will not. A missing sink, appliance or stone slab can stop the next trade from completing its work. Confirm selections early, check delivery status and delay demolition until materials and decisions are aligned.

“The start date is the finish date”

A builder's start date indicates when site activity should begin. It does not confirm that every downstream trade can attend without interruption. Ask for the sequence from demolition through final fit-off, then identify the items that could move handover.

A renovation may have only a short period of visible building work but a much longer total calendar time. Permit requirements, builder registration and ordered materials can stretch the programme before or between site activities.

The right question isn't “How fast can the renovation be done?” It's “Which parts of this schedule cannot be compressed without creating rework?”

A kitchen that appears simple but needs plumbing relocation belongs in a more involved planning category. Genuine speed comes from removing uncertainty early, not from rushing measurements, compliance work or trade handovers. JSImport

A Real Highett Kitchen Project Walkthrough

A Highett family recently planned a kitchen with new cabinetry, a custom pantry, updated appliances and a relocated window. They wanted more daylight and storage, yet the window change meant the work could not follow a simple cabinet replacement programme.

The project started with the brief, site measurements and service locations. Several 3D design reviews settled the pantry configuration, appliance positions and finishes before cabinetry was ordered. That early clarity shortened the pre-construction period because the joinery specification stayed stable.

Where the calendar moved

The window relocation required further documentation and approval coordination. This moved the project beyond the shorter renovation pathway. Cabinetry could be ordered only after the revised layout and construction information were sufficiently resolved.

On site, the sequence followed a practical order. The team protected access areas, removed the old kitchen, completed plumbing and electrical rough-ins, repaired surfaces, installed flooring and fitted the cabinetry. Stone measurement came after the cabinets were fixed in place. Benchtops, splashback, appliances, lighting and final adjustments followed.

The family also scheduled an adjacent bathroom upgrade during the same renovation period. Coordinating both areas reduced repeated disruption, although the household needed a room-by-room sequence showing which facilities remained available.

Bathroom work still required its own service and compliance checks, particularly where the scope extended beyond cosmetic finishes.

The lesson for investors

A similar Highett kitchen with a fixed layout and no window relocation could sit near the shorter end of its applicable timeline. This project took longer because the custom pantry and window change created extra design, approval and coordination work.

The calendar therefore included two different measures: active building time on site and the full period from design decisions to handover. The visible construction sequence can be relatively compact, while approvals, documentation and ordered joinery extend the total programme.

For an investor, the decision involves a clear trade-off. A custom layout may strengthen the property's long-term appeal, while a cosmetic refresh can return the kitchen to service sooner. Neither approach is automatically better. The right choice depends on the rental brief, building constraints and tolerance for vacancy. In this project, the window change delivered a stronger result, but it also carried the longer calendar.

Practical Ways to Speed Up Your Kitchen Remodel

Speed comes from decisions made before demolition, not from pushing trades to work faster. On a Highett project, the build may compress when the scope is fixed, while approvals, joinery production and late selections usually stretch the total calendar.

  • Freeze the brief early: Confirm whether the layout, plumbing points, windows and walls will change. A late revision can require updated drawings, trade coordination and approvals.
  • Confirm appliances before stone measurement: Cabinet dimensions, power requirements and cut-outs depend on the selected models.
  • Release cabinetry only from final information: Pantry widths, fillers and appliance clearances must be settled before joinery production.
  • Complete selections in one review: Record doors, handles, benchtops, splashbacks, sinks, taps, lighting and flooring together. This lets the builder check compatibility before orders are placed.
  • Protect the trade sequence: Finish plumbing and electrical rough-ins before walls and finishes close. Rushing this stage commonly creates rework.
  • Set one coordination point: One team overseeing design, construction and finishing can reduce handover gaps between separate trades.

The household's setup also affects progress. Review this guide to living in your house during renovation before work starts, especially if the kitchen is the only cooking area. Temporary cooking, food storage and washing-up arrangements should be ready before demolition.

A contractor and a homeowner reviewing a project schedule on a tablet inside a kitchen remodel.

Do not gain speed by omitting permit documentation, waterproofing checks or final testing. Those shortcuts often move time into defects, rectification and disputes. The contract should state the scope, allowance process, approval responsibilities, material selections and conditions that may change completion. A registered builder and clear approval path can shorten uncertainty, but they cannot remove required checks.

Planning Your Renovation With Confidence

A dependable kitchen programme begins with decisions that can be priced, approved and ordered. Before requesting quotes, document the layout, appliances, storage, finishes, site access and any bathroom or laundry work planned at the same time. This separates total calendar time from the on-site build period, which may be shorter than the wait for approvals, fabrication or deliveries.

Use this checklist:

  1. Define the brief and budget band: Separate layout and service changes from finish upgrades, so scope changes are visible.
  2. Complete the site review: Check walls, windows, plumbing, electrical access and Body Corporate requirements before drawings are finalised.
  3. Approve the design: Settle clearances, storage and finishes in the drawings and 3D visualisation.
  4. Confirm permits and registration: Identify who prepares documents, lodges applications and supervises regulated work in Victoria.
  5. Order long-lead items: Coordinate cabinetry, appliances, benchtops, fixtures and tiles before demolition is booked.
  6. Prepare for the unusable period: Arrange temporary cooking, food storage, washing-up and family meals.
  7. Set handover checks: Test appliances, cabinet adjustments, plumbing connections and lighting, then record cleaning and project documentation.

The same schedule needs to account for adjacent bathroom renovations, laundry work or new bathroom ideas. Shared access and overlapping trades can extend the calendar, even when each room's construction time appears manageable. A single programme gives the household, landlord or Body Corporate committee one sequence to review.

Screenshot from https://siteprobathrooms.com.au

For a kitchen-specific planning reference, review this guide to how to remodel a kitchen. Then request a consultation with your Highett property details, scope, appliance schedule and target date. A measured quote should identify approvals, procurement, site conditions and the period the kitchen will be unavailable.

Contact SitePro Bathrooms for an on-site consultation in Highett or greater Victoria. Ask for a written scope and timeline based on the actual home, not a generic two-month estimate.