• siteprobathrooms

Bathroom Design Online: A Practical Step-by-Step Guide

You've uploaded a rough sketch, added a few phone photos, and received a polished 3D bathroom design online. Then you notice the vanity blocks the door, the shower sits over an awkward waste position, and the render says nothing about what's behind the tiles. That's the point where a pretty concept becomes a costly problem.

A successful online process isn't just about choosing modern bathrooms, designer bathrooms, or the latest new bathroom ideas. It's one connected workflow, from accurate measurement to a checked layout, a site inspection, and a signed renovation quote. Some decisions are safe to make on-screen. Others must wait until a qualified professional sees the room before construction begins.

Measuring and Photographing Your Bathroom Before You Start

The homeowner who starts with inaccurate measurements usually spends the rest of the project correcting assumptions. A door swing gets missed, a window reveal is shallower than expected, or a pipe sits exactly where the new vanity needs to go. Measurement and photography are the most important inputs in bathroom design online, because every later decision depends on them.

Start with a simple measured plan. Use a steel tape, laser measure, notepad, and level, then record each wall from finished corner to finished corner. Note wall thickness where it's visible, ceiling height, and every change in direction. Mark the precise position and size of:

  • Doors: Record the opening width, frame position, swing direction, and available clearance.
  • Windows: Measure sill height, overall opening, reveal depth, and distance from each adjacent wall.
  • Fixtures: Locate the toilet, basin, bath, shower, vanity, and heated towel rail.
  • Services: Mark plumbing outlets, electrical points, switches, exhaust fans, lights, and the floor waste.
  • Drainage: Photograph and note the apparent waste-pipe direction, especially if the toilet or shower may move.

Don't rely on one dimension. Take measurements from more than one reference point, then check that the totals make sense. A level helps identify walls or floors that aren't straight, while a laser measure makes ceiling height and longer wall dimensions easier to verify.
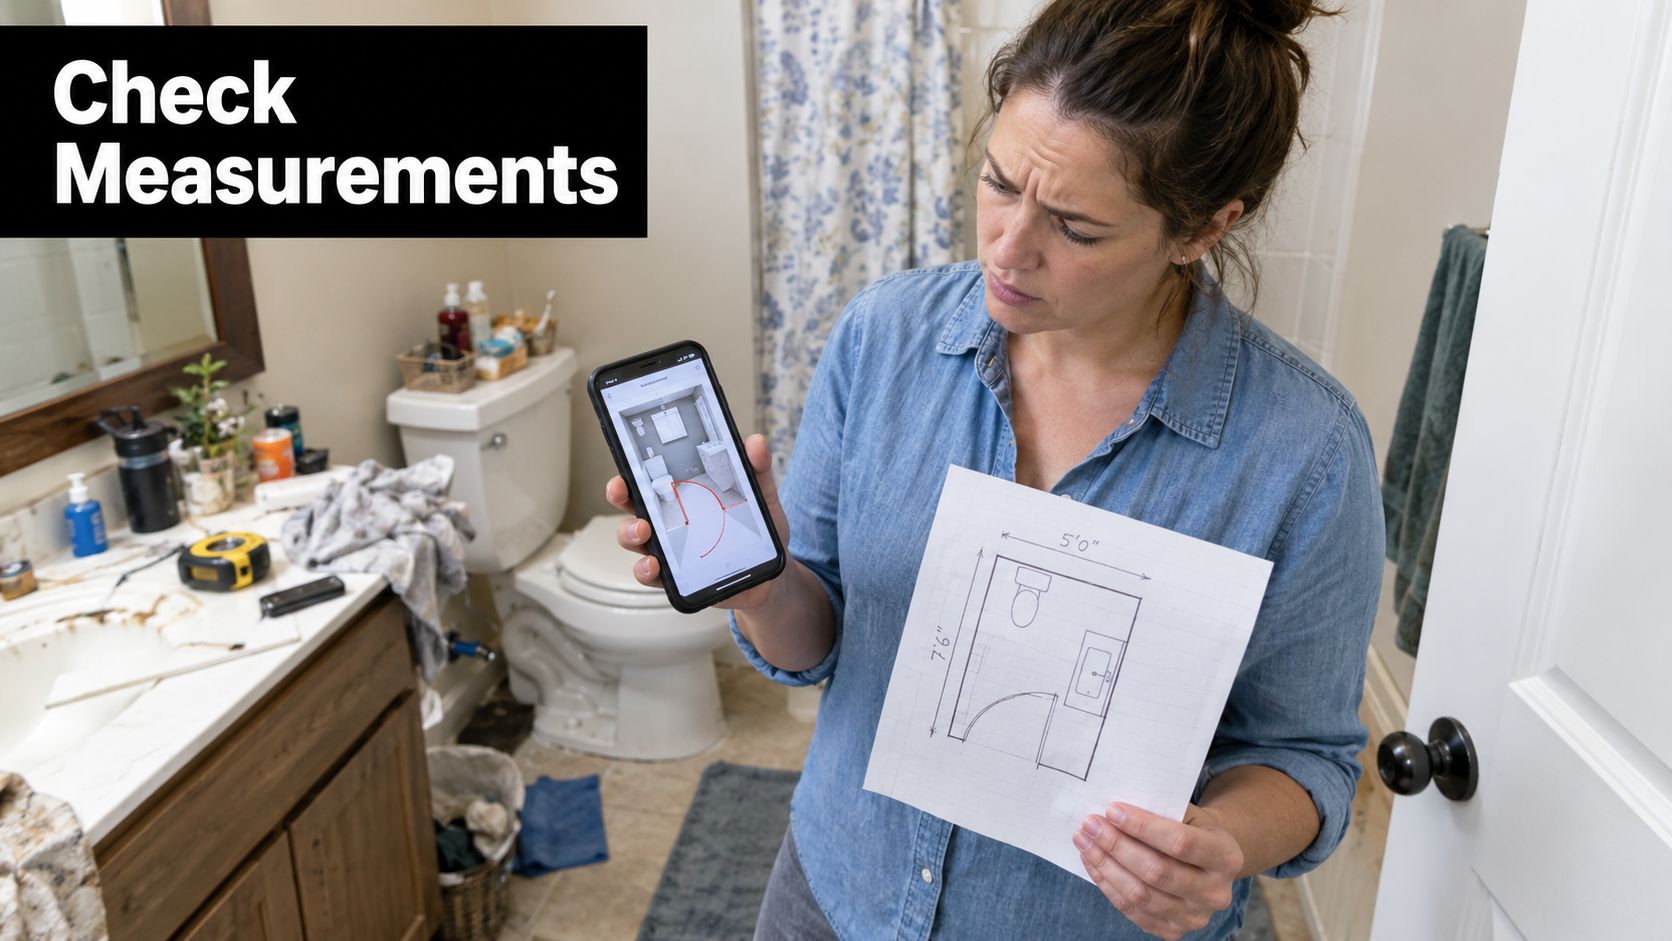
A confused woman comparing her bathroom renovation floor plan on paper and her phone while standing inside.

Take photographs that answer construction questions

Take wide-angle photographs from every corner, keeping the camera level rather than pointing sharply up or down. Add close-ups of the window reveals, floor waste, ceiling condition, wall junctions, shower base, existing sealant, and any visible waterproofing evidence. Include a tape measure in difficult areas so the designer can understand scale.

Photos still have limits. They can't reliably confirm the wall substrate, subfloor falls, or the condition of pipes behind tiled surfaces. They also can't prove whether a wall is structural or whether an existing waterproofing system has been installed correctly. Those unknowns require a site visit, inspection, or controlled opening-up before anyone promises a final construction scope.

Use this small bathroom layout dimensions guide to cross-check the plan before sending it through. Your upload should include a dimensioned floor plan, labelled photographs, service locations, a short list of unknowns, and a note explaining which fixtures must stay in place. Accurate inputs won't solve every building question, but poor inputs guarantee avoidable revisions.

Choosing Your Online Design Path

There are three sensible ways to approach bathroom design online. The right choice depends on whether you need inspiration, a buildable concept, or a design that connects directly to bathroom renovations and construction.

DIY planners and 3D tools

A browser-based planner lets you place fixtures inside a generic room footprint and test different arrangements. It's useful for understanding whether you prefer a shower-only room, a bath with a separate shower, a wall-hung vanity, or a more open wet-area arrangement. It's also a quick way to create a mood board and identify your preferred colour, tile, and fixture direction.

The limitation is structural judgment. A generic tool won't know whether your wall can accept a recessed cabinet, whether the floor can accommodate a relocated waste, or whether the proposed clearances work with the actual door, window, and pipework. Treat the result as an early conversation document, not construction documentation. A free 3D bathroom planner can help you explore options before you commit to a brief.

Dedicated online design services

A remote designer works from your measurements, photographs, preferences, and product requirements. You'll usually receive a custom layout, selected fixtures, finish suggestions, and one or more visual concepts. This route suits homeowners who want professional interpretation without managing every design decision alone.

The trade-off is accountability at the handover. The designer may not inspect the room, confirm substrate conditions, or control the contractor's interpretation of the drawings. You need to establish exactly what the package includes, how revisions work, whether products are available locally, and who checks the design before ordering.

Local renovation firms with an online front end

A local renovation firm can use online design to begin the project, then connect the concept to an in-room measure, trade coordination, scheduling, and a construction contract. SitePro Bathrooms is one example of a Victorian renovation company offering 3D design and renovation planning as part of its service.

This path is usually tied to the firm completing the work, so it's less flexible if you want to take the design elsewhere. In return, the same team can reconcile the digital layout with the actual room before finalising the quote.

Path Best For Main Strength Main Limitation Quote Linkage
DIY planner Early ideas and rough layouts Fast visual exploration No site or structural judgement Usually separate
Online design service Tailored design guidance Personalised concepts and selections Site accountability may be limited Often handed to another contractor
Local renovation firm Design-to-build projects Direct connection to scope and trades Usually tied to the building firm Integrated with inspection and quoting

Don't choose based on the render alone. Choose based on the level of risk in the project. A cosmetic fixture swap needs less technical involvement than a wet-room conversion, structural alteration, or layout that moves multiple services.

Briefing Style, Layout and Fixtures the Right Way

A designer can't produce a useful first concept from “modern, luxurious, and easy to clean”. Those words mean different things to different homeowners. A strong brief turns taste into decisions.

Before uploading anything, write down your preferences for:

  • Style direction: Choose a clear starting point, such as Hamptons, minimalist, industrial, heritage, or warm contemporary.
  • Colour palette: Identify preferred neutrals, accent colours, metal finishes, and tones you want to avoid.
  • Surfaces: State whether you're considering large-format tiles, small-format tiles, terrazzo, stone-look finishes, or painted walls outside wet areas.
  • Vanity configuration: Decide whether you're leaning towards wall-hung, freestanding, or built-in joinery.
  • Bath and shower priorities: Say which fixture matters most if the room can't comfortably accommodate both.
  • Storage: List what must fit, such as cleaning products, spare towels, children's toiletries, or accessible daily-use items.
  • Budget bracket: Set a realistic allowance for each fixture category rather than one broad total.

Package that information in a short written brief and a curated mood board. Six to ten reference images are enough if each image has a note explaining what you like. “The pale wall colour” is useful. “The floating vanity and concealed storage, but not the open shelving” is better.

Separate style decisions from layout constraints

Your layout brief should identify the things that can't move casually. Mark whether the toilet must remain on its current wall, whether the door may swing in the opposite direction, and which clearances are essential. Mention access requirements, child use, mobility considerations, cleaning preferences, and whether the bathroom needs to function as a family room or private ensuite.

Fifty unsorted inspiration images create noise. A designer can see that you like bathrooms, but not which elements you want combined. A shorter, annotated collection reveals intent and makes it easier to reject an attractive feature that conflicts with storage, ventilation, or maintenance.

The best brief arrives as a decision sheet, a labelled plan, annotated images, and a list of fixed constraints. On the designer's side, that creates a clear starting point for layout, fixture selection, and material coordination. It also reduces the revision cycle because the first concept answers the underlying questions instead of guessing at them.

Reading a 3D Design Before You Approve It

A 3D render is persuasive because it removes clutter. It shows clean tiles, perfect lighting, and a room without tools, dust, or exposed services. Review it as a technical proposal, not a finished photograph.

Begin with the plan view, then compare it with the render. Check the shower position against the existing plumbing rough-in and stack locations. Confirm that the toilet outlet, basin wastes, floor waste, and shower waste can connect in the proposed direction without creating an impractical chase, boxed-out wall, or excessive floor build-up.

Check water, waterproofing, and electrical constraints

For Victorian wet areas, the design must account for National Construction Code requirements. Shower floors must be waterproofed, wet-area walls are generally waterproofed to at least 1,800 mm, and a floor waste must have a continuous fall of at least 1:80 towards the waste. Compliance with Part 10.2 of the Housing Provisions or AS 3740 satisfies the wet-area performance requirement, as outlined in this Victorian bathroom renovation checklist.

The render won't prove that a floor falls correctly. It also won't show whether the substrate is suitable, whether the waterproofing membrane can be detailed around penetrations, or whether the shower screen needs additional support. Those items need technical review and, where necessary, site investigation.

Check window reveals for the proposed tile build-up. Review electrical points against wet-area zone separations, and make sure mirrors, cabinets, and lights don't conflict. Confirm that the exhaust fan has a sensible discharge route and that joinery won't obstruct isolation valves or service access.
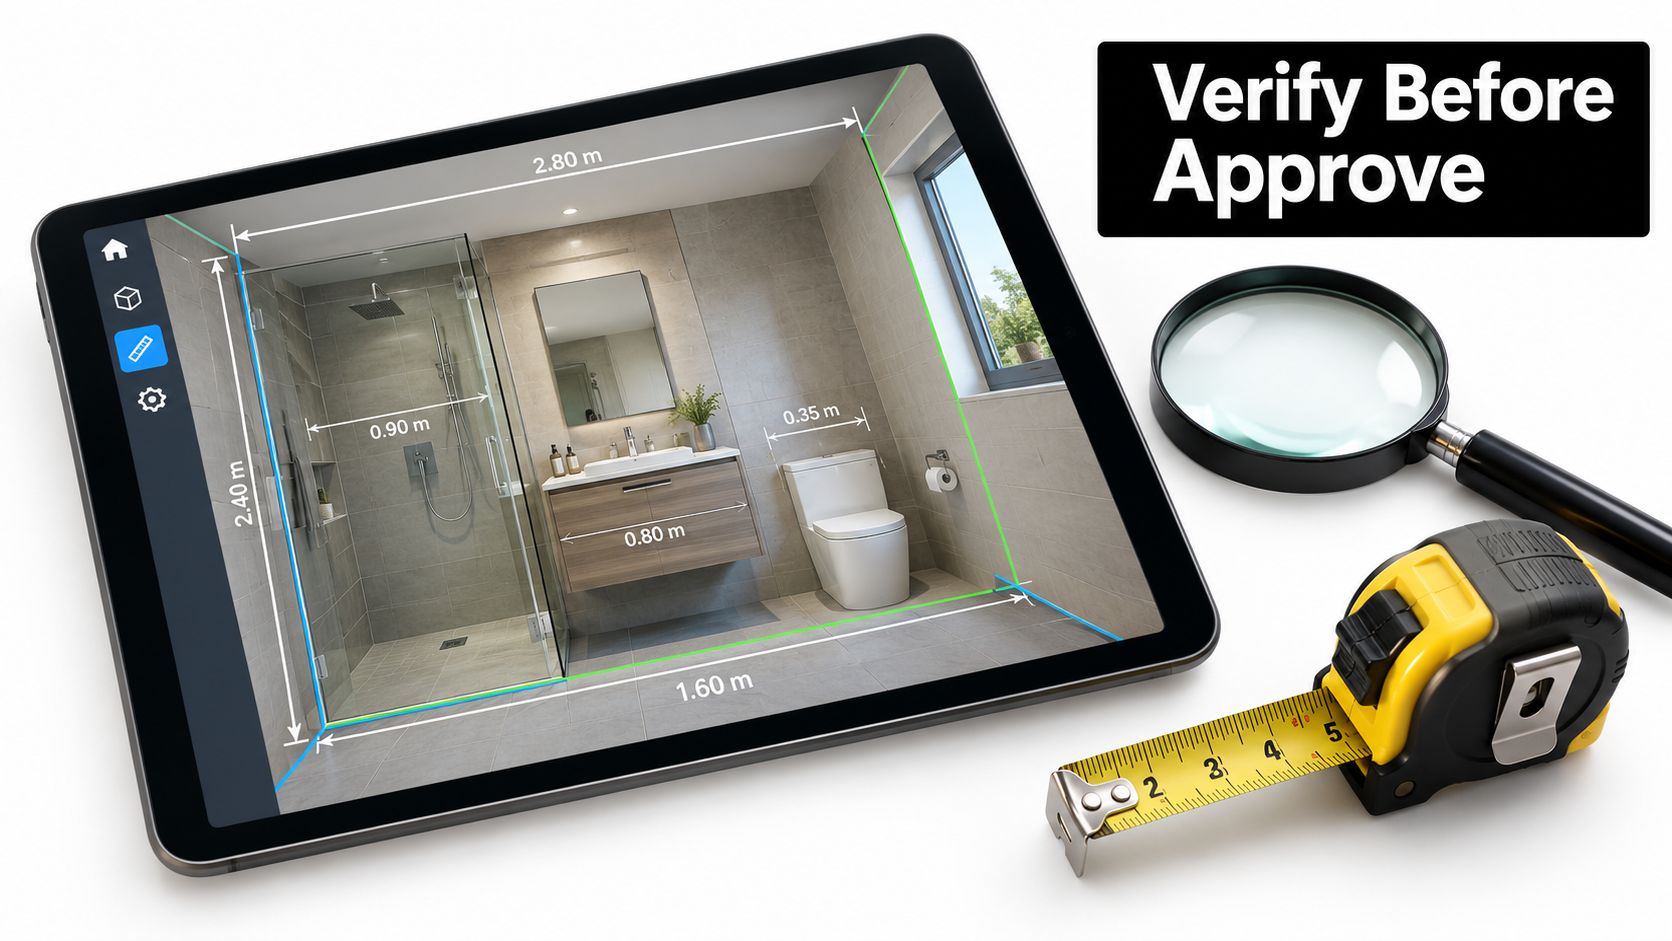
A digital tablet displaying a bathroom renovation layout with measurement annotations next to a magnifying glass and tape.

Look for the failures that renders hide

A floor waste positioned mid-bath is a clear warning. So is a glass panel with no apparent structural framing, a vanity blocking the isolation valves, or a mirror placed where a window or wall light makes it unusable. Tile layouts deserve the same scrutiny. Check where cuts land at corners, how the pattern meets the door, and whether the selected tile creates awkward slivers around the vanity.

Print the plan if possible. Mark every water, waste, electrical, ventilation, and structural point. Walk through the room mentally, opening the door, stepping into the shower, using the vanity, and reaching the valves. Approve the visual design only after the floor plan, services, clearances, and wet-area requirements tell the same story.

Turning an Online Design Into a Real Renovation Quote

An online design can establish the intended layout, fixture schedule, tile direction, joinery concept, and visible finishes. It can often support reasonable allowances for fixture supply, tile quantities, and cabinetry. It can't confirm every concealed condition, so the quote must separate known scope from provisional risk.

A site visit becomes necessary when the design changes plumbing, removes or opens walls, alters floor levels, depends on existing waterproofing, or involves uncertain building materials. The contractor may need to inspect the substrate, assess the subfloor, confirm pipe routes, investigate electrical capacity, and determine whether asbestos testing is required. Structural wall removal can't be priced responsibly from a render.

Understand the Victorian paperwork

In Victoria, domestic building work worth more than $10,000 generally must be completed by a registered building practitioner, and this includes renovations. Work above that threshold also requires a major domestic building contract. From 1 July 2026, Home Warranty insurance is required for work worth more than $20,000, according to the Victorian renovation guidance linked in this bathroom renovation overview.

Check the practitioner's registration and the scope attached to it. Victoria has a domestic builder registration class limited to bathroom, kitchen, and laundry renovation work. Don't assume that a polished online presence replaces registration checks, written documentation, or a clear contract.

The builder's usual hand-off should include an in-room measure, reconciliation of the online design, a revised scope, identified exclusions, and a final pricing structure. That may be a lump-sum quote or a cost-plus arrangement, but you need to understand which items are fixed and which remain allowances.

Practical rule: The online design starts the quote. The site inspection earns the right to call it final.

Control variations before they control the budget

Confirm every PC item, product allowance, delivery charge, and installation assumption. Imported tiles, custom joinery, and discontinued finishes can affect the programme as well as the price. Keep the design files, quote versions, selections, invoices, approvals, photographs, and written variation requests together.

Ask how progress payments are scheduled and review the cooling-off provisions before signing. Payments should align with the contract and applicable Victorian guidance, not informal requests made after an unexpected site problem. If a variation arises, require a written description of the change, its cost effect, and any timing impact before approving it.

Planning Around Real Australian Timelines and Costs

A polished online design can still face delays once demolition exposes the room. Online planning brings decisions forward, but construction remains tied to product availability, inspections, curing, trade sequencing, and defect rectification.

Australian reporting for 2026 places full bathroom renovations at approximately A$10,221 to A$20,443 nationally, with Melbourne projects around A$10,500 to A$21,000. The report also identifies hidden costs of 10% to 25% and a typical construction period of two to three weeks. Homeowners who stay in the property during the work can add 30% to 50% to the timeline. These figures are summarised in Australian renovation cost and duration reporting for 2026.

That construction window is only one part of the project. Design refinement, ordering, demolition, waterproofing, curing, tiling, fit-off, inspections, and defect corrections all need time around the physical build. Imported feature tiles, custom vanity joinery, and specialist tapware can delay the start if they are not available before demolition. For a detailed breakdown of what affects renovation duration, see this guide on how long a bathroom remodel should take.

Project Stage Duration Cost Drivers
Design refinement Variable Layout changes, selections, technical checking
Product procurement Variable Availability, custom joinery, imported finishes
Demolition and investigation Site-dependent Substrate damage, concealed services, testing
Waterproofing and curing Trade and product dependent Floor falls, penetrations, membrane detailing
Tiling Site-dependent Tile format, cuts, patterns, wall condition
Fit-off Site-dependent Plumbing, electrical, cabinetry, screens
Defect rectification Allow time before handover Adjustments, replacements, final sealing

Budget for the house you have

The Australian bathroom market is large and high-value. HIA-linked coverage recorded 241,180 bathroom renovations in the 12 months covered by its 2020 to 2021 Kitchens and Bathrooms Report, with an average bathroom installation cost of $21,484 in 2021. It also reported 542,600 new bathroom installations in 2021/22, with the installation market reaching $6.5 billion, up 24.2% in one year. While these HIA figures date from 2021, they remain a useful baseline for market scale, with current costs running higher according to the 2026 reporting above. See the Australian bathroom renovation coverage for the HIA-linked data.

Treat trends as design input, not a budget. Warm neutrals, large-format tiles, freestanding baths, wet rooms, curved forms, and softer metal finishes must still work with slip resistance, cleaning, ventilation, grout exposure, moisture, and resale appeal. Current Australian design coverage highlights pink marble, pale blue, brick-look tiles, neutral terrazzo, and small square tiles, as shown in this modern Australian bathroom design roundup.

Don't price a Victorian bathroom from an inspiration board. Allow for concealed rework, service relocation, and conditions revealed after demolition. I'd use a 15% to 20% contingency when the renovation contains meaningful unknowns. Set the reserve according to the home's age, planned plumbing movement, and the findings from the site inspection.

If you're planning bathroom renovations in Highett or greater Victoria, start with a measured plan, labelled photographs, and clear requirements. Send them to SitePro Bathrooms for a design discussion, then require an in-room inspection and written quote separating confirmed work from provisional items. The online design should lead to a signed quote that survives contact with the actual room.

  • siteprobathrooms

Planning a Home Renovation in Victoria: A 2026 Guide

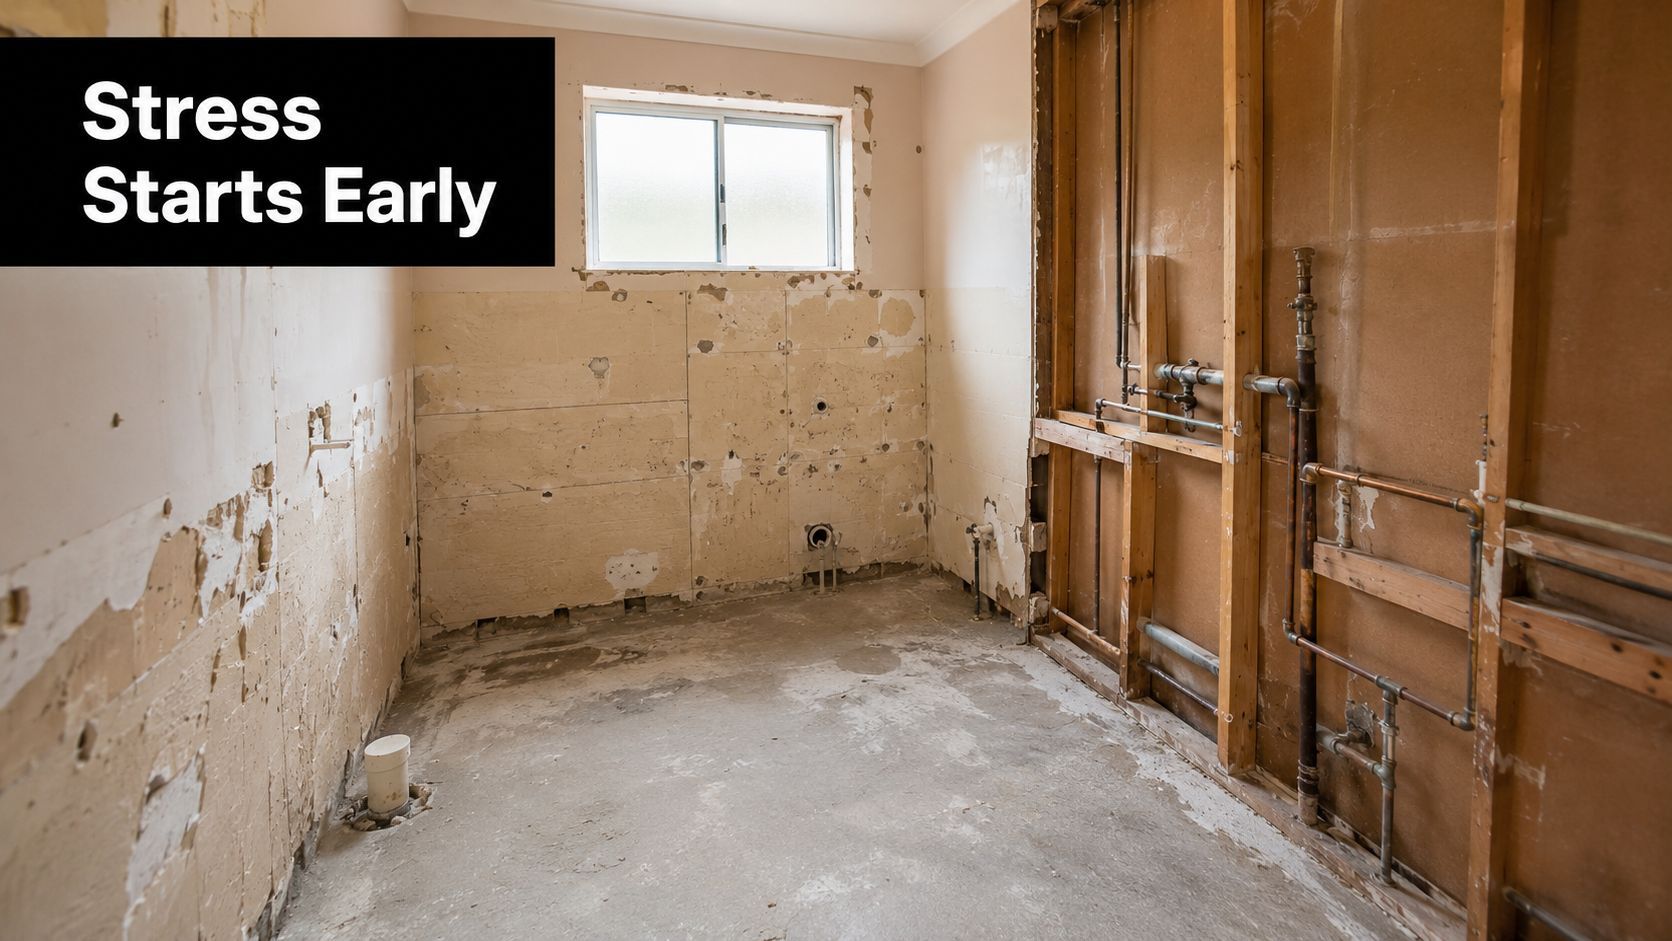
You're in Highett, the bathroom has been gutted, the plumbing is exposed, and a tradie is due to start next week. There are no finished drawings, nobody has confirmed whether a permit is required, and the budget is a rough guess based on a few online images. That's not a renovation plan. It's a demolition date attached to a list of unanswered questions.

The expensive problems usually begin before the first hammer. An undeclared change to the layout can alter the permit path. An unverified builder registration can leave you with the wrong person responsible for regulated work. A missing waterproofing inspection can force rework after tiles are installed. Planning a home renovation in Victoria means resolving those risks in the right order, before materials are ordered and trades are booked.

Why Most Renovation Stress Starts Before the First Hammer

A bathroom in Highett can look productive after demolition, with the vanity, tiles, and plaster removed. The exposed room often reveals the opposite. Structural conditions, plumbing routes, waterproofing, ventilation, and compliance decisions are now urgent, yet the drawings and approvals may still be incomplete. Demolition has converted unanswered questions into delays on site.

In Victoria, planning and building permits follow different paths. A planning permit may be required before building, extending, or renovating, particularly where council controls or a heritage overlay apply. A rebuild always needs a building permit. Confirm the planning position with council and review the Victorian guidance on plans and permits before demolition, ordering, or booking trades.

Permit status affects the critical path. It can determine whether drawings need revision, whether a registered building practitioner is required for the work, and whether inspections must be scheduled before walls and floors are closed. Treating approval as paperwork for later is how a planned start becomes a vacant, unusable room.

The four failures that create blowouts

Scope failure is usually the first problem. “Renovate the bathroom” might mean new finishes and fixtures, or it might involve moving walls, relocating plumbing, changing windows, replacing waterproofing, upgrading electrical work, and altering ventilation. Each version requires a different design, trade sequence, approval route, and budget allowance.

Write the scope in physical terms. Identify what stays, what moves, what gets replaced, and what may be exposed once demolition starts. If the work affects structural elements or regulated building work, confirm the practitioner's registration class and experience before accepting a quote.

Budget failure follows when the allowance covers only visible products. Tiles, a vanity, tapware, and a shower screen are selections, not a complete project cost. Labour, waste removal, electrical changes, waterproofing documentation, temporary facilities, delivery, access constraints, and remedial work belong in the same budget.

Ask for assumptions, exclusions, provisional items, and conditions that depend on opening the walls or floor. A low quote with missing scope is not a saving. It is a delayed cost.

Builder failure occurs when availability matters more than capability. Select a practitioner whose registration and experience match the work, especially where the renovation changes plumbing layouts, waterproofing, structural elements, or compliance-related details. A casual handyman is not a substitute for the people required to design, certify, and carry out regulated work.

Sequence failure stalls the site even when each individual decision seems minor. An unavailable basin can hold up installation. A tapware change after rough-in can force plumbing rework. Starting before the permit position is settled can interrupt several trades and push inspections out of order.

Victorian renovation guidance estimates that a building permit can add 2 to 4 weeks, while a planning permit can add 4 to 12 or more weeks. Use those lead times when setting the start date, ordering materials, and arranging accommodation. Review the Victorian permit timing guidance before committing to a demolition date.

Practical rule: If a decision can change the drawings, permit pathway, trade sequence, or purchase list, make it before you commit money.

Write the brief before requesting quotes

Start with one page. Make it specific enough that a designer, builder, or project manager can price the same job without guessing.

For a bathroom, record daily users, storage problems, shower preferences, accessibility needs, cleaning priorities, and whether the room must support children, guests, or ageing in place. For a kitchen, record cooking habits, appliance requirements, pantry storage, entertaining needs, and whether walls or services might move. For whole-home work, identify zones that must be completed together and areas that can wait.

Divide every request into three groups:

  • Must-haves: Changes that solve the current problem, such as a better shower layout, more storage, improved lighting, or a safer floor.
  • Nice-to-haves: Enhancements that can be removed without damaging the project, such as a feature tile, upgraded accessories, or decorative joinery.
  • Hard dealbreakers: Conditions you will not accept, such as losing the only family bathroom, compromising ventilation, exceeding a borrowing limit, or damaging a heritage feature.

Answer three blunt questions. How long will you live with the result? Who uses the room every day? What level of resale value matters in your suburb? A short-term refresh needs a different brief from a long-term home, and an owner-occupier will not always prioritise the same outcomes as an investor.

Use the brief during every quote review and design decision. If a new idea does not support a stated goal, move it to the nice-to-have column or a later stage. This keeps selections tied to the reason for renovating and limits scope changes that disrupt approvals, orders, and trade bookings.

An unfinished room undergoing a home renovation with exposed wooden wall studs and plumbing pipes exposed.

Australia's renovation market makes this front-end discipline more important. KPMG reported that renovation spending reached 40% of total residential construction spending in 2023–24, compared with 34.2% in 2018–19, while renovation spending increased 6.5% across that five-year period. The same release reported that inflation-adjusted spending on new private residential construction was 14% lower in 2023–24 than five years earlier. These figures appear in KPMG's renovation market release.

For homeowners, demand for trades, materials, surveyors, and approvals can affect availability. Your brief controls the decisions that shape the critical path. It is the document that keeps the design, permit route, budget, and construction sequence aligned before the first hammer.

Building a Renovation Budget That Actually Holds

A bathroom budget only holds when it includes the work behind the finishes. Don't treat a product list as a project budget. A cosmetic refresh, a complete wet-area rebuild, and a designer bathroom with layout changes carry different approval, labour, and coordination demands.

I won't publish invented 2026 price bands because no verified cost figures are available here. Instead, use the table below as a planning structure, then replace each tier with written quotes based on your actual room, access conditions, selections, and permit requirements.

2026 Victorian Bathroom Renovation Budget Bands

Project Tier Indicative 2026 Range (AUD) Typical Extras Homeowners Miss
Cosmetic refresh Obtain a project-specific written quote Minor repairs, disposal, painting, accessory changes, and delivery
Standard bathroom rebuild Obtain a project-specific written quote Waterproofing certification, electrical upgrades, tile wastage, skip hire, and temporary bathroom arrangements
Designer bathroom rebuild Obtain a project-specific written quote Detailed design, premium finishes, custom joinery, complex lighting, service relocation, inspections, and snagging

The useful financial discipline is to separate fixed scope from unresolved risk. Ask the builder to identify assumptions, exclusions, provisional items, access restrictions, and any work that depends on opening the walls or floor. Waterproofing certification, electrical upgrades for a new lighting layout, tile wastage, skip hire, temporary bathroom costs, and post-handover snagging should appear explicitly rather than hiding in a vague allowance.

Renovation demand is substantial. KPMG reported that renovation work represented 40% of residential construction spending in 2023–24, and Australian survey data recorded more than $3 billion spent on alterations and additions in the September quarter of 2023, according to the Australian renovation activity data. Those figures don't tell you what your bathroom will cost, but they do reinforce the need to book and budget carefully.

Add a 15 to 20 per cent contingency above fixed-price quotes as a planning recommendation, not as a claimed market statistic. Keep it available for concealed damage, scope decisions, compliance changes, and genuine variations. Track each selection before sign-off, including the item, allowance, supplier confirmation, delivery status, and whether installation is included. A spreadsheet updated weekly is more useful than a budget reviewed after the final invoice.

For a coordinated approach to scope, selections, and construction, review the bathroom renovation project management service, then compare its inclusions against your own brief.

Hiring the Right Builder and Designer in Victoria

A builder's registration class determines which domestic building work they can undertake. For a Victorian bathroom renovation, verify registration before discussing start dates. Check the builder's current details on the Victorian Building Authority public register, then ensure the contract names responsibility for the work, approvals, coordination, and defects.

Registration Class Scope Allowed Typical Project Fit
Unregistered handyperson Minor maintenance and non-regulated tasks only Cosmetic repairs that don't cross into regulated domestic building work
Domestic Builder Limited Work restricted by the conditions of the specific registration Small or narrowly defined projects that fit those limits
Domestic Builder Unlimited Domestic building work without the project-size cap applying to limited categories Larger, complex, structural, or fully coordinated bathroom renovations

A Domestic Builder Unlimited registration suits larger or more complex bathroom projects that extend beyond small repairs, subject to the conditions of the practitioner's registration. Confirm the class and current details through the VBA register before signing. Do not assume a tradesperson who can complete one part of the job can manage the entire renovation.

Questions that expose weak proposals

Request the registration number, recent comparable projects, and addresses you can inspect with the owner's permission. Ask for a written scope that states whether pricing is fixed or cost-plus, lists exclusions, explains variation approval, and identifies who handles the building permit. An unclear approval responsibility can delay the start and force redesign after selections have been made.

Ask how the builder will arrange waterproofing inspections, plumbing compliance, electrical certification, site protection, rubbish removal, and handover documents. Request the proposed programme, decision deadlines, defect process, and delay provisions. Treat “permits are just a formality” as a red flag. Planning and building approvals follow different paths, and an overlooked heritage overlay or structural change can hold up the critical path.

Designers require the same scrutiny. Confirm that their drawings include measured plans, elevations, reflected ceiling plans, lighting locations, tile layouts, fixture specifications, and construction notes. Ask whether they provide 3D design reviews and how they manage design freeze, the point after which changes require a formal variation. Late changes can affect approvals, ordering, labour, and the handover date.

SitePro Bathrooms provides concept development, 3D design, construction, and finishing as a coordinated renovation service. Whether you appoint one provider or separate professionals, choose people who can show how the brief becomes documentation, approvals, procurement, construction, and handover. Get those responsibilities in writing before the first deposit.

Navigating Victorian Planning and Building Permits

A bathroom renovation can stall before demolition if you treat approvals as paperwork to sort out later. Planning permits and building permits follow different paths, and satisfying one does not satisfy the other. Check both before the layout is locked, because an overlooked overlay or structural change can force redesign, delay orders, and extend the critical path.

A planning permit covers land use, neighbourhood amenity, siting, overlays, and development controls. Council assessment may be required for a heritage overlay, façade or window changes, certain siting changes, or two dwellings on one lot. A building permit covers construction compliance under Victoria's building framework, including structural safety, waterproofing, framing, and other Building Code requirements.

Check the pathway before design freeze

Start with the property information available through VicPlan, then contact the relevant council. Do this before design freeze. An internal bathroom may still involve a heritage control, altered window, relocated services, changed floor levels, or structural work. Each can change which approvals and documents are required.

Engage a private building surveyor early when walls, windows, floor levels, waterproofing, or structural elements will change. Ask the surveyor to confirm the required documents, which may include:

  • Measured drawings: Existing and proposed plans, elevations, and relevant sections.
  • Engineering information: Structural calculations and details for changed framing, beams, walls, or loads.
  • Wet-area documentation: Waterproofing details, product information, and inspection arrangements.
  • Specification schedules: Fixtures, materials, construction methods, and compliance details.
  • Site information: Property details, photographs, title or plan information, and relevant overlay or planning information.

Requirements depend on the property and scope. Council and the surveyor must confirm the pathway, rather than a builder relying on an assumption that the work is internal. Victorian consumer guidance advises homeowners to check with council before starting an extension or renovation. Use this Victorian building and renovation permit guidance as a reference for the distinction, but obtain project-specific advice from the appropriate Victorian authorities.

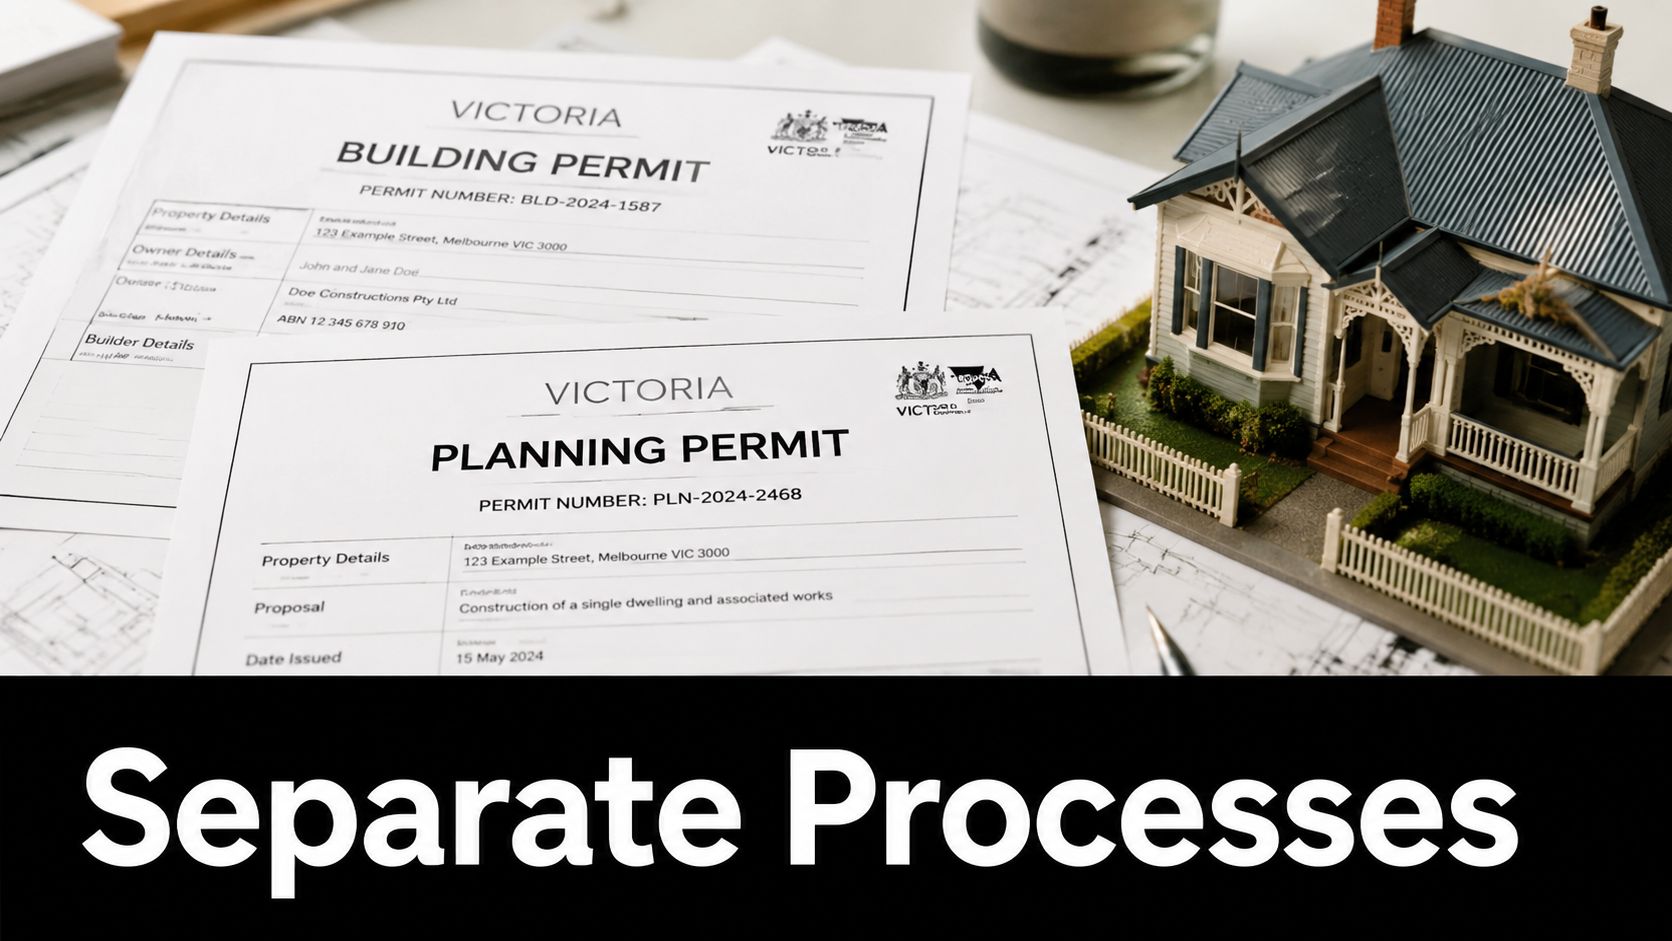
Building and planning permits for a home renovation project with a miniature model house on top of blueprints.

Cosmetic bathroom work can follow a different pathway from moving walls, changing plumbing layouts, altering load-bearing elements, or rebuilding waterproofing. “It's internal” does not mean “it's permit-free.”

Site rule: Never order materials around an unapproved layout. An early check costs less than demolition, redesign, and certification twice.

Timelines, Phasing, and How to Live Through the Works

A realistic Highett bathroom project can take 10 to 14 weeks from concept design to handover when design, approvals, procurement, construction, and rectification are included. That timeframe is a project-planning benchmark, not a promise. Access, scope, approvals, product availability, and inspection timing can move it.

The critical path should run in this order:

  1. Concept design: Confirm the brief, measure the room, test layouts, and identify structural or service changes.
  2. Documentation and permits: Finalise drawings, lodge the relevant applications, and allow the surveyor or council to assess them.
  3. Procurement: Confirm tile, tapware, vanity, shower screen, lighting, and accessories before demolition.
  4. Construction: Sequence demolition, rough-in, framing, waterproofing, tiling, fit-off, testing, and snagging.
  5. Handover: Collect certificates, inspect finishes, record defects, and confirm rectification dates.

Book the 3D review before the permit documentation is final. Changing tapware after waterproofing or moving a shower niche after tiling has started creates avoidable rework. A 3D model should settle clearances, door swings, fixture positions, tile runs, and storage before orders are placed.

Keep the house liveable

For a larger renovation, phase by zone. Complete the ensuite while the family uses the main bathroom, then swap zones. Don't open every wet area at once unless you have suitable temporary facilities and a firm reason to accept the disruption.

Create a weekly schedule with five columns: activity, responsible person, inspection date, delivery window, and homeowner decision deadline. Mark permit milestones, waterproofing inspections, tile delivery, shower-screen measurement, and final electrical and plumbing testing.

Allow extra breathing room around Christmas and Easter, when trade availability and deliveries can change. Before committing to the programme, read the practical advice on living in the house during a renovation. Protect one clean living zone, isolate dust, secure tools, and keep children and pets away from the work area.

A professional bathroom installer working on a shower head fixture during a residential home renovation project.

Locking In Fixtures, Finishes, and 3D Design Early

By demolition week, undecided fixtures are already a programme risk. The builder needs confirmed dimensions, connection points, delivery dates, installation requirements, and approved alternatives before the room is opened. A late selection can hold up a trade, trigger rework, or force a variation.

Use this order:

  • Layout first: Set the vanity, toilet, shower, bath, door swing, storage, and circulation.
  • Services second: Confirm plumbing, electrical, ventilation, heating, lighting, and niche positions.
  • Products third: Specify tile, tapware, vanity, shower screen, lighting, mirrors, and accessories.
  • Documentation fourth: Record product codes, dimensions, finishes, installation notes, and approved substitutions.
  • Procurement last: Order only after checking availability, lead time, damage policy, and delivery access.

Choose a look that suits the house and can be maintained. Warm neutrals, earthy tiles, natural stone, curved forms, tactile finishes, floating vanities, layered lighting, large-format tiles, and smart storage are all useful directions in current Australian bathroom design. Texture and smart features are discussed in 2026 bathroom ideas focused on texture and smart design, while practical Australian bathroom materials and layouts supports choosing materials and arrangements that work in daily use. Do not select a trend before checking cleaning, replacement, and installation requirements.

Use 3D design to test decisions

Review the 3D model after the concept layout and before orders. Test tile runs across each wall, vanity-door clearance at the entry, shower-screen clearance from the towel rail, and niche height against the people using the room.

A render is a decision record. Compare it with the measured room, mark every change, and issue the approved version for documentation. Changes to tile pattern, tapware finish, vanity size, or lighting position after procurement can delay the programme and create a variation.

Physical samples remain necessary. View tile, stone, grout, metal finishes, and cabinetry in the room's daylight and evening lighting. A sample board can expose clashes between warm neutrals, brushed metal, natural stone, and artificial light that a screen conceals.

In Victoria, altered waterproofing, plumbing layouts, structural elements, or compliance details can raise registration and approval questions. Check the work category before the design is final, using Victorian bathroom renovation guidance as a starting point. Confirm the permit pathway and registered trades with the relevant professionals before construction documents and orders are locked.

Your Pre-Renovation Checklist and Sample Schedule

The homeowner controls the information that keeps a project moving. Your builder can coordinate trades, but you must make sure finance, insurance, access, household logistics, selections, and approvals are ready.

Copy this checklist before work starts

  • Finance approval: Confirm the available funds, payment schedule, variation process, and contingency.
  • Insurance notification: Tell your insurer about the planned works before construction starts. Homeowners often forget this.
  • Permit confirmation: Keep written confirmation of the planning and building permit pathway.
  • Contract review: Check scope, exclusions, allowances, start date, completion conditions, variations, and defects.
  • Neighbour notice: Explain noisy work, access needs, deliveries, and any shared-boundary concerns.
  • Temporary facilities: Arrange a temporary bathroom or kitchen setup if the home will lose essential services.
  • Household logistics: Plan for children, pets, work-from-home needs, dust, noise, and safe access.
  • Valuables storage: Remove fragile items, secure documents, and clear paths for deliveries.
  • Meter readings: Record electricity, gas, and water readings before site establishment.
  • Selections register: Confirm every product, finish, quantity, supplier, delivery date, and approved substitute.
  • Inspection dates: Book the final waterproofing inspection before tiling is sealed. This is the second commonly missed item.

For a printable version, use the bathroom renovation checklist and adapt it to the scope in your contract.

Sample project schedule

Phase Indicative allocation Homeowner control point
Brief Early project stage Approve must-haves, nice-to-haves, and dealbreakers
Concept design Following the brief Approve layout and service changes
3D review Before documentation Confirm clearances, finishes, and fixture positions
Documentation After design decisions Check drawings, specifications, and permit documents
Permit lodgement Before procurement lock-in Confirm the approval pathway and outstanding requests
Procurement After selections are frozen Verify availability, delivery, and damage procedures
Build After approvals and deliveries are aligned Attend agreed inspections and approve variations in writing
Handover At practical completion Inspect, collect certificates, and record defects

At handover, check the waterproofing certificate, plumbing compliance documentation, electrical certificate, tile lippage, grout consistency, silicone finish, and silicone cure times. Test doors, drawers, exhaust fans, lights, taps, drainage, and hot water. Record every defect with a location, photograph, responsible party, and rectification date.

Allow a 13-week defects liability window in your project records and contract administration. Don't treat handover as the moment the builder leaves. It's the point where you verify that the promised result has been documented, tested, and completed.

Australian renovation demand continues to support careful scheduling. Roy Morgan reported that 8.4 million, or 62%, of Australia's 13.6 million homeowners had renovated in the previous 12 months, compared with 7.5 million, or 57%, three years earlier, as reported in its renovation activity findings. Start with the brief, confirm the permit path, appoint the right registered builder, and freeze the selections before demolition.


If you're planning bathroom renovations, a kitchen upgrade, or a larger Victorian home renovation in Highett or nearby, book an on-site consultation with SitePro Bathrooms. Bring your wish list, floor plans, and budget boundaries, and ask the team to measure the space, test the layout in 3D, identify the permit questions, and turn the agreed scope into a clear renovation pathway before you commit to demolition or procurement.

  • siteprobathrooms

Timber Cabinets Kitchen Guide for Victorian Homeowners

You're standing in a Highett kitchen that still works, but only just. The doors stick, the corner cupboard wastes space, and the timber finish looks tired in the places you touch every day. That's the moment most homeowners start weighing up whether to refresh what's there or pull it out and do it properly.

For timber cabinets kitchen projects, the wrong decision is usually obvious two years later, when the finish has moved, the hardware sags, or the layout keeps annoying everyone who cooks there. The right decision feels calm from day one. It gives you a kitchen that suits the house, the climate, and the way Australian families live.

Why Timber Cabinets Matter in a Victorian Kitchen Renovation

A Highett homeowner opens an old cupboard door, sees swollen edges, and compares timber with laminate. That comparison is fair, but it misses the issue. The house is already telling you what belongs there.

Australian housing gives timber cabinetry a strong case because the market is dominated by occupied dwellings, and many are separate houses where built-in kitchen joinery is standard rather than decorative. ABS data show there were 10.9 million occupied private dwellings at the 2021 Census, and roughly 63% were separate houses (ABS housing context cited via NAR). In Victoria, that matters because detached homes usually give you room for proper built-ins, not a quick surface update.

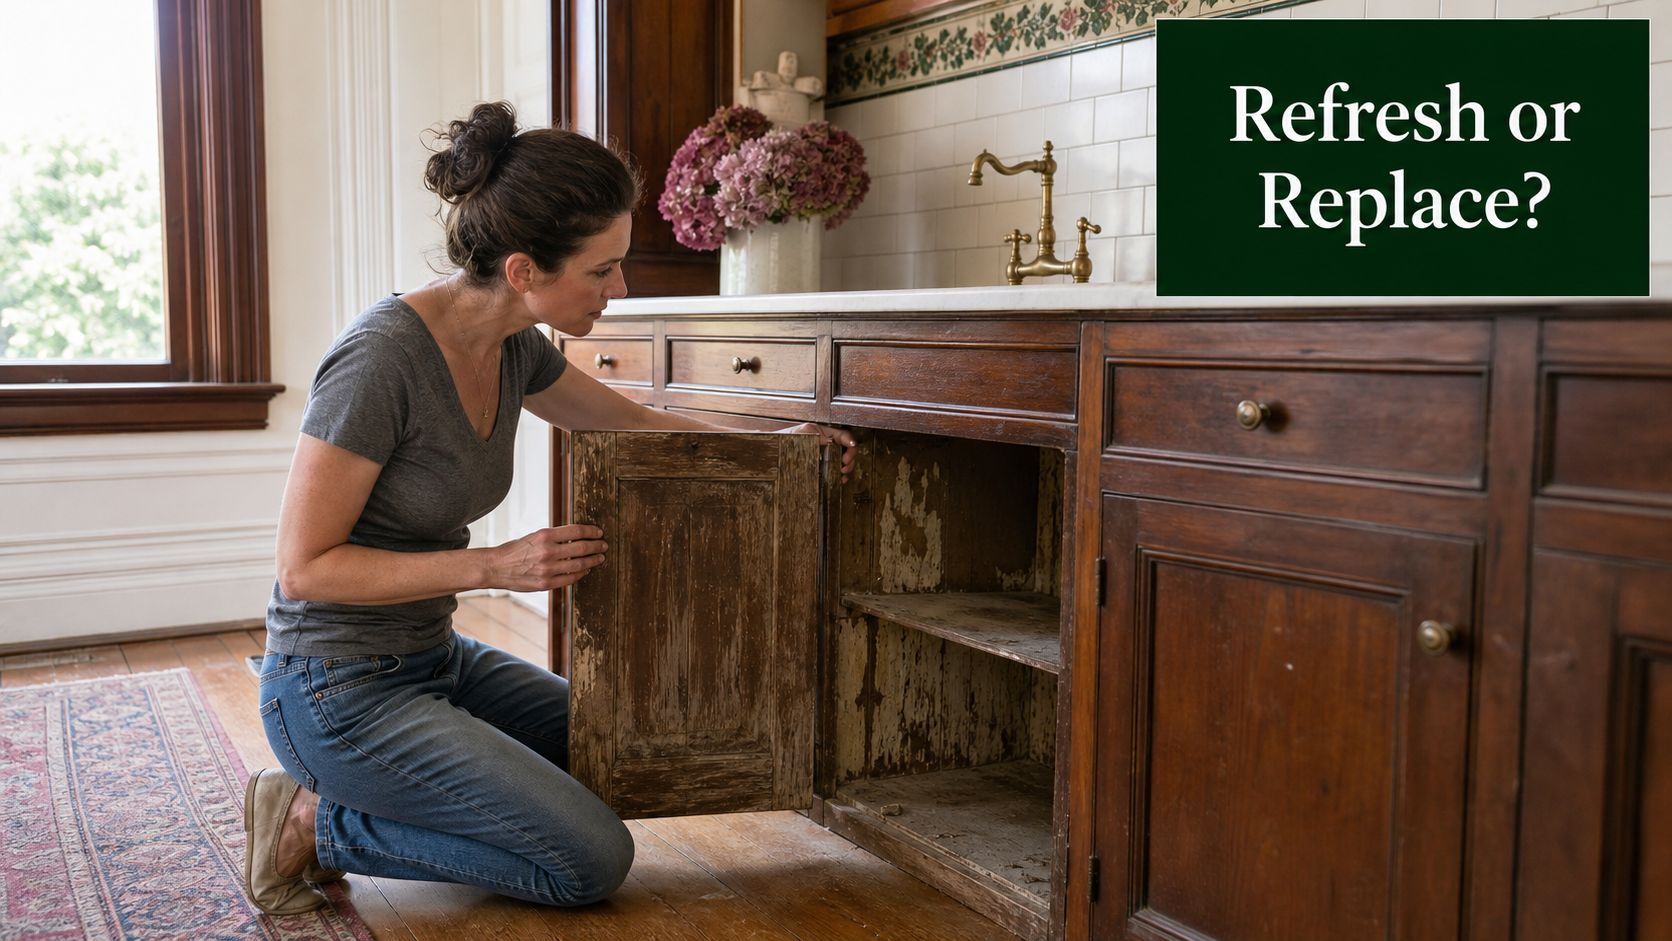
A woman kneeling on a rug examining the worn interior of an old wooden kitchen cabinet.

What the age of the house changes

The second pressure point is age. Australia's median dwelling age was 29 years in 2021 (ABS housing context cited via NAR), and that shows up in kitchens long before it shows up anywhere else. Doors go out of line. Shelves bow. Corners stop making sense.

Practical rule: if the carcass is tired, a fresh door front won't save the kitchen. Replace the structure, then choose the finish.

That is why timber still earns its place in Victorian renovations. It suits established suburban homes where cabinetry has to look good, hold weight, and survive hard use. It also fits the way buyers read quality in a renovated kitchen, which is one reason wood cabinets keep showing up in serious remodels (ABS housing context cited via NAR).

The four decisions that matter

Homeowners usually obsess over colour first. That is backwards. The decisions that drive the result are species, carcass quality, layout, and who builds it.

A timber face can look premium and still fail if the cabinet box is flimsy. A strong carcass can be let down by a poor corner layout. A beautiful finish can still be the wrong call if the builder is not set up for the scope.

The market logic also supports timber as a mainstream renovation choice, not a niche one. Australian furniture and fitted furniture work sits inside a sizeable manufacturing base, with 30,222 Australian businesses in furniture and other manufacturing in 2023 (Mordor Intelligence via ABS industry context). That helps explain why timber cabinetry keeps turning up in serious renovations. It has a real supply chain behind it, not just a style trend.

For a broader look at cabinet material choices, see kitchen cabinet material options.

Choosing the Right Timber Species and Engineered Option

Pick the surface based on how you use the kitchen, not on showroom mood lighting. That's the blunt truth. Solid timber, veneer, and timber-look panels each solve a different problem, and if you choose the wrong one, you'll end up paying for the wrong kind of prestige.

Solid timber versus engineered timber

Treat solid timber like a hardwood floor. It's genuine, it moves with the seasons, and it needs room to behave. In a dry, open-plan kitchen where the cabinets are more visual than exposed to steam and splashes, it can be a strong choice if you want the grain to age naturally.

Treat engineered timber-faced board like a plywood-backed panel with a timber skin. It's more stable in wet kitchen zones because the substrate helps control movement. That's why it often performs better around sinks, dishwashers, and areas that see repeated temperature and moisture changes.

For Victorian homes, I'm usually direct about this. If the kitchen is busy, go engineered for the main cabinet run and save solid timber for the places where touch and appearance matter most. If you want a lighter maintenance path, that's the smarter spend.

Species choice and how it behaves

Australian hardwoods such as Tasmanian oak and spotted gum bring a different visual character to imported oaks. Tasmanian oak reads softer and calmer. Spotted gum brings more grain movement and visual energy. Both can look excellent, but neither should be chosen just because the sample board looks rich under lighting that no real kitchen will ever have.

Good timber choice is about restraint. The more steam, sun, and handling a kitchen gets, the more you should favour stable construction and a finish that ages evenly.

If your kitchen faces strong sunlight, think carefully about how a finish will change over time. Some timber tones deepen gracefully, while others can yellow or look patchy as the room ages. That's why the better question isn't “which timber looks richest now?” It's “which timber will still look intentional after years of cooking, cleaning, and daylight?”

For a practical material overview, the kitchen cabinets materials guide on SitePro's kitchen cabinet materials page is worth reading before you sign off on samples.

The selection rule I give homeowners

Use this simple filter:

  • High-use family kitchen: choose engineered timber-faced panels for stability.
  • Dry, design-led space: consider more solid timber presence where the grain is the point.
  • Bright sunlit room: ask how the finish will age, not just how it photographs.
  • Busy cooking zone: prioritise a finish that's easy to maintain and less likely to move.

That's the core species decision. Everything else sits underneath it.

Cabinet Geometry and Hardware Standards That Change Everything

A timber kitchen can look convincing from the doorway and still fail at the joinery level. Doors and benchtops get the attention. The carcass, hinges, runners, and support structure do the work. Miss those details, and the kitchen feels expensive on delivery day, then cheap after the first hot summer.

Why carcass dimensions matter

Cabinet sizes are not a guess. Australian cabinetry practice treats built-in cabinetry as a proper construction class, with common kitchen dimensions built around 24 inches deep for base cabinets, 12.5 inches deep for wall cabinets, toe-kick spaces of about 4 inches high, and shelf adjustment commonly set in 32 mm increments (AS 4386-2018 reference.pdf)). Those dimensions decide whether the kitchen opens cleanly, stores properly, and stays easy to service.

Get the depth wrong and drawers hit handles. Make the toe-kick awkward and the whole kitchen feels clumsy at floor level. Ignore regular shelf spacing and you waste vertical space, then struggle to adjust anything later.

What to ask for on the quote

Before any cabinet order goes ahead, I want the quote to spell out the construction details in plain language.

Element Typical Specification Why It Matters
Cabinet depth Around 24 inches for base units Controls workspace and appliance clearances
Wall cabinet depth Around 12.5 inches Affects reach, visual balance, and head clearance
Toe-kick height About 4 inches Improves stance at benches and floor-level comfort
Shelf spacing 32 mm increments Makes shelves adjustable without fighting the carcass
Face frame 3/4-inch solid wood Adds stiffness at the opening and improves alignment
Shelves 3/4-inch veneered plywood Helps reduce sag and supports repeated use
Hardware Soft-close concealed hinges and full-extension drawer runners Reduces wear at moving joints and improves access

That table is the reference point. The door sample is not enough.

The load issue people underestimate

The carcass also has to carry weight without sagging or twisting. CASF's Australian timber installation guide calls for 16 mm minimum panel thickness and says benchtop load transfer should go through each end gable or division, not through shelves or local fixings alone (CASF timber installation guide). It also gives indicative module weights of 36 kg for 1200 × 900 × 32 mm and 81 kg for 3600 × 900 × 32 mm.

That is where cheap cabinetry starts to wobble. If the benchtop is heavy, the cabinet box has to act like structure, not furniture.

Ask for carcass thickness, hinge spec, drawer runner type, and load path. If the quote cannot answer those cleanly, the quote is not clean enough.

For cabinet sizing and layout checking, this kitchen cabinet sizes reference is worth opening before you compare builders.

Corner Cabinets and the Hidden Storage Problem

Corner cabinets look efficient in plan view and frustrating in real life. They're the dead letter office of the kitchen, full of things people own but can't reach quickly. In timber kitchens, the visual bulk of a corner unit can make the problem feel even heavier.

When the corner is a waste of space

Blind corners are the worst offenders. Guidance from woodworking practice notes that they can leave roughly 18 inches of unreachable depth (corner cabinet guidance). In plain English, that's a lot of lost storage if the kitchen is already awkward or non-square.

A Lazy Susan helps in some layouts because it turns a hard-to-reach void into rotating access. But it's not a magic fix. In a narrow or crooked Victorian kitchen, the hardware can still eat usable space and create a bulky visual lump right where the eye lands first.

What timber does to the corner

The timber finish matters more than people expect. A strong timber grain can hide the awkwardness of a corner unit if the cabinet is integrated properly. It can also exaggerate the bulk if the unit is oversized or too dark for the room.

Open corners and angled solutions often work better in older homes with imperfect walls. They let the kitchen breathe. They also stop you from paying for a deep, trapped void that nobody uses properly.

Use the corner to solve the room, not to protect a layout on paper. If the corner is the most complicated part of the plan, it deserves the most honest design.

My rule for Victorian renovations

If the kitchen is small or the walls are out of square, don't force a traditional corner just because it's familiar. Consider one of three outcomes instead.

  • Blind corner: only if you need hidden bulk storage and can accept access limits.
  • Lazy Susan or hinged corner: when you want easier reach and the room can spare the hardware.
  • Open or angled corner: when layout efficiency matters more than maximising enclosed volume.

That decision affects the timber treatment too. A bulky dark corner in a compact room can dominate the whole kitchen. A lighter timber tone, or an open detail, can make the space feel designed rather than forced.

Durability, Moisture and Maintenance in Australian Kitchens

A timber cabinet only earns its place in an Australian kitchen if it survives real daily use. That means steam from the cooktop, water near the sink, constant wiping, and the kind of wear that shows up after the renovation excitement has worn off. Kitchens stay high on the list for owner-occupied homes, and the reason is simple, people want a space they can cook in, clean properly, and trust for years.

A close-up view of a polished wooden cabinet door with a single water droplet resting on it.

Moisture determines durability

Steam, splash zones, heat, and repeated wiping punish weak cabinetry. Solid timber can be repaired and refreshed, which is a real advantage, but it also moves more than other constructions. Veneer is more stable, although the edge detailing and substrate quality have to be right or it will fail early at the joins. Timber-look panels usually ask less of the homeowner, but they do not give you the same material character.

I tell clients to match the construction to the exposure. Put the tougher, more forgiving build where water and heat are constant. Keep the more expressive timber detailing for spots that are not constantly soaked, scrubbed, or hit by steam.

Maintenance you'll live with

Cleaning is only part of the job. Timber finishes can also ask for oiling, recoating, or more careful care, and that only works if the household will keep doing it after the novelty fades. A kitchen should suit the way people live, not turn everyone into unpaid maintenance staff.

The sensible approach is straightforward:

  1. Check the finish type. Ask whether the surface handles everyday wiping without special products.
  2. Inspect the edges. Moisture usually finds the weak point first.
  3. Look under sinks and around dishwashers. Inferior construction shows itself there early.
  4. Put premium timber where exposure is lower. Save the more delicate detailing for areas that are less likely to be constantly wet.

Bathroom and kitchen thinking should line up in the same house. Wet areas fail for the same reasons, so the same discipline applies, and kitchen waterproofing requirements are worth checking before you commit to finishes. Durable renovation work starts with moisture control, then finish selection.

What I'd spend on

Spend on stability, edge protection, and good hardware before you spend on visual drama. A timber cabinet that stays aligned and resists moisture is worth more than a beautiful one that starts swelling or binding after the first serious cleaning cycle.

That is especially true in a family kitchen. You want a finish that can take knocks, a structure that does not move, and a surface you will not resent maintaining.

Custom Joinery Versus Flat-Pack and the Builder Registration Question

A Highett kitchen can look simple on paper and still become a mess on site. Once walls are opened, corners are out, and the timber finish has to meet real conditions, the joinery choice stops being cosmetic. Scope, durability, and builder registration decide what belongs in the room.

A perfect fit or off-the-rack

Custom joinery gives you the exact fit. It follows uneven walls, handles awkward storage, resolves appliance spacing properly, and lets the timber finish sit cleanly with the rest of the renovation. That is the right spend when the kitchen is structurally involved, the layout is non-standard, or the cabinetry needs to carry the design rather than sit behind it.

Flat-pack is the off-the-rack option. It works in straightforward rooms with standard dimensions, and it can suit a quick refresh or a tighter budget. The trade-off is plain, less flexibility on fit, less control over finish consistency, and fewer site-specific adjustments once the job is underway.

Where registration matters

Victorian renovation work carries a compliance layer, and kitchen work is part of that reality. Registered builders in Victoria fall into VBA categories that include domestic builder and unlimited building registrations, and the project scope determines which registration class is appropriate on site (VBA registration context). Domestic builders must be properly registered or licensed before carrying out or advertising domestic building work over the statutory threshold.

That matters because a kitchen replacement tied into structural work, waterproofing, or a larger remodel is a different job from swapping in a few cabinets. The builder's registration status affects what can legally be managed and supervised, and that affects how safely the whole project is delivered.

Do not separate the cabinetry question from the builder question. If the joinery is custom and the scope is complex, the builder needs to be legally able to carry it.

My recommendation

Use custom joinery when the room needs correction, the timber finish is supposed to anchor the design, or long-term durability matters more than the first invoice. Use flat-pack when the footprint is standard and the renovation is really a replacement job.

SitePro Bathrooms, for example, offers end-to-end kitchen renovation work that covers concept development, 3D design, construction, and finishing. That kind of workflow suits custom timber cabinetry when the project has several moving parts.

Using 3D Design to See Timber Cabinets Before Demolition

3D design is where timber decisions stop being theoretical. A sample chip in the hand tells you almost nothing about how the room will feel once the wall comes down, the corner is rebuilt, and the cabinets sit next to the benchtop under real light.

What should be modelled

A proper 3D render should show the timber species, carcass depth, corner treatment, and the way the benchtop weight is carried. It should also show how the kitchen sits beside any bathroom renovation if both are happening together, because trades, access, and sequencing matter more than most homeowners expect.

That's the value of a coordinated workflow. Concept development, detailed 3D design, construction, and finishing should line up before demolition starts, not after the walls are open and the job has become expensive to change.

Why the render matters in timber kitchens

Timber finishes can look warm in one light and heavy in another. A 3D model helps you see whether the grain reads calm or busy, whether the corner cabinet dominates the room, and whether the carcass proportions make the kitchen feel solid or clunky.

It also helps you sign off on hardware clearances. If a drawer front is too deep, or a handle clashes with a nearby wall return, you want to see that before anything is built.

If the design isn't clear on screen, it won't be clear on site.

That's the part many homeowners skip, then regret. The demolition only looks simple until the wrong cabinet depth or corner solution has already been ordered.

What good sign-off looks like

Before you approve anything, check that the render shows:

  • The actual timber tone in the room, not a generic substitute.
  • Cabinet depths and clearances against walls, windows, and appliances.
  • Corner storage access so the awkward zone isn't hidden by pretty visuals.
  • The relationship to any bathroom work if the renovation is part of a wider scope.

A design-led renovation saves arguments later. More important, it stops you from paying for a cabinet line that looked fine in theory and wrong in the room.

Your Timber Cabinets Decision Checklist

Use this as your quote-meeting filter. If a builder or designer can't answer these cleanly, keep walking.

  • Species choice: Have you chosen solid timber, veneer, or timber-look panels for the right reasons, not just appearance?
  • Carcass quality: Are panel thickness, face frames, shelf spacing, and hardware all specified clearly?
  • Corner layout: Does the floorplan use the corner well, or is it hiding wasted storage behind a pretty finish?
  • Durability: Will the finish cope with steam, splashes, and daily cleaning without becoming a maintenance headache?
  • Builder scope: Is the person running the job properly registered for the work they're taking on?
  • 3D sign-off: Have you seen the timber kitchen in a render before demolition, including any bathroom tie-in?

The right timber cabinets kitchen decision is the one that survives contact with a real house. Choose the timber for the room, not for the showroom. Choose the carcass for the load, not for the brochure. And choose the builder who can deliver the scope you're paying for.

If you're planning a Highett kitchen or a combined kitchen and bathroom renovation, book a detailed design discussion before you remove a single cabinet. Bring your room measurements, photos of the existing corner layout, and a clear idea of how much maintenance you're willing to live with, then make the timber decision on facts, not guesswork.