• siteprobathrooms

Overhead Kitchen Cabinets: Design, Install & Maintain

Overhead kitchen cabinets are commonly specified at 300–350 mm deep, with the underside positioned 500–600 mm above the benchtop. These measurements protect head space, preserve useful preparation room and leave practical clearance for everyday appliances.

But is filling every available section of wall with cupboards really the best way to make a Victorian kitchen work? A cabinet can add storage and still create dead space, awkward reaching, poor lighting or a dangerous habit of climbing a stool. The right design starts with the people using the kitchen, the tasks they perform and the room's actual measurements, not with a standard row of doors.

For Australian renovation context, cabinetry deserves careful attention. The 2023 Houzz Australia Kitchen Trends Study found that 90% of renovating households updated their kitchen cabinets, while 72% chose semi-custom or custom cabinetry. That preference makes sense in Highett homes, Melbourne apartments and family kitchens where walls, windows, splashbacks and appliances rarely line up perfectly with a generic module.

Understanding Overhead Cabinet Dimensions

Australian overhead cabinets are commonly 300–350 mm deep, while the space between the benchtop and cabinet underside is usually 500–600 mm. The depth keeps plates, glasses and pantry goods within reach without pushing the cupboard face too far into the room. It also reduces the chance of striking your head while leaning over the bench.

The vertical clearance has two jobs. It creates a comfortable working zone for food preparation, and it leaves room for countertop appliances such as a kettle, toaster or coffee machine. A cabinet mounted too low may interfere with appliance lids, door swings and sightlines. One mounted too high may turn daily storage into a step-stool task.
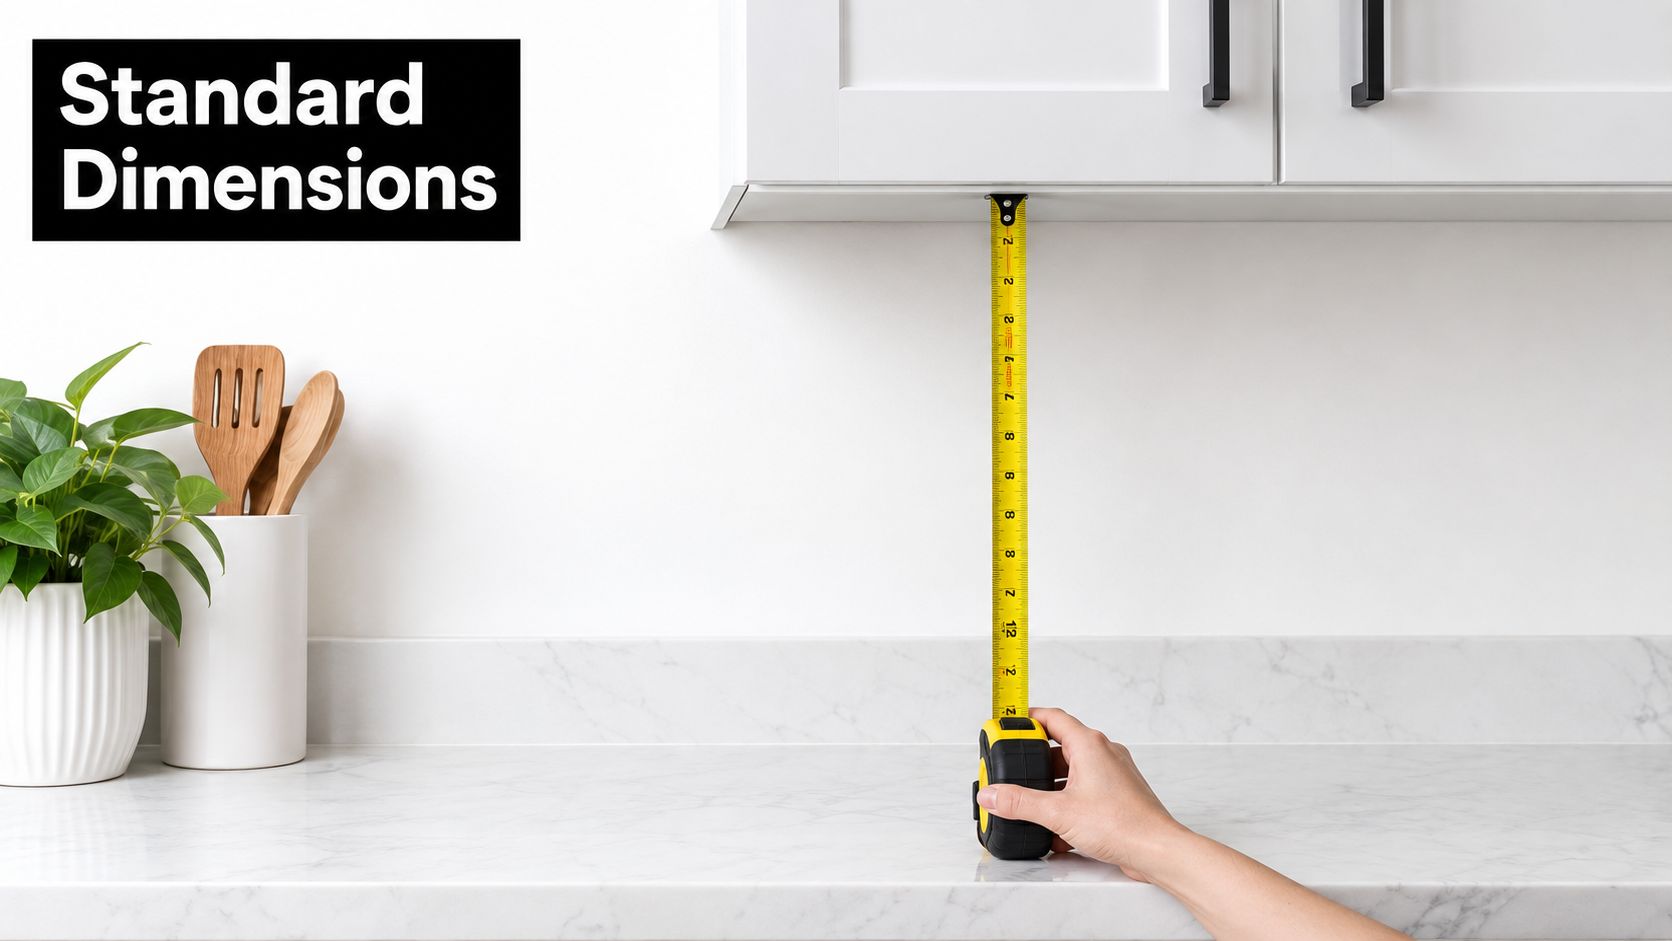
A hand uses a yellow tape measure to measure the distance between a kitchen countertop and cabinet.

Height should follow the room

A 720 mm-high wall cabinet is a frequent Australian configuration. A 600 mm unit may suit a smaller storage requirement or a room where visual openness matters, while a 900 mm unit can take advantage of a high ceiling or help create a more continuous full-height composition. These choices only work when measured against the finished floor, benchtop, splashback, ceiling and any bulkhead.

Australian cabinetry guidance identifies approximately 900 mm as a conventional benchtop working height, so a 600 mm overhead clearance places the cabinet underside near 1,500 mm above finished floor level. The relationship affects who can reach the lower shelf, where under-cabinet lighting can sit and whether tall appliances remain usable on the bench. Use the overhead cabinet height guide as a planning reference, then confirm the final dimensions on site.

When standard dimensions need adjustment

A compact Highett kitchen may need shallower cupboards beside a doorway to protect circulation. A tall household might prefer a slightly higher installation, while a household planning for ageing in place may need the daily-use shelf lower or fitted with pull-down hardware. Neither choice should be made from cabinet height alone.

Measure the actual appliance elevations before ordering. If the benchtop, splashback or ceiling changes during construction, the cabinet layout may need to change with them. A senior cabinetmaker checks these relationships together because a tidy elevation drawing can still produce an uncomfortable kitchen if the physical reach zones are ignored.

Choosing Cabinet Materials and Styles

Material choice changes more than appearance. It affects how the doors respond to steam, fingerprints, sunlight, cooking residue and repeated cleaning. In a busy Victorian kitchen, an attractive finish that demands constant polishing may become frustrating, while a quieter surface can remain practical for years.

White remains a strong preference. Australian renovation research recorded white as the selected cabinet colour for 62% of kitchen updaters in the 2023 study, as reported in the Australian kitchen renovation findings. White can reflect light in a narrow room, but the exact result depends on sheen, splashback colour, benchtop pattern and natural light direction.

Compare the construction choices

Cabinet Material Durability Maintenance Cost Range
Timber veneer Warm appearance and repairable character, with finish quality affecting longevity Wipe spills promptly and follow the maker's care advice Varies from moderate to premium
Engineered wood with laminate or melamine Consistent, practical surface suited to everyday use Usually simple to wipe, with care needed at exposed edges and joins Usually economical to mid-range
Painted board Broad colour choice and a tailored appearance May show chips and marks more readily, especially on busy doors Mid-range to premium
Acrylic Smooth, contemporary appearance and strong colour impact Fingerprints and surface marks can be more visible depending on sheen Premium
Glass-fronted doors Adds visual depth and helps display organised items Requires regular cleaning and disciplined shelf presentation Mid-range to premium

Engineered wood with a well-finished laminate or melamine surface often suits a rental, family kitchen or practical renovation. Timber veneer brings warmth to a traditional or country setting, but it should be selected with an understanding that natural grain varies. Acrylic and glass can support a modern or designer kitchen, though they draw attention to every object and reflection.

Use finish to control visual weight

Gloss fronts can bounce light around a compact kitchen, while matt finishes tend to soften reflections and fingerprints. A two-tone arrangement can place a darker colour on lower cabinets and a lighter colour overhead, making the wall units feel less imposing. Glass-fronted overheads can break up a long run, but they work best when the contents are deliberately organised.

For a Victorian home with timber floors and period details, painted doors may connect the new kitchen with the existing architecture. In a contemporary apartment, flat-panel fronts, restrained handles and a consistent edge detail can make the room feel calmer. Read the guidance on kitchen cabinet materials before choosing samples, and view them beside the actual benchtop and splashback rather than in isolation.

Practical rule: Choose the door finish for the way your household cooks and cleans, not only for how it looks in a showroom.

Planning Your Cabinet Layout and Storage

A well-planned kitchen follows the cook's movement. The sink, cooktop and refrigerator should form a short, practical sequence, while overhead cabinets should hold items near the task they support. Store plates near the dishwasher or dining area, cookware near the cooktop, and mugs or breakfast supplies where morning traffic does not cross the main preparation zone.

Cabinet volume matters less than useful location. The 2023 Houzz Australia Kitchen Trends Study recorded 53% of kitchen updaters installing built-in pantry cabinets and 27% creating space for a walk-in pantry. That supports a sound planning principle: overhead cupboards suit reachable daily items, while a pantry or tall cabinet can carry bulk goods and less frequently used stock.

Put useful items in the useful zone

Place plates, glasses and serving bowls where they can be lifted out without reaching across a hot surface or interrupting another person's work. Reserve higher shelves for occasional baking equipment or servingware only when someone in the household can retrieve it safely. A cabinet that looks spacious on the elevation may become dead storage if its contents are difficult to see or return.

Pull-down fittings can bring an upper shelf within easier reach. Full-extension drawers and pull-out pantry shelves reduce bending elsewhere, creating a better balance between wall storage and base storage. Corner carousels can improve access in awkward corners, provided the doors have enough clearance and the shelves are loaded by use rather than appearance. An appliance garage can conceal a toaster or small machine, but its doors, power points and ventilation must be resolved before manufacture.

Treat lighting as part of the cabinet plan

Under-cabinet lighting should illuminate the benchtop, not the cook's head or the cabinet doors. Give the electrician the final cabinet layout early, so wiring, switches and power points do not end up behind a fixed panel. Internal lighting can help with deep cupboards, but a clear shelf arrangement still matters. Light should make storage easier to find, not justify an oversized cabinet.

In a Highett kitchen with limited bench space, a shallow overhead run may preserve a continuous preparation area while a tall pantry stores bulky goods. In a Melbourne apartment, removing one section of wall storage may improve sightlines, though every displaced item needs a practical home. Review these kitchen cabinet storage ideas against the household's actual workflow, reach and cooking habits rather than copying a decorative arrangement.

Accessibility and Safety Considerations

More cabinet volume doesn't automatically mean more usable storage. If nobody can safely reach the upper shelf, that space becomes dead storage, and daily reliance on a step stool introduces unnecessary risk. The better question is not how many cupboards fit on the wall, but how much of the contents each person can see, reach and return without strain.

Map the reach zones before finalising the elevation. Put everyday plates, cups, oils and cooking tools in the comfortable zone for the main users. Move occasional servingware higher, and consider drawers, a full-height pantry or pull-down mechanisms for items that would otherwise demand repeated stretching.
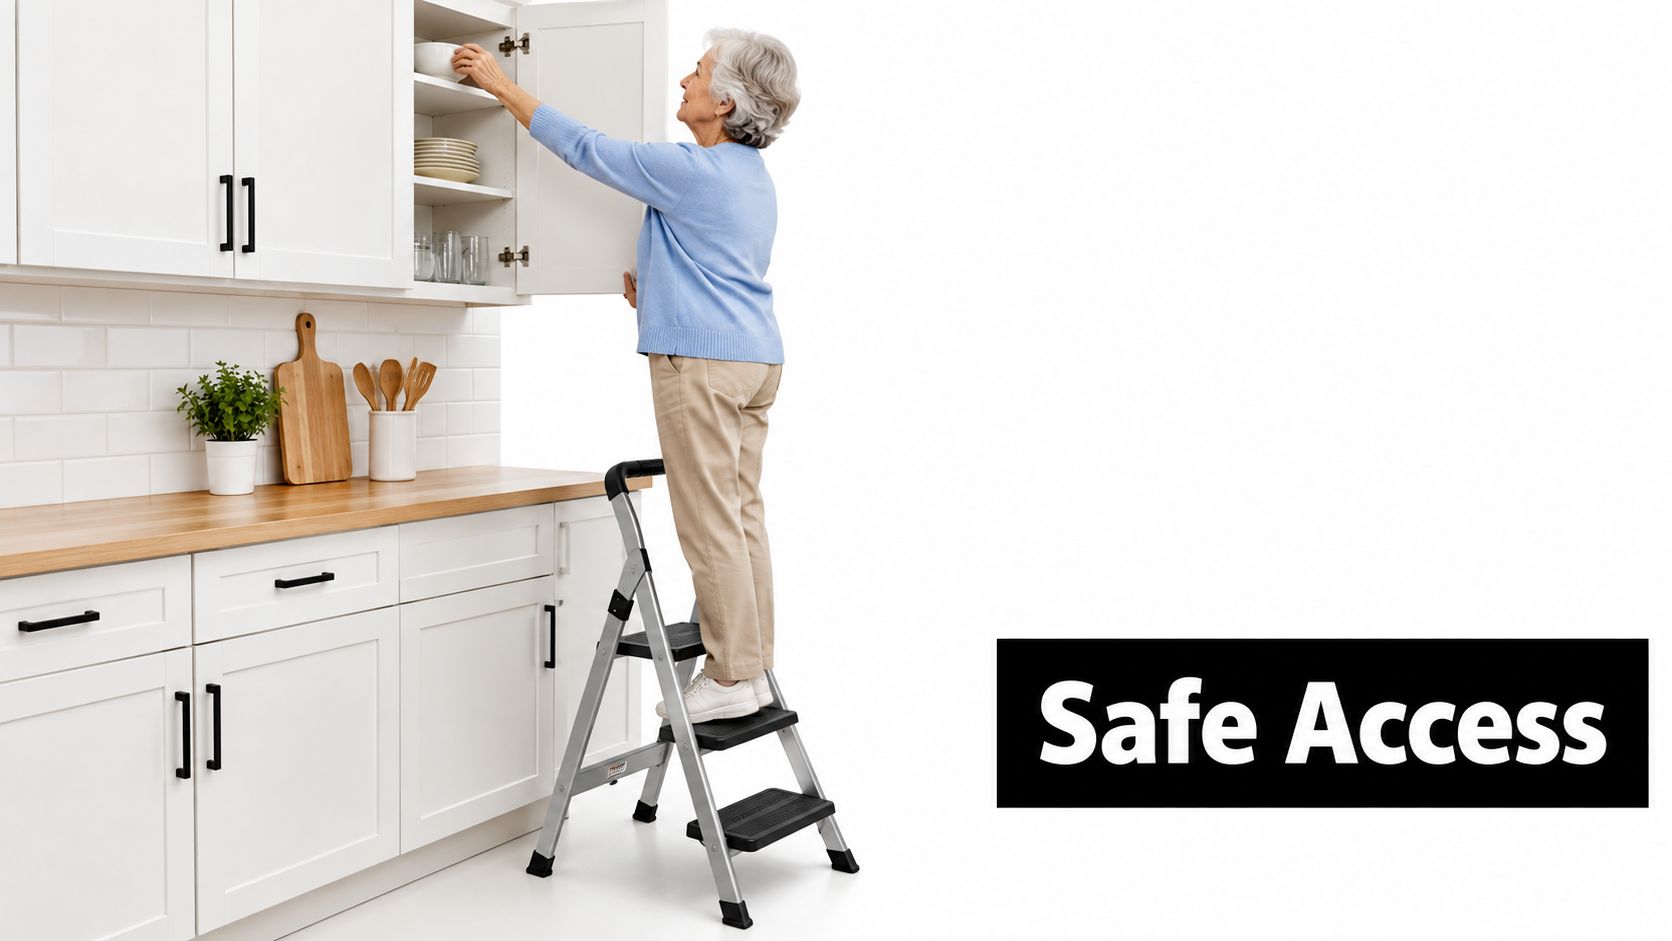
An elderly woman safely stands on a folding stepladder to reach items inside an overhead kitchen cabinet.

Design for changing needs

Older residents, people with mobility limitations and anyone with reduced balance may not use a high shelf in the same way as a younger, fully mobile person. Australian accessibility guidance discusses pull-down or motorised mechanisms for upper cabinets, alongside full-extension runners and pull-out pantry shelves that reduce bending and reaching. The Australian kitchen accessibility guidance also supports thinking about comfortable reach rather than assuming one standard height suits every household.

Families need a different form of planning. Keep knives, cleaning products and breakable items out of unsupervised reach, and avoid placing frequently handled goods above a cooktop where a child may be tempted to climb or stretch. Rounded edges, stable mounting and clear floor space reduce the consequences of hurried movement.

Decide whether every wall needs a cupboard

In a narrow Melbourne kitchen, deep or low overheads can close down sightlines and make the room feel crowded. Open shelving may create visual relief, but it exposes contents to grease and requires consistent organisation. Omitting upper cabinets can work when a pantry, drawers and generous lower storage replace their function. It fails when the result is food and appliances permanently covering the benchtop.

A minimalist kitchen isn't automatically an accessible kitchen. The strongest layout is the one that keeps essential items visible, reachable and safe.

Installation Requirements and Professional Help

Overhead cabinets carry significant weight once loaded with crockery, glassware and pantry goods. A secure installation starts with identifying suitable wall framing or structural fixing points, selecting fixings for the wall construction and creating a level reference line. Cabinets should be joined and supported according to their construction system, rather than just screwed into plasterboard and left to carry the load alone.

The wall may also need preparation. Uneven surfaces, old splashback adhesive, weak plaster or a hidden service can affect the fixing method and final alignment. A small error at the first cabinet can continue across the whole run, leaving uneven reveals, doors that drift out of line and a visible gap at the ceiling.

Coordinate the trades before the doors arrive

Electricians need the final cabinet plan for under-cabinet lighting, appliance outlets and any changes to existing wiring. Rangehood installers need the selected hood, ducting route and manufacturer clearances before a cabinetmaker closes the wall around them. Australian guidance commonly places cabinetry about 600 mm above an electric cooktop and approximately 650–750 mm above a gas cooktop, subject to the appliance instructions, as explained in this cooktop and rangehood clearance guidance.

Don't manufacture the cooking-zone cabinets from a guessed dimension. Check the appliance manual, rangehood requirements, ducting, splashback and door operation together. In a body corporate property, confirm whether approvals or documentation apply before work begins.

Know where kitchen work meets bathroom renovations

Victorian projects often involve more than cabinetry. If the same renovation includes bathroom renovations, a new wet area, relocated plumbing or structural changes, building approval and plumbing compliance need separate attention. A building permit may be required when a bathroom is created outside an existing wet area, walls are removed or fixtures move, while a licensed plumber must complete regulated plumbing connections and provide a Certificate of Compliance, as outlined in this Victorian bathroom permit guidance.

A domestic building practitioner is generally required for building work valued at $5,000 or more, and internal bathroom, kitchen and laundry work may fall within Domestic Builder: Limited registration when it stays inside the existing external walls, floor and ceiling. A registered builder with Unlimited registration covers a broader scope, so verify the current registration class and permitted work before signing.

Budget Planning and Cost Considerations

A useful cabinet budget starts with the specification, not a guessed total. Door material, cabinet internals, hinges, drawer runners, handles, end panels, fillers, lighting, installation and site preparation all affect the final result. Two kitchens with similar-looking doors can differ substantially once one includes custom dimensions, integrated appliances and specialist access hardware.

Separate the visible and hidden costs

Ask for the quote to identify each major component. The following items often change the price or programme:

  • Cabinet construction: Stock modules may limit fit, while semi-custom and custom cabinetry can respond to unusual walls, ceilings and appliance positions.
  • Hardware: Soft-close hinges are only one part of the decision. Pull-down fittings, lift-up doors and specialised internal accessories add function but also complexity.
  • Site preparation: Removing old cabinets, repairing walls, adjusting skirting and disposing of materials can sit outside a basic supply price.
  • Electrical and ventilation work: New task lighting, relocated outlets and rangehood ducting may require separate trades.
  • Installation conditions: A level, accessible room is simpler to fit than a home with uneven walls, tight access or occupied rooms.

Because verified pricing varies by material, supplier, room size and installation scope, treat any unitemised figure cautiously. A transparent quote should state what is included, what remains provisional and which selections could alter the amount.

Spend where daily use depends on quality

Hardware deserves priority in the areas opened repeatedly. A durable runner or accessible pull-down fitting can provide more practical value than a decorative upgrade that offers no functional benefit. Save by limiting unnecessary panels, avoiding overly complex door arrangements and choosing a finish that doesn't require specialist upkeep.

For a staged renovation, complete measurements and appliance selections before ordering overhead kitchen cabinets. Delaying a cabinet run is usually less disruptive than manufacturing it around an unconfirmed cooktop, rangehood or splashback.

Working with Professional Renovators

Professional renovation support is most valuable when several decisions interact. A good designer can test cabinet depth, reach zones, appliance clearances, lighting and finishes in a measured 3D design before construction begins. That visual check helps a Highett homeowner spot a bulky wall run or an inaccessible shelf while changes are still drawings, not demolition.

Ask how the renovator measures the room, records existing services and confirms appliance specifications. Request a written scope that separates cabinetry, installation, electrical work, plumbing, approvals, finishes and exclusions. You should also understand who coordinates the trades and who responds if a site condition changes.
Screenshot from https://siteprobathrooms.com.au

Ask better questions at the consultation

  • Reachability: Which shelves suit daily use for every person in the household?
  • Appliance coordination: Have the cooktop, hood, ducting and countertop appliances been included in the elevation?
  • Installation: What wall structure and fixing method will support the loaded cabinets?
  • Registration: Which domestic builder registration class applies to the work?
  • Wet areas: How will waterproofing, plumbing certificates and inspections be documented if bathroom renovations are part of the project?

The same planning discipline applies to new bathroom ideas, modern bathrooms and designer bathrooms. Attractive finishes still need sound waterproofing, workable storage and correctly coordinated services. In Victoria, wet-area waterproofing is governed by AS 3740, and shower waterproofing generally reaches at least 1,800 mm above the finished floor, or 2,100 mm where the recess is less than 1,000 mm wide, according to this Australian wet-area waterproofing guidance.

For homeowners wanting one coordinated process, SitePro Bathrooms provides measured kitchen planning, 3D design, cabinetry configuration, construction and finishing in Highett and greater Victoria. Book a consultation with your room measurements, appliance details and a list of the items that must remain within easy reach, then ask for a cabinet layout that proves the storage will be safe and usable before you approve manufacture.

  • siteprobathrooms

7 Smart Storage Solution Ideas for Modern Bathrooms

A compact bathroom can look calm in a showroom and chaotic by the end of a normal morning. Toiletries collect around the basin, towels lose their place, cleaning products disappear beneath the sink, and every exposed item competes with the room's finishes. The best smart storage solution isn't just the cabinet with the most compartments. It's planned around the room's dimensions, plumbing, electrical work, waterproofing and the way people use the space.

That approach works across bathroom renovations, kitchens, new bathroom ideas and modern bathrooms, especially where floor area is limited. Structural changes, waterproofing and electrical integration also need coordinated planning by appropriately qualified trades, including registered builders unlimited where the scope and registration pathway require it. For Highett renovation projects, SitePro Bathrooms provides a useful example of how concept development and 3D design can connect practical storage with modern, designer bathrooms finishes. Get to the list quickly, then test each option against your layout, maintenance expectations and budget.

1. Smart Vanity Storage with Integrated Lighting and Organisation Systems

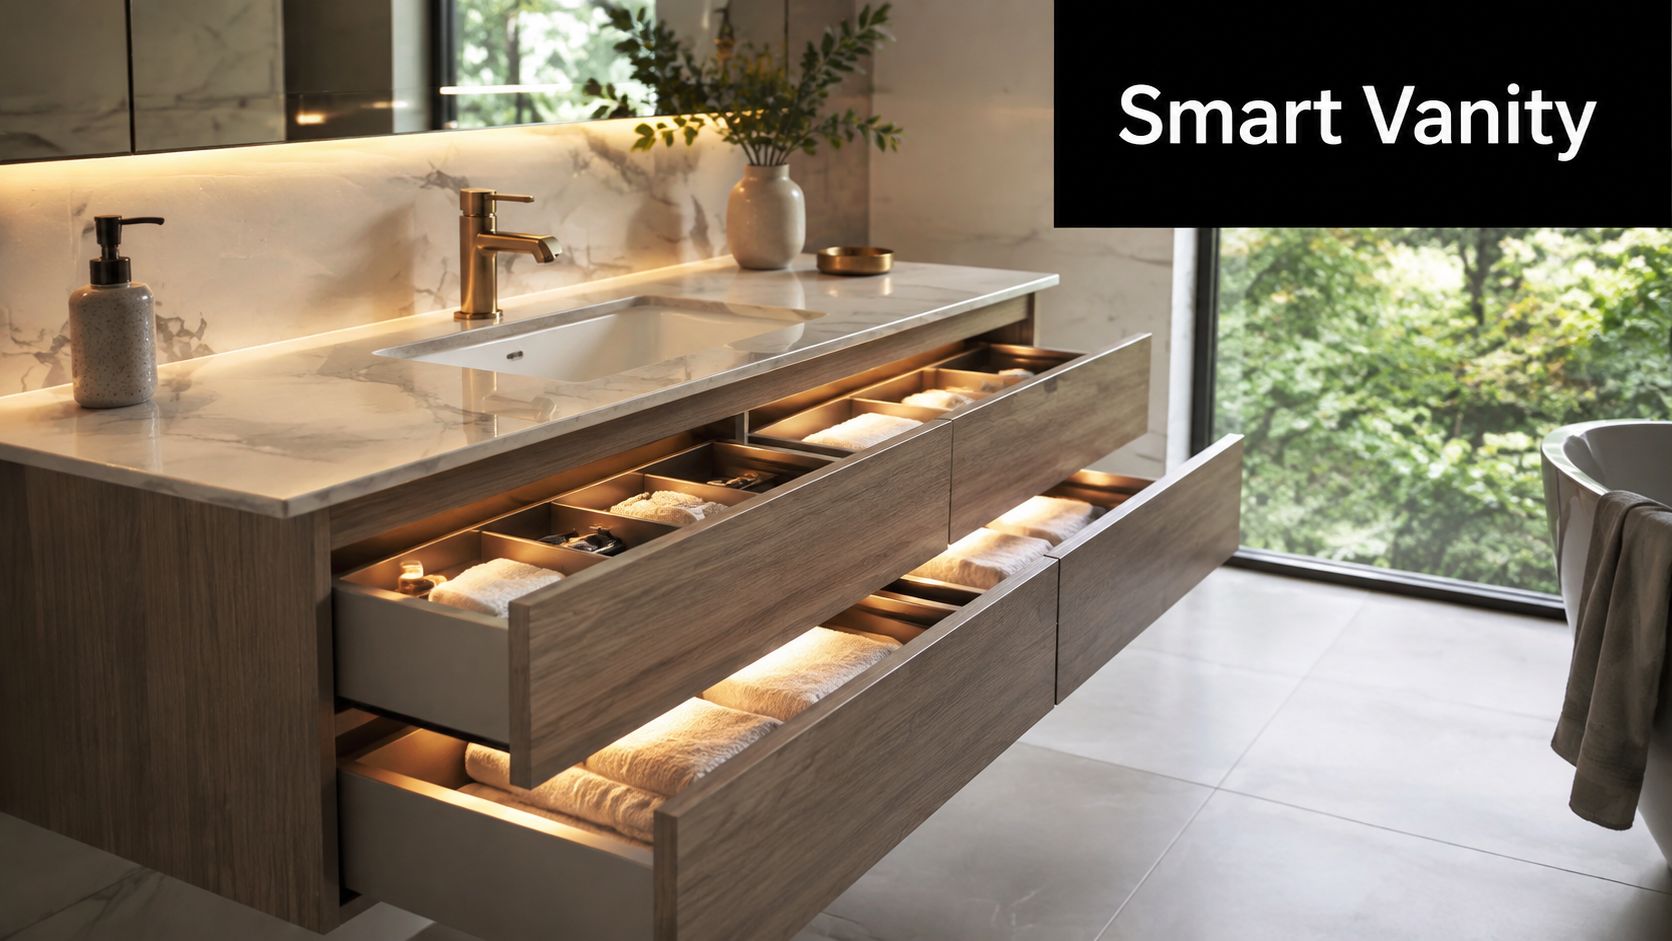
The vanity is usually the hardest-working storage zone in a bathroom. A well-planned drawer stack can keep toothbrushes, skincare, hair tools and spare products accessible without covering the benchtop. Pull-out drawers are generally more useful than a deep cupboard because you can see the contents from above and reach the back without kneeling.

Integrated lighting adds another layer of convenience. An LED strip that comes on when a drawer opens can help with early mornings and reduce the need to turn on every fitting. Soft-close runners also reduce slamming and help protect the cabinet, plumbing connections and stored items.

Design the drawer stack before the finishes

Storage should be resolved during the 3D design phase, before the vanity dimensions and electrical points are locked in. SitePro Bathrooms' guidance on lighting for bathroom vanities is relevant here because lighting needs to be coordinated with the cabinet construction rather than added as an afterthought.

  • Measure by routine: Allocate shallow drawers for daily products and taller compartments for bottles or appliances.
  • Check access: Confirm that doors and drawers won't clash with the shower screen, toilet or nearby wall.
  • Choose the light deliberately: Warm or cooler LED tones should suit the overall modern bathroom lighting plan.
  • Specify resilient finishes: Moisture-resistant board, sealed edges and suitable hardware matter in a humid bathroom.

Blum and Hettich systems can support organised drawer layouts, while Villeroy & Boch, Duravit and Keuco offer vanity options that suit designer bathrooms. The trade-off is that integrated lighting and premium drawer hardware add installation complexity. They're worthwhile when the vanity is a central storage hub, but unnecessary if a simple, well-sized drawer stack will meet the household's needs.

A modern floating bathroom vanity with illuminated drawers featuring organized storage and marble countertop

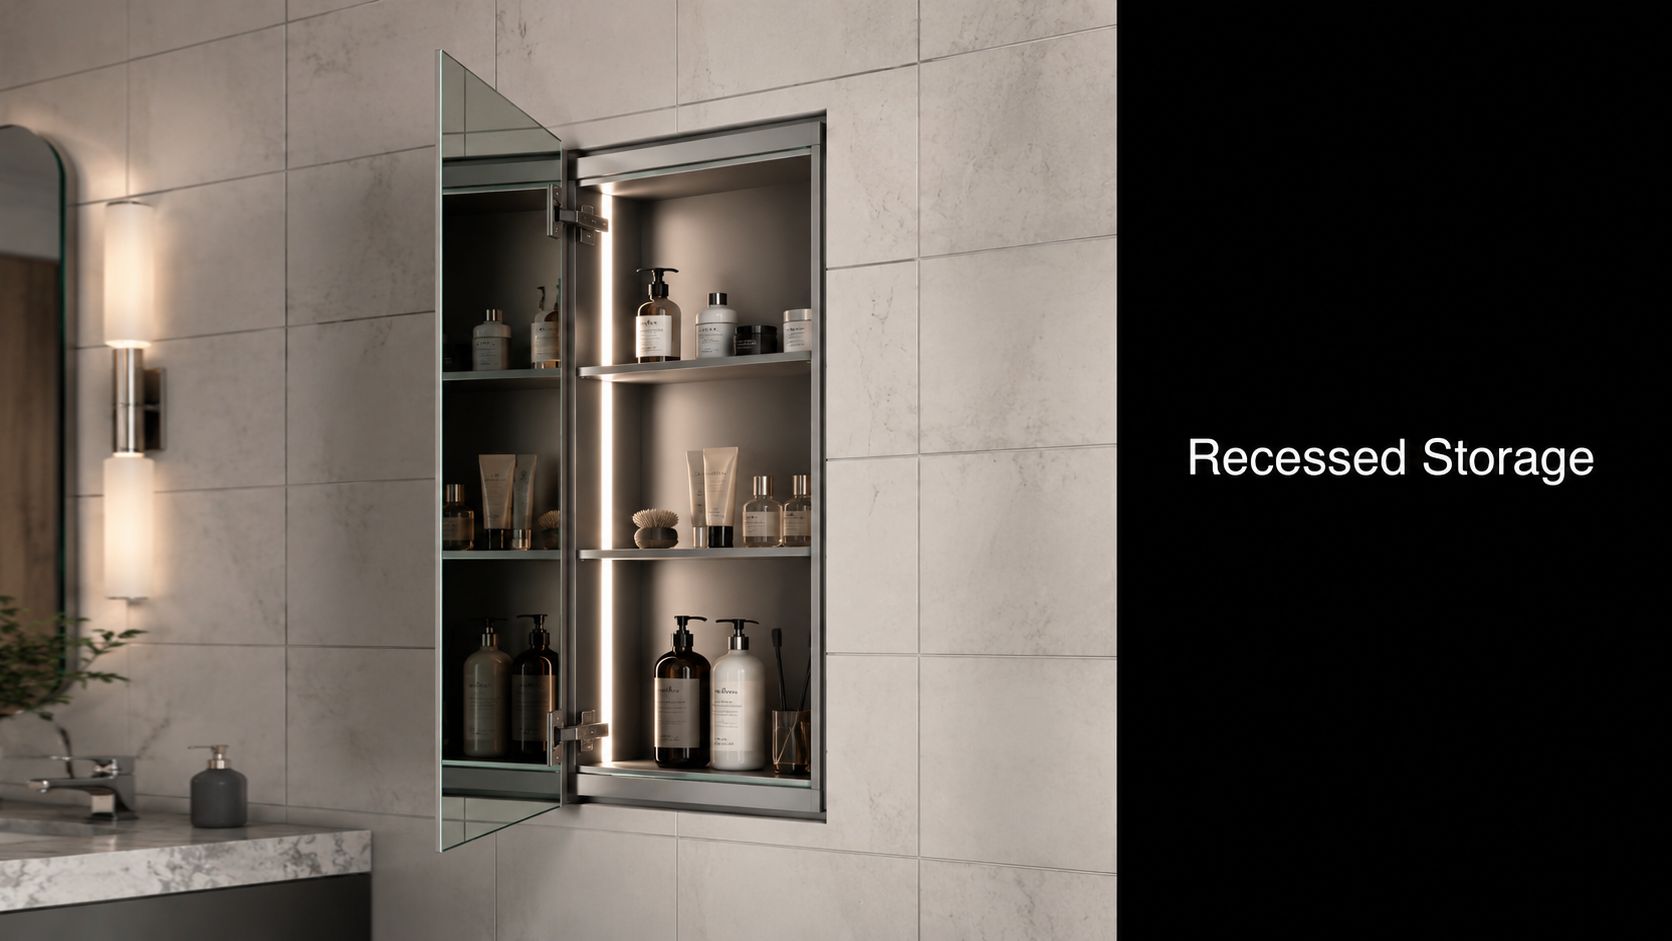
2. Wall-Mounted Recessed Storage Cabinets and Niches

Recessed storage gives a compact bathroom more usable capacity without adding another object to the room. A cabinet set into the wall can sit behind a mirror or above the basin, while a tiled niche can hold toiletries inside the shower zone. Both approaches preserve circulation space and create the clean lines associated with modern bathrooms.

This is particularly effective in a small ensuite where a projecting cabinet would narrow the room. A mirrored recessed cabinet can combine storage and reflection, while adjustable shelves allow the interior to change as household routines change. Solid doors may suit a calmer, more concealed look, whereas open niches make frequently used products easy to grab.

Resolve the cavity before construction

Recessed storage must be planned before wall linings, tiling and services are installed. The available cavity, wall structure, pipes and electrical routes all affect where a cabinet can safely go. A shallow cabinet may be enough for medicines and toiletries, but forcing a deeper unit into a service wall can create avoidable complications.

Practical rule: Never choose the cabinet location from the elevation alone. Confirm what's inside the wall before finalising the recess.

A shower niche needs particular care. Its backing, membrane detailing, tile falls and junctions must work as one waterproofing system. Outside the shower, a mirrored cabinet still needs protected materials, cleanable shelves and access for hinges, lighting components or future repairs.

A Highett bathroom renovation might use a recessed cabinet behind the mirror above the sink, then reserve a separate tiled niche for shower products. That division makes sense because the two zones have different moisture and access conditions. The trade-off is that recessed storage can be difficult to retrofit once the wall is finished. It's most efficient when included in the original concept and 3D design rather than treated as a late addition.

A modern recessed medicine cabinet with built-in LED lighting and organized shelves inside a tiled bathroom.

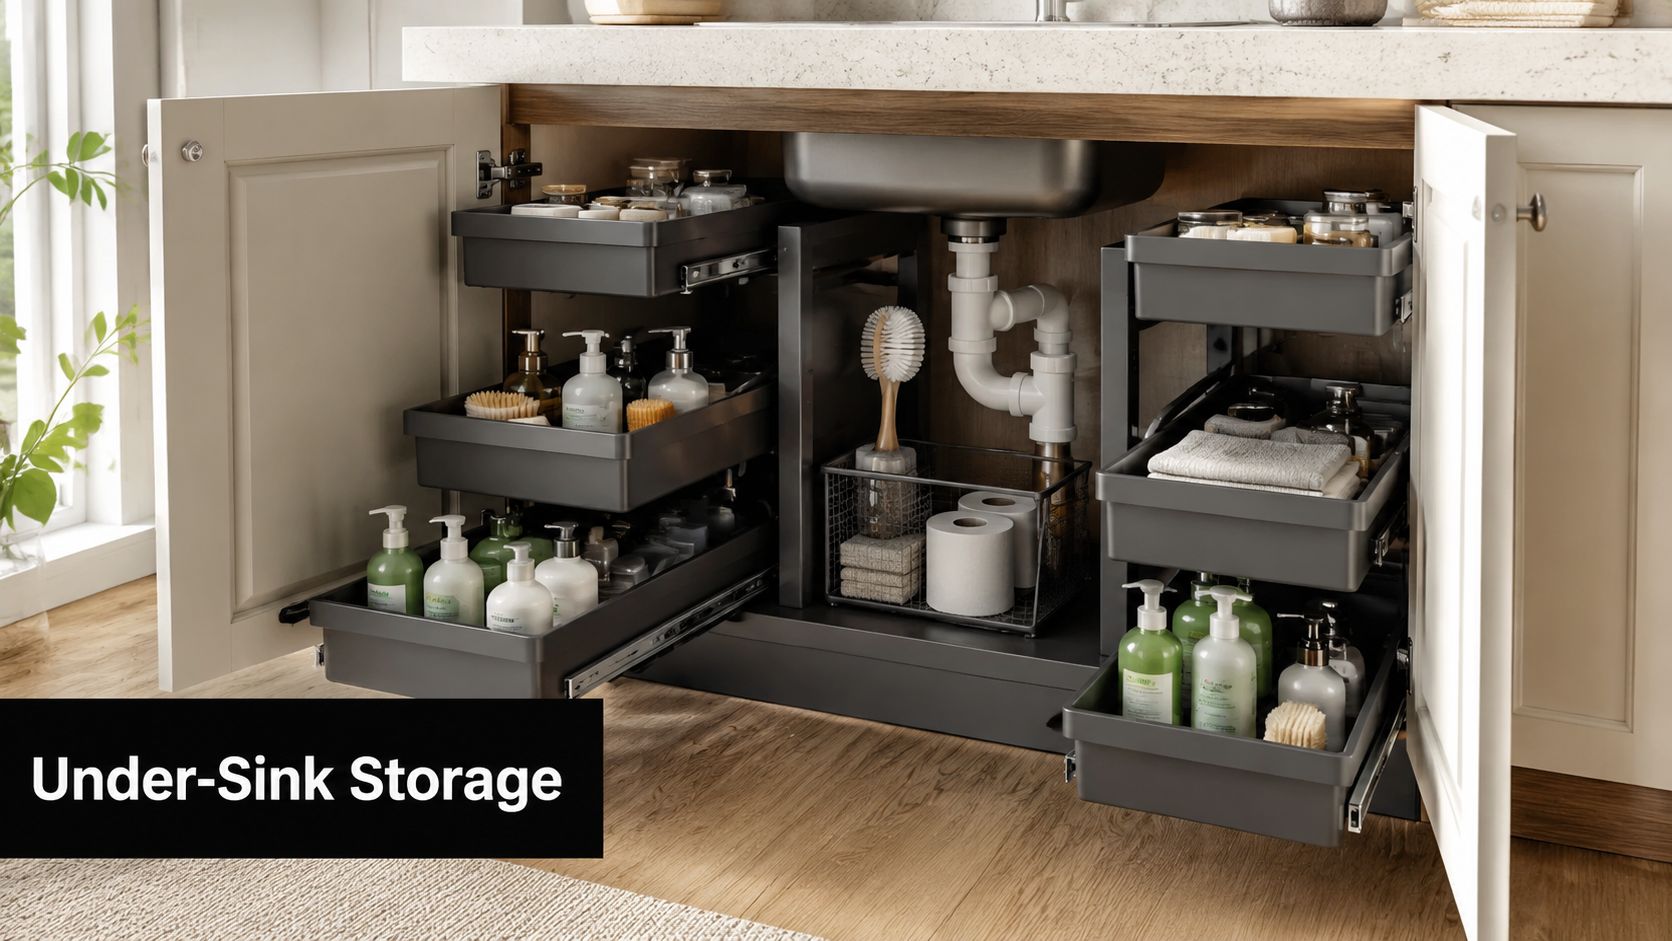
3. Under-Sink Pull-Out Drawers and Soft-Close Storage Systems

The space beneath a basin often collects travel toiletries, spare toothbrush heads and cleaning spray bottles that do not fit on the benchtop. Pull-out baskets, tiered shelves and drawers turn this awkward zone into usable storage, provided the layout follows the waste pipe, water connections and basin shape.

Measure the cabinet interior before choosing hardware. External width can be misleading because the trap, isolation valves, flexible hoses and drawer components all reduce the available space. A custom drawer may need a cut-out around the plumbing, while a pull-out basket can use the clear space without requiring pipework to move.

A useful arrangement keeps daily toiletries in the upper drawer, spare paper products or towels in a lower compartment, and cleaning products in a removable basket. Dividers stop separate categories from becoming one cluttered mass. The drawer fronts can still maintain a clean, modern finish while the internal fittings handle the practical work.

  • Map the plumbing: Photograph and measure the trap, isolation valves and flexible hoses before ordering hardware.
  • Use suitable materials: Stainless steel, treated timber and sealed cabinet components handle splash-prone conditions better than unprotected materials.
  • Specify controlled movement: Soft-close runners prevent slamming and reduce disturbance around concealed plumbing.
  • Keep repairs possible: Leave the isolation valve and trap accessible for future servicing.

A standard pull-out insert suits a regular cabinet, but custom tiered shelving can make better use of an irregular one. The decision depends on the service layout, not the hardware catalogue. A highly engineered insert adds little if it blocks a plumber's access or leaves dead space beside the basin.

SitePro Bathrooms can resolve these constraints during concept development and 3D design, testing drawer clearances, plumbing access and finishes before construction. That process connects practical storage with the cabinetry style selected for the renovation.

The same approach suits kitchen work, where the under-sink cabinet may hold bins, cloths and cleaning products. Visibility and access matter more than filling the cabinet with hardware.

A modern kitchen sink cabinet featuring organized pull-out drawers filled with cleaning supplies and household items.

4. Smart Shower Storage Niches with Integrated Shelving and Drainage

Shower storage has to survive constant water exposure, regular cleaning and the impact of bottles being moved around. A properly built niche keeps shampoo and soap off the floor, removes the need for a hanging caddy and gives the tiled wall a deliberate architectural detail.

The strongest result comes from planning the niche with the shower layout. Its position should be reachable without stepping out of the water, while its size should suit the products the household buys. A family bathroom may need storage at more than one height, while a minimalist ensuite may only need one compact recess.

Waterproofing determines whether the idea succeeds

A niche isn't just a hole lined with tiles. The substrate, membrane, corners, shelf falls and sealant joints all need to form a durable wet-area detail. Specialist pre-formed systems from Schlüter or Wedi can make the geometry more consistent, but they still require correct installation and compatible waterproofing.

The shelf should fall slightly towards the shower so water doesn't sit against the rear edge. A practical shelf surface should also be easy to clean and provide secure footing for bottles. Rounded or carefully finished tile edges reduce sharp corners, while good silicone detailing helps protect junctions.

For a renovation in Victoria, discuss the niche with the waterproofing installer before the tile layout is approved. SitePro Bathrooms' information on waterproofing in bathrooms reinforces why wet-area storage needs to be treated as part of the waterproofing plan, not as decorative joinery.

A niche that looks elegant on handover can become a maintenance problem if water remains trapped on its shelves or behind poorly sealed joints.

The trade-off is straightforward. A recessed niche gives the cleanest finish but requires early coordination. A corner-mounted unit may be less integrated, yet it can suit an existing bathroom where opening the wall would create unnecessary work.

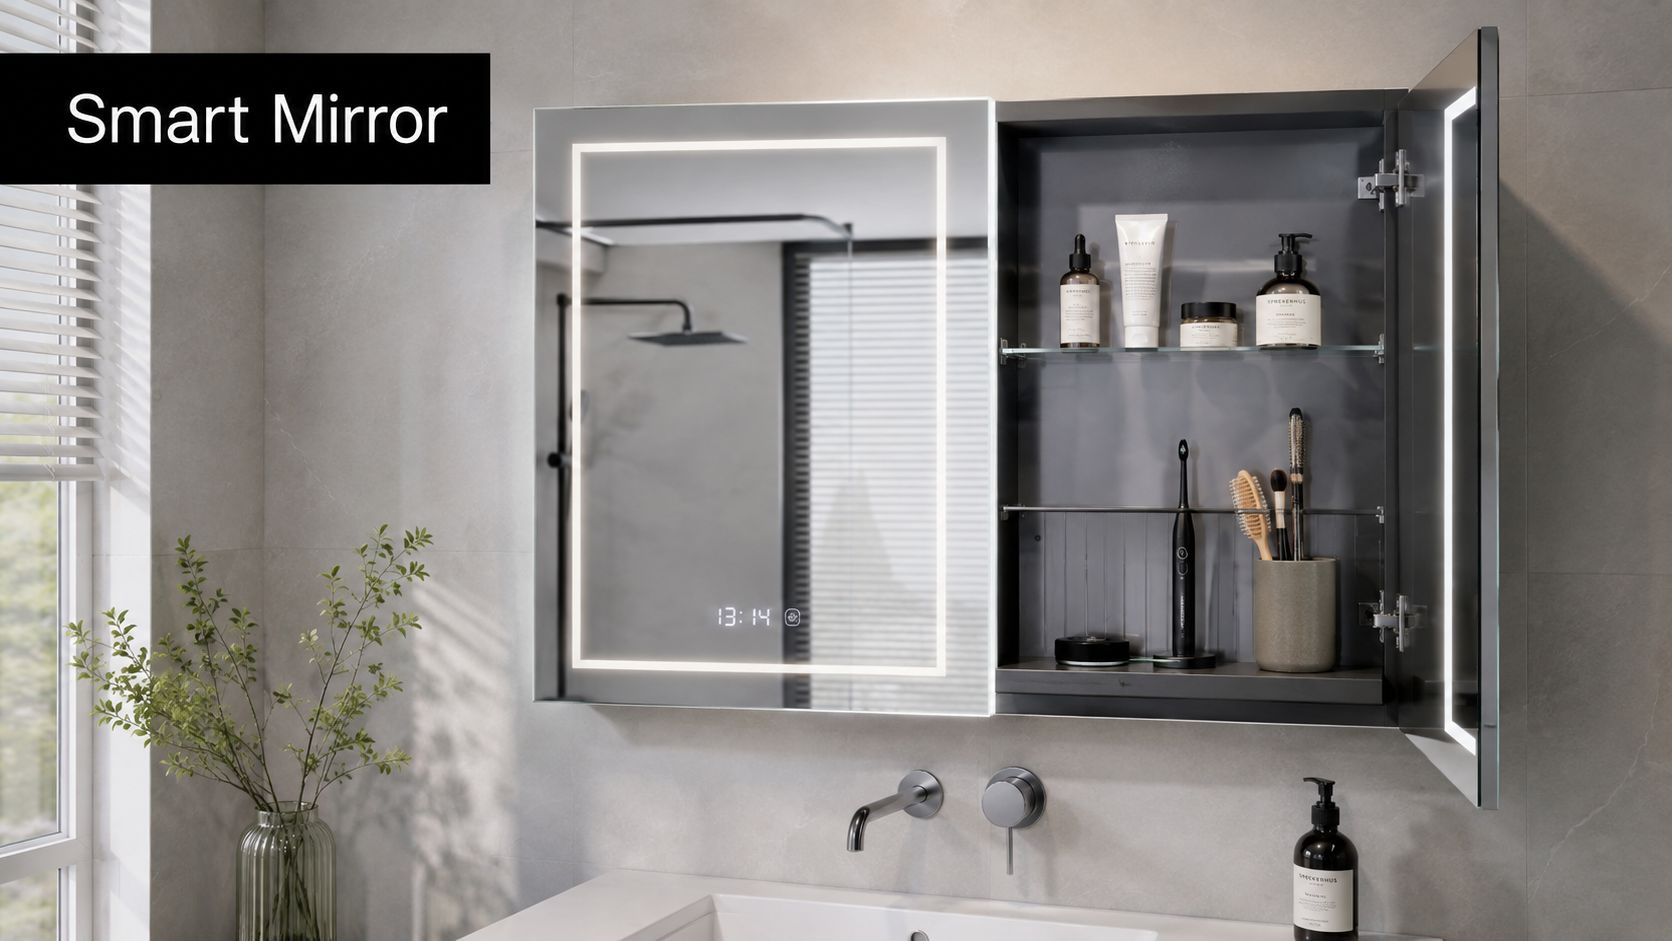
A modern smart bathroom mirror cabinet with integrated LED lighting and a built-in digital clock display.

5. Over-Toilet Storage Cabinets and Shelving Units

A toilet wall can become useful storage without narrowing the room. A shallow cabinet above the cistern holds spare toilet rolls, towels and occasional-use products while keeping the floor clear. In a compact ensuite, this can reduce pressure on the vanity and avoid adding a separate linen cupboard.

Choose the storage format around daily access. Open shelves keep towels and baskets visible, making them quick to reach and helping a small room feel lighter. Closed doors hide packaging, protect contents from dust and create a quieter visual field. A cabinet that matches the vanity can read as part of the joinery, while a contrasting finish can add a deliberate designer detail.

Start with the toilet, not the cabinet

Set out the unit from the finished floor, cistern, seat and flush controls. Allow room to sit, clean and service the toilet. A deep cabinet can make the area feel confined, and a low shelf may interfere with head clearance or everyday use.

Fixing deserves the same attention as appearance. Identify studs or use anchors suited to the wall construction, then confirm that the fixing can support folded towels, bottles and baskets. Adhesive alone is not an appropriate strategy for a loaded cabinet.

Use the upper section for occasional items and keep daily products within comfortable reach. Moisture-resistant board, sealed edges and a finish suited to bathroom humidity help the joinery last. Open shelves need baskets or trays to contain small items, while doors reduce dust and visual clutter.

SitePro Bathrooms' concept development and 3D design process can test the cabinet's depth, door swing and relationship with the vanity before installation. Their guide to small bathroom storage ideas is also useful when planning limited wall and floor area.

The practical balance is capacity with breathing space. A slim, well-fixed unit can add storage to Highett modern bathrooms. An oversized one can dominate the toilet zone, so the final design should follow the room's clearances rather than maximum cabinet volume.

6. Smart Medicine Cabinet Systems with Integrated Mirrors and Lighting

A mirrored medicine cabinet combines three functions in one wall element: reflection, concealed storage and task lighting. That makes it valuable above a vanity, where a separate mirror and wall cabinet could otherwise compete for space.

The interior should be organised around real routines. A family may need separate shelves for prescriptions, first-aid items and daily products, while a couple might prefer adjustable compartments for grooming equipment and skincare. Demister pads and integrated lighting can improve usability, but they introduce electrical components that need appropriate installation and future service access.

Coordinate the cabinet with the vanity

The mirror should relate to the vanity width, basin position and wall lighting. A cabinet that's too small may look lost above a broad vanity, while one that's too large can dominate a narrow wall. Touchless controls can help in a busy household or accessible bathroom, but a simple switch may be easier to maintain and replace.

Electrical planning belongs in the initial bathroom renovation design. The installer needs to confirm cable routes, switching, ventilation around the cabinet and the location of any power points. This is also where registered builders unlimited and appropriately licensed electrical trades become relevant to the project scope, particularly where several services are being coordinated.

Villeroy & Boch, Duravit, Keuco and Sprinz offer systems that can suit contemporary and designer bathrooms. The practical drawback is repair complexity. If lighting or demisting hardware fails, the cabinet may need a specialist component rather than a straightforward mirror replacement.

Use a neutral frame and restrained internal finishes if the bathroom needs to remain adaptable. That keeps the storage useful if the vanity, tapware or wall colour changes later. It's a strong choice when the room has limited wall area, but less compelling where a generous recessed cabinet already provides enough concealed storage.

7. Modular Bathroom Storage Systems with Customisable Components

Modular storage suits bathrooms that may need to change. Interchangeable cabinets, open shelves, drawers and tall units can be combined around the available wall, then adjusted as children grow, routines shift or different occupants use the room.

The strongest use case is a larger renovation where one custom cabinet would solve the immediate problem but limit future changes. A practical arrangement could place daily products in closed drawers, towels on an open shelf and backup supplies in a tall cabinet. Coordinated handles, finishes and proportions keep those separate components looking like one planned system.

Design the system around daily use

Start with the storage categories, not the modules. Match each category to a suitable compartment: heavy items need stable support, wet products need surfaces that are easy to clean, and frequently used objects should remain accessible without an awkward door swing.

Use these checks before ordering:

  • Check expansion options: Confirm whether extra modules and replacement hardware can be sourced later.
  • Keep the palette adaptable: Neutral finishes can remain suitable as paint, tile and tapware choices change.
  • Record the layout: Save product details, fixing positions and the final configuration for maintenance.
  • Allow service access: Keep plumbing, ventilation and electrical components reachable after installation.

A modular system can also establish a shared storage language between a bathroom and kitchen. Matching proportions or finishes helps the renovation feel deliberately designed rather than assembled from unrelated pieces.

The main trade-off is fit. Standard modules may leave irregular corners unused, while fully custom joinery can follow every change in the wall. Modular units can also appear generic when their height, spacing and depth are poorly matched to the room.

SitePro Bathrooms' concept development and 3D design process helps test those decisions before construction. The layout can be reviewed against door swings, circulation, wall irregularities and storage access, then refined with modern finishes that suit the broader renovation. That process is particularly useful for Highett homes with unusual walls, compact ensuites or combined bathroom and laundry layouts.

7-Point Smart Bathroom Storage Comparison

Item Implementation complexity Resource requirements Expected outcomes Ideal use cases Key advantages
Smart Vanity Storage with Integrated Lighting and Organization Systems Moderate–High, cabinetry + electrical integration, professional install High, custom cabinetry, LEDs, moisture‑resistant finishes, electrician Better organization, enhanced aesthetics, higher property value Full bathroom renovations; families; busy professionals Integrated lighting, customizable compartments, soft‑close, maximizes counter/vertical space
Wall-Mounted Recessed Storage Cabinets and Niches High, structural planning during renovation, built‑in work Moderate–High, registered builder, waterproofing, custom doors/mirrors Seamless, space‑saving storage; cleaner minimalist look Compact ensuites; small bathrooms; remodels No floor footprint, minimalist integration, mirrored options enlarge visual space
Under-Sink Pull-Out Drawers and Soft-Close Storage Systems Low–Moderate, plumbing-aware fitment, simpler installation Low–Moderate, pull‑out hardware, tiered shelving, water‑resistant materials Converts wasted space to accessible storage, conceals plumbing Retrofits; budget‑conscious upgrades; family bathrooms Easy access, cost‑effective, soft‑close, works with existing plumbing
Smart Shower Storage Niches with Integrated Shelving and Drainage High, requires waterproofing, correct slope and tile integration Moderate–High, waterproof membranes, builder, tile work, drainage details Organized shower storage, reduced pooling/mold risk, seamless aesthetic New showers or major remodels; family bathrooms Built‑in drainage, tile‑integrated look, anti‑mold design, non‑slip shelves
Over-Toilet Storage Cabinets and Shelving Units Low, simple wall‑mount or freestanding install Low, shelving/cabinet unit, anchors Quick vertical storage gain with low disruption Small bathrooms; rentals; quick budget renovations Uses unused vertical space, affordable, easy to install, no plumbing changes
Smart Medicine Cabinet Systems with Integrated Mirrors and Lighting Moderate–High, electrical and ventilation integration needed High, LED/demister components, electrician, specialized parts Combined mirror + storage, improved grooming visibility, premium finish High‑end remodels; busy professionals; ensuites Defogging, adjustable lighting, touchless options, space‑efficient
Modular Bathroom Storage Systems with Customizable Components High, professional design & custom installation High, modular components, design consultation, longer lead times Fully customizable, scalable storage with cohesive finishes Comprehensive renovations; evolving family needs; luxury projects Highly customizable, expandable, coordinated hardware/finishes, long‑term value

Turn Storage Planning Into a Better Renovation

The right storage approach depends on the room's constraints and the household's routines. If floor area is tight, start with recessed cabinets, wall niches and carefully planned vertical storage. If the shower is the main source of clutter, prioritise a waterproof niche with proper falls, sealed joints and accessible placement. If several people share the room, illuminated vanity drawers, mirrored cabinets and adaptable modules can make daily use easier without leaving products across the benchtop.

A storage plan should be checked against the whole renovation, not selected as a collection of attractive products. Before construction, confirm:

  • Measurements: Record finished wall lengths, ceiling height, basin dimensions, toilet clearance and door swings.
  • Services: Coordinate plumbing, electrical wiring, ventilation and lighting before cabinetry and wall linings are finalised.
  • Waterproofing: Detail shower niches, wet-area penetrations, backing and sealant joints with the waterproofing installer.
  • Materials: Choose moisture-resistant boards, sealed edges, corrosion-aware hardware and surfaces that can be wiped clean.
  • Access: Leave room to remove traps, reach isolation valves, service lighting and adjust hinges or runners.
  • Visual cohesion: Match vanity, mirror cabinet, tall storage and shelving finishes across the bathroom and, where relevant, the kitchen.

Cost also needs to reflect the level of work. Australian bathroom renovation guides commonly place a budget refresh at AUD 8,000 to 15,000, a mid-range renovation at AUD 15,000 to 35,000, and premium work at AUD 35,000 or more, while a typical project is often described as taking 3 to 5 weeks from demolition to completion. These figures are broad planning tiers, not a quote, and custom storage, service relocation, waterproofing requirements and selected finishes can change the final scope. See the Australian bathroom renovation guide for that budgeting context.

For new bathroom ideas, modern bathrooms or designer bathrooms in Highett and greater Victoria, SitePro Bathrooms can take storage from an early concept through detailed 3D design, construction and finishing. Review your room measurements, list what needs to be stored and request a custom quote through SitePro Bathrooms before choosing the cabinetry or hardware.