• siteprobathrooms

Bathrooms and Kitchens: The Renovation Guide

You can get through the first sketch of a bathroom or kitchen with a mood board and a few product samples, but the job changes the moment walls come open. In Victorian homes, the hidden work is usually where the budget, timeline, and compliance load sit, not in the tile choice. That's why bathrooms and kitchens need to be planned together, especially when you want a result that looks sharp on day one and still performs years later.

Most homeowners start by comparing finishes. On-site, the critical issues are drainage falls, duct routes, waterproofing junctions, demolition access, and how many trades need to touch the same room before it can be handed back. If you're weighing bathroom renovations or a kitchen upgrade, the smarter move is to treat both wet areas as one coordinated project, with one design logic and one construction sequence.

The Reality of Combined Wet Area Projects

A lot of projects begin with a simple brief. The bathroom feels tired, the kitchen is clunky, and the owners want a cleaner, more modern home without turning it into a building site for months. Then demolition starts, and the electrician, plumber, waterproofer, tiler, cabinetmaker, and painter all need access to the same narrowed timeline.

That's where fragmented scheduling gets expensive. If the bathroom is stripped first and the kitchen sits half-finished, the household still lives around skipped meals, noise, dust, and trade gaps. A coordinated program avoids paying twice for setup, demolition protection, waste removal, and site supervision.

A practical way to handle it is to run the work as one end-to-end scope, from concept through to final handover. That approach matters even more when one room affects the other, because a duct route, plumbing chase, or power upgrade can be shared or planned together instead of being reworked later.

Practical rule: if a wall, floor, or ceiling opening helps one room and complicates the other, resolve it in design, not on site.

For owners in Highett, the same logic helps with home logistics. Families can line up temporary cooking, washing, and storage arrangements once, instead of improvising twice. If you're considering a laundry addition or a reworked wet area, the sequencing guidance at SitePro Bathrooms' laundry planning resource is useful because it sits in the same project-management territory as a combined bathroom and kitchen upgrade.

The best outcome usually comes from one clear scope, one finish schedule, and one construction sequence. That doesn't make the renovation simpler, but it does make it controllable.

Market Trends Driving Australian Renovations
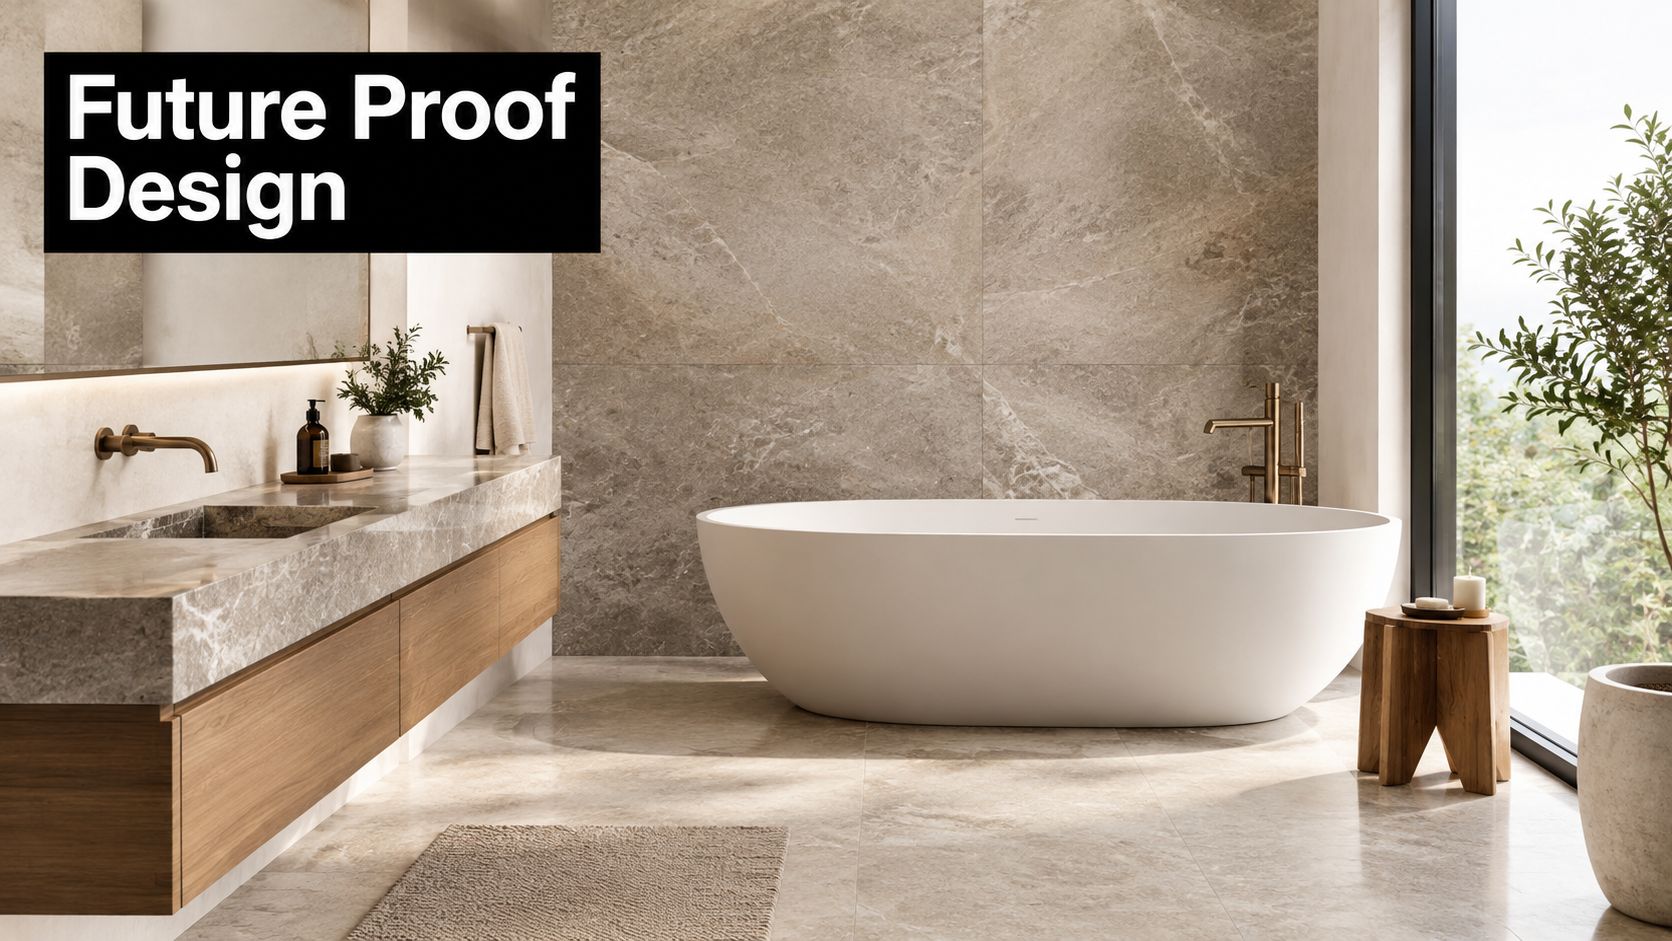
A modern, luxury bathroom interior with a white freestanding bathtub, marble walls, and wood-toned vanity cabinetry.

A Victorian renovation can start as a finish-selection exercise and become a services and structure project after demolition. National demand helps explain why bathrooms and kitchens remain common renovation targets. Australia recorded approximately 542,600 new bathroom installations in 2021–22, worth about $6.5 billion, according to the Housing Industry Association. The scale reflects regular household upgrades, not only high-end builds.

The average number of bathrooms per home also rose from 2.2 in 2019 to 2.6 in 2022. More ensuites and secondary bathrooms increase demands on existing floor plans, including privacy, storage, circulation, plumbing capacity, and access for future maintenance. In an older Victorian house, adding a wet area can involve more than moving fixtures. Floor levels, joist direction, drainage falls, wall framing, and heritage constraints can all affect the design.

What that means on the ground

Established homes often need service and compliance work before they can support modern layouts. A kitchen may require electrical upgrades, structural changes for an opened wall, or revised plumbing routes. A bathroom may need floor repairs, substrate replacement, or detailing that accommodates uneven existing construction. These items rarely appear in the glossy design image, but they influence both cost and program.

A renovation that looks simple online can become a structural job once walls and floors are opened.

The typical period before a bathroom was refreshed or fully upgraded fell from about 17 years before the pandemic to less than 14 years in 2022. That shorter cycle increases the value of durable finishes, accessible services, and repairable details. Faster refreshes do not justify cutting corners. Poor falls, weak substrate preparation, inaccessible shut-off points, or badly planned joinery can create failures well before the next renovation.

A modern two-story luxury house design featuring clean lines, large glass windows, and a landscaped front yard.

For Highett and greater Victoria, strong demand does not remove technical risk. It brings more projects into the same market, where compliance checks, structural discoveries, and trade availability can affect the final result. Allow a contingency for concealed conditions, confirm the scope before finishes are chosen, and treat NCC requirements as design inputs rather than late-stage paperwork.

Navigating Ventilation and Waterproofing Codes

A modern bathroom or designer kitchen fails fast if ventilation is an afterthought. The NCC 2022 condensation provisions require a mechanical exhaust system to provide at least 25 L/s for a bathroom and 40 L/s for a kitchen, with exhaust air discharged directly outdoors (NCC 2022 condensation management). That's the baseline, not the premium option.

The mistake I see most often is treating a fan or rangehood like a box-ticking appliance. A fan that vents into a roof cavity creates moisture problems above the ceiling line, where timber, insulation, and plasterboard are vulnerable. The same applies in kitchens, where cooking moisture and contaminants need to leave the building, not circulate through it.

What needs to happen before the walls close

The practical checklist is straightforward.

  • Confirm the installed airflow, not the brochure figure. Duct length, bends, and grille resistance all affect real performance.
  • Plan make-up air, so the fan or rangehood can move air instead of fighting a sealed room.
  • Keep the exhaust route direct, because long, twisty ducts reduce performance and create avoidable noise.
  • Discharge outdoors, not into the roof space, because condensation damage starts where warm air meets cold surfaces.
  • Check control logic, especially where a bathroom fan must be interlocked with the light and run-on requirements apply.

The waterproofing side is just as unforgiving. Wet-area elements need a waterproofing system, and in showers the floor, including any hob or step-down, must be waterproof. Shower walls need waterproofing to at least 1,800 millimetres above the floor substrate, and wall-floor junctions and penetrations need protection too (NCC wet area waterproofing).

If a 3D design leaves the exhaust route vague or the shower fall unresolved, it's not finished enough to build.

For a renovation in Victoria, the design conversation has to get specific here. Open showers, walk-in screens, and minimalist layouts all work, but only if the drainage, falls, and waterproofing details are resolved before tiling starts. The waterproofing guidance at this Victoria-focused resource is useful because it sits right where design ambition meets compliance reality.

Balancing Modern Aesthetics with Future Adaptability

New bathroom ideas often start with surface finishes. That makes sense, because people see tile, tapware, vanity colour, and lighting first. The problem is that a space can look refined and still be a pain to use if the shower entry is awkward, the storage is too high, or the circulation is too tight.

Older homes make this even more relevant. Industry reporting indicates that 36% of kitchen renovation jobs and 40% of bathroom renovation jobs occur in homes in the older age bracket (Sourceable reporting). That's a strong signal that renovation is not just about resale polish, it's also about keeping established housing useful for changing households.

Designing for now and later

The best adaptable spaces don't look clinical. They use quiet structural moves that hide in plain sight.

  • Step-free shower access keeps the room easier to enter now and less expensive to adapt later.
  • Reinforced walls behind finishes allow future grab rails without reopening waterproofing.
  • Slip-resistant flooring helps in wet zones without making the room feel institutional.
  • Lever handles and reachable controls are easier to use when hands are wet, full, or weak.
  • Clear storage zones reduce clutter and make cleaning simpler.

These decisions matter for ageing in place, disability access, rental durability, and body corporate use. They also work well in designer bathrooms, because good design is usually the kind that hides its problem-solving. A vanity can still look premium, a shower can still feel minimal, and storage can still be elegant if the room is laid out with real movement patterns in mind.

The same logic applies in kitchens. A layout that leaves workable circulation, safe reach zones, and sensible storage heights tends to age better than one built entirely around a picture-perfect island or a dramatic splashback. If you're planning to stay in the home for years, adaptable design is a value-preserving choice, not a compromise.

Deconstructing the Renovation Budget and ROI

Generic renovation quotes can be misleading because they blur together very different scopes. A cosmetic refresh, a like-for-like replacement, and a layout change all live in the same broad category online, but they behave very differently once trades are booked and walls are opened. That's why budget conversations in Victorian homes have to start with scope, not a headline figure.

Available 2026 estimates place a standard Melbourne bathroom renovation at roughly A$24,000–A$38,000 and a Melbourne kitchen renovation at about A$28,000–A$45,000, with structural changes and older homes widening those ranges significantly (What's the Damage 2026 renovation market report). Those figures are useful as a starting point, but they don't tell you what happens when a wall move triggers plumbing relocation, or when an older slab or frame needs correction.

Renovation Scope and Cost Drivers

Project Scope Key Cost Drivers Trade Complexity
Cosmetic refresh Paint, surface replacement, minor fixture swaps Lower, fewer site changes
Like-for-like replacement Demolition, reinstallation, standard plumbing and electrical updates Moderate, coordinated trades
Layout change Drainage shifts, electrical relocation, cabinet rework, waterproofing changes Higher, more sequencing risk
Structural renovation Wall changes, repair of hidden issues, permit pathway, added compliance work Highest, multiple approvals and trade interfaces

The trap is assuming return on spend is the only test that matters. Published ROI claims can sound neat, but they don't capture comfort, maintenance avoided, or rental durability. A room that functions well every day, drains properly, and doesn't develop moisture damage has value even when it doesn't fit a simple resale formula.

You also need contingency for hidden structural realities. In older Victorian homes, a concealed leak, out-of-square wall, or tired substrate can change the build sequence fast. That's why a realistic budget is one that accounts for the room you can see and the structure you can't.

Legal Requirements and Builder Registration

Victoria is not the place to start demolition and work out the paperwork later. A builder must be registered with the Building and Plumbing Commission when domestic building work exceeds $10,000, including labour and materials, or when the work involves structural changes regardless of value (Consumer Victoria registration checklist). That threshold matters because many bathroom renovations and kitchen projects cross it quickly once demolition, waterproofing, cabinetry, and trades are included.

The other important point is that the homeowner doesn't hand off responsibility just because a contractor is on site. The owner still needs to make sure the right building or planning permits are in place and that any required Certificate of Final Inspection or Occupancy Permit is issued when applicable. That's not paperwork for later, it's part of project control from the beginning.

What to check before signing

  • Registration status, if the scope passes the value threshold or includes structural work.
  • Permit pathway, because the renovation concept can change once planning or building conditions are known.
  • Contract scope, so labour, materials, and exclusions are clearly set out.
  • Inspection milestones, especially where waterproofing or concealed services need sign-off before finishes go in.
  • Handover documents, including certificates and completion records that matter for future sale or claims.

For homeowners comparing contractors, a registered-builder-focused guide can help frame the questions to ask, even if the final choice is still based on scope fit and communication. In practice, the lowest-friction projects are the ones where the builder, plumber, and other trades are coordinated under one plan, not booked independently and left to sort out overlaps on site.

Registered builders unlimited can sound like a broad label, but the issue is simpler. If the job affects structure, wet-area compliance, or permits, the contractor has to be legally set up to carry the responsibility. That protects the homeowner as much as the build quality does.

Managing the End to End Renovation Process

The difference between a smooth renovation and a stressful one is usually decided before demolition starts. A properly managed project begins with measured consultation, continues through 3D design, and then locks the technical details before anyone cuts timber or lifts tile. That sequence matters because duct routes, drainage falls, fixture clearances, and cabinet dimensions all depend on each other.

In a combined bathroom and kitchen job, the end-to-end approach removes a lot of guesswork. The same team can coordinate service locations, confirm waterproofing details, and sequence trades so one room doesn't sit half-built while another trade waits for access. That lowers the chance of expensive site compromises, especially in older houses where every concealed condition seems to introduce another decision.

What good coordination looks like

  • Design is fixed early, so fixtures, joinery, and service points don't keep shifting.
  • Ducting and drainage are resolved first, because they shape ceilings, bulkheads, and floor construction.
  • Waterproofing is inspected before finishes, so failures don't get buried.
  • Trades are sequenced, not stacked, which keeps the job moving without collisions.
  • Handover is documented, so the homeowner knows what was installed and what needs routine care.

The cleanest projects are the ones where the building sequence follows the design, not the other way around.

That's also where a coordinated renovator adds real value. SitePro Bathrooms is one example in this space, because it works through consultation, design, construction, waterproofing, and finishing as one managed process. The point isn't the brand name, it's the model, one team carrying the logic from first measure to final handover.

For homeowners in Highett and across Victoria, that structure is often the difference between a room that looks good in photos and a renovation that works under daily use. Bathrooms and kitchens don't reward improvisation. They reward planning, compliance, and trade coordination that respects what's hidden behind the surfaces.


If you're planning bathrooms and kitchens in a Victorian home, start with a proper scope review, a compliance check, and a budget that reflects hidden structural realities, not just visible finishes. Speak with a registered renovation team early, get the ventilation and waterproofing details locked in before ordering products, and choose a delivery process that manages design, trades, and handover as one project.
  • siteprobathrooms

Overhead Kitchen Cabinets: Design, Install & Maintain

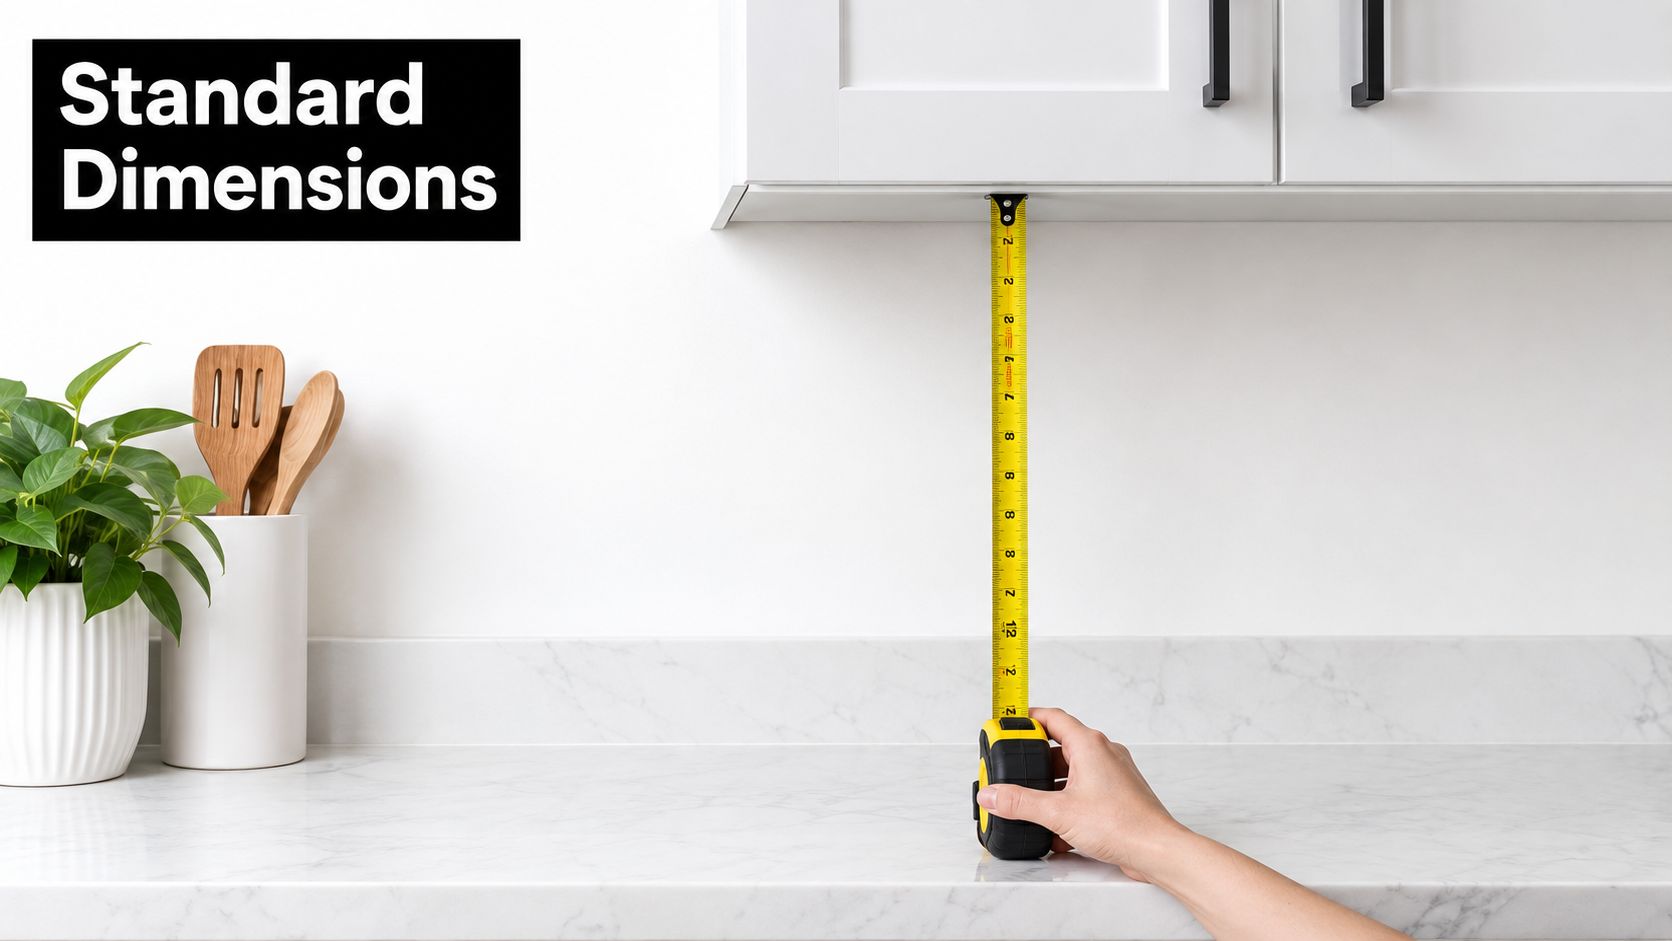
Overhead kitchen cabinets are commonly specified at 300–350 mm deep, with the underside positioned 500–600 mm above the benchtop. These measurements protect head space, preserve useful preparation room and leave practical clearance for everyday appliances.

But is filling every available section of wall with cupboards really the best way to make a Victorian kitchen work? A cabinet can add storage and still create dead space, awkward reaching, poor lighting or a dangerous habit of climbing a stool. The right design starts with the people using the kitchen, the tasks they perform and the room's actual measurements, not with a standard row of doors.

For Australian renovation context, cabinetry deserves careful attention. The 2023 Houzz Australia Kitchen Trends Study found that 90% of renovating households updated their kitchen cabinets, while 72% chose semi-custom or custom cabinetry. That preference makes sense in Highett homes, Melbourne apartments and family kitchens where walls, windows, splashbacks and appliances rarely line up perfectly with a generic module.

Understanding Overhead Cabinet Dimensions

Australian overhead cabinets are commonly 300–350 mm deep, while the space between the benchtop and cabinet underside is usually 500–600 mm. The depth keeps plates, glasses and pantry goods within reach without pushing the cupboard face too far into the room. It also reduces the chance of striking your head while leaning over the bench.

The vertical clearance has two jobs. It creates a comfortable working zone for food preparation, and it leaves room for countertop appliances such as a kettle, toaster or coffee machine. A cabinet mounted too low may interfere with appliance lids, door swings and sightlines. One mounted too high may turn daily storage into a step-stool task.

A hand uses a yellow tape measure to measure the distance between a kitchen countertop and cabinet.

Height should follow the room

A 720 mm-high wall cabinet is a frequent Australian configuration. A 600 mm unit may suit a smaller storage requirement or a room where visual openness matters, while a 900 mm unit can take advantage of a high ceiling or help create a more continuous full-height composition. These choices only work when measured against the finished floor, benchtop, splashback, ceiling and any bulkhead.

Australian cabinetry guidance identifies approximately 900 mm as a conventional benchtop working height, so a 600 mm overhead clearance places the cabinet underside near 1,500 mm above finished floor level. The relationship affects who can reach the lower shelf, where under-cabinet lighting can sit and whether tall appliances remain usable on the bench. Use the overhead cabinet height guide as a planning reference, then confirm the final dimensions on site.

When standard dimensions need adjustment

A compact Highett kitchen may need shallower cupboards beside a doorway to protect circulation. A tall household might prefer a slightly higher installation, while a household planning for ageing in place may need the daily-use shelf lower or fitted with pull-down hardware. Neither choice should be made from cabinet height alone.

Measure the actual appliance elevations before ordering. If the benchtop, splashback or ceiling changes during construction, the cabinet layout may need to change with them. A senior cabinetmaker checks these relationships together because a tidy elevation drawing can still produce an uncomfortable kitchen if the physical reach zones are ignored.

Choosing Cabinet Materials and Styles

Material choice changes more than appearance. It affects how the doors respond to steam, fingerprints, sunlight, cooking residue and repeated cleaning. In a busy Victorian kitchen, an attractive finish that demands constant polishing may become frustrating, while a quieter surface can remain practical for years.

White remains a strong preference. Australian renovation research recorded white as the selected cabinet colour for 62% of kitchen updaters in the 2023 study, as reported in the Australian kitchen renovation findings. White can reflect light in a narrow room, but the exact result depends on sheen, splashback colour, benchtop pattern and natural light direction.

Compare the construction choices

Cabinet Material Durability Maintenance Cost Range
Timber veneer Warm appearance and repairable character, with finish quality affecting longevity Wipe spills promptly and follow the maker's care advice Varies from moderate to premium
Engineered wood with laminate or melamine Consistent, practical surface suited to everyday use Usually simple to wipe, with care needed at exposed edges and joins Usually economical to mid-range
Painted board Broad colour choice and a tailored appearance May show chips and marks more readily, especially on busy doors Mid-range to premium
Acrylic Smooth, contemporary appearance and strong colour impact Fingerprints and surface marks can be more visible depending on sheen Premium
Glass-fronted doors Adds visual depth and helps display organised items Requires regular cleaning and disciplined shelf presentation Mid-range to premium

Engineered wood with a well-finished laminate or melamine surface often suits a rental, family kitchen or practical renovation. Timber veneer brings warmth to a traditional or country setting, but it should be selected with an understanding that natural grain varies. Acrylic and glass can support a modern or designer kitchen, though they draw attention to every object and reflection.

Use finish to control visual weight

Gloss fronts can bounce light around a compact kitchen, while matt finishes tend to soften reflections and fingerprints. A two-tone arrangement can place a darker colour on lower cabinets and a lighter colour overhead, making the wall units feel less imposing. Glass-fronted overheads can break up a long run, but they work best when the contents are deliberately organised.

For a Victorian home with timber floors and period details, painted doors may connect the new kitchen with the existing architecture. In a contemporary apartment, flat-panel fronts, restrained handles and a consistent edge detail can make the room feel calmer. Read the guidance on kitchen cabinet materials before choosing samples, and view them beside the actual benchtop and splashback rather than in isolation.

Practical rule: Choose the door finish for the way your household cooks and cleans, not only for how it looks in a showroom.

Planning Your Cabinet Layout and Storage

A well-planned kitchen follows the cook's movement. The sink, cooktop and refrigerator should form a short, practical sequence, while overhead cabinets should hold items near the task they support. Store plates near the dishwasher or dining area, cookware near the cooktop, and mugs or breakfast supplies where morning traffic does not cross the main preparation zone.

Cabinet volume matters less than useful location. The 2023 Houzz Australia Kitchen Trends Study recorded 53% of kitchen updaters installing built-in pantry cabinets and 27% creating space for a walk-in pantry. That supports a sound planning principle: overhead cupboards suit reachable daily items, while a pantry or tall cabinet can carry bulk goods and less frequently used stock.

Put useful items in the useful zone

Place plates, glasses and serving bowls where they can be lifted out without reaching across a hot surface or interrupting another person's work. Reserve higher shelves for occasional baking equipment or servingware only when someone in the household can retrieve it safely. A cabinet that looks spacious on the elevation may become dead storage if its contents are difficult to see or return.

Pull-down fittings can bring an upper shelf within easier reach. Full-extension drawers and pull-out pantry shelves reduce bending elsewhere, creating a better balance between wall storage and base storage. Corner carousels can improve access in awkward corners, provided the doors have enough clearance and the shelves are loaded by use rather than appearance. An appliance garage can conceal a toaster or small machine, but its doors, power points and ventilation must be resolved before manufacture.

Treat lighting as part of the cabinet plan

Under-cabinet lighting should illuminate the benchtop, not the cook's head or the cabinet doors. Give the electrician the final cabinet layout early, so wiring, switches and power points do not end up behind a fixed panel. Internal lighting can help with deep cupboards, but a clear shelf arrangement still matters. Light should make storage easier to find, not justify an oversized cabinet.

In a Highett kitchen with limited bench space, a shallow overhead run may preserve a continuous preparation area while a tall pantry stores bulky goods. In a Melbourne apartment, removing one section of wall storage may improve sightlines, though every displaced item needs a practical home. Review these kitchen cabinet storage ideas against the household's actual workflow, reach and cooking habits rather than copying a decorative arrangement.

Accessibility and Safety Considerations

More cabinet volume doesn't automatically mean more usable storage. If nobody can safely reach the upper shelf, that space becomes dead storage, and daily reliance on a step stool introduces unnecessary risk. The better question is not how many cupboards fit on the wall, but how much of the contents each person can see, reach and return without strain.

Map the reach zones before finalising the elevation. Put everyday plates, cups, oils and cooking tools in the comfortable zone for the main users. Move occasional servingware higher, and consider drawers, a full-height pantry or pull-down mechanisms for items that would otherwise demand repeated stretching.

An elderly woman safely stands on a folding stepladder to reach items inside an overhead kitchen cabinet.

Design for changing needs

Older residents, people with mobility limitations and anyone with reduced balance may not use a high shelf in the same way as a younger, fully mobile person. Australian accessibility guidance discusses pull-down or motorised mechanisms for upper cabinets, alongside full-extension runners and pull-out pantry shelves that reduce bending and reaching. The Australian kitchen accessibility guidance also supports thinking about comfortable reach rather than assuming one standard height suits every household.

Families need a different form of planning. Keep knives, cleaning products and breakable items out of unsupervised reach, and avoid placing frequently handled goods above a cooktop where a child may be tempted to climb or stretch. Rounded edges, stable mounting and clear floor space reduce the consequences of hurried movement.

Decide whether every wall needs a cupboard

In a narrow Melbourne kitchen, deep or low overheads can close down sightlines and make the room feel crowded. Open shelving may create visual relief, but it exposes contents to grease and requires consistent organisation. Omitting upper cabinets can work when a pantry, drawers and generous lower storage replace their function. It fails when the result is food and appliances permanently covering the benchtop.

A minimalist kitchen isn't automatically an accessible kitchen. The strongest layout is the one that keeps essential items visible, reachable and safe.

Installation Requirements and Professional Help

Overhead cabinets carry significant weight once loaded with crockery, glassware and pantry goods. A secure installation starts with identifying suitable wall framing or structural fixing points, selecting fixings for the wall construction and creating a level reference line. Cabinets should be joined and supported according to their construction system, rather than just screwed into plasterboard and left to carry the load alone.

The wall may also need preparation. Uneven surfaces, old splashback adhesive, weak plaster or a hidden service can affect the fixing method and final alignment. A small error at the first cabinet can continue across the whole run, leaving uneven reveals, doors that drift out of line and a visible gap at the ceiling.

Coordinate the trades before the doors arrive

Electricians need the final cabinet plan for under-cabinet lighting, appliance outlets and any changes to existing wiring. Rangehood installers need the selected hood, ducting route and manufacturer clearances before a cabinetmaker closes the wall around them. Australian guidance commonly places cabinetry about 600 mm above an electric cooktop and approximately 650–750 mm above a gas cooktop, subject to the appliance instructions, as explained in this cooktop and rangehood clearance guidance.

Don't manufacture the cooking-zone cabinets from a guessed dimension. Check the appliance manual, rangehood requirements, ducting, splashback and door operation together. In a body corporate property, confirm whether approvals or documentation apply before work begins.

Know where kitchen work meets bathroom renovations

Victorian projects often involve more than cabinetry. If the same renovation includes bathroom renovations, a new wet area, relocated plumbing or structural changes, building approval and plumbing compliance need separate attention. A building permit may be required when a bathroom is created outside an existing wet area, walls are removed or fixtures move, while a licensed plumber must complete regulated plumbing connections and provide a Certificate of Compliance, as outlined in this Victorian bathroom permit guidance.

A domestic building practitioner is generally required for building work valued at $5,000 or more, and internal bathroom, kitchen and laundry work may fall within Domestic Builder: Limited registration when it stays inside the existing external walls, floor and ceiling. A registered builder with Unlimited registration covers a broader scope, so verify the current registration class and permitted work before signing.

Budget Planning and Cost Considerations

A useful cabinet budget starts with the specification, not a guessed total. Door material, cabinet internals, hinges, drawer runners, handles, end panels, fillers, lighting, installation and site preparation all affect the final result. Two kitchens with similar-looking doors can differ substantially once one includes custom dimensions, integrated appliances and specialist access hardware.

Separate the visible and hidden costs

Ask for the quote to identify each major component. The following items often change the price or programme:

  • Cabinet construction: Stock modules may limit fit, while semi-custom and custom cabinetry can respond to unusual walls, ceilings and appliance positions.
  • Hardware: Soft-close hinges are only one part of the decision. Pull-down fittings, lift-up doors and specialised internal accessories add function but also complexity.
  • Site preparation: Removing old cabinets, repairing walls, adjusting skirting and disposing of materials can sit outside a basic supply price.
  • Electrical and ventilation work: New task lighting, relocated outlets and rangehood ducting may require separate trades.
  • Installation conditions: A level, accessible room is simpler to fit than a home with uneven walls, tight access or occupied rooms.

Because verified pricing varies by material, supplier, room size and installation scope, treat any unitemised figure cautiously. A transparent quote should state what is included, what remains provisional and which selections could alter the amount.

Spend where daily use depends on quality

Hardware deserves priority in the areas opened repeatedly. A durable runner or accessible pull-down fitting can provide more practical value than a decorative upgrade that offers no functional benefit. Save by limiting unnecessary panels, avoiding overly complex door arrangements and choosing a finish that doesn't require specialist upkeep.

For a staged renovation, complete measurements and appliance selections before ordering overhead kitchen cabinets. Delaying a cabinet run is usually less disruptive than manufacturing it around an unconfirmed cooktop, rangehood or splashback.

Working with Professional Renovators

Professional renovation support is most valuable when several decisions interact. A good designer can test cabinet depth, reach zones, appliance clearances, lighting and finishes in a measured 3D design before construction begins. That visual check helps a Highett homeowner spot a bulky wall run or an inaccessible shelf while changes are still drawings, not demolition.

Ask how the renovator measures the room, records existing services and confirms appliance specifications. Request a written scope that separates cabinetry, installation, electrical work, plumbing, approvals, finishes and exclusions. You should also understand who coordinates the trades and who responds if a site condition changes.

Screenshot from https://siteprobathrooms.com.au

Ask better questions at the consultation

  • Reachability: Which shelves suit daily use for every person in the household?
  • Appliance coordination: Have the cooktop, hood, ducting and countertop appliances been included in the elevation?
  • Installation: What wall structure and fixing method will support the loaded cabinets?
  • Registration: Which domestic builder registration class applies to the work?
  • Wet areas: How will waterproofing, plumbing certificates and inspections be documented if bathroom renovations are part of the project?

The same planning discipline applies to new bathroom ideas, modern bathrooms and designer bathrooms. Attractive finishes still need sound waterproofing, workable storage and correctly coordinated services. In Victoria, wet-area waterproofing is governed by AS 3740, and shower waterproofing generally reaches at least 1,800 mm above the finished floor, or 2,100 mm where the recess is less than 1,000 mm wide, according to this Australian wet-area waterproofing guidance.

For homeowners wanting one coordinated process, SitePro Bathrooms provides measured kitchen planning, 3D design, cabinetry configuration, construction and finishing in Highett and greater Victoria. Book a consultation with your room measurements, appliance details and a list of the items that must remain within easy reach, then ask for a cabinet layout that proves the storage will be safe and usable before you approve manufacture.

  • siteprobathrooms

Online Kitchen Planner Guide to Design Your Dream Layout in 2026

An online kitchen planner gives you a fast, visual way to mock up a kitchen and test layouts before you order a single thing or swing a sledgehammer. Think of it like a flight simulator for your renovation—low cost, low risk, but incredibly clear.

What an Online Kitchen Planner Actually Does

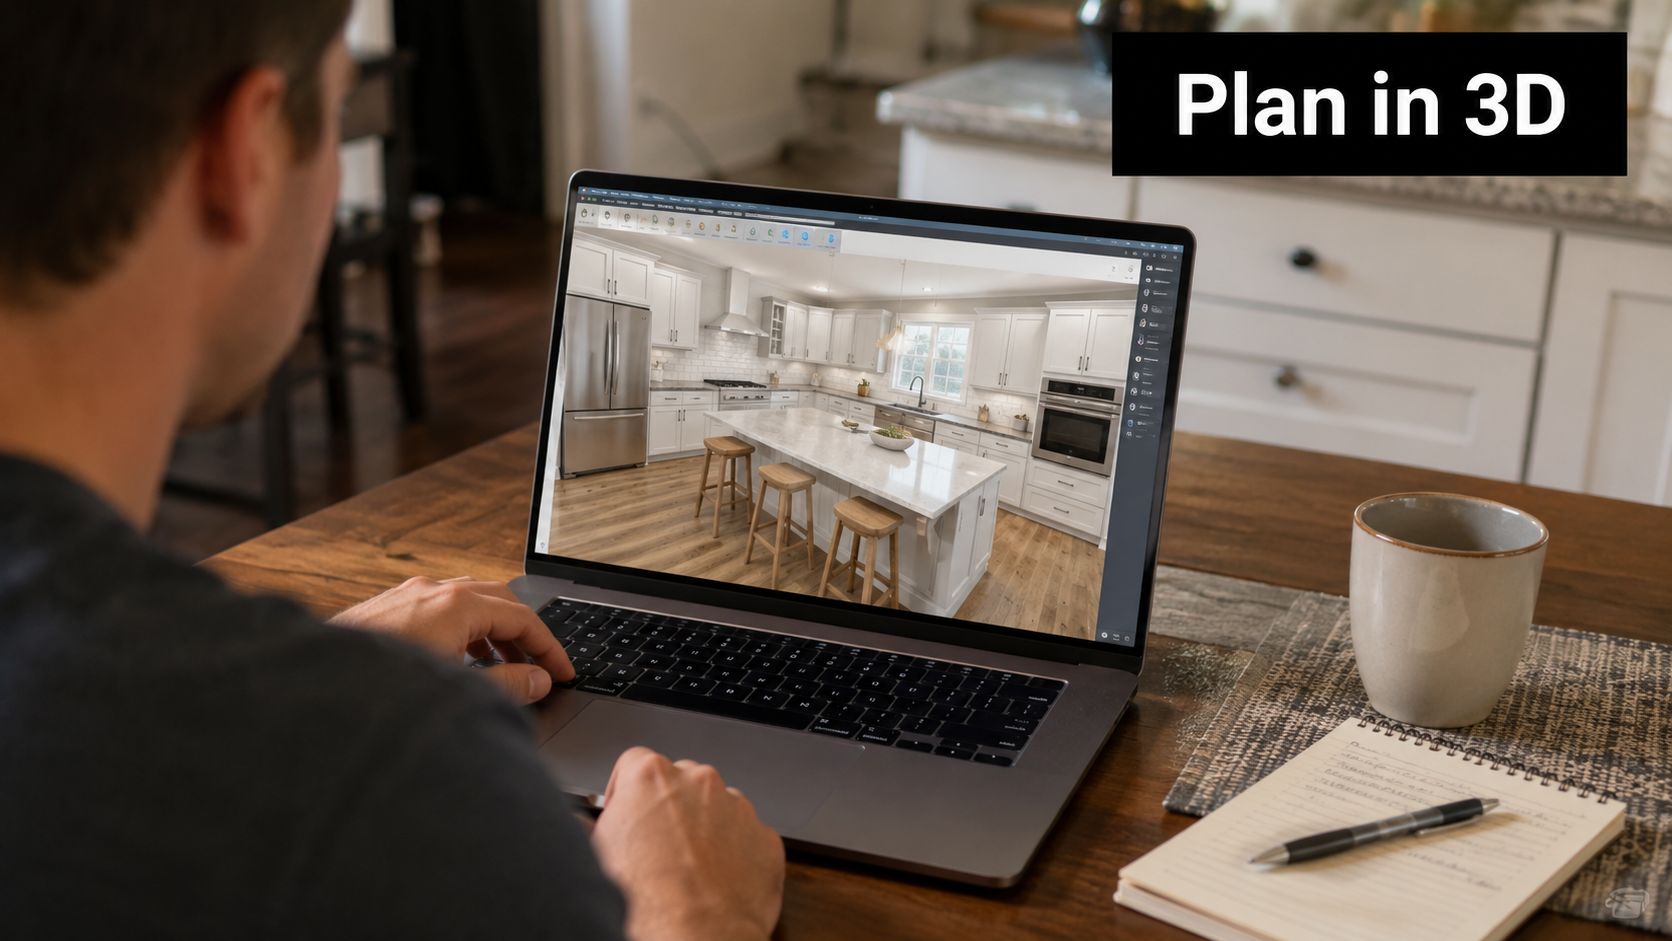
A person uses an online kitchen planner software on a laptop to design a modern white kitchen.

These tools let you draw a room to scale, drop in cabinets, benchtops, splashbacks, appliances, and lighting, then inspect the whole thing in 2D or 3D. It takes the guesswork out of checking clearances, bench depths, and appliance positions well before any tradies show up.

For instance, you can:

  • Measure a walkway and instantly see if an island will choke the flow.
  • Swap benchtop materials to see how they balance against the splashback.
  • Place a wall oven and check if a drawer can actually open beside it.

Features You’ll Usually Find

  • Scale drawing tools for walls, doors, and windows so the dimensions match your actual site.
  • A library of cabinetry, appliances, and finishes you can drop in and resize.
  • 2D plan and 3D walkthrough modes to check sightlines from the living area.
  • Versioning or save slots so you can compare two or three layouts side by side.

Key takeaway: Planning on screen catches layout mistakes at almost zero cost and clarifies choices you would otherwise argue over on site.

What Planners Intentionally Simplify

Keep in mind that these tools are built for early concepts, not construction. Joinery details and construction tolerances often get abstracted into generic cabinet blocks. Structural, plumbing, and electrical constraints usually are not modelled at all.

Waterproofing, fall to waste, and local building approvals sit well outside the scope of most consumer planners. A planner is brilliant for early decisions, but it is not a buildable construction document.

How Planners Help Real Renovation Choices

  • Test traffic flow and appliance placement to avoid costly rework.
  • Validate visual pairings like benchtop versus splashback before ordering materials.
  • Generate simple cut lists or screenshots to brief trades, speeding up that first site visit.

Planner Features and the Renovation Decisions They Support

Planner Feature What You Can Test Best Used For
Scaled room drawing Walkways, island clearance Early layout proofing
Cabinet library Door styles and storage counts Selecting joinery layout
3D walkthrough Sightlines and finish pairing Visualising mood and scale
Version save/export Compare layouts or share with trades Preparing for a quote or site measure

If you want to apply similar digital planning to bathroom renovations, Read also: SitePro Bathrooms 3D bathroom planner. These tools can help you explore new bathroom ideas and visualise modern bathrooms.

Why Planning Before Demolition Saves You Money and Stress

A couple reviews a home renovation plan on a digital tablet while sitting at a kitchen table.

Think of an online kitchen planner as a dress rehearsal for the real thing. You get to test out different layouts without spending a cent on physical changes. Once the sledgehammers come out, even minor mistakes turn into expensive headaches. Working through your design on screen first drastically cuts down on rework and delays.

Take kitchen islands, for instance. Modelling one lets you check clearances and see how people will move around the fridge and oven. You dodge those awkward moments where a seemingly perfect island suddenly blocks a hallway once the cabinets actually go in.

Key insight: Planning isn't an indulgence; it's risk reduction. Committees, investors, and families are far more likely to sign off on a budget when the unknowns are kept to a minimum.

How a Planner Catches Costly Mistakes Early

  • Check appliance door swings and drawer clearances using scaled components, ensuring nothing collides during installation.
  • Test bench depths for your small appliances so kettles and toasters fit without crowding your prep space.
  • Nudge fixtures by millimetres to see if shifting a sink 200–300 mm frees up a dishwasher cavity or improves the plumbing run.

Running through these quick checks saves you from ordering custom joinery that just ends up getting remade.

A Relatable Scenario

Picture a family home where a proposed island looked great on paper. Once modelled, though, it choked the main hallway by 150 mm. Spotting that on screen cost absolutely nothing. Fixing it after demolition? That would have meant days of extra trade work, plus remaking cabinets and flooring.

Practical Benefits Summarised

  1. Reduce waste: Fewer returned cabinets, less leftover tile, and lower disposal fees.
  2. Save time: Fewer on-site decisions and less back-and-forth with your trades.
  3. Improve quotes: Clear screenshots and precise measurements give tradies an accurate scope, meaning estimates land much closer to the final cost.
  • Tip: Use versioning to compare two layouts side by side, then share those renders with your builder for quick feedback.
  • Tip: Lock your critical measurements in the planner so you don't accidentally drift out of spec while tweaking door styles or colours.

When to Bring in a Professional

Consumer planners are brilliant for those early-stage sanity checks. But if your project involves structural changes, complex plumbing, or body corporate rules, you need to bring in a registered builder. SitePro Bathrooms provides professional 3D design that goes well beyond basic concept models, delivering detailed, buildable plans. This becomes especially important when your kitchen renovation ties into a bathroom renovation or a designer bathroom project.

Statistical note: Early planning typically reduces on-site change orders and can shorten construction time by measurable margins when designers and builders coordinate.

Next Steps and Resources

  • Model two or three realistic layouts using an online kitchen planner, focusing heavily on clearances and how appliances interact.
  • Save your renders to share with a registered builder or renovation partner before they do a site measure.
  • Get a handle on realistic budgeting and trade-ready planning in our cost guide: Read also Learn more about kitchen renovation costs in our guide

Frequently Asked Question Example

Q: Will a planner stop all surprises?
A: No. It reduces plenty of layout risks, but a site survey and professional input remain essential for structural and services work.

Inside a Modern Planner and How to Use It Well

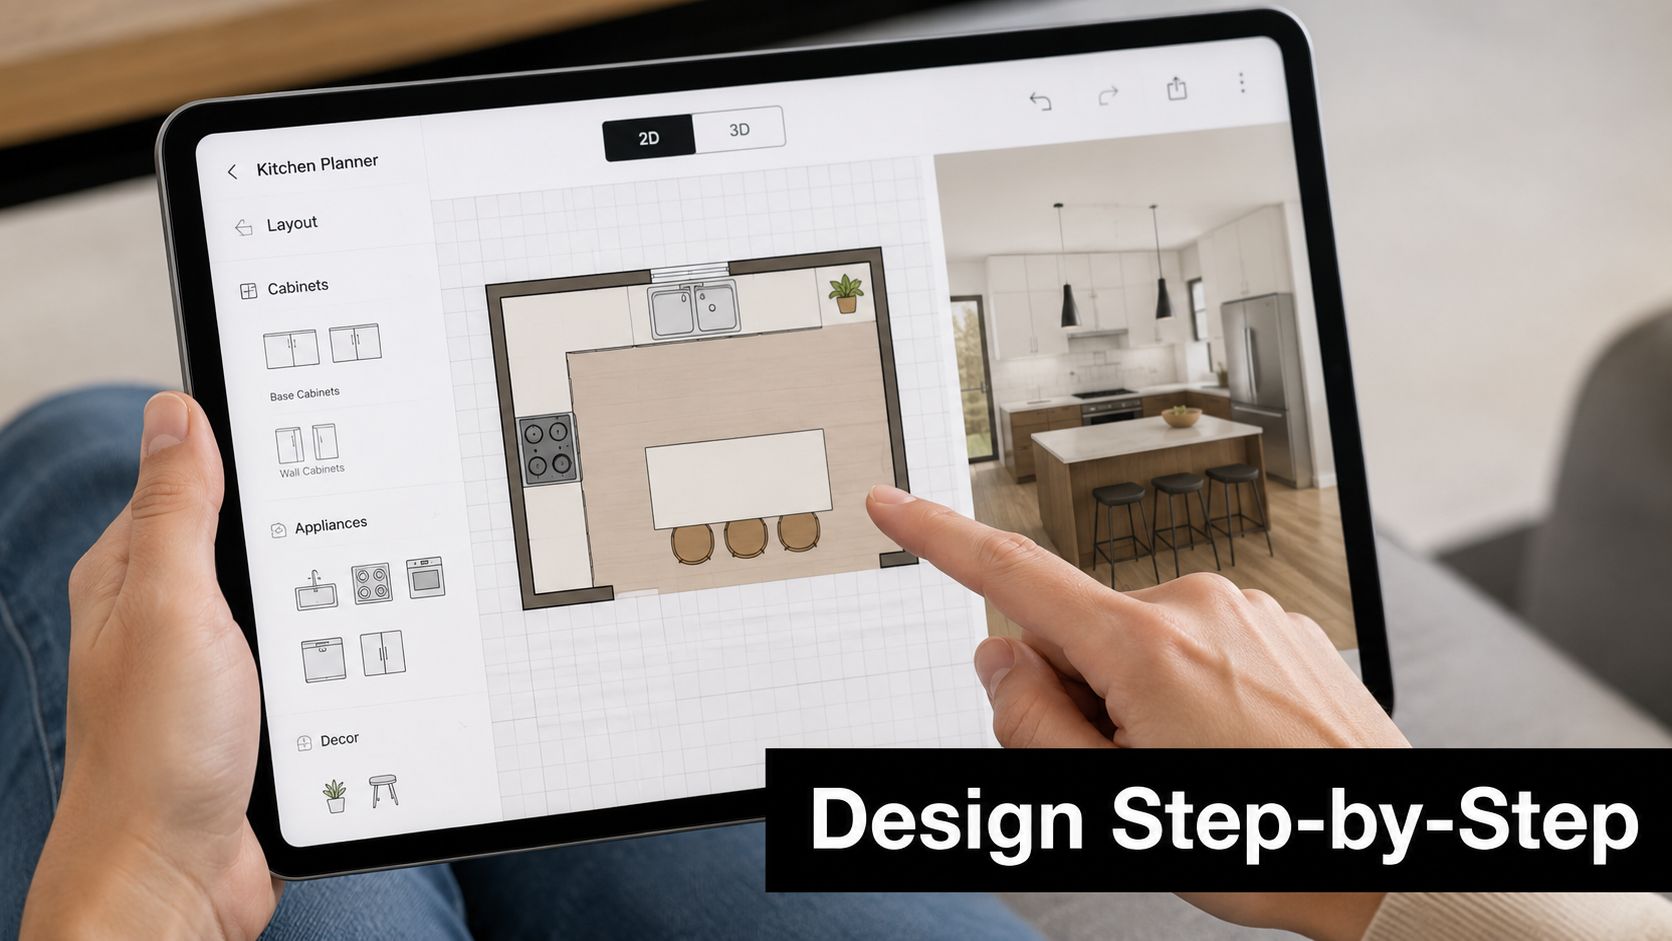
A person using an online kitchen planner tablet app to design a kitchen layout with 2D plans.

Picture an online kitchen planner as a digital building set that snaps to a grid and remembers exact dimensions. You start by carefully measuring the room, entering wall lengths, door swings, and window openings so the virtual model mirrors the actual space.

From there, you build out a baseline plan and layer in elements like cabinetry, benchtops, splashbacks, and appliances from the built-in library. This approach lets you rotate pieces, lock dimensions, and test clearances in minutes rather than hours.

A Typical Workflow

  1. Measure and enter room dimensions accurately to create a scaled canvas.
  2. Place structural openings so doors and windows dictate traffic flow.
  3. Drop in cabinets and appliances, then toggle between 2D and 3D to check sightlines.
  4. Save versions, test alternatives side by side, and export renders or simple cut lists for trades.

Key insight: Snapping to the grid and locking measurements prevents accidental drift, keeping your plan build-ready before the first site meeting.

A few practical tips can make the planner feel like a genuine design assistant rather than a simple toy. For instance, lock critical dimensions for bench depth and walkway clearances before you even think about tweaking finishes.

  • Use 2D for precise measurement adjustments and 3D to validate how the kitchen reads from the living area.
  • Save named versions such as “Island Option A” and “No Island Option B” to compare later.
  • Export screenshots and simple cut lists to share with a registered builder so the first site visit is focused and efficient.

Example Scenario

Imagine you model an island and discover it narrows a main pass-through by 150 mm. Catching that on screen costs nothing, but fixing it on site costs days of trades and extra expense.

The planner helps you clarify preferences so your initial design brief to a professional is concise. Consequently, your first meeting with a design team or registered builder becomes far more productive.

DIY Planner Workflow at a Glance

Here is a step-by-step table that turns the typical online planner workflow into a simple checklist for your first session.

Step Action in the Planner Outcome
Measure Enter walls, doors, windows Accurate base model
Layout Place cabinets and appliances Test clearances
Visualise Toggle 2D/3D Check sightlines
Export Save renders and cut lists Shareable brief for builders

Following this workflow keeps your project organised and ensures you get the most out of the software before committing to on-site work.

When your project extends to bathroom renovations or you need a coordinated style across the home, a consumer planner helps define the look. However, pairing this with professional 3D design from a renovation partner like SitePro Bathrooms will produce buildable drawings and proper service coordination for your new bathroom ideas.

You can learn more about standard dimensions in our guide on kitchen cabinet sizes.

Next steps are simple: measure, model two realistic layouts, save your exports, and book a site measure with your chosen renovation partner to turn the best screen layout into a practical plan for the site.

Where Online Kitchen Planners Hit Their Limits

A construction manager in a hard hat holding a tablet and gesturing in a kitchen undergoing renovation.

An online kitchen planner is like sketching on a napkin with a ruler—great for ideas but not a substitute for site-verified drawings.

These tools often assume perfect walls and flat floors, which means hidden on-site realities can undo a neat screen plan once demolition begins.

Common gaps include inaccurate wall measurements and ceiling height variations that affect tall cupboards and extractor clearances. This means an island that looks generous in 3D can block a passage by 150 mm when built, turning a small mistake into costly rework.

A render is a visual promise, not a construction guarantee.

Site and Services Limits

Consumer planners rarely model service zones behind walls such as plumbing chase space, electrical runs, or fall to waste for wet areas. They also do not simulate waterproofing layers, ventilation performance, or compliance with body corporate rules and local building regulations. For work that touches structure or services you need a measured site survey and engineered advice before anything is ordered.

  • Inaccurate allowances for waste and ventilation can lead to late-stage fixes that add days and thousands of dollars.
  • Cabinet libraries simplify joinery details, so onsite coping, filler panels, and site scribing often get overlooked.

When a Professional Steps In

If your project involves structural changes, complex plumbing, or combined kitchen and bathroom renovations, bring in a registered builder. Registered builders (unlimited) and specialist renovators provide site surveys, permit-ready drawings, and coordinated trades—especially important when pairing kitchen work with modern bathrooms or designer bathrooms.

  1. Book a site measure so walls, floors, and service positions are captured precisely.
  2. Use your planner screenshots as a starting point for a professional 3D design service to get buildable drawings.
  3. Treat the planner version as a visual guide during consultations, not as the final specification.

Use the online kitchen planner to explore layouts and test clearances; then validate those choices with a qualified renovation partner.

Practical Examples and Next Steps

  • Example 1 Test appliance swings and drawer clearances in the planner, then confirm exact offsets on site.
  • Example 2 Model a new island to check flow, but schedule a site measure to confirm walkway widths before ordering cabinetry.
  • Example 3 If you plan bathroom renovations alongside the kitchen, request integrated 3D design so wet-wall locations and waterproofing are coordinated.

Tables and lists clarify differences between a concept planner and a professional service, but the simplest next step is: model two realistic layouts, export renders, and book a site visit with a registered builder or specialist design team such as SitePro Bathrooms to move from idea to buildable plan.

DIY Planner Versus a Professional 3D Design Service

Choosing between an online kitchen planner and a professional 3D design service comes down to how much risk you're comfortable carrying, how complex the job actually is, and what you want the end result to look like.

A DIY planner works well for straightforward joinery changes, playing with colour options, or testing different bench depths without committing to anything. But a professional 3D design service delivers measured, buildable drawings and coordinated service planning that a consumer tool simply can't match.

When a DIY Planner Is Enough

If your project is mostly cosmetic — swapping out doors, updating benchtops, or reconfiguring storage without moving plumbing — a consumer planner can save you time and money. It lets you test sightlines, check appliance clearances, and experiment with island placement before ordering a single thing.

For small scope jobs, this approach cuts down on waste and speeds up decisions without the added cost of a designer.

  • Quick checks you can run in a planner that actually help:
    • Test walkway clearances and island placement so you don't block circulation paths.
    • Compare benchtop and splashback finishes to see how they sit together.
    • Check appliance door swings and drawer access to catch clashes before they become problems.

Key insight: For straightforward joinery refreshes, a well-modelled planner layout often gives you 80–90% of the clarity you need to get accurate quotes from builders.

When Professional 3D Design Pays Off

Projects that involve structural changes, moving plumbing, or combining kitchen and bathroom renovations need more than a visual mock-up. Professional 3D design includes a proper site measurement, service coordination across trades, and permit-ready drawings handled by qualified teams and registered builders.

This matters when you're opening a wall between the kitchen and living area, relocating a sink, or planning bathroom renovations alongside the kitchen so finishes and timelines line up across both spaces, helping you achieve beautiful modern bathrooms.

  • What a professional service brings to the table:
    1. An accurate site survey that picks up wall plumb, uneven floors, and ceiling height variations.
    2. Service coordination for plumbing, electrical, and waterproofing across kitchen and bathrooms.
    3. Detailed joinery specifications so what you see in the model is exactly what gets built.

Decision Framework You Can Use

  1. Assess the complexity — are you making structural changes or adding new wet walls? Go with professional 3D design.
  2. Think about budget impact — small cosmetic updates can stay DIY, but major reconfigurations usually save money overall when designed professionally because you avoid costly on-site surprises.
  3. Consider resale and compliance — if you're planning to sell soon or need body corporate approvals, working with registered builders and having documented designs for both your kitchen and designer bathrooms reduces your risk significantly.
Criterion DIY Planner Professional 3D Design
Cost upfront Low Moderate to high
Accuracy for build Conceptual Buildable
Service coordination No Yes
Suitable for combined bathroom work Not reliable Ideal

Practical Example

Picture this: you model an island in a planner and it looks perfect, but on site it narrows the pass-through by 150 mm. A professional site survey would have picked up the floor being out-of-plumb or a concealed service zone, and that costly remake never happens.

The same logic applies when you're coordinating bathroom renovations with the kitchen. A single design partner keeps waterproofing details, fall to waste, and finishes consistent across both rooms instead of leaving it to chance.

Professional note: Engaging a registered builder with 3D design capability tends to reduce on-site changes and helps keep the construction timeline on track.

Next Steps

  1. Use an online kitchen planner to explore two realistic layouts and export your renders.
  2. Share those files with a registered builder or a specialist renovation partner.
  3. Book a site measure and request detailed 3D design if your project involves structural work, plumbing changes, or combined bathroom renovations.

If you need coordinated kitchen and bathroom planning with proper site verification and 3D deliverables, consider working with a renovation partner experienced in bathroom renovations and designer bathrooms to ensure a smooth transition from screen to site.

From Screen to Site and Next Steps for Your Renovation

Think of an online kitchen planner as a rehearsal space — brilliant for testing layouts, but no replacement for an actual site survey. Use it to lock in circulation paths, bench depths, appliance clearances and basic visual decisions before any tradies show up on your doorstep.

Quick Action Checklist

  • Measure your walls, doors and windows carefully, then enter those figures into the planner.
  • Build two or three layouts that play around with different island sizes and appliance positions.
  • Save each version with a clear name and export screenshots or cut lists to share with your tradies.

Key takeaway: A solid planning phase means fewer on-site changes and a much more productive first site visit.

How to Decide Between DIY and Hiring a Pro

If your project is mostly cosmetic — new doors, a benchtop swap, straightforward joinery — a consumer planner will give you 80–90% of the clarity you need for accurate quotes. That said, once you start moving structural elements, relocating plumbing, or coordinating kitchen and bathroom work at the same time, it's time to bring in a professional design service alongside a registered builder.

  • DIY path: Lower upfront cost, quick iterations, and ideal for simple cosmetic updates.
  • Pro path: Measured site survey, permit-ready drawings, coordinated trades, and proper waterproofing for wet areas.

Bringing Bathroom Renovations into the Mix

A lot of families tackle kitchen and bathroom renovations together — it cuts down on overall downtime and keeps the style consistent across the home. When you're planning both, you need to account for waterproofing, fall-to-waste gradients, wet-wall locations and matching finishes whether you're going for a modern bathroom look or something more bespoke.

  1. Model your kitchen ideas using the planner.
  2. Draft a straightforward brief covering new bathroom ideas and any new design directions.
  3. Book a joint site visit so changes across both rooms are properly coordinated from the start.

Expert insight: A renovation partner offering professional 3D design helps avoid the costly disconnects that happen when kitchen and bathroom services are planned in isolation.

Next Step Recommendations

  1. Finalise two strong planner layouts and lock in your critical dimensions.
  2. Put together a short brief outlining your goals, budget range and timeline.
  3. Request a site measure and quote from a renovation partner experienced in bathroom renovations and working with registered builders (unlimited).

Take some time to explore past projects and client testimonials, then request a tailored quote that takes your ideas from on-screen renders to a finished room that actually works — practically and visually.

Frequently Asked Questions About Online Kitchen Planners

How accurate are consumer online kitchen planners for measurements?

Most consumer planners can be surprisingly precise if you enter measured wall lengths, door swings and window reveals carefully. The catch is they assume perfect walls and level floors, so small site variances like out‑of‑plumb walls or uneven floors often slip through. Use planner dimensions for concept testing, but always verify with a proper site measure before ordering cabinetry.

When can a planner be used to quote a build?

A planner can produce useful visuals and basic cut lists to help tradies prepare a ballpark quote. For a firm build quote, though, you need measured site drawings, service locations and joinery details supplied by a registered builder or professional 3D design service. If you want a reliable fixed price, book a site measure with a renovation partner who offers permit‑ready drawings.

Key insight: Use planner exports to speed up initial estimates, but expect a professional site check before anything is ordered.

How long does it take to model a typical kitchen?

A simple layout can be modelled in under an hour if you have measurements ready. A full, detailed concept with multiple options and finishes often takes several hours spread over a few sessions. Professional 3D design services typically take 1–3 weeks, depending on revisions and site verification.

Can the same planner approach apply to bathroom renovations?

Yes, the concept of scaled modelling and 3D walkthroughs transfers to bathroom renovations. But bathrooms require precise fall to waste, waterproofing and ventilation modelling, which most consumer planners omit. For combined kitchen and bathroom projects, coordinate with a renovation partner to align finishes and services, especially if you're aiming for high-end designer bathrooms.

Practical next steps for homeowners

  1. Measure the room and model two realistic layouts in your online kitchen planner.
  2. Export renders and a simple parts list to share with a registered builder.
  3. Book a site measure and, if your project includes wet areas or structural change, request professional 3D design.

Tips and quick takeaways

  • Use planners for early decisions on flow, bench depth and appliance placement.
  • Don't rely on them for waterproofing, structural or permit documentation.
  • Coordinate combined work — pairing kitchen planning with bathroom renovations and exploring new bathroom ideas saves time and avoids mismatched finishes.

If you want a more detailed consultation, consider booking a professional 3D design session with a renovation partner to move from concept to a buildable plan.