• siteprobathrooms

Renovation Cost Per M2 Australia: 2026 Breakdown

A good-quality renovation in Australia usually sits around A$3,000–A$5,000 per m². But a bathroom renovation often lands at A$15,000–A$30,000, and that's why small rooms can make cost per square metre look much higher than a whole-house average.

That gap catches homeowners out all the time. A compact bathroom can look expensive on paper even when the actual spend is still in the normal range for bathrooms, kitchens, and other wet areas.

Understanding the Australian Renovation Cost Range

The first mistake most homeowners make is treating renovation cost per m2 Australia as if it were one fixed national number. It isn't. A practical starting point is the broad Australian range of about A$3,000–A$5,000 per m² for a good-quality renovation, with basic cosmetic work often closer to A$1,000–A$2,500 per m² and high-end or luxury work able to exceed A$7,000 per m² (Custom Homes Online).

That range matters because the figure shifts with scope, finish level, and the type of room you're renovating. A whole-house quote spreads costs across larger areas and softer trades, while a bathroom or kitchen concentrates labour, compliance, waterproofing, tiling, and fixtures into a very small footprint.

Why a small bathroom skews the maths

A 6-square-metre bathroom in Highett can still need the same specialist trades as a much larger wet area. The floor area is tiny, but the fixed costs are not. Demolition, waterproofing, plumbing, electrical work, tiling, and fixtures all have to happen whether the room is 4 m² or 14 m².

That is why homeowners often see a per-m² number for a bathroom that looks far above the national average. The room is not overpriced just because the ratio is high. It usually means the project has fixed trade costs that do not shrink just because the room is small.

The trend from 2024 to 2026 supports that reading. Earlier guidance often sat closer to the lower thousands per square metre, but recent Australian guides place standard work in the A$3,000–A$5,000 per m² band and higher-end work above that, reflecting pressure from labour, materials, and trade availability.

Practical rule: use per-m² pricing to sanity-check a whole-home budget, but use room-specific budgeting for bathrooms and kitchens. That is where the numbers actually hold up.

For homeowners planning bathroom renovations, the better question is not “what's the average per m²?”. It is “what finish level am I buying, and what work is hidden inside that room?”

For kitchen planning, a room-by-room budget is more reliable than a blanket m² estimate. A useful starting point is the cost of a new kitchen guide, then adjust for joinery, appliance quality, plumbing moves, and how much structural work the room needs.

How Room Type Changes Your Cost Per Square Metre

Bathrooms and kitchens sit at the top of the cost stack because they're packed with trades and compliance work. A dry room, like a bedroom or living area, is mostly about surfaces. A wet area needs waterproofing, drainage, plumbing, electrical coordination, tiling, and joinery that must all line up properly.

That's why a cost per square metre figure can be useful for some rooms and misleading for others. A bedroom renovation can look relatively modest on a per-m² basis, while a bathroom can look shockingly expensive even when the absolute spend is still quite normal.

Room Type Per-Project Range Per-m² Range
Bathroom A$10,221–A$20,443 Best estimated from scope rather than area
Kitchen A$8,179–A$20,443 Best estimated from scope rather than area
Tiling A$36–A$92 per m² A$36–A$92 per m²
Flooring A$46–A$112 per m² A$46–A$112 per m²

Those project-level bathroom and kitchen benchmarks come straight from national Australian renovation market guidance, which also notes that tiling in Melbourne runs A$37–A$94 per m² (What's the Damage). That regional lift is modest on paper, but it still matters when you're comparing Highett, Melbourne, and broader national averages.

For a kitchen planning reference, a room-by-room approach is more reliable than a blanket m² estimate. If you want a useful comparison point, see the structure of a new kitchen cost breakdown and compare it with your actual scope.

What pushes wet areas higher

Bathrooms and kitchens are expensive because the cost drivers are stacked. Waterproofing is not optional. Plumbing relocations are rarely cheap. Electrical upgrades, extra cabinetry, and specialty finishes all add weight to the quote.

Wet-area pricing is built from fixed trade work first, and floor area second.

That's why modern bathrooms and designer bathrooms often sit at the upper end of the market. The room might be small, but the service load is dense.

The Finish Level Multiplier and What Your Budget Buys

Finish level is the main multiplier. Two bathrooms can share the same footprint and still sit in very different budget bands, because one is a basic cosmetic refresh and the other is a full rebuild with upgraded services and premium finishes.

In Victoria, a standard renovation benchmark sits at A$3,500–A$5,100 per m², cosmetic work is A$2,200–A$3,400 per m², and high-end work rises to A$4,800–A$7,200 per m² (CO-Architecture). That spread shows why “renovation” is not one product, and why bathroom and kitchen owners get the most misleading answers from a simple per-m² figure.

A woman looks concerned while reviewing a digital home budget spreadsheet on her laptop computer screen.

Cosmetic, standard, and high-end are not the same job

A cosmetic bathroom update usually keeps the layout, refreshes the finishes, and replaces tired visible items. That can deliver a clean result without opening the slab, moving plumbing, or redesigning the whole room.

A standard renovation goes further. It usually means a more complete reset, with better fixtures, smarter layout choices, and a stronger finish across the room. High-end work moves into custom joinery, premium surfaces, more design time, and tighter detailing.

The trade-off is simple. A homeowner can lift a room sharply with proper waterproofing, well-chosen tiles, and durable fixtures, without paying for luxury where it will not return value. A careful standard finish often looks more balanced than a flashy mix of expensive items dropped into a poor layout.

Spend on the parts you cannot easily change later, then keep the decorative layers disciplined.

That matters most in bathrooms, where layout and services are expensive to redo. If you are planning new bathroom ideas, use finish level to decide how far to go, not just what looks impressive in a showroom.

For reference, the national renovation benchmark also sits in a similar middle band, with quality projects commonly around A$3,000–A$5,000 per m² and high-end work able to reach A$5,000–A$7,000+ per m² (Three Birds Renovations).

Hidden Cost Drivers That Catch Homeowners by Surprise

Most budget blowouts don't come from the visible items. They come from what's under the old bathroom, behind the walls, or built into the way the house was originally constructed. In older Victorian homes, that's where the quote can change fast.

A stressed homeowner reviewing financial paperwork in a construction zone with a list of unexpected renovation costs.

The work that rarely looks expensive at the start

Old waterproofing is the big one. If the membrane has failed, the room often needs a more thorough rebuild than the homeowner expected. That can force extra demolition, more labour, and a deeper reset before the new finishes even go in.

Access is another hidden issue. Tight hallways, awkward staircases, and older building layouts make materials harder to move and labour slower to complete. Waste removal also gets more expensive when the site is constrained and skips can't be placed conveniently.

Then there's the planning layer. Renovation cost indicators for broader Australian projects say to estimate by adding the structural cost of new construction, the fit-out cost of the kitchen, bathrooms and laundry, the cost of upgrades to the existing home, and costs for decks, verandas, garages, and carports (Caulfield Krivanek). That framework matters because bathrooms are rarely just “a bathroom”. They're a fit-out line item sitting inside a bigger structural reality.

Questions to ask before you sign

  • Does the quote include demolition and rubbish removal? If not, that cost often lands later.
  • Is waterproofing included as a complete system? Partial wording can hide extra work.
  • Are plumbing relocations priced, or only like-for-like replacement? That difference changes the budget quickly.
  • Do permits, certifications, and final inspections sit inside the quote? They shouldn't be an afterthought.
  • Are electrical upgrades included, or allowed for separately? Bathrooms often need more than a surface refresh.

A 1960s Highett bathroom is a classic case where the room looks simple but the quote grows once the old structure is exposed. That doesn't mean the builder has padded the job. It usually means the room needed more than the surface plan suggested.

Sample Budgeting Calculations for a Highett Bathroom

A 5-square-metre bathroom is small enough to distort per-m² thinking and big enough to carry real costs. That makes it a useful planning example for Highett homeowners who want a realistic budget before seeking quotes.

For a room like this, a cosmetic refresh can plausibly sit around A$12,000–A$18,000. A standard renovation may land around A$18,000–A$28,000. A modern bathroom or designer bathrooms project can move into A$28,000–A$40,000+ once better fixtures, more complex finishes, and extra coordination are added.

The national bathroom benchmark helps frame that range. Hipages lists a typical Australian bathroom renovation at A$15,000–A$30,000 in 2026, which lines up with the idea that bathrooms are a defined room category, not a generic home-wide average.

A simple working budget

For a 5 m² bathroom, a practical scope might look like this in broad terms.

  • Demolition and removal, if the old room needs stripping back properly.
  • Waterproofing and tiling, which usually take a meaningful share of the budget.
  • Plumbing relocations, if the layout is changing rather than staying put.
  • Cabinetry and fixtures, including vanity, toilet, shower fittings, and tapware.
  • Electrical upgrades, especially where lighting or power needs updating.
  • Permits and certifications, where required.
  • Contingency, because old bathrooms often reveal more than they promise.

For a structured budgeting workflow, use the bathroom renovation cost calculator to test different finish levels before you commit to a builder's quote.

The budgeting discipline that actually works

Start with the room layout, then price the waterproofing and services, then layer finishes on top. That order matters because the hidden trades are what make a bathroom expensive, not the tapware alone.

If you want to avoid underquoting, set your budget around the likely room level first, then trim finishes if you need to. Do not start with the cheapest decorative items and hope the rest will somehow fit.

Smart Cost Reduction Strategies That Do Not Compromise Quality

The quickest way to save money is to cut scope early. Every plumbing move, structural change, and layout change adds trades, time, and coordination. Real savings usually come from disciplined decisions, not from chasing the cheapest item on every line.

Start by matching the finish level to the room's job and the property's value. A bathroom does not need luxury in every detail to work well. It needs a sound shell, a practical layout, and finishes that can cope with daily use without constant maintenance.

Where to save and where not to

Keep the plumbing where it already makes sense. Reusing the existing layout often removes a lot of complexity, especially in older homes where moving services starts a chain reaction across the room.

Put money into waterproofing, substrates, and anything that protects the structure. Those are poor places to bargain hunt. Save on decorative items that can be changed later, such as accessories or lighter styling choices.

Design detail also reduces change orders. 3D design visualisation helps the client and builder agree on the layout before demolition starts, which lowers the risk of expensive mid-build decisions. It is not a flashy step, but it often saves money by avoiding rework.

The cheapest renovation is usually the one that gets designed properly before the first wall comes down.

Three Birds Renovations notes that renovation pricing can vary widely by finish level and scope. That spread is the point. It shows why a bathroom or kitchen budget should be built around the room's likely workload first, then adjusted through finish choices rather than hope.

For homeowners considering whether to bring in SitePro Bathrooms, the practical question is whether the project needs coordinated design, quoting, and construction instead of piecemeal management. In a wet area, that coordination can mean the difference between a clean handover and weeks of avoidable rework.

The budgeting discipline that works

Price the room in this order, layout first, waterproofing and services next, finishes last. That sequence reflects how bathroom costs are built. The hidden trades drive the budget more than the visible fittings, and the small room format makes that even more obvious.

For kitchens and bathrooms, this approach matters because per-m² pricing can mislead. A compact room can look expensive on paper while still sitting inside a sensible room-level budget. The better method is to set a realistic allowance for the room, then decide where higher-grade finishes earn their place and where a standard spec is enough.

Keep one contingency line in the budget. Older bathrooms rarely open up exactly as planned once the walls or floor are exposed. If the room needs extra rectification, that reserve protects the quality of the final result without forcing cuts in the wrong places.

When to Engage a Registered Builder for Your Renovation

Bathroom projects are where compliance risk climbs fastest. Waterproofing, plumbing, electrical work, and finishing all need to line up properly, and a missed detail can turn into a costly fix later. That's why a registered builder often makes sense when the room is more than a cosmetic refresh.

What to check before you hire

Look for registered builder status first. Then check whether the builder can show completed wet-area work, not just general renovation photos. A portfolio with new bathroom ideas, modern bathrooms, and designer bathrooms gives you a much better sense of real experience than a polished sales pitch.

You should also confirm the service scope. Some builders only price construction. Others handle concept development, 3D design, build coordination, and finishing as one integrated process. That broader scope is usually more useful for homeowners who want one accountable team.

A specialist option in Highett is SitePro Bathrooms' guide on why using a registered builder matters. The point isn't the brand name, it's the model. Wet-area renovation works best when design, quoting, and construction are coordinated from the start.

Why the upfront fee isn't the whole story

A professional team can cost more at the quote stage, but that doesn't automatically mean a higher final spend. Better scope definition reduces variations. Proper sequencing reduces delays. Accurate quoting reduces the shock of missing items that reappear halfway through the build.

The test is net value. If a builder prevents waterproofing errors, rework, and scope drift, the job often ends up better controlled than a cheaper quote that leaves too many gaps.
Screenshot from https://siteprobathrooms.com.au

Frequently Asked Questions About Renovation Cost Per m²

Is per-m² pricing reliable for bathrooms?

Only as a rough guide. Per-m² pricing is useful for broad budgeting, but bathrooms distort the figure because a small room carries the same fixed trade costs as a larger area. Waterproofing, plumbing, electrical work, demolition, and fit-off all get squeezed into a compact footprint, so the cost per square metre can look inflated even when the actual room budget is normal for a quality renovation.

Why do Melbourne and Highett quotes often feel higher than national averages?

Victorian jobs usually carry firmer labour costs, tighter compliance requirements, and stronger expectations around finish quality. A standard renovation in Victoria commonly sits around A$3,500–A$5,100 per m² (CO-Architecture). That is one reason Melbourne quotes often sit near the upper side of national guidance, especially for kitchens and bathrooms where labour density is high.

What should be included in a proper bathroom quote?

A proper quote should clearly cover demolition, waterproofing, tiling, plumbing, electrical, fixtures, cabinetry, and any certification or permit work that applies to the job. If those items are left vague, the final price is still moving. Homeowners usually feel that gap only after work starts.

A detailed scope also makes the comparison fair. Two quotes can look close on paper while one is missing demolition disposal, licensed trades, or finish items that the other has already allowed for.

How do I tell whether a quote is underdone?

Check for broad allowances, missing trade categories, and wording that only covers like-for-like replacement. Bathrooms rarely stay like-for-like once the wall linings come off. Hidden damage, old services, and out-of-square framing can all push the job beyond the first number.

If the quote reads clean but the scope is thin, it is probably light on reality. That is where budgets get strained, because the missing work arrives later as variations.

Has renovation cost per m² Australia changed much in 2026?

The pressure is clearer at the top end. Recent guidance still places standard work around A$3,000–A$5,000 per m², with high-end work higher again, and the pressure is strongest where kitchens and bathrooms absorb more labour and specialist trades (Shaf Build, Three Birds Renovations). The main shift is not the idea of per-m² pricing itself, it is how fast the number climbs once finish level and hidden scope are included.

The safest approach has not changed. Set the room scope first, choose the finish level second, and price the hidden work before you get attached to the decorative details.

If you are planning a bathroom or kitchen renovation in Highett or greater Victoria, start with a room-level budget, not a broad m² assumption. Then ask for a detailed, scope-based quote so you can compare like with like and avoid the surprises that usually surface after demolition.


  • siteprobathrooms

Kitchen Renovation Timeline: Victorian Home Guide

A typical kitchen renovation timeline in Victoria is usually 8 to 14 weeks for a standard suburban project, not a simple 4-week turnaround. If you're planning structural changes, custom joinery, or premium finishes, that timeline can stretch further, and in some cases much further.

That's the part many homeowners only realise after they've already started collecting tile samples and appliance screenshots. On paper, a renovation can look straightforward. In practice, kitchens move through design decisions, approvals, ordering, demolition, rough-ins, installation, fit-off, and final handover, and every one of those steps has its own dependencies. In Victoria, that process has become even more sensitive to permit timing and material lead times.

If you're in Highett, Melbourne, or elsewhere across greater Victoria, the most useful thing you can do early is stop thinking about the project as one big event and start seeing it as a sequence. Once you understand that sequence, the timeline becomes far less stressful. You can plan meals, work around access issues, decide where to spend money, and avoid the changes that cause the most pain later.

A kitchen project also rarely sits in isolation. Many households planning kitchens are also weighing up bathroom renovations, comparing layouts, and saving inspiration for new bathroom ideas, modern bathrooms, and designer bathrooms at the same time. The planning principles are similar. Good design takes time. Clear decisions save rework. And the right team, including a registered builders unlimited mindset around capability and coordination, makes the job smoother from start to finish.

The Critical Pre-Construction Phase From Ideas to Approvals

The part clients most often underestimate is the phase before construction starts. For a mid-range project, planning commonly takes 4 to 6 weeks, and that timing matters because it sits inside a broader 10 to 18 week renovation window tied to the project's scope, selections, cabinetry lead time, and on-site works, as noted in the HIA Kitchens and Bathrooms Report 2025 summary on kitchen renovation costs and timelines. The same source states that the median cost of a kitchen renovation in Australia is $35,000.

A professional interior designer reviews kitchen renovation plans with a couple in their bright, modern home kitchen.

Start with function, not finishes

Most delays start with decisions that were left too loose. A client might know they want a warm white kitchen, timber accents, and a better island. That's a style direction, not a buildable plan.

Before contracts are signed, these points need to be settled:

  • Layout decisions: Are you keeping the sink, cooktop, and fridge in roughly the same places, or changing the room's working pattern?
  • Storage priorities: Do you need deeper drawers, overhead cupboards to the ceiling, appliance storage, or a better pantry arrangement?
  • Appliance specifications: Cabinet sizes depend on exact appliance models, not estimates.
  • Finish selections: Cabinet profile, benchtop material, handles, splashback, flooring, tapware, and lighting all affect sequencing.

If you're exploring layout options, a practical starting point is to review how an L-shaped kitchen layout can improve flow and storage before locking in cabinetry plans.

Practical rule: If a decision affects cabinet size, plumbing location, electrical points, or stone cut-outs, it must be final before ordering begins.

Approvals, drawings, and what actually keeps a job moving

The strongest planning phase has less to do with colour boards and more to do with coordination. That means measured drawings, realistic specifications, and one clear scope of work that every trade can follow.

A reliable pre-construction checklist includes:

  1. Site measure completed with confirmed wall, window, and service positions.
  2. Design signed off so everyone is building the same kitchen.
  3. Appliances selected with model numbers confirmed.
  4. Joinery drawings approved before manufacturing.
  5. Materials ordered early for any custom or slower lead-time items.
  6. Permits checked if structural work or regulated changes are involved.
  7. Contract and build schedule finalised so the site sequence is clear.

This is also where clients benefit from an experienced builder who can spot trade-offs early. A larger island might look excellent in a rendering, but if it narrows circulation or forces expensive service relocation, it may not be the right choice. A stone splashback can look sharp, but if a tiled finish gives you faster turnaround and easier replacement later, that can be the more practical call.

Well-run projects don't happen because people move fast. They happen because the important decisions are made early, documented properly, and protected from late changes.

Weeks 1-2 The Kick-Off Demolition and Service Rough-In

The first fortnight is when the house starts feeling like a worksite. Cabinets come out, old splashbacks disappear, walls open up, and the hidden condition of the room becomes visible. It's noisy, dusty, and disruptive, but it's also where the project starts earning momentum.

In Melbourne, a standard suburban kitchen renovation commonly has a 4 to 8 week construction timeline, with the most common breakdown allowing 1 week for demolition and 1 to 2 weeks for rough-in plumbing and electrical, according to Melbourne kitchen renovation timeline guidance.

A construction worker wearing a white hard hat and gloves performing kitchen demolition on wooden cabinets.

What demolition should look like

Good demolition is controlled, not chaotic. The goal isn't just to rip out the old kitchen. The goal is to remove it without damaging parts of the home that are staying, and without creating avoidable delays for the next trades.

A well-managed demolition phase usually includes:

  • Protection first: Floor coverings, dust barriers, and pathway protection through adjoining rooms.
  • Utility disconnection: Water, power, and gas are managed before any removal starts.
  • Careful strip-out: Existing cabinets, benchtops, appliances, and sometimes wall linings are removed in a sequence.
  • Waste management: Debris is cleared regularly so the site stays safe and accessible.

If your household includes children, pets, or people working from home, site safety matters from day one. It helps to understand standard construction site safety practices for workers and households before the first trade arrives.

Rough-in is the hidden stage that determines whether the kitchen works

Once the room is stripped back, plumbers and electricians do the first fix. This is the part clients don't see once the kitchen is complete, but it's one of the most important stages in the entire kitchen renovation timeline.

Rough-in work can include relocating or preparing for:

  • sink waste and water lines
  • dishwasher connection points
  • power for ovens, cooktops, rangehoods, fridges, and microwaves
  • lighting circuits and switch positions
  • island services where required

During planning, practical decisions beat trendy ones. Moving plumbing across the room may be possible, but it adds complexity. Adding feature lighting can lift the room, but only if those points are coordinated with cabinetry and ceiling work early.

The kitchen has to function long after the styling fades into the background. Rough-in work is where functionality is locked in.

If there's a mistake here, it usually shows up later as rework. A power point lands behind an appliance where it can't be accessed. A waste line sits too high for the new cabinet design. A pendant location looks centred in the room but off-centre over the island. None of those are dramatic design failures. They're coordination failures, and they cost time.

The first two weeks feel messy because they are. But if demolition is clean and rough-in is accurate, the rest of the build has a stable base.

Weeks 3-5 Building the Bones Walls Floors and Cabinetry

This is the stage where clients stop seeing a stripped shell and start seeing a kitchen again. The heavy disruption settles down, the room gets rebuilt, and the visual transformation becomes obvious. It's also the phase where precision matters most, because every finish that follows depends on the room being straight, level, and properly prepared.

Closing the room back up

After rough-in, the room needs to be made ready for finishes. That often means patching or replacing wall linings, setting corners properly, sanding surfaces, and applying the first coats of paint where needed. If the walls are uneven, cabinetry installation becomes harder and small alignment issues become more visible later.

Flooring decisions also affect sequencing. Some floors are best installed before major joinery goes in, while others are installed around the cabinetry depending on the material and build approach. What matters most is that the builder and installer are working to one coordinated plan.

A polished renovation doesn't come from expensive materials alone. It comes from a room that's been prepared properly so the final lines look clean.

Screenshot from https://siteprobathrooms.com.au

Cabinetry is where planning becomes visible

Cabinet installation is one of the most satisfying milestones in the whole job. You can finally read the layout in full scale. Walkways make sense. Storage starts to feel real. The island, pantry, and work zones become tangible.

What good cabinet installation involves:

  • Levelling every run: If the base cabinets aren't level, benchtops and appliance integration suffer.
  • Checking clearances: Doors, drawers, appliances, and traffic paths all need practical clearance.
  • Aligning bulkheads and panels: Small discrepancies become obvious once the kitchen is lit and finished.
  • Protecting surfaces immediately: New joinery can be damaged quickly if other trades aren't careful.

This is the stage where clients sometimes feel tempted to tweak things. A shelf might seem too high. A drawer stack might look different from what they imagined. Small concerns should absolutely be raised, but this is also why earlier design approval matters so much. Late changes to manufactured joinery aren't simple.

What works and what usually doesn't

Some choices consistently help the project move well. Others create friction.

Decision area What tends to work What often causes trouble
Layout Keeping key services close to original positions where practical Large late-stage layout changes after joinery is ordered
Storage Prioritising drawers and accessible pantry storage Designing around looks alone without daily-use habits
Installation Protecting new cabinetry from the next trades Treating installed joinery as if the room is already finished

Many homeowners planning kitchens are also comparing ideas for bathrooms at the same time. The same lesson applies across kitchens, bathroom renovations, modern bathrooms, and more bespoke designer bathrooms. The most impressive result usually comes from restraint and coordination, not from trying to include every idea at once.

Weeks 6-7 The Finishing Straight Benchtops Splashbacks and Fit-Off

By this point, the room already looks close to complete, but the last stages demand accuracy. A kitchen can feel nearly done while still needing multiple trades to return in the right order. Benchtops, splashbacks, tapware, appliances, and electrical accessories all rely on final measurements and careful installation.

Benchtops are measured after cabinetry for a reason

Stone and many other benchtop materials aren't finalised until the cabinets are installed and checked. That allows the fabricator to template the actual site conditions rather than relying on drawings alone. Even a well-built room can have small tolerances, and templating picks those up before the final surface is cut.

This stage usually involves:

  • Site measure after joinery install
  • Fabrication period
  • Benchtop installation
  • Cut-out confirmation for sinks, taps, and cooktops

If a project has custom edges, unusual shapes, or waterfall ends, precision becomes even more important. Rushing this part often leads to visible issues, and those are the kinds of issues clients notice every day.

Splashbacks and fit-off bring the kitchen to life

Once benchtops are in, the splashback can proceed. Tiled splashbacks remain popular because they're versatile, repairable, and can suit both minimalist and more detailed designs. If you're weighing the terminology or style approach, it helps to read a practical guide on splashback or backsplash and how the choice fits Australian renovations.

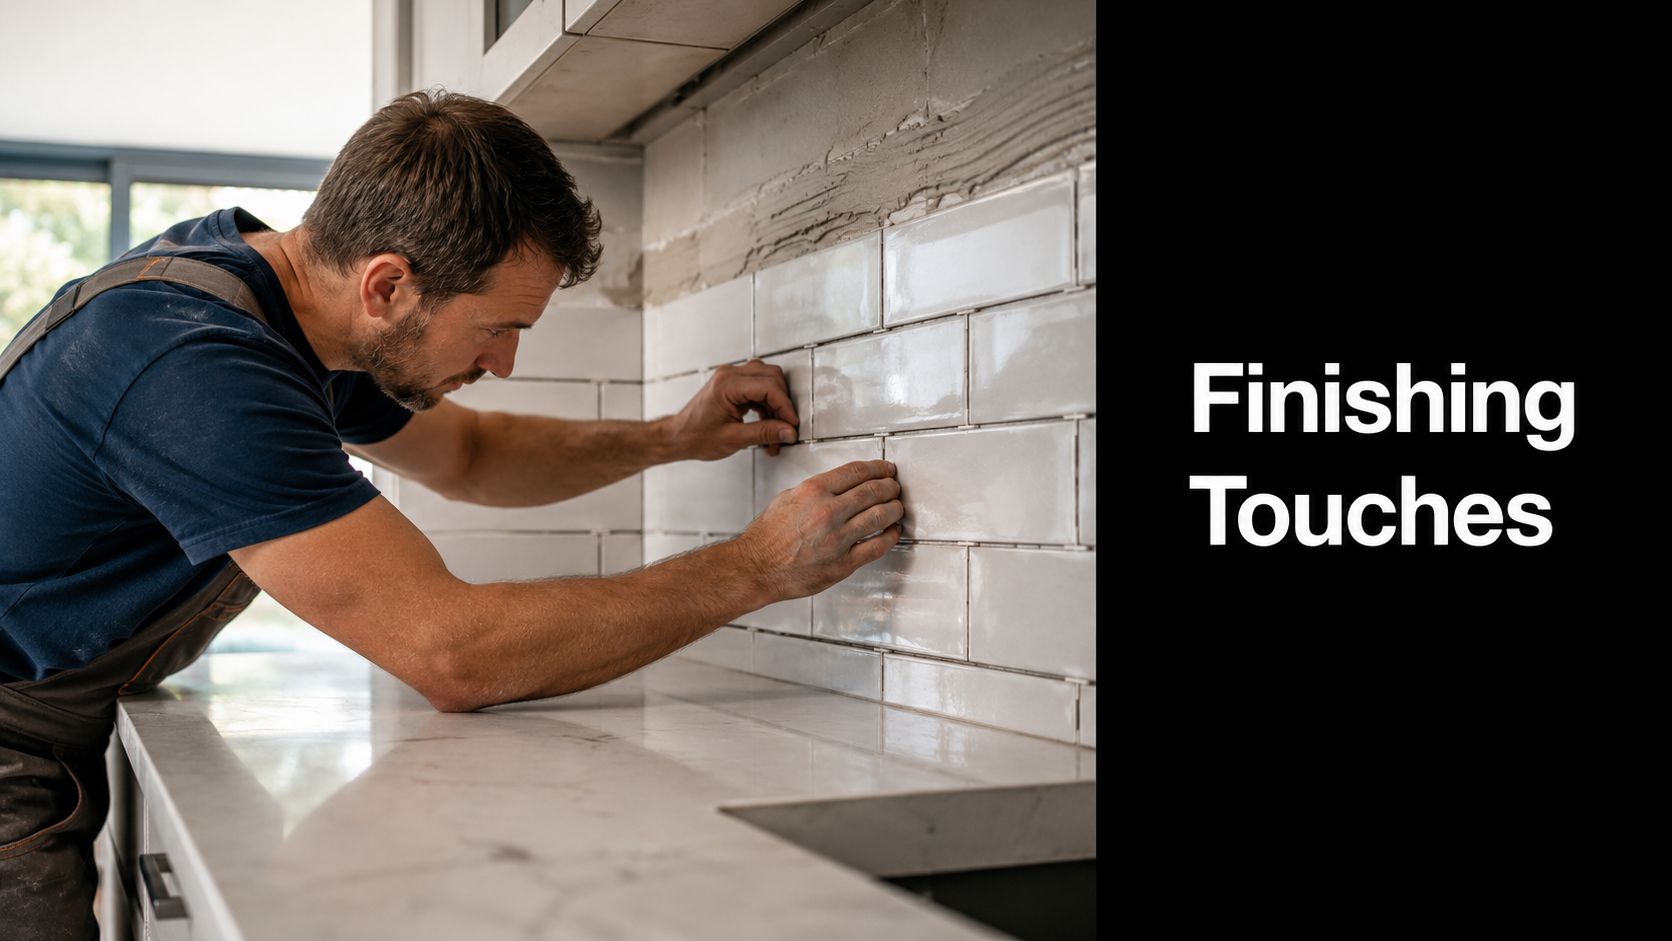
A professional construction worker carefully installing white subway tiles as a backsplash in a modern kitchen.

At the same time, second fix trades return to complete the fit-off. That often includes connecting the sink and tapware, finalising appliance hookups, installing switches and power points, fitting lights, and testing services.

A kitchen doesn't become usable when the cabinets go in. It becomes usable when every service is connected, every finish is sealed, and every trade has completed their final detail work.

The trade-offs homeowners should understand

This final phase is where material choices show their practical side.

  • Stone look versus flexibility: A full-height hard finish can look smooth and continuous, but tiled splashbacks often allow easier future repair.
  • Integrated features versus lead time: The more customised the detailing, the more tightly sequencing needs to be managed.
  • Statement finishes versus maintenance: Some finishes photograph beautifully but need more regular cleaning or careful use.

Clients often ask whether this is the “easy” part because the room already looks close to finished. It is, in fact, one of the tighter coordination phases. Several trades may need access in a short window, and one delay can push the next booking. That's why realistic scheduling matters right to the end of the kitchen renovation timeline.

Managing Delays and Final Handover

Most frustration in a renovation comes from not understanding where delays come from. In Victoria, two issues stand out. The first is approvals for structural or regulated work. The second is material timing, especially when the project depends on custom joinery, stone, or imported finishes.

For major structural kitchen changes, homeowners in Victoria now face an average 6 to 9 week administrative lag before construction can begin, and 42% of Melbourne kitchen renovations exceeded their projected timeline due solely to material delays, according to the Master Builders Association Victoria reference on permit delays and material overruns. That's why generic national advice often feels too optimistic for Melbourne and greater Victoria.

The permit-to-begin gap

A lot of published renovation advice starts the clock at demolition. That's useful only if your project doesn't need approvals. If walls are moving, structure is changing, or regulated work triggers extra documentation, your practical start date can shift well before any trade sets foot on site.

What this means in real terms:

  • You can't assume “builder booked” means “build starts now”.
  • Selections may need to be final earlier so drawings and approvals line up.
  • Temporary living arrangements may need a later start date than you first expected.

This delay isn't dramatic because anyone is doing something wrong. It happens because administration, documentation, and compliance now take longer on the kinds of projects that materially alter the space.

Melbourne supply chain pressure

The second issue is procurement. A kitchen can be ready for installation on paper and still stall because a key item hasn't arrived. In Melbourne's current market, that pressure is often felt most sharply in custom cabinetry and benchtop-related materials.

The jobs that stay on track usually have one thing in common. The builder and client commit to selections early enough to order long-lead items during the design phase, not after demolition.

Ordering late doesn't just delay delivery. It breaks the sequencing for everyone else on the job.

A simple risk check before construction should ask:

Risk area Why it delays projects Better approach
Permits Construction can't start until approvals are in place Confirm approval pathway before locking dates
Custom joinery Manufacturing doesn't happen instantly Finalise drawings and sign off early
Stone and specialty finishes Fabrication and delivery slots can shift Book templates and production windows in advance
Client changes Trades and materials have to be re-coordinated Freeze the scope before site works start

Final handover without loose ends

A proper handover is more than a quick walkthrough. The final stage should include touch-ups, sealant checks, appliance testing, adjustments to doors and drawers if needed, and a clear list of any remaining minor items.

Clients should expect to review:

  • Cabinet operation: drawers, hinges, and alignments
  • Benchtop and splashback finish: joins, edges, grout, and sealant
  • Services: lights, switches, outlets, plumbing fixtures, and appliance connections
  • Presentation: cleaning, waste removal, and protection removal

This is the point where patience pays off. A job that runs to a realistic timeline and closes with a proper defects check is almost always less stressful than a rushed project that technically finishes earlier but leaves unresolved problems behind.

Frequently Asked Questions About Renovations

A kitchen timeline becomes real the first morning you have no sink, no cooktop, and trades arriving before 8am. That is usually when Victorian homeowners stop asking abstract design questions and start asking practical ones about access, approvals, deliveries, and how long daily life will stay disrupted.

In Victoria, the right answer often depends on where the property is and what type of work is involved. A weatherboard home in regional Victoria, a unit in Bayside, and an apartment in inner Melbourne can all follow different timelines because council requirements, owners corporation rules, parking access, and supplier lead times are different.

Common questions from Victorian homeowners

Question Answer
How long will my kitchen be out of action? For most full renovations, expect several weeks where proper cooking and washing up are limited or not possible. In Melbourne homes, the disruption often starts as soon as demolition begins and continues until plumbing, electrical fit-off, and appliances are complete. Set up a temporary kitchenette before work starts, not after the cabinets come out.
Are apartment kitchens quicker than house renovations? Sometimes, but not automatically. Apartments are usually smaller, which helps, but Melbourne apartment projects often lose time through lift bookings, restricted delivery hours, protection requirements for common areas, and owners corporation approvals. A smaller room can still be slower if access is tight.
Is a cosmetic update on the same timeline as a full renovation? No. Keeping the existing layout usually shortens the program because plumbing and electrical points stay where they are. Once you start moving services, altering walls, or ordering made-to-order joinery, the timeline changes and the coordination load goes up.
Should appliances be chosen before work starts? Yes. Exact model numbers matter. We use appliance specifications to confirm cabinet sizes, power locations, ventilation requirements, and stone cut-outs. In Victoria, replacement stock can also vary by supplier and port delays still affect some lines, so late appliance decisions can hold up fit-off.
What causes the most avoidable delay? Client selections made too late. Benchtop stone, handles, tapware, tiles, appliances, and paint colours all affect ordering and sequencing. The other common problem in Melbourne is assuming a supplier can deliver "next week" during a busy period. Often they cannot.
Do kitchens in older Victorian homes take longer? Often, yes. In older Melbourne and regional homes, once demolition starts we sometimes find uneven floors, dated wiring, damaged plaster, or plumbing that needs bringing up to standard. Those issues are manageable, but they add time because they must be fixed properly before finishes go in.
Do permits or approvals affect kitchen timelines in Victoria? They can. A straightforward internal renovation may not need the same approval pathway as structural work, but once walls, windows, or building elements change, the approval process can extend the lead-up. Local council timing also varies across Victoria, so it is smart to confirm the pathway before booking trades.
Do kitchen and bathroom renovations follow similar planning rules? Yes. Both rely on accurate documentation, early selections, and disciplined sequencing. The room changes, but the project logic does not. Wet area compliance, service coordination, and access planning still need careful management.
Do I need a registered builder for a kitchen renovation? If the project includes structural work, regulated building work, or multiple trades that need close coordination, the right qualified team matters. Good management is what keeps the electrician, plumber, cabinetmaker, stone supplier, and installer working in the right order instead of waiting on each other.

Practical steps that reduce stress during the build

These are the habits that make a renovation easier to live with in a real Victorian home:

  • Set up a temporary kitchen properly: Use a kettle, microwave, toaster, bar fridge, and a simple washing-up station in another room.
  • Clear access paths early: In many Melbourne suburbs, tight driveways, limited street parking, and narrow side access slow deliveries if the site is cluttered.
  • Make selections before they are needed on site: If the tile shop is still waiting on your final choice when waterproofing or cabinetry is ready, the program starts slipping.
  • Check body corporate or apartment rules in advance: Delivery windows, noise limits, and lift bookings can affect the daily schedule.
  • Reply to site queries quickly: A same-day answer can save a day of delay.

The jobs that finish well are usually the jobs with fewer late decisions, fewer surprises, and clearer expectations from day one.

If you are still comparing ideas, start with the scope of work, the condition of the home, and any approval risks specific to your suburb or building type. That gives you a much more reliable timeline than a generic national estimate.

If you're planning a kitchen or bathroom project in Highett or across greater Victoria, SitePro Bathrooms can help you move from early concepts to final handover with clear planning, detailed design, and coordinated construction. If you'd like a custom quote or advice on your renovation timeline, get in touch through the SitePro Bathrooms contact page.

  • siteprobathrooms

Find Your Perfect Bathroom Remodel Contractor: VIC Guide

You notice the bathroom every morning. The shower leaks at the screen, grout keeps cracking, the exhaust fan never quite clears the steam, and part of you wonders whether a quick cosmetic update will do the job. Then someone starts talking about waterproofing, permits, and what might be hiding behind the wall, and the whole project suddenly feels less like decorating and more like a financial risk.

That is the point many homeowners in Victoria get caught out. They choose a contractor the same way they choose tiles. On appearance, price, and a few nice photos. A bathroom renovation is safer when you treat contractor selection as a risk-control decision first. The expensive part is often what no one sees once the job is finished. Waterproofing quality, sequencing, contract detail, compliance, hidden-condition allowances, and how a builder handles problems on site will affect the result long after the fittings go in.

Older housing adds another layer of risk. Victorian bathrooms often sit inside homes with ageing pipework, uneven walls, damaged substrates, old sheet linings, and the occasional surprise once demolition starts. In some properties, that surprise is rot. In others, it is asbestos or non-compliant past work. The 2021 Census finding that Australian dwellings have a median age of 39 years helps explain why an older bathroom can turn into more than a simple rip-out and replace.

A good bathroom remodel contractor is not just supplying labour and finishes. They are making judgement calls that protect your budget, your timeline, and the wet-area performance of the room itself. That starts well before demolition.

Planning Your Bathroom Renovation Before You Call a Pro

A bathroom renovation usually goes off track before demolition starts. The pattern is familiar. A homeowner has saved dozens of photos, picked a vanity style, and asked for a quote, but no one has pinned down what must stay, what can move, what standard of finish is expected, or how much risk the budget can carry if the room opens up badly.

That early planning stage is not just about design. It is your first layer of risk control. If the brief is vague, the quote will be vague. If the quote is vague, the contract leaves too much room for cost creep, disputes, and shortcuts once work begins.

Start with the job the bathroom needs to do.

Define what the bathroom must do

A family bathroom, an ensuite in a rental, and a long-term bathroom for ageing in place should not be planned the same way. Set function before finishes. Storage, shower access, ventilation, cleaning, durability, and waterproofing performance all affect the layout, the trade scope, and the final price.

A woman sketching architectural renovation plans for a home remodel while examining various stone tile samples.

A brief is usually ready for pricing when it answers these questions:

  • Primary purpose: daily family use, resale, ageing in place, tenant appeal, or a high-spec upgrade
  • Required function: walk-in shower, better extraction, more storage, easier cleaning, or a full waterproofing rebuild
  • Layout decision: keep plumbing positions close to existing, or rework the room completely
  • Finish level: practical and durable, or more custom with feature tiles, joinery, and upgraded fittings

If those answers are fuzzy, expect wide quote ranges and plenty of allowances.

One more point often gets missed. Decide early whether you want a contractor who can take full responsibility for the build, permits, sequencing, and compliance, or whether you are trying to coordinate part of the job yourself. In Victoria, that decision affects both risk and accountability. It is worth understanding why using a registered builder for your bathroom renovation reduces compliance and contract risk before you start collecting prices.

Split your ideas into needs and wants

This is one of the easiest ways to protect the budget.

Homeowners get caught when every item is treated as equally important. It never is. A larger shower, proper substrate repair, and an extraction upgrade belong in a different category from a fluted vanity, premium mirror cabinet, or a complex tile pattern that adds labour.

Use two columns and be strict:

Need now Want if budget allows
Proper waterproofing rebuild Feature lighting
Better shower size Niche detailing
More practical vanity storage Premium tile pattern
Ventilation upgrade Custom mirror design

That list helps with contractor discussions later. It also gives you a clean way to make cuts if demolition exposes damage.

Set a preliminary budget with a real contingency

Bathrooms in older Victorian homes can look straightforward until the strip-out starts. Then you find rotten flooring around the shower, out-of-level walls, failed past waterproofing, old plumbing that should have been replaced years ago, or sheet material that needs to be treated as asbestos until proven otherwise.

Those are not rare edge cases. They are part of renovating existing homes.

Build your early budget around four buckets:

  • Base construction: demolition, plumbing, electrical, substrate repairs, waterproofing, tiling, fit-off
  • Selections: tiles, vanity, tapware, shower screen, toilet, lighting, accessories
  • Site constraints: access, parking, waste removal, apartment rules, working hours
  • Contingency: a separate reserve for hidden conditions and necessary changes

A lot of homeowners make the same mistake here. They treat contingency as upgrade money. It is not. Keep a 10% to 20% contingency for hidden conditions and unavoidable variations. That buffer is what stops a bad surprise behind the wall from turning into a budget blowout.

If you are budgeting off inspiration images alone, assume the first numbers will be wrong. Photos do not show the screed correction, the framing repair, the waterproofing rebuild, or the compliance work. Those hidden items are often where the bulk of the money goes.

Finding and Vetting Potential Bathroom Contractors

A bathroom contractor is not just someone who delivers the look you want. In an older Victorian home, they are the person you trust to find risk early, price it fairly, and keep the job compliant when the room opens up and the surprises start.

Nice photos do not prove that.

What matters is whether the contractor regularly works in existing homes with uneven walls, tired plumbing, movement in the floors, and evidence of previous patch repairs. Bathrooms in older houses often hide the expensive problems until demolition. That is why contractor selection is a risk-management decision first, and a design decision second.

Where to look without relying on one source

Start with people who have completed a bathroom renovation recently, preferably in a home similar to yours. A recommendation from a neighbour in a 1970s brick veneer is more useful than one from someone who renovated a new townhouse. The build conditions are different, and that affects how realistic the pricing and timeline will be.

Then look at completed projects with a sharper eye. A contractor who mainly posts finished styling shots may still be good, but a stronger sign is seeing work across the messy parts of the build. Before-and-after photos, stripped-back rooms, corrected floors, rebuilt shower bases, and neatly resolved out-of-square walls tell you more than tapware close-ups.

Use a shortlist test that focuses on job fit:

  • Relevant project history: Have they completed bathrooms in homes like yours, not just bathrooms that photograph well?
  • Clear scope responsibility: Are they taking responsibility for the full renovation, or expecting you to coordinate parts of it?
  • Straight answers: Can they explain likely problem areas, realistic timing, and what usually triggers variations?
  • Site awareness: Do they ask about access, parking, apartment rules, or working-hour restrictions early?

Contractors who ask practical questions upfront usually run tighter jobs.

Check Victorian registration and trade responsibility

Homeowners often get caught out here. They assume the person quoting the job is also the person carrying legal and practical responsibility for the build.

Confirm who is responsible for supervision, trade coordination, and compliance-related work. Ask for registration details where required, and do not leave builder classification to guesswork or casual wording on a website. Homeowners trying to understand builder classifications sometimes search for terms like “registered builders unlimited”. In practice, the safer approach is simpler. Confirm that the contractor is properly set up for the scope of your project and willing to state that responsibility clearly in writing.

For a clearer explanation, read why using a registered builder matters for your bathroom renovation.

Ask direct questions:

  • Who supervises the work on site?
  • Who coordinates plumbing, electrical, waterproofing, and tiling?
  • Who handles compliance documents and any required permits?
  • Who is responsible if hidden damage is found after demolition?
  • Who approves and prices variations before extra work starts?

Those answers should be specific. “We'll sort it out” is not a useful answer.

Read portfolios and testimonials properly

A good portfolio shows decision-making, not just finishes. Look closely at tile set-out, niche placement, silicone lines, transitions at doorways, and how the vanity meets walls that may not be perfectly straight. In older Victorian bathrooms, tidy detail often reflects good preparation behind the tiles.

Testimonials need the same filter. Praise for a “beautiful bathroom” is fine, but it does not tell you much about how the contractor handled delays, damaged framing, product backorders, or a failed substrate uncovered mid-job. Stronger reviews mention communication, cleanliness, variation control, punctuality, and how problems were explained.

That is the ultimate test.

A contractor earns trust by how they deal with the room once it is opened up, not by how polished the final photo looks. Be careful with businesses that stay vague on process, avoid discussing hidden-condition risk, or brush past asbestos, waterproofing, and documentation. In Victorian bathroom renovations, those are not side issues. They are where budgets and disputes usually start.

How to Get and Compare Detailed Renovation Quotes

A bathroom quote usually looks tidy before demolition starts. Then the wall comes off, the floor is out of level, the shower area has old water damage, or there is asbestos in backing materials, and the cheap price stops looking cheap.

That is why quote quality is a risk question first and a price question second. If the paperwork leaves too much open to interpretation, you are the one carrying that risk once the room is opened up.

A person comparing various contractor renovation quotes and cost estimates on a wooden desk with a calculator.

What a proper quote should spell out

A usable quote reads like a scope document. It should show what the contractor has allowed for, what they have not allowed for, and where the price could change if hidden conditions are found.

Look for detail in these areas:

  • Demolition: what is being removed, whether strip-out is full or partial, and who is paying for waste removal
  • Pre-lining and pre-tiling work: wall straightening, floor levelling, substrate replacement, screeds, falls, and waterproofing preparation
  • Services: plumbing rough-in, drainage changes, electrical work, lighting, heating, exhaust fans, and final fit-off
  • Fixtures and finishes: actual products, or clear allowance amounts for tiles, tapware, vanity, toilet, shower screen, mirror, and accessories
  • Completion items: painting, silicone, final clean, rubbish removal, and defect rectification

In older Victorian homes, one line on “prep as required” is not enough. Preparation is often where the job is won or lost. A bathroom with out-of-plumb walls or a failed sheet substrate needs more labour than a newer room with sound surfaces, and the quote should show whether that has been allowed for.

Compare scope line by line

Do not compare quotes by total alone. Put them side by side and check how each builder has treated the same parts of the job.

Quote area Transparent quote Risky quote
Scope Breaks work into stages with clear inclusions Broad summary with little detail
Materials Names products or lists realistic allowances Uses vague wording like “owner to select” without allowance detail
Site preparation States what prep is included and what is excluded Hides prep inside general labour
Variations Explains how extra work is priced and approved Leaves variation process unclear
Exclusions Lists omitted work plainly Says nothing about exclusions
Payment schedule Tied to clear milestones Heavy deposit or front-loaded payments

Two prices can be close and still represent very different levels of risk.

One contractor may have allowed for proper floor correction, compliant waterproofing, and realistic fixture allowances. Another may have kept the number down by excluding difficult prep, underallowing finishes, or leaving half the room to future variations.

Watch the wording that causes budget blowouts

Some phrases deserve a hard follow-up before you accept a quote:

  • “Allow as needed”
  • “Standard preparation”
  • “Make good where required”
  • “PC items” or “provisional sum” without enough detail
  • “All works complete” without a breakdown

Those phrases are not always dishonest. Sometimes they are a sign the contractor does not yet have enough information. But if they stay vague after a site visit and product discussion, you should assume the price is still soft.

Ask direct questions:

  • What condition have you assumed the wall framing and floor substrate are in?
  • Have you allowed for replacing water-damaged sheeting or rotten timber if found?
  • Is asbestos testing or removal included, excluded, or not yet assessed?
  • Are tile trims, niches, underfloor heating, and floor waste relocation included?
  • Are fixture allowances realistic for the products we are considering?

That last point catches a lot of people. A quote can look competitive because the allowances are too low to buy the fittings you want. If you need a rough starting point before requesting site-specific pricing, a bathroom renovation cost calculator for Victoria projects can help you set a sensible budget range.

Check exclusions as closely as inclusions

Homeowners usually read the included items and skim the exclusions. Do the opposite as well.

The exclusions often tell you where the contractor expects cost pressure to appear. Common examples are asbestos removal, structural repairs, switchboard upgrades, rotten framing, council or building permit costs where required, and supply delays on owner-selected products.

That does not mean the quote is poor. It means the contractor is showing you where uncertainty sits. Clear exclusions are safer than a low number that assumes nothing will go wrong.

Cost check: If you cannot tell what would trigger extra charges, the quote is not detailed enough.

A good quote gives you enough detail to challenge assumptions before the contract stage. That is how you protect the budget.

Understanding the Contract and Project Kick-off

You are standing in a 1960s Victorian bathroom with a signed quote in hand, and it feels like the hard part is over. It is not. The contract stage is where a tidy-looking renovation either stays under control or turns into an argument about who pays for rotten framing, asbestos testing, or extra plumbing work once the walls are opened.

A contractor selection decision does not stop at price and presentation. It carries straight into risk control. Good paperwork reduces disputes, sets out who is responsible for approvals and licensed trades, and gives you a clear process when hidden conditions are found. Poor paperwork leaves too much open to interpretation, and that usually costs the homeowner.

Read the contract like a risk document

In Victoria, the contract matters as much as the workmanship because it sets the rules before the pressure starts. Friendly meetings and quick replies are useful, but they do not protect you if the scope is vague or the variation process is loose.

Read the document closely and check that written contracts clearly define the scope of work, price changes, and dispute resolution process. If those points are thin, the job is not ready to sign off.

A solid bathroom contract should state:

  • exactly what is being demolished, rebuilt, supplied, installed, and finished
  • who supplies each fixture and finish
  • how variations are priced, approved, and recorded before extra work starts
  • what each progress payment relates to
  • who arranges permits or other approvals if they are required
  • what happens if asbestos, water damage, or structural defects are found during demolition
  • how delays, defects, and disputes are handled

That last point gets missed. In older Victorian homes, hidden damage is not a remote possibility. It is a known risk. The contract should say how the contractor will stop work, document the issue, price the change, and wait for written approval before proceeding.

Lock decisions before the room is opened up

The cleanest projects are usually the least exciting at kick-off. Selections are settled, drawings match the fixtures, lead times are checked, and the first week of work is already mapped out.

Late changes create expensive rework. A different vanity can affect plumbing set-out. A larger tile can change falls and floor waste detailing. A new tap choice can require a different rough-in depth inside the wall. None of those are design problems only. They are cost and sequencing problems.

Screenshot from https://siteprobathrooms.com.au

Where available, 3D design helps because it exposes practical issues early. I would rather find an awkward door swing or a niche clash on a screen than after waterproofing has been applied.

Clarify compliance before work starts

A bathroom renovation in Victoria is not just a cosmetic update. Plumbing, electrical work, waterproofing, ventilation, and sometimes structural changes all carry compliance obligations. If the property is an apartment, owner corporation rules can add another layer around access, waste removal, delivery times, and protection of common areas.

Before kick-off, the contractor should be able to explain:

  • whether permits or approvals are needed
  • who is responsible for getting them
  • which trades must be licensed
  • what certificates or compliance documents you should receive at the end
  • how site access, parking, rubbish, and material storage will be handled

If those answers are vague, the risk has not disappeared. It has just been pushed down the track.

What a well-run kick-off actually looks like

A proper start to site works should feel organised, even a bit dull. That is a good sign.

You want confirmed scope documents, final or near-final selections, an inclusions schedule, a payment schedule tied to real milestones, access arrangements, product lead-time checks, and a clear point of contact. You also want to know what happens on day one, what gets protected before demolition, and when you will be asked to inspect or approve anything.

If a contractor wants to begin demolition while key fixtures are still undecided or special-order items have not been confirmed, treat that as a warning sign. The fastest start is not always the safest start.

The right contract and kick-off process do one job well. They make surprises easier to contain before they become budget blowouts.

Managing the Build and Spotting Common Red Flags

A Victorian bathroom can look tired but stable right up until demolition exposes what has really been happening behind the tiles. I have seen wall framing softened by years of slow leaks, failed sheeting around showers, and old materials that turn a simple refit into a repair job. That is the point where contractor selection stops being a design decision and becomes a risk-control decision.

The right contractor does not push past that moment to keep the schedule looking tidy. They stop the job, photograph the problem, explain whether it affects structure, waterproofing, plumbing, or compliance, and price the extra work in writing before anything changes on site. If there is suspected asbestos, work should pause until the material is properly assessed. If rot has spread into framing or flooring, the rebuild scope needs to be reset before the bathroom is closed up again.

A contingency fund matters here. Hidden conditions are common in older Victorian homes, especially where past waterproofing has failed or previous renovations were done poorly. If you want a practical benchmark, set aside a 10% to 20% contingency fund for hidden demolition findings and controlled variations. That buffer protects your decisions when the job uncovers something real.

What you should watch during key milestones

You do not need to stand over trades. You do need a clear view of a few inspection points where mistakes get expensive if they are missed.

During the build, pay attention to:

  • Demolition: Any decay, mould, termite damage, movement, or suspect materials should be documented and explained straight away.
  • Rough-in: Waste locations, tap positions, niches, power points, and lighting points should match the approved layout before walls are closed.
  • Substrate prep and waterproofing: Shortcuts in this stage cause long-term damage. Ask when you are meant to inspect, and what records will be kept.
  • Tiling and set-out: Check falls, tile alignment, trim details, and how cuts land around corners, grates, and fittings.
  • Fit-off: Confirm the installed fixtures match the quoted model numbers, not a substitute chosen because the original item was never ordered.

Photos help. Written updates help more.

A disciplined contractor will also tell you early if lead times, access issues, apartment rules, or hidden repairs are affecting the sequence of work. Silence is what causes budget shock.

Red flags that usually mean trouble

Some warning signs show up in the first week.

Watch for these:

  • Problems discovered but not priced properly: If extra work starts before you approve a written variation, cost control is already slipping.
  • Trade work happening out of sequence: Waterproofing, tiling, and fit-off rely on each earlier step being right. Rushed sequencing usually leads to rework.
  • Repeated changes to the same area: One correction can happen on any site. Several usually point to poor supervision or unclear documentation.
  • Selections still being chased during construction: Late decisions often lead to substitutions, delays, and arguments about who caused them.
  • Compliance questions answered vaguely: If you ask what certificate or handover document you will receive and the answer is fuzzy, treat that seriously.
  • A site that looks unmanaged: Persistent disorder, unprotected finishes, or materials left exposed to weather usually reflect weak site control.

If your contractor cannot explain a delay, a variation, or a defect in plain language, they do not have firm control of the build.

You are not looking for a perfect renovation with no surprises. You are looking for a contractor who contains surprises before they turn into leakage, defects, disputes, or a much bigger final invoice.

Your Bathroom Remodel Questions Answered

Do apartment bathroom renovations need approval in Victoria

Often, yes. For Victorians in apartments, guidance from Consumer Affairs and Owners Corporations makes it clear that renovations affecting common property require approval, which is why strata experience matters when choosing a bathroom remodel contractor (Victorian apartment renovation approval guidance).

That matters if your work affects waterproofing interfaces, penetrations, waste connections, access routes, acoustic expectations, or anything that could impact common property. A contractor who understands apartment work can help you avoid delays caused by incomplete approval steps.

What should investors prioritise over flashy design

For rental property work, durability usually beats novelty. Tenants notice easy-clean surfaces, practical storage, reliable ventilation, decent lighting, and fittings that don't feel flimsy. Owners also benefit from finishes that are easier to maintain between tenancies.

That's why the best bathroom renovations for investors often focus on solid layout choices, simpler detailing, and products that can be serviced or replaced without drama. The right contractor for that job may not be the one selling the boldest new bathroom ideas. It's often the one who understands staged work, low disruption, and compliance.

What makes designer bathrooms different from standard updates

A designer bathroom isn't just a bathroom with expensive tiles. It's a room where the layout, storage, scale, lighting, and material transitions have been resolved properly.

Typical differences include:

  • Better planning: fixture spacing, sightlines, door swing, and circulation feel intentional
  • Custom integration: joinery, recessed storage, mirror planning, and feature lighting work together
  • More disciplined detailing: tile set-out, trims, junctions, and proportions are considered early

Plenty of modern bathrooms look good in photos. Fewer still feel comfortable, easy to maintain, and well resolved in daily use.

Should I choose style first or process first

Process first. Always.

Style is important. But in wet areas, beautiful finishes can sit over poor prep. If the contractor's planning, quoting, contract detail, and site discipline are weak, even the best-looking bathroom can become an expensive lesson.


If you're planning bathroom renovations in Victoria and want a team that handles design, buildability, and project control together, SitePro Bathrooms is worth contacting for a personalized discussion about your space.