
• siteprobathrooms

How to Choose a Bathroom Vanity: Size, Style and Budget

You've found a vanity you like, checked the wall width and started matching tapware. Then you open the bathroom door and realise the drawers might hit it. Or the cabinet fits, but there's nowhere comfortable to stand while someone else uses the room.

That's the practical starting point for how to choose a bathroom vanity: work out how the whole room functions before choosing the cabinet. Width matters, but circulation, plumbing access and future use decide whether you'll still be happy with it after the renovation dust has gone.

Match Vanity Width to How the Bathroom Is Used

A vanity that fills the wall can still fail a family at 7 am. Choose its width around who uses the room, what needs to be stored and how long the layout must serve the household. A guest powder room mainly needs a hand basin and a place for soap. A shared family bathroom needs accessible storage, clear bench space and room for overlapping routines.

The Housing Industry Association reported that Australian homes averaged 2.6 bathrooms in 2022, up from 2.2 in 2019. The same Australian bathroom report recorded a typical renovation cycle shortening from about 17 years before the pandemic to fewer than 14 years in 2022. Allow for likely household changes when choosing a vanity, while giving priority to the people using the bathroom now.

Use width as a starting range

These are planning options, not guaranteed product configurations. Common Australian vanity size conventions provide a starting point, but check the selected unit's basin layout, drawer count and depth before deciding.

Vanity width by room and household

Width Typical depth Best fit Basins Storage pattern
400–600 mm 450–500 mm Guest powder room 1 small basin Open shelf or one drawer
600–750 mm 450–500 mm Ensuite or small main bathroom, one user at a time 1 basin Two drawers
900–1200 mm 450–500 mm Family bathroom, two regular users 1 basin, occasionally 2 small Three to four drawers
1200–1500 mm 450–500 mm Shared ensuite or larger family room 1 wide basin or 2 basins Four to six drawers or cupboard
1500–1800 mm 450–500 mm Master ensuite, two people preparing at once 2 basins Drawers plus tall cupboard

Choose extra width only when it improves daily use, such as giving each person a place for toiletries or keeping shared items off the bench. Check the effect on the route to the shower. A wider cabinet that makes the shower awkward to enter is a poor trade-off.

Choose storage around the morning routine

For a family of four sharing a bathroom, with two people getting ready at 7 am, a 1200 mm vanity with four drawers may work better than a 900 mm model, provided both fit the room without restricting circulation. Separate drawers give each person an organised place for their everyday items.

A second basin is useful when two people regularly need to wash at the same time. If the congestion comes from scattered products rather than simultaneous washing, prioritise bench space and well-planned drawers instead.

Practical rule: Buy enough vanity to support the household's routine, and leave comfortable access to the shower.

For a family bathroom around 900 mm wide, choose one well-organised basin over a cramped twin arrangement. Wider shared bathrooms can support two basins when simultaneous use is a regular need.

Measure and Check Clearances Before Ordering

A vanity may fit between the walls and still obstruct the doorway, toilet or shower in daily use. Older Victorian bathrooms often have uneven surfaces, tight footprints and plumbing that does not line up with a new cabinet. Check the whole route through the room, not just the width available for the unit.

Measure the finished room, including proposed wall linings, tiles and floor build-up. If demolition has not started, ask the installer to account for those layers before treating rough measurements as final.
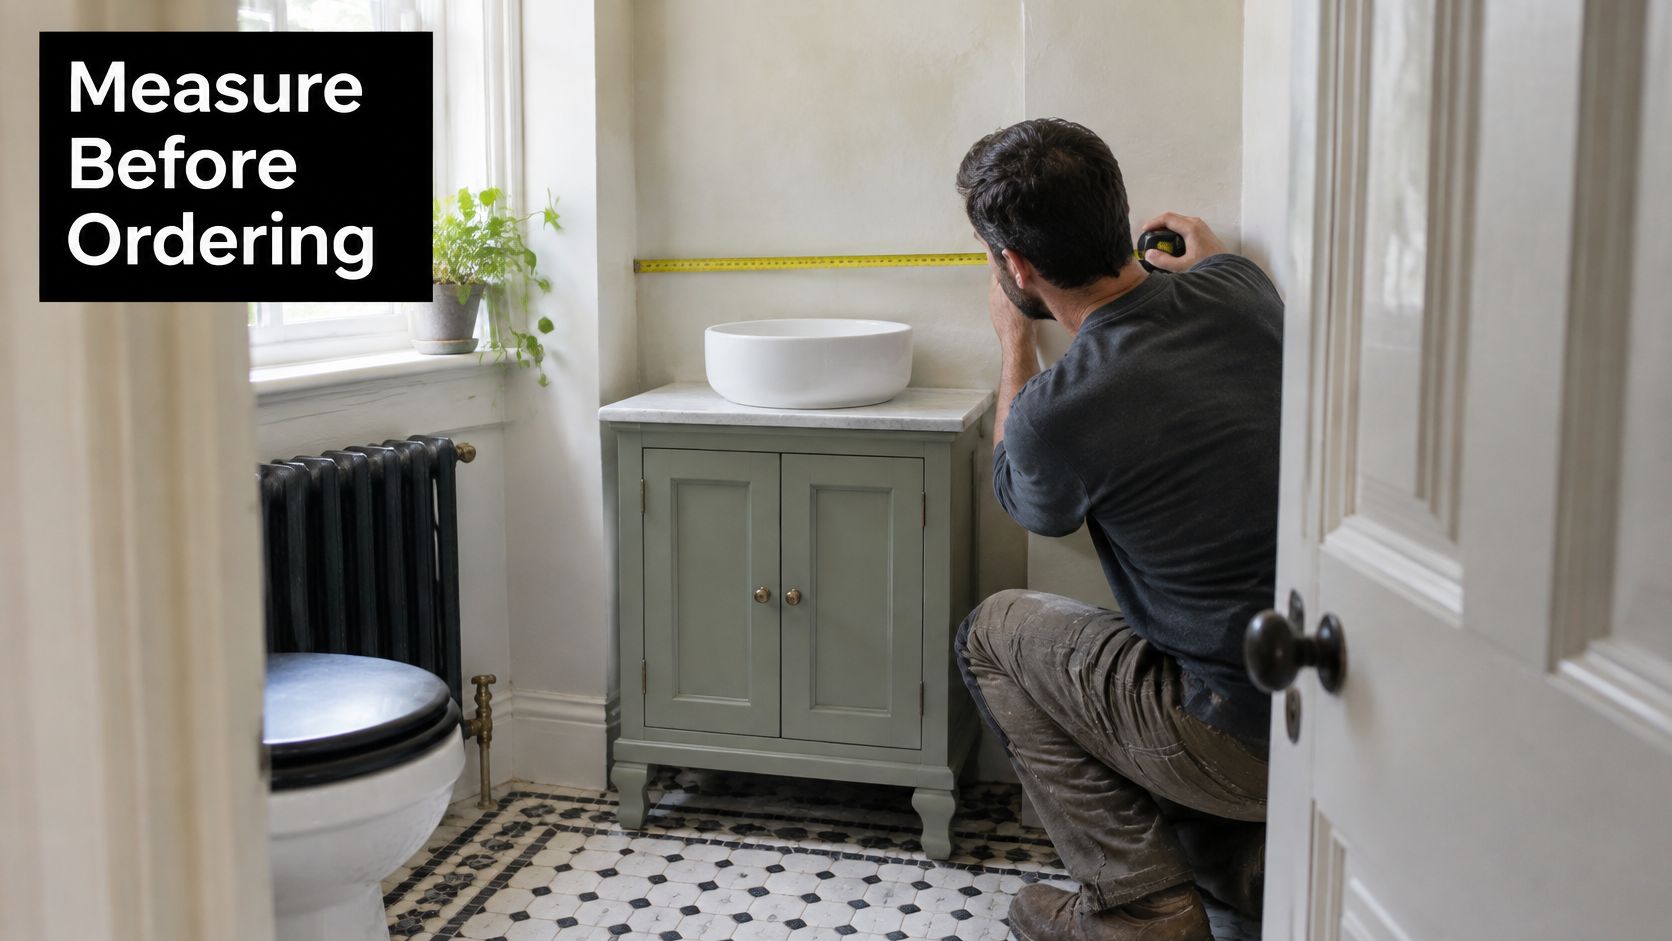
A professional tradesman measuring the wall space for a new vanity in a classic bathroom interior.

Record the room in a usable sequence

Use a tape measure, pencil, masking tape and a simple drawing. Write each measurement directly onto the drawing so the carpenter, plumber and designer can work from the same dimensions.

  1. Measure the available width at different heights. Check at floor level, around the proposed benchtop and above it. Use the narrowest relevant measurement and allow for the installer's fitting tolerance. Bare walls can give a false reading if skirting, tile thickness or an out-of-square corner is overlooked.

  2. Record usable depth. Measure from the finished wall towards the door, shower screen and opposite fixtures. Include handles and projections, not only the cabinet box. The basin and handles can reduce walking space even when the cabinet itself looks shallow.

  3. Trace the door swing. Mark the door's arc on the floor and check whether it passes over the proposed vanity. Include the handle, not just the door edge. A door that clears a closed cabinet may still hit someone using the basin.

  4. Allow for drawer extension and basin overhang. Get the actual drawer projection and benchtop dimensions. Cabinet depth alone will not show whether a drawer clears the toilet or whether the basin intrudes into the walkway.

  5. Locate structure and services. Mark the studs, hot-water and cold-water points, and waste outlet. Ask the installer to confirm concealed conditions where needed. Guessing from the existing cabinet can leave the new unit without suitable fixings or put pipework in the path of a drawer.

  6. Mark the toilet centreline and shower entry. Show how the fixtures relate to each other, not just where each one sits. Products can each fit their own spaces and still leave an awkward gap between them.

  7. Photograph each wall with the tape visible. Photograph exposed services before they are covered, and record relevant wall-cavity details. These images help the trades work from actual site conditions rather than separate assumptions.

Add windows, architraves and towel rails to the drawing. Check that drawer handles will clear nearby trim and that a mirror or tapware will not interfere with a window opening.

Separate legal clearances from comfortable fit

Under the NCC 2025 livable-housing provisions, where they apply, a fixed obstruction such as a vanity must be at least 450 mm from the toilet pan centreline, with a minimum 1,200 mm × 900 mm circulation space in front of the pan. Check the sanitary-compartment requirements and have the building surveyor confirm which provisions apply to the project.

Australian access guidance includes washbasin coordination benchmarks of 800–830 mm height, 450 mm width and a 425 mm wall setback. Treat these as part of the complete design, not a standalone compliance recipe. The designer or surveyor should confirm the applicable requirements and how they relate to the relevant access standard.

A legal minimum does not guarantee a comfortable fit. In a narrow ensuite, the toilet opposite the vanity may seem workable with every door and drawer closed. Open a deep drawer while the entry door swings, and the route can disappear. Reducing cabinet depth may solve the problem more effectively than reducing width.

If you are considering a second basin, use this double vanity sizing guide alongside the full room drawing. Check that both basins and their users fit without restricting access to the toilet, shower or doorway.

Plan for changing mobility

If ageing in place matters, assess the space beneath and around the basin before choosing a large floor-standing cabinet. Partly open or removable cabinetry beneath a suitably designed wall-hung basin may preserve options for seated use or future changes.

Check knee and toe clearance, reach to tapware, and space for a mobility device or assistance. A product described as accessible does not make the completed room compliant.

More concealed storage is no improvement if it takes away the space someone needs to use the basin.

Tape the chosen footprint onto the floor at full scale and leave it there for a day. Use the doorway, approach the shower and test the drawer positions. Then approve a dimensioned plan, with a model where useful.

The final check is practical: can every drawer and door open fully while someone stands at the toilet, without blocking the usable route through the room?

Basin, Style and Plumbing Fit

A basin choice changes more than the look of the vanity. It affects splash, bench space, cleaning and the position of the waste pipe, so confirm the bowl and tapware before ordering the cabinet or top.

Compare cleaning and bench-space trade-offs

Splash depends on the bowl shape, water flow and tap position, not just the basin type. Use the table to compare typical trade-offs, then check the dimensions of the exact model you plan to install.

Basin types compared

Basin type Splash exposure Cleaning Storage impact Best for
Vessel, sitting on top Greater bench exposure if poorly matched to tapware More work around the base and rim Raises rim height and occupies bench area Feature bathrooms where style leads
Undermount Generally contained with a suitable bowl and tap Easy bench wipe-down; maintain the underside joint Bowl occupies cabinet space below Busy family bathrooms where a clear bench is useful
Integrated top Generally contained; check bowl depth Few junctions to clean Bowl and bench layout determine storage below Compact or low-maintenance bathrooms
Semi-recessed Depends on projecting bowl and tap position More edges to wipe Can preserve space behind a projecting bowl Renovations balancing basin size and cabinet depth
Twin basins Depends on the individual installation Additional basin surfaces to clean Uses width and can reduce drawer space Shared ensuites with overlapping routines

An integrated bathroom sink can suit a compact bathroom where wiping down the basin and bench with fewer joints matters more than replacing the basin separately later. With an undermount, confirm how the installer will support the bowl and seal its underside junction.

A semi-recessed basin can provide a larger bowl while keeping the cabinet shallower, which may help in a tight room. Check the actual projection against the clear route through the bathroom. A larger basin is a poor trade if it crowds the approach.

Coordinate appearance and pipework

Choose a finish family, such as timber-look, painted shaker or gloss white, and coordinate it with the mirror, lighting and tapware. Matte black hardware can add contrast without making every surface compete for attention. Coordinated finishes make the room look planned rather than assembled.

Wall-hung units need confirmed structural support and accurately positioned wall connections. Floor-standing cabinets can conceal more pipework, but either design must leave isolation valves accessible for maintenance.

Before approval, confirm:

  • Waste alignment: The selected bowl and trap must suit the cabinet's internal layout.
  • Tap mounting: Decide between wall-mounted and deck-mounted tapware before finalising the top.
  • Maintenance access: Keep valves and connections reachable without dismantling the vanity.

For a busy family bathroom, an undermount basin is a practical choice when an easy-to-wipe bench and a conventional cabinet layout are priorities. In a small bathroom where cleaning fewer joins matters, an integrated basin and top may be the better fit. Choose a vessel basin when its appearance justifies the extra cleaning and the combined basin, tap and finished height work for daily use.

Storage, Materials and Wet-Area Durability

Start by classifying the splash exposure. A vanity beside an unenclosed shower or bath needs a more demanding material and installation specification than a cabinet in a relatively dry powder room.

Moisture-resistant doesn't mean waterproof. The substrate, edge treatment, plumbing cut-outs and benchtop junctions all matter, especially where water can reach surfaces you won't inspect during ordinary cleaning.

Match storage and surfaces to exposure

Choose deep soft-close drawers for bulky products and hair tools, with internal organisers for small daily items. Allow a suitable compartment for cleaning products, kept safely away from children, and use open shelving only where stored items will remain reasonably dry.

The bathroom benchtop materials guide can help narrow the surface choice. Ask for the manufacturer's written suitability and care requirements rather than relying on a showroom finish.

Vanity surface materials for wet and dry rooms

Surface Water tolerance Upkeep Watch for
Laminate-faced particleboard Vulnerable where edges are unsealed Wipe dry and maintain seals Swelling at cut edges and beneath the basin
Moisture-resistant MDF or melamine-faced board Depends on substrate and sealed edges Wipe clean; inspect junctions Swelling where the seal fails
Sealed solid timber Depends on finish condition Renew the finish as specified Finish wear near the basin
Solid surface, acrylic Generally suitable for wet benchtops Follow specified cleaning and repair methods Heat damage and scratches
Engineered stone Check the exact product specification Follow manufacturer's care instructions Weight and current supply and installation restrictions
Ceramic or porcelain top Suitable surface with sound junctions Clean joins and any tiled grout Joint staining or damage
Stainless steel Suitable for wet use Wipe clean Visible scratches and water marks

Material names aren't complete specifications. In particular, don't assume a material remains available or suitable for new installation just because it appears in an older product catalogue.

Require a sound wet-area build

The Victorian Building Authority states that wet-area construction must comply with NCC requirements and AS 3740 waterproofing provisions in its wet-area waterproofing guidance. A cabinet, plumbing cut-out or silicone bead cannot substitute for a compliant membrane system.

Require documentation of waterproofing before it's covered, photographs of concealed plumbing and accessible traps and isolation valves. Cabinet fixings and penetrations must be coordinated without compromising the waterproofing.

Handover check: Don't accept a dry-looking cabinet as proof that the installation is watertight.

Run the basin at full flow and inspect joints and cut-outs. Check for exposed MDF beneath the basin, confirm that doors and drawers clear adjacent fixtures, and make sure water doesn't pond against the wall or travel into an unsealed edge.

Budget Tiers and Where the Money Goes

A rental ensuite with existing plumbing and a standard layout rarely needs custom joinery. A family bathroom used by several people may justify mid-range construction, with drawers and dependable runners that stand up to daily use. Choose by how the room works and how easily the plumbing can be reached, not by the catalogue width alone.

The cabinet is only one part of the bill. Basin and tapware, plumbing changes, installation, mirrors, lighting and any repairs to the wet-area build can all affect the total.

Compare complete specifications, not headline prices

Keep quotes in AUD and ask suppliers to separate the vanity-only cost from installation and other trade work. Compare the same cabinet dimensions, top, basin and drawer configuration to see what drives the price.

Vanity budget tiers in AUD

Tier Main cost drivers What it typically includes Trade-off
Budget flat-pack Standard cabinet size, basic top and minimal drawer hardware Laminate faces and limited configurations Check moisture protection and service access carefully
Mid-range Top material, drawer count and upgraded runners Soft-close drawers and more size options Fewer bespoke finishes
Premium made-to-measure Specified top material, custom dimensions and fabrication time Bespoke finishes and a cabinet fitted to the room More coordination and potentially longer lead times

For a rental ensuite, a standard-width cabinet that resists moisture may be a better use of funds than custom joinery. Put the savings towards documented installation work. That can reduce avoidable replacement risk, though it cannot prevent all future damage.

Spend where it changes daily performance

  • Prioritise: Drawer runners, sealed edges, a suitable top and competent installation.
  • Save selectively: Choose standard dimensions and straightforward finishes when they fit the room and suit the existing service positions.
  • Separate the quote: Show the vanity, installation and trade-specific work as separate costs for a fair comparison.

Keep plumbing reachable for servicing, and make sure cut-outs are sealed. Set the budget after confirming the required dimensions, materials and installation work. If the total is too high, simplify decorative finishes before compromising access or construction quality.

Confirm the Vanity Choice Before You Order

A vanity can fit the wall and still make the bathroom awkward to use. Before ordering, check how people move past it, whether drawers and doors open without clashes, and whether pipes and fittings will remain accessible for maintenance. Approve one complete specification against a dimensioned plan, including the cabinet, top, basin, tapware, hardware and service requirements.

A design model can show drawer collisions, door swings and the view from the doorway. Check finishes under the proposed lighting, too. These checks help catch problems before a change affects finished work.
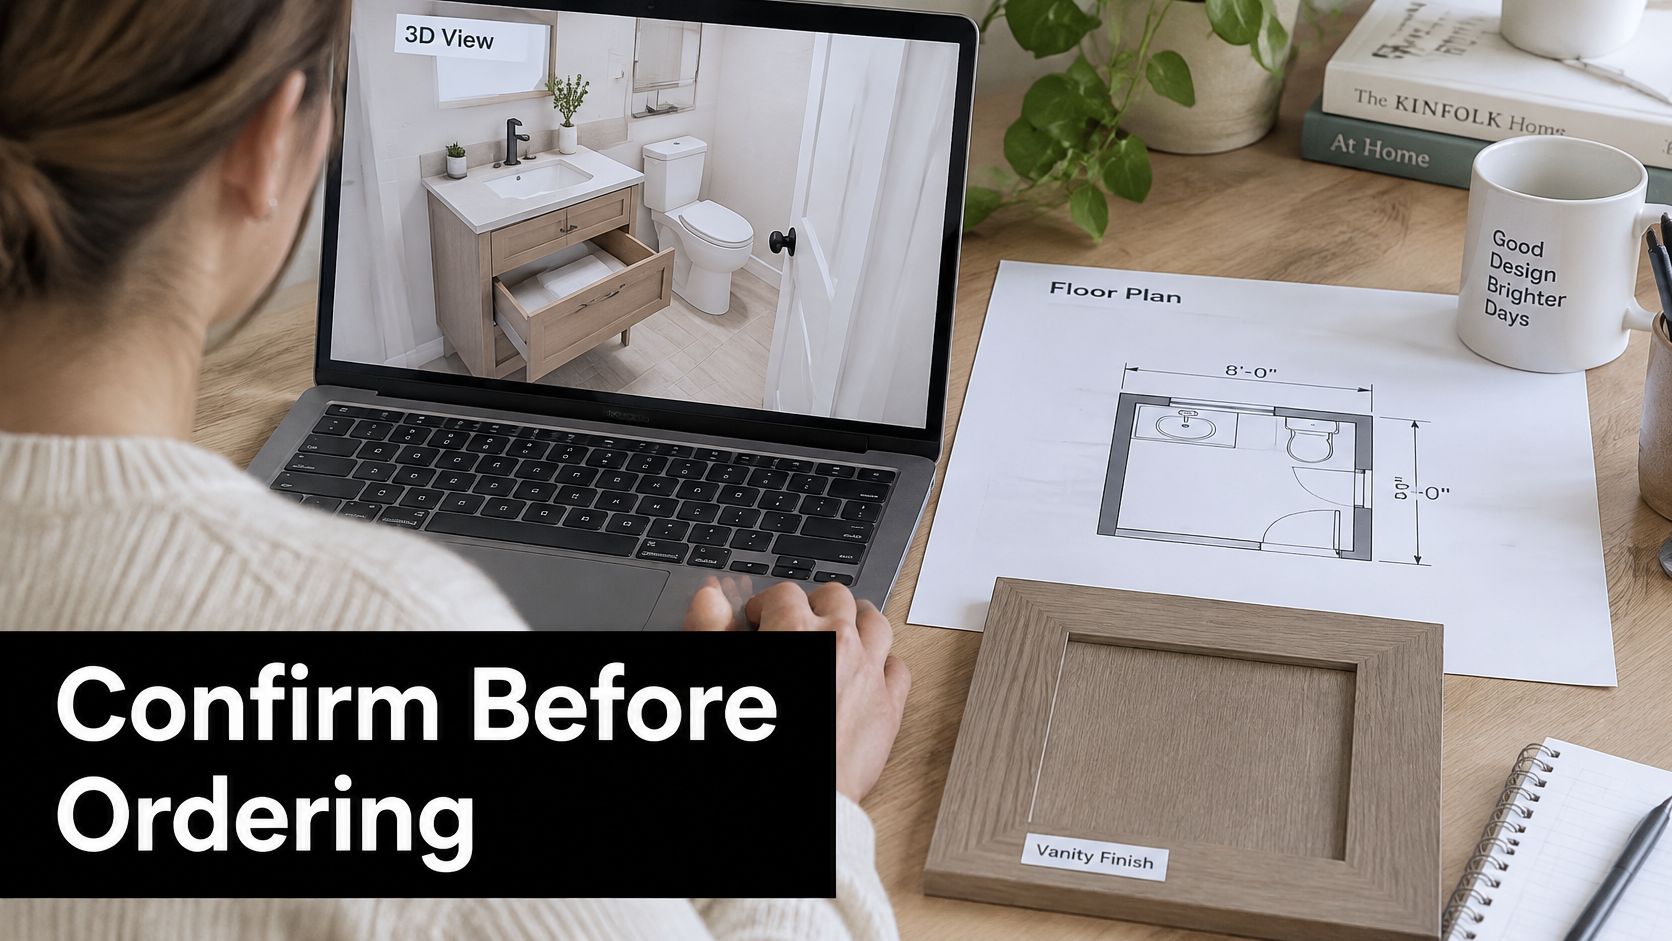
A woman reviewing a bathroom vanity design on a laptop next to a floor plan and finish sample.

Check who is authorised to carry out the work

For Victorian domestic building work worth more than $10,000, a registered practitioner and written contract are generally required, subject to specified single-trade exceptions, according to Consumer Affairs Victoria's renovation checklist. A bathroom project involving demolition, waterproofing, plastering and tiling needs a scope that accounts for each part of the work.

Check the actual registration class of any builder you compare. Confirm that it covers the proposed work, rather than relying on a broad description in an advertisement.

If the layout changes, check whether permits are required. Where applicable, a planning permit comes before a building permit issued by a registered building surveyor. The written scope should state who handles applications, while recognising the owner's responsibilities under Victoria's plans and permits guidance.

Sign off the complete specification

Before ordering, get written confirmation of the selected products, wall fixings, pipe positions and maintenance access. Agree how operation, drainage, workmanship and completion will be checked. These details help keep the vanity serviceable after installation, not just tidy on handover day.

SitePro Bathrooms provides concept development, 3D design, construction and finishing for bathroom projects.

The final fit test is practical: the vanity suits the room's circulation, leaves services accessible, and supports the household's needs over time.

  • siteprobathrooms

Transform Your Space: Small Bathroom Storage Ideas

Maximise Every Inch of Your Bathroom

You open the vanity and something falls out. The benchtop is crowded with skin care, spare toilet paper is wedged beside the loo, and the shower niche, if you have one at all, is doing very little heavy lifting. That's the reality in a lot of compact bathrooms. In a small ensuite or family bathroom, poor storage turns ordinary routines into constant tidying.

Small bathroom storage ideas work best when they solve two problems at once. They need to create usable room for daily items, and they need to make the bathroom feel calmer instead of tighter. That means choosing the right mix of built-in and retrofit storage, then matching it to the room's layout, wall construction, moisture levels, and how much disruption you're willing to take on.

These 8 solutions are the ones that repeatedly earn their keep in real bathroom renovations across Victoria. Some are quick additions you can fit in an afternoon. Others are worth folding into full bathroom renovations so the storage feels like part of the architecture, not an afterthought. I've included the practical side too: sizing cues, material choices, installation cautions, and where registered builders such as SitePro Bathrooms make the difference between a neat idea and a properly finished result.

1. Floating Shelves and Wall-Mounted Storage

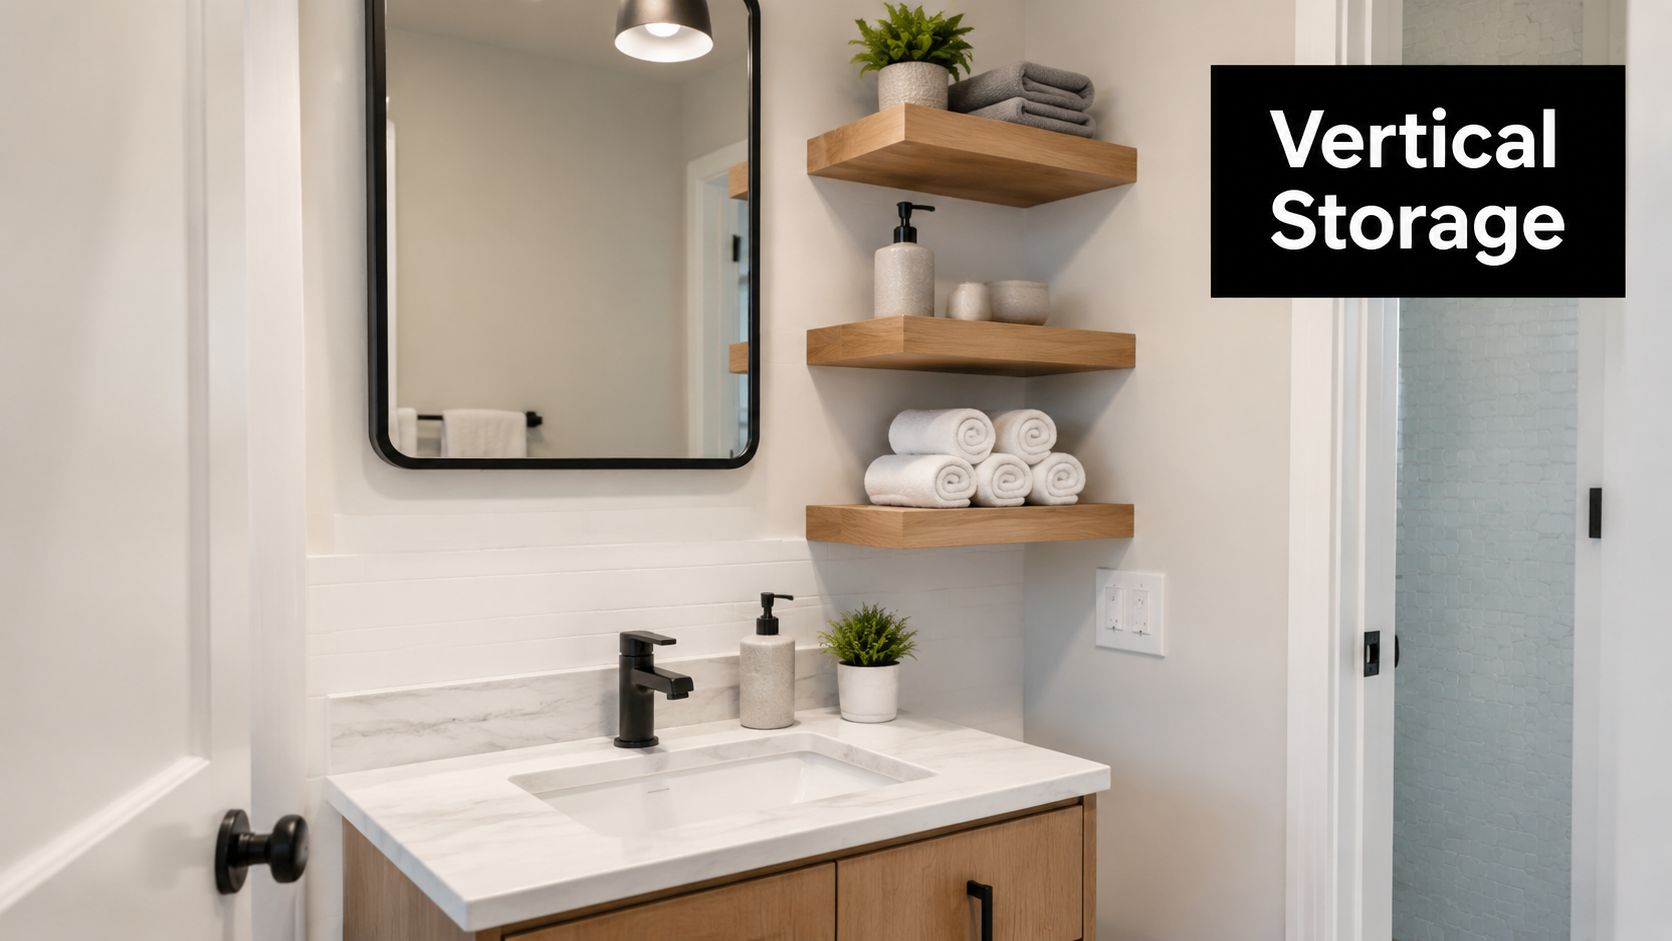
Floating shelves are one of the fastest ways to add storage without shrinking the room visually. In small bathrooms, floor space is precious, so moving towels, daily toiletries, and spare products onto the wall often gives the biggest improvement for the least disruption.

A modern bathroom vanity featuring floating wooden shelves for vertical storage and a stylish marble countertop.

Open shelving suits modern bathrooms because it keeps the lines light. I've seen this work particularly well above a toilet, beside a vanity, or on the blank wall opposite the shower where there's enough clearance to move comfortably. If you're planning a compact layout, these small-space bathroom design ideas show where wall storage can work without making circulation awkward.

What works best

Glass shelves stay visually quiet and resist moisture well. Powder-coated metal brackets are reliable in humid rooms, and sealed timber can look excellent if it's finished properly and kept away from constant splash zones. In a Highett-style contemporary renovation, a pair of oak-look shelves above a stone vanity can soften a room full of tile and chrome.

According to Highgrove Bathrooms, vertical storage solutions such as over-toilet shelves can increase usable storage capacity by up to 40% in small bathrooms without expanding the footprint, which is exactly why wall-mounted storage is so effective in tight rooms (Highgrove Bathrooms on clever storage ideas).

Practical rule: Don't install floating shelves just because a wall is empty. Install them where your hand naturally reaches during the morning routine.

Trade-offs and installation tips

Floating shelves look clean, but they can become visual clutter if every item is left exposed. Use them for neat, repeatable categories: rolled towels, matching canisters, a tray for skin care, or spare hand towels. Don't use them as a dumping zone for half-used products and random packaging.

A few details matter:

  • Fix into something solid: Stud fixing is best. Heavy-duty anchors can work, but they're a fallback, not the first choice.
  • Leave useful spacing: Enough height between shelves makes bottles easy to grab and easy to clean around.
  • Use moisture-safe finishes: Raw timber swells and stains fast in a bathroom.
  • Add light carefully: LED strip lighting under a shelf can lift the whole vanity area, but keep wiring coordinated during renovation works.

If the shelves sit on a tiled wall, I'd rather coordinate drilling and fixing with the renovation team than risk cracked tiles later.

2. Over-the-Toilet Storage Units

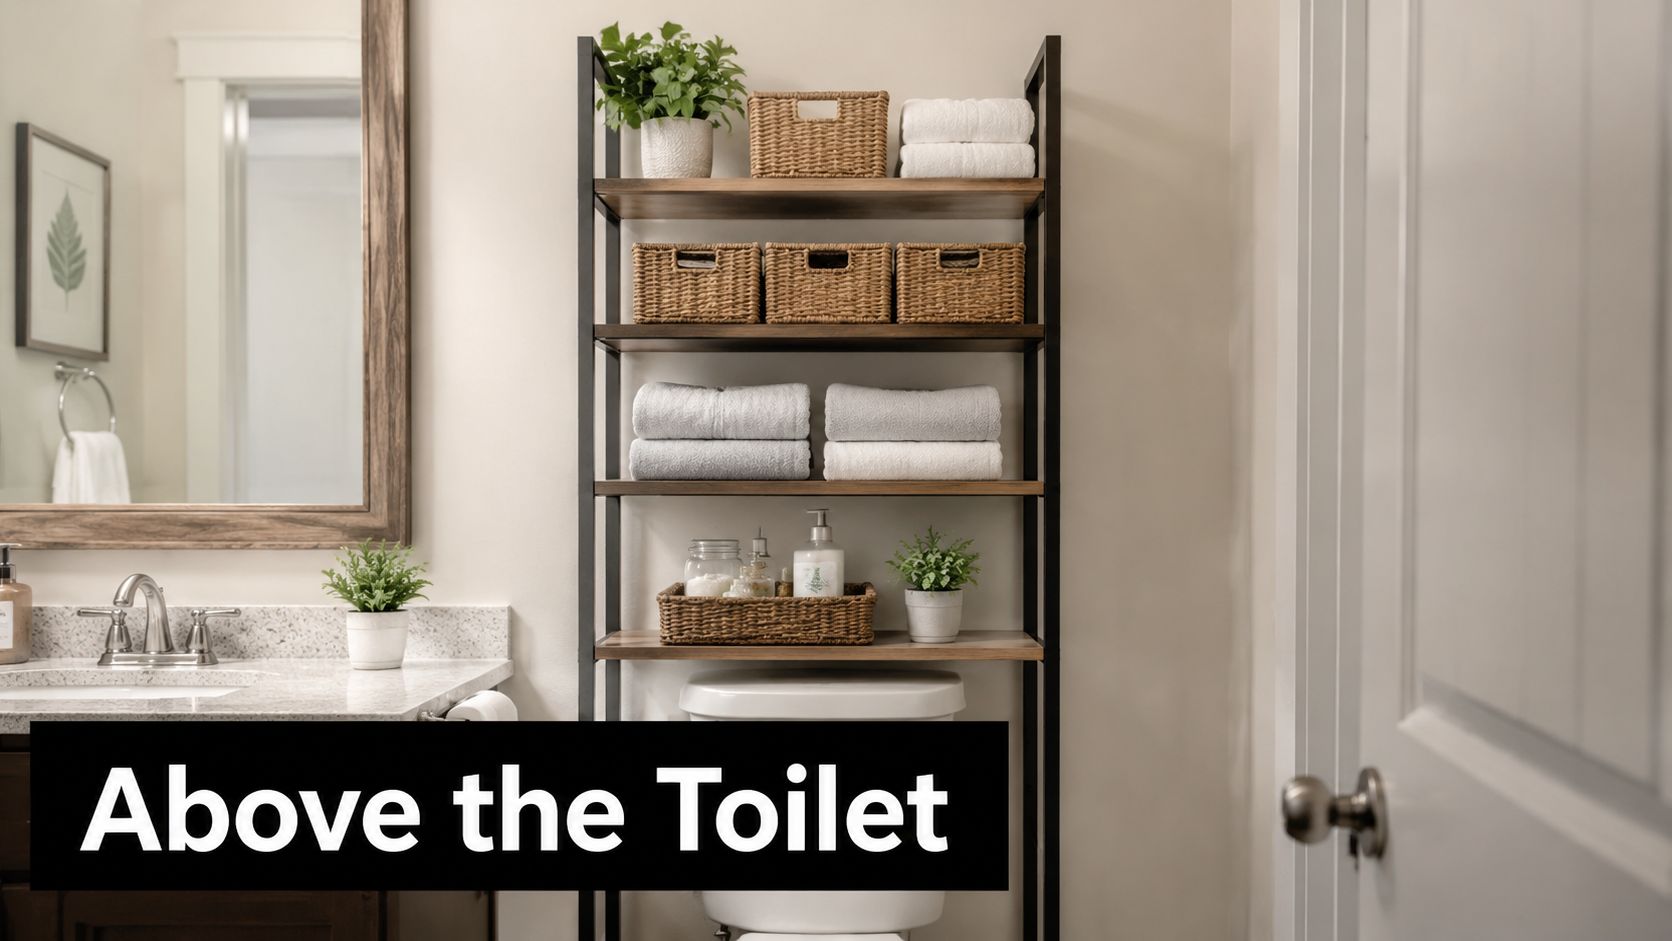
The wall above the toilet is usually underused, yet it's one of the most practical storage zones in the room. If you need a spot for spare toilet paper, guest towels, wipes, or cleaning products, an over-the-toilet unit often does the job without touching the vanity footprint.

A modern bathroom storage shelving unit placed over the toilet with organized baskets and folded white towels.

This is one of the easiest small bathroom storage ideas to retrofit. Freestanding units are useful in rentals or when you want storage now and a full renovation later. Wall-mounted cabinets above the cistern look cleaner and are easier to keep hygienic around the base.

Open shelves or closed cabinet

Open shelving works if your styling is disciplined. A few matching baskets, folded towels, and one decorative item can look polished. Once you start stacking mixed packaging, the area feels busy quickly.

Closed units hide mess better. They also suit family bathrooms where not everything needs to be on display. I usually prefer doors if the unit will hold cleaning products, backups, or personal items.

If the toilet wall is the only free wall in the room, use it properly. Don't waste it on decor when the bathroom is short on storage.

Common mistakes to avoid

The first mistake is buying the unit before measuring. Check ceiling height, cistern depth, button access, and whether the lid can still lift if needed. Leave enough room to clean around the toilet and enough breathing space so the storage doesn't feel like it's hanging over your head.

The second mistake is loading the highest shelf with heavy items. Keep bulkier supplies lower and lighter items higher for stability. In family bathrooms, over-the-toilet shelving is a good spot for backup stock, while everyday items stay closer to the vanity.

Material choice matters too:

  • Powder-coated metal: durable and neat for contemporary spaces
  • Bamboo or sealed timber: warmer look, but only if the finish is bathroom-safe
  • Laminate cabinetry: easiest to coordinate with bathroom renovations and existing joinery

This option isn't as integrated as built-in joinery, but it's fast, useful, and often the best answer when the layout leaves no spare floor area.

3. Recessed Medicine Cabinets and Niche Storage

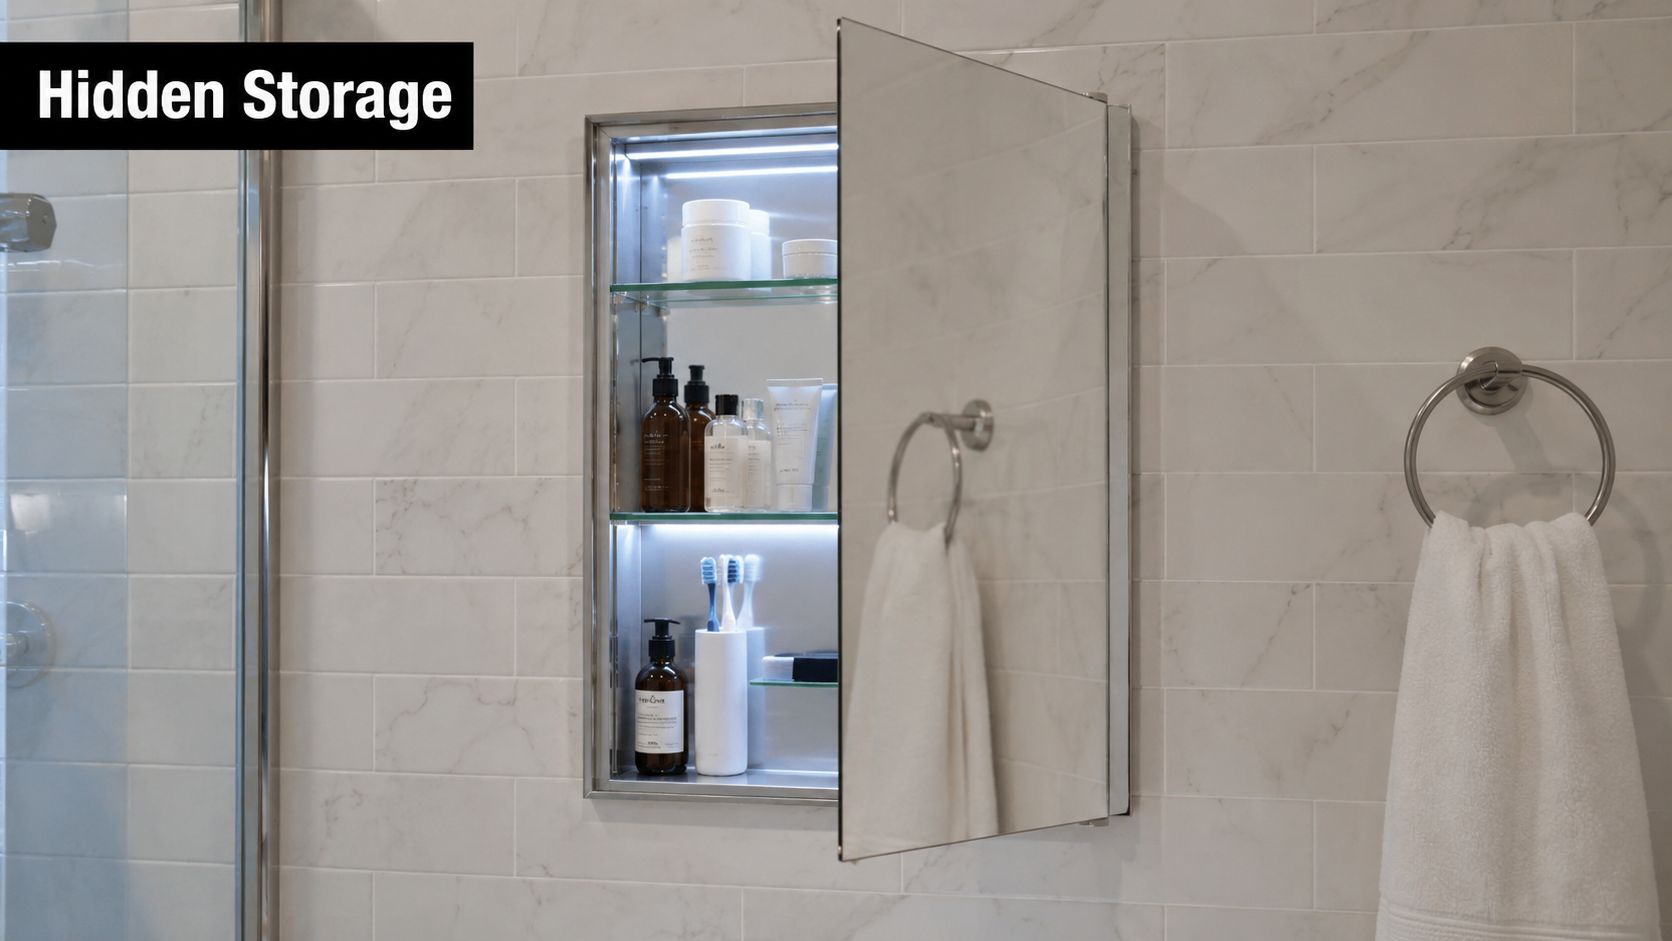
If you want storage that doesn't push into the room, recessed storage is hard to beat. It's one of the smartest inclusions in bathroom renovations because the storage sits inside the wall cavity instead of occupying visual or physical space.

A recessed medicine cabinet with integrated LED lighting and a mirror door displaying bathroom toiletries.

A recessed medicine cabinet above the vanity can replace a standard mirror while hiding toothbrushes, medicines, and grooming products. In showers, tiled niches stop bottles collecting on the floor or hanging from caddies. These details are common in designer bathrooms because they do useful work without adding bulk.

Built-in storage that earns its place

This is one area where planning early matters. The wall needs enough cavity depth, and the builder has to work around plumbing, wiring, and framing. One source notes that custom recessed wall niches and pull-out storage columns are recommended by 68% of Victoria-based renovators for compact spaces, and that these niches need a minimum wall cavity depth of 90mm, with reinforced backing supporting 12kg per linear metre in humid environments (ServiceSeeking on functional small bathroom storage).

Another Australian reference notes that recessed shower niches in designer bathrooms often use a minimum depth of 100mm, which is a useful reminder that the ideal niche size depends on the bottles you use and the wall construction available (Little Aussie on storage for small bathrooms).

Where it pays off

A mirrored cabinet above a compact vanity is usually the highest-value built-in storage in the room. It gives you reflection, concealed storage, and a cleaner benchtop all at once. In a shared bathroom, a double-width recessed cabinet can separate daily items by user without extra joinery below.

For shower niches, I'd focus on location before size. A beautifully tiled niche placed directly in the splash line or at an awkward height becomes annoying quickly.

A few rules help:

  • Align with tile set-out: It looks intentional and avoids ugly cuts.
  • Check bottle heights first: Tall pump bottles catch people out.
  • Waterproof meticulously: Niches are part of the wet area, not a decorative add-on.
  • Use recessed cabinets where swing space is comfortable: Door clearance still matters.

This is a builder-led solution. If you're already opening walls, it's one of the best new bathroom ideas to integrate properly rather than trying to retrofit later.

4. Corner Storage Solutions and Carousel Organisers

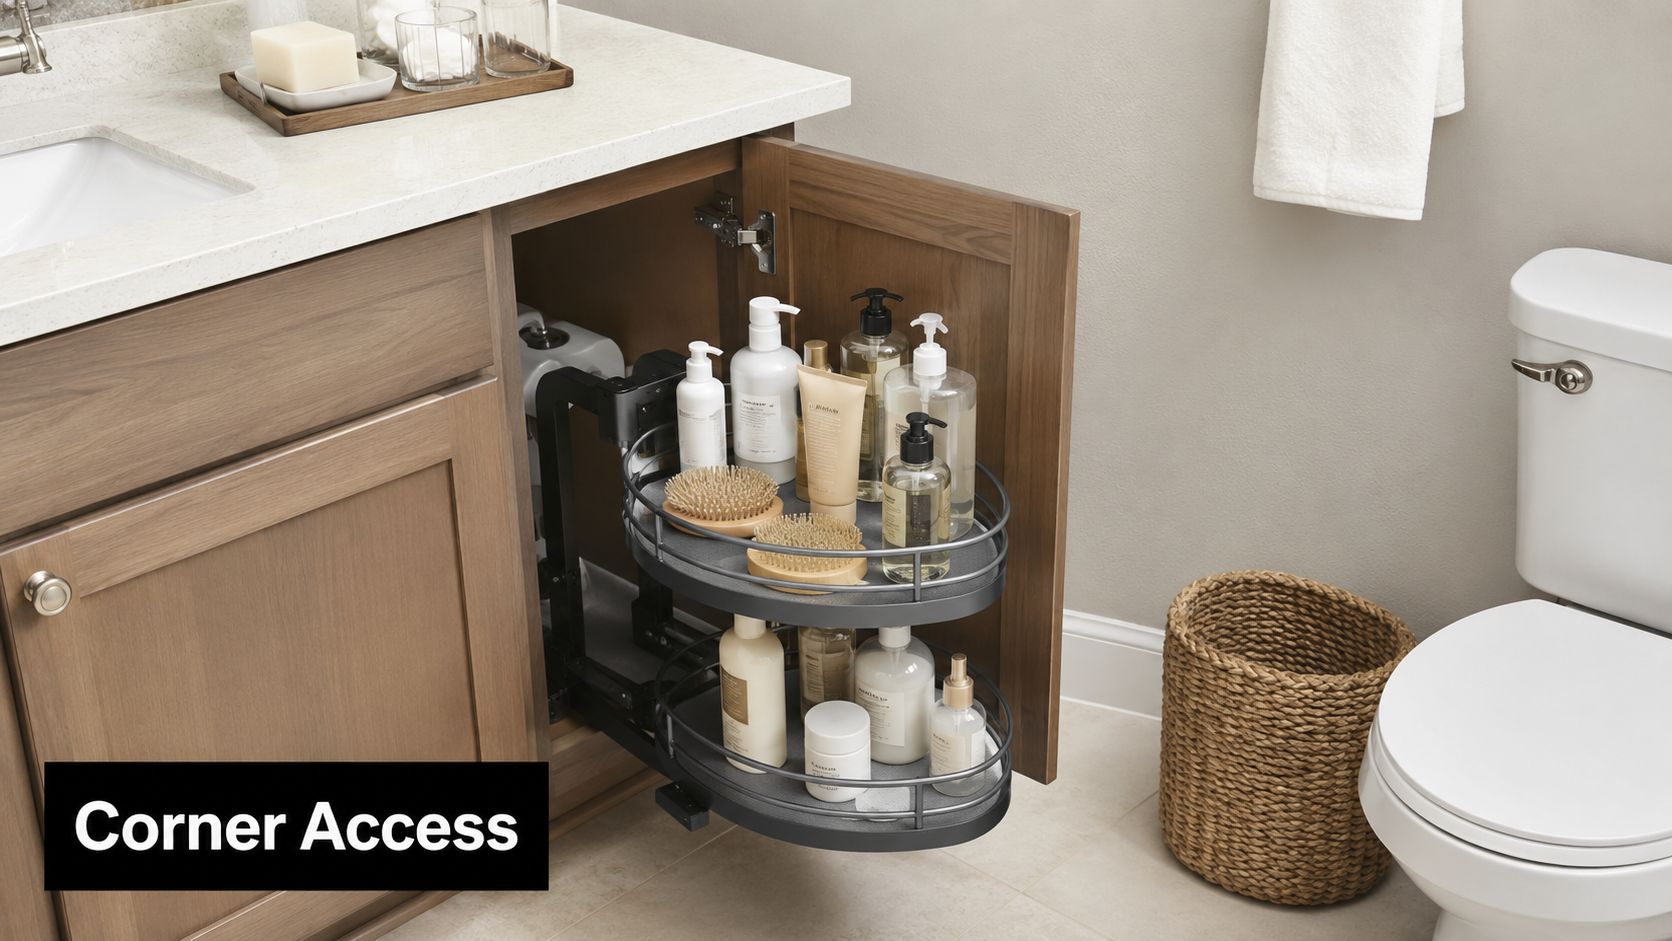
Corners are where storage either gets clever or gets wasted. In compact bathrooms, a corner vanity shelf, a corner cabinet, or a rotating organiser inside the vanity can recover awkward space that flat shelving can't use well.

A pull-out cabinet organizer in a bathroom vanity featuring shelves with various skincare products and accessories.

Carousel organisers are especially useful under sinks where plumbing eats the centre of the cabinet and leaves dead zones to either side. A rotating unit lets you reach the back without unloading the front every time. In tighter room shapes, the right corner strategy can be the difference between a vanity that works and one that constantly feels cramped.

If you're still deciding whether a corner vanity or angled joinery makes sense, these small bathroom layout dimensions are worth checking before you lock anything in.

Best use cases

I like carousel storage for categories that are hard to stack neatly. Hair products, backup toiletries, skin care, and first-aid items all suit rotating access better than deep fixed shelving. In family bathrooms, they also help stop duplicate buying because you can see what's in the cabinet.

Freestanding corner shelves can work, but they often look temporary unless the room has enough breathing room around them. Built-in corner joinery feels stronger in full bathroom renovations, especially where every millimetre matters.

The trade-off nobody mentions

Rotating storage sounds brilliant until the clearance is wrong. If the vanity door opening is too narrow, or the plumbing traps the organiser, the mechanism becomes more frustrating than useful.

Keep these points in mind:

  • Measure the usable opening, not just the cabinet size: Hardware and hinges reduce access.
  • Store light items up high: Upper corner shelves aren't the place for heavy cleaning bottles.
  • Choose rust-resistant hardware: Cheap rotating mechanisms don't last well in damp cabinetry.
  • Don't force a carousel into every vanity: Sometimes simple pull-out baskets are better.

Corner storage works best when it solves an access problem, not just a space problem.

A neat corner shelf in the shower can also be effective, but in wet areas I generally prefer a built-in niche unless the renovation scope is very limited.

5. Drawer Dividers and Vanity Organisation Systems

A good vanity can still behave badly if the drawers are just open boxes. Without internal organization, many bathrooms become dysfunctional. People add storage but never create order inside it, so the room still feels messy even when there's technically enough capacity.

Drawer dividers fix that. They turn one chaotic drawer into zones for daily grooming, skin care, dental items, medications, hair tools, and spare stock. In practice, this is one of the most affordable upgrades in the whole room, and one of the most effective.

Why organised storage feels bigger

This isn't just about tidiness. A 2024 University of Melbourne study cited by Bathroom Accessories Australia found that bathrooms with unorganised storage were rated 32% less satisfying by occupants, even when the square footage was identical, which lines up with what many homeowners feel when benchtops and drawers are cluttered (Bathroom Accessories Australia on smart storage solutions).

That's why vanity organisation should be treated as part of the design, not an optional add-on. In modern bathrooms, the drawer interior is doing just as much work as the external finish.

How to set drawers up properly

The best setups separate daily-use items from backup stock. Your morning and night products should live in the easiest-to-reach drawer. Refills, travel items, and less-used tools can sit lower or further back.

I'd usually organise a vanity like this:

  • Top drawer: daily grooming, toothbrushes, skin care, deodorant
  • Middle drawer: makeup, shaving gear, hair products
  • Lower drawer: backup toilet paper, hand towels, bulk items
  • Hidden insert or tray: medications or sharp tools, away from younger children

Use dividers that won't absorb moisture. Acrylic, sealed bamboo, and quality polymer inserts all work. Add non-slip liners first so trays don't shift whenever the drawer opens.

For bathroom renovations, this is worth discussing before the vanity is ordered. Deep drawers can store more, but shallow upper drawers often work better for everyday visibility. If the joinery is custom, planning appliance storage for hair dryers and straighteners from the start saves a lot of awkward retrofitting later.

6. Vertical Wall Pockets and Over-Door Storage

Not every bathroom needs construction work. Sometimes the room just needs more places to put things now. Vertical wall pockets and over-door organisers are the fast, low-commitment answer, especially for renters, guest bathrooms, and children's bathrooms that seem to accumulate products overnight.

These systems use surfaces that are usually ignored: the back of the door, the inside of a cabinet, or a narrow wall beside the vanity. They won't give you the polished look of custom joinery, but they can recover a surprising amount of practical storage.

Where these shine

I recommend them when the bathroom is missing linen storage or when the vanity is too small for the household. An over-door rack can hold towels or robes. Pocket organisers can store hair products, wipes, spare soap, cleaning cloths, or bath toys in a way that keeps them visible.

They're also useful for rental properties. One verified source states that 44% of Victorian rental properties underwent bathroom upgrades in 2024, while a 2025 JTW study reported that 73% of landlords in Victoria abandon storage upgrades because they fear breaching tenancy agreements. The same source highlights the value of non-invasive storage that avoids drilling or permanent alterations (Bathroom Accessories Australia on rental-ready bathroom storage gaps).

If you're aiming for a stronger design language long term, a feature like a mid-century modern bathroom vanity can eventually absorb some of what these temporary organisers are doing.

What to buy and what to skip

Clear pockets are useful because you can see everything quickly. Fabric organisers look softer but can hold moisture longer if ventilation is poor. Metal over-door hooks are durable, though they need enough door clearance to avoid rubbing on the frame.

A few practical notes:

  • Use them for light items: Don't overload door-mounted storage.
  • Check door swing carefully: The organiser shouldn't stop the door opening fully.
  • Keep categories simple: One pocket for dental, one for hair, one for extras.
  • Clean them often: Temporary storage gets grubby faster than built-in cabinetry.

This approach isn't elegant in every setting, but it's flexible, cheap to trial, and often the smartest stopgap before a full renovation.

7. Pedestal Sink Alternatives with Built-In Storage

Pedestal basins look light, but they usually sacrifice the very thing a small bathroom needs most. Storage. If a compact bathroom has a pedestal sink and nowhere else for toiletries, spare rolls, or cleaning supplies, replacing the basin with a small vanity is often the single most impactful change you can make.

Wall-hung vanities are the strongest option in many modern bathrooms because they free up floor area visually while adding drawers or shelving underneath. That combination makes the room feel more open and more useful at the same time.

Better than a pedestal for everyday use

This isn't just about adding a cupboard. The right sink unit can improve flow around the room, hide plumbing, and reduce benchtop clutter. A narrow wall-mounted vanity with one deep drawer and one shelf often outperforms a larger bulky unit because it stores what you use without swallowing the room.

One verified source notes that modular storage units with pull-out drawers beneath bathtubs can store up to 25 litres of cleaning supplies and towels, and credits Registered Builders Unlimited with recommending this type of integrated storage for compact spaces (Budget Box on small bathroom storage ideas). The same principle applies under the basin. Integrated storage beats decorative emptiness in a small bathroom almost every time.

When to involve registered builders

Once plumbing moves or cabinetry becomes built-in, this stops being a simple styling upgrade. Registered builders are worth engaging when the waste position, waterproofing, wall fixing, or tile layout needs proper coordination. That's particularly true in older homes, where wall condition and existing pipe locations can limit the vanity size more than people expect.

A few selection rules help:

  • Choose moisture-resistant carcass materials: Treated board, marine-grade components, or quality engineered products last better.
  • Keep kick-free designs where possible: Wall-hung units make cleaning easier.
  • Prioritise drawers over cupboards: Drawers give better access in shallow vanities.
  • Leave service access: Future plumbing maintenance shouldn't require joinery demolition.

This is one of the most practical new bathroom ideas if your current basin offers no storage at all. In full bathroom renovations, it's often the first layout decision I'd revisit.

8. Tiered Shelf Systems and Storage Ladders

Not every small bathroom wants more cabinetry. Sometimes a lighter, more decorative storage piece suits the room better. Tiered shelves and leaning ladders can add vertical storage for towels, baskets, and a few daily items without making the space feel boxed in.

These pieces work best when the bathroom already has core storage covered and needs overflow capacity, or when the room has an awkward spare corner that can't take conventional joinery. In styled designer bathrooms, a ladder shelf can soften a room full of hard surfaces and add a bit of warmth.

When freestanding storage works

A timber ladder beside a bath can hold towels beautifully. A narrow powder-coated shelf in a corner can carry baskets of toilet paper, guest items, or skin care. These are useful pieces in ensuites where you want the room to stay visually open.

Still, freestanding storage needs discipline. It's easy for a ladder shelf to become a staging point for clutter because there are no doors to hide anything.

Keep the bottom shelf for the heaviest items and the top shelves for light, infrequently handled pieces. That's what keeps these units safe and visually balanced.

Picking the right piece

The finish has to suit humidity. Sealed timber, bamboo designed for wet rooms, and rust-resistant metal all work. Cheap painted furniture from dry areas of the house usually won't.

Placement matters more than people think:

  • Use corners first: They preserve circulation.
  • Avoid door swing zones: A beautiful ladder in the wrong spot becomes a daily obstacle.
  • Add baskets for small items: Open shelves need containment to look tidy.
  • Limit what's on display: Towels, one tray, one basket. More than that starts looking crowded.

This is one of the more flexible small bathroom storage ideas because it doesn't require drilling or demolition. It also suits phased projects, where you've completed the main renovation and want to add a softer layer of functional styling afterwards.

8-Option Small Bathroom Storage Comparison

Item Implementation complexity Resource requirements Expected outcomes Ideal use cases Key advantages
Floating Shelves and Wall-Mounted Storage Low–Medium (anchoring to studs/anchors) Minimal tools and materials; $100–$400 per shelf Open vertical storage, minimalist look, limited weight capacity Small modern bathrooms, display of towels/toiletries Space-saving, easy to install, cost-effective
Over-the-Toilet Storage Units Low (freestanding or simple wall-mount) Unit purchase and basic assembly; $80–$300 Efficient above-toilet storage, easily accessible, can look crowded if overfilled Tight bathrooms, renters, budget renovations Affordable, small footprint, no major renovation
Recessed Medicine Cabinets and Niche Storage High (requires wall framing and professional install) Skilled labor, possible electrical/plumbing coordination; $400–$1,200 Seamless built-in storage, concealed items, polished aesthetic Major renovations, luxury/small bathrooms needing integrated storage Concealed storage, adds architectural value, dual-purpose mirror
Corner Storage Solutions and Carousel Organizers Medium (measurement and fitting required) Moderate cost and possible custom fitting; $150–$450 Maximizes corner dead space, rotating access to back items Under-sink corners, compact layouts where corners are wasted Efficient corner use, improved access, organized storage
Drawer Dividers and Vanity Organization Systems Low (simple install or inserts) Low cost; $50–$250 depending on customization Highly organized drawers, better visibility and routine efficiency Vanities with drawers, users wanting tidy, non-structural upgrades Cost-effective, customizable, improves daily use
Vertical Wall Pockets and Over-Door Storage Very low (no-drill or hanging) Very low cost; $25–$120, no professional installation Quick, visible storage; temporary solution with limited load capacity Renters, temporary needs, small bathrooms needing immediate storage Non-permanent, inexpensive, easy to install
Pedestal Sink Alternatives with Built-In Storage High (plumbing integration and custom install) Professional installation and plumbing work; $600–$1,500 Integrated concealed storage with modern sink aesthetic Renovations aiming to add sink storage and improve resale Combines sink and storage, modern look, conceals clutter
Tiered Shelf Systems and Storage Ladders Low (freestanding, no install) Low to moderate cost; $80–$300 Decorative vertical storage, open display, limited concealed capacity Styling-focused bathrooms, renters, display of towels/plants Attractive, movable, dual-purpose décor and storage

Bring It All Together

The best storage plan usually isn't a single hero feature. It's a combination. A recessed medicine cabinet clears the vanity top. Drawer organisers make the vanity usable. Shelves above the toilet recover dead wall space. A wall-hung vanity replaces a pedestal basin that never carried its share of the load. Once these moves start working together, the bathroom feels larger because it functions better.

That's the part many people miss. Storage isn't only about fitting more in. It's about reducing friction in the room. You want fewer items left on the basin, fewer bottles on the shower floor, and fewer awkward reaches into dark cabinet corners. Good storage shortens the morning routine, simplifies cleaning, and makes the whole bathroom read as calmer and more deliberate.

Some solutions are easy to test. Over-door organisers, freestanding over-toilet units, and tiered shelving can be added quickly and moved if they don't suit the space. Others are worth doing once, properly, during bathroom renovations. Recessed niches, medicine cabinets, vanity replacements, and integrated joinery all depend on wall structure, waterproofing, plumbing, and tile layout. That's where registered builders and a coordinated renovation team matter.

SitePro Bathrooms is well placed for that kind of work. The company handles the process from concept and 3D design through construction and finishing, which is exactly what compact bathrooms need. In small rooms, storage decisions affect everything else: mirror position, lighting, tap placement, circulation, and what sort of vanity or shower screen the room can comfortably take. A disconnected approach usually leads to compromises. A coordinated approach gives you storage that looks built-in because it was planned that way.

If you're weighing up new bathroom ideas for a cramped ensuite, updating a family bathroom, or preparing an investment property for a smarter refresh, start with a clear storage wishlist. List what has to live in the room every day, what can be stored elsewhere, and which problems are really layout problems in disguise. That exercise alone often shows whether you need a simple retrofit or a more complete redesign.

Then take the next step with SitePro Bathrooms. A builder-led consultation can help you decide which small bathroom storage ideas belong in a quick upgrade and which ones should be integrated into complete modern bathroom renovations for a cleaner, longer-lasting result.