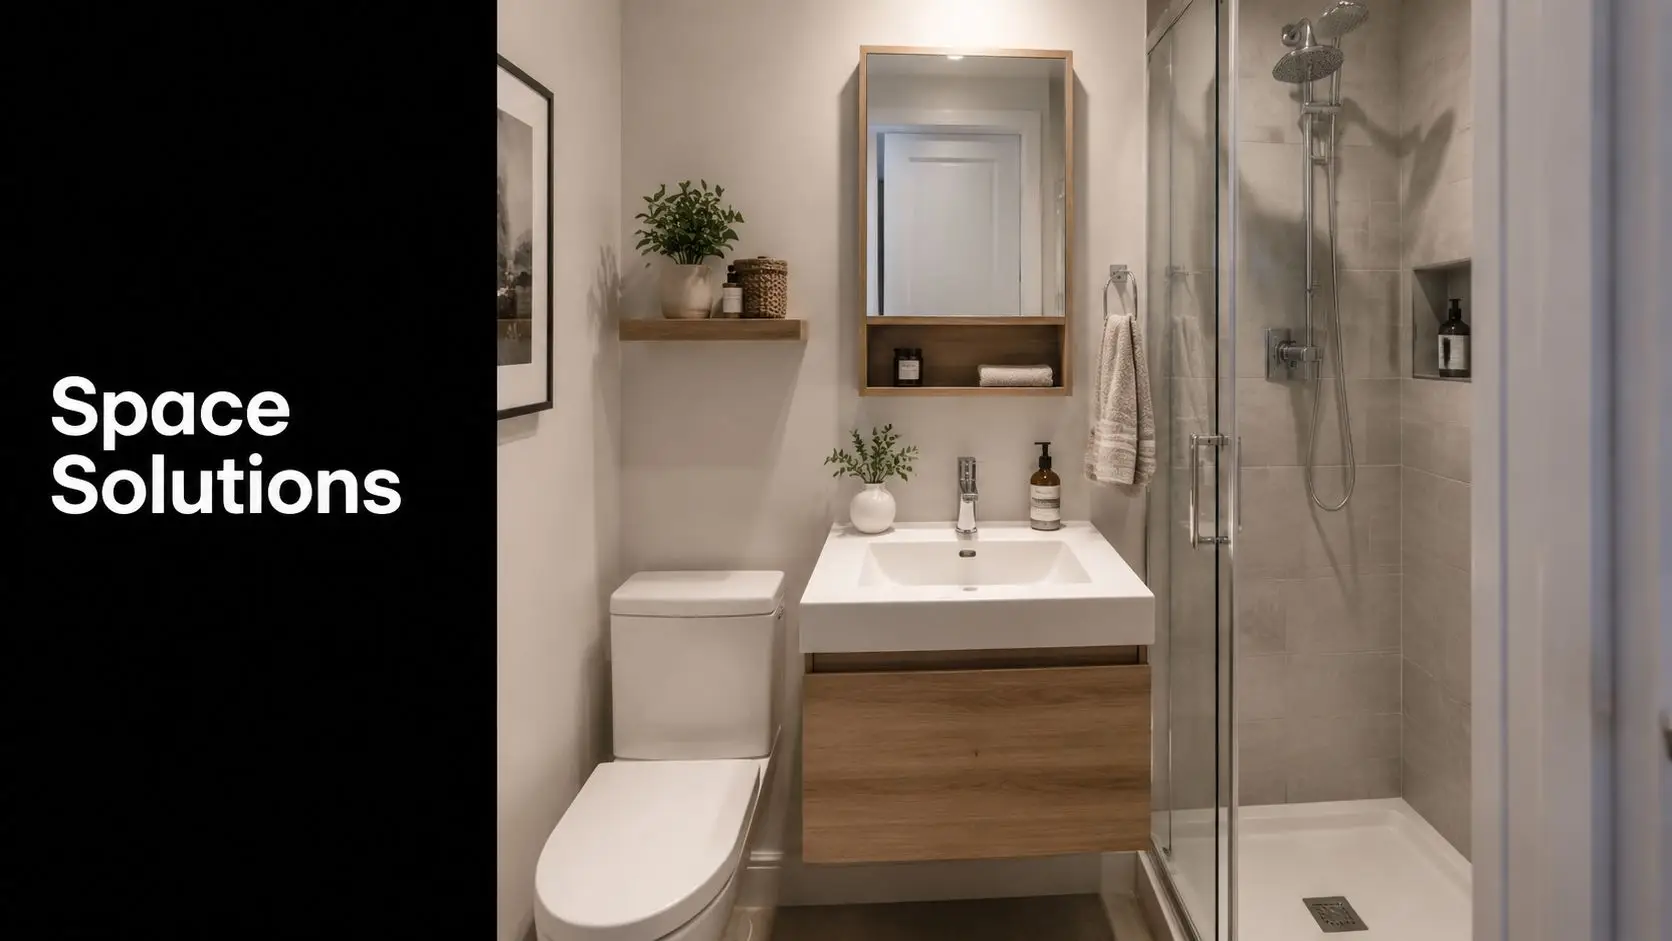
• siteprobathrooms

Mid Century Modern Bathroom Vanity: Your 2026 Guide

You're probably in the same spot many Victorian homeowners reach after scrolling through endless inspiration photos. You want a bathroom that feels warmer than stark contemporary design, cleaner than traditional joinery, and more considered than whatever happens to be on sale this week. You also need it to work. The vanity has to handle daily use, fit the room, and survive steam, splashes, and family habits that aren't always gentle.

That's why the mid century modern bathroom vanity keeps coming up in good bathroom renovations. It gives you strong design direction without locking you into something fussy. Done well, it sits comfortably in modern bathrooms, but it doesn't feel cold. It adds timber, shape, and personality, yet still supports a practical layout.

For many clients, the challenge isn't liking the look. It's choosing one that suits the room, the plumbing, the storage needs, and the finish level expected in designer bathrooms. That's where the decisions matter. A beautiful vanity with poor drawer access, awkward basin placement, or the wrong mounting method quickly becomes an expensive frustration.

Embracing Timeless Style in Your Bathroom

A vanity style isn't typically the initial focus. Instead, the process often begins with addressing a problem. The old bathroom feels dated, storage is clumsy, the room is hard to clean, and the overall look doesn't match the rest of the house. Then the search begins for new bathroom ideas that are stylish without becoming trendy for the wrong reasons.

A mid century modern bathroom vanity solves that tension well. It brings clean lines, warm materials, and visual lightness into a room that usually needs all three. Instead of relying on ornament, it uses proportion, timber grain, simple fronts, and carefully chosen hardware to do the work.
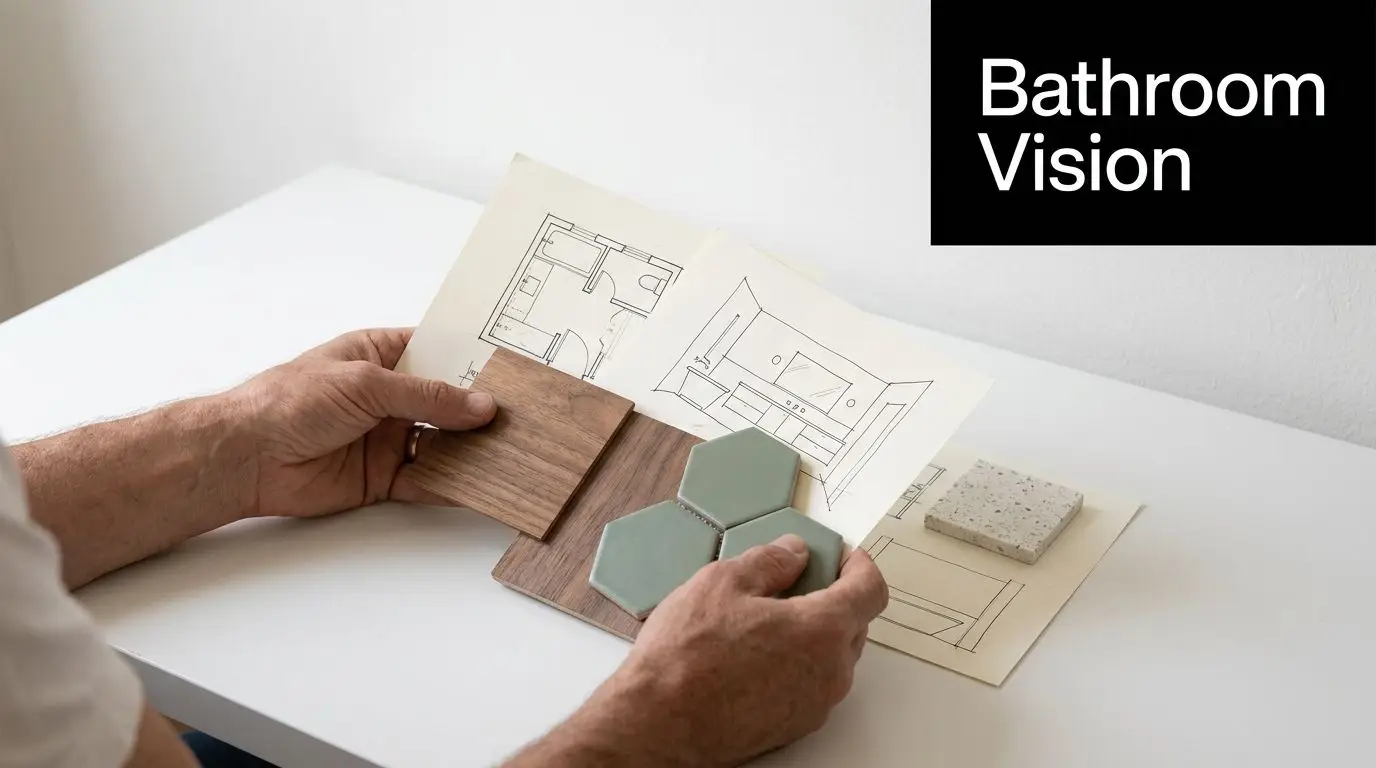
A person holding a wood sample and sage green hexagonal tiles over architectural sketches of a bathroom vanity.

Why this style works in real renovations

The appeal isn't just visual. In practice, this style helps homeowners make better decisions because it gives the renovation a clear filter. If an item is bulky, over-detailed, glossy in the wrong way, or decorative without purpose, it usually doesn't belong.

That clarity helps with:

  • Layout choices that keep the room open instead of overfurnished
  • Material selection that feels warm and architectural rather than generic
  • Fixture decisions that support a cohesive finish
  • Long-term appeal so the bathroom doesn't date too quickly

A good vanity shouldn't just fill a wall. It should organise the whole room around it.

What to get right first

Before choosing colours or mirrors, settle three practical points:

  1. How the vanity will be mounted
    Wall-hung and freestanding units create very different plumbing, cleaning, and visual outcomes.

  2. How much storage you need
    Daily-use family bathrooms need a different internal layout from guest ensuites.

  3. How the vanity connects to the rest of the bathroom
    The basin, tiles, tapware, lighting, and floor finish should support the vanity, not compete with it.

Stylish bathroom renovations either become calm and resolved, or crowded and compromised.

What Makes a Vanity Mid Century Modern

A mid century vanity is best understood as well-made furniture that happens to live in a bathroom. It isn't trying to look ornate, industrial, coastal, or ultra-minimal. It balances restraint with warmth. That's the key.
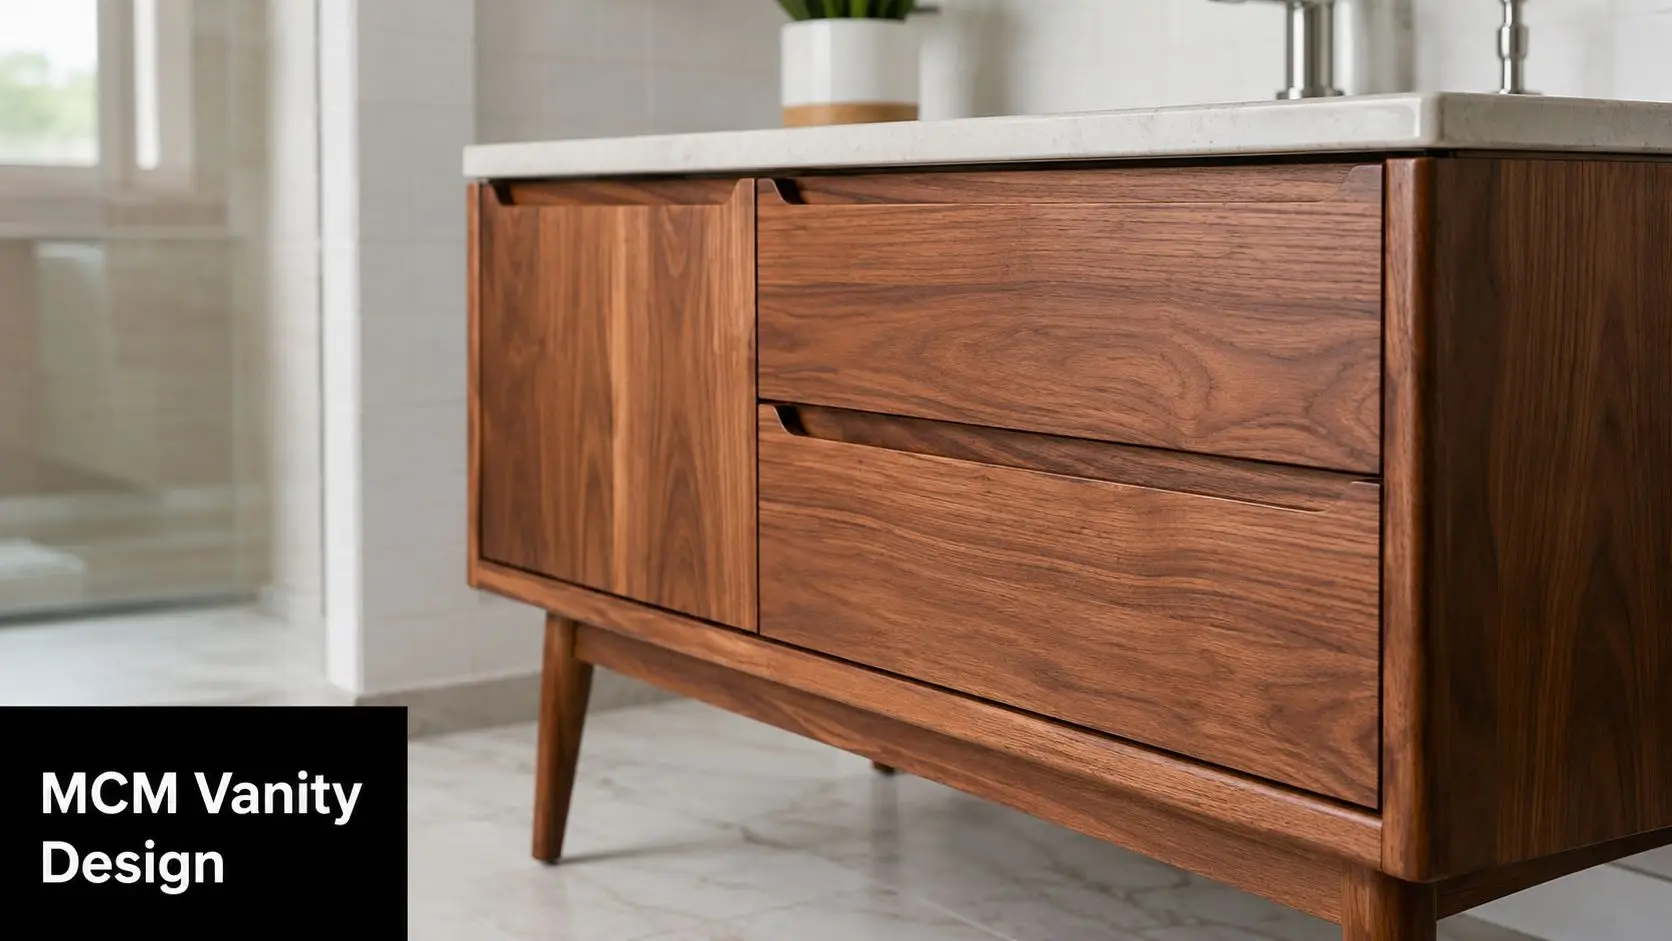
A modern walnut wood bathroom vanity cabinet featuring integrated drawer pulls and tapered mid-century style legs.

The design DNA

The style came from a period that valued functional design and honest materials. According to Phoenix Tapware's review of mid-century bathroom trends in Australia, mid-century modern bathroom vanity design emerged around the 1930s and reached peak popularity through the 1960s, using clean lines and practical materials such as wood, metal, and brass. The same source notes a strong Australian resurgence around organic forms, timeless functionality, and clean silhouettes, and points to custom solid wood and veneer vanities priced between $1,500 and $3,000 in Australia.

That history still shows up in the best current designs. You'll see:

  • Flat or simple drawer fronts instead of profiled cabinet doors
  • Warm timber tones that show grain rather than hiding it
  • Slim proportions with a lighter visual footprint
  • Minimal hardware or integrated pulls
  • Legs or floating forms that avoid a heavy box on the floor

What works and what doesn't

Some vanities get labelled mid-century when they're really just generic modern joinery with timber-look laminate. That usually misses the point.

A vanity feels authentically mid-century when it has:

  • Clear geometry with softened edges where needed
  • A furniture-like stance rather than a kitchen-cabinet look
  • Balanced detailing with nothing oversized or flashy

It stops feeling mid-century when it includes:

  • Thick waterfall ends that dominate the room
  • Busy shaker fronts or coastal panelling
  • Overly industrial hardware
  • Too many finishes in one unit

Practical rule: If the vanity is the loudest object in the room, it's usually not the right mid-century expression.

Why Victorian homeowners keep choosing it

In Victoria, this style fits a broad mix of homes. It can soften a compact apartment ensuite, bring order to a post-war renovation, or add warmth to a new extension. It also works well when clients want designer bathrooms that feel curated rather than showroom-generic.

The smartest results don't chase nostalgia. They take the principles of the style and adapt them to current use. Soft-close drawers, durable tops, better lighting, and better plumbing access can all sit behind a mid-century look without compromising it.

Materials and Finishes for an Authentic Look

Material selection is where many mid-century bathrooms either become convincing or drift into imitation. The style depends on the right surfaces. If the timber tone is wrong, the top is too busy, or the finish feels plastic, the whole vanity loses credibility.

There's another problem in the Australian market. The simple version is often the hardest to find. A homeowner discussing the search for a vanity in Australia described most available options as “busy, modern or beachy style vanities” while trying to find something “simple and clean” in a mid-century direction, which captures a real gap in the market for this look in practice, especially when custom vanities are already a popular element in Victoria renovations according to the same discussion thread on an Australian renovation conversation about mid-century bathroom vanity options.

Solid timber or veneer

Both can work. The right choice depends on budget, detailing, and how the bathroom is used.

| Material | Best use | Trade-off |
| | | |
| Solid timber | Feature vanities where grain, edges, and craftsmanship matter most | Costs more and needs careful sealing and ventilation management |
| Quality veneer | Cleaner budget control with a convincing timber face | Edge treatment matters. Cheap veneer quickly looks flat or artificial |

Solid timber gives you depth and authenticity. Veneer gives you control and can be very effective when the substrate, edge finishing, and coating are done properly. What doesn't work well is a fake timber pattern with repetitive grain that reads instantly as mass-produced.

Benchtops that support the style

The vanity top should calm the composition, not dominate it. Good choices usually include:

  • Muted stone-look surfaces with minimal movement
  • Simple solid-surface tops with crisp lines
  • Concrete-style finishes if the overall palette stays restrained

If you're considering an all-in-one basin arrangement, integrated bathroom sink options can suit the clean geometry of a mid-century scheme, especially when you want fewer visual breaks across the vanity top.

Finishes that age well

For timber finishes, satin usually beats high gloss. It reads more like furniture and shows fewer water marks. For handles and tapware, choose one metal finish and repeat it consistently.

A few practical calls help:

  • Walnut-style tones create warmth without making the room too yellow
  • Lighter oak directions can work, but only if the rest of the bathroom avoids a beach-house look
  • Matte or low-sheen coatings generally look more resolved than polished surfaces

The best mid-century vanities feel edited. Every visible finish should have a reason to be there.

Practical Sizing and Smart Storage Solutions

The vanity can be beautiful and still fail the room if it's the wrong type or size. Function must be the priority. In bathroom renovations, the vanity is often doing too many jobs at once. It has to store products, hide plumbing, support the basin, create bench space, and still leave enough room for movement.

For most mid-century schemes, I favour a lighter footprint. That often means a wall-hung vanity, especially in compact bathrooms.

Why wall-hung often wins

A bulky floor-standing unit can make a small bathroom feel shorter, heavier, and harder to clean. A wall-hung vanity opens the floor line and gives the room more breathing space. In lower-use bathrooms, that benefit can be even more valuable than extra cabinet volume.

A niche recommendation highlighted in a mid-century bathroom advice video discussing wall-mounted options suggests removing a replacement vanity in favour of a wall-mounted option in bathrooms “not getting a lot of daily use”. That advice matters because many homeowners don't get clear guidance on where a wall-hung mid-century sink or vanity is the better functional decision.

When a floating vanity is the right call

Choose wall-hung when:

  • The ensuite is compact and every visible floor area helps
  • Cleaning matters and you want easier access underneath
  • The style needs visual lightness to keep the joinery from looking blocky
  • The bathroom isn't trying to carry oversized storage

Check the finished height carefully. If you're weighing basin type, benchtop thickness, and user comfort, a guide to standard benchtop height is useful early in planning because the wrong height is hard to forgive once installed.

In small bathrooms, visual space is functional space. If the vanity looks lighter, the room usually works better.

Storage without losing the aesthetic

The common mistake is forcing too much storage into a mid-century vanity and ending up with a heavy cabinet that contradicts the style. The better approach is to make the storage smarter.

Use a mix of:

  • Deep drawers for daily items rather than low cupboards where things get lost
  • Inner organisers for grooming tools and small containers
  • A reduced-width vanity paired with mirrored shaving cabinets or wall niches
  • One open visual zone if the room needs a furniture feel, but not so much open shelving that clutter becomes unavoidable

Freestanding still has a place

A freestanding vanity can work in a larger bathroom or where wall structure makes mounting more complex. It also suits some furniture-inspired designs with tapered legs. But the proportions need discipline. If the unit is too deep, too tall, or too ornate at the base, it will overpower the room.

For compact ensuites in Victoria, the decision is usually straightforward. If you want the room to feel cleaner, bigger, and more aligned with the mid-century look, wall-hung is often the stronger move.

Styling Your Mid Century Modern Bathroom

A mid-century vanity won't carry the room by itself. The surrounding selections decide whether the bathroom feels coherent or confused. Often, modern bathrooms falter here. The vanity says one thing, the tiles say another, and the tapware introduces a third idea entirely.

The styling should feel deliberate. One strong vanity, one or two supporting shapes, one timber tone, one metal finish, and a restrained colour story usually gets the best result.
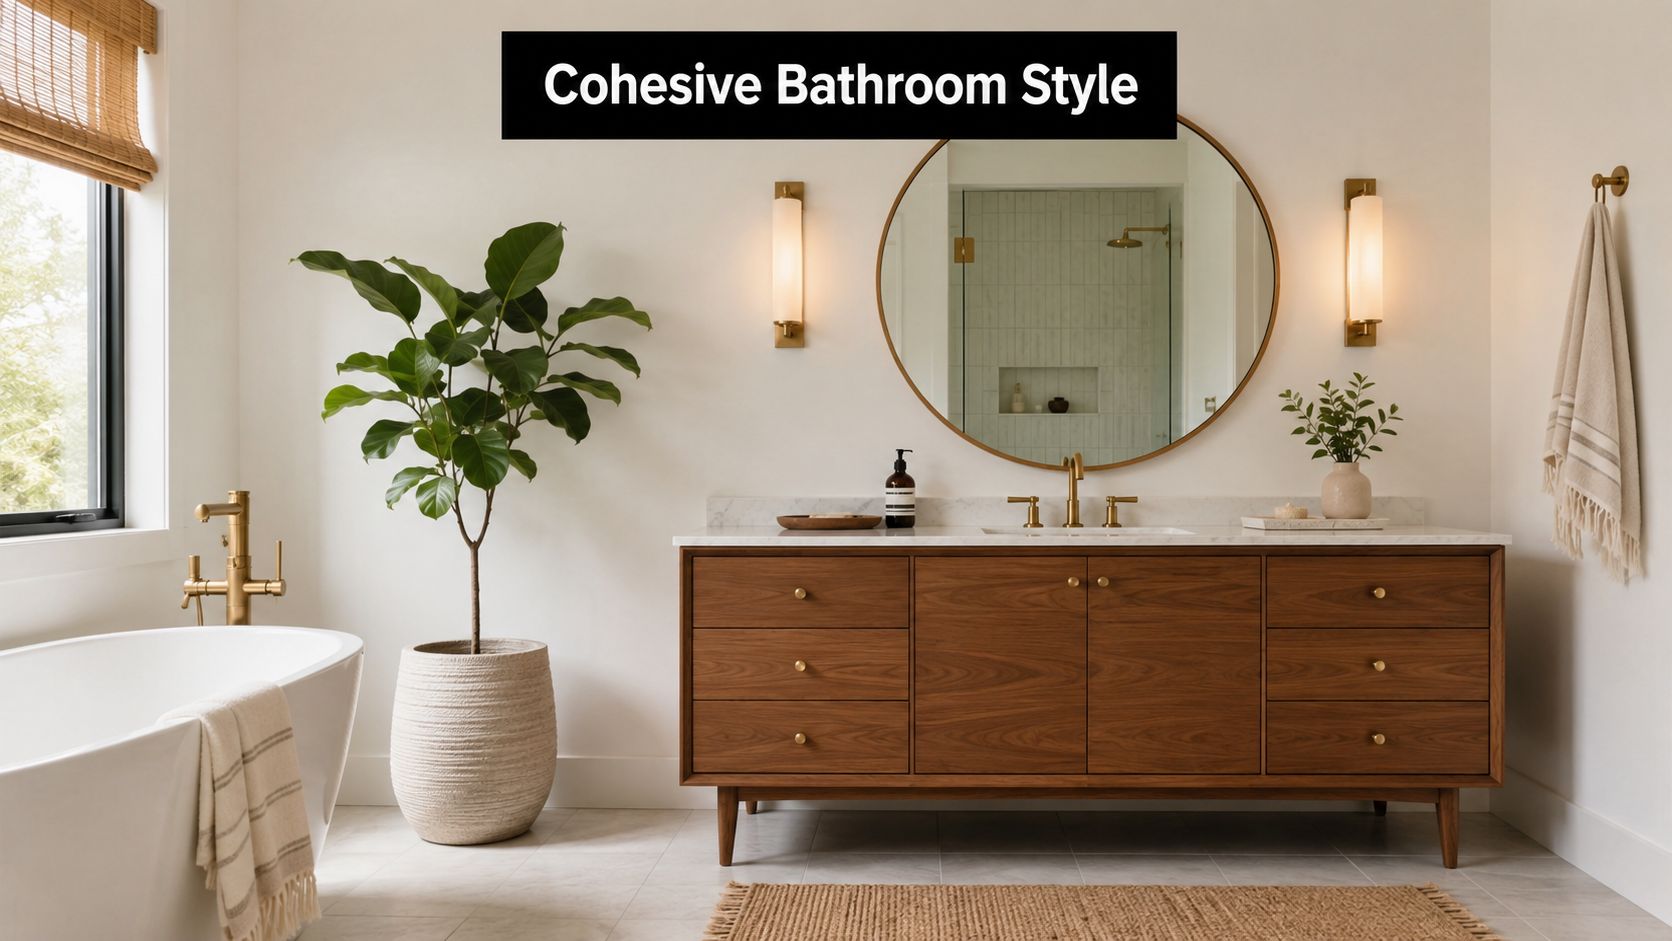
A modern bathroom vanity with a wood finish, circular mirror, and elegant gold fixtures in a bright room.

Colour, shape, and light

A practical guide to this style in Australia notes that soft pastel tones such as blush pink and minty green, bold graphic or hexagonal-shaped tiles, natural light, greenery, and angular metal fixtures are all part of the mid-century modern bathroom language. The same article also notes retail activity with discounts of up to 70% on mid-century modern bathroom collections as of July 1, 2026, which reflects strong consumer demand in Australia according to this overview of mid-century bathroom vanity ideas in Australia.

That doesn't mean you should use every feature at once. Good styling is selective.

A practical coordination checklist

  • Mirror choice
    Round mirrors and softly radiused rectangles work well because they break up the straight lines of the vanity.

  • Tapware direction
    Angular fixtures suit the style better than heavily curved or ornate sets.

  • Tile strategy
    If you use geometric tiles, keep the vanity face simple. Let one element be expressive and the other calm.

  • Lighting
    Choose fittings that feel architectural, not decorative. You want shape and glow, not embellishment.

  • Greenery and daylight
    If there's natural light, use it. A plant, a softer tile colour, and a timber vanity often do more than another layer of artificial styling.

What to combine and what to avoid

A strong mid-century palette often looks like this:

| Element | Better choice | Usually weaker choice |
| | | |
| Vanity finish | Warm walnut or calm timber grain | Grey-washed timber |
| Wall colour | Soft pastel or warm neutral | Bright white with no warmth |
| Tile pattern | Hexagon or bold graphic in moderation | Multiple feature tiles competing |
| Metal finish | One consistent angular metal finish | Mixed metals with no hierarchy |

For a fuller room concept, a mid-century modern bathtub pairing can help anchor the vanity within a complete scheme rather than treating it as a standalone feature.

The best designer bathrooms don't rely on more products. They rely on fewer, better-matched decisions.

Bringing Your Vision to Life with SitePro Bathrooms

Most clients don't arrive with a fully resolved design. They arrive with a folder of saved photos, a rough budget in mind, and a list of frustrations about the current bathroom. The process only becomes clear when someone translates those ideas into a layout, materials schedule, and buildable plan.

That's where a structured renovation pathway matters. A client might begin by saying they want warmer timber, better storage, and a bathroom that feels less generic. From there, the discussion turns practical. Can the plumbing shift to suit a wall-hung unit? Is the room better with drawers than doors? Does the floor need to be retiled throughout to make the vanity sit correctly in the space?

Seeing the bathroom before work starts

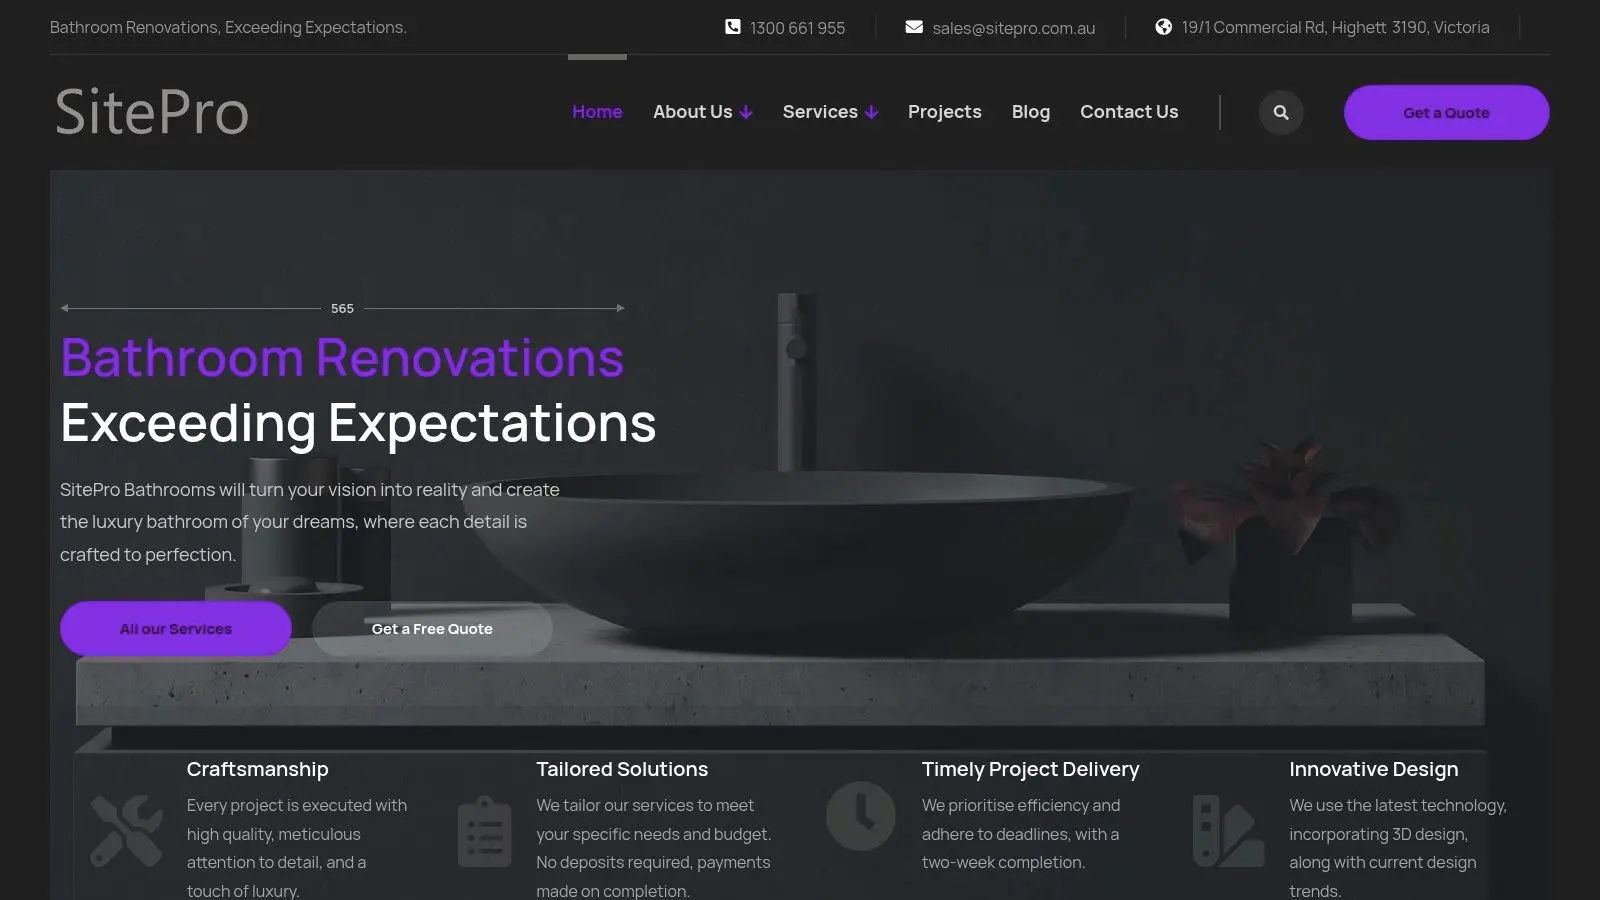
The biggest confidence shift usually happens during design visualisation. When the vanity, tiles, mirror, and lighting are shown together in a 3D layout, uncertainty drops quickly. Clients can assess scale, proportion, circulation space, and colour relationships before construction begins.
Screenshot from https://siteprobathrooms.com.au

That step matters because a mid-century bathroom is easy to get almost right. Almost right usually means the vanity is too deep, the timber tone is off, or the wall-hung setout clashes with tile joints. It's far better to resolve those issues on screen than on site.

From concept to handover

An end-to-end process keeps the bathroom organised from demolition through to installation and finishing. That includes:

  • Consultation and planning around layout, use, and style direction
  • Detailed design so materials and fixtures are selected with intention
  • Build coordination across plumbing, waterproofing, tiling, joinery, and fit-off
  • Final refinement so the vanity sits as part of a complete room, not an isolated product

For Victorian homeowners who want bathroom renovations handled properly, it also helps to work with a team that is registered builders unlimited and can coordinate the renovation from first measure to final clean.

If you're collecting new bathroom ideas and want them turned into a buildable plan, SitePro Bathrooms can guide you from concept through 3D design to a finished bathroom that feels resolved, practical, and built to last. You can explore their process and request a customized quote directly through the website.

Frequently Asked Questions About MCM Vanities

Can a mid-century vanity work in a small bathroom

Yes, if the proportions are controlled. The style often suits small spaces because it avoids visual heaviness. Wall-hung versions are especially effective in compact ensuites because they expose more floor area and make cleaning easier. The key is not overloading the vanity with unnecessary depth or oversized basins.

Is timber a risky choice in a bathroom

Timber is fine when the vanity is properly made, properly sealed, and paired with decent ventilation. The risk usually comes from poor finishing, water sitting around the basin, or steam-heavy rooms with inadequate extraction. In family bathrooms, I'd specify a finish that's easy to wipe down and I'd keep detailing simple around sink cut-outs and joins.

Should I buy off the shelf or go custom

That depends on how exact your vision is. Off-the-shelf can work if the size, timber tone, storage layout, and mounting type all align. The issue is that many homeowners looking for a mid-century vanity want something simple and clean, and that combination can be surprisingly hard to find. Custom is the better route when the room has awkward dimensions, the plumbing needs to be concealed carefully, or the style direction has to be precise.

What plumbing issues matter with a wall-hung vanity

Wall-hung units need more planning than people expect. The wall has to suit the mounting method, the waste position has to work with drawer design, and the setout needs to be coordinated before waterproofing and tiling are finalised. If the plumbing is left too low or too proud of the wall, it can compromise storage or force awkward modifications inside the cabinet.

Ask about plumbing setout before the vanity is ordered, not after it arrives. That one decision affects mounting height, drawer function, and the finished look.

What makes a mid-century bathroom feel authentic instead of themed

Restraint. Choose one strong timber vanity, one clear tile idea, one mirror shape, and one metal finish. Let the style come through proportion and material rather than retro accessories. That approach gives you a bathroom that feels current, not staged.
  • siteprobathrooms

Cost to Replace Bathroom Cabinets: A 2026 VIC Guide

The average cost to replace bathroom cabinets in Australia typically ranges from $1,500 to $2,500, depending on the cabinet type, materials, and how complex the installation is. If you choose a simple pre-made unit, you can spend far less on the cabinet itself, but custom designs, plumbing changes, and wall-mounted styles can push the total much higher.

Most homeowners start looking into this when the bathroom still works, but it no longer feels good to use. The vanity doors are swollen, the drawers stick, the finish looks tired, and the whole room dates the house more than you'd like. That's usually the point where bathroom renovations move from “one day” to “we need to sort this out”.

In Victoria, that decision often comes with a second question. How do you improve the look of the room without overspending on features that don't add practical value? That's where important details matter. The cost to replace bathroom cabinets isn't just about the cabinet box. Labour, removal, plumbing access, mounting method, and finish choices all change the final number.

Some homeowners want a tidy refresh. Others want modern bathrooms with cleaner lines, better storage, and finishes that feel more considered. Some are aiming for designer bathrooms, while others need durable cabinetry that can handle family use. All of those goals are valid. The key is matching the cabinet choice to the room, the budget, and the way the bathroom is used every day.

Planning Your Bathroom Cabinet Upgrade

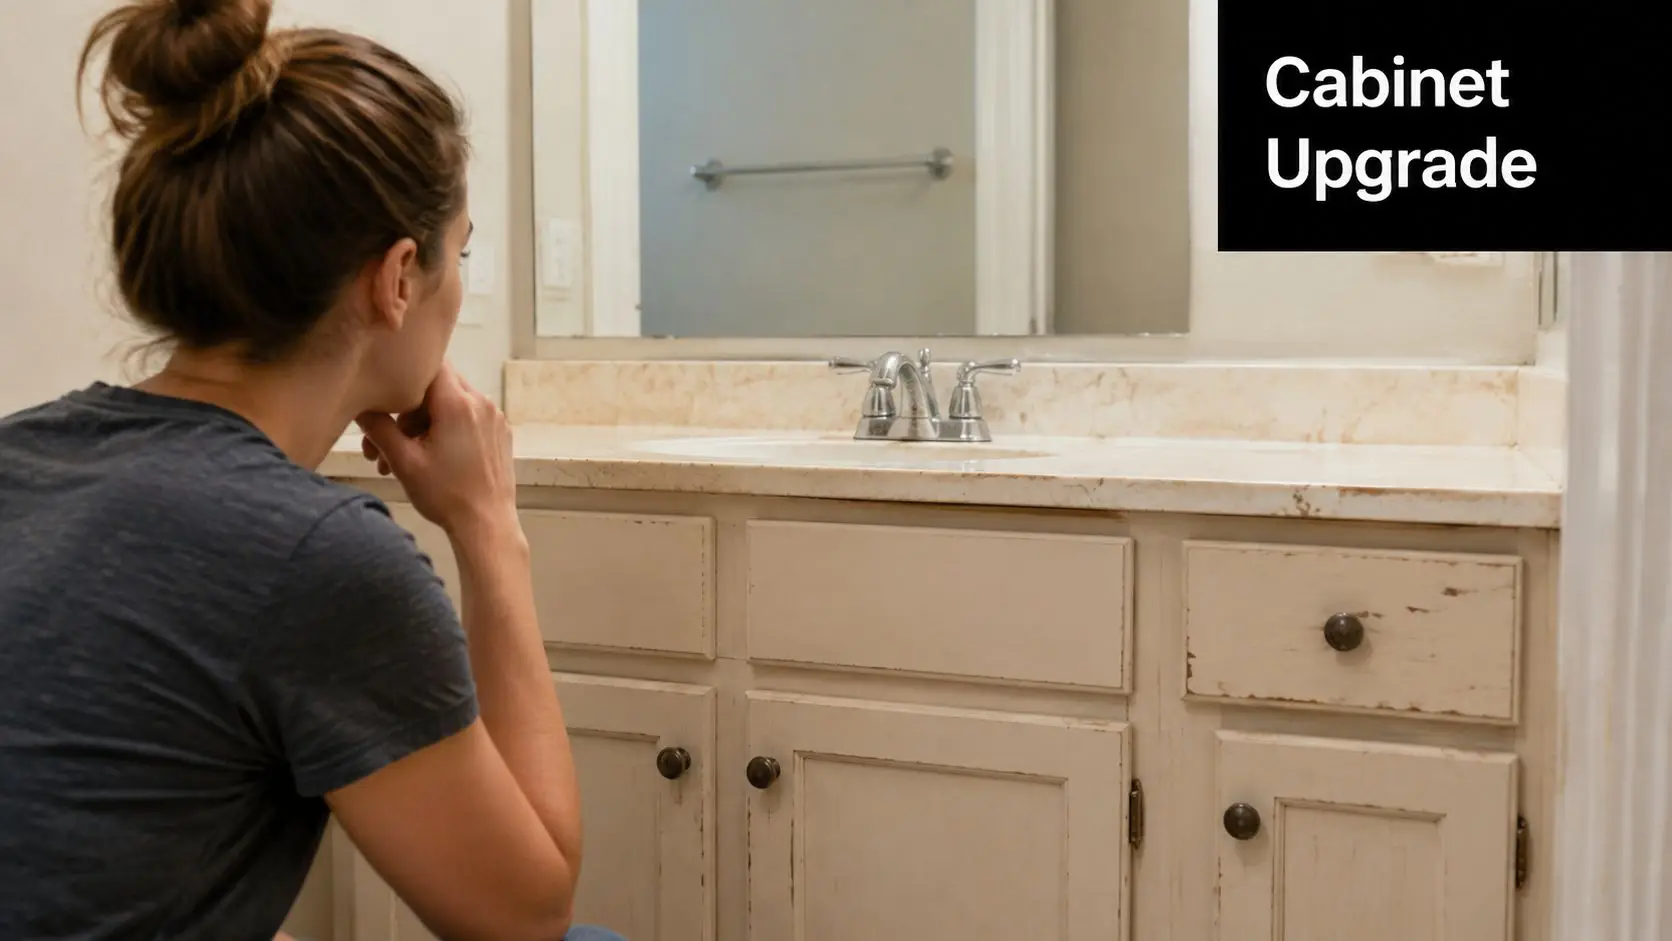
You're probably standing in front of an old vanity right now wondering whether it's worth replacing just the cabinets or whether the room needs more work. That's a common starting point, especially in older homes around Melbourne where the cabinetry has aged faster than the rest of the bathroom.

A young woman contemplating bathroom renovations while looking at an old cream-colored vanity cabinet and mirror.

A useful first step is to separate a cabinet upgrade from a full renovation. If the waterproofing, tiling, and layout are still in decent shape, replacing the cabinet can be a smart way to freshen the room without taking on a full strip-out. If the vanity is failing because of leaks, poor layout, or water damage around the walls and floor, the cabinet is often only one part of the job.

Start with what you're keeping

Before choosing colours or looking at new bathroom ideas, decide what stays:

  • Keep the plumbing where it is: This usually helps control labour and reduces disruption.
  • Keep the existing layout: If the room functions well, layout changes often cost more than they're worth for a cabinet-only project.
  • Keep what still performs: Mirrors, tapware, or tiles don't need replacing just because the cabinet does.

Practical rule: Spend money on the parts that improve function first. Better storage, durable finishes, and correct installation matter more than decorative upgrades you won't notice in six months.

Then define the brief properly

Most cabinet replacement projects become more expensive when the brief stays vague for too long. If you know you want wall-hung cabinetry, extra drawer storage, or a double-bowl setup, say it early. Those choices affect joinery selection, wall preparation, and installation sequencing.

If you're still shaping the project, this guide on how to plan a bathroom renovation is a practical place to organise the scope before you ask for quotes.

For homeowners in Highett and across Victoria, the best outcomes usually come from making a few grounded decisions early. Decide whether this is a simple cabinet swap, a style-driven update, or the first stage of broader bathroom renovations. Once that's clear, the pricing starts to make sense.

The Real Cost Breakdown for Cabinet Replacement

The total price only makes sense when you split it into parts. A lot of confusion comes from people comparing one quote that includes removal, installation, and plumbing with another that only covers the cabinet itself.

According to 2026 bathroom vanity replacement pricing in Australia, the average cost to replace a bathroom vanity ranges from $1,500 to $2,500. The same source notes that pre-made cabinets start around $200 to $500, mid-range options are $500 to $1,500, custom cabinets start at $1,500, and installation labour typically adds another $400 to $600.

Where the money usually goes

In a standard cabinet replacement, your quote generally covers four things:

  1. The cabinet itself
    This is the obvious cost, but it's not the whole job. Pre-made units are usually the cheapest entry point. Mid-range cabinets often give better finish quality and storage. Custom cabinetry costs more because it's built for your room, not adapted to it.

  2. Installation labour
    Labour covers setting out, levelling, securing the cabinet, reconnecting services where needed, and adjusting for walls and floors that aren't perfectly square.

  3. Removal and disposal
    Taking out an old vanity sounds simple until you run into silicone, swollen panels, tight plumbing clearances, or damage behind the unit.

  4. Fittings and finishing details
    Handles, soft-close hardware, filler panels, seals, and trim details can change both the look and the final spend.

Bathroom Cabinet Material Comparison 2026

Material Cost Tier Pros Cons
Melamine Budget Affordable, easy to source, suitable for straightforward updates Less forgiving in wet conditions if edges are damaged
PVC Budget Good option for moisture-prone bathrooms, practical for basic upgrades Style range can feel limited compared with more premium finishes
Laminate Mid-range Wide finish choice, easy to clean, suits many modern bathrooms Can look ordinary if paired with cheap hardware or poor detailing
Timber veneer Mid-range to high-end Warmer, more refined look, works well in modern bathrooms and softer palettes Needs careful finish selection in humid spaces
Solid timber High-end Strong visual impact, suited to designer bathrooms, can be long-lasting when detailed well Higher cost and more maintenance sensitivity in bathrooms

The exact material prices vary by supplier and finish, so it's smarter to use these as cost tiers rather than expecting one fixed dollar figure for each board type.

What works and what doesn't

A budget cabinet works well when the room is straightforward, the plumbing stays put, and you need a clean replacement that improves function. It doesn't work as well when homeowners expect a budget carcass to deliver a custom-fitted look against uneven walls.

A custom cabinet is worth it when the bathroom has awkward dimensions, when storage matters, or when the vanity is a major visual feature. It's less worthwhile when the rest of the bathroom is due for replacement soon and you're only trying to get a few more years from the room.

For anyone comparing cabinetry spending across rooms, this breakdown of the cost of kitchen cabinets helps show why bathroom joinery is priced differently. Bathrooms demand tighter tolerances, moisture resistance, and more careful installation around plumbing.

A good quote should tell you what's included, what's provisional, and what happens if the wall or plumbing needs adjustment once the old unit comes out.

That's where many homeowners either save money wisely or get caught by avoidable extras.

Key Factors That Influence Your Final Quote

Two vanity replacements can look similar on paper and still land at very different prices. The reason is usually hidden in the conditions of the room, not the photo of the cabinet.

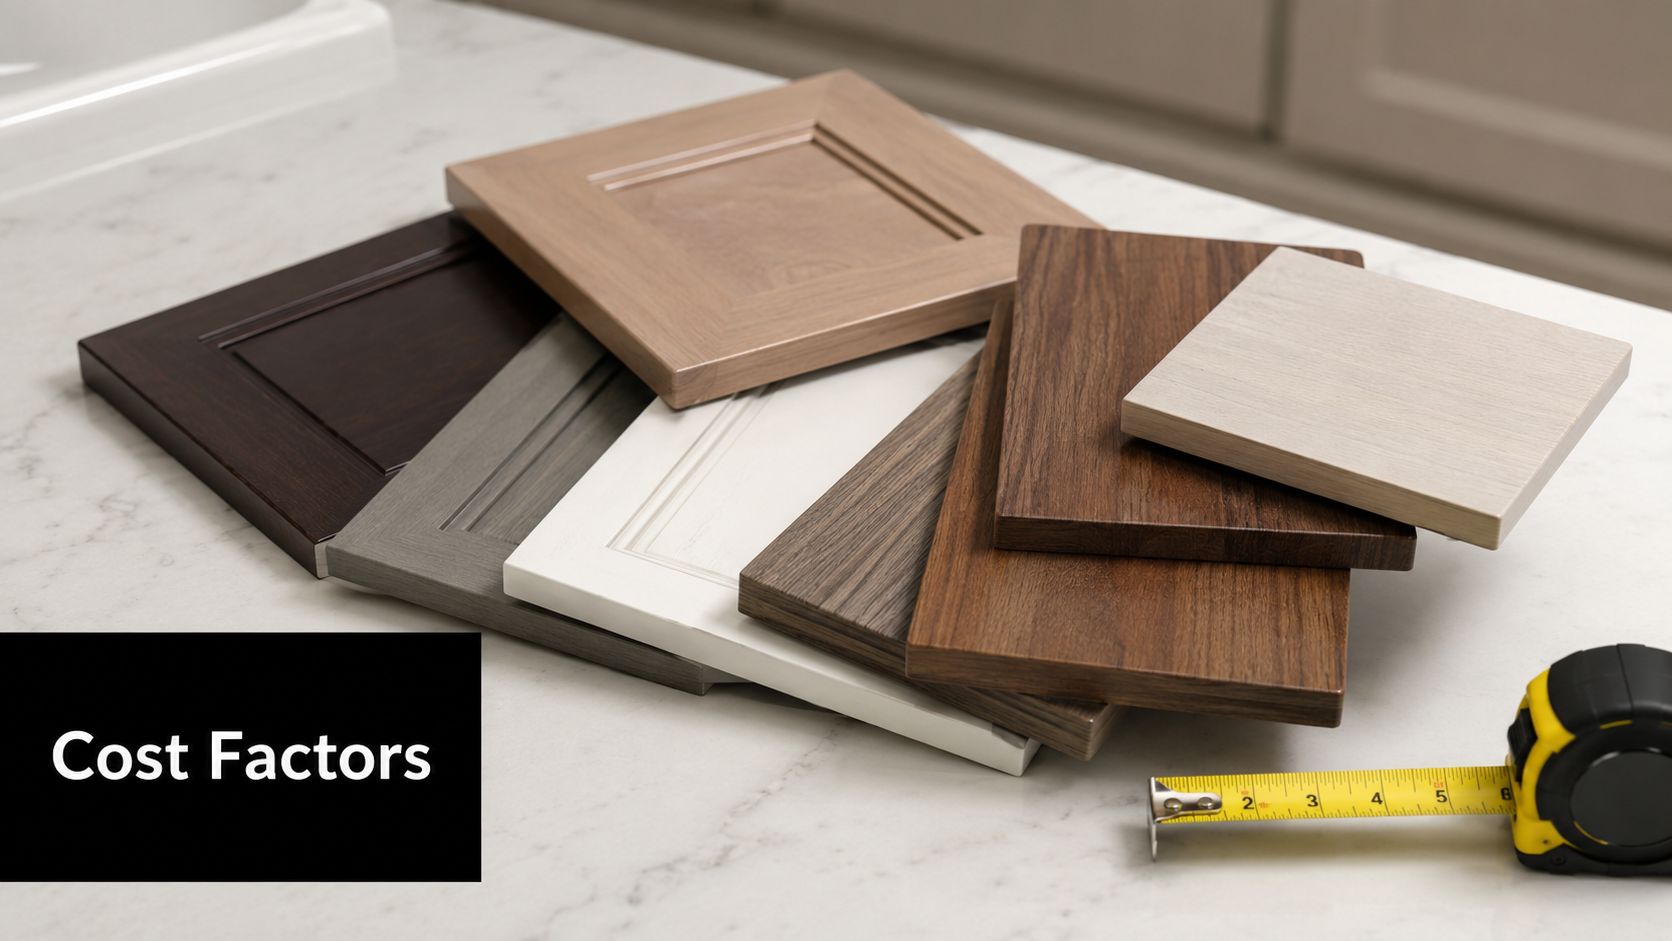
A collection of various wood and laminate cabinet door samples displayed on a white marble countertop surface.

Size changes more than storage

A larger vanity doesn't just use more material. It can require more handling, more fixing points, a larger top, more drawer hardware, and sometimes more plumbing coordination. Double-bowl units especially need more planning because internal drawer space and plumbing routes start competing with each other.

Bathrooms with tight doorways, uneven walls, or older plumbing can also slow the installation down. That's why a neat-looking room on inspection can still produce a more expensive quote once the install method is properly assessed.

Off-the-shelf versus custom fit

Off-the-shelf cabinets are the best value when your bathroom dimensions suit standard sizes and you're comfortable with modest compromises. A filler panel on one side or a small gap adjustment is usually fine.

Custom joinery earns its keep when the room is out of square, when you want every millimetre used well, or when the vanity is meant to anchor the room visually. That's often the case in modern bathrooms where the cabinetry line needs to feel clean and deliberate.

The hidden cost in floating vanities

This is the detail many generic guides skip. Wall-mounted vanities look simple. Installing them properly isn't simple.

According to Australian guidance on bathroom cabinet pricing and hidden wall-mounted vanity costs, wall-mounted vanities are found in 35% of new urban bathroom renovations and can cost 1.5x more to install than freestanding units, with $500 to $700 in extra labour often added for structural reinforcement and precise levelling.

That extra labour usually comes from issues homeowners don't see in the showroom:

  • Wall reinforcement: Floating units need solid support behind the wall, not just neat tile lines.
  • Precise set-out: If a wall-hung vanity is even slightly out, it looks wrong immediately.
  • Service coordination: Waste and water positions matter more because the underside stays visible.
  • Finish sensitivity: Modern styles expose errors. Freestanding cabinets can hide a lot more.

Wall-mounted vanities suit compact bathrooms well, but they only represent value when the wall can support them properly and the labour allowance is realistic from the start.

Style can be cheap. Proportion can't

Homeowners often focus on the door profile or colour first. In practice, proportion matters more. A cabinet that's too deep crowds the room. One that's too shallow looks underdone and often sacrifices usable storage.

That's why the smartest spending usually goes into layout fit, durable board selection, and installation quality. Handles, mirror pairings, and surface styling are easier places to save without making the room feel compromised. If you're aiming for fresh new bathroom ideas, spend on the bones of the cabinet first and the decorative layer second.

Sample Budgets for Common Bathroom Renovations

Real budgets are easier to understand when you attach them to a bathroom type. In Victoria, labour for a basic vanity installation generally sits at $50 to $100 per hour, a simple pre-made cabinet might cost $500, a larger 1500mm double bowl unit can be nearly $1,000, and a full custom replacement for two cabinets can approach $5,000 including professional installation, based on Victorian pricing examples for bathroom cabinet replacement.

Budget refresh for a small ensuite

A common ensuite update uses a simple pre-made cabinet, keeps the plumbing in place, and focuses on function over statement design. This suits landlords, investors, and homeowners who want a visible improvement without opening up the whole room.

What you're buying here is practicality. Clean lines, better storage than the old unit, and a bathroom that feels maintained again. This level works best when the room already has a decent layout and the existing finishes still look acceptable.

Mid-range makeover for a family bathroom

Most owner-occupiers tend to choose this option. The vanity quality steps up, the finish looks better, and the storage usually improves enough to make the room easier to live with every day.

A larger unit or upgraded hardware can be worth the spend in a family bathroom because this is the cabinet that gets used hard. Drawers that open properly, surfaces that handle moisture better, and better internal organisation usually matter more than chasing a dramatic designer look.

If the bathroom is used by multiple people every morning, storage and ease of cleaning usually deliver more value than decorative extras.

Designer upgrade for a main bathroom

At the premium end, the cabinet becomes part of the architectural feel of the room. Key elements include bespoke proportions, cleaner detailing, and stronger visual integration. A larger double-bowl arrangement or a two-cabinet replacement can approach the upper end of the figures above.

This level suits homeowners who want the vanity to feel built into the room rather than placed into it. It's also where mistakes cost more. If the joins, proportions, or mounting aren't right, the whole room feels off.

The key difference between these scenarios isn't only the cabinet price. It's how much precision the room demands, how hard the cabinetry will be used, and whether the project is about a tidy upgrade or a more complete bathroom renovation outcome.

DIY vs Hiring a Professional Renovator

DIY cabinet replacement looks straightforward when you're only looking at the old vanity from the front. Once removal starts, the job often becomes about hidden pipe positions, damaged wall linings, floor levels, and how well the new unit fits the room.

According to Australian vanity installation cost guidance, professional vanity installation costs between $50 and $100 per hour, a typical replacement takes 3 to 8 hours depending on complexity, and the average total installation cost is around $1,500 per unit when including removal and plumbing adjustments.

When DIY can make sense

DIY can be reasonable if all of the following are true:

  • You're replacing like for like: Same general size, same plumbing position, no layout changes.
  • The room is accessible: Plenty of working space and no hidden damage.
  • You've got the right skills: Accurate measuring, levelling, fixing, sealing, and safe handling of the unit.

If any of those points are shaky, DIY savings can disappear fast.

Where DIY usually goes wrong

The biggest issue isn't always the cabinet itself. It's everything around it.

  • Poor levelling: Doors and drawers never sit right if the cabinet starts out uneven.
  • Bad sealing: Water gets where it shouldn't, especially around tops and wall junctions.
  • Incorrect fixing: A vanity needs to stay rigid under daily use.
  • Plumbing surprises: Even a small mismatch can stop the install cold.

A wall-hung unit raises the stakes further because the fixing method matters as much as the cabinet.

Why many homeowners bring in a professional

Professional installation buys speed, accountability, and a cleaner result. It also helps when the scope crosses into work that needs licensed trades or broader building coordination. If plumbing is being moved, if walls need alteration, or if structural changes are involved, this is not the place to improvise. That's where licensed trades and, where relevant, registered builders unlimited matter.

You can save labour money with DIY. You can't save money by installing a bathroom cabinet twice.

For straightforward cabinet swaps, some capable homeowners do manage the job well. But if the room is older, the vanity is wall-mounted, or you want a polished finish that matches the rest of your home, hiring a professional renovator is usually the safer and better-value choice.

Your Project Timeline From Idea to Installation

Most cabinet replacements feel slower than homeowners expect at the start, then faster once the unit is on site and ready to install. The early time goes into decisions. The physical work usually moves much quicker.

Stage one is clarity

The first step is deciding whether you're replacing a single vanity, two bathroom cabinets, or folding the work into broader bathroom renovations. This is also when homeowners narrow down style direction, storage needs, and whether they want a freestanding or wall-mounted unit.

Rushing this part often creates delays later. If you haven't settled the cabinet width, basin arrangement, mounting type, and finish, the quote can only ever be partial.

Stage two is selection and ordering

After the scope is clear, the main time factor becomes product selection and supply. Pre-made cabinetry usually moves faster because sizes and finishes are already standardised. Custom joinery takes longer because it needs final site measures, production, and coordination with any related trades.

This is also the point where good planning protects the budget. A cabinet that looked right online can feel oversized in a compact bathroom once proper dimensions are checked.

Stage three is installation

For a simple replacement, installation itself is often the shortest phase. Removal of the old cabinet, preparation, fitting, and final connections can happen quickly when there are no surprises behind the unit.

If the project includes plumbing changes, wall repair, or floating vanity support work, the process naturally stretches out. That extra time isn't waste. It's what makes the final result line up, function properly, and last.

A smooth timeline usually comes from one thing. Decisions made early, with enough detail to avoid changing course once the job starts.

Visualise Your New Bathroom with SitePro

Most cabinet mistakes happen before the first tool comes out. The vanity is too bulky for the room, the drawers clash with the door swing, the finish fights with the tile colour, or the wall-mounted design looked better in theory than it does in the actual space.

That's why visual planning matters so much, especially if you want more than a basic swap. Homeowners chasing modern bathrooms or more refined designer bathrooms usually benefit from seeing the room properly before construction begins.

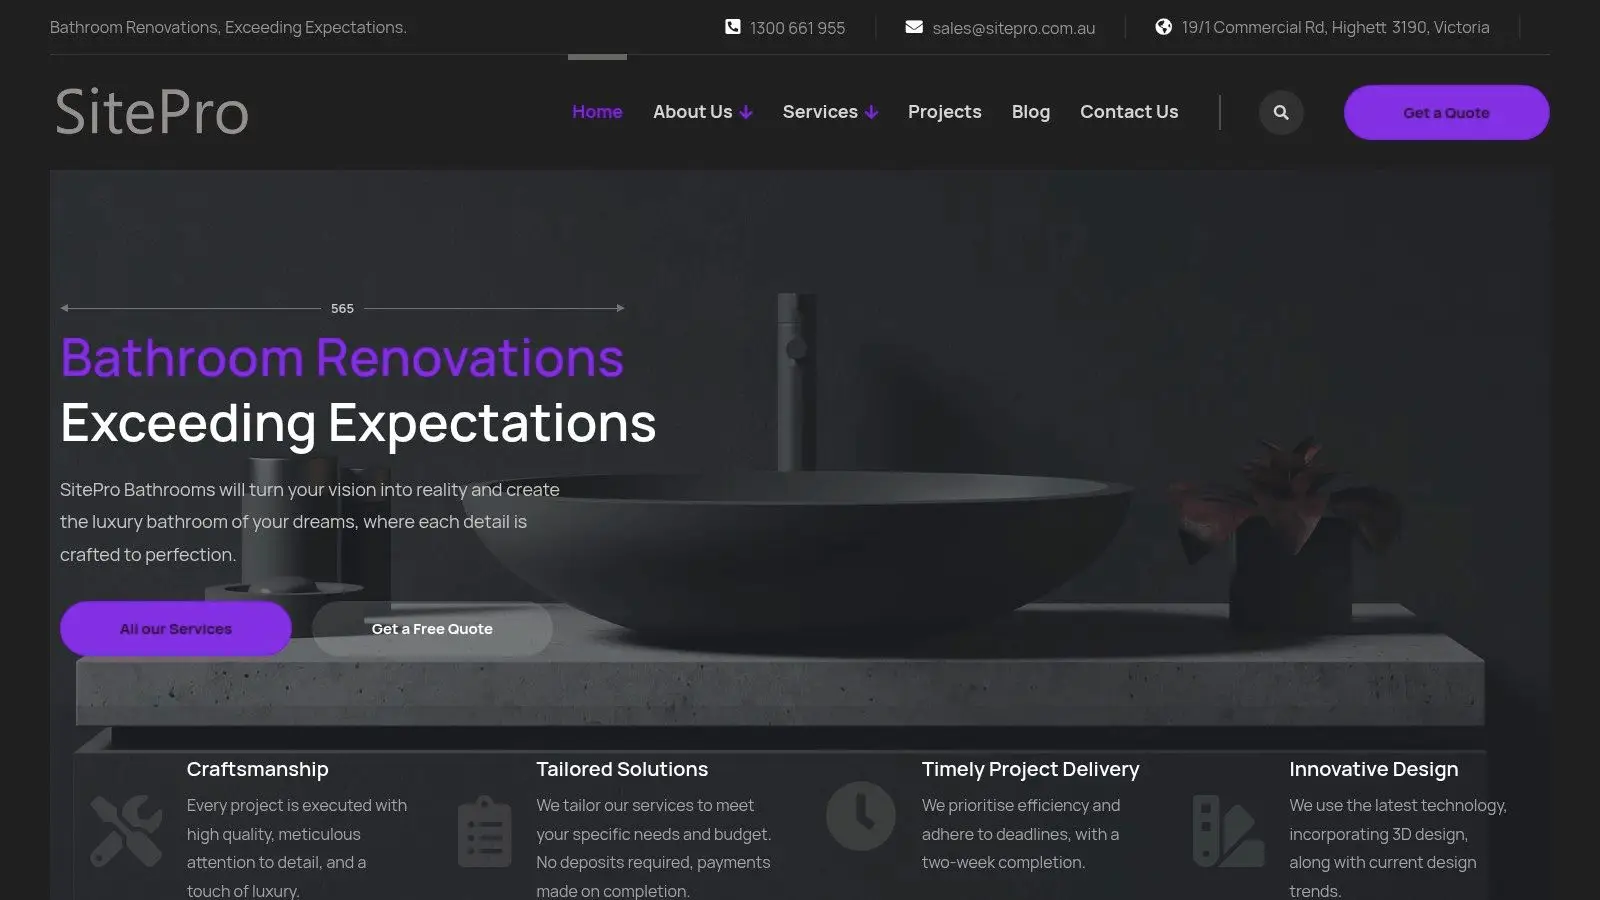
Screenshot from https://siteprobathrooms.com.au

Why 3D planning removes costly guesswork

A good 3D concept doesn't just show style. It helps test proportion, storage layout, circulation space, and how the vanity sits with mirrors, tapware, and lighting. That matters when you're trying to balance value and finish quality.

It also helps homeowners avoid two common problems:

  • Choosing a cabinet that suits a showroom, not the actual bathroom
  • Paying for custom work without being certain the layout solves the right problem

For cabinet replacement projects, visualisation is especially useful when the room is small, when storage is tight, or when the vanity needs to carry a lot of the design weight.

A stronger way to plan the spend

The best renovation budgets aren't always the biggest ones. They're the clearest ones. If you can see the design properly before the build, it becomes easier to decide where to spend and where to hold back.

That might mean choosing a more practical cabinet finish and putting the money into better drawer storage. It might mean realising a freestanding unit suits the room better than a floating one. Or it might confirm that the custom option is worth it because the room needs that level of fit.

For homeowners who want to test layouts and finishes before locking anything in, SitePro Bathrooms offers a free 3D bathroom planner that makes those decisions far easier to judge in context.

If you're weighing up the cost to replace bathroom cabinets and want a result that feels considered, not guessed, a clear plan is the smartest place to start. SitePro Bathrooms, based in Highett, helps homeowners turn ideas into practical, buildable bathroom renovations with personalized design support, reliable execution, and a no-obligation quote when you're ready to move forward.

  • siteprobathrooms

Bathroom Tiling Melbourne: 2026 Guide

Professional bathroom tiling in Melbourne usually lands between $2,000 and $8,000+, depending on bathroom size, tile choice, preparation work, and how complex the renovation is. For most homeowners, that means a small bathroom sits around $2,000 to $3,500, a medium one around $3,500 to $5,000, and a large bathroom can run $5,000 to $8,000+.

If you're staring at a tired bathroom in Highett or anywhere across greater Melbourne, you're probably stuck between excitement and dread. You've got new bathroom ideas saved on your phone, you've seen plenty of modern bathrooms online, and maybe a few designer bathrooms that look brilliant, but you still don't know where to start, what matters most, or which corners you absolutely cannot cut.

My advice is simple. Treat bathroom tiling as a building job first and a styling job second. The look matters, but the substrate, the falls, the waterproofing and the adhesive choice are what decide whether your bathroom still performs properly years from now. That's where a lot of bathroom renovations go wrong in Melbourne.

Planning Your Melbourne Bathroom Tiling Project

Most first-time renovators start in the same place. They walk into the bathroom every morning, notice the stained grout, the dated tile colour, the awkward layout, and think, “This whole room needs to change.” Then the questions start piling up. Keep the layout or move it? Retile only, or do a full rebuild? Hire a tiler, or bring in registered builders unlimited for the whole job?

The right answer depends on what's wrong with the room.

If the bathroom functions well and the issue is mainly cosmetic, a focused tiling upgrade can make sense. If the shower leaks, the floor holds water, the room feels cramped, or the walls are out of true, you're no longer choosing tiles. You're planning one of those bathroom renovations that needs proper coordination across demolition, waterproofing, tiling and finishing.

Start with three decisions

Before you choose a tile, lock in these points:

  • Scope first: Decide whether you're doing a re-tile, a floor-and-wall refresh, or a full bathroom rebuild.
  • Style second: Sort your visual direction early. Clean-lined modern bathrooms need different tile sizes and trims from more layered designer bathrooms.
  • Team third: Match the contractor to the job. A simple re-tile and a full structural renovation are not the same service.

Practical rule: If you're changing layout, plumbing positions, or multiple trades are involved, stop thinking like a shopper and start thinking like a project manager.

A common mistake is collecting finishes before confirming what the room can physically handle. I've seen homeowners fall in love with oversized porcelain, only to find the floor needs serious correction, the shower base doesn't have compliant falls, and the walls need more prep than expected.

Know what you want the room to feel like

You don't need a perfect Pinterest board. You do need a clear brief.

Ask yourself:

  1. Do you want the room to feel larger?
  2. Do you want easier cleaning?
  3. Is resale value the main goal?
  4. Are you aiming for warmth, minimalism, or a sharper architectural look?

If those are answered truthfully, the design choices get easier. Large-format tiles, fewer grout lines, neutral colours and simple joinery usually suit busy family homes. More expressive layouts, stone-look surfaces and feature walls can suit higher-end finishes, but only if the execution is tight.

Bathroom tiling Melbourne projects succeed when the planning is boring in the best possible way. Good measurements, honest budgeting, and a realistic scope beat impulse decisions every time.

Understanding Bathroom Tiling Costs in Melbourne for 2026

A bathroom tiling quote in Melbourne can look reasonable at first glance, then blow out fast once the actual work is priced properly. The difference usually sits behind the tile. Demolition, substrate repairs, waterproofing, waste removal, trims, silicone, and layout complexity all affect the final figure.

For 2026, use square metre rates as your starting point, then check the scope line by line. Homeowners who budget by tile price alone usually miss the expensive parts of the job, especially in older Melbourne homes where walls are rarely straight and floors often need correction before tiling can start.

Estimated 2026 Melbourne Bathroom Tiling Costs

Bathroom Size Typical Area (sqm) Estimated Cost Range
Small 5 to 8 $2,000 to $3,500
Medium Not specified $3,500 to $5,000
Large Not specified $5,000 to $8,000+

Treat that table as a baseline, not a promise.

A basic re-tile in a compact bathroom sits at the lower end if the room is square, access is easy, and the substrate is sound. Costs climb quickly once you add floor levelling, wall straightening, niches, feature strips, mitred corners, large-format porcelain, or detailed set-outs around fittings. If the quote also includes compliant waterproofing and proper prep, expect a higher number and take that seriously. Cheap waterproofing is one of the worst places to save money in Victoria.

What you are actually paying for

Labour is only one part of the bill. Adhesives, grout, trims, primers, waterproofing products, removal and disposal all add up, and they should be specified clearly in writing.

The tile itself can also distort your budget if you choose purely on looks. Non-porous porcelain is popular for good reason, but it often needs better substrate prep and the correct adhesive system to bond properly, particularly in wet areas that see regular temperature changes. That detail matters in Melbourne. A stylish tile installed with the wrong adhesive can fail long before it should.

If you want a more detailed pricing breakdown, this guide to bathroom tiling cost in Melbourne gives a useful project-level view.

The costs that get missed first

These are the items homeowners regularly overlook:

  • Tile removal and disposal: Old bathrooms create heavy waste, and dumping fees are real.
  • Substrate repair: Loose sheeting, water damage, cracked screeds, and uneven walls must be fixed before tiling.
  • Waterproofing: A compliant wet-area system is a separate trade step, not a free extra.
  • Edge trims and finishing: External corners, niche trims, movement joints, and silicone detailing affect both price and finish quality.
  • Difficult tile formats: Mosaics, stacked patterns, herringbone layouts, and large-format tiles take longer to set accurately.

One expensive surprise is rectification work after demolition. Once old tiles come off, the room tells the truth.

Tiling quote versus renovation quote

Homeowners often compare two numbers that are pricing completely different jobs. A tiling quote may cover demolition, surface prep, waterproofing, tile installation, grouting and sealing. A renovation quote can also include plumbing changes, electrical work, carpentry, shower screen installation, painting, and project management.

Ask one direct question before comparing prices. Is this quote for tiling only, or for a bathroom renovation with tiling included?

That distinction matters because bathroom work in Melbourne often triggers compliance requirements and extra trade coordination. If the room needs new sheeting, a revised shower base, or waterproofing work signed off by the right practitioner, the quote should reflect that. If it does not, the number is incomplete.

Budget for what sits under the finish, not just the finish you can see.

A good quote is detailed, boring, and easy to audit. That is what you want. If a cheap quote skips prep, waterproofing, adhesive specification, or waste removal, it is not efficient. It is missing costs you will likely pay later.

The End-to-End Tiling Process Explained

A Melbourne bathroom tiling job usually fails long before the grout goes in. The problem starts in the set-out, the substrate, or the adhesive choice. By the time you can see a cracked joint or a drummy tile, the mistake is already buried underneath.

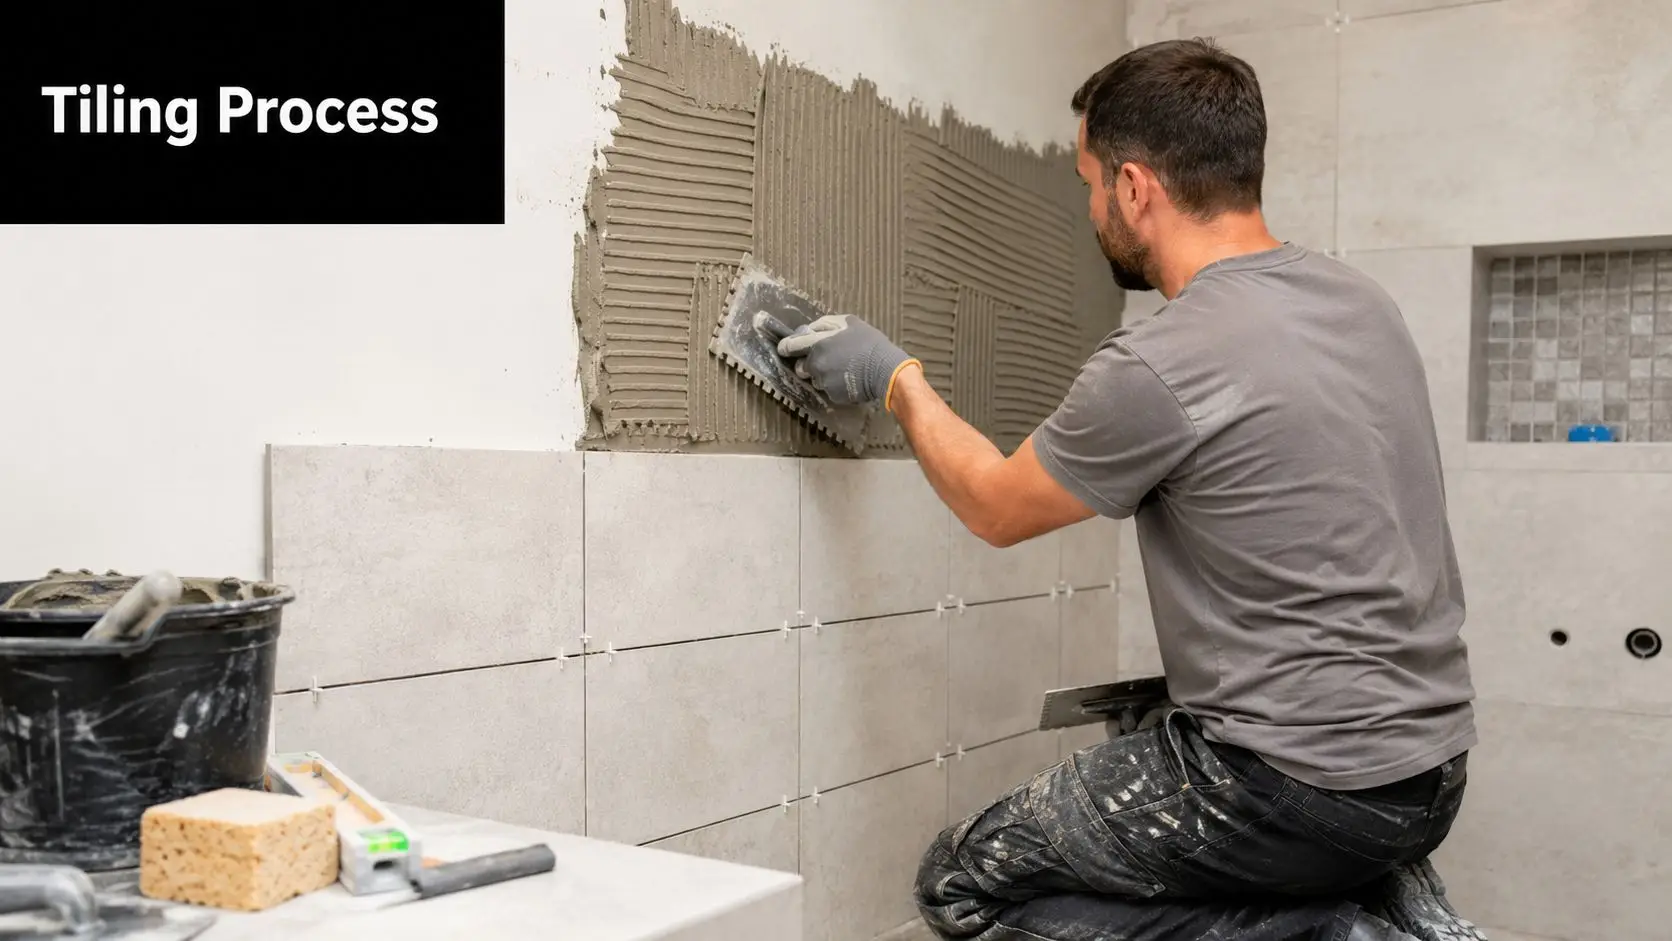
A professional tiler applying mortar to a bathroom wall using a notched trowel before setting tiles.

What happens before the first tile goes down

Start with the room, not the tile sample. A good tiler measures the space, checks the substrate, confirms waste positions, and looks for movement, swelling, moisture damage, poor falls, and walls that are out of plumb. In older Melbourne homes, those issues are common. If they are missed at the start, the finished bathroom will show every one of them.

Preparation decides the result. Demolition exposes the truth. Cement sheet may need replacing, floor levels may need correcting, and shower falls may need to be re-formed before any membrane or adhesive is applied.

AS 3958.1 sets the baseline for tile installation quality, and it matters in bathrooms. Surfaces need to be true enough for the tile format being used, falls need to direct water to the waste, and movement joints need to be allowed for instead of being grouted solid. Large-format porcelain is especially unforgiving. If the substrate is uneven or the adhesive is wrong, tiles will lip, sound hollow, or let go.

The installation sequence that gives you a bathroom that lasts

A proper process usually runs like this:

  1. Site inspection and set-out
    The tiler works out centre lines, cut positions, niche alignment, edge trims, and where small cuts can be avoided. This stage affects the whole visual finish.

  2. Demolition and strip-out
    Old tiles, failed bedding, and any damaged wall or floor linings are removed. Waste is cleared so defects are visible.

  3. Substrate correction
    Walls are straightened, floors are brought to the right levels, and shower falls are formed properly. Such meticulous corrections are the mark of a skilled tiler.

  4. Waterproofing preparation
    Junctions, penetrations, and sheet transitions are prepared so the membrane can bond properly once the waterproofing contractor starts.

  5. Tile installation
    Control lines are marked, the correct adhesive is selected for the tile type and substrate, and tiles are laid in a consistent sequence. For dense porcelain and other non-porous tiles, the adhesive choice matters. In Victoria's temperature swings, using the wrong adhesive can lead to bond failure.

  6. Grouting, silicone, and detailing
    Grout goes into the tile joints after curing. Silicone is used at changes of plane and movement points. Trims, corners, and drain finishes are checked at the end, not guessed at halfway through.

Why good tilers refuse to rush it

Bathrooms need curing time between stages. Adhesive needs time. Grout needs time. If someone is trying to compress the job into an unrealistic schedule, they are usually skipping preparation or tiling over work that has not stabilised.

Watch for one common mistake. Some installers treat bathroom tiling like a simple wall-and-floor finish. It is not. It is a layered system, and each layer depends on the one below being flat, dry, compatible, and properly cured.

Site advice: If a contractor cannot explain their set-out, substrate prep, or adhesive selection for your tile type, stop there and get another quote.

A quality tiling job looks clean on day one and still performs years later. That means straight lines, correct falls, sound bonding, movement where the room needs it, and no shortcuts hidden under the surface.

Navigating Melbourne's Building Codes and Waterproofing Rules

You do not notice bad waterproofing until the shower starts leaking into the room next door, the skirting swells, or the downstairs ceiling stains. By then, the tiles usually need to come off and the job gets expensive fast.

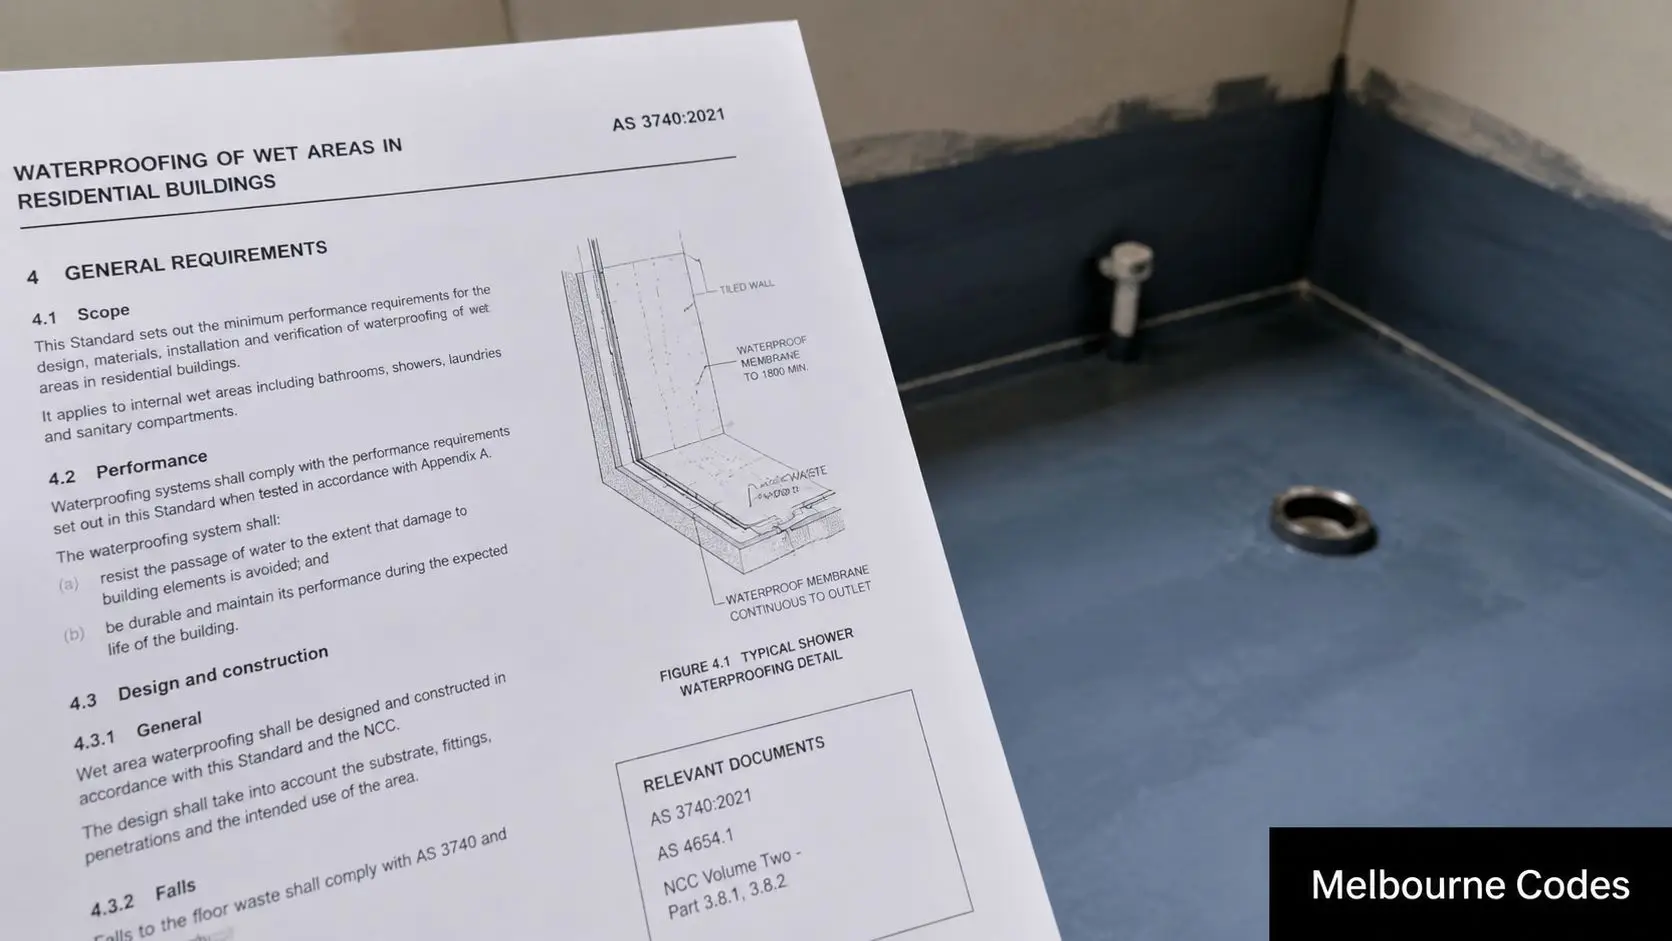
A close-up view of a bathroom renovation showing a waterproofed floor membrane next to a printed standard document.

What Victorian law requires

In Victoria, bathroom waterproofing has to comply with Australian Standard AS 3740. The Victorian Building Authority also expects regulated building work to be carried out by the right class of registered practitioner where registration is required, with compliance documentation issued when the job falls within those requirements.

For homeowners, the practical message is simple. Do not treat waterproofing as a side task for whoever happens to be on site that day. Get clear on who is doing it, what standard they are working to, and what paperwork you will receive at handover.

Falls matter too. Shower areas must drain properly to waste, and that starts well before tiles are laid. If the screed, tray, or substrate is wrong, no tile pattern will hide it and no grout will fix it.

The mistakes Melbourne homeowners miss

Melbourne bathrooms deal with steady moisture, cool winters, and temperature changes that expose weak workmanship. Failures often start in the hidden details. Incompatible primers, poor bond breakers at wall and floor junctions, rushed curing, and the wrong adhesive under dense porcelain are common causes.

This is the part many generic tiling guides skip. Large-format and non-porous tiles need the correct adhesive system for the substrate and wet area conditions. Use the wrong product and you can end up with drummy tiles, poor bond strength, or movement that cracks grout and breaks the waterproofing system underneath.

If you are still deciding on finishes, this guide on how to choose bathroom tiles for performance as well as style will help you avoid picking a tile that creates installation problems later.

What changes the method and the price

Compliant wet-area work costs more because there are more steps, more checks, and less room for shortcuts. A proper bathroom tiling job may include substrate correction, screeding for falls, primer compatibility checks, membrane detailing at penetrations and corners, curing time between stages, and adhesive selection matched to the tile and surface.

That is why a cheap quote is usually cheap for a reason.

If one contractor allows for waterproofing to AS 3740 and another barely mentions it, those are not equal quotes. One has priced the hidden work. The other has priced hope.

What to ask before you sign

Use this checklist and get the answers in writing:

  • Who is responsible for waterproofing? Ask for the practitioner's registration details if the work requires it.
  • What standard will the work follow? The answer should be AS 3740, not “our usual method”.
  • What areas are being waterproofed? Make them define the shower, floor, wall heights, niches, hob or hobless entry, and penetrations.
  • How will falls be formed and checked? Ask this before tiling starts, not after puddles appear.
  • Which adhesive will be used for your tile type? Dense porcelain and large-format tiles need the right adhesive and coverage method.
  • What compliance paperwork will you receive? If a certificate is required, make sure it is included in the scope.

Compliance is proof that the hidden parts of the bathroom were built properly, not just made to look good on completion day.

If you are hiring a registered builder for the full renovation, insist on clear trade coordination. Waterproofing, substrate preparation, and tiling have to work as one system. If responsibility is vague, defects usually follow.

Selecting the Right Tiles for Your Melbourne Bathroom

You pick a tile in the showroom under perfect lighting, then see it installed in a Melbourne bathroom with steam, hard water, winter cold, and a tight floor plan. It can look completely different. Choose tiles for the room you have, not the display wall.

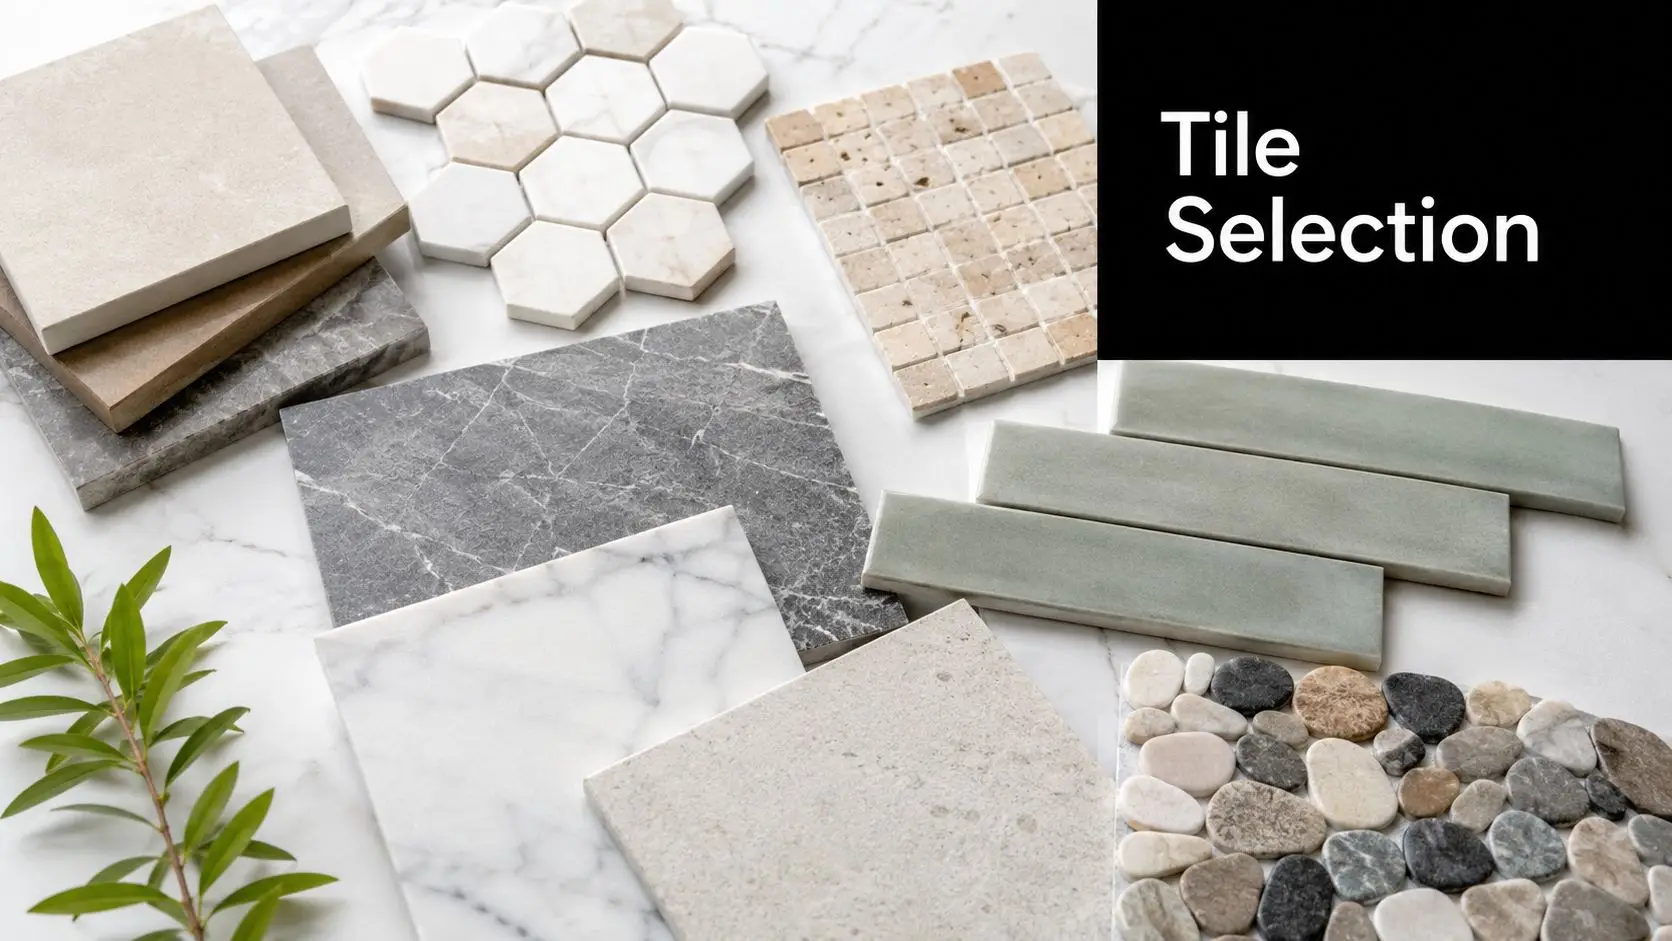
An array of various tile samples including marble, stone, and ceramic displayed on a white surface.

A good bathroom tile does three jobs at once. It has to suit the size and light of the room, hold up in a wet area, and work with the adhesive and substrate behind it. That last part gets missed all the time in Melbourne renovations, especially with dense porcelain and large-format tiles.

Ceramic, porcelain and stone-look options

Start with function, then choose the finish.

  • Ceramic tiles
    Best used on walls when budget is tight and you want a simple, clean result. They are easier to cut and usually cheaper than porcelain, but they are not my first choice for bathroom floors that take daily wear.

  • Porcelain tiles
    This is the safest all-round pick for most Melbourne bathrooms. Porcelain is dense, hard-wearing, and well suited to floors, shower areas, and large-format designs. It also gives you more control over the final look, from matte stone styles to sharper contemporary finishes.

  • Stone-look and natural-style finishes
    These work well if you want warmth without the upkeep of some natural materials. Keep the palette restrained. One consistent stone-look tile across floor and walls usually looks better than mixing several bold surfaces in a small bathroom.

Melbourne bathrooms generally suit quieter schemes. Soft greys, warm neutrals, off-whites, and natural stone or timber-look finishes age better than high-contrast trends that date fast.

The tile choice that affects installation quality

Large-format porcelain looks great, but it demands better installation practice. The tile is less forgiving, the substrate needs to be flatter, and the adhesive has to match a low-porosity material properly.

Back-buttering is standard good practice for many porcelain and large-format installations because it helps achieve proper adhesive coverage and a stronger bond. Skip that step, or use the wrong adhesive, and you increase the risk of drummy tiles, poor adhesion, and failures over time. In Victoria, where homes see cold spells, warm interiors, and regular moisture cycling, that is not a detail to wave away.

If you're narrowing down finishes and formats, this guide on how to choose bathroom tiles will help you compare options in a more practical way.

If your installer cannot clearly explain the adhesive system for porcelain, the coverage method, and whether back-buttering is required, keep asking questions.

What looks good and still works

My recommendation is simple.

Choose large-format porcelain if you want a cleaner look with fewer grout lines, but only if your installer is confident with layout, levelling, and coverage. Choose lighter or mid-tone colours if the bathroom is small or gets limited natural light. Use feature tiles in one area only, such as a niche or vanity wall. That gives the room character without turning it busy.

Also check the slip rating for floor tiles, especially in family bathrooms and hobless showers. A tile that looks sharp on a sample board can feel unsafe under wet feet.

Good bathroom tile selection is disciplined. Pick materials that suit Melbourne conditions, meet the demands of a wet area, and can be installed properly the first time.

Vetting and Choosing Your Bathroom Renovation Specialist

A bathroom renovation usually goes wrong at handover, not in the showroom. The tiles look good on a sample board, then the finished room ends up with poor falls, hollow spots, swollen skirtings, or waterproofing paperwork nobody can produce. In Melbourne, that is the difference between hiring a tiler for a tidy re-tile and hiring the right renovation specialist for a wet-area project that has to meet code.

Start by matching the contractor to the scope.

If you are replacing tiles on a sound, unchanged layout, a skilled tiler may be enough. If the job includes demolition, substrate repairs, waterproofing, plumbing coordination, electrical work, shower screen set-out, or any layout change, use a renovation contractor or registered builder who can manage the whole sequence properly. Bathrooms fail when trades are booked in isolation and no one owns the wet-area compliance from start to finish.

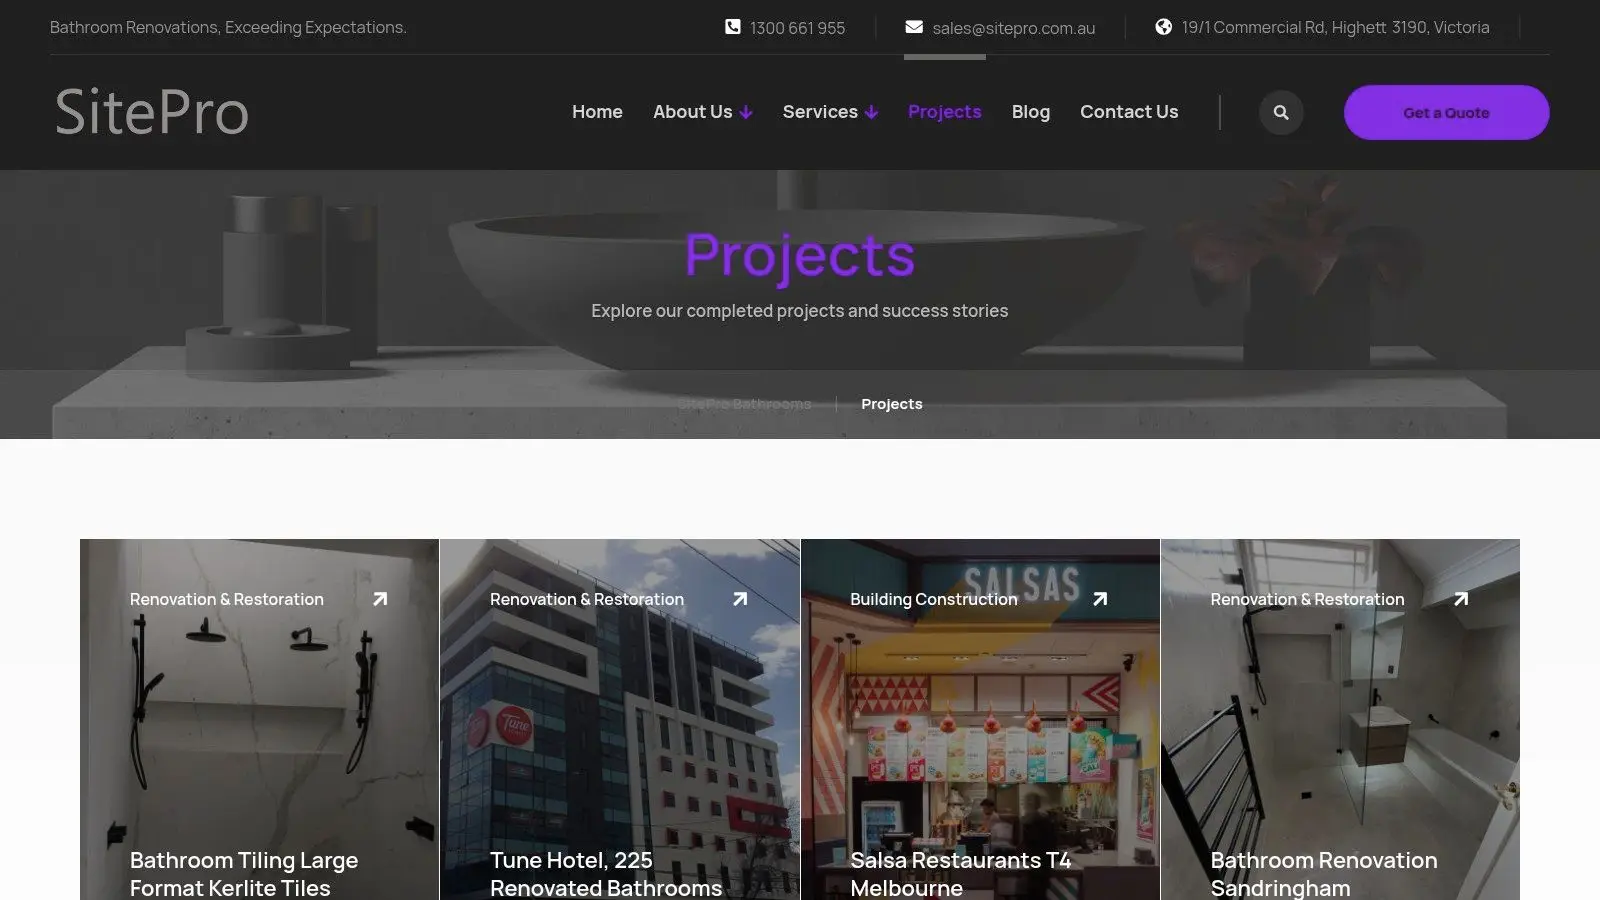
Screenshot from https://siteprobathrooms.com.au/projects/

If you want to see what that looks like in practice, review a bathroom remodel contractor with completed renovation projects and pay attention to process, not just finished photos.

What I would check before accepting any quote

Bring these questions to every site meeting and ask for clear answers in writing:

  • Who is responsible for waterproofing compliance? In Victoria, wet-area waterproofing must be done properly and in line with AS 3740. If they are vague here, stop the conversation.
  • Who is the VBA-registered practitioner for the regulated work? If building work requires registration, you need to know exactly who is carrying that responsibility.
  • What is included in substrate preparation? Tiling only lasts if the surface underneath is flat, stable, and suitable for the tile type.
  • What adhesive system are you using for porcelain or large-format tiles? Non-porous tiles need the right adhesive and coverage method, especially in bathrooms that cycle between damp, cool, and heated conditions.
  • What is excluded from the quote? Ask about demolition, waste removal, screeding, waterproofing, trims, silicone, tile edge finishes, and rectification of hidden damage.
  • What does the work sequence look like? A serious contractor can explain the order of demolition, prep, waterproofing, curing, tiling, grouting, and fit-off.
  • What happens if they uncover rotten framing, movement, or water damage? Variations are normal. Vague pricing is not.

Portfolio matters too, but use it properly. Do not judge a contractor by close-up photos of one niche and a tap set. Ask to see full bathrooms similar to yours in size, age, and finish level. Older Melbourne homes often have uneven walls, out-of-square corners, and subfloor movement. A specialist who can handle those conditions is more useful than one with polished marketing images.

One practical option in Melbourne is SitePro Bathrooms, which handles bathroom renovations from design development through to construction. That suits homeowners who want one team coordinating the wet-area work, trade sequence, and finish selections instead of chasing separate contractors.

Red flags that should end the discussion

Some comments are enough to walk away on the spot:

  • “We can tile over that.” Maybe. But if they have not checked movement, moisture, drainage, and build-up height, they are guessing.
  • “Waterproofing is standard, so we don't need to explain it.” You do need it explained, including who does it and how it will be documented.
  • “We'll sort the details after we start.” Scope disputes start exactly there.
  • “Large-format porcelain goes down like any other tile.” It does not. The adhesive, coverage, levelling, and substrate flatness matter more.
  • “Certificates or compliance records aren't a big issue.” In a Melbourne bathroom, they are.

Choose the contractor who inspects carefully, asks awkward questions early, and speaks clearly about waterproofing, substrate prep, adhesive choice, and responsibility for regulated work. That is the person protecting your bathroom, not just installing tiles.

Your Melbourne Bathroom Tiling Questions Answered

How long does a bathroom tiling project usually take?

A Melbourne bathroom takes as long as the substrate, waterproofing, and curing require. A straightforward re-tile is usually much quicker than a full renovation with demolition, plumbing changes, screeding, waterproofing, and fit-off.

Be wary of any timeline that sounds fast but skips drying time. In Victoria, wet-area work fails when trades rush the base, not when the tiler spends too long setting tiles. Older houses in Melbourne add another layer of delay because walls are often out of square, floors can need correction, and hidden water damage is common once demolition starts.

What's the best way to keep new grout clean?

Keep the room dry and the cleaning simple. Run the exhaust fan properly, wipe down standing water, and clean with a pH-neutral product instead of aggressive chemicals.

Grout usually stains because moisture sits on it every day. Silicone joints often show trouble first, especially in showers and around the bath. If you want the finish to last, ventilation matters almost as much as the tile installation itself.

Can you tile over existing bathroom tiles?

Only if the existing tiled surface is sound, well-bonded, correctly prepared, and the extra height will not create problems at drains, door thresholds, or fixtures.

In many Melbourne bathrooms, removal is the better call. Tiling over old tiles can trap defects you cannot see, including failed waterproofing, movement in the substrate, and poor falls to the waste. If the room has cracking, drummy tiles, moisture staining, or drainage issues, strip it back and fix the cause properly.

Are underfloor heating and sealing worth considering?

Underfloor heating is worth it in colder Melbourne homes, especially on slab floors or south-facing bathrooms that stay chilly through winter. Plan it before tiling starts so the floor build-up, thermostat position, and compatible adhesive system are sorted early.

Sealing depends on the tile and grout you choose. Dense porcelain often needs little or no sealing, while natural stone and some grout types benefit from it. Ask for product-specific advice, not a blanket upsell. The right system depends on tile porosity, cleaning habits, and how much water the room sees.

When should you stop researching and get a quote?

Get a quote once you can make three decisions. Your budget range, whether you are re-tiling or renovating the whole bathroom, and the tile style you want.

That is enough for a useful site inspection. A good specialist can then tell you if your preferred tiles need a flatter substrate, whether large-format porcelain calls for a different adhesive, whether the floor waste and falls need correction, and what regulated waterproofing work must be documented under AS 3740 and Victorian requirements.

Research helps at the start. Clear decisions save money once the work begins.

  • siteprobathrooms

8 Compact Bathroom Design Ideas for Modern Homes

Maximise Your Space: Transform Your Small Bathroom

You step into a bathroom that should work harder than it does. The vanity pushes into the walkway, the shower screen chops up the room, and every surface feels busy before the day has even started. That is a common problem in compact ensuites and apartment bathrooms, especially in older Victorian homes where the original layout was never designed for modern storage, lighting, or larger fittings.

Good compact bathroom design starts with the plan, not the product list. The best results come from getting the room proportions under control, protecting circulation space, and reducing visual weight so the bathroom feels calm and easy to use. In practice, that means making early decisions about fixture sizes, wall depths, tile scale, and where storage can be built in instead of added on later.

Registered builders and bathroom designers look at these rooms differently. We measure what people can stand in, reach, open, and clean. A vanity that looks fine on a showroom floor can make a 1.8 metre wide bathroom feel tight once clearances, door swings, and shower glass are accounted for. A tile choice that looks sharp in a sample board can make a small room feel chopped up if grout lines are too busy.

3D design visualisations help avoid those mistakes before demolition starts.

They let you test layouts, sightlines, fixture placement, and material combinations while changes are still cheap and simple. That is one of the clearest ways to de-risk a renovation in a small bathroom, where a 50mm adjustment can be the difference between a room that feels resolved and one that always feels compromised.

The ideas in this guide focus on buildable improvements with real impact. Expect specific measurements, material considerations, and layout decisions that help compact bathrooms look clean, work properly, and hold up well over time.

1. Wall-Mounted Vanities and Floating Fixtures

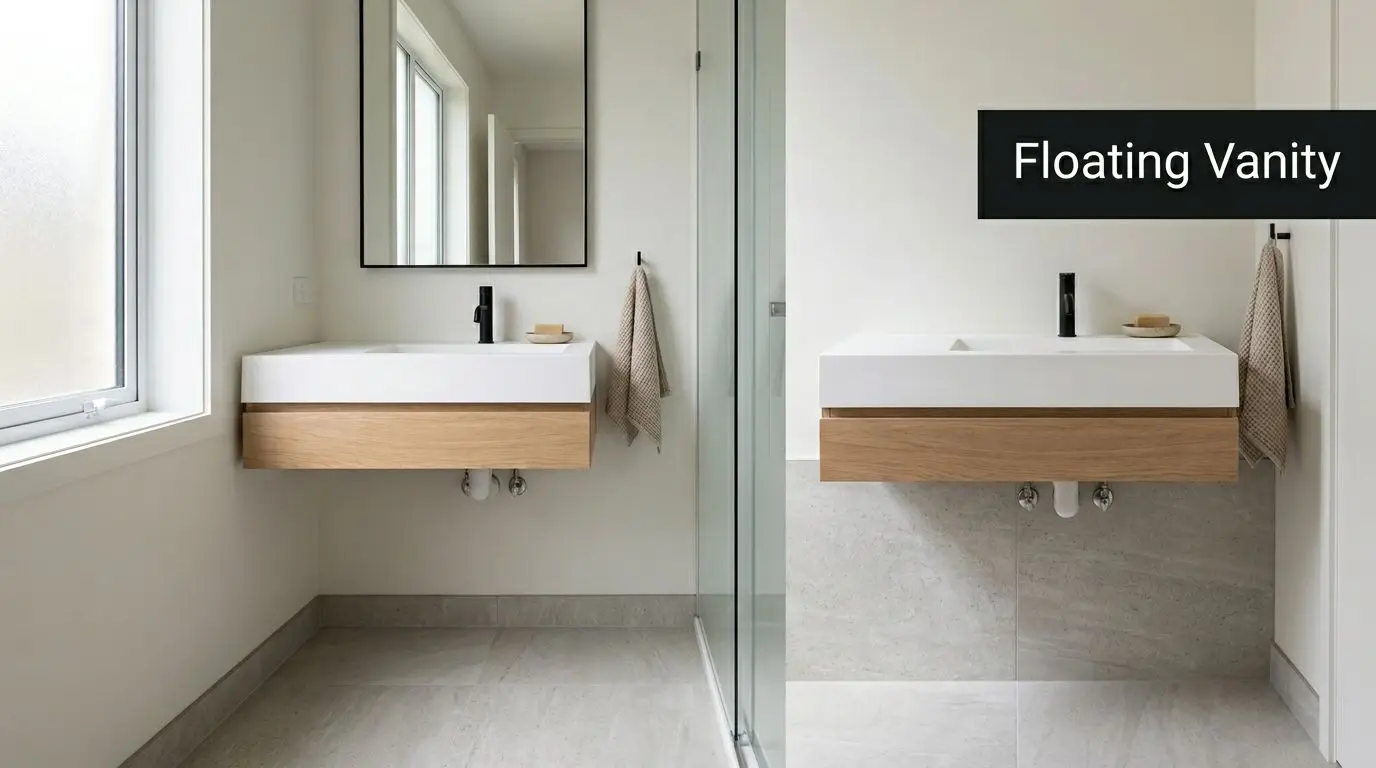
A compact bathroom can feel tight before anyone steps into the shower. The usual culprit is visual weight at floor level. Wall-mounted vanities fix that fast by exposing more floor, extending the sightline from the doorway, and giving the room a cleaner profile.

A modern bathroom featuring a floating wooden vanity with white countertop and black faucet in bright space.

In smaller ensuites, an 800mm vanity is often the safe starting point, but the right size depends on door swing, shower screen position, and how much standing room is left in front. I usually test that in a 3D model before any joinery is ordered. On paper, a wider unit can look manageable. In the room, a 50mm overrun can make drawers, circulation, and cleaning feel clumsy every day.

Mounting height matters too. Most wall-hung vanities land around 800 to 850mm high, but that range should be set by the users, not copied from a display suite. Families with young kids, older owners, and ageing-in-place renovations often need a different height to keep the basin comfortable and the storage usable.

What has to happen behind the wall

A floating vanity needs structure behind it. That means checking the framing, adding noggings or reinforcement where required, and setting plumbing points early so wastes, traps, and water lines stay hidden inside the cabinet.

Choose the vanity after the wall build-up is understood.

That trade-off gets missed all the time. A slim wall-hung unit looks great in a showroom, but if the wall can't take the load without major rework, the money may be better spent on a shallower cabinet, a custom carcass, or a different layout. The same planning step also helps coordinate tile set-out and floor lines, especially if you're pairing the vanity with large format bathroom tiles for a cleaner, more open finish.

A few practical rules make these fixtures work harder in small rooms:

  • Fix into solid structure: Use proper framing support and rated fixings. Plasterboard anchors are not enough.
  • Keep the cabinet depth under control: In tight bathrooms, a shallower vanity often improves movement more than a wider vanity improves storage.
  • Use durable finishes: Matte and satin joinery generally show fewer fingerprints and water marks than high gloss.
  • Leave a realistic cleaning gap: Too low and the underside becomes awkward to mop. Too high and the vanity can feel visually disconnected.

A wall-hung toilet can create the same lighter effect if the wall depth, cistern space, and plumbing layout allow for it. Registered builders earn their keep here. They can tell you early whether the wall should be rebuilt, packed out, or left alone, which is exactly the kind of decision that keeps a compact bathroom looking resolved instead of overworked.

2. Large Format Tiles and Minimal Grout Lines

A compact bathroom starts to feel bigger once the eye can travel across the room without stopping at every joint. Large format tiles help because they create broader, quieter surfaces. Less grout also means less visual clutter and less cleaning in a room that already works hard.

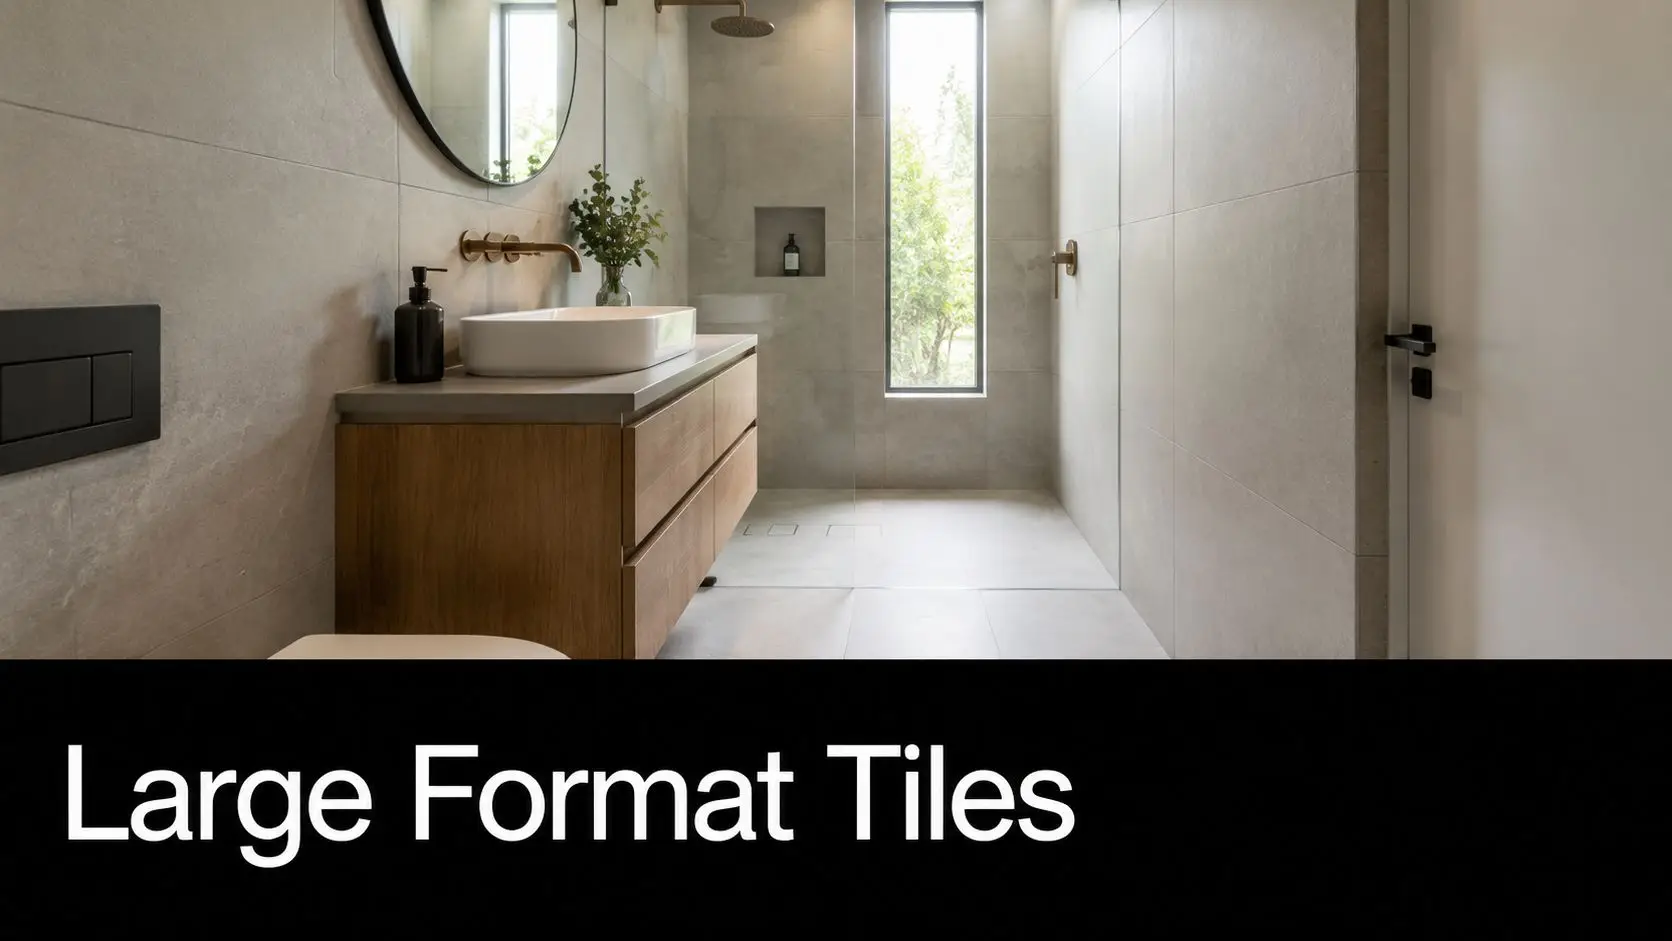
A modern, minimalist bathroom featuring large format gray stone tiles, a wooden vanity, and a glass shower.

In a tight ensuite, I usually get the best result from 1200 x 600mm or 600 x 600mm tiles, depending on how many doorways, niches, and corners the room has. Bigger is not always better. A tile that is too large for the wall can force awkward cuts around tapware, windows, or toilet pan set-outs, and that can make the room feel more contrived, not more spacious.

Orientation matters as much as size. Run rectangular tiles horizontally and a narrow room often reads wider. Stack them vertically and the ceiling can feel taller. The right choice depends on what the room is lacking, width, height, or both.

Large format finishes also ask more of the build. If the substrate is out of plane, the defects show immediately. Falls on the bathroom floor still need to work, especially near the shower entry, so the tile selection has to suit the waterproofing method, waste location, and drain detail. That is one reason we model tile set-outs in 3D before demolition starts. It lets clients see where joints land at the niche, vanity end, and shower screen, which avoids expensive last-minute compromises.

A few site rules make a big difference:

  • Straighten walls and floors first: Large tiles highlight dips and humps that smaller tiles can hide.
  • Set the layout before waterproofing is locked in: Drain position, niche width, and screen placement all affect the final cuts.
  • Use grout close to the tile colour: Tight tonal contrast keeps the surface reading as one field.
  • Limit feature tiles to one small area, if any: In compact rooms, too many patterns break up the space fast.

I also prefer carrying one main tile across the floor and at least one major wall plane. That restraint is what makes the room feel resolved. If you are planning an open shower zone or want the floor finish to continue cleanly through the wet area, these wet room bathroom ideas show how that approach works in practice.

For a closer look at material options, these large format bathroom tiles show why scale, finish, and grout selection have such a big effect in small bathrooms.

3. Compact Corner Shower Solutions and Walk-In Designs

A tight ensuite usually fails at the shower first. The enclosure sits in the wrong spot, the door swing steals circulation space, and the room feels smaller than the floor plan suggests. In compact bathrooms, shifting the shower into a corner or opening it up as a walk-in often gives back enough usable space to change how the whole room works.

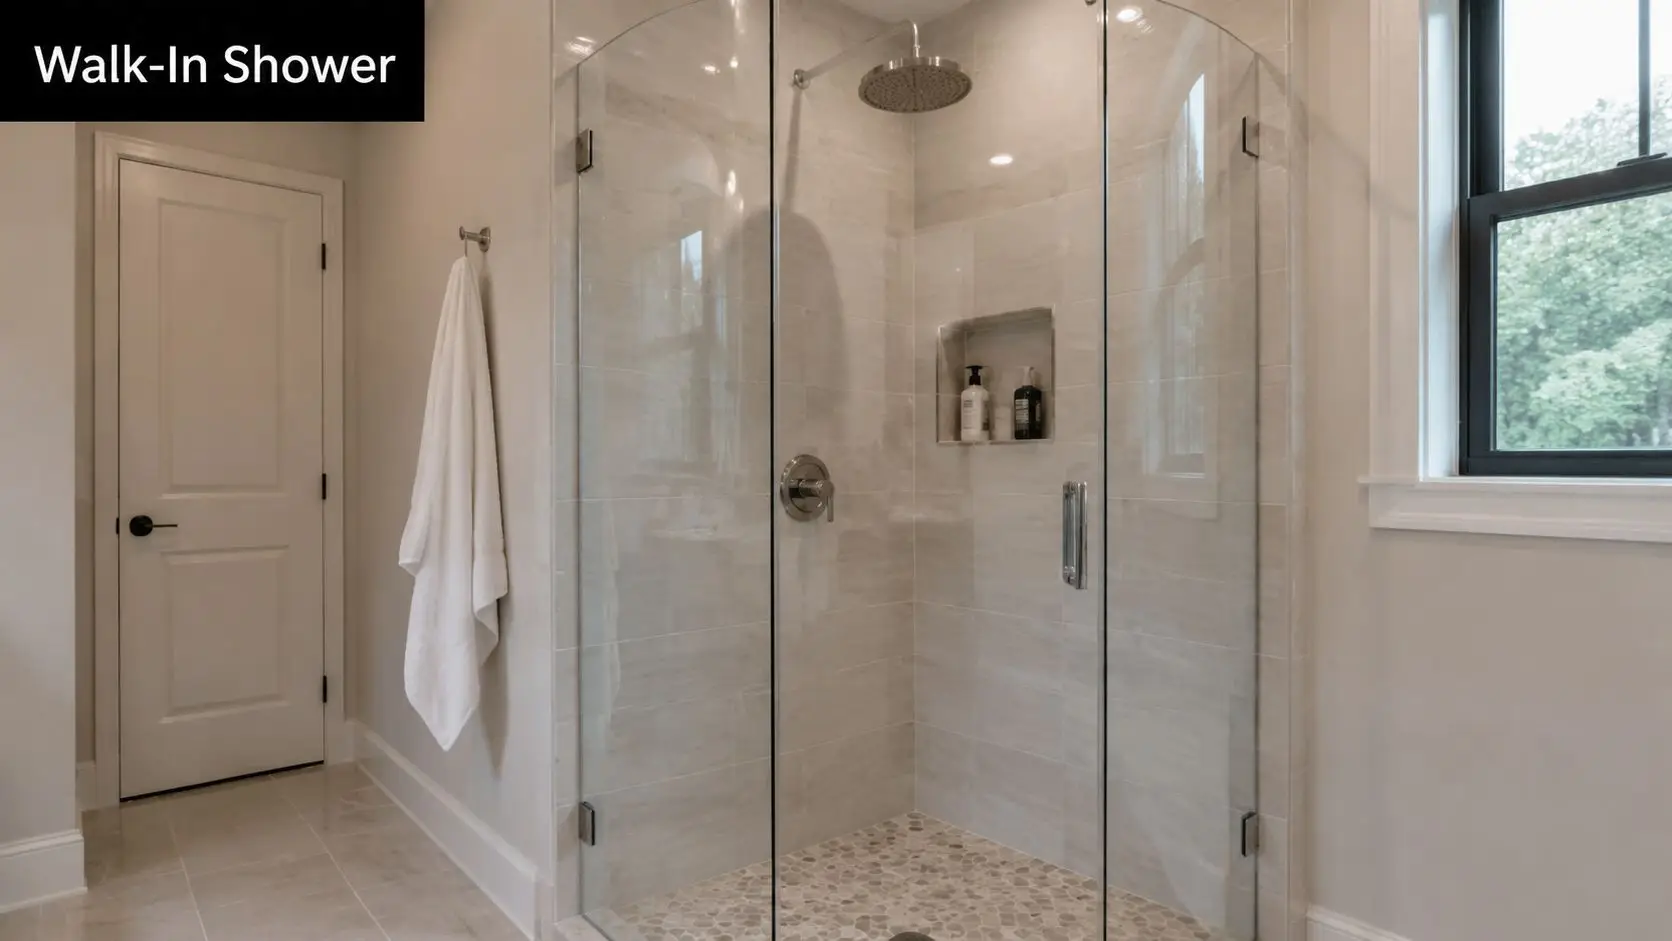
A modern walk-in shower with glass doors, pebble floor tiling, and neutral-colored stone walls in a bathroom.

I see this constantly in ensuites around 1.5 x 2 metres. A pivot door shower cuts into the path to the vanity or toilet and breaks the room into awkward pockets. A frameless corner layout or a properly planned walk-in keeps the centre clearer, improves sightlines, and makes the bathroom read as one volume instead of three cramped zones.

The trade-off is technical, not cosmetic. Walk-in showers only work when water is controlled properly. That means accurate falls to waste, a shower rose position that contains spray, and screen placement that protects the dry path through the room. Get those wrong and the bathroom never feels settled, no matter how refined the finishes are.

For compact walk-in showers, I usually set a niche around 1200mm high so daily products sit within easy reach and off the floor. Glass also needs judgement. Thicker frameless panels can feel premium, but in very small rooms the hardware, panel width, and cleaning access matter just as much as the glass specification. Sometimes a minimal fixed screen gives a better result than a full enclosure with extra channels and door furniture.

Curbless or low-threshold entries are also worth considering if you want the room to age well. They improve access and can make the footprint feel wider, but they need tighter floor planning because the whole wet area has to work harder. Here, 3D bathroom design visualisations earn their keep. We use them to test screen length, entry position, drain location, and clearances before demolition starts, which helps avoid expensive mid-build changes.

If you are comparing layouts, these bathroom design ideas for small spaces show how corner showers and open entries can be planned without wasting usable floor area. If you are weighing full wet-area planning, these wet room bathroom ideas show how that approach can work in a tighter footprint.

4. Recessed Storage and Hidden Shelving Systems

Open a compact bathroom after a busy morning and the problem shows up fast. Bottles line the vanity, spare toiletries drift onto the window ledge, and the room starts to feel smaller than it is. Recessed storage fixes that by using the cavity inside the wall, not the circulation space you need to move through the room.

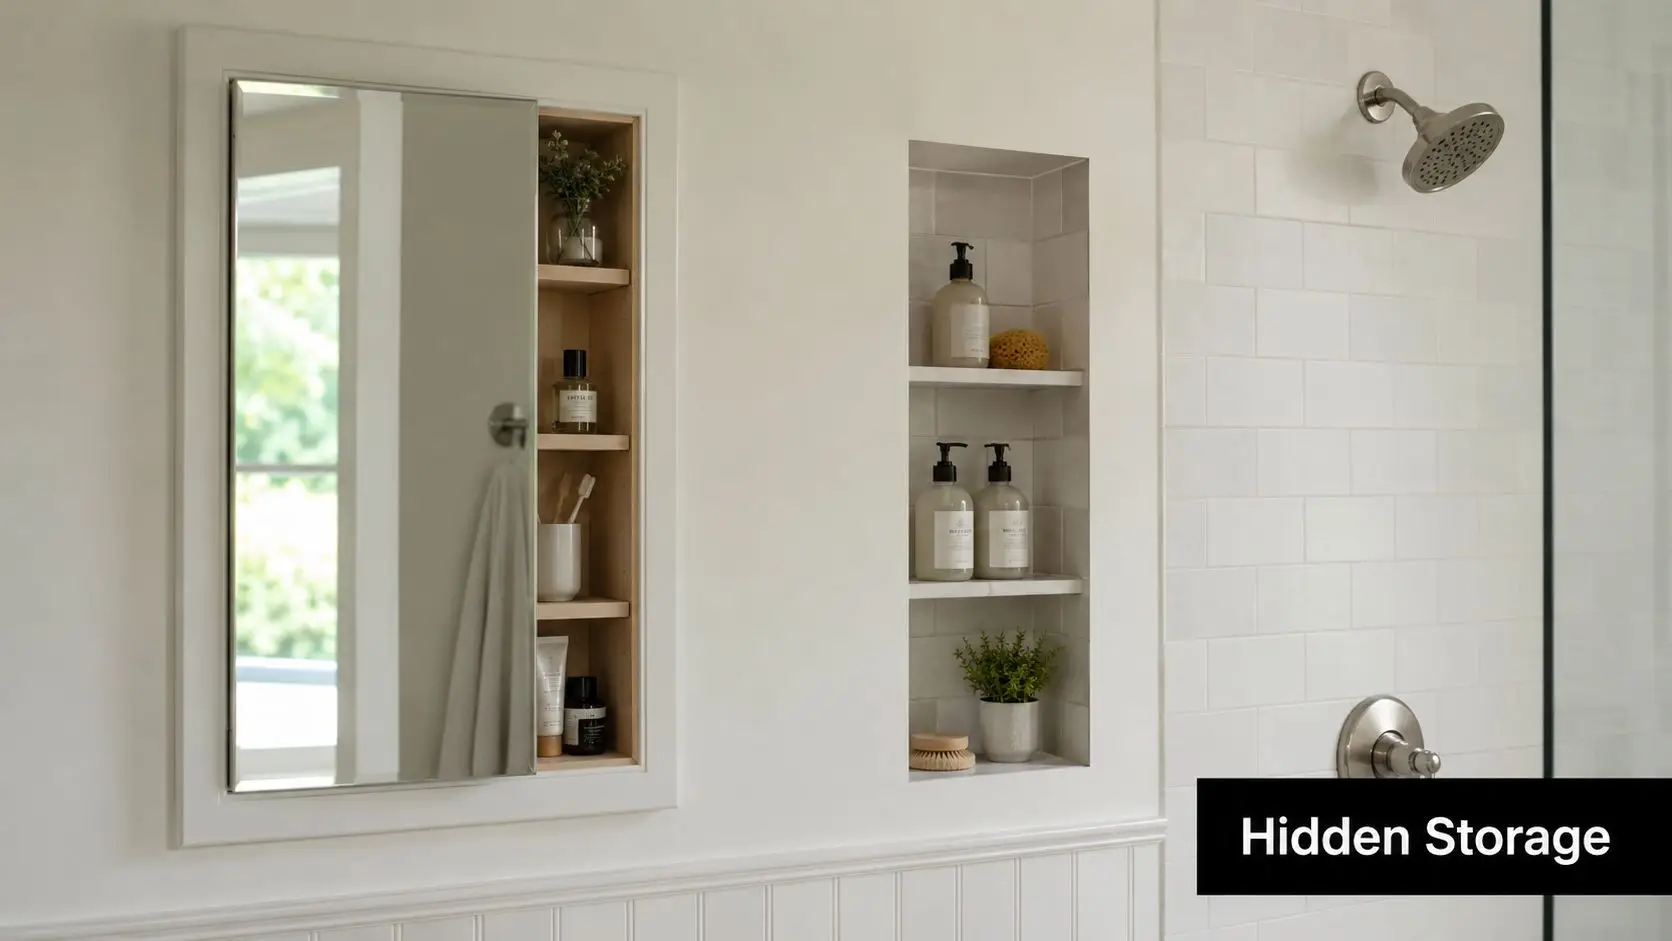
A bathroom wall featuring a recessed medicine cabinet and built-in wall niches for compact and functional storage.

A recessed mirrored cabinet above the vanity is one of the smartest upgrades in a small bathroom. You get everyday storage at eye level, the mirror stays flush with the wall plane, and the room avoids the visual bulk of a surface-mounted unit. In the shower, a properly sized niche keeps bottles off the floor and out of corners where grime builds up.

The catch is that recesses need to be designed early. Stud positions, pipe runs, membrane detailing, and tile set-out all affect what is possible. In many homes, an internal wall will only give you enough depth for a shallow cabinet unless the framing is adjusted. That trade-off needs to be resolved on the plan, not after sheeting starts.

I usually aim for one well-proportioned recess instead of several small ones. It looks calmer, it is easier to waterproof, and it gives you storage that people use. Shower niches also work better when their width is set to suit the tile module, because you avoid awkward cuts and the finished wall reads clean and intentional.

A few details make the difference:

  • Set the recess to the wall build-up. Standard framing, sheeting, adhesive, and tile thickness all affect final depth.
  • Line niches up with grout joints where possible. The result looks built with the room, not dropped in later.
  • Keep wet-area waterproofing continuous. Corners, shelf junctions, and niche bases need careful membrane treatment and falls.
  • Size storage for real products. Tall pump bottles, razors, and spare rolls need more than a decorative slot.

3D bathroom design visualisations help here because they let you test niche height, cabinet depth, and mirror proportions before demolition starts. We use them to check whether a recessed cabinet will clear plumbing, whether a niche will clash with a feature tile band, and whether the storage is large enough to reduce bench clutter. That early coordination avoids expensive site changes and usually produces a cleaner result.

For more layout-led examples, these small bathroom design ideas with hidden storage solutions show how recesses can keep the room calm, practical, and easy to maintain.

5. Vertical Space Optimisation with Tall Storage and High Ceilings

You feel the limitation in a compact bathroom at shoulder height first. Benchtops crowd quickly, towel storage gets pushed into another room, and a standard vanity ends up doing jobs it was never sized to handle. The fix is usually above eye level.

Wall height gives you storage volume without tightening circulation. In period homes with taller ceilings, that opportunity is even bigger, but the same principle works in newer builds. A well-proportioned tall cabinet, linen tower, or overhead joinery bank can carry spare towels, cleaning products, and backups while keeping the floor line open.

The key is restraint.

Tall storage improves a small bathroom when the joinery is narrow enough to stay out of the way and detailed well enough to read as part of the architecture. In tight rooms, I usually keep full-height cabinetry slimmer than clients first ask for, because extra depth often creates a bulky corner, pinches movement, and makes the room feel top-heavy. Stopping the cabinet just short of the ceiling also helps. It leaves a clean shadow line and avoids that wedged-in look.

A practical arrangement is a full-height tower beside a wall-hung vanity, with everyday items stored between waist and eye level and bulk items higher up. That layout works because it splits storage by frequency of use. The vanity handles daily traffic. The tall unit handles overflow. You get better function without resorting to an oversized basin cabinet that dominates the room.

Measurements matter here. Cabinet depth should be set against door swing, vanity projection, and the clear path to the shower or toilet. In renovation work, we also check wall plumb early because older rooms are rarely straight, and tall panels make irregularities obvious fast. This is one of those areas where 3D bathroom design visualisations earn their keep. They let you test cabinet height, depth, and sightlines before joinery is ordered, which is far cheaper than trimming a design on site after waterproofing and tiling are complete.

A few details make tall storage work properly:

  • Fix cabinets back to solid framing. Full-height units carry more load than they appear to, especially once shelves are filled.
  • Use adjustable shelving. Toiletries, towels, paper goods, and cleaning products all need different heights over time.
  • Keep daily-use items lower. Upper shelves suit spares and seasonal items, not products you reach for every morning.
  • Choose door swings carefully. In compact rooms, a poorly hinged tall door can clash with mirrors, lights, or the entry door.
  • Match the joinery finish to the room. Light timber tones, whites, and soft matt finishes usually keep vertical storage from feeling heavy.

High ceilings can also be reinforced visually, not just physically. Running tile, mirror, or joinery lines upward makes the room read taller, provided the composition stays simple. Too many horizontal breaks cut the wall up and reduce that effect.

Done well, vertical storage solves a real problem. It gets clutter off the vanity, keeps the room easier to clean, and makes a compact bathroom feel resolved rather than overworked.

6. Strategic Lighting Design and Mirror Placement for Space Expansion

Bad lighting shrinks a bathroom. It exaggerates shadows, flattens finishes, and makes mirrors less useful. Good lighting does the opposite. It opens the room up, improves grooming, and gives compact bathrooms a more expensive feel.

In practice, a single ceiling light in the middle of the room rarely cuts it. It creates shadows at the vanity and leaves corners dull. Better results come from layering. Recessed downlights handle general light, task lighting supports the mirror, and concealed or backlit elements soften the room at night.

Mirrors should work with light, not just fill a wall

Full-height mirrors are one of the easiest ways to stretch a room visually. In a compact ensuite, taking a mirror higher than standard eye level can make the ceiling feel taller, especially when the joinery below stays light and simple. If there's natural light, place the mirror so it catches and redistributes it rather than reflecting a blank wall.

Warm-white LEDs usually suit residential bathrooms best because they feel calmer than harsher light. Side lighting at the vanity is also more flattering than relying only on overhead fittings. That matters every morning, not just in photographs.

Australia's older population is also a practical reason to get this right. The ABS projects that the share of Australians aged 65 and over will rise from 16% in 2021 to 22% by 2046, and the National Housing and Homelessness Agreement 2022 to 2027 highlights the need for accessible, age-friendly housing, including bathrooms. Good mirror lighting and better visibility support that future-proofing without changing the look of the room.

  • Use separate switching: Mirror lights should be able to run without the full ceiling scheme.
  • Add dimming where possible: The bathroom needs different light levels at 6am and 10pm.
  • Coordinate ventilation with mirrors: Good extraction reduces condensation and keeps the mirror usable.

A backlit mirror over a floating vanity is one of those combinations that almost always works in modern bathrooms. It adds function, softens the wall, and reinforces the sense that the vanity is floating instead of sitting in a dark corner.

7. Neutral Colour Palettes and Strategic Contrast Design

A compact bathroom usually feels smaller before the fittings even go in. The problem often starts with colour selection. If every surface changes tone, finish, or pattern, the room breaks into pieces and the walls seem closer than they are.

For small bathrooms, I usually keep the main palette tight. Warm white, soft greige, pale stone, and light grey all hold up because they reflect light well and let the room read as one volume. That approach also gives more freedom with fixtures and joinery. You can update tapware or handles later without rebuilding the whole scheme around a bold wall tile.

The trade-off is that a neutral bathroom can look flat if the materials are too similar. Good compact bathroom design avoids that by changing texture and depth rather than jumping between heavy colours. Matte wall tiles, a lightly grained timber vanity, brushed metal tapware, or a niche lined in a slightly deeper tone will add definition without shrinking the room.

Controlled contrast works better than strong contrast.

In practice, that usually means limiting the room to one main neutral, one supporting tone, and one darker or warmer finish. A floating vanity in oak-look joinery against pale porcelain is a reliable combination. So is a soft white wall tile with a stone-look floor and brushed nickel fittings. If clients want black tapware, I usually contain the contrast and keep the surrounding surfaces quiet so the fittings read as accents instead of visual clutter.

This part is easier to get right in a 3D bathroom design than from a few loose samples on a bench. On screen, you can test how a darker vanity, niche tile, or grout colour changes the visual weight of the room before anything is ordered. That helps avoid one of the common renovation mistakes in compact spaces. Individually nice finishes that fight each other once they are installed.

A few combinations regularly perform well in tight footprints:

  • Warm white with pale greige: Soft, clean, and less clinical than plain white.
  • Light stone-look tile with oak or walnut-look joinery: Adds warmth without making the room busy.
  • Pale grey porcelain with brushed nickel or chrome: Simple, durable, and easy to keep consistent across fittings.
  • Muted green or clay as a small accent: Best used inside a niche, on joinery, or in accessories rather than across full walls.

Samples still matter, but they need to be tested properly. Check them under the actual bathroom lighting, next to the vanity finish, and beside the floor tile. I also like to view them at different times of day because a compact bathroom with one small window can shift from cool to warm quickly, and the colour that looked balanced in the showroom can read completely differently on site.

8. Multifunctional Fixtures and Space-Saving Innovations

A compact bathroom usually fails in the gaps between fixtures. The toilet projects too far, the vanity drawers hit the doorway, the mirror needs a separate light, and a towel rail ends up on the only free wall. The fix is not cramming in smaller products at random. It is choosing fixtures that solve two problems at once and planning their clearances before rough-in starts.

The best multifunctional pieces save space without making maintenance harder. A mirrored shaving cabinet with integrated lighting can remove the need for wall sconces and recover storage at eye level. A wall-hung toilet with an in-wall cistern opens up the floor and makes cleaning easier, but it also needs enough wall depth and an access point for servicing. A vanity with internal organisers sounds minor, yet in a tight room it often removes the need for an extra shelf or tower unit.

I see the same trade-off on many small projects. Clients want the room to feel open, but they also need it to work every day. That usually points to fixtures with clean geometry, concealed storage, and fewer separate add-ons fixed to the walls.

A few options consistently earn their place:

  • Mirrored cabinets with integrated lighting: combine task lighting, reflection, and storage in one unit.
  • Wall-hung toilets with concealed cisterns: reduce visual bulk and free up floor area, provided the wall build-up can accommodate the frame.
  • Vanities with drawer dividers and power access: keep benchtops clear and make daily use easier.
  • Heated towel rails in the right location: dry towels faster and add a small amount of background warmth, though they should not be treated as the main heat source.
  • Fold-down seats and support rails: improve accessibility without permanently consuming valuable circulation space.

Dimensions matter here. In a compact plan, even a small reduction in projection can improve how the room moves. A shorter projection toilet, a shallower vanity, or a recessed cabinet can be the difference between a layout that feels tight and one that feels resolved. These are the decisions worth testing in a 3D bathroom design before any plumbing is set. You can check door swings, standing room at the vanity, and whether a drawer front will clash with the toilet pan or shower glass.

Serviceability needs the same attention. Concealed cisterns, in-wall tap bodies, and integrated lighting all look tidy, but they must remain accessible for repair or replacement. If a product saves space on day one but creates invasive maintenance later, it is the wrong product for the job.

For compact bathrooms, I usually check three things before signing off on these fixtures:

  • Wall depth and framing: enough room for in-wall systems without compromising structure or pushing the room out awkwardly.
  • Clearances in use: doors, drawers, and bodies need space to move comfortably.
  • Long-term maintenance: filters, valves, drivers, and cistern components should be reachable without opening finished walls.

Used properly, multifunctional fixtures do more than save room. They reduce visual noise, improve daily use, and make a small bathroom feel considered instead of crowded. In the best layouts, every fitting earns its footprint.

8-Point Compact Bathroom Design Comparison

Solution Implementation Complexity Resource Requirements Expected Outcomes Ideal Use Cases Key Advantages
Wall-Mounted Vanities and Floating Fixtures Moderate–High, needs wall reinforcement and concealed services Skilled carpenter/plumber, reinforced studs/brackets, hidden plumbing, higher material cost Increased perceived floor space, easier cleaning, streamlined modern look Small ensuites, modern apartments, renovations with load-bearing walls Frees floor area, customizable height, minimalist aesthetic
Large Format Tiles and Minimal Grout Lines High, precise substrate prep and expert tiling required Experienced tiler, flat/level substrate, cutting tools, premium tiles Continuous surfaces, fewer visual breaks, premium contemporary finish Narrow bathrooms, showers, wet-room style renovations Visual continuity, easier cleaning, durable finish
Compact Corner Shower Solutions and Walk-In Designs Moderate–High, requires waterproofing, slope design and precise glazing Waterproofing membranes, frameless glass, skilled tiler/glazier, good ventilation Maximized usable floor area, open sightlines, accessible bathing Small bathrooms, attic/sloped ceilings, accessibility-focused projects Space-efficient layout, spa-like openness, improved access
Recessed Storage and Hidden Shelving Systems Moderate, best planned during framing; retrofit more invasive Carpentry, recessed cabinets/niches, waterproofing in wet areas, tile integration Reduced visual clutter, retained storage without protrusion, cleaner lines Tiled showers, compact ensuites, projects prioritizing minimalism Keeps counters clear, mirrored options amplify space, seamless integration
Vertical Space Optimization with Tall Storage and High Ceilings Moderate, requires secure anchoring and careful proportioning Custom cabinetry, strong wall fixings, possible step-stool/ladders Large storage capacity without floor impact, rooms feel taller Victorian homes with high ceilings, narrow bathrooms needing storage Maximizes vertical volume, organized storage, draws eye upward
Strategic Lighting Design and Mirror Placement for Space Expansion Moderate, needs electrical planning and coordinated placement Lighting fixtures, mirrors/backlighting, dimmers, professional electrician Perceived larger, brighter space, improved task visibility, enhanced ambiance Low-light bathrooms, hotel-style renovations, any compact bathroom Non-structural spatial gain, energy-efficient LEDs, immediate visual effect
Neutral Colour Palettes and Strategic Contrast Design Low, mainly finish and colour selection Paint/tiles/finishes, possible colour consultation, quality materials Brighter, cohesive appearance, reduced visual complexity, timeless look Small bathrooms, rentals, budget-conscious updates Cost-effective, broad appeal, enhances perceived spaciousness
Multifunctional Fixtures and Space-Saving Innovations Low–Moderate, depends on chosen fixtures and integrations Specialized fixtures (wall-hung toilets, integrated vanities), plumber/electrician Fewer separate elements, increased functionality in small footprint Tight renovations, compact apartments, accessibility retrofits Saves floor space, reduces clutter, combines functions for efficiency

Ready to Start Your Bathroom Renovation?

You feel the pressure of a compact bathroom the moment the door opens. Knees clip the vanity, storage spills onto the benchtop, and every fitting looks like it was chosen in isolation. Good renovations fix that at the planning stage, before a single tile comes off the wall.

Compact bathrooms work best when the room is designed as one coordinated system. Shift a vanity by 80 or 100mm and you may also need to adjust mirror width, wall light spacing, towel rail position, door clearance, and shower screen dimensions. On site, these small changes stack up fast. The cleanest results come from resolving them on paper first, then confirming them in a 3D model before construction starts.

That process also exposes the trade-offs early.

A floating vanity can open up the floor visually, but the wall needs the right framing and fixing points. Large format tiles reduce visual clutter, but they demand flatter substrates and a disciplined set-out or the room will look out of square. A walk-in shower can make a small bathroom feel calmer and more open, but only if the falls, drainage, waterproofing, and glass position are handled properly. In tight rooms, one weak decision tends to create three more.

3D design visualisations help remove that risk. They let clients compare a 750mm vanity against a 900mm option, test whether recessed shaving cabinets project too far into the room, and see if a full-height tile layout improves the proportions or makes the ceiling feel lower. It is much cheaper to correct joinery depth, niche placement, or circulation space on screen than after plumbing rough-in or waterproofing.

For homeowners in Highett and across greater Victoria, that level of planning also makes the build process easier to control. Selections are clearer, allowances are tighter, and trades are working to a layout that has already been resolved. That usually means fewer site changes, fewer delays, and a better finish at handover.

SitePro Bathrooms handles that chain of work end to end as registered builders unlimited. The team develops the layout, prepares detailed 3D designs, manages construction, and completes the finishing work as one coordinated package. That matters in compact bathrooms, where every millimetre has a job to do and good design only works if the build follows through.

If you want a small bathroom to feel measured, calm, and properly built, contact SitePro Bathrooms and start with a layout that is tested before demolition begins.

  • siteprobathrooms

Highett Homeowners: Your Bath and Kitchen Renovation Guide

You're probably standing in one of two places right now.

Either you're in a kitchen that no longer works for the way your household lives, with awkward storage, dated finishes, poor lighting and appliances that feel bolted on rather than planned in. Or you're in a bathroom that looks tired, feels cramped, and has started raising the kind of questions no homeowner enjoys asking, especially around waterproofing, drainage, ventilation and whether that old layout is worth keeping.

That's normal in Highett. A lot of homes across this pocket of Melbourne sit in the middle ground. They're not untouched originals, but they're not fully modern either. They often need more than a cosmetic update. A good bath and kitchen renovation usually means making smarter decisions about layout, services, compliance, storage, and how the space will perform day after day, not just how it will look in photos.

The homeowners who get the best result usually don't start with tile colours. They start by getting clear on scope, budget, technical constraints, and who's responsible for what. That's even more important in Victoria, where apartment and strata rules, trade sequencing, and builder registration all affect how smoothly the project runs.

Your Renovation Journey Starts Here

A first major renovation can feel bigger than it should. You look at the room every day, so it seems familiar, but once work begins, every decision suddenly affects another one. Move a vanity and you may need new plumbing positions. Shift a cooktop and you may change cabinetry, electrical, ventilation and splashback dimensions at the same time.

That's why I tell Highett homeowners to stop thinking about renovation as one giant event. It works better when you break it into a chain of linked decisions. Scope first. Design second. Selections third. Construction only after those pieces are properly aligned.

This isn't a niche category or a small household upgrade. Bathroom and kitchen work sits inside a very large, mature renovation market. The global bathroom remodelling market was valued at USD 200.2 billion in 2025 and is projected to reach USD 315.9 billion by 2035, according to the 2025 bathroom remodelling market figures published here. That scale matters because it reflects something practical. These rooms are expensive to build, technically dense, and worth planning properly.

Why these rooms matter more than others

Bathrooms and kitchens absorb more services, more materials, and more coordination than most other rooms in a home. They also carry more downside when they go wrong.

A bedroom with a poor paint choice is frustrating. A bathroom with poor falls or weak waterproofing can become a demolition job. A kitchen with unresolved service conflicts can delay cabinetry, appliances and handover.

Practical rule: The earlier you resolve layout, services and approvals, the fewer expensive surprises you'll face once trades are on site.

What a strong renovation feels like

A good renovation doesn't feel rushed. It feels organised.

You know what's staying and what's changing. You know whether you're aiming for modern bathrooms, designer bathrooms, or a simpler functional upgrade. You know whether the kitchen needs reconfiguration or just better storage and finishes. Most of all, you know why you're spending the money.

That clarity is what turns a stressful project into a manageable one.

Phase 1 Planning Your Renovation and Defining Scope

Most problems in a bath and kitchen renovation start before demolition. They start when the brief is vague.

Homeowners often arrive with saved images, a few new bathroom ideas, and a broad sense that the current room isn't working. That's a useful starting point, but it isn't yet a scope. Scope means defining what must change, what can stay, and what future decisions need to be made now rather than later.

A professional interior designer reviews architectural floor plans and fabric swatches on a tablet and paper.

Start with the reason, not the finishes

A renovation brief is stronger when it answers a few hard questions directly:

  • Daily function: Is the room difficult to use, short on storage, badly lit, or awkward for more than one person?
  • Property stage: Are you renovating for long-term living, to prepare for sale, or to improve a rental property?
  • Performance issues: Are you seeing signs of moisture trouble, poor ventilation, damaged joinery, or service problems?
  • Lifestyle fit: Does the layout suit how you cook, clean, bathe, store items and move through the room?

A family home in Highett often needs durability and routine-friendly planning. An investor may prioritise durable finishes and easier maintenance. A downsizer might value step-free access, simpler cleaning and stronger lighting more than statement materials.

Audit the room like a builder would

Before choosing tapware or door profiles, walk the room and assess it practically.

Check where doors clash. Look at how much bench space you regularly use. Notice whether drawers would outperform cupboards. In bathrooms, look at shower position, natural ventilation, towel placement, and whether the room feels tight because it is small or because the layout wastes space.

This stage is also where hidden constraints usually reveal themselves. Older homes may have uneven walls, non-standard framing, legacy plumbing positions, or electrical limitations. Apartments may involve access issues, waste stack constraints, noise restrictions and approval processes.

A beautiful plan that ignores existing services is still a bad plan.

Plan for electrification while the room is open

One decision many homeowners overlook is whether this renovation is the right time to update how the home runs, not just how it looks.

In Victoria, policy shifts are pushing household electrification forward, and that makes a renovation the right moment to assess switching from gas to electric appliances such as induction cooking or more efficient hot water systems, as discussed in this overview of Victorian gas reduction and electrification considerations. Once walls, floors and cabinetry are open, it's far easier to review power supply, appliance choice and switchboard implications than it is after the room is complete.

That doesn't mean every project should convert immediately. It does mean every project should ask the question.

Define what success looks like

For bathrooms, success may mean a better shower, stronger storage, cleaner lines and a room that's easier to maintain. For kitchens, it may mean a more efficient working layout, proper appliance integration and improved family flow.

Write the brief in plain language. For example:

  • Bathroom priority: larger shower, more vanity storage, warmer lighting, easier cleaning
  • Kitchen priority: better prep zone, wider drawers, integrated appliances, stronger ventilation
  • Non-negotiables: no layout change, or full layout change if the current one has inherent flaws
  • Nice-to-haves: feature tiling, recessed niches, custom joinery details, upgraded hardware

That document keeps the project grounded when choices multiply later.

Budgeting and Costs for Your Victorian Renovation

The budget question gets asked early because it should. Renovations go off track when homeowners commit to design ideas without understanding how quickly money gets absorbed by labour, services, joinery, waterproofing, finishes and site conditions.

The most useful way to think about budget isn't as one headline number. It's as a set of cost groups that shift depending on complexity. A simple refresh and a full reconfiguration might look similar on a mood board, but they are very different jobs on site.

Use benchmarks as a starting point, not a promise

As a planning benchmark, the median spend for a primary bathroom renovation in Australia is around AUD 15,000, while a kitchen renovation has a median spend of about AUD 24,000, based on these Australian renovation benchmark figures. Those figures are useful because they give homeowners a realistic entry point for thinking about scope.

They are not fixed prices for your home.

A Highett bathroom with layout retention, straightforward tiling and standard fixtures sits in a different category from a bathroom that needs drainage correction, substrate repair, custom joinery and premium fittings. The same goes for kitchens. Once you move plumbing, alter electrical locations, add custom cabinetry or solve structural issues, the budget changes with it.

Where the money usually goes

Most renovation budgets spread across a familiar set of categories. The exact split varies, but the categories don't.

Cost Category Typical Allocation (%)
Demolition and site preparation 5 to 10
Plumbing and drainage works 10 to 20
Electrical and lighting 8 to 15
Waterproofing and substrate preparation 5 to 12
Cabinetry and joinery 15 to 30
Benchtops or vanity tops 5 to 12
Tiling and surface finishes 10 to 20
Fixtures, fittings and appliances 10 to 20
Painting, fit-off and finishing 3 to 8
Project management and coordination 5 to 15

This table is illustrative. It helps you understand budget shape, not lock in a quote.

The biggest cost drivers in real projects

The jobs that push budget hardest in Victoria are rarely the decorative ones alone. They're usually tied to complexity.

  • Layout changes: Moving plumbing points, waste lines, gas points or major electrical locations often expands labour and coordination.
  • Custom joinery: Bespoke cabinetry improves fit and function, but it also increases design time, fabrication detail and lead time.
  • Existing condition issues: Once demolition begins, rotten substrates, out-of-level surfaces, non-compliant previous work or concealed damage can appear.
  • Access constraints: Apartments, narrow access, parking limitations and strata work rules can affect labour planning and delivery.
  • Finish level: Large-format tiling, detailed niches, feature lighting and premium fixtures all increase installation care.

A lot of homeowners underestimate how much hidden work sits behind a clean finished room. The visible surfaces matter, but they rest on preparation, coordination and compliance.

Keep a contingency, or expect stress

For kitchen projects in particular, practical renovation guidance recommends allowing a 10 to 20% contingency for latent conditions or scope changes, as outlined in this kitchen and bath planning guidance. That range exists for a reason. Once walls and floors are opened, some decisions can't be made from drawings alone.

If you budget to the last dollar, every surprise becomes a crisis. If you build in room, you can solve problems properly instead of patching over them.

Budget discipline works best before selections are finalised. The expensive version of almost every mistake is changing your mind after orders are placed or installation has begun.

Price the project in layers

I prefer homeowners to think in three layers rather than one total:

  1. Base build cost
    Demolition, rough-ins, waterproofing, substrate work, standard trade labour, installation.

  2. Selection cost
    Tiles, fixtures, cabinetry finishes, benchtops, appliances, lighting, mirrors, accessories.

  3. Risk allowance
    Contingency for what the room reveals once work begins, or for changes you may choose as design evolves.

That approach gives you better control. It also helps you decide where to spend. Some households choose to put more into cabinetry and less into feature tiles. Others prioritise better plumbing fixtures or stronger appliance integration.

If you want a rough early planning tool before obtaining a formal quote, a bathroom renovation cost calculator for initial budgeting can help frame the discussion. It won't replace site inspection or detailed scope, but it can stop the common mistake of designing a project far beyond the intended spend.

What works and what doesn't

What works is matching the brief to the budget. If the room needs full technical correction, spend there first. If the layout already performs well, preserve it and invest in better finish quality.

What doesn't work is trying to disguise a major rebuild as a cosmetic update. Those projects often cost more in the long run because the underlying issues were never properly addressed.

Designing Your Dream Space Layouts Materials and 3D Visualisation

Design gets more enjoyable once the practical groundwork is done. This is the point where new bathroom ideas stop being saved images and start becoming a room that fits your home, your routines and the way the space is built.

The strongest designer bathrooms and kitchens don't come from adding more features. They come from resolving the right details in the right order. First the layout. Then the service positions. Then the materials. Then the visual refinement.

A clear visual planning process helps with that.

Screenshot from https://siteprobathrooms.com.au

When the layout starts solving the room

A bathroom often changes dramatically from one smart move. That may be shifting the shower to free the vanity wall, recessing storage into a better position, or changing the door swing so the room opens cleanly. In kitchens, the breakthrough usually comes when circulation improves and appliances stop competing with prep space.

Good modern bathrooms aren't just minimal-looking. They're easier to use because the room has been zoned properly. Wet areas contain water better. Dry zones feel calmer. Storage lands where people naturally reach for it.

In a kitchen, the equivalent is service coordination and sequence of use. Prep, wash-up, cooking and storage should support each other rather than collide.

Materials should match the way you live

Some material choices look excellent on a board and become annoying in everyday use. Others seem modest at selection stage and turn out to be the best decision in the room.

A practical material review usually includes:

  • Joinery finishes: Will fingerprints show easily, and can the finish handle regular cleaning?
  • Benchtop surfaces: Does the household need impact resistance, stain resistance, or a lower-maintenance surface?
  • Tiles: Are you choosing a format and finish that suits both the room size and the cleaning reality?
  • Hardware and fixtures: Will the selected pieces feel solid and age well with repeated use?
  • Lighting: Does the plan include task light, ambient light and mirror lighting where needed?

The best material is rarely the one that shouts the loudest. It's the one that still feels right after years of use.

Why 3D design prevents expensive regret

Effective planning allows for the avoidance of many costly mistakes. A 2D plan is necessary, but for most homeowners it isn't enough. They can't easily judge depth, alignment, sightlines, bulk, colour balance or whether a niche, vanity, island or overhead cabinet will feel right in the room.

That's why 3D design matters. It lets you test the room before construction starts.

You can assess whether the vanity is too dominant, whether a nib wall makes sense, whether the shower screen feels intrusive, whether the splashback should run higher, or whether the kitchen island is making circulation tighter than expected. Those are exactly the sorts of issues that are cheap to fix on a screen and expensive to fix after framing, tiling or joinery production.

If you want to explore how that visual planning process works before build stage, a free 3D bathroom planner for layout visualisation is a useful starting point.

A simple example of design decisions that pay off

Consider a common Highett bathroom scenario. The existing room has a small shower, a bulky vanity, and wall tiles chosen more for trend than light reflection. On paper, the homeowner initially wants a larger vanity, feature wall tile, a recessed niche and a freestanding bath.

Once the room is tested properly in 3D, a few things become obvious. The bath crowds circulation. The larger vanity visually closes the room. The niche lands awkwardly against grout lines. The feature tile darkens the wet zone. A revised scheme with a better-proportioned vanity, lighter wall finish, integrated storage and a cleaner shower layout performs better and often looks more expensive because it feels resolved.

That's what good design does. It removes wrong choices early.

Staging the Project Timelines and Managing Expectations

A renovation runs smoothly when each trade arrives to complete work that the previous trade has properly prepared. That sounds simple, but it's where many projects drift into frustration. The problem usually isn't that work takes effort. It's that people expect visible progress every day, when some of the most important stages are hidden inside walls, floors and substrate preparation.

The sequence matters because the room is layered

Bathrooms and kitchens are built in layers, and each layer depends on the one beneath it. If rough-ins are wrong, cabinetry won't land properly. If substrate isn't right, waterproofing and tiles won't perform. If cabinetry is installed before services are confirmed, rework becomes painful and expensive.

A typical project usually moves through a sequence like this:

  1. Site preparation and protection
    Access planning, dust control, floor protection, delivery coordination and isolation of work areas.

  2. Demolition and strip-out
    Removal of fixtures, finishes, joinery and selected wall or floor elements.

  3. Structural or framing adjustments
    Only where required, including openings, support changes or corrections to existing construction.

  4. Rough-in stage
    Plumbing, drainage, electrical, ventilation and appliance service positions are set.

  5. Substrate preparation
    Wall and floor surfaces are corrected and prepared for waterproofing, tiling or cabinetry.

  6. Waterproofing and enclosed technical works
    Especially critical in bathrooms before finishes are installed.

  7. Tiling, plastering, cabinetry and fixed installations
    The visible shape of the room starts to return here.

  8. Benchtops, fit-off and finishing
    Fixtures, tapware, appliances, screens, mirrors, paint and final connections.

  9. Final clean and handover
    Defects are checked, adjustments are made and the space is prepared for use.

What homeowners often underestimate

The slowest-looking days can be the most important days. A room may appear unchanged while trades are correcting falls, setting service points, checking levels, waiting on custom fabrication or allowing materials to cure.

That isn't inactivity. It's part of building the room properly.

Kitchen projects need especially careful coordination before the decorative items arrive. Cabinetry, appliances, plumbing, electrical and ventilation have to be aligned before benchtops and splashbacks are ordered. Once those fixed elements are in production or installed, changes become disruptive.

How to make the timeline less stressful

A homeowner can't remove disruption completely, but they can reduce uncertainty.

  • Finalise selections early: Late fixture or tile decisions often create avoidable pauses.
  • Freeze the layout before rough-ins: Mid-stream layout changes usually affect several trades at once.
  • Allow for lead times: Custom joinery, stone and specialised finishes need planning room.
  • Plan household logistics: Temporary cooking, bathroom access, deliveries and parking should be considered before work starts.

Renovation stress usually comes from uncertainty, not from the existence of work itself.

The best timeline is not the fastest-looking one. It's the one that keeps the sequence intact.

Choosing Your Team Selecting a Registered Builder in Victoria

The builder you choose will shape almost everything that follows. Good design can be undermined by poor supervision, weak sequencing and inconsistent trade quality. A modest design can perform beautifully when the builder is organised, technically sound and realistic from the start.

That's why, in Victoria, registration matters. For kitchen and bathroom work, you want someone who understands renovation conditions, not just new build logic. Existing homes are less forgiving. Walls aren't always straight. Services aren't always where the old drawings suggest. Apartments add another layer of rules and access planning.

A professional builder in a black shirt shaking hands with a client during a home renovation project.

Why a specialist matters

A bath and kitchen renovation compresses a lot of work into a small footprint. The room may be compact, but the coordination is not. You need someone who can manage waterproofing, drainage, joinery tolerances, appliance integration, tiling logic, ventilation and final fit-off in the correct order.

That's where a renovation specialist has an edge over a generalist.

The phrase registered builder unlimited matters to many homeowners because it signals a formal level of builder registration in Victoria. Still, it should spark further questions. Registration is part of the screening process, not the whole process. You still need to assess whether the builder is structured, experienced in occupied homes, and clear about who manages each stage.

For a practical explanation of why this matters, see why using a registered builder matters for your bathroom renovation.

Questions worth asking before signing anything

Some questions sound basic, but they reveal a lot very quickly.

  • Who manages the project day to day: Will you deal with the quoting person, a site supervisor, or rotating trades?
  • How are trade stages sequenced: Ask how they handle rough-ins, waterproofing, cabinetry and fit-off coordination.
  • How are variations managed: You want a clear process before any changes occur.
  • What information is required before construction starts: A serious builder should want selections, drawings and scope clarity.
  • How is communication handled: Regular updates matter, especially if you're living in the home during works.
  • What experience do they have with similar properties: Highett houses, townhouses and apartment projects each present different constraints.

Signs of a builder who will make life easier

You're not only looking for technical competence. You're looking for steadiness.

A good builder usually does a few things consistently. They ask detailed questions early. They identify risks without dramatics. They don't promise that everything will be easy. They explain the order of operations clearly. And they're comfortable discussing approvals, responsibilities and site limitations before the contract is signed.

The right builder doesn't just tell you what you want to hear. They tell you what the room needs.

What to avoid

Be careful with anyone who prices quickly from limited information, shrugs off technical issues, or treats waterproofing and service coordination like minor details. Also be wary of vague answers around approvals, scheduling or who exactly will be on site.

The cheapest number on paper can become the most expensive job in practice if the scope is weak or the supervision is poor.

Avoiding Common Pitfalls and Highett Specific Considerations

The most expensive renovation mistakes are often the ones homeowners assume will sort themselves out on site. They won't.

Bathrooms and kitchens are unforgiving rooms because so much of the critical work disappears behind finishes. By the time a problem becomes visible, the rectification path is usually disruptive and costly.

A hand pointing to a renovation project schedule list on a clipboard on a wooden desk.

Bathroom failures usually start with hidden technical work

In bathroom renovations, waterproofing and drainage detailing are the highest-risk controls. Shower bases should fall at about 1:100 to 1:80 towards the waste, according to this bathroom remodelling guidance covering slope and drainage detail. That sounds minor until you see what happens when falls are wrong. Water sits in corners, loads the membrane, stresses grout lines and creates failure points that can't be properly corrected without removing finishes.

That's why sequence matters so much in bathrooms. Substrate preparation comes first. Then membrane installation and penetration sealing. Then tiling. Not the other way around.

Kitchen mistakes are usually coordination mistakes

A kitchen can look well designed and still fail in daily use if services weren't coordinated early enough. Appliance locations, cabinetry internals, power points, lighting, plumbing, ventilation and splashback dimensions all need to be resolved before production begins.

Common trouble points include:

  • Late appliance changes: Cabinet dimensions and service points may no longer match.
  • Unplanned power needs: Lighting and appliance use can outgrow the original electrical plan.
  • Poor ventilation planning: A kitchen that looks clean on day one may age poorly if steam and grease handling are weak.
  • Overdesigned layouts: More features don't always improve function.

Strata and apartment work in Victoria needs special care

This is one area too many renovation guides ignore. For apartment renovations in Victoria, compliance with body corporate rules is a major factor. Questions around who pays for shared-services damage, when committee approval is needed, and how to sequence noise-sensitive works without breaching by-laws are critical, as outlined in this guide to apartment renovation body corporate considerations.

In Highett and surrounding areas, that matters more than many owners expect. A straightforward bathroom renovation in a freestanding house can become a much more procedural job in a strata building. Access windows, lift protection, delivery rules, waste removal, working hours and waterproofing sign-off all need to be considered early.

If you're renovating in an apartment, treat approvals and access planning as part of the build, not paperwork to deal with later.

The biggest practical mistake of all

Changing your mind after work is underway.

Some changes are unavoidable. Many are not. Once layout, services and materials are committed, late design revisions have a ripple effect through labour, cost and timing. That's why proper planning, clear drawings and 3D review are so valuable. They don't remove every decision. They move the critical ones forward to the point where they're still cheap to make.

A successful bath and kitchen renovation in Highett doesn't come from luck. It comes from choosing the right scope, solving the technical risks early, and working with a team that understands both the design and the build reality in Victoria.


If you're ready to turn ideas into a buildable plan, SitePro Bathrooms in Highett can help with concept development, 3D design, construction and handover for bathrooms and kitchens across Victoria.

  • siteprobathrooms

Start Your Simple Bathroom Renovation in 2026

You're probably looking at a bathroom that still works, but doesn't feel good to use. The tiles look tired, the vanity has seen better days, and every online gallery seems to jump straight from “cheap refresh” to full luxury rebuild with very little practical advice in between.

That middle ground is where most homeowners in Victoria start. They want a simple bathroom renovation that lifts the room, controls costs, and avoids the kind of hidden mistakes that turn a modest project into a frustrating one. The trick is knowing where a refresh is enough, where it isn't, and which parts of the job need licensed trades and proper sequencing.

A simple renovation isn't about doing the bare minimum. It's about making smart decisions on layout, waterproofing, finishes, and scope so the bathroom looks better, works better, and holds up in a wet environment.

Is a Simple Refresh Enough for Your Bathroom

A lot of bathrooms don't need a full strip-out. Some need better lighting, a new mirror, updated tapware, or a cleaner vanity line. But the common mistake is assuming cosmetic change fixes a wet-area problem.

A bathroom vanity with cracked ceramic tiles around the sink questioning whether to renovate the space.

In Australian bathrooms, especially in a humid setting, the bigger issue is often behind the surface. Advice that focuses only on paint, hardware, mirrors, and lighting often skips moisture control, ventilation, and substrate condition. That matters because wet-area construction and waterproofing have to manage moisture intrusion, and a cosmetic-only makeover won't solve failed grout lines, deteriorated backing, or hidden waterproofing defects, as noted in this Australian bathroom refresh discussion.

When a refresh can work

A lighter-touch update can make sense if the room is dry, the layout functions well, and there's no sign of movement or water damage. In those cases, you might keep the footprint and focus on visible elements that improve daily use.

A refresh is usually worth considering when:

  • The layout already works: The shower, vanity and toilet are in sensible positions and there's no need to improve circulation.
  • Surfaces are tired, not failing: The room looks dated, but tiles are sound and there's no evidence of moisture getting behind them.
  • Storage is the main issue: Replacing a bulky vanity or mirror cabinet may solve the frustration without major building work.

When a simple renovation is the safer choice

If the bathroom smells damp, grout keeps cracking, silicone has failed repeatedly, or the room never seems to dry out properly, painting over the problem is false economy. A cheap update can become the expensive option when it ignores the wet-area basics.

Practical rule: If water management is in doubt, treat the job as a building issue first and a styling issue second.

That's where a proper renovation scope matters more than a cosmetic shopping list. If you're deciding between a touch-up and a more complete rebuild, this guide to a complete bathroom renovation process helps frame what's involved when the room needs more than surface changes.

Defining Your Scope and Setting a Realistic Budget

Most budget blowouts start before demolition. They start when the scope is fuzzy. Homeowners mix must-haves with nice-to-haves, assume every fitting can stay, or decide halfway through that the shower should move to the opposite wall.

For a simple bathroom renovation, scope discipline matters more than almost anything else.

Start with needs before wants

The cleanest way to plan is to separate function from finish. Ask a few direct questions before you choose colours or browse new bathroom ideas:

  • What isn't working now: Is it storage, shower access, cleaning, lighting, ventilation, or all of the above?
  • What can stay in place: If the layout is serviceable, keeping plumbing where it is usually protects your budget.
  • What level of finish suits the home: A family bathroom, investment property, and forever home don't need the same selections.

That last point gets missed often. Designer bathrooms look great in photos, but a practical renovation brief has to match the property and the way you use the room.

What a simple renovation usually costs

The numbers help anchor expectations. In Australia, a simple bathroom renovation typically costs $15,000 to $25,000, according to the 2024 AHURI report, and basic remodels in Victoria average about $18,500. The same data set notes that 68% of homeowners keep existing plumbing locations to reduce costs by up to $4,000, which is one of the most effective cost-control decisions available in a straightforward project. You can use a bathroom renovation cost calculator to test different scope choices against that range.

Another useful reality check comes from pricing trends. The Housing Industry Association 2026 Price Index reports that bathroom renovation costs in Australia have risen 34% since 2018, and simple renovations in Victoria now average $19,200 compared with $14,300 in 2018. The same report attributes much of that movement to labour and materials, while CSCA 2025 data shows skilled labour accounts for 55% of total cost in simple projects, with tile setters and plumbers in Melbourne charging $85 to $110 per hour.

Where the money usually goes

A simple renovation still has technical steps that can't be skipped. Even when the design is restrained, these areas drive cost:

Project element What affects budget most
Labour Licensed plumbing, electrical, tiling, waterproofing, and fit-off
Layout Whether plumbing stays where it is or needs to move
Finishes Tile size, fixture quality, shower screen type, vanity construction
Preparation Demolition complexity, wall condition, subfloor issues, compliance work

Keeping the plumbing layout is often the difference between a controlled renovation and an avoidable one.

A simple way to set your budget ceiling

Set your budget in three layers rather than one figure.

  • Core spend: Demolition, plumbing, electrical, waterproofing, tiling, fixtures.
  • Finish allowance: Vanity, tapware, mirror, lighting, screen, accessories.
  • Decision buffer: A reserve for issues uncovered after strip-out.

That approach keeps the conversation practical. You're not just asking what you want the room to look like. You're asking what the room needs to function properly, and which design choices improve the outcome without dragging the job into a more expensive category.

Simplified Design and New Bathroom Ideas

The best simple bathroom renovation plans don't start with a product list. They start with how the room should feel when you walk in and how easy it should be to use every day.

One common brief sounds like this: “We don't want anything flashy. We just want it to feel cleaner, more modern, and easier to live with.” That's usually the right starting point. Good design for simple bathrooms is less about adding features and more about removing friction.

Screenshot from https://siteprobathrooms.com.au

A practical design story

Take a typical older bathroom in suburban Melbourne. The room is compact. The vanity is too deep, the shower screen chops up the sightline, and the tile pattern makes the space feel busier than it needs to be.

The homeowner starts collecting inspiration for modern bathrooms and designer bathrooms, but most of what they save online isn't directly usable. The room doesn't have the ceiling height for dramatic pendant lighting, and it doesn't need a freestanding bath. What it needs is better proportion.

So the design conversation shifts. Instead of chasing features, we focus on a few moves that carry the room:

  • a floating vanity to open the floor visually
  • larger wall tiles to reduce grout lines
  • a cleaner shower screen profile
  • a restrained material palette that won't date quickly

That's how a simple project starts looking well resolved rather than budget-driven.

New bathroom ideas that usually work well

Some ideas photograph well but create maintenance headaches. Others steadily improve the room every day. These are the choices that tend to hold up:

  • Floating vanities: They make floor cleaning easier and create a lighter look in small rooms.
  • Frameless or minimal-frame shower screens: They reduce visual clutter and help the room feel wider.
  • Large-format tiles: Fewer grout joints usually means a calmer finish and less visual noise.
  • Wall-hung storage or recessed niches: Good storage matters more than extra decoration.
  • Simple colour palettes: Soft neutrals, warm whites, muted stone tones, and timber accents tend to age better than highly specific trends.

Why visualisation matters before demolition

A lot of expensive design regret comes from trying to picture everything in your head. Tile samples on a board rarely tell you how the room will read once the vanity, screen, lighting and sightlines are all in place.

That's where 3D planning earns its keep. It lets you test scale, spacing, storage and finish combinations before anything gets ripped out. SitePro Bathrooms offers design-led planning with 3D visualisation as part of the renovation process, and homeowners can also explore bathroom renovation ideas in Australia to refine their brief before locking in selections.

The smartest design change is often the one that removes a future regret before the job starts.

Keep the room cohesive

A simple bathroom renovation looks expensive when the details agree with each other. It looks patchy when every item tries to be the hero.

A good rule is to choose one feature to carry the room. It might be the vanity finish, the tile, or the shape of the mirror. Then keep the rest supportive. That balance is what gives even modest bathroom renovations a settled, intentional look.

Navigating Permits and Assembling Your Team

Many first-time renovators get uneasy concerning permits, inspections, and trade sequencing. They can picture the tiles and vanity, but these aspects feel harder to judge.

Even though a bathroom may look like a compact room, it combines plumbing, electrical work, wet-area construction, finishes, and compliance in one small footprint. That's why team quality matters so much.

A woman reviewing building permits and architectural floor plans on a wooden table at home.

Where simple jobs become expensive

One of the most common technical mistakes is getting rough-in locations wrong early. In Victoria, misalignment of plumbing rough-in points with the standard shower width can trigger a 29% cost overrun because trades end up rerouting after tiling has effectively boxed them in, according to the 2024 Renovation Cost Report by the Australian Institute of Architects, Victoria branch.

That's not a styling problem. It's a sequencing problem.

The safer method is to lock the layout, confirm plumbing positions before demolition gets too far, complete first-fix work properly, and inspect before closing walls. It sounds procedural because it is procedural. Good bathrooms are built through order, not improvisation.

Who should be on the job

For a straightforward renovation, you need people who can handle licensed work and coordinate handovers cleanly between stages. Depending on the project, homeowners may work with separate trades or engage a specialist renovation company or registered builders unlimited class builder to manage the job end to end.

What matters is not the label alone. It's whether the people on site can do these things properly:

  • Confirm rough-in points before walling starts
  • Carry out licensed plumbing and electrical work
  • Arrange required inspections
  • Install wet-area substrates correctly
  • Sequence waterproofing, tiling, and fit-off without shortcuts

Inspections are not admin for admin's sake

The Victorian Building Authority requires permits and inspections for plumbing and electrical work in the relevant circumstances, and the data makes the point clearly. Renovations that include a permit and inspection phase for those works have 91% higher success rates than projects that skip that step. The same guidance also requires the first-fix electrical stage to be completed and inspected before walls are closed, with outlets set at least 150mm from the shower edge, a code requirement linked to preventing 80% of future electrical safety violations.

Skipping inspection doesn't remove risk. It transfers risk to the homeowner.

Ask these questions before you hire

You don't need to interrogate trades like a building surveyor. But you do need clear answers.

  • Who is responsible for coordination: If one trade finishes late, who resets the sequence?
  • How are inspections handled: Don't assume someone else is lodging or arranging them.
  • What substrate is going into wet zones: Water-resistant backing matters as much as the tile finish.
  • When is first-fix signed off: This should be clear before any board or tile goes on.

A bathroom is one room, but it behaves like a chain. If the first links are weak, every finish that follows is sitting on compromised work.

The Renovation Timeline What to Expect

A bathroom renovation feels messy in the middle because it is. The room gets stripped back, the services are exposed, and for a while it looks worse than it ever did before. That part is normal.

What matters is whether the job moves in the right order, with each stage setting up the next one.

An unfinished bathroom under construction with exposed wooden wall studs, plumbing pipes, and a shower base.

Demolition and strip-out

The first phase is controlled removal. Old fixtures come out, wall and floor finishes are taken back, and the team gets a clear look at the substrate, framing and service locations.

This stage often answers the questions no quote can settle perfectly in advance. You find out whether the walls are sound, whether previous work was done properly, and whether the floor has any surprises that need correction before the rebuild.

First-fix services

Once the room is open, plumbing and electrical first-fix work happens before the bathroom gets closed up again, establishing positions for wastes, supply lines, outlets, switches, lighting and ventilation.

The reason this stage matters so much is simple. If service locations are off, every finish that follows gets harder. Tile set-out suffers, vanity placement becomes awkward, and late changes become expensive.

Walling and waterproofing

After first-fix inspection and substrate preparation, wet-area surfaces are built for tile. Then comes the stage that separates durable bathrooms from short-lived ones.

A critical technical requirement is the 24-hour flood test of the shower pan liner before tiling. According to the Master Builders Association of Victoria, failure rates in non-compliant projects reach 38%, while the Australian Building Codes Board reports that 65% of wet-area failures in Victoria stem from inadequate waterproofing installation. Projects that adhere to the flood-test protocol properly achieve success rates above 94%.

If a shower base isn't tested before tile goes down, the homeowner is being asked to trust work that hasn't been proven.

A properly built shower area also needs the right sequencing. The membrane must be suitable, the falls have to work toward the drain, and the assembly has to be allowed to cure as required before the next layer goes on.

Tiling and fit-off

Once waterproofing is confirmed, the room starts to turn the corner visually. Tiling goes in, grout lines define the surfaces, and the design decisions become real rather than theoretical.

After tiling cures, the fit-off stage brings the bathroom together:

  • Vanity and basin installation: The room starts functioning again.
  • Tapware and shower fittings: Final service points are connected.
  • Screen, mirror and accessories: The visual detail gets completed.
  • Testing and handover: Fixtures are checked and the room is cleaned for use.

What quality looks like on site

The best renovation timelines aren't the fastest looking ones. They're the ones where no one is rushing a wet-area stage just to make the calendar look good.

A good project manager keeps trades moving, but also protects the pauses that matter. Waterproofing has to cure. Inspections have to happen. Tile setting has to respect layout and level. Those are the moments that decide whether your bathroom still performs well years later.

Your Beautiful New Bathroom Awaits

A successful simple bathroom renovation comes down to judgement. Keep the parts that still work. Upgrade the parts that improve function. Don't spend designer-bathroom money on features you won't use, and don't cut corners on the hidden construction that protects the room.

That balance is what gives bathroom renovations long-term value. The budget needs to be realistic, the design needs to suit the home, and the build has to follow the right order with licensed trades handling the technical work. When those pieces line up, even a modest renovation can feel polished, calm and built to last.

For homeowners in Highett and across greater Victoria, the main challenge usually isn't finding inspiration. It's turning ideas into a project that stays controlled from first concept to final handover.

If your current bathroom is tired, cramped, hard to clean, or showing signs that a simple refresh won't solve, it's time to plan properly.


If you're ready to move from ideas to a workable renovation brief, contact SitePro Bathrooms to discuss your space, your layout, and the level of finish that makes sense for your home.

  • siteprobathrooms

Your Ultimate Bathroom Renovation Checklist

Dreaming of a new bathroom usually starts the same way. You've saved a folder of new bathroom ideas, shortlisted tiles, and pictured a calmer morning routine. Then the practical questions show up. What comes first, who needs to be booked, what can go wrong behind the walls, and how do you get that polished designer bathroom look without running into costly surprises halfway through?

That's where a proper bathroom renovation checklist earns its keep. The best renovations aren't driven by finishes alone. They're driven by sequence, documentation, and quality control at each stage. In Australia, that matters because bathroom work sits inside a regulated building framework. The strongest starting point is compliance with the National Construction Code and wet-area waterproofing requirements under AS 3740, with approvals, licensed trades, and final compliance paperwork treated as mandatory parts of the job, especially in Victoria where structural or plumbing changes can trigger permits, as noted in this Australian bathroom remodel checklist guide.

A well-built bathroom renovation checklist does more than keep a project organised. It protects the home from hidden moisture issues, poor drainage, bad ventilation, and rushed trade sequencing. It also gives you a clearer path from concept to handover, whether you're planning modern bathrooms, family bathrooms, or a more customized designer finish.

Use the list below like a registered builder would use a project plan. It's not just about what to choose. It's about when to decide, what to verify, and where not to cut corners.

1. Planning and Design Consultation

Start before you choose tapware, tiles, or colours. The first conversation should focus on how the bathroom needs to function. A family bathroom used by school-aged kids has different priorities from an ensuite designed for easy cleaning, quiet lighting, and more storage around the vanity.

Bring visual references, but don't stop there. Share your daily routine, the storage you're missing, who uses the room, and what frustrates you about the current layout. Good design consultation is partly about style and mostly about identifying constraints early. If the toilet location is awkward, the shower feels cramped, or the vanity blocks circulation, those issues need to be solved on paper first.

A man and woman review bathroom renovation blueprints while sitting at a table together.

What to bring into the first meeting

  • Style references: Save photos of bathrooms you like, but explain what you like about them. It might be the wall-hung vanity, not the colour scheme.
  • Non-negotiables: List what must stay or be added, such as a bathtub, extra power points, or shaving storage.
  • Household reality: Mention if it's the only bathroom, if kids use it, or if an older family member needs easy access.

One of the most useful things you can do before that meeting is read a practical guide on how to plan a bathroom renovation. It helps you arrive with better questions and fewer assumptions.

Practical rule: If you can't describe how the room should function on a rushed weekday morning, the design brief still isn't finished.

Ask about warranty coverage, after-sales support, previous projects similar to yours, and how design decisions get recorded. Verbal agreements are where many renovation misunderstandings start.

2. 3D Design Visualisation and Technical Drawings

A lot of expensive mistakes look obvious in a 3D model and invisible in your head. That's why proper visualisation matters. It's the difference between liking the idea of a floating vanity and seeing that it leaves the room feeling too stark once the wall tiles, mirror, and lighting are all in place.

3D design is useful for more than aesthetics. It helps test sightlines, door swings, clearances, and fixture proportions. In small bathrooms, this is especially important. A freestanding bath may look perfect in a photo, but in a tight room it can make cleaning harder and crowd access to the shower zone.

A person pointing at a laptop screen showing a modern 3D interior design bathroom renovation project.

What the drawings must show

Technical drawings shouldn't be decorative. They should clearly mark plumbing points, floor wastes, power points, lighting, switch positions, niche heights, vanity depth, and tile set-out intentions. If those details aren't documented, trades will end up making judgement calls on site.

Use a proper 3D bathroom planner to test alternatives before demolition starts. Ask to see the room from the doorway, from vanity height, and from inside the shower looking out. Those views often reveal issues the hero render hides.

A practical example. In one compact ensuite layout, shifting the shower screen by a small amount on the drawing can be the difference between a towel rail fitting properly or colliding with the door arc. That's the sort of problem you want solved before materials are ordered.

A strong render sells the vision. A strong technical drawing protects the build.

If you're aiming for modern bathrooms or high-end designer bathrooms, insist on both. The visual should guide the finish. The documentation should guide the trades.

3. Budget Development and Cost Planning

Discipline matters. A bathroom renovation checklist that skips budget structure usually leads to rushed compromises later. The budget should reflect the build sequence, not just a shopping list of fixtures.

Break costs into categories that make sense on site. Demolition, disposal, carpentry, plumbing, electrical, waterproofing, tiling, glazing, cabinetry, stone, painting, fit-off, and final clean should all be visible. When a quote is too broad, it's harder to see what's included, what's been assumed, and where variations are likely to appear.

For procurement, one of the smartest moves is to plan around lead-time risk, not just taste. Industry forecasts indicate sustained demand pressure in bathroom remodelling, with one projection putting the global market at USD 315.9 billion by 2035 and another at USD 615.61 billion by 2036, as discussed in this bathroom remodelling market analysis. For homeowners, the practical takeaway is simple. Order long-lead items early.

Where to spend and where to stay practical

  • Spend on hidden performance: Waterproofing products, plumbing quality, drainage details, and ventilation hardware matter more than a fashionable basin shape.
  • Be selective on statement pieces: A feature mirror or premium mixer can lift the room without forcing every finish into the top tier.
  • Keep a buffer: Older bathrooms can reveal damaged framing, uneven floors, or outdated services once demolition begins.

The most common budget mistake isn't choosing expensive tiles. It's approving a design before checking whether the chosen layout requires major plumbing relocation, custom joinery, or extra electrical work.

If you want a stress-free build, tie payment stages to completed milestones, not vague calendar dates. A well-planned budget should support good sequencing, not pressure trades to rush.

4. Permits and Building Code Compliance

Plenty of homeowners think compliance is paperwork at the end. It isn't. It starts before the first wall sheet comes off. In Victoria, bathroom renovations can involve permit-triggering structural or plumbing changes, so approvals, licensed trades, and final compliance documentation should sit inside the project plan from day one.

Australian bathroom guidance consistently treats bathroom work as a regulated building process, not a styling exercise. That's because moisture control, drainage, and safe plumbing integration aren't optional finish details. They're core performance requirements. If the job changes wall structure, alters plumbing, or affects waterproofed areas, the compliance path needs to be confirmed early.

A professional construction worker applying blue waterproof coating to shower floor and walls using a paint roller.

Compliance documents worth asking for

  • Trade licences and insurance: Check them before work begins, not after a problem appears.
  • Certificates for plumbing and electrical work: Keep copies with your home records.
  • Waterproofing records and sign-off: These matter because waterproofing is a controlled construction stage, not a casual add-on.

A simple example. If you add underfloor heating, extra power points near wet areas, or a heated towel rail, electrical safety expectations become part of the planning conversation. If you relocate a shower recess or move a floor waste, wet-area compliance moves with it.

What works is early confirmation with the right professionals. What doesn't work is assuming approval can be sorted out once the room is half-built.

5. Structural Assessment and Preparation

The nicest tile in the showroom won't save a bad substrate. Before any new bathroom ideas get locked in, the room needs to be assessed for the conditions that can undermine the whole renovation. That means checking framing, floors, wall straightness, previous leak damage, ventilation performance, and the condition of the existing plumbing penetrations.

In practice, this stage often separates cosmetic jobs from proper bathroom renovations. A room may look tired but sound. Another may look fine until demolition reveals swollen sheet linings, loose subfloor sections, or mould around the old shower area. If you build over those problems, they don't disappear. They stay hidden until they become expensive.

What to inspect before rebuilding

Look closely at wet-area transitions, floor levels, and where water has likely travelled before. Around old shower screens, behind vanities, and near poorly sealed bath edges are common trouble spots. Uneven floors also matter because they affect drainage falls and tile finish.

A typical real-world scenario is an older bathroom where the floor appears level to the eye but drops away in the wrong direction. The tiles might still sit nicely, yet the shower won't drain properly and water lingers outside the wet zone. That issue needs correction before waterproofing starts.

If the room isn't straight, dry, and solid before the membrane goes on, the finish quality won't last.

Preparation also includes practical site setup. Protect nearby flooring, define rubbish removal access, and isolate dust paths. A tidy prep stage saves a lot of frustration later, especially in occupied homes.

6. Fixture and Material Selection

Homeowners often get pulled too far toward looks alone. Style matters, but a successful bathroom renovation checklist treats fixture and material selection as a balance between appearance, durability, maintenance, and lead time.

Porcelain tiles, for example, are a practical choice in busy bathrooms because they're hard-wearing and easy to maintain. Natural stone can look excellent, but it usually asks more from the owner in sealing and cleaning. Matte black tapware can suit modern bathrooms, yet it tends to show water spotting differently from brushed metal finishes. None of these choices are wrong. They just need to fit the way the bathroom will be used.

Choose materials with the room in mind

  • Tiles: Think about slip resistance, grout maintenance, tile size, and how they'll sit with floor falls.
  • Vanities: Prioritise storage depth, drawer function, moisture-resistant construction, and cleaning access underneath or around the base.
  • Screens and fittings: Frameless glass looks sharp, but make sure it suits the room size and cleaning expectations.

For tile selection, it helps to review practical advice on how to choose bathroom tiles. Samples should always be checked in the bathroom's likely lighting conditions, not only under showroom lighting.

A good example is a homeowner choosing a pale stone-look tile for a designer bathroom, then discovering the room doesn't get enough natural light to show its texture properly. In that case, a slightly warmer tile or different finish can deliver a better result without changing the overall style.

Keep fixture finishes consistent. Mixing brushed brass, chrome, and matte black in one compact space usually looks less intentional than people expect.

7. Plumbing and Electrical Planning

Most layout changes are really plumbing and electrical decisions in disguise. Moving a vanity sounds simple until it affects mirror lighting, power point placement, and where the waste line can realistically run. The same goes for replacing a standard shower with a larger recess, adding a niche, or shifting the toilet for a cleaner plan.

Licensed trades should map this properly before rough-in starts. The room needs suitable water supply, drainage falls, safe electrical placement, switching logic, and service access for future maintenance. Planning for heated towel rails, underfloor heating, illuminated mirrors, or extra charging points is worth doing now because retrofitting later is messy and expensive.

Details that deserve more attention

Think beyond where fixtures go. Ask where isolation valves will sit, how the exhaust fan will be ducted, whether the lighting will flatter the mirror zone, and whether cleaning access has been considered around wall-hung fixtures.

Australian renovation guidance continues to stress the importance of ventilation, waterproofing, and electrical safety decisions in bathrooms, especially when adding powered features near water, as discussed in this bathroom remodel checklist commentary on Australian standards and moisture control. In plain terms, a beautiful room can still be a poor renovation if the fan, wiring, and wet-area detailing are under-specified.

One practical scenario. A homeowner selects a mirrored shaving cabinet late in the job and only then realises there's no planned recessed cavity, no dedicated light feed, and no convenient GPO location. That's not a design problem. It's a planning problem.

8. Waterproofing and Moisture Management

If there's one stage that should never be treated as routine, it's this one. In Australia, wet-area waterproofing is a compliance-critical part of the build. The National Construction Code requires wet-area waterproofing to resist moisture penetration, and AS 3740 is the referenced standard for domestic wet areas, as outlined in this discussion of waterproofing and wet-area standards.

That has practical consequences for your bathroom renovation checklist. The membrane system, substrate preparation, junctions, penetrations, floor falls, and inspection points should all be confirmed before tiling begins. Once tiles are laid, many failures become hidden.

The checks that matter before tiles go down

  • Substrate condition: Surfaces must be clean, stable, and suitable for the chosen membrane system.
  • Wet-area definition: Shower recesses, transitions, niches, and penetrations all need clear treatment.
  • Drainage logic: Falls should move water to the waste, not into corners or outside the shower line.

Australian guidance also consistently puts ventilation, leak prevention, shower recess waterproofing, substrate checks, and plumbing pressure or leak testing near the front of the process, with inspection points staged between rough-in, waterproofing, tiling, and fit-off, according to this Australian planning guide for bathroom remodel sequencing. That sequencing is what keeps hidden moisture damage from becoming a post-handover surprise.

Waterproofing isn't the part you notice on reveal day. It's the part you'll appreciate years later if it was done properly.

Don't sign off this stage on trust alone. Ask what system is being used, how the substrate was prepared, and when inspection occurred.

9. Installation and Construction Execution

This is the stage everyone pictures, but the visible progress only works when sequencing is tight. Good construction execution is mostly coordination. Demolition has to leave the right surfaces exposed. Rough-in has to happen before wall closure. Waterproofing must be completed before tiling. Fit-off needs finished surfaces ready, not nearly ready.

The practical challenge isn't just the build. It's living through it. That's especially true in smaller homes and apartments where there may be only one bathroom. Independent renovation guidance increasingly points out that temporary bathroom continuity, dust control, and circulation planning are often missing from mainstream checklists, even though they're central to how households cope during works, as explained in this guide on living through a bathroom renovation.

How to keep the build manageable

  • Set access rules early: Confirm start times, parking, site entry, and who locks up.
  • Protect the rest of the home: Use floor coverings, dust barriers, and a clear path for waste removal.
  • Plan household routines: If the only shower is offline, decide in advance how bathing, toileting, laundry, and storage will work.

A real-world trade-off appears here. The fastest build sequence isn't always the best one for an occupied home. Sometimes a slightly different order of works causes less disruption, keeps circulation safer, and reduces stress for the household.

If you have a project manager, use them. Ask for progress photos, milestone updates, and immediate communication when something unexpected appears behind walls or under floors.

10. Final Inspections, Adjustments, and Handover

Handover isn't a quick look at the tiles and a final invoice. It's a detailed quality-control stage. Every fixture should be tested. Every drain should be run. Every switch, fan, hinge, drawer, seal, and silicone joint should be checked with the same care that went into selecting the finishes.

Walk through the bathroom slowly. Look at grout consistency, tile cuts around fittings, alignment of accessories, door clearances, vanity drawer operation, and whether water drains where it should. Turn the shower on and watch where splash goes. Run the basin and inspect underneath. Use the exhaust fan and make sure it operates as intended.

Your handover list

  • Create a snag list: Note any cosmetic or functional issues while the trades are still engaged.

  • Collect documents: Keep warranties, care instructions, and compliance certificates together.
  • Ask for maintenance advice: Different surfaces need different cleaning methods, especially stone, glass coatings, and specialty finishes.

One common example is a bathroom that looks finished but still needs adjustment to a shower screen seal, vanity door alignment, or mixer temperature setting. Those aren't major faults, but they should be resolved before the project is closed out.

“Don't judge the room only when it's dry and spotless. Test it as a working bathroom.”

Photograph the completed space for your records. Keep all documentation in one folder. If you ever sell, lease, or need warranty support, organised records make life much easier.

Bathroom Renovation: 10-Point Comparison

Item Implementation Complexity Resource Requirements Expected Outcomes Ideal Use Cases Key Advantages
Planning and Design Consultation Low–Medium – meetings and revisions Designer/consultant time, homeowner input, site measurements Clear scope, timeline, budget and initial layout Project start, scope definition, feasibility checks Prevents scope creep; identifies issues early; aligns expectations
3D Design Visualisation and Technical Drawings Medium–High – technical modelling and drafting 3D designer/software, technical drafts, client review sessions Photoreal renders, technical plans and material palettes Complex layouts, visual decision-making, client approvals Reduces design regret; improves trade communication; tests options
Budget Development and Cost Planning Medium – detailed costing and contingency planning Estimator, supplier quotes, financial schedules, contingency funds Itemised budget, payment schedule and cost control measures Cost-sensitive projects, financing, prioritisation of features Prevents overruns; prioritises spending; enables financing arrangements
Permits and Building Code Compliance Medium–High – regulatory submissions and inspections Permit applications, licensed trades, council liaison Approved permits, compliance certificates and legal protection Projects requiring council approval or safety-critical changes Ensures safety and legality; protects insurance and resale value
Structural Assessment and Preparation High – expert inspection and remedial work Structural inspector, testing equipment, remedial trades Structural report, required repairs and accurate cost estimates Older homes, suspected damage, major layout or load changes Identifies hidden issues; prevents future failures; enables accurate quoting
Fixture and Material Selection Medium – specification and sourcing decisions Suppliers, samples, showrooms, lead-time planning Finalised fixtures/materials with warranties and delivery timelines Finish specification, longevity-focused upgrades, style choices Improves durability and value; personalises design; offers efficiency gains
Plumbing and Electrical Planning High – technical system design and compliance Licensed plumbers/electricians, schematics, compliance checks Code-compliant water and electrical systems sized for design Layout changes, new fixtures, heated elements and safety upgrades Ensures reliable function and safety; avoids costly future rework
Waterproofing and Moisture Management High – specialist application and ventilation design Waterproof membranes, qualified applicators, ventilation systems Protected wet zones, reduced mould risk and longer asset life Showers, wet rooms, humid climates or wet-area renovations Protects structure; prevents mould; extends bathroom longevity
Installation and Construction Execution High – multi-trade coordination and site management Project manager, coordinated trades, materials and logistics Completed bathroom built to spec with quality oversight Full renovations, complex installations, multi-trade projects Professional coordination; quality workmanship; warranty coverage
Final Inspections, Adjustments, and Handover Medium – testing, snagging and documentation Inspectors/project manager, testing tools, handover documents Certified completion, resolved snags and maintenance/warranty info Project closeout, warranty activation, documentation for resale Confirms compliance and function; provides documentation; protects owner

Your Renovation Success Starts with the Right Partner

A strong bathroom renovation checklist does more than keep you organised. It helps you make better decisions in the right order. That's what separates a renovation that merely looks good on completion from one that performs properly for years. If you want modern bathrooms, refined designer bathrooms, or practical family spaces, the path is the same. Plan thoroughly, document everything, use licensed trades, and treat waterproofing, ventilation, drainage, and compliance as core build issues.

The biggest mistakes usually happen when homeowners rush from inspiration into selection. They choose tiles before confirming substrate condition. They commit to a layout before checking plumbing implications. They fall in love with a showroom display before asking how the room will function on a busy weekday morning. Good bathroom renovations don't work that way. They move from consultation to design, from design to technical planning, from planning to procurement, and from there into controlled construction and careful handover.

That's also why the right renovation partner matters so much. You want a team that can connect the creative side of the job with the technical side. A polished finish means very little if the exhaust fan is underdone, the drainage is poor, or the waterproofing stage was rushed. The best results come from builders and renovation specialists who understand sequence, communicate clearly, and manage the project like a professional build rather than a collection of disconnected trade visits.

For homeowners in Highett and across greater Victoria, that matters even more when the home is occupied, the bathroom is the only one in the house, or the project includes structural, plumbing, or electrical changes. Those jobs need coordination, not guesswork.

If you're ready to turn new bathroom ideas into a finished space that looks sharp and holds up, work with a team that approaches the project like registered builders unlimited in their commitment to detail, compliance, and workmanship. SitePro Bathrooms offers the kind of end-to-end process that helps turn plans into completed bathrooms with less stress and fewer surprises. From design consultation and 3D visualisation through to construction and final handover, the right partner can turn a bathroom renovation checklist into a bathroom you're glad to live with every day.

  • siteprobathrooms

Bathroom Floor Heating: A Highett Renovator’s Guide 2026

On a winter morning in Highett, the bathroom floor can be the coldest surface in the house. You leave a warm bed, step onto tile, and the room feels far less inviting than the renovation photos suggested it would. That's usually the moment homeowners start asking whether bathroom floor heating is worth adding while the room is already being stripped back.

In the right bathroom, it is. Not because it turns a bathroom into a miracle energy saver, and not because every home needs it. It works because it fixes a very specific daily problem well. Cold tile becomes comfortable underfoot, the room feels more finished, and the whole space leans closer to the standard people expect from modern bathrooms and well-planned bathroom renovations.

That Icy Shock The Case for Warm Bathroom Floors

Step onto cold tile at 6:30 on a July morning in Highett and you feel the problem straight away. In a lot of older Victorian homes, the bathroom is one of the chilliest rooms in the house. Solid surfaces, little passive warmth, and older layouts all work against comfort.

That is why underfloor heating keeps coming up early in renovation planning. It solves a daily irritation in a part of the house you use first thing and last thing. In the right bathroom, it is not a flashy extra. It is a comfort upgrade with a clear job.

In Melbourne and across the bayside suburbs, this lands differently in older housing stock than it does in a brand-new build. Many Victorian-era and mid-century homes have bathrooms added or updated in stages, often with limited insulation below the floor and little thought given to winter comfort. Heated flooring helps correct that, but it needs to be planned properly around floor build-up, waterproofing, and the electrical or plumbing work already going into the room.

Why homeowners ask for it

Homeowners usually raise heated floors for practical reasons, not novelty.

  • Cold tile every winter: The bathroom looks good after a renovation but still feels harsh underfoot.
  • A more complete result: The fixtures and finishes are new, and they want the comfort level to match the visual standard.
  • Better use of a small room: In a bathroom, a modest upgrade can change the way the whole space feels.
  • Long-term value: If you are already stripping the room back, this is the stage where adding heating is far easier than trying to retrofit it later.

Warm floors do not scream for attention. They make the whole bathroom feel better built.

Why it suits bathrooms so well

Bathrooms are one of the few places where underfloor heating punches above its size. The rooms are compact, tiled surfaces are common, and you notice temperature at floor level more than you do in a hallway or living area. A small heated area can make the room feel far more comfortable without changing how the bathroom looks.

There is also a practical renovation advantage. In Victoria, bathroom work needs to line up with code requirements around waterproofing, clearances, electrical safety, and, where applicable, plumbing changes. Heated floors can fit well within that process, but only if the builder, waterproofer, tiler, and electrician are working from the same plan. That coordination matters even more in older homes where subfloors are rarely perfectly level and existing construction can throw up surprises once demolition starts.

An experienced registered builder such as SitePro adds value. The question is not just whether heated floors can be installed. It is whether they can be installed cleanly, safely, and in a way that suits the home, the budget, and the rest of the renovation.

Done well, bathroom floor heating improves comfort every winter morning. Done badly, it adds cost, floor height problems, or avoidable rework. That is why it pays to treat it as part of the bathroom build, not as an afterthought.

Electric vs Hydronic Systems Which Is Right for You

Step onto a tiled bathroom floor in a Highett winter and the question gets simple very quickly. You want warm tiles underfoot, but you also want a system that suits the way Victorian homes are renovated.

For bathroom-only projects, the choice is usually straightforward. Electric underfloor heating fits most renovations better. Hydronic underfloor heating can work well, but it is generally better suited to new builds, major extensions, or homes already being designed around a larger water-based heating setup.

A split view showing electric underfloor heating mats and water-based pipe systems installed under bathroom floor tiles.

Electric systems use mats or loose cables laid beneath the tile finish. Hydronic systems circulate heated water through pipework in the floor. Both can produce a comfortable result. The difference is how much work is involved to get there, how the floor build-up affects the room, and whether the rest of the house is being heated the same way.

That matters in older Victorian homes. Many have uneven subfloors, limited floor height, and renovation constraints that do not leave much room for bulky build-ups or extra plant. Once you add waterproofing, falls to wastes, tile thickness and door clearances, a system that looks fine on paper can become awkward on site.

The practical difference in a bathroom renovation

Electric systems heat up faster and are easier to control around daily routines. If the bathroom is busiest from 6:30 to 8:00 in the morning and again at night, electric usually suits that pattern well.

Hydronic systems are slower to respond and make more sense where they stay on for longer periods or serve several spaces together. In one bathroom, that can be more system than the job really needs.

Feature Electric System (Mats/Cables) Hydronic System (Pipes)
Best fit Bathroom renovations, ensuites, powder rooms New builds, large homes, multi-room heating plans
Heat-up behaviour Faster response for intermittent use Slower, steadier response
Installation complexity Simpler in a single-room renovation More involved, especially in an existing home
Floor build-up pressure Usually easier to manage in tight retrofits Can be harder where floor height is limited
Coordination needs Mainly builder, tiler, waterproofer, electrician Broader system coordination and plant planning
Practical value in a bathroom-only job Strong Often hard to justify unless part of a larger system

Where electric usually wins

In my experience, electric is the better fit for a standard bathroom renovation in Highett for three practical reasons.

  • It is easier to integrate into a renovation. The system can usually be planned within the normal tile and floor preparation sequence without turning the project into a larger mechanical design exercise.
  • It suits smaller rooms. Bathrooms, ensuites and powder rooms do not need the same heating strategy as open-plan living areas.
  • It gives better value for a single room. Homeowners are usually after comfort, reliable controls and a clean finished floor, not a full-house heating overhaul.

It also tends to be easier to price clearly. If you are already weighing tile choices and finish costs, it helps to understand how heating works alongside the overall bathroom tiling cost rather than treating it as a separate add-on with no relation to the rest of the floor assembly.

Where hydronic makes sense

Hydronic earns its place in the right project. If the home is a new build, if there is a slab designed for it, or if several rooms will run off the same heating system, hydronic can be a sound long-term choice. It can also appeal in high-end builds where the entire heating approach is being planned from day one.

That is a narrower use case in bathroom renovations across Victoria.

The other point homeowners often miss is approvals and trade coordination. In Victoria, bathroom work has to line up with the National Construction Code, waterproofing requirements, electrical safety rules, and any plumbing changes tied to the renovation. A registered builder like SitePro can coordinate those moving parts early, which matters more with hydronic because there are more components, more set-out decisions and less room for late changes.

For a single existing bathroom, electric usually delivers the comfort people want with less disruption, less floor-height pressure and fewer complications on site. Hydronic is still a good system. It just tends to make the most sense when the bathroom is one part of a bigger heating plan.

Understanding the Costs of Bathroom Floor Heating in Victoria

Bathroom floor heating is one of those upgrades that sounds simple until the quote lands. In Victorian homes, the price can shift quickly based on the age of the property, the type of subfloor, and how much work is already happening in the renovation.

The first thing I tell homeowners in Highett is to look at cost in two parts. Installation is only half the decision. Ongoing use matters too, especially if the system will run daily through winter rather than only on cold mornings.

What you are actually paying for

A proper quote should separate the heating system from the building work around it. That matters because the heater itself is only one part of the floor assembly.

Typical cost items include:

  • Heating supply: Electric mat or loose cable, thermostat, sensor, and control components.
  • Subfloor preparation: Levelling, patching, or build-up work so the finished floor sits correctly.
  • Floor assembly: Bedding the heating element properly so heat transfers well and the tile finish stays sound.
  • Electrical work: Final connection and testing by a licensed electrician.
  • Tiling and finishing: The heating layer has to work with the full floor build-up, which is why it helps to understand what affects bathroom tiling cost in a renovation.

That last part gets missed a lot. Heated floors do not sit outside the renovation. They affect heights, tile adhesive depth, transitions at the doorway, and sometimes the waste set-out.

Why costs vary so much in Victorian homes

Victorian housing stock is mixed, and that is where pricing starts to move. A 1970s brick veneer home on slab is a different job from a period weatherboard bathroom on timber joists. Apartments add another layer again, especially where floor height, strata requirements, and access are tight.

Older bathrooms also tend to hide surprises. Uneven substrates, outdated wiring, previous patch repairs, and floors that are out of level can all add labour before the heating goes down. In many cases, that preparation work has more impact on the final figure than the heating product itself.

Building compliance matters too. In Victoria, heated bathroom floors need to fit within the wider renovation scope, including waterproofing, electrical safety, and National Construction Code requirements. If the job includes structural changes or major bathroom works, coordination through a registered builder like SitePro helps avoid expensive rework later.

Good value usually comes from smarter coverage

Heating every bit of floor area is rarely the best use of the budget.

The better approach is to heat the zones you stand on. In front of the vanity, beside the shower, and through the main walking path usually delivers the comfort people notice most. There is no point paying to heat under a fixed vanity, toilet pan, or full-height joinery where the warmth will not be felt.

That approach keeps supply and running costs under better control, and it often makes the layout easier for the installer and tiler as well.

Running costs depend on how the room is used

Ongoing cost is less about the system in isolation and more about habits. A bathroom that gets used at the same time every morning is cheaper to run sensibly because the heating can be programmed around that routine. A floor left on longer than needed costs more, and poor insulation below the heating makes that worse.

For most households, underfloor heating works best as a comfort upgrade. It is there to take the chill off the tiles and make winter mornings easier. That is usually where the value sits in a Victorian bathroom renovation. Not in cheap whole-room heating, but in a warmer floor that feels good every day and fits the way the home is used.

Designing Your Heated Floor for Perfect Warmth

Step onto a cold bathroom floor in a Melbourne winter and you feel every shortcut made in the design. Good heating does not start with the cable or the mat. It starts with the layout, the floor finish, and a clear plan for how the room will be used in a Victorian home.

A professional interior designer uses a pencil and ruler to carefully mark up a bathroom blueprint.

Start with the floor finish

Tile is usually the right choice for a heated bathroom floor. Ceramic and porcelain both transfer warmth well, hold heat nicely underfoot, and already make sense in wet areas where durability and cleaning matter. In older Victorian homes around Highett and across Melbourne's bayside suburbs, that practical fit matters because bathroom renovations often need to work around uneven subfloors, tighter floor heights, and existing wet-area conditions.

The finish also affects how the whole system feels day to day. Large-format porcelain can look great, but it needs a flatter substrate and careful set-out. Smaller tiles can be more forgiving in older rooms that are a little out of square. If you are still weighing up finishes, this guide on how to choose bathroom tiles is worth reading before the heating plan is finalised.

Design the heated area around real use

A warm bathroom floor feels best when the heating is placed where bare feet land.

That means the design should follow the usable floor area, not the room outline on a plan. In practice, fixed vanities, toilet pans, bath hob bases, shaving cabinets that run to the floor, and full-height joinery all reduce the area worth heating. I regularly see homeowners assume a bigger heated area means a better result. Usually it just means spending more on sections of floor you never stand on.

The better layouts focus on three zones:

  • In front of the vanity, where people stand the longest
  • At the shower entry or beside the bath, where the floor feels coldest
  • Along the main walking line, especially in narrow bathrooms

That approach suits many Victorian renovations because these homes often have compact bathrooms and awkward footprints. A smartly placed heated zone gives a better comfort result than trying to cover every corner.

Plan around fixtures early

Heated floor design and bathroom design need to be coordinated from the start. If the vanity moves by even a small amount after the heating layout is drawn, the cable or mat position may need to change as well. The same goes for floor wastes, wall-hung toilets, nib walls, and shower screens.

This is one reason planning matters more in older Victorian homes. Existing framing, plumbing positions, and floor levels can limit what is easy to shift. If the renovation involves structural changes or a new layout, coordination through a registered builder such as SitePro helps keep the heating design aligned with the rest of the job and with Victorian building requirements.

Sensor location affects comfort

The floor sensor is a small detail that has a big effect on performance. Put it in the wrong spot and the floor can feel patchy or cycle poorly. It should sit where it can read a representative floor temperature, not tucked against a hot cable run or buried where future access becomes difficult.

Homeowners rarely see this part once the tiles are down, but it matters. A good design is not only about getting heat into the floor. It is about making sure the system responds properly on cold mornings and stays reliable over time.

Good design respects floor build-up

Underfloor heating adds layers. In a new build that is usually easy to accommodate. In a bathroom renovation, especially in an older Victorian house, added height can affect door clearances, shower set-downs, transitions to adjoining rooms, and the finished height at the hallway.

That trade-off needs to be sorted before materials are ordered. A heating system that looks fine on paper can create a poor threshold detail or extra work at the shower if nobody has allowed for the full floor build-up. The warmest floor is not the best result if the renovation ends up with awkward levels or drainage problems.

Installation Planning for Your Bathroom Renovation

Bathroom floor heating in Australia is not a casual add-on. In a wet area, every layer matters. If the planning is sloppy, you don't just get weak performance. You risk damage to waterproofing, poor sensor placement, difficult repairs and compliance problems that should never have been created in the first place.

A professional installer lays down electric radiant floor heating mesh on a freshly applied layer of adhesive.

Why this isn't a DIY wet-area job

A bathroom renovation already requires careful sequencing between demolition, substrate preparation, waterproofing, tiling and electrical work. Add floor heating and the margin for error gets tighter. Once the system is embedded below tile, mistakes become expensive and disruptive to fix.

One practical Australian concern that's often underexplained is wet-area compliance. A trade-focused discussion of bathroom floor heating highlights that the system must be correctly embedded, the temperature probe carefully positioned, and the electrical connection managed by a licensed professional to protect waterproofing integrity and meet safety requirements.

The details that separate a good job from a problem job

The system itself isn't the hard part. The hard part is coordination.

  • Sensor placement: The thermostat sensor should sit between heating wires, not touching them. A backup sensor in the wall cavity is a sensible safeguard if the primary one fails.
  • Correct embedding: The heating element needs proper coverage within the floor assembly for protection and even heat transfer.
  • Electrical sign-off: Final connection belongs to a licensed electrician, not a general trade improvising at the last minute.
  • Waterproofing continuity: Every penetration and layer has to be considered with the wet area as a whole.

A homeowner usually won't see those details once the room is finished. That doesn't make them optional.

Why insulation and subfloor prep matter

A useful benchmark from an installation specification is 10 W/sq ft for many electric mat systems, which helps explain why these products are typically used as comfort heating rather than primary whole-house heating. The same guide notes that insulation under the system is often recommended on concrete slabs and that the element should be embedded in thinset or self-levelling cement to improve thermal contact and protect the cable. It also explains the basic cause and effect clearly. Better insulation and tighter embedding improve heat transfer to the tile surface and help shorten warm-up time. That specification detail is outlined in this underfloor heating installation procedure.

In older Victorian homes, this matters a lot. Some bathrooms sit over cold slabs. Others have timber floors that need careful build-up management. If the base isn't prepared properly, the system can still work, but it won't work as well as it should.

Practical rule: Treat the heated floor as one part of the whole bathroom build-up, not as a separate accessory.

Who should coordinate it

A registered builder unlimited earns their place. Not because they personally install every component, but because they manage the sequencing, documentation, trade handover and accountability. That's especially valuable in a full bathroom renovation where the floor heating has to integrate with tile set-out, waterproofing details and overall floor height planning.

If you're mapping out the whole scope, this is the right stage to work through a proper renovation sequence such as this guide on how to plan a bathroom renovation.

Is It Worth It The ROI of Comfort in a Victorian Climate

For most Victorian households, bathroom floor heating is worth considering for comfort first. That's the honest answer. If someone is expecting it to behave like a financial windfall, they'll probably be disappointed. If they want a bathroom that feels better every day, the value case gets much stronger.

A practical discussion around Australian bathrooms in temperate climates puts it well. The main question is whether the upfront cost is justified by intermittent use, and the value is often found in comfort, moisture management and a more premium bathroom feel rather than pure energy savings. That's exactly how most successful bathroom heating decisions are made.

Where the value really sits

The return comes from a few places working together:

  • Daily comfort: The coldest surface in the room stops being the thing you dread in winter.
  • Moisture handling: A warmer floor can help the room feel drier and more settled after showers.
  • Perceived quality: Heated floors push a renovation into the category of modern bathrooms that feel thoughtfully upgraded, not just cosmetically updated.

For landlords and resale-minded owners, it can also help a bathroom stand apart. Not because every buyer will ask for it by name, but because better comfort tends to lift the overall impression of the room.

When it may not be worth it

There are bathrooms where it doesn't stack up well. A rarely used guest bathroom. A budget-driven rental refresh where the brief is durable and simple. A project where floor height constraints, electrical limits or waterproofing complexity make the trade-off poor.

The best decisions usually come from being specific about use. If the bathroom is used every day, mainly in colder months, and the renovation already includes quality tile work and updated controls, heated flooring often feels justified. If the room sees very light use, you may be better off putting the money elsewhere.

In Victoria, bathroom floor heating usually pays back in lived experience, not in bragging rights on a spreadsheet.

Start Your Bathroom Renovation with a Specialist in Highett

Once you know bathroom floor heating is something you want to explore, the next step is simple. Gather the right information before asking for a quote. That makes the conversation more useful and helps the builder tell you quickly whether the idea suits your bathroom, your layout and your budget.

Screenshot from https://siteprobathrooms.com.au

What to have ready

Bring practical details, not just inspiration images.

  • Room dimensions: Even rough measurements help start the discussion.
  • Floor finish preference: Tile choice affects both performance and build-up.
  • Subfloor type: Concrete slab, timber floor, apartment substrate or unknown.
  • Fixture plan: Bath, vanity, toilet, shower location and whether any joinery will be fixed to the floor.
  • Your priorities: Comfort, premium finish, fast heat-up, design look, or overall budget discipline.

If you've saved examples of new bathroom ideas, bring those too. They can reveal more than style preference. They often show whether you're leaning towards cleaner layouts, larger format tile, floating fixtures or a more detailed designer bathrooms brief.

Questions worth asking at the first meeting

A productive consultation usually covers things like:

  1. Is my bathroom a good candidate for floor heating?
  2. Should we heat the full open area or only a partial zone?
  3. Will floor height become an issue in this renovation?
  4. How will the heating layout affect waterproofing and tile set-out?
  5. Who coordinates the trades and electrical sign-off?

Those questions matter because underfloor heating performs best when it's designed as part of the whole renovation, not added late as an afterthought.

Why specialist coordination matters

In Highett and across greater Victoria, the easiest bathroom projects are the ones with one clear point of responsibility. A specialist renovation company can assess the room, prepare the layout, manage the sequencing and make sure the finished bathroom works as a whole.

SitePro Bathrooms is a local Highett renovation specialist and a registered builder unlimited, handling bathroom renovations from concept through construction and finish. If you want specific advice on heated floors, layout planning, modern bathrooms, or a full renovation scope, the best next step is to contact SitePro Bathrooms for a personalised renovation quote.

  • siteprobathrooms

Find Your Perfect Bathroom Remodel Contractor: VIC Guide

You notice the bathroom every morning. The shower leaks at the screen, grout keeps cracking, the exhaust fan never quite clears the steam, and part of you wonders whether a quick cosmetic update will do the job. Then someone starts talking about waterproofing, permits, and what might be hiding behind the wall, and the whole project suddenly feels less like decorating and more like a financial risk.

That is the point many homeowners in Victoria get caught out. They choose a contractor the same way they choose tiles. On appearance, price, and a few nice photos. A bathroom renovation is safer when you treat contractor selection as a risk-control decision first. The expensive part is often what no one sees once the job is finished. Waterproofing quality, sequencing, contract detail, compliance, hidden-condition allowances, and how a builder handles problems on site will affect the result long after the fittings go in.

Older housing adds another layer of risk. Victorian bathrooms often sit inside homes with ageing pipework, uneven walls, damaged substrates, old sheet linings, and the occasional surprise once demolition starts. In some properties, that surprise is rot. In others, it is asbestos or non-compliant past work. The 2021 Census finding that Australian dwellings have a median age of 39 years helps explain why an older bathroom can turn into more than a simple rip-out and replace.

A good bathroom remodel contractor is not just supplying labour and finishes. They are making judgement calls that protect your budget, your timeline, and the wet-area performance of the room itself. That starts well before demolition.

Planning Your Bathroom Renovation Before You Call a Pro

A bathroom renovation usually goes off track before demolition starts. The pattern is familiar. A homeowner has saved dozens of photos, picked a vanity style, and asked for a quote, but no one has pinned down what must stay, what can move, what standard of finish is expected, or how much risk the budget can carry if the room opens up badly.

That early planning stage is not just about design. It is your first layer of risk control. If the brief is vague, the quote will be vague. If the quote is vague, the contract leaves too much room for cost creep, disputes, and shortcuts once work begins.

Start with the job the bathroom needs to do.

Define what the bathroom must do

A family bathroom, an ensuite in a rental, and a long-term bathroom for ageing in place should not be planned the same way. Set function before finishes. Storage, shower access, ventilation, cleaning, durability, and waterproofing performance all affect the layout, the trade scope, and the final price.

A woman sketching architectural renovation plans for a home remodel while examining various stone tile samples.

A brief is usually ready for pricing when it answers these questions:

  • Primary purpose: daily family use, resale, ageing in place, tenant appeal, or a high-spec upgrade
  • Required function: walk-in shower, better extraction, more storage, easier cleaning, or a full waterproofing rebuild
  • Layout decision: keep plumbing positions close to existing, or rework the room completely
  • Finish level: practical and durable, or more custom with feature tiles, joinery, and upgraded fittings

If those answers are fuzzy, expect wide quote ranges and plenty of allowances.

One more point often gets missed. Decide early whether you want a contractor who can take full responsibility for the build, permits, sequencing, and compliance, or whether you are trying to coordinate part of the job yourself. In Victoria, that decision affects both risk and accountability. It is worth understanding why using a registered builder for your bathroom renovation reduces compliance and contract risk before you start collecting prices.

Split your ideas into needs and wants

This is one of the easiest ways to protect the budget.

Homeowners get caught when every item is treated as equally important. It never is. A larger shower, proper substrate repair, and an extraction upgrade belong in a different category from a fluted vanity, premium mirror cabinet, or a complex tile pattern that adds labour.

Use two columns and be strict:

Need now Want if budget allows
Proper waterproofing rebuild Feature lighting
Better shower size Niche detailing
More practical vanity storage Premium tile pattern
Ventilation upgrade Custom mirror design

That list helps with contractor discussions later. It also gives you a clean way to make cuts if demolition exposes damage.

Set a preliminary budget with a real contingency

Bathrooms in older Victorian homes can look straightforward until the strip-out starts. Then you find rotten flooring around the shower, out-of-level walls, failed past waterproofing, old plumbing that should have been replaced years ago, or sheet material that needs to be treated as asbestos until proven otherwise.

Those are not rare edge cases. They are part of renovating existing homes.

Build your early budget around four buckets:

  • Base construction: demolition, plumbing, electrical, substrate repairs, waterproofing, tiling, fit-off
  • Selections: tiles, vanity, tapware, shower screen, toilet, lighting, accessories
  • Site constraints: access, parking, waste removal, apartment rules, working hours
  • Contingency: a separate reserve for hidden conditions and necessary changes

A lot of homeowners make the same mistake here. They treat contingency as upgrade money. It is not. Keep a 10% to 20% contingency for hidden conditions and unavoidable variations. That buffer is what stops a bad surprise behind the wall from turning into a budget blowout.

If you are budgeting off inspiration images alone, assume the first numbers will be wrong. Photos do not show the screed correction, the framing repair, the waterproofing rebuild, or the compliance work. Those hidden items are often where the bulk of the money goes.

Finding and Vetting Potential Bathroom Contractors

A bathroom contractor is not just someone who delivers the look you want. In an older Victorian home, they are the person you trust to find risk early, price it fairly, and keep the job compliant when the room opens up and the surprises start.

Nice photos do not prove that.

What matters is whether the contractor regularly works in existing homes with uneven walls, tired plumbing, movement in the floors, and evidence of previous patch repairs. Bathrooms in older houses often hide the expensive problems until demolition. That is why contractor selection is a risk-management decision first, and a design decision second.

Where to look without relying on one source

Start with people who have completed a bathroom renovation recently, preferably in a home similar to yours. A recommendation from a neighbour in a 1970s brick veneer is more useful than one from someone who renovated a new townhouse. The build conditions are different, and that affects how realistic the pricing and timeline will be.

Then look at completed projects with a sharper eye. A contractor who mainly posts finished styling shots may still be good, but a stronger sign is seeing work across the messy parts of the build. Before-and-after photos, stripped-back rooms, corrected floors, rebuilt shower bases, and neatly resolved out-of-square walls tell you more than tapware close-ups.

Use a shortlist test that focuses on job fit:

  • Relevant project history: Have they completed bathrooms in homes like yours, not just bathrooms that photograph well?
  • Clear scope responsibility: Are they taking responsibility for the full renovation, or expecting you to coordinate parts of it?
  • Straight answers: Can they explain likely problem areas, realistic timing, and what usually triggers variations?
  • Site awareness: Do they ask about access, parking, apartment rules, or working-hour restrictions early?

Contractors who ask practical questions upfront usually run tighter jobs.

Check Victorian registration and trade responsibility

Homeowners often get caught out here. They assume the person quoting the job is also the person carrying legal and practical responsibility for the build.

Confirm who is responsible for supervision, trade coordination, and compliance-related work. Ask for registration details where required, and do not leave builder classification to guesswork or casual wording on a website. Homeowners trying to understand builder classifications sometimes search for terms like “registered builders unlimited”. In practice, the safer approach is simpler. Confirm that the contractor is properly set up for the scope of your project and willing to state that responsibility clearly in writing.

For a clearer explanation, read why using a registered builder matters for your bathroom renovation.

Ask direct questions:

  • Who supervises the work on site?
  • Who coordinates plumbing, electrical, waterproofing, and tiling?
  • Who handles compliance documents and any required permits?
  • Who is responsible if hidden damage is found after demolition?
  • Who approves and prices variations before extra work starts?

Those answers should be specific. “We'll sort it out” is not a useful answer.

Read portfolios and testimonials properly

A good portfolio shows decision-making, not just finishes. Look closely at tile set-out, niche placement, silicone lines, transitions at doorways, and how the vanity meets walls that may not be perfectly straight. In older Victorian bathrooms, tidy detail often reflects good preparation behind the tiles.

Testimonials need the same filter. Praise for a “beautiful bathroom” is fine, but it does not tell you much about how the contractor handled delays, damaged framing, product backorders, or a failed substrate uncovered mid-job. Stronger reviews mention communication, cleanliness, variation control, punctuality, and how problems were explained.

That is the ultimate test.

A contractor earns trust by how they deal with the room once it is opened up, not by how polished the final photo looks. Be careful with businesses that stay vague on process, avoid discussing hidden-condition risk, or brush past asbestos, waterproofing, and documentation. In Victorian bathroom renovations, those are not side issues. They are where budgets and disputes usually start.

How to Get and Compare Detailed Renovation Quotes

A bathroom quote usually looks tidy before demolition starts. Then the wall comes off, the floor is out of level, the shower area has old water damage, or there is asbestos in backing materials, and the cheap price stops looking cheap.

That is why quote quality is a risk question first and a price question second. If the paperwork leaves too much open to interpretation, you are the one carrying that risk once the room is opened up.

A person comparing various contractor renovation quotes and cost estimates on a wooden desk with a calculator.

What a proper quote should spell out

A usable quote reads like a scope document. It should show what the contractor has allowed for, what they have not allowed for, and where the price could change if hidden conditions are found.

Look for detail in these areas:

  • Demolition: what is being removed, whether strip-out is full or partial, and who is paying for waste removal
  • Pre-lining and pre-tiling work: wall straightening, floor levelling, substrate replacement, screeds, falls, and waterproofing preparation
  • Services: plumbing rough-in, drainage changes, electrical work, lighting, heating, exhaust fans, and final fit-off
  • Fixtures and finishes: actual products, or clear allowance amounts for tiles, tapware, vanity, toilet, shower screen, mirror, and accessories
  • Completion items: painting, silicone, final clean, rubbish removal, and defect rectification

In older Victorian homes, one line on “prep as required” is not enough. Preparation is often where the job is won or lost. A bathroom with out-of-plumb walls or a failed sheet substrate needs more labour than a newer room with sound surfaces, and the quote should show whether that has been allowed for.

Compare scope line by line

Do not compare quotes by total alone. Put them side by side and check how each builder has treated the same parts of the job.

Quote area Transparent quote Risky quote
Scope Breaks work into stages with clear inclusions Broad summary with little detail
Materials Names products or lists realistic allowances Uses vague wording like “owner to select” without allowance detail
Site preparation States what prep is included and what is excluded Hides prep inside general labour
Variations Explains how extra work is priced and approved Leaves variation process unclear
Exclusions Lists omitted work plainly Says nothing about exclusions
Payment schedule Tied to clear milestones Heavy deposit or front-loaded payments

Two prices can be close and still represent very different levels of risk.

One contractor may have allowed for proper floor correction, compliant waterproofing, and realistic fixture allowances. Another may have kept the number down by excluding difficult prep, underallowing finishes, or leaving half the room to future variations.

Watch the wording that causes budget blowouts

Some phrases deserve a hard follow-up before you accept a quote:

  • “Allow as needed”
  • “Standard preparation”
  • “Make good where required”
  • “PC items” or “provisional sum” without enough detail
  • “All works complete” without a breakdown

Those phrases are not always dishonest. Sometimes they are a sign the contractor does not yet have enough information. But if they stay vague after a site visit and product discussion, you should assume the price is still soft.

Ask direct questions:

  • What condition have you assumed the wall framing and floor substrate are in?
  • Have you allowed for replacing water-damaged sheeting or rotten timber if found?
  • Is asbestos testing or removal included, excluded, or not yet assessed?
  • Are tile trims, niches, underfloor heating, and floor waste relocation included?
  • Are fixture allowances realistic for the products we are considering?

That last point catches a lot of people. A quote can look competitive because the allowances are too low to buy the fittings you want. If you need a rough starting point before requesting site-specific pricing, a bathroom renovation cost calculator for Victoria projects can help you set a sensible budget range.

Check exclusions as closely as inclusions

Homeowners usually read the included items and skim the exclusions. Do the opposite as well.

The exclusions often tell you where the contractor expects cost pressure to appear. Common examples are asbestos removal, structural repairs, switchboard upgrades, rotten framing, council or building permit costs where required, and supply delays on owner-selected products.

That does not mean the quote is poor. It means the contractor is showing you where uncertainty sits. Clear exclusions are safer than a low number that assumes nothing will go wrong.

Cost check: If you cannot tell what would trigger extra charges, the quote is not detailed enough.

A good quote gives you enough detail to challenge assumptions before the contract stage. That is how you protect the budget.

Understanding the Contract and Project Kick-off

You are standing in a 1960s Victorian bathroom with a signed quote in hand, and it feels like the hard part is over. It is not. The contract stage is where a tidy-looking renovation either stays under control or turns into an argument about who pays for rotten framing, asbestos testing, or extra plumbing work once the walls are opened.

A contractor selection decision does not stop at price and presentation. It carries straight into risk control. Good paperwork reduces disputes, sets out who is responsible for approvals and licensed trades, and gives you a clear process when hidden conditions are found. Poor paperwork leaves too much open to interpretation, and that usually costs the homeowner.

Read the contract like a risk document

In Victoria, the contract matters as much as the workmanship because it sets the rules before the pressure starts. Friendly meetings and quick replies are useful, but they do not protect you if the scope is vague or the variation process is loose.

Read the document closely and check that written contracts clearly define the scope of work, price changes, and dispute resolution process. If those points are thin, the job is not ready to sign off.

A solid bathroom contract should state:

  • exactly what is being demolished, rebuilt, supplied, installed, and finished
  • who supplies each fixture and finish
  • how variations are priced, approved, and recorded before extra work starts
  • what each progress payment relates to
  • who arranges permits or other approvals if they are required
  • what happens if asbestos, water damage, or structural defects are found during demolition
  • how delays, defects, and disputes are handled

That last point gets missed. In older Victorian homes, hidden damage is not a remote possibility. It is a known risk. The contract should say how the contractor will stop work, document the issue, price the change, and wait for written approval before proceeding.

Lock decisions before the room is opened up

The cleanest projects are usually the least exciting at kick-off. Selections are settled, drawings match the fixtures, lead times are checked, and the first week of work is already mapped out.

Late changes create expensive rework. A different vanity can affect plumbing set-out. A larger tile can change falls and floor waste detailing. A new tap choice can require a different rough-in depth inside the wall. None of those are design problems only. They are cost and sequencing problems.

Screenshot from https://siteprobathrooms.com.au

Where available, 3D design helps because it exposes practical issues early. I would rather find an awkward door swing or a niche clash on a screen than after waterproofing has been applied.

Clarify compliance before work starts

A bathroom renovation in Victoria is not just a cosmetic update. Plumbing, electrical work, waterproofing, ventilation, and sometimes structural changes all carry compliance obligations. If the property is an apartment, owner corporation rules can add another layer around access, waste removal, delivery times, and protection of common areas.

Before kick-off, the contractor should be able to explain:

  • whether permits or approvals are needed
  • who is responsible for getting them
  • which trades must be licensed
  • what certificates or compliance documents you should receive at the end
  • how site access, parking, rubbish, and material storage will be handled

If those answers are vague, the risk has not disappeared. It has just been pushed down the track.

What a well-run kick-off actually looks like

A proper start to site works should feel organised, even a bit dull. That is a good sign.

You want confirmed scope documents, final or near-final selections, an inclusions schedule, a payment schedule tied to real milestones, access arrangements, product lead-time checks, and a clear point of contact. You also want to know what happens on day one, what gets protected before demolition, and when you will be asked to inspect or approve anything.

If a contractor wants to begin demolition while key fixtures are still undecided or special-order items have not been confirmed, treat that as a warning sign. The fastest start is not always the safest start.

The right contract and kick-off process do one job well. They make surprises easier to contain before they become budget blowouts.

Managing the Build and Spotting Common Red Flags

A Victorian bathroom can look tired but stable right up until demolition exposes what has really been happening behind the tiles. I have seen wall framing softened by years of slow leaks, failed sheeting around showers, and old materials that turn a simple refit into a repair job. That is the point where contractor selection stops being a design decision and becomes a risk-control decision.

The right contractor does not push past that moment to keep the schedule looking tidy. They stop the job, photograph the problem, explain whether it affects structure, waterproofing, plumbing, or compliance, and price the extra work in writing before anything changes on site. If there is suspected asbestos, work should pause until the material is properly assessed. If rot has spread into framing or flooring, the rebuild scope needs to be reset before the bathroom is closed up again.

A contingency fund matters here. Hidden conditions are common in older Victorian homes, especially where past waterproofing has failed or previous renovations were done poorly. If you want a practical benchmark, set aside a 10% to 20% contingency fund for hidden demolition findings and controlled variations. That buffer protects your decisions when the job uncovers something real.

What you should watch during key milestones

You do not need to stand over trades. You do need a clear view of a few inspection points where mistakes get expensive if they are missed.

During the build, pay attention to:

  • Demolition: Any decay, mould, termite damage, movement, or suspect materials should be documented and explained straight away.
  • Rough-in: Waste locations, tap positions, niches, power points, and lighting points should match the approved layout before walls are closed.
  • Substrate prep and waterproofing: Shortcuts in this stage cause long-term damage. Ask when you are meant to inspect, and what records will be kept.
  • Tiling and set-out: Check falls, tile alignment, trim details, and how cuts land around corners, grates, and fittings.
  • Fit-off: Confirm the installed fixtures match the quoted model numbers, not a substitute chosen because the original item was never ordered.

Photos help. Written updates help more.

A disciplined contractor will also tell you early if lead times, access issues, apartment rules, or hidden repairs are affecting the sequence of work. Silence is what causes budget shock.

Red flags that usually mean trouble

Some warning signs show up in the first week.

Watch for these:

  • Problems discovered but not priced properly: If extra work starts before you approve a written variation, cost control is already slipping.
  • Trade work happening out of sequence: Waterproofing, tiling, and fit-off rely on each earlier step being right. Rushed sequencing usually leads to rework.
  • Repeated changes to the same area: One correction can happen on any site. Several usually point to poor supervision or unclear documentation.
  • Selections still being chased during construction: Late decisions often lead to substitutions, delays, and arguments about who caused them.
  • Compliance questions answered vaguely: If you ask what certificate or handover document you will receive and the answer is fuzzy, treat that seriously.
  • A site that looks unmanaged: Persistent disorder, unprotected finishes, or materials left exposed to weather usually reflect weak site control.

If your contractor cannot explain a delay, a variation, or a defect in plain language, they do not have firm control of the build.

You are not looking for a perfect renovation with no surprises. You are looking for a contractor who contains surprises before they turn into leakage, defects, disputes, or a much bigger final invoice.

Your Bathroom Remodel Questions Answered

Do apartment bathroom renovations need approval in Victoria

Often, yes. For Victorians in apartments, guidance from Consumer Affairs and Owners Corporations makes it clear that renovations affecting common property require approval, which is why strata experience matters when choosing a bathroom remodel contractor (Victorian apartment renovation approval guidance).

That matters if your work affects waterproofing interfaces, penetrations, waste connections, access routes, acoustic expectations, or anything that could impact common property. A contractor who understands apartment work can help you avoid delays caused by incomplete approval steps.

What should investors prioritise over flashy design

For rental property work, durability usually beats novelty. Tenants notice easy-clean surfaces, practical storage, reliable ventilation, decent lighting, and fittings that don't feel flimsy. Owners also benefit from finishes that are easier to maintain between tenancies.

That's why the best bathroom renovations for investors often focus on solid layout choices, simpler detailing, and products that can be serviced or replaced without drama. The right contractor for that job may not be the one selling the boldest new bathroom ideas. It's often the one who understands staged work, low disruption, and compliance.

What makes designer bathrooms different from standard updates

A designer bathroom isn't just a bathroom with expensive tiles. It's a room where the layout, storage, scale, lighting, and material transitions have been resolved properly.

Typical differences include:

  • Better planning: fixture spacing, sightlines, door swing, and circulation feel intentional
  • Custom integration: joinery, recessed storage, mirror planning, and feature lighting work together
  • More disciplined detailing: tile set-out, trims, junctions, and proportions are considered early

Plenty of modern bathrooms look good in photos. Fewer still feel comfortable, easy to maintain, and well resolved in daily use.

Should I choose style first or process first

Process first. Always.

Style is important. But in wet areas, beautiful finishes can sit over poor prep. If the contractor's planning, quoting, contract detail, and site discipline are weak, even the best-looking bathroom can become an expensive lesson.


If you're planning bathroom renovations in Victoria and want a team that handles design, buildability, and project control together, SitePro Bathrooms is worth contacting for a personalized discussion about your space.

  • siteprobathrooms

Integrated Bathroom Sink: Renovation Guide 2026

You're probably in the same spot as a lot of Melbourne homeowners. You've saved a folder of modern bathrooms, you've compared vanity styles, and you keep coming back to the same clean, cohesive look. No raised basin. No visible join. Just one crisp surface that makes the whole room feel calmer and more expensive.

That look usually comes from an integrated bathroom sink.

It's easy to see why people like them. In designer bathrooms, an integrated sink often becomes the visual anchor of the vanity wall. It reads as tidy, contemporary, and well resolved. But after years of working around bathroom renovations, I can tell you this is one of those choices that shouldn't be made on looks alone. The ultimate decision involves the day-to-day use of the bathroom, how careful the household is, how likely staining is, and what happens if the basin gets damaged.
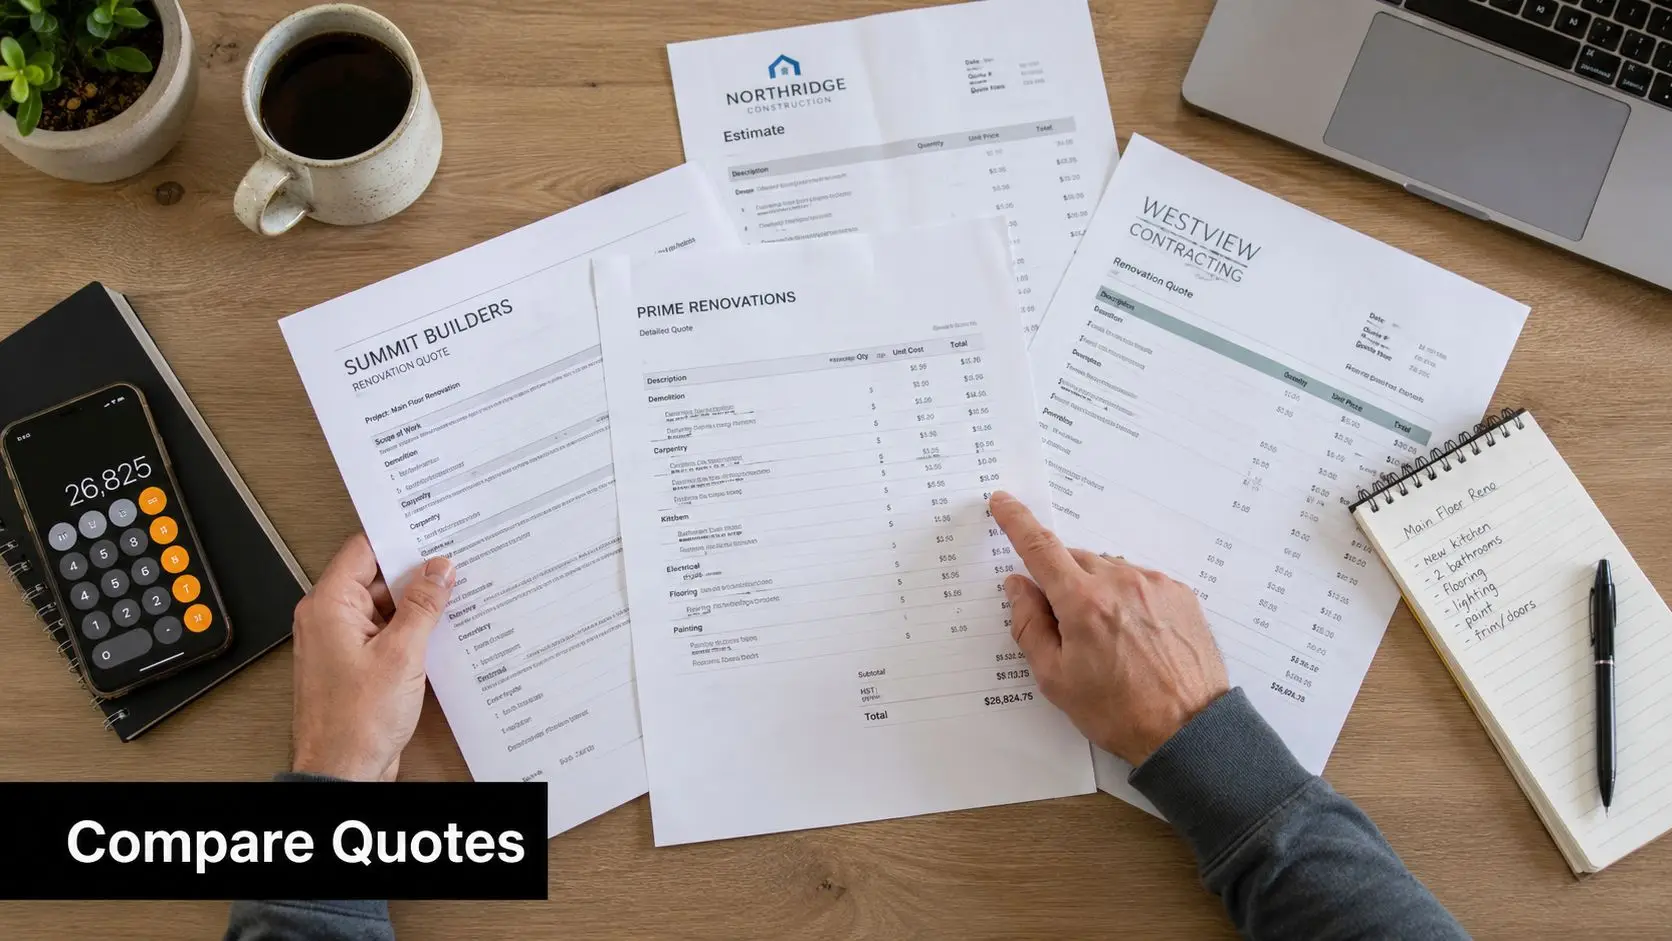
That matters whether you're planning a family bathroom, an ensuite refresh, or a full renovation with a professional team. The best sink isn't always the one that photographs best. It's the one that still works for your home years after handover.

The Centrepiece of Modern Bathroom Renovations

A typical renovation starts with photos. Then the practical questions show up. How hard is this to keep clean, what happens if it chips, and will I be replacing the whole top in eight years because one basin cracked?

That is why integrated sinks get so much attention. They give a bathroom a cleaner, more resolved vanity wall, and they often become the feature people notice first. In a modern renovation, the vanity usually sits in direct view from the doorway, so the sink has a bigger visual job than many homeowners expect.

The appeal is real, but so are the trade-offs. An integrated sink can make a modest bathroom look more considered without adding extra fittings or visual bulk. It can also lock you into a more expensive repair path later, because the basin is part of the top rather than a separate piece you can swap out.

Why people keep choosing it

In real projects, homeowners usually choose an integrated sink for a few practical reasons:

  • Cleaner presentation: The vanity reads as one finished surface, which suits contemporary bathrooms.
  • Less fuss around the basin edge: There is no raised rim where grime often builds up.
  • A more bespoke result: Even a standard-size vanity can look like it was custom made for the room.

Those are good reasons. They just should not be the only reasons.

I usually tell clients the same thing. People rarely regret a sink that is easy to wipe down. They do regret choosing one that is expensive to repair without knowing it upfront.

That long-term ownership side gets missed in a lot of design-led advice. For a main family bathroom, an integrated sink can work well if the material is forgiving and the household will treat it reasonably carefully. For rentals, kids' bathrooms, or homes where easy replacement matters, a separate basin often gives you a simpler and cheaper path if something goes wrong later.

Understanding the Integrated Sink Concept

An integrated sink is exactly what it sounds like. The basin and benchtop are made as one continuous unit, rather than a separate bowl being dropped into or mounted under a vanity top.

A modern bathroom vanity featuring a seamless integrated white sink and a brushed nickel faucet on wood cabinetry.

An integrated sink employs a unibody design. Instead of separate parts meeting at an edge, the sink and top are formed together. That's why the surface looks so clean. It also explains why these sinks are often chosen for bathrooms where low visual noise is part of the design brief.

According to this integrated sink overview, integrated bathroom sinks are specified as a single continuous assembly where the basin is fabricated from the same material as the countertop, eliminating the joint line where water, soap residue, and biofilm typically accumulate.

What that means in everyday use

In practical terms, the missing joint line is the whole story.

With many standard sink setups, the trouble spot is the perimeter where one element meets another. That edge can trap residue, hold moisture, and become the bit that always looks tired first. An integrated sink removes that weak visual and cleaning point.

That usually gives you:

  • Less edge grime: No lip for soap scum to sit against.
  • Simpler wiping down: You can clean the top and basin as one surface.
  • A neater finish: The vanity reads as one object, not several parts fitted together.

For busy homes, that's a genuine benefit. If the bathroom gets used hard before school, before work, and before sport on weekends, fewer joins usually means less fuss.

Where people get caught out

The same feature that makes an integrated sink neat also makes it less flexible.

Because the bowl is part of the top, you can't treat it like a separate item later. The shape, slope, and proportions are set by the fabrication. If you decide you don't like the basin profile, or if the top suffers localised damage, your options are narrower than they would be with a stand-alone basin.

Practical rule: If you want the least maintenance in daily cleaning, integrated usually performs well. If you want the easiest future replacement, it usually doesn't.

That's why this choice needs to be matched to the household, not just the style board.

Exploring Materials and Design Styles

Once you've decided you like the integrated look, the next question is material. The selected material can make the bathroom feel refined or overly delicate. Material choice changes the appearance, the feel under hand, and how forgiving the sink will be in daily use.

Screenshot from https://siteprobathrooms.com.au

The most common options homeowners look at are solid surface, stone-based tops, porcelain-style finishes, and concrete-look forms. Each one suits a different brief.

How each material tends to behave

Material Best for What usually works well What often needs caution
Solid surface Contemporary family bathrooms Soft seamless shapes, matte finish, easy visual integration Can show wear depending on use and cleaning habits
Stone-based finishes Premium vanity designs Crisp edges, refined appearance, suits high-end schemes Fabrication accuracy matters, repairs can be less simple
Porcelain-style integrated tops Clean, bright bathrooms Smooth finish, sharp modern look Hard impacts can be a concern
Concrete-look or cast finishes Architectural or earthy bathrooms Strong design presence, texture, warmth Needs a client who accepts patina and variation

Solid surface often appeals to people who want that sculpted one-piece feel. It suits minimalist vanities, curved corners, and softer matte palettes. In many new bathroom ideas, it's the material that gives an integrated sink its “hotel” look without making the room feel cold.

Stone-based integrated tops tend to suit more custom projects. They can look excellent in modern bathrooms where the vanity is designed as a central feature rather than a basic cabinet with a basin on top.

Design style matters as much as material

A mistake I see is choosing the sink style before the vanity style is settled. An integrated sink should work with the room's whole language.
For example:

  • Warm timber vanity plus white integrated top: Good for a softer contemporary look.
  • Flat two-pack cabinetry plus integrated basin: Strong choice for sharper designer bathrooms.
  • Floating vanity with fine edges: Helps smaller rooms feel less heavy.
  • Wall-to-wall vanity top: Useful when storage and bench space matter as much as looks.

If you're still comparing finishes, it's worth looking at how benchtop materials affect the broader renovation feel. This guide to kitchen benchtop materials is kitchen-focused, but the material logic carries over well to bathroom vanity planning.

Match the material to the household

The right material isn't the one with the best showroom impression. It's the one that fits the way your bathroom gets used.

A tidy ensuite used by two adults can support a more design-led choice. A family bathroom with kids, skincare products, colour treatments, and fast morning routines needs a more forgiving specification. Those are very different jobs for one vanity.
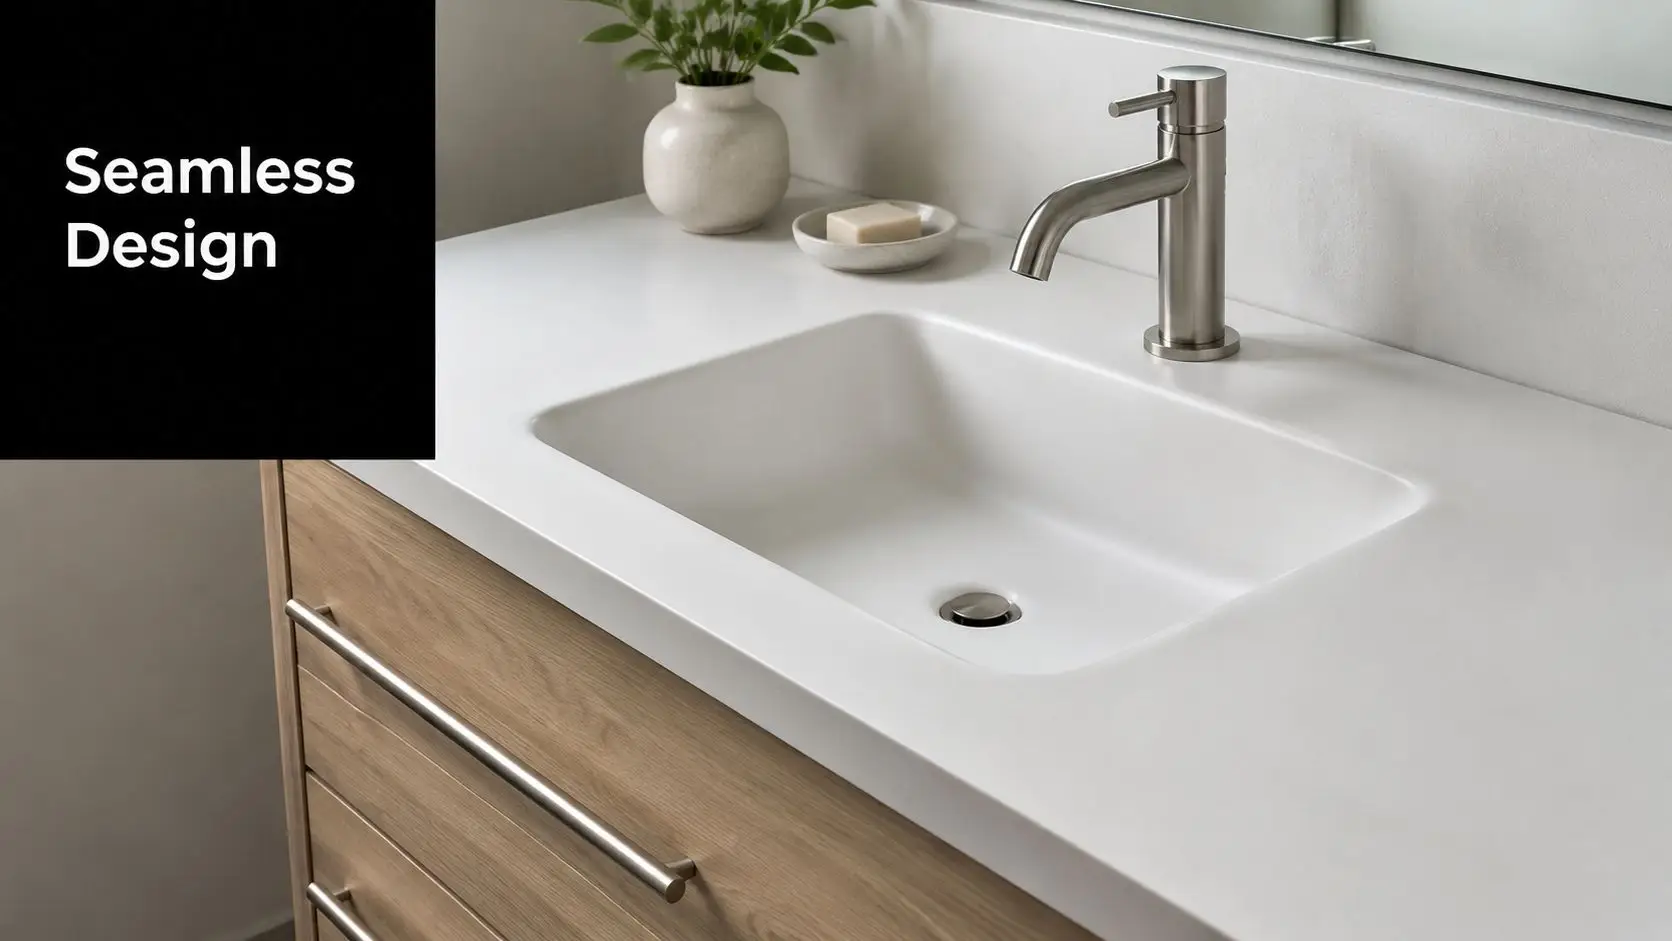
Weighing the Pros and Cons for Your Home

Integrated sinks do a lot right. They also ask for a bit more honesty during planning. If you're deciding between a standard basin setup and an integrated one, this is the point where aesthetics have to compete with ownership reality.

A modern bathroom vanity with a white integrated sink, wood cabinets, and minimalist accessories on a countertop.

What works well

The best argument for an integrated sink is simple. It makes the vanity easier to keep presentable.

There's no separate basin rim to clean around, and the top-to-bowl transition is visually quieter. In homes where people want less visual clutter, that alone can justify the choice. It also helps in bathrooms where every line counts, especially if the room is compact and you don't want a sink shape dominating the vanity.

The other strong advantage is the custom feel. Even straightforward bathroom renovations can look more resolved when the sink is integrated into the vanity top rather than selected as an afterthought.

Where the trade-offs become real

The downside isn't that integrated sinks are bad. It's that they can be unforgiving when something goes wrong.

According to this maintenance-focused guide, a key gap in most advice is how integrated sinks handle hard water buildup, staining from products like hair dye, or localised damage, as the one-piece design complicates repairs compared to a simple basin swap-out.

That issue matters far more in lived-in bathrooms than in showroom displays.

Here's the practical split:

  • If the household is careful, an integrated sink can stay looking excellent for a long time.
  • If the bathroom sees hard use, staining and surface wear need to be considered early.
  • If damage occurs, the repair path can be more involved than replacing a separate bowl.

The sleekest vanity in the room can become the most annoying one to own if the basin is damaged and the top can't be dealt with simply.

A quick decision view

Pro Why it matters
Seamless cleaning Fewer edges where residue collects
Refined appearance Strong fit for modern bathrooms and minimalist layouts
Custom visual result Makes the vanity feel purpose-designed
Con Why it matters
Repair complexity Damage can affect the whole vanity top, not just the bowl
Staining concerns Product use and water quality can influence long-term appearance
Less future flexibility You can't easily change just the basin style later

For owner-occupiers who want a polished primary bathroom, the pros often outweigh the cons. For rentals, teenagers' bathrooms, or heavily used family spaces, I'd slow down and assess whether the visual gain is worth the added replacement risk.

Design and Layout for Any Bathroom Size

An integrated sink isn't only for large statement bathrooms. In smaller rooms, it can solve problems, provided the vanity is sized properly and the basin shape suits the way the room is used.

A modern small bathroom featuring a floating wooden vanity, an integrated white sink, and a glass shower stall.

Integrated sinks commonly measure 24 to 36 inches wide and 16 to 24 inches front-to-back, according to this sizing guide on integrated versus undermount sinks. Those proportions are useful in Australian renovations because vanity depth often becomes the limiting factor, especially in ensuites, apartments, and older homes.

How to size one properly

Start with movement, not the vanity catalogue. You need enough clearance to stand comfortably, open drawers, and move past the vanity without the room feeling pinched.

Then look at three things:

  • Depth first: In many Victorian bathrooms, depth creates the biggest problem. A vanity that projects too far can tighten the walkway quickly.
  • Bench landing space: Even a small integrated top should leave some usable area for soap, toothbrushes, or handwash.
  • Basin position: A centred basin looks neat, but an offset bowl can improve function if storage or shared use matters more.

Small bathrooms often benefit most

Because integrated sinks remove visual interruption, they can help a compact room feel calmer. That doesn't mean the unit should be oversized. It means the vanity should be proportioned so the room still breathes.

A floating vanity helps. So does limiting heavy side panels and choosing a basin shape that contains splashing rather than spreading water across the top.

For smaller layouts, this collection of small bathroom ideas in Australia is useful for thinking through spacing, storage, and visual weight.

Don't ignore tapware and drainage

The sink isn't just a shape on a vanity drawing. The faucet reach, spout height, and basin slope all affect whether the vanity feels effortless or annoying.

A beautiful sink that splashes every morning isn't well designed. It's just well photographed.

If accessibility is part of the brief, integrated systems can also be a sensible option because the top and bowl can be planned as one coordinated surface. That makes it easier to think through user reach, vanity depth, and how much room the person needs at the basin.

Your Decision Checklist Before You Commit

The best way to choose an integrated sink is to stop asking, “Do I like the look?” and start asking, “Will I still like owning it in a few years?”

That shifts the decision from style alone to lifecycle value.

Ask these questions honestly

  • Who uses this bathroom every day?
    A calm ensuite used by adults is very different from a busy family bathroom or a guest bathroom that doubles as the kids' zone.

  • How careful are the users really?
    If the room gets rushed use, dropped items, product spills, and rough cleaning, the sink needs to cope with that reality.

  • Would replacement be simple if something went wrong?
    For renovators, landlords, and body corporates, the key issue is lifecycle cost. If a basin is damaged, an integrated unit often means replacing the entire countertop, as noted in this discussion of practical replacement cost.

  • Am I choosing this for resale, personal enjoyment, or tenancy durability?
    Those goals can point to different sink types.

When an integrated sink makes sense

An integrated sink is usually a strong choice when you want:

  1. A clean vanity line with minimal visual clutter.
  2. Easier wiping and fewer grime-catching edges.
  3. A bathroom that feels more custom than standard.

It can be a weaker choice when the room is exposed to hard wear, frequent product staining, or users who won't treat the surface gently.

Why professional planning matters

Bathroom renovations in Victoria sit inside a compliance-heavy process. The vanity choice doesn't exist in isolation. It interacts with waterproofing, plumbing set-out, wall finishes, storage needs, and who is responsible for the build outcome.

That's why it helps to work with a team that can resolve the whole room before construction starts. If you're weighing layout, durability, and compliance obligations, it's worth understanding why using a registered builder matters for your bathroom renovation. For more complex projects, a registered builders unlimited approach can provide the confidence that design intent and build responsibility stay aligned.

A good 3D design process also helps here. It lets you see whether the integrated sink improves the room, or whether a different basin format would give you a better result in use.

Frequently Asked Questions About Integrated Sinks

Can a chipped or cracked integrated sink be repaired

Sometimes.

The repair outcome depends on the material, how deep the damage runs, and whether it sits on a flat surface or inside the bowl where water and cleaning products hit it every day. Small chips in some solid-surface products can often be filled and refined to a reasonable standard. Hairline cracks, impact damage near the waste, and larger fractures are a different story. Those jobs are harder to hide and harder to trust long term.

The practical issue is replacement. With a separate basin, you can often swap the bowl and keep the vanity top. With an integrated unit, damage can turn into a full top replacement.

Are integrated sinks a good choice for rental properties

They suit some rentals, not all.

For a higher-end property where presentation matters and the vanity is unlikely to cop rough treatment, an integrated sink can work well. In a hard-use rental, student property, or home with frequent tenant turnover, I usually tell owners to look closely at repair risk first. One bad chip, a hair dye stain, or a burn mark can cost more to sort out than people expect.

If the main goal is low replacement cost over ten or fifteen years, a standard vanity with a separate basin is often the safer ownership decision.

What's the difference between an integrated sink and an undermount sink

An integrated sink is made as one continuous piece with the vanity top. An undermount sink is a separate basin fixed below the benchtop.

From normal standing height, both can give a clean result. The difference shows up later. Integrated sinks remove the join, so there is less edge detail to clean. Undermount sinks usually give you more flexibility if the basin gets damaged or if you want to change the look without replacing the whole top.

Are integrated sinks becoming more popular

Yes, especially in bathrooms where owners want a cleaner vanity line and a more custom look.

That said, popularity should not decide the purchase. In Australian homes, the better question is whether the sink suits the way the bathroom will be used, cleaned, and maintained over time. A product can be fashionable and still be the wrong choice for a busy family bathroom or a rental.

Are they only for large or luxury bathrooms

No.

They can work very well in smaller bathrooms because the continuous top can make the vanity look less cluttered. The catch is scale. If the bowl shape eats too far into the bench area, you lose the little bit of landing space that small bathrooms need for soap, toothbrushes, and day-to-day use.

Are integrated sinks hard to keep clean

Daily cleaning is usually easier because there are fewer joins, rims, and silicone lines catching grime.

Long-term maintenance depends more on the material than the format. Matte white finishes can mark up faster in some homes. Gloss surfaces show water spots less in others. In parts of Melbourne with harder water, mineral build-up around the waste and tap zone becomes a bigger issue than the integrated design itself. Use mild cleaners, avoid abrasive pads, and check what the manufacturer allows before assuming every stain can be scrubbed out.

Do integrated sinks cost more in the long run

They can.

Up front, they often sit above basic vanity-and-basin combinations. The bigger cost question is what happens if something goes wrong in year five or year eight. If the top and bowl are one piece, a repair may be limited and a replacement can involve the whole vanity top, plus plumbing labour to disconnect and refit. That is where lifecycle cost starts to matter more than showroom price.

For homeowners planning to stay put, the cleaner look may be worth it. For owners who want the simplest future repairs, a separate basin usually gives more flexibility.