• siteprobathrooms

8 Bathroom Tile Patterns for a Modern Renovation

What if the tile you pick is only half the decision, and the pattern is what decides whether the room feels calm, cramped, or expensive? In bathroom renovations, the layout does more visual work than expected. A good pattern can make modern bathrooms feel sharper, help designer bathrooms read as intentional, and stop a small room from looking pieced together.

The pattern choice also affects the job behind the scenes. Registered builders know that some layouts are more forgiving, while others need tighter planning, better substrate prep, and more waste allowance. That matters in real homes, especially in older Victorian properties, compact ensuites, and awkward apartment bathrooms where every cut shows.

There's a reason classic white wall tile and simple geometric floors became the visual baseline for modern bathrooms in the early 1900s. Historic bathroom design settled on 3 x 6 inch glazed white tile in running bond, with black-and-white hexagonal floors and checkerboard layouts also widely used, because those clean formats suited the germ-theory era and stayed practical to maintain historic bathroom tile history. Later, the postwar boom widened the palette again, with tile makers producing more than 200 shades of wall tile and nearly 100 floor-tile colours by the early 1950s, while one industry account says about five million of the 20 million new homes built between 1946 and 1966 received some form of pink bathroom, which is why retro-inspired schemes still have so much pull in Australian homes postwar bathroom tile colours.

If you're planning new bathroom ideas, don't start with a Pinterest image and hope for the best. Start with the pattern that suits the room shape, the maintenance you want, and the installer you have. That's the difference between a room that looks designed and one that looks like it fought the fit-out.

1. Herringbone Pattern

Herringbone works because it moves the eye. Rectangular tiles are set at angles so the layout creates a constant zigzag, which adds rhythm to walls and floors without needing loud colour or ornate decoration. In modern bathrooms, that movement can make a plain ensuite feel deliberate, and in designer bathrooms, it can turn a feature wall into the focal point of the whole room.
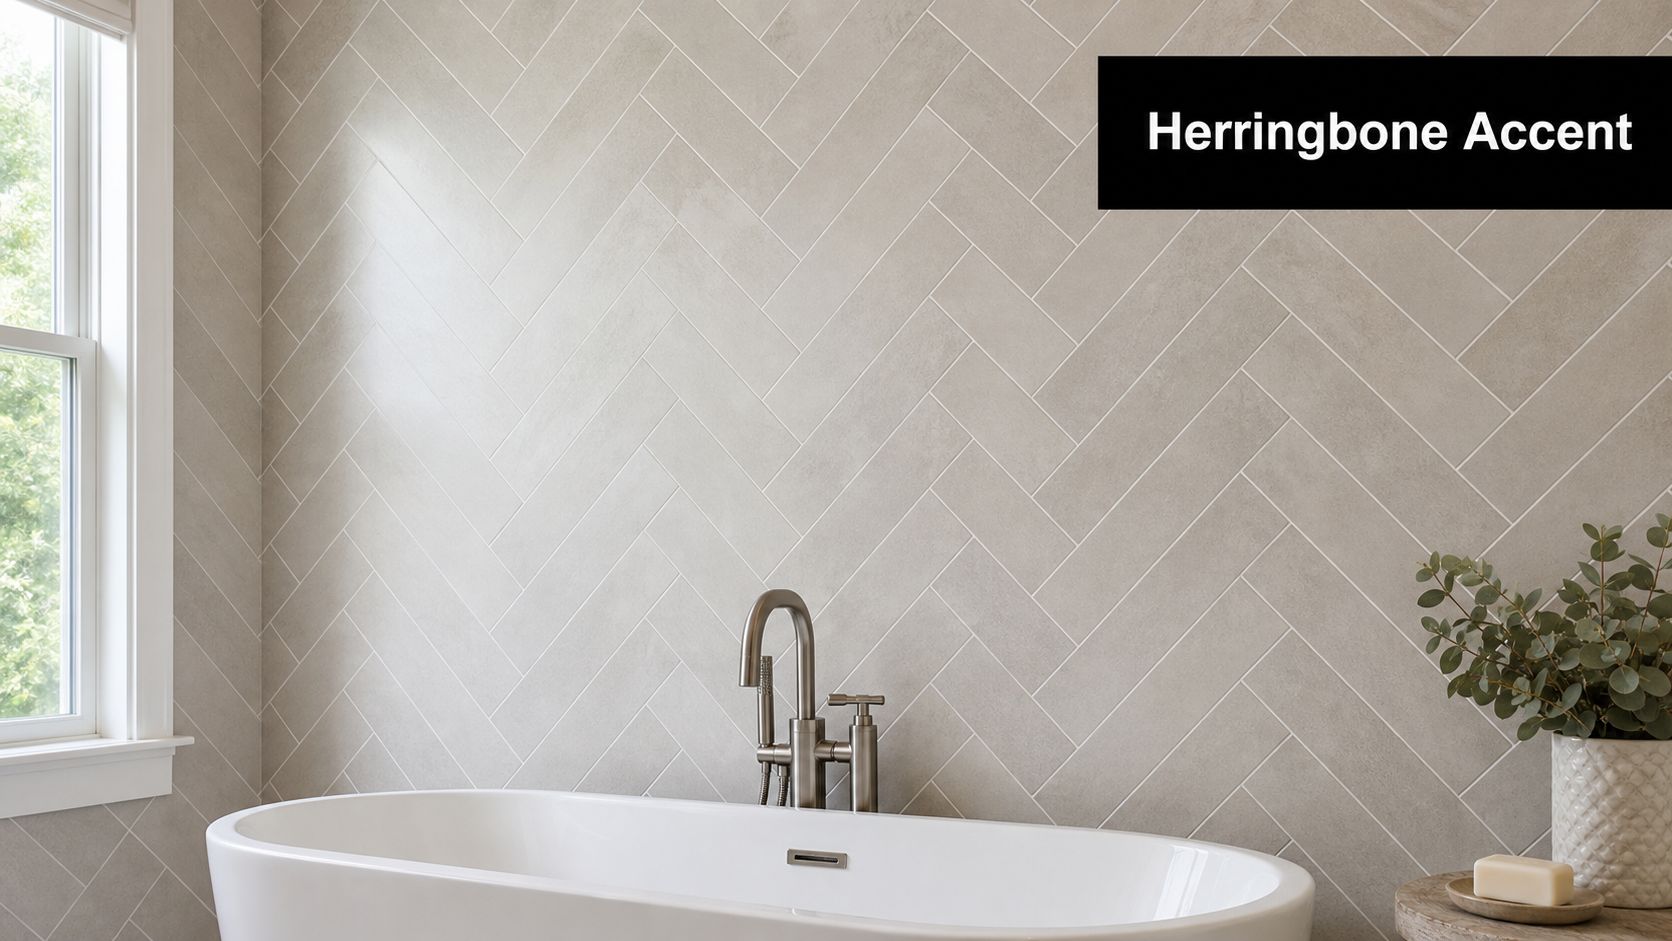
A modern bathroom wall featuring a stylish light grey tile in a herringbone pattern behind a white bathtub.

The layout is unforgiving. Herringbone rewards careful starting lines, especially around a bath niche, shower screen, or window opening, because a slight drift becomes obvious fast. I'd only use it where the room can handle the visual energy, or where the builder can centre the pattern properly on the most visible wall.

Practical rule: put herringbone where the eye naturally lands first, then let the rest of the room stay quieter.

For bathroom renovations, that usually means one feature wall, a shower surround, or a vanity splash area rather than wrapping every surface. Pairing it with matching grout creates a softer, more continuous look, while contrast grout makes the geometry punch harder. If the room is small, a neutral porcelain herringbone is usually safer than a busy marble mix, because the pattern already does plenty of work on its own.

A good registered builder will also plan the tile cuts before the first sheet goes up. That matters because herringbone uses angled cuts, and the waste allowance is higher than a straight grid. Grout maintenance also needs more attention than most homeowners expect, because the pattern creates more lines than a large-format install. If you want a practical guide after handover, keep how to clean floor tile grout handy for regular upkeep.

2. Subway Tile Pattern

Subway tile is the safest pattern for a reason. The brick-like stagger feels familiar, works with nearly any palette, and suits everything from a compact family bathroom to a polished transition space. It's also one of the easiest ways to get a clean, finished look without overdesigning the room.

What makes it durable is not just the tile itself, but the restraint. A white subway field with black grout can lean industrial, soft grey grout can feel calmer, and matching grout can make the wall read as a single quiet surface. In modern bathrooms, that flexibility is valuable because fixtures, mirrors, and lighting can carry the style without fighting the wall finish.

For installers, subway tile is more straightforward than herringbone or chevron, but there's still a right and wrong way to do it. A vertical stack can lift a compact room visually, while a standard stagger often feels more relaxed and traditional. Larger subway formats also reduce grout lines, which helps in small bathrooms where too much segmentation can make the room feel busy.

Here's where it earns its place in bathroom renovations. It can act as the main field tile and still let you introduce a second pattern in a niche, border, or vanity splash zone. That gives the room depth without turning it into a pattern sample board.

  • Use matte or glossy finishes deliberately: Gloss feels more classic and reflective, matte feels softer and more contemporary.
  • Choose grout as part of the design: Dark grout highlights the grid, while matching grout quietens it.
  • Let the fixtures finish the look: Chrome, brushed nickel, or matte black all change the final read of the room.
  • Mix only one accent pattern at a time: A subway field with a small herringbone inset or border keeps the design controlled.

If you're building a room that needs to age well, subway tile is still one of the most dependable new bathroom ideas around. It gives you a clean base, then leaves room for lighting, tapware, and joinery to do the styling.

3. Moroccan and Zellige Pattern

Zellige is for homeowners who want the bathroom to feel collected, not assembled. The hand-glazed look, irregular surface, and intricate geometry give the room personality before you even add mirrors or fittings. In designer bathrooms, it works best as a feature because the tile itself already carries a lot of visual weight.

The challenge is balance. A full room in zellige-inspired tile can become noisy quickly, especially in a small ensuite where there's already glass, chrome, and cabinetry competing for attention. That's why this pattern performs best on a shower wall, vanity backdrop, or powder room feature, where the eye gets one strong moment and then settles.

The right surrounding materials matter just as much as the tile. Neutral porcelain on the other walls, simple stone-look flooring, and warm metal fixtures let the zellige read as the hero instead of the entire story. Brass and gold-toned fittings suit the jewel-tone feel particularly well, while overcomplicated cabinetry usually dulls the effect.

For a project like this, bathroom renovations need a builder who understands specialty tile handling. Specialty cuts, colour variation, and the way artisanal surfaces reflect light mean layout decisions have to be made early. That's also where how to choose bathroom tiles becomes a useful decision aid, because the finish, tone, and surrounding materials all need to work together before installation starts.

Good zellige design should feel edited, not crowded.

That's the line I use on site. If the room already has a strong vanity, sculptural mirror, or bold lighting, keep the tile quieter. If the tile is the statement, everything else should stay restrained. In the right bathroom, zellige brings warmth and artistry that standard ceramic layouts can't match.

4. Hexagon and Geometric Tile Pattern

Hexagon tile suits homeowners who want pattern without clutter. It carries the look of classic geometric flooring, yet it still feels current in modern bathrooms because the shape is clean, structured, and easy to scale from subtle to bold. On a floor, it gives the room weight. On a wall, it reads as more architectural.

Geometric bathrooms have stayed relevant for a reason. Early bathroom design often used black-and-white hexagonal floors and checkerboard layouts because they created a tidy, easy-to-maintain visual language. That approach still holds up when the goal is a bathroom that feels ordered rather than decorative for its own sake.

Hexagon patterns are also useful in rooms with awkward proportions. The shape can soften irregular corners without looking loose, and a single-colour hex floor can make a compact room feel deliberate instead of crowded. Push too many colours into the mix, and the room starts to lose its calm. I usually steer clients toward one dominant tone and a grout colour that supports it rather than fighting it.

In bathroom renovations, this pattern often works best on the floor, then gets paired with simpler wall tile. That lets the geometry anchor the room while the walls keep the visual field quiet. If you want more personality, add it through brushed metal tapware, timber shelving, or a fluted vanity front instead of layering a second pattern beside the hexagon.

A clean geometric floor also suits family bathrooms where durability matters more than chasing a trend. The pattern adds texture without overwhelming the room, which makes it easier to live with over time. For homeowners looking for new bathroom ideas, that balance is usually the sweet spot, enough character to feel custom, not so much that it dates quickly.

5. Chevron and V-Pattern Tile Arrangement

Chevron is the sharper, more directional cousin of herringbone. Instead of overlapping rectangles, the cut ends meet to form a strong V, and that creates an unmistakable arrow-like movement across the surface. In modern bathrooms, it gives the room confidence fast.

That confidence is also the risk. Chevron has a harder visual edge than many people expect, so it works best where the room needs one decisive statement rather than constant pattern across every wall. Shower floors are a strong use case because the directionality feels purposeful underfoot and helps the layout read as designed, not random.

It also demands accuracy from the installer. The angles need to be planned before the first tile is fixed, because once the V starts drifting, the pattern stops looking elegant and starts looking off. That's why I'd only use chevron with a builder who has handled directional layouts before, not someone treating it like a standard brick bond with fancier cuts.

For a high-end result, keep the colour range tight. Monochrome grey, tonal stone, or a restrained marble look usually works best. If you introduce too much contrast, the chevron can take over the whole room and make the finish feel loud instead of refined.

Best use case: one controlled chevron zone, usually a shower floor or a single feature wall.

That approach gives bathroom renovations a strong design moment without blowing up the rest of the palette. It also pairs well with minimal fixtures, frameless glass, and simple joinery. In the right room, chevron reads as architectural. In the wrong room, it reads as busy.

6. Basketweave Pattern

Basketweave sits in a useful middle ground. It has more texture than a straight grid, but it doesn't shout the way some geometric layouts do. That makes it a smart choice for homeowners who want a bit more depth in modern bathrooms without drifting into a busy finish.

The pattern works by alternating horizontal and vertical groupings so the tile surface echoes woven material. On a bathroom floor, that brings a sense of structure and movement without overpowering the rest of the room. It suits transitional spaces especially well, where you want the bathroom to sit between classic and contemporary rather than lean heavily into one direction.

The trick is restraint in the surrounding finishes. Clean-lined vanities, plain mirrors, and simple tapware let basketweave do its work. If you pair it with too many competing elements, the pattern loses its sophistication. A charcoal grout can sharpen the definition, while a softer grout will quiet it down and make the floor feel more continuous.

In bathroom renovations, basketweave is often the kind of pattern that rewards a careful eye more than a big budget. The visual effect depends on clean alignment and a consistent starting point, so the tile setter needs to stay disciplined from the first row to the last. That's especially important if the bathroom has a recessed shower, a toilet nib, or a vanity return where the layout can easily drift.

Because the pattern is contained and readable, it works well in family bathrooms where you want something more considered than plain straight-laid tile but less dramatic than chevron or zellige. It's also one of the better new bathroom ideas when the client wants the room to age gracefully. The pattern feels classic without looking old-fashioned.

7. Large-Format and Minimalist Monolithic Tile Pattern

What gives a bathroom that calm, high-end look without adding visual noise? Large-format tile is usually the answer. Fewer grout lines, broader surfaces, and a cleaner field across the room help the space feel larger and more refined, and in modern bathrooms that restrained finish also makes day-to-day cleaning easier.

Large-format bathroom tile is generally understood as tile with one side at least 600 mm, and that scale changes the installation from the ground up. The substrate has to be flat, waterproofing needs to be correct, and the setter has to control lippage with care. If the base is off, large tile makes that problem obvious fast, which is why prep matters more here than it does with smaller formats.

I usually steer this pattern toward shower walls, main wall runs, and floor areas that benefit from a continuous surface. It suits projects where the brief calls for a quiet, high-end finish rather than a decorative pattern. For people comparing new bathroom ideas, it is often the safest choice when the room already has strong fixtures, good proportions, and a disciplined layout.

Material choice matters as much as size. Porcelain is usually the practical option because it has lower porosity and better dimensional stability than cheaper ceramic alternatives, which helps reduce lippage risk in wet-area installs. That is one reason registered builders often favour porcelain for large surfaces where performance has to match the finish.

If you want a clearer sense of how that approach reads in a finished room, SitePro Bathrooms' large-format bathroom tiles guide is worth a look before you commit. This pattern is the cleanest option on the page, but only when the prep work is exact. A flawless large-format wall looks effortless because a lot of effort went into it.

8. Encaustic and Hand-Painted Tile Pattern

Encaustic and hand-painted tiles bring a completely different energy into the bathroom. Each tile carries its own visual character, so the room stops feeling purely functional and starts feeling curated. That's why this pattern is so effective in designer bathrooms and powder rooms where you want a memorable impression.

The best use case is usually a feature zone, not full coverage. A border, entry wall, vanity splashback, or shower detail gives the room artistry without making it feel heavy. If you wrap every wall in a highly detailed pattern, the room can become visually exhausting, especially where there's limited natural light.

This is one of the patterns where the builder's coordination matters as much as the tile itself. Specialty tile needs careful handling, and the installation plan should account for how the design lines up with fixtures, niches, and edges. That's especially true when the tiles are artisan-made or custom-commissioned, because replacement and matching are not as simple as ordering another box.

For homeowners comparing bathroom renovations, encaustic work is ideal when personality is the brief. It suits heritage-inspired spaces, powder rooms, and transitional bathrooms where a bit of old-world reference feels deliberate rather than themed. In the right room, it can create that “finished by someone who cared” feeling that standard tile can't always deliver.

Use the rest of the room to support the art. Plain porcelain, subdued stone-look surfaces, and restrained tapware let the pattern remain the focal point. If the room is already busy, hand-painted tile can quickly tip from expressive to chaotic, so editing is essential.

Top 8 Bathroom Tile Patterns Comparison

Pattern Implementation complexity Resource requirements Expected outcomes Ideal use cases Key advantages
Herringbone Pattern High, precise angled cuts and alignment Skilled tiler, increased labour, moderate material waste Dynamic zigzag, depth and perceived space Feature walls, ensuites, contemporary renovations Timeless sophistication, strong directional flow, photogenic
Subway Tile Pattern Low, straightforward staggered layout Standard tiles, typical labour, cost-effective Clean, timeless, highly versatile finish All bathroom types, first-time renovations, rentals Most versatile, economical, easy to maintain
Moroccan / Zellige Pattern Very high, intricate mosaic placement Premium handcrafted tiles, specialist installers, high cost Rich, artisanal, jewel-toned statement aesthetic Statement powder rooms, designer luxury bathrooms Distinctive cultural character, high visual impact
Hexagon & Geometric Pattern Medium, precise cutting for shapes and edges Moderate material cost, common skilled labour Modern tessellated look, architectural interest Floors, feature walls, contemporary projects Contemporary appeal, versatile sizes, more affordable than bespoke mosaics
Chevron / V-Pattern High, exact angle cuts and careful alignment Skilled tilers, higher labour costs, precise layout planning Bold V-shaped directionality and strong focal lines Shower floors, feature walls, designer renovations Striking statement, guides sightlines, highly photogenic
Basketweave Pattern Medium, patterned placement, moderate precision Standard tiles, moderate labour, possible DIY for experienced Subtle woven texture, understated rhythm Floors, transitional bathrooms, family bathrooms Sophisticated without excess, hides imperfections, affordable relative to complex patterns
Large-Format / Monolithic Tiles High, requires level substrate and specialist handling Premium large tiles, specialized installers, higher material cost Seamless, spacious minimalist surfaces with minimal grout Compact bathrooms, luxury and minimalist renovations Minimal grout, easy cleaning, creates sense of space and luxury
Encaustic / Hand-Painted Tiles Very high, bespoke placement and careful curation Artisan tiles, custom sourcing, specialist installers, high cost Unique, artistic, highly personalized interiors Accent walls, powder rooms, bespoke designer bathrooms One-of-a-kind expression, strong artistic value, memorable focal points

Bring Your Bathroom Tile Pattern to Life

Choosing the right bathroom tile patterns is only the start. The outcome depends on how the layout is planned, cut, and installed. A pattern that looks effortless in a showroom can fall apart in an actual bathroom if the room shape is awkward, the substrate is uneven, or the installer doesn't understand how to centre the design around the most visible wall.

That's where working with experienced registered builders pays off. In Victoria, domestic building work, including renovation, alteration, improvement, repair, and maintenance of a home, sits under the Domestic Building Contracts Act framework, and work over $10,000 generally requires a written major domestic building contract, with builders registered for the class of work they perform Victorian domestic building registration and contract rules. For bathroom renovations, that legal and practical structure matters just as much as the tile choice itself.

The best outcomes usually come from treating pattern, material, and build method as one decision. Herringbone and chevron need more planning and more cut discipline. Subway, basketweave, and hexagon can be easier to control. Large-format tile demands better substrate prep, while zellige and encaustic need tighter design editing so the room doesn't feel overloaded. That's what underpins modern bathrooms, and it's where a good builder earns their keep.

At SitePro Bathrooms, the strongest projects usually start with 3D planning, because it lets you test how the pattern sits around the vanity, screen, niche, and floor waste before anything is fixed in place. If you're weighing up new bathroom ideas for a home in Highett or greater Victoria, talk to a team that understands both the visual result and the build sequence. Contact SitePro Bathrooms to discuss your bathroom renovation, review pattern options, and map out a design that looks right from day one through to final handover.
  • siteprobathrooms

Double Vanity Size Guide for Australian Bathroom Renovations

The most practical double vanity size for Australian shared bathrooms is 1524 to 1829 mm wide, with 1524 mm as the workable minimum and 1829 mm as the comfortable standard. In a morning rush, that difference decides whether two people can stand side by side without bumping elbows or fighting for basin space.

A lot of bathroom renovations in Victoria start with the same mistake, the vanity is chosen like a furniture piece instead of a working surface. The right double vanity has to clear doors, respect plumbing locations, leave room to move, and still give both users enough counter to function properly.

Why Double Vanity Size Matters in Australian Bathrooms

Shared bathrooms put pressure on the vanity fast. One person is brushing teeth, the other is shaving, and a unit that looked roomy in a showroom can feel tight as soon as it is installed in a real Victorian home. The problem is usually not the style, it is the working space.

A practical double vanity size for Australian shared bathrooms usually sits in the 1524 to 1829 mm range. 1524 mm is the workable minimum, while 1829 mm is the more comfortable standard. That width gives two users enough room to stand, wash, and reach without turning the basin zone into a daily argument over elbows and bench space.

The wall width has to work before the style does

Homeowners often start with the finish and try to make the size fit later. In the field, that usually goes badly because bathrooms are governed by door swings, circulation paths, and plumbing locations, not by the vanity photo.

A double vanity only performs properly when the wall can carry the load of two active stations. If the run is too tight, the centre section stops working as shared bench space and becomes a narrow strip that neither user can claim comfortably. If the run is too long for the room, the vanity starts to crowd the doorway or pinch the route past it.

Wall width also affects how the room feels at peak use. Two people can technically use a vanity, yet still be forced into awkward side steps, clipped elbows, and blocked access to drawers if the layout gives them nowhere to move. In a Victorian renovation, that is the difference between a vanity that suits the room and one that fills the wall.

For homeowners in Victoria, that is the test. The question is whether the bathroom can support two stations without giving up front circulation, storage access, and door clearance.

Standard Double Vanity Dimensions Explained

The practical way to judge a double vanity is to measure the whole footprint, not only the width on the product label. Width sets the starting point, but depth, height, and sink-centre spacing decide whether two people can use the vanity at the same time without bumping shoulders or fighting for bench space.

In Australian renovations, double vanities are commonly set around 152 to 182 cm wide, with depth usually around 450 to 600 mm and height around 820 to 900 mm. That range works in many bathrooms because it leaves usable circulation at the front while keeping the cabinet comfortable for daily use and the plumbing layout manageable (ArchiPro).

Width, depth, height, and spacing

Width matters because two sinks need real separation. Once the basin centres are pushed too close together, the middle section stops functioning as shared bench space and becomes a cramped strip that neither user can use properly.

A sensible layout keeps 300 to 400 mm between sink centres, allows about 750 mm front clearance for movement and door swing, and uses total countertop lengths of 1400 to 1800 mm for comfortable dual use. That detail gets missed often. A room may accept two basins on paper, yet still feel tight if the centres are crowded or the front zone is blocked (Bathroom Mountain).

Dimension Minimum Comfortable Standard Why It Matters
Width 1524 mm 1829 mm Two users need enough sink and counter separation to reduce elbow conflict and shared-use congestion
Depth 450 mm 600 mm Depth affects basin fit, splash control, and how far the vanity projects into the room
Height 820 mm 900 mm Correct height supports standing comfort across different users
Sink centres 300 mm apart 400 mm apart Wider spacing reduces elbow collision and makes simultaneous use easier
Front clearance 750 mm 750 mm or more Keeps movement safe and avoids a door or body-clash zone

A vanity can still be wrong if the depth or front clearance steals the room around it.

If you are comparing options, check the cabinet footprint, not only the benchtop edge. That is where many bad fit decisions start.

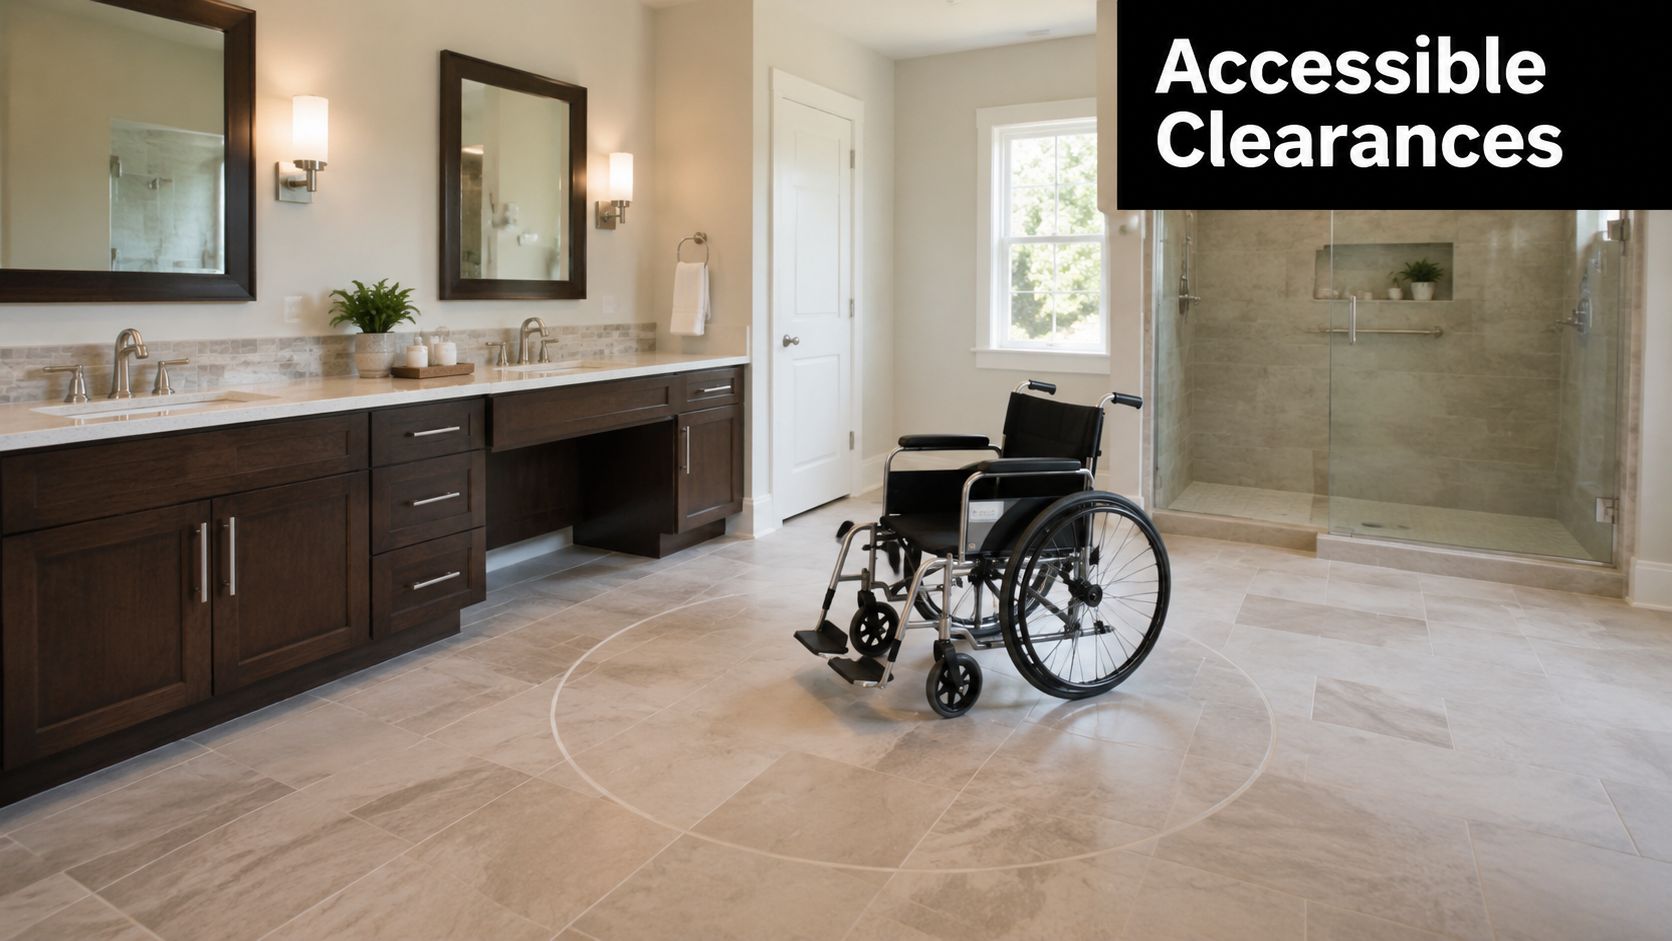
Clearances and Accessible Bathroom Considerations

A wheelchair positioned in the center of a spacious, accessible bathroom with a double vanity design.

A double vanity only earns its keep if the room still works around it. Cabinet width matters, but front circulation decides whether two people can use the room without bumping elbows, clipping a door, or standing in each other's path.

Clear floor space in front of the vanity should be generous enough for daily movement, and the smallest practical double units are only suitable when the room can still give them proper approach space. That matches what shows up on site. If the front zone is cramped, the vanity loses its value fast, even when both basins are fitted correctly.

Circulation is the real test

A room can measure up on paper and still fail in use if the vanity sits too close to a door, toilet, or shower entry. I've seen bathrooms where the basin positions were fine, but the door swing made the front edge awkward every time someone walked in.

Accessibility thinking helps in ordinary family homes too. Wall-mounted vanities and dual-height layouts can make the room easier to use for children, older users, and anyone who benefits from seeing more floor space. In rental fit-outs and long-term liveability planning, that open feel often gives more practical value than squeezing in another drawer.

The cleanest layout is the one that lets two people use the room without negotiating who moves first.

If the room is meant to suit different ages and mobility levels, judge the vanity with the whole bathroom in view. Check its relationship to the shower screen, toilet zone, towel storage, and the path back to the door. A well-sized double vanity with poor approach space still behaves like a barrier.

Layout Examples for Common Bathroom Sizes

The right double vanity size depends on how the room behaves in daily use. A vanity that looks generous on paper can still fail if it pins people against a door swing or steals the front circulation zone, while a slimmer wall-mounted run can keep a tight Australian bathroom working properly. Bigger only helps when the room has the width to support it.

For two users, sink-centre spacing and elbow clearance matter as much as the overall cabinet width. A practical double layout usually gives each person enough counter and basin room to move without brushing arms, and the common format sits around 60 inches or 72 inches, with custom widths reaching 84 inches in larger primary suites (The Cabinet Coach). That is the choice point, compact efficiency, or enough shared bench to make the vanity pleasant at peak use.

Compact ensuite

A compact ensuite needs discipline. A 1200 mm unit can work well if the room is small, especially when it is wall-mounted or kept shallow, because the priority is preserving a clear path rather than chasing bench length.

In that setting, every millimetre has to earn its place. Deep drawers can be more useful than a bulky cupboard if the cabinet has to stay visually light, and a reduced depth can stop the room from feeling pinched at the front edge. The trade-off is straightforward, less bench and less storage volume, but better circulation and a room that still feels workable.

Standard family bathroom

A standard family bathroom is where a double vanity starts to prove its value in everyday traffic. A run in the 1400 to 1800 mm range usually suits a room that sees two people at the basin at the same time and needs enough separation between users to avoid constant shoulder contact.

Dual-height planning can also help here. Adults and children do not always need the same working height, and a layout that allows for that can feel more natural than forcing every user onto one fixed line of fixtures. In many modern bathrooms, the better result comes from a cabinet that fits the room cleanly and leaves the front circulation open, not from adding width just because the wall can take it.

Spacious primary suite

A larger suite can take custom widths up to 84 inches (The Cabinet Coach). That extra span is useful when the brief calls for long bench runs, more drawer storage, and a built-in look that suits a more considered bathroom fit-out.

The catch is proportion. A bigger cabinet still needs room to breathe, and if the extra width narrows the approach or crowds the shower and door zone, the added surface stops being an advantage. I would rather fit a slightly shorter vanity that lets the room move well than force in a showpiece that dominates every path through the room.

For homeowners comparing cabinet height with the rest of the layout, this standard benchtop height guide helps when you are matching the vanity to the room's working clearances.

Selection Criteria for Storage Basins and Benchtops

The vanity can fit the wall and still work poorly in daily use if the basin and benchtop choices are off. Storage layout, basin profile, and top depth all change how a double vanity handles elbow room, shared access, and front circulation.

For a practical benchmark, many Australian fit-outs keep double vanity widths in the 152 to 182 cm range, with depths around 450 to 600 mm and heights around 820 to 900 mm to maintain comfortable standing use and keep the room moving. That span gives you room to choose between storage-heavy cabinets, slimmer tops, and different basin styles without pushing the layout into awkward territory.

Storage and basin choices change the usable footprint

Drawer storage usually works better than deep cupboards for everyday use because toiletries stay visible and within reach. Cupboards still make sense where plumbing sits through the middle of the cabinet, but they often waste the easiest access zones under a double vanity.

Basin style changes how the bench performs as shared space. An undermount or integrated basin keeps more useful surface than a bulky above-counter bowl, while a semi-recessed basin can suit tighter rooms where the cabinet depth needs to stay under control. If the basin profile takes too much bench, the vanity stops functioning like a common worktop and starts feeling like two separate basins with very little shared space between them.

For homeowners checking how bench height sits with the rest of the room, this standard benchtop height guide is a useful reference point before you commit to the final layout.

What tends to work best on site

  • Drawer-led storage: Best when the household uses the vanity hard and needs quick access to daily items.
  • Cupboard-led storage: Better when plumbing restrictions control the middle section.
  • Shallower benchtops: Useful where front circulation is tight and the bathroom needs more breathing room.
  • Deeper tops: Better where the room can handle more projection and the brief calls for extra bench comfort.

Plumbing still drives a lot of the final decision. Waste routing, tap reach, and isolation access can all force changes to the cabinet layout, which is why a vanity that looks right on paper can need a different internal setup once it is measured against the wall.

Measurement Checklist Before You Commit

A vanity that fits the wall can still fail the room. Before you order anything, measure the actual site, not the idealised space in your head.

Start with the wall width at more than one height, because skirting, tile edges, and uneven plaster can change the usable run. Then check where the plumbing rough-in sits, because the cabinet has to cover and access those points without awkward cut-outs or shifted basins.

Mark the room before you buy

Use masking tape on the floor to outline the proposed vanity footprint. That simple step shows you whether the front clearance still feels comfortable and whether the room can handle two people moving through at once.

  • Measure wall width carefully: Check the full run, then check again above skirting and tile lines.
  • Confirm plumbing positions: Mark wastes, water points, and any fixed obstruction before choosing the cabinet.
  • Test the door swing: Open the door fully and see whether it clashes with the vanity zone.
  • Check level and floor finish: A slope or tile lip can change how the cabinet sits and how the doors align.
  • Look for trim interference: Architraves and skirting boards often steal more usable width than people expect.

If you're assembling a broader renovation scope, the planning list in this bathroom renovation checklist is a useful companion before you lock in materials and trades.

Tape on the floor solves more arguments than a showroom visit ever will.

Once the footprint is marked out, stand in the room and use it for a few minutes. If the layout feels tight before demolition, it won't feel looser after the cabinets arrive.

When to Engage a Registered Builder and Designer

A double vanity can look straightforward on paper and still create problems once the room is measured in millimetres. The cabinet has to work around plumbing, wall straightness, door swing, tile build-up, and the space people need to stand at the basin without knocking elbows.

Some bathroom jobs stay simple. A vanity swap in the same position can often be handled with limited disruption. Once the plan shifts into layout changes, new services, or wider structural work, the job belongs with a registered builder who can coordinate the full sequence instead of treating the vanity as an isolated purchase.

For bathroom renovations in Victoria, a registered builder is generally required when the domestic building work passes the state's threshold for higher-value or more complex jobs, and the Domestic Building Contracts Act framework applies when the contract price is over A$10,000 (Wayfair guide). That matters when the bathroom is being reworked, not just refreshed with a new cabinet.

Unlimited registration matters when the scope grows

The difference between domestic builder limited and domestic builder unlimited matters as soon as the scope expands. Unlimited registration covers broader classes of domestic building work than limited registration, which is relevant for bathroom remodels that involve altered layouts, integrated services, or full-house renovation packages.

A designer adds another layer of control. A proper room plan shows how the double vanity sits beside tiles, lighting, mirrors, and circulation space before anything is ordered, and that is where avoidable mistakes usually get caught. It is easier to adjust sink spacing on a drawing than to discover the basin centres fight with a wall return after cabinetry arrives.

SitePro Bathrooms uses that same design-and-measure process in Victoria, with 3D design and on-site measurement to settle the fit before construction starts. For homeowners planning a registered-builder pathway with coordinated design, why using a registered builder matters for your bathroom renovation is a practical next read.

What a professional team changes

  • Design accuracy: Better alignment between room size, vanity width, and plumbing placement.
  • Trade coordination: Less rework when tiles, cabinetry, and services all have to meet in one room.
  • Build confidence: Clearer decisions around when a compact layout is enough and when a larger run is justified.
  • Finish quality: More reliable outcomes in modern bathrooms and designer bathrooms where the vanity is part of the overall composition.

If you are comparing layouts for bathroom renovations in Highett or elsewhere in Victoria, book a site measure and ask for a room-scaled plan before you order cabinetry. The right double vanity size is not the biggest one that fits on a showroom floor, it is the one that still leaves elbow room, front circulation, and clean access after the plumber, tiler, and electrician have done their part.

  • siteprobathrooms

Wall Hung Toilet Installation: A Complete Guide

You've probably got the bathroom half-measured, a tile sample on the bench, and one question sitting underneath the whole plan: can a wall hung toilet work in this room, or are you about to turn a straightforward upgrade into a structural job? In Highett and across Victoria, that's the core decision. Wall hung toilet installation is rarely a quick fixture swap, it's usually a renovation choice that affects framing, plumbing, waterproofing, and how the finished room will feel every day.

A typical couple planning a remodel often starts with the look, then discovers the hidden system underneath. That's where the project changes shape. A floor-mounted suite can be replaced as a simpler trade job, while a wall-hung setup usually belongs inside a broader bathroom renovation with a proper carrier, a concealed cistern, and enough wall depth to house it cleanly. Independent consumer guidance notes that a standard toilet installation can cost about $150 to $300, while a wall-mounted toilet installation typically starts around $500 and can exceed $1,000 depending on labour and wall work. Retrofit jobs often land much higher once the chase, framing, and finishes are counted, commonly $2,500 to $5,000 for retrofits versus $1,500 to $2,500 in new construction when the wall is already open, according to consumer guidance on concealed cistern systems and installation complexity (Consumer Reports).

For modern bathrooms and designer bathrooms, that cost gap explains why the fixture usually appears during a full remodel rather than as maintenance. It's not just a style choice. It's a clue that the room is being reworked around the toilet, not the toilet around the room.

Why a Wall Hung Toilet Changes the Whole Bathroom

A Highett couple on site usually starts with a simple brief, they want more floor space and a cleaner line under the vanity. The wall hung suite fits that brief, but the work sits behind the tile. That is the point where a toilet choice stops being a fixture swap and starts becoming a renovation decision.

A wall hung bowl changes the bathroom because the load is carried through the concealed carrier frame, the cistern, the plumbing set-out, and the finished wall thickness before the pan is ever fixed in place. In practice, the toilet choice affects framing layout, rough-in position, and the order of trades. On a job that is planned properly, the plumber, builder, and tiler all work from the same finished-wall datum, instead of correcting each other later.

What the project usually means on site

The hidden system is why wall hung toilets are usually specified during a full remodel. Concealed systems need wall depth, structural support, and access planning, and retrofit work often needs a built-out chase of about 6 to 8 inches. That makes the fixture part of the bathroom architecture, not just a piece of sanitaryware. In a compact Victorian bathroom, that can still be a sensible trade-off if the room is already open for larger works.

A wall hung toilet also changes the budget conversation. Market analysis from MarketIntelo shows the product is strongly associated with modern, premium bathroom design and space-saving preferences, which explains why it often appears in renovation briefs that already include new walls, new tile lines, and concealed services. That is a different decision from replacing a floor-mounted pan in place.

Practical rule: if the bathroom is not being opened for framing or plumbing work, a wall hung toilet is usually the wrong place to start.

That is the renovation mindset. If you are planning new bathroom ideas, the toilet can be built into the design brief from the start. If you are trying to keep the existing wall intact and avoid chasing services, a floor-mounted suite is usually the cleaner path.

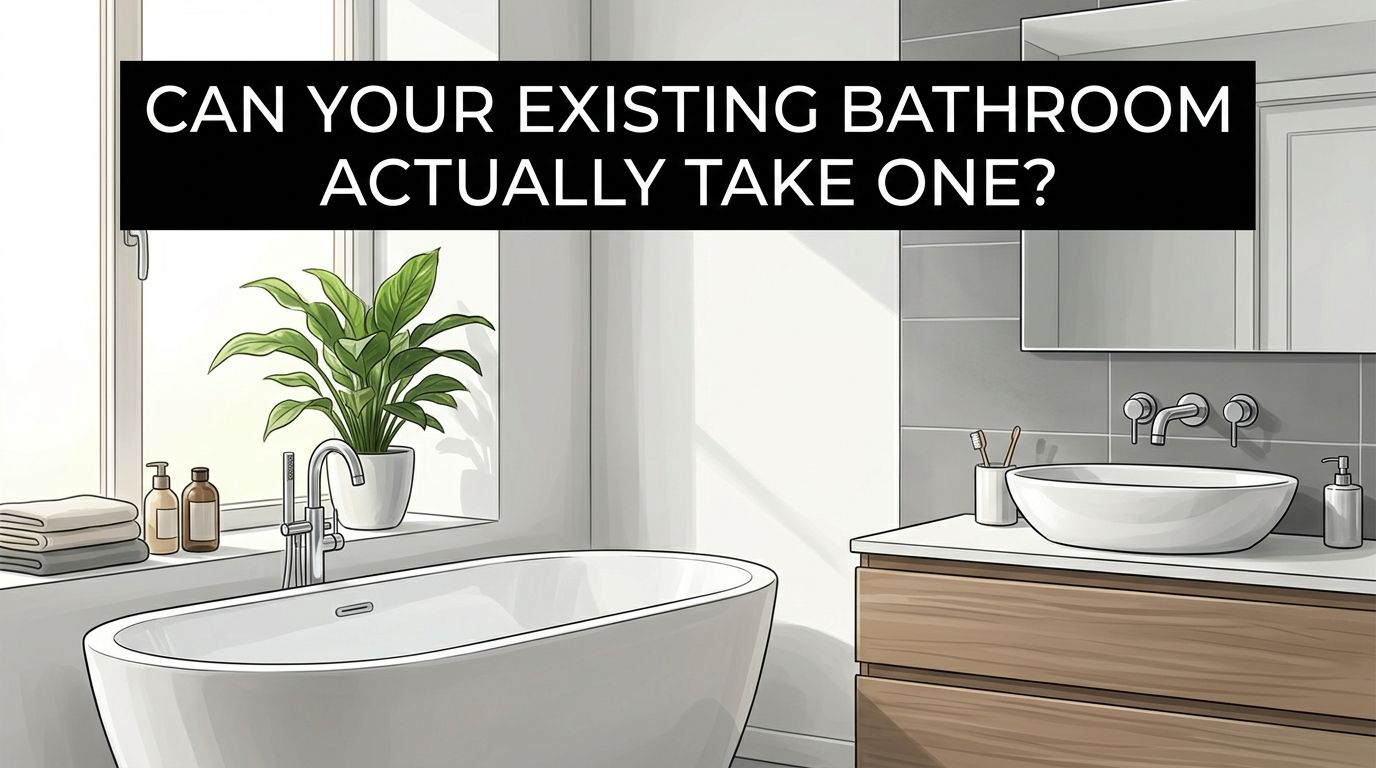
Can Your Existing Bathroom Actually Take One

Before a client commits to the bowl style, I want to know what's in the wall, where the drain runs, and how much room exists between the existing lining and the finished face. Those three things decide whether the bathroom gets a tidy false wall or turns into a larger reconfiguration. In older Victorian and Bayside homes, the answer is often buried behind a mix of patchwork repairs, irregular framing, and plumbing that doesn't line up with a modern carrier.

The checks that matter before you buy anything

First, the wall cavity has to suit the carrier and cistern. Product guidance commonly puts concealed cistern depth around 150 to 200 mm, with rough-in distances around 180 to 230 mm, which directly affects whether a standard stud wall can stay as-is or needs a framed chase (Simpolo). If the cavity can't take that depth, the wall needs to be built out. If the drain or water points miss the carrier's range, the plumbing has to move.

Second, the wall structure has to carry the load path. Installation guidance for wall-hung toilets commonly specifies a wall or frame system that can support 500+ lb, with the carrier fixed to reinforced studs or 2×6 framing (Satellite Industries). Another guide notes carrier systems are commonly specified at 400 kg or more, which is why this work often sits comfortably with registered builders unlimited where framing or lining changes are involved (Plumbing Supply and More). The point isn't the number alone, it's the fact that the structure has to be suitable before the wall is closed.

A simple false wall can be enough when the wall cavity, drain location, and service clearances all line up. A bigger reconfiguration becomes necessary when the carrier can't be fitted without moving plumbing or rebuilding the wall face. That's the decision tree most homeowners really need.

A modern, bright bathroom interior featuring a soaking tub, a vessel sink, and a wooden vanity cabinet.

If the wall won't accept the carrier without force, stop there. Forcing the system to suit the room usually creates the most expensive repairs later.

The practical question in an older bathroom is rarely “can it be done?” It's “can it be done without turning the room inside out?” If the answer is no, the smarter move is to redesign the wall and the services together instead of trying to squeeze a premium fixture into a weak layout.

Choosing the Right Carrier, Cistern and Flush Plate

The hidden parts matter more than the bowl finish. A wall hung toilet can look straightforward from the room side, but the carrier, cistern, and flush plate decide whether the install stays quiet, stable, and serviceable after the tiler leaves. On site, that is where a lot of cheap quotes fall apart, because the visible bowl is only one part of the job.

Match the system to the wall, not just the style

The carrier frame should be treated like a structural component, not a bracket. It has to suit the wall depth, the rough-in position, and the load path already discussed. If the wall is being rebuilt, the framing can be organised around the carrier. If the wall is staying mostly intact, the product choice has to fit the existing cavity rather than force awkward adjustments on site.

Dual-flush systems are now the mainstream choice in this category. A market report says dual-flush wall-hung models made up 68.2% of the market in 2025, and dual-flush systems typically use about 4.8 litres for a full flush and 2.6 litres for a reduced flush, compared with roughly 7.5 to 13 litres in older single-flush toilets (MarketIntelo). That matters because flush performance and water use sit inside the buying decision, not outside it. For homeowners planning modern bathrooms, the flush plate is also a visible detail, especially where the toilet sits in a feature wall or beside custom joinery.

Service access is the other major filter. A hidden cistern only works well when the shutoff, mechanism, and plate opening stay reachable after the wall is closed. If the access plan is an afterthought, the room may look cleaner on day one but become harder to maintain years later.

Practical rule: spend the money on the system that lets a plumber reach the mechanism without destroying the wall finish.

On a Highett job, I'd rather see a sensible carrier with proper access planning than a polished finish paired with a boxed-in cistern that makes future repairs awkward. SitePro Bathrooms, for example, includes toilet installation within its bathroom renovation fit-off work, which is the right context for hidden-system selection because the toilet is handled as part of the full room build, not as a loose replacement. That same approach matters for designer bathrooms too, where the flush plate, tile layout, and access panel have to work together. If the wall needs to be sealed around the carrier, follow a proper bathroom waterproofing sequence like the one set out in this waterproofing guide.

Framing, Plumbing and Drainage on Site

Once the old suite is out, the job turns into a site decision, not just a fixture swap. The carrier, framing, plumbing, and waste line all have to agree with the bathroom's final layout, because a wall hung toilet only works when the wall behind it is built for the load and the services are placed with the finish in mind.

The order that keeps the install honest

The carrier has to be anchored to both the wall and the floor, because the load should not depend on one fixing point alone. The frame needs to be set square, level, and matched to the manufacturer's setback before the wall is closed. The Australian Plumbing Code and installation guidance is the right reference point for this stage, and the finished bowl height still has to be confirmed before any linings go on.

Plumbing rough-in is where a lot of bathroom rework starts to go wrong. Waste and inlet connections need to be sealed correctly, then checked again after the first flush. Cut pipe ends should be trimmed and deburred before assembly, because a rough edge or a poor joint can leave hidden seepage behind the wall. The installer should also confirm the carrier frame is fixed to structurally adequate framing and that the bowl will sit at the correct finished-wall setback before tiling begins. If those details are off, the wall often has to come apart again.

A good Victorian installation is checked as a system, not as separate parts. A registered plumber should dry-fit the carrier, check the waste alignment, confirm the set-out against the finished wall thickness, and only then move toward closure. If you are working through the wider renovation budget at the same time, a bathroom renovation cost calculator helps keep the carrier choice, rough-in work, and finish allowances in the same conversation.

What a homeowner should expect to see

  • Dry-fit checks first. The frame is positioned, measured, and checked against the wall thickness before linings go up.
  • Anchor points fixed properly. The carrier is secured to the structure, not left floating on the lining.
  • Pipe ends finished cleanly. Cut edges should be trimmed and deburred before assembly.
  • Leak testing before closure. The plumber should confirm connections and check for seepage after the first flush.

The wall should only be closed when the installer is happy to have the entire system hidden for good.

That is the point where shortcuts show up later. If the carrier is out by a few millimetres, the correction usually happens before tiling, not after. If the drain line is wrong, the wall may need to open again.

Sheeting, Waterproofing and Tiling Around the Carrier

The finish work is where a wall hung toilet stops looking like a plumbing project and starts looking like a proper room. The challenge is that the lines you see in the finished bathroom depend on the thickness of the wall behind the tile. If the sheeting, waterproofing, and tile build-up are guessed rather than measured, the flush plate and bowl can finish awkwardly proud or recessed.

Build the wall around the service, not the other way around

Around the carrier, the sheeting needs to be cut cleanly and sealed at joints. Cement sheet is commonly used in wet areas because it handles the environment better than a casual lining choice, but it still has to be installed with proper seals and a sensible junction plan. Waterproofing the wet zones has to be done properly before tiling, and any bathroom renovation should be aligned with current Victorian waterproofing practice. For a broader look at that stage, see bathroom waterproofing guidance.

Finished wall thickness matters because the bowl setback is set relative to the carrier and the final surface. The manufacturer's template is more reliable than guesswork here. If the wall build is thicker than expected, the push plate and bowl can land in the wrong visual relationship. If it's thinner, the access opening and plate surround can look unfinished. That's why tilers and builders should be working off the same measurements, not different assumptions.

The flush plate cut-out deserves careful planning too. It's a design detail, but it's also the maintenance point for the cistern. The cleanest jobs leave the plate flush and intentional, with tile cuts balanced around it rather than chopped around the opening at the last minute. In older bathrooms, that service point is often the one thing nobody planned for. The smartest approach is to preserve access without making the wall look like it was built around a patch.

A few finish decisions that save rework

  • Set tile lines before fixing the board. The opening should be measured against the final tile module, not a rough wall face.
  • Leave the access point readable. A neat plate opening is better than a hidden mechanism that can't be serviced.
  • Use the template, not the tape guess. Manufacturer spacing controls the outcome more than instinct does.
  • Keep the finish thickness consistent. Uneven buildup changes the bowl relationship to the wall.

That's the point where new bathroom ideas become tangible. The hidden cistern no longer feels hidden. It feels integrated.

Costs, Timelines and What Drives Them

The cost question is not the toilet itself. It is how much wall work the toilet forces. Wall hung toilet installation in Victoria has to be priced as a bathroom change, not a fixture swap, because once the carrier goes in, the framing, plumbing, waterproofing, and tiling all start affecting the final number.

On site in Highett, I usually break quotes into three groups so the homeowner can see what is driving the price.

Project Type Typical Cost Range (AUD) Typical Timeline Trades Involved
Simple retrofit About $2,500 to $5,000 for retrofits Shorter once access is ready Licensed plumber, builder, tiler
Remodel with new framing Higher than a simple retrofit when the wall is rebuilt Longer because framing and finishes are sequenced Registered builder, licensed plumber, tiler
Full bathroom reconfiguration Depends on how much wall and plumbing work changes Longest, because the room is reworked around the carrier Registered builder, licensed plumber, waterproofing and tiling trades

Those ranges are useful because they reflect what usually changes on the tools. A retrofit with a ready-made cavity is one thing. A job that needs a new chase, adjusted set-out, or a rebuilt wall face is another. Victoria also has to account for trades charging differently across inner suburbs, bayside areas, and outer growth areas, so two bathrooms that look similar on paper can land at very different labour totals once site access and wall conditions are known.

If you want a rough planning figure, use a bathroom renovation cost calculator and compare it with the actual scope on the house. The useful detail is usually not the bowl price, it is the labour behind it. Carrier hardware, fixings, framing timber, pipe alterations, waterproofing materials, plasterboard or sheeting, and tile reinstatement all add up, and each one depends on how the existing wall is built.

The main cost drivers are predictable. Hidden cistern work brings structural fixings and access planning into the job. Retrofit work often needs a built-out wall section to hide the carrier and services. Waterproofing and tiling around the new wall face also take time, and that time shows up in the quote. Consumer guidance notes that wall mounted toilet installation typically sits above standard toilet replacement because the wall work is doing part of the job, not just the porcelain (Consumer Reports). That is the difference homeowners feel once the scope is written properly.

Timelines move the same way. A straightforward install runs quickly only when the wall is already suitable, the plumber can set the carrier without reworking the structure, and the finisher is not waiting on other trades. Once the bathroom has to be reconfigured around the toilet position, the job becomes a sequence rather than a single visit. The best way to budget for that is to ask what is included in the quote, then check whether structural fixing, licensed plumbing, waterproofing, and finish repairs are all named clearly.

Compliance, Service Access and Common Problems

A good wall hung toilet install still has to work five years later. That's where compliance, access, and maintenance planning start to matter more than the first flush. In Victorian renovation work, the safe approach is simple. If the project touches framing, waterproofing, or concealed plumbing, a licensed plumber and, where structural changes are involved, a registered builder should be part of the job from the start.

Service access is a design feature. The flush plate, shutoff, and internal mechanism need enough clearance to be reached without tearing into the wall, because hidden systems only feel premium when they're still serviceable. That's especially important in apartments, body corporate settings, and investment properties, where future access can affect who pays for what and how repairs are managed. For a broader planning checklist, the toilet renovation overview is a useful place to sanity-check the sequence before work begins.

The failures I see most often are plain and preventable. Cracked bowls usually come from overtightened mounting bolts. Persistent seepage usually traces back to miscut pipework or poor sealing. Slow cistern fill is often a service or adjustment issue, not a reason to rip the wall apart, but it still needs access planned for at the outset.

Best practice: close the wall only after the installer can prove the system is reachable, sealed, and stable.

That is the clean line between a bathroom that just looks finished and one that will stay dependable. Get the frame right, keep the access honest, and the hidden system stops being a risk.


If you're planning a bathroom upgrade in Highett or anywhere in Victoria, bring the wall hung toilet into the conversation before demolition starts. A site review with a licensed plumber and a builder who handles concealed cistern work will tell you quickly whether the wall can take a carrier, whether the plumbing needs moving, or whether the room should be reconfigured around the toilet from the start.

  • siteprobathrooms

Frosted Glass Shower Screens: A Homeowner’s Guide

You're standing in a half-finished bathroom, the tile is in, the plumber's finished, and the shower screen is the last big decision hanging over the room. In a compact Victorian ensuite or family bathroom, that choice usually comes down to one thing, how much privacy you need without turning the room into a dim box. That's exactly where frosted glass shower screens earn their place in bathroom renovations, because they solve a real conflict instead of just adding another finish to the shopping list.

Why Frosted Glass Shower Screens Matter in Modern Bathrooms

A typical Highett bathroom puts you right at the point of tension. There's a window letting in useful morning light, the shower sits close to the vanity, and the household still needs enough privacy for the room to feel comfortable when two people are trying to get ready at once. In that setting, frosted glass shower screens work because they soften sightlines without blocking daylight completely, which is why they've become such a practical default in modern bathrooms and designer bathrooms across Melbourne.

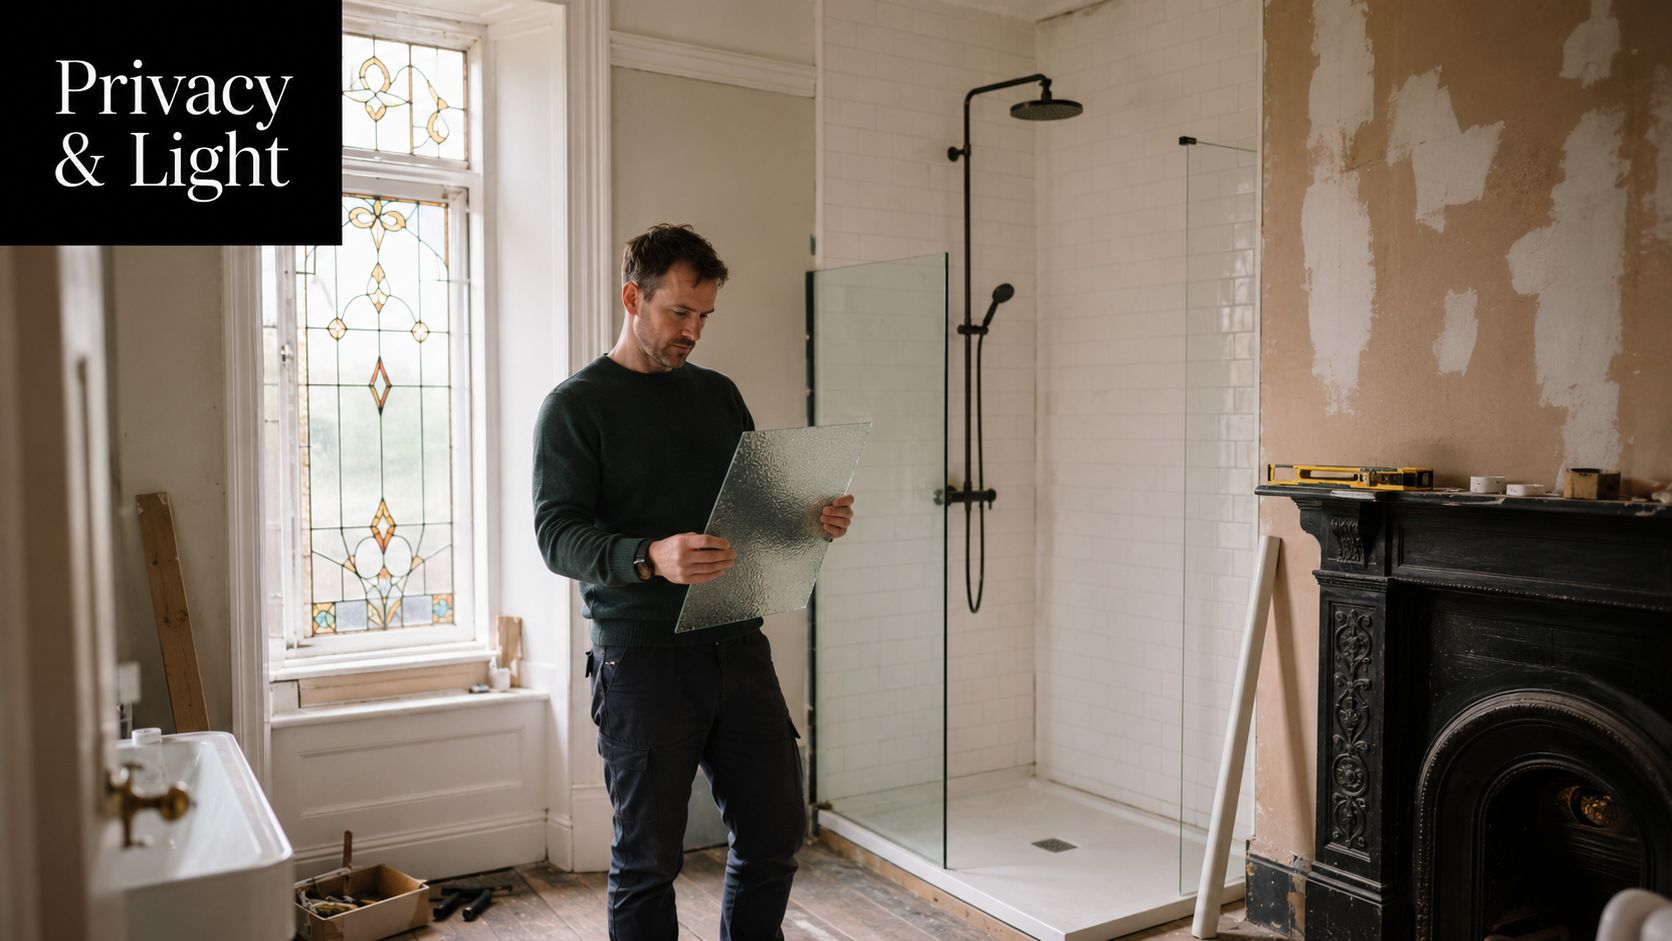
A man inspecting a piece of textured frosted glass in a bathroom undergoing renovation.

The bigger shift is that frosting isn't being treated as a gimmick or a compromise anymore. Australian trend reporting for 2026 points to more homeowners choosing textured, tinted, or frosted bathroom panels, along with bespoke sizing and custom etching, which tells you privacy-led glazing has moved into the design conversation rather than sitting on the edge of it history of glass shower screens. That shift makes sense in homes that are moving towards walk-in and curbless layouts, because those layouts open the room up visually while still needing a way to preserve personal privacy.

A frosted screen is usually doing two jobs at once. It's protecting the user's comfort, and it's helping the room keep its sense of light.

For a renovation brief, that means the screen shouldn't be an afterthought. It needs to be considered with the vanity position, window line, shower entry, and how the room reads from the door. In a small bathroom, the wrong screen can make the room feel busy and closed in. The right frosted panel can make the same room feel calm, ordered, and ready to use every morning.

What Frosted Glass Actually Is and How It Is Made

Frosted glass isn't a special structural category, it's a surface treatment. That matters because the privacy effect comes from how the surface scatters light, not from any change to the glass's role in the shower enclosure. In practice, the finish is usually created in one of three ways, acid etching, sandblasting, or film application, and each one leaves a slightly different result on the bathroom floor.

How the finish changes the look

Acid etching gives a smoother, more even frost and is often the finish people mean when they picture a clean, soft, semi-opaque panel. Sandblasting can create a stronger textured effect, which may suit a more architectural look but can also feel heavier in a small room. Film application is the most flexible in theory, because it can be used to trial a look without committing to a permanently treated panel, although it's not the finish I'd default to for a high-use family shower if longevity is the priority.

In showroom terms, it helps to separate frosted glass from the other common options. Clear glass gives the most openness. Tinted glass changes the visual tone more than the level of privacy. Low-iron glass is about colour clarity and reduced green cast, not frosting. Fluted or reeded glass still distorts sightlines, but it does that through profile and texture rather than a frosted surface.

The simplest rule is this. If you want to obscure direct view while still borrowing light from the bathroom or window, you're looking at a frosted finish. If you want the enclosure to disappear visually, clear or low-iron glass is closer to that outcome. If you want a more decorative texture with stronger visual movement, fluted glass sits in a different lane again.

Read the spec sheet for the finish, not just the marketing label. “Frosted” can describe several different treatments, and they don't all behave the same way in day-to-day use.

Popular Frosted Styles and How They Change a Bathroom

Different frosted styles suit different room sizes, and the wrong choice shows up fast in a narrow ensuite. A full-frost panel gives the strongest privacy and the most uniform look, which is why it often works best in shared bathrooms where the shower sits close to a doorway or vanity. It can be the right answer in a compact room, but it also has the highest chance of visually compressing the space if the room already lacks natural light.

Partial frost bands take a more measured approach. A lower band can shield the body while leaving the upper portion clearer, which keeps the room feeling more open. That can work well in bathrooms where the shower is visible from the door and privacy matters, but the homeowner still wants to see tile, ceiling height, or a window beyond the screen.

Matching style to room type

Gradient frost is more of a design-led move. It softens the lower or central area and eases out toward clarity, which can look excellent in designer bathrooms where the screen is part of the visual composition rather than just a barrier. Decorative etching suits a renovation where the client wants a custom feel, though it's usually better when the rest of the room is restrained. If the vanity, tile, and tapware are already expressive, too much pattern can start to feel busy.

Fluted or reeded patterns sit between practical privacy and decorative impact. They can be a smart choice for accessible curbless layouts, because they deliver visual interest without requiring a heavy framed look. In family bathrooms, they also tend to hide daily wear well.

The decision is not “which frosted style looks best on a sample board”. It's which one fits the room's job. Small ensuites need lightness. Family bathrooms need comfort and resilience. Designer bathrooms can carry a more expressive finish if the rest of the room stays disciplined. A good new bathroom ideas mood board should reflect that, instead of choosing the same style for every space.

Privacy and Light Trade-Off in Small Bathrooms

The common mistake is treating frosted glass as the automatic answer. In a compact Victorian bathroom, the core question is how much daylight and visual depth the room keeps after the frosting goes in. Privacy is easy to achieve. The harder part is keeping the room feeling open enough that people still want to use it.

Orientation matters. A north-facing bathroom with good daylight can usually absorb a frosted panel better than a south-facing room that already depends on borrowed light. Window position matters too. If the window sits high and away from the shower, frosting the screen may barely change the room's feel. If the shower screen sits directly between the window and the entry, the drop in apparent brightness can be much more noticeable.

Height and adjacency do the rest. A taller screen, or a screen placed close to bulky cabinetry, can make a small room feel more enclosed even when the glass is doing its job. That is why hybrid solutions often work well. A frosted lower section with a clearer upper section can keep privacy where the body needs it most while still letting light travel across the top of the room.

For compact layouts, planning beats guesswork. If you are working through a small ensuite layout, this small bathroom planning guide is useful background, but the live decision still comes down to how your room behaves at different times of day.

If a bathroom already feels tight, full frost can solve privacy and still leave you with a room that reads smaller than it really is.

The best test is simple. Stand in the doorway and ask whether the screen is helping the room look calmer, or whether it is creating a dark block in the middle of the layout. In some bathrooms, frosted glass is the right answer straight away. In others, a partial frost or a different glazing strategy keeps the open feel much better.

That trade-off also affects budget and upkeep in Victorian homes. More frosting can mean more time spent living with a panel that shows limescale and soap marks differently from clear glass, especially in hard-water areas where cleaning habits matter. It also shapes installed pricing, because the screen type, size, fixing detail, and finish all affect the labour and supply side of the job, and a good quote should reflect those realities rather than just the look on a mood board.

If you are choosing for a renovation, the right call is usually the one that suits the room first and the style second. A frosted screen should support the layout, not dominate it.

Glass Specs, Safety, and NCC Compliance Essentials

A shower screen quote should never start and end with the finish. The first things I look for are glass thickness, toughening, fixing details, and whether the proposed screen matches wet-area compliance requirements under the National Construction Code. The NCC is the Australian minimum standard for building work, and bathroom glazing has to satisfy safe-glazing and wet-area rules, which means decorative glass alone isn't enough for a compliant installation bathroom mountain shower screen installation.

In Australian fabrication, 6 mm toughened glass is a common baseline for frosted walk-in screens because it balances stiffness, impact resistance, and installability in framed or semi-frameless systems shower screens catalogue PDF. The frosting changes privacy and light diffusion, but it doesn't replace the engineering role of the glass. That job still belongs to the toughened substrate and the hardware holding it in place.

Frosted Shower Screen Specs at a Glance

Spec Typical Value Why It Matters
Glass type Toughened safety glass Required for safe shower use and compliance
Glass thickness 6 mm common baseline Helps balance strength and practical installation
Finish Acid etched, sandblasted, or film applied Determines privacy, texture, and cleaning behaviour
System type Framed or semi-frameless Affects rigidity, appearance, and price
Fixings Quality hinges, clips, and seals Supports safe installation and long-term performance

A compliant renovation should also show who is responsible for the installation details, not just the glass order. That's where a registered builder unlimited matters, because coordination between waterproofing, glass fixing, and final fit-off is what keeps the job clean and compliant. The waterproofing layer has to be right before the screen goes in, so the screen isn't trying to compensate for poor wet-area work. waterproofing standards in Australia sits alongside glazing compliance, not after it.

The practical takeaway is straightforward. Any quote worth considering should name the glass type, thickness, system style, and hardware spec. If it doesn't, you're comparing finish samples without knowing whether the installation underneath is up to standard.

What Frosted Screens Actually Cost in Victoria

Pricing for frosted screens sits above clear glass because the finish requires extra processing such as acid etching, sandblasting, or film application. Industry guidance puts frosted glass at about 20–30% more than clear glass of the same dimensions and thickness frosted glass shower doors. That premium is real, but it's usually easier to justify once you factor in that the screen affects both privacy and how finished the whole room feels.

There's also a broader pricing signal from glazing suppliers. One source notes that frosted glass adds about $30 per square foot compared with clear glass, reflecting the extra finishing process rather than a different core function frosted glass shower screen product page. For Victorian homeowners, the useful part of that information isn't the exact converted figure. It's the direction of travel. Frosted is a premium finish, not a baseline one.

What pushes the quote up

Custom sizing is the first driver. A standard rectangular panel is always easier to price than a screen that needs to work around a nib wall, a roof slope, or a tight mixer position. Hardware finish also changes the final number because hinges, clamps, and handles are visible design decisions, not invisible extras. Frameless systems usually sit at the sharper end of the pricing spectrum, while framed and semi-frameless options tend to be easier to keep under control without losing the frosted effect.

In a real renovation budget, that means frosted screens should be priced alongside tile selection, tapware, and waterproofing rather than treated as the last small item. They aren't small. They affect the room's privacy, brightness, and perceived quality in one move. An end-to-end quote is useful because it bundles measurement, fabrication, and installation into one figure, which makes it easier to see where the money is going.

If you're planning modern bathrooms with multiple premium finishes, frosted glass works best when the rest of the spec is disciplined. A simple room with one high-quality frosted screen often feels more resolved than a busy room where every surface is trying to make a statement.

Maintenance and Longevity in Hard-Water Victorian Homes

Frosted glass hides fingerprints and water spots better than clear glass, but it isn't maintenance-free. Texture can trap grime more readily than a smooth clear panel, so the cleaning routine matters more than some might expect. In Victorian homes where water quality and daily use vary from household to household, the key is consistency, not aggressive scrubbing.

A practical routine is simple enough to hand to everyone in the house. Keep the screen wiped down after use, give it a regular wash with a gentle bathroom cleaner, and inspect the edges and hardware for limescale or seal wear on a monthly rhythm. Existing care guidance commonly points to weekly cleaning, a deeper clean every four weeks, and monthly checks of edges and hardware for limescale and seal failure. That's sensible advice, because the finish itself lasts better when deposits aren't left to build up.

What to avoid on etched finishes

Abrasive pads are the quickest way to dull a frosted surface. So are harsh cleaners that leave the finish patchy or strip away any protective coating around it. If you're unsure, keep the product choice conservative and test it in one corner before committing to the full panel. The finish should be cleaned, not polished into clarity.

The longevity question often comes down to the whole system, not the glass alone. Seals age. Hardware loosens. Caulking needs attention. That's true for frosted, fluted, and clear screens alike, which is why I treat the upkeep conversation as part of the renovation decision rather than something to worry about later. Over a renovation lifecycle, frosted glass is often easier to live with visually, but it still rewards the same disciplined cleaning habits as any other shower screen.

A screen that hides spots well can tempt people into ignoring maintenance. That usually shortens the life of the seals before it does anything to the glass.

Choosing the Right Frosted Screen for Your Renovation

The best choice starts with the room, not the sample board. In a compact ensuite, full frost may be the cleanest answer if privacy matters more than visual openness. In a family bathroom, a partial frost or a more textured finish can keep the room feeling lighter while still softening direct views. In designer bathrooms, a custom etched or gradient treatment can make the screen feel like part of the architecture instead of just a barrier.

A useful rule is to match the screen to the way the room is used. If the shower sits near the door, think harder about how much of the screen needs to be opaque. If the room borrows daylight from one opening only, avoid over-frosting the whole enclosure. If the layout is accessible or curbless, make sure the finish, hardware, and panel geometry support easy movement as well as privacy.

The clearest decisions happen before installation, not after delivery. That's where concept drawings and 3D design visualisation help, because they let you compare how a frosted panel affects the room's sightlines before the build is locked in. For homeowners weighing options, frameless shower screen inspiration can be a useful reference point when deciding whether the room wants a lighter visual finish or a more enclosed one.

What to bring to a consultation

  • Measurements of the shower area: Exact dimensions stop avoidable fabrication surprises.
  • A note on privacy needs: Shared use, guest use, or master ensuite use changes the right finish.
  • Photos of the room in daylight: These show whether the bathroom already struggles for brightness.
  • Your preferred finish direction: Full frost, partial frost, gradient, or decorative etching.
  • A clear renovation brief: Tie the screen choice to the rest of the room, not just the shower.

If you're in Highett or anywhere across greater Victoria, bring those details to a consultation before you lock the glass in. The right screen lifts daily comfort, but it also helps the room feel more deliberate and better finished, which is what thoughtful bathroom renovations should do. Contact SitePro Bathrooms for a conversation about your bathroom, your layout, and the screen style that will work in your home.

  • siteprobathrooms

8 Small Bathroom Renovation Ideas for 2026

Struggling with a cramped, outdated bathroom right now? You're not alone, especially in a market like Australia where compact bathrooms often have to do more work in less space. The 2021 Census recorded about 10.85 million private dwellings nationally, and the ABS reported that around 70% were separate houses (ABS data discussed in renovation guidance), which is exactly why so many bathroom renovation conversations start with ensuites, powder rooms, and secondary bathrooms that need sharper planning rather than bigger footprints. In places like Highett, Victoria, that usually means making every fixture, tile choice, and storage decision count.

The best small bathroom renovation ideas are rarely about adding more stuff. They're about choosing pieces that free up floor area, improve circulation, and make the room easier to use every day. In compact Australian bathrooms, that also means balancing style with moisture control, waterproofing, and compliance, because the National Construction Code keeps evolving and Victorian waterproofing rules treat some bathroom work as regulated building work (NCC and VBA context). Good design in a small room isn't decorative first, it's practical first, then beautiful.

1. Wall-Mounted Fixtures and Floating Vanities

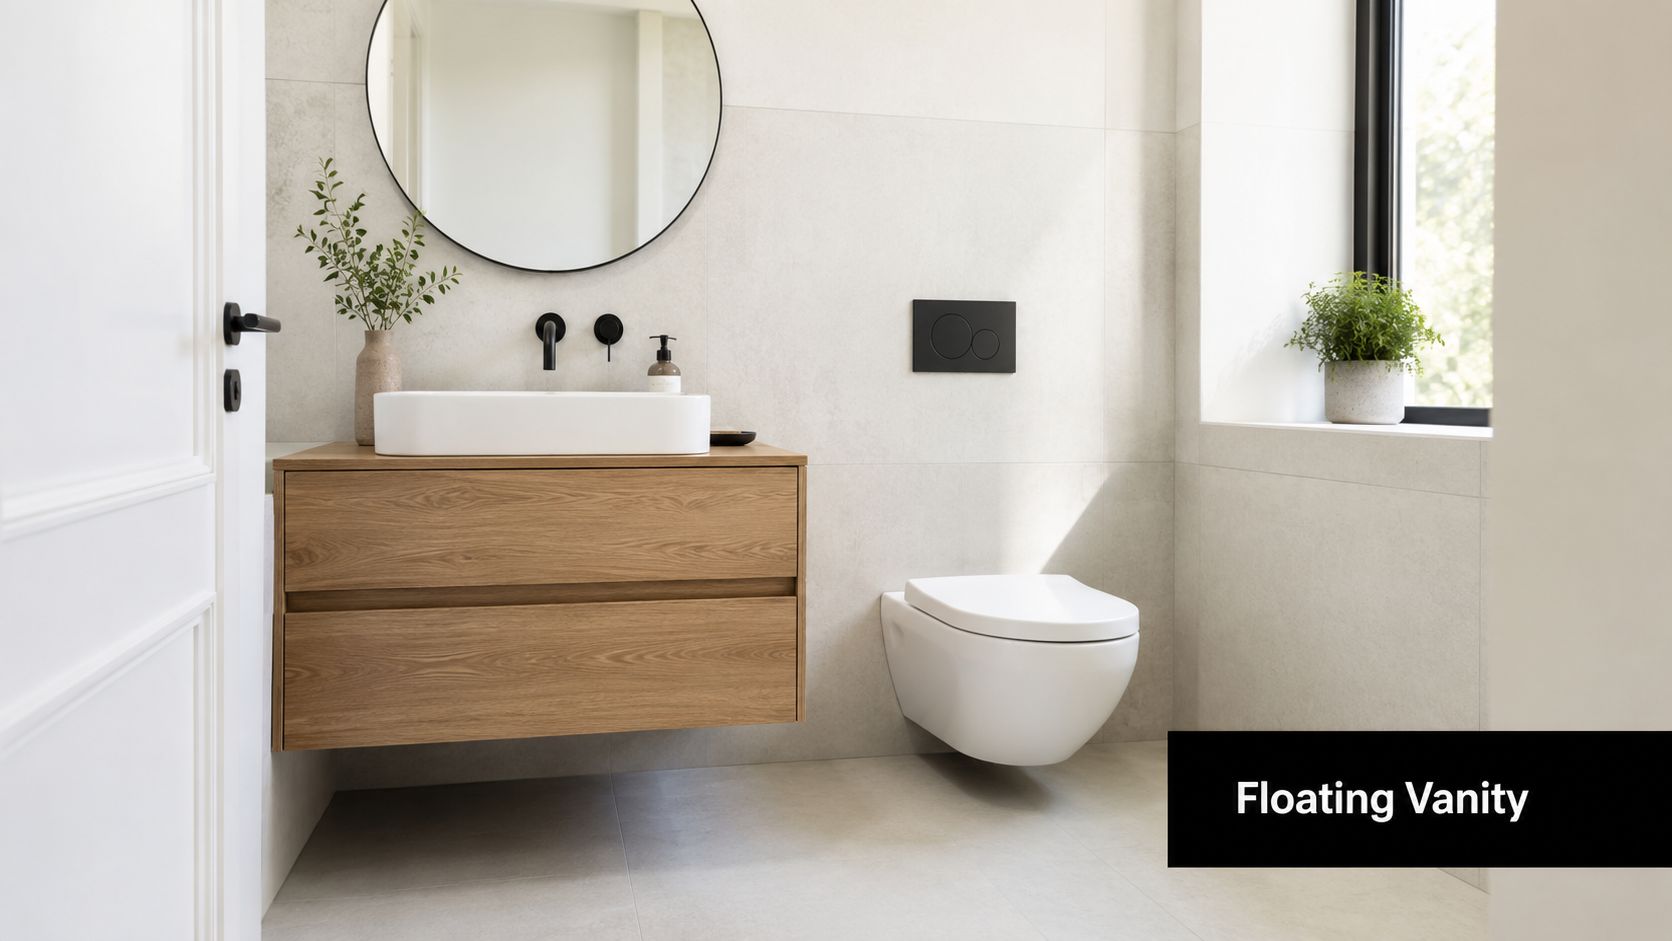
Wall-mounted fixtures change the feel of a small bathroom fast. A floating vanity, wall-hung toilet, and wall-mounted basin lift visual weight off the floor, so the room feels cleaner and less crowded. In compact bathrooms, that open floor line also makes cleaning simpler, which matters more than people expect once the space is in daily use.

A modern minimalist bathroom featuring a wooden floating vanity, wall-hung toilet, and round mirror with neutral tiles.

The best versions don't just look light, they work hard. I've seen Victorian homes in and around Melbourne transformed with natural oak floating vanities, while newer Highett bathrooms often suit white lacquered units with integrated lighting. If the vanity is too shallow or has wasted internal space, the room still feels cramped even if it looks modern.

Practical rule: don't choose a wall-hung unit just for the style. It needs proper framing support, planned plumbing routes, and a vanity design that gives back usable storage.

A good renovation team will check the wall structure before installation, because the fixture weight and plumbing position matter. For small bathrooms, I prefer vanities with drawers over open cavities, since drawers keep daily items organised without forcing you to bend into dark under-sink space. Moisture-resistant finishes, like engineered wood or stone, also hold up better in compact rooms where steam hangs around longer.

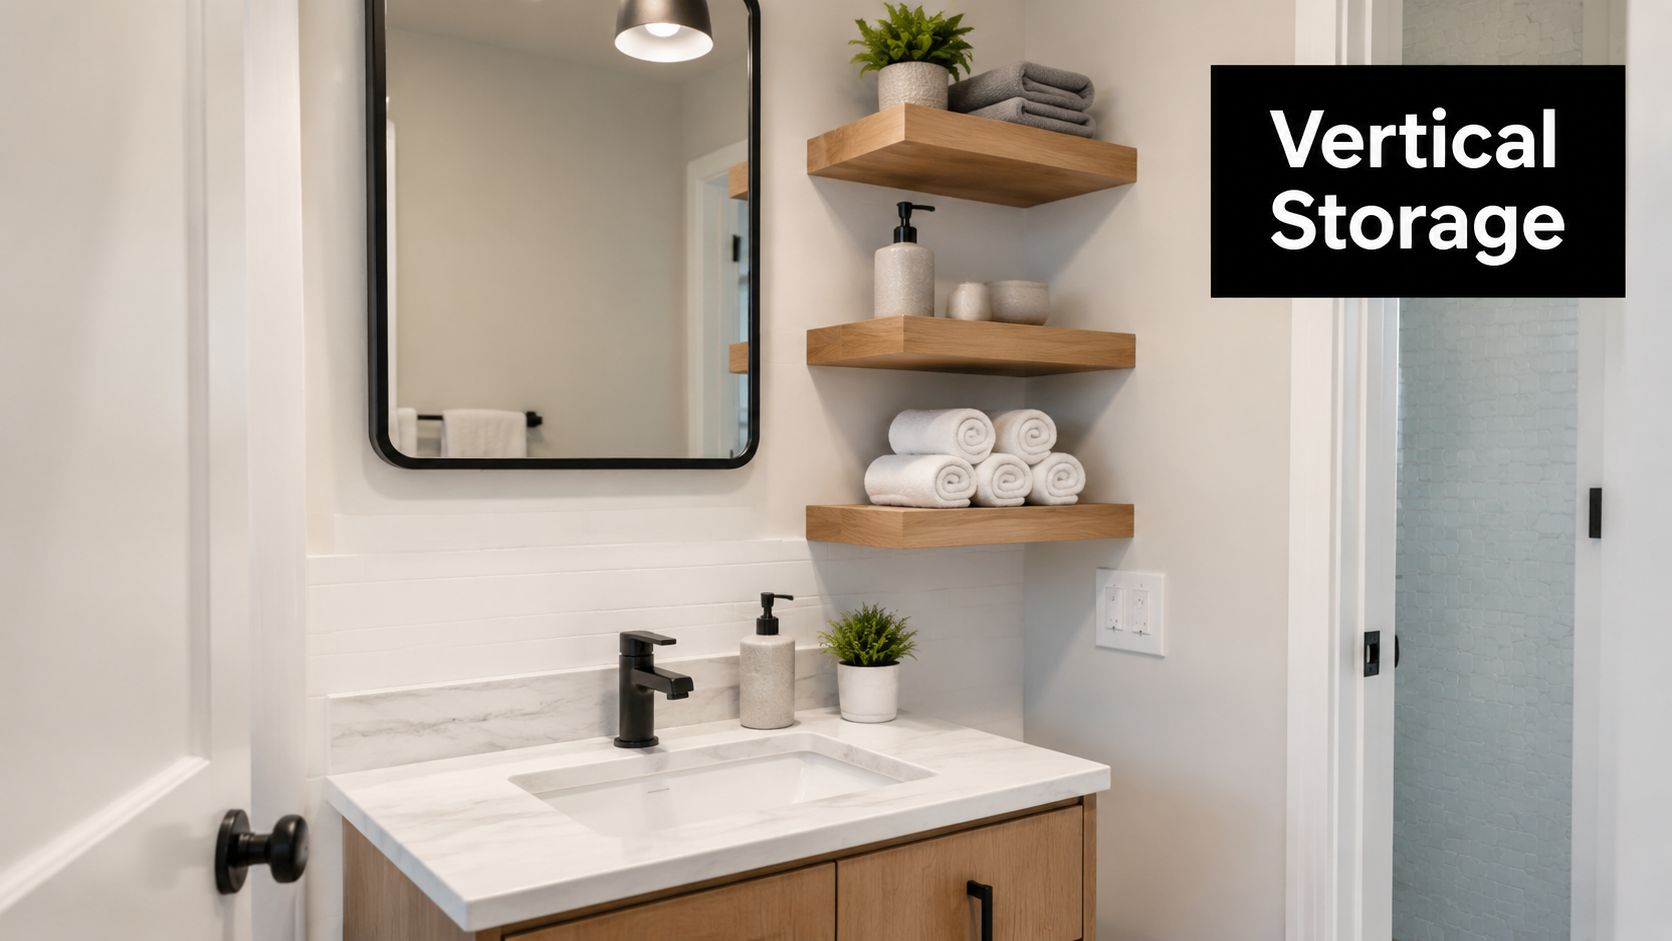
2. Smart Storage Solutions and Vertical Organisation

Storage is where many small bathrooms go wrong. People add a vanity, maybe a mirrored cabinet, and then wonder why the bench still looks cluttered. The answer is usually vertical planning, because the walls in a small bathroom are often the only spare real estate left.

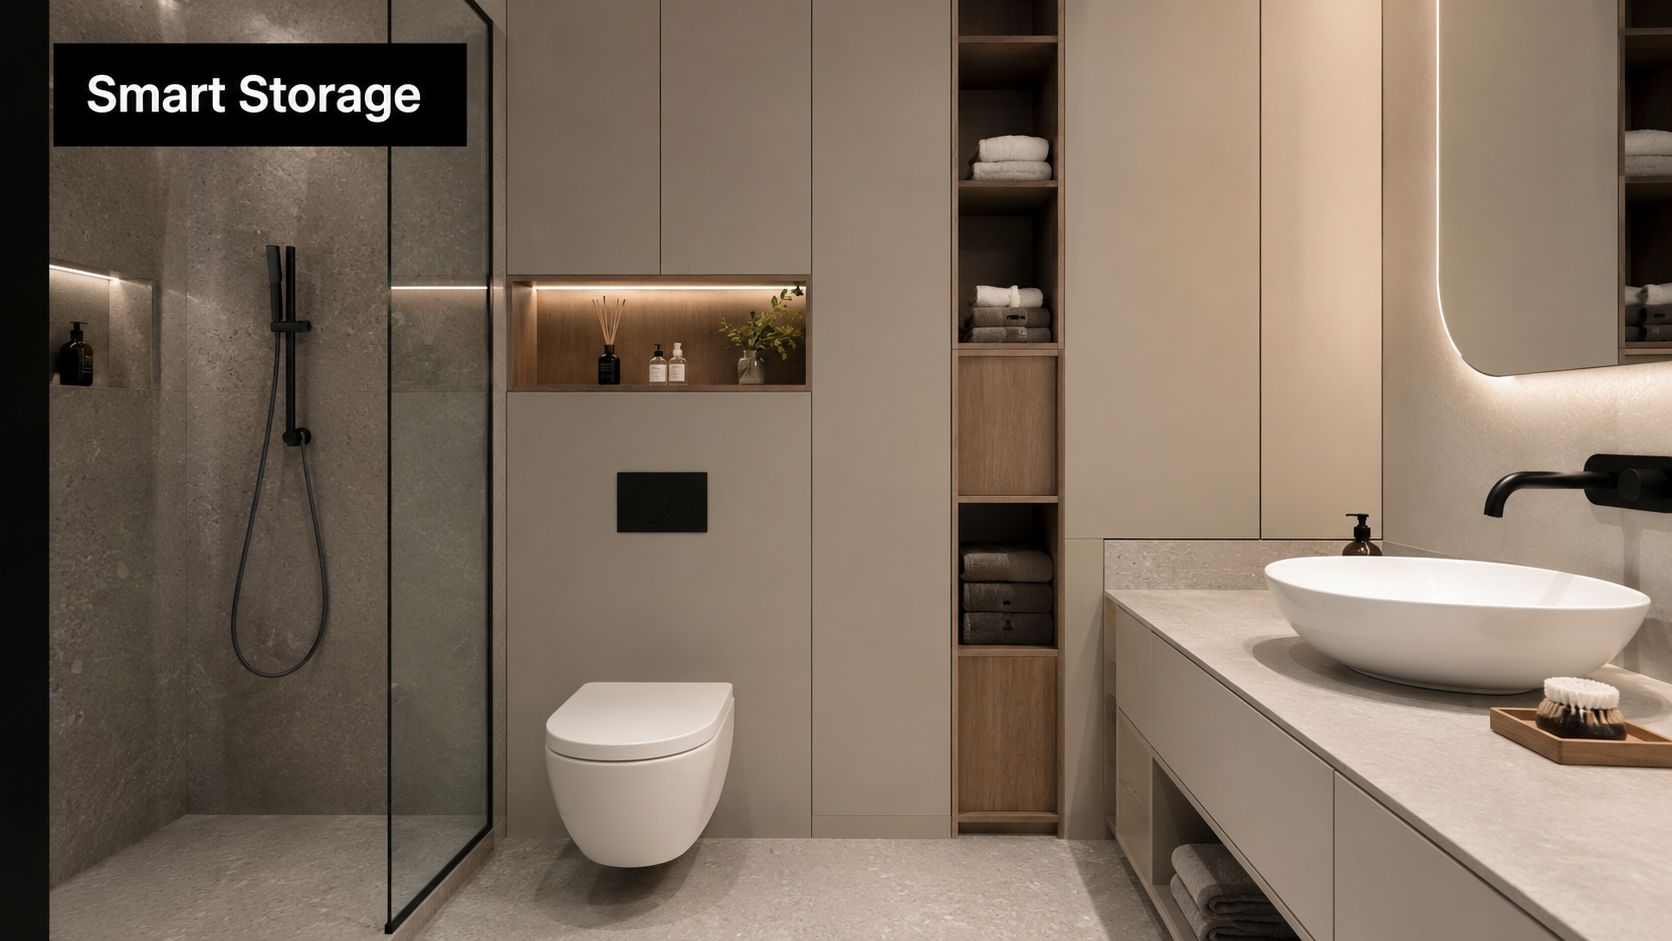
A modern, minimalist beige bathroom featuring a floating toilet, open shelving, and a glass shower stall.

Tall cabinetry, recessed niches, and mirrored shaving cabinets all help, but only if they're placed with circulation in mind. In compact Highett ensuites, floor-to-ceiling cabinets in matte grey can work well when the room has one clear storage wall, while family bathrooms often suit integrated corner niches for toiletries. The trick is not to store everything, it's to store the right things where they're easy to reach.

SitePro Bathrooms' small bathroom storage ideas is a useful reference point if you're weighing recessed cabinetry against freestanding options.

A few choices tend to work best in real projects:

  • Recessed medicine cabinets: These preserve wall depth, so you gain storage without stealing passage space.
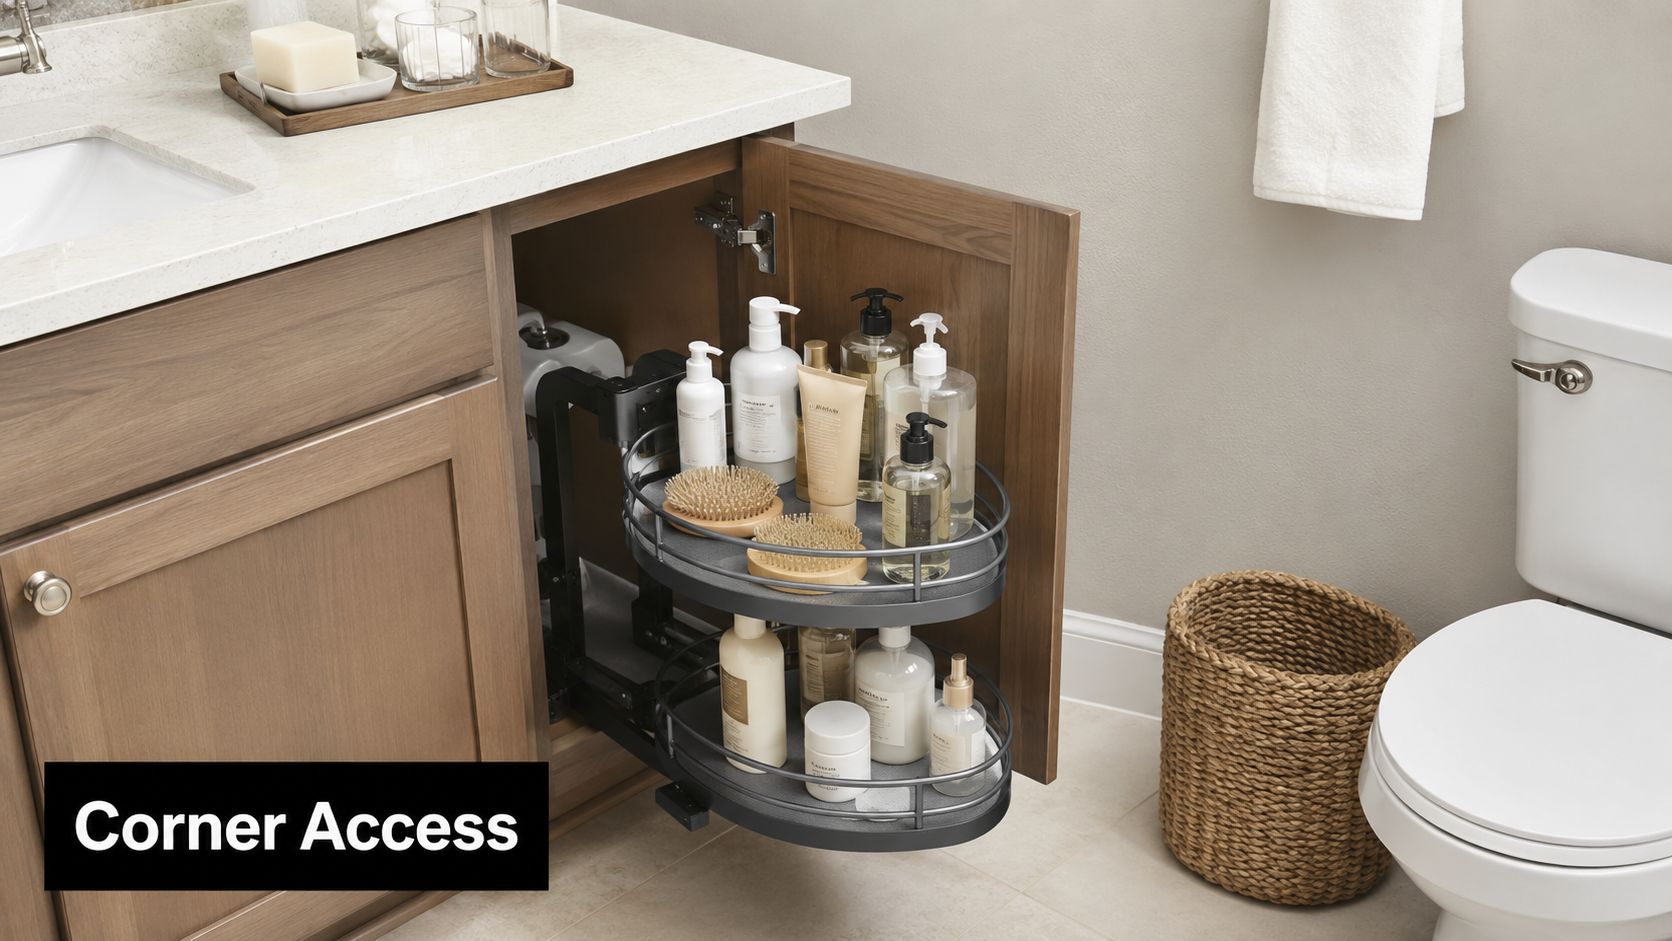
  • Pull-out organisers: They make deep cupboards usable instead of turning them into black holes.
  • Open shelving in moderation: Good for towels or display, poor for clutter if the room already feels busy.
  • Moisture-resistant finishes: Non-negotiable in wet areas, because cheap boards swell and age badly.

A 3D design preview helps here because storage mistakes are hard to undo after tiling. If a cabinet door clips the shower screen or blocks towel movement, the whole room feels tighter than it should.

3. Light and Mirror Strategies for Space Enhancement

A small bathroom can feel bright and open, or cramped and uneven, depending on how the light is planned. Natural light helps, but most compact bathrooms in Australian homes still need layered artificial lighting to carry the room through daily use. Overhead light, task lighting, and accent light should be planned together from the start, because each one affects how the space reads and how easy it is to use.

A modern bathroom vanity with dual sinks, marble countertops, and a large illuminated mirror with wood cabinets.

Mirrors are the quickest way to make a room feel larger, but the result depends on where they sit. A large mirror placed opposite a window can pull daylight deeper into the room, while a backlit mirror adds practical task lighting without crowding the wall. For homeowners weighing designer bathrooms against purely functional layouts, this combination often gives the best visual return because it widens the vanity zone without changing the floor plan.

If you want a more detailed look at mirror options, our LED-backlit bathroom mirrors guide covers the kinds of setups that suit compact spaces and everyday use.

Large mirrors work best when they're paired with even lighting. A bright mirror over a dim vanity still feels underdone.

Dimmers are worth including in small bathrooms because morning grooming and evening bathing need different light levels. Frosted or matte mirror finishes can reduce glare, which matters when reflective surfaces are already doing a lot of visual work. In Highett and across Victoria, exhaust and lighting should be planned together, because moisture builds up quickly in compact rooms and can affect both clarity and comfort.

A clean palette helps the lighting do more work. White ceilings, light wall colours, and reflective tile finishes bounce light well, but they need balance so the room does not feel flat. The strongest modern bathrooms usually combine brightness with some texture, so the space feels open without losing depth.

4. Compact and Corner-Integrated Fixtures

A small bathroom often feels larger once the fixtures stop fighting the layout. Compact basins, corner showers, and reduced-projection toilets can return circulation space that standard fittings take away, which helps in tight ensuites, apartment bathrooms, and older homes with awkward dimensions.

A modern bathroom featuring a walk-in open shower with concrete-look tiles and minimal style fixtures.

The layout still has to be measured with care. A toilet that sits closer to the wall can improve movement through the room, but if the basin is too small, everyday use becomes frustrating because water splashes further and bench space disappears. In Highett ensuite renovations, I've seen corner basins make good use of dead space, while sliding glass shower screens keep family bathrooms easier to move through where a hinged door would get in the way.

If a fixture saves space but makes cleaning or access harder, it is usually the wrong choice.

Brand selection still matters, but the name on the box should never drive the plan. Homeowners often prefer established Australian plumbing brands because they want parts availability, service support, and fittings that are familiar to local installers. Wall-mounted basin taps can also free up bench space, provided the wall cavity and plumbing layout are decided early enough for the builder and plumber to coordinate properly.

This is one of the places where professional 3D design pays off. A compact room can look fine on a sketch and still feel awkward once the vanity door swings into the shower line or the toilet clearance feels tight. SitePro Bathrooms uses that planning stage to test fixture sizes, corner placement, and access before work starts, which helps avoid costly changes once the build is underway.

5. Open Shower Designs and Frameless Enclosures

A tight bathroom can feel larger straight away when the shower stops breaking up the room. Open showers reduce visual clutter, and frameless glass keeps sightlines clear so the space reads as one continuous area. In a compact layout, that effect matters as much as the actual footprint, because every hard edge can make the room feel more boxed in.

SitePro Bathrooms' frameless shower screen guide is a useful starting point if you are choosing a screen for a small bathroom and want to weigh the practical differences before you commit.

The construction still has to be planned properly. Water needs a controlled path to the drain, so floor fall, waterproofing, and sealing must be coordinated from the start. The Victorian Building Authority and NCC context is important here, because waterproofing requirements and bathroom access rules mean this is a build sequence, not a styling decision (Victorian Building Authority and NCC context).

For a compact wet area, these details shape the result:

  • Proper floor fall: Water moves to the drain instead of sitting in low spots.
  • Quality waterproofing membrane: Protects the structure over the long term.
  • Thicker frameless glass: Gives better stability in daily use.
  • Non-slip flooring: Helps reduce slip risk in a wet zone.
  • Ventilation planning: Limits condensation and the mould issues that follow.

I've found open showers suit homeowners who want a clean, contemporary finish and less visual division in the room. They also make cleaning easier because there is less hardware to collect soap residue and grime. If you are planning a wet-room style bathroom in Highett, a registered builder should be involved early so the drainage, waterproofing, and tiling sequence is set before work starts, not guessed at on site.

6. Neutral Color Palettes and Visual Continuity

Neutral palettes work because they let the eye move without interruption. In a small bathroom, every hard contrast can make the room feel chopped up, while a coordinated palette ties the walls, floor, vanity, and fixtures together. That visual continuity is one of the simplest ways to make a compact room feel calmer and larger.

The best results usually use whites, warm greys, greige, taupe, or soft ivory tones rather than harsh, cold shades. A Highett bathroom with white subway tiles, a timber vanity, and soft grey walls can feel modern without looking sterile. Similarly, pale cabinetry paired with large-format porcelain tiles creates fewer grout lines, which helps reduce visual noise.

Texture still matters. A room built entirely from plain surfaces can feel flat, so add variation through stone, textured tile, brushed metal, or timber accents. I prefer warm neutrals over icy ones in most Australian homes because they usually sit better with natural light and make the room feel more liveable.

A few design moves usually help:

  • Large-format tiles: Fewer grout lines, cleaner visual flow.
  • Matched undertones: Keep paint, cabinetry, and tile tones compatible.
  • Subtle contrast: Use one darker accent, not many competing ones.
  • Textured finishes: Bring depth without breaking the palette.

You'll get the cleanest result when the palette is decided before construction starts. That's where detailed 3D design helps, because colour combinations that seem fine in a store can look quite different once they're sharing a small room with mirrors, light, and moisture.

7. Multifunctional Fixtures and Space-Saving Innovations

Multifunctional fixtures make sense in small bathrooms because they reduce the number of separate items competing for space. A combined bidet-toilet unit, a shower-bath hybrid, or a smart mirror with integrated storage can all pull double duty. In a compact room, that can be the difference between a layout that feels efficient and one that feels overcrowded.

The trade-off is complexity. The more functions a fixture combines, the more important warranty support, servicing access, and installation quality become. That's why I'd only specify a system like this when the owner is comfortable with the controls and the bathroom can support the electrical and plumbing requirements from the start.

Choose multifunctional pieces for function first. If they're clever but hard to service, they stop being clever very quickly.

For a practical renovation, think about how the room is used every day. A compact vanity with concealed storage may matter more than a high-tech mirror. A heated towel rail with a storage-friendly placement can be more useful than another decorative feature, especially in a small room where damp fabrics are a constant annoyance.

If you're considering these ideas in a renovation, document what each fixture does and how it will be maintained. That helps future servicing and avoids confusion if you ever need parts, repairs, or upgrades later. In small bathrooms, the best innovations are usually the ones that simplify life, not complicate it.

8. Professional Design and Planning Services for Optimal Space Utilisation

Professional planning is the difference between a bathroom that merely fits and one that works. In small bathrooms, there's very little room for error, so fixture placement, waterproofing, electrical points, and storage all need to be mapped before construction begins. That's especially true in Highett, Victoria, where homeowners often want the finish quality of designer bathrooms without wasting money on avoidable rework.

A detailed 3D design is one of the best tools available because it shows circulation, line of sight, and storage conflicts before a single tile is laid. It also helps homeowners compare layout options when they're deciding whether to keep plumbing in place or justify a change. For many compact projects, layout preservation is the smartest budget decision because the biggest costs are tied to labour, waterproofing, tiling, plumbing, and electrical work rather than the materials alone.

That's why working with registered builders unlimited matters. Small bathrooms are regulated spaces, and the wrong sequence can create compliance issues, leaks, or costly do-overs. A good builder coordinates the first fix, second fix, and finishing stages so the shower height, vanity position, and tile line all land where they should.

A well-run planning process usually includes:

  • Clear scope definition: Decide what matters most before work starts.
  • 3D renderings: Test the room visually and practically.
  • Budget alignment: Keep scope realistic for the space.
  • Builder coordination: Make sure trades don't clash.
  • Approval checkpoints: Confirm key choices before installation.

SitePro Bathrooms fits naturally. The company is based in Highett and focuses on bathroom renovations with end-to-end project coordination, which suits homeowners who want a structured process rather than piecemeal decision-making. For a small bathroom, that kind of planning support can save time, reduce stress, and deliver a better result.

8-Point Small Bathroom Renovation Comparison

Design solution Implementation complexity Resource requirements Expected outcomes Ideal use cases Key advantages
Wall-Mounted Fixtures & Floating Vanities Medium–High (structural reinforcement, plumbing reroute) Carpenter/framer, plumber, electrician, moisture‑resistant materials, higher‑cost fixtures More visible floor space, easier cleaning, modern look, improved accessibility Small bathrooms, accessibility upgrades, contemporary remodels Frees floor area, visual openness, flexible under‑vanity storage
Smart Storage & Vertical Organization Low–Medium (planning, some in‑wall work for recessed units) Joiner/cabinet maker, shelving, integrated lighting, design planning (3D helpful) Significantly increased storage, decluttered surfaces, better organization Family bathrooms, renters, spaces with limited floor area Maximizes vertical space, customizable organization, keeps counters clear
Light & Mirror Strategies Low–Medium (electrical work, mirror installation) Electrician, quality mirrors/LED fixtures, ventilation upgrades Perceived larger space, improved task lighting, energy savings Any small bathroom needing visual expansion or low‑cost upgrade Optical enlargement without structural changes; energy‑efficient lighting
Compact & Corner‑Integrated Fixtures Low–Medium (fixture selection, standard plumbing) Plumber, compact fixture suppliers, standard installation materials Full functionality in tight layouts, clearer circulation, space saved Very small bathrooms, corner dead‑space, secondary ensuites Space‑efficient solutions, often more affordable than custom builds
Open Shower Designs & Frameless Enclosures High (waterproofing, precise drainage, skilled trades) Waterproofing systems, premium glass, tilers, experienced installers Seamless wet/dry transition, enhanced openness, luxury aesthetic, better accessibility Contemporary renovations, wet‑room conversions, accessibility upgrades Maximizes light/space, easier cleaning, premium modern look
Neutral Color Palettes & Visual Continuity Low (material/paint selection, coordination) Tiles/paint, coordinated finishes, design visualization recommended Cohesive timeless look, perceived spaciousness, higher resale appeal Any small bathroom seeking timeless, calm aesthetic Brightens space, flexible accents, broad market appeal
Multifunctional Fixtures & Space‑Saving Innovations Medium–High (integrated units, electrical/plumbing integration) Specialized fixtures (bidet‑toilet, hybrids), plumber, electrician, higher unit cost Greater functionality in minimal footprint, fewer separate fixtures Tight footprints, tech‑forward designs, multi‑use spaces Combines functions to save space, often water/energy efficient
Professional Design & Planning Services High (comprehensive planning and coordination) Designers, registered builders, 3D visualization software, upfront design fees Optimized layout, reduced costly mistakes, clear budget/timeline, code compliance Full renovations, complex structural/plumbing constraints, investors Reduces risk, visualizes outcomes, coordinates trades and compliance

Your Next Steps to a Beautifully Renovated Bathroom

A small bathroom renovation can change how your home feels every single day. The room stops being a bottleneck and starts working like a properly designed part of the house, with better storage, easier cleaning, and a layout that makes sense. The strongest results usually come from a mix of practical decisions and good finish choices, not from chasing trends alone.

If you're renovating in Australia, the most valuable first step is a clear plan. Keep the layout simple where you can, because preserving plumbing locations often protects budget and reduces complexity. If you do want to reconfigure the room, make sure the design justifies the extra work with better circulation, better storage, or a clearer visual result.

This is also where compliance and workmanship matter. The National Construction Code, the Victorian Building Authority's waterproofing requirements, and the realities of tight bathroom sequencing all point in the same direction, small bathrooms need careful planning from the start (NCC and VBA context). That's why so many successful bathroom renovations begin with a detailed 3D model, a realistic budget, and a builder who knows how to coordinate the trade sequence properly.

SitePro Bathrooms works from Highett, Victoria, and offers bathroom renovations with concept development, 3D design, construction, and finishing under one coordinated service. If you're ready to turn a cramped ensuite or family bathroom into a room that works better every day, book a consultation and bring your measurements, photos, and priorities. The clearest next move is to get the layout assessed properly, then build the room around how you live.

  • siteprobathrooms

LED Backlit Bathroom Mirrors: The Complete Guide to 2026

You're standing at the vanity before work, the overhead light is flattening your face, the mirror is fogging at the edges, and the whole room still feels half finished. That's the moment most homeowners realise a bathroom doesn't need more decoration, it needs better light, cleaner wiring, and fixtures that suit daily use.

LED backlit bathroom mirrors solve that problem better than old vanity lighting ever did. They bring a softer perimeter glow, reduce visual clutter, and fit the direction most modern bathrooms are already heading in, but the value is deeper than looks. In bathroom renovations, especially across Victoria, the right mirror has to be specified with compliance, servicing access, and long-term maintenance in mind, or it becomes a frustrating hidden fault instead of a durable upgrade.

A woman stands in a dimly lit bathroom looking at her reflection with tired, stressed expressions.

If you're planning new bathroom ideas for a compact ensuite, a family bathroom, or a polished powder room, start with the mirror rather than treating it as an afterthought. The right choice changes the entire room, and it has to work with the rest of the lighting plan, not against it. For broader styling context, see bathroom decor ideas for Australian homes.

Why LED Backlit Bathroom Mirrors Are Transforming Modern Bathrooms

A bathroom with one weak ceiling fitting and a plain mirror feels dated fast. That is why so many renovators are moving toward LED backlit bathroom mirrors, especially when they want a cleaner finish without hanging extra fittings on the wall. The appeal is straightforward. A continuous halo of light makes the room feel calmer, more finished, and less clinical.

The product also makes sense from a practical renovation standpoint. LED lighting uses far less electricity than incandescent lighting for the same brightness, and many LED mirror products are rated for long service life, which can suit homes that need fixtures designed for daily use source. That kind of lifespan matters in designer bathrooms and family homes because no one wants a mirror that turns into a maintenance problem after the renovation dust settles.

What the glow does

Backlighting is not just decorative. It softens the hard edges of the vanity zone, lifts the wall visually, and creates a more expensive-looking finish without adding visual clutter. In a compact bathroom, that can make the room feel less boxed in.

Practical rule: choose backlighting for atmosphere, then add separate task lighting if the room needs serious grooming light.

The category has also matured. A projected LED mirrors market value of USD 17.5 billion by 2032 shows how far this product type has moved from novelty into mainstream bathroom specification source. That matters in Australia because a mature product category usually means better size ranges, more finish options, and easier sourcing during a renovation.

The lighting plan still has to be handled properly. If the mirror is part of a broader vanity scheme, the surrounding fittings need to work with it rather than fight it. See bathroom vanity lighting guidance before you lock in the mirror, and use bathroom decor ideas for Australian homes if you want the mirror to fit the room's overall style.

How Backlit Mirrors Differ from Front-Lit Alternatives

The biggest mistake homeowners make is buying a mirror for appearance and only later finding out it does not suit the room. A backlit LED mirror places LEDs behind the mirror glass so the light washes onto the wall and creates a halo effect. A front-lit mirror places LEDs on the face or edge so the light falls forward onto the user for grooming tasks source. That difference decides how the bathroom feels and how well it works.

Backlit mirrors are built for atmosphere first. Front-lit mirrors are built for clear face-level light first. Backlighting works like architectural cove lighting, while front-lighting behaves like direct task lighting aimed where you need it.

Use case decides the right mirror

In modern bathrooms, backlit mirrors work well when the goal is a calm, finished look. In designer bathrooms, they can become the focal point because the wall glow reads as deliberate rather than cluttered. For shaving, makeup, and other detail work, a front-lit mirror gives meaningful task illumination, while backlit mirrors provide minimal face-level task lighting source. The choice should follow the job the room has to do.

A mirror that looks elegant but leaves your face in shadow is the wrong choice for daily grooming.

For many Victorian homes, the practical answer is layered light. Use the mirror for ambience, then make sure the room has enough separate light for the tasks that matter. If the vanity wall is being redesigned at the same time, bathroom vanity lighting guidance is the right companion reference.

Key Specifications to Compare Before You Buy

The spec sheet tells you whether a mirror is worth the money. Skip the marketing language and check the details that affect comfort, safety, and maintenance.

Start with the performance basics

The most useful baseline is straightforward. LED bathroom mirrors should have IP44 protection, a demister, 2700K to 3000K colour temperature, and CRI 90 or above source. If you're fitting out a master ensuite, extras like a motion sensor and adjustable colour temperature are sensible upgrades, not gimmicks.

Here's a clean comparison framework.

Specification Recommended Threshold Why It Matters Best Suited For
IP rating IP44 Better moisture protection in bathroom conditions Main bathrooms and ensuites
Demister Built in Keeps the mirror usable after hot showers Steamy family bathrooms
Colour temperature 2700K to 3000K Warmer, more flattering light for daily use Renovations prioritising comfort
CRI 90 or above More accurate skin-tone rendering Grooming and makeup areas
Motion sensor Optional upgrade Convenient hands-free operation Master ensuites
Adjustable colour temperature Optional upgrade Lets you shift the mood and function Designer bathrooms

Read the spec in plain English

CRI tells you how truthfully colours appear under the mirror light. If it's too low, skin tones look dull and makeup matching gets harder. Colour temperature controls how warm or cool the light feels, and the range above suits a bathroom that needs both comfort and clarity.

The demister is one of the most underrated features because it stops the post-shower fog routine. Don't treat it as a luxury add-on if the bathroom is used every morning. It's a usability feature.

If a mirror is going into a wet zone, treat moisture protection as a design requirement, not an upgrade.

For buyers comparing mirrors online, a tidy checklist usually works better than trying to decode photos. Ask yourself three things. Is it safe for the room? Will it help with grooming? Will it still be useful in five years?

Sizing and Placement for Different Bathroom Types

The right mirror size depends on the vanity, the wall space, and how the room gets used. A mirror that's too narrow looks awkward. One that's too wide can crowd taps, splashbacks, or wall lights.

Compact ensuites need visual lightness

In a small ensuite, the mirror should feel integrated, not dominant. Leave a little breathing room on each side of the vanity so the composition doesn't feel squeezed, and check that the mirror doesn't clash with wall-mounted tapware or a medicine cabinet. A larger mirror can work well here because it reflects more light and makes the room feel less enclosed.

If the ensuite has limited daylight, don't rely on the mirror alone for grooming. Backlighting helps with ambience, but the room still needs enough light for shaving or makeup. That's where layout matters more than product style.

Family bathrooms need clear hierarchy

A family bathroom has different demands because multiple people use it in different ways. If you have a double vanity, two separate mirrors usually feel cleaner and more practical than one oversized sheet of glass, especially when children and adults share the space. It also gives each basin its own visual zone.

Powder rooms can go bolder

Powder rooms are where you can make a statement. Oversized mirrors, round shapes, or more sculptural forms work well because the room doesn't need to do the same heavy-duty grooming work as a main bathroom. That gives you more freedom to focus on impact.

For sizing, the rule is to proportion the mirror to the vanity rather than the wall. If the vanity is small, keep the mirror disciplined. If the room is spacious, the mirror can be more dramatic without feeling out of place.

Good placement beats expensive glass. A well-positioned mirror makes an average bathroom feel planned, while a poorly placed one makes even a costly renovation feel off.

If you're combining the mirror with a larger repaint, tile update, or cabinetry change, the overall room layout should be decided before ordering. In renovation work, that order saves money and avoids rework.

Electrical Compliance and Installation Realities in Australia

A backlit mirror looks simple once it is on the wall, but the electrical work behind it is where renovation mistakes show up. In Australia, an illuminated mirror is not just wall décor. Australian electrical safety for LED bathroom mirrors is governed by AS/NZS 3000 wiring rules and state electrical licensing requirements, so any mirror with integral lighting should be installed as a fixed electrical appliance by a licensed electrician rather than treated like a DIY wall accessory source. That is the standard you should insist on.

Bathroom zones change what is allowed and what is sensible, because shock risk rises in damp areas. IP ratings and RCD protection belong in the initial electrical plan, not as afterthoughts. If the mirror is going into a bathroom renovation, the wiring layout needs to be decided before tiles go up, not after. this bathroom downlight guide covers the same sort of rough-in planning that keeps bathroom lighting safe and practical.

Driver access is the hidden failure point

The part most buyers never think about is the driver and junction box. If you do not leave room behind the mirror, servicing becomes a mess later. A hidden driver that cannot be reached can turn a simple fault into a destructive repair.

That is why rough-in planning matters. Leave clearance for the electrical components, allow access where the electrician needs it, and do not assume the mirror will sit flush against any wall without consequences. In compact Victorian bathrooms, wall cavities are often tight, which makes poor planning more expensive than the mirror itself.

Builder registration also matters in Victoria

There is a separate compliance issue for the wider job around the mirror. Under the Victorian Building Regulations, a registered domestic builder with limited registration can carry out domestic building work up to a maximum value of $10,000, while a registered domestic builder with unlimited registration can carry out any domestic building work. That distinction matters once the project stops being a mirror swap and becomes a broader renovation.

If you are coordinating tiling, lighting, waterproofing, and cabinetry together, you need the right builder category and the right electrician working from the same plan. That is how you avoid holes being cut twice, waterproofing being disturbed, or the mirror ending up in the wrong place.

Plan the electrical access first, then order the mirror. That approach keeps maintenance straightforward and stops a cosmetic feature from becoming a costly fault later.

If you want the mirror supplied as part of a broader bathroom renovation, request a quote from SitePro Bathrooms before the rough-in is locked in.

Energy Efficiency and Long-Term Renovation Value

The value of an LED mirror in a renovation is not the purchase price, it is the total cost of ownership over a decade. A well-chosen mirror reduces ongoing electricity use, avoids frequent globe changes, and cuts down on the small maintenance jobs that become annoying in a finished bathroom. For homeowners renovating Victorian properties, that matters because every future access issue costs more once the wall is tiled and painted.

LED lighting uses far less electricity than older incandescent fittings, and the mirror itself can act as a durable fixed feature rather than a short-life decorative item. Independent guidance from Energy.gov explains why LED technology is efficient and long lasting, which is the reason these mirrors make financial sense in a renovation. You pay for a cleaner fit-out once, then avoid the repeat spending that comes with older lighting setups.

Don't oversell the mirror as the only light source

A backlit mirror improves appearance and task lighting, but it should not carry the bathroom on its own. In a dark or windowless room, relying on the mirror alone usually leaves the space feeling uneven, especially around the shower, vanity edges, and general circulation area. The correct approach is to treat it as one part of the lighting plan, not the entire plan.

That is where renovation value becomes practical. A mirror that looks sharp but leaves the room awkward to use is a poor upgrade, especially in a rental or resale context. Buyers and tenants respond to bathrooms that feel complete, easy to use, and properly lit, not just visually clever.

Long-term value also depends on what happens after the project is finished. If the driver is buried where nobody can reach it, or the fitting is installed in a way that makes future servicing difficult, the mirror becomes a maintenance problem instead of an asset. The right installation keeps access sensible, protects the wall finish, and gives you a fixture that still makes sense years after the renovation dust has gone.

How SitePro Bathrooms Delivers Your Complete Bathroom Transformation

The best mirror decision usually happens inside a full renovation plan, not as a standalone purchase. SitePro Bathrooms handles that kind of coordinated work in Highett and across Victoria, from concept development and 3D design through construction and finishing, so the mirror, lighting, cabinetry, and waterproofing are all resolved together. That approach suits homeowners who want their new bathroom ideas turned into a finished room without juggling trades and suppliers.

If you're planning bathroom renovations, the practical path is clear. Work with a team that can align the mirror choice with the wiring plan, confirm the placement before tiling, and keep the whole project compliant from start to finish. SitePro Bathrooms is one option for that kind of coordinated renovation, particularly where the project needs careful design, builder oversight, and a clean handover.


If you're ready to renovate a Victorian bathroom properly, start with a design consultation that treats the mirror, lighting, and electrical layout as one job. Review completed projects, check client feedback, and request a tailored quote so your bathroom upgrade is planned around real compliance, not guesswork.

  • siteprobathrooms

Steam Shower Room Design: Your Victoria Guide 2026

You've probably stood in a tired ensuite, looked at stained grout, a cramped shower base, and a fan that never quite clears the moisture, then thought a better bathroom would change the whole start and end of your day. A steam shower room design does that in a very direct way, because it turns a routine wash into a controlled, enclosed wellness space that works inside an ordinary Victorian home, not just in a hotel spa. In Australia, that kind of upgrade sits inside a real renovation pattern, with the ABS reporting that 5.8% of households completed a kitchen or bathroom upgrade in the 2021–22 financial year, so projects like this aren't fringe luxuries, they're part of a common household investment pattern ABS renovation context.

A modern luxury steam shower room with dark slate tiles, ambient under-bench lighting, and a glass door.

A regular shower is like a raincoat, it sheds water and gets out of the way. A steam shower is more like a sealed terrarium, it has to hold heat, manage condensation, and keep vapour from escaping into the rest of the house. The room's integration with waterproofing, ventilation, lighting, drainage, and structural finishes has to be planned from the start, because nice tiles and a glass panel alone will not hold up once steam and moisture are part of daily use.

In Melbourne renovations, that planning also has to fit the Victorian building context. Existing homes in Highett and nearby suburbs often bring awkward framing, ageing plumbing, limited fall for drainage, and tired surfaces that hide what is happening behind the walls. A proper steam shower needs to be checked against NCC expectations, and the builder must be registered where the work calls for it, so the design has to suit both the house and the rules before anyone starts setting out tile lines or ordering fittings.

From Bathroom Upgrade to Personal Sanctuary

A steam shower earns its place in a home when the room does more than look polished. It gives you a quiet, enclosed space where heat and humidity wrap around the body, which many homeowners want after a long commute, a late gym session, or a day spent hunched over a desk. The design goal isn't just comfort, it's a room that feels restorative every time you step in.

That's why I treat steam shower room design as part wellness upgrade, part building project. The benefit only shows up when the enclosure is tight, the moisture is controlled, and the room feels intentional rather than improvised. If the room leaks vapour into surrounding cabinetry or into a ceiling cavity, the luxury disappears fast.

Practical rule: if the room can't contain steam reliably, it's not a steam shower, it's just a shower with expensive finishes.

Why this sits inside real bathroom renovations

In Victoria, steam showers are usually built during broader bathroom renovations, not as isolated add-ons. That matters because the room has to work with waterproofing, ventilation, lighting, drainage, and structural finishes at the same time. The ABS data above shows why this is a mainstream renovation category, not a niche indulgence, and that changes how owners should budget and plan ABS renovation context.

For Highett and the surrounding Melbourne suburbs, the most successful projects tend to be compact, efficient, and carefully detailed. That suits existing homes, especially where the bathroom footprint is limited and the retrofit has to respect the house rather than fight it. It also explains why new bathroom ideas often focus on smaller but higher-spec layouts instead of oversized spa rooms.

The Foundations of Steam Shower Design

A steam shower starts with the room shell, not the fittings. A conventional shower only has to move water downwards and out, but a steam shower has to hold hot vapour inside the enclosure without letting it drift into nearby walls, ceilings, or cabinetry. Standard shower waterproofing is not enough for that job, because steam loads the whole assembly in a different way.

The room must be enclosed as one continuous system. Tiling by itself will not do it. Every edge, joint, and penetration has to work together, otherwise moisture finds the weakest point and settles where it should not. Ceiling height, ceiling slope, door sealing, and generator location all sit in the core geometry of the space.

Geometry that keeps the room usable

A practical layout keeps the ceiling no higher than 8 feet, around 2.4 metres, and uses a slope of at least 3/4 inch per foot, about 6 centimetres per metre, so condensate runs away from the bather instead of dripping back on them Steam room geometry. The generator should sit within 10 feet of the steam head on a dedicated 240V circuit Steam room geometry. That shortens the steam line and helps the system respond properly.

The ceiling shape does real work here. If the pitch is ignored, condensation collects overhead and drips where comfort should be highest. If the generator sits too far away, the steam output becomes slower and less consistent, which is a poor outcome in a retrofit where pipe runs and service access are already tight.

A builder also has to treat the room like a serviceable appliance, not just a finished bathroom. The steam unit should stay accessible in a dry, ventilated position, because maintenance gets difficult fast if it is buried behind permanent joinery or boxed into a wet cavity. Many retrofit ideas fail at this point, because they look tidy on paper but create painful access problems later.

In Victoria, that planning has to sit alongside the rest of the bathroom work. NCC expectations, Victorian builder registration rules, waterproofing, and the limits of an existing Melbourne house all shape what is realistic. A good steam shower design respects the building first, then the finishes.

Mastering Waterproofing and Vapour Control

Steam shower waterproofing is stricter than normal shower waterproofing because the enemy isn't only liquid water, it's vapour migration. A membrane that handles spray fine can still fail when heat and humidity push moisture into adjacent framing, linings, and insulation. That's how mould, softened substrates, and tired finishes start to appear around what looked like a high-end bathroom.

The critical benchmark here is vapour management. A continuous, bonded waterproof membrane should have a water vapour permeance of 0.5 perms or less to resist moisture migration into nearby building materials CTDA steam shower membrane guidance. In plain terms, the membrane can't be patched together loosely, because any weak transition becomes the path moisture follows.

What gets sealed before the tile goes down

The substrate, membrane, penetrations, and tiling system need to be decided together. Once tiles are on the wall, you're locked into the assembly beneath them, so this is the stage where design choices have the biggest long-term impact. Lights, controls, plumbing points, niches, and any venting details all need proper treatment before finishing starts.

A simple sizing approach helps keep the generator choice realistic. Measure the enclosure volume, then account for the materials inside it, because denser or more absorbent finishes change how hard the generator has to work. Smooth, non-porous interiors are easier on the system, while heavier or more heat-absorbing surfaces demand more from it.

For a homeowner, the controls are the user interface of the whole experience. That means the panel should be easy to reach, easy to read, and simple enough that the room feels intuitive, not technical. If you want to understand the practical side of waterproofing in a standard renovation context, the bathroom waterproofing guide is a useful companion to the steam-specific approach.

Choosing Materials for Modern and Designer Bathrooms

Material choice shapes both the look and the performance of a steam enclosure. In modern bathrooms and designer bathrooms, the best finishes are the ones that can handle repeated heat, condensation, and cleaning without losing their character. That's why the surface palette has to be selected for the environment, not just for the mood board.

Porcelain and ceramic are the safest starting points because they're non-porous and practical. Natural stone can still work, but it needs careful judgement, because it brings beauty and thermal mass along with more maintenance sensitivity. In a steam room, that trade-off matters more than it does in a standard bathroom.

Various stone and tile material samples arranged on a luxury surface for a steam shower room design.

Surfaces that look good and last

A tiled steam room works best when the tile format supports drainage, cleaning, and visual calm. Smaller-scale tiles often help on floors because they add more grout lines and therefore more grip, while large-format wall tiles can keep the enclosure feeling quiet and contemporary. The right mix gives the room a finished, deliberate look without making maintenance a chore.

Glass should be fully sealed and purpose-fitted, because any weak gasket or poor edge detail undermines the vapour barrier. Seating needs the same thinking. An integrated bench, corner seat, or floating perch should feel comfortable without interrupting circulation in the room, especially in compact Melbourne bathrooms where every centimetre counts.

Planning the footprint

The Australian Government's Livable Housing Design Standard recommends a minimum clear floor space of 900 mm x 900 mm for at least one shower Livable Housing benchmark. That gives a practical starting point for a steam enclosure that still allows usable movement, door swing, and day-to-day access. It's not just about fitting in, it's about making the room easy to live with.

Practical rule: choose finishes that support steam first, then refine the palette for style. Reversing that order usually leads to compromise.

If you're refining tile decisions for a wider renovation, the bathroom tile selection guide can help frame the look and maintenance side of the process.

Selecting Your Steam Generator and Controls

The generator does the heavy lifting in a steam shower room, and the wrong unit shows up quickly in daily use. If it is undersized, the room feels slow to heat and patchy in operation. If it is too large for the enclosure, the setup can cost more than necessary and be harder to tune properly.

Sizing starts with the enclosure volume, then moves to the room's materials and ceiling height. A room with more exposed surface area, denser linings, or a taller ceiling needs more energy to warm through and keep steam stable. In a Melbourne retrofit, that calculation has to be grounded in the existing bathroom, not in an idealised layout that only works on paper.

Budgeting the system properly

Estimated costs below are for the Melbourne area and can shift with site access, specification, and retrofit complexity.

Typical Steam Shower Renovation Cost Breakdown (Victoria) Estimated Cost Range (AUD)
Steam generator and controls $2,000 – $5,500
Waterproofing and membranes $1,500 – $4,000
Framing and enclosure preparation $1,000 – $3,500
Plumbing and drainage changes $1,200 – $4,500
Electrical work and dedicated circuit $900 – $3,000
Tiling and finishes $4,000 – $12,000
Glass, sealing, and hardware $2,500 – $8,000
Design and construction coordination $1,500 – $6,000

The generator sits inside a much larger budget, and that is where many owners misjudge the job. A steam shower only works properly when the waterproofing, membranes, plumbing, electrical work, tiling, and enclosure details all line up. In a Victorian renovation, those costs are not separate extras, they are part of the system that keeps the room working long term.

Controls that make the room easy to use

A simple controller suits a dedicated steam shower with a clear routine. Digital controls make more sense where the bathroom has multiple uses and the owner wants more control over temperature, timing, or start-up behaviour. The goal is not to add features for their own sake, it is to make the room straightforward to use every day.

Placement matters just as much as the control type. The generator should sit in a dry, ventilated, serviceable location, and the steam outlet needs to be positioned with the enclosure layout in mind. The electrical supply should be planned early so the build does not stall once the services are being rough-in. Good steam room geometry keeps those details working together, especially in compact retrofit bathrooms where access and serviceability are tight.

A well-chosen control setup also reduces friction after handover. If the owner can reach the panel easily, understand the settings without a manual, and service access stays practical for the builder or electrician, the room is far easier to live with. That is the difference between a steam shower that looks impressive and one that stays reliable in an ordinary Melbourne home.

Estimating Costs and Project Timelines in Victoria

A steam shower should be budgeted as a small specialist system inside a larger bathroom build, not as a single fixture. That's the right way to think about it in Victoria, because the cost sits across waterproofing, electrical, plumbing, tiling, and enclosure work. When those trades aren't coordinated, the project usually runs longer and creates more rework.

The strongest case for professional installation is simple. Steam enclosures demand exact waterproofing, sealed penetrations, compliant electrical work, and a properly integrated generator, and those are all easier to get right when one team manages the sequence. In real bathroom renovations, the big savings come from getting the details right the first time.

What the project usually needs

A typical Melbourne steam shower job starts with an on-site consultation, then moves into measured planning, detailed 3D design, approvals or trade coordination, demolition, waterproofing, services rough-in, tiling, installation, and final handover. That sequence matters because the room can't be tiled until the membrane and penetrations are already correct. Once the order of work slips, delays tend to multiply.
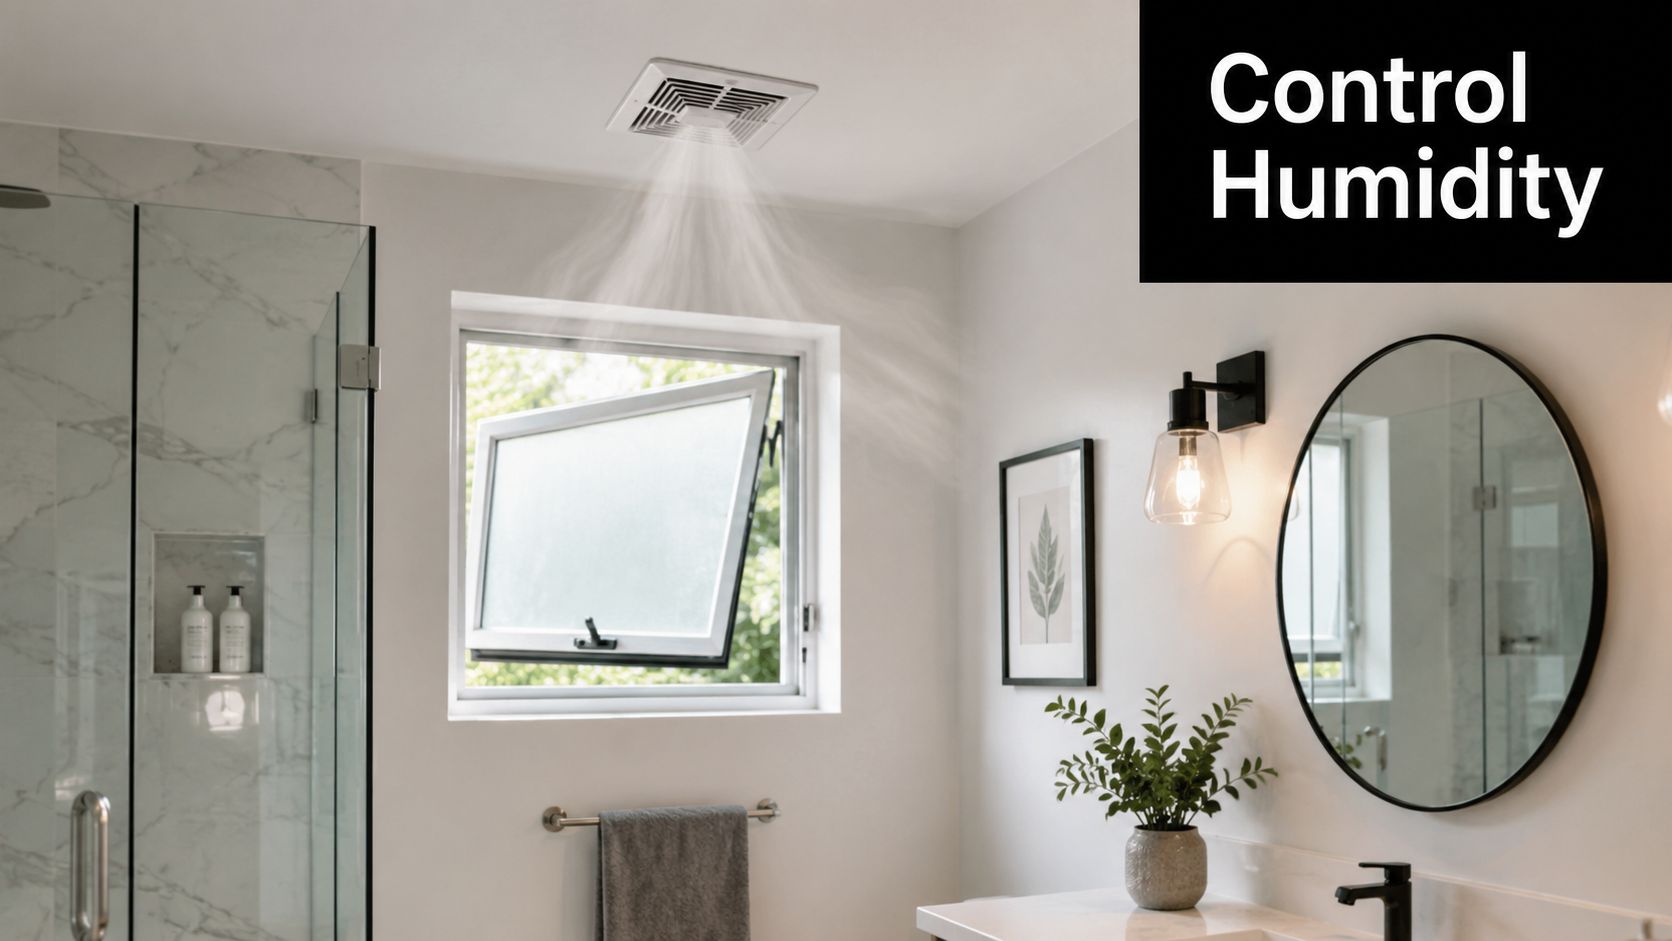
Good steam shower projects are built like systems, not like shopping lists. The parts only work when the sequence is right.

Why the Victorian context changes the risk

In Victoria, registered builders unlimited are required for most significant renovations, and any domestic building work valued at over AUD 10,000 must be carried out by a registered builder Victorian building requirement. That threshold is relevant because extensive bathroom renovations and steam shower installs usually sit above minor repair territory. If the work changes walls, waterproofing, drainage, or service penetrations, it belongs in regulated renovation ground.

For homeowners wanting a coordinated process, a firm such as SitePro Bathrooms can manage concept development, 3D design, construction, and finishing as one workflow. That matters in a steam project because the design isn't just visual, it has to support the trades that will physically build the enclosure.

Engaging a Specialist for Your Highett Renovation

A steam shower is too integrated to be treated like a simple fixture swap. The enclosure, membrane, drainage, electrical supply, and glass all need to work together, and Victorian rules mean the job belongs with a qualified renovation team once the scope becomes substantial. That's especially true when you're turning an older Highett bathroom into something that feels cleaner, warmer, and easier to use.

Screenshot from https://siteprobathrooms.com.au

The paperwork, trade coordination, and building sequence matter as much as the aesthetic decisions. If you want a renovation team that handles the whole path from planning to handover, why using a registered builder matters is worth reading before you start. That's where the compliance side meets the practical side of getting the room finished properly.

A specialist also helps you visualise the result before anything is demolished. That's useful in compact Melbourne bathrooms, where a few millimetres in the wrong place can affect door swing, seating, and movement. With steam showers, the best ideas are the ones that survive the build.


If you're planning a steam shower in Highett or anywhere in Victoria, start with a site visit, a realistic layout, and a builder who understands wet-area compliance as well as finish quality. Speak with a local renovation specialist, ask for a 3D design, and make sure the waterproofing, electrical, and plumbing plan is locked before the first tile comes off the wall.

  • siteprobathrooms

Lighting Bathroom Vanity: Your 2026 Design Guide

You can have a beautiful bathroom and still hate using it every morning. The mirror fogs, the face half in shadow, the razor catches under poor light, and the room looks polished only until you stand at the vanity. That's why lighting bathroom vanity areas properly is never a finishing touch, it's a core part of the renovation itself.

A good vanity setup changes how the whole room works. It affects grooming, comfort, and the way your finishes read in real life, not just in a render. In bathroom renovations, this is often the difference between a room that looks acceptable and one that feels properly designed.

Why Your Vanity Lighting Is More Than Just a Fixture

A vanity light does more than fill a wall with brightness. It sets the tone for shaving, makeup, skincare, hair checks, and every close-up task that exposes weak planning quickly. If the mirror throws glare or the ceiling light cuts shadows across your face, the room can still look polished while failing in daily use.

In an Australian bathroom renovation, the vanity area needs to be planned as the main task zone. Side sconces are commonly mounted around 165–180 cm from the floor and spaced about 70–76 cm apart so the light lands on the face rather than the mirror, while fixtures above a mirror are often set around 200 cm above floor level (Houzz AU). Those placements are not decorative detail, they shape how the room performs every day.

Practical rule: if the face is the subject, the light should behave like a portrait setup, not a ceiling wash.

The trade-offs show up fast on site. A single centre fitting is simple to install, but it usually gives the least flattering result at the mirror. A properly planned vanity setup needs to work with mirror size, benchtop height, wall finishes, and the rest of the bathroom lighting so the room reads as one finished composition. In a high-end renovation, that coordination starts in the 3D design stage and carries through to handover with a registered builder, because the final result depends on the lighting being resolved before the walls are closed up.

Choosing Your Vanity Lighting Fixtures

A modern bathroom vanity display featuring three mirrors with different styles of wall-mounted lighting fixtures installed.

The right fixture depends on how the bathroom is used, how much wall space you have, and how much visual clutter you can tolerate. In modern bathrooms and designer bathrooms, the fixture choice also needs to match the joinery, mirror shape, and the overall finish of the room.

Fixture Type Best For Light Quality Style
Side-mounted sconces Grooming, makeup, shaving, and smaller mirrors Even, flattering, and strong at face level Classic, balanced, architectural
Integrated lit mirrors Minimalist bathrooms and compact ensuites Clean and direct, with a sleek overall look Streamlined, modern, low-visual-noise
Overhead vanity bars Simple upgrades and wider mirrors Useful, but more prone to facial shadowing if poorly placed Straightforward, contemporary, practical

Side-Mounted Sconces

Sconces on both sides of the mirror are the most reliable option when you want flattering face light. They work because they bring illumination in from the sides, which reduces the hard shadow under the nose, chin, and eyes that a single overhead source creates. In a compact bathroom, that matters more than the fixture's style language.

This is also where finish choice matters. A brass pair can warm up a room with classic detailing, while matte black reads cleaner and more graphic. The key is that side lighting supports the mirror rather than competing with it.

Integrated Lighting in the Mirror

Integrated mirrors are popular in new bathroom ideas because they reduce visual clutter. They suit wall-hung vanities, slim tile layouts, and rooms where the mirror needs to feel almost invisible. The trade-off is that the light is often very controlled, so you need to check whether the distribution suits the face, not just the glass surface.

They're strongest in compact bathrooms where wall space is tight or where the design calls for a neat, built-in look. They're less forgiving if the room already has a lot of hard surfaces, because over-bright reflective surfaces can start to feel harsh.

Overhead Vanity Bars

An overhead bar is the easiest shape to understand and often the simplest to retrofit. It can work well over a single basin if the size and position are handled carefully, but it's rarely the most flattering option on its own. If this is the only fitting in the room, the face usually pays the price.

For a vanity, the best-looking light is rarely the one that disappears most quietly. It's the one that does the job without making the mirror feel overexposed.

The right choice isn't about chasing a trend. It's about matching the fixture type to the bathroom's geometry, finish level, and daily use. In a coordinated renovation, that choice should be made alongside the mirror, vanity, and electrical layout, not after the tiler has finished.

Perfect Placement and Mounting Heights

A modern bathroom vanity with a mirror and recommended height measurements for wall-mounted light fixtures.

A vanity light that looks right on paper can still fail on site if the height is set from the wrong reference point. In a real renovation, the finished bench, mirror size, wall finish, and light fitting all have to be locked in together, because the placement is judged from the completed setup, not a rough estimate. For that reason, bench height needs to be confirmed early before the electrician sets out the lights or the cabinetmaker finalises the mirror line.

Australian bathroom practice usually places side sconces around 165–180 cm from the floor and about 70–76 cm apart, so the light spreads across the face instead of reflecting straight back off the mirror. Fixtures above the mirror are commonly set around 200 cm above floor level. Those numbers work because they support the mirror without crowding it, and they leave enough room for the fitting to look intentional rather than squeezed in.

Why the Geometry Matters

Light performs best at face level because it crosses the features instead of washing down from above. That cross-lighting reduces shadows and makes the mirror practical for shaving, makeup, and close grooming. A ceiling fitting can still help with general room light, but it should not be expected to do the vanity's job.

The biggest mistake is choosing the fixture before the mirror size is fixed. Once the mirror changes, the spacing changes with it. If the light point is locked in too early, the final result can leave awkward gaps, fittings too close to the glass, or a layout that feels slightly off even if every measurement was technically “close enough”.

The best vanity layout is the one that feels obvious once it is installed.

A good builder and electrician also need to account for the mirror edge, the wall finish, and the clearance around shaving cabinets or frameless mirrors. That level of coordination is what gives a bathroom a high-end finish. It is not about a dramatic fitting. It is about the small decisions that keep the light centred, deliberate, and flattering from the first set-out through to handover.
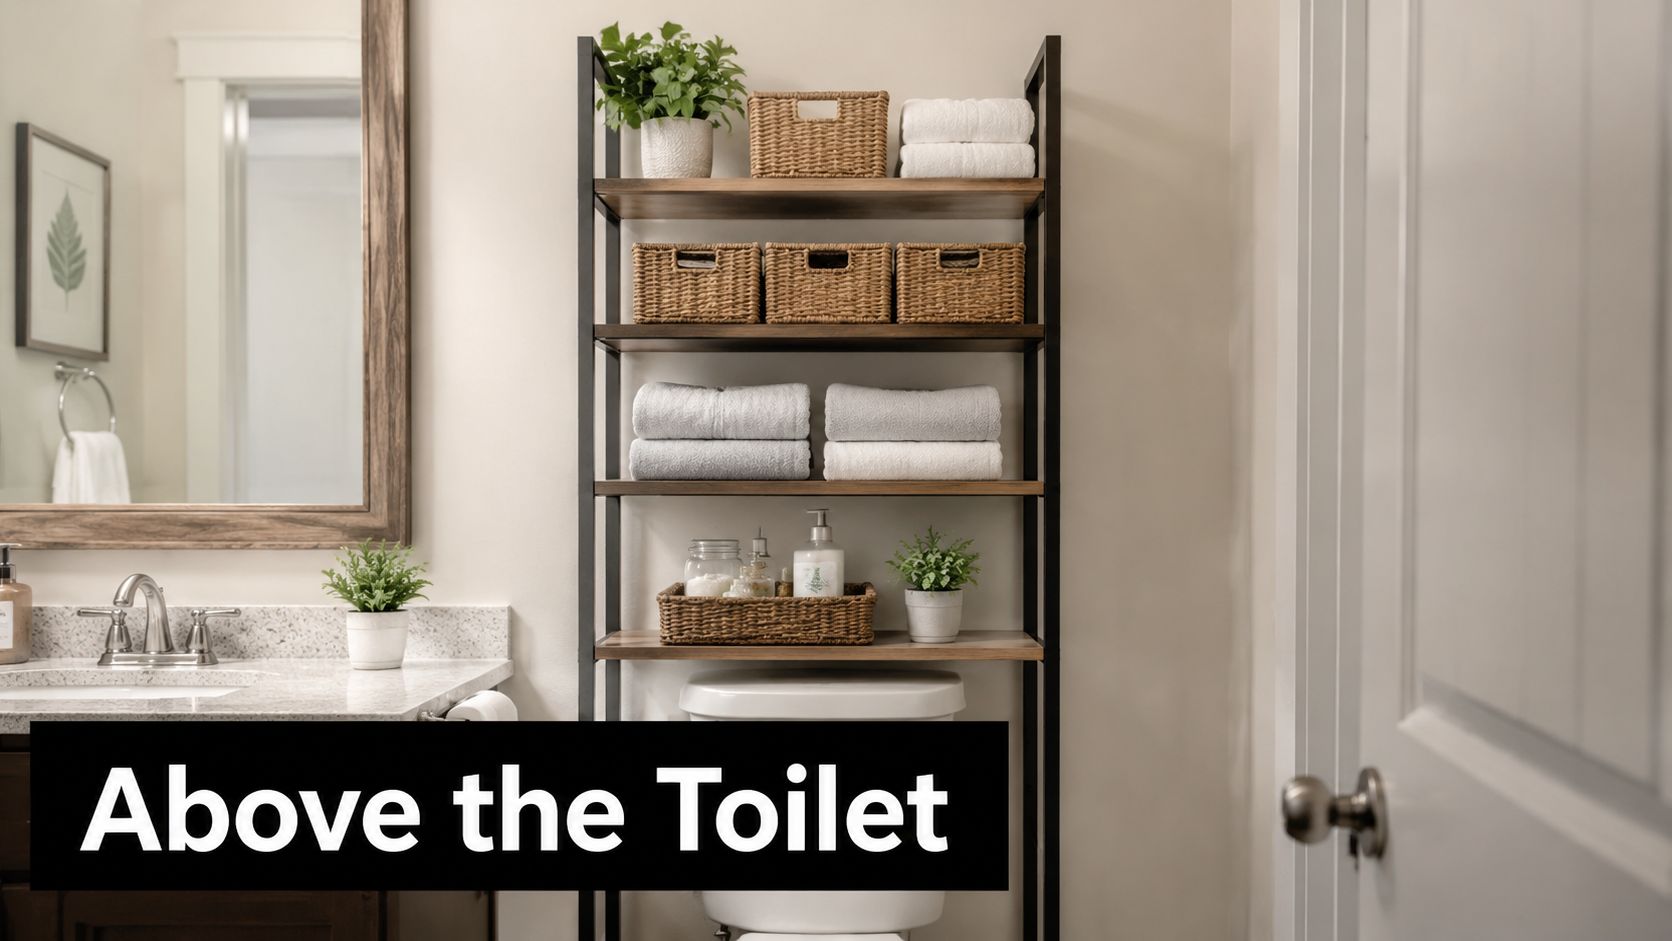
Getting the Light Right with Lumens and Colour

Brightness and colour quality are not the same thing. Lumens tell you how much light you're getting, while colour temperature tells you whether that light feels warm or cool. CRI tells you how accurately the light renders skin tone and finishes, which is why a pretty bulb can still be the wrong bulb for the vanity.

A stronger vanity spec for Australian homes uses 2700K–4000K with CRI 90+, plus about 800–1,600 total lumens at the vanity, which gives strong task lighting without forcing the whole room to feel overlit (Fat Shack Vintage). That range is useful because it supports grooming without turning the bathroom into a clinical space.

Reading the Specs Without Guesswork

Think of it this way. Lumens is quantity, Kelvin is character, and CRI is accuracy. You need all three working together if the vanity is going to look and perform well.

A warm tone can feel comfortable at night, but if it's too warm, skin and finishes can read muddy. A cooler tone can feel crisp, but if it goes too cool or the CRI is weak, the room starts to look flat and unforgiving. The right middle ground depends on the bathroom's materials, but the target range above gives a practical starting point.

Here's the trade-off. A brighter vanity doesn't automatically mean better grooming light if the colour quality is poor. The room may be more illuminated, but the face can still look dull or uneven in the mirror.

Use case rule: makeup, shaving, and skincare need accurate colour first, then brightness second.

In bathroom renovations, the product sheet matters as much as the finish schedule. A fixture that looks clean on the wall still needs to deliver the right output at the face. If it doesn't, the vanity ends up looking expensive but working badly.

Safety and Compliance in Australian Bathrooms

Bathroom lighting has to survive moisture, not just style pressure. For Australian bathrooms, the basin area is treated as a Zone 2 risk envelope, so fittings near the mirror need the relevant IP protection. IP44 is generally acceptable, and IP65 is a stronger sealed option for wet areas (Mint Lighting).

Downlight placement in a bathroom has to respect those same wet-area constraints, especially when the ceiling layout is doing part of the vanity's job. That's why compliance isn't just an electrical issue, it's a design issue too.

What the Rating Actually Means

An IP rating tells you how well a fitting is protected against solids and moisture. In practical terms, a bathroom light isn't just being judged by how bright it is or how nice it looks. It also needs to be positioned so it suits the wet-area envelope around the basin and mirror.

That changes the way you choose side lights, over-mirror fittings, and anything close to splash exposure. Decorative fittings can still be used, but only if they're specified correctly for the space. The best-looking light in the wrong zone is a poor choice.

A qualified electrician should confirm the fitting location against the room layout before walls are closed. In a proper renovation, the waterproofing, tiling, and electrical plan all need to line up. If they don't, the result can be a compromised finish or a fixture that feels like an afterthought.

The safest approach is simple. Choose compliant fittings first, then design around them. That's what separates a polished renovation from one that merely looks polished on day one.

Styling Your Vanity Lighting with Examples

Screenshot from https://siteprobathrooms.com.au

Modern Australian bathroom design is moving toward wall-hung vanities, frameless glass showers, large-format tiles, matte finishes, and smart mirrors with defog and lighting controls. Lighting needs to fit that language, not fight it.

Mid-century styling can still work in a bathroom when the mirror, vanity, and light finish are coordinated carefully. The right fixture turns the vanity into part of the room's design story instead of a separate add-on.

A classic bathroom might use a pair of warm-toned sconces beside a framed mirror, with the brass finish echoing tapware or cabinet handles. That creates a layered, established feel, especially when the room has stone or timber notes. In a minimalist ensuite, a slim backlit mirror can keep the wall quiet while still giving the face even illumination.

An industrial-inspired room often works better with a straight bar light or compact metal fittings, especially if the vanity is floating and the tiles are large-format. The line of the light helps anchor the mirror visually. A matte black finish can sharpen that effect without making the room feel heavy.

The most successful vanity lighting usually repeats one finish already present in the room, then stops there.

Smart mirrors suit modern bathrooms because they integrate function without adding bulk. They're a strong fit where cleaning lines matter and where the design is meant to feel light, not crowded. The mistake is treating style and performance as separate decisions. At the vanity, they're the same decision.

Integrating Lighting into Your Renovation Plan

A contractor examines renovation plans for a bathroom remodel featuring a freestanding bathtub and material samples.

Vanity lighting works best when it is built into the renovation plan before rough-in, not chosen at the end after the mirror has already been ordered. In bathroom renovations, the wall lining, waterproofing, mirror size, and wiring path all need to line up. A 3D design stage helps because you can see whether the light sits correctly over the basin, whether the mirror proportion feels right, and whether a bar, sconce, or integrated mirror suits the room.

In Victoria, a major domestic building contract is required for most domestic building work worth more than A$10,000. That affects vanity lighting because once a bathroom renovation moves past a basic cosmetic update, the paperwork, builder engagement, and coordination become part of the job, not an afterthought.

What to Lock In Early

A builder and electrician need the final mirror width, vanity height, and fitting type before the walls are sealed. If those details are unclear, the wiring can end up in the wrong place. That often forces awkward centring, visible patching, or a fixture that does not light the face properly.

A coordinated service helps with that. SitePro Bathrooms handles concept development, detailed 3D design, construction, and finishing in one process, which makes it easier to align the lighting with the rest of the room instead of trying to fit it in later.

Use the renovation timeline to your advantage:

  • Fix the mirror and vanity sizes early. Light placement depends on both, not just the wall space.
  • Choose the fixture type before electrical rough-in. Side sconces, bars, and lit mirrors all need different clearances.
  • Confirm compliance before tiling starts. Wet-area placement affects product choice and position.
  • Test the final effect at handover. The vanity should read cleanly in both bright and low-light use.
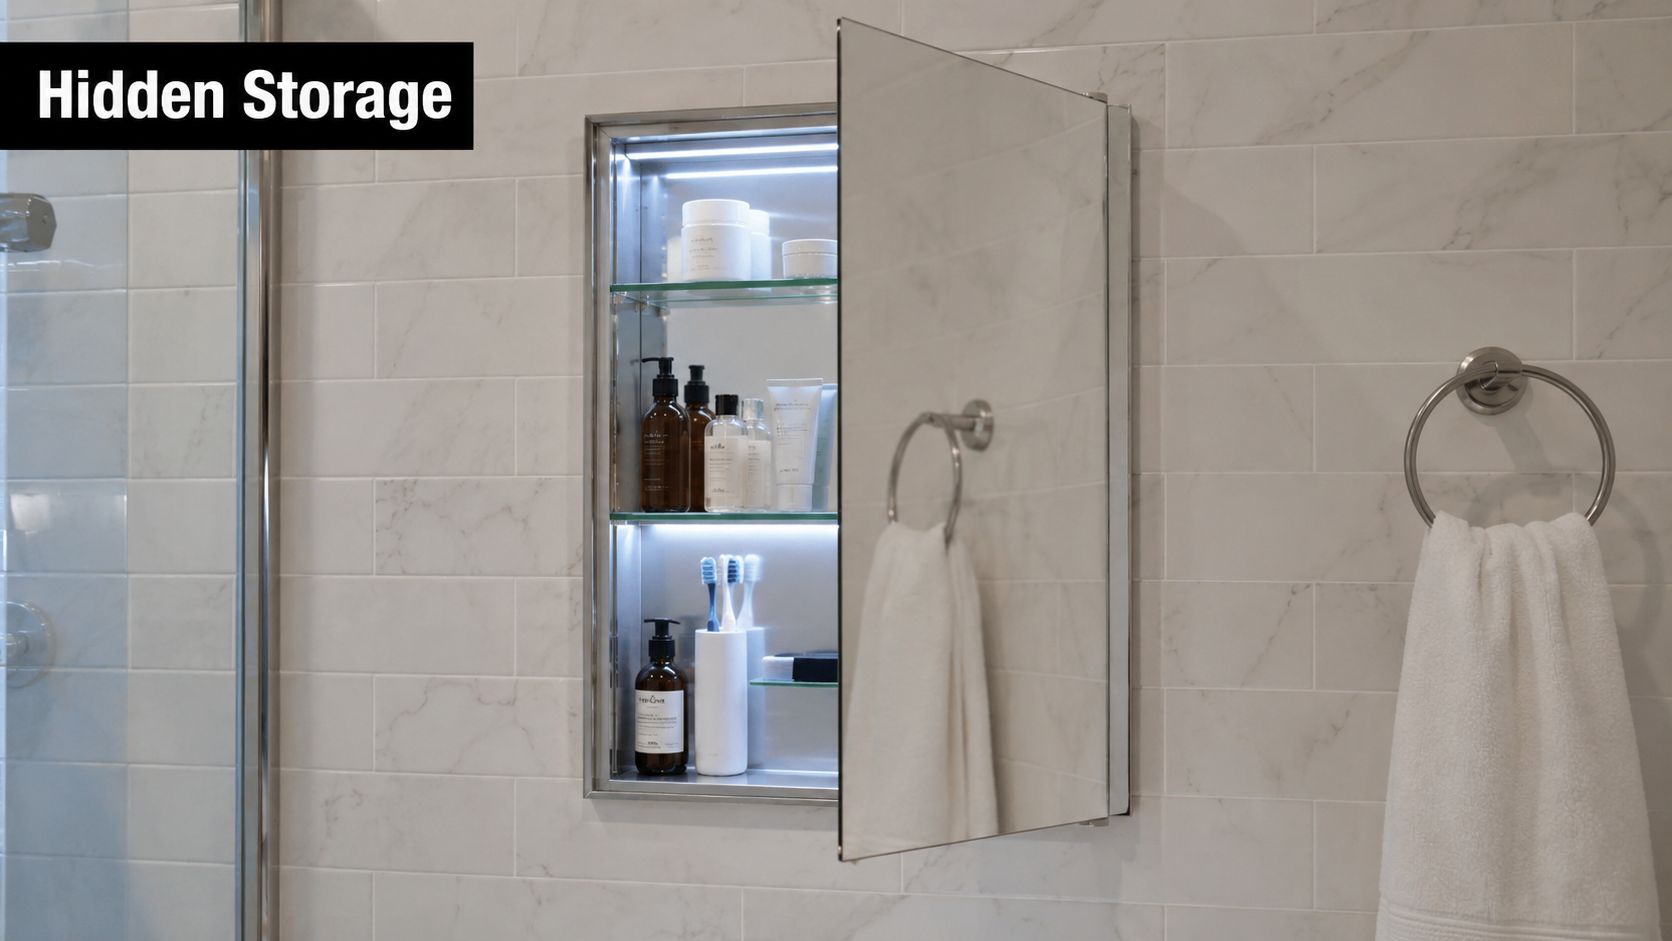
That approach keeps the lighting tied to the room's layout, so the finished bathroom feels planned rather than patched together. It is a small detail on paper, but in the room it is usually the difference between an average vanity wall and one that feels properly finished.

If you are planning bathroom renovations in Victoria and want the vanity lighting handled as part of the build, not as a last-minute add-on, book a consultation with SitePro Bathrooms and bring your mirror, vanity, and lighting ideas into the same design conversation before work starts.

  • siteprobathrooms

How to Prevent Bathroom Mold: A Complete Guide for 2026

You spot it while the shower is still damp. A dark mark in the silicone corner. A few specks in the grout. You scrub it off, think you've handled it, and two weeks later it's back.

That cycle frustrates a lot of homeowners because bathroom mold rarely starts as a simple cleaning problem. It starts as a moisture problem. The visible patch is just the part you can see. The underlying issue is usually a mix of trapped humidity, slow drying surfaces, soap residue, worn sealant, or water getting where it shouldn't.

If you're trying to work out how to prevent bathroom mold, the answer isn't one magic spray. It's a system. Good airflow, fast drying, regular maintenance, and in some bathrooms, proper bathroom renovations to fix design or waterproofing faults that basic cleaning will never solve. That matters even more in older Victorian homes, where dated fans, tired grout, and hidden moisture are common.

Understanding Why Mold Appears in Your Bathroom

Mold is often first noticed in the same places. The shower corner. Around the base of the screen. Along a grout line that never seems to stay clean. It looks like a surface issue, but in practice it's usually the result of three things happening together: moisture, warmth, and a food source.

Bathrooms supply all three without much effort. Hot showers create steam. Steam settles on ceilings, tiles, windows, and seals. Dust, soap scum, and dead skin cells give mold something to feed on. If those surfaces stay damp long enough, mold gets a foothold.

That's why some bathrooms always seem to struggle, even when the owner cleans regularly. The room may be trapping moisture after every shower. The grout may be cracked. The sealant may have started failing. Or the fan may be moving air poorly, so the room never fully dries between uses.

The visible spot is often the last sign

A black mark on silicone isn't always the beginning. It can be the first visible clue that moisture has been sitting in the room for quite a while. In older bathrooms, I often see people focus on scrubbing the stain while the actual cause sits behind the tile edge, under a vanity, or inside failed joints.

Mold that keeps returning usually points to a bathroom that stays wet longer than it should.

That's the practical difference homeowners need to understand. Surface mold can often be cleaned. Recurring mold means the bathroom environment is helping it come back.

Why prevention works better than removal

Once mold gets established in porous or damaged materials, cleaning becomes a repeating job. Prevention is cheaper, easier, and more reliable. That starts with daily habits, but it also extends to smarter material choices in modern bathrooms and designer bathrooms where layout, ventilation, and waterproofing are planned properly from the start.

If you're dealing with a minor issue, better habits may solve it. If the same patches return again and again, it's worth looking at the bathroom more like a renovator would. Persistent mold often tells you the room was never drying properly, never waterproofed properly, or has reached the point where patch repairs won't hold.

Mastering Humidity and Improving Air Circulation

You finish a hot shower, leave the room, and come back an hour later to a foggy mirror, damp grout, and a heavy smell in the air. That bathroom is staying wet too long. In my experience, that is the point where mold prevention stops being a cleaning question and becomes a drying question.

Humidity control does more to prevent mold than scrubbing ever will. If moisture sits in the room after every shower, spores get the same conditions they need day after day. Cleaning helps, but only if the bathroom can dry properly between uses.

Experts note that to prevent bathroom mold in Australia, keeping indoor humidity below 50% is the critical target, with 50% to 60% used as the broader working range for prevention in bathrooms. They also recommend running exhaust fans for 20 to 30 minutes after every shower and making sure the fan vents directly outside, not into a roof space or attic, because mold can't thrive without sustained moisture (guidance on bathroom humidity control and fan use).

A modern bathroom with a ceiling exhaust fan turned on to help control excess humidity and moisture.

Use the fan long enough, and make sure it is doing real work

Running the fan during the shower helps. Running it after the shower is what usually makes the difference. Steam keeps settling onto tiles, silicone, ceilings, and window frames well after the water is off.

A useful setup looks like this:

  • Start the fan early: Switch it on before or as the shower starts.
  • Keep it running after use: Let it clear the room for the full recommended period.
  • Give air a path to replace what is being extracted: If privacy and safety allow, leave the door slightly open once the room is no longer in use.
  • Check where it vents: A fan that dumps moist air into the roof cavity is shifting the problem, not fixing it.

I see plenty of bathrooms with a fan on the ceiling that barely moves air. Some are undersized. Some are clogged with dust. Some were never ducted out properly in the first place. If the room stays muggy long after bathing, it is worth looking at a proper bathroom exhaust fan installation instead of assuming the existing unit is good enough.

Reduce the moisture load before it lingers

Every wet surface keeps feeding humidity back into the room. Glass, wall tiles, tap ledges, shower screens, and the corners around the base of the shower all release moisture as they dry. The longer that takes, the longer mold has a wet environment to work with.

That is why a quick squeegee and wipe-down helps so much in real bathrooms. It cuts down the amount of water left behind, which means the fan has less moisture to remove. It is a simple habit, but there is a trade-off. It only works if the underlying bathroom design is sound. If water pools in corners, sits on poorly sloped surfaces, or gets trapped around failed joints, better habits will only limit the problem, not solve it.

Daily habits that help the room dry faster

Small routines matter here because they shorten the damp period after each shower.

  • Squeegee shower glass and tiled walls: Pay attention to bottom edges and corners.
  • Wipe shelves, niches, and mixer ledges: These spots hold water longer than people expect.
  • Spread towels out properly: Towels that stay damp add more moisture back into the room.
  • Use a dehumidifier in internal bathrooms: It can help where windows are absent and extraction is poor.

One practical test works well. If surfaces still feel wet or the room still smells musty well after use, the bathroom is not clearing moisture fast enough.

Know when humidity points to a renovation problem

Some bathrooms keep growing mold because the room was built with weak extraction, poor airflow, bad falls, or finishes that trap moisture. In those cases, you can improve conditions with better fan use and better drying habits, but you may never get a lasting result until the layout, ventilation, or waterproofing is corrected.

That is the line I look for on site. If the room dries properly, routine maintenance usually keeps mold under control. If it does not, recurring mold is often a sign the bathroom needs more than cleaning. It needs the moisture problem designed out.

Your Proactive Cleaning and Maintenance Routine

A bathroom usually does not turn mouldy because it was missed once. It turns mouldy because the same damp residue stays in the same places week after week.

That is why maintenance needs a routine, not a once-off clean when stains show up. In bathrooms I inspect, the repeat trouble spots are predictable. Grout lines, silicone junctions, shower corners, around the base of screens, and any shelf or niche that holds a thin film of water after use.

A person scrubbing white tiled shower walls with a yellow and green sponge to maintain bathroom cleanliness.

The weekly routine that makes the biggest difference

Regular cleaning works best when it targets the surfaces mould colonises first. Guidance on bathroom mould cleaning from RAC on vinegar cleaning for bathroom mould recommends a white vinegar and water mix for tiles, grout, and silicone, and notes that bleach often lightens staining without addressing growth properly on porous surfaces.

That lines up with what I see on site. Bleach can make a shower look better for a few days. It does not fix soap residue, trapped moisture, or failing joints, and repeated use can be hard on some finishes.

A practical weekly routine looks like this:

  • Spray grout lines and silicone seals: Focus on shower perimeters, wall-to-floor joints, and screen edges.
  • Let the solution sit before wiping: Contact time matters.
  • Scrub lightly with a soft brush or cloth: Aggressive scrubbing can rough up older grout and tired sealant.
  • Rinse if needed, then dry the surface: Cleaning that leaves water sitting behind defeats the point.
  • Check for early failure while you clean: Split silicone, pinholes in grout, and loose corners matter more than light staining.

If floor joints are already holding grime, how to clean floor tile grout will help you clean them properly without making old grout wear faster.

The monthly jobs people skip

Weekly cleaning keeps surface growth down. Monthly maintenance is where you catch the reasons it keeps coming back.

Ceiling corners, exhaust covers, window reveals, under floating vanities, behind toilets, and the underside of shelves often collect fine dust and soap residue. Mould feeds on that film, especially where condensation settles and no one wipes.

Use the monthly clean to inspect as much as to wash.

Look for these signs:

  • Silicone pulling away at corners or edges
  • Grout that stays dark long after the room has dried
  • Staining that returns in the same patch
  • Swollen trim, peeling paint, or musty odour near joinery
  • Dust build-up around exhaust grilles that restricts airflow

Towels, bathmats, and shower curtains also matter. If they stay damp, they keep adding moisture and organic residue back into the room. Wash them regularly and dry them fully before putting them back.

A maintenance rhythm that's realistic

The bathrooms that stay under control usually follow a simple pattern. Dry down after use. Clean the high-risk areas weekly. Inspect the room closely once a month.

Task Frequency Main focus
Shower wipe-down After use Glass, tiles, taps, corners
Vinegar spray Weekly Grout, silicone, splash zones
General bathroom clean Weekly Floors, vanity fronts, toilet surrounds
Detail clean and inspection Monthly Ceiling corners, exhaust cover, under cabinetry, behind toilet
Soft furnishing wash Regularly Towels, bathmats, shower curtains

Routine cleaning buys you control. It does not fix poor falls, trapped moisture behind tile, or joints that have already failed.

That trade-off matters. If the same mould patch keeps returning despite consistent cleaning, the bathroom is no longer giving you a maintenance problem. It is showing you a building problem.

Finding and Fixing Hidden Leaks and Waterproofing Failures

A bathroom can look clean on the surface and still be wet where it counts.

That is the point where mould stops being a housekeeping issue and starts looking like a building defect. If the same patch keeps coming back, especially around a shower base, wall junction, niche, or bath edge, water is often getting past the finish layer and staying trapped out of sight.

Cracked grout, split silicone, and movement at corners all give moisture a path in. Once water gets behind tiles or into wall linings, surface cleaning will only knock back what you can see. The source stays active.

Signs the problem is behind the tile line

Hidden leaks rarely announce themselves with obvious dripping. More often, the room shows a pattern of small failures that keep returning.

Watch for signs like these:

  • Mould reappearing in the same exact spot: recurring growth in one corner or joint usually points to ongoing moisture, not missed cleaning
  • Sealant peeling, shrinking, or separating from the wall: joints that have opened up let water enter during normal shower use
  • Musty smell that lingers after the room is dry: trapped moisture behind finishes often smells before it becomes visible
  • Paint blistering or swelling outside the shower area: water can travel beyond the wet zone and show up on adjacent walls, skirtings, or ceilings
  • Loose, hollow, or drummy tiles: movement under tiles can mean the substrate has been affected by moisture over time

I see this often in older bathrooms that have been re-sealed more than once. Fresh silicone can tidy the joint, but it does nothing for saturated backing boards, failed membranes, or poor falls that keep water sitting where it should drain away.

Patch repairs only work in the right conditions

A local repair can make sense. Replacing a short run of failed silicone or repairing isolated grout is reasonable when the rest of the bathroom is dry, sound, and well built.

The trade-off is simple. Small repairs are cost-effective for localised wear. They are poor value when moisture has already moved behind the tile line, because the visible defect is only the access point, not the full problem.

Painting over a stain, re-grouting a corner, or scrubbing the same patch every fortnight usually turns into repeat spending. The room looks better for a while, then the smell returns, the mould returns, or the wall outside the shower starts to show damage.

If the mould keeps returning after cleaning and minor sealing repairs, treat that as a sign to inspect the construction, not just the surface.

Where professional assessment matters

Once there is reason to suspect waterproofing failure, the job changes. The question is no longer how to remove mould. It is how far the water has travelled and what needs to be opened up to stop it properly.

A proper assessment checks the likely entry points, the condition of seals and junctions, signs of substrate movement, and whether the bathroom was waterproofed correctly in the first place. Homeowners can spot the warning signs. Diagnosing concealed moisture and failed wet area detailing usually needs renovation experience.

If you are weighing up repair versus rebuild, it helps to understand the basics of bathroom waterproofing and how failures happen before spending money on another short-term fix.

Designing a Mold-Resistant Bathroom Renovation

Some bathrooms keep growing mold because the room was built with weak details from day one. Poor extraction. Cementitious grout in heavy splash zones. Limited drying space. Tired seals. Water getting behind the tile finish. In those cases, cleaning can only do so much.

That's where bathroom renovations change the conversation. Instead of asking how to keep fighting mold, you redesign the room so mold has fewer opportunities to return. That's the long-term value in well-planned modern bathrooms. They don't just look better. They dry better, clean more easily, and protect the structure behind the tile.

Screenshot from https://siteprobathrooms.com.au

Start with the materials that resist water better

For homeowners collecting new bathroom ideas, the finish selections matter. Australian renovation guidance notes that epoxy grout provides superior water resistance compared with standard cementitious grout, and that a professional waterproofing membrane to all wet areas is a critical part of renovation work to prevent water ingress behind tiles (waterproofing advice for a mould-resistant renovation).

That's one of the clearest examples of short-term versus long-term thinking. Standard grout may cost less upfront, but it's more vulnerable to absorbing moisture. Epoxy grout gives mold less opportunity to take hold.

Material Choices for a Mold-Resistant Bathroom

Component Standard Option (Mold Prone) Upgraded Option (Mold Resistant)
Grout Cementitious grout Epoxy grout
Wet area protection Minimal or ageing barrier Professional waterproofing membrane
Sealants Old or poorly maintained joints Fresh, properly installed sealant
Ventilation Weak or badly ducted fan Correctly sized fan vented outside
Layout Tight corners and cluttered surfaces Easier-to-dry, easier-to-clean design

Good design reduces problem spots

A mold-resistant bathroom isn't only about hidden layers. Layout matters too. The easiest bathrooms to maintain usually have fewer awkward corners, fewer unnecessary ledges, and better spacing around the shower, vanity, and toilet.

That's why the best designer bathrooms often work so well in practice. The design isn't just visual. It supports airflow, access, and cleaning. Water has fewer places to sit. Surfaces are easier to reach. The room feels more open, so moisture clears faster.

Useful design moves include:

  • Reducing clutter traps: Built-in niches and shelves should be planned so water doesn't pool in them.
  • Making surfaces easier to reach: If you can't comfortably wipe it down, it often stays wetter for longer.
  • Improving ventilation placement: A fan needs to draw moisture from where steam collects.
  • Choosing finishes with durability in mind: Attractive materials still need to handle daily wet use.

Renovation is the right answer when the room keeps failing

A lot of people delay renovation because they hope one more reseal or one more deep-clean will finally sort it out. Sometimes it does. Often it doesn't. If the bathroom keeps showing the same moisture-related faults, the room is telling you something.

A proper renovation can address:

  • hidden water ingress behind tile finishes
  • ageing grout and sealant throughout the wet area
  • extraction problems caused by poor fan placement or ducting
  • layouts that trap moisture in corners and hard-to-clean gaps
  • worn finishes that stay damp and stain easily

The bathroom that stays mold-free the longest is usually the one designed to dry properly, not the one cleaned most aggressively.

For homeowners planning a lasting fix, new bathroom ideas need to be judged on performance as much as appearance. The best modern bathrooms and designer bathrooms earn their keep by doing both.

When DIY Is Not Enough and You Need a Professional

You clean the ceiling patch, wipe down the grout, run the fan, and for a few weeks the bathroom looks under control. Then the same black marks come back in the same corner, the room still smells damp, and the paint near the shower starts to lift. At that point, mold is no longer just a cleaning problem. It is usually a sign that the bathroom is holding moisture because something in the room is failing.

DIY has a place. Surface mold from a one-off ventilation lapse or missed cleaning can often be handled at home. Recurring mold is different. If it keeps returning after you have improved daily habits, cleaned properly, and replaced obvious sealant, the cause is often hidden behind tiles, inside wall linings, under shower bases, or in poor extraction setup that needs proper testing and repair.

A close-up view of dark mold buildup along the grout line between bathroom tiles and a bathtub.

Clear signs it's time to escalate

Treat the problem as a building issue, not a housekeeping issue, if you notice any of these:

  • Mold returns quickly after cleaning: Moisture is still feeding it from somewhere.
  • A damp smell lingers: Odour that never fully clears usually points to moisture trapped out of sight.
  • Grout and silicone keep breaking down: Repeated failure often means water is getting where it should not.
  • Paint blisters, trim swells, or plaster softens nearby: The wet area may be affecting surrounding finishes.
  • Steam hangs in the room long after a shower: The fan may be undersized, badly ducted, blocked, or in the wrong spot.

Why a professional assessment saves time and money

A bathroom has to work as a system. Ventilation, waterproofing, drainage, surface falls, sealing details, and material condition all affect how well the room dries out. If one part is wrong, you can keep cleaning forever and still lose the fight.

I see this often in older bathrooms. The owner has already done the sensible things. New silicone, stronger cleaning, longer fan run time, maybe even repainting. The room still breeds mold because the underlying fault sits behind the visible finish. A cracked shower base, failed membrane, leaking penetration, or poorly installed duct can keep the space damp for months before the damage becomes obvious.

That is the point where another patch repair can become expensive repetition.

For larger recurring problems, many homeowners prefer working with registered builders unlimited because the cause may involve several trades and more than one concealed defect. The goal is not just to remove the staining you can see. It is to stop the bathroom from creating the same conditions again next winter.

If your bathroom still smells damp, still grows mold in the same places, or still struggles to dry after you have handled the basics, get it assessed properly.

If you're ready to stop managing mold and start solving the cause, SitePro Bathrooms can help assess whether your bathroom needs targeted repairs or a full renovation that fixes the moisture, ventilation, and waterproofing issues for good.

  • siteprobathrooms

Transform Your Space: Small Bathroom Storage Ideas

Maximise Every Inch of Your Bathroom

You open the vanity and something falls out. The benchtop is crowded with skin care, spare toilet paper is wedged beside the loo, and the shower niche, if you have one at all, is doing very little heavy lifting. That's the reality in a lot of compact bathrooms. In a small ensuite or family bathroom, poor storage turns ordinary routines into constant tidying.

Small bathroom storage ideas work best when they solve two problems at once. They need to create usable room for daily items, and they need to make the bathroom feel calmer instead of tighter. That means choosing the right mix of built-in and retrofit storage, then matching it to the room's layout, wall construction, moisture levels, and how much disruption you're willing to take on.

These 8 solutions are the ones that repeatedly earn their keep in real bathroom renovations across Victoria. Some are quick additions you can fit in an afternoon. Others are worth folding into full bathroom renovations so the storage feels like part of the architecture, not an afterthought. I've included the practical side too: sizing cues, material choices, installation cautions, and where registered builders such as SitePro Bathrooms make the difference between a neat idea and a properly finished result.

1. Floating Shelves and Wall-Mounted Storage

Floating shelves are one of the fastest ways to add storage without shrinking the room visually. In small bathrooms, floor space is precious, so moving towels, daily toiletries, and spare products onto the wall often gives the biggest improvement for the least disruption.

A modern bathroom vanity featuring floating wooden shelves for vertical storage and a stylish marble countertop.

Open shelving suits modern bathrooms because it keeps the lines light. I've seen this work particularly well above a toilet, beside a vanity, or on the blank wall opposite the shower where there's enough clearance to move comfortably. If you're planning a compact layout, these small-space bathroom design ideas show where wall storage can work without making circulation awkward.

What works best

Glass shelves stay visually quiet and resist moisture well. Powder-coated metal brackets are reliable in humid rooms, and sealed timber can look excellent if it's finished properly and kept away from constant splash zones. In a Highett-style contemporary renovation, a pair of oak-look shelves above a stone vanity can soften a room full of tile and chrome.

According to Highgrove Bathrooms, vertical storage solutions such as over-toilet shelves can increase usable storage capacity by up to 40% in small bathrooms without expanding the footprint, which is exactly why wall-mounted storage is so effective in tight rooms (Highgrove Bathrooms on clever storage ideas).

Practical rule: Don't install floating shelves just because a wall is empty. Install them where your hand naturally reaches during the morning routine.

Trade-offs and installation tips

Floating shelves look clean, but they can become visual clutter if every item is left exposed. Use them for neat, repeatable categories: rolled towels, matching canisters, a tray for skin care, or spare hand towels. Don't use them as a dumping zone for half-used products and random packaging.

A few details matter:

  • Fix into something solid: Stud fixing is best. Heavy-duty anchors can work, but they're a fallback, not the first choice.
  • Leave useful spacing: Enough height between shelves makes bottles easy to grab and easy to clean around.
  • Use moisture-safe finishes: Raw timber swells and stains fast in a bathroom.
  • Add light carefully: LED strip lighting under a shelf can lift the whole vanity area, but keep wiring coordinated during renovation works.

If the shelves sit on a tiled wall, I'd rather coordinate drilling and fixing with the renovation team than risk cracked tiles later.

2. Over-the-Toilet Storage Units

The wall above the toilet is usually underused, yet it's one of the most practical storage zones in the room. If you need a spot for spare toilet paper, guest towels, wipes, or cleaning products, an over-the-toilet unit often does the job without touching the vanity footprint.

A modern bathroom storage shelving unit placed over the toilet with organized baskets and folded white towels.

This is one of the easiest small bathroom storage ideas to retrofit. Freestanding units are useful in rentals or when you want storage now and a full renovation later. Wall-mounted cabinets above the cistern look cleaner and are easier to keep hygienic around the base.

Open shelves or closed cabinet

Open shelving works if your styling is disciplined. A few matching baskets, folded towels, and one decorative item can look polished. Once you start stacking mixed packaging, the area feels busy quickly.

Closed units hide mess better. They also suit family bathrooms where not everything needs to be on display. I usually prefer doors if the unit will hold cleaning products, backups, or personal items.

If the toilet wall is the only free wall in the room, use it properly. Don't waste it on decor when the bathroom is short on storage.

Common mistakes to avoid

The first mistake is buying the unit before measuring. Check ceiling height, cistern depth, button access, and whether the lid can still lift if needed. Leave enough room to clean around the toilet and enough breathing space so the storage doesn't feel like it's hanging over your head.

The second mistake is loading the highest shelf with heavy items. Keep bulkier supplies lower and lighter items higher for stability. In family bathrooms, over-the-toilet shelving is a good spot for backup stock, while everyday items stay closer to the vanity.

Material choice matters too:

  • Powder-coated metal: durable and neat for contemporary spaces
  • Bamboo or sealed timber: warmer look, but only if the finish is bathroom-safe
  • Laminate cabinetry: easiest to coordinate with bathroom renovations and existing joinery

This option isn't as integrated as built-in joinery, but it's fast, useful, and often the best answer when the layout leaves no spare floor area.

3. Recessed Medicine Cabinets and Niche Storage

If you want storage that doesn't push into the room, recessed storage is hard to beat. It's one of the smartest inclusions in bathroom renovations because the storage sits inside the wall cavity instead of occupying visual or physical space.

A recessed medicine cabinet with integrated LED lighting and a mirror door displaying bathroom toiletries.

A recessed medicine cabinet above the vanity can replace a standard mirror while hiding toothbrushes, medicines, and grooming products. In showers, tiled niches stop bottles collecting on the floor or hanging from caddies. These details are common in designer bathrooms because they do useful work without adding bulk.

Built-in storage that earns its place

This is one area where planning early matters. The wall needs enough cavity depth, and the builder has to work around plumbing, wiring, and framing. One source notes that custom recessed wall niches and pull-out storage columns are recommended by 68% of Victoria-based renovators for compact spaces, and that these niches need a minimum wall cavity depth of 90mm, with reinforced backing supporting 12kg per linear metre in humid environments (ServiceSeeking on functional small bathroom storage).

Another Australian reference notes that recessed shower niches in designer bathrooms often use a minimum depth of 100mm, which is a useful reminder that the ideal niche size depends on the bottles you use and the wall construction available (Little Aussie on storage for small bathrooms).

Where it pays off

A mirrored cabinet above a compact vanity is usually the highest-value built-in storage in the room. It gives you reflection, concealed storage, and a cleaner benchtop all at once. In a shared bathroom, a double-width recessed cabinet can separate daily items by user without extra joinery below.

For shower niches, I'd focus on location before size. A beautifully tiled niche placed directly in the splash line or at an awkward height becomes annoying quickly.

A few rules help:

  • Align with tile set-out: It looks intentional and avoids ugly cuts.
  • Check bottle heights first: Tall pump bottles catch people out.
  • Waterproof meticulously: Niches are part of the wet area, not a decorative add-on.
  • Use recessed cabinets where swing space is comfortable: Door clearance still matters.

This is a builder-led solution. If you're already opening walls, it's one of the best new bathroom ideas to integrate properly rather than trying to retrofit later.

4. Corner Storage Solutions and Carousel Organisers

Corners are where storage either gets clever or gets wasted. In compact bathrooms, a corner vanity shelf, a corner cabinet, or a rotating organiser inside the vanity can recover awkward space that flat shelving can't use well.

A pull-out cabinet organizer in a bathroom vanity featuring shelves with various skincare products and accessories.

Carousel organisers are especially useful under sinks where plumbing eats the centre of the cabinet and leaves dead zones to either side. A rotating unit lets you reach the back without unloading the front every time. In tighter room shapes, the right corner strategy can be the difference between a vanity that works and one that constantly feels cramped.

If you're still deciding whether a corner vanity or angled joinery makes sense, these small bathroom layout dimensions are worth checking before you lock anything in.

Best use cases

I like carousel storage for categories that are hard to stack neatly. Hair products, backup toiletries, skin care, and first-aid items all suit rotating access better than deep fixed shelving. In family bathrooms, they also help stop duplicate buying because you can see what's in the cabinet.

Freestanding corner shelves can work, but they often look temporary unless the room has enough breathing room around them. Built-in corner joinery feels stronger in full bathroom renovations, especially where every millimetre matters.

The trade-off nobody mentions

Rotating storage sounds brilliant until the clearance is wrong. If the vanity door opening is too narrow, or the plumbing traps the organiser, the mechanism becomes more frustrating than useful.

Keep these points in mind:

  • Measure the usable opening, not just the cabinet size: Hardware and hinges reduce access.
  • Store light items up high: Upper corner shelves aren't the place for heavy cleaning bottles.
  • Choose rust-resistant hardware: Cheap rotating mechanisms don't last well in damp cabinetry.
  • Don't force a carousel into every vanity: Sometimes simple pull-out baskets are better.

Corner storage works best when it solves an access problem, not just a space problem.

A neat corner shelf in the shower can also be effective, but in wet areas I generally prefer a built-in niche unless the renovation scope is very limited.

5. Drawer Dividers and Vanity Organisation Systems

A good vanity can still behave badly if the drawers are just open boxes. Without internal organization, many bathrooms become dysfunctional. People add storage but never create order inside it, so the room still feels messy even when there's technically enough capacity.

Drawer dividers fix that. They turn one chaotic drawer into zones for daily grooming, skin care, dental items, medications, hair tools, and spare stock. In practice, this is one of the most affordable upgrades in the whole room, and one of the most effective.

Why organised storage feels bigger

This isn't just about tidiness. A 2024 University of Melbourne study cited by Bathroom Accessories Australia found that bathrooms with unorganised storage were rated 32% less satisfying by occupants, even when the square footage was identical, which lines up with what many homeowners feel when benchtops and drawers are cluttered (Bathroom Accessories Australia on smart storage solutions).

That's why vanity organisation should be treated as part of the design, not an optional add-on. In modern bathrooms, the drawer interior is doing just as much work as the external finish.

How to set drawers up properly

The best setups separate daily-use items from backup stock. Your morning and night products should live in the easiest-to-reach drawer. Refills, travel items, and less-used tools can sit lower or further back.

I'd usually organise a vanity like this:

  • Top drawer: daily grooming, toothbrushes, skin care, deodorant
  • Middle drawer: makeup, shaving gear, hair products
  • Lower drawer: backup toilet paper, hand towels, bulk items
  • Hidden insert or tray: medications or sharp tools, away from younger children

Use dividers that won't absorb moisture. Acrylic, sealed bamboo, and quality polymer inserts all work. Add non-slip liners first so trays don't shift whenever the drawer opens.

For bathroom renovations, this is worth discussing before the vanity is ordered. Deep drawers can store more, but shallow upper drawers often work better for everyday visibility. If the joinery is custom, planning appliance storage for hair dryers and straighteners from the start saves a lot of awkward retrofitting later.

6. Vertical Wall Pockets and Over-Door Storage

Not every bathroom needs construction work. Sometimes the room just needs more places to put things now. Vertical wall pockets and over-door organisers are the fast, low-commitment answer, especially for renters, guest bathrooms, and children's bathrooms that seem to accumulate products overnight.

These systems use surfaces that are usually ignored: the back of the door, the inside of a cabinet, or a narrow wall beside the vanity. They won't give you the polished look of custom joinery, but they can recover a surprising amount of practical storage.

Where these shine

I recommend them when the bathroom is missing linen storage or when the vanity is too small for the household. An over-door rack can hold towels or robes. Pocket organisers can store hair products, wipes, spare soap, cleaning cloths, or bath toys in a way that keeps them visible.

They're also useful for rental properties. One verified source states that 44% of Victorian rental properties underwent bathroom upgrades in 2024, while a 2025 JTW study reported that 73% of landlords in Victoria abandon storage upgrades because they fear breaching tenancy agreements. The same source highlights the value of non-invasive storage that avoids drilling or permanent alterations (Bathroom Accessories Australia on rental-ready bathroom storage gaps).

If you're aiming for a stronger design language long term, a feature like a mid-century modern bathroom vanity can eventually absorb some of what these temporary organisers are doing.

What to buy and what to skip

Clear pockets are useful because you can see everything quickly. Fabric organisers look softer but can hold moisture longer if ventilation is poor. Metal over-door hooks are durable, though they need enough door clearance to avoid rubbing on the frame.

A few practical notes:

  • Use them for light items: Don't overload door-mounted storage.
  • Check door swing carefully: The organiser shouldn't stop the door opening fully.
  • Keep categories simple: One pocket for dental, one for hair, one for extras.
  • Clean them often: Temporary storage gets grubby faster than built-in cabinetry.

This approach isn't elegant in every setting, but it's flexible, cheap to trial, and often the smartest stopgap before a full renovation.

7. Pedestal Sink Alternatives with Built-In Storage

Pedestal basins look light, but they usually sacrifice the very thing a small bathroom needs most. Storage. If a compact bathroom has a pedestal sink and nowhere else for toiletries, spare rolls, or cleaning supplies, replacing the basin with a small vanity is often the single most impactful change you can make.

Wall-hung vanities are the strongest option in many modern bathrooms because they free up floor area visually while adding drawers or shelving underneath. That combination makes the room feel more open and more useful at the same time.

Better than a pedestal for everyday use

This isn't just about adding a cupboard. The right sink unit can improve flow around the room, hide plumbing, and reduce benchtop clutter. A narrow wall-mounted vanity with one deep drawer and one shelf often outperforms a larger bulky unit because it stores what you use without swallowing the room.

One verified source notes that modular storage units with pull-out drawers beneath bathtubs can store up to 25 litres of cleaning supplies and towels, and credits Registered Builders Unlimited with recommending this type of integrated storage for compact spaces (Budget Box on small bathroom storage ideas). The same principle applies under the basin. Integrated storage beats decorative emptiness in a small bathroom almost every time.

When to involve registered builders

Once plumbing moves or cabinetry becomes built-in, this stops being a simple styling upgrade. Registered builders are worth engaging when the waste position, waterproofing, wall fixing, or tile layout needs proper coordination. That's particularly true in older homes, where wall condition and existing pipe locations can limit the vanity size more than people expect.

A few selection rules help:

  • Choose moisture-resistant carcass materials: Treated board, marine-grade components, or quality engineered products last better.
  • Keep kick-free designs where possible: Wall-hung units make cleaning easier.
  • Prioritise drawers over cupboards: Drawers give better access in shallow vanities.
  • Leave service access: Future plumbing maintenance shouldn't require joinery demolition.

This is one of the most practical new bathroom ideas if your current basin offers no storage at all. In full bathroom renovations, it's often the first layout decision I'd revisit.

8. Tiered Shelf Systems and Storage Ladders

Not every small bathroom wants more cabinetry. Sometimes a lighter, more decorative storage piece suits the room better. Tiered shelves and leaning ladders can add vertical storage for towels, baskets, and a few daily items without making the space feel boxed in.

These pieces work best when the bathroom already has core storage covered and needs overflow capacity, or when the room has an awkward spare corner that can't take conventional joinery. In styled designer bathrooms, a ladder shelf can soften a room full of hard surfaces and add a bit of warmth.

When freestanding storage works

A timber ladder beside a bath can hold towels beautifully. A narrow powder-coated shelf in a corner can carry baskets of toilet paper, guest items, or skin care. These are useful pieces in ensuites where you want the room to stay visually open.

Still, freestanding storage needs discipline. It's easy for a ladder shelf to become a staging point for clutter because there are no doors to hide anything.

Keep the bottom shelf for the heaviest items and the top shelves for light, infrequently handled pieces. That's what keeps these units safe and visually balanced.

Picking the right piece

The finish has to suit humidity. Sealed timber, bamboo designed for wet rooms, and rust-resistant metal all work. Cheap painted furniture from dry areas of the house usually won't.

Placement matters more than people think:

  • Use corners first: They preserve circulation.
  • Avoid door swing zones: A beautiful ladder in the wrong spot becomes a daily obstacle.
  • Add baskets for small items: Open shelves need containment to look tidy.
  • Limit what's on display: Towels, one tray, one basket. More than that starts looking crowded.

This is one of the more flexible small bathroom storage ideas because it doesn't require drilling or demolition. It also suits phased projects, where you've completed the main renovation and want to add a softer layer of functional styling afterwards.

8-Option Small Bathroom Storage Comparison

Item Implementation complexity Resource requirements Expected outcomes Ideal use cases Key advantages
Floating Shelves and Wall-Mounted Storage Low–Medium (anchoring to studs/anchors) Minimal tools and materials; $100–$400 per shelf Open vertical storage, minimalist look, limited weight capacity Small modern bathrooms, display of towels/toiletries Space-saving, easy to install, cost-effective
Over-the-Toilet Storage Units Low (freestanding or simple wall-mount) Unit purchase and basic assembly; $80–$300 Efficient above-toilet storage, easily accessible, can look crowded if overfilled Tight bathrooms, renters, budget renovations Affordable, small footprint, no major renovation
Recessed Medicine Cabinets and Niche Storage High (requires wall framing and professional install) Skilled labor, possible electrical/plumbing coordination; $400–$1,200 Seamless built-in storage, concealed items, polished aesthetic Major renovations, luxury/small bathrooms needing integrated storage Concealed storage, adds architectural value, dual-purpose mirror
Corner Storage Solutions and Carousel Organizers Medium (measurement and fitting required) Moderate cost and possible custom fitting; $150–$450 Maximizes corner dead space, rotating access to back items Under-sink corners, compact layouts where corners are wasted Efficient corner use, improved access, organized storage
Drawer Dividers and Vanity Organization Systems Low (simple install or inserts) Low cost; $50–$250 depending on customization Highly organized drawers, better visibility and routine efficiency Vanities with drawers, users wanting tidy, non-structural upgrades Cost-effective, customizable, improves daily use
Vertical Wall Pockets and Over-Door Storage Very low (no-drill or hanging) Very low cost; $25–$120, no professional installation Quick, visible storage; temporary solution with limited load capacity Renters, temporary needs, small bathrooms needing immediate storage Non-permanent, inexpensive, easy to install
Pedestal Sink Alternatives with Built-In Storage High (plumbing integration and custom install) Professional installation and plumbing work; $600–$1,500 Integrated concealed storage with modern sink aesthetic Renovations aiming to add sink storage and improve resale Combines sink and storage, modern look, conceals clutter
Tiered Shelf Systems and Storage Ladders Low (freestanding, no install) Low to moderate cost; $80–$300 Decorative vertical storage, open display, limited concealed capacity Styling-focused bathrooms, renters, display of towels/plants Attractive, movable, dual-purpose décor and storage

Bring It All Together

The best storage plan usually isn't a single hero feature. It's a combination. A recessed medicine cabinet clears the vanity top. Drawer organisers make the vanity usable. Shelves above the toilet recover dead wall space. A wall-hung vanity replaces a pedestal basin that never carried its share of the load. Once these moves start working together, the bathroom feels larger because it functions better.

That's the part many people miss. Storage isn't only about fitting more in. It's about reducing friction in the room. You want fewer items left on the basin, fewer bottles on the shower floor, and fewer awkward reaches into dark cabinet corners. Good storage shortens the morning routine, simplifies cleaning, and makes the whole bathroom read as calmer and more deliberate.

Some solutions are easy to test. Over-door organisers, freestanding over-toilet units, and tiered shelving can be added quickly and moved if they don't suit the space. Others are worth doing once, properly, during bathroom renovations. Recessed niches, medicine cabinets, vanity replacements, and integrated joinery all depend on wall structure, waterproofing, plumbing, and tile layout. That's where registered builders and a coordinated renovation team matter.

SitePro Bathrooms is well placed for that kind of work. The company handles the process from concept and 3D design through construction and finishing, which is exactly what compact bathrooms need. In small rooms, storage decisions affect everything else: mirror position, lighting, tap placement, circulation, and what sort of vanity or shower screen the room can comfortably take. A disconnected approach usually leads to compromises. A coordinated approach gives you storage that looks built-in because it was planned that way.

If you're weighing up new bathroom ideas for a cramped ensuite, updating a family bathroom, or preparing an investment property for a smarter refresh, start with a clear storage wishlist. List what has to live in the room every day, what can be stored elsewhere, and which problems are really layout problems in disguise. That exercise alone often shows whether you need a simple retrofit or a more complete redesign.

Then take the next step with SitePro Bathrooms. A builder-led consultation can help you decide which small bathroom storage ideas belong in a quick upgrade and which ones should be integrated into complete modern bathroom renovations for a cleaner, longer-lasting result.