• siteprobathrooms

Adding a Bathroom: A Victoria Homeowner’s Guide (2026)

If your home has reached that stage where mornings feel like a queue, guests always need to “just wait a minute”, or the kids have somehow taken over the only shower, adding a bathroom starts to feel less like a luxury and more like the obvious next step. In a lot of Melbourne homes, that pressure point arrives well before the family is ready to move.

That's especially true in older houses across bayside suburbs, where the floor plan often made sense decades ago but doesn't suit how people live now. A second bathroom can mean a private ensuite, a proper family bathroom renovation strategy, or a basic toilet and shower where they're needed most. It can also be the difference between making your current house work for another ten years and deciding you've outgrown it.

The catch is that adding a bathroom isn't just about picking tiles and tapware. In Victoria, the job sits at the intersection of layout, drainage, waterproofing, permits, structural work, and compliance. That's where many first-time renovators get tripped up. The nicest new bathroom ideas still fail if the location is wrong, the plumbing run is awkward, or the approvals haven't been handled properly.

Is Adding a Bathroom the Right Move for Your Home

A typical scenario goes like this. A family buys a solid home in Highett because the block is good, the schools are close, and the location works. A few years later, the one original bathroom starts causing friction. One person needs the shower, another needs the basin, and guests are walking past bedrooms to get to the toilet.

That's usually the moment people start looking at adding a bathroom instead of moving house.
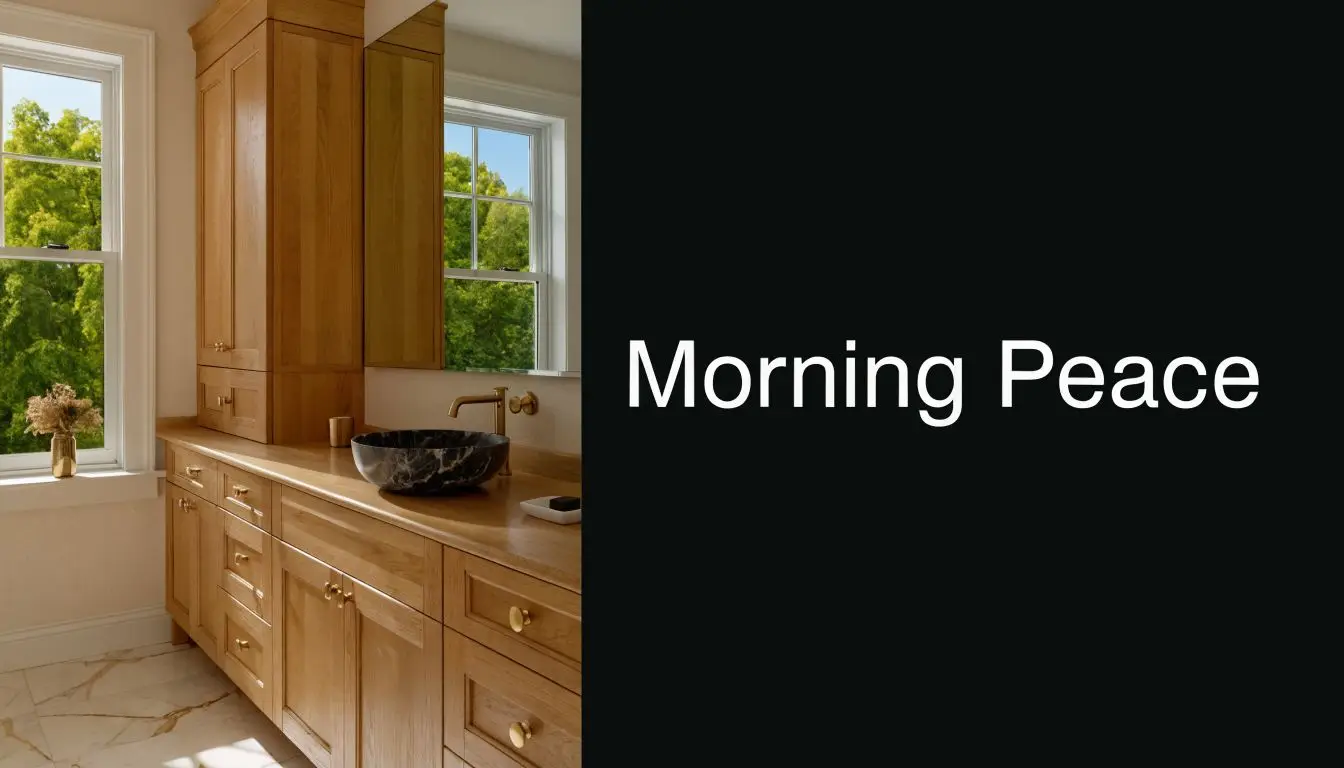
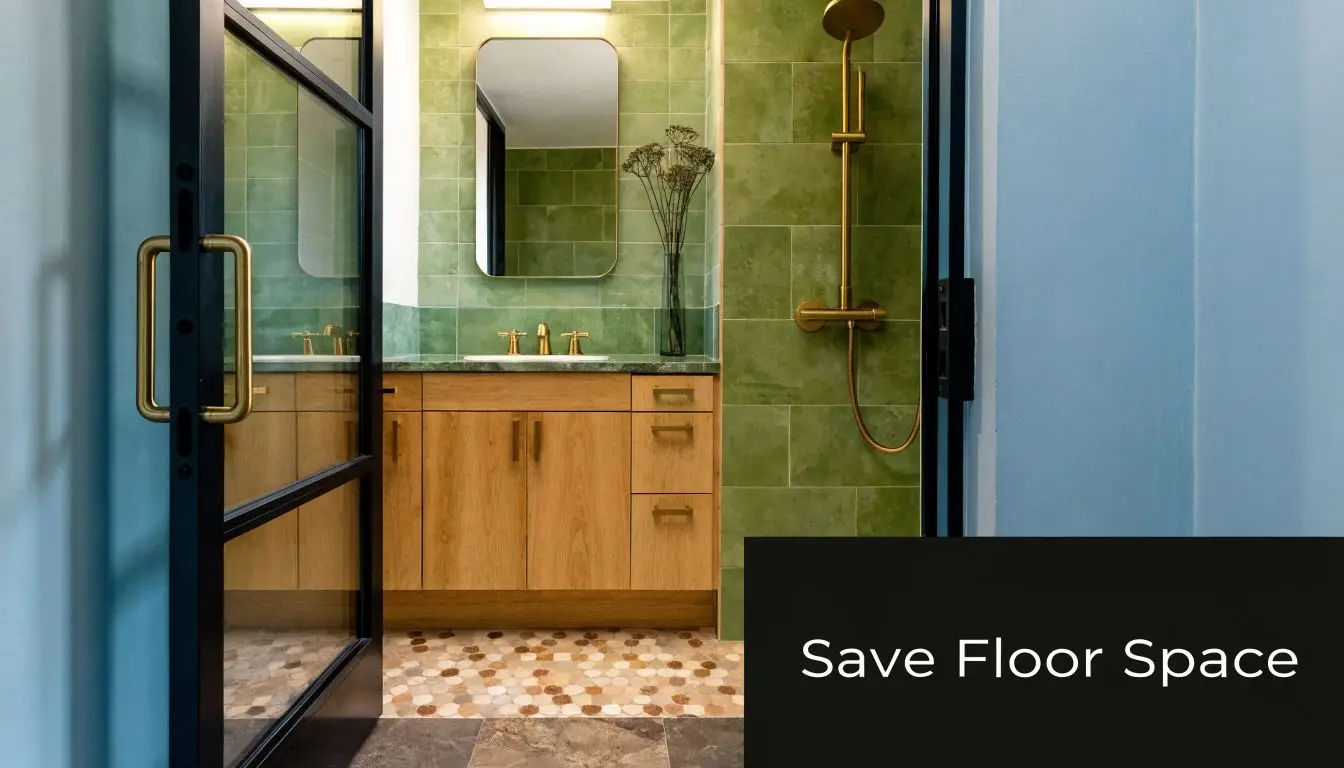
A modern bathroom vanity with natural wood cabinets, brass hardware, and a dark marble bowl sink.

When the project makes sense

The best bathroom additions solve a daily problem first. Value matters, but function matters more. If the house has one bathroom serving a growing family, no guest facility, or no ensuite for the main bedroom, the project often pays off in day-to-day comfort long before resale enters the conversation.

There's also a property angle. Bathroom additions in Victoria have been linked with resale uplift, particularly when the new room is practical, well-located, and built to suit the home rather than forced into it. That's one reason so many owners now look at modern bathrooms and smarter layouts as part of a larger upgrade plan rather than a cosmetic renovation alone.

A good bathroom addition doesn't feel “added on”. It feels like the house should always have had it.

What works and what doesn't

Some additions are straightforward wins. Turning underused floor area into a compact ensuite, reworking a laundry, or converting part of a garage can transform the way a house functions. These projects tend to work because they use space the home already has.

What doesn't work is chasing a bathroom at any cost. If the room ends up dark, cramped, or dependent on difficult plumbing runs, the final result can feel compromised. The same applies when homeowners start with finishes instead of planning. Designer bathrooms only work when the bones are right first.

A better approach is to test three things early:

  • Daily use: Who needs the room, and when?
  • Placement: Can it sit near existing services or in a structurally sensible spot?
  • Long-term fit: Will it still suit the home in five or ten years?

Lifestyle first, style second

Many strong projects begin to take shape, driven by varied needs. A family might want a hard-wearing bathroom near the kids' bedrooms. A couple might want a calm ensuite with cleaner lines and more storage. An investor might focus on adding an extra shower and toilet to make the property more attractive to future buyers or tenants.

All three are valid. The right answer depends on the house, not on trends.

Finding the Perfect Spot Feasibility and Layout Planning

The location drives almost everything. Cost, complexity, approvals, plumbing, natural light, and how the bathroom feels once it's finished all start with one decision. Where will it go?

Before you think about finishes, walk through the house and look for wasted or underperforming space. In many homes, the answer isn't an extension. It's a better use of existing floor area.
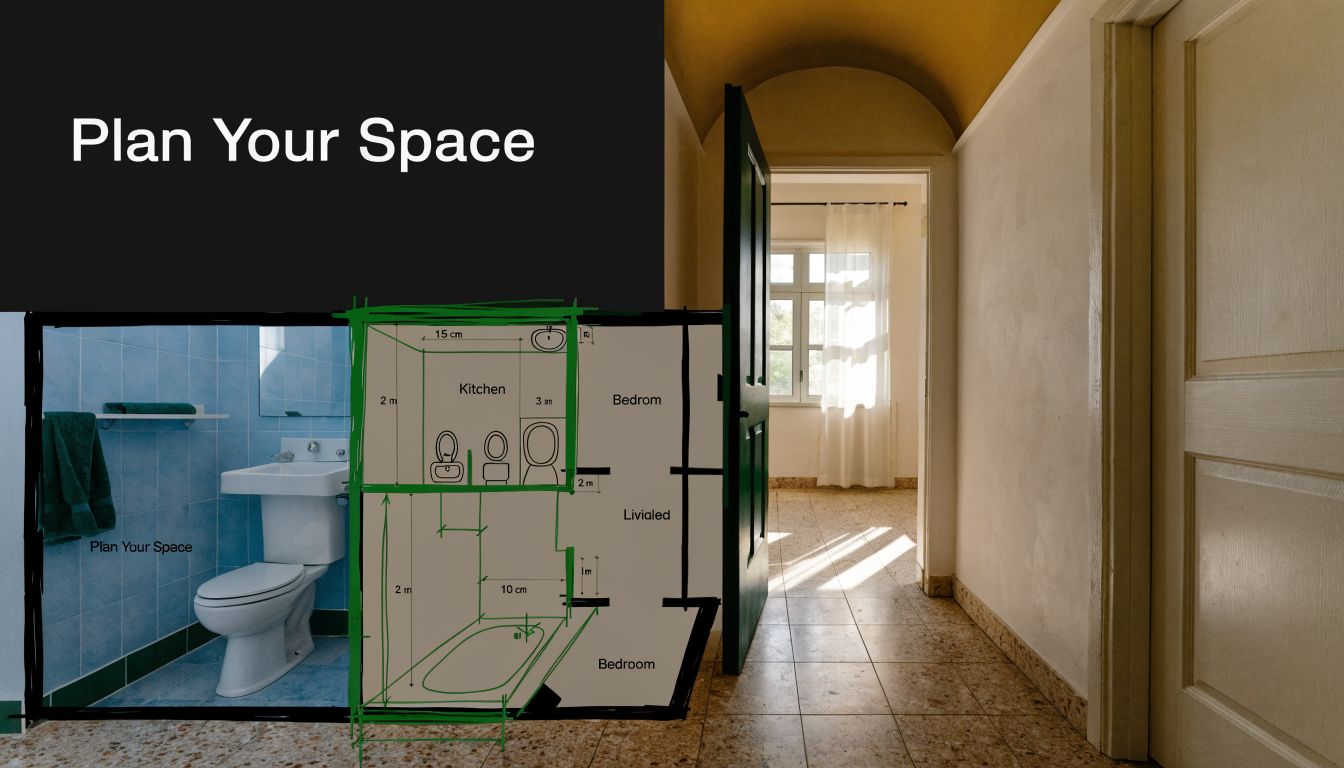
A conceptual floor plan overlaying a bathroom layout onto a hallway and doorway interior design perspective.

The most common locations

A few spots come up again and again because they're practical.

  • Laundry conversion: If the laundry is oversized or poorly laid out, it can often absorb a shower room or combined bathroom.
  • Garage conversion: Useful when internal space is tight, but structural and approval issues need close attention.
  • Upstairs reconfiguration: A common move in older homes where a robe, retreat, or part of a hall can become an ensuite.
  • Ground-floor extension: Best when the existing plan offers no sensible internal option, though this usually carries more build complexity.
  • Large walk-in storage area: Sometimes the simplest answer, especially near existing plumbing.

Each option has trade-offs. A converted internal space often saves money and shortens the build path. An extension gives more freedom but adds more structural, envelope, and drainage work.

What to check first

The first walkthrough should be practical, not aspirational. Ask:

  1. How close is the new room to existing water and waste lines? Shorter runs are usually simpler.
  2. Does the floor structure support the change? Upstairs additions often need more scrutiny.
  3. Can the room ventilate properly? Bathrooms without natural airflow need careful mechanical ventilation planning.
  4. Will the new layout damage another room? A second bathroom shouldn't ruin circulation or storage elsewhere.
  5. Is there enough door clearance and usable floor space? A plan can fit on paper and still feel awkward in real life.

If you're considering an ensuite, looking at examples of ensuite design layouts and planning ideas can help you understand how circulation, vanity position, and shower placement affect the final feel of the room.

Practical rule: The cheapest square metre in a bathroom addition is often the one that already exists inside the house.

Layout matters more than room size

A bathroom doesn't need to be huge to work well. What matters is sequence. If the first thing you hit is the toilet, the room feels clumsy. If the vanity steals the walkway, the room feels tight. If the shower door opens into the traffic line, the room feels badly planned even when the finishes are beautiful.

That's why early visualisation matters. Good 3D planning helps homeowners test whether a nib wall improves privacy, whether a cavity slider frees up circulation, or whether swapping a hinged shower screen for a fixed panel gives the room more breathing space.

Here's what usually improves the layout fast:

  • Place the vanity where it's easy to access
  • Keep the toilet out of the direct sightline where possible
  • Use shower screens and door swings to preserve movement
  • Build in storage from the start
  • Future-proof with walk-in access if the household may need it later

Natural light and privacy

The nicest bathrooms balance light and privacy. A frosted window, skylight, or borrowed light from an adjacent zone can lift a room dramatically. But privacy should be handled early, especially in side setbacks, garages, or upper-level additions overlooking neighbours.

A bright room feels larger. A private room gets used comfortably. You need both.

Budgeting Your Victorian Bathroom Addition A Realistic Cost Breakdown

A bathroom addition can look straightforward on paper, then shift fast once the hidden work is priced properly. In Victoria, the budget is usually driven by drainage, waterproofing, structure, ventilation, and access before anyone starts talking about tile patterns or tapware finishes.

For a full bathroom addition in Victoria, I'd usually tell homeowners to allow about AU$25,000 to AU$60,000 as a practical working range based on SitePro's project experience across Melbourne. A compact bathroom carved from existing internal space can sit at the lower end. An upstairs addition, garage conversion, or new extension can move well beyond that range once structural changes and longer service runs are involved.

Where the money usually goes

The spending pattern is fairly consistent, even though every house throws up its own issues.

Expense Category Estimated Cost (AU$) Percentage of Total Budget
Fixtures and fittings AU$10,000 to AU$20,000 45%
Plumbing and electrical AU$8,000 to AU$12,000 30%
Structural work AU$5,000 to AU$15,000 25%

Those percentages are best treated as a guide, not a fixed formula. In an older Melbourne home, plumbing and structural work often take a bigger share because the existing house was never set up for an extra wet area. In a cleaner internal conversion with easy access to waste lines, more of the budget can go into finishes and joinery.

The biggest budgeting mistake is assuming visible items control the final cost. They don't. A cheaper basin mixer will not offset a new drainage connection under a slab, floor levelling, or reinforcement for an upper-floor bathroom.

What usually pushes the budget up

Some costs are easy to see early. Others only show themselves after site inspection and opening works.

  • Longer plumbing and drainage runs increase labour, materials, and coordination
  • Concrete slab work can add excavation, cutting, and reinstatement costs
  • Garage and upstairs conversions often need structural engineering and floor reinforcement
  • Older homes can uncover out-of-level floors, dated pipework, and framing adjustments
  • Tight side access slows delivery, waste removal, and trades
  • Higher-end selections such as custom vanities, full-height feature tiling, and niche fittings add up quickly

A separate toilet can also affect the number, especially if you are adding or relocating it as part of the new layout. If that forms part of the wider scope, it helps to understand the cost differences in a toilet renovation or relocation project before locking in the final design.

The trade-off that matters most

The clearest cost split is usually conversion versus extension.

Using existing internal space is often the more controlled option because the roof, external walls, and footprint are already there. The trade-off is that you may be working around awkward dimensions or existing doors and windows.

Building outward gives you more freedom with layout and can produce a better end result for family use. It also brings extra costs such as footings, framing, cladding, roofing, insulation, and external weatherproofing. In Victoria, it can also make the approval pathway more involved, which affects both time and consultant costs.

A budgeting approach that works in practice

Start with a realistic range, then rank your priorities. For most households, that means deciding what matters most out of function, storage, durability, and finish level.

A good budget usually includes:

  • the base build cost
  • fixture and fitting selections
  • a contingency for hidden conditions
  • consultant and permit-related costs where required

Keep some room in reserve. In existing homes, surprises are common. Rotten subfloors, pipe relocations, and framing changes are not rare events. They are part of bathroom building, especially in older Victorian housing stock.

The projects that stay under control are usually the ones where the owners are clear on what they are paying for. Better layout, proper storage, easy-clean surfaces, and reliable waterproofing usually give more long-term value than chasing expensive finishes in the wrong room shape.

Navigating Council Permits and Victorian Building Codes

A lot of bathroom additions in Victoria go off track before any tiles are laid. The plans look straightforward, the room seems small, and the owner assumes approvals will be simple. Then the drainage set-out does not suit the existing pipe run, the window is too small for ventilation requirements, or structural changes have already started before a permit is in place.

That is where experience matters. In Victoria, adding a bathroom is regulated building work once you involve structural changes, new plumbing, drainage alterations, or work that triggers a building permit. If those parts are handled poorly, the room may look finished but still create problems at inspection, handover, or resale.
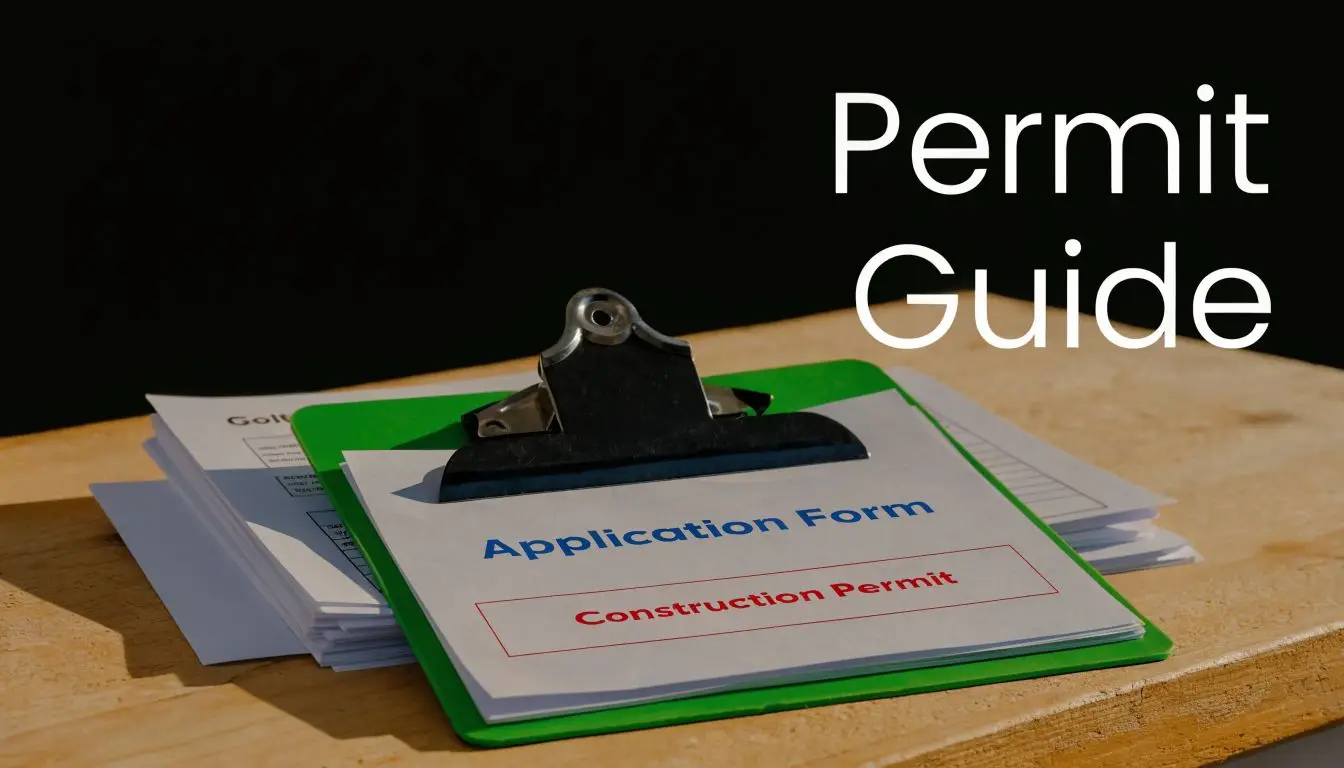
A clipboard with a construction permit application form sits on a wooden desk with papers.

The approvals side

For many bathroom additions, a building permit is required. The plumbing and drainage also need to comply with the applicable standards, including AS/NZS 3500.3. Whether council is directly involved depends on the scope, the siting, and whether planning controls affect the property. That point catches plenty of homeowners in Melbourne, especially on older blocks, heritage-affected sites, or projects that push into an extension.

In practice, projects run by licensed trades and properly documented from the start pass inspections far more reliably than jobs pieced together on the fly. The common failures are predictable. Incorrect pipe fall, poor ventilation to internal rooms, incomplete waterproofing details, and site conditions that were never checked properly before work began.

What homeowners should expect

A compliant bathroom addition usually involves more than one approval path and more than one party checking the work.

  1. Site assessment and measured drawings
    Existing floor levels, wall locations, drainage points, and structural conditions need to be confirmed on site.

  2. Permit documentation
    If a building permit is required, the drawings and supporting details have to reflect what will be built.

  3. Licensed trade work
    Plumbing, electrical, and any structural changes must be carried out by the right registered or licensed professionals.

  4. Mandatory inspections and certificates
    The job needs to be inspected at the right stages, not just at the end when everything is covered up.

For smaller linked projects, such as folding a separate WC into a new bathroom, the layout choices can affect both plumbing and approval requirements. This guide to renovating a toilet within a bathroom reconfiguration is useful if you are trying to connect old and new wet areas without creating compliance issues.

Why builder oversight matters

On a bathroom addition, someone needs to take responsibility for the whole job. Not just the tiling. Not just the plumbing. The whole chain, from drawings and permits through to waterproofing, ventilation, drainage, and final sign-off.

That is why builder oversight matters on regulated work.

I see the same mistake with first-time renovators. They speak with individual trades, get a rough idea of costs, and assume the pieces will come together on site. They usually do not. One trade works from an old plan, another makes a site decision without checking the permit drawings, and the owner gets left sorting out delays and variation costs.

Common trouble spots in Victoria

Some issues come up again and again on Melbourne bathroom additions:

  • Drainage runs that looked fine on paper but do not work with the actual floor height
  • Internal bathrooms without adequate mechanical ventilation
  • Structural alterations started before permit approval
  • Assumptions that a small room means permit-free work
  • Waterproofing details that do not suit the substrate or room design
  • Older homes hiding rotten framing, uneven floors, or outdated services

Older Victorian housing stock adds another layer. Weatherboard homes, post-war brick veneers, and terrace-style renovations often carry hidden conditions that affect compliance as much as cost. A bathroom addition in a new home and one in a 1930s house are rarely the same exercise.

The jobs that stay under control are the ones where compliance is treated as part of the build from day one. Not as paperwork to sort out after the room is already closed up.

The Construction Sequence From Frame to Taps

A bathroom addition can look like it is racing ahead one week, then lose time fast because one step was done too early or checked too late. On Melbourne jobs, the build itself is usually straightforward. Keeping the sequence tight is what protects the budget, the finish, and the compliance side of the work.
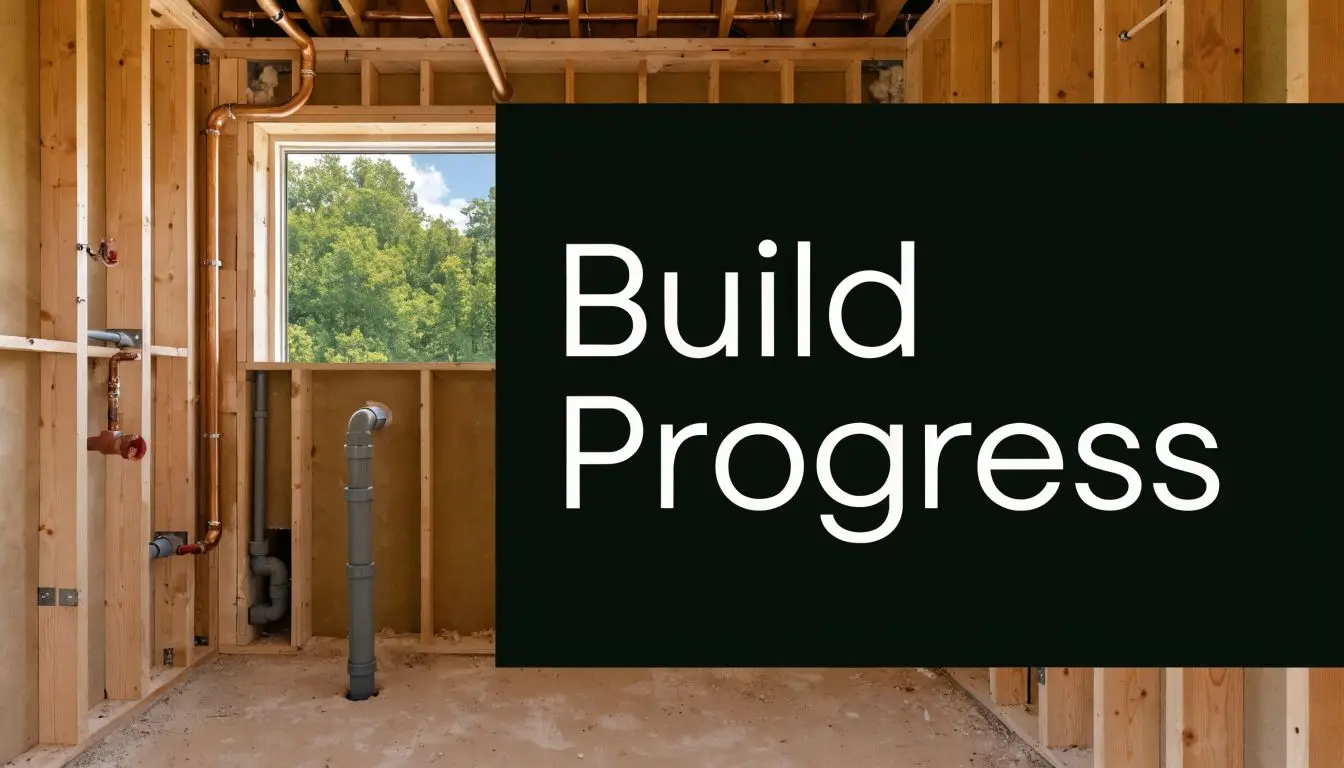
An unfinished room under construction showing exposed wooden wall studs and newly installed copper and PVC plumbing pipes.

The first physical stage is usually demolition or strip-out, if the new bathroom is going into an existing room, part of a laundry, a garage conversion, or an upstairs rework. Once the room is opened up, the condition of the house becomes clear. I often find floor levels out by more than expected, old pipework in the wrong spot, or framing that needs repair before any new work starts.

From there, the structure and services get set in place.

  • Framing: new walls, door openings, shower hobs, wall niches, and any structural changes are built to the approved layout
  • Plumbing rough-in: water, waste, and drainage points are set before the room is lined
  • Electrical rough-in: lighting, switches, power, heated rails, and exhaust wiring are positioned before surfaces are closed

This stage gives the builder one of the last chances to catch layout issues cheaply. A shifted waste point or a niche that clashes with pipework is manageable here. It is expensive once waterproofing, tile, and fit-off have started.

The waterproofing checkpoint

Waterproofing is the part of the job that deserves the least guesswork. Industry data consistently shows that a large share of bathroom rectification work comes back to moisture ingress. In practice, that means small mistakes at junctions, penetrations, and floor-to-wall transitions can lead to major repair work later.

In Victoria, wet area waterproofing needs to suit the substrate, the room layout, and the intended use of the space. The membrane system matters, but so does the preparation underneath it. If the floor is uneven, the falls are wrong, or the sheeting is not installed properly, the membrane is already starting from a weak position.

Rushing this stage is one of the costliest mistakes on a bathroom addition.

The finishing sequence

Once rough-ins are checked and waterproofing has cured, the room starts to look like a bathroom. The order still matters.

  1. Wall linings and floor preparation
  2. Tiling and grout
  3. Cabinetry, toilet, shower fittings, tapware, and screens
  4. Electrical fit-off
  5. Painting, sealing, testing, and final adjustments

This is also the point where poor planning becomes obvious. A vanity can crowd a doorway. A shower screen can leave too little clearance. A towel rail can end up fighting for the same wall space as a switch plate. Good documentation reduces that, but site checking still matters because older Melbourne homes rarely give perfectly square rooms or level floors.

If you want a realistic sense of timing between rough-in, waterproofing, tiling, and fit-off, this guide on how long a bathroom remodel should take helps set expectations.

Small build choices that make a big difference

A lot of value gets decided before the taps go on. If the room might need easier access later, frame for it now. A wider doorway, a hobless shower, or noggings for future grab rails cost far less during construction than after the bathroom is finished.

Other choices that usually pay off are straightforward:

  • Recessed niches to keep storage off the floor area
  • Wall-hung vanities where every millimetre counts
  • Cleaner shower detailing to reduce maintenance
  • Stronger mechanical ventilation in internal or low-airflow bathrooms
  • Simple alignment of fittings and fixtures so the room feels deliberate and balanced

A good bathroom addition is built in layers. Each layer has to be right before the next one starts. That is how you get from bare frame to finished taps without paying twice for the same work.

Choosing Your Builder and Finalising Your Design

The builder you choose will shape the outcome as much as the budget or the plan. A bathroom addition asks for more than decent workmanship. It needs coordination. The room has to be designed properly, documented clearly, built in the right order, and handed over without unresolved compliance issues.

That's why homeowners should spend more time vetting the builder than choosing feature tiles.

What to ask before signing

The basics matter. Ask whether the builder is appropriately registered, fully insured, and experienced with structural bathroom additions rather than cosmetic bathroom renovations alone. Then go further.

Ask how they handle:

  • Documentation and approvals
  • Trade sequencing
  • Waterproofing responsibility
  • Variations and cost changes
  • Communication during the build
  • Defect management after completion

You're looking for clarity, not charm. A strong builder can explain the build pathway in plain language.

Why design should be locked in early

Many expensive problems don't come from bad construction. They come from unfinished decisions. A homeowner changes the vanity width once plumbing is roughed in. The shower screen conflicts with a light switch. The wall niche lands in the same space as pipework. Suddenly the build is absorbing changes that should have been solved before work started.

That's where detailed visual planning helps. Internal project data from more than 50 Victorian bathroom projects shows that 3D modelling can cut mid-project changes by up to 25%, making budgets and timelines more reliable. That's the strongest argument for resolving layout, fixture positions, and joinery before demolition begins.

The difference between a quote and a build plan

A cheap quote can hide a vague scope. A better quote usually reflects better thinking. It shows what is included, what assumptions have been made, and where allowances sit. That clarity matters most on bathroom additions because small omissions become expensive once walls are opened.

If you want a project that feels organised from the start, work with a team that handles the process end to end. SitePro Bathrooms does exactly that, from concept and 3D planning through construction and handover. If you're ready to price your project properly, you can request a tailored bathroom renovation quote from SitePro Bathrooms.

Frequently Asked Questions About Bathroom Additions

Is adding a bathroom worth it in Victoria

Usually, yes, if it fixes a real problem in the way the home works.

A second bathroom often makes the biggest difference in older Melbourne homes with one original bathroom and a growing family, regular guests, or a main bedroom that would benefit from an ensuite. In resale terms, buyers respond well to practical improvements they can use straight away. The best return usually comes from adding the right bathroom in the right spot, not from overspending on finishes that do not suit the area or the house.

Is it better to convert space or build an extension

If you have usable internal space, a conversion is often the simpler and cheaper option. Converting part of a laundry, rear hallway, oversized bedroom, or underused study can reduce structural work and keep approval pathways more straightforward.

An extension can still make sense, especially if the existing floorplan is already tight. But once you push outside the current building envelope, costs usually rise fast. Footings, external walls, roofing, stormwater, setbacks, and site access all start to matter more, and in Victoria that can also mean a more involved permit process.

Can I add a bathroom in an apartment

Sometimes, but apartment bathrooms are rarely simple.

The main limits are strata approval, waterproofing requirements, acoustic treatment, and where existing waste pipes and water services run. If the proposed bathroom sits a long way from the stack, the design may need reworking or the project may stop making financial sense. In older blocks around Melbourne, that question comes up a lot.

How do I know if the layout is workable

A workable layout needs more than fittings that physically fit on paper. It needs enough clearance to use the room comfortably, practical door swings, proper ventilation, compliant waterproofing details, and plumbing runs that can be built without creating bigger problems elsewhere.

If the toilet is jammed behind a door, the vanity has no useful storage, or the shower only works with custom compromises everywhere, the plan needs more work.

What's the biggest mistake homeowners make

Committing to the idea before testing the site.

The expensive mistakes usually start with assumptions. Homeowners see an unused corner and assume it can take a bathroom. Then the floor wastes do not fall the right way, the wall carries load, the ceiling space is too tight for exhaust ducting, or a permit issue appears late. In Victoria, those details matter early. A quick feasibility check saves far more than it costs.

If you're planning on adding a bathroom in Highett or anywhere across greater Melbourne, the smartest first step is a proper site-based assessment. SitePro Bathrooms can help with design, layout planning, 3D visualisation, construction, and a clear quote that matches the actual conditions of your home.
  • siteprobathrooms

Modern Bathroom Renovations: 2026 Highett Design Guide

If you're in Highett staring at a bathroom with tired tiles, poor storage, fogged mirrors, and a shower that never quite feels right, you're in the same position as many Victorian homeowners. The room still works, technically. But it doesn't work well. It's slow in the morning, awkward at night, and every dated finish makes the whole space feel older than the rest of the house.

That's usually when modern bathroom renovations move from “nice idea” to practical priority. You want a room that's easier to clean, better organised, properly ventilated, and built for the way your household lives. You also want something that won't feel dated again in a few years.

In Highett and the surrounding bayside suburbs, that decision often comes with extra layers. Older homes can hide plumbing limitations, uneven walls, and layouts that were never designed for contemporary fixtures. Even newer homes can suffer from poor waterproofing, weak ventilation, and builder-grade finishes that haven't aged well. Good planning matters because bathroom renovations aren't just about selecting attractive tapware and tiles. They involve structure, drainage, compliance, and trade coordination.

There's also a strong financial case for doing the job properly. The global bathroom remodeling market reached USD 412.80 billion in 2025 and is projected to reach USD 428.07 billion in 2026, with the residential segment making up about 85.8% of the market, which shows how firmly bathrooms now sit in the category of core home investment rather than optional luxury, according to Future Market Insights' bathroom remodeling market outlook.

Your Journey to a Modern Bathroom Starts Here

A first bathroom project usually starts with mixed signals. You've saved inspiration photos. You know you want cleaner lines, better lighting, and more storage. At the same time, you're wondering what you're permitted to change, what the job is likely to cost, and how to avoid spending heavily on a room that looks good online but performs poorly in real life.

That uncertainty is normal. A modern bathroom should feel simple when finished, but it takes careful decisions to get there. The layout has to suit the room. The materials have to handle moisture. The plumbing has to support the fixtures you choose. The workmanship has to hold up after years of steam, water, and daily use.

For most Highett homeowners, the smartest starting point is to narrow the project into three practical questions:

  1. What isn't working now
    Is the issue storage, shower size, lighting, cleaning effort, poor ventilation, or a combination of all of them?

  2. What level of change do you want
    Some projects keep the existing footprint and upgrade finishes. Others move walls, rotate the vanity, or replace a bath with a walk-in shower.

  3. What can't be compromised
    This usually includes waterproofing, drainage falls, ventilation, compliant electrical work, and using the right trades.

Practical rule: If a renovation decision improves the look but weakens drainage, access, cleaning, or compliance, it's the wrong decision.

Modern bathrooms work best when the design follows the room's daily demands. A family bathroom needs different priorities from an ensuite. An investment property needs different selections from a forever home. A compact older bathroom in Highett often benefits more from smarter layout planning than from expensive finishes alone.
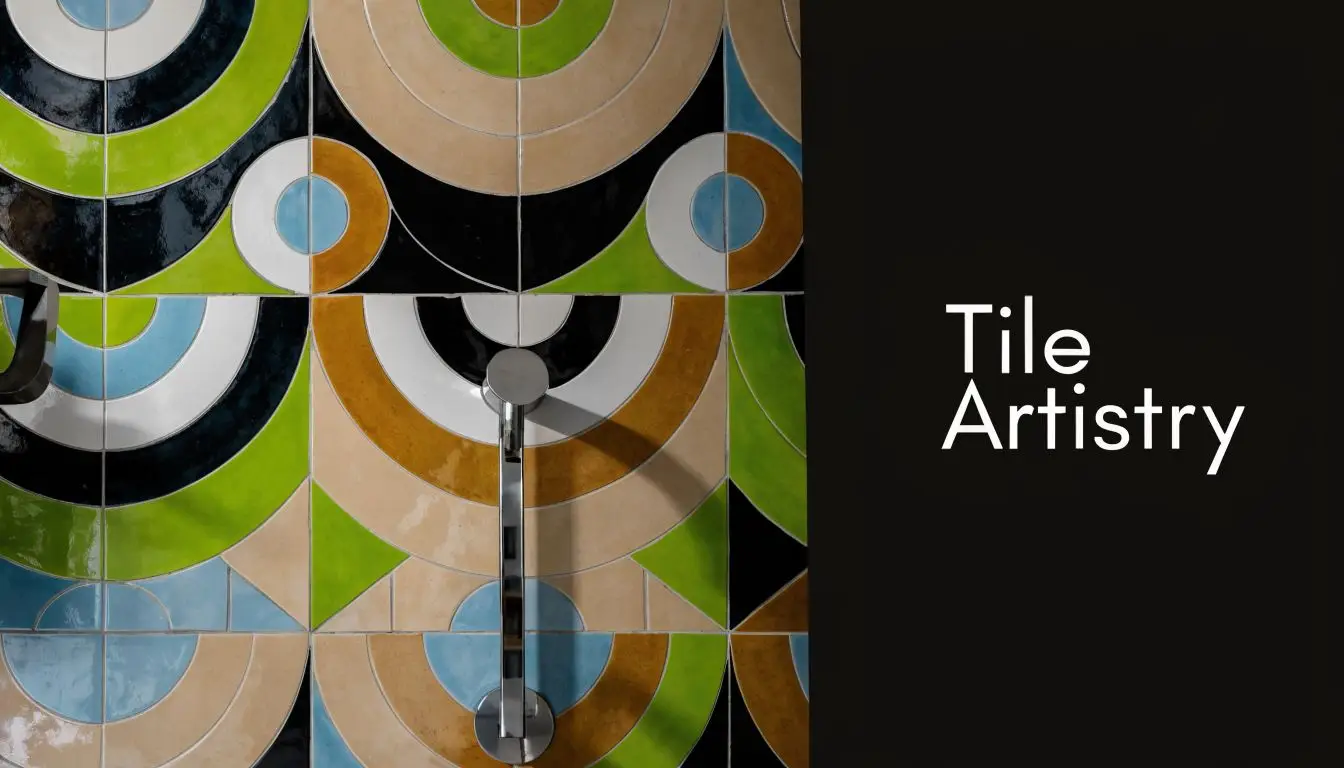
The strongest results come from balancing new bathroom ideas with buildability. That's what turns inspiration into a bathroom you'll still be happy with after the novelty wears off.

Defining the Modern Bathroom Aesthetic

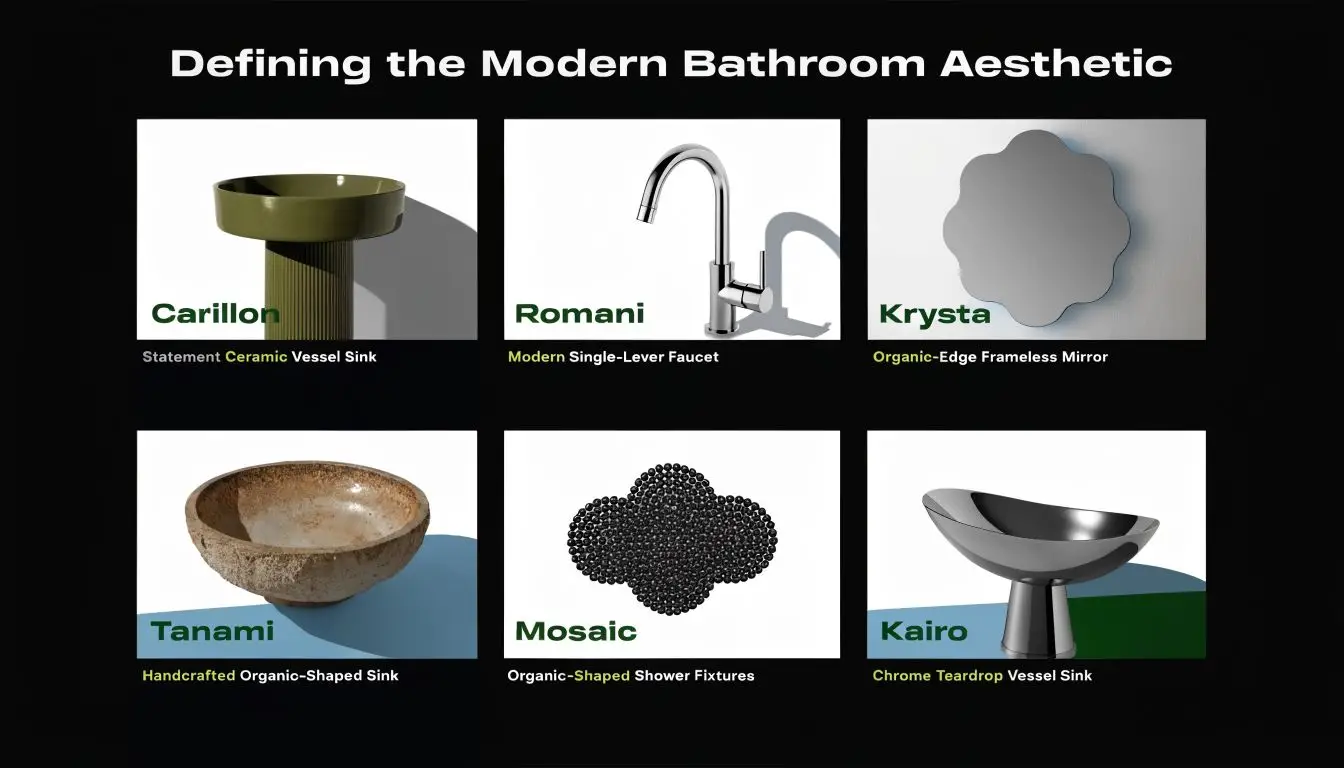
Modern doesn't mean cold, empty, or overly glossy. In practice, the best modern bathroom renovations use restraint. Fewer visual interruptions, cleaner detailing, and materials that do their job without asking for constant attention. That's why many well-designed designer bathrooms feel calm rather than busy.

The look usually comes from a handful of consistent choices. Flat or lightly profiled cabinetry. Minimal grout lines. Frameless or low-visual-weight shower screens. Hardware in a single finish. Open wall space around mirrors and vanities. Good lighting that flatters the room instead of fighting it.

A gallery showcasing six unique, modern bathroom fixtures including sinks, a faucet, a mirror, and shower tiles.

What modern design gets right

A well-composed modern bathroom usually relies on contrast in small doses rather than decoration in bulk. You might see warm timber against white porcelain, brushed metal against soft stone tones, or a floating vanity balanced by a full-height tiled wall. The room feels deliberate because every element has a reason to be there.

That matters in Highett homes, where bathrooms often aren't large. Cluttered detailing shrinks a room quickly. Clean lines and visual continuity make a compact space read larger and feel more organised.

These are the design moves that generally work:

  • Large uninterrupted surfaces: They make walls and floors feel less chopped up.
  • Natural texture: Timber tones, stone-look surfaces, and matte finishes stop the room from feeling clinical.
  • Integrated storage: Recessed niches, mirrored cabinets, and vanity drawers reduce bench clutter.
  • Simple fixture language: Rounded all over, or angular all over, usually looks better than mixing too many shapes.

The tile decision that changes the whole room

One of the clearest markers of modern bathrooms is the move toward large-format tiling. Modern bathroom renovations commonly use tiles from 24×24 inches to 48×96 inch porcelain slabs, and the reduced grout joints help create the expansive look people want while also lowering cleaning effort because grout is the most maintenance-demanding part of a tiled bathroom, as explained in this guide to modern bathroom design and tile scale.

That design choice has a trade-off. Large-format tiles look refined, but they also expose installation errors. Lippage, poor set-out, misaligned cuts, and uneven joints are much easier to see when the room is otherwise minimal.

Fewer lines on the wall means every line has to be right.

There's another important distinction. Large-format tile may suit walls and some general floor areas, but shower floors are different. They need proper drainage control and slip resistance, which is why smaller mosaics are often the right technical answer even when the rest of the room uses larger pieces. In a modern bathroom, that contrast isn't a compromise. It's good design backed by function.

What usually dates a “modern” bathroom too quickly

Some bathrooms miss the mark because they chase trend over durability. Common problems include oversized statement basins that leave no bench space, awkwardly dark finishes that show every watermark, and decorative feature tiles that dominate a small room.

A modern bathroom should still be easy to live with on a rushed weekday. If the room looks sharp but gives you nowhere to put a toothbrush, towel, or cleaning product, the design hasn't been resolved.

Planning Your Renovation and Budgeting for Highett Homes

Budgeting gets easier once you stop thinking of a bathroom as one price and start seeing it as a set of moving parts. The final spend depends on layout changes, waterproofing requirements, fixture level, tile selection, custom joinery, and how much remedial work the room needs once demolition starts. Older Highett homes can surprise you here. Out-of-square walls, ageing pipework, and previous patch repairs often affect scope.

The first useful distinction is between a cosmetic update and a full renovation. If you keep the plumbing where it is, retain a workable layout, and focus on new finishes, the budget pressure usually stays lower. Once you move waste points, alter walls, enlarge showers, or replace everything down to the substrate, costs rise quickly.

Cost ranges homeowners can use for early planning

The table below gives practical planning ranges in AUD for Highett and broader Victorian projects. These are working estimates only, not fixed quotes. Site access, product selection, and hidden condition issues can change the figure materially.

Renovation Type Estimated Cost Range (AUD)
Cosmetic bathroom refresh $12,000 to $18,000
Standard full bathroom renovation $18,000 to $30,000
Mid-range modern bathroom renovation $30,000 to $45,000
Premium designer bathroom with layout changes $45,000 to $70,000+
Compact ensuite renovation $16,000 to $28,000
Accessible or future-proofed bathroom with specialist detailing $30,000 to $55,000+

Those ranges are most useful when paired with a scope list. Instead of asking “What does a bathroom cost?”, ask what your budget needs to cover.

What pushes the price up

In local projects, these are the biggest budget drivers:

  • Layout changes: Moving the shower, toilet, or vanity usually affects plumbing, floor waste positions, and wall repairs.
  • Tile selection and coverage: Full-height tiling, large-format materials, and difficult set-outs take more labour and skill.
  • Joinery level: Off-the-shelf vanities cost less than fully custom cabinetry built around an awkward room.
  • Hidden repairs: Damaged sheeting, poor previous waterproofing, and structural rectification add cost without adding visible glamour.
  • Fixture complexity: Wall-hung fittings, in-wall cisterns, recessed storage, and integrated lighting all increase labour coordination.

A bathroom renovation can still be financially sensible. A well-executed remodel delivers about 70 to 80% return on investment, and the median cost for primary bathroom renovations reached USD 13,500 in 2022, up 50% year over year, according to Market Research Future's bath remodeling market report. Those figures aren't a substitute for a project-specific estimate in Victoria, but they do reinforce a broader truth. Bathrooms are one of the rooms where careful spending can improve both daily use and resale appeal.

Budgeting without fooling yourself

A practical budget should separate what you want from what the room requires. Put your money into the hard-to-change items first: waterproofing, drainage, tiling quality, ventilation, and reliable fixtures. Decorative upgrades can sit after that.

Set your “must-have” list before you choose finishes. Otherwise the budget gets consumed by visible items and the hidden essentials get squeezed.

If you're planning your first project, allow enough flexibility to handle discoveries during demolition. Bathroom renovations almost always become harder and more expensive when owners commit every dollar to the pretty part of the room.

Selecting Materials and Fixtures for Durability and Style

A bathroom can look finished on handover day and still be a poor long-term fit. That usually comes down to selections. Materials need to survive moisture, cleaning products, temperature shifts, and daily wear. Stylish choices matter, but the better question is whether a finish still works after years of steam, splashes, and hard use.

The easiest way to choose well is to compare products by maintenance burden, repairability, and how forgiving they are in a wet area. Some finishes look sharp under showroom lighting and become irritating almost immediately in real homes.

A design collage displaying various interior materials and fixtures like metal hardware, wood cabinetry, marble tiles, and ceramics.

Vanities, benchtops, and surface choices

For vanity cabinetry, laminate and polyurethane finishes are common because they're practical and easier to maintain than many raw or lightly sealed timber options. Timber can work beautifully, but it needs the right detailing and realistic expectations around movement and upkeep. In a family bathroom, consistency often beats novelty.

Benchtops should suit both water exposure and the visual tone of the room. Porcelain and engineered surfaces are popular because they can offer a crisp, modern look with relatively straightforward cleaning. Matte finishes tend to hide water spotting better than high gloss. That's a small detail, but it affects how the room feels on an ordinary Tuesday morning.

Tile choices need the same mindset. The wall tile that looks elegant in a sample board may not be the best choice if every splash mark shows up instantly. If you're weighing style against maintenance, start with how much effort you're willing to put in week after week.

For a more detailed look at tile decision-making, this guide on how to choose bathroom tiles is worth reading before you lock in finishes.

Fixtures should suit the plumbing, not just the mood board

Many initial projects struggle at this stage. Homeowners purchase advanced shower systems, touchless tapware, or a smart toilet because the product fits their design brief, then discover the existing plumbing doesn't support it properly.

Before installing modern fixtures, especially smart toilets, touchless faucets, and advanced shower systems, an in-depth plumbing assessment is essential because existing water pressure and flow rates need to be verified for compatibility with those fixtures, as outlined in this bathroom remodel plumbing checklist.

That affects more than performance. It can change the entire project scope. If the plumbing supports your planned fixtures, great. If it doesn't, you may need different products, upgraded services, or layout changes. Better to know that early than after ordering expensive items.

Selections that usually age well

Some combinations remain durable and easy to live with:

  • Wall-hung vanity with drawers: Easier floor cleaning and better storage access than deep cupboards.
  • Porcelain wall and floor surfaces: Hard-wearing and available in restrained finishes that suit modern bathrooms.
  • Simple mixer and shower forms: Cleaner visually and often easier to service than overly complicated feature pieces.
  • Mirrored storage: Adds utility without making a small room feel crowded.

One practical option for homeowners who want selections tied to a full renovation process is using a specialist service such as SitePro Bathrooms, which handles bathroom design, 3D drawings, on-site assessment, and construction coordination as part of an end-to-end scope. That setup can help keep material choices aligned with buildability, rather than treated as a separate showroom exercise.

Waterproofing Ventilation and Legal Compliance

The most expensive bathroom failures in Victoria are often hidden behind the finished surfaces. The room might look polished, but if the waterproofing is poor, the substrate is compromised, or the ventilation is inadequate, the renovation hasn't been done properly. Modern bathroom renovations demand more than a good eye. They require disciplined execution where the homeowner won't see it.

This is the point many first-time renovators underestimate. Tiles aren't the waterproof layer. Grout isn't the waterproof layer. Silicone alone doesn't solve movement or moisture management. The performance of the room depends on the systems beneath the finish.

Waterproofing is not the place to cut corners

In practical terms, compliant waterproofing protects adjoining rooms, framing, flooring, and the long-term integrity of the bathroom itself. When waterproofing fails, the signs often arrive late. Swollen skirting, mould smell, loose tiles, stained ceilings below, or soft wall linings. By then, the repair usually means opening the room back up.

For Highett homeowners, the right question isn't whether waterproofing is included. It's how it's being prepared, applied, cured, detailed around penetrations, and documented. Shower niches, hob transitions, wall-floor junctions, and waste areas are all common failure points if the work is rushed or badly sequenced.

A bathroom can survive a design mistake. It won't survive a waterproofing failure for long.

Ventilation decides how the room ages

Good ventilation protects finishes and keeps the room healthier to use. Without it, steam hangs in the space longer, mirror cabinets stay damp, paint degrades faster, and mould becomes much harder to control. In smaller bathrooms and ensuites, this issue shows up quickly.

Mechanical extraction should be planned as part of the renovation, not treated as an afterthought. That includes fan placement, duct routing, and the overall lighting plan. If you're reviewing fitting choices, this article on downlights in bathrooms helps explain how lighting decisions interact with wet-area practicality.

Why a registered builder matters in Victoria

Legal compliance matters just as much as workmanship. Depending on the project scope and value, Victorian renovation work can require the right registration, permits, and appropriately licensed trades. That's one reason many homeowners look specifically for registered builders unlimited or similarly qualified professionals with the authority to manage larger and more complex residential works. The exact registration pathway should match the nature of the project, but the underlying principle is simple. If the work requires compliant building oversight, the person taking responsibility needs to be properly registered to do it.

That protects the homeowner in several ways:

  • Insurance pathway: Properly documented and compliant work is easier to support if something goes wrong.
  • Trade coordination: Plumbing, electrical, waterproofing, and structural tasks need correct sequencing.
  • Accountability: There's a responsible party attached to the scope, not a loose collection of subcontractors.
  • Resale confidence: Future buyers and their advisers often scrutinise bathroom work closely.

Bathrooms aren't minor rooms anymore. The scale of investment homeowners are making reflects that. The global market figures cited earlier support the same conclusion: bathrooms have become essential residential assets, not side projects. As spending and expectations rise, professional compliance becomes more important, not less.

If a contractor talks mainly about finishes and barely mentions waterproofing, ventilation, registration, or inspections, that's a warning sign. A modern bathroom should be attractive. It should also be legal, durable, and built to stay that way.

Maximising Space and Accessibility in Your Layout

A bathroom doesn't need to be large to feel generous. It needs the right layout. In many Highett homes, the challenge isn't total floor area. It's that the room was planned for a different era. Swinging doors collide with vanities, bulky shower screens cut up the sightline, and storage is either too shallow or in the wrong place.

Good layout work solves daily friction first. You should be able to move through the room naturally, open drawers fully, dry off without banging an elbow, and clean around fittings without gymnastics. That's what makes a bathroom feel modern, even before the finishes go in.

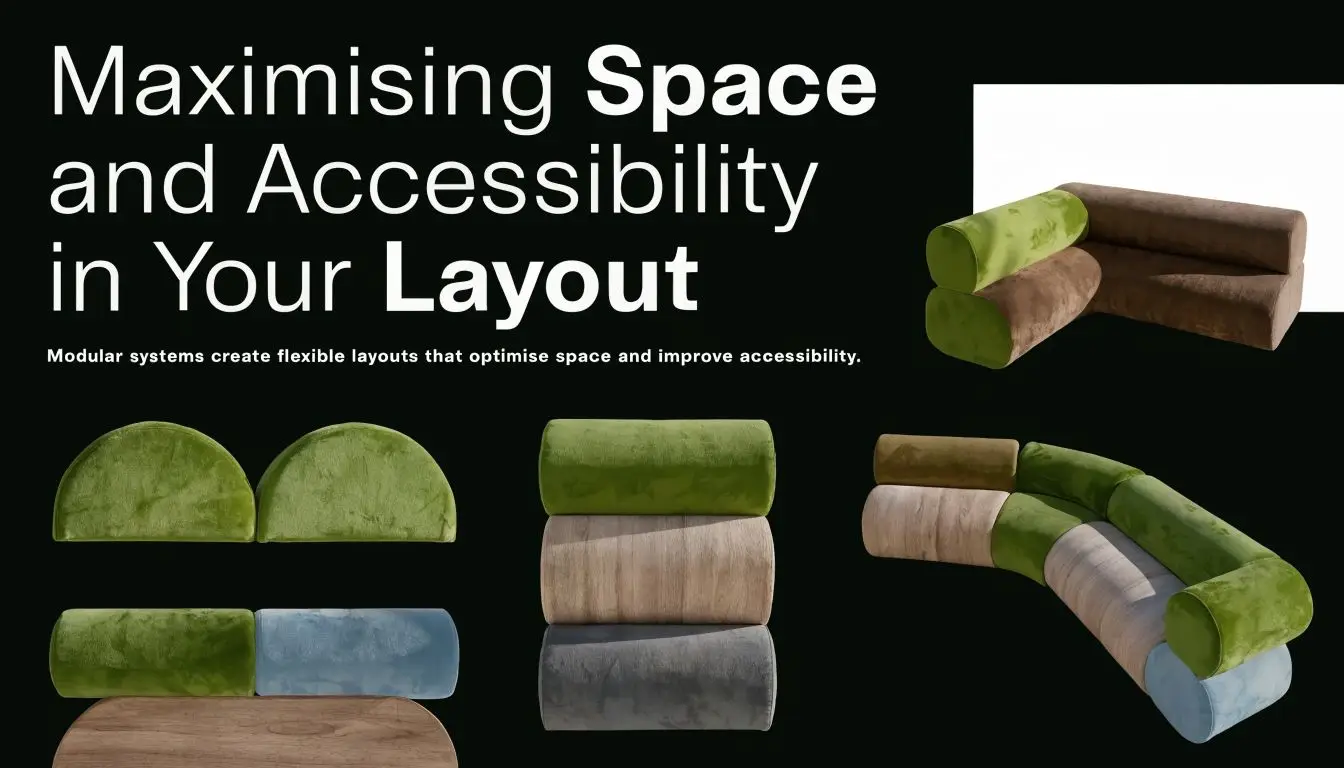
A marketing graphic showcasing modular furniture components that create flexible, space-saving layouts for modern home interior designs.

Small-space moves that work in older Victorian homes

A few layout decisions consistently improve compact bathrooms:

  • Wall-hung vanity: Exposes more floor area and makes the room easier to clean.
  • Frameless shower screen: Keeps the visual line open instead of breaking the room into pieces.
  • Large mirror: Reflects light and gives a narrower space more presence.
  • Recessed storage: Niches and in-wall cabinets reduce the need for protruding shelves.
  • Sliding or well-planned door swing: Prevents awkward conflicts with basins, towel rails, or toilets.

These choices work because they reduce visual and physical obstruction. The room feels calmer when fewer elements interrupt your eye line.

Accessibility is smart planning, not a specialist add-on

Many homeowners only think about accessibility when an immediate need appears. It's better to plan for it while the room is already being rebuilt. That doesn't mean making the bathroom look clinical. It means choosing a layout that remains comfortable and safe over time.

Useful future-proofing features include step-free shower entry, strong wall provisions for future grab rails, wider circulation areas, practical vanity heights, and tapware that's easy to use with limited grip strength. A handheld shower on a rail is another simple inclusion that improves flexibility for children, older adults, and anyone with temporary mobility issues.

The best accessible detail is the one you barely notice because it fits the room naturally.

A curbless shower, for example, can look cleaner and more contemporary than a traditional hobbed shower while also making access easier. That's a rare case where style and function point in exactly the same direction.

Think beyond the current household

Families change. Parents age. Injuries happen. Guests stay over. Good bathroom planning accounts for more than today's routine. If your renovation can improve safety and convenience now without compromising style, it's usually worth doing.

This matters even more in homes where the bathroom will serve multiple generations. A layout that only suits one stage of life often forces another renovation sooner than expected. Smart modern bathrooms don't just photograph well. They adapt well.

The Renovation Journey From 3D Design to Completion

A bathroom renovation feels manageable when each stage is resolved before the next one starts. It feels chaotic when decisions are made on the run. The difference usually comes down to planning, documentation, and who is coordinating the trades. Homeowners often assume the hard part is choosing the tiles. In reality, the hard part is keeping design, buildability, and sequencing aligned from day one.

That's where a proper process earns its keep. A bathroom should be designed as a buildable room, not as a collection of disconnected selections.

It starts on paper before it starts on site

The early stage should answer the big questions clearly. What stays. What moves. What the room needs to do better. Which fixtures fit. How storage is handled. How the lighting works. What the finished sightlines will be from the doorway.

A 3D design is useful because it turns vague ideas into something testable. You can assess proportions, recess locations, vanity scale, tile balance, and circulation before demolition begins. That's especially helpful in smaller Highett bathrooms, where a few centimetres in the wrong place can make the room feel cramped.

Selections also need to be finalised in enough detail that the trades can work without guesswork. If the wall mixer height, niche position, tile set-out, mirror dimensions, and electrical rough-in points are still fluid halfway through, delays and compromises tend to follow.

Construction only runs smoothly when trades are coordinated

Once demolition begins, the room moves through a sequence that has to be respected. Strip-out. Substrate preparation. Plumbing and electrical rough-in. Waterproofing. Tiling. Fit-off. Joinery. Final fixtures. That order sounds simple, but there are dozens of smaller decisions within it that affect quality.

The homeowner shouldn't be left managing those moving parts alone. Plumbers, electricians, tilers, waterproofers, and carpenters all rely on timing and accurate information. If one stage slips or gets installed incorrectly, the impact usually lands on the next trade.

A managed project should also reduce disruption to the household. That means realistic timelines, clear communication about access, sensible material delivery planning, and making sure variations are identified early rather than buried until the end.

If you're trying to judge whether a proposed timeline sounds realistic, this article on how long a bathroom remodel should take gives a useful planning reference.

What a well-run renovation looks like

When the process is working, you'll notice a few things:

  • Decisions are documented: There's less back-and-forth on site because positions and selections were resolved early.
  • Questions are specific: Trades ask about exact details, not broad guesses.
  • The room improves in logical stages: You can see the structure of the project, not just scattered activity.
  • Quality checks happen before the next layer covers the previous one: Problems are easier to fix when caught early.

Authentic confidence provides the true advantage. You understand the process, the underlying reasons, and the specific individuals accountable for every phase of the work. That clarity transforms a complex project into a controlled one.

A successful modern bathroom renovation isn't the result of one smart tile choice or one expensive fitting. It comes from a chain of good decisions, made in the right order, and executed by the right people. That's how a dated bathroom in Highett becomes a room that looks sharp, functions properly, and still feels right long after handover.


If you're weighing layouts, finishes, or the practical side of bathroom renovations in Highett, start with the room's real constraints first. Once the plumbing, waterproofing, ventilation, compliance, and layout are solved, the design choices become much clearer. That's when modern bathrooms stop being overwhelming and start becoming buildable.

  • siteprobathrooms

Expert Guide To Bathroom Displays Melbourne

You're probably in the same place most bathroom renovation clients start. You've saved photos of modern bathrooms, shortlisted a few designer bathrooms you like, and maybe visited a showroom or two, only to leave with more ideas than answers.

That's normal. Bathroom displays melbourne can be inspiring, but inspiration on its own doesn't build a bathroom. A display only becomes useful when you treat it as a working reference for selections, layout decisions, measurements, and buildability. That's where many projects either sharpen into a clear plan or drift into expensive guesswork.

The smartest showroom visits aren't casual browsing trips. They're data-gathering sessions for your bathroom renovations. Every vanity depth, tile finish, drawer layout, screen profile, and tapware finish you inspect should help answer a practical question about your own room. Will it fit. Will it function. Will it last. Will it still work in five years.

Turning Inspiration into Action for Your Bathroom Renovation

A good showroom visit starts before you look at colours or tapware. It starts with a shift in mindset. Don't walk in asking, “What do I like?” Walk in asking, “What can work in my bathroom?”

That approach matters because renovating isn't a fringe decision anymore. The Australia Bathroom Fittings Market is projected to grow from USD 429.82 million in 2023 to USD 790.20 million by 2032, at a CAGR of 7.00%. That tells you something useful. Homeowners are continuing to put serious value into bathroom upgrades, and they're treating them as meaningful property improvements rather than cosmetic spending.

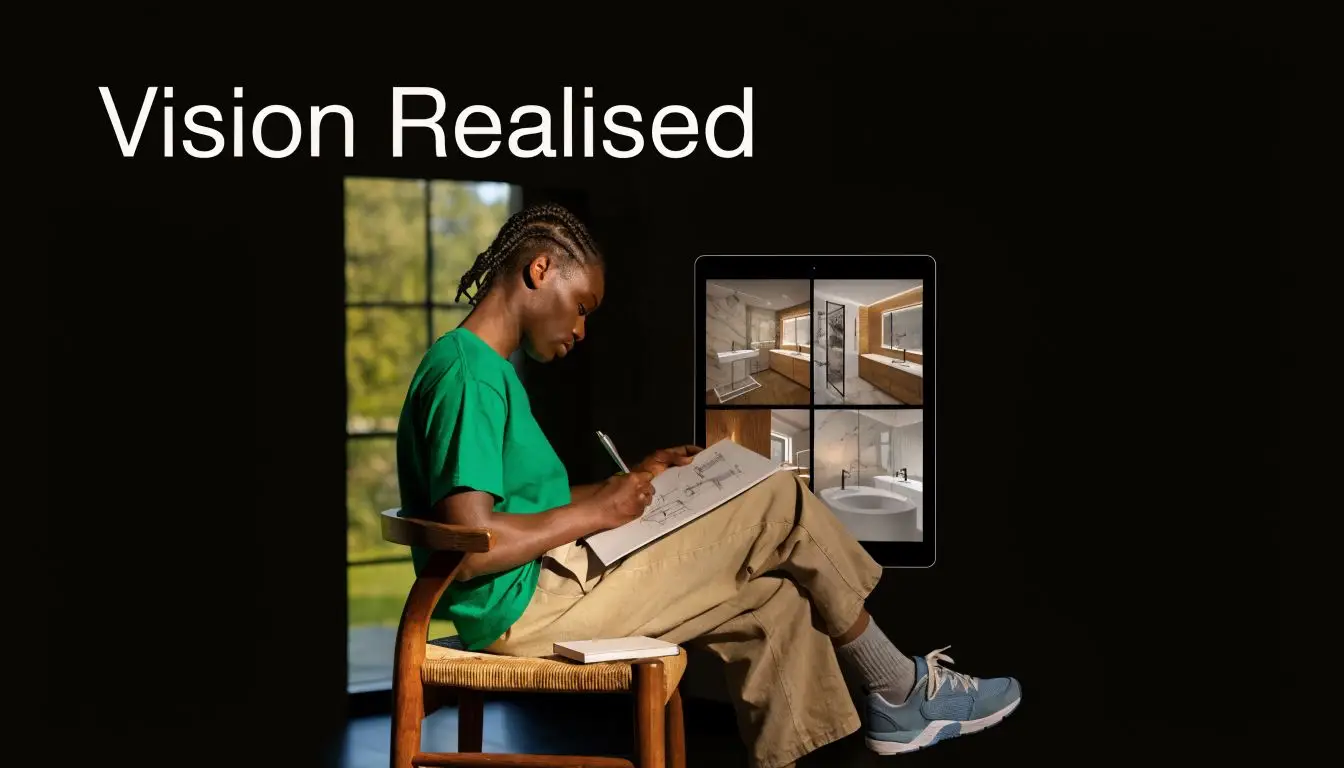
A creative professional sketching interior designs for a bathroom project while viewing digital bathroom renders.

Why showroom visits often go wrong

Visitors often enter a display with the right intention and the wrong process. They react to styling instead of analysing the setup. They remember the feature wall but forget to check whether the vanity projection would crowd their doorway at home. They focus on a freestanding bath without asking whether the room can carry that layout comfortably.

A showroom is staged to sell a feeling. Your job is to extract useful information from that feeling.

Three things matter more than the wow factor:

  • Layout clues that show how much room fixtures really need
  • Material decisions that affect maintenance, durability, and cleaning
  • Specification details that can feed into design drawings and quoting

Practical rule: If you can't take a display idea home as a measurable selection or a clear layout reference, it's only inspiration.

What a productive visit looks like

The best clients I see don't try to finalise everything in one afternoon. They use bathroom displays melbourne to narrow choices. They identify what style direction suits the home, what fixtures feel right in person, and what details need checking in a proper design stage.

That's the point where new bathroom ideas become usable. A floating vanity stops being a trend image and becomes a question of width, drawer access, cleaning space underneath, storage volume, and visual weight in the room. A niche stops being a Pinterest detail and becomes a waterproofing and tile setout decision.

If you approach showrooms this way, you'll leave with something more valuable than a stack of brochures. You'll leave with evidence. And evidence is what turns renovation ideas into a buildable plan.

How to Prepare Before You Visit Any Melbourne Showroom

Walking into a showroom without preparation usually leads to poor decisions. Everything looks good under display lighting. That doesn't mean it suits your bathroom, your budget, or the way your household uses the space.

Preparation at home saves time and sharpens your eye once you're standing in front of real products.

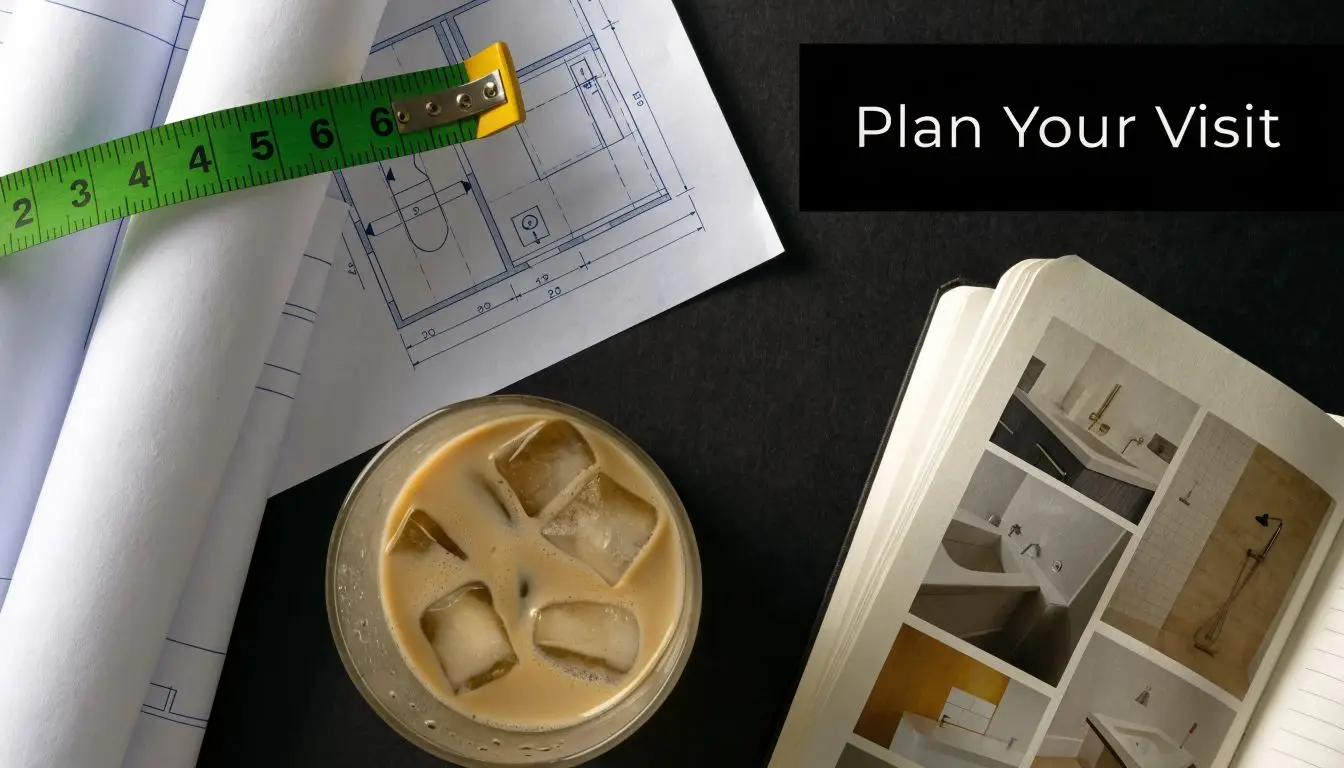
A professional desk setup featuring architectural blueprints, a measuring tape, iced coffee, and a bathroom design brochure.

Bring the right information with you

You don't need architectural drawings to get value from a showroom. You do need a basic record of your existing room.

Take these with you:

  • Room measurements including wall lengths, ceiling height, window position, and door swing
  • Fixture locations such as toilet position, waste points, and current shower or bath location
  • A short style folder with images you've saved for modern bathrooms, classic bathrooms, or more bespoke designer bathrooms
  • A budget range for the full job, not just products
  • A practical wish list covering storage, cleaning, lighting, ventilation, and who uses the bathroom daily

The room sketch can be rough. What matters is accuracy. A badly measured room sends you toward the wrong products very quickly.

Know your style, but don't overcommit

Mood boards help, but they can also trap people into copying a look that doesn't suit their actual home. A compact family bathroom won't always support the same selections that work in a large display suite.
Use your reference images to define direction, not dictate every choice. You might like warm timber, brushed finishes, wall-hung joinery, and large-format tiles. That's enough to guide a productive showroom visit.

If you're weighing tile options, this guide on how to choose bathroom tiles is worth reading before you go. It helps separate visual preference from practical performance.

Think beyond today's needs

One thing many homeowners miss is future use. That matters even more if you plan to stay in the property long term, live in a multigenerational home, or manage a property that needs broader usability.

A 2023 Master Builders Australia survey found that 68% of Victorian homeowners over 50 prioritise accessibility in renovations. The gap is that many local displays still don't show these features in a way that feels modern and well designed.

That means you often need to look for accessible planning cues yourself, including:

  • Shower access with low-threshold or walk-in layouts
  • Wall reinforcement potential for future grab rails
  • Tapware operation that's easier to use than tight pin handles
  • Clear movement space around the vanity and toilet
  • Lighting and contrast that improve usability, not just appearance

A bathroom can be contemporary and still be easier to use. Good planning does both.

Set your showroom agenda

Before you leave home, write down the five decisions you most need help with. Not twenty. Five.

For example:

  1. Vanity type and width
  2. Shower screen style
  3. Tile finish for floor grip and wall maintenance
  4. Bath or no bath
  5. Storage layout

That list keeps you focused. It stops you getting distracted by display features that look impressive but have nothing to do with the problems your renovation must solve.

What to Inspect in Designer Bathroom Displays

A polished display can hide weak choices. Good styling often covers poor storage, awkward proportions, or products that feel less solid the moment you touch them.

When you inspect bathroom displays melbourne properly, you stop looking like a shopper and start thinking like someone who has to live with the result every day.

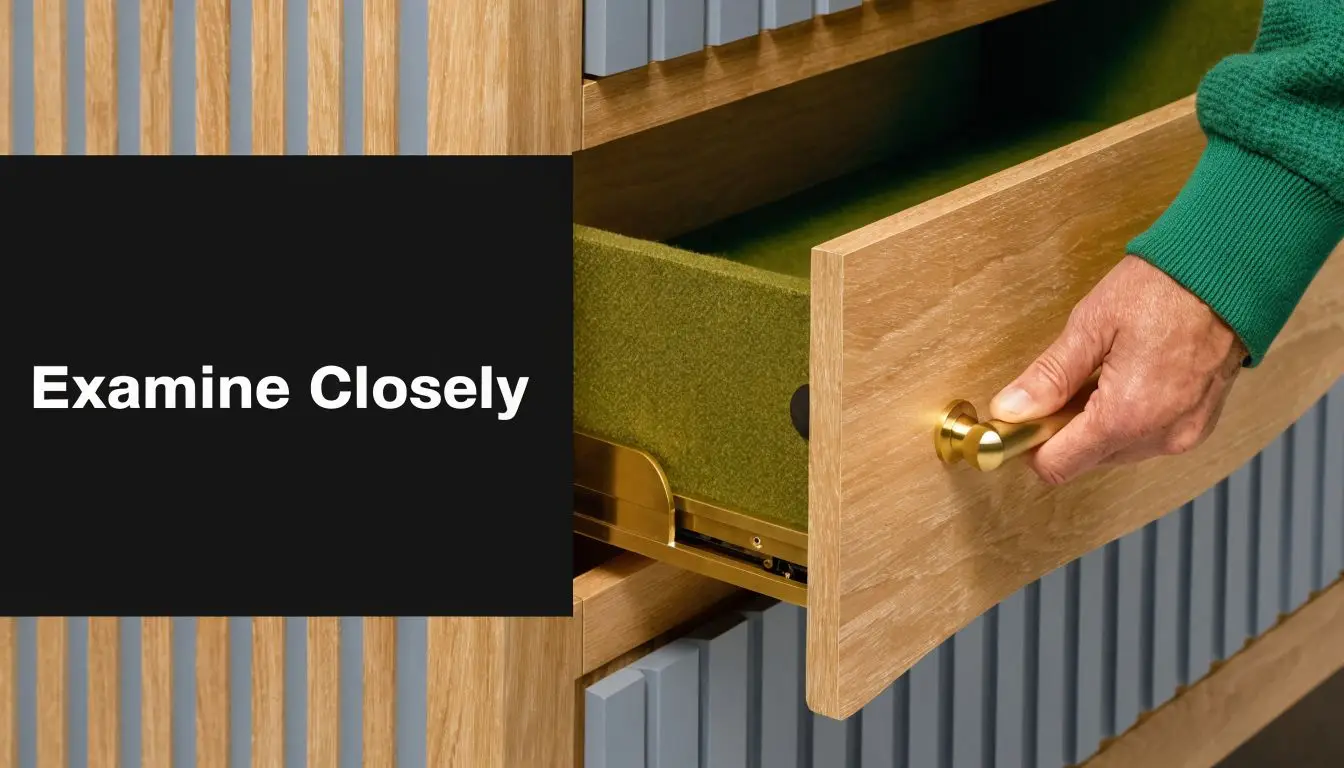
A close-up view of a person opening a modern wooden drawer featuring a sleek gold handle.

Start with the vanity

The vanity deserves more attention than it often gets. It's one of the hardest-working pieces in the room, and it shapes how the whole bathroom feels.

Bathroom vanities have evolved into 'hero' furniture pieces, with floating designs in sustainable timbers like oak and walnut becoming especially popular in Melbourne. Modern vanities now incorporate smart storage like integrated power outlets and custom dividers.

That trend makes sense, but it only works when the vanity performs as well as it presents.

Inspect these details closely:

  • Drawer function. Open every drawer fully. Check glide quality, extension, soft-close action, and whether internal storage is useful.
  • Material finish. Look at corners, edges, and undersides. These reveal quality more effectively than front faces do.
  • Storage logic. A vanity can look sleek and still waste space. Dividers, charging points, and practical drawer depth matter.
  • Cleaning practicality. Wall-hung units look lighter, but make sure the profile and finish won't become a dust trap.

If you're comparing heights and user comfort, this article on standard benchtop height helps frame what feels right in everyday use.

Test every touchpoint

You can learn a lot from thirty seconds of physical interaction. Don't just stand back and admire the room. Use it.

Touch the tapware. Pull the handles. Step into the shower area. Check whether the mirror placement feels natural. Look at the tile surface from different angles, especially under strong lighting.

A few practical checks matter more than display styling:

Element What to inspect
Vanity drawers Smooth action, usable internal layout, quality of runners
Tapware Solid feel, finish consistency, ease of grip
Tiles Surface texture, slip feel underfoot, grout line effect
Shower screen Hardware sturdiness, ease of cleaning, visual bulk
Basin and benchtop Splashing behaviour, edge detailing, cleaning access

Look past the styling tricks

Displays are often arranged to exaggerate space. Mirrors are oversized. Lighting is flattering. Towels and accessories soften hard lines. None of that is wrong, but it can blur your judgement.

Strip the display back mentally and ask:

  • If the styling were removed, would the proportions still look right?
  • Does the layout leave enough practical elbow room?
  • Is the feature product strong enough to justify its visual dominance?
  • Would this still feel balanced in a normal household bathroom?

The best display isn't the one that photographs well. It's the one that still makes sense after you remove the styling layer.

Judge the installation, not just the products

Even a quality product can look poor if it's installed badly. Showroom fit-off should be cleaner than residential work because the display doesn't have the same live-site constraints. If you notice rough silicone lines, awkward junctions, misaligned tile cuts, or inconsistent gaps in a display, pay attention.

That's useful information. It shows where a concept may be less refined in practice than it appears in marketing photos.

This is especially important with designer bathrooms, where tight detailing is part of the appeal. Fine lines, floating forms, recessed storage, and large-format materials all rely on precise execution. If the workmanship isn't there, the look falls apart quickly.

Key Questions to Ask Showroom Suppliers

A showroom visit gets more useful when you stop asking “How much is this?” and start asking “What do I need to know before this goes into a real renovation?”

Good questions expose hidden costs, lead times, installation requirements, maintenance issues, and whether a product suits your layout at all. They also help you compare suppliers on substance rather than sales language.

Essential Showroom Questions Checklist

Category Question to Ask
Product specs What are the exact dimensions, including projection from wall and required clearances?
Materials What is this made from, and which parts are most vulnerable to moisture or wear?
Finish How should this finish be cleaned, and what tends to mark or stain it?
Joinery Are the drawers soft-close, full-extension, and serviceable if hardware fails later?
Tapware What pressure or plumbing conditions does this need to work properly?
Shower screens What installation conditions are required for this screen to fit correctly?
Tiles Is this tile better suited to floors or walls, and how does the surface feel when wet?
Lighting What effect does this lighting produce in a smaller or darker bathroom?
Warranty What does the warranty actually cover, and what falls outside it?
Availability Is this stocked locally, made to order, or subject to long lead times?
Maintenance Which parts usually need adjustment, resealing, or replacement over time?
Compliance Are there any installation or compliance requirements a registered builder needs to allow for?

What separates a useful answer from a sales answer

A useful answer is specific. It gives dimensions, conditions, limitations, and practical consequences.

A sales answer tends to stay broad. It sounds reassuring but doesn't tell you what your builder or designer needs to know.

Listen for details about:

  • Installation conditions such as wall type, fixing requirements, and tolerance for uneven surfaces
  • Ongoing maintenance including finish care, parts access, and common wear points
  • Suitability for compact rooms, family bathrooms, or low-maintenance investor projects

Ask about coordination, not just supply

Bathroom renovations succeed when product selection and site execution are coordinated. That's why you should ask how information is provided for quoting and construction. Dimension sheets, finish schedules, and installation details matter far more than a glossy brochure.

It's also reasonable to ask whether they regularly work with qualified renovation teams and whether specifications are clear enough for registered builders unlimited style compliance expectations on larger or more complex work. You're not just buying a product. You're assessing whether the supply process supports a clean build.

“If a supplier can't explain how a product gets from display floor to compliant installation, keep asking questions.”

From Showroom Inspiration to a 3D Reality

After a few showroom visits, most homeowners have a phone full of photos and a head full of competing ideas. That's the moment where projects either become structured or start to drift.

What you need next isn't more browsing. You need translation. Every selection and layout reference from the showroom has to be tested against your room, your priorities, and the constraints of real construction.

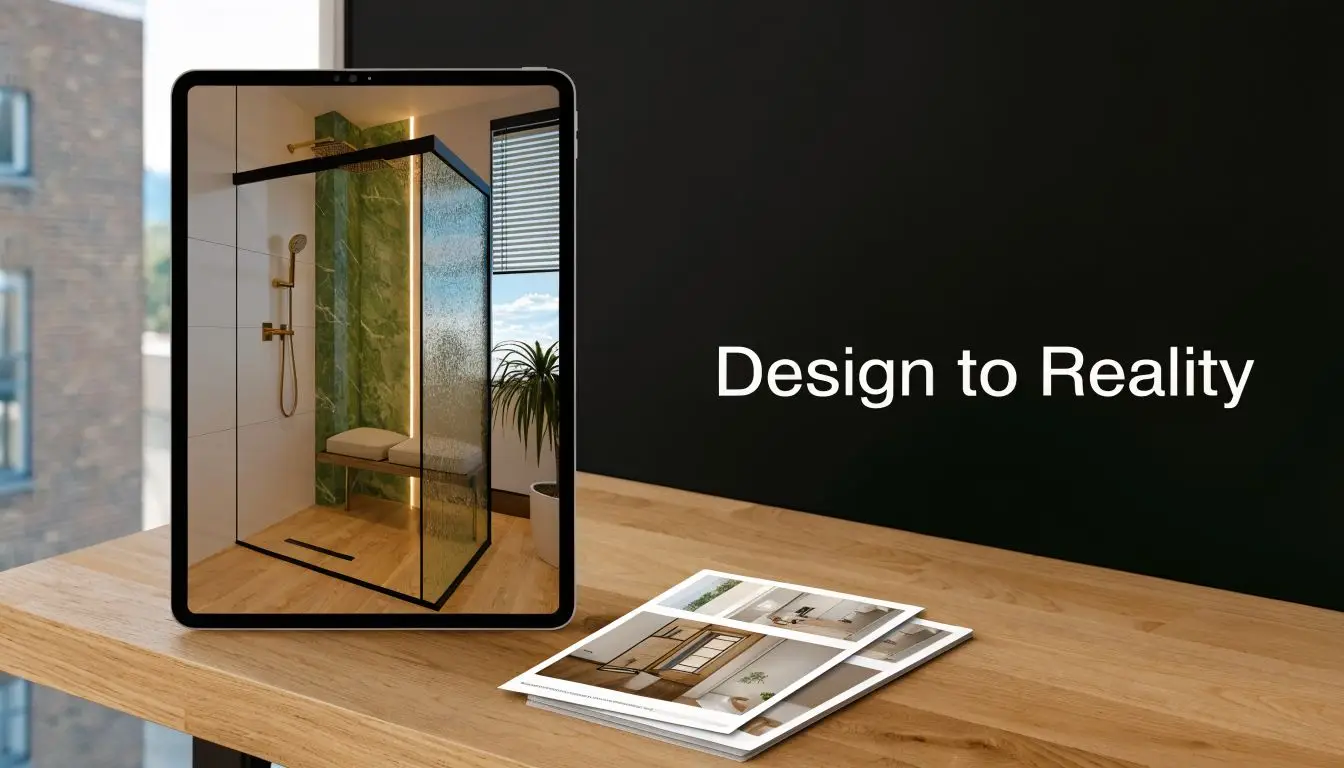
A modern tablet displaying a luxurious bathroom design, placed on a wooden desk with printed brochures.

Why 3D design changes the quality of decisions

A proper 3D process earns its place. It takes the things you liked in a display and checks whether they work in your actual bathroom.

That includes the obvious decisions, such as whether a wall-hung vanity feels too dominant in a compact room, but it also catches less obvious conflicts. Door swing. Screen placement. Reach space. Storage access. Visual crowding. Junctions between fixtures and tile setout.

According to Victorian builder surveys, renovation projects planned with detailed 3D displays achieve 92% on-time completion and 15% higher client satisfaction, compared to 65% for those using basic 2D plans. Common pitfalls like door swing obstructions account for 28% of all rework.

That lines up with what works in practice. Once clients can see the room properly, decisions sharpen. They stop choosing in isolation and start choosing in context.

What gets resolved before construction starts

A useful 3D design process doesn't just produce a pretty render. It resolves build questions early.

That usually includes:

  • Layout testing so fixture positions work together, not just individually
  • Selection validation to confirm chosen products suit the available space
  • Proportion checks so feature items don't overpower the room
  • Practical access review around drawers, screens, doors, and circulation
  • Presentation clarity so everyone is working from the same plan

If you're planning a smaller adjoining bathroom, this guide on designing an ensuite is a helpful example of how compact spaces benefit from tighter planning discipline.

What clients often realise at this stage

The most common shift happens when someone sees their preferred display ideas modelled in their own room. A product that looked perfect in a large showroom might feel oversized at home. A darker finish might need more balance. A bath might consume too much functional space. Or the room might handle a stronger design move than they first expected.
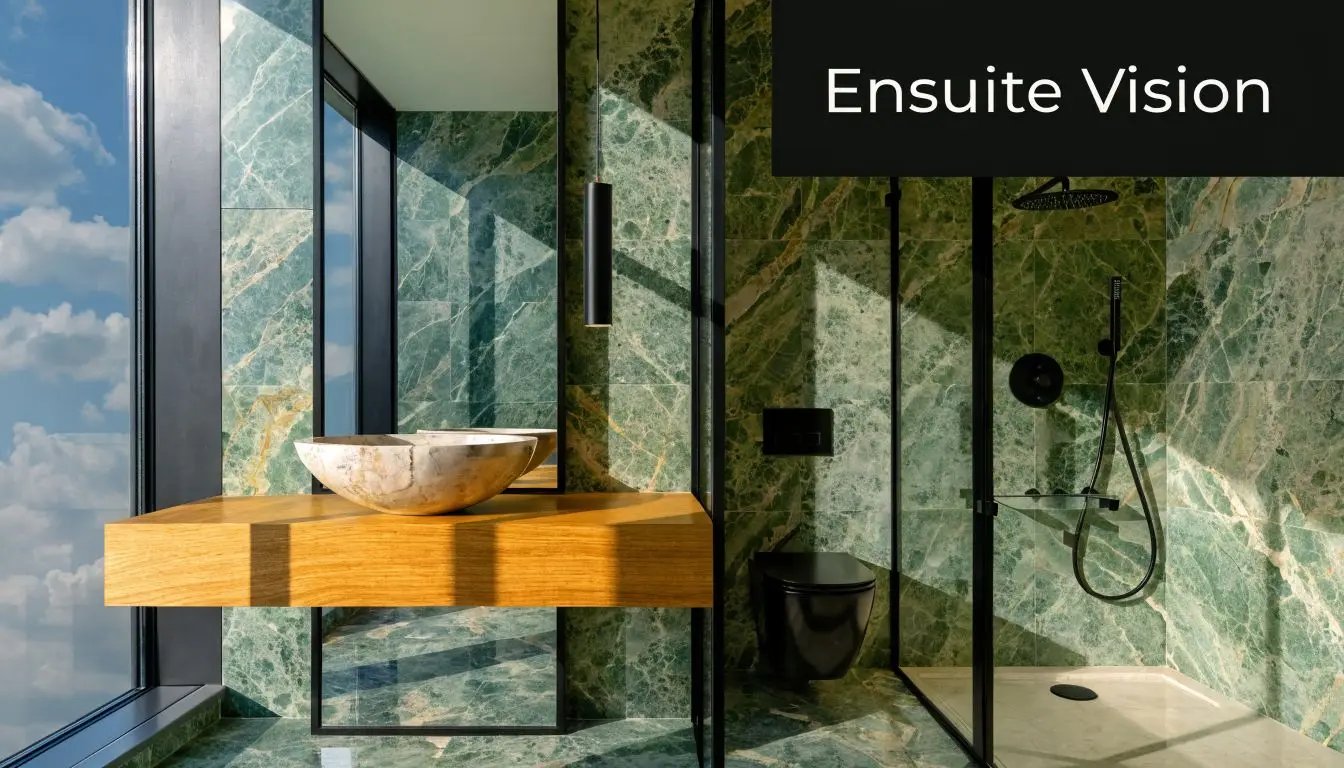
That's a healthy outcome. It's far better to change your mind in a render than during demolition.
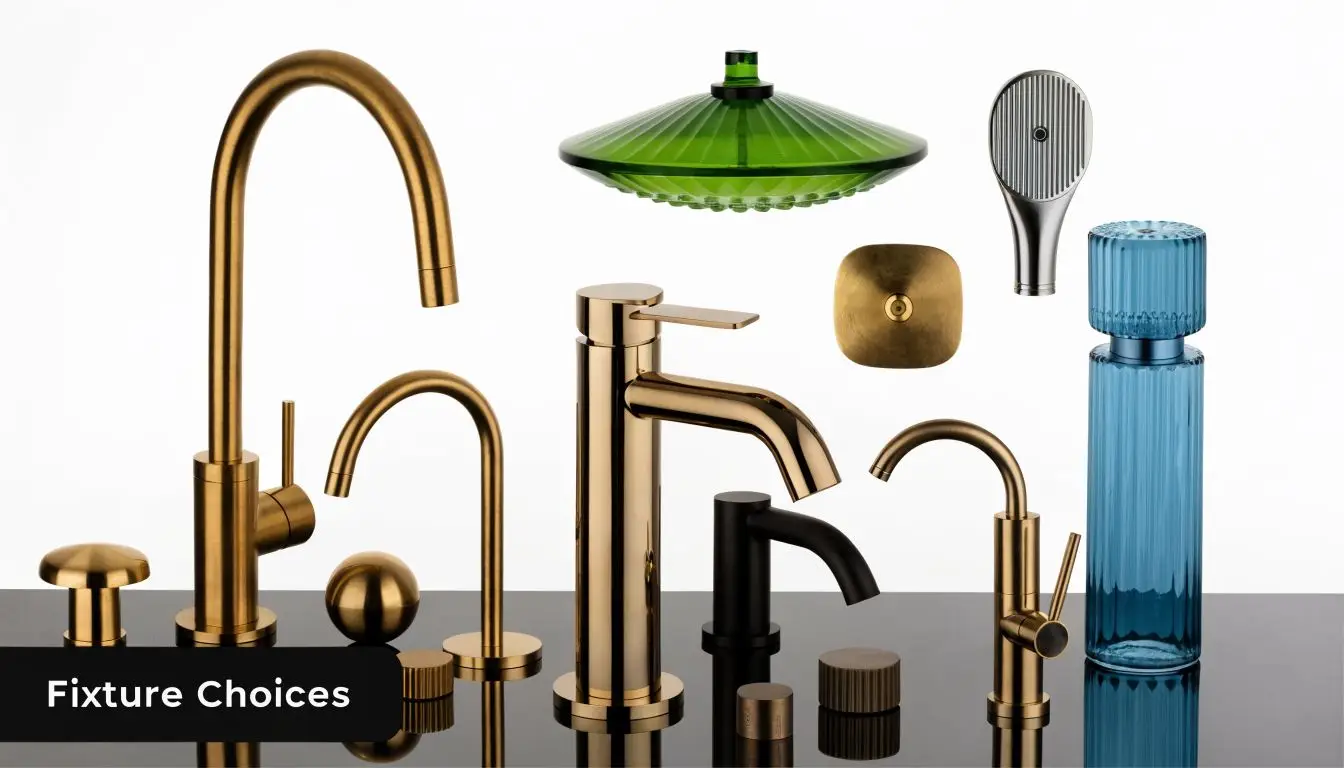
Good 3D planning doesn't lock clients in. It gives them enough clarity to make better changes before the build starts.

For modern bathrooms in particular, this stage matters because the cleaner the design language, the less room there is for unresolved layout problems. Minimal spaces only look effortless when the planning behind them is thorough.

Making Your Final Selections and Maximising Value

Final selections shouldn't be a rush to the cheapest acceptable option. They should be the point where style, durability, and property value line up.

That's especially true for investors, but owner-occupiers benefit from the same thinking. Low upfront spend can be expensive if products age badly, mark easily, or need replacement earlier than expected. Value sits in the full picture. Function, lifespan, maintenance, fit, and the contribution the bathroom makes to the home.
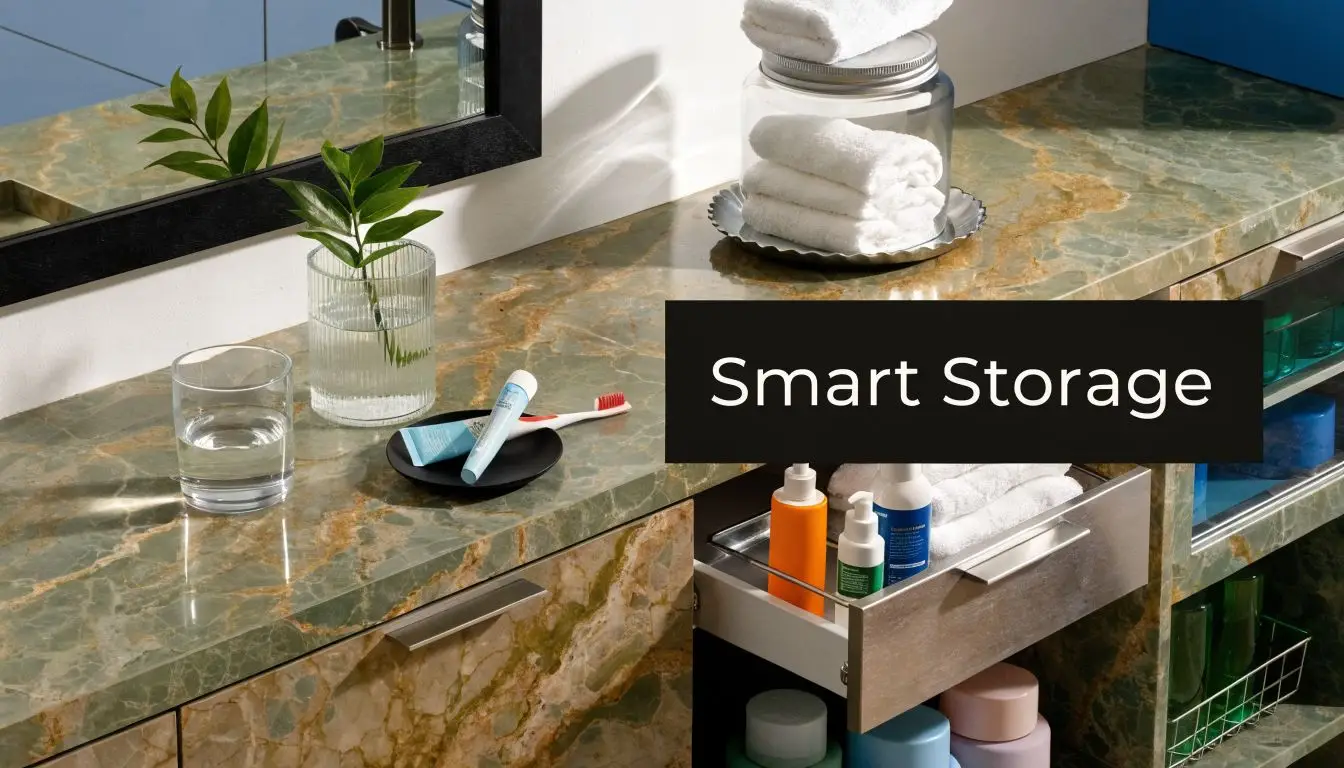

Think in terms of matched decisions

Selections work best when they support each other. A premium vanity paired with weak tapware, poor lighting, or impractical storage usually won't deliver the result clients expect. The room feels inconsistent because it is inconsistent.

The opposite also happens. Mid-range selections can perform very well when the layout is resolved, finishes are balanced, and specifications are matched properly.

For investor-focused work, there's useful benchmark guidance here. For Melbourne investors, a benchmark bathroom renovation cost of around $12,000 can target a 10-15% property revaluation. Using modular displays with vanities from 600-1200mm can help project a 20% equity gain while avoiding the 25% cost overruns common with specification mismatches.

Where value usually gets lost

In my experience, value usually slips away in three places:

  • Overbuying features that don't suit the room or tenant profile
  • Underspecifying daily-use items such as storage, hardware, and easy-clean surfaces
  • Mismatched product choices that create extra site adjustments later

If a selection creates friction during installation, cleaning, or daily use, it's rarely good value even if the purchase price looked attractive.

For homeowners, the right final package is the one you won't regret after the novelty fades. For investors, it's the one that presents well, functions reliably, and supports the property as an asset rather than a maintenance problem.

Frequently Asked Questions About Visiting Bathroom Displays

Should I visit showrooms before getting a renovation quote

Yes, but don't treat the visit as the final decision stage. Use it to narrow style direction, inspect product quality, and identify a few realistic options. Quoting becomes far more accurate when your preferences are grounded in actual products rather than screenshots.

How many showrooms should I visit

Usually enough to compare, not enough to confuse yourself. Once you start seeing the same ideas repeated, stop collecting more inspiration and start refining your selections.

Is it a problem if I like parts of different displays

Not at all. Most strong bathrooms are built from a mix of references. What matters is how those ideas work together in one room, with one clear layout and one consistent level of finish.

What if the display bathroom is much larger than mine

That's common. Focus on proportions, storage ideas, materials, and fixture details rather than copying the full layout. Large displays often make products feel more flexible than they'll be in a compact room.

Should I bring photos and measurements

Yes. They make every showroom conversation more useful. Staff can respond more accurately, and your later design process will be clearer.

Are showroom displays a reliable guide to build quality

They're a starting point, not proof of how your project will turn out. Look closely at installation quality, ask practical questions, and make sure your final selections are tested through a proper design and quoting process.


If you're ready to turn bathroom displays melbourne into a buildable renovation plan, SitePro Bathrooms can help with concept development, detailed 3D design, construction, and finishing for bathroom renovations across Highett and greater Victoria.

  • siteprobathrooms

Bathroom Decor Australia: 2026 Trends & Ideas

You’re probably doing what most Melbourne homeowners do at the start of a bathroom renovation. Saving polished photos, comparing tile samples, wondering whether the brushed nickel tapware costs too much, and trying to work out if the room you have can ever look like the designer bathrooms you keep seeing online.

That mix of excitement and hesitation is normal. Bathrooms ask for more decisions per square metre than almost any other room in the house. Layout, waterproofing, lighting, ventilation, storage, cleaning, finish durability, and budget all collide in one compact space. If you get the decor right but the planning wrong, the room won’t feel good to use. If you make it technically sound but visually flat, you’ll feel that disappointment every morning.

Good bathroom decor australia choices sit in the middle of those extremes. They look refined, but they also suit the way Australian homes are lived in. They handle steam, hard water, family traffic, damp towels, cleaning products, and shifting design tastes. They also need to respect compliance, especially in Victoria, where wet area requirements are not something you can treat as a background detail.

Your Guide to Bathroom Decor in Australia

Bathroom decor in Australia has moved well beyond choosing a nice vanity and matching mirror. Clients now expect more from the room. They want comfort, practical storage, easy maintenance, and a finish that feels current without becoming dated too quickly. They also want the renovation to add value, not just visual appeal.

That shift isn’t just anecdotal. The Australia bathroom accessories market was valued at USD 540.02 million in 2025 and is projected to expand to USD 1,373.00 million by 2034, growing at a CAGR of 10.92%, according to Australia bathroom accessories market projections. The same source notes that growth is being driven by demand for eco-friendly materials and smart home integrations as Australians prioritise sustainability and convenience.

That tells you something useful as a renovator. People aren’t spending more attention on bathrooms by accident. They’re treating them as serious living spaces.

What homeowners usually get stuck on

The overwhelm usually comes from four pressure points:

  • Style confusion because modern bathrooms can mean warm minimalism, hotel-style luxury, coastal calm, textured natural finishes, or darker moodier palettes.
  • Budget tension because some upgrades matter more than others, and expensive choices aren’t always the smartest ones.
  • Layout limitations because many Victorian homes have compact footprints, awkward windows, or plumbing positions that make dream layouts unrealistic.
  • Compliance blind spots because decor decisions often get made before waterproofing, ventilation, and access requirements are properly resolved.

Practical rule: A bathroom should be designed from the floor plan out, not from the tapware in.

What works in real homes

The strongest renovations don’t chase every trend. They translate the best new bathroom ideas into choices that suit the home, the household, and the room size. In a compact ensuite, that might mean a floating vanity, recessed storage, and one standout surface rather than five competing finishes. In a family bathroom, it might mean prioritising tougher materials, better drawer storage, and lighting that works at 6 am as well as 9 pm.

A well-planned bathroom renovation also separates designer bathrooms from merely expensive bathrooms. A designer result feels balanced. The proportions are right. The lighting is flattering. The joinery solves storage properly. The tile selections support the room instead of fighting for attention.

That’s the standard worth aiming for. Not showroom fantasy. A bathroom that looks sharp, functions cleanly, and still makes sense years after handover.

Embracing 2026 Modern Bathroom Trends

The most useful 2026 trends aren’t the loudest ones. They’re the ones that improve how the room feels day to day. In practice, the best modern bathrooms are moving toward calmer finishes, more tactile materials, better hidden storage, and technology that solves an actual problem rather than adding gimmicks.

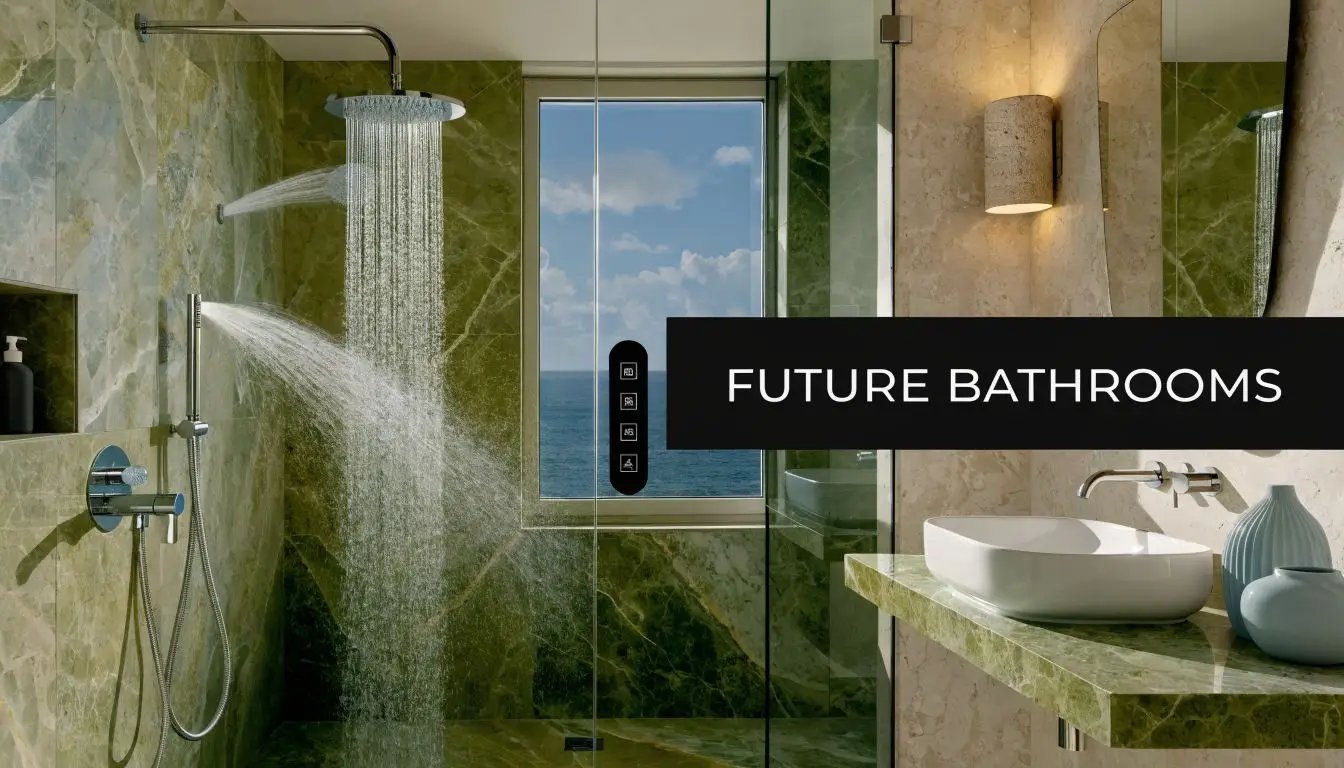
A luxurious modern bathroom featuring marble walls, a rainfall shower, and a scenic ocean view through window.

The micro-spa look needs restraint

A lot of homeowners ask for a spa feel. That’s understandable, but it often gets interpreted too narrowly. A spa-style bathroom isn’t created by adding every luxury feature possible. It comes from controlling visual noise.

The better version usually includes:

  • A simplified palette with two main materials and one accent finish
  • A generous shower experience with enough elbow room and good water containment
  • Soft lighting that doesn’t flatten faces or create harsh glare on mirrors
  • Storage that disappears so benches stay clear

What doesn’t work is layering texture over texture in a small room. Ribbed joinery, busy stone, statement floor tile, fluted glass, oversized pendants, and dark grout can quickly make an ensuite feel crowded instead of restful.

Nature-led finishes suit Australian light

Australian homes often get strong natural light, and bathroom decor should respond to that. Warm whites, soft stone tones, muted greens, clay shades, and natural timber notes generally read better in daylight than icy grey schemes. They also age more gracefully.

This doesn’t mean every bathroom should be beige. It means the palette should work with the light quality in the room. A south-facing bathroom can carry more warmth. A bright west-facing room may need softer contrast so it doesn’t feel harsh in the afternoon.

Natural materials look best when you balance them with clean lines. If every surface tries to feel organic, the room can start to look unresolved.

Smart features should solve friction

Technology has a place in modern bathrooms, but only when it reduces daily annoyance. Useful additions include demisting mirrors, well-integrated lighting controls, and ventilation that responds to moisture levels. Those upgrades make the room easier to use and easier to maintain.

Less useful are tech inclusions that complicate servicing, date quickly, or add visual clutter. If a feature needs constant explaining, it’s probably not improving the room.

Texture is back, but scale matters

One of the strongest shifts in new bathroom ideas is the move away from completely flat, sterile surfaces. Textured tiles, curved mirrors, softened vanity profiles, and more tactile finishes are all coming through. They can make a bathroom feel considered and less clinical.

The key is scale. In smaller bathrooms, use texture in one zone only. A ribbed vanity front or textured feature tile can work beautifully, but pairing both with patterned flooring and veined wall tile usually tips the room into visual chaos.

For many bathroom renovations, the most successful trend move is selective adoption. Borrow the warmth, the calm, and the functionality from current design. Leave the excess behind.

Choosing Climate-Smart and Durable Materials

Material selection decides whether a bathroom still looks good after real use. Steam, temperature changes, cleaning chemicals, wet feet, water splash, and poor ventilation will expose weak choices very quickly. The best-looking room on handover can become the most disappointing room in the house if the finishes weren’t chosen for Australian conditions.

The first foundational element is the wet area build-up behind the visible surfaces. Under the NCC 2022 standards, mandatory in Victoria, bathroom wet area walls must be waterproofed to a minimum height of 1,800mm, which matters for preventing moisture damage and mould growth in Australian homes, as outlined in Victorian bathroom standards and waterproofing requirements. Decor sits on top of that foundation. It doesn’t replace it.

Start with the surfaces that take the hit

Tiles, benchtops, vanity finishes, and shower wall materials all need to cope with moisture and cleaning. Homeowners often focus on appearance first, but the better sequence is this: performance, maintenance, then appearance.

If you’re comparing tile options in detail, a practical breakdown in this guide on how to choose bathroom tiles is a useful place to narrow the field.

Comparison of Bathroom Surface Materials for Australian Climates

Material Pros Cons Best For
Porcelain tile Dense, low maintenance, handles moisture well, available in many finishes Can feel hard and cold underfoot, cheaper prints can look artificial Floors, shower walls, family bathrooms
Ceramic tile Cost-effective, broad style range, easier to cut for wall applications Usually less robust than porcelain in heavy-use areas Bathroom walls, lower-impact areas
Engineered stone look surfaces Consistent appearance, cleaner visual lines, suits modern bathrooms Some finishes show water marks more easily, edge profiles matter Vanity tops, splashbacks, streamlined schemes
Natural stone Rich character, high-end appearance, unique variation Requires more maintenance, can etch or stain depending on type Feature walls, premium designer bathrooms
Timber veneer or timber-look joinery Adds warmth, softens hard finishes, works across many styles Real timber needs careful detailing in wet zones Vanities, shaving cabinets, storage
Acrylic or solid surface style wall panels Fewer grout lines, easier cleaning, sleek contemporary finish Not every home suits the look, detailing must be neat Low-maintenance shower zones

Where people often choose badly

The most common mistake isn’t picking an ugly material. It’s picking the right material in the wrong location.

  • Glossy floor tiles look crisp in a showroom, but they can become slippery and unforgiving in everyday use.
  • Highly porous natural finishes can create a maintenance burden that doesn’t suit busy households.
  • Delicate cabinetry finishes near wet zones can swell, peel, or wear prematurely if the detailing is poor.
  • Too many grout joints create more cleaning work and can make a small room feel busy.

The practical trade-off

Luxury and durability aren’t opposites, but they do require balance. A premium stone-look porcelain often gives you the visual calm of a slab material with easier day-to-day maintenance. Real timber can be beautiful, but many homes are better served by timber-look joinery in the highest splash areas. Large-format tiles reduce grout lines, but they need skilled set-out so cuts don’t look awkward around niches, drains, and corners.

The best material schedule usually mixes priorities. Spend visual impact where the eye lands first. Spend durability where the room works hardest. That’s how modern bathrooms keep their finish without becoming high-maintenance.

Mastering Colour Palettes and Lighting

Most bathroom decor mistakes aren’t about boldness. They’re about mismatch. The colour palette says calm, but the lighting is clinical. The tile is soft and warm, but the mirror light throws grey shadows onto skin. The vanity is elegant, but the room feels flat because every finish sits at the same visual volume.

A bathroom needs colour and light to work as one system.

A luxurious bathroom featuring natural marble walls, wooden cabinetry, indoor plants, and a large arched window.

Build the palette from the largest surface

Start with the largest surface area. Typically, this is the wall tile or floor tile. Once this is established, choose the vanity finish, then tapware, then mirrors and accessories. Doing it in the opposite order often leads to scattered decisions.

A simple framework works well:

  1. Choose the base tone
    Warm neutral, cool neutral, earthy mid-tone, or darker dramatic palette.

  2. Add one grounding element
    Timber-look joinery, deeper floor tile, or a stronger stone pattern.

  3. Use metal finishes as punctuation
    Not as the main story.

The rooms that feel expensive often have less contrast than people expect. They use tonal variation rather than constant opposition.

What colours tend to last

In Australian homes, timeless doesn’t have to mean plain. These palette directions generally hold up well:

  • Warm stone and off-white for calm, adaptable spaces
  • Soft green-grey and timber for homes that need warmth without heaviness
  • Charcoal accents with lighter walls for a sharper contemporary look
  • Muted clay and sand tones where you want softness and depth

Very trendy colours can work, but they should usually be easy to replace. Paint, accessories, and decorative lighting are safer places for experimentation than full-height feature tile in a strong niche tone.

Layered lighting changes everything

Most bathrooms need three lighting layers. If they only have one, the room rarely performs well.

  • Ambient lighting gives the room overall brightness. Ceiling lighting usually handles this.
  • Task lighting supports shaving, skincare, makeup, and grooming. Mirror-side lighting or well-placed integrated mirror lighting does the heavy lifting.
  • Accent lighting creates mood and depth. Under-vanity lighting, niche lighting, or a decorative wall light can do this subtly.

If you’re planning ceiling placement, this guide on downlight placement in a bathroom helps avoid the common issue of putting light exactly where it casts shadows onto the face.

Good bathroom lighting should make the room feel brighter, but your reflection softer.

What usually goes wrong

One central downlight over the vanity is a classic mistake. It throws shadows under the eyes and chin and makes daily use less comfortable. Another problem is over-lighting glossy finishes, which can create glare and make the room feel colder than intended.

A strong bathroom lighting plan respects function first, but it doesn’t stop there. It also shapes mood. That’s what turns a practical room into one that feels finished.

Smart Space Planning for Every Bathroom Size

A bathroom can be beautiful and still feel awkward. That usually comes down to planning, not styling. If circulation is tight, doors clash, drawers can’t open fully, or the shower feels boxed in, no amount of expensive decor will rescue the experience.

Function-first planning matters even more in Victorian homes, where existing footprints often aren’t generous. Many ensuites and secondary bathrooms need very careful set-out to avoid wasted space.

A modern, stylish bathroom in Australia featuring a unique green storage unit, wood flooring, and a glass-enclosed shower.

Ergonomics are part of good design

Australian standards recommend basin tops sit between 860–880mm from the floor and shower heads at 1,900–2,100mm, which supports a more functional and comfortable room, according to Australian bathroom dimension guidelines. Those details sound technical, but they directly affect whether a bathroom feels natural to use.

The same applies to door clearance, shower proportions, and tap placement. A room can be legally built and still feel wrong if the ergonomics haven’t been thought through carefully.

Compact bathrooms need visual discipline

In a small ensuite, the layout has to do more than fit. It has to feel composed.

A few moves tend to work well:

  • Floating vanities keep more floor visible
  • Wall-hung storage reduces visual bulk
  • Large mirrors stretch sightlines
  • Clear shower screens maintain openness
  • Recessed niches reduce the need for add-on storage

For more layout-specific inspiration, these small bathroom ideas for Australian homes show the kinds of adjustments that can make tight rooms perform better.

Larger bathrooms still need structure

A bigger room isn’t automatically easier. In fact, large bathrooms can feel disjointed when fixtures are spread too far apart or when every wall gets a different treatment. Family bathrooms need zones. Wet zone, vanity zone, storage zone, circulation path.

That zoning creates order. It also helps with lighting, material transitions, and cleaning.

If you have extra space, use it to improve comfort, not to increase walking distance between fixtures.

Why 3D planning saves money

Many layout problems don’t show up clearly on a flat plan. You only notice them once you picture a person opening a vanity drawer, stepping out of the shower, or trying to hang a towel beside a swinging door. That’s why 3D visualisation is so useful before construction starts.

It helps test:

  • Sightlines from the doorway
  • Balance between vanity, mirror, and lighting
  • Storage usability
  • Shower screen size and swing
  • How finishes read together in the actual room shape

Modern bathrooms achieve practicality rather than remaining merely aspirational. The room gets resolved before trades start cutting, setting, and installing. That protects both budget and outcome.

Budgeting Your Renovation and Sourcing Smartly

A bathroom budget usually comes undone after the selections start. The vanity gets upgraded, the tile area expands, the tapware finish changes, and suddenly the money that should have gone into prep and installation has been spent on visible items. I see this often in Melbourne renovations, especially when homeowners are trying to recreate a high-end look in a standard suburban bathroom or compact apartment ensuite.

The fix is straightforward. Rank every cost by how hard it is to change later, how much daily use it gets, and whether it affects compliance.

Spend where failure costs the most

Put the budget into the parts behind the finished surface first. If waterproofing, falls to waste, substrate preparation, or ventilation are handled poorly, the room may look good at handover and still become expensive to fix. In Victoria, bathrooms also need trades and installation methods that meet the relevant Australian requirements, so budget pressure should never push those items down the list.

The categories that usually deserve protection are:

  • Waterproofing and substrate preparation
  • Qualified labour from registered or licensed builders and trades
  • Tapware and fittings used every day
  • Vanity storage that improves function
  • Ventilation and lighting that support comfort and maintenance

Good budgeting protects performance before appearance. That is how a bathroom keeps working long after the styling trend has passed.

Cut costs where replacement is easy

Savings are still possible, but they need to be deliberate.

Good places to save often include:

  • Using a feature tile in one area instead of tiling every wall
  • Choosing porcelain that gives the look of stone or terrazzo with less upkeep
  • Keeping plumbing close to existing locations where practical
  • Reducing customisation on decorative details while keeping storage well resolved

This is the practical middle ground between Pinterest ambition and a real renovation budget. The room can still feel refined, but the money goes into items that improve use in an Australian home, not just the photo.

Storage usually earns its keep

Analysts tracking the Australian bathroom furniture market found strong demand for bathroom cabinets and growing interest in vanities. That lines up with what happens on site. Storage has a direct effect on whether the room feels organised, easy to clean, and calm to use during a busy morning.

A well-planned vanity earns its floor space. It gives everyday items a home, reduces bench clutter, and helps the whole room read as considered rather than crowded.

Cheap joinery often shows its age early. Drawers start to rack, finishes wear at the edges, and the inside never quite works for real household storage.

Source with lead times, warranties, and replacements in mind

Sourcing smartly is not only about ticket price. Check lead times before you commit to imported tiles, custom glass, specialty basins, or uncommon tapware finishes. One delayed item can hold up multiple trades and push labour costs up.

Local supply can make life easier, especially if an item arrives damaged or a replacement part is needed months later. It also helps when you are matching accessories and finishes across separate orders.

The best budget is rarely the cheapest one. It is the one that puts money into the parts that protect the build, trims costs where the compromise is low, and leaves you with a bathroom that suits the way Australians live.

Bringing Your Designer Bathroom Vision to Life

A strong bathroom renovation doesn’t come from a moodboard alone. It comes from a sequence of good decisions. Trend choices that suit the home. Materials that handle moisture and wear. Lighting that flatters and functions. Layouts that feel right in use, not just on paper. Budget choices that protect the important parts first.

That’s how bathroom decor australia moves from inspiration to a finished room that works.

A luxurious modern bathroom featuring vibrant green marble vanity, a gold frame mirror, and checkered sphere pendant light.

Some homeowners enjoy being fully involved in every selection. Others want a clear expert process that removes the guesswork. Both approaches benefit from the same essentials: careful planning, realistic detailing, strong communication, and trades who understand that a bathroom is one of the most unforgiving rooms in the house for poor workmanship.

The best results usually share a few traits:

  • The layout was solved early, before finishes distracted from functional issues.
  • The visual language stayed consistent, instead of chasing too many new bathroom ideas at once.
  • The build team respected compliance and sequencing, rather than treating them as admin.
  • The final room reflected the household, not just a passing online trend.

A bathroom should feel better six months after completion than it did on handover day. That’s the test.

If you want a smoother path from concept to completion, SitePro Bathrooms offers end-to-end bathroom renovations in Highett and across greater Victoria, including 3D design, coordinated construction, and finishes that balance practicality with a designer outcome. You can explore the project gallery and renovation guidance on the SitePro Bathrooms website or get in touch for a personalised consultation on your next bathroom upgrade.


If you’re ready to create a bathroom that feels refined, functional, and properly built for Victorian conditions, talk to the team at SitePro Bathrooms.

  • siteprobathrooms

How To Choose Bathroom Tiles: Your 2026 Expert Guide

You’ve probably got a dozen tile tabs open right now. One looks perfect in the showroom, another seems cheaper online, and a third keeps showing up in modern bathrooms on social media. The problem is that bathroom tile isn’t just a style choice. In a Victorian home, it’s also a building decision.

A good tile choice has to do three jobs at once. It has to suit the way the room is used, handle moisture properly, and still look right once it’s installed under your actual lighting, next to your vanity, tapware, and shower screen. That’s where many bathroom renovations go off track. People choose a tile they like before they’ve worked out what the room needs.

If you want to know how to choose bathroom tiles properly, start with function and finish with style. That order matters.

Planning Your Foundation Before You Browse

Most homeowners start with colour. Builders start with use.

A family bathroom in Highett has different demands from a guest powder room or a quiet ensuite. The first gets daily traffic, wet feet, dropped products, stronger cleaning chemicals, and more wear around the shower and vanity. The second may barely see use. If you treat those rooms the same, you often end up overspending in one or under-specifying the other.

Start with how the bathroom is actually used

Before you visit a showroom, answer four practical questions:

  1. Who uses the room every day
    Kids, older adults, tenants, guests, or just two adults all create different wear patterns and safety needs.

  2. Where are the wet zones
    The shower floor, shower walls, bath surround, and floor outside the shower don’t all need the same tile.

  3. How much natural light is there
    A soft grey tile in a bright north-facing bathroom can look very different in a darker south-facing room.

  4. What are you renovating around
    Existing windows, nib walls, floor falls, recessed niches, and door clearances all affect tile size and layout.

That last point gets missed a lot. A tile may look balanced on a sample board and awkward in a compact bathroom once cuts start appearing around the vanity, waste, and corners.

Practical rule: choose the room type first, then the floor tile, then the wall tile, then any feature tile. That sequence keeps the project grounded.

Break the bathroom into zones

A bathroom isn’t one tiled box. It’s a set of zones with different demands.

  • Shower floor
    This is the highest-risk area for slipping and one of the most demanding for drainage. Grip matters more than visual simplicity.

  • Main floor
    This needs durability, cleaning practicality, and a finish that still looks good when wet.

  • Walls in splash areas
    These need a surface that handles regular moisture and is easy to wipe down.

  • Vanity or feature wall
    Here, you can take more design freedom because the performance demands are lower.

If you’re working with a builder, this early planning stage is also when compliance and scope should be locked in. That’s one reason using a registered builder for your bathroom renovation matters. Bathrooms don’t forgive loose planning.

Test the tile in your real light

Showroom lighting flatters almost everything. Your bathroom won’t.

Take samples home and check them at three times of day. Morning light, late afternoon light, and artificial lighting can all change how a tile reads. Warm whites can turn creamy. Cool greys can become blue. Gloss tiles can bounce light well on one wall and show every splash mark on another.

A simple pre-selection checklist helps:

  • Check scale
    Hold the sample against the room dimensions, not just in your hand.
  • Check reflection
    Look at the tile under downlights and window light.
  • Check maintenance
    Rub water on the surface and see what marks show.
  • Check neighbouring finishes
    Put the sample next to cabinetry, benchtops, and paint.

That groundwork makes the rest of the decision much easier.

Material Matters for Victorian Homes

A bathroom in Melbourne can look dry at 10 am and still carry moisture in the air well into the afternoon. In older Victorian homes, that gets amplified by cooler rooms, limited ventilation, and wall and floor substrates that are rarely as flat or stable as they first appear. Tile choice has to suit those conditions, not just the showroom sample.

A selection of various durable tile samples including stone, ceramic, and marble textures for home renovation.

Porcelain, ceramic and stone compared

The material sets the baseline for how the bathroom will wear, how much maintenance it will need, and how forgiving it will be in a wet Victorian climate.

Material Where it works well Where it can fall short
Porcelain Floors, showers, family bathrooms, high-use ensuites Usually costs more than basic ceramic and can be harder to cut and drill
Ceramic Walls, lower-wear areas, some lighter-use bathrooms Less durable on hard-working floors and in consistently wet areas
Natural stone Feature walls, high-end bathrooms, spa-style finishes Needs sealing, more maintenance, and tighter installation control

For most Victorian homes, porcelain is the safest all-round choice. It is denser, absorbs less water, and stands up better to regular wetting, cleaning, and temperature swings between colder mornings and heated interiors. That matters in suburbs closer to the bay, but I also see it matter in inland Melbourne bathrooms where condensation lingers because the room never really dries out.

Ceramic still has a place. It is often good value on walls, easier on the budget, and available in a huge range of finishes. The limitation is wear. On floors that cop daily traffic, dropped products, and repeated cleaning, ceramic can show its age sooner than a good porcelain tile.

Natural stone gives a bathroom a different character, but it asks more from the owner and the installer. Stone needs the right sealer, the right adhesive system, and realistic expectations about upkeep. If a client wants stone in a period renovation or a higher-end ensuite, I make sure they understand the maintenance before we order. That is the same approach I recommend when designing an ensuite for a tighter footprint, because premium finishes have to perform, not just photograph well.

PEI and slip resistance are practical selection checks

A good-looking tile can still be the wrong tile.

PEI rating helps you judge how the surface will handle wear. For bathroom walls, the demand is low. For an ensuite floor, the load is still fairly modest, but it is constant. For a family bathroom, traffic, grit on feet, and stronger cleaning products all add up. If the tile is too lightly rated for the job, the finish dulls or scratches long before the waterproofing system is due for inspection.

Slip resistance matters even more in real use. In Australia, bathroom floor tiles should be checked against AS 4586, not chosen on appearance alone. A polished tile can look sharp on a display board and become a liability once soap film, overspray, and steam hit the surface. For shower floors in particular, a suitable slip rating and a surface that still feels secure when wet are worth paying for.

What works in Victorian bathrooms

These are the combinations I recommend most often across Melbourne renovations:

  • For shower floors
    Use smaller format tiles or a textured surface so the floor follows the fall properly and gives better grip underfoot.

  • For main bathroom floors
    Choose porcelain with confirmed slip performance and a wear rating that suits family use, not just guest use.

  • For walls
    Ceramic often works well because the wear is lower and the cleaning is straightforward, provided the tile is installed over the right substrate in wet areas.

  • For feature areas
    Stone or specialty finishes can work, but only if sealing, cleaning, and long-term upkeep are acceptable to the owner.

  • For any tile you are seriously considering
    Ask for the technical data sheet. Check water absorption, slip classification, and whether the tile is rated for the location you plan to use it in.

The tile itself is only part of the decision. In Victoria, the material has to work with the waterproofing system, the substrate, the room ventilation, and how the household uses the bathroom. That is why a tile that suits a powder room wall may be a poor choice for a shower floor in a busy family home.

Sizing Up Your Style With Finishes and Shapes

Once the technical side is sorted, the design decisions become much clearer. New bathroom ideas begin to take shape. The tile still has to perform, but now it can also set the mood of the room.

An artistic arrangement of various colored, shaped, and textured ceramic and stone sample tiles.

Large format versus small format

Large-format tiles often suit modern bathrooms because they create a calmer visual field. Fewer grout lines usually means the room feels less busy, and in a smaller bathroom that can make the space read larger.

Small tiles do a different job. They add texture, movement, and often better practicality underfoot in the shower. Mosaics are especially useful where the floor needs to follow fall lines cleanly toward the waste.

A simple comparison helps:

  • Large-format tiles
    Best for a sleek appearance, easier visual continuity, and cleaner wall expanses.

  • Medium-format tiles
    Good when you want balance and easier handling around standard bathroom dimensions.

  • Mosaics and smaller tiles
    Strong for shower floors, niches, curved details, and feature moments.

Gloss, matte and textured finishes

Finish changes how a tile looks and how it behaves.

Gloss tiles reflect more light, so they can brighten an ensuite or make a narrow bathroom feel more open. They’re often useful on walls, especially where you want a crisp, polished feel. The downside is that they tend to show splash marks, smudges, and uneven wall light more readily.

Matte and textured finishes feel quieter and more architectural. They usually suit floors better because they look more grounded and are less visually slippery. In designer bathrooms, a matte tile can also make stone-look finishes read more naturally.

Builder’s note: if you love a glossy tile, keep it on the wall. Let the floor do the hard work.

Shape changes the personality of the room

The same colour palette can feel classic, sharp, soft, or bold depending on shape and layout.

Shape Effect in the room Best use
Subway Familiar and adaptable Walls, niches, splashback-style areas
Square Calm and balanced Floors or walls in minimalist bathrooms
Hexagon More graphic and contemporary Feature areas, powder rooms, small impact zones
Kitkat or finger mosaics Vertical texture and movement Curved walls, niches, vanity features

If you’re aiming for designer bathrooms rather than trend-driven bathrooms, restraint usually wins. One hero tile, one supporting field tile, and a consistent colour story tend to age better than mixing too many shapes and finishes in one room.

Beyond the Tile Grout Layout and Substrate

A bathroom can have beautiful tile and still fail if the supporting work is poor. The finished look depends on what’s underneath, what sits between the tiles, and how the whole layout is set out before the first piece is fixed.

A professional tiler in a blue uniform and green beanie installing ceramic bathroom floor tiles.

Grout affects both look and maintenance

People often treat grout as an afterthought. It isn’t.

A grout colour that matches the tile creates a more unified finish. A contrasting grout makes the pattern stand out and can sharpen the geometry of subway, stack bond, or herringbone layouts. Neither is right or wrong. It depends on whether you want the tile shape to disappear or become part of the design.

Grout width also matters. Narrow joints can look refined on rectified porcelain, while slightly wider joints may better suit handmade-look finishes that have natural variation.

  • Matching grout
    Better when you want a calm, continuous surface.

  • Contrasting grout
    Better when shape and pattern are part of the design intent.

  • High-moisture areas
    Need a grout selection that stands up to regular cleaning and damp conditions.

Layout decides whether the room feels polished

Layout is where trade skill becomes visible.

A centred layout around the vanity or rear wall often feels deliberate and balanced. Poor planning leaves you with awkward slivers at edges, messy cuts at the doorway, or feature walls that aren’t visually centred to the fittings. This is one of the reasons tile should never be selected in isolation from the room measurements.

If you’re considering bigger tile formats, installing large-format porcelain tiles requires tighter planning around substrate flatness, lipping control, and set-out. The larger the tile, the less forgiving the room becomes.

Set-out should respond to the room, not force the room to obey the tile packet.

The substrate and waterproofing do the hidden heavy lifting

No tile system is better than the surface beneath it.

The substrate has to be sound, level, and suitable for a wet area build-up. Floor falls need to be correct before tiling begins. Waterproofing needs to be completed properly, with junctions, penetrations, and transitions treated as critical details rather than quick prep.

Experienced bathroom renovations separate from cosmetic updates. A bathroom might look excellent on completion and still hide movement, moisture problems, or weak prep that leads to failure later. In practice, the best-looking result usually starts with the least glamorous work.

Designer Bathroom Inspiration in Action

Good tile selection becomes easier when you can see how the decisions work together. The room type drives the palette, the finish, and the layout. That’s true whether you’re aiming for practical family use or a more refined designer bathroom feel.

A luxurious bathroom featuring bold green marble countertops, blue and beige tile flooring, and dark wall accents.

A family bathroom that can take daily use

A busy shared bathroom usually works best with a restrained base. Think matte porcelain on the floor in a mid tone that hides marks well, then simpler wall tiles that keep the room bright without asking for too much maintenance.

The feature can sit behind the vanity rather than in the shower. That keeps the high-design moment in the driest visual zone and leaves the most demanding areas easy to clean and easy to live with.

A compact ensuite that feels bigger than it is

An ensuite often benefits from lighter wall tiles and a simpler tile count. Gloss on the walls can help bounce light around, while a smaller, more tactile tile underfoot in the shower gives grip and solves the drainage geometry neatly.

In tight rooms, keeping the floor tile consistent through the open floor and into the shower usually helps the space feel less chopped up.

A seamless main bathroom with a luxury finish

For higher-end modern bathrooms, one stone-look porcelain used across floor and selected walls can create a quiet, spa-style result. The success here usually comes from discipline. Minimal transitions, carefully selected grout, and clean set-outs do more than adding extra colours or feature strips.

Luxury in a bathroom rarely comes from using more materials. It usually comes from using fewer materials more carefully.

Your Final Checklist for a Perfect Choice

A tile sample can look right in the showroom and still be wrong for a Victorian bathroom once steam, winter temperatures, cleaning, and daily foot traffic come into play. The final check is where costly mistakes get caught before the order is placed.

Price per square metre rarely tells the full story. The actual cost sits in the whole assembly: surface preparation, waterproofing, falls, trims, waste from cuts, grout selection, and the extra labour some tiles demand. I have seen inexpensive tiles turn into expensive jobs because they arrived with edge variation, chipped during cutting, or forced awkward set-outs around wastes and niches.

Before you order, run through these points:

  • Use check
    Match the tile to the room’s actual job. A hard-wearing family bathroom needs a different floor tile from a low-use powder room or ensuite.

  • Wet-zone check
    Confirm the shower floor, main floor, and walls are suited to their location. In Melbourne homes, that usually means paying close attention to grip underfoot and ease of cleaning on larger wall areas.

  • Performance check
    Read the technical data sheet. Check water absorption, slip rating where relevant, tile variation, and whether the product suits internal wet areas under Australian requirements.

  • Lighting check
    View the sample in your own bathroom, in daylight and at night. South-facing rooms, poor natural light, and warm artificial lighting can all change how colour and texture read.

  • Layout check
    Make sure the tile size works with the room dimensions, floor wastes, niches, windows, and tap set-outs. Good tile choices still fail visually if the layout creates thin cuts in obvious places.

  • Installation check
    Confirm the substrate is suitable, the waterproofing system is specified correctly, and the installer has allowed for movement joints, falls, and the right adhesive for the tile type.

Professional specification usually pays for itself because it removes guesswork from the parts homeowners do not always see. The tile has to work with the substrate, the waterproofing, the room dimensions, and the way the bathroom will be used through Melbourne’s colder months and humid summer periods. That is what gives you a bathroom that still looks right and performs properly years after handover.

If you’re ready to turn your shortlist into a finished bathroom, SitePro Bathrooms can help with practical selection, 3D planning, and build execution that balances new bathroom ideas with real-world performance in Victorian homes.

If you want expert help choosing tiles for modern bathrooms, family bathrooms, ensuites, or more refined designer bathrooms, contact SitePro Bathrooms to discuss your renovation.

  • siteprobathrooms

10 Small Bathroom Ideas Australia for 2026

A small bathroom usually shows its problems in the first ten seconds. The door clips the vanity, the toilet feels too close to the shower screen, and there is nowhere practical to put towels, chargers, or spare toiletries. I see this often in older homes, compact apartment ensuites, and family bathrooms where the room was built around old plumbing positions rather than how people use it.

Small spaces punish guesswork.

Good results come from disciplined planning, not decorating tricks. The best small bathroom ideas for Australian homes are the ones that improve circulation, storage, cleaning access, moisture control, and day-to-day comfort without creating compliance problems during the build.

From a registered builder’s perspective, the job starts with constraints:

  • where the wastes and water lines can realistically move
  • how waterproofing will be detailed
  • whether ventilation is adequate for the room size and climate
  • what door swing and fixture clearances will allow comfortable use
  • how tile set-out, falls, and sheet sizes affect the final layout

That is why we use 3D bathroom design before demolition on tight projects at SitePro Bathrooms. It helps homeowners see whether a wall-hung vanity will free up movement, whether a nib wall will make the shower feel boxed in, and whether a larger mirror cabinet gives better value than widening the vanity by another 100 millimetres. On site, those decisions affect cost, compliance, and how the room performs over time.

Materials matter too. In Australian conditions, a small bathroom has to handle heat, steam, cleaning chemicals, and daily wear in a confined area. A finish that looks good in a showroom can be the wrong choice if it marks easily, holds moisture, or needs more maintenance than the household will realistically keep up with.

The 10 ideas that follow come from that practical lens. They focus on layout, storage, light, ventilation, and fixture selection that work in compact bathrooms, with the trade-offs explained clearly so you can make decisions that suit the space, the budget, and the way your household uses the room.

1. Vertical Storage Solutions and Wall-Mounted Fixtures

A modern bathroom design featuring a floating sink and toilet with wooden cabinetry and green glass.

A small bathroom usually feels tight for one simple reason. Too much of the usable room is taken up at floor level.

In practice, the quickest way to improve movement is to shift storage and fixtures onto the walls. Floating vanities, wall-hung toilets, recessed mirror cabinets, and tall joinery all help the floor read as more open. The room is easier to clean, sightlines improve, and the layout feels less congested from the doorway.

At SitePro Bathrooms, this is one of the first things we test in 3D design on compact projects. A wall-hung vanity can give better toe room and make a narrow bathroom easier to use, but only if the depth, mirror placement, and door clearances are resolved properly before the build starts.

What usually works best

For most small ensuites and family bathrooms, one organised storage wall performs better than several small additions spread around the room.

A practical layout often includes:

  • A floating vanity to free up visible floor area and simplify cleaning
  • A recessed mirror cabinet for daily-use items without adding bulk
  • A full-height linen or utility cabinet for towels, toilet paper, and cleaning products
  • Wall-hung toilet pans where the wall construction and budget allow for an in-wall cistern
  • Shallow shelving above the toilet or beside the vanity where circulation space remains clear

The goal is not to cram more into the room. The goal is to store what the household needs without creating pinch points.

The builder's trade-offs

Wall-mounted fixtures look simple once they are tiled and finished. The hard part sits behind the walls.

Before specifying them, I check four things:

  • Structural support: Wall-hung vanities and toilet frames need proper fixing points in the framing or masonry.
  • Service locations: Water lines, wastes, and cistern positions have to work within the wall depth and floor build-up.
  • Access for maintenance: Concealed cisterns and mirrored cabinets still need sensible access for future repairs.
  • Material durability: Joinery boards, edge finishes, and internal carcasses need to suit humid conditions, especially in poorly ventilated bathrooms.

There is also a budget trade-off. Wall-hung toilets and custom recessed storage usually cost more than standard floor-mounted fixtures and off-the-shelf cabinetry. In a tight renovation budget, I would usually prioritise a floating vanity and a good mirror cabinet first, because they deliver a clear space benefit without pushing framing and plumbing costs too far.

Older homes add another layer. In many Melbourne renovations, the wall depth, existing plumbing set-out, and condition of the framing limit how much can be recessed or concealed. That does not rule out wall-mounted solutions, but it does mean the design has to be resolved early so waterproofing, tile set-out, and fixture heights all align on site.

Done properly, vertical storage and wall-mounted fixtures make a small bathroom feel calmer, cleaner, and easier to use every day.

2. Light Colours and Reflective Materials for Spatial Perception

A bright bathroom with light tiles, a window overlooking trees, a vanity, and a white toilet.

A small bathroom can have adequate floor area and still feel cramped. Dark tiles, heavy contrast, and broken sightlines do that quickly. In practice, the visual result often comes down to how the surfaces handle light.

Light finishes usually perform better in compact Australian bathrooms because they reflect both natural and artificial light instead of soaking it up. White, warm off-white, pale greige, soft stone, and muted green generally hold up well. They make wall planes read more continuously, which helps the room feel less boxed in.

At SitePro Bathrooms, I do not treat this as a styling decision alone. It affects tile selection, lighting layout, mirror size, and how the whole room reads once waterproofing, grout colour, and joinery are in place.

What works on site

Large-format tiles can be a smart choice in a small bathroom because fewer grout joints mean less visual interruption. A full-height mirror, a clear shower screen, and a restrained finish palette usually do more for perceived space than adding extra features.

A practical specification often looks like this:

  • Keep the main tile light: Mid-tone and dark tiles can work, but they usually need better lighting and more careful contrast control.
  • Match grout closely to the tile: High-contrast grout chops up the walls and floor.
  • Use reflective surfaces selectively: Mirrors, glazed wall tiles, and glass screens help. Too many glossy finishes can feel cold and show water spotting faster.
  • Limit the finish changes: Two or three dominant finishes are usually enough in a compact room.
  • Choose warmer whites where possible: Cooler whites can read harsh under some LED lighting.
  • Coordinate fixture heights early: Mirror scale, wall lights, and vanity proportions need to align. It helps to resolve these against standard vanity dimensions before construction starts, especially if you are reviewing standard benchtop height and bathroom vanity proportions.

There is a trade-off here. An all-white bathroom can feel larger, but if every surface is glossy and flat, the room can also feel clinical. I usually balance light tiles with timber-look joinery, brushed metal tapware, or a stone-look tile that has some softness in it. That keeps the space bright without making it feel sterile.

Climate matters too. In humid parts of Australia, highly polished surfaces show condensation, soap residue, and hard water marks more readily. Matte floor tiles are often the better call for slip resistance and day-to-day maintenance, while reflective finishes are better reserved for walls, mirrors, and shower glass.

The best small bathrooms are simple for a reason. They use light well, keep the palette controlled, and avoid surface choices that make the room feel busier than it is.

3. Compact Corner Basins and Space-Saving Vanities

A luxurious walk-in frameless glass shower featuring stunning green and gold marble tiled walls and floor.

Corners are often wasted in small bathrooms. That’s a mistake, especially in narrow layouts where the vanity projects into the main path of travel. A compact corner basin or reduced-depth vanity can free up movement without making the bathroom feel stripped back.

In very tight rooms, a slim-depth vanity in the 450 to 500 mm range is often a workable choice, and single vanities commonly sit within a 600 to 900 mm width range in Australian planning guidance outlined by ABI Interiors’ bathroom sizing article. The exact vanity height still needs to suit the users and basin type, which is why proportion matters as much as footprint.

Where corner fixtures make sense

If the bathroom door opens toward the vanity, or the walkway between vanity and shower is pinched, shifting the basin into a corner can solve a circulation problem immediately. This is common in older terraces, compact apartment ensuites, and secondary bathrooms where the room width just isn’t generous.

A good corner setup usually includes:

  • A wall-mounted tap set: This keeps the basin deck cleaner and frees up usable surface area.
  • Built-in mirror storage: You’ll lose some vanity volume, so storage has to move upward.
  • Softened edges: Curved vanity corners are kinder in tight walkways than square cabinet fronts.
  • Clear standing room: A small vanity still needs to be comfortable to stand at.

Don’t pick a tiny vanity just because it fits on paper. If users have to stand sideways to brush their teeth, the layout still isn’t right.

What doesn’t work

A corner basin won’t fix a bad room if everything else stays oversized. Pairing a small basin with an overbuilt toilet pan, bulky shower frame, or oversized towel rail usually cancels out the gain.

The better result comes from treating the room as one coordinated plan. That’s where proper bathroom renovations differ from piecemeal swaps. Every item needs to support the same goal.

4. Walk-In Showers with Glass Enclosures Instead of Bathtubs

A modern, stylish bathroom featuring green wall tiles, light wood vanity, and a black-framed glass door.

A common small-bathroom problem is simple. The bath takes up half the room, the shower feels cramped, and the floor area never works properly. In many Australian renovations, replacing that bath with a walk-in shower is the change that gives the layout back.

It does not suit every home. If it is the only bathroom in a family house, removing the bath can reduce practicality and resale appeal. In an ensuite, guest bathroom, or apartment with a tight footprint, a shower-only layout often makes better use of the room.

Glass enclosures help because they keep sightlines open. You see more floor, more wall tile, and fewer visual breaks. That makes the room read as one space instead of several small zones.

What matters in a real renovation

The success of a bath-to-shower conversion is not about the glass alone. The build detail decides whether the room feels larger and performs properly over time.

A registered builder will usually assess these points first:

  • Shower footprint: A compact shower can work well, but it still needs enough standing room to wash comfortably without hitting the screen or tapware.
  • Waterproofing and falls: A walk-in entry needs correct floor grading so water stays in the shower area and drains as intended.
  • Screen placement: Fixed glass is often cleaner and easier to maintain than bulky framed doors, but it must be sized to control overspray.
  • Tile selection: Slip resistance matters more once the shower becomes the main wet zone.
  • Storage: Recessed niches or in-wall shelves keep bottles off the floor and stop the shower from feeling cluttered.

At SitePro Bathrooms, we usually test this change in 3D before demolition starts. That lets clients see whether the shower opening, glass length, vanity clearance, and toilet position will improve circulation, not just look better on a plan.

Trade-offs homeowners should weigh up

A walk-in shower gives back usable space, but there are compromises.

  • Pros

    • Opens the room visually
    • Improves movement in narrow bathrooms
    • Makes cleaning easier when detailing is simple
    • Suits ageing-in-place better than climbing into a bath
  • Cons

    • Removes bathing option for young children
    • Needs accurate drainage to avoid water escaping
    • Frameless glass shows poor installation quickly
    • Full open-entry designs can feel cold in winter

In older homes, I often find the best result is not the biggest shower possible. It is the shower that leaves the right clearance around everything else. A smaller, well-positioned walk-in shower usually performs better than an oversized one that crowds the vanity or toilet.

For Australian conditions, material choice also matters. Use glass hardware, sealants, and tile systems that handle heat, moisture, and daily cleaning without failing early. Small bathrooms work harder than large ones, so the detailing has to be tighter.

5. Pocket Doors and Sliding Barn Doors for Space Efficiency

A standard hinged door occupies more room than generally appreciated. In a small bathroom, the door swing can block the vanity, clip the toilet pan, or force the whole layout into a worse arrangement. Changing the door type can open up options that weren’t possible before.

Pocket doors are the cleaner solution when the wall can accommodate them. They disappear into the cavity and free up usable floor area near the entry. In some renovations, a surface-mounted sliding door is the simpler option if the wall construction or service locations make a pocket system impractical.

Where this idea earns its keep

This is especially useful in narrow ensuites, powder rooms, and terrace-style homes where there’s no spare circulation space. Instead of designing around the door arc, you can place fittings where they work best.

A few points matter before committing:

  • Check the wall cavity: Pocket doors and plumbing don’t mix well in the same section of wall.
  • Coordinate early: Electrical runs, switches, and noggings need to be planned before framing closes up.
  • Use quality hardware: Cheap tracks and rollers make small bathrooms feel worse, not better.
  • Think about privacy: Barn-style doors can look good, but they don’t seal acoustically the way a standard hinged door does.

A sliding door is a space-saving move, not an automatic upgrade. If the wall is full of services, forcing it can create more building problems than it solves.

For modern bathrooms, a concealed pocket door usually gives the cleaner finish. For character homes, a carefully chosen sliding door can work visually, but it still needs to function well first.

6. Multi-Functional Vanity Units with Integrated Storage and Seating

The vanity does more work than any other fitting in a small bathroom. It handles handwashing, daily storage, mirror position, bench space, and often the room’s visual centre. If the vanity is poorly chosen, the whole bathroom feels compromised.

That’s why multi-functional vanities are worth serious attention in compact bathroom renovations. The best ones combine basin, drawers, mirror storage, and enough usable bench edge for daily routines without making the room feel overloaded.

The smarter way to use one unit

Deep drawers usually outperform cupboard doors in tight spaces because you can access everything from above. Pair that with a mirrored shaving cabinet and the room becomes easier to keep tidy. In some layouts, a small pull-out stool or integrated perch can be useful, but only if it tucks away fully and doesn’t clutter the floor.

Where a bathroom also has to absorb laundry functions, combined planning matters even more. Thoughtful laundries in bathrooms design planning can stop the vanity wall from becoming a crowded run of unrelated fixtures.

What to prioritise

A vanity should match how the bathroom is used, not just the look you want.

  • Choose drawers over dead space: They make small storage more usable.
  • Keep the depth honest: Full-depth cabinetry can choke a narrow bathroom.
  • Use the mirror cabinet properly: It’s one of the easiest ways to add storage without adding bulk.
  • Think about resale: Highly customised joinery can be brilliant, but it still needs broad everyday appeal.

A lot of designer bathrooms succeed because they hide the practical work well. In a small room, that’s often the mark of good design rather than expensive design.

7. Strategic Lighting Design and Layered Illumination

A small bathroom can be well laid out and still feel cramped if the lighting is wrong. I see this often in older Australian homes where a single centre batten or downlight leaves the mirror in shadow, flattens tile colour, and makes the room feel narrower than it is.

Good lighting needs to be planned with the renovation, not selected after the tiles and cabinetry are locked in. At SitePro Bathrooms, we test lighting positions during the 3D design stage so clients can see how mirror lights, ceiling fittings, and low-level lighting will read in a tight room.

What a practical lighting plan includes

Layered lighting works because each fitting has a job.

  • Task lighting at the mirror: Side-mounted or well-positioned mirror lighting reduces facial shadows and makes daily use easier.
  • Ambient ceiling lighting: General light should cover the full room evenly, not just the centre.
  • Low-level feature lighting: Under-vanity or niche lighting can add depth and help a floating fixture read lighter.
  • Correct IP-rated fittings: Wet areas and steam-prone bathrooms need fittings suited to the zone and conditions.

Downlights still have a place, but placement matters more than quantity. A row of poorly placed fittings can create glare on tiles and leave the vanity area underlit. If you’re planning recessed fittings, bathroom downlight placement and selection should be worked through alongside the mirror size, shower location, and ceiling set-out.

Trade-offs that matter in real renovations

More fittings are not always better. They add cost, can overcomplicate the ceiling, and in a very small bathroom they sometimes make the space feel harsher rather than brighter.

A better result usually comes from balancing a few elements well:

  • keep mirror lighting at a usable height
  • avoid relying on one central fitting
  • use warm or neutral light that suits the tile colour and skin tones
  • add under-bench LED lighting only where it supports the design and can be detailed neatly

Under-bench lighting is one of those details that looks simple but needs proper planning. The cable path, transformer location, vanity construction, and cleaning access all need to be resolved early. Done well, it gives a floating vanity more visual separation from the floor and helps the room feel less heavy.

Lighting will not fix a poor layout. It will, however, make a well-designed small bathroom feel clearer, calmer, and easier to use every day.

8. Niche Shelving and Recessed Storage in Shower and Walls

A small shower with three bottles on the floor, a wire rack on the screen, and nowhere to put soap always feels tighter than it is. Recessed storage fixes that at the source. It puts storage inside the wall cavity, keeps circulation space clear, and reduces the visual clutter that makes compact bathrooms feel busy.

From a builder’s perspective, niches work well only when they are resolved early. On SitePro Bathrooms projects, we set them out during design, often in 3D, so the niche size, tile lines, framing, and waterproofing all work together before demolition is complete. That avoids the common result in small bathrooms: a niche that looks like an afterthought and creates more detailing problems than storage value.

What makes a niche work properly

A neat niche is a construction detail, not just a cut-out in the wall.

The practical checks are straightforward:

  • Stud location: The wall frame limits width unless the framing is altered properly.
  • Wall depth: Some walls do not have enough cavity depth for useful storage.
  • Waterproofing detail: Internal corners, fall, and sealing all need to be handled correctly in wet areas.
  • Tile set-out: A niche that lands awkwardly across grout lines usually looks wrong, even in a simple bathroom.
  • Item height: Shampoo bottles, pump packs, and razors all need realistic clearance.
  • Cleaning access: Deep or overly segmented niches collect residue and are harder to maintain.

One mistake I see often is oversizing the niche. In a small bathroom, a long horizontal recess can look smart on a plan but dominate the shower wall once tiled. A more restrained niche, sized around the products used in the home, usually looks better and performs better.

Build the niche into the design before waterproofing starts. Retrofitted niches are where neat ideas often turn into messy repairs.

Where recessed storage earns its keep

The best locations are the ones that solve a real storage problem without adding bulk.

  • In the shower wall: Keeps daily toiletries off the floor and away from hanging caddies.
  • Beside the vanity: Useful for hand towels or small items where joinery depth is limited.
  • Above a bath hob or ledge: Works if the wall construction allows it and the waterproofing detail is resolved properly.
  • Inside a partition wall: Can suit toilet paper or spare products in tight layouts, provided the wall is not carrying services that conflict with the recess.

There is also a compliance and services trade-off here. Not every wall is suitable. Plumbing pipes, cisterns, electrical runs, and structural framing can rule a niche out quickly. In older Australian homes, that constraint shows up often, especially in brick veneer renovations and apartments where wall depth is limited. In those cases, I would rather specify a shallower recessed option or redesign adjacent joinery than force a niche into the wrong wall.

Done properly, recessed storage makes a small bathroom easier to use and easier to clean. It gives back usable room without adding another fixture into an already tight space.

9. Minimalist Design and Decluttering for Perceived Space

A small bathroom can be fully compliant, well finished, and still feel cramped if every surface is busy. I see this often in renovations where the layout is sound, but the room is carrying too many visual decisions at once. Extra colours, open shelving packed with products, oversized tapware, and decorative accessories all compete for attention in a space that has very little to spare.

Minimalist design solves that problem by reducing visual noise.

From a builder’s perspective, the goal is not to make the room feel bare. The goal is to make it read clearly, clean easily, and stay practical for daily use. At SitePro Bathrooms, that usually starts in the design phase with 3D planning. Homeowners can see early whether a room feels calm and ordered, or whether too many fixture shapes, finish changes, and exposed items are making it feel tighter than it is.

Why a simpler room usually feels larger

Perceived space is heavily affected by how many lines, objects, and material changes the eye has to process. In a compact bathroom, a quieter design often works harder than an expensive one.

A restrained scheme usually includes:

  • One dominant tile selection: This keeps surfaces visually connected instead of chopped up.
  • Simple vanity fronts: Flat or lightly profiled cabinetry tends to look cleaner than ornate detailing.
  • Controlled tapware and accessories: Slim, practical fittings reduce bulk without sacrificing function.
  • Closed storage where possible: Everyday products stay accessible without living on display.
  • A limited material palette: Fewer finish changes usually make the room feel more settled and more spacious.

There is a trade-off. Ultra-minimal bathrooms can become frustrating if storage has not been planned properly. If there is nowhere for spare toilet rolls, cleaning products, hair tools, or daily toiletries to go, clutter comes back within a week. Good minimalist design depends on enough usable storage behind the scenes.

What works in real Australian renovations

In older homes and apartments, compact bathrooms often need to handle hard water marks, humidity, and frequent cleaning in a small footprint. That is why I favour minimalist choices that are easy to maintain, not just visually restrained on handover.

The details that generally hold up best are:

  • Cabinet finishes that wipe down easily: Matte surfaces can look good, but some show residue and fingerprints more readily than homeowners expect.
  • Wall-hung fixtures with clean lines: These help the floor read more openly and make cleaning easier around the base.
  • Mirrors and screens with minimal framing: Heavy visual borders can make a tight room feel boxed in.
  • Integrated storage inside the vanity or shaving cabinet: This keeps daily items close without filling every ledge and corner.
  • A realistic edit of accessories: Towel rails, hooks, shelves, and holders should match how the bathroom is used, not how a display suite is styled.

That last point matters. A family bathroom, an ensuite, and an apartment bathroom do not need the same level of display or the same number of accessories.

A practical minimalist checklist

Homeowners usually get a better result by editing with function in mind.

  • Keep the benchtop for daily essentials only
  • Choose two or three finishes and repeat them consistently
  • Avoid decorative items that collect dust or reduce usable space
  • Store backup products out of sight
  • Select fixture sizes that suit the room, not the showroom

Done well, minimalist design makes a small bathroom feel calmer, easier to use, and easier to keep clean. It also helps the quality of the renovation show through, because the eye is not distracted by clutter or too many competing elements.

10. Intelligent Ventilation Systems and Moisture Management

The failure I see most often in small bathrooms is not tile choice or layout. It is trapped moisture.

A bathroom can look sharp at handover and still develop peeling paint, swollen cabinetry, mould around silicone, and a musty smell within a short period if extraction and airflow were never resolved properly. In a compact room, steam builds fast and lingers longer, especially where showers sit close to the vanity, toilet, and door.

From a builder’s perspective, ventilation needs to be designed at the same time as the layout, waterproofing, and material schedule. At SitePro Bathrooms, we usually test this in the 3D design stage because fan location, duct runs, door clearances, window positions, and shower configuration all affect how the room dries out after use. That is particularly important in Australian homes, where climate, roof space access, and older construction methods can change what is practical.

What good moisture control looks like in a small bathroom

A good system clears steam quickly and gets moist air out of the building. It also suits how the bathroom is used in reality.

In practice, that usually means:

  • An exhaust fan sized for the room and use pattern: A tiny fan in a high-use family bathroom rarely performs well.
  • Ducting that runs to the outside: Moist air discharged into the roof space can create bigger problems above the ceiling.
  • Short, efficient duct runs where possible: Long or poorly installed ducting reduces performance.
  • Humidity sensing or run-on timers: These help in households where the fan is switched off too early.
  • Materials that cope with regular condensation: Cabinet boards, paint systems, trims, and sealants all need to suit a wet environment.

Wet room style bathrooms and full-height tiled surfaces can be easier to clean, but they also make extraction more important because more of the room is exposed to steam and splash. Cleanability improves when the detailing is simple. Drying performance still depends on ventilation.

The trade-offs homeowners should know

Better ventilation usually costs more upfront. It can also require more coordination.

Common constraints include:

  • Limited ceiling space: Apartments and some slab homes do not leave much room for ducting.
  • No external wall nearby: That can make the duct route longer and less efficient.
  • Noise expectations: Quieter fans are available, but they need to be selected and installed properly.
  • Energy use versus runtime: A fan that runs longer manages moisture better, but homeowners need to be comfortable with how it operates.
  • Window reliance: A window helps, but it is not a substitute for mechanical extraction, especially in winter or in bathrooms with poor cross-flow.

These are practical decisions, not showroom decisions.

Moisture management is more than the fan

The fan matters, but it is only one part of the system. Small bathrooms hold up better when the rest of the detailing is done properly too.

  • Seal penetrations carefully: Pipe penetrations, fittings, and junctions need neat, durable sealing.
  • Use moisture-resistant substrates in the right locations: This matters behind tiles, around vanities, and near shower zones.
  • Protect joinery from constant wetting: Cabinet design should account for splash zones and cleaning habits.
  • Allow the room to dry between uses: Door undercuts, window placement, and fan controls all play a part.

A registered builder treats ventilation and moisture control as a performance issue from day one. That approach usually gives homeowners a bathroom that stays cleaner, smells better, and lasts longer under real Australian conditions.

10-Point Comparison: Small Bathroom Ideas (Australia)

Solution Implementation complexity Resource requirements Expected outcomes Ideal use cases Key advantages
Vertical Storage & Wall-Mounted Fixtures Moderate–high (wall reinforcement, plumbing) Medium–high cost; professional install; moisture‑resistant materials Frees floor area, cleaner look, improved accessibility Ensuites, compact bathrooms <5 m², Victorian terraces Maximises usable floor space; modern appearance; easier cleaning
Light Colours & Reflective Materials Low (paint, tiles, mirrors) Low cost; standard trades Brighter rooms, perceived larger space, timeless aesthetic Dark small bathrooms, rentals, budget renovations Low cost, quick visual impact, increases appeal
Compact Corner Basins & Space‑Saving Vanities Low–moderate (plumbing, tight fit) Low–medium cost; specialized fixtures Efficient corner use, retains functionality with smaller footprint Studio ensuites, tight layouts, terrace bathrooms Frees central space; affordable; many style options
Walk‑In Showers with Glass Enclosures Moderate–high (waterproofing, glass fitting) Medium–high cost; quality glass & ventilation required Visual openness, easier cleaning, improved accessibility Bathrooms where tubs are rarely used; rental/upgrades Maintains sightlines; modern look; appeals to buyers/renters
Pocket Doors & Sliding Barn Doors High for pockets (structural work); moderate for barn doors Medium–high cost; carpentry and possible rerouting Recovers door swing space; smoother traffic flow; variable privacy Terraces, tight entryways, accessible bathrooms Eliminates swing area; improves circulation; contemporary feel
Multi‑Functional Vanity Units Moderate (joinery, plumbing integration) Medium cost; customisation increases cost Consolidated storage and function; neater countertops Apartments, family bathrooms needing storage Maximises storage; customizable; reduces extra furniture
Strategic Lighting & Layered Illumination Low–moderate (electrical planning) Low–medium cost; electrician recommended; LEDs Enhanced depth, better task lighting, improved mood and safety Homes with limited natural light; modern refurbishments Energy‑efficient; improves perceived space; flexible ambience
Niche Shelving & Recessed Storage Moderate (must be planned in renovation) Low–medium cost; tiling & waterproofing work Hidden storage, decluttered surfaces, integrated look Showers, small ensuites, renovations Saves surface space; built‑in aesthetic; keeps toiletries organized
Minimalist Design & Decluttering Low (design approach) Low cost; investment in hidden storage helpful Perception of larger, calmer space; low maintenance Busy professionals, rentals, contemporary homes Cost‑effective; timeless; easy upkeep
Intelligent Ventilation & Moisture Management Moderate–high (ducting, HVAC expertise) Medium–high cost; proper ductwork and maintenance Prevents mold, improves air quality, protects structure Humid climates, bathrooms with condensation issues Protects materials, improves health, extends component life

Bringing Your Small Bathroom Vision to Life

A small bathroom usually looks simple on paper. Then demolition starts, the walls open up, and the room shows its limits. Door swings clash with vanity depth. Existing plumbing fixes the layout more than expected. Storage disappears fast unless it is designed into the walls and joinery from day one.

That is why small bathroom ideas australia homeowners get the best results from are usually the ones that solve real site constraints first. In a compact room, good design is not about adding features. It is about choosing the right ones, sizing them properly, and making sure the build will comply with Australian requirements for waterproofing, drainage, electrical work, ventilation, and fixture placement.

From a builder’s perspective, the strongest small-bathroom renovations usually come down to a few practical decisions:

  • keep floor area clear with wall-hung fixtures where the wall construction allows it
  • reduce visual clutter with simpler finishes and storage that is built in, not added later
  • avoid oversized vanities and shower screens that restrict movement
  • choose materials that handle moisture, temperature shifts, and daily cleaning in Australian conditions
  • resolve the layout in drawings and 3D before construction starts, especially where plumbing moves are being considered

Cost control starts well before the first trade arrives. In small bathrooms, wasted money usually comes from late changes, unsuitable fixture sizes, and discovering too late that a wall cannot take the item selected or that services need to be rerouted. Earlier in the article, renovation cost pressure and tighter household budgets were already noted. That pressure makes planning more important, not less.

A registered builder helps by dealing with the parts homeowners do not always see at the concept stage:

  • checking whether proposed layouts can be built within the room’s actual dimensions
  • coordinating plumbing, electrical, waterproofing, tiling, and ventilation before work begins
  • allowing for access, maintenance, and service clearances
  • selecting products and finishes that will hold up in wet areas over time
  • identifying trade-offs early, such as whether extra storage is worth giving up circulation space

3D design is especially useful in small bathrooms because small measurement errors have big consequences. A vanity that looks compact in a showroom can feel oversized once the toilet pan, shower entry, and towel rail are all in place. Seeing the room properly before demolition helps prevent expensive revisions and gives homeowners a clearer basis for decisions.

For homeowners in Highett and across greater Victoria, SitePro Bathrooms is one local option for design development, 3D visualisation, construction, and finishing. That kind of coordinated delivery suits compact bathrooms because there is less tolerance for guesswork, rushed selections, or poor sequencing between trades.

The goal is straightforward. Build a bathroom that fits the room, meets code, manages moisture properly, and feels calm to use every day. In a small space, that standard comes from disciplined planning and careful execution, not from trying to force in features the room cannot comfortably hold.

  • siteprobathrooms

Your Guide to a Downlight in Bathroom Renovations

A lot of bathroom renovations start the same way. Homeowners spend weeks choosing tiles, tapware and a vanity profile, then lighting gets left until the electrical rough-in is already booked. That’s usually the moment the questions start. How many fittings do you need, what IP rating is required, and will a downlight in bathroom spaces make the room feel sharp and modern or harsh and clinical?

In Highett, I see this often in both compact ensuites and larger family bathrooms. The room looks straightforward on plan, but bathrooms are one of the trickiest spaces in the house to light properly. Water, steam, mirrors, ceiling heights and daily grooming all change the way light behaves. A fitting that works perfectly in a hallway can be the wrong choice above a shower or vanity.

Good lighting does two jobs at once. It keeps the room safe and compliant, and it makes the space easier to use every day. In designer bathrooms, it also helps the finishes look expensive, balanced and calm. That’s why the lighting layout needs the same attention as waterproofing, joinery and tile set-out.

Setting the Scene for Your Bathroom Lighting

You’re probably at the stage where the new bathroom ideas are starting to feel real. Tile samples are on the bench, the vanity size is locked in, and you’re trying to picture how the room will feel at 6:30 in the morning and again at night when you want the space to be softer. That’s exactly where lighting decisions matter most.

A modern bathroom under construction featuring tan stone tiles, a floating vanity, and a glass shower stall.

One common pattern in bathroom renovations is that clients know the look they want, but not how to achieve it with lighting. They’ll say they want modern bathrooms with a clean ceiling line, or designer bathrooms that feel hotel-like without being gloomy. Recessed downlights are usually part of that answer, but only when they’re selected and positioned properly.

A bathroom isn’t lit like a living room. You need useful light at the mirror, safe fittings in wet areas, and enough control so the room doesn’t feel overlit at night. If the renovation timeline is already on your mind, it helps to understand how long a bathroom remodel should take before electrical choices start affecting the build sequence.

Practical rule: If lighting is being discussed after tiles are ordered and ceilings are framed, you’re already giving away design control.

The best results come when lighting is planned early. That’s when the builder, electrician and designer can coordinate mirror position, fan placement, ceiling battens, insulation clearance and switch locations before anyone starts cutting holes.

Understanding Bathroom Downlights

A downlight is a recessed ceiling fitting that directs light downward. In bathrooms, that usually means a cleaner ceiling, less visual clutter and a more architectural finish than a central oyster light or bulky decorative fitting. That’s why downlights are so popular in modern bathrooms.

Why homeowners choose them

Downlights work well when you want the ceiling to disappear visually. In smaller rooms, that matters. A compact ensuite can feel less crowded when the fittings sit flush and the eye isn’t pulled up to hanging fixtures.

They also suit a wide range of layouts. A single room can use downlights for general ambient light, tighter task lighting near a vanity, and feature lighting over a shower niche or textured wall if the overall plan is handled properly.

Where they work well and where they don’t

The biggest strength of a downlight in bathroom design is simplicity. The biggest weakness is that simplicity can fool people into thinking placement doesn’t matter. It does.

Here’s the trade-off in practical terms:

  • Clean look: Recessed fittings support minimalist, high-end bathrooms and keep sightlines tidy.
  • Flexible planning: They can be used in ensuites, family bathrooms and powder rooms with different beam spreads and trim sizes.
  • Low visual bulk: They’re useful where ceiling height is modest and you don’t want fittings hanging into the room.

But there are drawbacks:

  • Poor placement causes shadows: A fitting directly over the user at the vanity can make grooming harder, not easier.
  • Too many create glare: A ceiling dotted with fittings often looks busy and feels uncomfortable.
  • Wrong product choice shortens life: Bathrooms expose fittings to steam and moisture, so general-purpose products often disappoint.

A sleek ceiling isn’t the same thing as a good lighting plan.

The balanced view

If you want a simple answer, downlights are usually the right starting point for bathroom renovations, but not always the full solution. They give you the base layer. They don’t automatically solve vanity lighting, mirror glare or mood. That’s where beam angle, CRI, zoning and layout start to matter.

Critical Safety Regulations for Bathroom Lighting

This is the part that should never be guessed. In Victoria, bathroom electrical compliance is governed by AS/NZS 3000 wiring rules. Bathroom zones then determine what level of moisture protection a light fitting needs under AS/NZS 60598.

A person is installing a recessed downlight in a bathroom ceiling while performing electrical wiring work.

The simplest way to think about it is this. The closer the fitting is to direct water exposure, the higher the protection level needs to be. That protection level is shown as the IP rating. If the wrong fitting goes in the wrong zone, the issue isn’t only cosmetic or administrative. It creates a real safety and durability problem.

A cited industry summary notes that in Victoria, Zone 1 above a shower requires a minimum IP44 rating, but many professionals recommend IP65 to limit steam ingress, which can reduce a downlight’s lifespan by up to 50%. The same source notes that 28% of Victorian bathroom electrical faults stem from incorrectly IP-rated fittings, which is why licensed installation matters (bathroom IP rating and fault summary).

How the bathroom zones work

Bathrooms are divided into zones based on water exposure. In practice, the most critical areas are inside the bath or shower, directly above those fixtures, and the surrounding splash zone.

Zone Location Description Minimum IP Rating SitePro Recommended Rating
Zone 0 Inside bath or shower basin IPX7 / IP67 IP67
Zone 1 Above bath or shower to 2.25m height IP44 to IPX4-IPX5 minimum IP65
Zone 2 Around fixtures, generally 0.6m from water source to 2.25m IP44 / IPX2-IPX4 minimum IP65 where practical
Outside zones Areas outside defined splash zones IPX0 IP44 or higher for added durability

That table is the conversation I want clients to have with their builder and electrician before final selections are made.

What this means on a real project

On site, the mistakes are usually predictable. Someone chooses fittings by appearance alone. Or they assume the centre of the ceiling is automatically outside the risk area. In a steamy room, that assumption can be expensive.

These are the checks that matter most:

  • Check the actual zone: Don’t estimate from memory. Measure from the bath and shower footprint and confirm the ceiling height.
  • Read the fitting specification: The trim style tells you nothing about compliance. The IP rating does.
  • Match the fitting to the ceiling build-up: Insulation, cut-out size and fire separation all affect what can be installed safely.
  • Use licensed trades: Wet-area electrical work isn’t a DIY area.

For broader site safety thinking during a renovation, it also helps to understand worker safety on construction sites, because bathroom lighting decisions sit inside a much bigger compliance process.

On site advice: If a fitting is only “probably fine” for a wet area, it isn’t the right fitting.

Why the recommended rating is often higher than the minimum

Minimum compliance and best practice aren’t always the same thing. A bathroom in regular use creates steam, condensation and repeated moisture cycling. That’s why many builders and electricians prefer a higher rating than the bare minimum, especially over showers and in homes where the bathroom sees heavy daily use.

For homeowners, that usually means fewer callbacks, fewer failed fittings and a better result long after handover.

Choosing the Best Downlight Types for Your Space

Once safety and zoning are sorted, product choice becomes a design decision. It determines whether many bathrooms either become calm and usable, or end up looking bright on paper and uncomfortable in real life.

Various modern designer LED lighting fixtures of different shapes, materials, and colors displayed on a reflective surface.

Fixed, fire-rated and adjustable options

A standard fixed LED downlight is usually the workhorse. It handles general illumination well and suits most ceilings where you want a neat, consistent finish.

A fire-rated downlight matters where the ceiling system needs to maintain fire performance. In upper-level rooms or where there’s habitable space above, this isn’t a decorative upgrade. It’s part of a compliant ceiling strategy.

An adjustable or gimbal-style fitting has a narrower use, but it can solve specific problems. It’s useful when you need to direct light away from a mirror, bring light onto a feature wall, or avoid a harsh drop straight onto a user’s face.

CRI matters more than most people realise

If you only remember one lighting term for the vanity area, make it CRI, or Colour Rendering Index. This tells you how accurately a light source shows colours and skin tones.

A verified industry summary notes that for vanity lighting, downlights placed directly overhead can cast shadows that accentuate wrinkles. The same summary says a Dulux AU lighting study found LEDs with a CRI above 95 can reduce makeup application errors by 40%, while only 22% of Melbourne renovations use them (beam angle and CRI summary).

That lines up with what works in practice. Cheap, low-quality light makes faces look dull, tired or patchy. High-CRI light gives a more natural reading of skin, hair and finishes.

Beam angle changes the feel of the room

Beam angle controls how wide the light spreads. That affects both comfort and function.

A tighter beam is more focused. It can help with targeted light over a shower or niche, but if it’s used carelessly over a vanity, it creates hotspots. A wider beam can soften general lighting, but too much width in a small room can flatten the space and increase glare.

I usually explain it this way:

  • Narrower beam: Better for control, accenting and avoiding spill into every corner.
  • Wider beam: Better for broad ambient coverage, but easier to overdo in compact rooms.
  • Balanced scheme: Best result for most bathrooms, with one beam approach for general light and another for key task areas.

Good bathroom lighting doesn’t blast every surface equally. It puts light where people actually need it.

What works best in modern bathrooms

For most modern bathrooms, the strongest combination is simple. Use quality LED fittings, choose fire-rated products where the ceiling build-up requires them, and prioritise high CRI around the vanity. If a fitting can tilt, use that feature deliberately rather than as a gimmick.

For designer bathrooms, restraint usually wins. Fewer, better-chosen fittings create a cleaner result than overcomplicating the ceiling with too many fixture types.

Perfect Placement and Spacing for Downlights

The layout is where the whole scheme either starts to make sense or falls apart. You can buy a compliant, high-quality fitting and still get a poor result if the spacing is wrong.

A modern bathroom vanity featuring a large mirror with reflection of downlights and scenic window views.

For compact Victorian ensuites sized 3 to 5m², guidance supports 2 to 4 inch fittings, with one downlight per 1.5 to 2m² and enough illumination to achieve 300 to 500 lux for task lighting over sinks. In lower-ceiling homes of 2.4 to 2.7m, this more precise approach can reduce multi-shadowing by up to 40% compared with larger wide-angle lights (compact ensuite placement guidance).

Start with layers, not a grid

The mistake I see most is people trying to centre lights by eye and create a neat row pattern. Bathrooms don’t need a runway grid. They need layered light.

Think in three parts:

  1. Ambient light for the whole room.
  2. Task light where people shave, apply makeup, brush teeth and clean.
  3. Accent light only if there’s a feature worth highlighting.

That approach is more useful than trying to make the ceiling look mathematically symmetrical.

Practical placement for common bathroom areas

A better layout usually follows how the room is used.

  • At the vanity: Don’t rely on one fitting directly above the user’s head. That tends to put the brow and nose into shadow. Slightly offset placement works better, especially when combined with mirror or side lighting.
  • In the shower zone: Use the correct wet-area fitting, but avoid making it the brightest point in the room unless the shower is enclosed and dark.
  • In the centre of the room: One fitting may help with circulation space, but only if it supports the full layout rather than creating glare on glossy tiles.
  • Near feature finishes: If you have stone texture, a niche, or a detailed wall tile, controlled light can help. Random extra fittings usually won’t.

Compact ensuite example

A small Highett ensuite often needs restraint more than output. With a low ceiling and limited floor area, oversized fittings or broad flood beams can make the room feel flatter and brighter than intended.

A better approach is:

  • Use smaller-diameter fittings
  • Space them to suit room function, not just room shape
  • Keep vanity lighting flattering rather than top-heavy
  • Include dimming so the room can shift from morning task use to evening comfort

If you’re planning a small room, designing an ensuite properly from the start helps the lighting plan make more sense because vanity depth, mirror width and shower location all affect placement.

The right number of downlights is the number that lights the room properly. Not the number that fills the ceiling.

Why dimming is worth including

Bathrooms do double duty. They’re workspaces in the morning and wind-down spaces at night. Dimming gives you flexibility without changing the fittings themselves.

In practical terms, that means the same layout can support bright, useful task lighting when needed and a softer feel when the room is being used for a bath or late-night routine.

Common Downlight Mistakes to Avoid in Your Renovation

Most bathroom lighting problems aren’t caused by one dramatic error. They come from a series of small decisions that were never coordinated.

The first and most serious mistake is using the wrong IP-rated fitting in the wrong area. That can create safety issues, shorten product life and complicate final compliance. Homeowners sometimes assume all recessed lights sold for bathrooms are suitable everywhere in the room. They aren’t.

The next problem is overlighting. People worry a bathroom will feel dim, so they keep adding fittings. The result is often a ceiling full of evenly spaced circles that produce glare off tiles, mirrors and stone tops. The room feels more like a treatment room than a home.

Mistakes that keep showing up on site

  • Treating the vanity like general space: The vanity is a task zone. If the downlight sits directly overhead, facial shadows get worse.
  • Ignoring insulation and ceiling conditions: Not every fitting suits every ceiling build-up. Insulation contact, fire separation and cut-out depth all need checking.
  • Choosing on trim colour alone: A black, white or brushed finish might suit the palette, but appearance doesn’t tell you whether the fitting is appropriate.
  • Skipping dimmers: That usually seems like a small omission at quote stage and a daily annoyance after handover.

What doesn’t work in real bathrooms

A common assumption is that more downlights automatically means a better bathroom. It usually means the opposite. Strong bathrooms use fewer fittings with better purpose.

Another weak move is leaving lighting until the electrician is already roughing in. By then, the mirror size, joinery height and shower set-out may already be fixed, and the opportunity for a refined layout is gone.

Bad bathroom lighting is rarely a product problem alone. It’s usually a planning problem.

If you’re chasing designer bathrooms rather than just functional ones, avoid the temptation to solve every issue with another hole in the ceiling.

Working With Your Renovator for Flawless Lighting

Lighting gets better when it’s resolved before construction, not adjusted during it. A good renovator should be able to explain where each fitting goes, why it belongs there, what rating it needs, and how it will interact with the mirror, ceiling, fan and tile layout.

That matters because bathroom renovations involve more than selecting a fitting from a display board. The layout has to work with framing, waterproofing, electrical rough-in, insulation, ceiling cut-outs and final usability. Homeowners don’t need to manage all of that themselves, but they should expect clear answers.

Questions worth asking early

Ask your renovator these things:

  • How are the wet-area zones being assessed
  • What CRI is being specified near the vanity
  • Will the room rely only on ceiling light, or is it layered
  • Is the lighting shown in the design before installation starts

A professionally modelled design can do more than improve confidence. Verified guidance notes that integrating lighting plans into 3D designs can reduce energy consumption by 20 to 30% when placement is simulated and efficient LED fixtures are selected to meet AS 1680 goals (3D lighting design and energy savings).

That’s one reason experienced, registered builders unlimited in practical knowledge tend to protect the client from expensive guesswork. You see the lighting intent early, not after the plaster is patched.


If you’re planning a bathroom renovation in Highett or elsewhere in Victoria and want a lighting plan that balances compliance, comfort and clean design, SitePro Bathrooms can help. Their end-to-end bathroom renovations process includes 3D design, practical layout planning and a build approach focused on modern bathrooms, designer bathrooms and durable results that work in everyday life.

  • siteprobathrooms

Art Deco Bathroom: A 2026 Renovation Guide

You’re probably here because you like the look of an art deco bathroom, but you’re also trying to work out whether it will suit your home, your budget, and the way your household uses the space every day. That’s the right question to ask.

A good Art Deco renovation isn’t just about black tiles and gold tapware. It relies on symmetry, disciplined material choices, and careful detailing. Get that right and the room feels elegant for years. Get it wrong and it starts to look like a theme.

In Victoria, that balance matters even more. Many bathroom renovations sit inside older homes where layout limits, heritage considerations, waterproofing requirements, ventilation, and buildability all need to be resolved before anyone orders a tile. The strongest results come from treating style and construction as one job, not two separate decisions.

Embracing the Art Deco Aesthetic

The Art Deco style is recognizable on sight, though its underlying appeal is not always easily articulated. In a bathroom, the style is built on three things: geometry, symmetry, and glamour with restraint.

A luxurious Art Deco style bathroom featuring green doors, marble sinks, and a black and white tiled floor.

Know the visual language

If you want the room to feel authentic, start with the forms that define the style.

  • Geometry first: chevrons, zig-zags, stepped profiles, fan patterns, sunbursts, and strong vertical lines.
  • Symmetry always matters: mirror-centred layouts, paired lights, repeated tile lines, and balanced joinery.
  • Luxury through finish: polished surfaces, reflective metals, glass, stone, and crisp edges.
  • Controlled colour: strong contrast usually works better than too many tones fighting each other.

The movement began in western Europe in the 1910s and 1920s, came to prominence at the 1925 Paris Exposition, and later became a major style in the United States during the 1930s. Its design language included geometric patterns such as chevrons, zig-zags, and sunbursts, along with materials like chromed steel and terrazzo that helped democratise high-style interiors. That long history is one reason the look still holds up in Victorian homes today, as outlined in Britannica’s history of Art Deco.

What makes it timeless

A proper art deco bathroom doesn’t chase trends. It uses order.

That’s why the style still feels relevant in modern bathrooms. Even when the fixtures are contemporary and the waterproofing, lighting, and ventilation are completely current, the room can still feel distinctly Deco if the layout is disciplined and the detailing is sharp.

Practical rule: If a feature doesn’t strengthen symmetry or geometry, it usually weakens the room.

One common mistake is confusing Art Deco with “old-fashioned”. They’re not the same thing. Generic vintage styling tends to lean soft, decorative, and mixed. Art Deco is more structured. The lines are cleaner. The contrasts are stronger. The room feels composed, not nostalgic.

Start with one dominant idea

Before selecting finishes, decide what will carry the design.

For some bathrooms, it’s the floor pattern. In others, it’s a stepped vanity wall, a dramatic mirror, or a pair of wall lights over a pedestal basin. Once that anchor is clear, the rest of the space should support it rather than compete with it.

A few combinations consistently work well:

  • Black and white geometry for a crisp classic look
  • Mint with black accents for a softer period feel
  • Rose with dark trim if you want something more expressive
  • Terrazzo and chrome when you want Deco character with a slightly cleaner modern edge

New bathroom ideas often fail because they try to include every Deco reference at once. Better designer bathrooms edit hard. One statement floor, one strong mirror, one confident metal finish. That usually gives a better result than piling in decorative elements.

Planning Your Art Deco Renovation Project

Art Deco looks expensive because it punishes shortcuts. Cheap planning shows up fast in this style. Off-centre fittings, uneven set-outs, poor lighting placement, and substitute materials are all easy to spot.

That’s why the planning phase carries more weight here than it does in many standard bathroom renovations. Before construction starts, the layout, finishes, compliance pathway, and sequencing should already be resolved.

Budget for the style you actually want

The biggest budget tension in an art deco bathroom is material authenticity versus cost control. Feature tiling is the clearest example.

According to this Art Deco renovation cost reference, geometric tiling can cost $150/sqm versus $80/sqm for standard tiling, and well-executed Art Deco-inspired renovations can boost Victorian property values by 12-15%. In Highett, investors have reportedly seen up to a 22% rental uplift post-reno. That doesn’t mean every bold renovation pays back equally, but it does support spending properly on the visible elements that define the room.

Here’s how that plays out in practice:

  • Spend on what the eye reads first: floor pattern, vanity wall, basin choice, mirror, and lighting.
  • Save in low-impact zones: concealed storage details, secondary wall areas, or simpler shower glazing where it doesn’t affect the style.
  • Avoid false economy: if you downgrade the main tile or trim package after the design is set, the whole room can lose coherence.

The rooms that hold value are usually the ones where the planning decisions stay consistent from concept to handover.

Compliance and builder selection matter

Many projects drift off course when fundamentals are overlooked. An Art Deco bathroom may look decorative, but the build still depends on the same fundamentals as any serious renovation: substrate preparation, waterproofing, falls, ventilation, electrical coordination, and fixture rough-ins that suit the final layout.

If your home has period character or sits within an area where original features matter, that planning gets more sensitive. Some homes also carry planning protections, so preserving the right details can be important to long-term value and approval pathways.

That’s why I’d always treat builder selection as a design decision, not just a contract decision. If you’re weighing up qualifications, approvals, and accountability, this guide on why using a registered builder matters for your bathroom renovation is worth reading.

Lock the design before demolition

A detailed design package prevents the most expensive renovation habit of all: changing your mind mid-build.

For Art Deco work, that package should clearly show:

  1. Centrelines and symmetry points for mirrors, lights, niches, basins, and feature walls
  2. Tile set-outs so cuts fall in the right places
  3. Fixture selections before rough-in starts
  4. Joinery and stone profiles that match the intended era character
  5. Lighting locations relative to mirrors, not just the room plan

Three-dimensional design is particularly useful here because symmetry can look fine on paper and still feel wrong once the room is built. If the bathroom has a tight footprint, seeing proportions before construction helps avoid awkward compromises.

Selecting Core Materials and Fixtures

Art Deco bathrooms have strong bones. If the foundational pieces are wrong, no amount of styling fixes the room later.

The best approach is to choose the permanent elements first. That means the basin type, floor material, wall treatment, metal finish, and bath or shower format. Accessories come after that.

A sleek, chrome bathroom faucet set against a contemporary sink and decorative green textured glass element.

Fixtures that suit the era

Historically, Art Deco bathrooms helped establish features that are standard now, including separate shower spaces and pedestal basins. The style also favoured marble or geometric floor tiles, along with coloured enamels and porcelains introduced in the 1920s. In heritage homes, preserving or carefully echoing those features helps maintain the property’s character, as noted in this guide to Art Deco bathrooms.

That history matters because it gives you a clear filter for choosing fixtures today.

  • Pedestal basin or console-style basin: usually a better fit than a bulky vanity box if you want authentic Deco character
  • Framed mirror: works better than a soft organic shape
  • Separate shower zone: keeps the room feeling ordered
  • Chrome hardware: usually reads more authentic than trend-driven finishes
  • Structured bath form: a simple silhouette generally works better than an overly sculptural contemporary tub

Modern bathrooms still need storage, of course. In a family bathroom, that often means using a vanity with stronger furniture detailing rather than forcing a strict period basin where it won’t be practical.

Choose surfaces with discipline

The easiest way to lose the style is to mix too many surface languages. Art Deco asks for clarity.

Below is a practical comparison for common material directions.

Art Deco Material Comparison Authenticity Typical Cost (per sqm) Maintenance Notes
Geometric feature tiling High $150/sqm More grout lines and pattern alignment require careful cleaning and precise installation
Standard tiling Lower for Deco use $80/sqm Easier to source and simpler to maintain, but can look flat if overused in a Deco scheme
Marble High Qualitatively higher than standard tile options Elegant and period-appropriate, but needs considered maintenance
Terrazzo High Qualitatively varies by selection Durable and well suited to Deco styling, especially with controlled colour palettes

What works and what doesn’t

Some combinations consistently age well. Others date quickly.

What works

  • Polished chrome with strong tile geometry
  • Black, white, green, or blush used with restraint
  • Stone or porcelain with crisp edging
  • Vanity detailing that references furniture rather than flat-pack cabinetry

What usually doesn’t

  • Timber-heavy rustic finishes
  • Soft coastal palettes
  • Matte black hardware paired with period styling
  • Too many curves competing with geometric tilework

In designer bathrooms, the best fixture choice isn’t always the newest one. It’s the one that supports the room’s structure.

If you want an art deco bathroom that still functions for daily life, make every selection answer two questions. Does it fit the style, and will it wear well under real use? If one answer is no, keep looking.

Mastering Tiles and Geometric Patterns

In an Art Deco bathroom, tiles do most of the talking. They create the rhythm, define the symmetry, and set the room’s level of confidence. If the tile design is weak, the bathroom won’t read as Deco no matter how good the tapware looks.

A close-up of decorative, geometric, multi-colored tiles featuring circular and triangular patterns in an Art Deco style.

Use pattern with intent

A strong pattern needs room to breathe. That means deciding where the geometry belongs instead of spreading it across every surface.

Common layouts that work well include:

  • Feature floor, quieter walls: ideal when you want drama without visual overload
  • Framed wall sections: useful behind the vanity or bath
  • Bordered compositions: especially effective in narrow bathrooms because they make the room feel more deliberate
  • Repetition with one accent tone: gives depth without chaos

Classic Deco palettes still perform well. Black and white is the most architectural. Mint with black feels distinctly period. Rose with darker trim can work beautifully if the rest of the room stays controlled.

The tiling method matters

A decorative tile design is only as good as the set-out. In practice, the set-out often determines the success or failure of many bathroom renovations.

According to this tiling guide for Art Deco bathrooms, an expert installation method includes using laser levels for symmetry with error under 2mm, using large-format wall tiles to reduce grout lines, adding contrasting marble borders to widen narrow spaces visually, and finishing with gloss black pencil trims and R11-rated mosaic floors. The same source notes that mismatched grout causes 25% of rework in HIA Victoria stats.

That aligns closely with what works on site.

  1. Start from the room’s centreline, not from the nearest corner.
  2. Lock the feature pattern before any cuts are approved.
  3. Match the grout tone to the design intent. If you want the geometry to read sharply, don’t blur it with the wrong grout.
  4. Use trims deliberately. They should frame the composition, not look like an afterthought.

If you’re using larger porcelain formats on walls as part of the overall scheme, this article on installing large-format porcelain tiles is a useful companion read.

Wrong grout can undo good tile selection. The pattern loses definition, and the whole room starts to feel messy.

Common errors to avoid

The most common tile mistakes in an art deco bathroom are predictable:

  • Off-centre feature lines
  • Competing patterns on floor and walls
  • Cheap trims that flatten the finish
  • Glossy surfaces in high-touch family zones where marks become annoying
  • Tiny tile cuts in visible corners

The best rooms don’t just use geometric tile. They organise it. That’s the difference.

Lighting and Hardware The Finishing Touches

An Art Deco bathroom often comes together in the last layer. The room may already be waterproofed, tiled, and painted, but it won’t feel complete until the mirror, lighting, and hardware start working as one composition.

A close-up view of an elegant Art Deco style light fixture with green etched glass shades beside a mirror.

Build the mirror wall properly

The mirror wall usually sets the tone for the whole bathroom. In Deco rooms, it should feel centred, framed, and intentional.

A few details make a big difference:

  • Pair the lights symmetrically: one each side of the mirror usually reads better than relying on a single overhead fitting
  • Choose a geometric mirror shape: stepped corners, arches with structure, or strong rectangular forms tend to suit the style
  • Keep hardware consistent: don’t mix too many metal tones in the same sightline

Wall lighting is particularly effective in this style because it reinforces balance. It also improves task lighting at the basin, which matters in everyday use.

Treat hardware like jewellery

Towel rails, robe hooks, handles, shower frames, and tapware should all support the same design language. Angular profiles, polished finishes, and crisp mounting points generally suit the room best.

Restraint proves its worth once more. If the tilework is busy, the hardware should be cleaner. If the room is more pared back, the hardware can carry a bit more visual weight.

Small fittings do a lot of visual work in an Art Deco space. If they look generic, the room loses sharpness.

Adapting the look for smaller bathrooms

A lot of people assume Art Deco only works in a large room. It doesn’t. You just need to compress the language without losing the order.

For compact ensuites and narrower rooms:

  • Use one hero mirror rather than several decorative moments
  • Run vertical lines to draw the eye upward
  • Keep the floor pattern tight and controlled
  • Use glass carefully so the shower doesn’t break the room into pieces
  • Repeat key finishes so the space feels coherent

In smaller modern bathrooms, a full period recreation can feel forced. A better move is often a Deco-inspired composition with one or two classic references handled well. That might mean a pedestal-style basin silhouette, chrome hardware, geometric floor tile, and symmetrical sconces, while the rest of the room stays pared back.

The result still reads as a designer bathroom, but it functions like a contemporary one.

Frequently Asked Questions about Art Deco Bathrooms

Is an art deco bathroom just a trend

No. The style has lasted for more than a century, which is why it still appeals to homeowners who want a room with identity rather than a short-lived fashion look. What changes over time is how strongly you apply it.

If you want longevity, keep the permanent items classic and let the bolder personality come through mirrors, lighting, colour accents, and feature tile rather than making every single surface dramatic.

Does Art Deco work in family bathrooms

Yes, if you choose materials carefully. Family bathrooms need surfaces that clean well, layouts that don’t waste space, and fixtures that can handle daily use.

The trick is to separate the decorative layer from the hard-wearing layer. Use durable tile, practical storage, and easy-clean shower zones, then bring in Deco character through shape, symmetry, and controlled contrast rather than delicate ornament.

Can you mix Art Deco with modern bathrooms

Yes, and in many Victorian renovations that’s the smartest approach. A full historical recreation isn’t always practical, especially when you need better storage, stronger lighting, improved ventilation, and current waterproofing standards.

The blend works best when the architecture stays clean and the Deco influence appears in selected moments, such as the floor pattern, metal finish, mirror profile, or wall lights.

Is it suitable for smaller ensuites

It can be excellent in small spaces because symmetry creates order. The room feels considered rather than cramped.

What doesn’t work is overscaling the pattern or crowding the room with too many decorative references. In a compact bathroom, one strong idea nearly always performs better than five smaller ones.

How long should this kind of renovation take

The honest answer depends on site conditions, fixture lead times, design changes, and whether structural or compliance issues appear once demolition begins. Deco-style bathrooms can also need more coordination because set-outs and finish details matter so much.

If you’re trying to set realistic expectations before committing, how long a bathroom remodel should take gives a practical overview of the variables.

Do I need original period fixtures

No. You need the right proportions and finish quality more than you need authentic old pieces.

Many new bathroom ideas borrow the Deco vocabulary successfully without pretending the room is original. The key is choosing fixtures that respect the style. If the silhouette, placement, and materials are right, the bathroom will feel convincing and live much better day to day.

What’s the biggest mistake people make

They confuse “more” with “better”. Too many patterns, too many metals, too many decorative add-ons.

The strongest art deco bathroom usually comes from a disciplined plan: one dominant tile idea, one main mirror statement, one consistent hardware finish, and a layout that feels centred from the moment you walk in.


If you’re planning bathroom renovations in Highett or across greater Victoria and want an art deco bathroom that balances period character with buildable detail, SitePro Bathrooms can help with design, 3D visualisation, and end-to-end delivery by a team focused on durable, well-resolved results.

  • siteprobathrooms

Designing an Ensuite: Modernize Your Victorian Bath

You’re probably at the stage where the idea sounds simple enough. Take part of the bedroom, convert an old robe, borrow space from a hallway, and create an ensuite that makes mornings easier. Then the key questions start. Will it feel cramped? Can the plumbing go there? Is a toilet opposite the bed always a bad idea? Will the renovation add value, or just cost money?

That’s where good planning matters. Designing an ensuite isn’t only about fitting in a shower, vanity and toilet. In Victorian homes, especially in tighter footprints, the best results come from balancing layout, compliance, storage, light, and future use from the beginning. A smart ensuite should work well on day one, still work years later, and sit naturally with the rest of the home.

Your Ensuite Vision and Foundation

An ensuite changes how a home feels to live in. It cuts traffic to the main bathroom, gives privacy, and makes the morning routine far less chaotic. It can also strengthen resale appeal. In Victoria, homes with an ensuite command a $160,000 premium compared with similar homes without one, according to Domain’s report on ensuite design and buyer appeal.

That figure gets attention, but the practical side matters just as much. A valuable ensuite isn’t the one with the most fittings. It’s the one that feels easy to use, suits the household, and doesn’t create maintenance problems later.

A modern luxury ensuite bathroom featuring green marble walls, a wooden vanity, and a glass shower enclosure.

Start with the space you actually have

Most ensuite mistakes happen before tiles or tapware are chosen. Homeowners often measure wall to wall and assume every millimetre is usable. It isn’t. Door swings, wall thickness, plumbing positions, windows, and circulation all take space.

A better starting point is to map the room in layers:

  1. Structural limits
    Mark the full room dimensions, ceiling height changes, windows, and any bulkheads or nib walls.

  2. Fixed services
    Locate waste points, water supply lines, and likely ventilation paths. If these are awkward, the design needs to respond to them.

  3. Useable floor area
    Work out where a person can stand, turn, dry off, and open joinery comfortably.

Define who the room is for

An ensuite for a young couple looks different from one for ageing parents, a landlord fit-out, or a family home where one bathroom is always under pressure. The brief should be specific.

Ask these questions early:

  • Daily use
    Will two people use it at the same time, or is it mainly a private single-user space?

  • Storage needs
    Do you need medicine storage, makeup lighting, towel storage, a laundry hamper, or shaving access at the vanity?

  • Comfort level
    Are you after a compact, efficient room, or are you trying to create one of those polished designer bathrooms that feels more like a retreat?

  • Future use
    Will this need to suit reduced mobility later, even if that isn’t a concern today?

Practical rule: If a feature looks good on a wishlist but makes movement harder every day, it usually doesn’t belong in a small ensuite.

Build a brief before choosing finishes

Plenty of homeowners jump straight into new bathroom ideas. They save marble-look tiles, brushed metal tapware and timber vanities, but they haven’t settled the core brief. That leads to expensive redesigns and compromises.

A good brief is short and clear. It should list the absolute necessities first, then the desirable extras. In most ensuites, the essentials are the shower, vanity, toilet, ventilation, lighting, and storage. Extras might include a double basin, heated floor, niche lighting, or feature stone.

If you want to test ideas visually before construction, a proper bathroom interior design process helps sort out proportion, fixture placement, and finishes before trades are booked.

If the room feels resolved on paper, the build runs more cleanly on site.

Mastering Your Ensuite Layout Strategy

A good ensuite layout feels obvious once it’s built. You walk in, everything is where it should be, nothing blocks movement, and the room feels bigger than its footprint. Getting there takes restraint.

In compact Victorian homes, layout matters more than almost any finish selection. For ensuites in the 2 to 4m² range, a linear layout can free up 1m² of floor area and improve usability by 25% in user trials, according to guidance on small ensuite design layouts. That’s why it’s usually the first arrangement worth testing in tight rooms.

Why linear layouts work

A linear layout places the main fixtures along one wall. Usually that means vanity, toilet and shower aligned in sequence, with the shower often positioned at the end wall. The benefit isn’t style alone. It clears the centre of the room and improves circulation.

That matters in a narrow ensuite where every projection competes with body movement. It also tends to simplify cleaning, glazing, and visual order.

Sightlines matter more than people think

Homeowners often focus on whether everything fits. The better question is what you see first. If the toilet is the first thing visible from the bed, the room will feel less considered no matter how expensive the finishes are.

A stronger arrangement often does three things:

  • Protects privacy by keeping the toilet out of direct bedroom sightlines
  • Presents the vanity first because it’s the most furniture-like element
  • Contains the wet zone so overspray and moisture stay controlled

In small ensuites, a room can be technically compliant and still feel wrong. Sightlines are usually the reason.

Ensuite layout options for small spaces

Layout Type Best For (Room Shape) Pros Cons
Linear Long and narrow rooms Clear circulation, simple plumbing runs, cleaner visual lines Can feel rigid if storage isn’t integrated well
End-shower layout Rectangular rooms with a clear short wall Strong sense of depth, shower is easy to screen off Needs careful door and vanity placement
Corner shower layout Squarer rooms Makes use of awkward corners, can open central floor area Corners can feel tighter and glazing can interrupt flow
Opposing fixtures Wider rooms Balanced look, allows separation of functions Can create pinch points in small footprints
Pocket-door ensuite with side entry Very tight or retrofitted spaces Removes door swing conflict, improves entry sequence Requires early wall planning and joinery coordination

The layout trade-offs that matter on site

There’s no perfect plan. There’s the plan that suits the room and the household best.

A few trade-offs come up often:

  • Door swing versus usable wall space
    A standard hinged door can steal the best vanity wall. In some rooms, changing the door arrangement solves more than changing fixtures.

  • Larger vanity versus movement space
    Extra bench space sounds attractive, but not if it narrows the route to the shower.

  • Feature shower screen versus maintenance
    Frameless glass keeps the room open. Heavier framing creates more visual interruption and more edges to clean.

If you’re selecting vanity dimensions, mirror size, and basin placement together, it helps to understand standard benchtop height considerations in bathroom planning because comfort at the vanity affects how the whole room is used.

A simple way to test a plan

Print the floor plan and mark the path from bed to vanity, vanity to toilet, and door to shower. If any path feels squeezed, interrupted, or visually awkward, the room needs refining. That test is basic, but it catches many layout problems before construction starts.

Plumbing Ventilation and Waterproofing Essentials

The part of an ensuite you don’t see is what determines whether it performs well for years or starts causing trouble early. Many bathroom renovations are won or lost based on these unseen elements.

A polished tile finish won’t compensate for poor falls, weak extraction, awkward plumbing runs, or bad waterproofing. Those aren’t cosmetic issues. They affect moisture control, durability, maintenance, and compliance.

Plumbing decisions should happen early

The easiest ensuite to build is usually the one that respects the existing plumbing logic of the home. If the new room can sit close to existing waste and water lines, the design tends to be simpler and the construction sequence more predictable.

That doesn’t mean the layout should be dictated entirely by old pipework. It means the design needs to understand what can be moved, what shouldn’t be moved, and what impact those moves will have on floor build-up, wall thickness, and fixture positioning.

In older Victorian homes, that’s especially important where underfloor structure, slab penetrations, or wall framing can limit options.

Ventilation isn’t optional

Ensuites work hard in a short period of time. Hot showers, little natural air movement, and closed doors create the perfect conditions for lingering moisture. If extraction is poor, mirrors stay fogged, grout stays damp, and mould finds a foothold.

Good ventilation should be planned as part of the room, not added as an afterthought. That means looking at fan location, duct route, air movement, and whether the room also benefits from natural ventilation. In practice, the best ventilation setups are usually the least noticeable because they keep the room dry and stable.

A bathroom that doesn’t dry properly will keep reminding you that the hidden work wasn’t resolved.

Waterproofing needs a zero-compromise approach

Waterproofing failures are expensive because the damage often shows up late. By the time a stain appears on an adjacent wall or moisture gets into joinery, the repair is no longer minor.

That’s why this part of the work belongs with qualified trades and a builder who understands sequencing. Substrate preparation, set-downs, junction detailing, waste installation, membrane application, curing times, and tile installation all affect the final outcome.

For homeowners comparing contractors, why using a registered builder matters for your bathroom renovation is worth understanding before you commit. If you’re searching for registered builders unlimited experience, the point isn’t the label alone. It’s whether the team can coordinate compliance, trades, inspections, and responsibility for the finished room.

What works and what doesn’t

  • Works well
    Keeping plumbing efficient, specifying proper extraction, and treating waterproofing as a controlled trade sequence.

  • Usually goes wrong
    Moving fixtures late in the process, underestimating moisture loads, or letting visual choices drive technical decisions.

The most successful ensuites feel effortless because the infrastructure was handled properly first.

Choosing Fixtures for Style and Function

Once the layout and technical framework are settled, the room starts to become real. This is the stage homeowners usually enjoy most. It’s also where plenty of projects drift off course if every choice is made in isolation.

Good fixture selection isn’t about collecting attractive pieces. It’s about building a room where each element supports the others. The vanity should suit the wall and circulation. The shower screen should suit the light. The tapware finish should suit the maintenance expectations of the household, not only the showroom display.

A curated collection of modern bathroom fixtures including gold faucets, knobs, and decorative glass elements.

Think like you’re walking through the room

A practical way to choose fixtures is to imagine using the room in sequence.

You enter. You see the vanity first. The mirror and lighting shape the room immediately. You move to the shower. The screen either keeps the room feeling open or cuts it up visually. Then you notice whether storage is hidden, whether cleaning looks manageable, and whether the finishes feel calm or busy.

That sequence is why the vanity usually carries so much weight in ensuite design. It’s the main piece of joinery, the visual anchor, and often the hardest-working storage element.

Vanity choices that hold up

A floating vanity can make a small ensuite feel lighter and easier to clean. A floor-mounted vanity can offer a more grounded furniture look and sometimes extra practical storage. Neither is always right.

The better decision usually comes down to four questions:

  • How much storage do you need every day
  • How much floor area do you want visible
  • Will the room benefit from a slimmer profile
  • How much maintenance are you willing to take on around edges and finishes

For modern bathrooms, clean-lined vanities with restrained detailing usually work best. For more layered designer bathrooms, timber texture, curved forms, stone tops, and carefully chosen handles can add warmth without cluttering the space.

Screens, glass and light

One of the smartest choices in a compact ensuite is the shower screen. In many projects, it is through this choice that function and appearance either come together or pull apart.

Reflecting current standards in Victoria, 72% of dwellings built post-2000 include at least one ensuite, and one strong design move for light and privacy is fluted glass, which can allow up to 80% more natural light penetration while still screening views, according to advice on ensuite design and fluted glass use.

That makes fluted glass especially useful when a homeowner wants privacy between the shower and vanity zone, or wants to soften the view of the toilet without shutting the room down.

If clear glass makes the room feel exposed and full opacity makes it feel boxed in, fluted glass often lands in the right middle ground.

Finishes that look good after the handover

Some new bathroom ideas look excellent in a sample tray but become harder to live with once soap residue, fingerprints, and daily wear arrive.

A few reliable principles help:

  • Matte textures can soften glare and add depth, but they may show residue differently depending on colour.
  • Highly reflective finishes can brighten a room, though they often need more regular wiping.
  • Timber-look joinery adds warmth, but the detailing around handles, edges, and kick zones matters.
  • Feature stone or stone-look surfaces work best when the rest of the palette is restrained.

The most convincing ensuite schemes usually mix a few materials rather than too many. One statement surface, one grounding neutral, and one metal finish is often enough.

Integrating Smart Storage and Accessibility

Storage and accessibility are often treated as separate topics. In practice, they belong together. Both are about reducing friction. Both make the room easier to use. Both improve the long-term value of the renovation.

That matters in Victoria because 16% of Victorians are over 65, and a 2024 Master Builders Australia report noted that 35% of Victorian bathroom renovations require modifications within 5 years due to poor forward-planning for mobility, as outlined in guidance on small ensuites and accessibility planning.

A future-ready ensuite doesn’t have to look clinical. Most of the best accessibility decisions are almost invisible when they’re planned well.

An elegant bathroom vanity with marble countertop, featuring organized toiletries, a plant, and an open storage drawer.

Storage that removes clutter properly

In a small ensuite, clutter isn’t only untidy. It makes the room harder to clean and harder to move through. Good storage should pull everyday items off the bench and off the floor without making the room feel overbuilt.

The most useful storage is usually integrated into the room from the start:

  • Recessed mirror cabinets keep daily-use items close to the vanity without adding bulk.
  • Drawer-based vanities generally make access easier than deep cupboard shelves.
  • Shower niches work when they’re planned around tile set-out and bottle height.
  • Joinery for hampers and bins helps keep laundry and waste out of view.

Accessibility that still feels residential

Many people hear accessibility and picture grab rails added late, bulky fittings, or a room that looks institutional. That’s usually the result of retrofitting, not thoughtful design.

A better approach is to build flexibility into the room early. That might mean:

  1. A step-free shower entry so access is easier now and safer later.
  2. Wall reinforcement in key zones so support rails can be added cleanly if needed.
  3. Door and circulation planning that reduces tight turning and awkward entry points.
  4. A vanity setup with clear legroom or more forgiving edges if mobility changes.

These decisions also help households beyond ageing-in-place. They suit injury recovery, temporary mobility issues, visiting parents, and multi-generational living.

The best accessible bathroom usually doesn’t announce itself. It simply feels easier for everyone to use.

Future-proofing is a design decision

When storage and accessibility are planned together, the room becomes calmer and more resilient. There’s less visual noise, fewer obstacles, and a safer movement path.

That’s especially relevant when designing an ensuite in a compact footprint. Every drawer front, nib wall, threshold and fixture projection affects how the room works. A beautiful room that can’t adapt is a short-term solution. A well-planned room keeps earning its place in the home.

From Plan to Reality with a Renovation Specialist

A well-designed ensuite still needs disciplined delivery. Many projects become stressful at this point. Not because the idea was wrong, but because selections were incomplete, site conditions weren’t considered early enough, or no one was properly coordinating the moving parts.

A smoother renovation usually comes from a simple sequence and clear decisions at each point.

Start with a realistic brief and budget

The budget should reflect more than visible finishes. It needs to account for demolition, services, substrate preparation, waterproofing, tiling, glazing, joinery, electrical work, plumbing, and any compliance-related adjustments uncovered on site.

It also helps to separate wants into levels. Keep one list for essentials and another for optional upgrades. That makes it easier to protect the function of the room if something in the build needs adjustment.

Resolve design before construction starts

The more decisions made before work begins, the fewer disruptions during the build. That includes confirming fixture sizes, tile set-out intent, joinery details, lighting positions, power points, and how doors and screens will operate in real life.

Visual planning helps. SitePro Bathrooms offers concept development, detailed 3D design, construction, and finishing as part of an end-to-end renovation process, which gives homeowners a way to test the room before demolition begins.

Know what a managed process should look like

A renovation specialist should be able to give you a clear path from first measure to handover. That normally includes:

  • Site assessment
    Checking the room, services, access, and likely constraints before design is locked in.

  • Design resolution
    Finalising layout, fixtures, finishes, and practical details such as storage and lighting.

  • Construction coordination
    Sequencing demolition, rough-in work, waterproofing, tiling, fit-off, and finishing so trades don’t work against each other.

  • Handover
    Walking the room with you, checking operation, finish quality, and any maintenance guidance you’ll need.

Expect questions during the process

Even a tightly run project will involve decisions once walls are opened or services are confirmed. That isn’t a warning sign on its own. What matters is whether those decisions are handled clearly, documented properly, and resolved without guesswork.

An ensuite renovation should feel organised, not chaotic. When the planning is sound, the layout is practical, and the build team handles the technical work properly, the end result is more than an extra bathroom. It becomes one of the hardest-working rooms in the home.


If you’re planning an ensuite in Highett or greater Victoria, the strongest results come from getting the layout, compliance, storage and accessibility right before construction starts. That’s the difference between a room that merely fits and one that feels right every day.

  • siteprobathrooms

Standard Benchtop Height: Your 2026 Design Guide

You’re probably deep in selections right now. Tiles are shortlisted, tapware is pinned, vanity finishes are under debate, and the kitchen palette has finally stopped changing every second day.

Then a builder or designer asks a less exciting question. What height do you want the benchtop?

That’s the point where many homeowners realise a renovation isn’t held together by colour choices alone. A benchtop that looks perfect in a showroom can feel wrong every single day once you’re chopping vegetables, loading the dishwasher, cleaning teeth, or helping kids get ready in the morning. In both kitchen and bathroom renovations, small dimensional decisions shape how the room works long after the styling is finished.

The Critical Detail in Your Renovation Plan

A standard benchtop height sounds like a technical detail. In practice, it’s one of the decisions that determines whether a renovation feels effortless or slightly annoying every day.

The usual pattern is familiar. Homeowners spend weeks refining layout ideas, comparing stone finishes, and collecting new bathroom ideas for modern bathrooms or designer bathrooms. Measurements often get pushed into the background because they don’t feel as visible as the fun choices. But height is one of the details that changes how a room performs from the first day of use.

In kitchens, the wrong height shows up quickly. Prep feels awkward. Dishwashing feels harder than it should. Appliances don’t line up cleanly. In bathrooms, vanity height affects daily routines just as much, especially in family homes where more than one age group is using the same space.

A renovation manager sees this issue before installation, not after handover. That’s the difference good planning makes. If the bench height is resolved early, cabinetry, appliances, splashbacks, and circulation all fall into place with fewer compromises. If it’s left vague, the project often ends up chasing fixes late in the process.

Practical rule: If a dimension affects comfort, appliance fit, and cabinet selection at the same time, it isn’t a minor detail.

This matters even more when the project includes both kitchen and bathroom work. A home doesn’t need every surface at the same height, but it does need a clear logic behind each one. That’s why early planning on kitchen renovation layouts and inclusions should always include benchtop and vanity height, not just finishes and fixtures.

Homeowners usually remember the look first. They live with the height every day.

The Australian Standard Benchtop Height Explained

In Australia, the standard benchtop height is 900mm to 920mm from the floor. That benchmark is widely used because it suits standard appliances, standard cabinet manufacturing, and common installation methods across residential projects, with base cabinets typically 720mm high plus a kickboard and a 30 to 40mm benchtop. That convention influences over 80% of Australian residential projects, according to Australian kitchen bench height guidance.

A close-up view of a person resting their arms comfortably on a smooth wooden tabletop surface.

How the height is built

Think of the final bench height like a recipe. It isn’t one piece. It’s the sum of several parts working together:

  • Base cabinet: This is the main body of the joinery and forms the structural core.
  • Kickboard: This lifts the cabinet off the floor and creates the recessed space near your feet.
  • Benchtop material: Stone, laminate, timber, or another surface adds the final thickness on top.

When those components are set up in the usual way, the finished working surface lands in the standard range. That’s why the number keeps turning up in renovation plans. It isn’t arbitrary. It’s tied to how cabinets and appliances are made.

Why it became the norm

Many homeowners assume 900mm to 920mm is a hard building code requirement. It usually isn’t. It’s better understood as an industry convention that became dominant because it works well for most households and for standardised manufacturing.

Cabinet makers, appliance suppliers, and installers all benefit when common dimensions align. The more a project stays within established norms, the easier it is to coordinate ovens, dishwashers, end panels, and adjacent finishes without introducing avoidable complexity. That’s one reason standard height remains the default in Victorian renovations.

For homeowners, this is the practical takeaway. Standard height is popular not because people lack imagination, but because it solves several buildability problems at once.

A standard height usually gives the cleanest path to appliance compatibility, predictable joinery, and fewer surprises on site.

If you’re comparing renovation concepts, it helps to understand where standards and technical requirements overlap. Broader renovation regulations and planning considerations shape the project, but benchtop height itself is often a design and manufacturing decision rather than a strict compliance rule.

Ergonomics The Science Behind the Standard

The standard works because it suits a lot of people, not because it suits everyone.

That distinction matters. A bench can be conventional and still feel wrong for the people who use it most. Ergonomics is what explains that gap. It looks at how the body moves during everyday tasks and where strain starts to creep in.

A person wearing headphones holding a tape measure while planning a home improvement or design project.

What your body is doing at the bench

A benchtop isn’t just a shelf. It’s a work surface. In a kitchen, you lean over it to slice, rinse, scrub, lift, plate up, and clean. In bathrooms, vanity surfaces support grooming tasks that also depend on posture, reach, and comfort.

A useful rule in practice is the bent-elbow check. If the work surface sits too low relative to the user’s elbow, the person bends through the upper back and shoulders. If it sits too high, the shoulders rise and the wrists start working at awkward angles. Neither feels dramatic in the first minute, but both become obvious over repeated daily use.

Why average doesn’t always feel right

The trade-off behind a standard dimension is simple. It aims to work reasonably well for the average adult across common tasks, even though every household is different.

That compromise is visible in the data. A 915mm high bench can force stooping for 40% of adults taller than 173cm because of an elbow-to-bench mismatch of 10 to 15cm, according to analysis of bench height and body fit. That’s a clear reminder that “standard” and “ideal” aren’t always the same thing.

On site, this is usually where complaints start: not with the colour of the stone, but with the feeling that the bench is making someone lean or hunch.

Work zones matter

Different activities place different demands on the body. A prep zone, sink zone, and vanity area may all look visually connected, but they don’t always need to behave the same way.

That’s why experienced renovation planning looks beyond a single number. Good design tests whether the main user can stand comfortably, reach naturally, and work without unnecessary bending. For households with one primary cook or with very tall family members, that check can change the whole conversation.

The standard is a strong baseline. It isn’t a substitute for thinking about who uses the room.

Beyond the Standard Task-Specific Bench Heights

Not every surface in a home should sit at one uniform height. That approach can make a floor plan look neat on paper, but it often ignores how people use different zones in practice.

A well-planned renovation treats the home as a series of working surfaces with different jobs. Kitchen prep, island seating, and bathroom vanity use all place different demands on posture, reach, and circulation. That’s where practical design starts to move beyond the default.

Kitchen benches and island seating

The main kitchen bench usually needs to support standing tasks. Prep, rinsing, and everyday clean-up all happen there, so the height has to feel comfortable over time and still coordinate with appliances and joinery.

Island seating is a different category. Bar seating heights are engineered to 1050mm and require a minimum 300mm clearance for legroom, which helps create a comfortable dining position and a clear visual break in open-plan layouts, as outlined in Australian guidance on kitchen bench dimensions.

That’s why a breakfast bar shouldn’t merely be treated as an extension of the prep surface. It has its own ergonomic and spatial logic.

  • Prep bench: Usually benefits from a height selected for standing comfort and easy task flow.
  • Bar seating zone: Needs stool compatibility, overhang planning, and enough knee space underneath.
  • Visual separation: A raised seating edge can help define the kitchen without adding walls.

Bathroom vanities need their own logic

Bathroom renovations often expose the same mistake in a different form. Homeowners carry kitchen assumptions into a vanity design, then wonder why the basin area feels awkward once it’s built.

Vanity use is different. People lean in closer, use mirrors continuously, and share the space with different family members. In homes with children, grandparents, or mixed accessibility needs, the vanity height deserves just as much attention as the kitchen bench. This is especially relevant in modern bathrooms where floating joinery and vessel basins can distort the perceived working height if the planning only focuses on appearance.

A surface can look balanced in elevation drawings and still be uncomfortable once a basin, mirror, and tap projection are added.

Purpose-built zones work better than one-size-fits-all

Task-specific planning often produces better outcomes than insisting every horizontal line match throughout the house. That doesn’t mean creating visual clutter. It means assigning the right height to the right use.

Good examples include:

  • A lower surface for force-based tasks: Some homeowners prefer a dedicated area that assists in applying force for hands-on food preparation.
  • A raised bar edge: This suits seated use and separates entertaining from cooking mess.
  • A customized vanity: Useful when the bathroom is shared by adults, children, or older relatives.

New bathroom ideas and kitchen planning transition from style exercises to functional designs. The most successful spaces usually aren’t the ones that follow one number everywhere. They’re the ones that understand what each surface is supposed to do.

When to Customise Your Benchtop Height

Custom height makes sense when the people using the space don’t fit the assumptions behind standard joinery.

That often happens in homes with very tall adults, shorter users, people with mobility needs, or multi-generational households where one surface has to work for very different bodies. It also comes up in bathroom renovations where vanity use patterns are very specific. A family ensuite, a children’s bathroom, and an investor-grade rental upgrade don’t always need the same answer.

The trade-off is straightforward. Customisation can improve comfort and usability, but it can also make the project more complex. Deviating from the 900–920mm standard can increase costs because cabinets may need to be specially manufactured, and it may complicate future resale value. Sticking to the standard generally preserves compatibility with off-the-shelf cabinetry and market appeal, according to Australian kitchen measurement guidance.

The clearest reasons to customise

Some scenarios justify a custom approach more strongly than others.

  • A primary user is noticeably taller or shorter than average: Daily comfort can outweigh the convenience of staying standard.
  • The household includes accessibility needs: A standard bench may not support safe, independent use.
  • The room has more than one working zone: A split-height approach may solve a practical problem without forcing the entire room to change.
  • The bathroom has a specific user group: Kids’ bathrooms, ageing-in-place planning, and shared family bathrooms often need more nuanced thinking.

For homeowners wanting to see how these choices play out in finished spaces, reviewing a built bathroom renovation project in Sandringham can help translate dimensions into real layout decisions.

Standard vs Custom Benchtop Height A Comparison

Factor Standard Height (900-920mm) Custom Height
Cabinet compatibility Works smoothly with off-the-shelf cabinetry May require special manufacturing or adjustment
Appliance coordination Usually simpler to integrate with common kitchen appliances Can require more planning around alignment and fit
Budget control More predictable during quoting and procurement Can increase costs through bespoke joinery
Resale appeal Familiar to buyers and generally easier for the market to accept May suit a niche buyer if highly personalised
Daily comfort Good general solution for many households Better when tailored to a clear user need
Accessibility response Limited if users need a non-standard working level Stronger option when mobility or reach is a key issue

Decision test: Customise when a real user need is clear and ongoing. Don’t customise just because the option exists.

That’s the balance registered builders unlimited and renovation managers have to get right. Personalisation is valuable when it solves a real problem. It doesn’t help when it adds cost without improving day-to-day use.

Planning Your Perfect Height with 3D Design

Choosing the right height gets easier once you stop treating it as an abstract number.

Most homeowners understand the issue as soon as they stand at a proposed surface and compare it with their natural elbow position. If the bench sits too low, you’ll feel the forward bend. If it sits too high, your shoulders and forearms tell you quickly. That simple body check is useful, but it becomes far more powerful when it’s combined with a proper design model.

A minimalist graphic with the text Planning Your Perfect Height above a green Book Consultation button.

Use the elbow rule as a starting point

For practical planning, measure where your bent elbow naturally falls while standing in a relaxed position. The goal is to place the main work surface below that point so the shoulders stay settled and the wrists don’t have to compensate.

That doesn’t produce one perfect answer for every room. It gives you a realistic starting range that can then be tested against cabinetry, appliances, basin choice, and circulation. In kitchens and modern bathrooms alike, the best dimension is the one that survives contact with real use.

A few checks help before anything is locked in:

  • Test the main user first: Not the occasional guest, but the person who uses the room most.
  • Check the task, not just the room: Prep, washing, grooming, and seated use can all point to different solutions.
  • Account for finished elements: Basin height, benchtop thickness, and splashback details all affect the final feel.
  • Review adjacent fixtures: The bench has to work with drawers, mirrors, appliances, and tap locations.

Why 3D design reduces expensive mistakes

3D modelling earns its place in a renovation process. It lets homeowners assess proportion, height relationships, and visual balance before joinery is manufactured.

That matters because adaptive planning is becoming more relevant. There has been a 25% rise in adaptive height projects in Melbourne, and 3D modelling is useful for testing options such as split-height benches like 900mm for prep and 850mm for a sink to support accessibility needs in multi-generational homes, according to guidance on adaptive countertop height planning.

Good 3D design doesn’t just show what the room will look like. It helps confirm whether the room will work.

For homeowners planning designer bathrooms, new bathroom ideas, or a full kitchen update, that visual testing reduces guesswork. You can compare a standard layout against a custom one and decide whether customisation improves daily life enough to justify the change.

A standard benchtop height remains the right answer for many Victorian homes. But the strongest renovation outcomes usually come from testing that standard against the people who’ll live with it.


If you’re planning a renovation in Highett or greater Victoria and want expert guidance on benchtop or vanity heights, SitePro Bathrooms can help. Their team handles concept planning, 3D design, and construction for kitchens, bathroom renovations, modern bathrooms, and designer bathrooms, with the practical oversight you’d expect from SitePro Bathrooms.

Refined using the Outrank app