• siteprobathrooms

Cost to Replace Bathroom Cabinets: A 2026 VIC Guide

The average cost to replace bathroom cabinets in Australia typically ranges from $1,500 to $2,500, depending on the cabinet type, materials, and how complex the installation is. If you choose a simple pre-made unit, you can spend far less on the cabinet itself, but custom designs, plumbing changes, and wall-mounted styles can push the total much higher.

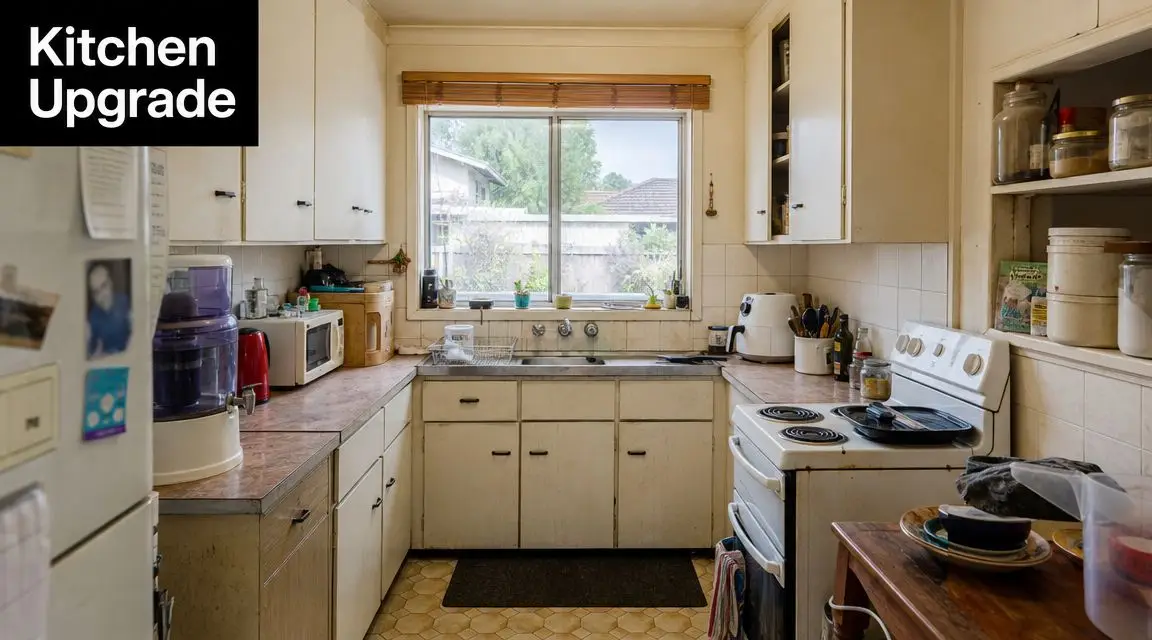
Most homeowners start looking into this when the bathroom still works, but it no longer feels good to use. The vanity doors are swollen, the drawers stick, the finish looks tired, and the whole room dates the house more than you'd like. That's usually the point where bathroom renovations move from “one day” to “we need to sort this out”.

In Victoria, that decision often comes with a second question. How do you improve the look of the room without overspending on features that don't add practical value? That's where important details matter. The cost to replace bathroom cabinets isn't just about the cabinet box. Labour, removal, plumbing access, mounting method, and finish choices all change the final number.

Some homeowners want a tidy refresh. Others want modern bathrooms with cleaner lines, better storage, and finishes that feel more considered. Some are aiming for designer bathrooms, while others need durable cabinetry that can handle family use. All of those goals are valid. The key is matching the cabinet choice to the room, the budget, and the way the bathroom is used every day.

Planning Your Bathroom Cabinet Upgrade

You're probably standing in front of an old vanity right now wondering whether it's worth replacing just the cabinets or whether the room needs more work. That's a common starting point, especially in older homes around Melbourne where the cabinetry has aged faster than the rest of the bathroom.
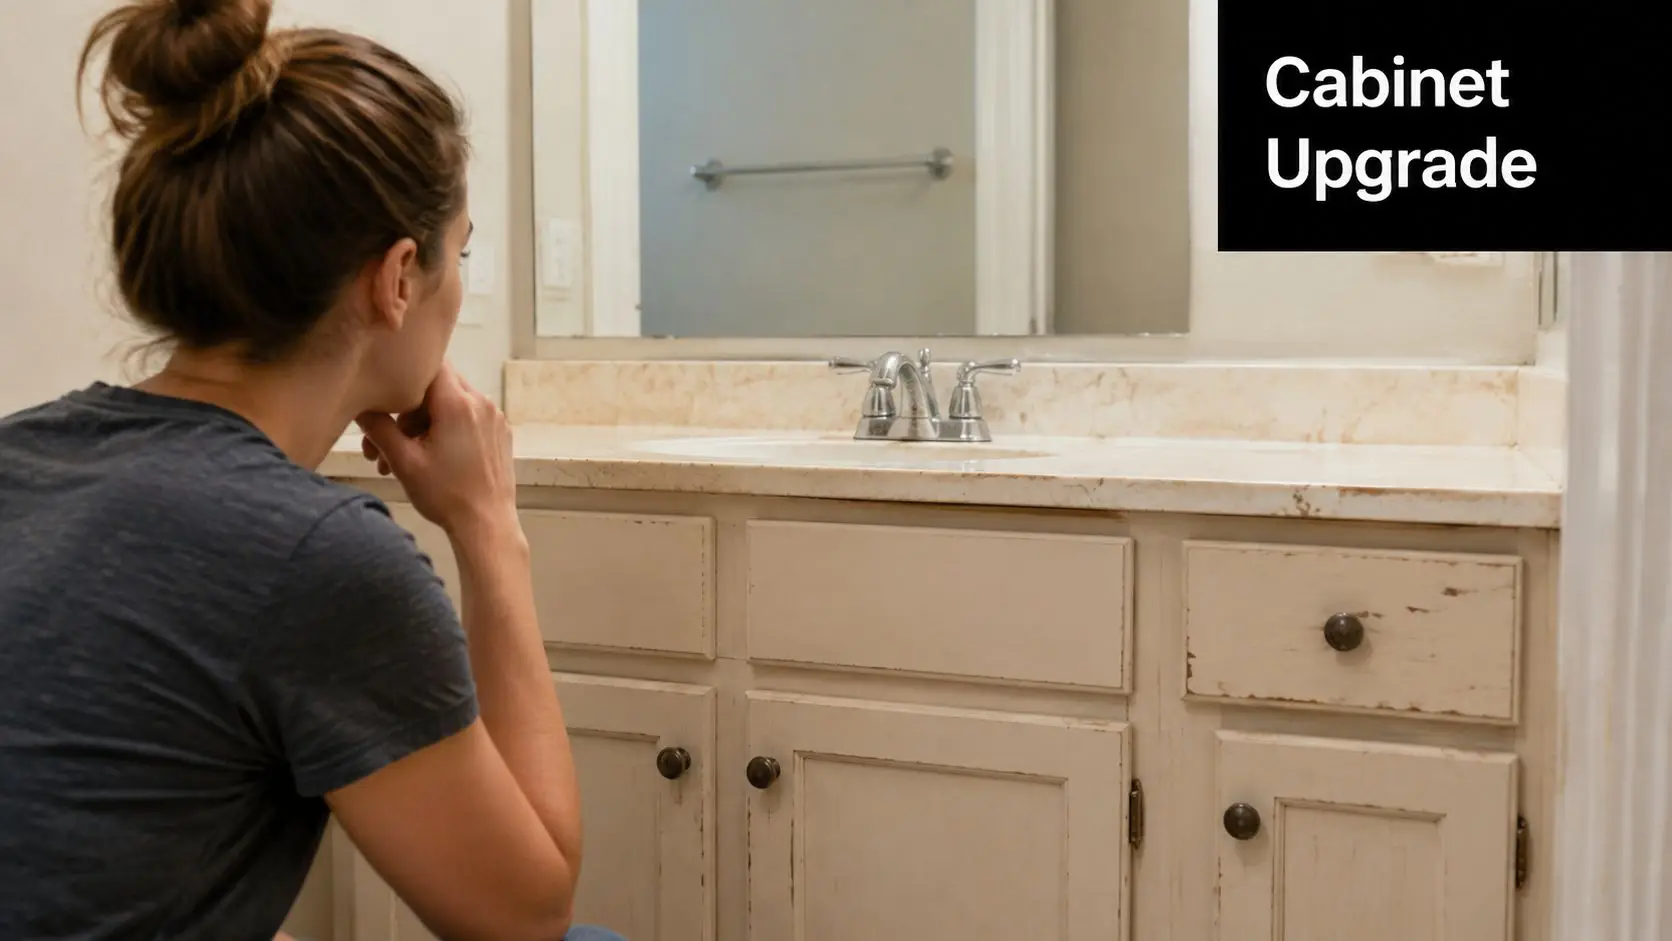
A young woman contemplating bathroom renovations while looking at an old cream-colored vanity cabinet and mirror.

A useful first step is to separate a cabinet upgrade from a full renovation. If the waterproofing, tiling, and layout are still in decent shape, replacing the cabinet can be a smart way to freshen the room without taking on a full strip-out. If the vanity is failing because of leaks, poor layout, or water damage around the walls and floor, the cabinet is often only one part of the job.

Start with what you're keeping

Before choosing colours or looking at new bathroom ideas, decide what stays:

  • Keep the plumbing where it is: This usually helps control labour and reduces disruption.
  • Keep the existing layout: If the room functions well, layout changes often cost more than they're worth for a cabinet-only project.
  • Keep what still performs: Mirrors, tapware, or tiles don't need replacing just because the cabinet does.

Practical rule: Spend money on the parts that improve function first. Better storage, durable finishes, and correct installation matter more than decorative upgrades you won't notice in six months.

Then define the brief properly

Most cabinet replacement projects become more expensive when the brief stays vague for too long. If you know you want wall-hung cabinetry, extra drawer storage, or a double-bowl setup, say it early. Those choices affect joinery selection, wall preparation, and installation sequencing.

If you're still shaping the project, this guide on how to plan a bathroom renovation is a practical place to organise the scope before you ask for quotes.

For homeowners in Highett and across Victoria, the best outcomes usually come from making a few grounded decisions early. Decide whether this is a simple cabinet swap, a style-driven update, or the first stage of broader bathroom renovations. Once that's clear, the pricing starts to make sense.

The Real Cost Breakdown for Cabinet Replacement

The total price only makes sense when you split it into parts. A lot of confusion comes from people comparing one quote that includes removal, installation, and plumbing with another that only covers the cabinet itself.

According to 2026 bathroom vanity replacement pricing in Australia, the average cost to replace a bathroom vanity ranges from $1,500 to $2,500. The same source notes that pre-made cabinets start around $200 to $500, mid-range options are $500 to $1,500, custom cabinets start at $1,500, and installation labour typically adds another $400 to $600.

Where the money usually goes

In a standard cabinet replacement, your quote generally covers four things:

  1. The cabinet itself
    This is the obvious cost, but it's not the whole job. Pre-made units are usually the cheapest entry point. Mid-range cabinets often give better finish quality and storage. Custom cabinetry costs more because it's built for your room, not adapted to it.

  2. Installation labour
    Labour covers setting out, levelling, securing the cabinet, reconnecting services where needed, and adjusting for walls and floors that aren't perfectly square.

  3. Removal and disposal
    Taking out an old vanity sounds simple until you run into silicone, swollen panels, tight plumbing clearances, or damage behind the unit.

  4. Fittings and finishing details
    Handles, soft-close hardware, filler panels, seals, and trim details can change both the look and the final spend.

Bathroom Cabinet Material Comparison 2026

Material Cost Tier Pros Cons
Melamine Budget Affordable, easy to source, suitable for straightforward updates Less forgiving in wet conditions if edges are damaged
PVC Budget Good option for moisture-prone bathrooms, practical for basic upgrades Style range can feel limited compared with more premium finishes
Laminate Mid-range Wide finish choice, easy to clean, suits many modern bathrooms Can look ordinary if paired with cheap hardware or poor detailing
Timber veneer Mid-range to high-end Warmer, more refined look, works well in modern bathrooms and softer palettes Needs careful finish selection in humid spaces
Solid timber High-end Strong visual impact, suited to designer bathrooms, can be long-lasting when detailed well Higher cost and more maintenance sensitivity in bathrooms

The exact material prices vary by supplier and finish, so it's smarter to use these as cost tiers rather than expecting one fixed dollar figure for each board type.

What works and what doesn't

A budget cabinet works well when the room is straightforward, the plumbing stays put, and you need a clean replacement that improves function. It doesn't work as well when homeowners expect a budget carcass to deliver a custom-fitted look against uneven walls.

A custom cabinet is worth it when the bathroom has awkward dimensions, when storage matters, or when the vanity is a major visual feature. It's less worthwhile when the rest of the bathroom is due for replacement soon and you're only trying to get a few more years from the room.

For anyone comparing cabinetry spending across rooms, this breakdown of the cost of kitchen cabinets helps show why bathroom joinery is priced differently. Bathrooms demand tighter tolerances, moisture resistance, and more careful installation around plumbing.

A good quote should tell you what's included, what's provisional, and what happens if the wall or plumbing needs adjustment once the old unit comes out.

That's where many homeowners either save money wisely or get caught by avoidable extras.

Key Factors That Influence Your Final Quote

Two vanity replacements can look similar on paper and still land at very different prices. The reason is usually hidden in the conditions of the room, not the photo of the cabinet.
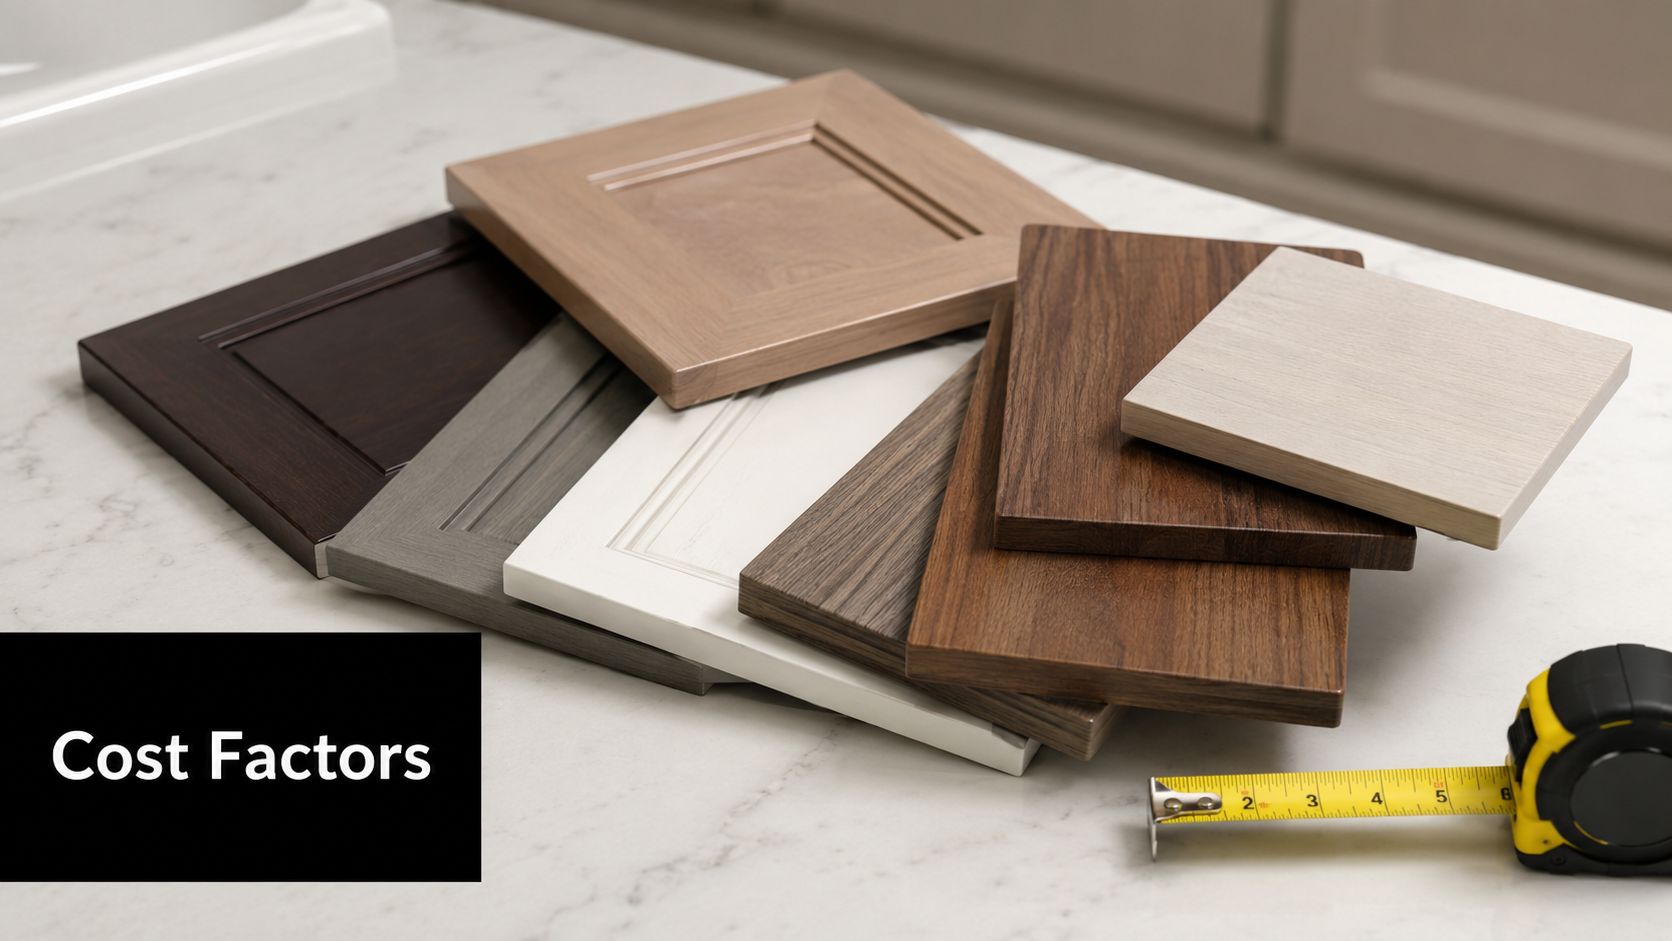
A collection of various wood and laminate cabinet door samples displayed on a white marble countertop surface.

Size changes more than storage

A larger vanity doesn't just use more material. It can require more handling, more fixing points, a larger top, more drawer hardware, and sometimes more plumbing coordination. Double-bowl units especially need more planning because internal drawer space and plumbing routes start competing with each other.

Bathrooms with tight doorways, uneven walls, or older plumbing can also slow the installation down. That's why a neat-looking room on inspection can still produce a more expensive quote once the install method is properly assessed.

Off-the-shelf versus custom fit

Off-the-shelf cabinets are the best value when your bathroom dimensions suit standard sizes and you're comfortable with modest compromises. A filler panel on one side or a small gap adjustment is usually fine.

Custom joinery earns its keep when the room is out of square, when you want every millimetre used well, or when the vanity is meant to anchor the room visually. That's often the case in modern bathrooms where the cabinetry line needs to feel clean and deliberate.

The hidden cost in floating vanities

This is the detail many generic guides skip. Wall-mounted vanities look simple. Installing them properly isn't simple.

According to Australian guidance on bathroom cabinet pricing and hidden wall-mounted vanity costs, wall-mounted vanities are found in 35% of new urban bathroom renovations and can cost 1.5x more to install than freestanding units, with $500 to $700 in extra labour often added for structural reinforcement and precise levelling.

That extra labour usually comes from issues homeowners don't see in the showroom:

  • Wall reinforcement: Floating units need solid support behind the wall, not just neat tile lines.
  • Precise set-out: If a wall-hung vanity is even slightly out, it looks wrong immediately.
  • Service coordination: Waste and water positions matter more because the underside stays visible.
  • Finish sensitivity: Modern styles expose errors. Freestanding cabinets can hide a lot more.

Wall-mounted vanities suit compact bathrooms well, but they only represent value when the wall can support them properly and the labour allowance is realistic from the start.

Style can be cheap. Proportion can't

Homeowners often focus on the door profile or colour first. In practice, proportion matters more. A cabinet that's too deep crowds the room. One that's too shallow looks underdone and often sacrifices usable storage.

That's why the smartest spending usually goes into layout fit, durable board selection, and installation quality. Handles, mirror pairings, and surface styling are easier places to save without making the room feel compromised. If you're aiming for fresh new bathroom ideas, spend on the bones of the cabinet first and the decorative layer second.

Sample Budgets for Common Bathroom Renovations

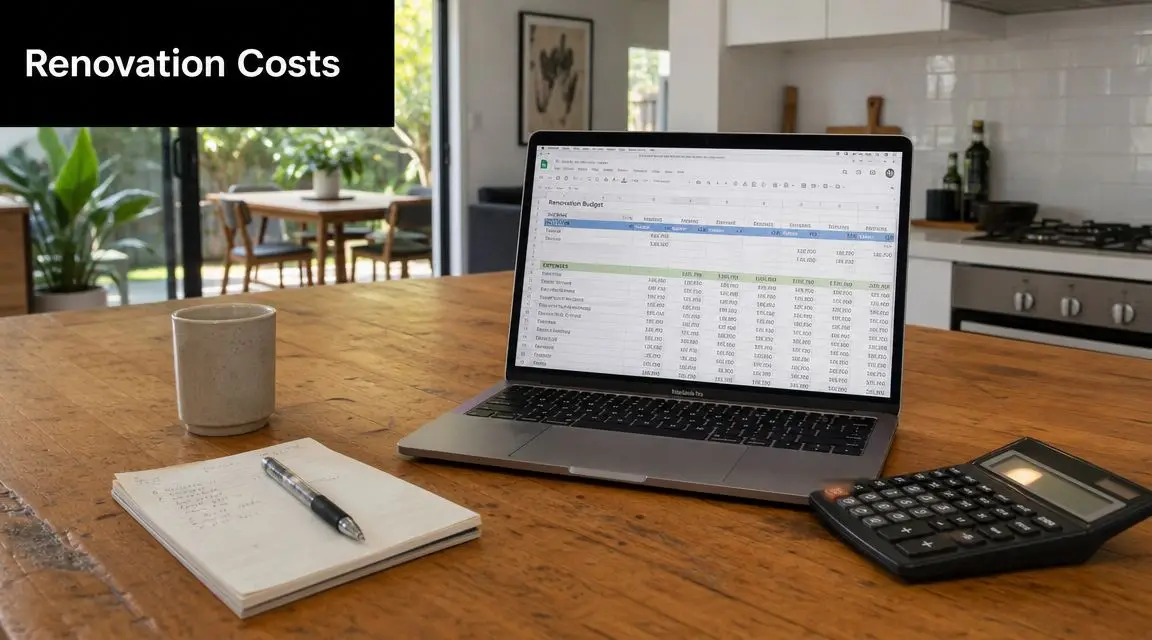
Real budgets are easier to understand when you attach them to a bathroom type. In Victoria, labour for a basic vanity installation generally sits at $50 to $100 per hour, a simple pre-made cabinet might cost $500, a larger 1500mm double bowl unit can be nearly $1,000, and a full custom replacement for two cabinets can approach $5,000 including professional installation, based on Victorian pricing examples for bathroom cabinet replacement.

Budget refresh for a small ensuite

A common ensuite update uses a simple pre-made cabinet, keeps the plumbing in place, and focuses on function over statement design. This suits landlords, investors, and homeowners who want a visible improvement without opening up the whole room.

What you're buying here is practicality. Clean lines, better storage than the old unit, and a bathroom that feels maintained again. This level works best when the room already has a decent layout and the existing finishes still look acceptable.

Mid-range makeover for a family bathroom

Most owner-occupiers tend to choose this option. The vanity quality steps up, the finish looks better, and the storage usually improves enough to make the room easier to live with every day.

A larger unit or upgraded hardware can be worth the spend in a family bathroom because this is the cabinet that gets used hard. Drawers that open properly, surfaces that handle moisture better, and better internal organisation usually matter more than chasing a dramatic designer look.

If the bathroom is used by multiple people every morning, storage and ease of cleaning usually deliver more value than decorative extras.

Designer upgrade for a main bathroom

At the premium end, the cabinet becomes part of the architectural feel of the room. Key elements include bespoke proportions, cleaner detailing, and stronger visual integration. A larger double-bowl arrangement or a two-cabinet replacement can approach the upper end of the figures above.

This level suits homeowners who want the vanity to feel built into the room rather than placed into it. It's also where mistakes cost more. If the joins, proportions, or mounting aren't right, the whole room feels off.

The key difference between these scenarios isn't only the cabinet price. It's how much precision the room demands, how hard the cabinetry will be used, and whether the project is about a tidy upgrade or a more complete bathroom renovation outcome.

DIY vs Hiring a Professional Renovator

DIY cabinet replacement looks straightforward when you're only looking at the old vanity from the front. Once removal starts, the job often becomes about hidden pipe positions, damaged wall linings, floor levels, and how well the new unit fits the room.

According to Australian vanity installation cost guidance, professional vanity installation costs between $50 and $100 per hour, a typical replacement takes 3 to 8 hours depending on complexity, and the average total installation cost is around $1,500 per unit when including removal and plumbing adjustments.

When DIY can make sense

DIY can be reasonable if all of the following are true:

  • You're replacing like for like: Same general size, same plumbing position, no layout changes.
  • The room is accessible: Plenty of working space and no hidden damage.
  • You've got the right skills: Accurate measuring, levelling, fixing, sealing, and safe handling of the unit.

If any of those points are shaky, DIY savings can disappear fast.

Where DIY usually goes wrong

The biggest issue isn't always the cabinet itself. It's everything around it.

  • Poor levelling: Doors and drawers never sit right if the cabinet starts out uneven.
  • Bad sealing: Water gets where it shouldn't, especially around tops and wall junctions.
  • Incorrect fixing: A vanity needs to stay rigid under daily use.
  • Plumbing surprises: Even a small mismatch can stop the install cold.

A wall-hung unit raises the stakes further because the fixing method matters as much as the cabinet.

Why many homeowners bring in a professional

Professional installation buys speed, accountability, and a cleaner result. It also helps when the scope crosses into work that needs licensed trades or broader building coordination. If plumbing is being moved, if walls need alteration, or if structural changes are involved, this is not the place to improvise. That's where licensed trades and, where relevant, registered builders unlimited matter.

You can save labour money with DIY. You can't save money by installing a bathroom cabinet twice.

For straightforward cabinet swaps, some capable homeowners do manage the job well. But if the room is older, the vanity is wall-mounted, or you want a polished finish that matches the rest of your home, hiring a professional renovator is usually the safer and better-value choice.

Your Project Timeline From Idea to Installation

Most cabinet replacements feel slower than homeowners expect at the start, then faster once the unit is on site and ready to install. The early time goes into decisions. The physical work usually moves much quicker.

Stage one is clarity

The first step is deciding whether you're replacing a single vanity, two bathroom cabinets, or folding the work into broader bathroom renovations. This is also when homeowners narrow down style direction, storage needs, and whether they want a freestanding or wall-mounted unit.

Rushing this part often creates delays later. If you haven't settled the cabinet width, basin arrangement, mounting type, and finish, the quote can only ever be partial.

Stage two is selection and ordering

After the scope is clear, the main time factor becomes product selection and supply. Pre-made cabinetry usually moves faster because sizes and finishes are already standardised. Custom joinery takes longer because it needs final site measures, production, and coordination with any related trades.

This is also the point where good planning protects the budget. A cabinet that looked right online can feel oversized in a compact bathroom once proper dimensions are checked.

Stage three is installation

For a simple replacement, installation itself is often the shortest phase. Removal of the old cabinet, preparation, fitting, and final connections can happen quickly when there are no surprises behind the unit.

If the project includes plumbing changes, wall repair, or floating vanity support work, the process naturally stretches out. That extra time isn't waste. It's what makes the final result line up, function properly, and last.

A smooth timeline usually comes from one thing. Decisions made early, with enough detail to avoid changing course once the job starts.

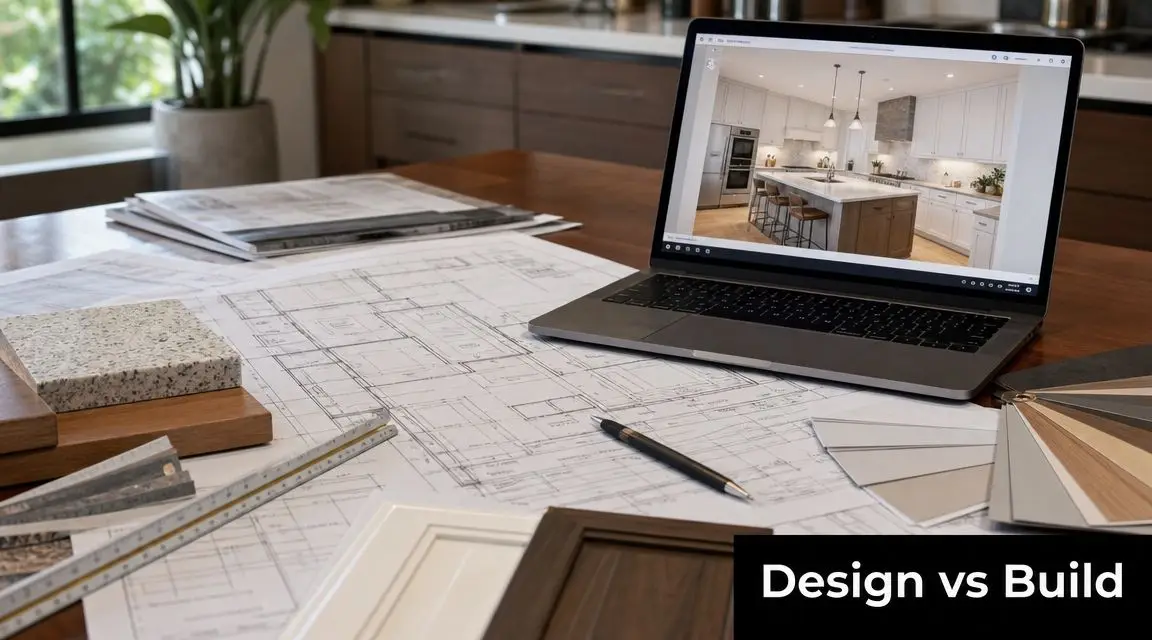
Visualise Your New Bathroom with SitePro

Most cabinet mistakes happen before the first tool comes out. The vanity is too bulky for the room, the drawers clash with the door swing, the finish fights with the tile colour, or the wall-mounted design looked better in theory than it does in the actual space.

That's why visual planning matters so much, especially if you want more than a basic swap. Homeowners chasing modern bathrooms or more refined designer bathrooms usually benefit from seeing the room properly before construction begins.
Screenshot from https://siteprobathrooms.com.au

Why 3D planning removes costly guesswork

A good 3D concept doesn't just show style. It helps test proportion, storage layout, circulation space, and how the vanity sits with mirrors, tapware, and lighting. That matters when you're trying to balance value and finish quality.

It also helps homeowners avoid two common problems:

  • Choosing a cabinet that suits a showroom, not the actual bathroom
  • Paying for custom work without being certain the layout solves the right problem

For cabinet replacement projects, visualisation is especially useful when the room is small, when storage is tight, or when the vanity needs to carry a lot of the design weight.

A stronger way to plan the spend

The best renovation budgets aren't always the biggest ones. They're the clearest ones. If you can see the design properly before the build, it becomes easier to decide where to spend and where to hold back.

That might mean choosing a more practical cabinet finish and putting the money into better drawer storage. It might mean realising a freestanding unit suits the room better than a floating one. Or it might confirm that the custom option is worth it because the room needs that level of fit.

For homeowners who want to test layouts and finishes before locking anything in, SitePro Bathrooms offers a free 3D bathroom planner that makes those decisions far easier to judge in context.

If you're weighing up the cost to replace bathroom cabinets and want a result that feels considered, not guessed, a clear plan is the smartest place to start. SitePro Bathrooms, based in Highett, helps homeowners turn ideas into practical, buildable bathroom renovations with personalized design support, reliable execution, and a no-obligation quote when you're ready to move forward.

  • siteprobathrooms

8 Compact Bathroom Design Ideas for Modern Homes

Maximise Your Space: Transform Your Small Bathroom

You step into a bathroom that should work harder than it does. The vanity pushes into the walkway, the shower screen chops up the room, and every surface feels busy before the day has even started. That is a common problem in compact ensuites and apartment bathrooms, especially in older Victorian homes where the original layout was never designed for modern storage, lighting, or larger fittings.

Good compact bathroom design starts with the plan, not the product list. The best results come from getting the room proportions under control, protecting circulation space, and reducing visual weight so the bathroom feels calm and easy to use. In practice, that means making early decisions about fixture sizes, wall depths, tile scale, and where storage can be built in instead of added on later.

Registered builders and bathroom designers look at these rooms differently. We measure what people can stand in, reach, open, and clean. A vanity that looks fine on a showroom floor can make a 1.8 metre wide bathroom feel tight once clearances, door swings, and shower glass are accounted for. A tile choice that looks sharp in a sample board can make a small room feel chopped up if grout lines are too busy.

3D design visualisations help avoid those mistakes before demolition starts.

They let you test layouts, sightlines, fixture placement, and material combinations while changes are still cheap and simple. That is one of the clearest ways to de-risk a renovation in a small bathroom, where a 50mm adjustment can be the difference between a room that feels resolved and one that always feels compromised.

The ideas in this guide focus on buildable improvements with real impact. Expect specific measurements, material considerations, and layout decisions that help compact bathrooms look clean, work properly, and hold up well over time.

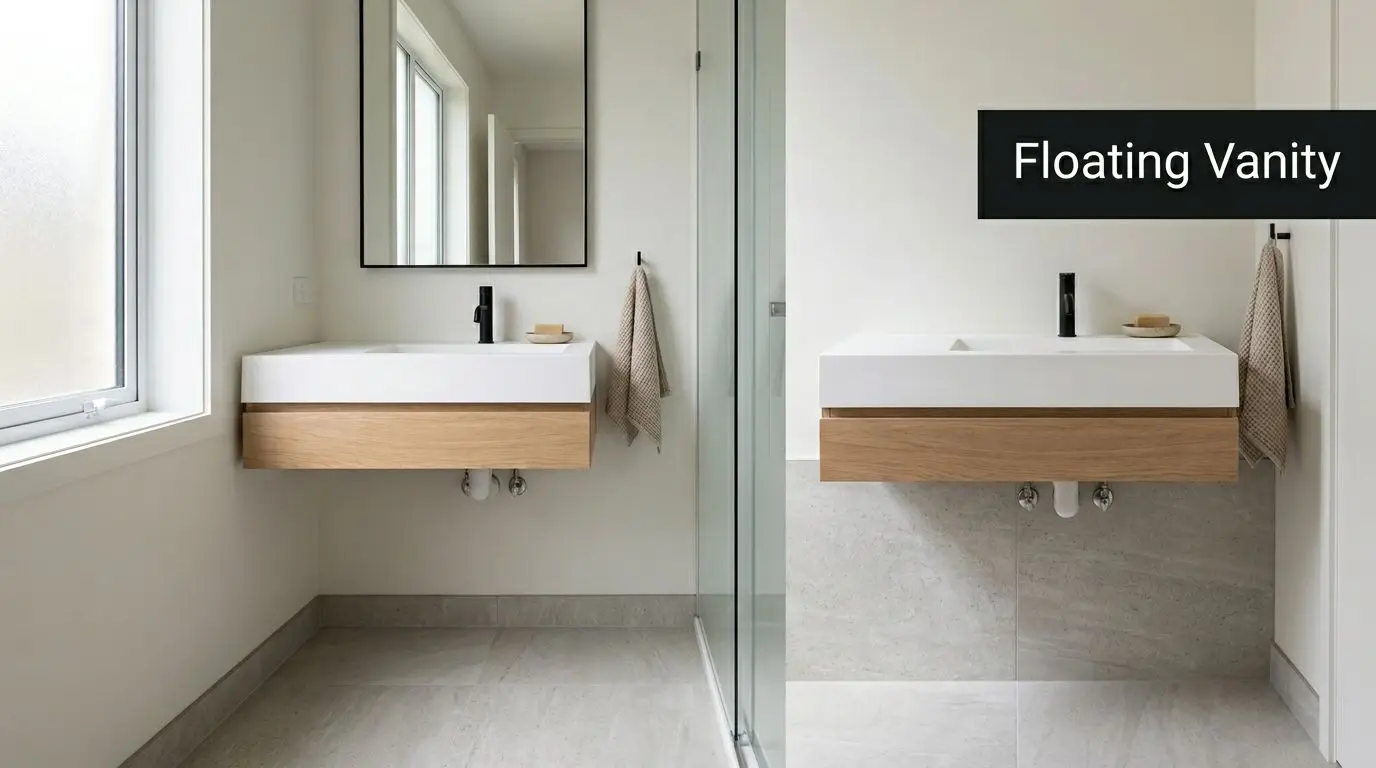
1. Wall-Mounted Vanities and Floating Fixtures

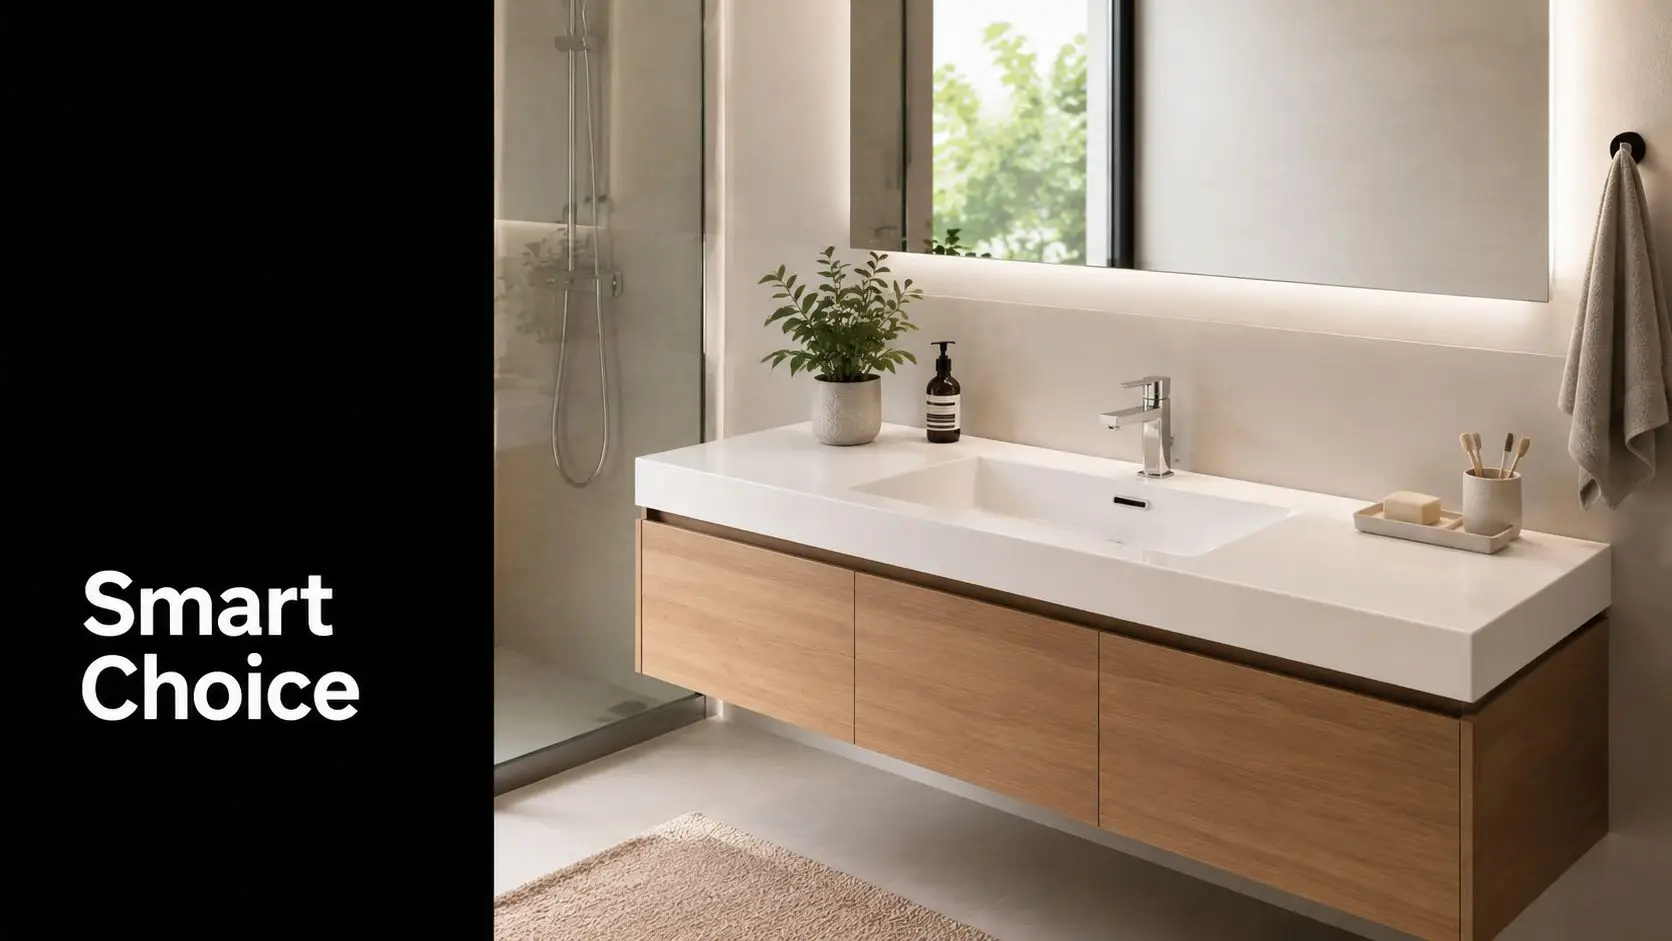
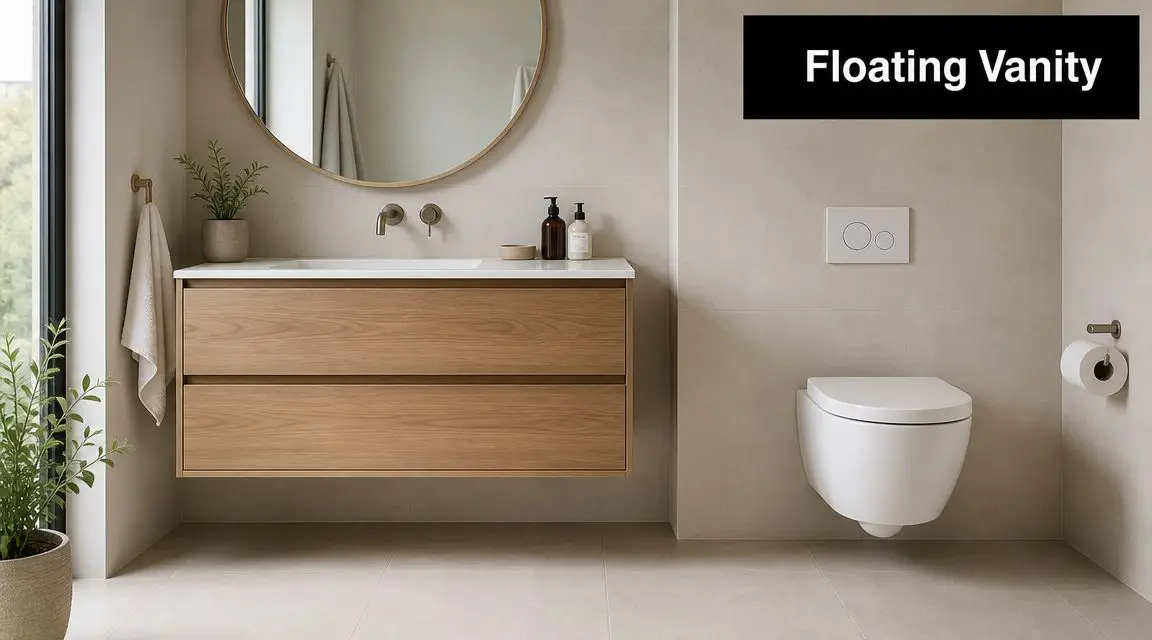
A compact bathroom can feel tight before anyone steps into the shower. The usual culprit is visual weight at floor level. Wall-mounted vanities fix that fast by exposing more floor, extending the sightline from the doorway, and giving the room a cleaner profile.

A modern bathroom featuring a floating wooden vanity with white countertop and black faucet in bright space.

In smaller ensuites, an 800mm vanity is often the safe starting point, but the right size depends on door swing, shower screen position, and how much standing room is left in front. I usually test that in a 3D model before any joinery is ordered. On paper, a wider unit can look manageable. In the room, a 50mm overrun can make drawers, circulation, and cleaning feel clumsy every day.

Mounting height matters too. Most wall-hung vanities land around 800 to 850mm high, but that range should be set by the users, not copied from a display suite. Families with young kids, older owners, and ageing-in-place renovations often need a different height to keep the basin comfortable and the storage usable.

What has to happen behind the wall

A floating vanity needs structure behind it. That means checking the framing, adding noggings or reinforcement where required, and setting plumbing points early so wastes, traps, and water lines stay hidden inside the cabinet.

Choose the vanity after the wall build-up is understood.

That trade-off gets missed all the time. A slim wall-hung unit looks great in a showroom, but if the wall can't take the load without major rework, the money may be better spent on a shallower cabinet, a custom carcass, or a different layout. The same planning step also helps coordinate tile set-out and floor lines, especially if you're pairing the vanity with large format bathroom tiles for a cleaner, more open finish.

A few practical rules make these fixtures work harder in small rooms:

  • Fix into solid structure: Use proper framing support and rated fixings. Plasterboard anchors are not enough.
  • Keep the cabinet depth under control: In tight bathrooms, a shallower vanity often improves movement more than a wider vanity improves storage.
  • Use durable finishes: Matte and satin joinery generally show fewer fingerprints and water marks than high gloss.
  • Leave a realistic cleaning gap: Too low and the underside becomes awkward to mop. Too high and the vanity can feel visually disconnected.

A wall-hung toilet can create the same lighter effect if the wall depth, cistern space, and plumbing layout allow for it. Registered builders earn their keep here. They can tell you early whether the wall should be rebuilt, packed out, or left alone, which is exactly the kind of decision that keeps a compact bathroom looking resolved instead of overworked.

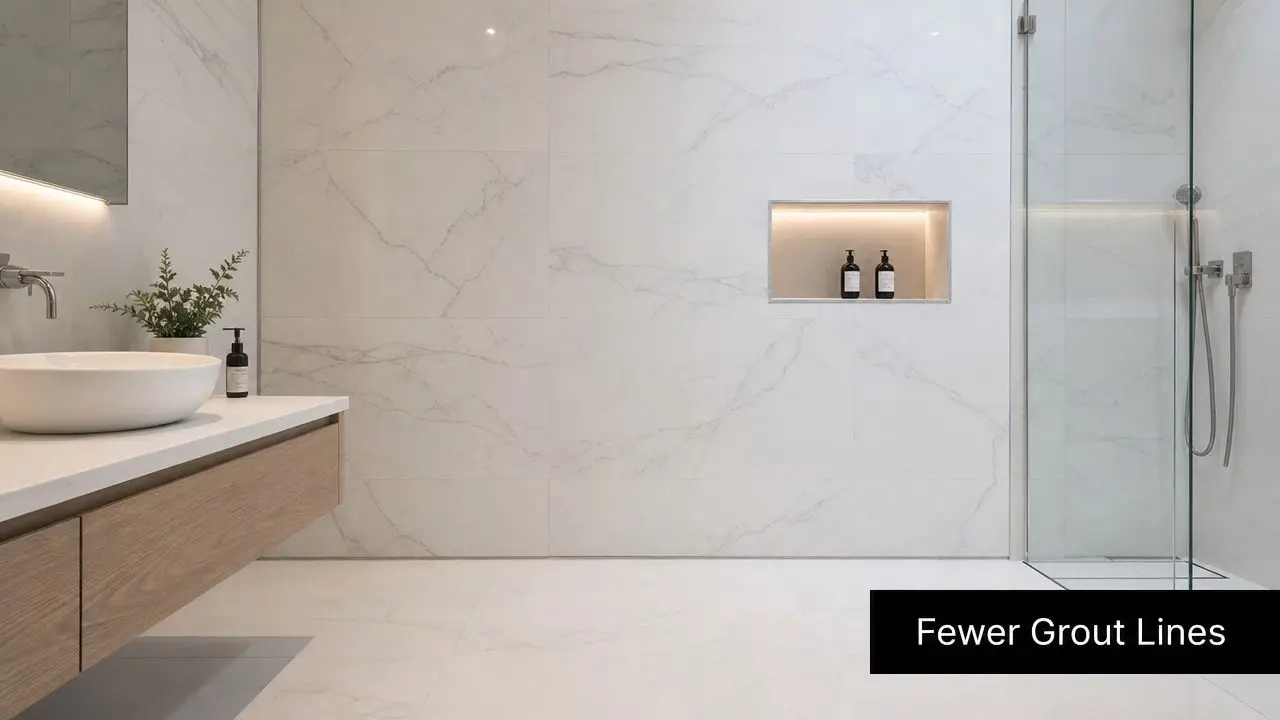
2. Large Format Tiles and Minimal Grout Lines

A compact bathroom starts to feel bigger once the eye can travel across the room without stopping at every joint. Large format tiles help because they create broader, quieter surfaces. Less grout also means less visual clutter and less cleaning in a room that already works hard.

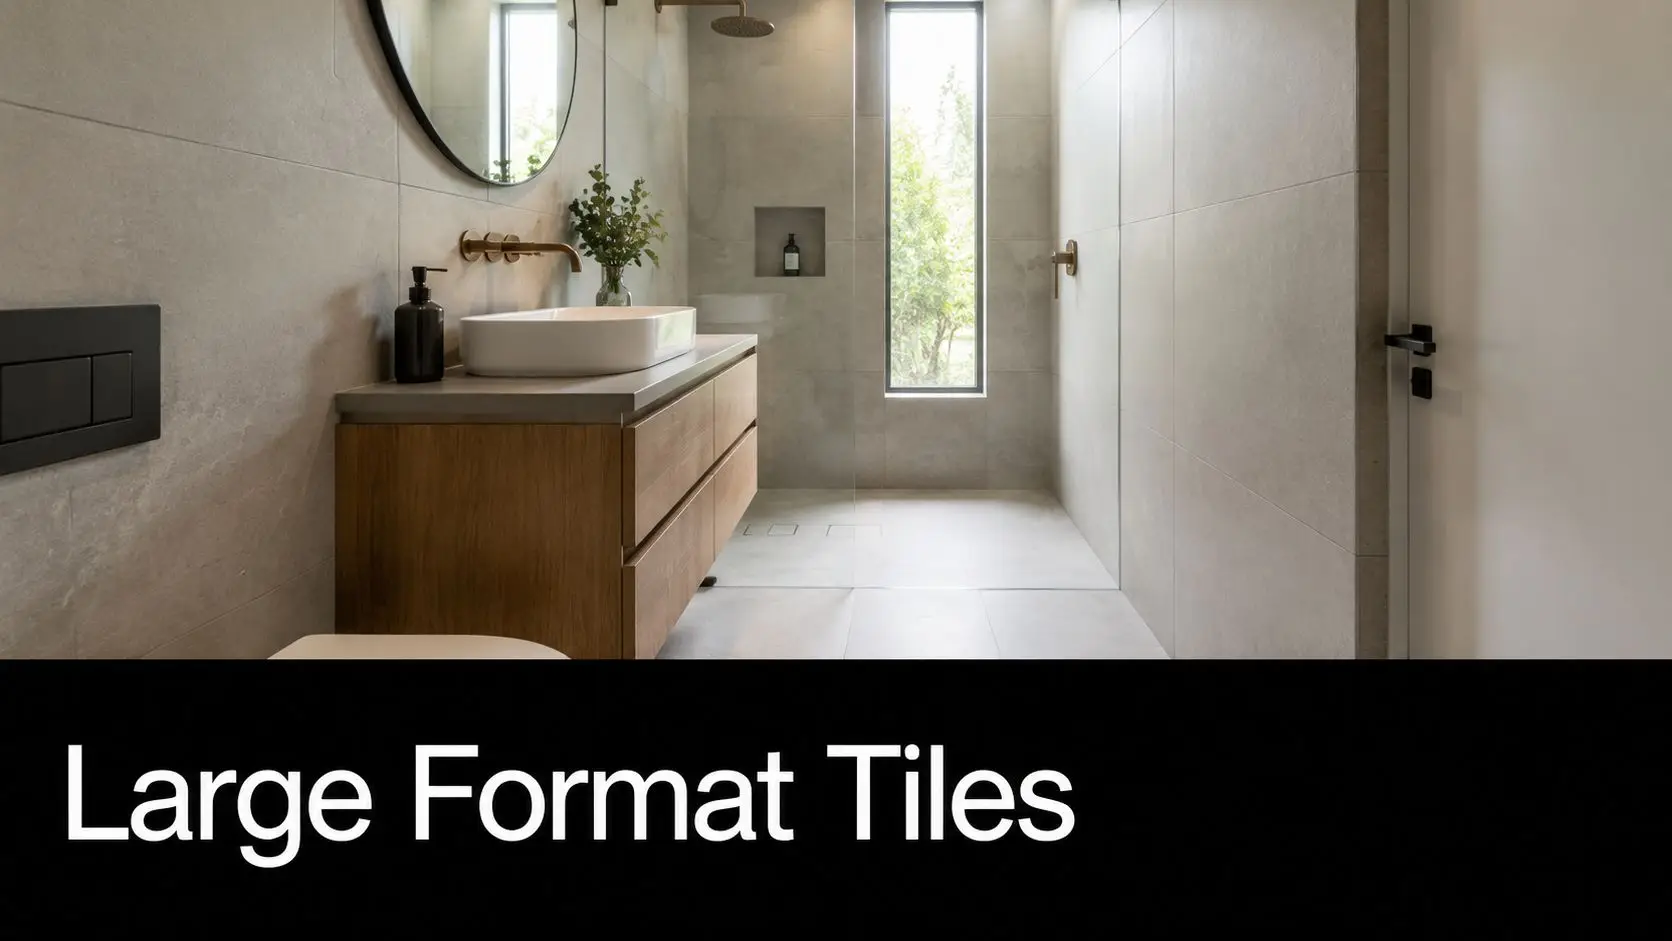
A modern, minimalist bathroom featuring large format gray stone tiles, a wooden vanity, and a glass shower.

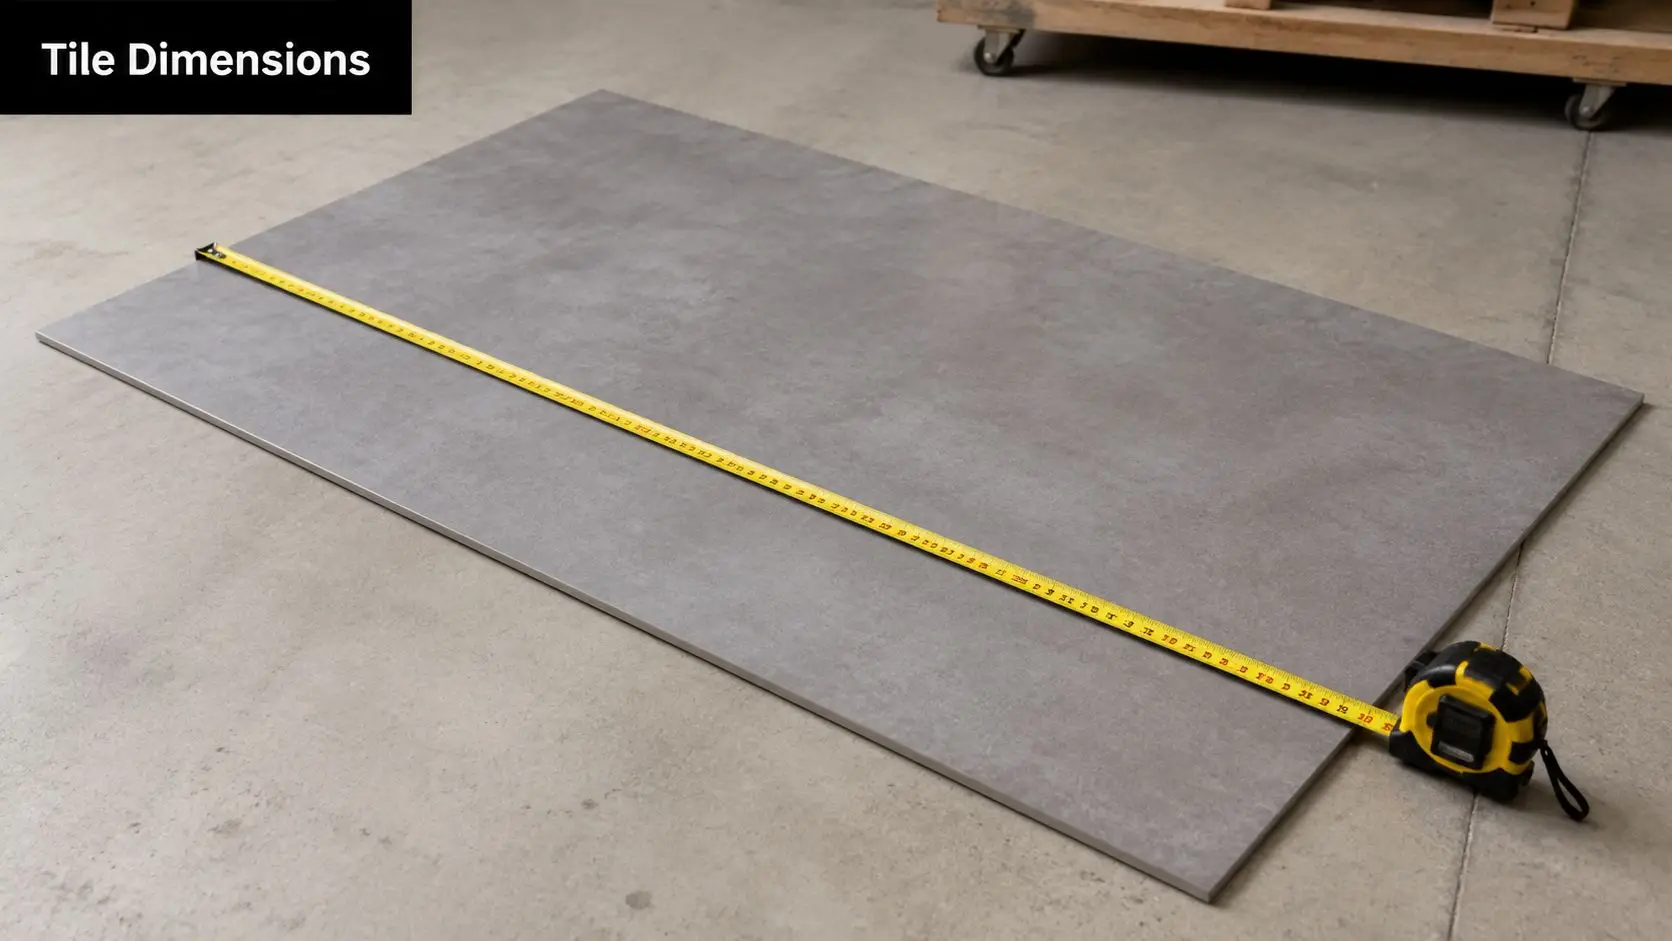
In a tight ensuite, I usually get the best result from 1200 x 600mm or 600 x 600mm tiles, depending on how many doorways, niches, and corners the room has. Bigger is not always better. A tile that is too large for the wall can force awkward cuts around tapware, windows, or toilet pan set-outs, and that can make the room feel more contrived, not more spacious.

Orientation matters as much as size. Run rectangular tiles horizontally and a narrow room often reads wider. Stack them vertically and the ceiling can feel taller. The right choice depends on what the room is lacking, width, height, or both.

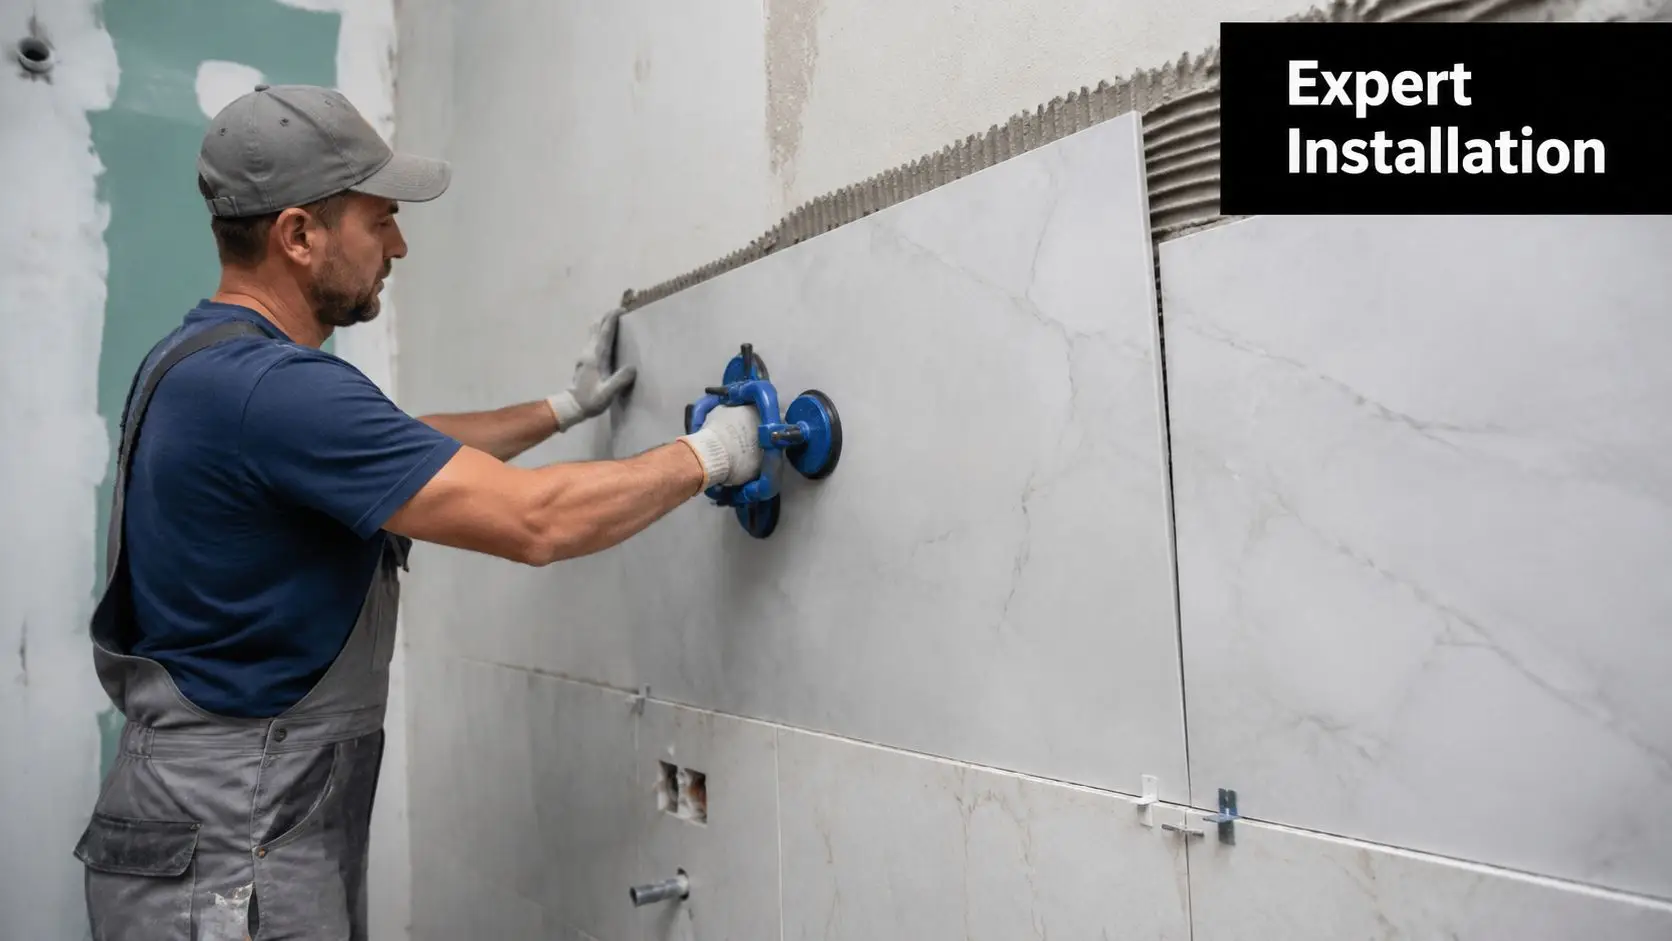
Large format finishes also ask more of the build. If the substrate is out of plane, the defects show immediately. Falls on the bathroom floor still need to work, especially near the shower entry, so the tile selection has to suit the waterproofing method, waste location, and drain detail. That is one reason we model tile set-outs in 3D before demolition starts. It lets clients see where joints land at the niche, vanity end, and shower screen, which avoids expensive last-minute compromises.

A few site rules make a big difference:

  • Straighten walls and floors first: Large tiles highlight dips and humps that smaller tiles can hide.
  • Set the layout before waterproofing is locked in: Drain position, niche width, and screen placement all affect the final cuts.
  • Use grout close to the tile colour: Tight tonal contrast keeps the surface reading as one field.
  • Limit feature tiles to one small area, if any: In compact rooms, too many patterns break up the space fast.

I also prefer carrying one main tile across the floor and at least one major wall plane. That restraint is what makes the room feel resolved. If you are planning an open shower zone or want the floor finish to continue cleanly through the wet area, these wet room bathroom ideas show how that approach works in practice.

For a closer look at material options, these large format bathroom tiles show why scale, finish, and grout selection have such a big effect in small bathrooms.

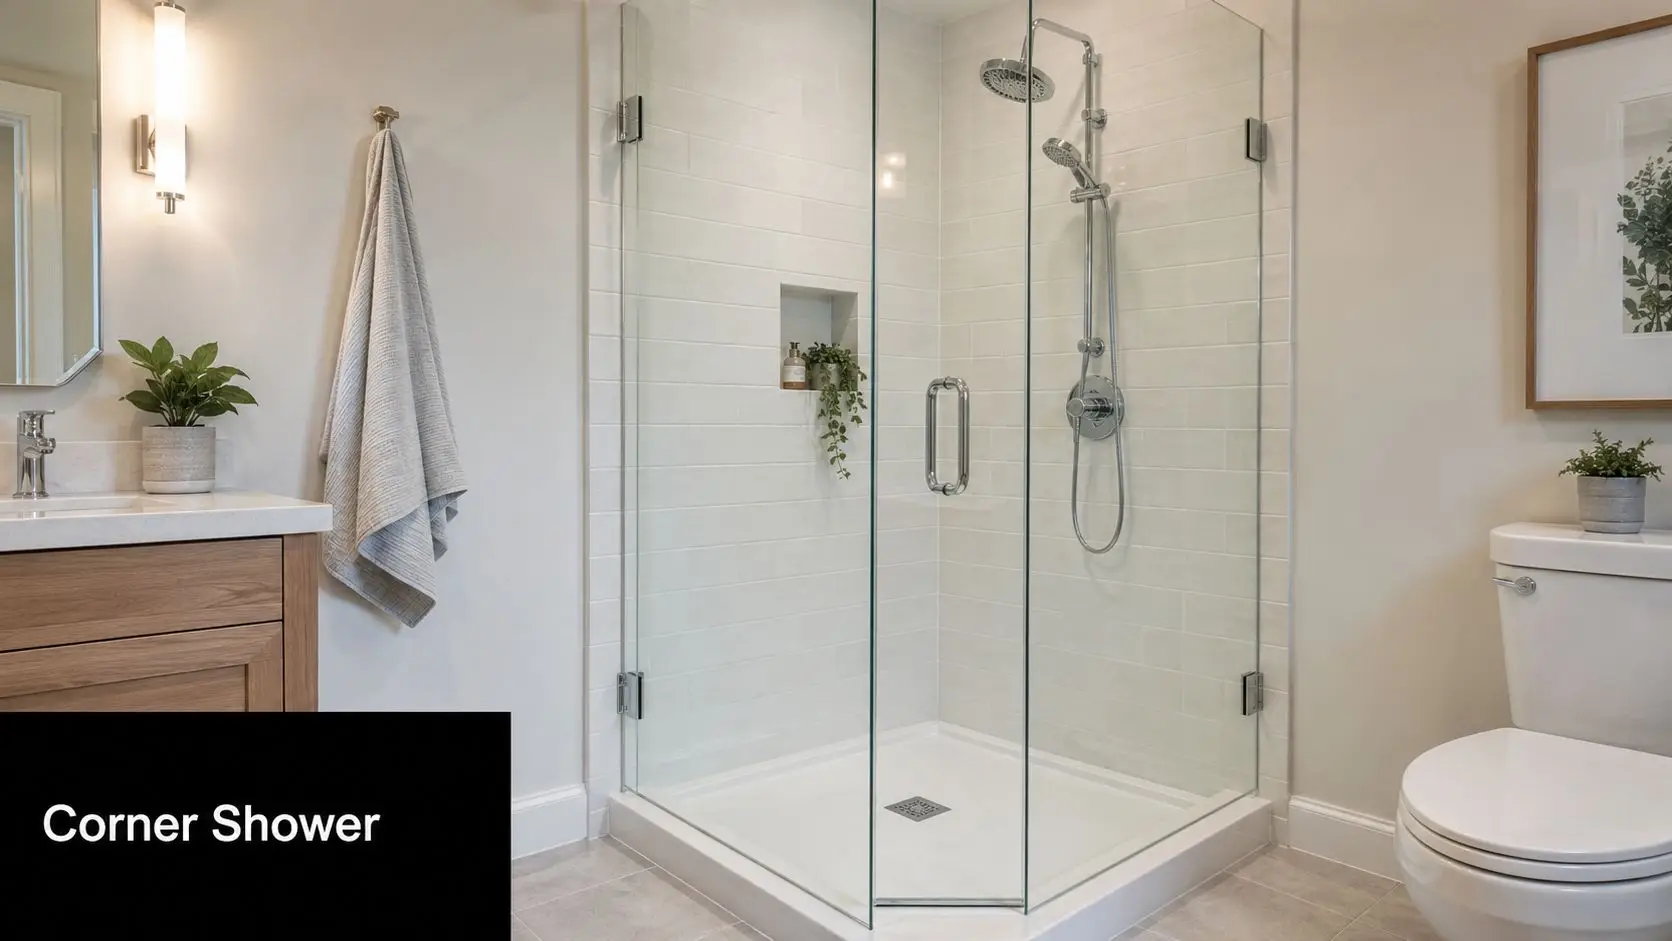
3. Compact Corner Shower Solutions and Walk-In Designs

A tight ensuite usually fails at the shower first. The enclosure sits in the wrong spot, the door swing steals circulation space, and the room feels smaller than the floor plan suggests. In compact bathrooms, shifting the shower into a corner or opening it up as a walk-in often gives back enough usable space to change how the whole room works.

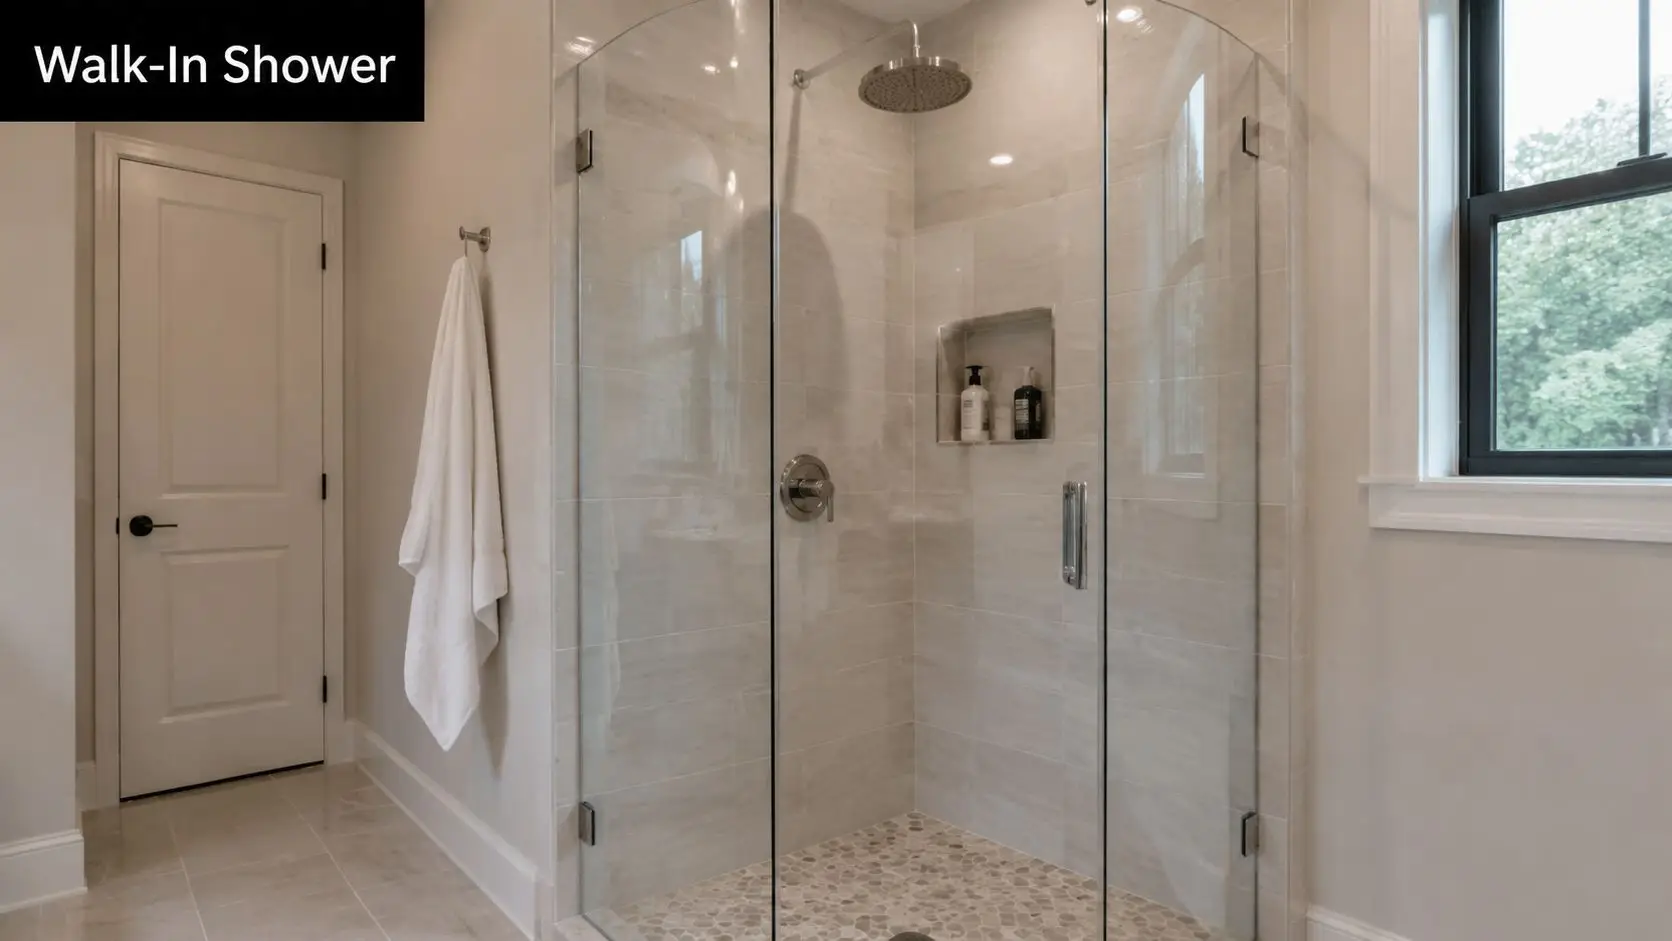
A modern walk-in shower with glass doors, pebble floor tiling, and neutral-colored stone walls in a bathroom.

I see this constantly in ensuites around 1.5 x 2 metres. A pivot door shower cuts into the path to the vanity or toilet and breaks the room into awkward pockets. A frameless corner layout or a properly planned walk-in keeps the centre clearer, improves sightlines, and makes the bathroom read as one volume instead of three cramped zones.

The trade-off is technical, not cosmetic. Walk-in showers only work when water is controlled properly. That means accurate falls to waste, a shower rose position that contains spray, and screen placement that protects the dry path through the room. Get those wrong and the bathroom never feels settled, no matter how refined the finishes are.

For compact walk-in showers, I usually set a niche around 1200mm high so daily products sit within easy reach and off the floor. Glass also needs judgement. Thicker frameless panels can feel premium, but in very small rooms the hardware, panel width, and cleaning access matter just as much as the glass specification. Sometimes a minimal fixed screen gives a better result than a full enclosure with extra channels and door furniture.

Curbless or low-threshold entries are also worth considering if you want the room to age well. They improve access and can make the footprint feel wider, but they need tighter floor planning because the whole wet area has to work harder. Here, 3D bathroom design visualisations earn their keep. We use them to test screen length, entry position, drain location, and clearances before demolition starts, which helps avoid expensive mid-build changes.

If you are comparing layouts, these bathroom design ideas for small spaces show how corner showers and open entries can be planned without wasting usable floor area. If you are weighing full wet-area planning, these wet room bathroom ideas show how that approach can work in a tighter footprint.

4. Recessed Storage and Hidden Shelving Systems

Open a compact bathroom after a busy morning and the problem shows up fast. Bottles line the vanity, spare toiletries drift onto the window ledge, and the room starts to feel smaller than it is. Recessed storage fixes that by using the cavity inside the wall, not the circulation space you need to move through the room.

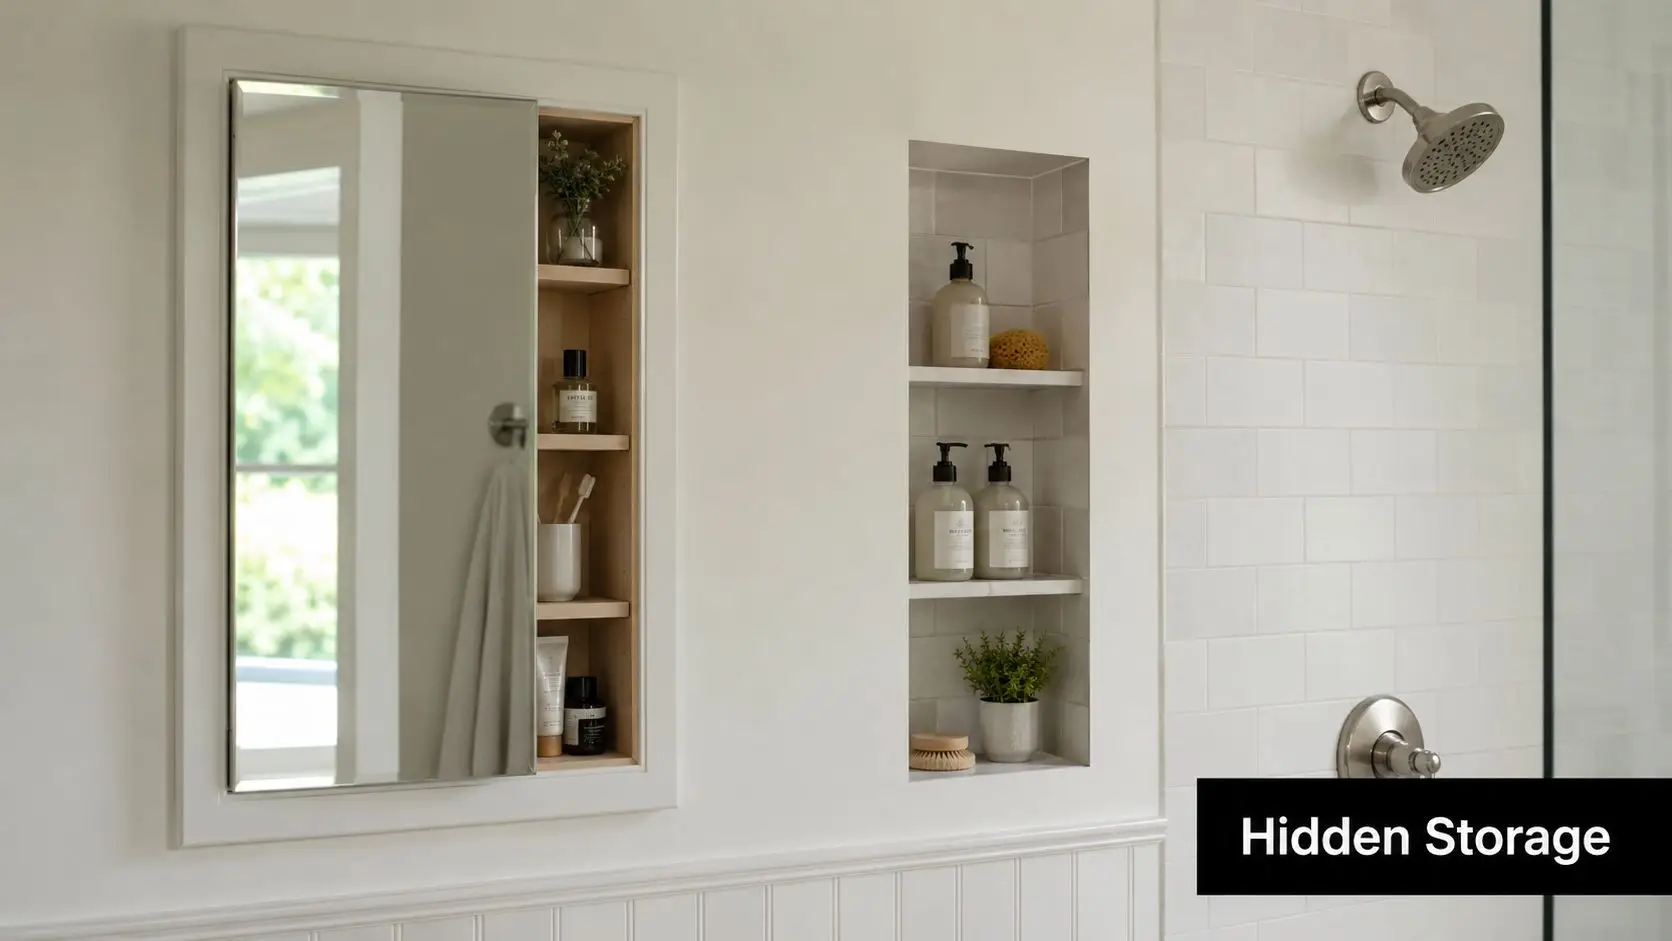
A bathroom wall featuring a recessed medicine cabinet and built-in wall niches for compact and functional storage.

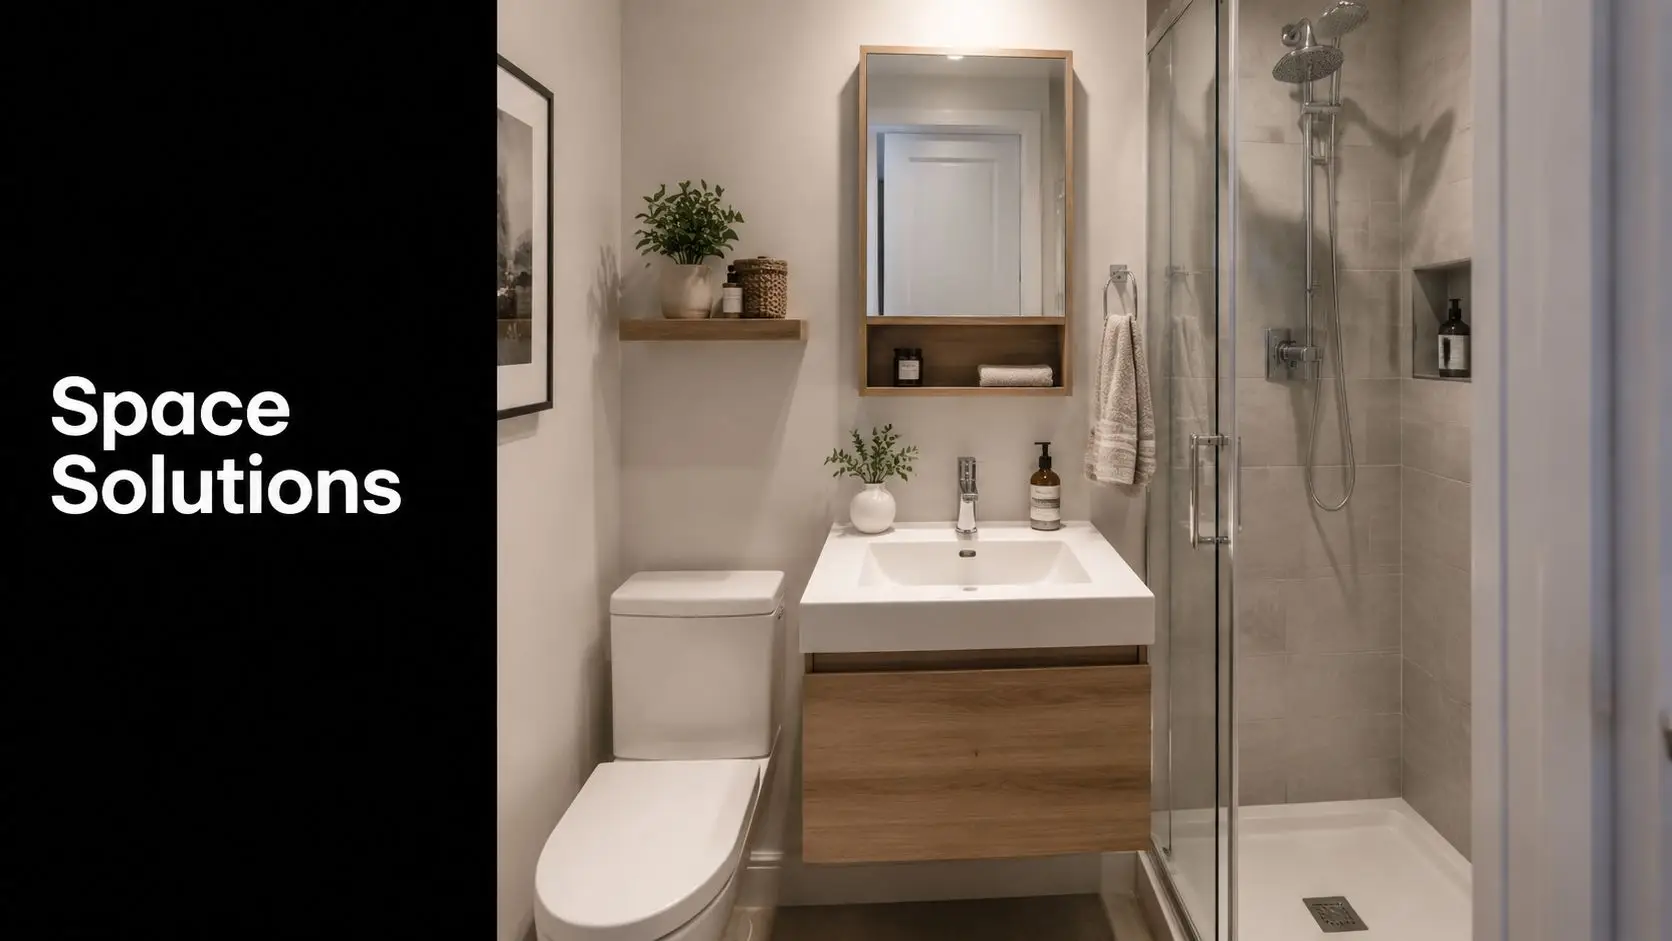
A recessed mirrored cabinet above the vanity is one of the smartest upgrades in a small bathroom. You get everyday storage at eye level, the mirror stays flush with the wall plane, and the room avoids the visual bulk of a surface-mounted unit. In the shower, a properly sized niche keeps bottles off the floor and out of corners where grime builds up.

The catch is that recesses need to be designed early. Stud positions, pipe runs, membrane detailing, and tile set-out all affect what is possible. In many homes, an internal wall will only give you enough depth for a shallow cabinet unless the framing is adjusted. That trade-off needs to be resolved on the plan, not after sheeting starts.

I usually aim for one well-proportioned recess instead of several small ones. It looks calmer, it is easier to waterproof, and it gives you storage that people use. Shower niches also work better when their width is set to suit the tile module, because you avoid awkward cuts and the finished wall reads clean and intentional.

A few details make the difference:

  • Set the recess to the wall build-up. Standard framing, sheeting, adhesive, and tile thickness all affect final depth.
  • Line niches up with grout joints where possible. The result looks built with the room, not dropped in later.
  • Keep wet-area waterproofing continuous. Corners, shelf junctions, and niche bases need careful membrane treatment and falls.
  • Size storage for real products. Tall pump bottles, razors, and spare rolls need more than a decorative slot.

3D bathroom design visualisations help here because they let you test niche height, cabinet depth, and mirror proportions before demolition starts. We use them to check whether a recessed cabinet will clear plumbing, whether a niche will clash with a feature tile band, and whether the storage is large enough to reduce bench clutter. That early coordination avoids expensive site changes and usually produces a cleaner result.

For more layout-led examples, these small bathroom design ideas with hidden storage solutions show how recesses can keep the room calm, practical, and easy to maintain.

5. Vertical Space Optimisation with Tall Storage and High Ceilings

You feel the limitation in a compact bathroom at shoulder height first. Benchtops crowd quickly, towel storage gets pushed into another room, and a standard vanity ends up doing jobs it was never sized to handle. The fix is usually above eye level.

Wall height gives you storage volume without tightening circulation. In period homes with taller ceilings, that opportunity is even bigger, but the same principle works in newer builds. A well-proportioned tall cabinet, linen tower, or overhead joinery bank can carry spare towels, cleaning products, and backups while keeping the floor line open.

The key is restraint.

Tall storage improves a small bathroom when the joinery is narrow enough to stay out of the way and detailed well enough to read as part of the architecture. In tight rooms, I usually keep full-height cabinetry slimmer than clients first ask for, because extra depth often creates a bulky corner, pinches movement, and makes the room feel top-heavy. Stopping the cabinet just short of the ceiling also helps. It leaves a clean shadow line and avoids that wedged-in look.

A practical arrangement is a full-height tower beside a wall-hung vanity, with everyday items stored between waist and eye level and bulk items higher up. That layout works because it splits storage by frequency of use. The vanity handles daily traffic. The tall unit handles overflow. You get better function without resorting to an oversized basin cabinet that dominates the room.

Measurements matter here. Cabinet depth should be set against door swing, vanity projection, and the clear path to the shower or toilet. In renovation work, we also check wall plumb early because older rooms are rarely straight, and tall panels make irregularities obvious fast. This is one of those areas where 3D bathroom design visualisations earn their keep. They let you test cabinet height, depth, and sightlines before joinery is ordered, which is far cheaper than trimming a design on site after waterproofing and tiling are complete.

A few details make tall storage work properly:

  • Fix cabinets back to solid framing. Full-height units carry more load than they appear to, especially once shelves are filled.
  • Use adjustable shelving. Toiletries, towels, paper goods, and cleaning products all need different heights over time.
  • Keep daily-use items lower. Upper shelves suit spares and seasonal items, not products you reach for every morning.
  • Choose door swings carefully. In compact rooms, a poorly hinged tall door can clash with mirrors, lights, or the entry door.
  • Match the joinery finish to the room. Light timber tones, whites, and soft matt finishes usually keep vertical storage from feeling heavy.

High ceilings can also be reinforced visually, not just physically. Running tile, mirror, or joinery lines upward makes the room read taller, provided the composition stays simple. Too many horizontal breaks cut the wall up and reduce that effect.

Done well, vertical storage solves a real problem. It gets clutter off the vanity, keeps the room easier to clean, and makes a compact bathroom feel resolved rather than overworked.

6. Strategic Lighting Design and Mirror Placement for Space Expansion

Bad lighting shrinks a bathroom. It exaggerates shadows, flattens finishes, and makes mirrors less useful. Good lighting does the opposite. It opens the room up, improves grooming, and gives compact bathrooms a more expensive feel.

In practice, a single ceiling light in the middle of the room rarely cuts it. It creates shadows at the vanity and leaves corners dull. Better results come from layering. Recessed downlights handle general light, task lighting supports the mirror, and concealed or backlit elements soften the room at night.

Mirrors should work with light, not just fill a wall

Full-height mirrors are one of the easiest ways to stretch a room visually. In a compact ensuite, taking a mirror higher than standard eye level can make the ceiling feel taller, especially when the joinery below stays light and simple. If there's natural light, place the mirror so it catches and redistributes it rather than reflecting a blank wall.

Warm-white LEDs usually suit residential bathrooms best because they feel calmer than harsher light. Side lighting at the vanity is also more flattering than relying only on overhead fittings. That matters every morning, not just in photographs.

Australia's older population is also a practical reason to get this right. The ABS projects that the share of Australians aged 65 and over will rise from 16% in 2021 to 22% by 2046, and the National Housing and Homelessness Agreement 2022 to 2027 highlights the need for accessible, age-friendly housing, including bathrooms. Good mirror lighting and better visibility support that future-proofing without changing the look of the room.

  • Use separate switching: Mirror lights should be able to run without the full ceiling scheme.
  • Add dimming where possible: The bathroom needs different light levels at 6am and 10pm.
  • Coordinate ventilation with mirrors: Good extraction reduces condensation and keeps the mirror usable.

A backlit mirror over a floating vanity is one of those combinations that almost always works in modern bathrooms. It adds function, softens the wall, and reinforces the sense that the vanity is floating instead of sitting in a dark corner.

7. Neutral Colour Palettes and Strategic Contrast Design

A compact bathroom usually feels smaller before the fittings even go in. The problem often starts with colour selection. If every surface changes tone, finish, or pattern, the room breaks into pieces and the walls seem closer than they are.

For small bathrooms, I usually keep the main palette tight. Warm white, soft greige, pale stone, and light grey all hold up because they reflect light well and let the room read as one volume. That approach also gives more freedom with fixtures and joinery. You can update tapware or handles later without rebuilding the whole scheme around a bold wall tile.

The trade-off is that a neutral bathroom can look flat if the materials are too similar. Good compact bathroom design avoids that by changing texture and depth rather than jumping between heavy colours. Matte wall tiles, a lightly grained timber vanity, brushed metal tapware, or a niche lined in a slightly deeper tone will add definition without shrinking the room.

Controlled contrast works better than strong contrast.

In practice, that usually means limiting the room to one main neutral, one supporting tone, and one darker or warmer finish. A floating vanity in oak-look joinery against pale porcelain is a reliable combination. So is a soft white wall tile with a stone-look floor and brushed nickel fittings. If clients want black tapware, I usually contain the contrast and keep the surrounding surfaces quiet so the fittings read as accents instead of visual clutter.

This part is easier to get right in a 3D bathroom design than from a few loose samples on a bench. On screen, you can test how a darker vanity, niche tile, or grout colour changes the visual weight of the room before anything is ordered. That helps avoid one of the common renovation mistakes in compact spaces. Individually nice finishes that fight each other once they are installed.

A few combinations regularly perform well in tight footprints:

  • Warm white with pale greige: Soft, clean, and less clinical than plain white.
  • Light stone-look tile with oak or walnut-look joinery: Adds warmth without making the room busy.
  • Pale grey porcelain with brushed nickel or chrome: Simple, durable, and easy to keep consistent across fittings.
  • Muted green or clay as a small accent: Best used inside a niche, on joinery, or in accessories rather than across full walls.

Samples still matter, but they need to be tested properly. Check them under the actual bathroom lighting, next to the vanity finish, and beside the floor tile. I also like to view them at different times of day because a compact bathroom with one small window can shift from cool to warm quickly, and the colour that looked balanced in the showroom can read completely differently on site.

8. Multifunctional Fixtures and Space-Saving Innovations

A compact bathroom usually fails in the gaps between fixtures. The toilet projects too far, the vanity drawers hit the doorway, the mirror needs a separate light, and a towel rail ends up on the only free wall. The fix is not cramming in smaller products at random. It is choosing fixtures that solve two problems at once and planning their clearances before rough-in starts.

The best multifunctional pieces save space without making maintenance harder. A mirrored shaving cabinet with integrated lighting can remove the need for wall sconces and recover storage at eye level. A wall-hung toilet with an in-wall cistern opens up the floor and makes cleaning easier, but it also needs enough wall depth and an access point for servicing. A vanity with internal organisers sounds minor, yet in a tight room it often removes the need for an extra shelf or tower unit.

I see the same trade-off on many small projects. Clients want the room to feel open, but they also need it to work every day. That usually points to fixtures with clean geometry, concealed storage, and fewer separate add-ons fixed to the walls.

A few options consistently earn their place:

  • Mirrored cabinets with integrated lighting: combine task lighting, reflection, and storage in one unit.
  • Wall-hung toilets with concealed cisterns: reduce visual bulk and free up floor area, provided the wall build-up can accommodate the frame.
  • Vanities with drawer dividers and power access: keep benchtops clear and make daily use easier.
  • Heated towel rails in the right location: dry towels faster and add a small amount of background warmth, though they should not be treated as the main heat source.
  • Fold-down seats and support rails: improve accessibility without permanently consuming valuable circulation space.

Dimensions matter here. In a compact plan, even a small reduction in projection can improve how the room moves. A shorter projection toilet, a shallower vanity, or a recessed cabinet can be the difference between a layout that feels tight and one that feels resolved. These are the decisions worth testing in a 3D bathroom design before any plumbing is set. You can check door swings, standing room at the vanity, and whether a drawer front will clash with the toilet pan or shower glass.

Serviceability needs the same attention. Concealed cisterns, in-wall tap bodies, and integrated lighting all look tidy, but they must remain accessible for repair or replacement. If a product saves space on day one but creates invasive maintenance later, it is the wrong product for the job.

For compact bathrooms, I usually check three things before signing off on these fixtures:

  • Wall depth and framing: enough room for in-wall systems without compromising structure or pushing the room out awkwardly.
  • Clearances in use: doors, drawers, and bodies need space to move comfortably.
  • Long-term maintenance: filters, valves, drivers, and cistern components should be reachable without opening finished walls.

Used properly, multifunctional fixtures do more than save room. They reduce visual noise, improve daily use, and make a small bathroom feel considered instead of crowded. In the best layouts, every fitting earns its footprint.

8-Point Compact Bathroom Design Comparison

Solution Implementation Complexity Resource Requirements Expected Outcomes Ideal Use Cases Key Advantages
Wall-Mounted Vanities and Floating Fixtures Moderate–High, needs wall reinforcement and concealed services Skilled carpenter/plumber, reinforced studs/brackets, hidden plumbing, higher material cost Increased perceived floor space, easier cleaning, streamlined modern look Small ensuites, modern apartments, renovations with load-bearing walls Frees floor area, customizable height, minimalist aesthetic
Large Format Tiles and Minimal Grout Lines High, precise substrate prep and expert tiling required Experienced tiler, flat/level substrate, cutting tools, premium tiles Continuous surfaces, fewer visual breaks, premium contemporary finish Narrow bathrooms, showers, wet-room style renovations Visual continuity, easier cleaning, durable finish
Compact Corner Shower Solutions and Walk-In Designs Moderate–High, requires waterproofing, slope design and precise glazing Waterproofing membranes, frameless glass, skilled tiler/glazier, good ventilation Maximized usable floor area, open sightlines, accessible bathing Small bathrooms, attic/sloped ceilings, accessibility-focused projects Space-efficient layout, spa-like openness, improved access
Recessed Storage and Hidden Shelving Systems Moderate, best planned during framing; retrofit more invasive Carpentry, recessed cabinets/niches, waterproofing in wet areas, tile integration Reduced visual clutter, retained storage without protrusion, cleaner lines Tiled showers, compact ensuites, projects prioritizing minimalism Keeps counters clear, mirrored options amplify space, seamless integration
Vertical Space Optimization with Tall Storage and High Ceilings Moderate, requires secure anchoring and careful proportioning Custom cabinetry, strong wall fixings, possible step-stool/ladders Large storage capacity without floor impact, rooms feel taller Victorian homes with high ceilings, narrow bathrooms needing storage Maximizes vertical volume, organized storage, draws eye upward
Strategic Lighting Design and Mirror Placement for Space Expansion Moderate, needs electrical planning and coordinated placement Lighting fixtures, mirrors/backlighting, dimmers, professional electrician Perceived larger, brighter space, improved task visibility, enhanced ambiance Low-light bathrooms, hotel-style renovations, any compact bathroom Non-structural spatial gain, energy-efficient LEDs, immediate visual effect
Neutral Colour Palettes and Strategic Contrast Design Low, mainly finish and colour selection Paint/tiles/finishes, possible colour consultation, quality materials Brighter, cohesive appearance, reduced visual complexity, timeless look Small bathrooms, rentals, budget-conscious updates Cost-effective, broad appeal, enhances perceived spaciousness
Multifunctional Fixtures and Space-Saving Innovations Low–Moderate, depends on chosen fixtures and integrations Specialized fixtures (wall-hung toilets, integrated vanities), plumber/electrician Fewer separate elements, increased functionality in small footprint Tight renovations, compact apartments, accessibility retrofits Saves floor space, reduces clutter, combines functions for efficiency

Ready to Start Your Bathroom Renovation?

You feel the pressure of a compact bathroom the moment the door opens. Knees clip the vanity, storage spills onto the benchtop, and every fitting looks like it was chosen in isolation. Good renovations fix that at the planning stage, before a single tile comes off the wall.

Compact bathrooms work best when the room is designed as one coordinated system. Shift a vanity by 80 or 100mm and you may also need to adjust mirror width, wall light spacing, towel rail position, door clearance, and shower screen dimensions. On site, these small changes stack up fast. The cleanest results come from resolving them on paper first, then confirming them in a 3D model before construction starts.

That process also exposes the trade-offs early.

A floating vanity can open up the floor visually, but the wall needs the right framing and fixing points. Large format tiles reduce visual clutter, but they demand flatter substrates and a disciplined set-out or the room will look out of square. A walk-in shower can make a small bathroom feel calmer and more open, but only if the falls, drainage, waterproofing, and glass position are handled properly. In tight rooms, one weak decision tends to create three more.

3D design visualisations help remove that risk. They let clients compare a 750mm vanity against a 900mm option, test whether recessed shaving cabinets project too far into the room, and see if a full-height tile layout improves the proportions or makes the ceiling feel lower. It is much cheaper to correct joinery depth, niche placement, or circulation space on screen than after plumbing rough-in or waterproofing.

For homeowners in Highett and across greater Victoria, that level of planning also makes the build process easier to control. Selections are clearer, allowances are tighter, and trades are working to a layout that has already been resolved. That usually means fewer site changes, fewer delays, and a better finish at handover.

SitePro Bathrooms handles that chain of work end to end as registered builders unlimited. The team develops the layout, prepares detailed 3D designs, manages construction, and completes the finishing work as one coordinated package. That matters in compact bathrooms, where every millimetre has a job to do and good design only works if the build follows through.

If you want a small bathroom to feel measured, calm, and properly built, contact SitePro Bathrooms and start with a layout that is tested before demolition begins.

  • siteprobathrooms

10 Wet Room Bathroom Ideas for Your Victorian Home

If you're staring at a bathroom that feels tight, dated, or awkward to use, a wet room can completely change how the space works. Instead of boxing the shower into a cubicle, the room is designed as a fully waterproofed environment with level access, cleaner lines, and a more open feel. In a Highett home, that often means a bathroom that looks larger, feels more modern, and works better for day-to-day life.

That's a big reason wet rooms have moved well beyond niche designer bathrooms. The 2025 Houzz Bathroom Trends Study, referenced by NAR, notes that one in six renovated bathrooms now features a wet room, with demand tied to space efficiency, barrier-free access, and easier maintenance. For Victorian homeowners, that puts wet rooms squarely in the conversation for bathroom renovations that need to balance style, usability, and long-term value.

The appeal is obvious. Wet rooms suit compact floorplans, support age-in-place thinking, and fit the clean look many people want from modern bathrooms. The catch is that they only work when the technical side is handled properly. Waterproofing, falls to waste, drainage placement, ventilation, and heating all need to be resolved at design stage, not patched in once tiling starts.

Below are wet room bathroom ideas that work in real Victorian homes. Some lean minimalist, some feel warm and residential, and some are built around accessibility from day one. All of them come with trade-offs worth knowing before you commit, especially if you want a result that looks like a designer bathroom but performs like a properly built one.

1. Minimalist Wet Room with Seamless Flooring

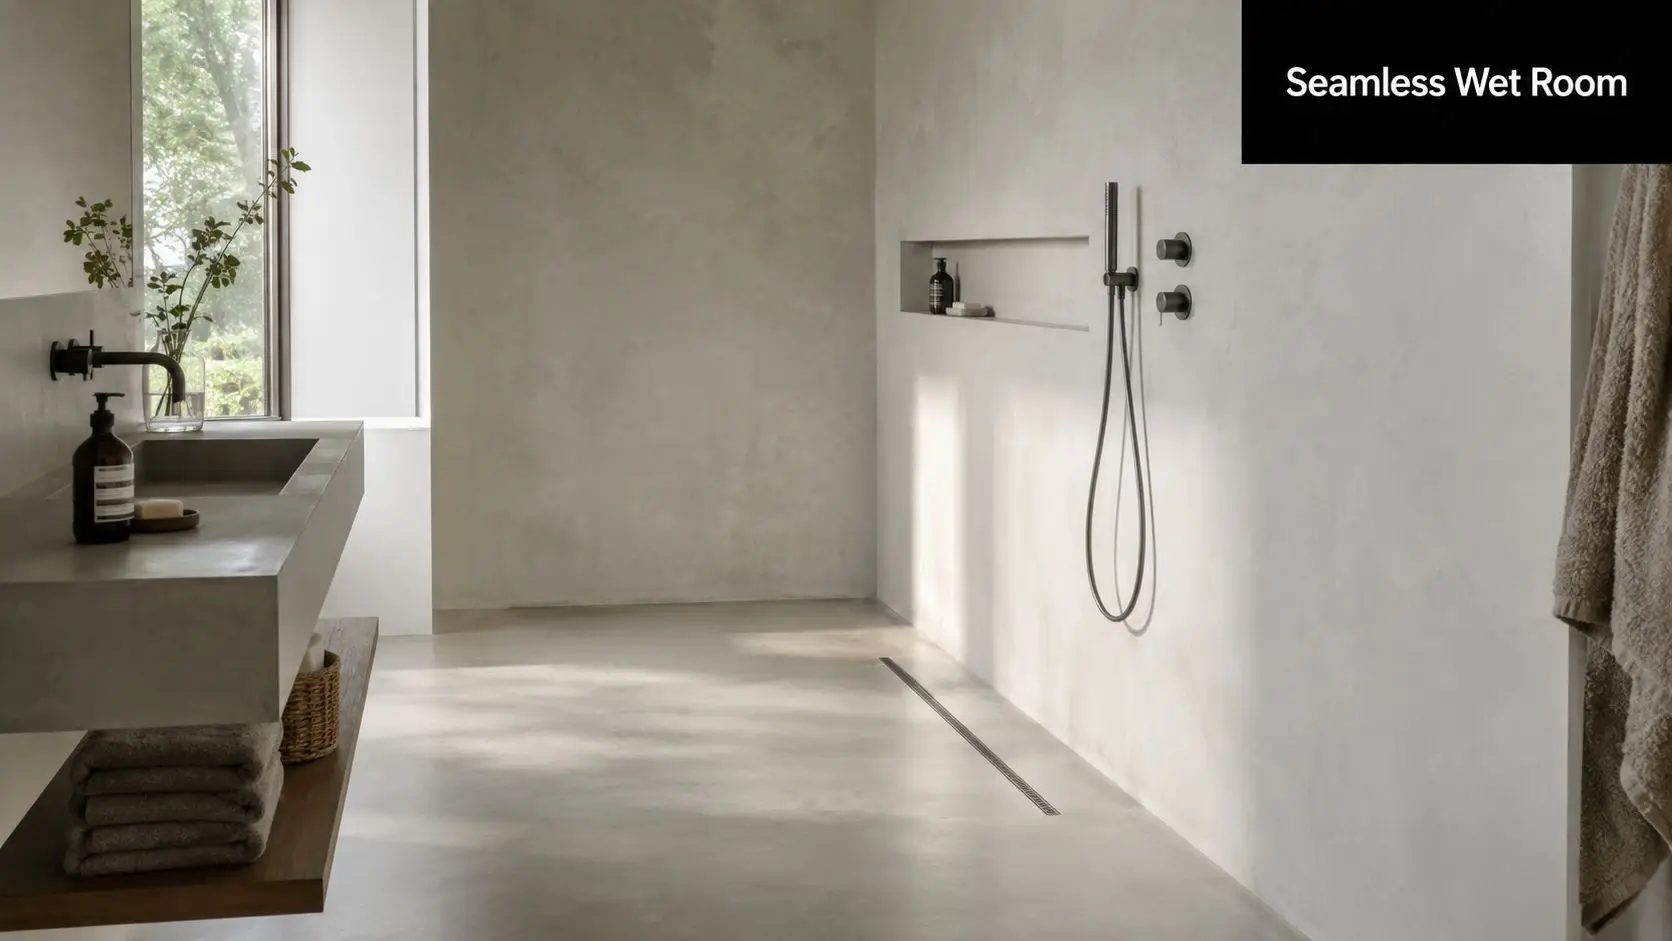
A modern, minimalist wet room bathroom featuring seamless concrete walls, a floating sink, and shower fixtures.

A continuous floor is one of the strongest wet room ideas for older Highett bathrooms that feel chopped up by shower screens, hob edges, and too many material changes. When the same tile runs through the whole room and the shower zone is defined by floor fall rather than a step or tray, the space reads bigger immediately.

This approach suits modern bathrooms because it removes visual clutter. A floating vanity, wall-faced toilet, recessed niche, and a linear drain can be enough to make a compact room feel calm instead of crowded. In a Victorian renovation, that matters more than people think because many bathrooms do not have spare floor area to waste.

What makes it work

The finish looks effortless, but the build isn't. The floor has to be formed correctly so water moves to waste without ponding, and the whole room needs thorough waterproofing because splash won't stay neatly inside one corner.

Practical rule: If you want the floor to look flat, the builder has to work much harder to hide the fall.

A few details usually separate a good result from a frustrating one:

  • Use textured floor tiles: They keep the minimalist look but give better grip underfoot.
  • Choose a drain early: Drain type affects set-out, tile cuts, and how neat the room feels.
  • Keep junctions simple: Fewer trims, fewer level changes, and fewer materials usually look better.
  • Think about winter comfort: In Melbourne conditions, underfloor heating can make an open shower zone feel much more inviting.

Large-format tiles are especially effective in this style because they reduce grout lines and help the room feel quieter visually. If you're comparing finishes, large-format bathroom tiles for a seamless wet room look are worth reviewing before you lock in the layout.

What doesn't work is chasing a minimalist look with cheap detailing. Misaligned falls, poor membrane work, and badly planned drain positions stand out fast in a stripped-back room because there's nowhere for defects to hide.

2. Natural Stone Wet Room with Spa Integration

A luxurious spa-inspired bathroom featuring a modern freestanding bathtub and a spacious walk-in rainfall shower.

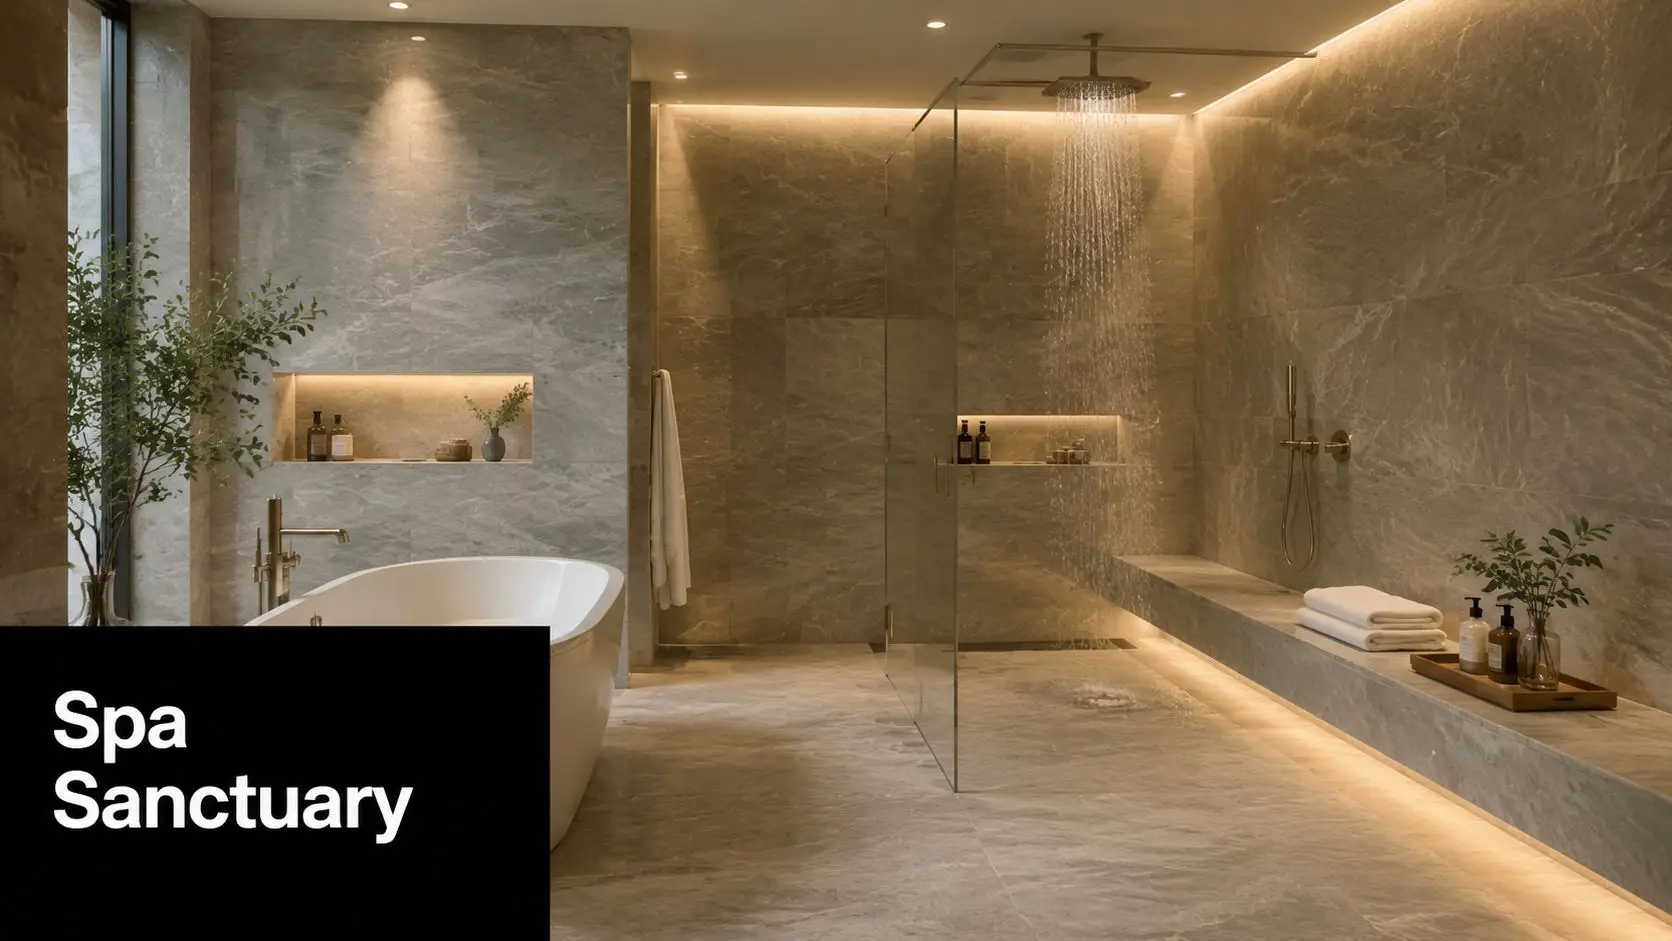
If you want the bathroom to feel like a retreat rather than a utility room, natural stone and spa features can take a wet room in that direction quickly. Think honed limestone, textured slate, or a marble-look palette paired with a rainfall shower, a heated towel rail, and a bench integrated into the wet zone.

This style suits bayside and premium family homes because it feels timeless when the material selection is disciplined. One feature wall can be enough. Covering every surface in bold stone usually pushes the room from calm to heavy, especially in bathrooms without abundant natural light.

Where the luxury budget actually goes

The main cost driver in a wet room isn't just the visible finish. It's the technical build behind it. Realtor.com's wet room cost guidance says a wet room will typically cost 25% to 30% more than a conventional bathroom with a separate shower enclosure, before higher-end fixtures are added, and luxury fixtures can add USD 10,000 to 25,000+ more.

That matters because stone and spa fittings magnify mistakes. If the substrate moves, the waterproofing is poor, or ventilation is weak, premium finishes won't save the room.

The most successful stone wet rooms usually share a few traits:

  • Slip resistance comes first: Honed or textured finishes are often a better fit than highly polished stone.
  • Thermostatic control matters: Premium shower fittings should deliver consistent temperature, not just a luxury look.
  • Ventilation needs to match moisture load: More water output means more steam on walls, mirrors, and ceilings.
  • Bench design has to be deliberate: A seat can feel resort-like, but only if drainage and waterproofing around it are handled properly.

A spa wet room should feel refined, not oversized and impractical. In many Highett homes, the smartest version is a restrained one with one standout material, one strong shower experience, and detailing that stays easy to clean.

3. Industrial-Chic Wet Room with Exposed Brick

A modern, accessible wet room bathroom featuring a wall-mounted fold-down shower seat, grab rails, and basin.

Industrial wet rooms can look fantastic in renovated period homes, converted spaces, or houses where you want more character than a white-box bathroom delivers. Exposed brick, black tapware, concrete-look tiles, and steel-framed mirrors can create a strong Melbourne feel when they're balanced properly.

The key word is balanced. Too much raw material makes the room cold, dark, and hard to maintain. Too little and the style reads as a theme instead of a resolved design.

The heritage and moisture trade-off

Exposed brick is where a lot of homeowners get caught. Brick can be visually rich, but it isn't automatically wet-room friendly. In older Victorian homes, walls may need substantial preparation before they can safely sit inside a high-moisture space.

Wet rooms aren't forgiving of decorative decisions that ignore moisture management.

If you like this look, keep these decisions practical:

  • Limit true exposed masonry to controlled areas: A feature wall outside the heaviest splash zone is often safer.
  • Use stainless steel where possible: It ages better than finishes that can corrode or chip.
  • Warm the palette with timber or softer lighting: Raw surfaces need something to stop the room feeling harsh.
  • Check heritage constraints early: Older homes can require a more considered approach to wall treatment and layout changes.

An industrial wet room often works best when the shell is tough and the fittings are simple. Wall-mounted mixers, a frameless fixed panel if needed for splash control, and concealed storage stop the room from feeling cluttered.

What usually doesn't work is chasing an urban warehouse look in a small suburban bathroom without enough light. Dark brick, dark floors, and black fittings can compress the room quickly. If your bathroom has limited daylight, use the industrial style as an accent rather than the whole story.

4. Accessible and Universal Design Wet Room

A modern Scandi-style bathroom with light wood vanity, a vessel sink, and a minimalist walk-in shower.

A Highett wet room often needs to serve more than one stage of life. I see this with local families who want a bathroom that works for older parents now, gives kids room to move safely, and still looks like part of a well-finished home rather than a care facility.

That is why universal design suits Bayside renovations so well. Many homeowners are planning for longer-term living, and a level-entry wet room makes that easier without locking you into a clinical look. In practical terms, it means getting the layout right from the start so the room remains usable if mobility changes later.

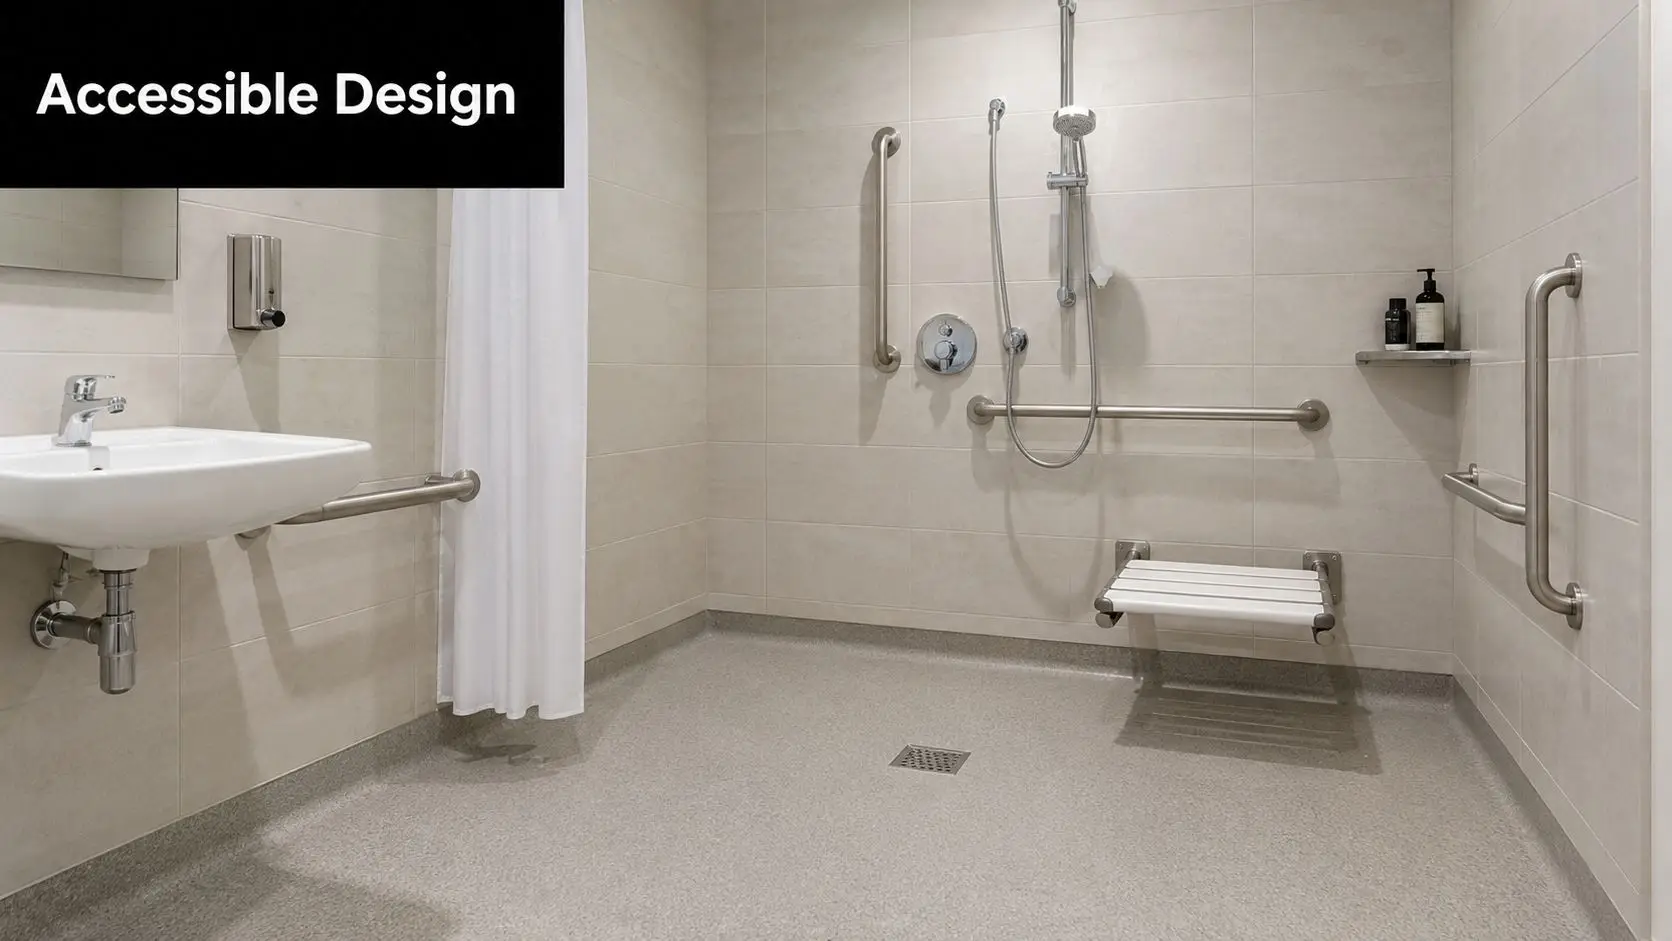
AS1428 is a useful reference point, but the standard only helps if the design is built around it. Clear floor space, comfortable turning room, reachable controls, and support-ready wall framing all need to be resolved before waterproofing and tiling begin. In a typical Highett renovation, that can also mean checking whether an older subfloor allows the falls, drainage position, and recessing needed for a flush shower entry.

The local trade-off is usually space. Many bathrooms in this part of Melbourne were not originally planned as accessible rooms, so every millimetre matters. A builder may need to shift a doorway, widen circulation beside the toilet, or use a fixed screen carefully so splash control does not come at the cost of access. Victorian winters matter too. If the room is more open, underfloor heating and well-placed heating can make daily use far more comfortable, especially for older occupants.

For Australian guidance, use the Victorian Building Authority information on building and renovating. It is a better fit for a Victorian project than generic overseas advice, and it reinforces the value of using registered professionals who understand local compliance, waterproofing, and layout constraints.

A strong universal-design wet room usually includes:

  • Level access: No raised hob or lip to interrupt walking or mobility aids.
  • Slip-resistant flooring: Choose a tile finish that stays safer underfoot when wet.
  • Reinforced walls: Future grab rails can be added without opening finished walls later.
  • Clear fixture placement: Mixers, niches, and shower controls should be easy to reach from standing or seated positions.
  • Contrast where it helps: Subtle visual definition at the floor, walls, and fittings improves confidence without making the room look institutional.

The mistake is treating accessibility as an add-on after the finishes have been chosen. The best results come from resolving drainage, structure, circulation, heating, and support points early, then wrapping the room in materials that still feel calm, refined, and suited to the rest of the house.

5. Scandinavian Minimalist Wet Room with Light Wood

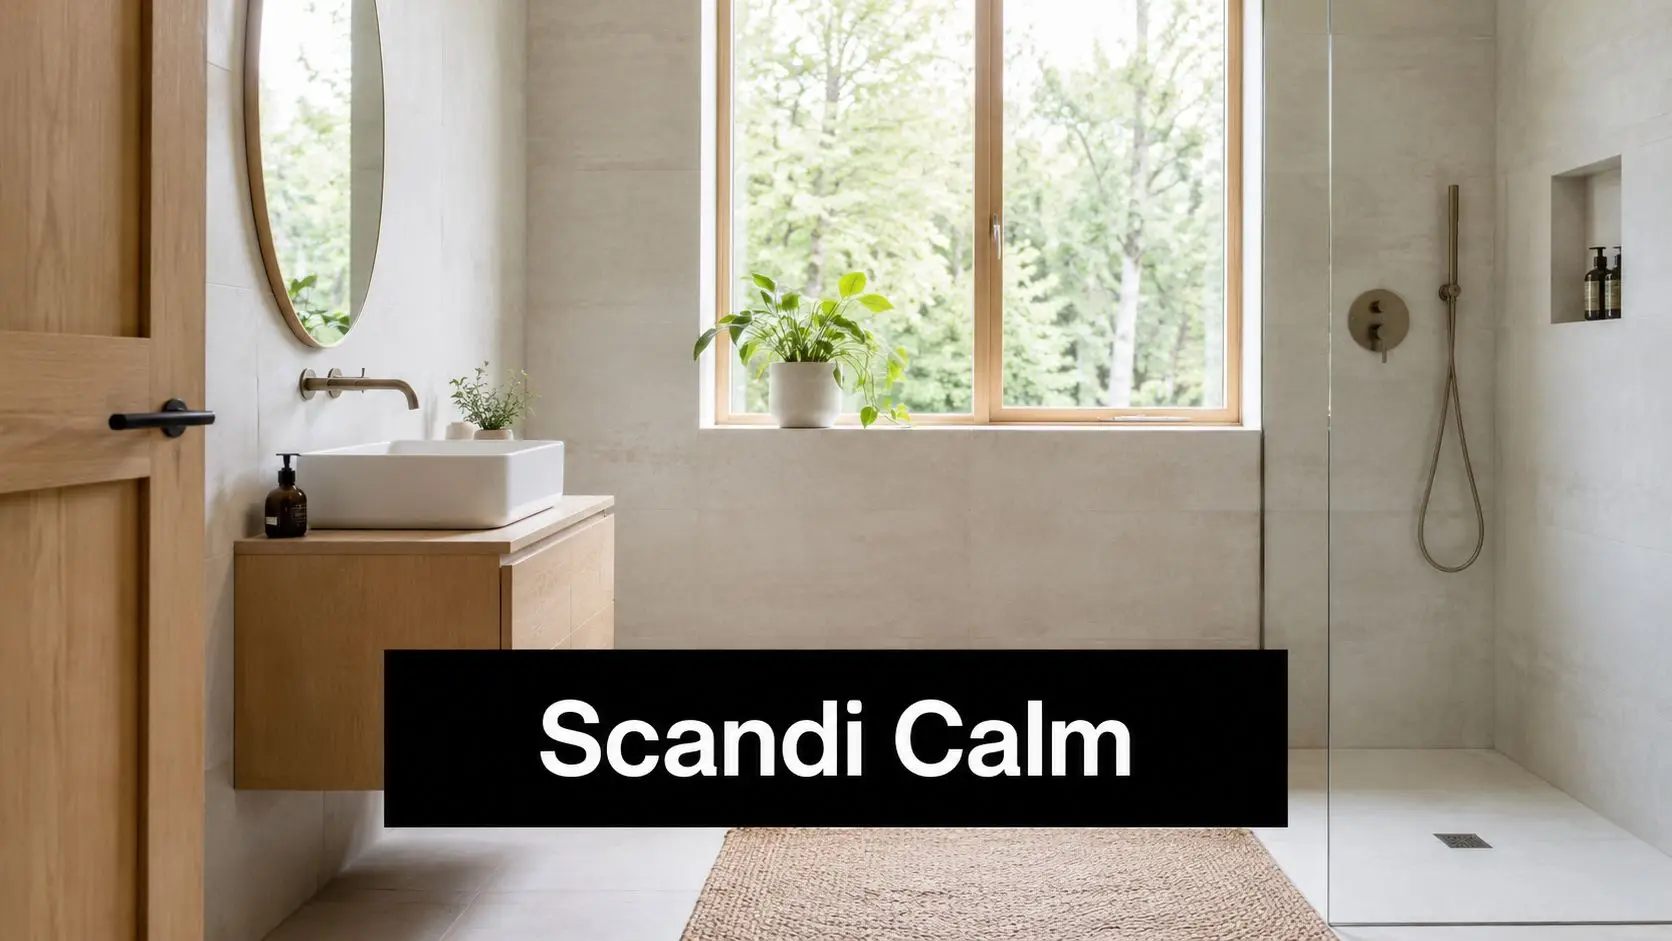
Scandinavian-inspired wet rooms are popular because they soften the hard edges that can make open bathrooms feel sterile. Pale tiles, light timber, brushed metal, soft white walls, and simple joinery create a calm room that still feels warm enough for everyday family life.

This look works particularly well in Highett homes where the bathroom doesn't get a flood of natural light. A lighter palette reflects what light you do have, and the timber tones stop the room feeling flat.

How to keep timber-looking spaces practical

The trick is restraint. You don't need a full timber-clad bathroom to get the effect. A vanity in oak or ash tones, a timber-framed mirror, and a niche shelf detail can carry the style without overcomplicating the maintenance.

Use matte finishes where possible. They reduce glare, hide water spotting better than highly polished surfaces, and suit the relaxed feel of Scandinavian design.

A few combinations tend to age well:

  • Pale stone-look porcelain with oak-toned joinery
  • Off-white wall tiles with a light grey floor
  • Brushed nickel tapware instead of high-gloss chrome
  • Textured towels and soft lighting rather than decorative clutter

This style also suits underfloor heating and good layered lighting. A wet room can feel exposed in winter, so warmth underfoot and softer ambient light help the room feel comfortable, not just visually clean.

What doesn't work is mixing too many pale finishes with no contrast at all. The result can feel washed out. One darker note, such as a charcoal drain, a warm bronze fitting, or a stone vanity top, usually gives the room enough definition.

6. Compact Wet Room for Small Bathrooms and Ensuites

Small bathrooms are where wet rooms can be either brilliant or disappointing. Done properly, they remove the visual and physical bulk of a shower cubicle. Done badly, they leave the whole room wet after every shower and make storage even more difficult.

That's why compact wet room design has to be ruthless about planning. Every fitting needs a reason to be there, and every millimetre of wall space should earn its keep.

Small-space moves that actually help

Wall-hung vanities and toilets free up the floor visually, which makes the room read larger. Recessed niches work better than bulky corner caddies. A fixed glass screen can be useful in tight rooms if it controls splash without cutting the space in half.

In a compact wet room, layout matters more than luxury fittings.

If you're working with an ensuite or narrow footprint, these choices usually pay off:

  • Keep the vanity slim: Deep vanities often cause more circulation problems than people expect.
  • Use mirrors generously: They bounce light and make a narrow room feel less boxed in.
  • Build storage into the walls: Recessed shaving cabinets and niches are more efficient than add-on storage.
  • Ventilate aggressively: Smaller rooms trap moisture faster, especially during winter.

For compact layouts, it helps to review small ensuite design ideas that prioritise space and function before fixing plumbing positions. The best small wet rooms often come from smart planning rather than expensive materials.

One more reality check. Not every small bathroom should become a full wet room. Sometimes a curbless open shower with tighter wet-zone control is the better answer if you need the rest of the room to stay drier between uses.

7. Warm Contemporary Wet Room with Timber and Warm Tones

If all-white bathrooms leave you cold, a warm contemporary wet room can feel far more liveable. Think soft neutrals, clay tones, warm timber, brushed brass or bronze fittings, and stone with natural variation rather than high-contrast veining.

This style suits family homes because it feels inviting. It also bridges the gap between modern bathrooms and older Victorian houses that still have some period character elsewhere in the home.

Warmth needs discipline

The room should feel layered, not busy. Warm-toned bathrooms go wrong when every finish competes for attention. Terracotta floor tiles, walnut joinery, cream walls, brass fixtures, patterned stone, and feature lighting can sound beautiful individually and chaotic together.

A more controlled approach works better:

  • Pick one hero tone: Timber, clay, or stone. Not all three at full strength.
  • Use clean lines: Warm materials look more contemporary when the forms stay simple.
  • Choose lighting carefully: Warm lighting supports the palette, but it still needs to be bright enough for practical use.
  • Seal moisture-sensitive finishes properly: Warm textures only last if they're suited to a wet environment.

This type of room often benefits from natural light, but it can also work well in darker spaces if the lighting plan is strong. Wall lights beside the mirror, soft ceiling lighting, and under-vanity glow can make the room feel considered rather than dim.

A warm contemporary wet room is one of the easiest wet room bathroom ideas to personalise. It can lean coastal, refined, or luxurious without losing the practical benefits of level access and open planning.

8. Multi-Generational Wet Room with Flexible Features

A common Highett brief is straightforward. Make the bathroom safe for grandparents, practical for kids, and still polished enough that it does not feel like a retrofit. A wet room suits that brief because the room can stay open, level, and easier to adapt as the household changes.
This approach is particularly relevant across Bayside, where more families are reworking their homes to support older parents, teenagers, or a longer-term stay from adult children. In renovation projects around Highett, that often means one bathroom has to serve very different users across the same week, not at some distant future point.

The design has to work now. It also needs enough foresight to avoid another renovation in a few years.

A good multi-generational wet room usually includes:

  • Level access into the shower area: Easier for young children, older relatives, and anyone recovering from injury.
  • A hand shower on a rail: Useful for seated showering, assisted bathing, and routine cleaning.
  • Reinforced walls for future grab rails: The room can change later without opening up finished tile work.
  • Storage at different heights: Children can reach daily items, while adults still get practical vanity and mirror space.
  • Circulation space that allows assistance: If one person needs help, the room should not become awkward or unsafe.

The trade-off is floor area. Flexibility sounds good on paper, but in a tight bathroom it can lead to a layout that serves every possible scenario poorly. The better approach is to prioritise your current household, then build in a few low-visibility allowances for later. Reinforcement in walls, sensible clearances, and a shower area sized properly from the start do more good than filling the room with specialist fixtures you may never use.

For Victorian homes, compliance and detailing matter as much as layout. If accessibility is part of the brief, the room should be checked against relevant requirements such as AS1428 clearances, gradients, and fixture positioning where applicable. Heating also deserves attention in Melbourne winters. An open wet area that works well in January can feel cold in July without underfloor heating, careful ventilation, or both. Practical planning like this has more impact than trend-driven features, though some homeowners combine flexible planning with smart bathroom technology used in modern construction and fit-outs to improve comfort and day-to-day use.

Done properly, a multi-generational wet room does not look clinical. It looks calm, well resolved, and ready for real family life in a Highett home.

9. Smart Wet Room with Technology Integration

Technology can improve a wet room, but only when it solves a real problem. Good examples include heated floors on timers, demisters for mirrors, humidity-sensing exhaust fans, digital shower controls, and lighting scenes that shift from bright task light to softer evening use.

In Victorian homes, the practical value is often comfort and moisture control rather than novelty. Open shower areas can feel cool in winter and stay damp if ventilation lags behind use, so smart systems can help the room perform better day after day.

Add technology where it reduces friction

A humidity-sensing fan is often more useful than voice control. A mirror demister can be more practical than an app-connected fitting that nobody uses after the first month. The smartest modern bathrooms usually prioritise reliability over gimmicks.

The technical side still matters. Wet rooms place electrical components in a moisture-heavy environment, so coordination between waterproofing, electrical rough-in, and fixture selection has to be tight.

A sensible smart wet room may include:

  • Programmable underfloor heating: Better comfort for cold mornings.
  • Humidity-responsive ventilation: Useful for enclosed or poorly ventilated rooms.
  • Digital thermostatic shower control: Consistent temperature and easier operation.
  • Task and ambient lighting zones: Better function without overlighting the room.

If you're interested in connected systems more broadly, how IoT is changing construction planning and coordination gives useful context for why early specification matters.

What doesn't work is filling a bathroom with proprietary gadgets that are hard to service later. Choose systems with straightforward controls, local support, and a clear reason to exist.

10. Outdoor-Inspired Wet Room with Natural Materials and Biophilia

A Highett wet room can take cues from the coast without slipping into a theme. Along the Beach Road corridor, that often means finishes that echo the local tea-tree and dune palette: sandy stone tones, muted greens, soft light, and materials that feel calm rather than glossy.

Done well, this style suits homeowners who want a bathroom that feels grounded and restorative. Done poorly, it can turn into a damp room full of high-maintenance surfaces.

The trade-off is straightforward. Natural materials add warmth and character, but wet rooms are hard on anything porous, absorbent, or poorly sealed. In Victorian homes, where winter mornings are cold and bathrooms often stay closed up for longer, I would always treat heating, extraction, and waterproofing as part of the design, not afterthoughts.
That matters even more if you want timber accents, planted niches, or textured stone. The room still needs correct falls to drain, a substrate prepared for continuous wet use, and a ventilation setup that clears steam quickly. For local guidance on wet area construction and compliance, the Victorian Building Authority sets out the baseline requirements through its building standards and practitioner guidance.

A restrained material palette usually works best here:

  • Stone or stone-look tiles with a slip-resistant finish
  • Curved edges or recessed shelving to soften the room
  • Moisture-tolerant plants used sparingly, near light and away from constant spray
  • Skylights or obscure glazing where privacy and orientation allow
  • Warm floor heating to keep the space comfortable through colder Victorian months

Restraint makes the room feel more expensive.

A couple of well-placed ferns can work. A dense wall of greenery in an ensuite with weak ventilation usually becomes a cleaning job. The same goes for raw timber in splash zones. Use timber-look porcelain where direct water contact is constant, and keep real timber to vanities, battens, or areas that can dry properly between uses.

If you want the bathroom to feel connected to the outdoors, focus on texture, light, and temperature first. Those choices last longer in a Highett renovation than decorative styling alone.

10 Wet Room Design Comparison

If you are weighing up wet room bathroom ideas for a Highett renovation, the right choice usually comes down to how you live, who uses the room, and how much build complexity your budget can carry. Some designs look impressive in photos but need tighter detailing, more maintenance, or more floor area than homeowners expect.

This comparison focuses on practical outcomes. It also reflects what matters in Victoria, including winter comfort, slip resistance, ventilation, and accessible design decisions that may need to align with AS1428 principles.

Design Implementation complexity Resource requirements Expected outcomes Ideal use cases Key advantages
Minimalist Wet Room with Continuous Flooring High, with precise set-downs, falls, and drainage detailing Experienced waterproofers and tilers, premium membranes, linear or central drains, carefully selected floor tiles Open, modern room that is easier to clean and feels larger Compact ensuites, high-end renovations, accessible layouts Reduces visual clutter, makes small rooms read larger, works well for step-free access when detailed properly
Natural Stone Wet Room with Spa Integration Very high, often involving structural coordination and specialist installation Natural stone, spa plumbing, underfloor heating or heated seating, strong extraction, stone sealing Premium, retreat-style bathroom with a higher-spec finish Main ensuites, larger homes, luxury renovations Creates a high-end, relaxing feel, adds comfort in winter, suits homeowners prioritising long-term appeal
Industrial-Chic Wet Room with Exposed Brick Medium, with careful treatment of porous surfaces and junctions Brick or brick-look finish, concrete or porcelain tiles, corrosion-resistant fittings, specialist sealers Hard-wearing bathroom with strong character and texture Character homes, converted spaces, design-led renovations Adds personality without overcomplicating the layout, hides wear reasonably well, pairs well with durable finishes
Accessible and Universal Design Wet Room Medium to high, with careful planning around circulation, support rails, and fixture placement Slip-resistant flooring, reinforced walls, certified rails, suitable drainage, possible OT input, strong ventilation Safer bathroom that supports independent use now and later Older residents, NDIS participants, family homes, long-term homes Improves day-to-day safety, supports ageing in place, can be designed to look refined rather than clinical
Scandinavian Minimalist Wet Room with Light Wood Medium, with attention to timber placement and moisture control Light timber accents outside direct splash zones, pale tiles, quality waterproofing, good natural and artificial light Bright, calm bathroom with a soft, restrained finish Contemporary homes, smaller bathrooms, homeowners wanting a lighter interior feel Keeps the room feeling airy, ages well visually, balances warmth with a clean layout
Compact Wet Room for Small Bathrooms and Ensuites Medium, with tight space planning and precise fixture selection Wall-hung fixtures, recessed storage, efficient drainage, clear shower zone planning, reliable extraction Better use of a small footprint without making the room feel cramped Apartments, small ensuites, granny flats, older homes with limited space Gets more function from less floor area, improves movement through the room, often removes the need for bulky screens
Warm Contemporary Wet Room with Timber and Warm Tones Medium to high, because mixed finishes need careful detailing in wet zones Timber-look porcelain or protected timber joinery, warm-toned tiles, layered lighting, quality sealants and membranes Inviting bathroom that feels less stark than a cooler minimalist scheme Family homes, period homes, premium renovations Creates a comfortable, lived-in feel, softens the look of larger bathrooms, suits daily family use
Multi-Generational Wet Room with Flexible Features High, with more coordination around clearances and changing user needs Adjustable fittings, generous circulation space, seating options, reinforced fixing points, well-considered storage Bathroom that works across different ages and mobility levels Multi-generational households, adaptable family homes, granny flats Reduces the need for later alterations, supports changing access needs, makes the room easier for everyone to use
Smart Wet Room with Technology Integration High, due to electrical coordination and careful product selection for wet areas Smart controls, thermostatic mixers, lighting controls, sensors, licensed electrical work, dependable connectivity More control over comfort, lighting, and water use Newer homes, luxury renovations, homeowners who value convenience Improves comfort and usability, can help manage heating and lighting efficiently, gives repeat users quicker setup
Outdoor-Inspired Wet Room with Natural Materials and Biophilia High, with more attention to moisture management, cleaning, and plant suitability Stone or stone-look surfaces, moisture-tolerant planting used sparingly, strong extraction, good daylight, careful material selection Calmer bathroom with a natural, grounded feel Larger bathrooms, premium homes, wellness-focused renovations Uses texture and light well, creates a restful atmosphere, brings in natural character without relying on short-lived styling

A comparison table helps narrow the style direction, but buildability should decide the final brief. In Highett homes, I would usually test each option against four filters first. Budget, winter warmth, cleaning effort, and who needs to use the room over the next ten years. That process usually rules out the wrong concept quickly and leaves you with a wet room that performs well, not just one that photographs well.

Start Your Bathroom Renovation With Confidence

A wet room can be one of the smartest upgrades you make to a Victorian home. It can open up a cramped layout, improve accessibility, reduce visual clutter, and give the bathroom a more refined, architectural feel. For many Highett homeowners, it also solves everyday frustrations that a standard shower enclosure never quite fixes.

That said, a wet room isn't a shortcut to better design. It asks more of the build than a conventional bathroom. The entire room has to be treated as a water-managed environment, not just the shower corner. If falls are wrong, drainage is underdone, ventilation is weak, or waterproofing is treated as a box-ticking exercise, the bathroom may look good on handover day and perform poorly over time.

That's why planning matters so much. The best results come from resolving the practical questions early. Who's using the room now. Whether ageing-in-place should be factored in. How much splash control the layout needs. Where heating should go for winter comfort. Whether natural materials are realistic for the way your household lives. These aren't minor details. They shape whether the room feels effortless or annoying to use.

For homeowners exploring new bathroom ideas, it also helps to be honest about priorities. Some wet rooms are mainly about luxury and clean aesthetics. Others are about accessibility and future-proofing. Some need to make a tiny ensuite feel bigger. Others need to support a multi-generational household. Once that purpose is clear, the design gets much easier to refine.

Good wet room design also depends on local knowledge. Victorian homes vary widely in structure, floor levels, ventilation constraints, and renovation potential. Local standards, practical heating choices, and experience with real bathroom renovations in Highett and greater Victoria make a difference when details need to be resolved properly rather than guessed on site.

If you want the finished result to look like a designer bathroom and perform like a professionally built wet area, work with qualified professionals who understand both design and construction. SitePro Bathrooms brings that end-to-end approach to bathroom renovations, from 3D planning through to construction and finishing. As registered builders unlimited, the team can help you shape modern bathrooms that are beautiful, durable, and designed for how your household uses the space.

If you're ready to turn these wet room bathroom ideas into a real project, contact SitePro Bathrooms to discuss your layout, your style, and the practical requirements behind a successful wet room.

  • siteprobathrooms

Bathroom Floor Heating: A Highett Renovator’s Guide 2026

On a winter morning in Highett, the bathroom floor can be the coldest surface in the house. You leave a warm bed, step onto tile, and the room feels far less inviting than the renovation photos suggested it would. That's usually the moment homeowners start asking whether bathroom floor heating is worth adding while the room is already being stripped back.

In the right bathroom, it is. Not because it turns a bathroom into a miracle energy saver, and not because every home needs it. It works because it fixes a very specific daily problem well. Cold tile becomes comfortable underfoot, the room feels more finished, and the whole space leans closer to the standard people expect from modern bathrooms and well-planned bathroom renovations.

That Icy Shock The Case for Warm Bathroom Floors

Step onto cold tile at 6:30 on a July morning in Highett and you feel the problem straight away. In a lot of older Victorian homes, the bathroom is one of the chilliest rooms in the house. Solid surfaces, little passive warmth, and older layouts all work against comfort.

That is why underfloor heating keeps coming up early in renovation planning. It solves a daily irritation in a part of the house you use first thing and last thing. In the right bathroom, it is not a flashy extra. It is a comfort upgrade with a clear job.

In Melbourne and across the bayside suburbs, this lands differently in older housing stock than it does in a brand-new build. Many Victorian-era and mid-century homes have bathrooms added or updated in stages, often with limited insulation below the floor and little thought given to winter comfort. Heated flooring helps correct that, but it needs to be planned properly around floor build-up, waterproofing, and the electrical or plumbing work already going into the room.

Why homeowners ask for it

Homeowners usually raise heated floors for practical reasons, not novelty.

  • Cold tile every winter: The bathroom looks good after a renovation but still feels harsh underfoot.
  • A more complete result: The fixtures and finishes are new, and they want the comfort level to match the visual standard.
  • Better use of a small room: In a bathroom, a modest upgrade can change the way the whole space feels.
  • Long-term value: If you are already stripping the room back, this is the stage where adding heating is far easier than trying to retrofit it later.

Warm floors do not scream for attention. They make the whole bathroom feel better built.

Why it suits bathrooms so well

Bathrooms are one of the few places where underfloor heating punches above its size. The rooms are compact, tiled surfaces are common, and you notice temperature at floor level more than you do in a hallway or living area. A small heated area can make the room feel far more comfortable without changing how the bathroom looks.

There is also a practical renovation advantage. In Victoria, bathroom work needs to line up with code requirements around waterproofing, clearances, electrical safety, and, where applicable, plumbing changes. Heated floors can fit well within that process, but only if the builder, waterproofer, tiler, and electrician are working from the same plan. That coordination matters even more in older homes where subfloors are rarely perfectly level and existing construction can throw up surprises once demolition starts.

An experienced registered builder such as SitePro adds value. The question is not just whether heated floors can be installed. It is whether they can be installed cleanly, safely, and in a way that suits the home, the budget, and the rest of the renovation.

Done well, bathroom floor heating improves comfort every winter morning. Done badly, it adds cost, floor height problems, or avoidable rework. That is why it pays to treat it as part of the bathroom build, not as an afterthought.

Electric vs Hydronic Systems Which Is Right for You

Step onto a tiled bathroom floor in a Highett winter and the question gets simple very quickly. You want warm tiles underfoot, but you also want a system that suits the way Victorian homes are renovated.

For bathroom-only projects, the choice is usually straightforward. Electric underfloor heating fits most renovations better. Hydronic underfloor heating can work well, but it is generally better suited to new builds, major extensions, or homes already being designed around a larger water-based heating setup.
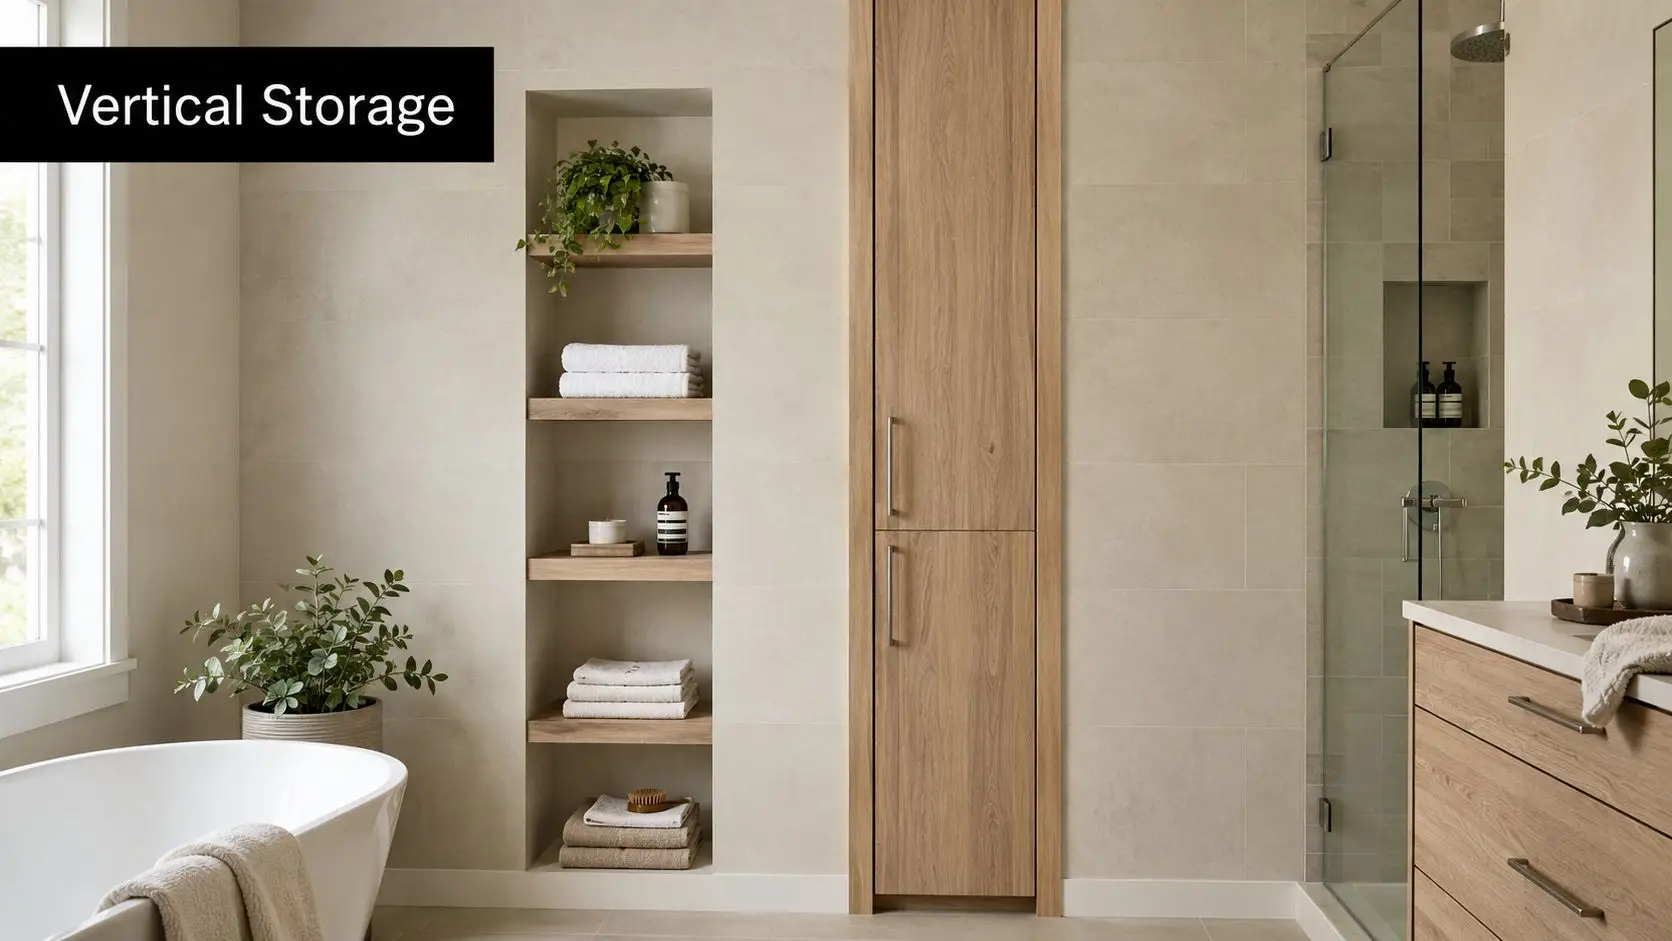
A split view showing electric underfloor heating mats and water-based pipe systems installed under bathroom floor tiles.

Electric systems use mats or loose cables laid beneath the tile finish. Hydronic systems circulate heated water through pipework in the floor. Both can produce a comfortable result. The difference is how much work is involved to get there, how the floor build-up affects the room, and whether the rest of the house is being heated the same way.

That matters in older Victorian homes. Many have uneven subfloors, limited floor height, and renovation constraints that do not leave much room for bulky build-ups or extra plant. Once you add waterproofing, falls to wastes, tile thickness and door clearances, a system that looks fine on paper can become awkward on site.

The practical difference in a bathroom renovation

Electric systems heat up faster and are easier to control around daily routines. If the bathroom is busiest from 6:30 to 8:00 in the morning and again at night, electric usually suits that pattern well.

Hydronic systems are slower to respond and make more sense where they stay on for longer periods or serve several spaces together. In one bathroom, that can be more system than the job really needs.

Feature Electric System (Mats/Cables) Hydronic System (Pipes)
Best fit Bathroom renovations, ensuites, powder rooms New builds, large homes, multi-room heating plans
Heat-up behaviour Faster response for intermittent use Slower, steadier response
Installation complexity Simpler in a single-room renovation More involved, especially in an existing home
Floor build-up pressure Usually easier to manage in tight retrofits Can be harder where floor height is limited
Coordination needs Mainly builder, tiler, waterproofer, electrician Broader system coordination and plant planning
Practical value in a bathroom-only job Strong Often hard to justify unless part of a larger system

Where electric usually wins

In my experience, electric is the better fit for a standard bathroom renovation in Highett for three practical reasons.

  • It is easier to integrate into a renovation. The system can usually be planned within the normal tile and floor preparation sequence without turning the project into a larger mechanical design exercise.
  • It suits smaller rooms. Bathrooms, ensuites and powder rooms do not need the same heating strategy as open-plan living areas.
  • It gives better value for a single room. Homeowners are usually after comfort, reliable controls and a clean finished floor, not a full-house heating overhaul.

It also tends to be easier to price clearly. If you are already weighing tile choices and finish costs, it helps to understand how heating works alongside the overall bathroom tiling cost rather than treating it as a separate add-on with no relation to the rest of the floor assembly.

Where hydronic makes sense

Hydronic earns its place in the right project. If the home is a new build, if there is a slab designed for it, or if several rooms will run off the same heating system, hydronic can be a sound long-term choice. It can also appeal in high-end builds where the entire heating approach is being planned from day one.

That is a narrower use case in bathroom renovations across Victoria.

The other point homeowners often miss is approvals and trade coordination. In Victoria, bathroom work has to line up with the National Construction Code, waterproofing requirements, electrical safety rules, and any plumbing changes tied to the renovation. A registered builder like SitePro can coordinate those moving parts early, which matters more with hydronic because there are more components, more set-out decisions and less room for late changes.

For a single existing bathroom, electric usually delivers the comfort people want with less disruption, less floor-height pressure and fewer complications on site. Hydronic is still a good system. It just tends to make the most sense when the bathroom is one part of a bigger heating plan.

Understanding the Costs of Bathroom Floor Heating in Victoria

Bathroom floor heating is one of those upgrades that sounds simple until the quote lands. In Victorian homes, the price can shift quickly based on the age of the property, the type of subfloor, and how much work is already happening in the renovation.

The first thing I tell homeowners in Highett is to look at cost in two parts. Installation is only half the decision. Ongoing use matters too, especially if the system will run daily through winter rather than only on cold mornings.

What you are actually paying for

A proper quote should separate the heating system from the building work around it. That matters because the heater itself is only one part of the floor assembly.

Typical cost items include:

  • Heating supply: Electric mat or loose cable, thermostat, sensor, and control components.
  • Subfloor preparation: Levelling, patching, or build-up work so the finished floor sits correctly.
  • Floor assembly: Bedding the heating element properly so heat transfers well and the tile finish stays sound.
  • Electrical work: Final connection and testing by a licensed electrician.
  • Tiling and finishing: The heating layer has to work with the full floor build-up, which is why it helps to understand what affects bathroom tiling cost in a renovation.

That last part gets missed a lot. Heated floors do not sit outside the renovation. They affect heights, tile adhesive depth, transitions at the doorway, and sometimes the waste set-out.

Why costs vary so much in Victorian homes

Victorian housing stock is mixed, and that is where pricing starts to move. A 1970s brick veneer home on slab is a different job from a period weatherboard bathroom on timber joists. Apartments add another layer again, especially where floor height, strata requirements, and access are tight.

Older bathrooms also tend to hide surprises. Uneven substrates, outdated wiring, previous patch repairs, and floors that are out of level can all add labour before the heating goes down. In many cases, that preparation work has more impact on the final figure than the heating product itself.

Building compliance matters too. In Victoria, heated bathroom floors need to fit within the wider renovation scope, including waterproofing, electrical safety, and National Construction Code requirements. If the job includes structural changes or major bathroom works, coordination through a registered builder like SitePro helps avoid expensive rework later.

Good value usually comes from smarter coverage

Heating every bit of floor area is rarely the best use of the budget.

The better approach is to heat the zones you stand on. In front of the vanity, beside the shower, and through the main walking path usually delivers the comfort people notice most. There is no point paying to heat under a fixed vanity, toilet pan, or full-height joinery where the warmth will not be felt.

That approach keeps supply and running costs under better control, and it often makes the layout easier for the installer and tiler as well.

Running costs depend on how the room is used

Ongoing cost is less about the system in isolation and more about habits. A bathroom that gets used at the same time every morning is cheaper to run sensibly because the heating can be programmed around that routine. A floor left on longer than needed costs more, and poor insulation below the heating makes that worse.

For most households, underfloor heating works best as a comfort upgrade. It is there to take the chill off the tiles and make winter mornings easier. That is usually where the value sits in a Victorian bathroom renovation. Not in cheap whole-room heating, but in a warmer floor that feels good every day and fits the way the home is used.

Designing Your Heated Floor for Perfect Warmth

Step onto a cold bathroom floor in a Melbourne winter and you feel every shortcut made in the design. Good heating does not start with the cable or the mat. It starts with the layout, the floor finish, and a clear plan for how the room will be used in a Victorian home.

A professional interior designer uses a pencil and ruler to carefully mark up a bathroom blueprint.

Start with the floor finish

Tile is usually the right choice for a heated bathroom floor. Ceramic and porcelain both transfer warmth well, hold heat nicely underfoot, and already make sense in wet areas where durability and cleaning matter. In older Victorian homes around Highett and across Melbourne's bayside suburbs, that practical fit matters because bathroom renovations often need to work around uneven subfloors, tighter floor heights, and existing wet-area conditions.

The finish also affects how the whole system feels day to day. Large-format porcelain can look great, but it needs a flatter substrate and careful set-out. Smaller tiles can be more forgiving in older rooms that are a little out of square. If you are still weighing up finishes, this guide on how to choose bathroom tiles is worth reading before the heating plan is finalised.

Design the heated area around real use

A warm bathroom floor feels best when the heating is placed where bare feet land.

That means the design should follow the usable floor area, not the room outline on a plan. In practice, fixed vanities, toilet pans, bath hob bases, shaving cabinets that run to the floor, and full-height joinery all reduce the area worth heating. I regularly see homeowners assume a bigger heated area means a better result. Usually it just means spending more on sections of floor you never stand on.

The better layouts focus on three zones:

  • In front of the vanity, where people stand the longest
  • At the shower entry or beside the bath, where the floor feels coldest
  • Along the main walking line, especially in narrow bathrooms

That approach suits many Victorian renovations because these homes often have compact bathrooms and awkward footprints. A smartly placed heated zone gives a better comfort result than trying to cover every corner.

Plan around fixtures early

Heated floor design and bathroom design need to be coordinated from the start. If the vanity moves by even a small amount after the heating layout is drawn, the cable or mat position may need to change as well. The same goes for floor wastes, wall-hung toilets, nib walls, and shower screens.

This is one reason planning matters more in older Victorian homes. Existing framing, plumbing positions, and floor levels can limit what is easy to shift. If the renovation involves structural changes or a new layout, coordination through a registered builder such as SitePro helps keep the heating design aligned with the rest of the job and with Victorian building requirements.

Sensor location affects comfort

The floor sensor is a small detail that has a big effect on performance. Put it in the wrong spot and the floor can feel patchy or cycle poorly. It should sit where it can read a representative floor temperature, not tucked against a hot cable run or buried where future access becomes difficult.

Homeowners rarely see this part once the tiles are down, but it matters. A good design is not only about getting heat into the floor. It is about making sure the system responds properly on cold mornings and stays reliable over time.

Good design respects floor build-up

Underfloor heating adds layers. In a new build that is usually easy to accommodate. In a bathroom renovation, especially in an older Victorian house, added height can affect door clearances, shower set-downs, transitions to adjoining rooms, and the finished height at the hallway.

That trade-off needs to be sorted before materials are ordered. A heating system that looks fine on paper can create a poor threshold detail or extra work at the shower if nobody has allowed for the full floor build-up. The warmest floor is not the best result if the renovation ends up with awkward levels or drainage problems.

Installation Planning for Your Bathroom Renovation

Bathroom floor heating in Australia is not a casual add-on. In a wet area, every layer matters. If the planning is sloppy, you don't just get weak performance. You risk damage to waterproofing, poor sensor placement, difficult repairs and compliance problems that should never have been created in the first place.

A professional installer lays down electric radiant floor heating mesh on a freshly applied layer of adhesive.

Why this isn't a DIY wet-area job

A bathroom renovation already requires careful sequencing between demolition, substrate preparation, waterproofing, tiling and electrical work. Add floor heating and the margin for error gets tighter. Once the system is embedded below tile, mistakes become expensive and disruptive to fix.

One practical Australian concern that's often underexplained is wet-area compliance. A trade-focused discussion of bathroom floor heating highlights that the system must be correctly embedded, the temperature probe carefully positioned, and the electrical connection managed by a licensed professional to protect waterproofing integrity and meet safety requirements.

The details that separate a good job from a problem job

The system itself isn't the hard part. The hard part is coordination.

  • Sensor placement: The thermostat sensor should sit between heating wires, not touching them. A backup sensor in the wall cavity is a sensible safeguard if the primary one fails.
  • Correct embedding: The heating element needs proper coverage within the floor assembly for protection and even heat transfer.
  • Electrical sign-off: Final connection belongs to a licensed electrician, not a general trade improvising at the last minute.
  • Waterproofing continuity: Every penetration and layer has to be considered with the wet area as a whole.

A homeowner usually won't see those details once the room is finished. That doesn't make them optional.

Why insulation and subfloor prep matter

A useful benchmark from an installation specification is 10 W/sq ft for many electric mat systems, which helps explain why these products are typically used as comfort heating rather than primary whole-house heating. The same guide notes that insulation under the system is often recommended on concrete slabs and that the element should be embedded in thinset or self-levelling cement to improve thermal contact and protect the cable. It also explains the basic cause and effect clearly. Better insulation and tighter embedding improve heat transfer to the tile surface and help shorten warm-up time. That specification detail is outlined in this underfloor heating installation procedure.

In older Victorian homes, this matters a lot. Some bathrooms sit over cold slabs. Others have timber floors that need careful build-up management. If the base isn't prepared properly, the system can still work, but it won't work as well as it should.

Practical rule: Treat the heated floor as one part of the whole bathroom build-up, not as a separate accessory.

Who should coordinate it

A registered builder unlimited earns their place. Not because they personally install every component, but because they manage the sequencing, documentation, trade handover and accountability. That's especially valuable in a full bathroom renovation where the floor heating has to integrate with tile set-out, waterproofing details and overall floor height planning.

If you're mapping out the whole scope, this is the right stage to work through a proper renovation sequence such as this guide on how to plan a bathroom renovation.

Is It Worth It The ROI of Comfort in a Victorian Climate

For most Victorian households, bathroom floor heating is worth considering for comfort first. That's the honest answer. If someone is expecting it to behave like a financial windfall, they'll probably be disappointed. If they want a bathroom that feels better every day, the value case gets much stronger.

A practical discussion around Australian bathrooms in temperate climates puts it well. The main question is whether the upfront cost is justified by intermittent use, and the value is often found in comfort, moisture management and a more premium bathroom feel rather than pure energy savings. That's exactly how most successful bathroom heating decisions are made.

Where the value really sits

The return comes from a few places working together:

  • Daily comfort: The coldest surface in the room stops being the thing you dread in winter.
  • Moisture handling: A warmer floor can help the room feel drier and more settled after showers.
  • Perceived quality: Heated floors push a renovation into the category of modern bathrooms that feel thoughtfully upgraded, not just cosmetically updated.

For landlords and resale-minded owners, it can also help a bathroom stand apart. Not because every buyer will ask for it by name, but because better comfort tends to lift the overall impression of the room.

When it may not be worth it

There are bathrooms where it doesn't stack up well. A rarely used guest bathroom. A budget-driven rental refresh where the brief is durable and simple. A project where floor height constraints, electrical limits or waterproofing complexity make the trade-off poor.

The best decisions usually come from being specific about use. If the bathroom is used every day, mainly in colder months, and the renovation already includes quality tile work and updated controls, heated flooring often feels justified. If the room sees very light use, you may be better off putting the money elsewhere.

In Victoria, bathroom floor heating usually pays back in lived experience, not in bragging rights on a spreadsheet.

Start Your Bathroom Renovation with a Specialist in Highett

Once you know bathroom floor heating is something you want to explore, the next step is simple. Gather the right information before asking for a quote. That makes the conversation more useful and helps the builder tell you quickly whether the idea suits your bathroom, your layout and your budget.

Screenshot from https://siteprobathrooms.com.au

What to have ready

Bring practical details, not just inspiration images.

  • Room dimensions: Even rough measurements help start the discussion.
  • Floor finish preference: Tile choice affects both performance and build-up.
  • Subfloor type: Concrete slab, timber floor, apartment substrate or unknown.
  • Fixture plan: Bath, vanity, toilet, shower location and whether any joinery will be fixed to the floor.
  • Your priorities: Comfort, premium finish, fast heat-up, design look, or overall budget discipline.

If you've saved examples of new bathroom ideas, bring those too. They can reveal more than style preference. They often show whether you're leaning towards cleaner layouts, larger format tile, floating fixtures or a more detailed designer bathrooms brief.

Questions worth asking at the first meeting

A productive consultation usually covers things like:

  1. Is my bathroom a good candidate for floor heating?
  2. Should we heat the full open area or only a partial zone?
  3. Will floor height become an issue in this renovation?
  4. How will the heating layout affect waterproofing and tile set-out?
  5. Who coordinates the trades and electrical sign-off?

Those questions matter because underfloor heating performs best when it's designed as part of the whole renovation, not added late as an afterthought.

Why specialist coordination matters

In Highett and across greater Victoria, the easiest bathroom projects are the ones with one clear point of responsibility. A specialist renovation company can assess the room, prepare the layout, manage the sequencing and make sure the finished bathroom works as a whole.

SitePro Bathrooms is a local Highett renovation specialist and a registered builder unlimited, handling bathroom renovations from concept through construction and finish. If you want specific advice on heated floors, layout planning, modern bathrooms, or a full renovation scope, the best next step is to contact SitePro Bathrooms for a personalised renovation quote.

  • siteprobathrooms

Integrated Bathroom Sink: Renovation Guide 2026

You're probably in the same spot as a lot of Melbourne homeowners. You've saved a folder of modern bathrooms, you've compared vanity styles, and you keep coming back to the same clean, cohesive look. No raised basin. No visible join. Just one crisp surface that makes the whole room feel calmer and more expensive.

That look usually comes from an integrated bathroom sink.

It's easy to see why people like them. In designer bathrooms, an integrated sink often becomes the visual anchor of the vanity wall. It reads as tidy, contemporary, and well resolved. But after years of working around bathroom renovations, I can tell you this is one of those choices that shouldn't be made on looks alone. The ultimate decision involves the day-to-day use of the bathroom, how careful the household is, how likely staining is, and what happens if the basin gets damaged.

That matters whether you're planning a family bathroom, an ensuite refresh, or a full renovation with a professional team. The best sink isn't always the one that photographs best. It's the one that still works for your home years after handover.

The Centrepiece of Modern Bathroom Renovations

A typical renovation starts with photos. Then the practical questions show up. How hard is this to keep clean, what happens if it chips, and will I be replacing the whole top in eight years because one basin cracked?

That is why integrated sinks get so much attention. They give a bathroom a cleaner, more resolved vanity wall, and they often become the feature people notice first. In a modern renovation, the vanity usually sits in direct view from the doorway, so the sink has a bigger visual job than many homeowners expect.

The appeal is real, but so are the trade-offs. An integrated sink can make a modest bathroom look more considered without adding extra fittings or visual bulk. It can also lock you into a more expensive repair path later, because the basin is part of the top rather than a separate piece you can swap out.

Why people keep choosing it

In real projects, homeowners usually choose an integrated sink for a few practical reasons:

  • Cleaner presentation: The vanity reads as one finished surface, which suits contemporary bathrooms.
  • Less fuss around the basin edge: There is no raised rim where grime often builds up.
  • A more bespoke result: Even a standard-size vanity can look like it was custom made for the room.

Those are good reasons. They just should not be the only reasons.

I usually tell clients the same thing. People rarely regret a sink that is easy to wipe down. They do regret choosing one that is expensive to repair without knowing it upfront.

That long-term ownership side gets missed in a lot of design-led advice. For a main family bathroom, an integrated sink can work well if the material is forgiving and the household will treat it reasonably carefully. For rentals, kids' bathrooms, or homes where easy replacement matters, a separate basin often gives you a simpler and cheaper path if something goes wrong later.

Understanding the Integrated Sink Concept

An integrated sink is exactly what it sounds like. The basin and benchtop are made as one continuous unit, rather than a separate bowl being dropped into or mounted under a vanity top.

A modern bathroom vanity featuring a seamless integrated white sink and a brushed nickel faucet on wood cabinetry.

An integrated sink employs a unibody design. Instead of separate parts meeting at an edge, the sink and top are formed together. That's why the surface looks so clean. It also explains why these sinks are often chosen for bathrooms where low visual noise is part of the design brief.

According to this integrated sink overview, integrated bathroom sinks are specified as a single continuous assembly where the basin is fabricated from the same material as the countertop, eliminating the joint line where water, soap residue, and biofilm typically accumulate.

What that means in everyday use

In practical terms, the missing joint line is the whole story.

With many standard sink setups, the trouble spot is the perimeter where one element meets another. That edge can trap residue, hold moisture, and become the bit that always looks tired first. An integrated sink removes that weak visual and cleaning point.

That usually gives you:

  • Less edge grime: No lip for soap scum to sit against.
  • Simpler wiping down: You can clean the top and basin as one surface.
  • A neater finish: The vanity reads as one object, not several parts fitted together.

For busy homes, that's a genuine benefit. If the bathroom gets used hard before school, before work, and before sport on weekends, fewer joins usually means less fuss.

Where people get caught out

The same feature that makes an integrated sink neat also makes it less flexible.

Because the bowl is part of the top, you can't treat it like a separate item later. The shape, slope, and proportions are set by the fabrication. If you decide you don't like the basin profile, or if the top suffers localised damage, your options are narrower than they would be with a stand-alone basin.

Practical rule: If you want the least maintenance in daily cleaning, integrated usually performs well. If you want the easiest future replacement, it usually doesn't.

That's why this choice needs to be matched to the household, not just the style board.

Exploring Materials and Design Styles

Once you've decided you like the integrated look, the next question is material. The selected material can make the bathroom feel refined or overly delicate. Material choice changes the appearance, the feel under hand, and how forgiving the sink will be in daily use.

Screenshot from https://siteprobathrooms.com.au

The most common options homeowners look at are solid surface, stone-based tops, porcelain-style finishes, and concrete-look forms. Each one suits a different brief.

How each material tends to behave

Material Best for What usually works well What often needs caution
Solid surface Contemporary family bathrooms Soft seamless shapes, matte finish, easy visual integration Can show wear depending on use and cleaning habits
Stone-based finishes Premium vanity designs Crisp edges, refined appearance, suits high-end schemes Fabrication accuracy matters, repairs can be less simple
Porcelain-style integrated tops Clean, bright bathrooms Smooth finish, sharp modern look Hard impacts can be a concern
Concrete-look or cast finishes Architectural or earthy bathrooms Strong design presence, texture, warmth Needs a client who accepts patina and variation

Solid surface often appeals to people who want that sculpted one-piece feel. It suits minimalist vanities, curved corners, and softer matte palettes. In many new bathroom ideas, it's the material that gives an integrated sink its “hotel” look without making the room feel cold.

Stone-based integrated tops tend to suit more custom projects. They can look excellent in modern bathrooms where the vanity is designed as a central feature rather than a basic cabinet with a basin on top.

Design style matters as much as material

A mistake I see is choosing the sink style before the vanity style is settled. An integrated sink should work with the room's whole language.

For example:

  • Warm timber vanity plus white integrated top: Good for a softer contemporary look.
  • Flat two-pack cabinetry plus integrated basin: Strong choice for sharper designer bathrooms.
  • Floating vanity with fine edges: Helps smaller rooms feel less heavy.
  • Wall-to-wall vanity top: Useful when storage and bench space matter as much as looks.

If you're still comparing finishes, it's worth looking at how benchtop materials affect the broader renovation feel. This guide to kitchen benchtop materials is kitchen-focused, but the material logic carries over well to bathroom vanity planning.

Match the material to the household

The right material isn't the one with the best showroom impression. It's the one that fits the way your bathroom gets used.

A tidy ensuite used by two adults can support a more design-led choice. A family bathroom with kids, skincare products, colour treatments, and fast morning routines needs a more forgiving specification. Those are very different jobs for one vanity.

Weighing the Pros and Cons for Your Home

Integrated sinks do a lot right. They also ask for a bit more honesty during planning. If you're deciding between a standard basin setup and an integrated one, this is the point where aesthetics have to compete with ownership reality.

A modern bathroom vanity with a white integrated sink, wood cabinets, and minimalist accessories on a countertop.

What works well

The best argument for an integrated sink is simple. It makes the vanity easier to keep presentable.

There's no separate basin rim to clean around, and the top-to-bowl transition is visually quieter. In homes where people want less visual clutter, that alone can justify the choice. It also helps in bathrooms where every line counts, especially if the room is compact and you don't want a sink shape dominating the vanity.

The other strong advantage is the custom feel. Even straightforward bathroom renovations can look more resolved when the sink is integrated into the vanity top rather than selected as an afterthought.

Where the trade-offs become real

The downside isn't that integrated sinks are bad. It's that they can be unforgiving when something goes wrong.

According to this maintenance-focused guide, a key gap in most advice is how integrated sinks handle hard water buildup, staining from products like hair dye, or localised damage, as the one-piece design complicates repairs compared to a simple basin swap-out.

That issue matters far more in lived-in bathrooms than in showroom displays.

Here's the practical split:

  • If the household is careful, an integrated sink can stay looking excellent for a long time.
  • If the bathroom sees hard use, staining and surface wear need to be considered early.
  • If damage occurs, the repair path can be more involved than replacing a separate bowl.

The sleekest vanity in the room can become the most annoying one to own if the basin is damaged and the top can't be dealt with simply.

A quick decision view

Pro Why it matters
Seamless cleaning Fewer edges where residue collects
Refined appearance Strong fit for modern bathrooms and minimalist layouts
Custom visual result Makes the vanity feel purpose-designed
Con Why it matters
Repair complexity Damage can affect the whole vanity top, not just the bowl
Staining concerns Product use and water quality can influence long-term appearance
Less future flexibility You can't easily change just the basin style later

For owner-occupiers who want a polished primary bathroom, the pros often outweigh the cons. For rentals, teenagers' bathrooms, or heavily used family spaces, I'd slow down and assess whether the visual gain is worth the added replacement risk.

Design and Layout for Any Bathroom Size

An integrated sink isn't only for large statement bathrooms. In smaller rooms, it can solve problems, provided the vanity is sized properly and the basin shape suits the way the room is used.

A modern small bathroom featuring a floating wooden vanity, an integrated white sink, and a glass shower stall.

Integrated sinks commonly measure 24 to 36 inches wide and 16 to 24 inches front-to-back, according to this sizing guide on integrated versus undermount sinks. Those proportions are useful in Australian renovations because vanity depth often becomes the limiting factor, especially in ensuites, apartments, and older homes.

How to size one properly

Start with movement, not the vanity catalogue. You need enough clearance to stand comfortably, open drawers, and move past the vanity without the room feeling pinched.

Then look at three things:

  • Depth first: In many Victorian bathrooms, depth creates the biggest problem. A vanity that projects too far can tighten the walkway quickly.
  • Bench landing space: Even a small integrated top should leave some usable area for soap, toothbrushes, or handwash.
  • Basin position: A centred basin looks neat, but an offset bowl can improve function if storage or shared use matters more.

Small bathrooms often benefit most

Because integrated sinks remove visual interruption, they can help a compact room feel calmer. That doesn't mean the unit should be oversized. It means the vanity should be proportioned so the room still breathes.

A floating vanity helps. So does limiting heavy side panels and choosing a basin shape that contains splashing rather than spreading water across the top.

For smaller layouts, this collection of small bathroom ideas in Australia is useful for thinking through spacing, storage, and visual weight.

Don't ignore tapware and drainage

The sink isn't just a shape on a vanity drawing. The faucet reach, spout height, and basin slope all affect whether the vanity feels effortless or annoying.

A beautiful sink that splashes every morning isn't well designed. It's just well photographed.

If accessibility is part of the brief, integrated systems can also be a sensible option because the top and bowl can be planned as one coordinated surface. That makes it easier to think through user reach, vanity depth, and how much room the person needs at the basin.

Your Decision Checklist Before You Commit

The best way to choose an integrated sink is to stop asking, “Do I like the look?” and start asking, “Will I still like owning it in a few years?”

That shifts the decision from style alone to lifecycle value.

Ask these questions honestly

  • Who uses this bathroom every day?
    A calm ensuite used by adults is very different from a busy family bathroom or a guest bathroom that doubles as the kids' zone.

  • How careful are the users really?
    If the room gets rushed use, dropped items, product spills, and rough cleaning, the sink needs to cope with that reality.

  • Would replacement be simple if something went wrong?
    For renovators, landlords, and body corporates, the key issue is lifecycle cost. If a basin is damaged, an integrated unit often means replacing the entire countertop, as noted in this discussion of practical replacement cost.

  • Am I choosing this for resale, personal enjoyment, or tenancy durability?
    Those goals can point to different sink types.

When an integrated sink makes sense

An integrated sink is usually a strong choice when you want:

  1. A clean vanity line with minimal visual clutter.
  2. Easier wiping and fewer grime-catching edges.
  3. A bathroom that feels more custom than standard.

It can be a weaker choice when the room is exposed to hard wear, frequent product staining, or users who won't treat the surface gently.

Why professional planning matters

Bathroom renovations in Victoria sit inside a compliance-heavy process. The vanity choice doesn't exist in isolation. It interacts with waterproofing, plumbing set-out, wall finishes, storage needs, and who is responsible for the build outcome.

That's why it helps to work with a team that can resolve the whole room before construction starts. If you're weighing layout, durability, and compliance obligations, it's worth understanding why using a registered builder matters for your bathroom renovation. For more complex projects, a registered builders unlimited approach can provide the confidence that design intent and build responsibility stay aligned.

A good 3D design process also helps here. It lets you see whether the integrated sink improves the room, or whether a different basin format would give you a better result in use.

Frequently Asked Questions About Integrated Sinks

Can a chipped or cracked integrated sink be repaired

Sometimes.

The repair outcome depends on the material, how deep the damage runs, and whether it sits on a flat surface or inside the bowl where water and cleaning products hit it every day. Small chips in some solid-surface products can often be filled and refined to a reasonable standard. Hairline cracks, impact damage near the waste, and larger fractures are a different story. Those jobs are harder to hide and harder to trust long term.

The practical issue is replacement. With a separate basin, you can often swap the bowl and keep the vanity top. With an integrated unit, damage can turn into a full top replacement.

Are integrated sinks a good choice for rental properties

They suit some rentals, not all.

For a higher-end property where presentation matters and the vanity is unlikely to cop rough treatment, an integrated sink can work well. In a hard-use rental, student property, or home with frequent tenant turnover, I usually tell owners to look closely at repair risk first. One bad chip, a hair dye stain, or a burn mark can cost more to sort out than people expect.

If the main goal is low replacement cost over ten or fifteen years, a standard vanity with a separate basin is often the safer ownership decision.

What's the difference between an integrated sink and an undermount sink

An integrated sink is made as one continuous piece with the vanity top. An undermount sink is a separate basin fixed below the benchtop.

From normal standing height, both can give a clean result. The difference shows up later. Integrated sinks remove the join, so there is less edge detail to clean. Undermount sinks usually give you more flexibility if the basin gets damaged or if you want to change the look without replacing the whole top.

Are integrated sinks becoming more popular

Yes, especially in bathrooms where owners want a cleaner vanity line and a more custom look.

That said, popularity should not decide the purchase. In Australian homes, the better question is whether the sink suits the way the bathroom will be used, cleaned, and maintained over time. A product can be fashionable and still be the wrong choice for a busy family bathroom or a rental.

Are they only for large or luxury bathrooms

No.

They can work very well in smaller bathrooms because the continuous top can make the vanity look less cluttered. The catch is scale. If the bowl shape eats too far into the bench area, you lose the little bit of landing space that small bathrooms need for soap, toothbrushes, and day-to-day use.

Are integrated sinks hard to keep clean

Daily cleaning is usually easier because there are fewer joins, rims, and silicone lines catching grime.

Long-term maintenance depends more on the material than the format. Matte white finishes can mark up faster in some homes. Gloss surfaces show water spots less in others. In parts of Melbourne with harder water, mineral build-up around the waste and tap zone becomes a bigger issue than the integrated design itself. Use mild cleaners, avoid abrasive pads, and check what the manufacturer allows before assuming every stain can be scrubbed out.

Do integrated sinks cost more in the long run

They can.

Up front, they often sit above basic vanity-and-basin combinations. The bigger cost question is what happens if something goes wrong in year five or year eight. If the top and bowl are one piece, a repair may be limited and a replacement can involve the whole vanity top, plus plumbing labour to disconnect and refit. That is where lifecycle cost starts to matter more than showroom price.

For homeowners planning to stay put, the cleaner look may be worth it. For owners who want the simplest future repairs, a separate basin usually gives more flexibility.

  • siteprobathrooms

Large Format Bathroom Tiles: Your Ultimate 2026 Guide

You're probably looking at bathroom photos online and noticing the same thing over and over. Big wall tiles. Wide floor tiles. Barely any grout lines. The room looks calmer, cleaner, and more expensive than the typical bathroom with lots of small joints breaking everything up.

That look is real, and large format bathroom tiles are a big reason for it. But the part most homeowners don't get told early enough is that the visual payoff depends on the installation quality far more than the tile itself. A beautiful large tile on an uneven floor or poorly prepared wall won't read as luxurious. It will read as wonky, with visible lippage, awkward cuts, and drain details that never quite look right.

In bathroom renovations, that's where decisions get made. Not in the showroom. On site. In the substrate prep, the set-out, the cuts around the waste, and the judgment about where a large tile works brilliantly and where a smaller format is the smarter call.

Why Large Format Tiles Define Modern Bathrooms

A lot of clients start with a feeling rather than a specification. They want a bathroom that feels less busy. Less dated. More like the designer bathrooms they've saved from display homes, hotels, or renovation galleries.

Large format bathroom tiles usually sit at the centre of that look because they simplify the room visually. Fewer grout joints mean fewer interruptions across the floor and walls, so the bathroom feels more architectural and less patchworked together. In modern bathrooms, that restraint matters. The tile isn't fighting for attention. It becomes the backdrop that lets the vanity, tapware, lighting, and niche detailing do their job.

That's why these tiles suit so many current new bathroom ideas. They work with soft stone looks, concrete finishes, marble effects, and plain tonal schemes. They can make a compact ensuite feel less chopped up, and they can give a family bathroom a more deliberate, custom-built appearance.

Why homeowners are drawn to them

The appeal usually comes down to a few practical and visual points:

  • Cleaner visual lines: Fewer joints make the room feel more continuous.
  • Less grout to look after: There's less grout visible on the finished surface.
  • A slab-like look: Many people want the appearance of sheet stone without using actual slabs.
  • Better fit for minimalist design: Large tiles pair well with floating vanities, frameless screens, and recessed storage.

Large format tiles can make a bathroom look effortless, but the build itself isn't effortless. The finish only looks simple because a lot of technical work happened before the tile went down.

In high-end bathroom renovations, that's the key distinction. The dream is visual. The success is technical.

Understanding Large Format Tile Sizes and Materials

Large format tile sounds straightforward until selections start. A tile can look right in the showroom and still be the wrong choice for the room, the substrate, or the budget once the install begins.

A large grey tile being measured diagonally with a yellow measuring tape on a concrete floor.

In current trade use, large format usually means a tile with at least one facial dimension over 584 mm. Older usage was looser, and many installers still refer to tiles with one side around 15 inches or more as large format. The category has widened because manufacturing has improved and larger pieces are now common in residential bathrooms.

Size changes more than appearance. A 600×600 mm tile covers 0.36 m², while a 600×1200 mm tile covers 0.72 m², halving the number of visible tile units and creating a cleaner look, as detailed in this tile size guide.

Common sizes you'll see in bathrooms

In real bathroom renovations, a few sizes come up again and again:

  • 600×600 mm: A practical floor tile and sometimes a good wall option in smaller bathrooms.
  • 600×1200 mm: Common on shower walls, main bathroom walls, and larger floor areas.
  • Panel-style large tiles: Used where clients want a slab look with fewer joins, but they demand better handling, flatter surfaces, and a more experienced installer.

The right size depends on the room, the set-out, and how many cuts the space will force. A tile that looks premium on a sample board can become awkward around windows, niches, in-wall cisterns, and tight door openings. That is why selection should happen alongside layout planning, not before it. If you are still comparing formats and finishes, this guide on how to choose bathroom tiles is a useful starting point.

Material choice matters as much as size

Large format is only half the decision. The material affects weight, cutting, slip resistance, maintenance, and how forgiving the tile will be once the bathroom is in daily use.

Material Best For Durability Water Resistance Maintenance
Porcelain Floors, walls, showers High Strong choice for wet areas Low to moderate
Ceramic Wall applications and lighter-duty areas Good in the right application Suitable where properly specified Low
Natural stone Feature walls and premium finishes Varies by stone type Varies by stone type Higher, often needs more care

How these materials behave in a bathroom

Porcelain is the material we specify most often for large format bathroom work. It is dense, hard-wearing, and well suited to wet areas when the product is rated for the application. It also gives clients plenty of design range, especially in stone-look, concrete-look, and marble-look finishes.

Ceramic still has a place, particularly on walls where impact and foot traffic are not concerns. It can be a sensible way to keep costs under control, but it is not always the best fit for large floor tiles or demanding wet area conditions.

Natural stone gives a result that manufactured tiles still struggle to copy properly. It also brings more responsibility. Stone selection needs more care, sealing is often part of the job, and maintenance expectations need to be clear before the renovation starts. Clients who love stone usually accept that trade-off. Clients who want a lower-fuss bathroom usually end up happier with porcelain.

Benefits and Drawbacks of Large Tiles in Bathrooms

A minimalist, modern bathroom featuring white large format marble tiles with minimal grout lines on walls and floors.

Large tiles can absolutely improve a bathroom. They can also create more work, more risk, and more cost than people expect. Both things are true at once.

Where they shine

The biggest win is visual continuity. On a bathroom wall, a large tile gives your eye fewer joints to track, so the room feels calmer. On a floor, that reduced segmentation can make the layout feel more generous and less cluttered.

They also make cleaning simpler in a very ordinary, practical way. Less grout means less grout to scrub, less visual discolouration over time, and fewer interrupted surfaces around vanities, baths, and shower walls.

Other common strengths include:

  • A more upscale finish: Large tiles often read as refined and contemporary.
  • Better feature walls: Veining and texture are easier to appreciate over a bigger tile face.
  • Stronger design cohesion: Floors and walls can feel connected rather than pieced together.

Where people get caught out

The drawbacks usually show up after selection, when the renovation moves from mood board to actual construction.

  • Material handling is harder: Bigger tiles are heavier, more awkward to move, and easier to damage during transport and cutting.
  • Labour can increase: Setting out, cutting, levelling, and edge treatment generally demand more time and skill.
  • The room shape matters: Narrow returns, boxed-in plumbing, older walls, and tricky corners can all work against oversized tiles.
  • Finish selection still matters for safety: A polished tile may look sharp on a sample board but may not be the right finish for every wet floor.

A large tile doesn't hide poor workmanship. It exposes it.

There's also the issue of proportion. A tile can be technically “large format” and still be wrong for the room. In a tight bathroom with lots of nib walls, small returns, or an awkward shower footprint, oversized pieces can lead to fussy cuts that spoil the clean look you were aiming for.

That doesn't mean you should avoid them. It means the tile choice should come after the layout is understood, not before.

The Secrets to a Flawless Large Format Tile Installation

A professional construction worker installing large format marble-patterned tiles on a bathroom wall using a suction tool.

A large format tile job usually looks decided in the showroom. In practice, it is decided much earlier, when the walls are checked, the floor is flattened, and the set-out is resolved before a single tile is fixed.

Industry guidance for large format tile points to tighter substrate tolerances and the need to choose the right mortar build for bigger pieces, because these tiles bridge over irregularities rather than hiding them, as outlined in this large-format tile installation guidance. On site, that shows up fast. A slight hump becomes lippage. A shallow low spot leaves poor support. A rushed patch repair can telegraph straight through the finished surface.

Renovation bathrooms make this harder. Existing rooms often come with patched screeds, old adhesive residue, out-of-square corners, chased walls from plumbing work, and level changes between the main floor and wet areas. Large tiles demand that those problems are corrected first, not disguised during fixing.

Flatness decides the finish

Small tiles can spread minor variation across more joints. Large tiles cannot. Fewer grout lines mean less forgiveness, so any proud edge or hollow section is easier to see and easier to feel underfoot.

That is why prep work often takes longer than clients expect. Self-levelling, screeding, wall straightening, and careful checking with long levels are not extras. They are part of getting the clean look people want from this format.

Practical rule: If the tile adhesive is being used to fix major unevenness, the substrate preparation was likely insufficient.

Installation quality comes from the decisions behind the tiles

Good large format tiling is a control job. The installer needs to manage the layout, the substrate, the adhesive coverage, the handling method, and the edge details at the same time. If one part slips, the whole room can look off.

On our large format Kerlite tiling projects, the difference usually comes down to work that is easy to miss once the room is finished:

  • Set-out planning: Joint lines, centre lines, feature walls, and cut locations need to be resolved before fixing starts.
  • Substrate correction: Walls and floors often need flattening and patching so the tile sits fully supported.
  • Handling and bedding: Large pieces need proper lifting, careful placement, and full contact behind the tile.
  • Edge detailing: Niches, trims, corners, and terminations need to look deliberate, not improvised on the day.

Skill level matters here. So does scope. In more involved renovations, many homeowners prefer one contractor to manage demolition, substrate prep, waterproofing, tiling, and finishing under the same build process, particularly when the work sits under a registered builders unlimited licence structure that covers broader renovation responsibility.

Designing Your Space with Large Format Tiles

The design part is where large tiles become either elegant or awkward. Good design isn't just choosing a nice tile. It's deciding where the tile should stop, how the joints line up, what happens at corners, and whether the room geometry supports the format at all.
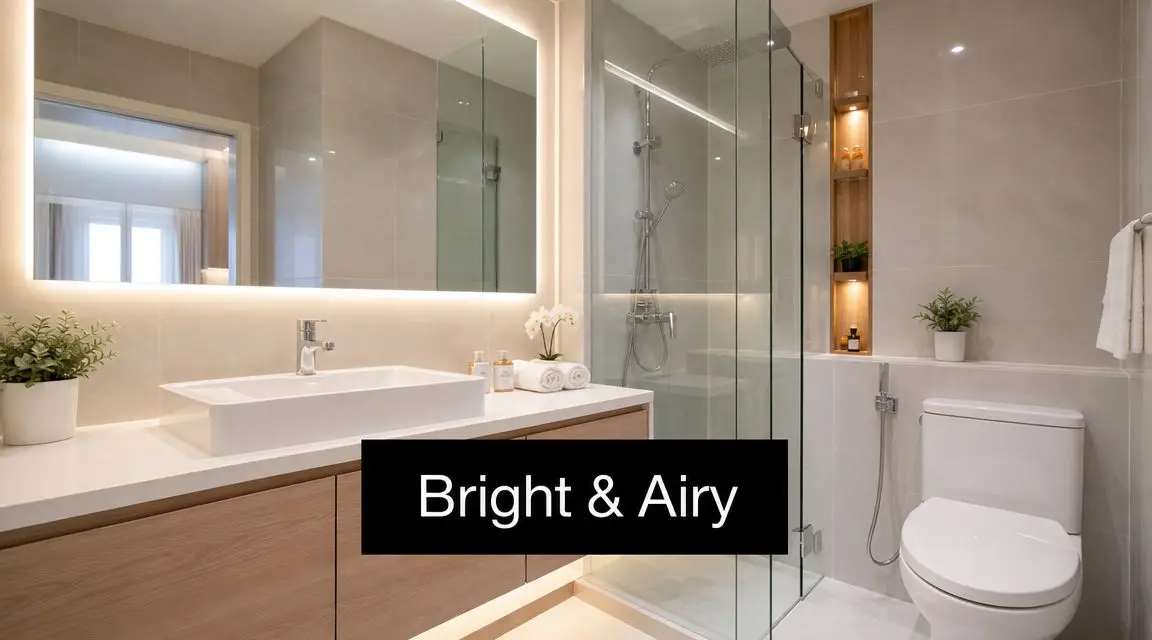
Screenshot from https://siteprobathrooms.com.au

One of the most common trouble spots is the shower floor. Large tiles don't easily conform to the fall toward the waste, and often require envelope cuts to create the necessary grade, which adds labour and demands more skill, as discussed in this article on large tiles in bathrooms. That's why a tile that looks perfect on the main bathroom floor may not be the right choice inside the shower area.

Layout choices that change the result

The layout pattern affects the room more than many people expect.

  • Stack bond: Clean, aligned joints. This suits minimalist bathrooms and works well with rectified tiles.
  • Offset layouts: These can soften the look, but they need care with larger pieces to avoid drawing attention to slight variation.
  • Vertical wall orientation: Useful when you want the room to feel taller.
  • Horizontal wall orientation: Often broadens the room visually and suits long shower walls.

Grout colour matters too. A close colour match makes the surface feel more monolithic. A contrasting grout makes the tile module more visible, which can be useful if you want pattern and rhythm rather than a continuous surface.

Corners, edges, and transitions

It determines whether many bathrooms either feel custom or feel standard.

You generally have two broad visual directions:

  • Metal trims: Practical, neat, and consistent when used carefully.
  • Mitred edges: More refined visually, but they require stronger execution and are less forgiving if workmanship slips.

The same goes for niches, hob tops, and vanity splash zones. With large format tiles, every edge detail is amplified because there are fewer lines elsewhere to distract the eye.

The larger the tile, the more every cut looks deliberate. If a cut isn't deliberate, everyone notices.

For homeowners trying to resolve these decisions before work begins, a visual planning process helps. SitePro Bathrooms offers 3D bathroom design as part of renovation planning, which is useful when testing tile direction, niche placement, and edge treatments before construction starts. You can also see a real example of this approach in this large format Kerlite bathroom tiling project.

Budgeting and Maintaining Your Large Format Tiles

Large format bathroom tiles can be excellent value over the life of a renovation, but only if you budget for the whole system, not just the tile selection.

The tile itself is only one part of the cost. Preparation can add more than people expect, especially if the existing bathroom has uneven walls, patch repairs, old flooring build-up, or wet-area geometry that needs correction before tiling starts. Labour can also rise because cutting, handling, laying, and finishing larger tiles takes more care.

What to budget for besides the tile

A realistic budget usually needs to account for:

  • Substrate preparation: Levelling, flattening, and remedial work before tiling starts.
  • Specialised installation materials: Adhesives and bedding products suited to larger formats.
  • Extra cutting and finishing time: Particularly around niches, drains, windows, and tight corners.
  • Higher-skill tiling labour: Large tile work often leaves less room for error.

If you're comparing options, this breakdown of bathroom tiling costs helps frame where the money generally goes.

Keeping them looking good

Maintenance is usually straightforward, especially when you've reduced grout lines. That said, the right cleaning method depends on the finish and material.

  • Porcelain: Usually low-fuss. Clean regularly and avoid residue build-up that dulls the surface.
  • Textured finishes: Better for grip, but they can hold more soap residue if neglected.
  • Natural stone: Needs a gentler maintenance approach and may require sealing and stone-safe cleaning products.

The biggest long-term saving often comes from getting the installation right the first time. That protects the look, reduces the chance of remedial work, and gives the bathroom a finish that still feels sharp years later.

Your Large Format Tile Questions Answered

Can large format bathroom tiles work in a small bathroom

Yes, if the room suits them.

Small bathrooms often benefit from larger tiles because fewer grout lines can make the space feel calmer and less busy. The catch is layout. If the room has tight returns, boxed-out plumbing, narrow nib walls, or several door and window trims, large tiles can create too many small cuts and the finish can start to look forced.

We assess the room before we assess the tile. In a clean rectangular space, large formats usually work well. In a compact bathroom with lots of interruptions, a smaller tile often gives a neater result and wastes less material.

Are large tiles suitable for shower floors

Sometimes. Shower floors are where the practical limits show up fast.

A shower floor has to fall correctly to the waste, and large tiles do not like bending to that shape. If the waste position requires multiple falls, the installer may need envelope cuts to make the tile sit properly. That can work, but it changes the look and adds labour. In many renovations, we use large tiles on the bathroom floor and shower walls, then switch to a smaller tile or mosaic on the shower floor because it handles the falls better and gives more grip underfoot.

Are large tiles slippery

Slip resistance comes from the tile surface, not the tile size. A polished large tile can be a poor choice for a wet floor, while a matte or textured large tile can be suitable.

The product rating matters, but so does the location. A tile that works on a bathroom floor may still be the wrong choice inside the shower.

Can you tile over existing tiles

It is possible in some bathrooms, but it is rarely a shortcut.

The existing tiles need to be firmly bonded, the surface needs to be true enough to accept a large format tile, and the added height has to work at the doorway, floor waste, and fixtures. In full bathroom renovations, removing the old tiles usually gives better control over levels, waterproofing, and the final finish. Large tiles tend to expose any problem underneath, so this is one area where saving time upfront can cost more later.

What's the biggest mistake people make

Buying the tile based on the showroom look, then trying to force it into a room that does not suit it.

Large format bathroom tiles reward careful planning and accurate preparation. The wrong place, poor prep, or weak set-out will be immediately obvious. When the format matches the room and the installation is handled properly, the result looks sharp and holds up well. When those basics are missed, even an expensive tile can look average.

  • siteprobathrooms

Best Kitchen Designers Melbourne: 2026 Guide

If you're reading this, there's a fair chance your kitchen is still “working” on paper but frustrating you every day in real life. The drawers catch each other. The dishwasher door blocks the walkway. The power points are never where you need them. In many Melbourne homes, especially older ones, the kitchen wasn't designed for the way families live now.

That frustration often starts in the kitchen and then spills into the rest of the house. Once you notice the cramped layout, dated finishes, or poor storage in one room, you start seeing the same problems in the bathroom, laundry, and hallway too. That's why the search for kitchen designers in Melbourne often turns into a bigger question. Who can help plan the whole renovation properly, without turning it into a drawn-out mess?

A good renovation partner doesn't just make a kitchen look better. They solve movement, storage, lighting, services, and sequencing. If they also understand bathroom renovations, modern bathrooms, designer bathrooms, and practical new bathroom ideas, you get a more consistent home and a simpler project overall.

Is It Time for a Kitchen Transformation

A typical Melbourne brief sounds like this. The kitchen is too dark. The pantry is too shallow. Two people can't move through the room without bumping into each other. The appliances were replaced over time, so nothing aligns properly anymore. In older weatherboard, brick, and period homes, the layout often belongs to another era.

A dated residential kitchen space in need of a professional renovation and modern upgrade

That doesn't mean every kitchen needs a complete gut renovation. Some need better planning more than they need expensive finishes. A kitchen can look new and still function badly. It can also look modest and work brilliantly. The point of bringing in a professional is to separate what's cosmetic from what's holding the room back.

Signs the problem is layout, not just style

You probably need design input if any of these sound familiar:

  • Traffic jams happen daily: People collide around the fridge, sink, or cooktop because the room has no clear circulation.
  • Storage exists but doesn't work: Corner cupboards are dead space, overheads are hard to reach, and drawers don't suit what you own.
  • The room fights the house: The kitchen feels disconnected from dining, outdoor entertaining, or family supervision.
  • Light is poorly used: Benches sit in shadow while the brightest part of the room is wasted.
  • Updates have been piecemeal: New appliances, old cabinetry, mismatched plumbing points, and no overall plan.

A renovation should remove daily friction. If the same annoyance shows up every morning and every evening, it's a design problem.

There's also a broader market reason this work remains steady. The Australian Bureau of Statistics reported that owner-occupier alterations and additions were valued at approximately A$11.4 billion in 2023–24, which shows how substantial the renovation market is that supports kitchen design work in Melbourne and Victoria, as noted in this Australian renovation market overview.

Why the kitchen decision often becomes a whole-home decision

Homeowners rarely stop at one room once they start planning seriously. If the kitchen cabinetry is tired, there's a good chance the bathroom vanity, shower layout, or storage planning is dated too. Coordinating both spaces at once can help with finish selection, scheduling, and overall design consistency.

That doesn't mean both rooms must be renovated together. It means you should hire with the bigger picture in mind. A team that understands kitchen planning and bathroom renovations can help you decide what to stage now, what to defer, and how to avoid choices in one room that create clashes in the next.

Designer or Builder Who Should You Call First

Most homeowners ask the same question at the start. Do you call a designer first, or a builder first? The answer depends on what kind of help you need and how much uncertainty is still in the project.

A professional interior design workspace featuring architectural blueprints, a laptop showing kitchen renderings, and material samples.

A designer focuses on layout, proportions, storage, finishes, fixtures, and how the room will feel to use. A builder focuses on construction, trades, site conditions, sequencing, and delivery. Both matter. The problem starts when they're disconnected.

When a designer-only service makes sense

A standalone designer can be the right first call if:

  • You need clarity before committing: You're still testing layouts or deciding whether the renovation is worth doing.
  • You want concept development: You need drawings, finish direction, and a better brief before pricing.
  • Your scope is still moving: You haven't decided whether the project includes walls, windows, or adjoining spaces.

That path can work well, but only if the design is grounded in how the room will be built.

Why integrated design and construction usually runs better

For most full renovations, an integrated model is cleaner. The designer develops ideas that a construction team can price, sequence, and build properly. That reduces the classic problem of a beautiful plan that turns out to be too complex, too expensive, or too dependent on site conditions no one checked early enough.

This matters even more if the company includes registered builders unlimited and can manage the build responsibility as well as the design intent. Homeowners get one conversation about layout, one process for revisions, and one accountable team when questions come up during demolition, rough-in, joinery, and fit-off.

Practical rule: If walls may move, services may relocate, or the kitchen links to bathroom upgrades, choose a team that can design and build under one roof.

A useful starting point is reviewing an end-to-end renovation process such as this guide on how to remodel a kitchen. It helps you see how planning, selections, and construction need to connect from day one.

The simplest way to decide

Use this filter:

Situation Best first call
You need ideas and layout options Designer
You already have drawings and want build pricing Builder
You want one team to own concept through completion Design-build firm
You're considering kitchen and bathroom renovations together Integrated renovation team

When searching kitchen designers Melbourne, the safest route isn't picking design over construction. It's choosing a process where neither gets separated from the other.

Reading a Portfolio and Understanding Services

A kitchen portfolio should help you answer one question. Can this team solve the kind of problems your house is likely to present?

Screenshot from https://siteprobathrooms.com.au

In Melbourne, that matters more than homeowners expect. A polished gallery can hide the hard part. Older brick homes, narrow terraces, post-war layouts, and apartments with fixed services all put pressure on the design. The useful portfolios show how those constraints were handled, not just how the finished kitchen photographed.

When I review kitchen work, I look for build decisions hiding in plain sight. Fridge location. Clearances at the island. How a pantry was fitted into an off-square room. Whether overheads stop short of a bulkhead cleanly or look like they were forced in late. Those details tell you whether the designer understands renovation work, or only styling.

What a strong portfolio actually proves

The best project sets show reasoning. You should be able to see why the layout changed and what improved for the household.

  • Small footprints treated realistically: Tight kitchens need proper aisle widths, workable landing space near appliances, and storage that does not crowd the room.
  • Older-home constraints resolved properly: Melbourne homes often come with uneven walls, ceiling drops, chimney breasts, odd window heights, or floor level changes. A capable designer plans around these conditions early.
  • Lighting tied to function: Good kitchens show task lighting over prep areas, practical general lighting, and fixture choices that suit the ceiling height and room shape.
  • Storage based on use: Deep drawers, bin placement, broom cupboards, tray storage, and pantry access matter more than a long list of finishes.
  • Connection to adjoining rooms: If the kitchen sits beside a laundry, powder room, or family bathroom, the design should show some logic across the whole renovation, especially where plumbing runs, flooring transitions, and material choices overlap.

That last point is easy to miss. Homeowners looking for kitchen designers in Melbourne are often planning more than one room, even if they start with the kitchen. A portfolio that includes both kitchens and bathrooms can be useful because it shows whether the team can carry the same practical thinking across wet and dry areas of the home.

Trend awareness matters less than judgment

A current-looking portfolio is fine. Judgment matters more.

Many finishes photograph well and date quickly. Some layouts look generous in wide-angle images and feel cramped on site. A large island can improve prep space and family seating, but in a Victorian or weatherboard extension it can also create a bottleneck between the cooktop, fridge, and rear door. Pale cabinetry can brighten a dark room, but in a busy family home it may show knocks, fingerprints, and cleaning wear faster than owners expect.

Good designers explain those trade-offs. They do not apply the same solution to every house.

What to check on the service list

Service pages often sound similar, so translate each item into what you will receive during the renovation.

Service What it means for you
3D design visualisation You can test layout, sightlines, appliance positions, and proportions before joinery is ordered
Material and finish selection Finishes are chosen with durability, cleaning, cost, and lead times in mind, not only colour
Project management Trades, deliveries, sequencing, defects, and site questions are handled through one process
Permit guidance You get advice on whether structural changes, plumbing moves, or building work need further documentation
Joinery documentation Cabinetmakers work from clear dimensions and details, which reduces site fixes and variation costs

Ask one more practical question. What is excluded?

Some design services stop at concept drawings. Others include selections but not site measures, or documentation but not coordination with trades. If you are also considering a bathroom update, check whether the same team can align tile selections, plumbing decisions, waterproofing interfaces, and storage planning across both spaces. That usually saves time and prevents the common problem of a new kitchen that feels disconnected from the rest of the renovation.

Material guidance is another area where the service list should be specific. Cabinet finishes, benchtops, and internals all wear differently in kitchens and bathrooms, so it helps to review a practical resource on kitchen cabinet materials and how they perform in daily use.

A portfolio should leave you with more than ideas. It should give you confidence that the designer can handle an older Melbourne home, document the work properly, and carry the renovation logic beyond one room.

Key Questions for Vetting Melbourne Designers

Once you've narrowed your shortlist, the consultation matters more than the gallery. During this meeting, you determine whether the person in front of you can manage a Melbourne renovation, not just discuss one well.

The strongest conversations are specific. You want to hear how they measure, how they document, how they handle revisions, and what happens when an old house reveals something unpleasant after demolition.

What to listen for in the first meeting

A good designer should ask detailed questions about how you live. Not broad lifestyle talk. Useful questions. Who cooks most often. Whether kids need breakfast seating. Whether you bulk-buy groceries. Whether you want appliances hidden or accessible. Whether the bathroom next door is likely to be renovated later and might affect plumbing strategy.

They should also talk clearly about site constraints. In Melbourne homes, those can include uneven walls, floor levels, access issues, old services, and adjoining rooms that don't align neatly.

Essential questions for your designer consultation

Category Question to Ask
Layout How do you test circulation before finalising the design?
Appliances At what stage do you lock appliance models and dimensions?
Storage How do you decide what should be drawers, shelves, pantry space, or overheads?
Buildability What parts of my brief are likely to create construction challenges?
Budget control How do you keep selections aligned with budget during design?
Variations How do you handle changes once work has started?
Older homes What do you check first in period or irregular Melbourne homes?
Documentation What drawings and schedules will I receive before construction?
Site management Who is my point of contact once work begins?
Bathrooms If I renovate a bathroom later, how do we avoid clashing finishes or duplicated work?

One technical question that reveals a lot

Ask this directly: How do you validate the plan before ordering cabinetry?

If the answer is vague, be cautious. A key validation step before ordering cabinetry is to check the design against appliance-door swings and drawer overlaps, because poor placement and insufficient counter space are among the biggest functionality failures in kitchen renovations, as outlined in this kitchen planning mistakes guide.

That check sounds simple, but it tells you a lot about the designer's process. Serious teams don't stop at a plan view. They test exact appliance sizes, opening arcs, clearances, and movement paths before manufacturing starts.

If the fridge door opens into the main prep zone or two drawers collide, the issue wasn't bad luck. It was missed in design.

Red flags worth noticing early

Some warning signs are less obvious than bad communication. Watch for these:

  • They speak only in finishes: If every answer comes back to colour, stone, or tapware, they may be weak on function.
  • They avoid discussing constraints: Experienced designers know old homes are full of surprises. They won't pretend otherwise.
  • They can't explain sequencing: If they can't walk you through demolition, rough-in, joinery, and fit-off in plain language, handover may be messy.
  • They overpromise on certainty: Good operators are confident, but they don't pretend hidden conditions never exist.

How to compare two good candidates

If both seem capable, compare them on process, not personality alone. The better choice is usually the one who gives clearer answers on documentation, appliance integration, storage planning, communication during site works, and how kitchen decisions may affect future bathroom upgrades.

That's especially relevant if you're trying to create a consistent renovation across the home rather than treating each room as a separate style exercise.

Budgeting Your Melbourne Kitchen Renovation

A Melbourne kitchen budget usually shifts the moment walls are opened or measurements get serious. A 1930s home with uneven walls, a narrow rear extension, or an old laundry beside the kitchen will price very differently from a newer apartment, even if the finishes look similar on a mood board.
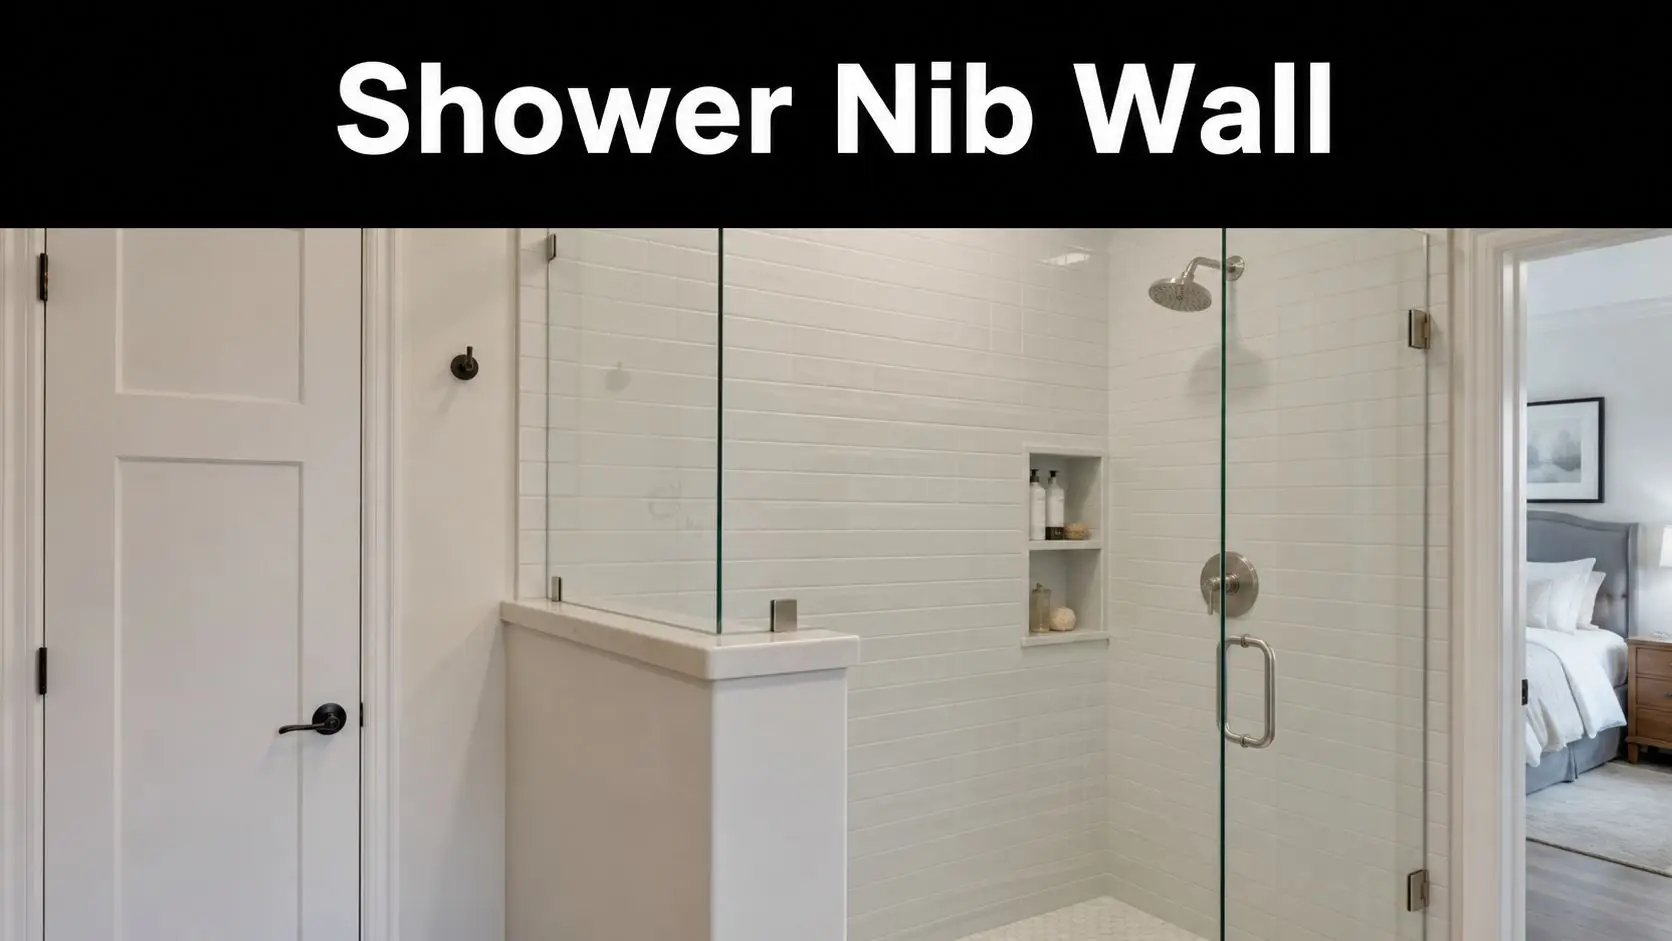
A laptop showing a renovation budget spreadsheet sitting on a wooden table with a calculator and notepad.
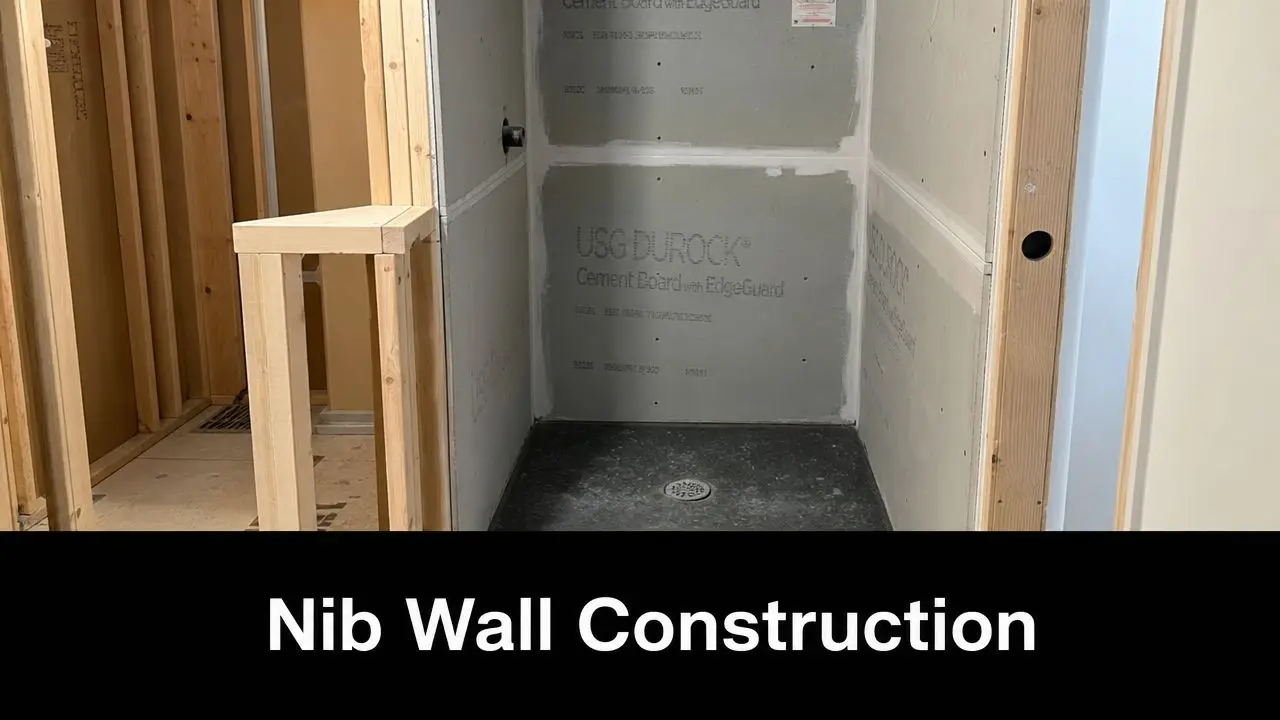
The clearest way to budget is to group the project by scope. That gives you a more reliable starting point than asking for one flat figure before anyone has checked services, access, or structural limits.
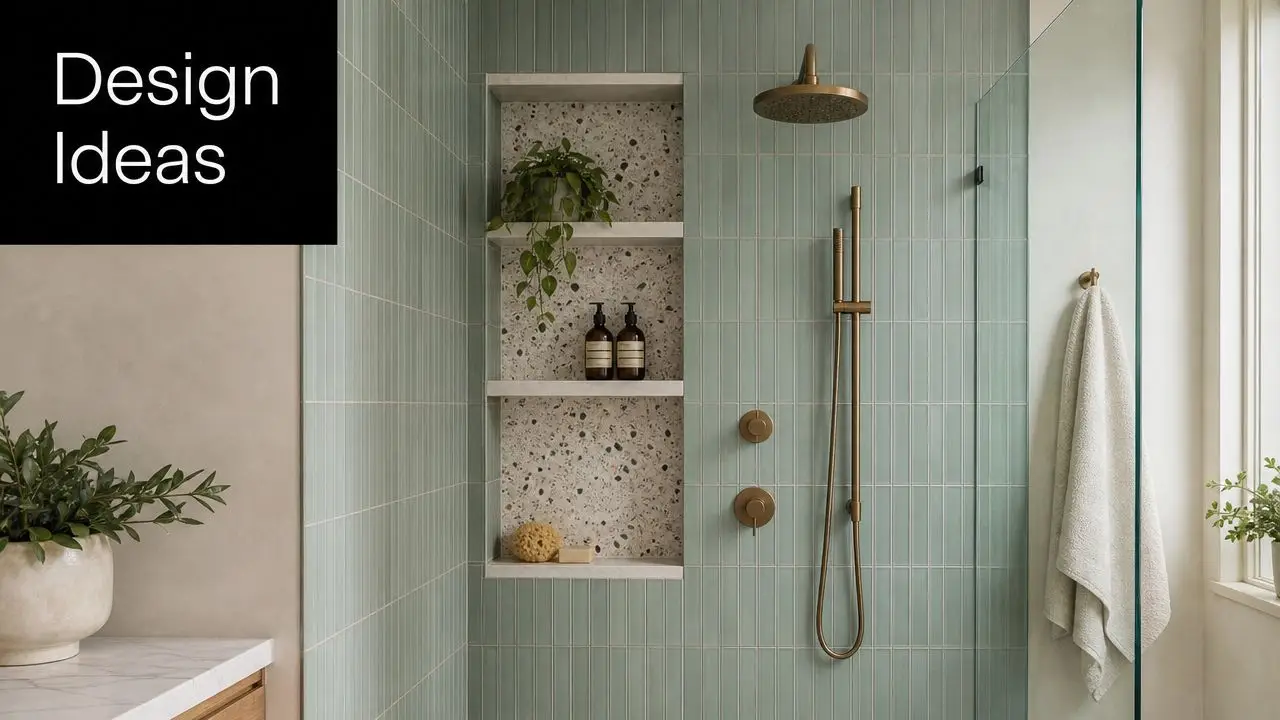
Three scope levels that affect price

  • Cosmetic refresh: Keeping the layout and services largely where they are, while updating visible finishes and selected components.
  • Full replacement: Removing the existing kitchen and installing a new layout with new cabinetry, fixtures, surfaces, and appliances.
  • Custom reconfiguration: Reworking walls, openings, services, or adjoining spaces to improve the whole floorplan.

Each step up adds more than materials. It adds labour, approvals, trade coordination, lead time, and the chance of uncovering hidden issues once demolition starts.

What usually pushes the price higher

Higher budgets often come from complexity, not from one luxury item. In Melbourne homes, the common culprits are older structures, tight footprints, and rooms that were never designed for modern appliances or storage.

Cost driver Why it matters
Custom cabinetry Non-standard sizes, fillers, panels, and internal accessories take more labour and planning
Service relocation Moving plumbing, electrical, or gas changes both trade scope and sequencing
Structural work Openings, wall changes, and support requirements add approvals and site complexity
Finish sensitivity Some materials require more careful handling, templating, or installation
Access conditions Tight entries, upper levels, and occupied homes slow delivery and installation

Irregular floorplans deserve special attention. Older Melbourne houses often have out-of-square walls, chimney remnants, boxed-in pipes, or awkward transitions into dining rooms and laundries. Those details usually mean more custom joinery, more site checking, and less room for pricing shortcuts.

If the bathroom is part of the wider renovation plan, mention it while the kitchen budget is being built. Shared plumbing walls, tile selections, waterproofing schedules, and trade bookings can affect the overall cost and the order of works. Pricing both spaces with one renovation plan often gives a clearer picture of where to spend and where to hold back.

Why timelines move

Budget and timing are tied together. A project with slow selections, late appliance decisions, or changes after cabinetry has been ordered will usually cost more to deliver.

The shortest build programs come from firm decisions made early.

That applies before site work starts and during it. Long-lead tapware, stone re-selection, hidden water damage, and electrical upgrades can all stretch the program. In occupied homes, timing also depends on how much temporary kitchen access the household needs and whether bathroom works are happening at the same time.

For a practical benchmark, this cost of a new kitchen guide helps frame likely scope and spending ranges. Use it as a planning tool, then test the numbers against your actual layout, your home's age, and any bathroom work you want bundled into the renovation.

Preparing to Request Your Renovation Quote

A strong quote starts with a strong brief. If you ask three renovation companies for pricing but give each of them a different version of your project, the numbers won't be comparable and the process will feel confusing from the start.

The goal isn't to produce architectural drawings yourself. It's to give enough clarity that the designer or builder can respond accurately and spot issues early.

What to prepare before the first call

Bring practical information, not just inspiration screenshots.

  • Must-haves first: List what the room must solve. Better pantry storage, a wider prep zone, easier cleaning, a bath-to-shower conversion, or stronger lighting.
  • Nice-to-haves second: Add the items you'd like if budget and layout allow.
  • Rough measurements: Room size, window positions, door swings, and any obvious ceiling bulkheads or nib walls.
  • Appliance intentions: Note what you're keeping, replacing, integrating, or upsizing.
  • Daily-use notes: Explain how the household cooks, stores food, entertains, and uses adjoining spaces.

Think beyond the kitchen while the planning is fresh

If your ensuite, main bathroom, or powder room is also dated, mention it early. Even if you stage the work, it helps to know whether the same renovation partner can coordinate kitchen and bathroom renovations under one planning approach. That's where new bathroom ideas become more than a wishlist. They become part of a sensible long-term plan for the house.

This also helps if you want cohesion between kitchen finishes and modern bathrooms without making every room look identical. The best results usually share a design language, not a repeated formula.

What a productive quote request sounds like

A useful enquiry is clear and specific. It explains the house type, the suburb, the broad scope, whether layout changes are likely, and whether you want kitchen-only work or a combined kitchen and bathroom pathway.

You don't need polished terminology. You do need honesty about priorities. If storage matters more than a statement island, say so. If the family bathroom is the next stage, mention it. If you're worried about managing trades yourself, make that clear from the outset.


If you're ready to speak with kitchen designers in Melbourne, prepare your brief around function first, style second, and sequencing throughout. That approach leads to better layouts, cleaner pricing, and fewer surprises once work begins. A renovation company that handles both kitchens and bathrooms can then assess whether your project is best tackled in one stage or as a planned series of upgrades, with one coordinated design direction across the home.

  • siteprobathrooms

8 Clever Bathroom Design Ideas for Small Spaces

Transform Your Compact Bathroom: From Cramped to Clever

Struggling with a bathroom that feels more like a cupboard than a room? You're not alone. In older Victorian homes, compact ensuites, narrow hall bathrooms, and tight apartment wet areas are common, and they often come with awkward door swings, bulky vanities, and storage that never quite works.

The good news is that a better result usually comes from smarter planning, not a bigger footprint. The strongest bathroom design ideas for small spaces focus on circulation, sightlines, storage, and fixtures that earn their keep every day. That's where well-planned bathroom renovations make the biggest difference. A room can feel calmer, cleaner, and easier to use without moving every wall.

The best small bathrooms also need to work for real life. That means thinking beyond the photo-ready look. A bathroom should suit young families, busy professionals, older homeowners, and anyone planning to stay in the property long term. Modern bathrooms look great, but the best designer bathrooms also make movement easier, cleaning simpler, and future changes less disruptive.

These new bathroom ideas get practical fast. They're based on what performs well on site, what tends to date badly, and where registered builders unlimited in renovation scope can add value through proper planning, waterproofing, and layout control.

1. Wall-Mounted Fixtures and Floating Vanities

A modern bathroom with a floating wood vanity, circular mirror, and wall-mounted toilet on beige tiled walls.

A small bathroom usually feels crowded at shin level first. Once the floor is cluttered with a full-depth vanity, a bulky toilet suite, and side panels that run to the tiles, the room starts to read tighter than it is. Wall-mounted fixtures and floating vanities fix that by clearing the sightline across the floor and giving you more usable space where movement matters most.

I use this approach often in compact ensuites and narrow hall bathrooms, especially in older homes where shifting walls is off the table. A floating vanity can make the room feel lighter, but its primary value is practical. You can clean underneath it properly, spot plumbing issues earlier, and reduce the hard corners that catch knees, walking aids, or a hurried foot on the way past.

What works on site

The best results come from getting the vanity depth right. In a tight room, a slimmer wall-hung unit with full-extension drawers usually works harder than a wider cabinet with hinged doors. Drawers let you reach the back without kneeling on the floor, which matters for everyday use now and matters even more if the homeowner wants to age in place.

Wall support needs to be planned early. A floating vanity or wall-hung pan is only as good as the framing behind it, so reinforcement has to be allowed for before sheeting, waterproofing, and tiling begin. That is routine work for a registered builder, but it is also where shortcuts cause trouble later.

SitePro Bathrooms has used this layout strategy in local renovations where clients wanted a cleaner designer look without sacrificing function. One common example is replacing a floor-standing vanity in a narrow family bathroom with a wall-hung unit that leaves open floor below and easier access beside it. That small change can improve circulation straight away and leave more flexibility if grab rails or mobility adjustments are needed later.

For more examples that suit local homes, these Australian small bathroom ideas show how floating fixtures can be used without making the room feel underdone or impractical.

  • Choose drawers over cupboards: They use the cabinet volume better and are easier to access from above.
  • Keep underside clearance useful: Enough open space below the vanity helps with cleaning and can make the room easier to use for anyone with reduced mobility.
  • Pair style with storage discipline: A floating vanity looks best when the benchtop stays clear, so include drawer organisers and nearby recessed storage in the plan.
  • Be honest about trade-offs: Wall-mounted fixtures cost more to install than basic floor-mounted options, but they usually return that value in easier maintenance, better movement, and a more adaptable layout.

2. Compact Corner Showers with Glass Enclosures

A modern, bright bathroom interior featuring a corner shower with glass walls and light beige subway tiles.

A tight ensuite often fails in one specific way. The shower door clips the vanity, the room feels boxed in, and two people cannot pass each other without a shuffle. A compact corner shower fixes that by putting the wet area into the part of the room that is usually hardest to use well, which opens the centre of the bathroom for easier movement.

Done properly, it also sets the room up better for ageing in place. A corner shower with clear glass, a low-threshold entry, and sensible placement of tapware is easier to enter, easier to supervise if someone needs assistance, and easier to adapt later with grab rails or a hand shower. The layout needs to be resolved before waterproofing and drainage are locked in, with the work carried out to the relevant Australian Standards, including AS/NZS 3740 for waterproofing and AS/NZS 3500.2 for plumbing and drainage.

Glass keeps the room readable

In small bathrooms, visual bulk matters almost as much as actual size. Heavy framed enclosures break up sightlines and can make a compact room feel tighter than it is. Frameless or lightly framed glass usually works better because you can read the full width of the room at a glance.

On SitePro Bathrooms projects, this is a common fix in older homes where the footprint stays the same but the bathroom needs to feel calmer and easier to use. One local ensuite had an old hinged screen that blocked the vanity every morning. Switching to a corner shower with a fixed glass panel removed the door conflict, improved circulation, and left clearer access if mobility needs change later.

The best compact shower layouts solve movement problems first and style second. Good design does both.

  • Choose a low-threshold entry: It improves access now and makes future mobility changes easier to handle.
  • Use recessed storage inside the shower: Bottles stay off the floor, cleaning gets easier, and the enclosure looks less cluttered.
  • Keep framing light: Bold black trims can suit larger bathrooms, but in very small rooms they often add visual weight.
  • Check the swing and reach zones: Tapware, towel access, and entry clearance all need to work comfortably for children, older adults, and anyone with limited mobility.

The trade-off is straightforward. Glass enclosures and custom corner layouts usually cost more than a basic boxed shower, especially if walls are out of square or drainage needs adjusting. In return, you get better circulation, a cleaner look, and a bathroom that is easier to use for longer.

3. Vertical Storage Solutions and Recessed Shelving

A modern bathroom features a tall wooden storage cabinet and built-in wall shelves with white towels and decor.

Small bathrooms usually don't fail because they lack style. They fail because there's nowhere to put anything. Benchtops fill up, the vanity becomes a junk drawer, and spare toilet paper ends up balanced on top of the cistern.

That's why vertical storage matters so much. When floor area is limited, the walls need to work harder. Tall cabinetry, recessed mirror cabinets, in-wall niches, and shelving above the toilet can add order without making the room feel crowded.

Recessed storage is usually the smarter option

In tight bathrooms, projecting shelves often create more problems than they solve. They catch elbows, interrupt walkways, and make the room feel narrower. Recessed shelving avoids that because the storage sits inside the wall line rather than on top of it.

On real projects, shower niches are one of the simplest upgrades with the biggest payoff. They keep bottles off the floor, remove the need for hanging caddies, and look intentional once tiled in. The same applies to a recessed shaving cabinet over the vanity. It gives you daily storage without chewing up circulation space.

A common SitePro Bathrooms approach in compact Victorian homes is to combine one strong vanity drawer stack with one or two built-in storage moments rather than cramming cabinets into every spare corner. That tends to produce a calmer room and a better long-term result.

  • Plan niches before walls are closed: Retrofitting them later is harder and more disruptive.
  • Store by use zone: Keep everyday items near the vanity and shower products in the shower niche.
  • Limit open shelving: Too much visible storage makes a small bathroom feel busy.
  • Think about reach: Accessible storage should be easy to grab without bending or stretching awkwardly.

For ageing-in-place planning, this matters more than many people realise. Storage that's easy to reach at standing height can be far more useful over time than low cupboards that require kneeling.

4. Light Palettes, Strategic Lighting, and Reflective Surfaces

A modern, bright, and airy bathroom featuring a wooden vanity, a sleek sink, and a glass-enclosed shower.

A dark small bathroom feels smaller than it is. That's the blunt version. Even a well-planned layout can fall flat if the finishes absorb light and the lighting plan is an afterthought.

Light-reflective finishes, clear glass, and well-placed mirrors do a lot of heavy lifting in compact rooms. Pale tiles, soft neutrals, and warm whites help bounce light around, while a large mirror over the vanity expands the sense of depth. The trick is balance. If everything is glossy and cold, the room can feel sterile.

Layer the lighting, don't rely on one fitting

A single ceiling light in the centre rarely works well. It throws shadows where you need visibility, especially at the mirror. Good small-bathroom lighting usually combines general ceiling light with focused vanity lighting and, where suitable, a subtle feature like under-vanity or niche lighting.

In practical terms, I'd rather see a simple palette with an excellent lighting plan than expensive finishes under poor lighting. The room will look better every day, and it will be easier to shave, apply makeup, clean, and move around safely.

For homeowners refining their lighting plan, this guide to downlight placement in a bathroom is a useful starting point.

On-site lesson: Expensive tiles won't rescue a room with bad lighting.

A common local scenario is a windowless ensuite that originally relied on one yellowed oyster light. Reworking that kind of room with brighter layered lighting, a clear-glass screen, and a mirror that reflects the full width of the vanity can completely change how open it feels.

  • Keep the main palette light: It improves perceived space.
  • Add warmth with timber or brushed metal: This stops the room feeling clinical.
  • Use mirrors deliberately: They should reflect light or open sightlines, not visual clutter.

5. Combination Fixtures and Dual-Purpose Elements

Small bathrooms improve fast when each fitting handles more than one job. That's why combination fixtures earn their place. A vanity with integrated drawer storage, a mirror cabinet, a toilet with cleaner lines, or a compact basin shelf can remove the need for separate add-ons that crowd the room.

Many new bathroom ideas sound good in a showroom but don't perform well once installed. A tub-shower combo, for example, only makes sense if the household will use the bath. In many smaller renovations, the bath becomes the room's biggest obstacle. It takes up visual and physical space, and it often makes shower access harder for children, older adults, and anyone with mobility limitations.

Pick fixtures based on use, not habit

A practical bathroom should reflect how the room is used. In a compact ensuite, a single well-designed vanity, good drawer storage, and a shower that's easy to enter will usually outperform a longer wish list of individual items.

Dual-purpose fittings also simplify cleaning. Fewer legs, fewer corners, and fewer freestanding accessories mean fewer dust traps and less visual noise. That's one reason integrated mirror cabinets remain such a reliable option in compact bathrooms. They hide clutter while still giving you the mirror you need.

SitePro Bathrooms projects often show this principle in family homes where clients want the room to feel uncluttered but still highly functional. A custom vanity with internal organisers, towel storage built into the side panel, and a mirrored shaving cabinet can replace several separate storage pieces.

  • Favour integrated storage: It cuts benchtop mess.
  • Question the bath requirement: If it's rarely used, the shower may deserve the space instead.
  • Allow for future needs: Powered bidet seats or upgraded mirror cabinets are easier if electrical planning happens early.

Combination fixtures aren't about squeezing in more. They're about reducing bulk while keeping the room useful.

6. Curbless Walk-In Showers and Accessibility-First Design

A small bathroom often shows its limitations at the shower entry first. The raised hob catches toes, the screen narrows the approach, and the room starts to feel tighter than it is. A curbless walk-in shower fixes several of those problems at once. The floor line stays continuous, access improves, and the room usually looks calmer because there is less visual interruption.

In renovation work, this approach earns its place for practical reasons, not just appearance. It suits children, older homeowners, people recovering from injury, and anyone who wants easier day-to-day use without rebuilding the room again in a few years. In many established homes, especially where the footprint cannot grow, accessibility has to be designed into the layout rather than added later.

The details matter. A curbless shower only works well when the floor falls are planned properly, waterproofing is handled carefully, and the drain location suits the tile format. I usually recommend resolving the floor finish and waste position together early, because the wrong tile can fight the fall and make the job harder to execute cleanly. This guide on how to choose bathroom tiles for wet areas and small bathrooms helps homeowners make those selections before installation starts.

Accessibility-first design also does not need to look medical. Large-format tiles, a frameless fixed panel, a hand shower on a rail, and a linear drain can still give the room a refined, contemporary finish. If future grab rails may be needed, wall backing should go in while the walls are open. That small decision saves time, cost, and patching later.

SitePro Bathrooms has used this approach in local projects where clients wanted the bathroom to feel more open now but also safer over time. A common example is an older homeowner replacing a step-over shower after a fall scare or minor injury. Once the hob is removed and the circulation path is cleaned up, the room usually feels easier to use immediately, not just later in life.

  • Keep the entry flush or very low-threshold: It reduces trip risk and makes cleaning easier.
  • Allow clear approach space: Tight entries undermine the benefit of a walk-in layout.
  • Use slip-resistant floor tiles: Safety starts with grip under wet feet.
  • Add wall reinforcement in shower and toilet zones: Future support rails become a simple fit-off job.
  • Check door swing and screen placement carefully: An outward-opening or cavity slider often frees up valuable movement space.

The trade-off is build complexity. Floor levels, drainage, and waterproofing need tighter coordination than a standard shower base. Done properly, though, a curbless shower gives a small bathroom one of the few upgrades that improves visual space, daily comfort, and ageing-in-place readiness in the same move.

7. Efficient Tile Patterns and Minimalist Finishes

Tile choice can either calm a small bathroom down or make it feel busy before the room is even furnished. In compact spaces, fewer visual interruptions usually win. That's why large-format tiles, restrained colour changes, and minimal grout contrast tend to perform better than intricate patterns spread across every surface.

The reason is simple. Continuous surfaces read as larger surfaces. When the eye isn't stopping at every grout line, border, and feature strip, the room feels more open.

Use interest carefully, not everywhere

This doesn't mean a small bathroom has to be plain. It means the focal point needs discipline. A single tiled shower wall, a textured feature niche, or a vanity splashback in a distinct finish can add character without shrinking the room visually.

What generally doesn't work is combining multiple feature tiles, strong floor patterns, dark grout, and several metal finishes in one compact footprint. That approach can turn a small bathroom into a sample board.

A good tile strategy is to keep the field tile calm and let one detail do the talking. In designer bathrooms, that often creates a more premium result than a busier, trend-heavy mix.

For homeowners weighing up finishes, this guide on how to choose bathroom tiles is worth reviewing before final selections are locked in.

  • Match grout closely to tile colour: It softens visual breaks.
  • Run tile consistently: Continuity helps the room feel bigger.
  • Limit bold patterns to one zone: Accent, don't overload.
  • Think about maintenance: Heavily textured tiles can be harder to clean in wet areas.

In practice, many SitePro Bathrooms projects use this restrained approach because it ages better. It also gives clients more flexibility to update mirrors, tapware, or accessories later without redoing the whole look.

8. Multi-Functional Vanities and Smart Storage Integration

The vanity is usually the hardest-working piece in a small bathroom. It carries storage, basin space, daily-use items, and often the visual centre of the room. If it's badly designed, the whole bathroom feels compromised.

A smart vanity doesn't just fit the wall. It supports how the household uses the room. Deep drawers for toiletries, internal organisers, hidden power access for grooming tools, and a benchtop that doesn't become a dumping ground all matter more than a flashy finish on its own.

The best vanity is the one that removes clutter

In compact bathrooms, integrated organisation beats extra furniture every time. A vanity with proper drawer divisions can eliminate the need for countertop trays, side trolleys, and over-door organisers that make the room feel temporary and crowded.

This also ties back to accessibility. Drawers are usually easier to use than low shelves. Pull-out storage reduces bending and rummaging, and a well-positioned basin leaves enough clear bench space for daily routines. For family bathrooms, that usability matters as much as style.

A common real-world note from local renovations is that clients often ask for the biggest vanity that can physically fit. Once plans are tested, the better answer is usually the vanity that leaves the room comfortable to move through. Slightly smaller joinery with better internal design often wins.

  • Prioritise drawer storage: It's more usable than deep cupboards.
  • Keep the top easy to maintain: Less clutter means easier cleaning.
  • Integrate towel and everyday storage: Don't rely on afterthought accessories.
  • Balance size with circulation: Bigger isn't better if the room becomes awkward.

A well-resolved vanity often gives small bathrooms their polished, custom feel. It's one of the clearest examples of practical planning creating a designer result.

8-Item Comparison: Small-Space Bathroom Design Ideas

Item Implementation complexity Resource requirements Expected outcomes Ideal use cases Key advantages
Wall-Mounted Fixtures and Floating Vanities High, structural reinforcement, complex plumbing/electrical, professional install Moderate–high: reinforced studs, concealed cisterns, specialist fixings, skilled labour Increased perceived floor space, easier cleaning, modern aesthetic Compact bathrooms, ensuites, accessible renovations Visual expansion, improved cleaning access, adjustable heights
Compact Corner Showers with Glass Enclosures Medium, precise measurements, glass handling, waterproofing Medium: tempered glass, hardware, waterproof membrane, pro installer Efficient corner use, maintained light flow, improved accessibility (low-threshold) Small ensuites, apartments, coastal or contemporary homes Saves corner space, transparent visual openness, easy to clean
Vertical Storage Solutions and Recessed Shelving Medium–High, recessed shelving needs structural planning; tall cabinets simpler Low–high depending on approach: cabinetry, stud-work, waterproofing for wet areas Maximised storage without floor footprint, clearer counters, built‑in look Narrow bathrooms, family homes, renovation projects planned early Maximses storage, preserves floor space, keeps sight lines clean
Light Palettes, Strategic Lighting, and Reflective Surfaces Low–Medium, lighting design and secure mirror mounting require care Low–medium: paint/tiles, LEDs, mirrors, electrical work Brighter, perceived larger space, improved task lighting and ambiance Windowless or small bathrooms, modern makeovers, energy‑efficient upgrades Amplifies light, flexible aesthetic, energy-efficient options
Combination Fixtures and Dual-Purpose Elements Medium, integrated units may need plumbing and electrical coordination Medium: integrated units, possible electrical for washlets, skilled installers Fewer standalone fittings, consolidated functionality, reduced clutter Very compact bathrooms, rentals, space‑constrained apartments Space-saving, multifunctionality, can be cost-effective vs multiple fixtures
Curbless/Walk-In Showers and Accessibility-First Design High, precise floor slope, drainage design, extensive waterproofing High: engineered bases/slopes, linear drains, skilled trades, waterproof membranes Seamless floor, improved accessibility, reduced trip hazards, contemporary look Ageing-in-place renovations, universal-design bathrooms, high-end remodels Universal access, seamless aesthetic, easier cleaning
Efficient Tile Patterns and Minimalist Finishes Medium, large-format tiles require skilled install and substrate prep Medium–high: large-format tiles, specialist cutting tools, experienced tiler Visual continuity, fewer grout lines, easier maintenance, refined look Modern renovations, small bathrooms seeking visual expansion Expands perceived space, durable finish, lower grout maintenance
Multi-Functional Vanities and Smart Storage Integration Medium, precise measurement, possible custom joinery, professional install Medium–high: quality cabinetry, organisers, soft-close hardware, reinforcement Consolidated storage, organised counters, maximised usability in small footprint Small family bathrooms, apartments, tight layouts needing efficient storage Maximises function, hides clutter, integrated organisation systems

Your Blueprint for a Better Small Bathroom

Small bathrooms don't need gimmicks. They need clear decisions. The best bathroom design ideas for small spaces improve movement, reduce visual clutter, and make daily use easier. When those ideas are carried through properly, the room feels bigger because it works better, not because someone relied on a few decorating tricks.

That's why layout should come before finishes. A floating vanity looks sharp, but it works best when the door swing, shower entry, storage, and lighting have already been resolved. A frameless screen feels open, but only if the shower position supports circulation and the waterproofing is handled properly. Good design in compact rooms is always connected to sound construction.

Accessibility deserves a place in that planning from day one. Even if you don't need mobility support now, choices like low-threshold showers, better clearances, stronger wall reinforcement, easier-to-reach storage, and safer lighting can make the bathroom more comfortable for years. They also tend to produce calmer, more refined spaces right now. That's a rare case where practical planning and designer outcomes line up neatly.

This is also why experienced bathroom renovations matter. In a small footprint, every decision has a knock-on effect. Move the vanity and you affect the mirror, lighting, storage, and walkway. Change the shower type and you may affect drainage, waterproofing details, and how the whole room is entered and cleaned. Tight rooms leave less margin for error, so planning and execution have to be tighter too.

SitePro Bathrooms approaches compact renovations with that broader view. The work isn't just about making a bathroom look new. It's about making it function properly for the home, the people using it, and the way those needs can change over time. That includes concept development, 3D design, build coordination, and the finishing detail that turns a constrained room into one that feels considered.

If you're weighing up new bathroom ideas for an ensuite, apartment bathroom, or family wet area in Highett or greater Victoria, now's the right time to map it properly. As registered builders unlimited in delivering modern bathrooms and designer bathrooms, SitePro Bathrooms can help you turn a cramped layout into a practical, polished space with a clearer plan and a smoother build process.


If you're ready to move from ideas to a buildable design, contact SitePro Bathrooms to discuss your renovation and explore a custom 3D plan for your small bathroom.

  • siteprobathrooms

Nib Wall in Shower: Modern Bathroom Guide 2026

You're probably looking at a bathroom plan where the shower meets the vanity and thinking the same thing many clients do. That little leftover strip looks awkward, won't be pleasant to clean, and doesn't feel like a proper finished detail.

That's exactly where a nib wall often earns its place. In the right layout, it can make a bathroom feel resolved instead of compromised. In the wrong layout, it can chew up room, complicate the glass, and add cost without giving much back.

From a builder's perspective, a nib wall in shower design isn't a styling extra. It's a construction decision that affects framing, waterproofing, tile set-out, and the way the shower screen is made and installed. If you're planning bathroom renovations and weighing up new bathroom ideas for modern bathrooms or more customized designer bathrooms, it's worth understanding what this small wall really does.

What Exactly Is a Nib Wall in a Shower

A nib wall is a short partial wall that projects from an existing wall. In Australian renovation practice, it's commonly built as a bricked and tiled section between the shower and another fixture, most often the vanity, or sometimes to create separation around a toilet area. One Australian renovation guide describes it as a short wall used to define zones in tight bathrooms where every bit of space matters, not just to hide plumbing or fill a gap (Australian nib wall guidance for small bathrooms).

A modern bathroom featuring a white tiled shower enclosure with a glass door and a nib wall.

In plain terms, it's the bit of built structure that stops a bathroom from ending in an odd, unfinished sliver. Instead of running glass hard up against the vanity, or leaving a narrow dead gap beside the screen, the nib wall creates a deliberate edge. It gives the shower a proper boundary and gives the rest of the room a cleaner line.

Why homeowners notice it so late

Renovations rarely begin with the specific request for a nib wall; instead, an existing problem is identified first. The vanity feels too close to the shower. The screen looks like it's landing in the wrong spot. The room needs a divider, but a full-height wall would make the bathroom feel boxed in.

That's where a nib wall works well. It sits in the middle ground between open and enclosed.

A good nib wall doesn't call attention to itself. It makes the whole bathroom layout feel like it was always meant to work that way.

In compact ensuites and family bathrooms, that matters. You want enough separation between wet and dry zones, but you don't want to lose openness, light, or ease of movement. A nib wall can help give structure without turning the room into a maze.

What it looks like in a finished bathroom

Most nib walls are tiled to match the shower or surrounding walls, so they read as part of the architecture rather than an add-on. Some sit at vanity height for a neat visual line. Others extend higher if the layout needs more privacy or stronger support for the screen.

If you want to see how small layout changes can completely alter the feel of a room, these bathroom renovation before and after examples show why details like wall placement matter more than people expect.

The important thing is this. A nib wall isn't there to decorate the shower. It's there to solve a layout problem in a way that also improves the final look.

The Practical Benefits of a Shower Nib Wall

The biggest practical win is simple. A nib wall removes that awkward strip beside the shower where dust, water splash, and grime tend to collect. In Australian bathroom renovation practice, it's commonly used to eliminate the gap between a vanity or adjacent fixture and the shower screen, and one Perth renovation source notes that a practical access gap should be about 100 mm for cleaning and maintenance if that gap is left open (Perth renovation guidance on nib wall versus shower gap).

If the layout leaves only a skinny leftover space, that gap usually becomes a nuisance rather than a feature. It's hard to reach, hard to clean, and visually untidy. Closing it with a nib wall gives the room a sharper finish.

Where the nib wall helps most

A nib wall usually pays off when the bathroom has one of these issues:

  • A vanity-shower pinch point where the screen can't land neatly without creating a narrow cavity.
  • A need for privacy so the shower or toilet isn't fully exposed from the doorway.
  • A walk-in shower layout that needs definition without using a full-height partition.
  • A modern minimalist plan where too much glass would feel cold or too exposed.

That's why nib walls show up so often in modern bathrooms. They let the room feel open, but not unfinished.

Benefits clients tend to appreciate after handover

The visual benefit is immediate, but the day-to-day advantages are what usually matter most after the renovation is done.

  • Cleaner junctions: Fewer awkward edges mean less build-up in spots that are annoying to wipe down.
  • A stronger shower edge: Glass feels more intentional when it lands on a tiled wall rather than hovering beside cabinetry.
  • Better privacy: Even a low wall can block direct sightlines in a useful way.
  • A more solid feel: All-glass showers can look sleek, but a nib wall often gives the room more substance.

Practical rule: If a detail makes cleaning harder and doesn't improve function, it usually shouldn't stay in the design.

There's also a styling upside. A nib wall can make a bathroom feel more custom because it introduces a built element instead of relying on standard screen geometry alone. That's often why it shows up in designer bathrooms. Not because it's trendy, but because it resolves several problems at once.

What doesn't work is adding a nib wall just because you've seen one in a photo. If the room already has enough separation and clear screen placement, a nib wall can become extra bulk with no real payoff. The best ones are there for a reason.

Construction and Dimensions Deep Dive

A nib wall looks simple in the finished bathroom. It isn't simple once construction starts. This is one of those details that has to be built accurately from the inside out or it causes follow-on problems with waterproofing, tile alignment, and glass installation.

A wooden framed nib wall structure standing next to an unfinished tiled shower enclosure during construction.

How a nib wall is built properly

On site, the sequence matters. The wall has to be locked into the room as a built element, not treated like a piece of trim.

  1. Frame it square and solid
    The structure needs to be stable enough to carry tile, resist movement, and support whatever glass detail is being fixed to or beside it. If the wall has any flex, the finish won't last well.

  2. Sheet it with the right substrate
    Wet area linings need to suit the application. The wall face, top, and returns all need proper preparation before any membrane goes on.

  3. Waterproof the full wet interface
    A lot of DIY thinking often falls short at this stage. The top of the nib wall, the junctions into the floor and main wall, and the transition into the shower area all need careful waterproofing. Water doesn't only hit the front face. It tracks into edges, corners, and penetrations.

  4. Tile to the actual glass dimensions
    The finished wall thickness matters. Tile build-up, trims, falls, and edge details all influence where the glass sits.

Height and thickness choices

There isn't one universal nib wall height that suits every bathroom. The right height depends on what the wall needs to do.

A lower nib wall can line up neatly with the vanity and keep the room feeling open. A taller one gives more privacy and a stronger visual divide. The wrong height usually looks accidental. It either feels stumpy and unresolved, or it blocks too much sightline and light.

Thickness matters too. Too thin, and it can look flimsy or become difficult to finish cleanly. Too bulky, and it starts stealing usable space. In a tight ensuite, even a small overbuild can make circulation feel cramped.

A practical builder will test this in plan before anything is framed. The wall has to work with:

  • Door swing
  • Vanity depth
  • Screen position
  • Tile module
  • Shower entry clearance

If a nib wall only works on paper and not in movement, it's the wrong nib wall.

Why this isn't a casual add-on

This is also why professional coordination matters. A nib wall touches multiple trades, and every one of them needs the same set-out. Framing, waterproofing, tiling, and glazing all follow the same line. If one trade guesses, the rest inherit the problem.

For homeowners comparing quotes, this is where experienced renovation teams and registered builders unlimited stand apart. The detail isn't difficult because it's fancy. It's difficult because every layer has to finish in exactly the right place.

Large-format tile work raises the stakes again because small set-out errors become more visible. If you're considering that finish, this guide to installing large-format porcelain tiles is worth a look before you lock in the design.

Design Variations and Finishing Touches

The best nib walls don't all look the same. Some disappear into the room and let the glass do the talking. Others become a feature that gives the bathroom its character.

A modern bathroom shower area featuring light green vertical tiles, a terrazzo tiled wall niche, and brass fixtures.

The quiet version

In pared-back modern bathrooms, the nib wall is often tiled to match the surrounding walls. Same tile, same grout tone, same clean edge. That approach keeps the room calm and architectural.

This works especially well when the aim is to make the shower zone feel integrated, not highlighted. The wall reads as part of the bathroom shell, and the screen feels lighter because it's anchored by something solid.

The feature version

For clients chasing stronger new bathroom ideas, the nib wall can carry a different tile or a more expressive finish. Vertical stack tiles, stone-look porcelain, textured ceramics, or a tile wrap with a crisp trim can all make the wall feel intentional.

Used carefully, this is one of the easiest ways to create a focal point without cluttering the room. A small wall can do a lot of visual work.

  • Matching tile finish: Best when you want an uninterrupted, spacious feel.
  • Contrasting feature tile: Stronger personality and more visual definition.
  • Stone-look wrap: Adds weight and a premium finish.
  • Integrated niche or ledge: Useful where the wall can also contribute storage.

Planning details that affect the finish

The nib wall has to be designed early, not squeezed in late. Technical planning guidance for shower enclosures notes that the wall affects glass dimensions, door swing, circulation clearances, and tile set-out, and installers treat it as a custom interface between the waterproofed wet area and frameless glass hardware, not as a decorative extra (technical planning for shower enclosure layout).

That builder's view matters because some of the nicest design ideas only work if they're coordinated upfront.

For example:

Design choice What it changes
Frameless screen landing on nib wall Requires precise finished dimensions
Feature tile on nib wall only Changes tile set-out and edge detailing
Recessed niche into adjacent wall Needs framing and waterproofing planned early
Higher nib wall for privacy Alters sightlines and room openness

Early decisions make better bathrooms. Late nib wall decisions usually create compromises.

If you're sorting through finishes, this guide on how to choose bathroom tiles is useful because the tile selection and nib wall design should always be considered together.

A good nib wall can support the look of designer bathrooms without forcing the room into a showpiece. It just gives the space enough built structure to feel composed.

Nib Walls vs Alternatives for Your Shower

If you're deciding between a nib wall and other enclosure options, it helps to think in trade-offs rather than absolutes. None of the common choices is perfect. Each one prioritises something different.

A modern bathroom featuring a walk-in glass shower enclosure and a built-in nib wall with matte black fixtures.

Option comparison

Option Works well when Main upside Main drawback
Nib wall with glass panel You need a tidy divider without fully closing the room Balanced privacy, structure, and openness Adds building and tiling work
Full frameless glass screen You want the lightest visual footprint Open feel and minimal visual interruption More glass to clean and less concealment
Full-height tiled partition wall You want stronger separation and privacy Solid division and reduced splash visibility Can make a smaller bathroom feel heavier

What tends to work in real bathrooms

A full glass screen suits bathrooms where the layout is already clean and there's enough space for the glazing to sit naturally. It's often the simplest visual answer. But if the screen ends beside a vanity in a tight plan, it can expose exactly the sort of awkward junction that is typically avoided.

A full-height partition wall gives a lot of privacy and can be useful when the room needs stronger zoning. The downside is that it can shut the bathroom down visually. In smaller rooms, that loss of openness is hard to ignore.

The nib wall in shower layouts often lands in the sweet spot. It gives the shower a proper edge, helps with visual order, and still allows glass above or beside it so the bathroom doesn't feel too enclosed.

Budget and maintenance trade-offs

Clients usually have to choose what they care about most.

  • If easy cleaning matters most, avoiding awkward dead spaces is usually smarter than chasing the most minimal look.
  • If openness matters most, glass wins, but you'll accept more exposed surfaces.
  • If privacy matters most, a taller built wall may be worth the visual weight.
  • If you want a middle-ground solution, the nib wall often delivers the best mix.

A nib wall won't suit every bathroom. But when a layout needs structure and a frameless screen alone won't solve the practical issues, it's often the most balanced answer.

Is a Nib Wall Right for Your Bathroom

The right question isn't whether a nib wall looks good. It's whether it solves enough problems in your bathroom to justify its place.

If your plan has an awkward shower-to-vanity relationship, a nib wall can be one of the smartest decisions in the renovation. If your bathroom is already spacious and the screen can sit cleanly without it, the wall may be unnecessary. Good design is usually about restraint as much as features.

Quick decision filter

Ask yourself these questions:

  • Do you have an awkward leftover gap? If yes, a nib wall may resolve it cleanly.
  • Do you want more privacy without a full wall? That's one of its best uses.
  • Are you trying to keep the room open? A nib wall can help, but only if it's sized properly.
  • Are you comfortable with added construction complexity? It needs proper integration, not an afterthought.
  • Do you want the bathroom to feel more custom-built? A well-detailed nib wall often helps achieve that.

The best nib wall is the one that improves function, supports the glass, suits the tile layout, and still leaves the bathroom feeling easy to use.

In practical terms, a nib wall is part of the broader bathroom renovations scope. It affects labour, materials, waterproofing, glazing, and finishing. That means it should be priced and designed as part of the full room, not treated as a last-minute extra.

If you're in Highett or elsewhere in Victoria and want clear advice on whether a nib wall suits your layout, SitePro Bathrooms can help. The team handles design, planning, and construction from concept through to handover, so you can see how the wall will affect the look, function, and buildability of the space before work begins. Get in touch to discuss your bathroom, compare layout options, and request a customized quote.

  • siteprobathrooms

How to Clean Floor Tile Grout Like a Renovation Pro

You mop the floor, the tiles come up well, and the grout still looks tired. That's the part that frustrates most homeowners. Clean tile with dirty grout makes the whole room feel older than it is.

In bathrooms, that matters more than people think. Grout sits in the joints where moisture, soap residue, body oils and general foot traffic collect. It also tends to show every shortcut. Wipe-only cleaning makes the surface look better for a day, but it rarely pulls the dirt out of the grout line itself.

A professional result comes from using the right sequence, choosing products that suit the tile and grout you have, and knowing when discolouration is no longer a cleaning problem. That last point is the one many DIY guides miss. Sometimes dark grout is just grime. Sometimes it's the bathroom telling you something deeper is going on underneath.

Beyond the Grime Why Grout Health Matters

Grout becomes noticeable when it stops matching the rest of the floor. The tiles still reflect light. The room may even smell clean. But the joints look patchy, dark or uneven, and suddenly the whole bathroom feels neglected.

That visual effect isn't trivial. Grout lines frame every tile, so when they stain, the floor loses definition. In a well-finished bathroom, especially one with careful tile selection, clean grout is what makes the layout read as sharp and intentional. If you're planning updates, the tile choice itself matters just as much as the maintenance plan, and this guide on how to choose bathroom tiles is worth reading before you commit to a finish.

What grout is really doing

Grout isn't just cosmetic filler. It's a porous joint material that sits in a hard-working part of the room. On a bathroom floor, it deals with splashed water, cleaning residue, dust, skin oils and whatever gets tracked in from the rest of the house.

That's why grout often gets dirty faster than the tile around it. The tile surface is comparatively easy to wipe. The grout line grabs residue and holds it.

Practical rule: If the floor looks dirty again soon after mopping, the problem is often in the grout lines, not on the tile face.

What discolouration can mean

In many bathrooms, dark grout is built-up soil. A proper clean fixes it. In others, the darkening keeps returning in the same zones, especially near showers, corners and drainage points. That's where experience matters.

Look at the pattern, not just the colour:

  • Even general dullness usually points to surface grime and residue.
  • Patchy dark areas can suggest repeated moisture exposure.
  • Cracking, powdering or soft spots often mean cleaning isn't the actual issue.
  • Discolouration that returns quickly after drying deserves closer attention.

Grout health affects more than appearance. It influences how clean the bathroom feels, how easy it is to maintain, and whether a small maintenance task stays small. If the joints are intact and the staining is superficial, cleaning and sealing can restore the floor nicely. If the grout is failing, you're not preserving the bathroom by scrubbing harder. You're only delaying the proper fix.

The Foundation A Safe and Effective Everyday Clean

Most grout doesn't need aggressive treatment first. It needs the right order. When homeowners ask me how to clean floor tile grout without damaging it, I start with a simple rule. Remove dry debris first, then clean, then extract the residue fully.

Professional guidance for floor tile grout follows this sequence: dry-sweep or vacuum first, apply a non-abrasive, pH-balanced cleaner or a baking-soda and peroxide paste, let it dwell for about 5 to 10 minutes, scrub with a soft- or stiff-bristle brush in short strokes, then rinse thoroughly with warm water and dry the surface. The same guidance notes that removing loose debris first prevents pushing grime deeper into the grout line, as outlined in this step-by-step professional grout cleaning guide.

A person scrubbing light-colored floor tile grout with a small white brush and a spray bottle.

Start dry, not wet

This is the step people rush past. If dust, hair and grit are still on the floor, the brush turns them into slurry and pushes them into the grout.

Use a broom or vacuum and take your time around the edges. Bathrooms collect fine debris in corners and along the wall line. That debris ends up in the joints if you skip prep.

For tiled floors with larger porcelain pieces, grout lines can be visually subtle, which makes hidden residue easier to miss. That's one reason installation quality and material choice matter in the first place. If you're dealing with broad tile surfaces and narrow joints, this article on installing large-format porcelain tiles gives useful context.

Use a mild cleaner the right way

For a routine clean, use a non-abrasive, pH-balanced cleaner. If you prefer a more hands-on DIY approach for general soil, a diluted cleaner can work well when used properly. One grout-cleaning guide specifies 2 tablespoons of cleaner to 1 cup of water, then recommends leaving the solution on the grout for a few minutes before scrubbing, rinsing and drying in this grout cleaning guide.

The important part isn't flooding the floor. It's giving the cleaner contact time.

Let the product sit on the grout long enough to loosen grime, but don't leave the floor soaking. Controlled dwell time works better than excess water.

Scrub with control, then remove what you loosened

Use a grout brush or a small bristle brush. Short strokes work better than wide sweeping motions because they keep pressure in the joint where the grime sits. You're not polishing the tile. You're agitating the grout line.

A good everyday process looks like this:

  1. Sweep or vacuum thoroughly so loose dirt doesn't get pushed into the joints.
  2. Apply cleaner to the grout lines rather than flooding the whole floor.
  3. Wait for the dwell time so the cleaner can break down residue.
  4. Brush in short passes with steady pressure.
  5. Rinse with warm water and lift the dirty water away.
  6. Dry the surface so moisture doesn't sit in the joints.

If you only wipe the area after scrubbing, some of the loosened residue stays behind. That's why pros focus on removal, not just agitation. Grout is porous. If the dirty solution isn't properly rinsed and taken off the floor, the line can dry looking almost as dull as it did before.

Targeted Solutions for Stubborn Grout Stains

Some grout responds straight away to a routine clean. Some doesn't. The mistake is treating every stain the same way. If you keep throwing more elbow grease at a stain that needs a different approach, you waste time and wear the grout down.

When an everyday clean stalls, step up carefully. For deeper cleaning, a commonly recommended DIY method is a peroxide-and-baking-soda paste made with 1/2 cup baking soda plus 1/4 cup hydrogen peroxide, left for 5 to 10 minutes before scrubbing and rinsing. That timing aligns with other instructions that use a 10-minute dwell time for 3% hydrogen peroxide to break down grime, as explained in this guide to cleaning grout and tile.

A steam cleaner nozzle cleaning dark grout between light-colored ceramic floor tiles, effectively removing dirt and grime.

For general deep-set grime

This is the most common bathroom-floor problem. The grout looks grey or brown, especially along walking lines and near the vanity.

Use the peroxide and baking soda paste on the grout only. Apply it neatly, let it sit within that 5 to 10 minute window, then scrub and rinse thoroughly. Don't let the paste dry hard on the surface. If it dries completely, you've created another residue-removal job.

What usually works:

  • Targeted application keeps the treatment where it's needed.
  • Moderate dwell time gives the mix time to break down grime.
  • Thorough rinsing stops loosened dirt from settling back into the joint.

What usually doesn't:

  • Smearing paste across the whole floor and hoping for an even result.
  • Leaving it too long because more time isn't always better.
  • Skipping the rinse and just wiping the tile face.

For damp-area spotting and recurring dark marks

Bathrooms often get small dark patches in the grout near showers, around the toilet, or in corners where airflow is poor. Start with the same deeper-cleaning method above, then watch what happens over the next few days.

If the area lightens, dries evenly and stays stable, the issue was likely surface contamination. If it darkens again quickly in the exact same spot, take that seriously. Repeating the same treatment over and over doesn't solve moisture coming from below or behind.

Stains that return in a pattern are rarely random. Bathrooms tend to tell you where the real problem is.

For greasy build-up and layered residue

Kitchen grout often gets grease. Bathroom floor grout usually gets soap film, body-product residue and cleaner build-up. The fix is similar in principle. You need a cleaner that breaks down the film, plus brushing and a proper rinse.

A layered residue problem often shows up as grout that feels tacky when wet or looks blotchy after drying. In that case, do two smaller controlled cleaning passes instead of one heavy attack. The first pass loosens the top layer. The second gets to what's underneath.

Steam and hand cleaning compared

Steam can help on stubborn grout, but it isn't magic. It's useful when you want a low-chemical approach and you're careful with the material.

Method Best use Watch for
Hand scrubbing Precise spot treatment and routine deep cleaning Too much force can wear weak grout
Steam cleaning Low-chemical cleaning on suitable surfaces Heat and moisture can be a poor choice for already failing grout
Paste treatment Deep grime in porous grout lines Residue if not rinsed off properly

Use steam as a tool, not a shortcut. If grout is cracked, loose or powdery, steam won't repair it. It may just expose how compromised the joint already is.

Protect Your Work Grout Sealing and Minor Repairs

A clean grout line looks good for a moment. A sealed grout line stays cleaner for longer. That's the difference between a weekend clean-up and proper maintenance.

Grout is porous, so once you've cleaned it properly, it makes sense to protect that surface from taking on new staining straight away. Expert DIY guidance recommends letting grout dry fully before applying a thin coat of sealer and repeating sealing annually for light-coloured grout. The same guidance warns against acidic cleaners like vinegar on natural stone because they can etch the surface, as explained in this grout cleaning and sealing guide.

A person applies protective sealer to light beige floor tile grout lines using a small applicator brush.

Manual care versus steam-assisted maintenance

Homeowners often ask whether they should rely on brushing and sealing alone, or add steam into the mix. The answer depends on the floor condition and the material.

A simple comparison helps:

  • Manual clean plus sealer suits most standard maintenance jobs. It gives you control and lets you inspect the grout closely.
  • Steam plus sealer can work where you want less chemical use, but only if the grout and tile finish can handle it.
  • Repeated harsh cleaning without sealing is the worst option. You do the hard work, then leave the grout open to absorb new staining again.

For modern bathrooms, sealing is especially important because cleaner lines and lighter grout colours show dirt quickly. A sealed joint is easier to maintain and less likely to take on every splash and footprint.

Minor cosmetic repairs you can handle

Cleaning sometimes reveals that the issue isn't just staining. You may find hairline cracks, shallow pinholes or small sections where the grout has worn back.

For minor cosmetic issues:

  • Touch-up pens can help with appearance where the grout is sound but uneven in colour.
  • Small repair kits can patch localised defects if the surrounding grout is still solid.
  • Fresh sealer after repair helps protect the area once it has cured and dried properly.

What these options can't do is fix movement, water intrusion or widespread failure. If the grout line keeps opening up, crumbles under light brushing or sounds hollow beside loose tiles, cosmetic products are only hiding the symptom.

Clean first, inspect second, seal last. If you reverse that order, you lock in problems instead of solving them.

When to Stop Scrubbing and Call a Professional

There's a point where more cleaning stops being maintenance and starts being avoidance. If the grout is still dark after proper treatment, or if it keeps changing colour again after drying, the floor may be pointing to a failure in the tile assembly rather than a dirty surface.

Persistent grout darkening can indicate a compliance or waterproofing issue in line with AS 3740, the Australian standard for waterproofing wet areas. Consumer cleaning advice often doesn't help homeowners distinguish a surface stain from a more serious assembly failure, which is why this wet-area grout article is such an important reference point.

Screenshot from https://siteprobathrooms.com.au

Warning signs that cleaning won't fix

Put the brush down if you're seeing signs like these:

  • The same grout lines darken again and again after they appear to dry.
  • Grout is cracking, flaking or washing out during normal cleaning.
  • Tiles feel loose or sound hollow underfoot.
  • Musty odours keep returning even after the room has been cleaned.
  • Staining is concentrated near wet zones such as the shower entry or floor waste.

Those are maintenance red flags. In bathrooms, surface finishes and waterproofing work as a system. If one part fails, the visible symptom often appears in the grout first.

Why this matters for renovation value

Cleaning directly connects to long-term bathroom value. A floor that only looks dirty may need a proper deep clean and reseal. A floor with moisture-related grout failure may need regrouting, local tile removal, or a broader bathroom renovation depending on what's underneath.

That matters if you're weighing up new bathroom ideas, planning designer bathrooms, or trying to preserve the condition of an existing space before problems spread. Homeowners often wait too long because the issue still looks cosmetic from above.

If a professional inspection shows waterproofing failure or a failed tile bed, the right next step isn't another cleaning product. It's a proper remedial approach by experienced bathroom renovators and registered builders unlimited who understand how wet areas should perform, not just how they should look.

A Pro's Perspective on Grout Cleaning Safety

The safest way to clean grout depends on what's on either side of it. That's the part generic advice skips. Guidance differs for sanded, unsanded, epoxy and natural-stone installations, and some materials need a much gentler approach than others. This tile and grout care guide notes the need to avoid acidic cleaners like vinegar on natural stone and to use softer brushes or pH-neutral cleaners where appropriate.

Match the method to the material

If you're working on ceramic or porcelain with sound cement-based grout, you've got more room to use brushing and targeted deep cleaning. If the floor includes natural stone, polished finishes or specialty grout, be conservative.

A simple safety filter works well:

  • Natural stone needs non-acidic cleaning and gentle tools.
  • Epoxy grout usually needs less aggressive treatment because it resists staining differently.
  • Older or fragile grout can fail under hard scrubbing even if the tile itself looks fine.

Ventilation matters too. Bathrooms that stay damp are harder to keep clean and harder to keep dry after cleaning. Good airflow supports every other maintenance step, which is why practical upgrades like bathroom exhaust fan installation can make a real difference to ongoing grout condition.

Use grout as a diagnostic tool

The smartest way to think about grout is this. It's not just a cleaning target. It's a visible indicator of how the bathroom is performing.

If a careful clean restores the joints and they stay consistent, your maintenance routine is doing its job. If the grout keeps deteriorating, darkens in fixed areas, or starts breaking apart, the bathroom is asking for more than a scrub. At that stage, DIY has given you useful information, and that's valuable in itself.


If your grout problems look like more than surface dirt, contact SitePro Bathrooms for advice on repair options, waterproofing-related issues, or a full bathroom renovation that fixes the cause instead of covering it up.