• siteprobathrooms

Kitchen Designs for Small Spaces: 8 Smart Examples

A compact kitchen doesn't have to sacrifice style or capability. The popular advice is to make everything smaller, but that can produce a cramped room with undersized work zones, poor storage and appliances that don't suit the way you cook. Better kitchen designs for small spaces start with decisions, not decoration. Measure circulation, protect the main preparation, cooking and cleaning zones, assign storage before choosing finishes, select appliances around actual usage, and layer lighting so every surface works after dark. Plumbing, ventilation and electrical requirements also need to be resolved as one coordinated design, not patched in after the cabinetry is ordered.

The same discipline applies to bathroom renovations, new bathroom ideas, modern bathrooms and designer bathrooms. A compact ensuite succeeds when every centimetre has a job, services are planned early and storage doesn't obstruct movement. SitePro Bathrooms brings that integrated approach to kitchen and bathroom renovation planning in Highett and across Victoria, combining concept development, 3D design, construction and finishing.

The eight strategies below are complete renovation approaches. Each one has a different spatial logic, storage profile, finish and implementation risk.

1. Galley Kitchen Layout with Integrated Storage

A galley kitchen places two parallel runs on opposite sides of a walkway. In a narrow apartment, terrace or townhouse, this keeps the refrigerator, sink, cooktop and preparation area within short reach without pushing cabinetry into the room's centre. It suits kitchens positioned between an entry and living area, provided the passage remains comfortable and appliance doors do not obstruct movement.

Victoria's Apartment Design Guidelines state that a single-aspect open-plan habitable room can extend to 9 metres in depth when the relevant conditions are met. The guidance also requires enough room for cooking, cleaning, food preparation and storage. In a compact open-plan home, that makes daylight, ventilation and the kitchen's distance from the window practical planning concerns, not just visual ones.

Practical rule: A galley layout should shorten work paths, not simply fill both walls with cabinets.

Assign one run to the main preparation and cooking sequence. Use the opposite run for refrigeration, tall storage and equipment accessed less often. Floor-to-ceiling cabinetry adds capacity, but a continuous dark wall can make the room feel enclosed. Pale doors, a reflective splashback, selected glass fronts and handleless detailing reduce that visual weight without giving up storage.

Where the trade-off appears

An apartment may suit an integrated, handleless galley, while a Highett terrace may benefit from timber-toned doors and a more familiar benchtop arrangement. Pale finishes create a calm room, but they show some marks and need a cleaning routine suited to daily cooking. Recessed or track lighting over both work surfaces prevents the person at the bench from working in their own shadow.

Cabinet depth and appliance clearances should be confirmed in the 3D design before ordering. A full-height pantry can improve capacity, yet it may reduce useful wall space for benchtop preparation. Integrated appliances create a quieter appearance, while freestanding units can lower the joinery cost or simplify later replacement. SitePro Bathrooms can test these choices through 3D kitchen planning as part of its renovation services in Highett and across Victoria.

Positioning the galley perpendicular to the living area can define the kitchen and improve visual flow. It fails when the parallel runs narrow the home's only route or an open dishwasher blocks the walkway. Confirm those risks on site before cabinetry fabrication.

A modern galley kitchen design for small spaces with minimalist cabinets and sleek countertops under warm lighting.

2. Handleless Cabinetry and Minimalist Hardware

Handleless cabinetry can make a small kitchen read as built-in furniture rather than a collection of separate cupboards and appliances. Push-to-open systems and integrated finger grooves remove projecting hardware, which helps in tight circulation zones and creates a quiet visual language suited to modern interiors.

The visual gain comes with practical trade-offs. Push-to-open doors can be awkward when hands are wet or occupied, while a finger groove needs enough clearance for a comfortable grip. Test the mechanism in a showroom or design consultation before committing. Check door heights as well, particularly in family kitchens where several users reach for the same cupboards.

Door profiles, cabinet materials and benchtops should be assessed together. SitePro Bathrooms' kitchen cabinet materials guide can help narrow suitable finishes before the cabinetry is designed. Matching every surface can make a compact room feel flat. A contrasting benchtop creates a visual stopping point, while a restrained door finish keeps the joinery from dominating.

Make the clean look practical

Matte and soft-touch finishes generally hide fingerprints better than dark gloss, although every surface still needs a cleaning routine. Align integrated appliances with the cabinet fronts where possible. A freestanding stainless-steel unit beside beige doors can look intentional, but mismatched depths and exposed gaps quickly weaken the result.

Hardware-free fronts also affect appliance access and storage costs. Reliable runners, accessible drawers and easy-grip openings may provide better daily performance than a fully uninterrupted elevation. Confirm these choices in the 3D design before ordering, alongside appliance clearances and service access. SitePro Bathrooms can test the layout and finish combination through 3D kitchen planning as part of its renovation services in Highett and across Victoria.

Warm neutral doors, under-cabinet task lighting and a pale stone-look work surface suit a contemporary Melbourne apartment. In a Highett renovation, the same profile could pair with timber or a darker counter for added warmth. Lighting matters more when handles provide no visual rhythm, so separate work-surface lighting from ambient room lighting.

Choose handleless cabinetry for its workflow, maintenance and fit, not for appearance alone.

A handleless kitchen works best when the mechanism, finish and appliance layout are resolved together. Otherwise, the clean front elevation becomes an expensive compromise rather than a useful small-space strategy.

A modern, minimalist kitchen with seamless beige cabinets, warm under-cabinet lighting, and a clean marble countertop.

3. Compact Island with Multi-Functional Design

A small kitchen island should earn its footprint through several jobs. It can combine preparation space, drawers, seating and a boundary between cooking and living, but every added function uses circulation and may obstruct appliance doors. A peninsula or mobile unit can provide similar utility with less structural commitment, especially in a tight open-plan home.

Treat the island as part of the work zone, not a decorative centrepiece. Seating on the living-room side can replace a separate breakfast setting, while kitchen-facing storage keeps cookware and everyday items close to the preparation area. Open shelving maintains sightlines but demands disciplined styling and regular cleaning. Solid cabinetry offers more concealed capacity, though it makes the divider visually heavier.

SitePro Bathrooms' kitchen island design guidance helps identify electrical and plumbing requirements early. Resolve those services with appliance positions, flooring transitions and installation access during the 3D planning stage. The same review can test integrated dishwashers, compact appliance packages, panel-ready refrigeration and combination cooking units without sacrificing workable clearances. SitePro Bathrooms can connect this planning with end-to-end renovation services in Highett and across Victoria.

Specify an island by workflow, storage performance and service access. Its appearance comes after those constraints are solved.

Choose permanence carefully

A fixed island suits a household that uses the surface throughout the day and needs dependable storage. A mobile island may fit a smaller apartment better when the room must shift from cooking to entertaining. Locking wheels and a durable top are required. A lightweight trolley with poor stability becomes inconvenient around hot cookware and small appliances, while a fixed unit carries higher installation and flooring risks.

One NSW case study involving a five-square-metre apartment kitchen found that removing the wall between the kitchen and living area created a stronger sense of space. Joinery and benchtops were prioritised within a budget of roughly $40,000 excluding appliances. The Houzz Australia kitchen case-study collection supports the broader planning lesson: changing enclosure and concentrating investment on useful surfaces can outperform cosmetic updates when circulation is the main problem.

Do not install an island just because measurements allow one. If it leaves too little room to turn, open a dishwasher or carry a hot pan, the extra benchtop will create daily frustration instead of useful capacity.

A bright, modern kitchen featuring a functional gray kitchen island with bar stools and white cabinetry.

4. Vertical Storage Solutions and Wall-Mounted Organisation

Small kitchens often have more usable wall height than floor area. Tall cabinets, floating shelves, rails, pegboards and wall-mounted pot storage can move equipment upward, leaving the floor clearer. The strategy resembles modern bathroom planning, where wall-mounted vanities and concealed storage keep compact rooms visually open.

The risk is turning every wall into a display. Open shelving works for attractive, frequently used items, but it exposes dust, grease and inconsistent storage. Closed cabinetry is better for appliances, cleaning products and food packaging. A balanced scheme might place everyday crockery on one shelf, dry goods in consistent containers on another and less attractive equipment behind doors.

Build a storage hierarchy

Start at hand level. Place frequently used items where they can be reached without bending or climbing, then reserve high cupboards for occasional equipment. Deep shelves need vertical dividers, pull-outs or labelled containers, otherwise items disappear behind one another. Hidden brackets create a cleaner appearance for floating shelves, but the wall and fixing method must support the actual load.

Australian guidance recommends vertical planning, including tall pantry cabinets, full-height overheads and pull-out fittings. It also notes that an island with cupboards and drawers on both sides can increase capacity by up to 40% when designed appropriately, a benchmark outlined in Better Homes and Gardens Australia's small-kitchen advice. Use that figure as a planning reference, not a promise for every room.

Scandinavian-inspired Melbourne kitchens can use timber shelves and a pegboard for warmth, while an industrial Fitzroy-style scheme may suit exposed rails and darker metal. In either case, task lighting above shelves improves visibility and prevents the upper wall from becoming a shadowed storage band.

A Highett renovation might combine a full-height pantry at one end, closed overheads above the sink and one deliberately styled open shelf. That arrangement gives the room personality without making every possession part of the kitchen's visual composition.

A modern, organised kitchen featuring vertical pantry pull-out storage, wooden pegboard, and open shelving in a bright, airy space.

5. Compact Appliances and Integrated Kitchen Equipment

Appliance selection determines whether a small kitchen remains practical or becomes crowded. Start with the cabinet opening, fillers, door swings, ventilation route and service points. A model that fits the drawing but blocks a neighbouring drawer has failed as a space-saving choice.

A 450 mm dishwasher can replace a 600 mm unit, freeing cabinet width, as noted earlier in the Australian small-kitchen guidance. That arrangement suits households with lighter washing loads, while larger families or frequent pan users may need the capacity of a full-width machine. Base the decision on daily washing habits, not solely on the narrowest available cabinet.

Integrated dishwashers, concealed rangehoods and panel-ready refrigeration create a quieter elevation. Compact appliance packages and combination cooking units can also reduce visual interruption, provided technicians can reach filters, connections and controls. Confirm local service support, replacement access and warranty requirements before cabinetry is ordered.

Choose the appliance package around workflow, then design the cabinet fronts around it.

Protect the working surface

Set the stove, refrigerator and sink first. Optional equipment, such as wine coolers or secondary appliances, should not consume preparation space or remove safe landing areas. Induction cooktops provide a clean cooking surface with flexible sizing, while combination ovens can replace separate cooking units. The right configuration depends on baking frequency, grill use, meal size and how many small appliances remain on the bench.

A one-sentence decision test helps: if an appliance reduces preparation space every day, its convenience may not justify its cabinet cost.

Registered builders should check ventilation, electrical loads, plumbing and cabinetry clearances before installation. In Victoria, domestic building registration includes separate limited and unlimited classes, and work above the relevant contract value must be completed by a registered builder. The Victorian registration research overview offers context for checking who can legally contract for and perform the proposed scope.

A compact Melbourne apartment may suit an integrated dishwasher, induction cooktop and under-bench refrigerator. A family kitchen in Highett may work better with a wider dishwasher and fewer cabinets elsewhere. SitePro Bathrooms can test these trade-offs through 3D design before construction and coordinate the renovation work across Highett and Victoria. The successful package is the one that preserves usable bench space, appliance access and safe landing zones beside cooking and cleaning areas.

6. Light Colours, Reflective Surfaces and Visual Expansion

Light finishes can make a small kitchen feel more open, but they cannot correct poor planning. Cream, off-white and pale grey cabinetry, reflective splashbacks, glass and stainless steel distribute daylight and artificial light. Their effect depends on a layout with clear movement, adequate storage and enough preparation space.

Pure white may look stark under cool lighting. Off-white or cream adds warmth, while timber shelf edges, natural veneer or a timber-toned benchtop prevents the room feeling clinical. Warm brass, copper or bronze hardware can introduce definition without creating numerous competing lines.

Choose finishes for the way the kitchen will be cleaned and used, not only for how they appear in photographs.

Make brightness maintainable

High-gloss doors reflect more light, yet fingerprints and marks show quickly. Semi-gloss cabinetry offers some reflection with a more forgiving everyday appearance. Pale benchtops also need careful material selection around coffee, red wine, oils and food preparation. A stain-resistant surface and practical splashback usually deliver more value than a delicate finish chosen solely for visual effect.

A Highett renovation might combine white handleless cabinetry with a light quartz-look counter. A soft-grey Melbourne apartment could use stainless-steel appliances and a mirror-like splashback. In Victoria interiors influenced by Scandinavian design, cream cabinetry, timber accents and well-placed natural light can provide warmth without making the room feel crowded.

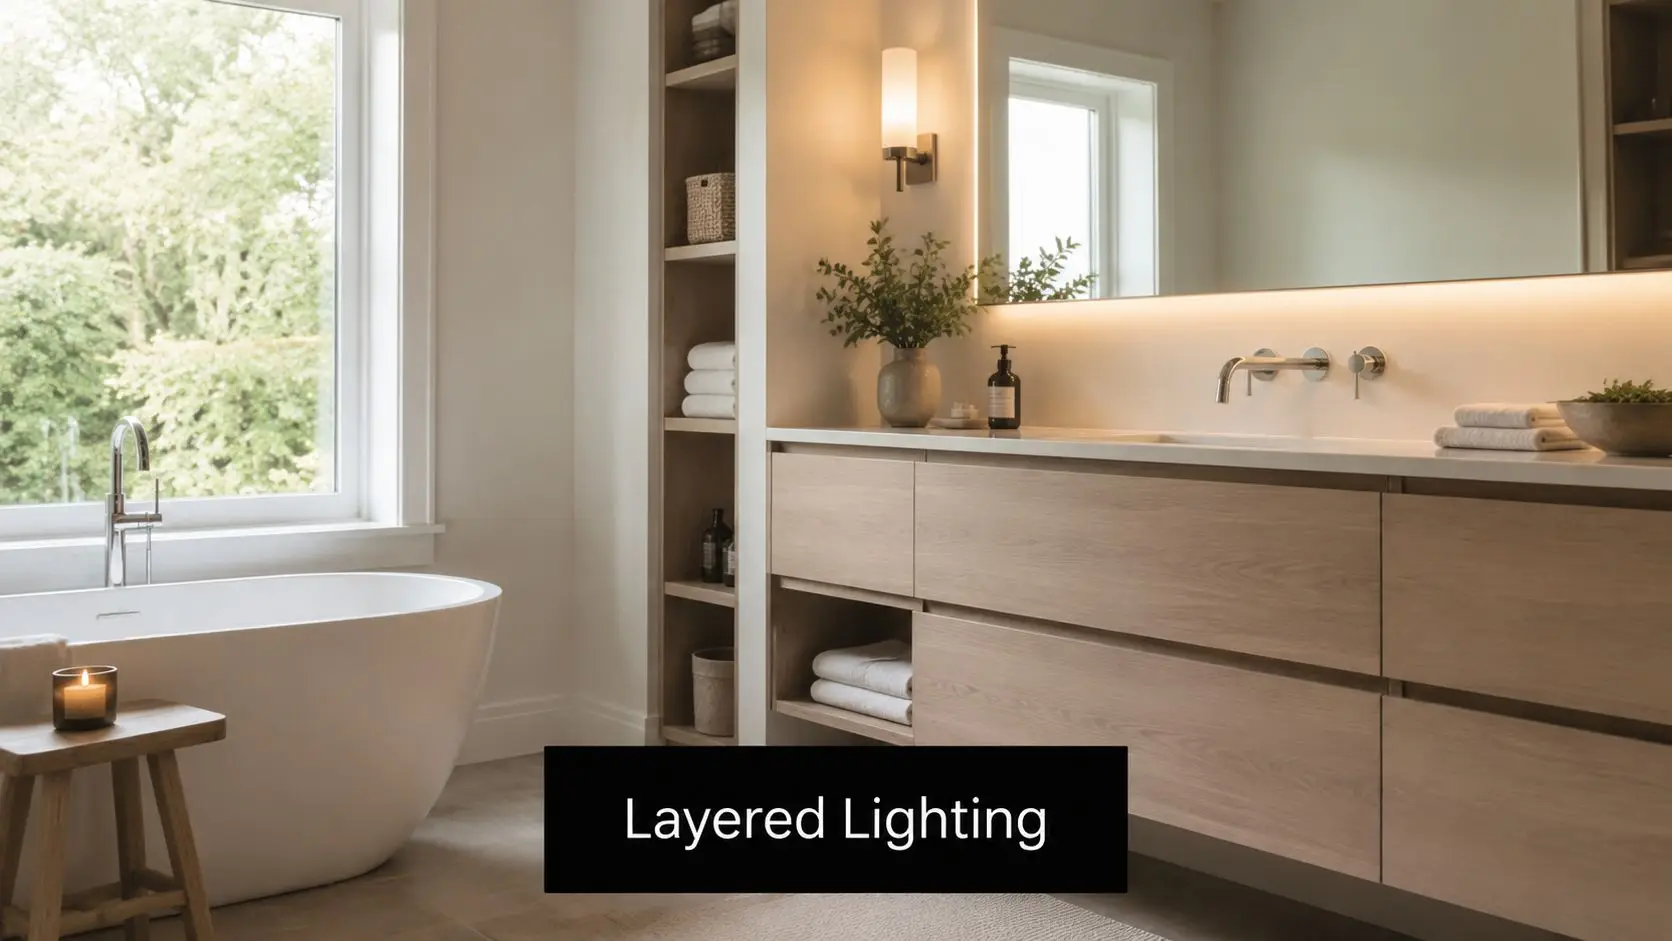
Plan illumination in layers rather than relying on one ceiling fitting:

  • Task lighting: Install under-cabinet lights above preparation and cleaning surfaces.
  • Ambient lighting: Use ceiling fixtures to illuminate the room evenly and reduce harsh shadows.
  • Feature lighting: Place a pendant above an island or dining edge to establish a focal point.
  • Reflective coordination: Combine pale walls and a considered splashback to direct light towards darker corners.

As noted in the Better Homes and Gardens Australia guidance above, reflective and pale finishes can support visual expansion. Kitchens, however, must also withstand grease, impact and frequent cleaning. Use plants, textiles and removable accessories for personality, then keep permanent finishes calm enough to suit the limited visual space. SitePro Bathrooms can test these colour, lighting and material decisions through 3D design before coordinating renovation work in Highett and across Victoria.

7. Smart Storage Solutions and Hidden Pantry Systems

Small kitchens gain usable capacity when storage matches the way each item is handled. Pull-out pantries, internal drawer dividers, corner mechanisms, appliance garages and narrow larders can turn awkward gaps into practical storage. They also keep food packaging and small appliances off the benchtop, so the room is easier to use and clean.

SitePro Bathrooms' kitchen cabinet storage ideas provides a useful starting point for planning internal organisation alongside cabinet appearance. Allocate storage by routine: plates near the dishwasher, pans near the cooktop, knives beside the preparation area and frequently used dry goods at an accessible height.

Prioritise access and workflow before adding specialised fittings.

A pull-out pantry between a wall and appliance works well when its shelves suit the stored items. Corner carousels can improve access to deep cabinetry, although moving parts increase cost and may need adjustment over time. Soft-close runners make drawers easier to use, but reliable construction matters more than filling every cabinet with mechanisms.

Confirm drawer sizes, dividers and internal fittings before the cabinet order is placed. Retrofitting them later can reduce capacity or leave awkward gaps. Appliance garages also require power, clearance and ventilation planning, especially when a toaster, kettle or coffee machine will run inside the cupboard. Internal lighting helps locate items, but it cannot correct a garage that is too shallow.

In a Highett renovation, high-quality pull-out storage systems could sit beside a closed pantry. A Melbourne apartment might instead rely on soft-close drawer systems and one compact appliance garage. Assess load ratings, replacement parts, cleaning access and reach before approving the layout. The right configuration depends on the cabinet dimensions, appliance locations and budget.

Hidden storage can conceal a planning problem. If every surface must be cleared before cooking, the kitchen may not have enough landing space beside the sink or cooktop. Design storage and benchtop area together, then test the arrangement through SitePro Bathrooms' 3D design process before renovation work in Highett or across Victoria begins. The goal is a kitchen that stores more while making preparation easier, not a room where clutter is hidden behind doors.

8. Dual-Purpose Furniture and Flexible Design Elements

Flexible furniture makes a small kitchen adapt to changing use. A fold-down table can support weekday meals and disappear when the room needs circulation. A rolling island can provide preparation space, storage and occasional seating, then move aside for entertaining or access to adjoining areas.

The strongest flexible pieces have a clear everyday function. A mobile island with locking wheels and a durable worktop is useful if it can be moved safely and parked without blocking a door. Bar stools should tuck fully beneath a counter if they sit in a main walkway. Bench seating can add storage under the seat, but it shouldn't force people to pass through the cooking zone to reach the table.

Design for movement, not novelty

Fold-down tables should be mounted at a comfortable working height and finished to relate to the fixed benchtop. Expandable surfaces need reliable hardware and a place to store extension components. A visually clever table that takes several minutes to operate may remain folded permanently, which means its flexibility has no practical value.

In a Highett apartment, a wall-mounted table might replace a separate dining setting. A Melbourne home with a wider open-plan room could use a rolling island cart and a bench with under-seat storage. These solutions work when the furniture supports the main circulation path rather than competing with it.

Electrical planning becomes more complicated when an island moves. Avoid assuming that a mobile unit can safely carry a cooktop, sink or powered appliance without a carefully designed service arrangement. For many small kitchens, a movable prep surface is the safer and more adaptable choice, while permanent services remain in the main cabinetry.

Flexible design also suits changing households. A kitchen may need child-friendly access today, entertaining space later and easier movement as occupants age. Test furniture positions during consultation, including fully open drawers, pulled-out bins and seated access. The room should work in its least convenient configuration, not only when every chair and trolley is perfectly parked.

8-Point Small-Space Kitchen Design Comparison

Design Implementation complexity Resource requirements Expected outcomes Ideal use cases Key advantages
Galley Kitchen Layout with Integrated Storage Medium, careful planning for workflow Moderate, cabinetry, integrated storage, standard appliances Streamlined workflow, maximized counter use Narrow kitchens, single-cook households, apartments Very efficient use of floor area; cost-effective
Handleless Cabinetry and Minimalist Hardware Medium–High, precision alignment and mechanisms High, quality push-open/soft-close systems, custom fronts Seamless, uncluttered aesthetic, perceived larger space Modern/ designer renovations, open-plan homes Clean lines, easier maintenance, adds value
Compact Island with Multi-Functional Design Medium, may require utility hookups Moderate–High, custom island, seating, electrical/plumbing Extra prep space, seating, improved multi-user workflow Open-plan kitchens with adequate clearance, families Adds prep/seating, focal point, flexible (mobile option)
Vertical Storage & Wall-Mounted Organization Low–Medium, shelving/cabinet installation Low–Moderate, tall cabinets, shelves, rails Increased storage without reducing floor area, taller visual feel Small kitchens, low-footprint homes, renters Maximizes capacity, visually expands space, adaptable
Compact Appliances & Integrated Equipment Medium–High, ventilation and utility coordination High, specialized compact units, professional installation Seamless integration, more usable counters, lower energy use Small apartments, concealed-appliance preferences Space-saving, cohesive look, multifunction units
Light Colors, Reflective Surfaces & Visual Expansion Low, finish and lighting selections Low–Moderate, paints, glossy finishes, lighting Brighter, airier appearance; perceived larger space Dark or small kitchens, apartments lacking natural light Dramatic visual expansion with minimal cost
Smart Storage & Hidden Pantry Systems Medium–High, custom systems and precise fit Moderate–High, pull-outs, carousels, organizers High organization, reduced visual clutter, better accessibility Kitchens needing maximum concealed storage Maximizes usable storage, improves order and access
Dual-Purpose Furniture & Flexible Design Elements Low–Medium, furniture selection and placement Low–Moderate, quality multifunctional pieces Flexible layouts, convertible dining/prep areas Renters, multifunctional small apartments Versatile, affordable alternative to structural changes

Turn a Tight Footprint into a Better Kitchen

The right compact kitchen isn't selected from a catalogue of attractive images. Choose the layout first, then test how people move through it with cabinet doors, drawers, dishwasher racks and oven doors open. A galley may deliver the best workflow in a narrow room, while a compact island may suit an open-plan apartment. In another home, the honest answer may be a peninsula, a single-wall kitchen or flexible furniture rather than a fixed centrepiece.

Next, map storage around real routines. List the cookware, appliances, food supplies and cleaning items that need a permanent home. Decide which items must be visible, which can sit in tall cabinetry and which should be removed from the brief altogether. A narrow dishwasher, integrated appliance or pull-out pantry can free valuable width, but only if it supports the way the household cooks and cleans.

Finishes should follow the spatial plan. Light colours and reflective surfaces can improve brightness, but they won't create preparation space. Handleless cabinetry can calm the room, but it needs comfortable mechanisms and reliable hardware. Open shelving can provide character and easy access, but closed storage will protect the room from visual and practical clutter. Lighting, splashbacks, benchtops and cabinet fronts should be coordinated for durability as well as appearance.

Services need the same level of attention. Confirm plumbing routes, electrical points, ventilation, appliance specifications, structural changes and installation access before construction. Victoria's apartment guidance reinforces the need to preserve daylight, movement and functional kitchen tasks in compact open-plan homes. The Victorian Apartment Design Guidelines are a useful planning reference when a renovation affects room depth, open-plan living or the relationship between the kitchen and natural light.

Before requesting a consultation, document the room dimensions, window and door locations, must-have appliances, storage frustrations, cooking habits and preferred finishes. Include photos of the existing kitchen and note where plumbing, power and ventilation currently sit. That information makes the first design discussion more productive and helps reveal which changes will provide genuine benefit.

SitePro Bathrooms in Highett, Victoria supports concept development, detailed 3D design, construction and finishing for small-kitchen renovations. The same coordinated conversation can include bathroom renovations, registered builders unlimited, new bathroom ideas, modern bathrooms and designer bathrooms, which is useful when several areas of a home need work under one renovation plan. You can review project information, design services and contact options at SitePro Bathrooms. Prepare your measurements and priorities, then request a consultation to test the layout before committing to finishes or construction.

  • siteprobathrooms

Bathroom Layout with Tub and Shower That Actually Works

A bathroom layout with tub and shower looks simple on paper until you stand in the room and trace the door swing with your foot. In a Highett-era weatherboard, that usually means staring at a narrow rectangle, a timber subfloor, and a list of fixtures that all want the same patch of floor. The right answer isn't “fit everything in”, it's to decide what can move, what must stay fixed, and where the wet zone can sit without making the room feel cramped.

What a Real Tub-and-Shower Bathroom Needs

Stand in a current bathroom and picture a 1700mm bath and a 900mm x 900mm shower dropped into the room. If the door opens into the vanity, or the toilet gets squeezed between the two, the layout is already working against the space before tile goes in. A practical bathroom layout with tub and shower starts with clearance, not finishes.

A modern bathroom under renovation featuring a freestanding bathtub, a glass-enclosed shower, and a yellow measuring tape.

Read the room size before you read the brochure

A compact combo usually needs about 5.5m² before it stops feeling forced. Separate fixtures with proper clearance are more comfortable around 7 to 8m². That lines up with Australian sizing guidance that says a full bathroom with both a tub and shower generally needs at least 40 square feet to fit comfortably, while the average Australian bathroom is about 3m x 2m, or roughly 6 square metres (Habitus Living).

The fixed dimensions tell the story. Australian guidance commonly places a bath at around 1500mm to 1700mm long and 700mm to 800mm wide, with 900mm of clear space in front recommended for safe access. A tight shower baseline is often 900mm x 900mm (Buildmat). For accessibility, AS 1428.1-based planning pushes the shower zone to around 1160mm x 1100mm and requires a 1500mm turning circle or equivalent T-shape (Archibox).

Practical rule: if you can't draw the bath, shower, vanity and door swing on the same sheet without overlap, the room is too tight for a comfortable combo.

Highett weatherboard homes often bring another constraint, wall height. Typical heights run about 2.4m to 2.7m, which affects screen choice, tile termination and where splash protection can stop cleanly. That matters more than people expect, because the room has to work vertically as well as across the floor.

Layout Options That Work in Australian Homes

A Highett bathroom often starts with one hard question on site, what can fit without choking circulation. I look at the shell first, then the tub-and-shower arrangement, then I check how the vanity, toilet and door swing sit around it. That order keeps the room practical, not just tidy on paper.

Compare the four layouts commonly built

The full bath with a separate shower enclosure suits rooms above 7m² and works best when one wall run can take the bath cleanly. It gives the most balanced result for daily use and resale, but only if the toilet and vanity still leave enough clear movement around the wet zone.

The combo wet zone with a shower over bath behind a single screen fits roughly 4.5m² to 5.5m². It uses the floor well, but it asks one area to do two jobs. Access, drying and cleaning all happen in the same footprint, so the room needs disciplined detailing.

The 3-in-1 niche lines up the shower, tub and linen storage along one wall. It suits narrow rooms around 2.0m to 2.4m wide, especially where the entry wall is short. Done well, it can feel ordered. Done poorly, it feels squeezed, so the aisle width has to be checked carefully.

The L-shape places the bath on the long wall and the shower in the corner return, which opens the opposite side for the toilet and vanity. That is the layout I favour when a room needs separation without losing an open feel. It keeps the wet and dry zones easy to read.

Configuration Min. Room Size Best Room Shape Key Trade-off
Full bath separate shower 7m²+ More square rooms Best comfort, highest floor area demand
Combo wet zone 4.5m² to 5.5m² Compact rectangle Saves space, weakens both functions
3-in-1 niche Narrow 2.0m to 2.4m wide rooms Long, tight room Efficient but can feel crowded
L-shape Mid-size rooms Rectangular or offset rooms Better separation, needs careful corner planning

For a clear room-size reference, use this small bathroom layout guide. That sizing check is what separates modern bathrooms that flow from designer bathrooms that only look good in a render.

Mapping the Wet Zone Step by Step

A bath-and-shower room works best when it is drawn like a trade plan, not a mood board. On a Highett-era weatherboard renovation, I start with the bath because it is usually the longest fixed item, then I trace the shower screen around it, then I check the toilet, vanity and entry path for clashes. Get that sequence wrong and you pay for it later in glass changes, plumbing revisions or tile cuts that never quite look right.

A hand-drawn architectural floor plan of a small bathroom featuring a bathtub, shower, toilet, and sink on graph paper.

Work from the bath outward

Fix the bath against the longest external wall or the wall that already suits the plumbing, and leave 50mm clear to the tile termination. That gap gives the bath lip, waterproofing and finish materials room to resolve cleanly instead of crowding each other at the edge. Once the bath is set, the room shows you what is realistic.

The shower comes next. Its waste should line up with the joist span or sit directly above a stack where possible. In older homes, joist direction often limits where a new waste can run, and that is where ceiling access below can become the awkward part of the job. The shower screen then needs its own check, because the door swing or slide path can wreck an otherwise workable plan.

Pivot screens need 700mm of clearance, while sliding screens need 580mm. That small difference often decides whether the room feels easy to use or constantly pinched, especially near a vanity edge or towel rail. Allow 600mm in front of the toilet and 400mm each side of the vanity basin so the room works without side-stepping.

A shower door that hits the vanity in the drawing will hit it on site too. Tile will not fix that.

Ventilation should sit inside the wet zone, not on its edge. A window or extractor fan placed too close to the boundary lets vapour drift into the wrong part of the room, which is a poor setup in a compact renovation. The room then stops behaving like a set of separate fixtures and starts working as one system.

Waterproofing has to follow that same level of planning. Before demolition starts, review a waterproofing planning guide so the hidden work is treated as a proper trade step, not something to sort out later.

Plumbing and Drainage Behind the Layout

A tub-and-shower room asks more of the plumbing than a shower-only bathroom. Two bathing functions share the same floor, wall cavity, and waste path, so the layout can look fine on paper and still fail on the tools if the drainage plan is poor. The visual set-out and the hydraulic set-out have to match.

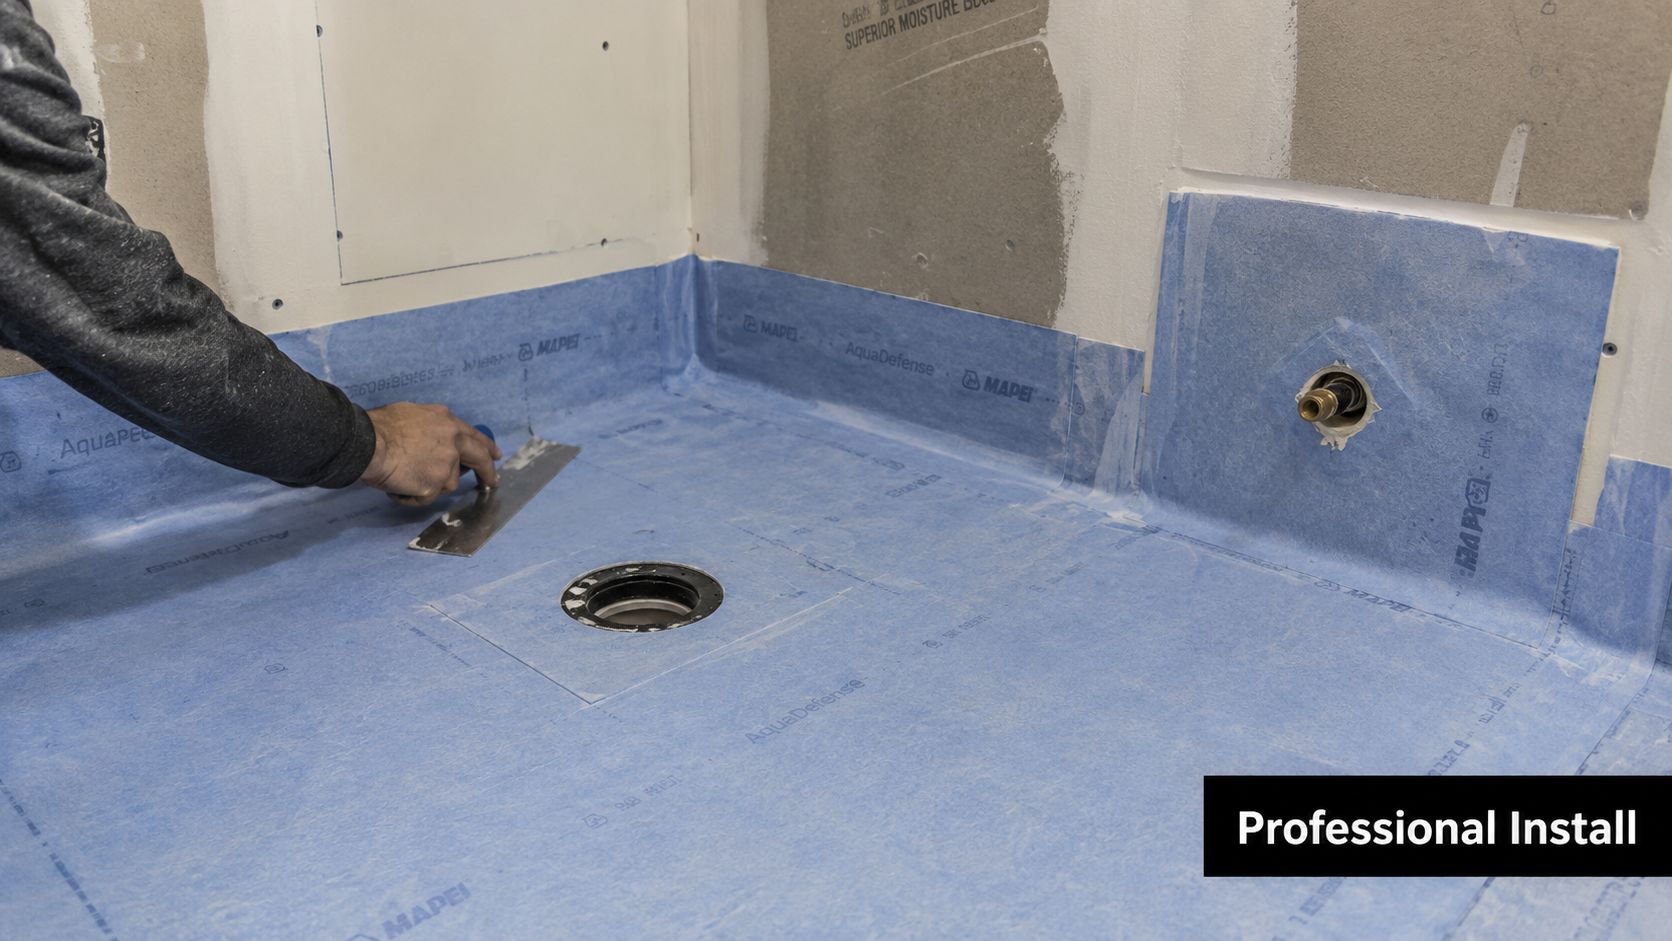
A close-up view of a shower floor drain pipe being installed during a bathroom renovation project.

The hidden work starts with the wastes

Map the 100mm shower waste and the 40mm bath waste separately, then bring both runs back to a single 100mm stack where possible. That keeps the wall work simpler and gives the plumber a cleaner fall line. The shower floor should fall at least 1:80 toward a puddle flange, or water will sit where it shouldn't.

The bath should sit as close to the stack as the room allows. Long horizontal drain runs slow discharge and make later access harder, especially where the subfloor is already tight. In a Highett weatherboard, joist direction also shapes the job, because a new waste crossing joists needs proper approval and often a deeper bearer solution.

Mixer heights are usually set early for a reason. The bath mixer commonly sits at 900mm, while the shower mixer sits at 1100mm, and dual outlets are usually plumbed from a single hot and cold manifold behind the wall. Set those points late, and the wall layout starts collecting compromises.

Waterproofing scope grows in a combo room because a shower-over-bath throws splash farther than a standalone screen. The wet zone needs to be treated as one protected area, not just the bath base and a few tiles behind the shower head.

Builder's rule: if the waste run looks tidy on paper but forces the ceiling below to be opened twice, it is not tidy enough.

bathroom renovations stay orderly when the plumbing is set out early. A layout that respects the hidden services first is far less likely to drift into site-only decisions once the walls are open.

Accessibility and Future-Proofing Choices

A tub-and-shower combo can work well in a family bathroom, but the layout still has to answer the access question first. If the bath forces a high step or squeezes the shower entry, the room may suit young children now and become awkward later if mobility changes.

Test the room against the step-free question

A 1500mm-deep bath needs a 550mm step-in clearance from the floor, which is not step-free. A level-entry shower at the same point has zero rise, so accessible planning treats the shower as the controlling element, not the bath. In Australia, at least one shower in a new dwelling must have a hobless, step-free entry, and accessible-bathroom references call for a clear shower zone around 1160mm x 1100mm or larger with level access and grab rails (KBDi).

That changes the layout in plain terms. Keeping the original bath preserves family use, but the step issue stays. A low-step 480mm-profile bath reduces the climb, while a shower-over-bath with a shallow 380mm tub is a compromise between family utility and access. Removing the tub entirely can create room for a 1200mm turning circle for wheelchair or commode movement, and a full turning circle needs about 3.6 square metres clear. Guidance on accessible shower planning also stresses the need to hold clear circulation space around the entry and fittings (NCC).

Configuration Step-In Height Turning Circle Possible Resale Reach
Original bath kept Higher step, not step-free Limited Strong for family buyers, weaker for mobility needs
Low-step bath Reduced step Sometimes limited Better compromise, still not fully accessible
Shower-over-bath with shallow tub Compromised access Limited Familiar to buyers, but not future-proofed
Tub removed Level access possible Yes, if planned well Stronger for ageing-in-place and universal use

A transfer-reinforced shower seat only needs 900mm beside it, so a better layout can matter more than a bigger room. In Highett and across Bayside, a ground-floor bathroom that passes the step-free test has broader appeal because it works for children now and mobility needs later. That matters when a renovation is judged on long-term use as much as appearance.

Designing in 3D Before You Demolish

A 2D plan can hide the problems until the old bathroom is already stripped out. Then the vanity door clips the bath mixer, the shower screen blocks the towel rail, or the toilet roll holder ends up where your elbow needs space. A 3D check catches those clashes while they are still cheap to fix.

A person holding a tablet displaying a 3D bathroom design inside an unfinished construction site room.

Ask for the exact products, not placeholders

The model should use the actual bath and screen sizes, not generic stand-ins. A 1500mm bath with a 900mm shower screen occupies a different wall footprint from a 1700mm bath with a frameless 1000mm panel, and that difference shows up fast in a tight room. Walk the design from the doorway, from inside the shower and from a seated position on the toilet. That gives a realistic read on reach, circulation and sightlines.

Open every drawer and door in the render. Vanity drawers often collide with a side-mounted bath mixer or a freestanding tub tap stand, and that clash usually only appears once the hardware is in place. If storage matters, mirrored cabinets, wall-mounted vanities and recessed shower shelving can earn their keep without taking up more floor space, which suits compact modern bathrooms and many new bathroom ideas.

A proper 3D review also shows where the room starts to feel cramped, especially in a Bayside renovation where every millimetre has to work. In a Highett-era weatherboard bathroom, that check can save a costly change after waterproofing has already gone down.

Use a planning pass that includes detailed 3D drawings and layout visualisation, like the SitePro Bathrooms' 3D planner, before demolition starts. In a tight room, the render is often the cheapest place to make mistakes.

Pulling the Whole Layout Together

A tub-and-shower bathroom works best when the layout is settled in the right order. Start with the wet zone and confirm the bath length before anything else shifts. In a Highett-era weatherboard bathroom, a bath that does not sit cleanly usually means the room needs a different plan, not a cosmetic fix.

Use one decision path from sketch to handover

Run the clearance check step by step. Check the shower screen swing arc first, then 600mm in front of the toilet, then 700mm at the vanity, then the AS 1428.1 turning circle at the door if accessibility is part of the brief. That order keeps the room honest. A layout can look balanced on paper and still fail at the doorway.

After that, settle the plumbing. Waste gradients, the bath and shower mixer heights at 900mm and 1100mm, and the waterproofing scope certified to AS 3740 need to line up before demolition starts. Leave those decisions too late and the trades end up fixing layout problems with plumbing compromises.

Then build the 3D model and test the doors, drawers and glass. Real hardware shows conflicts that flat drawings miss. Vanity drawers can foul a side-mounted bath mixer, and a glass panel can cut across a path that felt open in plan view. That check often decides whether bathroom renovations stay on track, because it shows the room as it will function.

Final check: bath footprint, shower clearance, waste route, waterproofing scope, 3D model, then demolition.

A well-planned bathroom layout with tub and shower is not about fitting in more fixtures. It is about making the room clear, drain properly, open properly and age well. If you are planning one in Highett or elsewhere in Victoria, talk to a registered builders unlimited team, have the layout modelled in 3D, and confirm the wet zone before the first tile comes off the wall.

  • siteprobathrooms

Frameless Shower Screen Cost: A 2026 Pricing Guide

A professionally installed frameless shower screen in Melbourne typically costs A$560 to A$1,090, with a median around A$800, while custom configurations can stretch from A$1,400 to A$3,850. The final frameless shower screen cost depends far more on layout, hardware, site conditions and installation complexity than on the word “frameless” alone.

You're probably looking at two quotes that appear to specify the same clear glass screen, yet differ by hundreds of dollars. One may cover a measured, compliant installation with premium hinges and difficult access. The other may be a supply-only price that leaves sealing, wall correction, old silicone removal and installation risk for you to absorb.

For a Melbourne bathroom renovation, the sensible approach is to separate product cost, installation complexity and Victorian compliance before comparing totals. That's how you avoid choosing a cheap quote that becomes expensive once the installer finds uneven walls, missing backing or a body corporate restriction.

What a Frameless Shower Screen Actually Costs in Melbourne

The current Melbourne benchmark is straightforward. A professionally installed standard frameless screen generally sits between A$560 and A$1,090, with a median of about A$800, while bespoke corner, diamond, return-panel and tile-following designs can reach A$1,400 to A$3,850 according to Victorian pricing guidance from Melbourne frameless shower screen cost guidance.

That range is broad because “frameless” describes the visual style, not the whole specification. A fixed panel with simple brackets is a different job from a hinged door with a return panel, custom notches, premium hardware and difficult access. Australian pricing examples show a standard 2100mm x 900mm walk-in panel at about A$360 including aluminium channel, while a more involved three-panel sliding enclosure is about A$690 plus A$400 installation. Australian shower screen cost examples demonstrate why panel count and moving hardware influence the final bill.

Melbourne benchmark by configuration

Configuration Low (A$) Median (A$) High (A$)
Fixed panel, standard installation 560 800 1,090
Two-panel or return-panel design 900 1,400 2,200
Custom corner, diamond or tile-following design 1,400 2,400 3,850

These are practical budgeting ranges, not promises. A supplier may quote a clear 10mm panel with standard pivot hinges, while another includes low-iron glass, polished channels, upgraded hardware and an allowance for waterproofing repairs. Both screens can look almost identical after installation.

A Brighton ensuite example

Suppose you're renovating a Brighton ensuite with a three-wall shower recess. The walls are newly tiled, the floor is level and the opening suits a single fixed panel. A total near the lower or middle part of the Melbourne range is reasonable if access is uncomplicated and the specification stays standard.

Change that design to a hinged door with a return panel, add a corner bracket, specify a custom cut around an uneven tile line and require a narrow delivery window, and the quote can move sharply higher. Inner-suburban access can also affect labour planning. A Richmond or Brunswick apartment may require lift bookings, restricted loading access or coordination around public transport and building rules. CBD apartments can add body corporate timing requirements even when the glass itself hasn't changed.

Estimator's rule: compare the exact opening, panel count, hardware schedule and installation inclusions. Comparing only the headline “frameless” label guarantees a misleading result.

The Main Cost Drivers Behind the Price Tag

A quote becomes easier to judge once you read it as a list of physical tasks rather than a single product price. The glass is only one line. The installer also has to measure, fabricate, transport, lift, align, anchor, seal and sometimes correct the substrate.

Samples of clear and low-iron glass next to a metal shower door hinge on a workbench

Glass and hardware

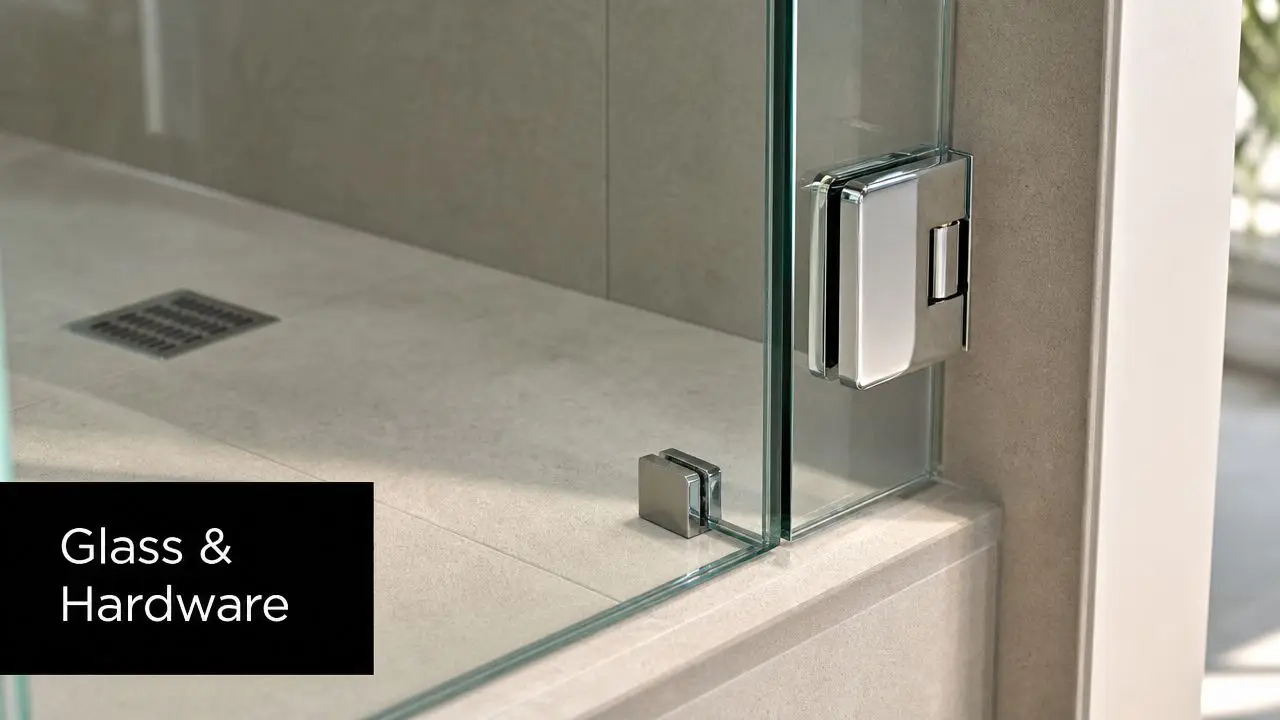
Glass selection changes the product specification. An 8mm clear panel is a different purchase from 10mm clear glass or 10mm low-iron glass. Low-iron glass offers a cleaner visual tone, while thicker glass provides a more substantial feel for large frameless panels. Australian guidance confirms that size and glass complexity are major price drivers, with small-to-medium frameless screens commonly around A$350 to A$850 and large custom enclosures reaching about A$2,500. See the Australian frameless shower screen cost guide for the published market range.

Hardware adds another layer. Standard chrome hinges and handles usually cost less than matte black or brushed brass finishes. Minimal-seal clamp fixing can look cleaner, but a channel may provide better adjustment or support where walls aren't perfectly true. A quote that includes polished channels, upgraded hinges and custom brackets shouldn't be compared directly with a basic chrome package.

Door geometry and labour

A fixed panel has fewer moving parts and fewer alignment points. A pivot or hinged door needs accurate hinge positioning, a correct swing clearance and reliable sealing. A sliding design adds track hardware, rollers and more fabrication coordination.

Installation also depends on what the installer finds on site. Existing silicone may need removal, a hob may need to come out, tiles may require rebedding and an out-of-plumb wall may need a custom cut or adjustment channel. Travel, difficult parking, after-hours access and body corporate booking conditions can add time without changing the visible design.

How A$700 becomes A$2,200

A simple fixed panel can begin with a modest supply figure and straightforward installation. The price escalates when the project includes:

  • Two or more panels: More glass edges, brackets and alignment work.
  • A hinged door: Hinges, handles, swing clearance and sealing become critical.
  • Custom cuts: Notches, angled edges and tile-following cuts require more fabrication.
  • Site preparation: Old silicone, damaged grout, uneven tiles or hob removal add labour.
  • Premium finishes: Special hardware and low-iron glass lift the specification.
  • Restricted access: Apartments and difficult suburbs can require extra handling and scheduling.

That's how a basic quote near A$700 can become approximately A$2,200 once the design and site conditions change. The increase isn't automatically excessive. It should be visible in the line items.

Fixed Panel, Two-Panel, or Sliding Frameless Designs

The right layout depends on how the shower fits the room, not on which design photographs best. A fixed panel is usually the most economical frameless option. A two-panel enclosure gives better containment. A slider solves a clearance problem but introduces more hardware and maintenance points.

The three common layouts

Layout Best For Installed Range (A$)
Single fixed panel Three-wall alcoves and open walk-in showers 560 to 850
Two-panel pivot or hinged design Wider openings needing stronger splash control 900 to 1,650
Sliding frameless system Tight bathrooms where a swing door conflicts with fittings 1,400 to 2,800

A single fixed panel creates the cleanest modern look and usually has the lowest installation risk. It works well when the shower has three enclosing walls and the panel can sit at a sensible angle. The compromise is splash behaviour. If the opening is too exposed or the water direction is poorly planned, the room can still become wet.

A two-panel pivot layout suits a wider shower where you want a proper entry door. It offers better enclosure and feels more substantial, but the installer needs accurate wall measurements. Hinges must land on sound substrate, the door must clear the vanity or toilet and the seals must meet without forcing the glass.

A sliding frameless system makes sense when a hinged door would foul another fixture. It's useful in compact Melbourne bathrooms, but overhead tracks and rollers increase the number of components that need precise installation. You're paying for a space-saving mechanism, not just extra glass.

When a return panel earns its place

A return panel is worth considering when the shower sits at a corner and a single screen would leave too much of the entry open. It can improve splash control and define the wet zone without enclosing the room completely. Allow roughly A$300 to A$600 for the return-panel decision according to the stated Melbourne planning benchmark, depending on brackets, glass dimensions, corner conditions and installation work.

Don't add a return panel only because it looks more luxurious. Add it when the bathroom layout needs better containment, when a vanity is close to the opening or when the shower's spray direction makes an open panel impractical.

Frameless vs Semi-Frameless vs Fully Framed Screens

The premium for frameless glass is justified when the bathroom is designed as a long-term owner-occupier space and the finish matters. It isn't automatically the right choice for a rental, a tight budget or walls with difficult tolerances.

Screen Type Typical Cost (supply + install) Glass Thickness Frame Material Best For Drawback
Frameless Higher, configuration dependent Commonly thicker safety glass Minimal brackets, channels or stainless hardware Premium modern bathrooms and designer bathrooms Higher fabrication and installation cost
Semi-frameless Mid-range, configuration dependent Often thinner than frameless specifications Partial aluminium framing, commonly top or bottom channel Owners wanting a cleaner look at a controlled cost Visible channel remains
Fully framed Lower, configuration dependent Thinner safety glass options are common Aluminium framing around the glass Rentals, budgets and uneven walls More visible framing and seals

Frameless screens rely on the glass, hinges, brackets and wall substrate to do more of the structural work. That creates the open, transparent appearance many homeowners want, but it also makes accurate measurement and compliant fixing more important. A semi-frameless screen still uses substantial framing, often including a full top or bottom channel, so it can tolerate some conditions more easily.

Fully framed units remain practical. They can suit rental properties, budget-led bathroom renovations and walls where achieving a clean frameless tolerance would require expensive correction. Aluminium is common, while brass or stainless steel hardware can change the finish, feel and expected durability of the assembly.

Glass thickness affects the visual impression as well. Thinner glass can look lighter, while thicker glass gives a more solid frameless appearance. The correct specification must still suit the opening, hardware and applicable safety requirements. Australian industry guidance points to AS/NZS 2208 as the relevant safety glass standard, so never trade compliance away to save on the screen.

For privacy-led modern bathrooms, you can also review frosted glass shower screens before deciding that fully clear glass is essential.

Practical choice: choose framed when budget or rental use dominates, semi-frameless as the balanced middle ground, and frameless when the brief calls for a premium finish that you'll live with for years.

Sample Quotes and How to Read Them Properly

A useful quote answers four questions before you pay a deposit. What exactly is being supplied? What installation work is included? What could trigger a variation? What warranty applies after handover? If the document can't answer those questions, the low price tells you very little.

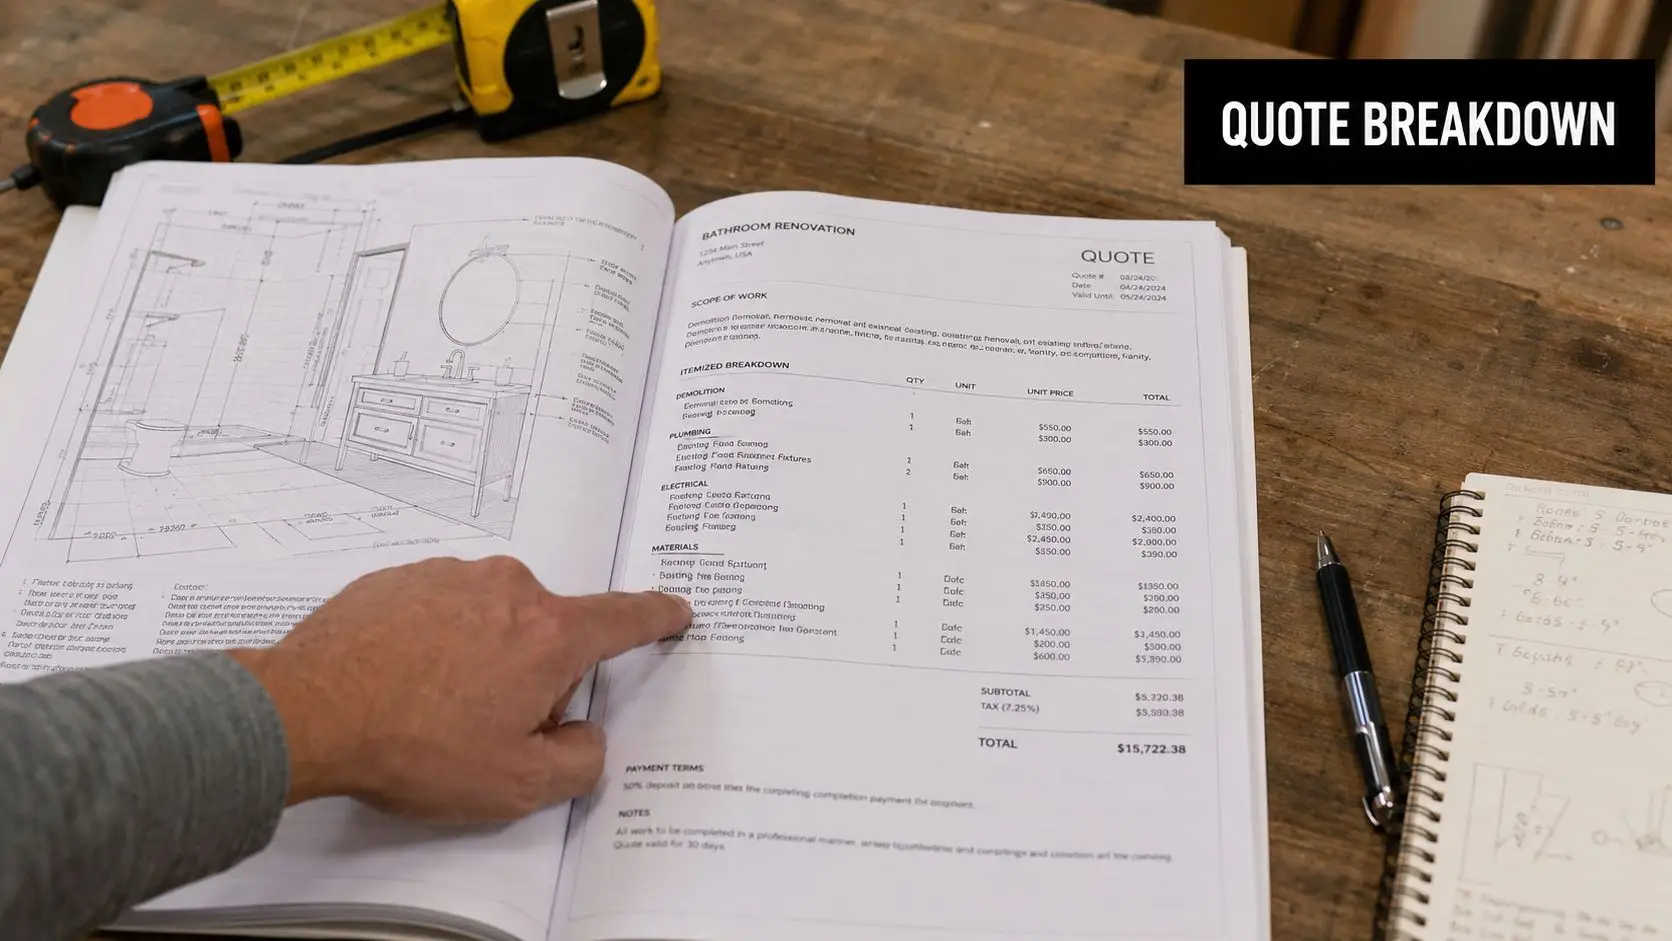
A printed renovation quote from Home Renovations with a red pen resting on the document clipboard.

Three example quotes

A 900mm x 2000mm fixed panel at A$640 may be appropriate for a standard opening with sound tiles, uncomplicated access and basic hardware. A 1000mm pivot door at A$890 should specify the hinge set, handle, seals, swing direction and whether fixing points are included.

A 1200mm two-panel slider at A$1,650 reflects a more involved arrangement with track hardware and multiple panels. Installation can add A$220 to A$340 per screen, so the supply figure and installed total must be shown separately in the quote. These examples are useful only when the dimensions and inclusions match your bathroom.

Where variations hide

Read the exclusions carefully. Common gaps include:

  • Waterproofing repairs: The quote may exclude any correction to the wet-area substrate.
  • Silicone removal: Old sealant can take time to remove cleanly.
  • Channel cutting: Angled or shortened channels may cost extra.
  • Corner brackets: A return panel may need additional support.
  • Polished edges: Edge finishing may not be included in a base glass price.
  • Glass upgrades: Toughened glass, low-iron glass or specialty finishes can alter the total.
  • Travel charges: Some installers add fees outside a stated service radius, including a 25km radius in certain quote structures.

Supply-only glaziers, bathroom renovators and plumbing-led firms may present the same job differently. A supply-only provider can show a sharp product price but leave measuring and fitting to another trade. A renovation company may bundle coordination with tiling and waterproofing. The cheapest line item often excludes the site measure, warranty documentation or responsibility for making the installation work with the completed bathroom.

Four checkpoints before acceptance

  1. Measured dimensions are confirmed on site, not copied from a rough homeowner measurement.
  2. Glass thickness and hardware brand are named, including finish and hinge type.
  3. The total installed price is clear, with unknowns and variation triggers identified.
  4. Workmanship warranty is written down, alongside product warranty conditions.

Never accept “standard installation” as a sufficient description. Ask what standard means for your walls, tiles, access and waterproofing.

Bathroom Renovations, Timelines, and Victorian Building Rules

A frameless screen should be planned with the wet-area work, not added as a last-minute decorative purchase. Two screens that look identical can attract very different quotes because the total combines the glass and hardware, installation conditions, site sequencing and Victorian compliance responsibilities.

Demand for bathroom renovations remains strong. The Housing Industry Association's bathroom market report recorded 542,600 new bathroom installations in 2021/22, with installation value rising 24.2% in one year to A$6.5 billion. It also reported that the average number of bathrooms per home increased from 2.2 in 2019 to 2.6 in 2022, supporting continued interest in modern and designer bathrooms.

A luxurious bathroom featuring a sleek freestanding white bathtub and a modern frameless glass shower enclosure.

The Victorian compliance question

A frameless screen requires compliant safety glass. The relevant Australian standard is AS/NZS 2208, as outlined in Australian shower screen compliance guidance. Compliance is only part of the installation. The installer must also account for the waterproofed wet area, tile falls, shower base and fixing locations. Poorly chosen fixing points can create both water-management and warranty problems.

For broader bathroom work, Victoria requires registration for domestic building work where the contract exceeds A$10,000, and for certain work, including reblocking, restumping, demolishing or removing a home, regardless of cost. Check the Victorian domestic building practitioner registration requirements before appointing a contractor.

A Domestic Builder Unlimited can carry out, manage or arrange subcontractors for all components of domestic building work. That registration class matters on larger renovations, particularly where the scope includes structural changes, plumbing relocation or waterproofing. It does not mean every screen-only replacement requires a registered builder. Confirm who holds responsibility when several trades affect the finished shower area, and review this bathroom waterproofing guidance before work begins.

A sensible renovation sequence

  • Demolition: Remove existing fixtures and finishes.
  • Plumbing rough-in: Relocate or prepare plumbing before wall finishes.
  • Waterproofing: Complete the wet-area system and allow required curing.
  • Tiling: Finish walls and floors so final dimensions can be measured.
  • Screen measure: Confirm the finished opening and fixing points.
  • Screen installation: Fit glass, hardware and seals after fabrication.
  • Final fit-off: Complete accessories, mirrors and remaining fixtures.

A full Australian bathroom renovation can take 2 to 4 weeks, or 10 to 14 working days, according to a 2026 Australian renovation timing and cost report. Living in the home during the work can add 30% to 50% to the timeline. Order and measure the screen at the correct stage, after finished surfaces are ready but early enough to protect the programme.

Budgeting Tips, Warranty, and Requesting an Accurate Quote

For a standard Melbourne installation, set a working budget of around A$800 to A$1,200. For a custom layout, allow roughly A$1,800 to A$3,500, then keep a 10% to 15% contingency for waterproofing surprises, altered fixing points, difficult access or hinge upgrades. These planning ranges reflect the configuration spread discussed earlier, not a guaranteed price.

The most reliable saving is design discipline. Keep the opening standard where possible, choose a fixed panel if it provides enough splash control, and avoid custom angles unless the room requires them. Don't save money by removing measurement, compliant glass or proper sealing from the scope.

Warranty and maintenance

Ask for separate warranty terms for glass, hardware, seals and workmanship. A written warranty should state what happens if a hinge loosens, a seal fails or the screen requires adjustment after installation. Cleaning also matters. Abrasive products, aggressive scraping and unapproved sealants can damage finishes or create grounds for warranty disputes.

Routine care is inexpensive when you keep it consistent:

  • Squeegee after use: Remove standing water before mineral deposits build up.
  • Dry with microfibre: Pay attention to hinges, channels and lower seals.
  • Check hinges annually: Look for movement, corrosion or silicone separation.
  • Use approved products: Follow the installer's care instructions rather than experimenting with harsh chemicals.

There's no need to invent a large maintenance allowance. A few minutes of care after each shower and a periodic hardware check protect the finish better than occasional aggressive cleaning.

The SitePro Bathrooms quote checklist

When requesting a bathroom renovation cost estimate from SitePro Bathrooms, provide four pieces of information:

  1. Exact panel sizes: Include finished wall-to-wall measurements where available.
  2. Shower base type: State whether the screen sits on a tiled floor, hob, tray or bath.
  3. Tile substrate age and condition: Mention movement, hollow tiles, cracks or previous screen holes.
  4. Victorian compliance documents: Identify whether the project includes waterproofing records, structural work or other documentation requirements.

SitePro Bathrooms provides coordinated bathroom renovation services including design, construction and finishing, so it can be considered alongside a specialist screen installer when the glass forms part of a wider project. The important point is to appoint a party that clearly accepts responsibility for the measured opening, compliant materials, installation and final watertight result.

Final budgeting rule: spend on the parts that prevent failure, accurate measurement, compliant safety glass, sound fixing points and competent sealing. Save on decorative upgrades only after those items are secure.

If you're renovating in Highett, Melbourne or greater Victoria, request an itemised frameless shower screen quote before ordering glass. Provide your layout, dimensions, access restrictions and waterproofing details, then ask for the installed total, exclusions, warranty and proposed installation sequence in writing.

  • siteprobathrooms

Freestanding Bath with Shower: Design Ideas for 2026

A freestanding bath can absolutely double as a shower, but the Victorian setup must include proper splash containment, compliant waterproofing, suitable plumbing, and a safe floor waste. In Australia, the shower enclosure ranks as the most important bathroom product at 44%, ahead of baths at 35%, so the shower function shouldn't be treated as an afterthought. Reece's Australian bathroom insights help explain why this decision matters.

You may be standing in a Highett bathroom wondering whether that elegant sculptural tub can handle school-day showers, muddy feet, and regular cleaning. The answer isn't decided by the bath's shape alone. It depends on where the shower rose lands, how the screen catches spray, whether the floor drains properly, and whether the finished room satisfies Victorian building and accessibility requirements.

A freestanding bath with shower is a strategic compromise. It preserves the visual impact of a centrepiece bath while keeping the shower available for daily use. It can work brilliantly in a family bathroom, but it can also create a damp, awkward room if the design team treats it like a standard enclosed shower.

Can a Freestanding Bath Really Work as a Shower

In a Highett family bathroom, that sculptural freestanding bath may need to handle school-day showers, muddy feet, and constant cleaning. It can, but only if the shower is designed as the primary wet zone rather than added after the bath has been chosen.

A freestanding bath works with a wall-mounted, ceiling-mounted, or floor-mounted shower outlet. It also needs a screen or another barrier to direct spray back into the wet area. The floor waste must sit in a sensible position, with enough fall to prevent water collecting around the bath feet or travelling towards the doorway.

The exposed sides create the trade-off. A built-in bath benefits from walls or a tiled hob that contain water. A freestanding model leaves curved edges, exposed floor junctions, and more surfaces to clean after each shower. A fixed glass panel can catch the main spray path, but it will not provide the containment of an enclosed shower.

Practical rule: Design the shower first, then place the freestanding bath inside the protected wet zone.

For Victorian work, shower walls need waterproofing to at least 1800 mm above the floor substrate. The shower floor, junctions, and penetrations also require treatment under the National Construction Code. The NCC wet-area waterproofing provisions set out the 1800 mm wall requirement, which affects the shower rose, mixer, wall lining, screen position, and tile layout.

Drainage needs the same attention. Victorian practitioner guidance discusses shower-floor falls between 1:60 and 1:80, along with waterstops and boundary-control zones for unenclosed showers. The Victorian waterproofing guidance explains why placing a bath too close to an open shower increases the consequences of poor drainage.

Before ordering products, confirm the bath footprint, waste location, cleaning access, and screen swing. SitePro Bathrooms' freestanding bath installation guide outlines the practical checks that should happen before installation.

Design Options for a Freestanding Bath with Shower

There isn't one correct configuration. The right choice depends on whether you prioritise compact planning, visual openness, easy cleaning, or long-term accessibility.

Option Typical Space Needed Splash Control Screen Required Best For
Wall-mounted shower with fixed glass panel Compact to moderate Good along the protected side, limited elsewhere Yes, usually a fixed panel Small family bathrooms and ensuites
Ceiling or rail rainfall shower Moderate, with careful overhead positioning Moderate unless paired with a wide screen Usually yes Design-led rooms where the bath must remain visually open
Curved or hinged screen with hand-held diverter Compact to moderate Better around the bath's curve Yes Rooms needing flexible rinsing and stronger splash control
Full wet-room layout with freestanding soaker Larger, open planning Depends on drainage and zoning Optional, but often useful Large family bathrooms and designer bathrooms

Fixed glass beside the bath

A wall-mounted shower with a single fixed panel is usually the most sensible compromise. The wall carries the mixer and shower outlet, the panel catches the primary spray, and the bath can sit close enough to function without turning the entire room into a wet room. Keep the showering position aligned with the screen, not aimed across the room.

A deliberately open ceiling-fed shower

A ceiling or rail rainfall rose creates the cleanest freestanding appearance because the wall carries less visual hardware. It also demands accurate positioning. If the rose sits outside the bath's usable area, water will land on the floor, not in the tub. This look suits a larger room where a generous wet zone can be properly graded and waterproofed.

Curved or hinged protection

A curved or hinged screen works when the bath has a pronounced rim or when the user needs a hand-held shower for rinsing. It offers better control than a single narrow panel, but moving glass adds hinges, seals, and cleaning points. Don't choose it purely for appearance. Confirm that the screen can open without striking a vanity, toilet, or doorway.

The wet-room approach

A full wet room treats the floor as the shower basin and places the freestanding bath inside the broader wet zone. It offers the most flexible layout, but it also puts more responsibility on falls, membrane continuity, wall junctions, and waterstop detailing. The bath becomes the feature piece, while drainage and circulation determine whether the room works.

For a compact Highett ensuite, I'd usually start with a fixed panel and wall-mounted shower. For a larger family bathroom, a wet-room layout can be attractive, provided the homeowner accepts the extra waterproofing and cleaning demands.

Plumbing and Waterproofing Essentials for Victorian Homes

Freestanding bath plumbing looks tidy only after the floor has been opened and every pipe reaches its intended position. In a Highett renovation, the bath location, tapware, shower outlet, waste route, and floor structure must be resolved before finishes are chosen.

Set the rough-in before choosing the finish

Floor-mounted taps need hot and cold pipework to rise through an exact floor position. Wall-mounted fillers require a concealed valve and a cavity that can hold the pipework. A ceiling shower adds another route through the structure, while a wall rail keeps access simpler for future servicing.

The bath waste may need relocation. The new position could sit over a joist, fall too far from the existing connection, or fail to provide adequate drainage fall. Confirm the route before closing the floor. Tiling over an unresolved waste line turns a plumbing decision into demolition.

Treat the shower zone as a complete wet area

The shower floor requires full waterproofing, and the shower walls need treatment to at least 1800 mm above the floor substrate. Membrane continuity must cover wall and floor junctions, penetrations, the screen area, mixer, and waste. Follow the applicable Victorian requirements and the Australian waterproofing standards guide rather than relying on a product brochure.

The membrane must connect logically around the bath and screen. A freestanding tub does not reduce the shower's waterproofing obligations. Its exposed perimeter can create more junctions and allow water to reach surrounding flooring, especially where the screen leaves an open entry.

Drainage matters more than the bath photograph. A beautiful tub with a badly planned waste route becomes an expensive maintenance problem.

Before tiling, check substrate condition, membrane detailing, falls, and the location of every penetration. Photograph the work and retain the installer's documentation. These records help identify responsibility if moisture appears later.

Check the existing structure

Older Highett homes may contain timber subfloors, stumps, uneven levels, or previous plumbing alterations beneath the bathroom. A cast-iron bath places a different load on the structure from a lightweight acrylic model, particularly when filled and occupied. Have the builder inspect joists, bearers, supports, and the proposed waste route before delivery day.

A freestanding bath with shower succeeds when the drainage and waterproofing plan leads the design. Choose the sculptural finish after the structure, falls, and service routes are confirmed.

Safety, Accessibility, and Livable Housing Rules

A freestanding bath with shower can look open and calm while creating a less forgiving place to enter, stand, turn, and clean. Curved slipper profiles reduce the flat standing surface available to a shower user, and water on a polished floor increases the slip risk. The safest design starts by deciding whether the room must support ageing in place, limited mobility, or future grabrail installation.

A modern white freestanding bathtub placed on a gray tiled floor in a bright luxury bathroom.

The hobless issue

The Livable Housing Design Standard requires at least one shower to be hobless and step-free. A freestanding bath can obstruct that objective because the user may need to step over the bath rim to reach the shower. A screen that meets the floor and properly contains water can help define a compliant shower area, but the bath itself remains a physical barrier.

The freestanding bath also creates a grabrail problem. It has no adjoining walls for fixings, so it is specifically excluded from the grabrail rule that applies to certain supported bath arrangements. If a household may need rails later, install suitable structural backing in the walls and keep circulation clear rather than assuming the finished room can be adapted easily.

Make daily use safer

Use anti-slip treatments and stable, easy-to-operate lever taps. A thermostatic mixing valve should keep delivered water below 50°C, and the hand-held shower should be reachable without leaning across a wet, curved rim. Provide enough clear space to approach the shower, transfer safely, and dry without standing in the main splash path.

The design shouldn't rely on a freestanding bath's visual lightness. Smaller, softer-oval, shallower profiles can make compact rooms feel less crowded, but they don't automatically solve entry, drainage, or grabrail access. If universal access is a serious goal, compare the bath's appearance with a step-free shower before signing off the layout.

Cost, Timeline, and Permit Triggers in Victoria

Homeowners often price the bath first and discover the budget later. The bath is only one part of the job. Waterproofing, exposed tapware, screen design, ceiling access, waste relocation, structural work, permits, and trade coordination can change the total substantially.

The specific bath, exposed or wall-mounted tapware, screen, ceiling-fed shower, and labour should each appear as separate lines in the quote. For broader planning, bathroom addition and renovation considerations can help identify which decisions increase scope before construction begins.

Component Typical Cost (AUD) Time Required Permit/Trades Required
Freestanding bath A$1,500 to A$8,000+ Product lead time plus installation Builder and plumber
Exposed or wall-mounted tapware Product-specific Rough-in and fit-off Licensed plumber
Shower screen Product-specific Measure, manufacture, install Glazier or bathroom contractor
Ceiling-fed shower Product-specific Ceiling rough-in and fit-off Licensed plumber, builder if structure changes
Waterproofing A$800 to A$2,500 for a standard 6 m² bathroom Preparation, membrane, inspection and cure time Registered builder or appropriate contractor
Labour and coordination Scope-dependent Demolition through handover Registered builder, licensed trades

The A$1,500 to A$8,000+ bath range and the A$800 to A$2,500 waterproofing range for a standard 6 m² bathroom are planning allowances, not promises. The Victorian Building Authority waterproofing fact sheet reinforces why shower waterproofing creates technical work beyond the visible fittings.

Permits and registration

In Victoria, domestic building work valued over A$16,000 generally must be carried out by a registered builder, as set out in the Victorian Building Regulations registration provisions. A bathroom, kitchen and laundry renovation is a specific registration class, and plumbing must be completed by a licensed plumber with the relevant compliance documentation.

Permit requirements depend on scope. Structural changes, moving plumbing fixtures, converting a non-wet area into a bathroom, and significant electrical work can trigger a building permit, while cosmetic updates and like-for-like replacements often don't. Victorian renovation permit guidance explains why the same-looking bathroom may have a different approval path depending on what moves behind the walls.

Planning Your Renovation from First Idea to Build

A successful freestanding bath project begins with a measured brief, not a product purchase. Write down who uses the bathroom, whether the shower is the everyday fixture, whether future accessibility matters, and what you refuse to compromise on. Then test the wish list against the room's doors, windows, waste locations, ceiling, storage, and floor structure.

Use a six-stage workflow

  1. Brief and wishlist: Decide whether the bath is a feature, a practical family fixture, or both. Select the preferred shower arrangement before choosing a tub.

  2. Site measure and feasibility: Record room dimensions, doorway widths, stairwell access, ceiling height, existing waste routes, and floor construction. Measure the route the bath must travel through the house, not only the room where it will sit.

  3. Three-dimensional concept design: Review the bath, screen, shower drop, vanity, toilet, lighting, and tile proportions together. A 3D view exposes conflicts that a flat sketch can hide.

  4. Product selection and specification: Lock the bath model, waste, tapware, screen, shower hardware, tiles, and accessories. Confirm lead times before demolition.

  5. Quote and contract: Require the scope to identify waterproofing, inspections, permits, structural checks, rubbish removal, protection of existing finishes, and compliance documents.

  6. Build and handover: Sequence demolition, framing, plumbing rough-in, electrical rough-in, waterproofing, tiling, fit-off, testing, and final inspection.

The floor waste position, ceiling shower height, screen type, and bath model must be fixed early. Each choice affects pipe routes, membrane detailing, tile set-out, ceiling or truss modifications, and the order in which the builder, plumber, waterproofer, tiler, and electrician work.

A builder discussing home floor plans on a tablet with a client at a wooden table.

Before the first tool enters the room, confirm product delivery access, storage, floor protection, tile quantities, bath weight, and inspection timing. Victorian consumer guidance says homeowners should complete building plans first, check planning and building permit needs, and make sure required permits are obtained before work starts. The Victorian plans and permits checklist also makes clear that the homeowner remains responsible for ensuring the approvals are in place.

A Highett Renovation Walkthrough with SitePro Bathrooms

Consider a representative Highett project involving a 1990s ensuite. The homeowners wanted a freestanding bath with shower, but the original room couldn't safely fit a separate bath and shower without sacrificing circulation. The agreed direction was a wall-mounted shower, one fixed glass panel, and a hobless entry beside the bath.

The first visit focused on measurements and constraints, not finishes. The team checked the existing waste, wall construction, ceiling route, doorway access, and floor condition. During the 3D concept review, the homeowners could see the screen position, shower drop, bath clearance, vanity relationship, and tile arrangement before demolition.

A bathroom under construction featuring an exposed shower area and a white freestanding bathtub.

Once the products were approved, demolition exposed the substrate and plumbing routes. Framing and rough-in followed, with the plumber positioning the waste, mixer, and shower supply before the walls and floor were closed. The waterproofer then completed the wet-area membrane, with the work documented and certified before tiling began.

The final sequence included tiling, screen installation, bath and tap fit-off, electrical completion, testing, cleaning, and compliance sign-off. The builder-licensed team coordinated VBA documentation, the building permit process, inspection timing, and trade access rather than leaving the homeowners to chase each specialist.

SitePro Bathrooms offers concept development, 3D design, construction, and finishing through its Highett bathroom renovation service. A real programme depends on approvals, product availability, hidden conditions, and inspection scheduling, so the consultation should establish the actual sequence rather than promise an artificial deadline.

The right contact path is simple. Start with the room address, current photos, rough dimensions, and a clear statement that the project involves a freestanding bath with shower. Ask for an on-site feasibility review before selecting the bath.

Pros, Cons, and Smart Alternatives to Consider

The strongest argument for a freestanding bath with shower is visual. It gives a bathroom a centrepiece, creates a more open composition than a built-in tub, and can make a compact renovation feel more considered. It also preserves bathing while supporting the shower routine that most households rely on.

The compromises are equally real:

Benefit Compromise
Strong focal point More exposed splash and cleaning
Bath and shower in one layout Awkward screen design around curves
Flexible placement Larger effective footprint
Premium, spa-like appearance Harder grabrail planning
Works in selected compact rooms Greater dependence on drainage and membrane detailing

Don't choose this layout if the household needs effortless step-free access, quick cleaning, or straightforward future grabrail installation. A curved rim can become a daily obstacle, and an open screen can leave the surrounding floor wetter than expected.

Alternatives that often work better

A back-to-wall freestanding bath keeps some of the sculptural look while reducing exposed cleaning gaps and simplifying screen placement. A shower-over-bath with a tiled surround offers stronger splash containment, though it gives up the clean freestanding appearance.

A walk-in shower with a separate bath is the clearest choice for households with enough room. It separates the wet functions, improves accessibility planning, and makes each zone easier to detail. A wet-room conversion with a freestanding soaker gives the most design freedom, but the floor falls, waterstops, membrane continuity, and circulation must be engineered carefully.

Each alternative still needs to respect Victorian waterproofing and wet-area rules. None removes the need to consider the hobless shower requirement or Livable Housing objectives. The decision should reflect the home's structure, the household's routines, and the likely future use of the room, not only the image that first caught your attention.

If the freestanding bath remains the right choice after those tests, book a consultation with SitePro Bathrooms in Highett. Bring your measurements, photos, preferred style, and accessibility priorities, then ask the renovator to prove where the water will go, how the screen will work, and what approvals the project needs.


Book an on-site bathroom consultation before ordering a freestanding bath with shower. Ask for a measured layout, 3D design review, waterproofing and drainage plan, permit assessment, and itemised quote so your Highett renovation looks refined and works properly every day.

  • siteprobathrooms

Curved Wall Tiles: A Practical Guide for Renovators

You're standing in a Melbourne bathroom with a sketch of a rounded shower niche, a curved vanity and a sample board that looks perfect in the showroom. On site, however, the wall has framing joints, waterproofing, tile tolerances and plumbing to accommodate. That gap between the drawing and the finished surface is where curved wall tiles succeed or fail.

A curve can make a compact bathroom feel calmer, soften a hard corner and give modern bathrooms a custom designer finish. It can also expose a wavering substrate, complicate waterproofing and push a simple renovation into regulated building work. The right decision depends less on fashion than on radius, tile format, substrate quality, installation skill and the Victorian requirements attached to the renovation.

What Curved Wall Tiles Really Are and Why They Catch Attention

The homeowner's rounded shower niche usually begins as a design gesture. A straight recess feels ordinary, while a curved back wall catches light differently and makes the shower zone feel more architectural. The tile isn't laid over a flat wall with flexible grout. Curved wall tiles are ceramic, porcelain or stone pieces manufactured or cut so their faces follow an arc.

A concave tile face curves inward, like the inside of a bowl. A convex face pushes outward, like the outside of a column. The radius describes the size of the circle from which that curve is taken. A large radius creates a gentle sweep, while a smaller radius produces a tighter bend and places greater demands on the tile, adhesive and backing.

Most domestic installations don't use one large tile bent around the wall. Standard ceramic and porcelain tiles are rigid, so installers generally create the curve with small-format mosaics, tapered pieces, purpose-made curved units or carefully cut sections. A mosaic sheet can follow a changing line because its individual pieces move across the backing, even though each piece remains relatively rigid.

Practical rule: Measure the finished substrate radius before ordering tiles. A drawing can show a curve, but only the built wall confirms whether the selected format will follow it cleanly.

The appeal is strongest in designer bathrooms, where the curve becomes part of the room's identity rather than a decorative afterthought. It can frame a shower, round a vanity front or create a visual transition between wet and dry zones. Homeowners exploring bathroom tile patterns for a modern renovation will find that tile direction, joint rhythm and grout colour matter as much as the tile itself.

Australia's ceramic-tile market provides a broader context. It was valued at US$1,873.6 million in 2025 and is projected to reach US$2,849.5 million by 2034, implying a 4.63% CAGR from 2026 to 2034, according to Australian curved-wall tile market context. Curved applications remain niche, but they sit within a growing wall-tile ecosystem that supports specialist formats, custom runs and installation guidance.

Materials, Manufacturing Methods, and Australian Tolerance Standards

The manufacturing method determines how confidently a tile can follow a curve. Dust-pressed porcelain begins as compacted powder formed under pressure, then fired into a dense, rigid piece. Extruded ceramic is formed through a die, which can make specialised profiles more practical. Natural stone is cut from slabs or blocks, while some custom products use a backing or segmented construction to create controlled flexibility.

Manufacturers may produce a curve in several ways:

  1. Moulded arcs are formed to a specified radius, producing a consistent factory profile.
  2. Waterjet-cut pieces are cut from rectangular blanks to create tapered segments or repeating shapes.
  3. Ribbed or segmented backings allow smaller faces to move across a curve without forcing one large rigid body to bend.

Porcelain handles moisture well and offers a clean, contemporary finish, but its density makes cutting and drilling demanding. Glazed ceramic is often easier to cut and suits many bathroom applications, although the glaze and body still need checking before installation. Marble and limestone bring natural variation and a premium appearance, yet their calcium-based surfaces need gentler cleaning and careful sealing. Terrazzo can create a strong visual statement, but its weight, edge treatment and manufacturer tolerances need to be confirmed before it reaches a curved substrate.

Curved Tile Materials at a Glance

Material Typical Manufacturing Method Best Suited Radius Tolerance Behaviour
Porcelain Dust-pressed and fired, or cut into shaped pieces Gentle to moderate curves, depending on format Rigid, so substrate accuracy and full bedding are critical
Glazed ceramic Dust-pressed or extruded, with a surface glaze Gentle curves and segmented layouts Easier to cut than porcelain, but glaze alignment remains visible
Natural stone Cut from slab or block, sometimes waterjet-shaped Broad, controlled curves Natural variation can disguise minor differences, but thickness varies
Terrazzo Cast or pressed composite, then cut and finished Broad curves using smaller pieces Weight and edge consistency require careful substrate support

Australian technical benchmarks make these differences visible on site. For dust-pressed ceramic wall tiles with water absorption above 10%, allowable curvature can be +0.5%, not exceeding 2 mm, or -0.3%, not exceeding 1.5 mm under the relevant framework described in Australian ceramic tile market and tolerance guidance. First-quality ceramic tiles may also have up to 0.5% allowable curvature, meaning a 600 × 300 mm tile can curve by as much as 3 mm and still meet first-quality requirements.

Those tolerances sound small until a strong bathroom light runs across a curved wall. A minor deviation can become obvious lippage, uneven joints or a broken visual rhythm. Tighter radii therefore demand better factory sorting, more careful dry-laying and, in some cases, a minimum order because the supplier needs enough matching pieces from a controlled run.

For a broader guide to selecting finishes, compare the practical considerations in how to choose bathroom tiles.

Where Curved Wall Tiles Look Best in Modern Bathrooms

Curves earn their place when they improve how the room feels or functions. A rounded shower alcove can soften the visual weight of plumbing walls and create a more generous entry path, particularly in a compact Melbourne ensuite. A curved rear wall also catches overhead light across the tile faces, giving a small wet zone more depth than a flat, heavily jointed wall.

Niches need particular care. A tight internal curve can be attractive, but it leaves less room for standard shelves, plumbing penetrations and cleaning access. A broad arc often works better than a dramatic bend because it provides the design effect without forcing every fitting to become custom.

A professional construction worker uses a long spirit level to check the alignment of a curved wall.

The strongest room zones

A rounded vanity front works when the joinery and wall line share the same geometry. The curve can flow into bench seating or a wall return, making the vanity feel built into the room rather than pushed against it. In a narrow bathroom, that softer edge can reduce the boxed-in feeling created by parallel walls.

Freestanding bath surrounds are another strong application. A tiled curve behind the bath creates a feature without requiring a busy pattern, especially with vertical rectangular pieces or a restrained natural texture. The result suits modern bathrooms that rely on shape, shadow and material contrast rather than ornament.

Archway transitions can connect an ensuite with a hallway or dressing area. Here, the tile may stop at the wet-zone boundary, while the plaster or painted finish continues the form. That distinction matters. A tile curve should have a clear termination, not fade into an awkward cut line where the wall changes material.

Fluted curves, soft minimalism and hotel-style wet rooms have made rounded forms more familiar in contemporary Australian interiors. The curve still needs to solve a spatial problem, though. If it blocks a door swing, reduces usable vanity width or creates a difficult shower screen junction, it's a costly flourish rather than a useful design move.

Installation Considerations, Substrate Limits, and Common Challenges

A curved wall should be treated as a system, not a tile pattern. The installation starts before waterproofing and follows the geometry through framing, lining, membrane, adhesive and grout.

Verify the wall before choosing the tile

First inspect the existing framing, lining type and wall condition. Wider stud centres can allow flex, and that movement may show through as lippage on a curved face. Where the curve needs a cement-based tile underlay or another rigid lining, the framing must support the sheet edges and maintain the intended radius.

Australian training recognises tiling curved walls, columns, circular walls and arches on solid and sheet substrates as a specialised skill, as shown in the curved-surface tiling training component. That classification reflects the practical reality. The installer must plan the curve before applying adhesive or mortar, not improvise after the wall is waterproofed.

Sheet manufacturers also impose radius limits. One Australian technical guide allows lining boards on curved walls down to a minimum radius of 1,000 mm, while corner beads can be used down to 500 mm, as set out in curved-wall lining guidance. Tighter curves need closer support and mechanical fixing. Another manufacturer guide specifies nails or screws rather than adhesive for curved-wall sheets and requires framing to support every sheet edge.

Site observation: If the substrate feels springy before tiling, the finished wall won't become rigid because tiles have been added. Fix the wall first.

Build the finish in sequence

  1. Confirm the radius. Check the built curve at several points with templates, straightedges and a long level. A smooth arc matters more than a nominal dimension on the plan.
  2. Prepare the lining. Use a suitable tile underlay where the curve and wet-area requirements call for it. Fix sheets mechanically as specified and eliminate drummy or wavering sections.
  3. Maintain waterproofing continuity. The membrane must follow the bend without thinning at the inside of a concave curve or splitting at transitions.
  4. Dry-fit the layout. Establish verticals, centre lines, feature edges and termination points before mixing adhesive.
  5. Use suitable adhesive. A flexible, polymer-modified cement adhesive generally suits ceramic and porcelain curves, subject to the tile and substrate manufacturer's requirements.
  6. Achieve full-bed coverage. Voids behind curved pieces create weak spots and can leave tiles rocking under movement.
  7. Allow movement at transitions. The common failure occurs where a flat wall meets a curved return. Without movement allowance, the grout cracks along that junction.

Standard pressed tiles become risky on tight curves. Curves tighter than roughly 600 mm external radius generally call for purpose-made pencil tiles or mosaic formats rather than forcing a large rigid tile to bend. Large-format porcelain also needs more planning, and the large-format porcelain installation guide is relevant when the design includes substantial rigid panels.

Informational guide on installation, substrate limits, and common challenges for applying sealant to stone surfaces.

Cost Implications and Victorian Renovation Thresholds

Curved tile work costs more because nearly every stage carries additional risk. The tile price is only the starting point. Purpose-made curved or pencil tiles can cost two to four times the equivalent standard line, while curved layouts commonly require 15% to 20% waste because an off-cut from one section rarely fits the next section. These figures are planning allowances, not guarantees, and the final result depends on tile format, supplier availability and the shape of the wall.

Labour is the larger lever. A curved wall can demand three to five times the tiling hours of a flat equivalent because each piece may need dry-fitting, individual bedding and alignment checks. A small mosaic can reduce cutting, but it still requires a clean substrate and careful sheet manipulation. A large custom panel may reduce joints while increasing templating, handling and breakage risk.

Curved vs Flat Tile Wall Cost Driver Comparison

Cost Driver Flat Wall Curved Wall
Tile supply Standard ranges are widely available Specialist, custom or purpose-made formats may be needed
Waste Off-cuts can often be reused elsewhere Curved off-cuts rarely match the next section
Substrate Straight framing and lining Radius accuracy, edge support and stiffness require more preparation
Labour Repeating layout with simpler bedding Dry-fitting and continuous alignment checks add time
Waterproofing Broad flat runs are easier to membrane The membrane must remain continuous through bends and transitions
Defects Easier to identify and replace individual tiles Radius inconsistency and lippage are more visible

Victoria's regulatory framework determines whether the curve is merely a tiling choice or part of a larger regulated renovation. A Domestic Builder Unlimited registration is the highest residential building class and allows the practitioner to carry out, manage or arrange all components of domestic building work. A Domestic Builder Limited registration covers specified classes, including bathroom, kitchen and laundry renovation, according to the Victorian registration framework.

The Victorian Building Authority application for a Domestic Builder Limited registration requires project evidence, a technical referee report, qualifications, a criminal history check, photo identification, declarations and payment. The published fee is $765.40 where the applicant isn't registered in another domestic building class, or $612.30 where they are, as stated in the VBA application form.

Victorian guidance differs in the stated renovation threshold, with one source referring to work above $10,000 and another identifying $16,000 and over as requiring a registered builder, as outlined in Victorian renovation guidance. Confirm the applicable threshold and building pathway before signing a scope. Structural framing changes, waterproofing alterations and plumbing relocation shouldn't be treated as informal tiling work.

Maintenance Tips for Long-Lasting Curved Surfaces

A curved surface needs the same cleaning discipline as a flat wall, but its geometry creates places where moisture and residue behave differently. The inside of a concave curve can restrict airflow, especially behind a shower screen, so soap film and mould can appear first along the lower grout lines and transition joints.

Grout selection matters from the start. Epoxy or polyurethane grout is often considered for its moisture resistance and flexibility, subject to compatibility with the tile and manufacturer instructions. Cementitious grout needs sealing and periodic renewal. In shower conditions, plan for a 12 to 24 month resealing cycle for cementitious grout, as recommended by the product system and site conditions, rather than waiting until water visibly darkens the joints.

A practical cleaning routine

  • After each shower: Squeegee the curved wall, paying attention to the concave lower section where droplets collect.
  • During weekly cleaning: Use a non-abrasive cleaner and a soft brush on grout lines. Avoid aggressive scrubbing that can wear a sealer.
  • For natural stone: Don't use acidic descalers on marble or limestone. Their calcium-based surfaces can etch, even when the tile looks protected.
  • For porcelain: Stronger compatible cleaners are generally more forgiving, but always follow the tile and cleaner instructions.
  • At transitions: Inspect the flexible joint where the curve meets the flat wall. Cracked grout at this point often signals that movement has been forced into a rigid joint.

Lippage can become more noticeable over time if a tile rocks under movement. Run your fingers across high points along the radius during cleaning. If a piece moves, sounds hollow or catches a cloth, arrange an inspection before water reaches the adhesive bed or the grout begins to fail.

A bathroom undergoing renovation featuring a clawfoot tub, a new curved wall with green tiles, and a checklist.

Run a quarterly check

Look for darkened grout, failed sealant, loose mosaic pieces, chipped edges and changes in the curve's reflected light. A strong side light can reveal waviness that overhead lighting misses. Record any changes with photographs, then have the installer or builder investigate rather than only applying fresh grout over the symptom.

Deciding If Curved Wall Tiles Suit Your Renovation

A curved wall earns its cost when the geometry improves the room and the construction team can control every layer behind the tile. Use three tests before demolition begins.

Project fit

Start with the physical wall. Is the existing framing capable of supporting the lining, waterproofing and tile load without flex? Does the curve improve circulation, create a useful niche or connect the vanity and bath into one composition? Check whether a heritage overlay or planning requirement applies to the property, particularly in older inner-Melbourne suburbs, before changing external or structurally significant forms.

Three conditions should stop the design until resolved:

  • Slab movement joints cross the proposed curve. The tile layout can't bridge a movement joint.
  • The shower base conflicts with the radius. The screen, waste position and waterproofing fall need to work with the wall geometry.
  • Structural sign-off is required. Don't proceed with a decorative tile decision while the structural design remains uncertain.

Budget fit

Compare the curve with another feature upgrade that uses the same renovation allowance. A curved vanity return may deliver more value than a fully curved shower wall if it improves access and storage. If the wider bathroom scope approaches the Victorian registered-builder trigger, confirm the pathway early and decide whether a registered builder unlimited or a limited practitioner is appropriate for the work being arranged.

Timeline fit

Templated panels, custom arcs and imported formats can require different lead times. Small-format curved mosaics are usually more forgiving when the design needs adjustment, while large curved panels demand a verified template, prepared substrate and coordinated delivery. Never order the tile before the final radius, sheet system and plumbing positions are confirmed.

For a first curved project, choose small-format tiles, a generous radius and a straightforward termination. Reserve large-format curved panels for renovations where the substrate, budget, waterproofing plan and registered builder are aligned before demolition starts.

If you're planning bathroom renovations in Highett or greater Victoria, contact SitePro Bathrooms to discuss the geometry, compliance pathway and finish before work begins. Their team can coordinate concept development, 3D design, construction and finishing, helping you decide whether curved wall tiles will create a durable feature or an avoidable complication.

  • siteprobathrooms

Bathroom Tiles Black

You're standing in a dated 1990s Highett bathroom with two tile samples in your hands. One is bright white and familiar. The other is matte black, dramatic, and difficult to ignore. The Pinterest images make the dark option look effortless, but your real question is more practical: will it still look good after hard-water marks, soap film, wet towels, children, pets, and several years of ordinary use?

That's the right question. Bathroom tiles black should be assessed as a maintenance and compliance decision before they're treated as a colour choice. The tile's finish, tested slip rating, grout, lighting, ventilation, cleaning routine and installation quality will determine whether the result feels considered or becomes a daily source of frustration.

Why Homeowners Are Choosing Black Bathroom Tiles in 2026

Black bathrooms have become more appealing because they create immediate depth. A dark wall behind a floating vanity can make pale stone, warm timber and brushed metal feel more deliberate. In bayside renovations, black is also being used alongside matte tapware, fluted glass and warmer timber vanities, replacing the colder, purely white bathroom aesthetic.

Australian trade coverage reports that richer, darker bathroom palettes are gaining popularity as homeowners move towards texture and spa-inspired luxury rather than sleek white rooms. The same coverage identifies material changes following the 1 July 2024 engineered-stone ban, with interest shifting towards natural stone, concrete benchtops and concrete-look basins. Australian trade coverage of darker bathroom palettes and material choices

A man in a sweater comparing a white tile to a black tile inside a bathroom.

The Pinterest image versus the occupied bathroom

An all-black bathroom photographs well because the room is styled, dry and carefully lit. A Highett family bathroom has different conditions. Soap film gathers around tapware, mineral spotting appears on dark surfaces, and lint from towels or clothing becomes much easier to see. Strong natural light can make every dried droplet stand out, while poor ventilation leaves residue on textured finishes.

That doesn't make black a poor choice. It means the colour amplifies everything around it. A mismatched grout, weak vanity lighting or unsuitable sealant becomes more obvious against black than against a forgiving warm neutral.

Recent Australian trend reporting describes continued interest in dark finishes, while also identifying a move towards warm neutrals, large-format porcelain and textured surfaces that reduce grout lines and support comfortable underfoot finishes. Australian bathroom tile trend coverage

Practical rule: If you love black but dislike frequent wiping, use it where it has visual impact without placing it on every high-contact surface.

The other decision is safety. A black tile must be selected by its measured wet slip classification, not by how textured or secure it appears in a showroom. Victorian renovation planning also needs to account for who's legally permitted to carry out the work. Those checks should happen before the tile order, not after the design has been finalised.

Styles and Finishes Worth Specifying

A showroom sample can look convincing under bright display lighting and still be wrong for your bathroom. Start by separating material, surface finish and edge profile, then match each to the location where it will perform.

Natural stone

Honed bluestone and granite bring variation that manufactured tiles can't fully reproduce. Subtle pitting, tonal movement and a developing patina can suit a heritage-style Highett home, particularly with a timber vanity and aged metalware. The trade-off is care. Around shower niches, tap penetrations and splash zones, natural stone needs careful sealing and a routine that respects the product.

Honed stone is best reserved for owners who accept ongoing maintenance. It can be a strong powder-room floor or a restrained feature surface, but it isn't the sensible default for a busy family shower.

Porcelain finishes

Matte porcelain is the practical starting point for a main bathroom floor. Look for a vitrified product with a tested wet rating suited to the exact zone, not a product described as “non-slip”.

Lappato porcelain has a partially polished surface. It reflects more light than matte tile and can bring depth to a wall, but the surface may show water marks more readily and shouldn't be assumed suitable for a shower floor.

Full polished porcelain gives the strongest reflective effect. It works on a dry vanity wall or decorative splashback, but a glossy black tile generally isn't the floor choice I'd make for a wet barefoot area.

Soft-touch and structured finishes offer a more tactile appearance. They can add grip and reduce the visibility of fine scratches, although texture may hold soap residue and grout haze. That's a maintenance exchange, not a free improvement.

Colour, size and edge

Charcoal often gives a softer result than true black, particularly in a small ensuite or a room with limited daylight. Veined marble-look porcelain creates movement and can make a black wall less visually flat, while a solid basalt-look tile delivers a quieter architectural effect.

Pressed-edge tiles suit relaxed, heritage-inspired floors because their slight edge variation supports a softer, less rigid pattern. Rectified porcelain has cleaner edges and tighter joint potential, making it effective for large-format feature walls where you want the black surface to read as a broad plane.

Fluted black ceramic is particularly effective behind a vanity in a powder room. It gives the wall shadow and texture without committing the entire wet room to a surface that may be demanding to clean.

Choose the finish for the zone first. A beautiful wall tile isn't automatically a safe floor tile, and a grippy floor tile may be unnecessarily difficult on a full-height wall.

Don't rely on an assumed price band without a current quote. Tile cost varies with material, format, finish, stock availability and installation complexity, so compare complete supply-and-lay pricing rather than the sample price alone.

A human hand touches a dark, textured black bathroom tile sample displayed in a showroom.

Slip Ratings and Safety on Bathroom Floors

Colour comes after safety. Under AS 4586, wet-area floor surfaces are assessed by slip resistance testing, and bathroom specifications commonly use P-ratings to identify performance in wet barefoot conditions. General bathroom floors are commonly specified at P3 minimum, while shower floors often require a higher barefoot wet rating such as P4 or P5. AS 4586 information from Standards Australia

The pendulum test assesses how a surface behaves under controlled wet conditions. The resulting P-rating gives the designer, builder and homeowner a measurable basis for selection. A black tile can look convincingly textured under showroom lights, but dark colour can visually flatten the surface and conceal moisture. That visual impression isn't a safety rating.

A glossy black porcelain tile may be unsuitable for a wet bathroom floor if its tested classification is too low. Matte or structured porcelain may perform better, but the product certificate must confirm the result. A tile marketed for walls may not be designed for floor loading or barefoot wet traffic.

Match the rating to the zone

Black Tile Finish Typical P-Rating Recommended Bathroom Zone
Glossy black porcelain Often P1 to P2, verify the certificate Dry wall surfaces and decorative splashbacks
Matte vitrified porcelain Can achieve P3 or higher, verify the certificate General bathroom floors where the rating is suitable
Structured or micro-matt porcelain May achieve P4 or P5, verify the certificate Shower floors when the tested classification matches
Decorative black wall tile Not assumed suitable for flooring Vanity walls, feature walls and splashbacks

The exact requirement also depends on the floor design. A hob-less shower needs carefully formed falls to the waste and a continuous transition between areas. Ramps, thresholds and shower entries can change how water moves across the surface, so the tiler shouldn't make layout decisions before the substrate, drainage and waterproofing details are confirmed.

The NCC Volume Two wet-area provisions also matter to the overall bathroom build. Ask for the tile's test documentation and discuss the intended zone with the contractor. CodeMark certification, where applicable to the relevant product category, can support documentation, but it doesn't remove the need to confirm the tile's actual use, installation system and wet-area compliance.

For a practical selection process, use this guide to choosing bathroom tiles alongside the product certificate. A wet bare-foot sample test can reveal texture and comfort, but it's only a practical check. It doesn't replace formal testing.

Pairing Black Tiles with Fixtures, Lighting and Colour

Black tiles don't have one fixed appearance. Their undertone changes with the surfaces and light around them. The same 600 x 600mm black tile can look calm and architectural beside a white basin in a federation-style Highett home, then feel much heavier beside a moody charcoal vanity in a new build.

Tapware changes the temperature

Matte black tapware creates a low-contrast, tonal bathroom. That can be stylish, but it also risks merging the fittings into the background. Brushed brass introduces warmth and gives black a more decorative, residential character. Chrome reflects the room and provides a sharper, brighter contrast. Brushed nickel is quieter than chrome and sits comfortably with charcoal, timber and warm stone.

Lighting can shift the tile's perceived colour. Warm 3000K LED downlights tend to pull black towards charcoal or brown-grey, especially beside timber. Cooler 4000K lighting can make the same tile read more inky or blue-grey. Always view samples under the proposed lighting rather than making a decision beneath a showroom's general illumination.

Tapware Finish Lighting at 3000K Warm Lighting at 4000K Cool Best Paired With
Matte black Soft, tonal and restrained Sharper, darker and more graphic Pale stone, timber or a light mirror
Brushed brass Rich and warm More defined, with stronger contrast Timber veneer and warm neutral walls
Chrome Reflective and bright Crisp and contemporary White basins and pale terrazzo
Brushed nickel Muted and balanced Clean without looking stark Charcoal, greige and natural textures

Give the eye somewhere to rest

A timber veneer vanity can stop black tile from feeling severe. White stone creates a strong graphic contrast, while a concrete-look laminate supports an industrial scheme but may produce too much grey if the floor and walls are also dark.

Layering black across the floor, wall, vanity, mirror frame and tapware is a common mistake. One light-reflective surface, such as a pale terrazzo benchtop or a generous mirror splashback, can return light to the room and prevent the overall effect from becoming visually closed.

Australian trend reporting identifies Contemporary Classics, Modern Australian, Wellness Sanctuary, White On White and Colour Drenching as current bathroom directions. Modern Australian is described as a locally curated approach by designers and architects, which helps explain why black is increasingly being softened with timber, stone and tactile finishes rather than used as a single uninterrupted block. Australian bathroom trend directions from Reece

Layout, Tile Size and Grout Choices

Tile format changes the perceived proportions of a room, but it doesn't override poor planning. A 300 x 600mm black tile introduces more joints and can make a compact ensuite feel structured. A 600 x 600mm format gives a calmer grid. Large-format 900 x 900mm or 1200 x 600mm tiles can reduce visual interruption, provided the walls, floor levels, access and tiler's equipment can accommodate them.

Small mosaics need more caution than their popularity suggests. The additional grout lines can create a grey haze across a black floor, particularly when soap residue and dust settle into the joints. Mosaics are still useful in shower floors because their smaller pieces can follow falls and create a detailed surface, but the grout becomes a major part of both the appearance and the maintenance plan.

Let the pattern set the mood

A brick layout softens black because the staggered joints break up the mass. Stack bond makes the room feel more ordered and harder-edged, which suits a contemporary scheme. Herringbone adds movement and works well on a vanity wall or a restrained feature section, but it increases cutting and alignment requirements.

Grout deserves a sample board of its own:

  • Matching black grout creates a near-slab, although shade variation and application marks can become visible.
  • White grout frames every tile and gives the wall a graphic, gallery-like quality, but it demands careful cleaning.
  • Mid-grey grout is more forgiving visually and can moderate the contrast, though it may dull the clarity of a strongly designed black layout.

Waterproofing and falls must be resolved before the layout is locked. AS 3740 requirements affect substrate preparation, membrane detailing, penetrations and drainage, so the pattern shouldn't dictate a cut that compromises the wet-area build-up. The same principle applies when using large-format bathroom tiles. The format needs to suit the room and installation system, not just the visualisation.

Cleaning and Maintenance in Hard-Water Areas

Dark tile behaves a little like a black car. A polished surface reflects every calcium drip, while a honed surface disguises some droplets but can hold residue in its pores and texture. In Melbourne's bayside homes, hard-water spotting, soap film and lint are practical considerations, not minor styling details.

Australian tile-care guidance recommends wiping surfaces after use, maintaining strong ventilation, using bathmats to reduce standing water and choosing mild cleaners rather than abrasive products that may damage the grout or tile surface. Australian bathroom tile cleaning guidance

A spray bottle and folded grey cloth sit on a counter in front of black bathroom tiles.

Match the routine to the finish

For polished black porcelain, use a microfibre squeegee after showering and wipe visible droplets before they dry. A pH-neutral cleaner used during routine cleaning is safer than aggressive scrubbing, which can leave fine marks or disturb the grout surface. The appearance standard is high, so this finish suits homeowners who enjoy a carefully maintained room rather than those who want the bathroom to look untouched between cleans.

Honed black stone needs more attention to sealing. Products such as honed basalt or bluestone should follow the manufacturer's sealer instructions, with resealing scheduled according to the product, use and observed water absorption. Don't assume a natural-stone tile has the same care requirements as porcelain.

Textured and fluted finishes hide individual droplets better, but their recesses catch soap, hair and grout haze. Use a soft brush where the manufacturer permits it, rinse thoroughly and avoid abrasive powders. A shower niche, ledge and the area behind a wall-mounted basin usually deserve extra attention because residue settles there first.

Black also reveals household debris quickly. Pet hair, towel fibres, dust and footprints may be visible within hours, particularly on smooth floor tiles. Young children and shedding pets don't rule out black, but they do make a full-room dark floor a higher-maintenance commitment.

Use this floor tile grout cleaning guide for the jointed areas, then confirm product-specific instructions before applying any cleaner or sealer.

Finish Maintenance demand Suitable tolerance
Polished porcelain High visibility of spotting Owners willing to wipe frequently
Matte porcelain Moderate, with good everyday practicality Most main bathrooms
Honed natural stone High, including sealing and stain care Detail-focused owners
Structured porcelain Moderate to high, depending on texture depth Homes prepared for brushing and rinsing

Planning a Highett or Victoria Renovation the Right Way

A black tile order doesn't make a renovation compliant. The legal and technical decisions sit behind the finish, and they need to be documented before demolition begins.

In Victoria, work valued at more than $10,000 must be carried out by a Registered Builder, according to Victorian bathroom renovation guidance. Bathroom and kitchen work must also comply with plumbing rules, and plumbing tasks require licensed plumbers. Victorian bathroom renovation questions and building requirements

Connect the paperwork to the design

A fully tiled shower needs a compliant water-resistant and waterproofing system beneath the visible tile. A black feature wall still sits over that system, so a dramatic finish doesn't reduce the importance of membrane detailing. If the vanity moves and the drainage or water connections change, a licensed plumber needs to carry out that work.

Before approving the order, confirm:

  1. The design freeze includes tile format, grout colour, niche positions, shower falls, waste location and fixture penetrations.
  2. The tile documentation identifies the intended floor or wall use and provides the relevant slip-performance information for wet zones.
  3. The builder and trades are appropriately registered or licensed for the work they're undertaking.
  4. The waterproofing stage is documented before tiling covers the membrane and junctions.
  5. The substrate and falls are checked before large-format or patterned tiles are cut.
  6. The grout and silicone are allowed to cure according to the product instructions before the room returns to normal use.
  7. The handover file includes invoices, product details, care instructions, waterproofing records and any relevant certificates.

Sequencing affects the final appearance as much as compliance. A rushed tile layout can leave narrow cuts around a niche. A late fixture change can force new penetrations through a finished surface. Black tile exposes those compromises because uneven lines and patching are more visible against a dark field.

Keep the documents. Future owners, insurers and warranty conversations are better served by a clear record of who did the work, what products were installed and how the wet area was constructed.

A coordinated renovation service can connect concept development, 3D design, construction and finishing. SitePro Bathrooms is one local option that provides those stages as part of its renovation work, including bathroom tiling and large-format tile projects. The important point isn't the company name. It's choosing a process that keeps design, compliance and installation decisions in the same conversation.

A person reviews architectural floor plans and stone tile samples on a wooden office desk table.

Where Black Works Best and Where to Avoid It

Black earns its place when it creates contrast, focus or depth without making every surface responsible for carrying the room. A powder room is often the safest place to be ambitious because it has less continuous shower exposure and usually a simpler cleaning pattern. A fluted black ceramic vanity splashback can provide the drama of a dark scheme while keeping the main floor lighter and easier to manage.

A single feature wall opposite a window can also work well. Natural light gives the tile something to respond to, while a pale basin, mirror or stone surface keeps the composition open. Behind a floating vanity, black provides a grounded backdrop and lets the joinery become the warmer, tactile element.

Strong applications

  • Powder-room walls: Use texture, fluting or a bold layout where the surface can be appreciated without full-room wet-area maintenance.
  • Vanity splashbacks: Pair black with a pale basin, warm timber or reflective mirror to create a defined focal point.
  • A single shower wall: Keep the floor independently specified for slip performance and choose a wall finish for its visual contribution.
  • Light-filled bathrooms: Let daylight balance the depth of the tile, but still inspect samples for spotting under actual use conditions.

Applications that deserve caution

A full-room dark floor in a windowless ensuite can feel enclosed and will show lint, hair and footprints quickly. Large-format black matte tiles in a home with young children may require more cleaning than the household wants to provide, especially where the finish has enough texture to hold residue.

An all-black shower is another high-maintenance choice. Soap residue, limescale and towel fibres can become visible within hours, and a dark glossy floor may fail the practical safety test even if it looks sleek. The better solution is often a black wall with a lighter or carefully rated floor, or a charcoal floor with a more forgiving tonal range.

Modern bathrooms and designer bathrooms don't need to rely on maximum darkness. Current Australian direction is moving towards warm neutrals such as putty, mushroom, bone, greige, sandy off-whites and warm taupe, while features including rainfall shower heads with handheld attachments, double vanities, heated towel rails, in-floor heating and steam showers are being incorporated into renovation briefs. Australian bathroom trends for 2026

Before you sign off on bathroom tiles black, book a design consultation, bring your grout and fixture preferences, and request a sample board viewed under your actual lighting. Ask for the slip-rating documentation for every proposed floor tile, confirm the cleaning requirements for the chosen finish, and have the waterproofing and plumbing sequence explained in writing. That small amount of scrutiny is what separates a dramatic bathroom from an expensive daily headache.


If you're planning bathroom renovations in Highett or greater Victoria, contact SitePro Bathrooms to discuss your layout, tile samples, lighting and compliance requirements. Bring photos of the existing room and the finishes you're considering, then request a coordinated design and renovation plan before ordering any black tile.

  • siteprobathrooms

Planning a Home Renovation in Victoria: A 2026 Guide

You're in Highett, the bathroom has been gutted, the plumbing is exposed, and a tradie is due to start next week. There are no finished drawings, nobody has confirmed whether a permit is required, and the budget is a rough guess based on a few online images. That's not a renovation plan. It's a demolition date attached to a list of unanswered questions.

The expensive problems usually begin before the first hammer. An undeclared change to the layout can alter the permit path. An unverified builder registration can leave you with the wrong person responsible for regulated work. A missing waterproofing inspection can force rework after tiles are installed. Planning a home renovation in Victoria means resolving those risks in the right order, before materials are ordered and trades are booked.

Why Most Renovation Stress Starts Before the First Hammer

A bathroom in Highett can look productive after demolition, with the vanity, tiles, and plaster removed. The exposed room often reveals the opposite. Structural conditions, plumbing routes, waterproofing, ventilation, and compliance decisions are now urgent, yet the drawings and approvals may still be incomplete. Demolition has converted unanswered questions into delays on site.

In Victoria, planning and building permits follow different paths. A planning permit may be required before building, extending, or renovating, particularly where council controls or a heritage overlay apply. A rebuild always needs a building permit. Confirm the planning position with council and review the Victorian guidance on plans and permits before demolition, ordering, or booking trades.

Permit status affects the critical path. It can determine whether drawings need revision, whether a registered building practitioner is required for the work, and whether inspections must be scheduled before walls and floors are closed. Treating approval as paperwork for later is how a planned start becomes a vacant, unusable room.

The four failures that create blowouts

Scope failure is usually the first problem. “Renovate the bathroom” might mean new finishes and fixtures, or it might involve moving walls, relocating plumbing, changing windows, replacing waterproofing, upgrading electrical work, and altering ventilation. Each version requires a different design, trade sequence, approval route, and budget allowance.

Write the scope in physical terms. Identify what stays, what moves, what gets replaced, and what may be exposed once demolition starts. If the work affects structural elements or regulated building work, confirm the practitioner's registration class and experience before accepting a quote.

Budget failure follows when the allowance covers only visible products. Tiles, a vanity, tapware, and a shower screen are selections, not a complete project cost. Labour, waste removal, electrical changes, waterproofing documentation, temporary facilities, delivery, access constraints, and remedial work belong in the same budget.

Ask for assumptions, exclusions, provisional items, and conditions that depend on opening the walls or floor. A low quote with missing scope is not a saving. It is a delayed cost.

Builder failure occurs when availability matters more than capability. Select a practitioner whose registration and experience match the work, especially where the renovation changes plumbing layouts, waterproofing, structural elements, or compliance-related details. A casual handyman is not a substitute for the people required to design, certify, and carry out regulated work.

Sequence failure stalls the site even when each individual decision seems minor. An unavailable basin can hold up installation. A tapware change after rough-in can force plumbing rework. Starting before the permit position is settled can interrupt several trades and push inspections out of order.

Victorian renovation guidance estimates that a building permit can add 2 to 4 weeks, while a planning permit can add 4 to 12 or more weeks. Use those lead times when setting the start date, ordering materials, and arranging accommodation. Review the Victorian permit timing guidance before committing to a demolition date.

Practical rule: If a decision can change the drawings, permit pathway, trade sequence, or purchase list, make it before you commit money.

Write the brief before requesting quotes

Start with one page. Make it specific enough that a designer, builder, or project manager can price the same job without guessing.

For a bathroom, record daily users, storage problems, shower preferences, accessibility needs, cleaning priorities, and whether the room must support children, guests, or ageing in place. For a kitchen, record cooking habits, appliance requirements, pantry storage, entertaining needs, and whether walls or services might move. For whole-home work, identify zones that must be completed together and areas that can wait.

Divide every request into three groups:

  • Must-haves: Changes that solve the current problem, such as a better shower layout, more storage, improved lighting, or a safer floor.
  • Nice-to-haves: Enhancements that can be removed without damaging the project, such as a feature tile, upgraded accessories, or decorative joinery.
  • Hard dealbreakers: Conditions you will not accept, such as losing the only family bathroom, compromising ventilation, exceeding a borrowing limit, or damaging a heritage feature.

Answer three blunt questions. How long will you live with the result? Who uses the room every day? What level of resale value matters in your suburb? A short-term refresh needs a different brief from a long-term home, and an owner-occupier will not always prioritise the same outcomes as an investor.

Use the brief during every quote review and design decision. If a new idea does not support a stated goal, move it to the nice-to-have column or a later stage. This keeps selections tied to the reason for renovating and limits scope changes that disrupt approvals, orders, and trade bookings.

An unfinished room undergoing a home renovation with exposed wooden wall studs and plumbing pipes exposed.

Australia's renovation market makes this front-end discipline more important. KPMG reported that renovation spending reached 40% of total residential construction spending in 2023–24, compared with 34.2% in 2018–19, while renovation spending increased 6.5% across that five-year period. The same release reported that inflation-adjusted spending on new private residential construction was 14% lower in 2023–24 than five years earlier. These figures appear in KPMG's renovation market release.

For homeowners, demand for trades, materials, surveyors, and approvals can affect availability. Your brief controls the decisions that shape the critical path. It is the document that keeps the design, permit route, budget, and construction sequence aligned before the first hammer.

Building a Renovation Budget That Actually Holds

A bathroom budget only holds when it includes the work behind the finishes. Don't treat a product list as a project budget. A cosmetic refresh, a complete wet-area rebuild, and a designer bathroom with layout changes carry different approval, labour, and coordination demands.

I won't publish invented 2026 price bands because no verified cost figures are available here. Instead, use the table below as a planning structure, then replace each tier with written quotes based on your actual room, access conditions, selections, and permit requirements.

2026 Victorian Bathroom Renovation Budget Bands

Project Tier Indicative 2026 Range (AUD) Typical Extras Homeowners Miss
Cosmetic refresh Obtain a project-specific written quote Minor repairs, disposal, painting, accessory changes, and delivery
Standard bathroom rebuild Obtain a project-specific written quote Waterproofing certification, electrical upgrades, tile wastage, skip hire, and temporary bathroom arrangements
Designer bathroom rebuild Obtain a project-specific written quote Detailed design, premium finishes, custom joinery, complex lighting, service relocation, inspections, and snagging

The useful financial discipline is to separate fixed scope from unresolved risk. Ask the builder to identify assumptions, exclusions, provisional items, access restrictions, and any work that depends on opening the walls or floor. Waterproofing certification, electrical upgrades for a new lighting layout, tile wastage, skip hire, temporary bathroom costs, and post-handover snagging should appear explicitly rather than hiding in a vague allowance.

Renovation demand is substantial. KPMG reported that renovation work represented 40% of residential construction spending in 2023–24, and Australian survey data recorded more than $3 billion spent on alterations and additions in the September quarter of 2023, according to the Australian renovation activity data. Those figures don't tell you what your bathroom will cost, but they do reinforce the need to book and budget carefully.

Add a 15 to 20 per cent contingency above fixed-price quotes as a planning recommendation, not as a claimed market statistic. Keep it available for concealed damage, scope decisions, compliance changes, and genuine variations. Track each selection before sign-off, including the item, allowance, supplier confirmation, delivery status, and whether installation is included. A spreadsheet updated weekly is more useful than a budget reviewed after the final invoice.

For a coordinated approach to scope, selections, and construction, review the bathroom renovation project management service, then compare its inclusions against your own brief.

Hiring the Right Builder and Designer in Victoria

A builder's registration class determines which domestic building work they can undertake. For a Victorian bathroom renovation, verify registration before discussing start dates. Check the builder's current details on the Victorian Building Authority public register, then ensure the contract names responsibility for the work, approvals, coordination, and defects.

Registration Class Scope Allowed Typical Project Fit
Unregistered handyperson Minor maintenance and non-regulated tasks only Cosmetic repairs that don't cross into regulated domestic building work
Domestic Builder Limited Work restricted by the conditions of the specific registration Small or narrowly defined projects that fit those limits
Domestic Builder Unlimited Domestic building work without the project-size cap applying to limited categories Larger, complex, structural, or fully coordinated bathroom renovations

A Domestic Builder Unlimited registration suits larger or more complex bathroom projects that extend beyond small repairs, subject to the conditions of the practitioner's registration. Confirm the class and current details through the VBA register before signing. Do not assume a tradesperson who can complete one part of the job can manage the entire renovation.

Questions that expose weak proposals

Request the registration number, recent comparable projects, and addresses you can inspect with the owner's permission. Ask for a written scope that states whether pricing is fixed or cost-plus, lists exclusions, explains variation approval, and identifies who handles the building permit. An unclear approval responsibility can delay the start and force redesign after selections have been made.

Ask how the builder will arrange waterproofing inspections, plumbing compliance, electrical certification, site protection, rubbish removal, and handover documents. Request the proposed programme, decision deadlines, defect process, and delay provisions. Treat “permits are just a formality” as a red flag. Planning and building approvals follow different paths, and an overlooked heritage overlay or structural change can hold up the critical path.

Designers require the same scrutiny. Confirm that their drawings include measured plans, elevations, reflected ceiling plans, lighting locations, tile layouts, fixture specifications, and construction notes. Ask whether they provide 3D design reviews and how they manage design freeze, the point after which changes require a formal variation. Late changes can affect approvals, ordering, labour, and the handover date.

SitePro Bathrooms provides concept development, 3D design, construction, and finishing as a coordinated renovation service. Whether you appoint one provider or separate professionals, choose people who can show how the brief becomes documentation, approvals, procurement, construction, and handover. Get those responsibilities in writing before the first deposit.

Navigating Victorian Planning and Building Permits

A bathroom renovation can stall before demolition if you treat approvals as paperwork to sort out later. Planning permits and building permits follow different paths, and satisfying one does not satisfy the other. Check both before the layout is locked, because an overlooked overlay or structural change can force redesign, delay orders, and extend the critical path.

A planning permit covers land use, neighbourhood amenity, siting, overlays, and development controls. Council assessment may be required for a heritage overlay, façade or window changes, certain siting changes, or two dwellings on one lot. A building permit covers construction compliance under Victoria's building framework, including structural safety, waterproofing, framing, and other Building Code requirements.

Check the pathway before design freeze

Start with the property information available through VicPlan, then contact the relevant council. Do this before design freeze. An internal bathroom may still involve a heritage control, altered window, relocated services, changed floor levels, or structural work. Each can change which approvals and documents are required.

Engage a private building surveyor early when walls, windows, floor levels, waterproofing, or structural elements will change. Ask the surveyor to confirm the required documents, which may include:

  • Measured drawings: Existing and proposed plans, elevations, and relevant sections.
  • Engineering information: Structural calculations and details for changed framing, beams, walls, or loads.
  • Wet-area documentation: Waterproofing details, product information, and inspection arrangements.
  • Specification schedules: Fixtures, materials, construction methods, and compliance details.
  • Site information: Property details, photographs, title or plan information, and relevant overlay or planning information.

Requirements depend on the property and scope. Council and the surveyor must confirm the pathway, rather than a builder relying on an assumption that the work is internal. Victorian consumer guidance advises homeowners to check with council before starting an extension or renovation. Use this Victorian building and renovation permit guidance as a reference for the distinction, but obtain project-specific advice from the appropriate Victorian authorities.

Building and planning permits for a home renovation project with a miniature model house on top of blueprints.

Cosmetic bathroom work can follow a different pathway from moving walls, changing plumbing layouts, altering load-bearing elements, or rebuilding waterproofing. “It's internal” does not mean “it's permit-free.”

Site rule: Never order materials around an unapproved layout. An early check costs less than demolition, redesign, and certification twice.

Timelines, Phasing, and How to Live Through the Works

A realistic Highett bathroom project can take 10 to 14 weeks from concept design to handover when design, approvals, procurement, construction, and rectification are included. That timeframe is a project-planning benchmark, not a promise. Access, scope, approvals, product availability, and inspection timing can move it.

The critical path should run in this order:

  1. Concept design: Confirm the brief, measure the room, test layouts, and identify structural or service changes.
  2. Documentation and permits: Finalise drawings, lodge the relevant applications, and allow the surveyor or council to assess them.
  3. Procurement: Confirm tile, tapware, vanity, shower screen, lighting, and accessories before demolition.
  4. Construction: Sequence demolition, rough-in, framing, waterproofing, tiling, fit-off, testing, and snagging.
  5. Handover: Collect certificates, inspect finishes, record defects, and confirm rectification dates.

Book the 3D review before the permit documentation is final. Changing tapware after waterproofing or moving a shower niche after tiling has started creates avoidable rework. A 3D model should settle clearances, door swings, fixture positions, tile runs, and storage before orders are placed.

Keep the house liveable

For a larger renovation, phase by zone. Complete the ensuite while the family uses the main bathroom, then swap zones. Don't open every wet area at once unless you have suitable temporary facilities and a firm reason to accept the disruption.

Create a weekly schedule with five columns: activity, responsible person, inspection date, delivery window, and homeowner decision deadline. Mark permit milestones, waterproofing inspections, tile delivery, shower-screen measurement, and final electrical and plumbing testing.

Allow extra breathing room around Christmas and Easter, when trade availability and deliveries can change. Before committing to the programme, read the practical advice on living in the house during a renovation. Protect one clean living zone, isolate dust, secure tools, and keep children and pets away from the work area.

A professional bathroom installer working on a shower head fixture during a residential home renovation project.

Locking In Fixtures, Finishes, and 3D Design Early

By demolition week, undecided fixtures are already a programme risk. The builder needs confirmed dimensions, connection points, delivery dates, installation requirements, and approved alternatives before the room is opened. A late selection can hold up a trade, trigger rework, or force a variation.

Use this order:

  • Layout first: Set the vanity, toilet, shower, bath, door swing, storage, and circulation.
  • Services second: Confirm plumbing, electrical, ventilation, heating, lighting, and niche positions.
  • Products third: Specify tile, tapware, vanity, shower screen, lighting, mirrors, and accessories.
  • Documentation fourth: Record product codes, dimensions, finishes, installation notes, and approved substitutions.
  • Procurement last: Order only after checking availability, lead time, damage policy, and delivery access.

Choose a look that suits the house and can be maintained. Warm neutrals, earthy tiles, natural stone, curved forms, tactile finishes, floating vanities, layered lighting, large-format tiles, and smart storage are all useful directions in current Australian bathroom design. Texture and smart features are discussed in 2026 bathroom ideas focused on texture and smart design, while practical Australian bathroom materials and layouts supports choosing materials and arrangements that work in daily use. Do not select a trend before checking cleaning, replacement, and installation requirements.

Use 3D design to test decisions

Review the 3D model after the concept layout and before orders. Test tile runs across each wall, vanity-door clearance at the entry, shower-screen clearance from the towel rail, and niche height against the people using the room.

A render is a decision record. Compare it with the measured room, mark every change, and issue the approved version for documentation. Changes to tile pattern, tapware finish, vanity size, or lighting position after procurement can delay the programme and create a variation.

Physical samples remain necessary. View tile, stone, grout, metal finishes, and cabinetry in the room's daylight and evening lighting. A sample board can expose clashes between warm neutrals, brushed metal, natural stone, and artificial light that a screen conceals.

In Victoria, altered waterproofing, plumbing layouts, structural elements, or compliance details can raise registration and approval questions. Check the work category before the design is final, using Victorian bathroom renovation guidance as a starting point. Confirm the permit pathway and registered trades with the relevant professionals before construction documents and orders are locked.

Your Pre-Renovation Checklist and Sample Schedule

The homeowner controls the information that keeps a project moving. Your builder can coordinate trades, but you must make sure finance, insurance, access, household logistics, selections, and approvals are ready.

Copy this checklist before work starts

  • Finance approval: Confirm the available funds, payment schedule, variation process, and contingency.
  • Insurance notification: Tell your insurer about the planned works before construction starts. Homeowners often forget this.
  • Permit confirmation: Keep written confirmation of the planning and building permit pathway.
  • Contract review: Check scope, exclusions, allowances, start date, completion conditions, variations, and defects.
  • Neighbour notice: Explain noisy work, access needs, deliveries, and any shared-boundary concerns.
  • Temporary facilities: Arrange a temporary bathroom or kitchen setup if the home will lose essential services.
  • Household logistics: Plan for children, pets, work-from-home needs, dust, noise, and safe access.
  • Valuables storage: Remove fragile items, secure documents, and clear paths for deliveries.
  • Meter readings: Record electricity, gas, and water readings before site establishment.
  • Selections register: Confirm every product, finish, quantity, supplier, delivery date, and approved substitute.
  • Inspection dates: Book the final waterproofing inspection before tiling is sealed. This is the second commonly missed item.

For a printable version, use the bathroom renovation checklist and adapt it to the scope in your contract.

Sample project schedule

Phase Indicative allocation Homeowner control point
Brief Early project stage Approve must-haves, nice-to-haves, and dealbreakers
Concept design Following the brief Approve layout and service changes
3D review Before documentation Confirm clearances, finishes, and fixture positions
Documentation After design decisions Check drawings, specifications, and permit documents
Permit lodgement Before procurement lock-in Confirm the approval pathway and outstanding requests
Procurement After selections are frozen Verify availability, delivery, and damage procedures
Build After approvals and deliveries are aligned Attend agreed inspections and approve variations in writing
Handover At practical completion Inspect, collect certificates, and record defects

At handover, check the waterproofing certificate, plumbing compliance documentation, electrical certificate, tile lippage, grout consistency, silicone finish, and silicone cure times. Test doors, drawers, exhaust fans, lights, taps, drainage, and hot water. Record every defect with a location, photograph, responsible party, and rectification date.

Allow a 13-week defects liability window in your project records and contract administration. Don't treat handover as the moment the builder leaves. It's the point where you verify that the promised result has been documented, tested, and completed.

Australian renovation demand continues to support careful scheduling. Roy Morgan reported that 8.4 million, or 62%, of Australia's 13.6 million homeowners had renovated in the previous 12 months, compared with 7.5 million, or 57%, three years earlier, as reported in its renovation activity findings. Start with the brief, confirm the permit path, appoint the right registered builder, and freeze the selections before demolition.


If you're planning bathroom renovations, a kitchen upgrade, or a larger Victorian home renovation in Highett or nearby, book an on-site consultation with SitePro Bathrooms. Bring your wish list, floor plans, and budget boundaries, and ask the team to measure the space, test the layout in 3D, identify the permit questions, and turn the agreed scope into a clear renovation pathway before you commit to demolition or procurement.

  • siteprobathrooms

Designing a Kitchen Island That Works for Real Life

You're standing in the kitchen with a tape measure, trying to decide whether an island will improve the room or leave everyone squeezing sideways between the cooktop and fridge. The plan looks simple. Draw a rectangle, add stools, choose a stone top. In a Victorian home, less forgiving.

A kitchen island affects floor structure, plumbing, electrical work, appliance access, stone fabrication, cabinetry delivery and the way the rest of the renovation is sequenced. It can also compete with bathroom renovations for the same trades, budget and working space. Good designing a kitchen island starts with buildability and budget, then moves to storage, seating and finishes.

Why Your Kitchen Island Is Bigger Than a Bench

A long island can look excellent on a plan and still fail on site. I have seen layouts with generous stools, useful storage and a broad preparation surface become awkward once the dishwasher door, refrigerator swing and route to the dining area were marked on the floor. The island fitted dimensionally, but two people could no longer move through the kitchen without getting in each other's way.

An island becomes part of the room's structure, services and circulation. Its footprint affects safe appliance access, clear movement and the installer's ability to bring cabinetry and stone into position without damaging completed floors, walls or joinery.

Its size also creates work beyond the kitchen:

  • The floor carries new loads: Cabinetry, appliances, stone and people leaning on a seating edge concentrate weight in one area. Older Victorian floors may need checking before the layout is fixed.
  • Services need a route: A sink, dishwasher, cooktop, power point or gas connection must be planned before flooring and cabinetry are closed.
  • The benchtop controls logistics: A large slab requires accurate measuring, delivery planning and, where sheet dimensions cannot cover the run, a carefully positioned joint.
  • The renovation sequence changes: Demolition, rough-ins, flooring, cabinetry, stone templating and final fit-off need to follow the correct order.

Practical rule: If the island only works after you ignore door swings and traffic paths, it does not work.

Australian planning guidance generally allows at least 900 mm around an island, with 1,000 to 1,200 mm preferred where two people cook, unload a dishwasher or pass each other regularly. A seating zone also needs roughly 900 mm behind stools when someone must walk past, particularly in a family kitchen or shared preparation area. The Australian kitchen-island planning guide provides useful guidance for checking whether an island will fit.

These clearances are only the beginning. The island must also suit the floor structure, service routes, slab handling and the wider renovation program.

If an adjoining bathroom is being stripped at the same time, the builder may be coordinating demolition, electrical work, plumbing, plastering and floor protection across both rooms. A rushed island decision can send trades back to completed areas, increase disruption and make the connected renovation harder to control. Plan the island while those adjacent works are still being drawn, not after the finishes have been chosen.

Getting the Size and Clearance Right

The island should be drawn around the room's fixed conditions, not around a photograph. Measure walls, windows, doors, bulkheads, existing cabinetry and appliance positions. Then draw the island at full size, including handles, open doors, stools and the standing space needed to work safely.

Use clearance as a behaviour test

Keep at least 900 mm around the island. Allow 1,000 to 1,200 mm preferred where two people cook, unload a dishwasher or pass each other regularly. The Australian guide to island sizes and layouts outlines these planning considerations. The wider clearance is working space, not decoration. It lets one person prepare food while another opens a drawer or carries a dish past.

Test the plan in this order:

  1. Map appliance door swings and traffic paths.
  2. Set the island footprint.
  3. Check working-side clearance.
  4. Check seating-side clearance.
  5. Run through the busiest daily routines before ordering cabinetry.

A standard Australian island bench is commonly 900 mm deep overall, using 600 mm cabinetry and a 300 mm seating overhang. Bench-to-bench spacing of about 1,200 mm is widely used, while comfortable stool use needs at least 300 mm of legroom beneath the top. The Australian kitchen dimensions guide explains these dimensions and their structural implications.

An outdoor air conditioning unit with labeled clearance measurements for optimal airflow, maintenance, and system longevity.

Size for the people who use it

A compact prep island may suit one cook. A family island needs separate areas for preparation, serving, seating and movement. If one person is chopping, another is carrying a hot tray and a child is eating at the end, a clearance that looked acceptable on paper can become restrictive.

Do not extend the island to fill the room. Extra length can provide more storage and clearer work zones, but it can also introduce a slab joint, complicate installation and make the centre harder to clean. Select the largest footprint that protects safe movement and matches the household's routines.

The room shape still sets the limits. Compare the island's relationship with an L-shaped kitchen layout before finalising the plan. Adjacent cabinetry, door swings and the route through the renovation should determine the island, including how it will work alongside any bathroom being renovated at the same time.

Planning Services and Structure Before You Fall in Love with Stone

The stone sample is easy to choose. The difficult decisions sit below the benchtop, inside the walls and across the renovation schedule. A Victorian home may need floor strengthening, new service routes and careful coordination with bathroom works before the island footprint is fixed.

Start with the floor structure. A timber floor may support a modest island, but a long stone top, integrated sink, heavy appliance or deep seating overhang can concentrate weight in one area. Confirm the joist direction and condition early. Depending on the house, the work may require a reinforced bearer, added supports or another method of spreading the load. Concrete slabs remove some structural questions, but they still need checking for plumbing, electrical conduits and existing services.

Put services on the drawing first

An island sink needs a waste route back to the main drainage connection. That route may run beneath the floor, through framing or along another planned path, with enough fall and access for future maintenance. The dishwasher should sit close enough to the sink for practical connections, while cabinetry must leave room to isolate, inspect or replace appliances.

An island cooktop or oven creates more coordination:

  • Electrical supply: Dedicated circuits and appliance locations must be confirmed before cabinetry is made.
  • Power points: GPOs need safe positions away from splash-prone areas.
  • Lighting: Pendant wiring should be planned before the ceiling is closed or painted.
  • Gas: If gas remains, a licensed fitter must install it to a compliant isolation point.
  • Ventilation: The cooktop position can affect extraction, ceiling penetrations and the room's visual balance.

Bathroom renovations can share this access. A single demolition period may expose floors and walls for several service routes, reducing duplicated work and patching. The sequence must be drawn and documented, however. If the island changes after first fix, the trades may need to reopen finished areas, adding cost and delay to the wider renovation.

Confirm the slab before finalising the footprint

Standard engineered stone slab sizes in Australia are typically around 3,060 mm by 1,440 mm. That dimension constrains the maximum continuous island run without a visible joint, particularly with a waterfall edge or generous overhang. If the proposed top exceeds the available sheet, revise the island length, accept a joint or choose a different material layout before fabrication.

A measured plan should record the appliance positions, waste points, power, lighting, ventilation, floor structure and access routes. It should also show how kitchen work will be sequenced with adjacent bathroom demolition and installation. Resolve those buildability decisions first, then select stone as a finish that fits the plan rather than forcing the renovation to fit the stone.

Choosing Materials and Finishes That Earn Their Place

A kitchen island earns its finish through daily use, not showroom photography. A family island may face hot cookware, spills, chair contact, cleaning products and constant handling, while a decorative island without a sink or cooktop carries less exposure. Choose the surface and joinery around those conditions first.

Compare the benchtop options

Material Durability Stain/Heat Resistance Typical Cost (per m², AUD) Slab Length Limit Best For
Engineered stone Hard-wearing for everyday use, subject to manufacturer care requirements Good everyday resistance, hot cookware still needs protection Varies by specification and supplier Depends on available sheet size Contemporary family kitchens
Natural stone Can be highly durable, with variation between stone types Resistance varies, sealing and care may be required Varies by stone and fabrication Depends on selected slab Kitchens where natural variation is part of the design
Solid timber Repairable and warm, but can mark and move with moisture More vulnerable to heat, staining and standing water Varies by species and finish Depends on board construction Warm, tactile interiors
Stainless steel Durable and hygienic, though it can scratch and show fingerprints Strong heat and moisture performance Varies by fabrication Fabricated to project requirements Hard-working or commercial-inspired zones
Laminate Practical and economical, with quality dependent on construction Good for general use, but vulnerable at damaged edges and prolonged heat Varies by range and profile Determined by manufactured sheets Budget-conscious renovations

The island should also belong to the wider home. Warm timber in the kitchen can make a cool benchtop feel disconnected, unless the cabinetry, flooring or lighting provides a clear link. If adjacent bathroom works use stone, tile or timber-look finishes, repeating a related tone can make both rooms feel considered without matching every surface.

Spend where the island takes punishment

Painted polyurethane gives cabinetry a smooth, controlled colour, but busy ends can show knocks readily. Timber veneer brings grain and warmth. Laminate is often a practical choice for panels exposed to chair scuffs, bags and family traffic. Deep colours may show marks more clearly, so assess samples in the room's natural light and against the household's cleaning habits.

Edge treatment changes both appearance and performance. A sharp profile suits a crisp contemporary kitchen, but a softer edge handles everyday contact more comfortably. A waterfall end uses extra material and requires accurate fabrication, with the slab pattern aligned across the return.

Review the complete surface choice with this kitchen benchtop materials guide before treating the island as a standalone feature. Confirm the finish works with the floor, cabinetry, adjacent bathroom selections and the level of maintenance the household will provide. A beautiful material that needs constant protection can become an expensive irritation once the renovation is complete.

Seating, Storage and How the Island Handles Real Workflows

An island earns its footprint when it supports the way the household cooks, eats and moves. A backless stool suits a modest overhang, while a broad upholstered chair needs more clearance behind it and makes the island feel larger from the circulation side. The comfortable option for one household can obstruct another, particularly in a Victorian home where walls, doorways and existing floor structure already limit movement.

Start with the daily scenes

Map the ordinary moments before choosing the seating layout. On a school morning, one person may prepare breakfast while another opens the refrigerator and a child sits at the island. During dinner preparation, the surface may carry ingredients, chopping boards and serving dishes. After school, several people may gather at the same edge while the cook still needs access to drawers and the sink.

Seating areas need about 900 mm behind stools for passing, particularly where the island shares space with the main kitchen route. Beneath the benchtop, allow at least 300 mm of legroom. Overhangs beyond 300 mm require additional structural support, especially with stone tops. Confirm the support detail with the cabinetmaker and stone fabricator before the slab is ordered.

A single-height island keeps the surface visually calm and preserves flexible preparation space. A stepped breakfast bar separates food from seating, but reduces usable surface and creates a junction that collects crumbs. A multi-tier design can hide mess from the dining area, yet adds edges and may make conversation less natural.

A kitchen island design showing organized storage, counter seating, and functional pull-out drawers in a luxury home.

Give every drawer a job

Storage should follow the workflow rather than fill every available cavity.

  • Large drawers suit pots, pans and mixing bowls near the preparation zone.
  • Narrow pull-outs keep oils, trays and frequently used ingredients visible and reachable.
  • Waste storage belongs close to preparation and clean-up, not at the far end of the room.
  • Open shelving can display cookbooks or serving pieces, but needs disciplined organisation.
  • Seating ends should not take the best storage location from the working side.

Drawer heights also need to match their contents. A shallow drawer wastes space for pans, while an oversized drawer can become difficult to organise and heavy to open. Check corner access, handle clearances and the relationship between island storage and nearby bathroom works, especially if shared plumbing routes or flooring are being coordinated.

A sink keeps the cook connected to guests and family, but puts dishes in the room's most visible position. A clean-up zone on the perimeter can keep the island clearer, particularly where entertaining is frequent. Review drawer depth, corner access and appliance placement with these kitchen cabinet storage ideas before approving the final elevations.

Budgeting, Timelines and the Bigger Renovation Picture

A kitchen island becomes expensive when its design ignores the work beneath it. Cabinetry and a benchtop are only the visible parts. Plumbing, new electrical circuits, gas, ventilation, floor repairs, custom seating, stone joins and difficult access through a Victorian home can all change the final cost.

Start with a measured allowance, then separate island costs from work already included in the wider renovation. Cabinetry and hardware form the base. Benchtop fabrication can become the largest finish cost when the island is long, has a thick edge or requires a premium slab. Services and labour determine how much floor, wall or ceiling access is needed.

Build the allowance around complexity

A standalone custom island typically ranges from $3,000 to $9,000 before major services are added. A plumbed, powered or highly customised island needs its own allowance, rather than being squeezed into a furniture-style budget.

Island Type Typical Cost Range (AUD) Kitchen Share of Renovation Budget Lead Time (Measure to Install) Key Cost Drivers
Base cabinetry-and-benchtop island Project-specific quotation Depends on the wider scope Depends on cabinetry and stone availability Cabinetry, hardware, benchtop, delivery and installation
Plumbed and powered island Project-specific quotation, with services added Higher than a furniture-style island Requires early rough-in coordination Sink, waste, dishwasher, circuits, lighting and floor access
Full custom island with stone and integrated seating Project-specific quotation Determined by fabrication and structural complexity Longer where custom fabrication and slab joints are involved Custom cabinetry, stone profile, support frame, seating, access and finishing

The table is a planning framework, not a measured quotation. Confirm slab dimensions, support requirements and access before approving a finish that may need joins or specialist handling.

Coordinate it with the rest of the house

In Victoria, kitchen and bathroom renovations often share demolition, electrical, plastering, tiling, waterproofing coordination and site access. Running adjacent bathroom work at the same time can help organise trades, but only when both scopes are fixed early. A bathroom renovation may also alter walls, doors or service routes, reducing the kitchen footprint available for the island.

Set aside money for coordination and building work before choosing decorative upgrades. The kitchen budget may need to cover floor repairs, structural checks, temporary protection and reinstatement after services are installed. An island that crosses a shared plumbing route can also affect the bathroom sequence, particularly where flooring or access panels are involved.

Allow time for the measure-up, design approval, demolition, first fix, cabinetry manufacture, installation, stone templating, fabrication and final fit-off. Stone and cabinetry should be ordered only after site dimensions, appliance specifications and service locations are confirmed.

Ask the renovation specialist to list provisional allowances, exclusions, lead times, site responsibilities and the process for approving variations. That paperwork protects the programme as much as it protects the budget. A clear decision about what the island must do is usually more valuable than spending early on a finish that later needs redesigning.

Common Mistakes That Derail Island Designs

The expensive island mistakes usually start with assumptions made on paper. A plan can look generous until someone stands at the dishwasher. A slab can appear achievable until the fabricator checks sheet dimensions and the route into the house. A sink can seem simple until the waste path has to cross the floor.

Mistake one is trusting the plan without testing the room

Mark the island perimeter on the floor with tape and place temporary boxes where the cabinetry will sit. Open the oven, dishwasher, bin and refrigerator doors. Put stools behind the seating edge, then walk through the room while another person prepares food.

This practical test exposes conflicts that a clean drawing hides:

  • Appliance overlap: A door may open into the main working aisle.
  • Traffic pressure: The route to the dining room may cut through the preparation zone.
  • Stool congestion: Chairs may reduce the passage behind the seating side.
  • Reach problems: A deep island can leave the centre difficult to clean or use.
  • Corner dead space: Cabinetry may create storage that looks generous but is awkward to access.

The fix may involve a different orientation, fewer seats, relocated appliances or a simpler preparation station. Shrinking the island is only one option.

Mistake two is ordering an oversized slab too early

Large islands look impressive in drawings, but fabrication depends on sheet dimensions, transport access, handling and support. A standard Australian slab reference gives 3,060 mm by 1,440 mm as a common slab size. A longer or deeper design may therefore require a joint, a revised layout or more material planning.

Check the slab before the cabinetry order. Confirm where joins will fall, whether a waterfall end can be handled safely and how the stone will enter the home. A centred joint can look deliberate. One forced into the busiest preparation area reads as a late compromise.

Stone also needs enough room for templating and fabrication. Walls, panels, appliance positions and finished floor levels should be settled before the final measure.

Mistake three is leaving services until after cabinetry

A sink, dishwasher or cooktop is part of the island's construction plan, not a late accessory. Waste needs a workable route and fall. Power needs the correct circuit and a safe outlet position. Gas work requires a licensed fitter and a compliant isolation point. Pendant lights need wiring before the ceiling is closed.

Start with a services drawing that identifies:

  1. Existing waste points and likely connection routes.
  2. Floor joists, slab penetrations and structural constraints.
  3. Appliance loads and electrical locations.
  4. Lighting, extraction and ventilation requirements.
  5. Access for future maintenance.

A bathroom renovation beside the kitchen makes this coordination more important. Shared access, demolition and service routes can help the programme when both rooms are planned together. If the bathroom scope changes later, it may affect walls, flooring, doors or the space available for the island.

Mistake four is assuming the floor will cope

Cabinetry may be relatively light compared with stone, but the load becomes concentrated along the island footprint. Long tops, integrated appliances and unsupported overhangs increase the need to check the substrate before installation.

Resolve reinforcement before the joiner arrives. Waiting until stone is on site can mean removing finished work, delaying fabrication or accepting a support detail that weakens the design. For stone overhangs beyond 300 mm, additional structural support is recommended to reduce cracking or deflection risk, particularly with stone tops. Confirm the support detail with the relevant trade and structural professional before fabrication.

Floor levels matter as well. An island installed over an uneven or recently repaired surface can show gaps at the panels, affect appliance alignment and create problems where the kitchen meets adjacent bathroom works.

Mistake five is designing storage for appearance

Deep cupboards often look efficient in an elevation. In daily use, the back corners become storage graveyards. Drawers usually give better access to heavy cookware, while narrow pull-outs can suit oils and trays. Open shelves work only when the household is comfortable maintaining a visible display.

Assign storage according to the person using it. Pots belong near the preparation or cooktop zone. Everyday dishes should sit close to clean-up. Bins should support the movement from chopping board to waste. Seating should not consume the best drawer bank because it photographs well.

Check door swings and drawer pulls against nearby appliances. A beautiful storage plan fails if two drawers cannot open together or if the dishwasher blocks access to the cutlery drawer.

Mistake six is treating seating as decoration

A stool needs knee room, a comfortable seat height and enough space for the person beside it. The overhang must suit the stool and the support detail, rather than being chosen after the cabinetry and stone are fixed. A family using the island for meals needs a different arrangement from a household wanting one perch for morning coffee.

Keep the working side clear. If seating forces people to cross behind the cook, the island becomes a bottleneck. If a raised breakfast bar blocks the cook's view or interrupts serving, it may add visual layering without improving the workflow.

Seating also changes how the island handles spills, heat and cleaning. Place it away from the busiest appliance openings and avoid creating a narrow passage between stools and a bathroom access route.

Mistake seven is forgetting light, heat and air

An island can become a dark obstacle when the lighting plan is left until the end. Pendants should illuminate preparation without producing glare across the seating side. A cooktop requires careful consideration of extraction and the relationship between heat, traffic and nearby seating.

The construction scope should state who is responsible for cabinetry, stone templating, plumbing, electrical work, structural checks, appliance connections and final fit-off. It should also list provisional allowances, exclusions, lead times and the variation process. Regular site checks keep the plan aligned with what the builder finds inside the walls and floor.

Measured drawings and a 3D review can expose a conflict before construction. SitePro Bathrooms offers a kitchen planner that lets homeowners enter room dimensions, position cabinets and appliances, and compare layouts in 2D and 3D, including island sizes and appliance positions.

A convincing render is not proof that an island can be built. It helps when it exposes a problem before the trades arrive.

The same planning discipline applies when the renovation includes a bathroom. Industry data shows bathroom renovations account for a significant share of Australian home improvement spend, so kitchen and bathroom scopes need their own allowances, sequencing and trade responsibilities. Treating the island as a separate decorative purchase can create conflicts with waterproofing, flooring, access and service installation next door.

In Victoria, domestic builders registered in the DB-U class may carry out, manage or arrange subcontractors for all components of domestic building work. Confirm the builder's registration before signing, then define the actual scope and responsibilities in the contract. The registration category does not replace clear documentation.

A buildable island comes from connected decisions. Measure the room, test the clearances, confirm the floor and services, check the slab, allocate storage by workflow and settle the colour and edge profile last. If you're planning a kitchen island in Highett or greater Victoria, SitePro Bathrooms can provide a measured renovation consultation with a coordinated 3D layout, services review and itemised quotation before cabinetry or stone is ordered.

  • siteprobathrooms

10 Kitchen Cabinet Storage Ideas for Renovations

You've got plenty of cabinetry, yet the kitchen still feels short on storage. Baking trays are stacked behind one another, the back of the corner cupboard has become a graveyard for jars, and the space beneath the sink is difficult to use because plumbing takes up the most convenient area. Meanwhile, the benchtop fills with appliances because putting them away is inconvenient.

The strongest kitchen cabinet storage ideas start before cabinet doors are chosen. Measure the room, map plumbing and power, note what your household reaches for every day, and decide which items should stay visible versus concealed. In compact Victorian kitchens, an extra cabinet isn't always the answer. Better access, sensible zoning, and storage that suits the way you cook often deliver more value.

Australian renovators are already prioritising practical storage. The 2023 Houzz Australia Kitchen Trends Study reports that 53% of kitchen updaters are installing pantry cabinets, while 27% are allowing space for a walk-in pantry. The same study identifies pull-out waste and recycling cabinets, cutlery organisers, deep drawer organisers, and similar built-in features among the most requested additions.

SitePro Bathrooms is relevant when a kitchen renovation forms part of a broader home upgrade. Its Highett team provides concept development, 3D design, construction, and finishing for coordinated kitchen and bathroom renovations. The storage decisions below will help you have a more useful design conversation.

1. Pull-Out Pantry Systems

Deep cabinets hold a surprising amount, but fixed shelves often make the rear space impractical. A pull-out pantry solves that access problem by bringing the entire shelf forward, so bottles, packets, jars, and small appliances can be seen without emptying the cabinet first.

This option suits narrow vertical cabinets, deep base cabinets, and carefully planned corner zones. It works particularly well in compact kitchens where floor area is limited, but it isn't automatically the best choice for every pantry. A narrow mechanism can limit what you store, and a fully loaded pull-out places considerable demand on its runners. Choose quality hardware, distribute weight sensibly, and don't treat the cabinet as a dumping zone.

Practical rule: Measure the finished internal width, depth, and height, not just the rough opening. Hinges, door thickness, fillers, and adjacent handles can affect the usable clearance.

Plan access before ordering

Use a pull-out for items you reach for frequently, such as oils, sauces, cereals, or spices. A full-height unit is less useful if it sits beside a wall or appliance that prevents the door from opening properly. Soft-close runners can reduce slamming and wear, while shelf lips and dividers help stop containers moving when the unit travels.

A 3D layout makes it easier to test the relationship between the pantry, refrigerator, preparation zone, and cooktop. Include the mechanism during the renovation design phase rather than trying to force a proprietary insert into a finished cabinet. SitePro Bathrooms' online kitchen planner can help frame those layout discussions before construction details are finalised.

A wooden pull-out pantry cabinet stocked with various dry goods, spices, and jars in a modern kitchen.

2. Vertical Dividers for Baking Sheets and Trays

Flat cookware becomes difficult to manage when it's stacked horizontally. A vertical divider cabinet turns baking sheets, cooling racks, chopping boards, serving trays, and pan lids into a file-like arrangement. You can pull out one item without disturbing the rest.

This is one of the simplest storage decisions to build into a new cabinet run. It suits family kitchens that use several trays regularly, as well as entertaining-focused homes with large serving pieces. It can also work in a narrow cabinet beside an oven, provided the opening is wide enough for comfortable removal.

Build the divider around the collection

Start by measuring the largest tray, including its handles or rim. Fixed timber slots create a custom appearance, while adjustable metal dividers provide more flexibility if your cookware changes. Leave enough space for fingers to grip each item, but don't make the slots so generous that trays lean into one another.

Moisture deserves attention. Damp boards or recently washed racks shouldn't be pushed tightly together, so slight separation and ventilation matter. A divider near the dishwasher may be convenient, but confirm that steam and splashes won't create a maintenance problem.

For a renovation, specify the divider location alongside the oven, preparation bench, or pantry. A cabinet that opens directly onto the main work zone will be used more often than one placed across a traffic path. In designer kitchens, the storage can remain completely concealed while still supporting a highly practical workflow.

A kitchen cabinet organised with vertical dividers storing baking sheets, cooling racks, and wooden cutting boards.

3. Soft-Close Drawer Inserts and Organisers

A drawer without internal organisation usually becomes a shallow pile of utensils. Inserts divide that space into working categories, keeping cutlery, peelers, measuring tools, tongs, and gadgets visible at a glance. The improvement comes from arranging the contents around use, not from adding compartments for their own sake.

Place everyday knives, forks, spoons, and cooking tools in the easiest drawers to reach. Less-used items can share a deeper drawer or a second tier. A two-level insert can increase access in a compact kitchen, but check that the upper tray clears the drawer front and doesn't force you to remove items before reaching the lower level.

Design drawers by task

A family kitchen might group school-lunch tools, food clips, and reusable containers near the preparation area. A keen home cook may prefer separate zones for knives, scales, thermometers, and measuring equipment. The right arrangement depends on who uses the kitchen and whether several people need access at the same time.

  • Measure first: Check the drawer box, internal height, runners, and front clearance before purchasing an insert.
  • Group by frequency: Keep the tools used at every meal in the most accessible drawer.
  • Allow for change: Adjustable dividers are more useful than rigid compartments when utensils vary in size.
  • Coordinate hardware: Soft-close runners should be selected with the cabinetmaker, not added as an afterthought.

Bamboo organisers can suit a warm contemporary palette, while removable plastic inserts may be easier to clean. Don't overfill every section. A drawer that technically stores more but requires careful stacking won't provide better daily access.

A two-tier corner lazy Susan turntable inside a kitchen cabinet filled with various spice jars.

4. Lazy Susan Turntables for Corner Cabinets

Corner cabinets fail when their depth exceeds your reach. A lazy Susan gives that dead space a moving surface, allowing jars, condiments, cookware, or small appliances to rotate towards the opening. It's a practical alternative to leaving the rear of the cabinet unused.

A turntable suits households that want to retain a corner cabinet without installing a more complex custom mechanism. It works best when the cabinet's internal shape leaves sufficient clearance for the rotating shelves and the door can open fully. Measure the cabinet carefully, including obstructions, hinges, shelf pins, and the thickness of the door.

Choose the right corner mechanism

Use a two-tier system where the cabinet has enough vertical space for both shelves. Keep heavy items low and distribute weight evenly. Non-slip liners help prevent jars and bottles from sliding as the shelf turns, but they won't compensate for overloading or poorly fitted hardware.

Some corner spaces are better served by a blind-corner pantry or a full-extension system. The choice depends on the opening, available depth, and the items you need to store. A turntable is convenient for smaller items that benefit from visibility. It can be frustrating for irregular cookware that catches against neighbouring pieces.

Install the mechanism during the renovation so the cabinet, doors, and shelves are designed together. SitePro Bathrooms' blind-corner pantry guidance is useful when comparing a rotating solution with a pull-out arrangement.

5. Overhead Cabinet Hanging Systems

The underside of an upper cabinet or the inside top of a cabinet often contains unused vertical space. Small hooks, rails, or hanging racks can use that area for mugs, measuring spoons, aprons, tea towels, or lightweight decorative objects. This can keep frequently handled items accessible without occupying another shelf.

The system works best for light items that you use regularly. Hanging mugs beneath a cabinet near the coffee station can be convenient, while storing heavy cookware from a door or upper shelf creates unnecessary strain. Adhesive hooks avoid drilling, but they still need a clean, suitable surface and a realistic weight limit.

Protect door clearance and sightlines

Before fitting anything, close the door and check the hinge movement. A mug or utensil that sits too low can collide with the contents below or prevent the door from sealing. Keep hanging storage away from heat, steam, and areas where splashes are common.

In a farmhouse renovation, a rail for tea towels may add useful character. In modern bathrooms and kitchens with a restrained finish, concealed hooks inside a cabinet can provide the same function without visual noise. Lighting also matters. An item may be technically stored but practically forgotten if the cabinet interior is dark.

Use this idea selectively. Too many hooks turn a tidy cabinet into another crowded display, and adhesive products can fail when exposed to grease or moisture. Plan the location in the 3D design stage, especially if upper cabinets include integrated lighting or unusual door heights.

6. Tiered Shelf Risers and Stackable Shelving

A fixed shelf often leaves unused space above plates, bowls, cans, or packets. A shelf riser divides that vertical void into separate levels, helping you see and reach items without creating unstable towers. Stackable shelving is especially effective in cabinets where shelf positions can't easily be changed.

This solution fits renters, smaller kitchens, and renovation clients who want flexible organisation rather than permanently built-in hardware. It also lets you test a storage arrangement before committing to custom cabinetry. The trade-off is that freestanding risers can shift, collect crumbs, or fail under heavy loads if they aren't designed for the job.

Match each tier to the contents

Use a sturdy riser for plates and bowls, and lighter units for packets or small pantry goods. Non-slip mats can reduce movement. Group similar items by size so you don't create an awkward overhang, and leave enough room for the cabinet door to close without catching the front edge.

Start with the cabinet that causes the most frustration rather than buying organisers for every shelf. If the lower level becomes overloaded, the riser hasn't solved the access problem. It has created another obstacle.

In modern kitchen renovations, built-in adjustable shelving may be the better long-term answer where storage needs are stable. Freestanding risers remain useful for testing heights, accommodating changing crockery, or organising a pantry that needs regular reconfiguration.

7. Specialised Spice Rack Cabinets

Spices disappear when they're stored in a deep drawer or behind tall bottles. A narrow cabinet with tiered shelves keeps labels facing forward and places seasonings close to the preparation or cooking zone. It can be concealed behind a standard door or integrated into a wider pantry arrangement.

Position the rack away from direct cooktop heat and strong sunlight. Heat and light can affect the condition of spices, while a cabinet beside the cooktop may collect grease. If the rack is near the preparation bench, you'll gain access without placing every jar on the benchtop.

Make the collection manageable

Standardising jar sizes creates a cleaner arrangement and makes shelf spacing easier to plan. Label containers clearly, then organise them alphabetically, by cuisine, or by how often you use them. The best system is the one everyone in the household will maintain.

Interior LED lighting can improve visibility, but the electrician and cabinetmaker need to coordinate wiring, switching, and heat management. Include those details before the cabinet is manufactured. A spice rack that blocks a drawer, reduces a landing area, or sits too far from the cooking workflow may look elegant while performing poorly.

For a minimalist kitchen, concealed spice storage protects a clear visual line. In a more expressive designer kitchen, an open display can work if the jars remain orderly and the location doesn't expose them to cooking residue. Review the collection periodically rather than allowing rarely used jars to occupy the most accessible positions.

8. Under-Sink Organisers and Drawer Systems

The cabinet beneath the sink has to house pipes, waste fittings, cleaning products, bins, and sometimes a filtration unit. A fixed shelf often leaves a dark, awkward cavity. Shallow pull-outs, sliding drawers, and split-level organisers give each item a defined position while keeping the plumbing accessible.

Photograph the existing plumbing before demolition. During design, mark the trap, isolation valves, filters, waste connections, and the space needed for future repairs. Ask the cabinetmaker to create removable drawer sections or shaped components around the pipework. A storage layout that cannot be taken out for servicing will cause trouble later.

Keep the zone safe and serviceable

Choose moisture-resistant cabinet finishes and allow some ventilation. Store bottles and cleaning products in leak-contained trays, with child-safety latches where children may reach hazardous supplies. Keep the plumbing exposed enough for inspection. The plumber should be able to reach valves, connections, and filters without dismantling permanent storage.

A pull-out bin can separate general waste and recycling while keeping containers off the benchtop. Its usefulness depends on capacity, liner removal, odour control, and how easily the door opens. Separate compartments need enough width for real household waste, not just a tidy showroom arrangement.

Check the bin position against the preparation area and the dishwasher. A short route can improve cleanup, while a bin beside stored food or clean dishes may create an avoidable hygiene concern. In a compact kitchen, under-sink drawers can recover valuable access, but leave room to spot leaks and wipe the cabinet floor. The same service-first approach helps when planning bathroom renovations, new bathroom ideas, or modern bathrooms, where concealed plumbing also needs practical access. Registered builders unlimited can help coordinate these details across a broader home renovation, including designer bathrooms.

9. Integrated Wine and Beverage Coolers

A built-in beverage cooler gives drinks a defined home and can keep the main refrigerator available for food. It suits households that entertain often, collect wine, or want a dedicated coffee and drinks station. Integrated cabinetry can make the appliance appear intentional rather than added to the end of a run.

This is a premium choice, so planning errors are expensive. Confirm electrical requirements, ventilation, door swing, service access, and the appliance manufacturer's installation clearances. A cooler enclosed without adequate ventilation may perform poorly or require premature servicing.

Decide whether it earns the space

Place the unit away from direct sunlight and heat-producing appliances. A drinks station near the dining area can reduce traffic through the cooking zone, while a cooler beside the cooktop may be convenient but less suitable for temperature-sensitive storage. Capacity should reflect actual entertaining habits, not an idealised lifestyle.

In a designer kitchen, panelled integration can preserve a consistent cabinet finish. In a more informal renovation, a visible appliance may be easier to replace or maintain. Either approach needs a clear plan for power and ventilation before the cabinetmaker finalises the opening.

A beverage cooler also competes with drawers, pantry storage, and bins. Compare the benefit against the cabinet space it consumes. If drinks are rarely stored separately, deep drawers or a better pantry may solve a more pressing problem.

10. Custom Pantry Cabinet Systems

A custom pantry earns its cabinet space when the household needs separate zones for bulk goods, baking supplies, small appliances, lunch items, or specialist ingredients. Choose between a full-height cabinet, walk-in pantry, or butler's pantry according to available floor area, daily routines, and whether appliances should stay hidden from the main room.

Pantry storage is widely included in kitchen renovations, but adoption alone does not make a walk-in pantry suitable for every Victorian home. A full-height cabinet may provide better access in a compact layout, while a walk-in pantry needs practical entry clearance, lighting, ventilation, and enough width to avoid becoming a narrow storage corridor. The choice also affects the wider renovation plan, including circulation between the kitchen, modern bathrooms, and other living areas.

Design around volume and frequency

Separate everyday items from reserve stock. Keep frequently used goods between comfortable reach heights, place occasional supplies higher, and use adjustable shelves so the arrangement can change. A baker may need broad shelves for flour and mixers, while a family may prioritise lunchboxes, cereals, and quick-access snacks.

A pantry should solve a clear access problem, not just add volume. Deep shelves can hold more, but they also hide older supplies. Shallower shelves improve visibility and replenishment, although they may reduce capacity. Include task lighting, durable surfaces, and a surface that can be wiped clean after spills. Labels and categories help, but the layout should remain usable without perfect organisation.

Plan power outlets before installation if appliances will sit inside the pantry. Confirm door swing, shelf depths, ventilation, and clearance for carrying stock into the space. These details matter in designer bathrooms and broader home renovations too, where registered builders unlimited can coordinate services, cabinetry, and changing room requirements.

Before committing, check dimensions and clearances with SitePro Bathrooms' kitchen cabinet sizes guide. The practical test is simple: each zone should be easy to reach, replenish, clean, and justify against the floor area it occupies.

Top 10 Kitchen Cabinet Storage Ideas: Side-by-Side Comparison

Storage Solution Implementation Complexity Resource Requirements Expected Outcomes Ideal Use Cases Key Advantages
Pull-Out Pantry Systems High, custom cabinetry or deep-cabinet retrofit Moderate–high cost; requires ≥12" depth and quality slides Maximizes deep storage; full-extension access and visibility Renovations with deep or awkward cabinets; compact kitchens Full-access vertical storage; adjustable shelving
Vertical Dividers for Baking Sheets and Trays Medium, dedicated slot or retrofit inserts Low–moderate cost; precise interior measurements Upright organization; prevents warping and stacking damage Baking sheet, cutting board, and tray storage Keeps flat items visible and easy to retrieve
Soft-Close Drawer Inserts and Organizers Medium, drawer sizing and possible reinforcement Low–moderate cost; soft-close slides and modular inserts Reduced clutter; protected utensils; quieter drawers Utensil/cutlery organization in everyday kitchens Customizable compartments; improved workflow
Lazy Susan Turntables for Corner Cabinets Low–Medium, simple retrofit or install Low cost; correct diameter and quality bearings Converts corner dead space to accessible storage Corner cabinets for spices, small appliances, pantry items 360° access; affordable corner solution
Overhead Cabinet Hanging Systems Low, simple hooks/rails (adhesive or screw) Very low cost; minimal tools; limited weight capacity Utilizes unused vertical interior space; frees counters Small kitchens, mug and small-item storage Inexpensive; easy to install and customize
Tiered Shelf Risers and Stackable Shelving Very Low, plug-and-play setup Low cost; measure shelf height for fit Increases usable shelf levels; organized displays Dishware, bowls, pantry tiering; renters and quick upgrades Affordable; reconfigurable; works in existing cabinets
Specialized Spice Rack Cabinets Medium–High, custom narrow/angled shelving Moderate cost; optional lighting; dedicated cabinet space High visibility and protection for spices; improved workflow Gourmet cooks, frequent-seasoning users, display kitchens Optimized spice visibility; tailored storage
Under-Sink Organizers and Drawer Systems Medium–High, plumbing-aware customization Moderate cost; moisture-resistant materials; precise fit Organized under-sink area; safer hazardous-item storage Cleaning supplies, trash/recycling, compact sinks Maximizes awkward space around plumbing; pull-out access
Integrated Wine and Beverage Coolers High, built-in integration, electrical and ventilation High cost; dedicated power and ventilation; cabinet space Climate-controlled beverage preservation; frees fridge space Entertaining homes, collectors, luxury renovations Preserves wine quality; attractive built-in feature
Custom Pantry Cabinet Systems Very High, full custom design and installation Very high cost; dedicated wall space; 3D planning Maximum bulk storage and tailored organization Large families, entertainers, luxury home builds Fully customizable; substantial storage and resale value

Choose Storage That Earns Its Cabinet Space

Good storage solves a specific problem. Pull-outs improve access to deep cabinets, vertical dividers stop baking trays and boards becoming a leaning stack, and drawer inserts give small tools a defined place. Turntables make corners more usable, while shelf risers add levels where fixed shelves leave empty height. Custom pantry systems handle higher-volume storage, but they require more planning and can consume valuable floor area.

Australian renovation research shows why this approach matters. HIA's Reno Revolution coverage says 29% of renovators cite inadequate storage as a key issue, behind outdated or small spaces at 44% and old finishes at 43%. The same source also underlines that storage is a real renovation pain point, not merely a preference for a cleaner-looking kitchen.

Budget should shape the decision without reducing it to the cheapest hardware. Houzz AU reports an average kitchen renovation spend of $19,300, with larger kitchens over 10 square metres averaging $22,600 and smaller kitchens under 10 square metres averaging $14,600, as reported in the Houzz Australia kitchen renovation coverage. A compact kitchen may gain more from deep drawers, internal organisers, and a carefully located pantry cabinet than from an oversized feature pantry.

Test the layout before construction

Before finalising drawings, check:

  • Cabinet dimensions: Confirm internal width, depth, height, shelf clearances, and mechanism requirements.
  • Daily reach: Put frequent-use items near the preparation, cooking, and cleaning zones.
  • Plumbing: Allow inspection and repair access beneath sinks and around filtration equipment.
  • Electrical planning: Coordinate outlets and dedicated circuits for integrated coolers and pantry appliances.
  • Ventilation: Protect enclosed appliances and moisture-prone storage with appropriate airflow.
  • Door clearance: Check handles, walls, appliances, and adjacent drawers at full opening.
  • Future flexibility: Prefer adjustable shelves and adaptable compartments where household needs may change.

A broader renovation plan can also connect kitchen storage with bathroom renovations. Modern bathrooms and new bathroom ideas often rely on floating vanities, flat-panel cabinetry, neutral finishes, and concealed storage, while designer bathrooms demand the same attention to access, moisture, lighting, and service zones as a kitchen. If one project covers several rooms, coordination matters more than selecting isolated features.

Homeowners may also search for registered builders unlimited when comparing renovation coordination options in Victoria. A Domestic Builder, Unlimited registration allows a builder to personally carry out, manage, or arrange subcontractors for all components of domestic building work, and to handle functions such as plan examination, tendering, building surveyor submissions, and inspection organisation. The Australian Institute of Building licensing guidance also states that this registration doesn't permit total demolition of an existing building.

For a coordinated project in Highett or greater Victoria, discuss the storage brief before finishes are locked in. Homeowners planning kitchen or bathroom renovations can explore SitePro Bathrooms' consultation, 3D design, construction, and finishing services, then request a personalised conversation about cabinet access, plumbing, appliances, and the way each room needs to work.

  • siteprobathrooms

Kitchen Renovation Before After: Real Transformations

You've probably seen the pattern online. A dated kitchen appears in one photograph, then the next image shows clean cabinetry, a generous island and carefully styled benchtops. The transformation looks simple until you stand in your own kitchen and notice the uneven floor, crowded work triangle, ageing wiring and benchtop material that may no longer suit current requirements.

A credible kitchen renovation before and after comparison needs to show more than colour changes. It should explain what stayed, what moved, what compliance work was required and why the final cost changed. In Highett and greater Victoria, that distinction separates a useful renovation plan from an attractive photograph that gives you unrealistic expectations.

What a Kitchen Renovation Before After Really Shows

A homeowner standing in front of a dated timber kitchen usually sees the obvious problems first: dark doors, tired handles, poor lighting and a benchtop that has lost its appeal. Those items can create a striking visual improvement without changing the room's footprint. Repainting, replacing handles, updating lighting and fitting new surfaces may produce a strong after image while retaining the existing plumbing, electrical points and cabinetry carcasses.

That's the first important distinction. A cosmetic refresh changes what you see. A reconfiguration changes how the kitchen works. Moving a sink, widening an opening, removing a wall or creating a new island can affect flooring, services, structural elements and approvals. The photograph might show only a brighter room, but the construction process may involve several trades working in sequence.

A side-by-side comparison of a kitchen renovation showing the transformation from dated wood to modern white.

The visible result hides the scope

A compact apartment kitchen in Highett might retain its sink, cooktop and waste connections while gaining better storage, lighter finishes and integrated appliances. The room can look substantially larger even though no wall has moved. That approach usually limits disruption and makes the existing layout work harder, but it won't solve a poor workflow.

A family kitchen with a closed-off dining area presents a different decision. Removing a dividing wall and introducing an island can improve sightlines and casual dining, yet the project may require structural advice, revised electrical planning, new flooring and more extensive joinery. The island also needs enough circulation around it. A beautiful oversized island that restricts cupboard access isn't a successful after state.

Victoria's renovation market includes both extremes. A 2024 Australian national survey found kitchens and bathrooms were the two most popular rooms to renovate, while over 30% of respondents set budgets between A$5,000 and A$15,000. The same survey estimated typical kitchen projects at 2 to 9 weeks, depending heavily on scope and retained services, as reported in Australian renovation cost and timing research.

Practical rule: Compare your kitchen with online examples by scope, not by appearance. Ask whether the project retained the layout, replaced the cabinetry or altered the building itself.

What changed in 2026

The strongest contemporary results aren't stark white rooms. Australian design coverage points towards warm minimalism, timber tones, earthy neutrals, concealed appliances and larger islands. These choices can make a kitchen feel calm and integrated, but they still need to reflect the home's architecture and the way the household cooks.

Before signing off a design, mark the changes in three groups:

  • Surface changes: doors, handles, paint, splashback, lighting and selected appliances.
  • Functional changes: drawer configuration, pantry storage, appliance placement and task lighting.
  • Building changes: walls, plumbing, electrical circuits, flooring levels, ventilation and structural work.

That record makes the before-and-after comparison honest. It also gives your builder a clearer brief and helps you decide whether your priority is presentation, storage, entertaining space or long-term practicality. For a broader comparison of renovation outcomes, see this guide to bathroom renovation before and after projects.

Real Project Budgets and Timelines Explained

A kitchen budget is only useful when it shows the work behind the finished photograph. Demolition, rubbish removal, electrical changes, plumbing, installation, benchtops, splashbacks, floor repairs and compliance decisions can each change the final price. Ask the builder to mark every item as included, provisional or excluded before comparing quotes.

The scope matters more than the finish at the start. The ranges below are Australian benchmarks, not promises for a Highett property. Existing conditions, site access, joinery specifications and structural changes will determine the contract value.

Compare scope before finishes

Scope level Typical cost range Timeline Expected ROI
Cosmetic refresh Qualitative range, generally below a full remodel when services and cabinetry are retained Shorter programme, subject to product availability Often strongest when the existing layout already works
Mid-range renovation Around A$35,000 Often within the broader 2 to 9 week Australian kitchen project context Estimated resale uplift of A$20,000 to A$28,000, or 57% to 80% ROI in the cited benchmark
Extensive renovation Around A$65,000 Longer programme because structural and service work add sequencing Reported return of 62% to 75%, with estimated value of roughly A$40,000 to A$48,750

The mid-range benchmark and resale figures come from Australian renovation value guidance. The broader timeline context is reported in the national renovation survey. The extensive-renovation return comes from the same Australian value benchmark.

A mid-range renovation can suit a home where the layout is basically sound but storage, lighting and finishes are tired. New drawers may improve everyday use, task lighting can correct poor visibility, and appropriately selected appliances can support the way the household cooks. An extensive renovation has a stronger case when the plan wastes space or services are poorly positioned. Structural work still does not guarantee an equivalent increase in resale value.

Melbourne renovation guidance describes well-executed projects as capable of returning 1.5x to 2x the spend in suitable conditions. On that benchmark, a A$50,000 renovation could add about A$75,000 to A$100,000 to sale value. The same advice warns against over-capitalising, recommending a tired kitchen be raised to a solid 7/10 to 8/10 finish instead of receiving costly upgrades that buyers may not value. See Melbourne kitchen renovation ROI advice for that guidance.

Why the quote changes after design

Engineered-stone changes have made benchtop selection a compliance and budget decision, not just a styling choice. Australian renovation coverage describes increased use of zero-silica engineered stone and advanced porcelain surfaces. It also places complete kitchen renovation benchmarks around $35,000 nationally in 2026, with HIA-linked estimates closer to $42,000 including installation. The material, fabrication method and installation requirements need to be confirmed before the quote is accepted. Further context is available in Australian kitchen trends and renovation costs.

Your quote should identify:

  • Benchtop material and fabrication: Confirm the surface, edge profile, cut-outs, installation method and disposal of the old benchtop.
  • Service relocation: Check whether plumbing, electrical circuits, ventilation and appliance connections are included.
  • Making good: Allow for walls, floors, plaster, paint and splashback areas exposed during demolition.
  • Access and waste: Apartment access, parking, stairs and rubbish removal can increase labour without changing the design.
  • Lead times: Cabinetry, appliances and custom surfaces can delay the programme when orders are placed late.

A workable schedule begins with design confirmation and site checks, then moves through demolition and rough-in work before cabinetry, benchtops, splashbacks and final fit-off. Hidden conditions, split deliveries and unresolved selections are common sources of delay. Compare quotes by their inclusions and exclusions, using this guide to the cost of a new kitchen as a practical reference.

Detailed Case Studies from Victorian Homes

Before-and-after photographs rarely show the decisions that control the budget. In Highett and nearby Victorian suburbs, apartment access, existing services, structural walls and changing benchtop requirements can matter as much as the new cabinetry. The following profiles are practical project patterns, not reported client case studies, so they include no invented final costs or homeowner feedback.

A compact apartment refresh

A small apartment kitchen may have service points in sensible locations yet still suffer from poor storage, dark finishes and limited bench space. Relocating plumbing would add disruption without addressing the main problem, so the sink and cooking zone remain in place.

Storage planning delivers the visible improvement. Deep drawers replace awkward lower cupboards, overhead cabinetry reaches usable heights, and a tall pantry uses the available vertical space. Lighter doors, a reflective splashback and layered lighting make the room feel less enclosed. Integrated appliances reduce visual noise, although they can cost more and may be harder to replace if future appliance dimensions change.

Retaining services usually limits disruption and makes the existing layout work harder, but it won't solve a poor workflow. The risk is filling the room with too much joinery. A large island or excessive cabinetry can reduce working clearance and make an apartment kitchen less practical.

A family home opened to daily life

The second project starts with a kitchen separated from the living and dining areas. The owners want better supervision of children, casual meals at an island and a clearer connection to the backyard. Removing the visual barrier may achieve that result, subject to structural assessment, with the island positioned between preparation and living zones.

An island needs careful planning beyond its finish. Movement around it must remain comfortable, storage should sit on the useful side, and seating must stay clear of the main cooking path. Electrical planning also needs to happen before surfaces close up, because outlets, lighting and appliance circuits must be resolved early.

The hidden cost can sit behind the walls or under the floor. Outdated wiring, uneven flooring or a load-bearing wall may change the scope after demolition begins. Investigate those conditions first, record the findings and price the required work rather than treating it as an unavoidable surprise.

A detailed three-dimensional design helps homeowners assess whether the proposed opening, cabinetry and circulation work together. For further planning guidance, review these modern kitchen design ideas.

A premium joinery project

The third profile suits a larger home where the owners want concealed appliances, custom timber joinery and an organised entertaining zone. The finished design may include a full-height pantry wall, appliance garage, timber detailing and a carefully selected alternative to engineered stone. Changes to engineered-stone use and fabrication requirements can affect material selection, edge details, lead times and coordination, so the surface decision belongs in the scope review, not only the styling stage.

Premium joinery depends on accurate site measurements and a firm decision schedule. Custom panels must align with adjoining doors, appliance clearances need checking before manufacture, and timber tones should be assessed in the actual light. A late design change can delay several trades rather than one isolated item.

The common lesson is straightforward. A successful renovation matches the property, the household's routine and the amount of building work the owners are prepared to fund. The most expensive finish cannot rescue a poor layout, unresolved compliance work or a budget that ignored the conditions behind the before photograph.

Design Choices That Age Well Versus Those That Date Quickly

Following the latest kitchen trend doesn't guarantee a durable result. A photograph taken on handover day rewards visual novelty, while a household lives with cleaning requirements, storage limitations, damaged edges and changing tastes for years. The better question is whether the design will still feel proportionate and practical after the styling has disappeared.

Australian trend coverage describes a move from stark white towards warm minimalism, timber, earthy neutrals, hidden appliances and larger islands. Those elements can age well when they're used as a restrained palette and supported by a sound layout. They date more quickly when every surface, fitting and joinery detail repeats the same trend.

Keep the permanent decisions quiet

Cabinet proportions, work zones and storage deserve more attention than decorative fashion. Shaker, flat-panel and subtly profiled doors can all work when the scale suits the home. A neutral base also gives future owners, tenants or your own changing preferences room to add personality through paint, stools, artwork and movable lighting.

Timber brings warmth, but tone and finish matter. A small amount of timber can soften a neutral kitchen, while heavily matching timber across doors, flooring and furniture may make the room feel tied to a specific period. Earthy colours can provide character without demanding that every future choice coordinate with a strong feature colour.

The safest trend is a layout that works. Finishes can change later. Poor circulation and inadequate storage are expensive to correct.

Large islands need particular discipline. They support preparation, gathering and casual dining only when there's enough space to move around them and open nearby doors. If an island blocks the refrigerator, narrows the cooking route or becomes a dumping surface, its visual impact won't compensate for its daily inconvenience.

Treat surfaces as working materials

Benchtop selection involves maintenance as well as appearance. Some surfaces may need more care around heat, staining, impact or edge damage, while others may offer a more forgiving routine at the expense of a particular look. Ask the fabricator what cleaning, sealing and repair practices apply to the material under consideration, especially when comparing natural stone, porcelain and compliant alternatives.

Hidden appliances can create a beautifully quiet room, but access must remain practical. An appliance garage needs ventilation, usable power and enough clearance for the items you operate. Concealing everything can also make a kitchen feel less accessible if doors are heavy or storage is positioned above comfortable reach.

Hardware and tapware are easier to change than cabinetry, so they're useful places for controlled personality. Choose finishes that tolerate fingerprints, moisture and regular handling. Before committing, place samples beside the floor, wall colour and benchtop under both daylight and artificial light. A finish that looks balanced in a showroom can appear much stronger in a smaller Victorian room.

Working with Registered Builders and Understanding Compliance

A kitchen renovation becomes riskier when homeowners treat registration as a box-ticking exercise. In Victoria, the consumer regulator says a person carrying out domestic building work must register when handling a contract worth more than AUD 10,000. The requirement applies to individual practitioners rather than businesses, so you need to understand who is responsible for the work and contract.

Registered practitioners must hold the required qualifications, knowledge and expertise, and have domestic building insurance where applicable under the regulator's guidance. Registration doesn't guarantee that a particular design will suit your home, but it gives you a formal credential to verify before you sign.

Check the person behind the business

Ask for the practitioner's registration details and confirm that the registered individual matches the person named in the contract. Review the written scope, payment stages, variations process, start conditions and practical completion requirements. A polished showroom or website isn't a substitute for checking the contractual party.

Some single-trade work, including tiling, painting, plumbing and glazing, may not require registration when performed as isolated jobs. The regulator's position is different when those trades form part of a broader domestic building project, so don't assume that splitting a renovation into separate invoices removes the registration or insurance issues. The reference supplied for Victoria's registration guidance is available through this domestic building registration information.

Put compliance into the quote

Engineered-stone changes affect both product selection and the way a benchtop is discussed. Ask your builder and fabricator to identify the proposed material, confirm its suitability for the project and explain fabrication, handling and installation requirements. If the quote says “stone benchtop”, it hasn't given you enough information to compare options properly.

Use a written clarification list before accepting a price:

  1. Confirm inclusions: Demolition, disposal, rough-ins, cabinetry, surfaces, splashback, painting and final cleaning should be identified.
  2. Separate allowances: Provisional sums should state what they cover and what could cause them to change.
  3. Record existing conditions: Ask how the quote treats concealed wiring, uneven floors, moisture damage or structural discoveries.
  4. Set variation controls: Require changes to be priced and approved in writing before the work proceeds.
  5. Check handover: Include testing, defect recording, appliance fit-off and final inspection.

A cheap quote isn't a saving if it leaves the expensive work undefined. Clarity protects the budget before demolition starts.

Coordinating Kitchen and Bathroom Renovations for Maximum Value

Kitchen and bathroom renovations often become linked once work begins. Both rooms may require plumbing, electrical coordination, cabinetry, tiling, waterproofing or careful sequencing, and both can disrupt the household when trades need repeated access. Planning them together can reduce duplicated design conversations and help organise the overall construction period, although it still requires a realistic cash-flow plan.

The design language can connect without making the rooms identical. A kitchen with warm timber and earthy neutral tones can sit comfortably beside a bathroom using a floating vanity, restrained wall colour and tactile finishes. Modern bathrooms commonly use flat-panel cabinetry, floating vanities, open showers and curbless showers, while Australian bathroom guidance also highlights natural textures, hazy greens and sunbaked neutrals. See these new bathroom ideas and modern bathroom examples.

Decide what should happen first

If funds are limited, prioritise failures before decoration. In the kitchen, poor storage, unsafe or unsuitable surfaces, defective services and water damage deserve attention before premium handles or statement lighting. In the bathroom, waterproofing, drainage, ventilation and damaged substrates should lead the programme.

A coordinated plan should show:

  • Shared decisions: Confirm colours, hardware families and timber or neutral tones together.
  • Trade sequencing: Schedule demolition, service rough-ins, wall preparation, cabinetry, surfaces and fit-off to avoid clashes.
  • Household access: Decide which room must return to service first and protect areas that remain occupied.
  • Budget boundaries: Keep separate allowances for each room so one project doesn't absorb the other.

Independent 2026 Australian renovation-market reporting estimates total home renovation spending at more than AUD 50 billion, with kitchen and bathroom work together accounting for over 60% of that spend. The same reporting places a complete bathroom renovation nationally between AUD 10,221 and AUD 20,443, with a midpoint of AUD 15,332, and gives Melbourne a range of AUD 10,500 to AUD 21,000. These figures are summarised in Australian bathroom renovation cost reporting.

For homeowners comparing bathroom renovations, registered builders unlimited and smaller specialist teams, the deciding factor should be scope control, communication and documented responsibility. SitePro Bathrooms is one local option that combines concept development, 3D design, construction and finishing for kitchen and bathroom projects. Request a detailed consultation, insist on a written inclusions schedule and judge the finished design by how well it works after the before-and-after photographs are forgotten.
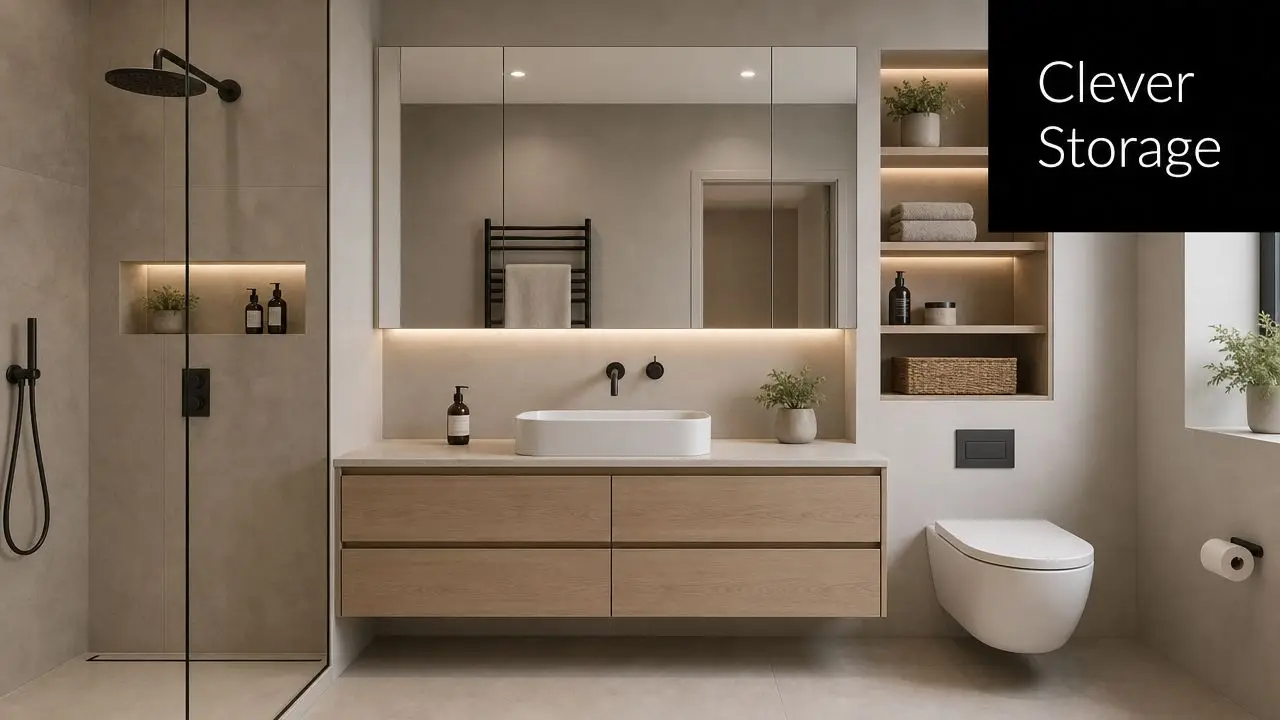

If your Highett or greater Victorian kitchen is ready for a realistic transformation, start by documenting the current layout, photographing services and listing the problems you want solved. Then contact SitePro Bathrooms to discuss your priorities, review a tailored 3D concept and request a quote that separates cosmetic work, structural changes, compliant surface choices and every necessary finishing trade.