• siteprobathrooms

8 Bathroom Floor Plans for Every Home

The most luxurious-looking bathroom layout isn't automatically the best one. A freestanding bath, oversized shower and double vanity can look impressive in a render, yet still create awkward door swings, poor circulation or an expensive plumbing reconfiguration.

Good bathroom floor plans start with how the room must work. Room dimensions, fixture clearances, household routines, accessibility needs and the renovation budget should shape the plan before finishes do. The eight layouts below cover compact ensuites, Victorian family bathrooms, guest facilities and premium designer bathrooms, with practical trade-offs for each.

Australian dimensions are planning guides, not construction drawings. Verify the existing room, service locations, structure and compliance requirements on site with qualified professionals, including Registered Builders Unlimited where the scope requires it. Bathroom renovations, new bathroom ideas, modern bathrooms and designer bathrooms are connected decisions. The layout determines what style can work comfortably, and the style affects the cost and complexity of delivering it.

1. The Galley Bathroom Floor Plan

A galley bathroom uses two opposing walls, with fixtures and storage arranged along each side. It suits narrow ensuites, apartment bathrooms and compact secondary rooms because it keeps the circulation path direct rather than spreading fixtures across a wider footprint.

This plan works best when the doorway opens into a clear route rather than directly into a vanity, toilet or shower screen. A wall-mounted vanity can preserve floor visibility, while a wall-faced toilet keeps the edges of the room easier to clean. Tall cabinetry is often more useful than a deep base cabinet, particularly when towels and cleaning products need to stay accessible without narrowing the walkway.

A compact full bathroom is commonly planned at about 2.0m x 2.5m, or around 5m², while practical guidance allows about 750–800mm of width around a toilet, 600mm of clear space in front of it and 700mm of standing space in front of a vanity. These figures should be checked against the actual products selected and the finished wall positions. See the Australian bathroom dimension guidance before committing to a narrow sequence.
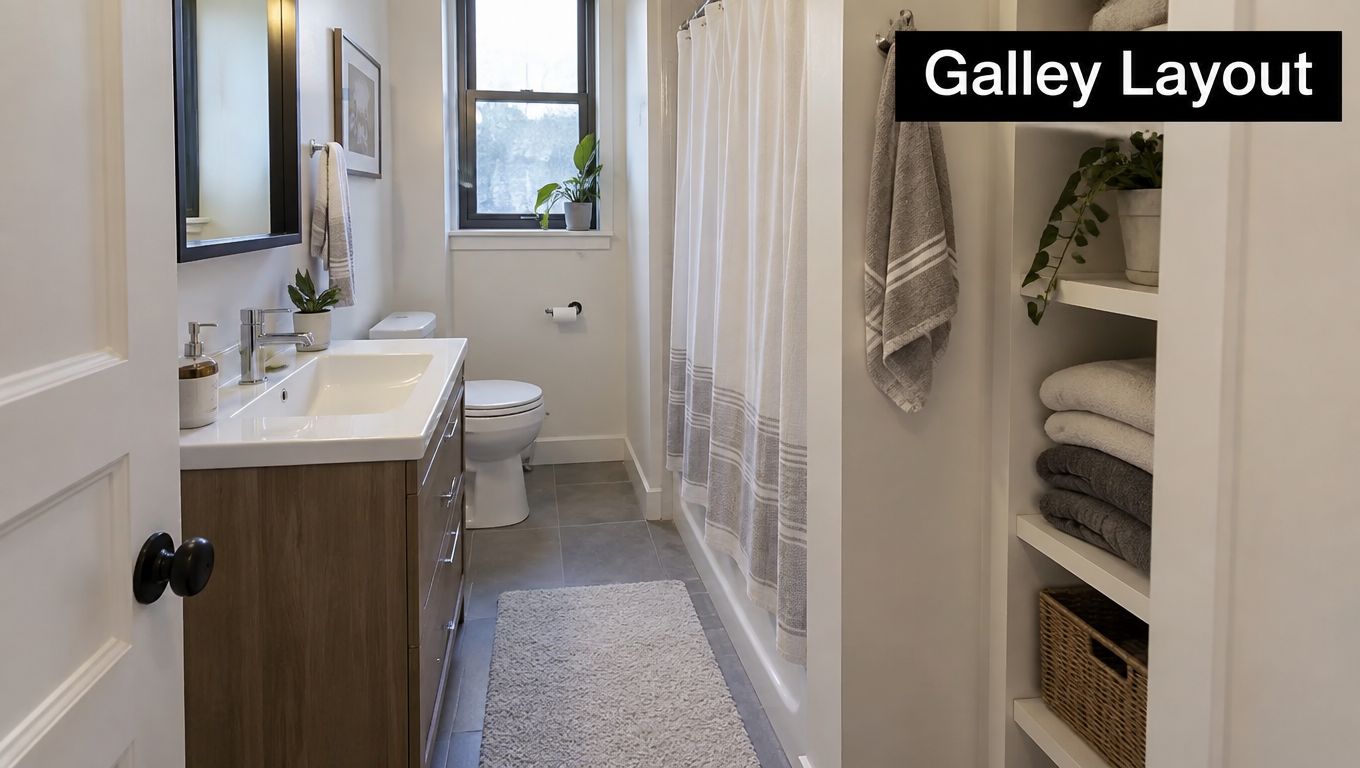
A narrow bathroom featuring a wood vanity, white toilet, shower with curtain, and open shelving with towels.

What works and what doesn't

Works well:

  • One wet zone at the end: A shower or bath at the far end gives the room a visual destination and limits splash movement.
  • Reflective finishes: Mirrors, pale tiles and carefully placed lighting can make the corridor feel less enclosed.
  • Vertical storage: A tall cabinet uses wall height instead of taking more floor area.
  • Wall-mounted fixtures: These can make cleaning easier and reduce visual bulk.

Doesn't work well: A hinged shower door that swings into the main path, deep cabinetry on both walls, or a vanity that forces two people to pass sideways. This is a practical layout for a Melbourne inner-suburban apartment ensuite or a compact Victorian terrace bathroom, but it needs disciplined product selection.

2. The Corner Bath Configuration

A corner bath can anchor a larger bathroom without requiring the tub to run along the entire length of a wall. It creates a bathing zone and leaves the remaining walls available for a vanity, toilet, shower or storage. In a family bathroom, that separation can make the room feel more organised. In a designer bathroom, the bath becomes a deliberate visual feature rather than an item squeezed into leftover space.

The trade-off is access. A corner position can make the back edge difficult to clean, especially if cabinetry or a shower screen closes in the adjacent sides. Choose the tub and tapware together, then check that a person can reach the controls, clean around the rim and move safely between the bath and other fixtures.

Freestanding tubs create a contemporary look, but they need space around the curves and services must be planned carefully. A built-in bath can provide a useful ledge, simpler cleaning access and a more efficient footprint. Neither option is automatically superior. The right choice depends on whether the household values bathing, storage, easy maintenance or a strong focal point.

Give the bath a purpose

Tilework can define the corner without adding a wall. A change in texture, a curved feature tile arrangement or a warmer material behind the bath can establish the zone while preserving openness. Natural light from a larger window or skylight can support the relaxed feel associated with modern bathrooms, provided privacy, waterproofing and ventilation are resolved.

This approach suits a master ensuite in a contemporary home, a larger family bathroom in an established Highett residence or a new bathroom combining a tub with a walk-in shower. It isn't a sensible choice for a very tight room where the bath would reduce the usable circulation around the toilet and vanity.

Practical rule: Treat the corner bath as a circulation decision first and a styling decision second. If access around it is poor on the plan, beautiful tile won't fix the problem on site.

3. The Three-Fixture Linear Layout

The linear plan places the toilet, vanity and shower or bath in a straightforward sequence, usually along one wall or along the most efficient run of the room. It gives homeowners an easy-to-read layout and often allows existing plumbing positions to remain close to their current locations.

That simplicity can reduce disruption during bathroom renovations. Keeping fixtures near existing service points may limit demolition and drainage changes, although the actual saving depends on the slab, wall construction, pipe condition and the required compliance work. A registered builder can assess those conditions before the plan is treated as final.

A family bathroom might place the vanity near the entry, the toilet in the middle and the shower or bath at the far end. This sequence makes the most visually prominent fixture the first thing seen on entry, while the wettest area sits away from the doorway. A rental bathroom may use the same arrangement with durable wall finishes, accessible storage and readily replaceable fittings.

Improve the basic sequence

A linear plan doesn't have to look ordinary. A long vanity with two basins can create a strong horizontal line, while a recessed niche or tall cabinet can break up the run. Small square tiles, neutral terrazzo, brick-look tiles and warm earthy finishes can all change the character of the room without changing the underlying geometry. Current Australian design coverage also highlights curved forms, floating vanities, timber and stone surfaces, and nature-inspired colours such as beige, clay, taupe, soft brown and muted greens as directions for contemporary bathrooms. These are style choices, not substitutes for usable spacing, as shown in this Australian modern bathroom design coverage.

Use the fixture order to support the household. A family that needs quick access to the basin may prefer it close to the door. A household concerned about toilet sightlines may position the vanity or a short privacy wall in the first view. The linear layout is often the most predictable option for a budget-conscious update, but it becomes uncomfortable when every fixture is oversized.
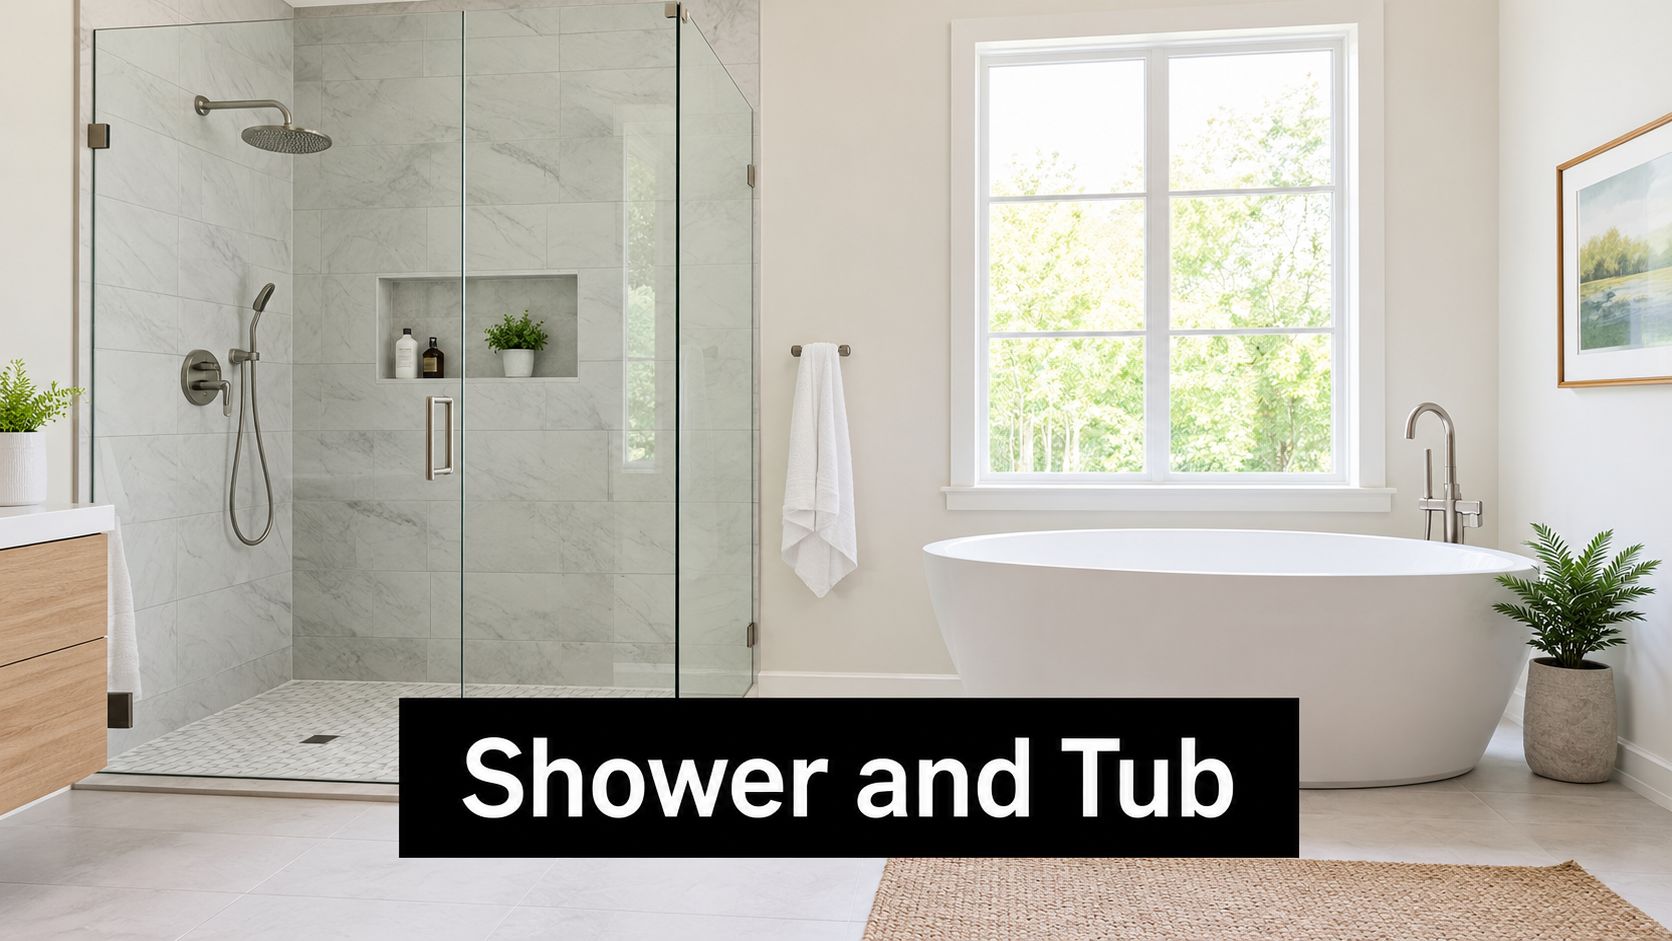
A modern bathroom with a glass-enclosed shower, freestanding white bathtub, and neutral elegant decor.

4. The Walk-In Shower with Separate Tub

A separate walk-in shower and bath gives each activity its own zone. The shower can be designed for fast daily use, while the tub supports longer bathing and becomes a visual centrepiece. This is a strong fit for a spacious master ensuite or a family bathroom where different people use the room in different ways.

The cost is space and coordination. Two bathing areas need separate waterproofing details, drainage planning, ventilation and access paths. Frameless glass can preserve sightlines, but it doesn't remove the need to control splash. A shower opening that looks generous in a render may still send water towards the vanity if the screen, showerhead and floor fall aren't resolved together.

Separate functions, shared maintenance

The shower should be planned around the person using it, not only the appearance of the glass. Check where the controls sit, whether the user can turn on the water without standing under the showerhead, and whether a shelf or niche is reachable without crossing the wettest area. The tub should have enough surrounding access for cleaning and safe entry. Heated floors, layered lighting and durable stone-look surfaces can add comfort, but they also increase the specification and installation decisions.

This layout can suit a luxury ensuite in inner Melbourne, a premium development or a larger home in Highett. It doesn't make sense to force both fixtures into a room where the toilet door, vanity and shower entry compete for the same clearance. In that situation, a well-designed shower-only plan will usually serve the household better.

A separate tub and shower is valuable only when both can be reached, cleaned and used without one becoming an obstacle to the other.

Natural stone, pale blue, pink marble and small square tiles can all support a distinctive designer bathroom, but the visual language should follow the plan. A dramatic material is easier to live with when the room already has a clean movement pattern. Independent lighting for the shower and tub can then make the zones feel intentional rather than crowded.

5. The L-Shaped Bathroom Configuration

An L-shaped bathroom places fixtures along two adjoining walls. The change of direction creates natural zones without adding a full-height partition, so the vanity can occupy one leg while the toilet, shower or bath uses the other.

This arrangement is flexible when a room has an awkward corner, a window on one wall or an entry that makes a single straight run impractical. Positioning the vanity near the junction can make the two zones feel connected, although a large cabinet placed directly in the corner may create a difficult-to-clean recess. Corner shelving, a shallow mirrored cabinet or a carefully detailed return can use that area more effectively.

Use the corner deliberately

The L shape often works in a family bathroom where the toilet can sit around the corner from the entry view. It can also suit a master ensuite in a contemporary home, with the vanity on one wall and a walk-in shower on the other. A corner-positioned toilet may save space, but only if its required clearances and access remain comfortable.

The main risk is awkward navigation. A person entering the room should not have to walk around a projecting vanity to reach the shower, and the door shouldn't collide with a cabinet or privacy screen. Check the plan with the door open, the shower screen installed and the vanity drawers extended. These simple tests reveal problems that a flat furniture layout can hide.

Consistent tilework can visually unify the two legs, while a different finish at the shower or vanity can reinforce zoning. Independent lighting for each wall prevents one side of the room becoming a dim afterthought. This layout is a useful middle ground between the economy of a linear plan and the separation of a larger luxury bathroom.

6. The Double Vanity Master Ensuite

A double vanity gives two people separate grooming positions, storage and lighting. It suits couples who use the bathroom at the same time, especially when the room has enough wall length for two basins without sacrificing the shower entry or toilet clearance.

The layout needs more than two basins. Each user should have a usable mirror, task lighting, drawer space and somewhere to place daily items. Two independent vanity modules can provide clearer personal storage, while one long cabinet with double sinks may deliver more continuous benchtop and a cleaner visual line. The choice depends on whether the household values individual organisation or shared counter space.

A double vanity can consume the wall that would otherwise hold linen storage. Plan drawers for grooming products, a tall cabinet for towels and a discreet location for cleaning supplies before finalising the basin arrangement. Wall-mounted cabinetry can keep the floor visually open, but it must be fixed to suitable structure and coordinated with plumbing.

Make shared use feel calm

Install independent lighting and avoid relying on one central fitting behind the users. Sconces beside each mirror can reduce shadows, while consistent tapware and materials keep the two stations from looking disconnected. Ventilation also matters when two people use the room in quick succession.

Before selecting a cabinet, review double vanity size and planning guidance alongside the actual basin, tap and mirror specifications. Product dimensions vary, and the finished wall-to-wall measurement matters more than a catalogue image.

This plan belongs in a larger master ensuite, a premium apartment or a substantial new bathroom project. It isn't automatically an upgrade in a compact ensuite. If the second basin makes the passage narrow or removes useful storage, one generous vanity may be the more comfortable and economical decision.

7. The Wet Room Open-Plan Design

A wet room removes the conventional shower enclosure and waterproofs a larger part of the bathroom floor. The shower becomes an open bathing zone, separated by distance, glass, a low screen or a change in material rather than a fully enclosed cubicle.

The visual result can be highly effective. Continuous flooring makes a compact bathroom feel less interrupted, and a walk-through arrangement can improve access for people who find a shower threshold difficult. The design also allows the shower, vanity and bath to read as a single architectural composition, which explains its place in high-end modern bathrooms and designer bathrooms.

Waterproofing is the layout

Wet rooms are less forgiving than standard shower layouts. The floor fall, waste location, waterproofing system, wall junctions, screen position and door details must be coordinated before tiling begins. Large-format, slip-resistant tiles can reduce grout lines, but they still need to be installed over a correctly formed substrate. Ventilation must control moisture beyond the immediate shower area.

Use an experienced professional for the construction and certification requirements. In Victoria, domestic building work worth more than AUD 10,000 must be carried out by a builder registered with the Building and Plumbing Commission, and the requirement covers renovations, extensions, repairs and combined-skill work. If the builder isn't properly registered, the client can't obtain Home Warranty insurance, according to Victorian guidance on builders and tradespeople.

For a closer comparison of open shower construction and enclosure-based planning, review wet rooms versus walk-in showers. This concept suits a contemporary Melbourne apartment, a premium Highett renovation or an architecturally designed home. It doesn't suit every household, particularly where splash control, fast cleaning or limited construction risk matters more than the open aesthetic.

8. The Compact Powder Room Single-Fixture Layout

A powder room usually contains a toilet and a compact basin, making it one of the most efficient ways to add a useful bathroom facility. It can fit beside an entry, under stairs, off an open-plan living area or in a previously underused section of a Victorian terrace.

The plan is simple, but the experience is highly sensitive to the door and sightline. A pocket door can preserve internal floor area, while a door that opens towards the toilet can make the room feel smaller and harder to use. Positioning the basin where it greets the visitor can improve the first impression and keep the toilet less prominent when the door is left open.

A wall-mounted toilet and pedestal or wall-mounted basin can preserve visual floor space. The compromise is reduced storage, so plan a narrow ledge, mirrored cabinet or recessed shelf for soap and hand towels. Efficient fixtures, strong extraction and durable finishes matter because a confined room receives concentrated use and has limited opportunities for air movement.

Keep the small room intentional

Light colours and reflective surfaces can make the room feel more open, but a powder room also gives you permission to use one memorable feature. A sculptural basin, decorative light, brick-look tile or small square tile can create character without filling the room with objects. Current Australian design coverage identifies pink marble, pale blue, brick-look tiles, neutral terrazzo and small square tiles among notable bathroom directions, as outlined in independent Australian bathroom design coverage.

For practical ideas that balance storage, access and style, see these compact bathroom design ideas. A powder room is suitable for guests, landlords and families wanting a quick-access facility, but it shouldn't be treated as a substitute for a full bathroom. Check ventilation, door clearances and the location of existing drainage before deciding that an under-stair space is suitable.

8 Bathroom Floor Plans: Quick Comparison

Layout Implementation complexity Resource requirements Expected outcomes Ideal use cases Key advantages
The Galley Bathroom Floor Plan Low–Medium, straightforward plumbing along walls Small footprint; low–moderate cost; standard trades Space-efficient layout, clear traffic flow, moderate value uplift Compact ensuites, apartments, cost‑effective renovations Maximizes wall storage; minimizes wasted space; economical
The Corner Bath Configuration Medium, corner plumbing and positioning considerations Medium space; moderate cost (higher if freestanding) Luxurious focal point, improved aesthetics, moderate value increase Master ensuites, larger bathrooms, designer renovations Creates spa-like focal point; frees wall space; visual interest
The Three‑Fixture Linear Layout Low, simplest and most repeatable layout Flexible footprint; low cost; minimal specialist work Practical, cost‑effective, easy to maintain and renovate Family/secondary bathrooms, rental properties, budget projects Easiest plumbing; economical; familiar, efficient plan
Walk‑In Shower with Separate Tub High, multiple zones, complex plumbing Large footprint; high cost; specialist trades High‑end luxury, multi‑user functionality, strong value uplift Luxury master ensuites, high‑end renovations, families Offers flexibility; simultaneous use; strong designer appeal
The L‑Shaped Bathroom Configuration Medium, plumbing on two walls, careful sequencing Medium space; moderate cost; typical trades Good zoning and flow, more visual interest than linear Odd‑shaped rooms, modern renovations, versatile layouts Efficient corner use; distinct zones; flexible design options
Double Vanity Master Ensuite Medium–High, double plumbing and larger layout Large footprint; higher fixture and installation cost Enhanced convenience, symmetry, significant value increase Couples, master ensuite upgrades, upscale properties Eliminates conflicts; ample storage/counter space; premium feel
Wet Room Open‑Plan Design High, advanced waterproofing and drainage expertise Medium–Large space; high cost; certified builders required Ultra‑modern open aesthetic, excellent accessibility, high impact Design‑forward homes, accessibility projects, luxury builds Seamless visual space; accessibility friendly; strong designer statement
Compact Powder Room Single‑Fixture Layout Low, very simple plumbing and fit‑out Minimal space; low cost; quick installation Functional guest facility, rapid ROI, space saving Guest cloakrooms, under‑stair or hallway installations, urban flats Minimal footprint; cost‑effective; fast to install

Choose the Plan That Fits Your Household

Start by measuring the finished room, not just the structural opening. Record the location of the toilet waste, water points, floor wastes, windows, nib walls, hot-water services and any structural elements that limit movement. Existing service locations can influence the cost of bathroom renovations, but they shouldn't be preserved blindly if they create a poor door swing or unusable circulation.

Map the entry next. Draw the door open and closed, then mark the route from the doorway to every fixture. Australian planning references don't set one universal national bathroom room size. They focus more heavily on clearances, and current guidance identifies a shower enclosure around 900mm x 900mm as a comfortable planning reference, with about 900mm of clear circulation in front of fixtures. The same guidance notes that a room of around 3.6m² can function as a minimum viable bathroom, while spaces below about 4m² are generally considered small and need careful linear or galley sequencing. Review the Australian small bathroom planning guidance and verify the finished dimensions with your project team.

For projects built from October 2023, the NCC requires a 900mm x 1200mm clear zone in front of the toilet to support future accessibility, and bathroom doors require an 820mm clear opening. Planning references also identify a finished floor-to-ceiling height of at least 2.1m over at least two-thirds of the floor area. These requirements make accessibility and room geometry part of the floor-plan decision, not details to leave until the tiler arrives. Confirm the current application with a qualified professional using the Australian bathroom planning and NCC guidance.

Then match the layout to the people using it:

  • Compact ensuite: Choose a galley or linear arrangement when a direct route and restrained fixture sizes matter most.
  • Family bathroom: A linear, L-shaped or corner-bath plan can separate noisy, wet and storage-heavy activities without unnecessary walls.
  • Couples: A double vanity works when both users need simultaneous access and the room can provide independent storage.
  • Aging-in-place planning: Prioritise generous circulation, a clear shower entry, stable surfaces and future adaptability. Confirm accessibility details rather than relying on a visual approximation.
  • Guest facility: A powder room is efficient, but a small full bathroom may offer more flexibility for visitors and future household changes.
  • Premium designer renovation: A separate tub and shower or wet room can deliver impact, provided waterproofing, drainage, ventilation and maintenance are funded properly.

Budget decisions should follow the layout, not just the tapware schedule. Moving a fixture may involve demolition, drainage, slab work, waterproofing and compliance checks. Keeping services close to their existing positions can simplify the job, but a cheap plan that leaves a door colliding with a vanity isn't good value.

Renovation intent in Australia rose from 30% in 2024 to 43% in 2025, while 89% of surveyed Australians identified rising living costs as their top concern, 49% delayed renovations and 28% reduced scope, according to Australian renovation research reported by realestate.com.au. For Victorian homeowners, that makes prioritisation practical. Protect clear circulation, shower access, storage and toilet sightlines before spending on decorative upgrades.

Use a measured plan and, where possible, a 3D layout to test door positions, fixture spacing, materials and sightlines before construction. Confirm waterproofing, drainage, ventilation, structural changes and compliance with qualified professionals. In Victoria, check whether the project requires a Domestic Builder (Unlimited) registration, which covers all components of domestic building work, or a Domestic Builder (Limited) registration, which covers only the components listed on the registration certificate. The Victorian bathroom, kitchen and laundry renovation registration information explains the relevant registration pathway.

SitePro Bathrooms works with Victorian homeowners on concept development, measured planning, 3D design, construction and finishing. If you're planning a bathroom renovation in Highett or greater Victoria, contact SitePro Bathrooms to test your preferred floor plan, compare practical options and develop a coordinated project from the first concept through to handover.


  • siteprobathrooms

How to Remodel a Bathroom: Complete Victorian Guide 2026

For a full bathroom renovation in Melbourne, allow A$18,000 to A$40,000 and plan around a standard 3 to 5 week timeline. The final result depends less on the shower screen you choose than on how carefully you coordinate plumbing, waterproofing, materials, inspections, and trades before demolition begins.

You may be standing in a dated bathroom right now, comparing new bathroom ideas on your phone while trying to work out whether the toilet should move, which tiles will suit the space, and how long your household can manage without a functioning shower. That uncertainty is normal. The difficulty is that an attractive bathroom renovation is also a tightly sequenced building project.

After managing end-to-end bathroom renovations around Melbourne, I've found that most expensive problems start before the first tile is removed. A late fixture selection can hold up a plumber. An unconfirmed layout can force electrical changes. A poorly planned shower fall can create drainage problems that only become obvious after the finished surface is installed.

Learning how to remodel a bathroom properly means treating design, budget, compliance, and coordination as one project rather than separate decisions.

Why Your Bathroom Remodel Starts with a Plan

A homeowner may begin with a simple intention, replace the vanity, modernise the shower, and make the room feel larger. Then the decisions multiply. The existing plumbing doesn't suit the new layout, the chosen vanity has a different waste position, the feature tile is unavailable, and the electrician needs access before the walls are closed.

That's how a manageable renovation becomes a chain of rushed compromises. You can avoid much of that pressure by defining the scope before demolition, including the room's measurements, the intended layout, the fixtures, the finishes, and the compliance work that sits behind the visible design.

A stressed woman standing in a messy bathroom undergoing home renovation with debris and tools scattered around.

Start with the room, not the inspiration board

Begin with an on-site assessment. Record the room's dimensions, door swing, window position, ceiling height, existing waste points, water connections, ventilation, power outlets, and access constraints. In a compact Highett bathroom, a small change to the vanity depth can affect circulation, door clearance, and the position of the toilet.

Then decide whether you're retaining the existing layout or changing it. Keeping plumbing in broadly the same locations can simplify coordination, while moving a toilet, shower waste, or vanity may involve more invasive work beneath floors or inside walls. Neither option is automatically right. A new layout can solve genuine functional problems, but it needs to justify the additional construction complexity.

A structured bathroom renovation planning process should finish with a written scope. It should identify what will be demolished, what will remain, which fixtures are being supplied, who is responsible for ordering them, and what assumptions the quote contains.

Practical rule: If a decision can affect a wall, floor, pipe, power point, or waterproofing detail, make it before demolition.

Use 3D design to test decisions early

Two-dimensional plans are useful, but many homeowners struggle to judge how a room will feel from a flat drawing. A 3D visualisation can show the relationship between the vanity, shower enclosure, toilet, wall niches, tile proportions, lighting, and storage before construction starts.

That matters because a bathroom can be technically functional and still feel cramped. A deep vanity may reduce the usable passage. A large mirror may compete with a wall light. A niche may sit at an awkward height once the final tile layout is established. These issues are cheaper to solve on a screen than after waterproofing and tiling.

A good planning phase doesn't eliminate every unknown. Existing buildings can reveal concealed damage or irregular framing once opened. It does, however, separate genuine site conditions from avoidable design changes. The more clearly the project is documented, the easier it is for the builder and trades to work from the same information.

Planning Your Bathroom Renovation Budget and Timeline

A realistic Melbourne renovation budget starts with the full scope, not a fixture catalogue. Current Australia-focused guidance places a typical Melbourne bathroom renovation around A$10,500 to A$36,750, while basic-to-premium national renovation ranges run from about A$10,000 to more than A$55,000. Use those figures as a starting point only. The actual allowance depends on the room's layout, access, materials, concealed conditions, and Victorian compliance requirements. The cost ranges are outlined in this Australian renovation market guide.

Victorian cost guidance also covers a wide spread. A standard project may land around A$15,000 to A$35,000, while a full renovation can range between A$18,000 and A$40,000, depending on materials and layout complexity, as described in Australia-specific bathroom renovation cost guidance. Use our detailed guide on how to budget a bathroom remodel to test your allowance against scope, materials, labour, and compliance requirements.

Build the quote around scope

Ask for a quote that separates the main cost groups rather than combining everything into one unexplained figure.

  • Strip-out and preparation: Confirm whether demolition, disposal, surface preparation, framing, and making good are included.
  • Plumbing and electrical: Check whether the allowance covers replacement connections only or relocation of services.
  • Waterproofing and drainage: Look for wet-area preparation, membrane application, screeding, testing, and floor waste work.
  • Tiles and finishes: Confirm tile quantities, trims, grout, adhesive, sealing, delivery, and cutting assumptions.
  • Fixtures and installation: List the exact toilet, vanity, basin, tapware, shower fittings, screen, mirror, and accessories.
  • Project management: Establish who coordinates trades, checks deliveries, manages variations, and arranges final handover.

Allowances should also identify who supplies each item and when it must arrive. In Melbourne projects, a missing waste fitting or incorrect tap connection can hold up several trades, not just the installer responsible for that product.

Confirm Victorian requirements before work starts. Ask your builder which permits, inspections, plumbing certificates, electrical documentation, and waterproofing records apply to the project. The required paperwork depends on the work and property, so record responsibilities in the contract rather than assuming someone else is handling them.

Treat the timeline as a sequence

Plan a standard full renovation around 3 to 5 weeks, while recognising that the duration depends on scope, site access, product availability, inspection requirements, and drying periods. Demolition comes before rough-in plumbing and electrical work. Substrate preparation and waterproofing come before tiling. Tiling and curing come before final fixture installation.

Trade scheduling needs active coordination. The plumber may need the finished floor level before setting a waste. The electrician may need wall locations confirmed before rough-in. The tiler needs prepared, stable surfaces. A late delivery can therefore affect several people and extend the handover date.

Order custom or slow-to-source items early, store them safely, and inspect them before installation. Have the project manager explain how variations are approved. A written variation records the price, consequence, and timing impact before the change is carried out.

Designing Modern Bathrooms with 3D Visualization

Modern bathrooms don't need to follow a single formula. Strong Australian bathroom design often combines natural textures, earthy tones, hazy greens, sunbaked neutrals, tactile surfaces, timber vanities, and brushed golden-hued tapware. These cues form part of the Modern Australian direction described in current Australian bathroom design guidance.

The important point is consistency. Designer bathrooms aren't created just by adding expensive products. They usually depend on a controlled relationship between colour, texture, hardware, lighting, tile scale, and joinery. A warm timber vanity can work beautifully with muted green cabinetry or neutral wall tiles, but the surrounding selections need to support that decision.

Turn ideas into a buildable specification

Start by choosing the functional priorities. A family bathroom may need generous storage, easy-clean surfaces, and a bath. An ensuite may prioritise a larger shower, concealed storage, or a more open feeling. A rental property may require durable, easily replaceable fittings rather than highly customised details.

Then test the layout in three dimensions. Review the room from the entry, shower, vanity, and toilet positions. Check whether doors collide, whether the mirror is comfortable to use, whether the shower screen leaves enough access, and whether the lighting illuminates faces without creating glare.

A 3D design should also show the finish schedule. Identify the floor tile, wall tile, grout colour, vanity finish, basin, tapware, shower fittings, screen, mirror, lights, and accessories. This gives each trade a clear reference and reduces the chance that a late selection changes the position of an outlet or fitting.

Use visualisation to prevent site changes

A flat plan may show that everything fits. A 3D model helps you judge whether everything feels balanced. You can see the visual weight of a dark floor, the effect of a full-height tile, or the amount of wall revealed above a vanity before buying materials.

Several new bathroom ideas either become useful or remain vague at this stage. A curved mirror, finger tile, wall-hung vanity, recessed niche, or feature wall can look excellent in concept, but each choice has construction consequences. It may change tile cuts, framing, waterproofing junctions, access requirements, or installation order.

A free 3D bathroom planner can help homeowners communicate those preferences before the quote is finalised. SitePro Bathrooms provides consultation, measurement, 3D design, construction, and finishing as part of its end-to-end renovation service, which is one model for keeping the design and building information connected.

A beautiful render is only useful when the builder can translate it into accurate dimensions, product specifications, and trade instructions.

Demolition, Waterproofing, and Trade Coordination

Demolition should reveal the existing conditions without creating unnecessary damage. Protect access paths, isolate services, control dust, and remove fittings carefully where they may be reused. Once the room is open, check the substrate, framing, plumbing routes, ventilation, and electrical conditions before committing to the final rough-in.

The legal and administrative side matters as much as the physical work. In Victoria, domestic building work worth more than A$10,000 generally requires the builder or tradesperson carrying out the work to be registered with the Building and Plumbing Commission, and a major domestic building contract is required above that threshold. The rule has exclusions for some single-trade-only work, including tiling, painting, plumbing, electrical, glazing, and insulating when those trades are performed on their own. The scope of your project therefore matters. The Victorian position is summarised in this guide to bathroom renovation regulations.

Confirm the registration pathway

A full-scope bathroom remodel isn't the same as booking one isolated trade. Ask who holds responsibility for the overall work, who is coordinating the contract, and whether the registration matches the work being undertaken. Victoria distinguishes between limited domestic building registration for bathroom, kitchen, and laundry renovations and registered builders unlimited registration.

The Victorian Building Authority application pathway for a Domestic Builder Limited to Bathroom, Kitchen and Laundry Renovation lists a A$612.30 application fee for applicants already registered in another domestic building class. That detail reinforces that bathroom renovations sit within a formal registration framework rather than an informal handyman category. You can review the specialist renovation registration context through this bathroom renovation registration information.

Treat waterproofing as a system

The shower floor must be fully waterproofed. Shower walls must be waterproofed to at least 1800 mm above the floor substrate, and wall junctions inside the shower must be waterproofed 40 mm either side of the junction. Floor wastes should fall at a minimum gradient of 1:80 and no steeper than 1:50, so the screed can drain water without creating an unsafe or ineffective slope. These Victorian requirements are set out in the state-by-state bathroom waterproofing guidance.

Waterproofing isn't just a grey coating rolled across an open floor. The membrane has to work across corners, penetrations, junctions, changes of material, and movement-prone areas. A small defect around a pipe penetration can be more consequential than an obvious mark on the wall because finished tiles can conceal the problem.

The practical sequence is straightforward:

  1. Prepare the substrate: Make sure surfaces are sound, clean, suitably dry, and shaped to the required falls.
  2. Detail the junctions: Treat corners, wall-to-floor transitions, penetrations, and waste connections as critical areas.
  3. Apply the membrane: Follow the specified system and coverage requirements rather than treating waterproofing as a single quick coat.
  4. Allow curing: Don't rush the drying period to recover time elsewhere.
  5. Test and document: Confirm the work before tiles and fixtures cover the accessible surfaces.

A construction worker applying grey waterproofing membrane to a shower floor with a paint roller.

The builder must coordinate demolition, plumbing relocation, electrical rough-in, wall preparation, waterproofing, and inspection in the right order. If one trade works too early, another may need to cut into completed work. Testing before finishes go in is essential because rectifying a concealed defect after tiling is invasive and expensive.

Tiling, Fixture Installation, and Finishing Touches

Once the waterproofing has been tested and the substrate is ready, the room begins to look like the design you approved. Tiling should still be approached as technical work, not merely as a decorative layer. The installer needs to establish starting lines, tile centres, cuts at corners, falls around wastes, junction details, and the relationship between wall and floor patterns.

Tile selection affects installation as well. Small-format tiles can suit curved or sloped areas but create more grout lines. Large-format tiles can produce a calmer appearance but demand flatter substrates and careful handling. A strong feature tile may become visually overwhelming if it appears on every wall. The right choice depends on the room's proportions, maintenance expectations, and the skill required to install it cleanly.

Coordinate the visible work

A useful installation order usually keeps the most vulnerable finishes protected. Floor and wall tiling, grout, and sealants need appropriate curing time before other trades work against them. The exact sequence can vary, but the person managing the project should decide it before trades arrive.

Fixture installation then follows the set-out recorded in the design specification. Check the positions of:

  • The vanity and basin: Confirm wall fixing points, waste alignment, tap reach, drawer clearances, and splash protection.
  • The toilet: Verify the pan location, cistern access, connection, and clearance from nearby walls or cabinetry.
  • The shower: Check screen dimensions, door swing, shower arm height, controls, niche position, and drainage.
  • The tapware and accessories: Confirm that rails, hooks, toilet roll holders, and shelves have adequate support behind the finished surface.
  • The mirror and lighting: Make sure the mirror, light fittings, switches, and power points work together visually and functionally.

The best new bathroom ideas are resolved at this stage because the trades have a precise reference rather than a verbal description. “Modern” isn't enough instruction for a tiler or electrician. A drawing showing tile direction, grout lines, fitting heights, and junctions is far more useful.

Finish with discipline

Caulking, painting, mirror fitting, hardware, and touch-ups may be the last tasks, but they determine how polished the room feels. Check that silicone lines are even, tile edges are clean, grout is consistent, fittings are level, and exposed fixings are neat.

Don't allow final accessories to become an afterthought. A towel rail fixed into an unsuitable surface can loosen. A poorly sealed vanity edge can allow water behind the cabinet. A mirror installed before the final electrical check can create avoidable rework.

The finishing team should protect completed tiles and use the correct sealants for each junction. Good workmanship isn't only about the major fixtures. It shows in the straightness of lines, the alignment of hardware, the quality of cuts, and the absence of rushed patching.

Handover, Quality Checks, and Your New Bathroom

A bathroom isn't complete when the tools leave the room. Handover should be a controlled inspection in which the builder and homeowner walk through the completed space, test the fixtures, record outstanding items, and agree on how those items will be resolved.

Run water through every basin, shower, and bath outlet. Flush the toilet repeatedly. Check that water drains without visible ponding, that the shower screen contains spray, that doors and drawers open freely, and that ventilation operates correctly. Look closely at grout lines, silicone joints, tile edges, mirror mounts, paint finishes, and accessory fixings.

Use a written completion checklist

A practical handover checklist should include:

  • Water performance: Confirm hot and cold operation, pressure, temperature control, and leaks at visible connections.
  • Drainage: Check that water moves towards the waste and doesn't sit in corners or along thresholds.
  • Surface quality: Inspect tile alignment, grout consistency, cuts, trims, and finished edges in natural and artificial light.
  • Fixture stability: Test the vanity, toilet, basin, shower fittings, screen, mirror, and wall-mounted accessories.
  • Electrical and ventilation: Confirm switches, lighting, exhaust operation, and any required safety documentation.
  • Sealant and junctions: Examine silicone around the shower, vanity, bath, screen, and wall-to-floor transitions.
  • Documentation: Collect warranties, care instructions, product details, and contact information for follow-up work.

A registered builder should also explain how to maintain the selected surfaces. Natural materials, textured tiles, painted cabinetry, tapware finishes, grout, and silicone don't all require the same cleaning method. Clear maintenance advice protects the work and helps you identify a genuine defect early.

Resolve the small details before you close the project

Walk through the room at the same time of day you normally use it. Turn on the lights, open the vanity drawers, stand in the shower, and check the mirror from the intended position. Practical problems often show up during use, not during a quick visual inspection.

The final punch list may contain minor items, such as a paint touch-up, a door adjustment, a replacement trim, or a sealant correction. That doesn't mean the project has failed. It means the handover process is doing its job. What matters is that every item is recorded, assigned, and completed rather than forgotten once the invoice is issued.

When homeowners ask how to remodel a bathroom, they often focus on the finished image. The better measure is whether the room works every day, drains properly, remains easy to clean, and matches the agreed specification. Careful planning, Victorian compliance, 3D visualisation, and disciplined trade coordination all contribute to that result.

If you're planning bathroom renovations in Highett or elsewhere in Victoria, arrange an on-site consultation before choosing products or booking demolition. Bring your preferred ideas, your storage requirements, and your budget range, then ask for a measured layout, a detailed scope, a 3D design, and a written programme from a suitably registered renovation professional.


Contact SitePro Bathrooms through its bathroom renovation service to discuss your room, confirm the existing conditions, and develop a coordinated plan from concept through final handover.

  • siteprobathrooms

What Are Finishes in Construction: The Complete 2026 Guide

Construction finishes are the final surface layers applied to floors, walls, ceilings and fixtures. They provide aesthetic appearance and protective performance, and in wet areas such as bathrooms they also form part of the required waterproofing system under Australian standards. Australia recorded $82.5 billion in construction work done in the June quarter of 2026, showing the scale of the industry in which these final layers help determine build quality and cost control.

You may be standing in that decision-making gap now, surrounded by tile samples, paint cards, benchtop brochures and tapware finishes. Every sample looks convincing on its own, but the difficult questions come later. Will the floor cope with water? Will the painted wall show every joint under bright lighting? Will the grout, hardware and benchtop still be practical to clean?

For a homeowner planning bathroom renovations or a kitchen upgrade in Victoria, finishes are where design choices meet building performance. They determine how a room feels, but they also influence moisture control, durability, maintenance, safety and compliance.

Why Finishes Make or Break a Renovation

Three weeks into a bathroom renovation in Highett, a homeowner can easily become overwhelmed by attractive options. A soft stone-look tile may suit the mood board, a warm paint colour may complement the vanity, and brushed metal tapware may look right in the showroom. None of those samples, by themselves, explain how the completed room will respond to steam, splashes, cleaning products and everyday use.

A Highett bathroom project makes the point clearly. The owner wanted a refined floor tile and a larger wall tile, but the important conversation started underneath those visible surfaces. The installer checked the substrate, planned the finished levels around the waste, and coordinated the tile layout with the waterproofing details. That preparation reduced the risk that a beautiful finish would conceal a weak or poorly sequenced installation.

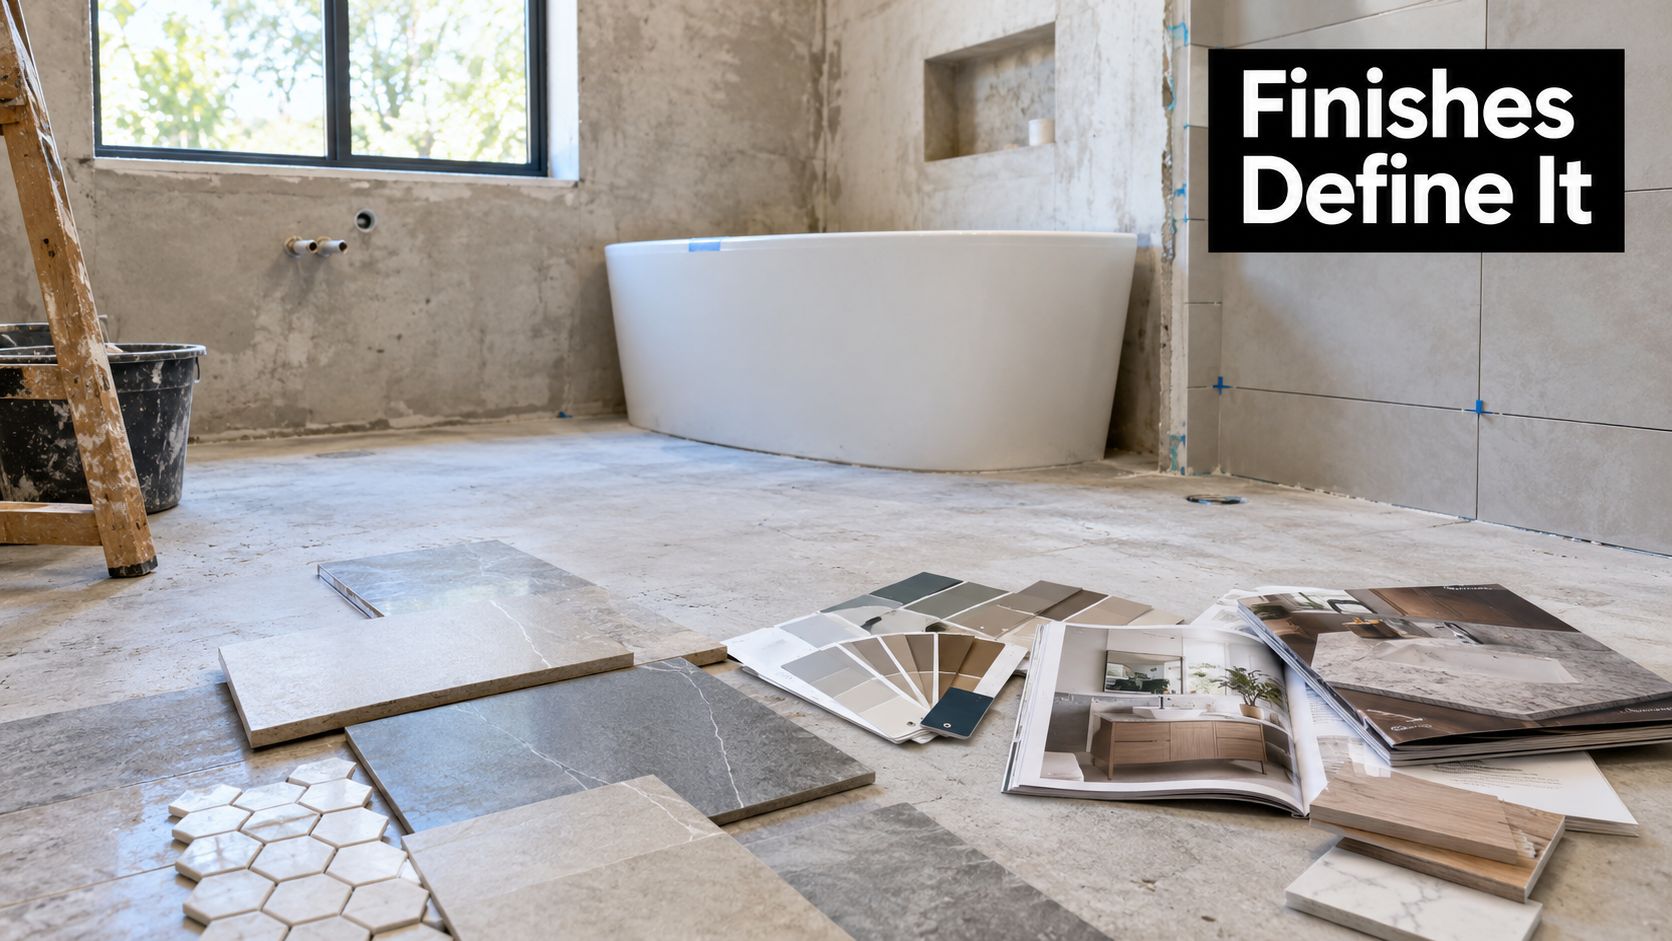
A bathroom under renovation featuring a freestanding bathtub, tile samples, color palettes, and interior design magazines.

More than a decorative layer

A finish is the part of the building you see, touch, walk on, wipe down and live against. It can be a tile, paint system, stone surface, timber trim, cabinet coating, tapware finish or ceiling treatment. Some finishes protect the underlying structure from moisture and abrasion, while others help the room meet practical requirements for cleaning, slip resistance or access.

Australian construction activity demonstrates why this stage deserves careful planning. The Australian Bureau of Statistics reported $82.5 billion in total construction work done in the June quarter of 2026, with Victoria accounting for $19,733.7 million in that period, as shown in the ABS building activity release. Those figures describe a large construction market, but the homeowner experiences its value through smaller decisions, including whether a bathroom floor drains properly and whether a kitchen surface remains usable.

Practical rule: A finish should look right, perform in its location and remain maintainable after handover. If it only satisfies the first test, it isn't a complete solution.

The bridge between structure and living

The structure provides the frame, walls, floors and services. Finishes turn that framework into a usable home. A bathroom isn't complete when the pipework is connected, and a kitchen isn't complete when the cabinetry carcasses are installed. The final layers determine whether the spaces feel durable, comfortable and resolved.

That is why finishes can make a renovation feel like a lasting upgrade or a cosmetic repair. The right combination protects the work beneath, supports daily routines and gives the design its character.

The Main Categories of Construction Finishes

A bathroom renovation in a Victorian weatherboard home may involve the same tile as a new townhouse, yet the finish still has to suit the room's substrate, moisture exposure, ventilation and daily use. Construction finishes are therefore more than visible decoration. They form a performance envelope, with each layer helping the room resist water, wear, staining and movement.

Floors and walls

Floor finishes include ceramic and porcelain tiles, natural stone, engineered timber, vinyl planks and polished concrete. In a bathroom, the choice must work with waterproofing, drainage falls, slip resistance, cleaning and regular contact with wet feet. A kitchen floor faces a different test: dropped cookware, food spills, chair movement and traffic between the sink, cooktop and refrigerator.

Wall finishes include plasterboard, paint systems, tiles, waterproofing membranes and specialist coatings such as microcement. Painted plasterboard can provide a smooth surface in a dry kitchen or living area. Tiles and suitable coatings can handle more contact around a kitchen sink, splashback or shower. The waterproof membrane sits behind the visible surface, so a shower tile is only one component of a larger wet-area assembly.

Paint also has a protective job. Historic practice used oil paints on timber, metal and plaster, with glossy natural-oil finishes helping resist water and corrosion. The supplied New South Wales heritage fact sheet link, however, leads to an article about construction completion timing rather than a heritage publication, so it does not support that historical paint claim. The practical lesson remains sound: choose a coating for the material beneath it and the conditions surrounding it.

Fixtures, trims and ceilings

Fixture finishes appear on tapware, shower fittings, vanity surfaces, handles, drains and other hardware. Chrome, brushed nickel, brass and dark finishes create different visual effects. Their suitability also depends on cleaning routines, visible water marks and the quality of the product beneath the coating.

Trim finishes include skirting boards, architraves, door frames, cornices and cabinetry edges. Painted timber and MDF are common in Victorian kitchens and bathrooms, but sharp corners and neat joints depend on preparation, sanding and the correct coating system.

Ceilings may use painted plasterboard, moisture-resistant board systems or exposed structural treatments. In bathrooms, ventilation and surface preparation matter alongside colour, because condensation can reveal weak joints and unsuitable paint.

Because the membrane sits below the tile, specify the wet-area system as one assembly, substrate, membrane, adhesive and tile, rather than choosing the tile alone.

How to Choose the Right Finishes for Your Space

Selection becomes easier when you stop asking which finish is most attractive and start asking which finish suits the conditions. A bathroom floor, kitchen benchtop and hallway wall each face different combinations of moisture, impact, cleaning and visual scrutiny.

Start with performance

Moisture resistance comes first in bathrooms and around kitchen sinks. Confirm what sits behind the visible surface, how water will drain, and whether the selected product is suitable for its location. A honed travertine floor may offer warmth and texture, but it needs a maintenance commitment that a homeowner may not want. A porcelain-look tile can create a similar visual direction with a different care routine.

Durability depends on use. A floor in a busy family bathroom faces repeated wet feet and cleaning, while a guest ensuite may experience lighter use. Benchtops need resistance to spills, heat and abrasion, and cabinet finishes need to tolerate contact around handles and work areas.

Maintenance should be judged candidly. Ask whether the surface needs sealing, specialised cleaning or regular attention to preserve its appearance. A finish that demands more care isn't automatically a bad choice, but the commitment should be clear before installation.

For practical tile planning, use this guide to choose bathroom tiles alongside your installer's advice about substrate, drainage and layout.

Compare the whole finish system

A room feels coherent when the floor, walls, fixtures, trims and cabinetry share a deliberate relationship. That doesn't mean every surface needs to match. A textured wall tile may work with a calm floor, while a warm vanity can balance cooler tapware. The finish hierarchy should also reflect the budget. Spend more on surfaces that face water and heavy use, then simplify lower-risk decorative details.

Finish Combination Moisture Resistance Durability Maintenance Budget Impact
Porcelain tile, painted plasterboard and chrome hardware Strong when correctly installed High for typical bathroom use Straightforward cleaning Moderate
Natural stone, stone benchtop and brushed metal hardware Depends on sealing and product selection Good, with care Regular maintenance may be needed Higher
Textured tile, painted vanity and dark hardware Strong for suitable wet-area tile Good, though texture can hold residue More attention around grooves and edges Moderate
Microcement surfaces, floating vanity and concealed hardware Dependent on professional application and sealing Suitable when specified for the location Resealing and careful cleaning may be required Higher
Terrazzo-look tile, timber-look cabinetry and warm metal hardware Strong when tile and cabinetry are correctly selected Good for busy rooms Generally manageable, with grout care Moderate to higher

In wet areas, performance precedes style. A finish that fails can lead to water damage, disruption and remediation, not merely a disappointing colour choice.

Finishes in Action, The Bathroom Renovation Sequence

A bathroom renovation works from the substrate outward. Each visible finish relies on the layer beneath it, so changing the tile or vanity late in the process can affect levels, clearances and waterproofing details.

Prepare before covering

The sequence starts with demolition, substrate preparation and service coordination. The builder or relevant tradesperson checks that walls and floors are sound, suitably even and ready to receive the planned system. Drainage falls, step-downs, hob details and penetrations need to be resolved before the waterproofing membrane is applied.

Under the NCC-referenced AS 3740:2021 framework, domestic wet areas require waterproofing materials and installation details for floors, walls, junctions and penetrations. At a shower floor and wall junction, waterproofing must extend at least 150 mm above finished tile level or 25 mm above the maximum retained water level, whichever is greater, as explained in the Australian wet-area waterproofing guidance.

That requirement makes finished levels important from the beginning. If the tile thickness, waste position or shower detail changes after waterproofing has been planned, the team may need to revisit the entire build-up.

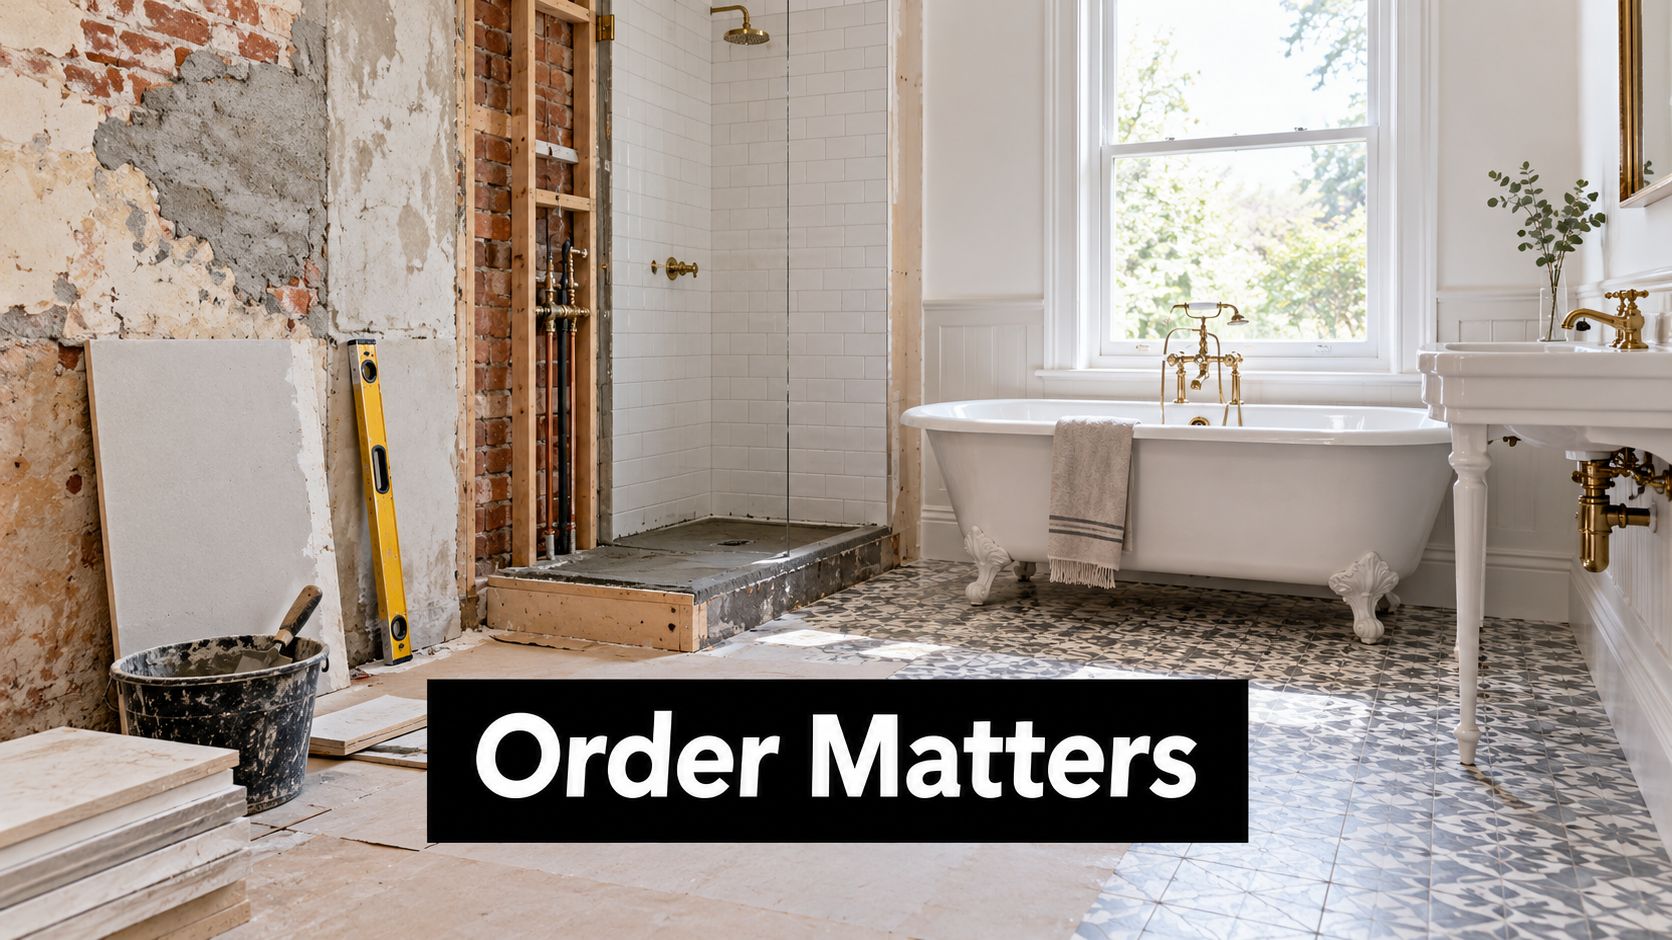
A partially renovated bathroom featuring a clawfoot bathtub, exposed brick walls, and a new tiled floor installation.

Install the visible layers in order

Once the waterproofing has been inspected and accepted, the tiler installs the floor and wall finishes, maintaining the planned falls towards the waste. Large-format tiles can create a calm appearance, but their suitability depends on the substrate, room geometry, handling and drainage design. Review the installation implications before choosing large-format bathroom tiles.

Painted areas require their own quality check. Queensland's Standards and Tolerances Guide identifies Level 4 as the default plasterboard finish, with AS/NZS 2589 commonly used to describe finish levels from Level 0 to Level 5. A higher-gloss coating can reveal joints, fastener heads and waviness, so the finish level should be agreed before sanding and painting.

The final sequence includes moisture-suitable paint, cabinetry, vanity tops, tapware, shower fittings, mirrors, trims and hardware. A careful defect inspection checks grout, silicone, paint edges, alignment, drainage and the operation of doors and drawers.

A common mistake is choosing decorative tiles before confirming the waterproofing and substrate plan. The tile is visible, but the preparation decides whether the finish can perform.

2026 Finishes Trends for Kitchens and Bathrooms

A Victorian bathroom renovation often starts with a mood board, then meets practical limits such as a narrow footprint, limited daylight or a busy family routine. The strongest 2026 direction combines warmth and texture with finishes that can handle moisture, cleaning and daily wear. The result should work as a performance envelope, with the visible surface supported by sound substrate preparation, compliant waterproofing, appropriate paint levels and durable materials.

Australian design coverage points towards warm neutrals, curved forms, floating vanities, timber, stone, textured surfaces and freestanding baths in contemporary bathrooms, as described in this Australian modern bathroom design overview. These choices can soften compact rooms and older Victorian homes. They still need to suit ventilation, available space, cleaning routines and the way the room is used.

Texture with a practical purpose

Fluted cabinetry, reeded glass, ribbed wall treatments and textured tiles add depth to bathrooms and kitchens. Their grooves and edges can also collect dust, soap residue and cooking splashes. Use texture selectively, keep frequently touched areas accessible, and confirm that the surface can be cleaned with ordinary household methods.

Microcement and terrazzo-style finishes create a more continuous appearance, with fewer visible joints. Microcement suits contemporary interiors when professionally applied, although high-wetness areas may require periodic resealing. Terrazzo can provide a durable patterned surface, but the selected product and installation method determine how it responds to moisture, impact and cleaning.

The Australian bathroom trend coverage for 2026 describes freestanding baths as centrepieces, double vanities extending beyond ensuites, and tactile details such as fluted cabinetry and ribbed glass becoming more common. These ideas earn their place when they improve storage, movement, comfort or cleaning, rather than creating a showroom effect alone.

Choose the trend that earns its place

Recycled-content materials and low-silica surfaces are becoming important considerations in Australian bathroom and kitchen selection, according to 2026 Australian interior trend reporting. Ask suppliers for product information, installation requirements, maintenance guidance and any relevant compliance details. Sustainability claims need to be matched with evidence and a realistic care plan.

For styling and accessory guidance that complements these directions, see our overview of bathroom decor in Australia.

A finish earns its place when it suits the moisture level, tolerates expected use, remains serviceable and fits the wider palette. Warm neutrals and tactile materials can create a calm result, but they cannot compensate for poor waterproofing, an unsuitable substrate or paint preparation that does not match the lighting and coating.

Common Finish Mistakes That Cost Victorian Homeowners

Most expensive finish problems begin before the final surface is installed. A tile may crack because the substrate wasn't prepared properly, or a painted wall may reveal defects because the specified finish level didn't match the lighting and coating.

Four decisions that deserve extra scrutiny

Ignoring substrate preparation creates trouble beneath the surface. Uneven walls, movement, poorly treated junctions and compromised waterproofing can lead to cracked tiles, hollow areas, ponding or leaks. Ask who will inspect the substrate and how the team will record waterproofing and pre-tile checks.

Choosing the wrong plasterboard finish can leave joints and fastener heads visible once paint dries. The required finish should reflect the room, lighting conditions and coating sheen. Agreeing this before construction prevents a dispute after the painter has completed the work.

Putting appearance ahead of safety and care is another common error. A highly polished stone floor may look striking, but a wet bathroom also needs an appropriate slip-resistant surface and a cleaning routine the household can follow. A finish that demands constant care may be unsuitable for a busy family even if it looks impressive on installation day.

Skipping Victorian compliance documentation creates avoidable risk. Structural work must be performed by a registered builder, and Victoria requires a written major domestic building contract for residential building work worth more than A$10,000, according to the Victorian domestic building contract guidance. Check that the person engaged has the appropriate registration, including whether a registered builder unlimited registration is relevant to the scope.

Plumbing, gasfitting and drainage work must be carried out by a plumber registered or licensed with the Building and Plumbing Commission. For plumbing work over A$750, the plumber must provide a compliance certificate, as set out in the Victorian home improvement checklist.

Check before you approve the order

  • Compliance: Confirm the builder, plumber and required documentation for the scope.
  • Slip performance: Ask for the product's suitability and slip information for wet floors.
  • Warranty coverage: Keep product warranties and installation requirements together.
  • Maintenance: Understand sealing, cleaning and repair expectations before purchase.

Turning Finish Choices Into Confident Decisions

The homeowner in Highett who began with a table covered in samples can now sort those choices into useful questions. Which surfaces face water? Which receive heavy contact? What preparation does each product need? How will the colours, textures and hardware work together once the room is viewed as a whole?

That framework makes bathroom renovations and kitchen projects easier to manage. You identify the categories, set performance requirements, choose a finish level, confirm the installation sequence and then select the style that fits. Trends become options rather than instructions.

Victoria's construction total mentioned earlier shows that finishes sit within a substantial regional building market. For an individual homeowner, the investment is personal, but the decision still has a material effect on durability, maintenance and the cost of future repairs.

A successful renovation should look considered when the trades leave and remain practical through ordinary daily life. The best finish choices bring engineering, design and living together. They protect the work beneath, support the way your household uses the room and give the project its final sense of completion.


If you're planning a bathroom or kitchen renovation in Highett or greater Victoria, contact SitePro Bathrooms to discuss your layout, finishes, waterproofing requirements and construction sequence. Bring your preferred tiles, colours or new bathroom ideas to the consultation, and request a coordinated plan that connects the design with the practical work required for a durable result.

  • siteprobathrooms

Overhead Cabinet Height Guide for Australian Homes

In Australia, standard overhead cabinets are commonly 720 mm high, with a minimum 650 mm gap between the benchtop and cabinet underside, positioned around 1485 mm from the floor. That benchmark gives you a reliable starting point, but the right overhead cabinet height still depends on your ceiling, appliances, users and overall room design.

You're standing in a half-finished kitchen with a tape measure in one hand and a pencil in the other. The benchtop is installed, the wall is bare, and you're trying to decide whether the overhead cabinets should sit close enough for easy access or high enough to protect your workspace. One mark too low can make the room feel crowded. One mark too high can turn everyday storage into a job requiring a step stool.

Why Overhead Cabinet Height Matters

Overhead cabinet height affects more than the appearance of a joinery elevation. It determines how comfortably you can reach plates, glasses and pantry items, how much space remains for a kettle or mixer, and whether the room feels open when you stand at the benchtop. A cabinet run also needs to work around rangehoods, cooktops, splashbacks, cornices, power points and lighting.

The mistake many homeowners make is measuring from the wrong reference point. They measure from the floor to the cabinet top, or from the existing wall rather than the finished benchtop. Installers usually need to work from the finished floor, benchtop surface and cabinet underside, because those are the surfaces that control the usable clearances.

Practical rule: Mark the underside of the cabinet first. It gives the installer a clear line to level across the wall and makes the remaining cabinet height easier to calculate.

A badly chosen height is also costly to correct. Once cabinets have been fixed, splashbacks cut and electrical fittings positioned, moving the run can create new holes, exposed wall areas and mismatched tile lines. The same principle applies during bathroom renovations, where mirrored cabinets, floating vanities, plumbing and wall finishes must share a limited elevation.

This guide gives you a complete reference for standard measurements, reach comfort, ceiling-height options, appliance safety and custom joinery. It also explains how the logic transfers to new bathroom ideas, modern bathrooms and more specific designer bathrooms. By the end, you'll be able to identify whether the standard benchmark suits your home, whether an appliance requires a higher run, or whether custom cabinetry deserves consideration.

Standard Overhead Cabinet Heights in Australia

Australian joinery uses familiar modular dimensions, but each measurement describes a different part of the installation. The cabinet height is not the same as the benchtop clearance, and neither measurement tells you the cabinet's position until you account for the finished benchtop and floor.

Measurement Standard Dimension What It Means
Wall cabinet height 720 mm The height of a commonly used overhead cabinet carcass
Wall cabinet depth 300–450 mm The front-to-back depth range commonly used for wall cabinets
Minimum benchtop-to-cabinet gap 650 mm The minimum clear distance from the finished benchtop to the underside of the overhead cabinet
Typical underside position About 1485 mm from the floor A common floor-to-cabinet-underside position in an Australian kitchen
Benchtop-to-cabinet gap in a standard setup Roughly 565–585 mm The practical gap often left above a 900 mm benchtop

These benchmarks are summarised in Australian kitchen cabinet size guidance and supported by Australian joinery references covering wall cabinet height, depth and floor position. The widely used 720 mm cabinet height gives a useful balance between storage volume and reach. A 300–450 mm depth range keeps the cabinet useful without allowing the front edge to dominate the benchtop.

The minimum 650 mm clearance is measured vertically from the finished benchtop to the underside of the wall cabinet. It isn't measured to the cabinet top, cornice or highest decorative trim. If your benchtop sits at the common 900 mm height, the resulting gap may be smaller than 650 mm in some arrangements, so the actual installation needs to be checked from the finished surfaces rather than assumed from a catalogue dimension.

The 1485 mm floor-to-underside position provides a familiar starting point for a standard elevation. It helps align the overhead run with the working zone below while preserving usable space for benchtop appliances. Don't treat it as an automatic instruction, though. A cooktop, unusual benchtop height or accessibility requirement can override the general arrangement.

Ergonomics and Benchtop Clearance Guidelines

A technically acceptable height can still feel wrong in daily use. Stand at the benchtop and reach forward with your elbow relaxed. The shelves you use most should sit in a comfortable reach zone, while less frequently used cookware can occupy the higher areas.

The cabinet's underside also shapes the working corridor. A gap that feels generous in an empty room can become restrictive once a kettle, coffee machine, food processor or stand mixer is placed below it. Use the standard benchtop height reference alongside the cabinet measurement, because the two surfaces work as a pair.

Test the reach before ordering

Use painter's tape to mark the proposed cabinet underside on the wall. Then place a temporary box or sheet of cardboard at the approximate cabinet front edge. Ask the main users to reach for a mug, lift a saucepan and look towards the back of the benchtop.

Watch for three problems:

  • Overhead reach: If regular items sit above comfortable shoulder height, the top shelf may become storage you own but rarely use.
  • Forward projection: Deeper cabinets can affect sightlines and make the benchtop feel enclosed, particularly in a narrow kitchen.
  • Working clearance: Small appliances need room for lids, handles, cords and movement, not just a gap that looks adequate on an elevation.

Shorter adults, children who access their own items and people using mobility aids may need a lower or selectively lowered storage zone. Taller users may prefer extra clearance above the benchtop, especially if they regularly prepare food beneath the cabinets. The correct decision is the one that serves the people using the room, not an assumed average household.

A cabinet can be perfectly level and still be in the wrong place for the person who uses it every day.

You don't have to lower the entire run to improve access. A designer can reserve the most reachable shelves for daily items, use drawers or open shelving in a working zone, or create a mixed-height elevation. Keep cooktop clearances separate from comfort adjustments, because appliance safety requirements aren't optional ergonomic preferences.

Cabinet Heights for Different Ceiling Heights

Ceiling height changes what happens above the cabinets, but it doesn't automatically change the safe or comfortable position of the underside. Start with the benchtop, appliance requirements and user reach. Then decide how to treat the space between the cabinet top and ceiling.

Standard ceiling rooms

In a room with a conventional ceiling, a 720 mm wall cabinet and a floor-to-underside position around 1485 mm can create a balanced, familiar elevation. The remaining space above may be finished with a cornice, filler panel or bulkhead, depending on the ceiling detail and the desired style.

Leaving a visible gap can suit a relaxed renovation, but it creates a surface where dust can collect. A closed treatment gives the cabinetry a more deliberate built-in appearance. Check the cornice and bulkhead dimensions early, because they can affect doors, lighting and the visual line of the room.

Higher ceilings

A higher ceiling gives you more vertical space, but raising the entire cabinet run can make everyday storage less accessible. Instead, keep the working underside close to the established benchmark where it suits the household, then use taller cabinetry, a second tier or a carefully proportioned bulkhead above.

The Australian cabinet range commonly extends to 905 mm in height, with wall cabinet depths around 300–350 mm in many layouts, as outlined in standard cabinet dimension guidance. A taller cabinet can use more of the wall without forcing every frequently used shelf higher.

Double-storey and raked ceilings

A double-storey void or raked ceiling often makes a full-height overhead run look visually heavy. In those rooms, designers may stop the cabinet at a clear architectural line, use a tall pantry bank at one end, or allow the upper wall to remain open. The right choice depends on whether the room needs more storage or more visual breathing space.

For a built-in treatment, a 260–320 mm bulkhead can close the run to the ceiling where the cabinet design and ceiling geometry allow it. Confirm the finished ceiling level before ordering. Raked ceilings, beams and uneven cornices can make a standard rectangular closure unsuitable.

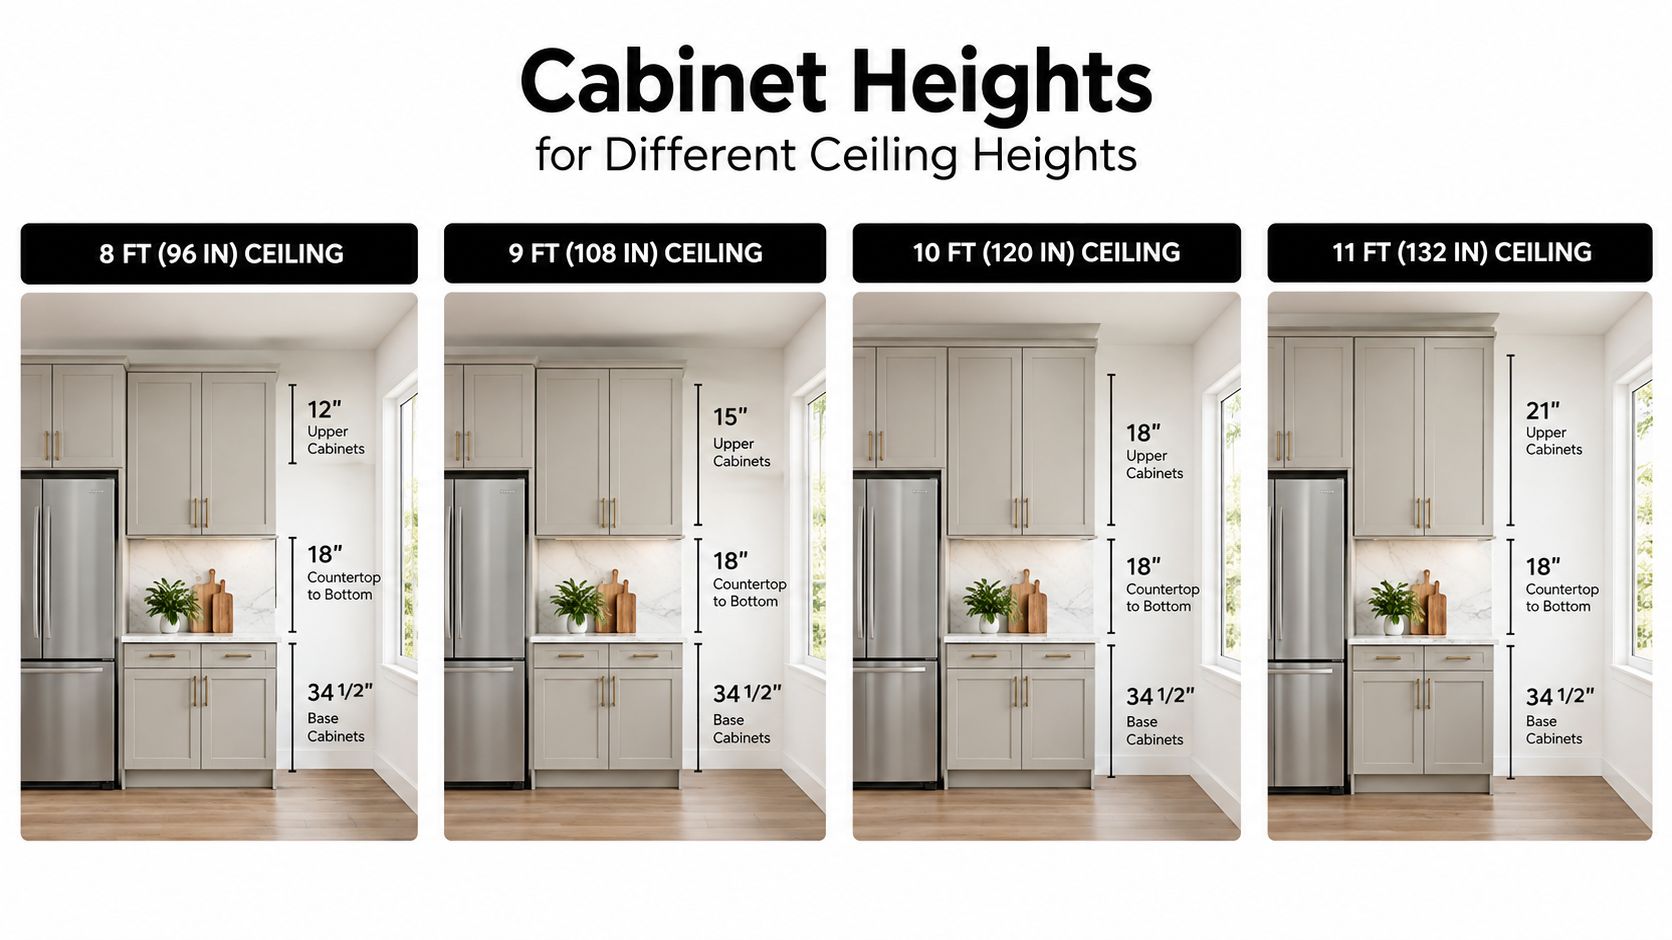
A diagram comparing kitchen cabinet dimensions for eight, nine, ten, and eleven foot ceiling heights.

Safety Clearances Around Cooktops and Appliances

The benchtop-to-cabinet gap is a general planning dimension. The space above a cooktop is a separate safety zone, and appliance requirements can force the cabinetry or rangehood higher than the surrounding run.

Australian kitchen guidance identifies a minimum 650 mm clearance between the cooktop area and the underside of overhead cabinetry, while some guidance states that the minimum rises to 700 mm near gas cooktops. The higher requirement reflects the heat and flame risk associated with gas appliances, so it must be treated as a safety constraint rather than a preference. See the Australian dimension guidance on kitchen clearances and appliance zones before finalising the elevation.

Check the appliance instructions first

The rangehood and cooktop installation instructions take priority over a general cabinet layout. They may specify a particular clearance, ventilation arrangement or relationship between the appliance and surrounding cabinetry. Your installer should check those requirements before the cabinet order is released.

A practical sequence is:

  1. Confirm the cooktop model and fuel type.
  2. Check the rangehood and cooktop installation requirements.
  3. Mark the required vertical clearance from the finished benchtop.
  4. Adjust the overhead cabinet or rangehood position.
  5. Check whether the change affects adjacent doors, fillers, lighting or the splashback.

Gas cooking can therefore create a different underside height from the cabinets beside it. The run may need a stepped arrangement, a higher central cabinet or a dedicated rangehood enclosure. Don't lower neighbouring cabinets just to create a level line if doing so compromises the cooktop zone.

Heat, steam and splashes also influence material selection and detailing. Cabinet doors, panels, rangehood surrounds and splashback junctions should be coordinated with the appliance installation, not treated as separate decisions after the joinery is designed.

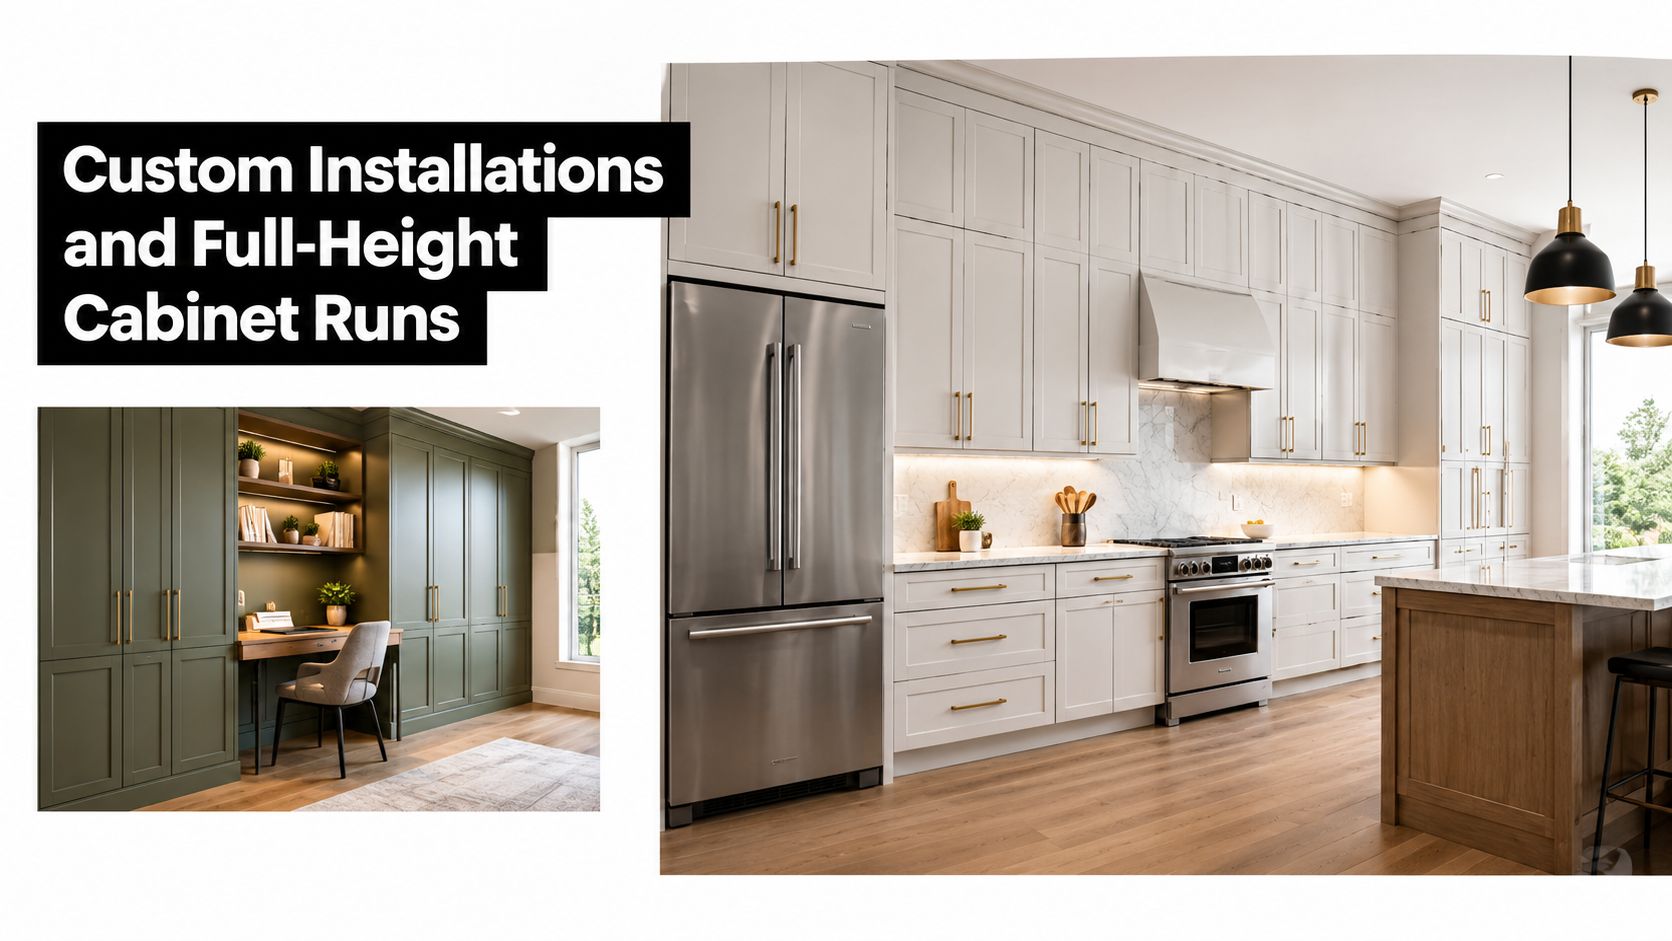
Custom Installations and Full-Height Cabinet Runs

Stock modules work well when the room follows familiar proportions. Custom joinery earns its place when the ceiling, appliances, storage needs or architectural lines don't cooperate with standard modules.

A custom-height wall cabinet can preserve a comfortable underside while extending storage upwards. A stacked configuration can place everyday items in the lower cabinet and occasional-use items in the upper tier. In a butler's pantry, a stepped run may respond to different benchtop levels, appliance positions or a change from preparation space to tall storage.

Choose the right closure strategy

There are three common ways to handle the space above a cabinet:

  • Open gap: Suitable when the ceiling detail is simple and the homeowner accepts the cleaning requirement.
  • Bulkhead closure: A 260–320 mm bulkhead can close the run for a fitted appearance where the room allows it.
  • Full-height joinery: Tall cabinets can run towards the ceiling and create a continuous architectural wall.

A tall or pantry cabinet may use a 2073 mm cabinet height, a dimension recorded in Australian modular joinery references. It can work beside a refrigerator, oven bank or laundry storage, but it needs careful coordination with doors, handles, skirting and ceiling finishes.

Material choice matters as much as height. Compare moisture resistance, door construction, internal finishes and edge details in a guide to kitchen cabinet materials before selecting a custom solution. Bathrooms require even closer attention to humidity, splash exposure and ventilation.

3D design visualisation is particularly useful here. A homeowner can compare a single cabinet tier with stacked doors, view the sightline from the entry, and test whether a full-height run overwhelms the room before construction begins. SitePro Bathrooms provides concept development and 3D design as part of its renovation process, which is one way to coordinate cabinet proportions with the wider room.

A modern kitchen and a green home office featuring full-height custom cabinetry and elegant design elements.

Overhead Cabinets in Bathroom Renovations

Bathrooms use the same basic measurement logic as kitchens, but the storage usually sits above a vanity rather than a food-preparation benchtop. The key reference surfaces are the finished floor, vanity top, basin, mirror and any nearby shower or tall storage.

A mirrored cabinet needs to serve the people looking into it, not just fill the wall. Mount it so the main users can see their faces comfortably without stretching or crouching, then check that the doors won't conflict with taps, wall lights or shower screens. A floating vanity changes the apparent height of the room by exposing more floor, but it doesn't remove the need to coordinate the mirror and storage elevation.

Match storage to the bathroom's daily rhythm

A compact ensuite may benefit from a mirrored cabinet above the basin and a tall storage tower beside the vanity. A family bathroom might need open access to towels, concealed storage for toiletries and a clear wall area around the basin. The cabinet should be positioned around those habits rather than copied from a kitchen elevation.

Current Australian bathroom design references feature open showers, subway tile, terrazzo floors, floating vanities and freestanding baths, with Melbourne examples showing contemporary and modern bathroom styles in local design galleries. Those features affect cabinet placement. A freestanding bath may need an uninterrupted focal wall, while an open shower requires careful consideration of splash exposure and storage materials. See the modern bathroom design examples for the range of styles homeowners are using as inspiration.

A designer bathroom often looks simple because the measurements have been carefully resolved. The mirror may align with a tile grid, the vanity may leave a deliberate visual gap below, and a tall cabinet may occupy an otherwise unused corner. Test the sightlines from the doorway, basin and shower, just as you would test reach and appliance clearance in a kitchen.

Working With a Registered Builder on Your Project

Cabinet height decisions become more complicated when the work includes waterproofing, plumbing relocation, structural changes or electrical installation. A builder can coordinate those trades before a cabinet position becomes fixed, reducing the risk that a mirror, power point, pipe or rangehood lands in the wrong place.

Victoria also has a specific compliance threshold. Domestic building work worth more than $10,000 must use a registered builder or building company, according to Victorian practitioner guidance summarised in bathroom renovation guidance for Victorian homeowners. That requirement is particularly relevant when a bathroom renovation combines demolition, waterproofing, joinery and finishing work under one project.

What the unlimited class means

The Domestic Builder, Unlimited registration class is a real Victorian practitioner category. Public Victorian listings include examples with licence codes such as CDB-U 48514 and CDB-U 100587, demonstrating that the category is used for licensed domestic builders undertaking broader residential work. The registration class doesn't remove the need to check the builder's experience, insurance, written scope and proposed subcontractors.

Before signing, ask the builder to confirm:

  • Registration: Verify the current registration and the relevant practitioner class.
  • Scope: Make sure cabinet installation, waterproofing, plumbing, electrical work and finishing are clearly allocated.
  • Drawings: Review the elevations and service locations before ordering joinery.
  • Variations: Establish how changes to cabinet height or appliance position will be documented and priced.
  • Handover: Confirm what inspections, certificates and warranties apply to the completed work.

An experienced renovation team should spot conflicts between cabinet height, cornice lines, plumbing outlets, lighting and appliance clearances during design. That planning is valuable in both kitchens and bathrooms, where a small elevation change can affect several trades at once.

Quick-Reference Measurement Checklist

Keep this list beside your tape measure during the design appointment. Each figure applies to a particular part of the room, so don't use a cabinet dimension as though it were an appliance clearance.

  • Wall cabinet height: 720 mm for a commonly used Australian overhead cabinet carcass. See the cited Australian cabinet dimension guidance above.
  • Wall cabinet depth: 300–450 mm as a common range for overhead storage.
  • Minimum general clearance: 650 mm from the finished benchtop to the cabinet underside.
  • Gas cooktop clearance: 700 mm where the applicable guidance requires the higher minimum near gas.
  • Typical underside position: About 1485 mm from the floor in a standard kitchen arrangement.
  • Typical benchtop gap: Roughly 565–585 mm above a 900 mm benchtop in the standard setup.
  • Full-height closure: A 260–320 mm bulkhead can close the upper gap where the ceiling and cabinetry allow it.
  • Tall pantry height: 2073 mm is a recorded Australian modular tall-cabinet dimension.
  • Bathroom storage: Apply the same reach and sightline principles around the vanity, mirror and tall storage, then check moisture exposure and plumbing locations.

For a conventional ceiling, begin with the standard underside benchmark and test the reach. For a higher ceiling, consider taller modules, a second tier or a bulkhead rather than automatically raising everyday storage. For a raked ceiling, unusual appliance zone or designer bathroom layout, use a measured elevation and 3D view before committing to custom joinery.

A measuring checklist graphic showing a tape measure, a metal ruler, and a digital weight scale.


Before ordering cabinets, measure the finished floor and benchtop, mark the proposed underside, test reach with the main household users, and check every cooktop and rangehood requirement. If you're planning a kitchen or bathroom renovation in Highett or greater Victoria, contact SitePro Bathrooms to arrange a design consultation, review the elevation in 3D, and coordinate cabinetry, plumbing, electrical work and construction before installation begins.

  • siteprobathrooms

How to Quote a Kitchen Renovation the Right Way

You're standing in a Highett weatherboard kitchen with three renovation quotes on the dining table. The totals look alarming, the cabinetry colour is identical, and you've already measured the room twice. One builder has priced the job at $42,000, another at $58,000, and a third at $71,000. The question isn't which builder is expensive. It's what each document has included.

Learning how to quote a kitchen renovation properly means reading beyond the grand total. A credible quote identifies the work, materials, allowances, exclusions, approvals and payment stages that sit behind the number. Australian renovation data illustrates why this matters: the median renovation spend was reported at $29,155 in 2021, while the average kitchen installed in a new home was $27,944 in the same year, with major components listed separately rather than hidden inside one lump sum (Australian renovation cost breakdown).

Three Quotes on the Bench and No Idea Why They Differ

The first document looks tidy. It has a short description, a completion estimate and a total of $42,000. Then you notice that electrical rough-in is excluded. The quote covers cabinetry installation, but not necessarily the work required to move power points, prepare the rangehood connection or make the existing wiring suitable for the new layout.

The $58,000 quote is harder to read. It says “kitchen fit-out” in one line, with no separation between joinery, installation, plumbing, electrical work or finishing. That wording may represent a complete package, or it may leave important decisions to an allowance hidden in the terms and conditions. You can't compare it with the first quote until the builder explains what that line contains.

The $71,000 document is the most detailed. It lists cabinetry, stone and appliances, but the stone allowance has no square-metre quantity or product specification behind it. A generous-looking allowance can still mislead if the builder has priced a basic material while your selections require more fabrication, thicker edges, cut-outs or a waterfall end.

Three different kitchen renovation quote sheets laid out on a wooden table with a pen.

The total doesn't tell you the scope

A quote is a language game when categories remain vague. “Cabinetry” could mean supply only, assembled units, handles and panels, or a fully installed joinery package. “Plumbing” could mean reconnecting existing services, relocating pipework, supplying tapware or all three.

The price gap isn't automatically evidence of builder greed. Each builder may have made different assumptions about demolition, structural work, waste removal, appliance supply, wall repairs, flooring transitions and finishing. The homeowner has to convert those assumptions into comparable scope before choosing.

Australian guides place kitchen renovation costs across broad bands because the work varies from a flat-pack refresh to a custom rebuild. One 2026 guide gives a national range of $8,179 to $20,443, with a midpoint of $14,311, while warning that projects can range from $5,000 for a flat-pack refit to more than $80,000 for a custom rebuild. Those figures aren't a substitute for a site-specific quote. They demonstrate why the brief must state whether the project is cosmetic, mid-range or a full rebuild.

Practical rule: Never compare totals until every builder has priced the same room, the same products and the same work sequence.

Defining the Renovation Before Any Money Is Spent

The scope document is the foundation of the quote. It turns a wish list into a construction brief that a cabinetmaker, electrician, plumber and builder can interpret in the same way.

Start with the layout. State which walls remain, which are removed and whether the island changes position. Record where the sink, dishwasher, cooktop, oven, refrigerator and rangehood will sit. If the existing gas cooktop is being replaced with induction, say whether the gas service will be capped and whether the electrical supply needs an upgrade. A builder can't price a service change accurately from a mood board.

Lock the decisions that affect labour

Your scope should identify:

  • Appliances: List the brand, model number, dimensions and installation requirements for every appliance.
  • Cabinetry: Describe the door profile, internal configuration, drawer hardware, panels, fillers, kickboards and finish.
  • Benchtops: Name the material, thickness, edge detail, cut-outs, joins and any upstands.
  • Splashback: Specify tile, sheet material, grout, pattern, height and the wall preparation required.
  • Flooring: State whether existing flooring stays, is repaired, is removed or continues into the renovated area.
  • Services: Mark the new positions for power points, switches, lighting, water, waste, gas and ventilation.
  • Finishing: Include plaster repairs, painting, tiling, caulking, cleaning and rubbish removal.

This level of detail prevents four common forms of drift. Different trades stop quoting different layouts. Allowances can't substitute a cheaper material without being visible. Variations become easier to assess because the original obligation is written down. “While you're at it” additions can be priced as deliberate changes rather than absorbed informally during a stressful job.

Use a one-page handover brief

A practical scope sheet can fit on one page if it uses direct language. Put the property address, project description, existing conditions, proposed layout, product schedule, service changes, demolition extent, exclusions and required completion standard at the top. Attach the plan, appliance list, elevations and finish schedule.

Ask every builder to return the scope with their quote. If a builder proposes an alternative, require the alternative to be listed beside the specified item rather than replacing it without notice. Victorian guidance on getting quotes also warns that the lowest quote may omit materials and finishes, while missing allowances for demolition, permits, asbestos assessment, structural engineering and hardware can create later budget blowouts (Victorian guidance on building quotes).

The homeowner should own the brief. The builder should price it, challenge unsafe or impractical choices and identify unknowns before signing.

Measuring and Photographing the Existing Kitchen

Treat the existing kitchen as a forensic site. A quick tape measure across the longest wall won't reveal whether a new cabinet will collide with a window reveal, whether the floor drops under the toe-kick or whether a waste pipe runs through the proposed drawer bank.

Draw a scaled plan and record every wall length, window, door opening, ceiling height and appliance clearance. Mark the locations of water, gas, waste, power points, switches, the rangehood flue and any visible beams. Note the direction of doors and the distance from corners to services. Measurements should be taken from fixed reference points, not estimated from cabinet edges that may be out of square.

Photograph what the quote can't see

Take wide photographs of every wall, then follow with close-ups of:

  • Connections: Existing plumbing, gas points, power points and appliance outlets.
  • Low-level conditions: The subfloor behind the toe-kick and any signs of dampness or movement.
  • Overhead constraints: Ceiling height, bulkheads, ducting and rangehood paths.
  • Structural details: Beams, posts, wall junctions and openings that cabinetry must work around.
  • Demolition risks: Original tiles, old vinyl, adhesive, damaged plaster and areas that may contain asbestos-era materials.

Highett's post-war homes can hide surprises beneath flooring and behind original tiling. Photos won't replace a site inspection, but they give every quoting builder the same starting information and make later discussions more precise.

A contractor measuring a kitchen and drawing a floor plan for a home renovation project.

Build a small measurement kit

Use a tape measure, laser measure, graph paper, pencil, camera, torch and a straightedge. Keep the original photographs, annotated plan and appliance specifications in one folder. A homeowner preparing an early layout can also use an online kitchen planner to test cabinet positions before requesting site quotes.

This documentation shifts the conversation from “we allowed for something around there” to “the service is this distance from the corner, the wall is this length and the benchtop has this number of joins”. That doesn't remove uncertainty, but it gives the builder fewer reasons to hide uncertainty inside a broad allowance.

Anatomy of an Itemised Kitchen Quote

A defensible kitchen quote separates the work into cost buckets. The exact amount depends on access, materials, labour availability, site condition and the design, but the structure should remain clear even when the total changes.

Australian renovation reporting itemised major components at $12,868 for cabinetry, $6,600 for benchtops, $6,579 for built-in appliances, $5,138 for labour, $3,407 for flooring and $1,779 for wall finishes and splashbacks in its 2021 breakdown (Australian kitchen renovation component benchmarks). These are benchmarks, not a price list for a Highett property. Their value is that they show how a serious quote should expose the major moving parts.

What each category needs to show

Demolition should state what is removed, who disconnects appliances, how surfaces are protected and whether waste is removed from site. Structural and framing work needs a description of the wall, beam, post, lintel or opening involved, not just “builder's works”.

Cabinetry should show the number and type of units, panels, fillers, internal accessories, hardware, finish and installation. Benchtops need material, thickness, edge profile, cut-outs, joins, support requirements and templating. Appliances should identify whether the builder supplies them or installs owner-supplied products.

Plumbing and electrical work must distinguish rough-in from fit-off. Rough-in covers the concealed service preparation before walls and cabinetry close. Fit-off covers the visible connections, switches, outlets, fixtures and final testing. Flooring, painting, tiling and cleaning should each have their own lines where they form part of the contract.

Cost Category Typical Range (AUD) Notes
Demolition and waste removal Varies by site and waste volume State removal extent, protection, disposal and hazardous-material assumptions
Structural and framing changes Varies by wall and engineering requirements Identify load-bearing work, beams, posts, temporary support and finishes
Cabinetry and joinery Varies by specification List units, panels, internals, hardware, finish, delivery and installation
Benchtops Varies by material and fabrication Include thickness, edge, joins, cut-outs, templating and support
Splashbacks and wall finishes Varies by selected finish State tile or sheet material, preparation, grout, trims and installation
Appliances Varies by model and installation Include model numbers, delivery, panels, connections and commissioning
Plumbing and electrical rough-in Varies by service relocation Separate concealed preparation from final connection
Plumbing and electrical fit-off Varies by fixtures and points List tapware, sink, outlets, switches, lighting and testing
Flooring, painting and tiling Varies by area and substrate Give measured areas, preparation, transitions, coats and trims
Labour and project coordination Varies by programme and trades State supervision, protection, scheduling, cleaning and handover

A single line reading “kitchen renovation, $45,000” is a warning sign. It may be a legitimate fixed price, but you can't test it, compare it or manage variations without a breakdown. Itemisation also reveals mark-ups and exposes which category inflates fastest between builders.

Allowances Selections Contingency and Permits

Allowances become expensive when the quote uses a low placeholder and the homeowner chooses a real product later. A $4,000 appliance allowance against an $8,000 induction cooktop creates a $4,000 owner-funded gap before installation or electrical changes are considered. The problem isn't the variation itself. The problem is that the original allowance disguised the likely specification.

A prime cost, or PC, sum generally covers a product that hasn't been selected. A provisional sum covers work whose extent or cost remains uncertain. Both can be legitimate, but the quote should identify the assumed product or scope, the included amount, the labour treatment and the builder's margin on any difference.

Turn selections into fixed decisions

Make a selection schedule for tapware, handles, benchtops, splashback tile, light fittings, sink, waste kit and door hardware. Include a product reference, finish, dimensions and price basis. If the selected item changes, the variation should show the original allowance, the new cost, labour impact, delivery effect and margin.

The same approach applies to modern choices that look standard in a design image but alter fabrication and installation. Handleless joinery can require different profiles and clearances. Integrated appliances need panels, ventilation and careful alignment. Porcelain or sintered-stone benchtops can involve specialised fabrication. A larger multifunctional island affects support, access, electrical planning and installation sequencing. Australian trend coverage also identifies warm minimalism, textured neutrals, layered LED lighting and durable low-maintenance materials as current design directions, all of which can change the specification even when the room layout stays the same.

Allow for the unknown without hiding it

For an established Highett home, carry a contingency of 10% to 15% for concealed conditions, and a project-management buffer of 5% to 10% if you're coordinating trades yourself. These figures are planning allowances, not guaranteed costs. Keep them outside the builder's fixed scope so you can see whether the quote is complete or merely optimistic.

Permits belong in the early scope discussion. Structural work requires a building permit through a private building surveyor, while drainage alterations require a compliance certificate from a licensed plumber. Victoria also requires registration with the Building and Plumbing Commission for domestic building work worth more than AUD 10,000, and structural work requires a registered builder and building permit regardless of cost (Victorian renovation and bathroom compliance guidance).

For practical permit and approval planning, review the building permit requirements guide alongside the quote and ask who lodges each document, pays each fee and supplies the final certificate.

A modern kitchen countertop featuring an induction cooktop with an eight thousand dollar price tag displayed nearby.

Comparing Quotes the Apples to Apples Way

Put the quotes into one comparison sheet and replace each builder's wording with the scope item you need. The exercise should make omissions visible before price influences your judgement.

Start with the physical work. Each builder should respond to the same demolition extent, cabinetry run, benchtop material, appliance list, tile selection, electrical points, plumbing points and flooring transitions. If one quote includes a new rangehood route and another assumes the existing flue remains, they aren't competing on the same job.

Compare exclusions before inclusions

Inclusions make a quote look generous. Exclusions explain why it may be cheap. Read every exclusion and translate it into a question:

  • Is demolition complete, including adhesive and old flooring?
  • Is waste removed from site?
  • Are wall repairs and painting included?
  • Are appliance panels, delivery and installation included?
  • Are plumbing and electrical changes priced as rough-in and fit-off?
  • Are structural engineering, permits and inspections included?
  • Are hardware, fillers, scribes and end panels included?
  • Is final cleaning part of the handover?

Normalise allowances by replacing them with the actual specified product price. If a builder has priced a generic sink allowance and another has included the exact sink, use the same product basis for both. The difference that remains is more meaningful.

Comparison Category What to Align Why It Matters
Scope of works Layout, demolition, structural work and finishing Different work descriptions create false price differences
Cabinetry Brand or manufacturing standard, run, internals and hardware Joinery can look similar while construction and installation differ
Benchtops Material, thickness, edge, joins and cut-outs Fabrication details affect both supply and labour
Appliances Models, panels, delivery, connections and commissioning Allowances can conceal major specification gaps
Services Identical plumbing, gas, electrical and lighting points Relocation work can sit outside a headline price
Finishes Same flooring, paint, tiles, grout and trims “Complete” doesn't define finish quality
Exclusions Demolition, permits, engineering, waste and repairs Exclusions transfer risk back to the homeowner
Contract terms Deposit, progress stages, variations and warranty A low price can carry unfavourable commercial terms
Programme Start date, milestones and handover conditions Delays affect temporary cooking, trades and accommodation
Defects process Inspection, rectification and liability period You need a clear route for incomplete work

Then assess payment stages against completed work rather than calendar dates. A quote that wins on three categories but loses on nine may be cheaper only because the homeowner is carrying the missing scope.

Locking It In with a Pre-Signing Checklist for Highett Homes

The night before signing, put the quote, scope, plans, selections and contract together on the kitchen bench. Read them as one document. Any item that appears in a drawing but not in the quote needs an answer in writing.

Confirm the builder's current Victorian registration and request the relevant warranty insurance certificate. The Victorian Building Authority recognises a limited domestic builder pathway for bathroom, kitchen and laundry renovation, while Domestic Builder, Unlimited is a recognised registration category. A builder quoting major work should have a registration class that matches the scope, not merely general renovation experience.

This matters beyond kitchens. Bathroom renovations, structural alterations and multi-trade projects can involve different compliance responsibilities. If you're considering new bathroom ideas, modern bathrooms or more detailed designer bathrooms, confirm whether the proposed work sits within a limited class or requires a builder with broader registration. Referee guidance for the limited bathroom, kitchen and laundry class refers to a registered Domestic Builder, Unlimited, or a builder registered in the relevant class.

Check the local conditions

Ask whether Bayside Council requires a building permit for your scope and whether nearby heritage overlay controls affect the property. Confirm that splashback and wet-area waterproofing is quoted to NCC 3.8.1 standards, with preparation, membrane work and certification clearly assigned.

The contract should use terms suited to Victorian domestic building work over $16,000, such as an appropriate HIA or Master Builders form. Progress payments should follow completed stages, not dates on a calendar. Record the start milestone, cabinetry measure, demolition, rough-in, installation, fit-off, practical completion and defects inspection.

Use this ten-point final check

  1. Scope match: The plans, selections and written scope describe the same renovation.
  2. Layout confirmed: Wall removals, service positions and appliance locations are fixed.
  3. Allowances locked: Every PC and provisional sum states its basis and adjustment method.
  4. Contingency disclosed: Unknown conditions and owner-managed buffers are visible.
  5. Exclusions reviewed: You know what you must supply, organise or pay separately.
  6. Approvals assigned: Permit applications, fees, inspections and certificates have named owners.
  7. Timeline milestones: Start, trade stages and handover conditions are written down.
  8. Payment stages: Payments correspond to completed work and verified progress.
  9. Defect liability: The inspection process and rectification period are clear.
  10. Variations clause: No extra work proceeds without written price and approval.

SitePro Bathrooms is one local option that provides kitchen renovation planning with 3D design and an itemised quotation covering labour, materials, fixtures, finishes and a projected timeline. Whether you choose a coordinated renovation company or separate trades, insist on the same written clarity.

A woman reviewing a building contract and builder registration certificate before signing a home renovation project.

A reliable kitchen quote isn't the document with the lowest total. It's the document that tells you exactly what will happen, what materials will arrive, who will do the work, what remains uncertain and how changes will be approved. Before signing, ask each Highett builder to reissue the quote against your final scope and comparison sheet. That one step will give you a defensible price, a clearer contract and far fewer surprises once the old kitchen is removed.


If you're planning a kitchen or bathroom renovation in Highett, prepare your appliance list, existing-room photographs and preferred layout before requesting a specific quote. Contact SitePro Bathrooms to discuss the scope, explore a coordinated design and construction process, and receive a written quotation based on the actual requirements of your home.