• siteprobathrooms

8 Clever Bathroom Design Ideas for Small Spaces

Transform Your Compact Bathroom: From Cramped to Clever

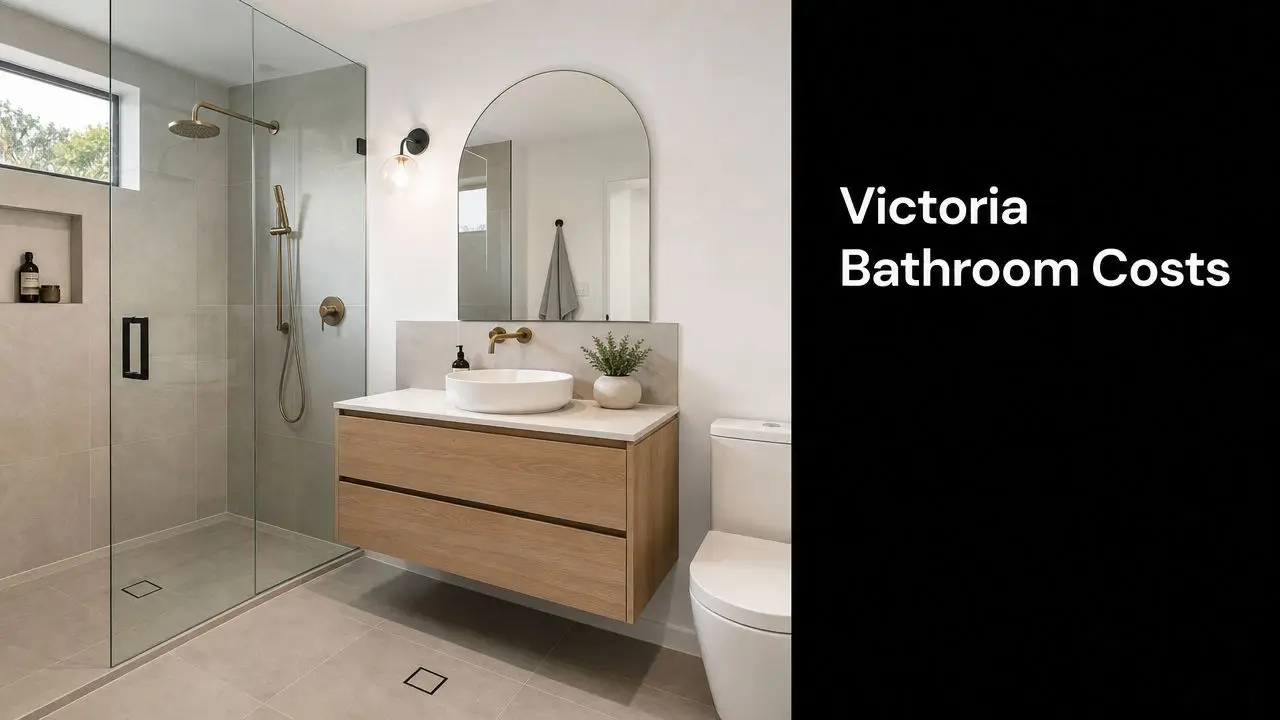
Struggling with a bathroom that feels more like a cupboard than a room? You're not alone. In older Victorian homes, compact ensuites, narrow hall bathrooms, and tight apartment wet areas are common, and they often come with awkward door swings, bulky vanities, and storage that never quite works.

The good news is that a better result usually comes from smarter planning, not a bigger footprint. The strongest bathroom design ideas for small spaces focus on circulation, sightlines, storage, and fixtures that earn their keep every day. That's where well-planned bathroom renovations make the biggest difference. A room can feel calmer, cleaner, and easier to use without moving every wall.

The best small bathrooms also need to work for real life. That means thinking beyond the photo-ready look. A bathroom should suit young families, busy professionals, older homeowners, and anyone planning to stay in the property long term. Modern bathrooms look great, but the best designer bathrooms also make movement easier, cleaning simpler, and future changes less disruptive.

These new bathroom ideas get practical fast. They're based on what performs well on site, what tends to date badly, and where registered builders unlimited in renovation scope can add value through proper planning, waterproofing, and layout control.

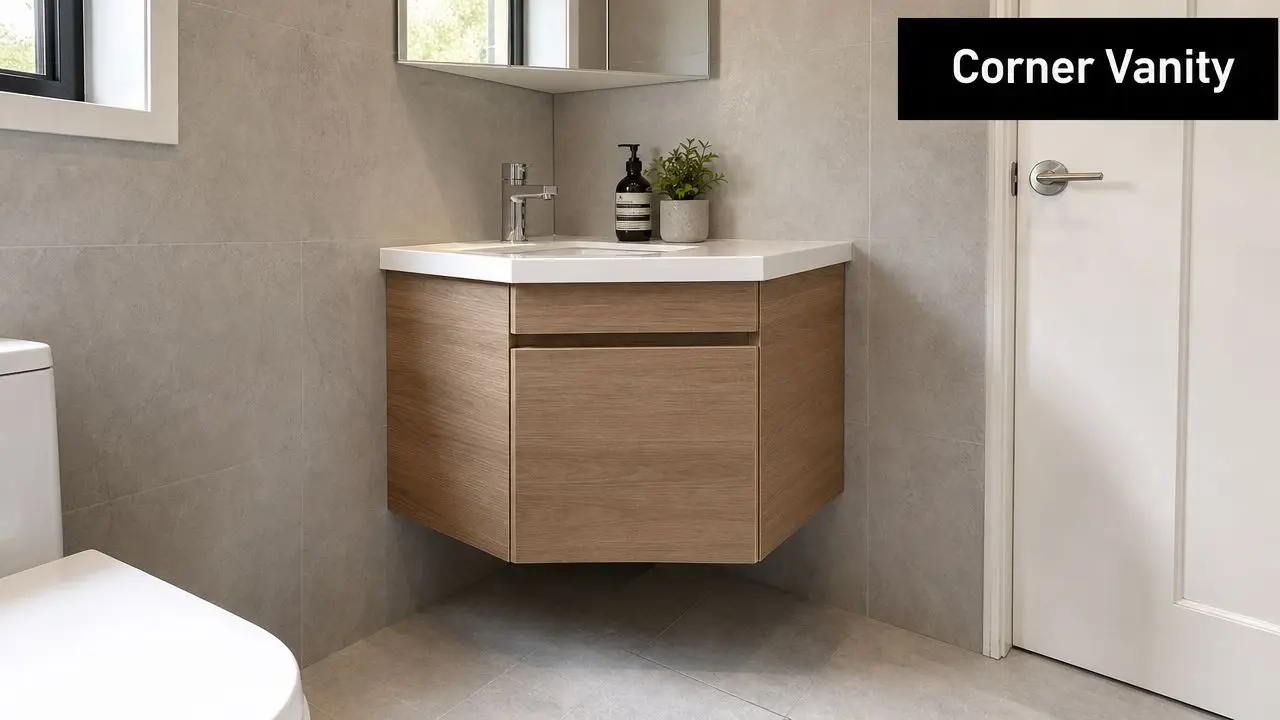
1. Wall-Mounted Fixtures and Floating Vanities

A modern bathroom with a floating wood vanity, circular mirror, and wall-mounted toilet on beige tiled walls.

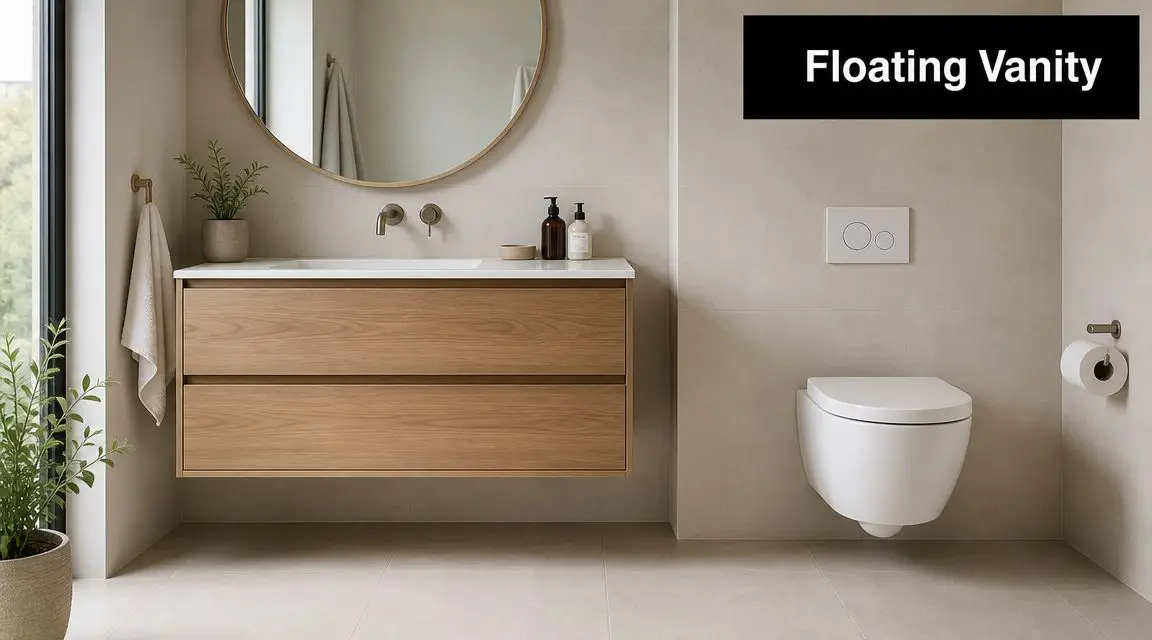
A small bathroom usually feels crowded at shin level first. Once the floor is cluttered with a full-depth vanity, a bulky toilet suite, and side panels that run to the tiles, the room starts to read tighter than it is. Wall-mounted fixtures and floating vanities fix that by clearing the sightline across the floor and giving you more usable space where movement matters most.

I use this approach often in compact ensuites and narrow hall bathrooms, especially in older homes where shifting walls is off the table. A floating vanity can make the room feel lighter, but its primary value is practical. You can clean underneath it properly, spot plumbing issues earlier, and reduce the hard corners that catch knees, walking aids, or a hurried foot on the way past.

What works on site

The best results come from getting the vanity depth right. In a tight room, a slimmer wall-hung unit with full-extension drawers usually works harder than a wider cabinet with hinged doors. Drawers let you reach the back without kneeling on the floor, which matters for everyday use now and matters even more if the homeowner wants to age in place.

Wall support needs to be planned early. A floating vanity or wall-hung pan is only as good as the framing behind it, so reinforcement has to be allowed for before sheeting, waterproofing, and tiling begin. That is routine work for a registered builder, but it is also where shortcuts cause trouble later.

SitePro Bathrooms has used this layout strategy in local renovations where clients wanted a cleaner designer look without sacrificing function. One common example is replacing a floor-standing vanity in a narrow family bathroom with a wall-hung unit that leaves open floor below and easier access beside it. That small change can improve circulation straight away and leave more flexibility if grab rails or mobility adjustments are needed later.

For more examples that suit local homes, these Australian small bathroom ideas show how floating fixtures can be used without making the room feel underdone or impractical.

  • Choose drawers over cupboards: They use the cabinet volume better and are easier to access from above.
  • Keep underside clearance useful: Enough open space below the vanity helps with cleaning and can make the room easier to use for anyone with reduced mobility.
  • Pair style with storage discipline: A floating vanity looks best when the benchtop stays clear, so include drawer organisers and nearby recessed storage in the plan.
  • Be honest about trade-offs: Wall-mounted fixtures cost more to install than basic floor-mounted options, but they usually return that value in easier maintenance, better movement, and a more adaptable layout.

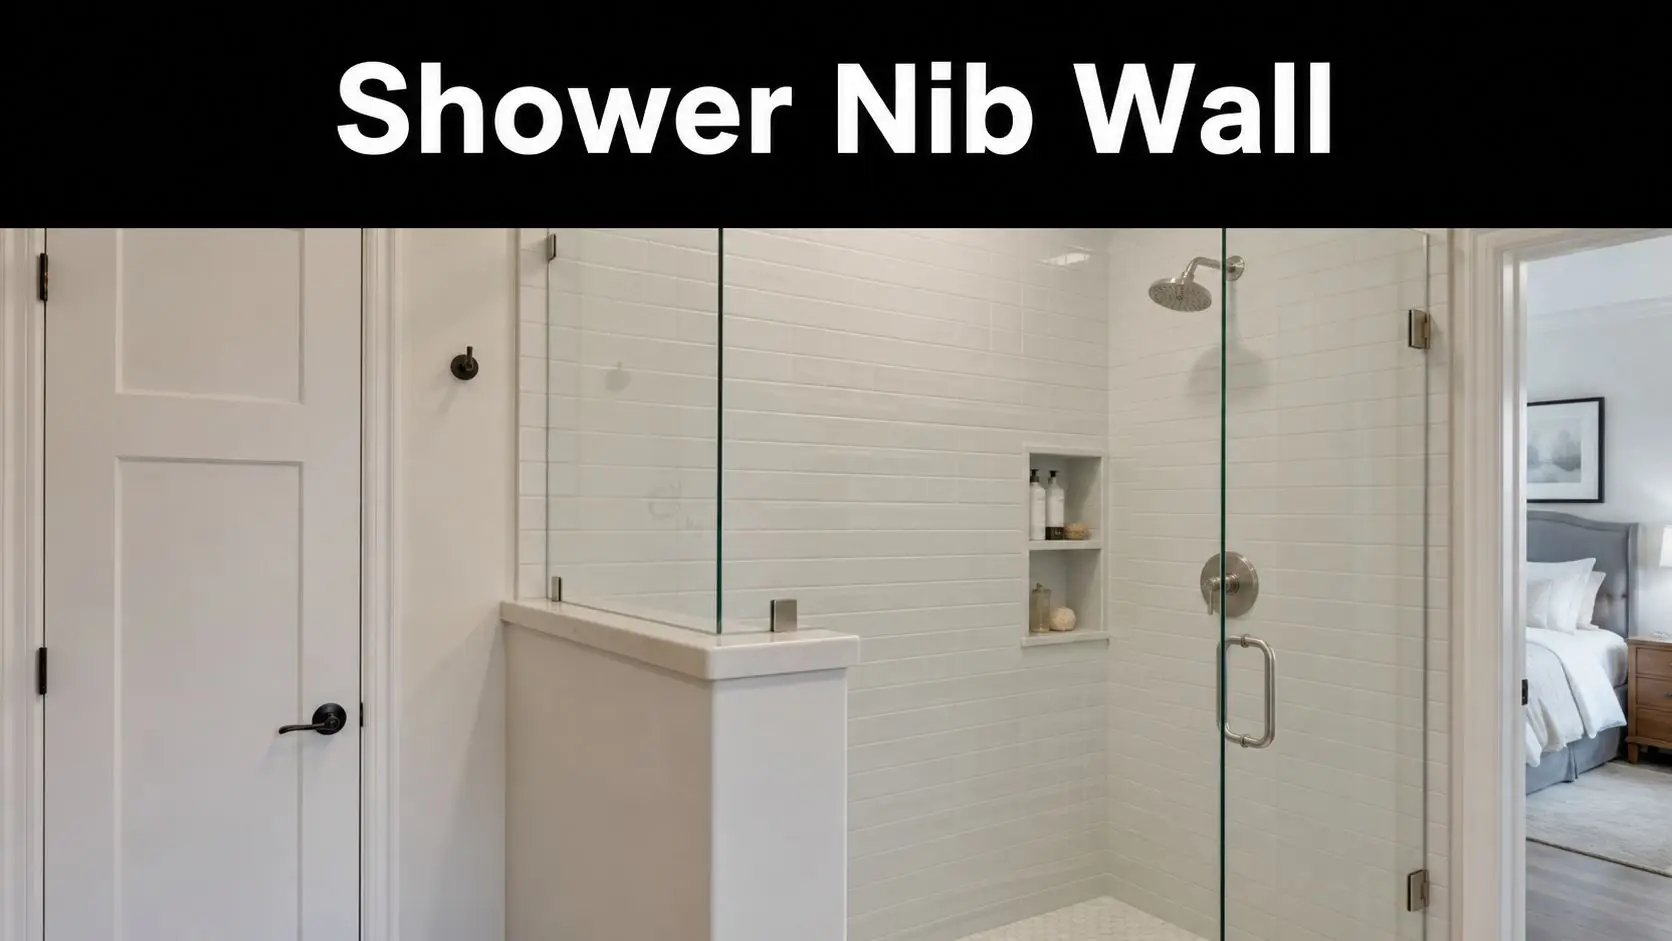
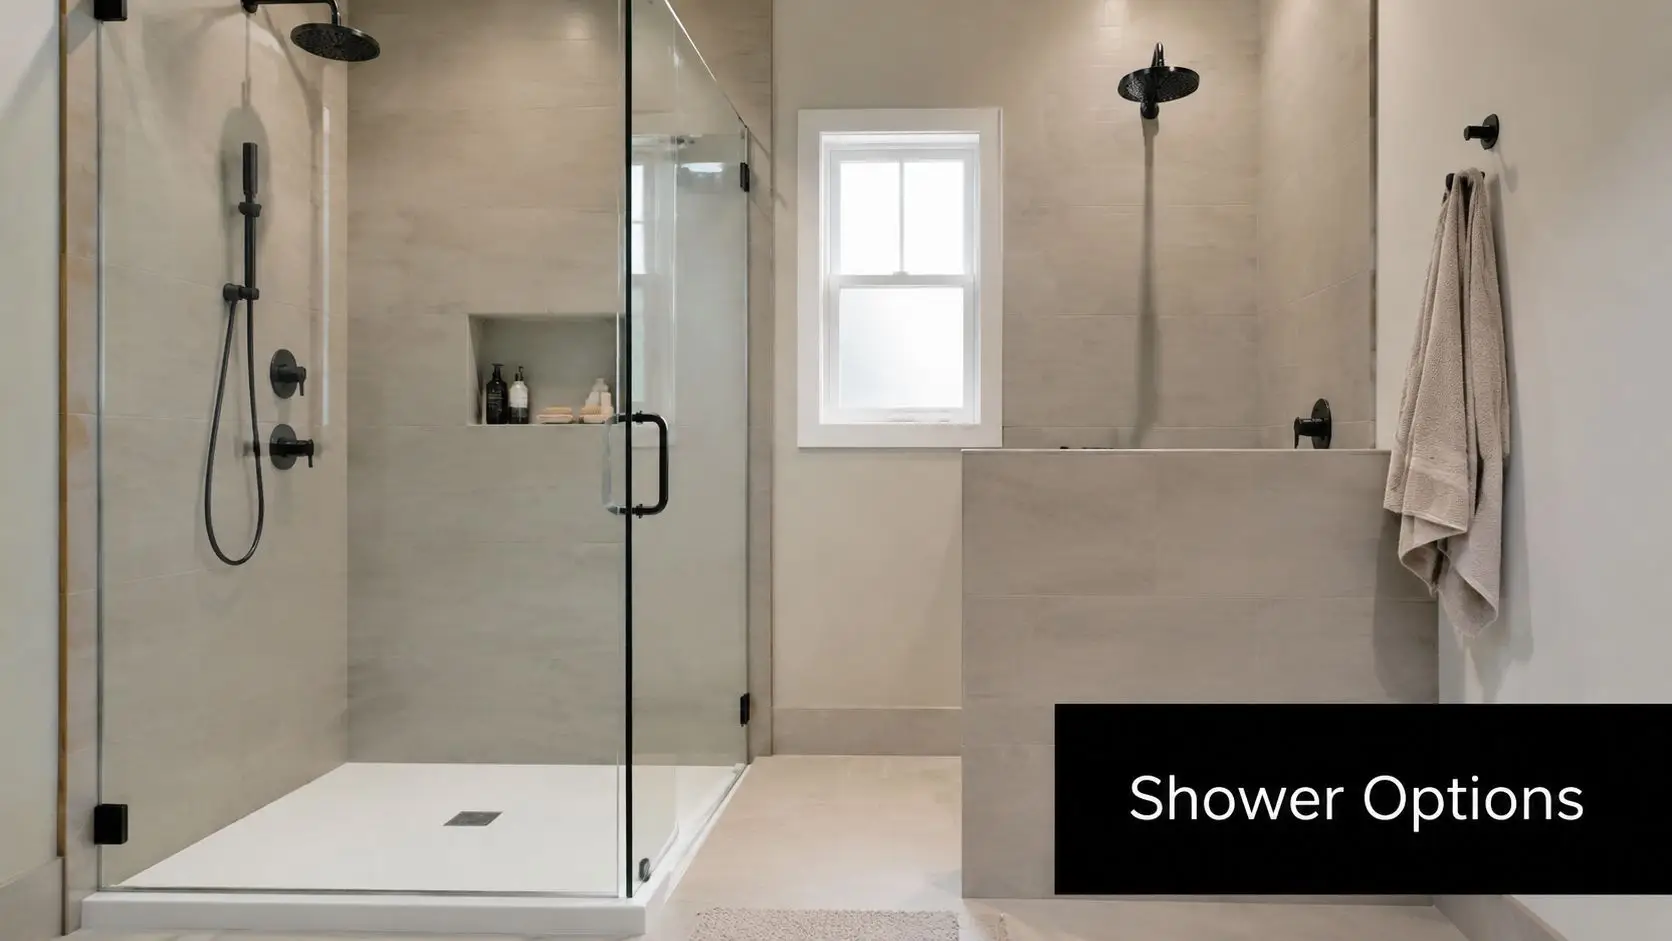
2. Compact Corner Showers with Glass Enclosures

A modern, bright bathroom interior featuring a corner shower with glass walls and light beige subway tiles.

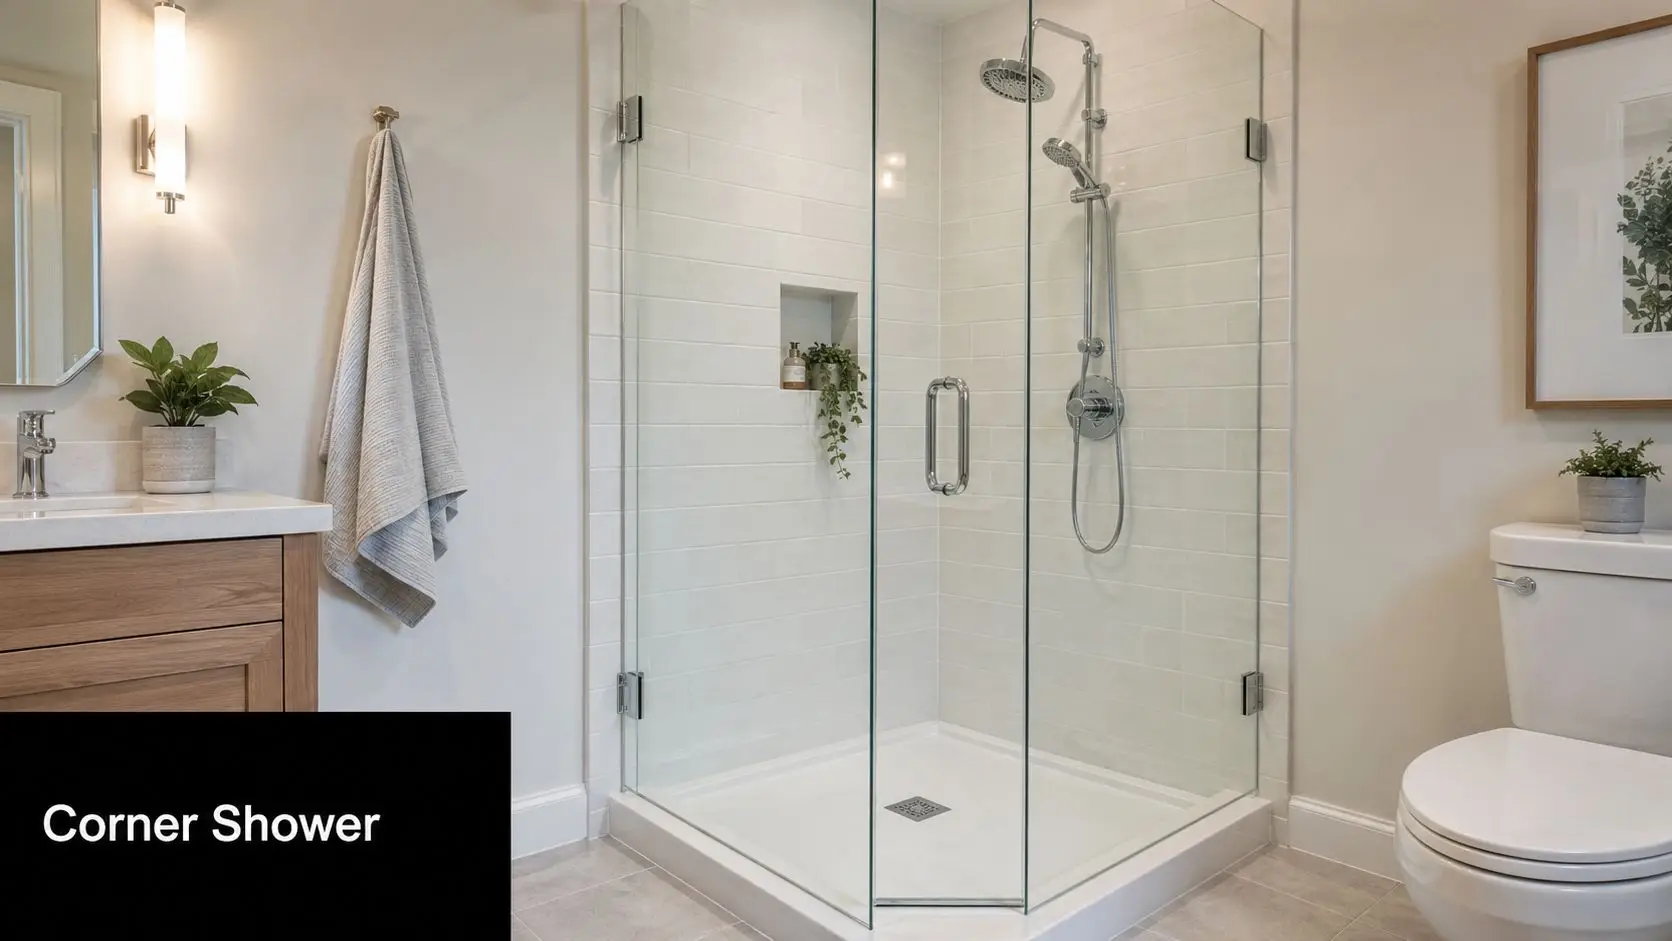
A tight ensuite often fails in one specific way. The shower door clips the vanity, the room feels boxed in, and two people cannot pass each other without a shuffle. A compact corner shower fixes that by putting the wet area into the part of the room that is usually hardest to use well, which opens the centre of the bathroom for easier movement.

Done properly, it also sets the room up better for ageing in place. A corner shower with clear glass, a low-threshold entry, and sensible placement of tapware is easier to enter, easier to supervise if someone needs assistance, and easier to adapt later with grab rails or a hand shower. The layout needs to be resolved before waterproofing and drainage are locked in, with the work carried out to the relevant Australian Standards, including AS/NZS 3740 for waterproofing and AS/NZS 3500.2 for plumbing and drainage.

Glass keeps the room readable

In small bathrooms, visual bulk matters almost as much as actual size. Heavy framed enclosures break up sightlines and can make a compact room feel tighter than it is. Frameless or lightly framed glass usually works better because you can read the full width of the room at a glance.

On SitePro Bathrooms projects, this is a common fix in older homes where the footprint stays the same but the bathroom needs to feel calmer and easier to use. One local ensuite had an old hinged screen that blocked the vanity every morning. Switching to a corner shower with a fixed glass panel removed the door conflict, improved circulation, and left clearer access if mobility needs change later.

The best compact shower layouts solve movement problems first and style second. Good design does both.

  • Choose a low-threshold entry: It improves access now and makes future mobility changes easier to handle.
  • Use recessed storage inside the shower: Bottles stay off the floor, cleaning gets easier, and the enclosure looks less cluttered.
  • Keep framing light: Bold black trims can suit larger bathrooms, but in very small rooms they often add visual weight.
  • Check the swing and reach zones: Tapware, towel access, and entry clearance all need to work comfortably for children, older adults, and anyone with limited mobility.

The trade-off is straightforward. Glass enclosures and custom corner layouts usually cost more than a basic boxed shower, especially if walls are out of square or drainage needs adjusting. In return, you get better circulation, a cleaner look, and a bathroom that is easier to use for longer.

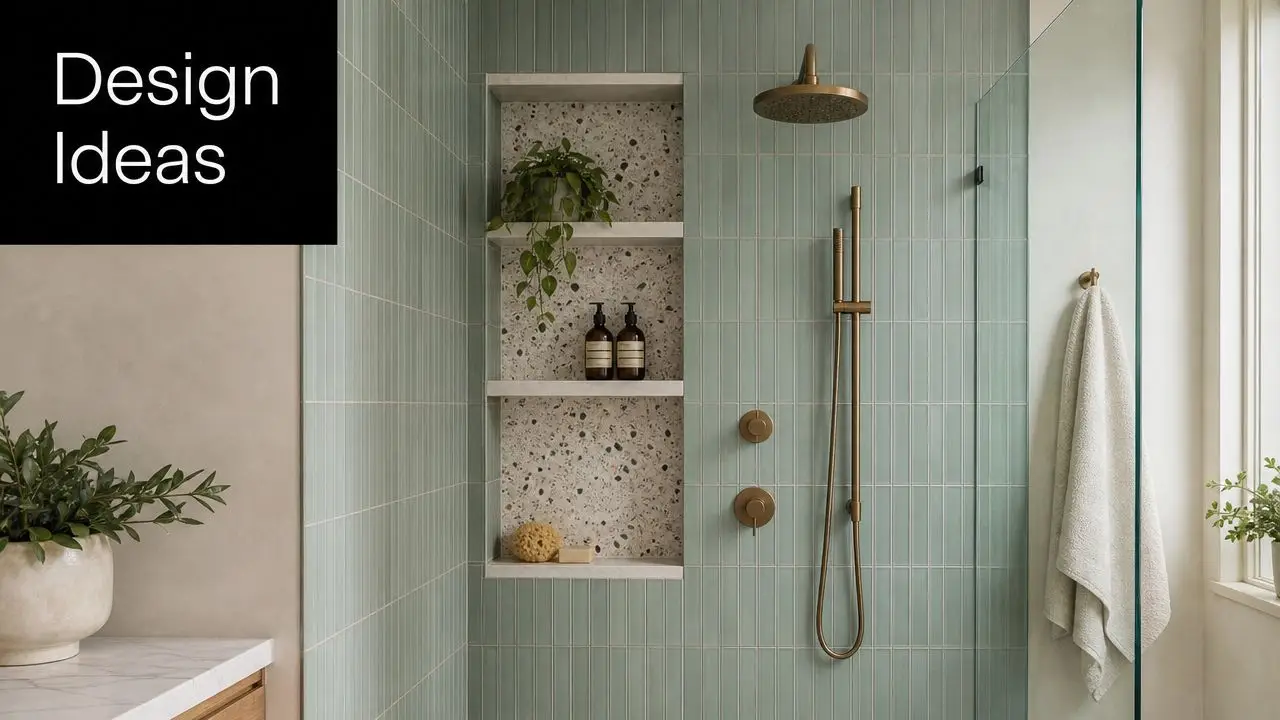
3. Vertical Storage Solutions and Recessed Shelving

A modern bathroom features a tall wooden storage cabinet and built-in wall shelves with white towels and decor.

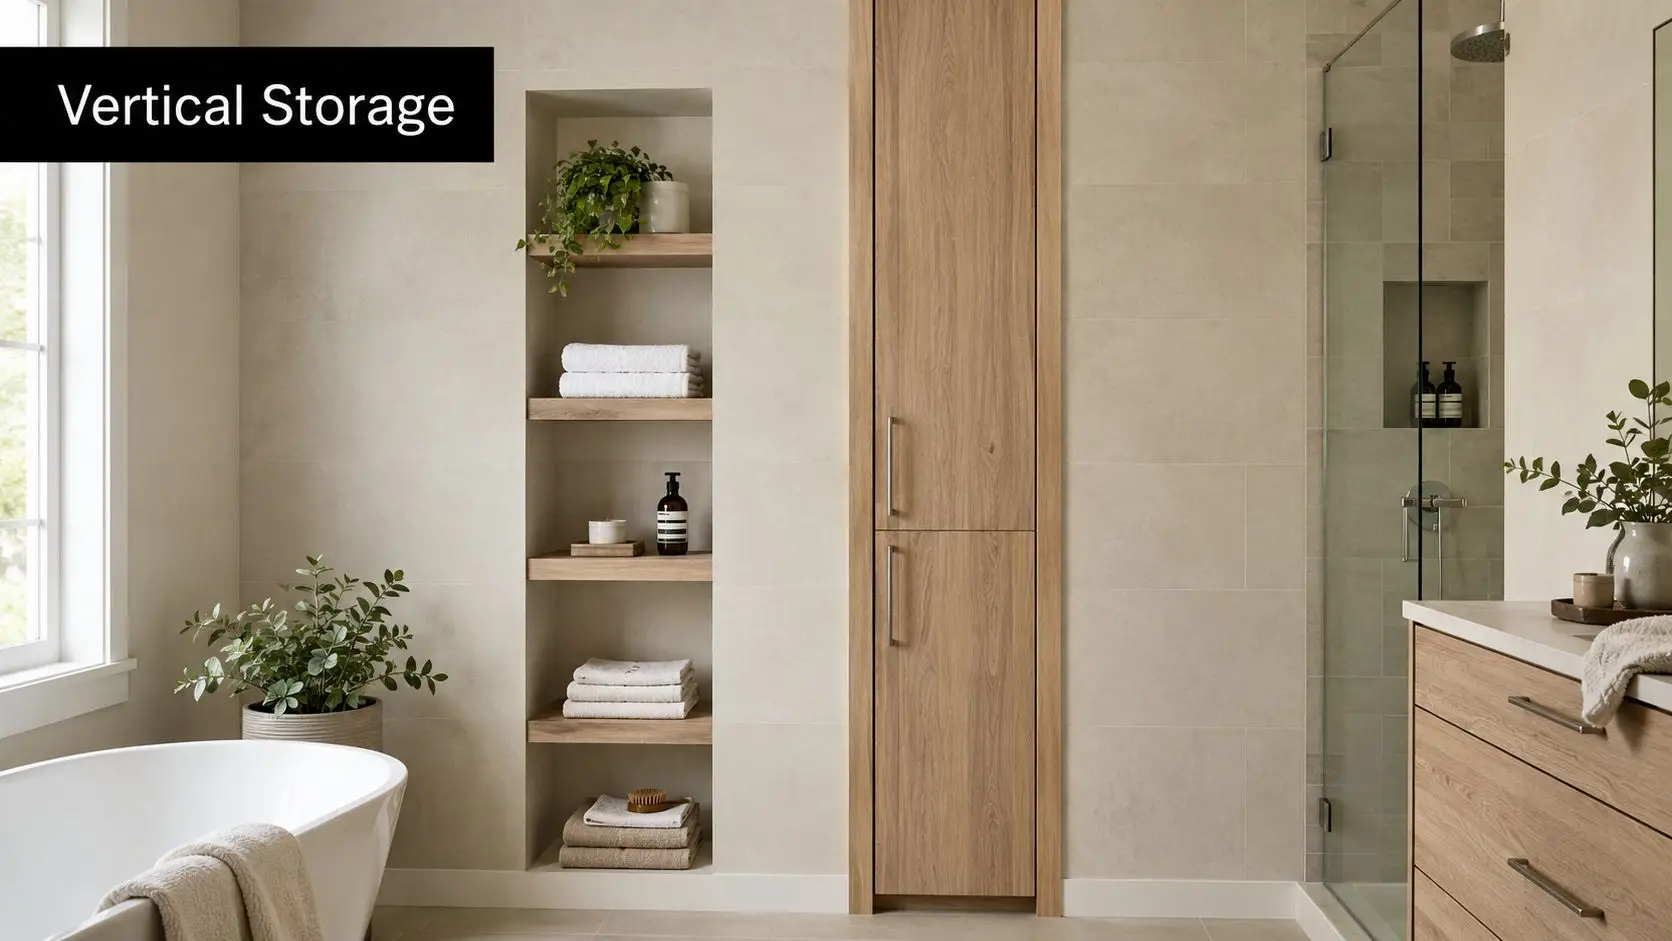
Small bathrooms usually don't fail because they lack style. They fail because there's nowhere to put anything. Benchtops fill up, the vanity becomes a junk drawer, and spare toilet paper ends up balanced on top of the cistern.

That's why vertical storage matters so much. When floor area is limited, the walls need to work harder. Tall cabinetry, recessed mirror cabinets, in-wall niches, and shelving above the toilet can add order without making the room feel crowded.

Recessed storage is usually the smarter option

In tight bathrooms, projecting shelves often create more problems than they solve. They catch elbows, interrupt walkways, and make the room feel narrower. Recessed shelving avoids that because the storage sits inside the wall line rather than on top of it.

On real projects, shower niches are one of the simplest upgrades with the biggest payoff. They keep bottles off the floor, remove the need for hanging caddies, and look intentional once tiled in. The same applies to a recessed shaving cabinet over the vanity. It gives you daily storage without chewing up circulation space.

A common SitePro Bathrooms approach in compact Victorian homes is to combine one strong vanity drawer stack with one or two built-in storage moments rather than cramming cabinets into every spare corner. That tends to produce a calmer room and a better long-term result.

  • Plan niches before walls are closed: Retrofitting them later is harder and more disruptive.
  • Store by use zone: Keep everyday items near the vanity and shower products in the shower niche.
  • Limit open shelving: Too much visible storage makes a small bathroom feel busy.
  • Think about reach: Accessible storage should be easy to grab without bending or stretching awkwardly.

For ageing-in-place planning, this matters more than many people realise. Storage that's easy to reach at standing height can be far more useful over time than low cupboards that require kneeling.

4. Light Palettes, Strategic Lighting, and Reflective Surfaces

A modern, bright, and airy bathroom featuring a wooden vanity, a sleek sink, and a glass-enclosed shower.

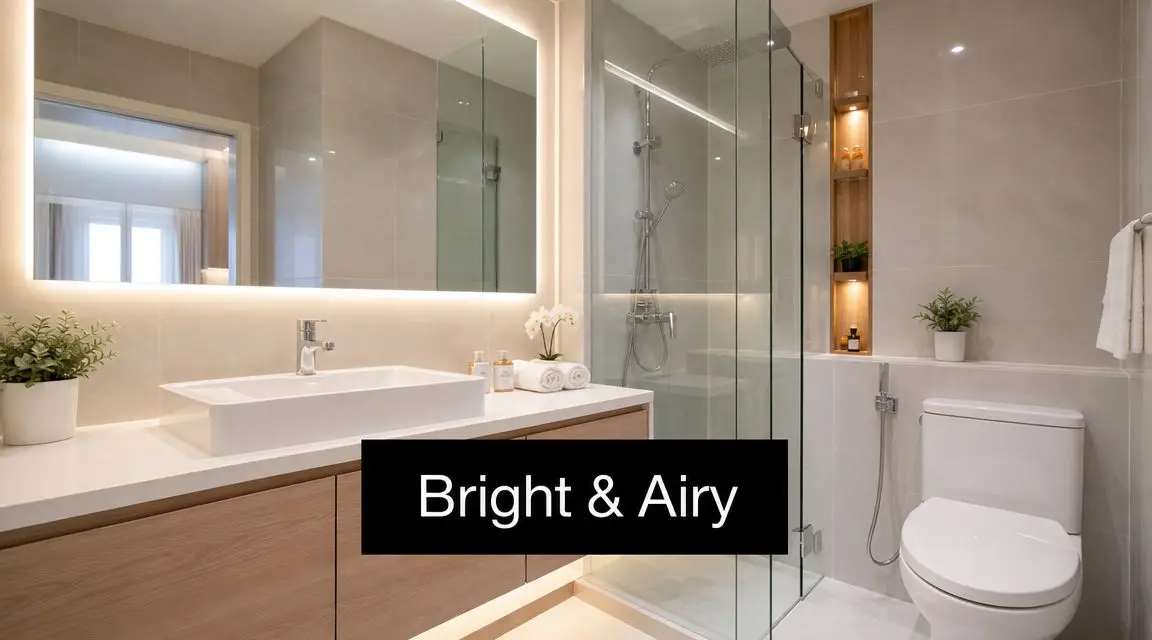
A dark small bathroom feels smaller than it is. That's the blunt version. Even a well-planned layout can fall flat if the finishes absorb light and the lighting plan is an afterthought.

Light-reflective finishes, clear glass, and well-placed mirrors do a lot of heavy lifting in compact rooms. Pale tiles, soft neutrals, and warm whites help bounce light around, while a large mirror over the vanity expands the sense of depth. The trick is balance. If everything is glossy and cold, the room can feel sterile.

Layer the lighting, don't rely on one fitting

A single ceiling light in the centre rarely works well. It throws shadows where you need visibility, especially at the mirror. Good small-bathroom lighting usually combines general ceiling light with focused vanity lighting and, where suitable, a subtle feature like under-vanity or niche lighting.

In practical terms, I'd rather see a simple palette with an excellent lighting plan than expensive finishes under poor lighting. The room will look better every day, and it will be easier to shave, apply makeup, clean, and move around safely.

For homeowners refining their lighting plan, this guide to downlight placement in a bathroom is a useful starting point.

On-site lesson: Expensive tiles won't rescue a room with bad lighting.

A common local scenario is a windowless ensuite that originally relied on one yellowed oyster light. Reworking that kind of room with brighter layered lighting, a clear-glass screen, and a mirror that reflects the full width of the vanity can completely change how open it feels.

  • Keep the main palette light: It improves perceived space.
  • Add warmth with timber or brushed metal: This stops the room feeling clinical.
  • Use mirrors deliberately: They should reflect light or open sightlines, not visual clutter.

5. Combination Fixtures and Dual-Purpose Elements

Small bathrooms improve fast when each fitting handles more than one job. That's why combination fixtures earn their place. A vanity with integrated drawer storage, a mirror cabinet, a toilet with cleaner lines, or a compact basin shelf can remove the need for separate add-ons that crowd the room.

Many new bathroom ideas sound good in a showroom but don't perform well once installed. A tub-shower combo, for example, only makes sense if the household will use the bath. In many smaller renovations, the bath becomes the room's biggest obstacle. It takes up visual and physical space, and it often makes shower access harder for children, older adults, and anyone with mobility limitations.

Pick fixtures based on use, not habit

A practical bathroom should reflect how the room is used. In a compact ensuite, a single well-designed vanity, good drawer storage, and a shower that's easy to enter will usually outperform a longer wish list of individual items.

Dual-purpose fittings also simplify cleaning. Fewer legs, fewer corners, and fewer freestanding accessories mean fewer dust traps and less visual noise. That's one reason integrated mirror cabinets remain such a reliable option in compact bathrooms. They hide clutter while still giving you the mirror you need.

SitePro Bathrooms projects often show this principle in family homes where clients want the room to feel uncluttered but still highly functional. A custom vanity with internal organisers, towel storage built into the side panel, and a mirrored shaving cabinet can replace several separate storage pieces.

  • Favour integrated storage: It cuts benchtop mess.
  • Question the bath requirement: If it's rarely used, the shower may deserve the space instead.
  • Allow for future needs: Powered bidet seats or upgraded mirror cabinets are easier if electrical planning happens early.

Combination fixtures aren't about squeezing in more. They're about reducing bulk while keeping the room useful.

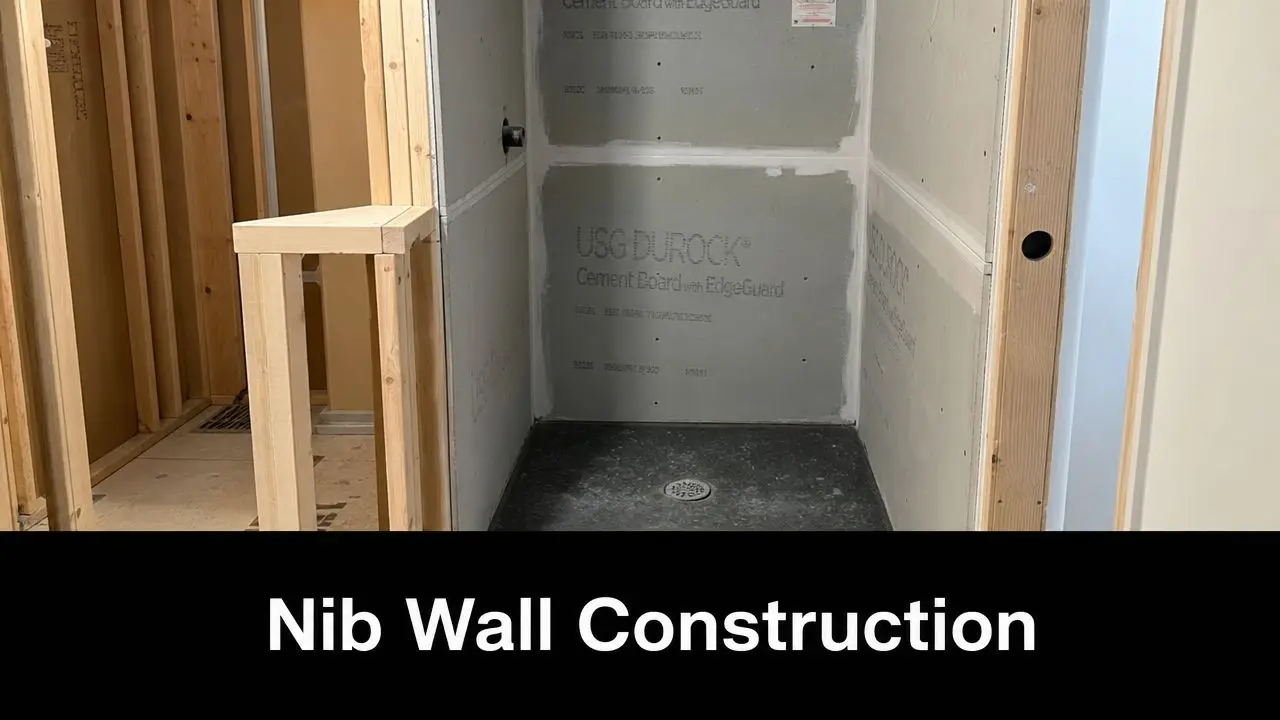
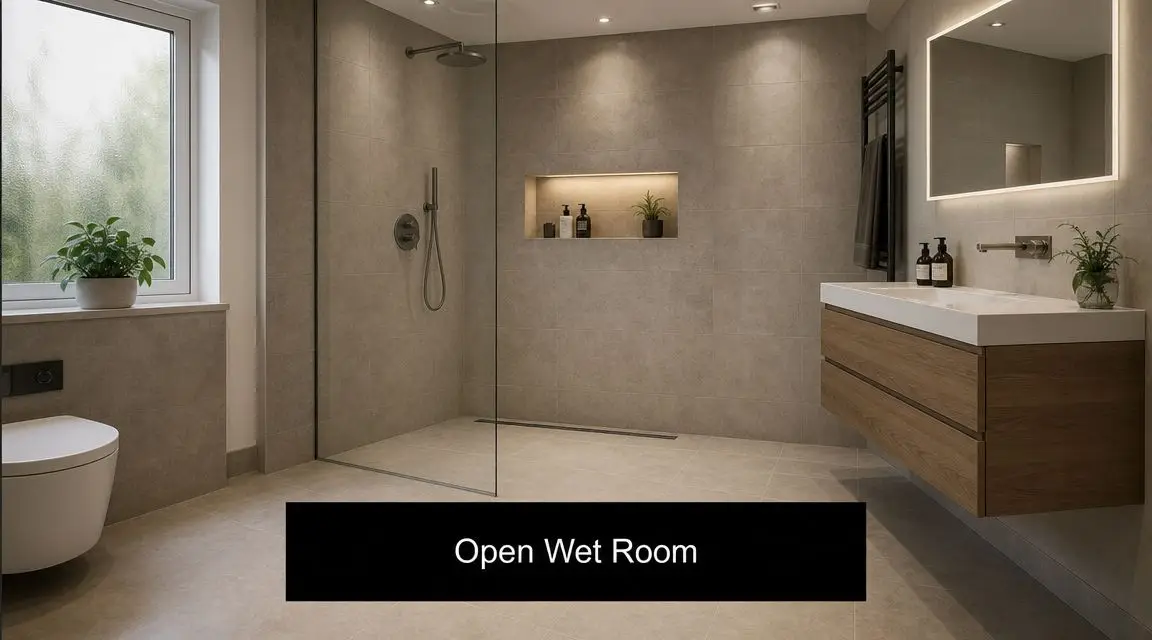
6. Curbless Walk-In Showers and Accessibility-First Design

A small bathroom often shows its limitations at the shower entry first. The raised hob catches toes, the screen narrows the approach, and the room starts to feel tighter than it is. A curbless walk-in shower fixes several of those problems at once. The floor line stays continuous, access improves, and the room usually looks calmer because there is less visual interruption.

In renovation work, this approach earns its place for practical reasons, not just appearance. It suits children, older homeowners, people recovering from injury, and anyone who wants easier day-to-day use without rebuilding the room again in a few years. In many established homes, especially where the footprint cannot grow, accessibility has to be designed into the layout rather than added later.

The details matter. A curbless shower only works well when the floor falls are planned properly, waterproofing is handled carefully, and the drain location suits the tile format. I usually recommend resolving the floor finish and waste position together early, because the wrong tile can fight the fall and make the job harder to execute cleanly. This guide on how to choose bathroom tiles for wet areas and small bathrooms helps homeowners make those selections before installation starts.

Accessibility-first design also does not need to look medical. Large-format tiles, a frameless fixed panel, a hand shower on a rail, and a linear drain can still give the room a refined, contemporary finish. If future grab rails may be needed, wall backing should go in while the walls are open. That small decision saves time, cost, and patching later.

SitePro Bathrooms has used this approach in local projects where clients wanted the bathroom to feel more open now but also safer over time. A common example is an older homeowner replacing a step-over shower after a fall scare or minor injury. Once the hob is removed and the circulation path is cleaned up, the room usually feels easier to use immediately, not just later in life.

  • Keep the entry flush or very low-threshold: It reduces trip risk and makes cleaning easier.
  • Allow clear approach space: Tight entries undermine the benefit of a walk-in layout.
  • Use slip-resistant floor tiles: Safety starts with grip under wet feet.
  • Add wall reinforcement in shower and toilet zones: Future support rails become a simple fit-off job.
  • Check door swing and screen placement carefully: An outward-opening or cavity slider often frees up valuable movement space.

The trade-off is build complexity. Floor levels, drainage, and waterproofing need tighter coordination than a standard shower base. Done properly, though, a curbless shower gives a small bathroom one of the few upgrades that improves visual space, daily comfort, and ageing-in-place readiness in the same move.

7. Efficient Tile Patterns and Minimalist Finishes

Tile choice can either calm a small bathroom down or make it feel busy before the room is even furnished. In compact spaces, fewer visual interruptions usually win. That's why large-format tiles, restrained colour changes, and minimal grout contrast tend to perform better than intricate patterns spread across every surface.

The reason is simple. Continuous surfaces read as larger surfaces. When the eye isn't stopping at every grout line, border, and feature strip, the room feels more open.

Use interest carefully, not everywhere

This doesn't mean a small bathroom has to be plain. It means the focal point needs discipline. A single tiled shower wall, a textured feature niche, or a vanity splashback in a distinct finish can add character without shrinking the room visually.

What generally doesn't work is combining multiple feature tiles, strong floor patterns, dark grout, and several metal finishes in one compact footprint. That approach can turn a small bathroom into a sample board.

A good tile strategy is to keep the field tile calm and let one detail do the talking. In designer bathrooms, that often creates a more premium result than a busier, trend-heavy mix.

For homeowners weighing up finishes, this guide on how to choose bathroom tiles is worth reviewing before final selections are locked in.

  • Match grout closely to tile colour: It softens visual breaks.
  • Run tile consistently: Continuity helps the room feel bigger.
  • Limit bold patterns to one zone: Accent, don't overload.
  • Think about maintenance: Heavily textured tiles can be harder to clean in wet areas.

In practice, many SitePro Bathrooms projects use this restrained approach because it ages better. It also gives clients more flexibility to update mirrors, tapware, or accessories later without redoing the whole look.

8. Multi-Functional Vanities and Smart Storage Integration

The vanity is usually the hardest-working piece in a small bathroom. It carries storage, basin space, daily-use items, and often the visual centre of the room. If it's badly designed, the whole bathroom feels compromised.

A smart vanity doesn't just fit the wall. It supports how the household uses the room. Deep drawers for toiletries, internal organisers, hidden power access for grooming tools, and a benchtop that doesn't become a dumping ground all matter more than a flashy finish on its own.

The best vanity is the one that removes clutter

In compact bathrooms, integrated organisation beats extra furniture every time. A vanity with proper drawer divisions can eliminate the need for countertop trays, side trolleys, and over-door organisers that make the room feel temporary and crowded.

This also ties back to accessibility. Drawers are usually easier to use than low shelves. Pull-out storage reduces bending and rummaging, and a well-positioned basin leaves enough clear bench space for daily routines. For family bathrooms, that usability matters as much as style.

A common real-world note from local renovations is that clients often ask for the biggest vanity that can physically fit. Once plans are tested, the better answer is usually the vanity that leaves the room comfortable to move through. Slightly smaller joinery with better internal design often wins.

  • Prioritise drawer storage: It's more usable than deep cupboards.
  • Keep the top easy to maintain: Less clutter means easier cleaning.
  • Integrate towel and everyday storage: Don't rely on afterthought accessories.
  • Balance size with circulation: Bigger isn't better if the room becomes awkward.

A well-resolved vanity often gives small bathrooms their polished, custom feel. It's one of the clearest examples of practical planning creating a designer result.

8-Item Comparison: Small-Space Bathroom Design Ideas

Item Implementation complexity Resource requirements Expected outcomes Ideal use cases Key advantages
Wall-Mounted Fixtures and Floating Vanities High, structural reinforcement, complex plumbing/electrical, professional install Moderate–high: reinforced studs, concealed cisterns, specialist fixings, skilled labour Increased perceived floor space, easier cleaning, modern aesthetic Compact bathrooms, ensuites, accessible renovations Visual expansion, improved cleaning access, adjustable heights
Compact Corner Showers with Glass Enclosures Medium, precise measurements, glass handling, waterproofing Medium: tempered glass, hardware, waterproof membrane, pro installer Efficient corner use, maintained light flow, improved accessibility (low-threshold) Small ensuites, apartments, coastal or contemporary homes Saves corner space, transparent visual openness, easy to clean
Vertical Storage Solutions and Recessed Shelving Medium–High, recessed shelving needs structural planning; tall cabinets simpler Low–high depending on approach: cabinetry, stud-work, waterproofing for wet areas Maximised storage without floor footprint, clearer counters, built‑in look Narrow bathrooms, family homes, renovation projects planned early Maximses storage, preserves floor space, keeps sight lines clean
Light Palettes, Strategic Lighting, and Reflective Surfaces Low–Medium, lighting design and secure mirror mounting require care Low–medium: paint/tiles, LEDs, mirrors, electrical work Brighter, perceived larger space, improved task lighting and ambiance Windowless or small bathrooms, modern makeovers, energy‑efficient upgrades Amplifies light, flexible aesthetic, energy-efficient options
Combination Fixtures and Dual-Purpose Elements Medium, integrated units may need plumbing and electrical coordination Medium: integrated units, possible electrical for washlets, skilled installers Fewer standalone fittings, consolidated functionality, reduced clutter Very compact bathrooms, rentals, space‑constrained apartments Space-saving, multifunctionality, can be cost-effective vs multiple fixtures
Curbless/Walk-In Showers and Accessibility-First Design High, precise floor slope, drainage design, extensive waterproofing High: engineered bases/slopes, linear drains, skilled trades, waterproof membranes Seamless floor, improved accessibility, reduced trip hazards, contemporary look Ageing-in-place renovations, universal-design bathrooms, high-end remodels Universal access, seamless aesthetic, easier cleaning
Efficient Tile Patterns and Minimalist Finishes Medium, large-format tiles require skilled install and substrate prep Medium–high: large-format tiles, specialist cutting tools, experienced tiler Visual continuity, fewer grout lines, easier maintenance, refined look Modern renovations, small bathrooms seeking visual expansion Expands perceived space, durable finish, lower grout maintenance
Multi-Functional Vanities and Smart Storage Integration Medium, precise measurement, possible custom joinery, professional install Medium–high: quality cabinetry, organisers, soft-close hardware, reinforcement Consolidated storage, organised counters, maximised usability in small footprint Small family bathrooms, apartments, tight layouts needing efficient storage Maximises function, hides clutter, integrated organisation systems

Your Blueprint for a Better Small Bathroom

Small bathrooms don't need gimmicks. They need clear decisions. The best bathroom design ideas for small spaces improve movement, reduce visual clutter, and make daily use easier. When those ideas are carried through properly, the room feels bigger because it works better, not because someone relied on a few decorating tricks.

That's why layout should come before finishes. A floating vanity looks sharp, but it works best when the door swing, shower entry, storage, and lighting have already been resolved. A frameless screen feels open, but only if the shower position supports circulation and the waterproofing is handled properly. Good design in compact rooms is always connected to sound construction.

Accessibility deserves a place in that planning from day one. Even if you don't need mobility support now, choices like low-threshold showers, better clearances, stronger wall reinforcement, easier-to-reach storage, and safer lighting can make the bathroom more comfortable for years. They also tend to produce calmer, more refined spaces right now. That's a rare case where practical planning and designer outcomes line up neatly.

This is also why experienced bathroom renovations matter. In a small footprint, every decision has a knock-on effect. Move the vanity and you affect the mirror, lighting, storage, and walkway. Change the shower type and you may affect drainage, waterproofing details, and how the whole room is entered and cleaned. Tight rooms leave less margin for error, so planning and execution have to be tighter too.

SitePro Bathrooms approaches compact renovations with that broader view. The work isn't just about making a bathroom look new. It's about making it function properly for the home, the people using it, and the way those needs can change over time. That includes concept development, 3D design, build coordination, and the finishing detail that turns a constrained room into one that feels considered.

If you're weighing up new bathroom ideas for an ensuite, apartment bathroom, or family wet area in Highett or greater Victoria, now's the right time to map it properly. As registered builders unlimited in delivering modern bathrooms and designer bathrooms, SitePro Bathrooms can help you turn a cramped layout into a practical, polished space with a clearer plan and a smoother build process.


If you're ready to move from ideas to a buildable design, contact SitePro Bathrooms to discuss your renovation and explore a custom 3D plan for your small bathroom.

  • siteprobathrooms

Nib Wall in Shower: Modern Bathroom Guide 2026

You're probably looking at a bathroom plan where the shower meets the vanity and thinking the same thing many clients do. That little leftover strip looks awkward, won't be pleasant to clean, and doesn't feel like a proper finished detail.

That's exactly where a nib wall often earns its place. In the right layout, it can make a bathroom feel resolved instead of compromised. In the wrong layout, it can chew up room, complicate the glass, and add cost without giving much back.

From a builder's perspective, a nib wall in shower design isn't a styling extra. It's a construction decision that affects framing, waterproofing, tile set-out, and the way the shower screen is made and installed. If you're planning bathroom renovations and weighing up new bathroom ideas for modern bathrooms or more customized designer bathrooms, it's worth understanding what this small wall really does.

What Exactly Is a Nib Wall in a Shower

A nib wall is a short partial wall that projects from an existing wall. In Australian renovation practice, it's commonly built as a bricked and tiled section between the shower and another fixture, most often the vanity, or sometimes to create separation around a toilet area. One Australian renovation guide describes it as a short wall used to define zones in tight bathrooms where every bit of space matters, not just to hide plumbing or fill a gap (Australian nib wall guidance for small bathrooms).

A modern bathroom featuring a white tiled shower enclosure with a glass door and a nib wall.

In plain terms, it's the bit of built structure that stops a bathroom from ending in an odd, unfinished sliver. Instead of running glass hard up against the vanity, or leaving a narrow dead gap beside the screen, the nib wall creates a deliberate edge. It gives the shower a proper boundary and gives the rest of the room a cleaner line.

Why homeowners notice it so late

Renovations rarely begin with the specific request for a nib wall; instead, an existing problem is identified first. The vanity feels too close to the shower. The screen looks like it's landing in the wrong spot. The room needs a divider, but a full-height wall would make the bathroom feel boxed in.

That's where a nib wall works well. It sits in the middle ground between open and enclosed.

A good nib wall doesn't call attention to itself. It makes the whole bathroom layout feel like it was always meant to work that way.

In compact ensuites and family bathrooms, that matters. You want enough separation between wet and dry zones, but you don't want to lose openness, light, or ease of movement. A nib wall can help give structure without turning the room into a maze.

What it looks like in a finished bathroom

Most nib walls are tiled to match the shower or surrounding walls, so they read as part of the architecture rather than an add-on. Some sit at vanity height for a neat visual line. Others extend higher if the layout needs more privacy or stronger support for the screen.

If you want to see how small layout changes can completely alter the feel of a room, these bathroom renovation before and after examples show why details like wall placement matter more than people expect.

The important thing is this. A nib wall isn't there to decorate the shower. It's there to solve a layout problem in a way that also improves the final look.

The Practical Benefits of a Shower Nib Wall

The biggest practical win is simple. A nib wall removes that awkward strip beside the shower where dust, water splash, and grime tend to collect. In Australian bathroom renovation practice, it's commonly used to eliminate the gap between a vanity or adjacent fixture and the shower screen, and one Perth renovation source notes that a practical access gap should be about 100 mm for cleaning and maintenance if that gap is left open (Perth renovation guidance on nib wall versus shower gap).

If the layout leaves only a skinny leftover space, that gap usually becomes a nuisance rather than a feature. It's hard to reach, hard to clean, and visually untidy. Closing it with a nib wall gives the room a sharper finish.

Where the nib wall helps most

A nib wall usually pays off when the bathroom has one of these issues:

  • A vanity-shower pinch point where the screen can't land neatly without creating a narrow cavity.
  • A need for privacy so the shower or toilet isn't fully exposed from the doorway.
  • A walk-in shower layout that needs definition without using a full-height partition.
  • A modern minimalist plan where too much glass would feel cold or too exposed.

That's why nib walls show up so often in modern bathrooms. They let the room feel open, but not unfinished.

Benefits clients tend to appreciate after handover

The visual benefit is immediate, but the day-to-day advantages are what usually matter most after the renovation is done.

  • Cleaner junctions: Fewer awkward edges mean less build-up in spots that are annoying to wipe down.
  • A stronger shower edge: Glass feels more intentional when it lands on a tiled wall rather than hovering beside cabinetry.
  • Better privacy: Even a low wall can block direct sightlines in a useful way.
  • A more solid feel: All-glass showers can look sleek, but a nib wall often gives the room more substance.

Practical rule: If a detail makes cleaning harder and doesn't improve function, it usually shouldn't stay in the design.

There's also a styling upside. A nib wall can make a bathroom feel more custom because it introduces a built element instead of relying on standard screen geometry alone. That's often why it shows up in designer bathrooms. Not because it's trendy, but because it resolves several problems at once.

What doesn't work is adding a nib wall just because you've seen one in a photo. If the room already has enough separation and clear screen placement, a nib wall can become extra bulk with no real payoff. The best ones are there for a reason.

Construction and Dimensions Deep Dive

A nib wall looks simple in the finished bathroom. It isn't simple once construction starts. This is one of those details that has to be built accurately from the inside out or it causes follow-on problems with waterproofing, tile alignment, and glass installation.

A wooden framed nib wall structure standing next to an unfinished tiled shower enclosure during construction.

How a nib wall is built properly

On site, the sequence matters. The wall has to be locked into the room as a built element, not treated like a piece of trim.

  1. Frame it square and solid
    The structure needs to be stable enough to carry tile, resist movement, and support whatever glass detail is being fixed to or beside it. If the wall has any flex, the finish won't last well.

  2. Sheet it with the right substrate
    Wet area linings need to suit the application. The wall face, top, and returns all need proper preparation before any membrane goes on.

  3. Waterproof the full wet interface
    A lot of DIY thinking often falls short at this stage. The top of the nib wall, the junctions into the floor and main wall, and the transition into the shower area all need careful waterproofing. Water doesn't only hit the front face. It tracks into edges, corners, and penetrations.

  4. Tile to the actual glass dimensions
    The finished wall thickness matters. Tile build-up, trims, falls, and edge details all influence where the glass sits.

Height and thickness choices

There isn't one universal nib wall height that suits every bathroom. The right height depends on what the wall needs to do.

A lower nib wall can line up neatly with the vanity and keep the room feeling open. A taller one gives more privacy and a stronger visual divide. The wrong height usually looks accidental. It either feels stumpy and unresolved, or it blocks too much sightline and light.

Thickness matters too. Too thin, and it can look flimsy or become difficult to finish cleanly. Too bulky, and it starts stealing usable space. In a tight ensuite, even a small overbuild can make circulation feel cramped.

A practical builder will test this in plan before anything is framed. The wall has to work with:

  • Door swing
  • Vanity depth
  • Screen position
  • Tile module
  • Shower entry clearance

If a nib wall only works on paper and not in movement, it's the wrong nib wall.

Why this isn't a casual add-on

This is also why professional coordination matters. A nib wall touches multiple trades, and every one of them needs the same set-out. Framing, waterproofing, tiling, and glazing all follow the same line. If one trade guesses, the rest inherit the problem.

For homeowners comparing quotes, this is where experienced renovation teams and registered builders unlimited stand apart. The detail isn't difficult because it's fancy. It's difficult because every layer has to finish in exactly the right place.

Large-format tile work raises the stakes again because small set-out errors become more visible. If you're considering that finish, this guide to installing large-format porcelain tiles is worth a look before you lock in the design.

Design Variations and Finishing Touches

The best nib walls don't all look the same. Some disappear into the room and let the glass do the talking. Others become a feature that gives the bathroom its character.

A modern bathroom shower area featuring light green vertical tiles, a terrazzo tiled wall niche, and brass fixtures.

The quiet version

In pared-back modern bathrooms, the nib wall is often tiled to match the surrounding walls. Same tile, same grout tone, same clean edge. That approach keeps the room calm and architectural.

This works especially well when the aim is to make the shower zone feel integrated, not highlighted. The wall reads as part of the bathroom shell, and the screen feels lighter because it's anchored by something solid.

The feature version

For clients chasing stronger new bathroom ideas, the nib wall can carry a different tile or a more expressive finish. Vertical stack tiles, stone-look porcelain, textured ceramics, or a tile wrap with a crisp trim can all make the wall feel intentional.

Used carefully, this is one of the easiest ways to create a focal point without cluttering the room. A small wall can do a lot of visual work.

  • Matching tile finish: Best when you want an uninterrupted, spacious feel.
  • Contrasting feature tile: Stronger personality and more visual definition.
  • Stone-look wrap: Adds weight and a premium finish.
  • Integrated niche or ledge: Useful where the wall can also contribute storage.

Planning details that affect the finish

The nib wall has to be designed early, not squeezed in late. Technical planning guidance for shower enclosures notes that the wall affects glass dimensions, door swing, circulation clearances, and tile set-out, and installers treat it as a custom interface between the waterproofed wet area and frameless glass hardware, not as a decorative extra (technical planning for shower enclosure layout).

That builder's view matters because some of the nicest design ideas only work if they're coordinated upfront.

For example:

Design choice What it changes
Frameless screen landing on nib wall Requires precise finished dimensions
Feature tile on nib wall only Changes tile set-out and edge detailing
Recessed niche into adjacent wall Needs framing and waterproofing planned early
Higher nib wall for privacy Alters sightlines and room openness

Early decisions make better bathrooms. Late nib wall decisions usually create compromises.

If you're sorting through finishes, this guide on how to choose bathroom tiles is useful because the tile selection and nib wall design should always be considered together.

A good nib wall can support the look of designer bathrooms without forcing the room into a showpiece. It just gives the space enough built structure to feel composed.

Nib Walls vs Alternatives for Your Shower

If you're deciding between a nib wall and other enclosure options, it helps to think in trade-offs rather than absolutes. None of the common choices is perfect. Each one prioritises something different.

A modern bathroom featuring a walk-in glass shower enclosure and a built-in nib wall with matte black fixtures.

Option comparison

Option Works well when Main upside Main drawback
Nib wall with glass panel You need a tidy divider without fully closing the room Balanced privacy, structure, and openness Adds building and tiling work
Full frameless glass screen You want the lightest visual footprint Open feel and minimal visual interruption More glass to clean and less concealment
Full-height tiled partition wall You want stronger separation and privacy Solid division and reduced splash visibility Can make a smaller bathroom feel heavier

What tends to work in real bathrooms

A full glass screen suits bathrooms where the layout is already clean and there's enough space for the glazing to sit naturally. It's often the simplest visual answer. But if the screen ends beside a vanity in a tight plan, it can expose exactly the sort of awkward junction that is typically avoided.

A full-height partition wall gives a lot of privacy and can be useful when the room needs stronger zoning. The downside is that it can shut the bathroom down visually. In smaller rooms, that loss of openness is hard to ignore.

The nib wall in shower layouts often lands in the sweet spot. It gives the shower a proper edge, helps with visual order, and still allows glass above or beside it so the bathroom doesn't feel too enclosed.

Budget and maintenance trade-offs

Clients usually have to choose what they care about most.

  • If easy cleaning matters most, avoiding awkward dead spaces is usually smarter than chasing the most minimal look.
  • If openness matters most, glass wins, but you'll accept more exposed surfaces.
  • If privacy matters most, a taller built wall may be worth the visual weight.
  • If you want a middle-ground solution, the nib wall often delivers the best mix.

A nib wall won't suit every bathroom. But when a layout needs structure and a frameless screen alone won't solve the practical issues, it's often the most balanced answer.

Is a Nib Wall Right for Your Bathroom

The right question isn't whether a nib wall looks good. It's whether it solves enough problems in your bathroom to justify its place.

If your plan has an awkward shower-to-vanity relationship, a nib wall can be one of the smartest decisions in the renovation. If your bathroom is already spacious and the screen can sit cleanly without it, the wall may be unnecessary. Good design is usually about restraint as much as features.

Quick decision filter

Ask yourself these questions:

  • Do you have an awkward leftover gap? If yes, a nib wall may resolve it cleanly.
  • Do you want more privacy without a full wall? That's one of its best uses.
  • Are you trying to keep the room open? A nib wall can help, but only if it's sized properly.
  • Are you comfortable with added construction complexity? It needs proper integration, not an afterthought.
  • Do you want the bathroom to feel more custom-built? A well-detailed nib wall often helps achieve that.

The best nib wall is the one that improves function, supports the glass, suits the tile layout, and still leaves the bathroom feeling easy to use.

In practical terms, a nib wall is part of the broader bathroom renovations scope. It affects labour, materials, waterproofing, glazing, and finishing. That means it should be priced and designed as part of the full room, not treated as a last-minute extra.

If you're in Highett or elsewhere in Victoria and want clear advice on whether a nib wall suits your layout, SitePro Bathrooms can help. The team handles design, planning, and construction from concept through to handover, so you can see how the wall will affect the look, function, and buildability of the space before work begins. Get in touch to discuss your bathroom, compare layout options, and request a customized quote.

  • siteprobathrooms

How to Clean Floor Tile Grout Like a Renovation Pro

You mop the floor, the tiles come up well, and the grout still looks tired. That's the part that frustrates most homeowners. Clean tile with dirty grout makes the whole room feel older than it is.

In bathrooms, that matters more than people think. Grout sits in the joints where moisture, soap residue, body oils and general foot traffic collect. It also tends to show every shortcut. Wipe-only cleaning makes the surface look better for a day, but it rarely pulls the dirt out of the grout line itself.

A professional result comes from using the right sequence, choosing products that suit the tile and grout you have, and knowing when discolouration is no longer a cleaning problem. That last point is the one many DIY guides miss. Sometimes dark grout is just grime. Sometimes it's the bathroom telling you something deeper is going on underneath.

Beyond the Grime Why Grout Health Matters

Grout becomes noticeable when it stops matching the rest of the floor. The tiles still reflect light. The room may even smell clean. But the joints look patchy, dark or uneven, and suddenly the whole bathroom feels neglected.

That visual effect isn't trivial. Grout lines frame every tile, so when they stain, the floor loses definition. In a well-finished bathroom, especially one with careful tile selection, clean grout is what makes the layout read as sharp and intentional. If you're planning updates, the tile choice itself matters just as much as the maintenance plan, and this guide on how to choose bathroom tiles is worth reading before you commit to a finish.

What grout is really doing

Grout isn't just cosmetic filler. It's a porous joint material that sits in a hard-working part of the room. On a bathroom floor, it deals with splashed water, cleaning residue, dust, skin oils and whatever gets tracked in from the rest of the house.

That's why grout often gets dirty faster than the tile around it. The tile surface is comparatively easy to wipe. The grout line grabs residue and holds it.

Practical rule: If the floor looks dirty again soon after mopping, the problem is often in the grout lines, not on the tile face.

What discolouration can mean

In many bathrooms, dark grout is built-up soil. A proper clean fixes it. In others, the darkening keeps returning in the same zones, especially near showers, corners and drainage points. That's where experience matters.

Look at the pattern, not just the colour:

  • Even general dullness usually points to surface grime and residue.
  • Patchy dark areas can suggest repeated moisture exposure.
  • Cracking, powdering or soft spots often mean cleaning isn't the actual issue.
  • Discolouration that returns quickly after drying deserves closer attention.

Grout health affects more than appearance. It influences how clean the bathroom feels, how easy it is to maintain, and whether a small maintenance task stays small. If the joints are intact and the staining is superficial, cleaning and sealing can restore the floor nicely. If the grout is failing, you're not preserving the bathroom by scrubbing harder. You're only delaying the proper fix.

The Foundation A Safe and Effective Everyday Clean

Most grout doesn't need aggressive treatment first. It needs the right order. When homeowners ask me how to clean floor tile grout without damaging it, I start with a simple rule. Remove dry debris first, then clean, then extract the residue fully.

Professional guidance for floor tile grout follows this sequence: dry-sweep or vacuum first, apply a non-abrasive, pH-balanced cleaner or a baking-soda and peroxide paste, let it dwell for about 5 to 10 minutes, scrub with a soft- or stiff-bristle brush in short strokes, then rinse thoroughly with warm water and dry the surface. The same guidance notes that removing loose debris first prevents pushing grime deeper into the grout line, as outlined in this step-by-step professional grout cleaning guide.

A person scrubbing light-colored floor tile grout with a small white brush and a spray bottle.

Start dry, not wet

This is the step people rush past. If dust, hair and grit are still on the floor, the brush turns them into slurry and pushes them into the grout.

Use a broom or vacuum and take your time around the edges. Bathrooms collect fine debris in corners and along the wall line. That debris ends up in the joints if you skip prep.

For tiled floors with larger porcelain pieces, grout lines can be visually subtle, which makes hidden residue easier to miss. That's one reason installation quality and material choice matter in the first place. If you're dealing with broad tile surfaces and narrow joints, this article on installing large-format porcelain tiles gives useful context.

Use a mild cleaner the right way

For a routine clean, use a non-abrasive, pH-balanced cleaner. If you prefer a more hands-on DIY approach for general soil, a diluted cleaner can work well when used properly. One grout-cleaning guide specifies 2 tablespoons of cleaner to 1 cup of water, then recommends leaving the solution on the grout for a few minutes before scrubbing, rinsing and drying in this grout cleaning guide.

The important part isn't flooding the floor. It's giving the cleaner contact time.

Let the product sit on the grout long enough to loosen grime, but don't leave the floor soaking. Controlled dwell time works better than excess water.

Scrub with control, then remove what you loosened

Use a grout brush or a small bristle brush. Short strokes work better than wide sweeping motions because they keep pressure in the joint where the grime sits. You're not polishing the tile. You're agitating the grout line.

A good everyday process looks like this:

  1. Sweep or vacuum thoroughly so loose dirt doesn't get pushed into the joints.
  2. Apply cleaner to the grout lines rather than flooding the whole floor.
  3. Wait for the dwell time so the cleaner can break down residue.
  4. Brush in short passes with steady pressure.
  5. Rinse with warm water and lift the dirty water away.
  6. Dry the surface so moisture doesn't sit in the joints.

If you only wipe the area after scrubbing, some of the loosened residue stays behind. That's why pros focus on removal, not just agitation. Grout is porous. If the dirty solution isn't properly rinsed and taken off the floor, the line can dry looking almost as dull as it did before.

Targeted Solutions for Stubborn Grout Stains

Some grout responds straight away to a routine clean. Some doesn't. The mistake is treating every stain the same way. If you keep throwing more elbow grease at a stain that needs a different approach, you waste time and wear the grout down.

When an everyday clean stalls, step up carefully. For deeper cleaning, a commonly recommended DIY method is a peroxide-and-baking-soda paste made with 1/2 cup baking soda plus 1/4 cup hydrogen peroxide, left for 5 to 10 minutes before scrubbing and rinsing. That timing aligns with other instructions that use a 10-minute dwell time for 3% hydrogen peroxide to break down grime, as explained in this guide to cleaning grout and tile.

A steam cleaner nozzle cleaning dark grout between light-colored ceramic floor tiles, effectively removing dirt and grime.

For general deep-set grime

This is the most common bathroom-floor problem. The grout looks grey or brown, especially along walking lines and near the vanity.

Use the peroxide and baking soda paste on the grout only. Apply it neatly, let it sit within that 5 to 10 minute window, then scrub and rinse thoroughly. Don't let the paste dry hard on the surface. If it dries completely, you've created another residue-removal job.

What usually works:

  • Targeted application keeps the treatment where it's needed.
  • Moderate dwell time gives the mix time to break down grime.
  • Thorough rinsing stops loosened dirt from settling back into the joint.

What usually doesn't:

  • Smearing paste across the whole floor and hoping for an even result.
  • Leaving it too long because more time isn't always better.
  • Skipping the rinse and just wiping the tile face.

For damp-area spotting and recurring dark marks

Bathrooms often get small dark patches in the grout near showers, around the toilet, or in corners where airflow is poor. Start with the same deeper-cleaning method above, then watch what happens over the next few days.

If the area lightens, dries evenly and stays stable, the issue was likely surface contamination. If it darkens again quickly in the exact same spot, take that seriously. Repeating the same treatment over and over doesn't solve moisture coming from below or behind.

Stains that return in a pattern are rarely random. Bathrooms tend to tell you where the real problem is.

For greasy build-up and layered residue

Kitchen grout often gets grease. Bathroom floor grout usually gets soap film, body-product residue and cleaner build-up. The fix is similar in principle. You need a cleaner that breaks down the film, plus brushing and a proper rinse.

A layered residue problem often shows up as grout that feels tacky when wet or looks blotchy after drying. In that case, do two smaller controlled cleaning passes instead of one heavy attack. The first pass loosens the top layer. The second gets to what's underneath.

Steam and hand cleaning compared

Steam can help on stubborn grout, but it isn't magic. It's useful when you want a low-chemical approach and you're careful with the material.

Method Best use Watch for
Hand scrubbing Precise spot treatment and routine deep cleaning Too much force can wear weak grout
Steam cleaning Low-chemical cleaning on suitable surfaces Heat and moisture can be a poor choice for already failing grout
Paste treatment Deep grime in porous grout lines Residue if not rinsed off properly

Use steam as a tool, not a shortcut. If grout is cracked, loose or powdery, steam won't repair it. It may just expose how compromised the joint already is.

Protect Your Work Grout Sealing and Minor Repairs

A clean grout line looks good for a moment. A sealed grout line stays cleaner for longer. That's the difference between a weekend clean-up and proper maintenance.

Grout is porous, so once you've cleaned it properly, it makes sense to protect that surface from taking on new staining straight away. Expert DIY guidance recommends letting grout dry fully before applying a thin coat of sealer and repeating sealing annually for light-coloured grout. The same guidance warns against acidic cleaners like vinegar on natural stone because they can etch the surface, as explained in this grout cleaning and sealing guide.

A person applies protective sealer to light beige floor tile grout lines using a small applicator brush.

Manual care versus steam-assisted maintenance

Homeowners often ask whether they should rely on brushing and sealing alone, or add steam into the mix. The answer depends on the floor condition and the material.

A simple comparison helps:

  • Manual clean plus sealer suits most standard maintenance jobs. It gives you control and lets you inspect the grout closely.
  • Steam plus sealer can work where you want less chemical use, but only if the grout and tile finish can handle it.
  • Repeated harsh cleaning without sealing is the worst option. You do the hard work, then leave the grout open to absorb new staining again.

For modern bathrooms, sealing is especially important because cleaner lines and lighter grout colours show dirt quickly. A sealed joint is easier to maintain and less likely to take on every splash and footprint.

Minor cosmetic repairs you can handle

Cleaning sometimes reveals that the issue isn't just staining. You may find hairline cracks, shallow pinholes or small sections where the grout has worn back.

For minor cosmetic issues:

  • Touch-up pens can help with appearance where the grout is sound but uneven in colour.
  • Small repair kits can patch localised defects if the surrounding grout is still solid.
  • Fresh sealer after repair helps protect the area once it has cured and dried properly.

What these options can't do is fix movement, water intrusion or widespread failure. If the grout line keeps opening up, crumbles under light brushing or sounds hollow beside loose tiles, cosmetic products are only hiding the symptom.

Clean first, inspect second, seal last. If you reverse that order, you lock in problems instead of solving them.

When to Stop Scrubbing and Call a Professional

There's a point where more cleaning stops being maintenance and starts being avoidance. If the grout is still dark after proper treatment, or if it keeps changing colour again after drying, the floor may be pointing to a failure in the tile assembly rather than a dirty surface.

Persistent grout darkening can indicate a compliance or waterproofing issue in line with AS 3740, the Australian standard for waterproofing wet areas. Consumer cleaning advice often doesn't help homeowners distinguish a surface stain from a more serious assembly failure, which is why this wet-area grout article is such an important reference point.

Screenshot from https://siteprobathrooms.com.au

Warning signs that cleaning won't fix

Put the brush down if you're seeing signs like these:

  • The same grout lines darken again and again after they appear to dry.
  • Grout is cracking, flaking or washing out during normal cleaning.
  • Tiles feel loose or sound hollow underfoot.
  • Musty odours keep returning even after the room has been cleaned.
  • Staining is concentrated near wet zones such as the shower entry or floor waste.

Those are maintenance red flags. In bathrooms, surface finishes and waterproofing work as a system. If one part fails, the visible symptom often appears in the grout first.

Why this matters for renovation value

Cleaning directly connects to long-term bathroom value. A floor that only looks dirty may need a proper deep clean and reseal. A floor with moisture-related grout failure may need regrouting, local tile removal, or a broader bathroom renovation depending on what's underneath.

That matters if you're weighing up new bathroom ideas, planning designer bathrooms, or trying to preserve the condition of an existing space before problems spread. Homeowners often wait too long because the issue still looks cosmetic from above.

If a professional inspection shows waterproofing failure or a failed tile bed, the right next step isn't another cleaning product. It's a proper remedial approach by experienced bathroom renovators and registered builders unlimited who understand how wet areas should perform, not just how they should look.

A Pro's Perspective on Grout Cleaning Safety

The safest way to clean grout depends on what's on either side of it. That's the part generic advice skips. Guidance differs for sanded, unsanded, epoxy and natural-stone installations, and some materials need a much gentler approach than others. This tile and grout care guide notes the need to avoid acidic cleaners like vinegar on natural stone and to use softer brushes or pH-neutral cleaners where appropriate.

Match the method to the material

If you're working on ceramic or porcelain with sound cement-based grout, you've got more room to use brushing and targeted deep cleaning. If the floor includes natural stone, polished finishes or specialty grout, be conservative.

A simple safety filter works well:

  • Natural stone needs non-acidic cleaning and gentle tools.
  • Epoxy grout usually needs less aggressive treatment because it resists staining differently.
  • Older or fragile grout can fail under hard scrubbing even if the tile itself looks fine.

Ventilation matters too. Bathrooms that stay damp are harder to keep clean and harder to keep dry after cleaning. Good airflow supports every other maintenance step, which is why practical upgrades like bathroom exhaust fan installation can make a real difference to ongoing grout condition.

Use grout as a diagnostic tool

The smartest way to think about grout is this. It's not just a cleaning target. It's a visible indicator of how the bathroom is performing.

If a careful clean restores the joints and they stay consistent, your maintenance routine is doing its job. If the grout keeps deteriorating, darkens in fixed areas, or starts breaking apart, the bathroom is asking for more than a scrub. At that stage, DIY has given you useful information, and that's valuable in itself.


If your grout problems look like more than surface dirt, contact SitePro Bathrooms for advice on repair options, waterproofing-related issues, or a full bathroom renovation that fixes the cause instead of covering it up.

  • siteprobathrooms

Top 8 Ensuite Designs Small for 2026

Transform Your Cramped Ensuite Into a Smart Sanctuary

You step into the ensuite at 6:30 am, turn sideways to clear the vanity, bump the door against the toilet, and realise the room is working against you before the day has even started. That problem usually comes down to planning, not floor area.

In Melbourne homes, I see the same issue again and again. Older ensuites often have tight footprints, awkward plumbing positions, and door swings that steal usable space. Small rooms can still feel refined and expensive, but only when every fitting is chosen with clearances, storage, and day-to-day use in mind.

The difference is proving the layout before construction starts.

A strong small ensuite design is not just a set of ideas pulled from inspiration photos. It needs to be tested at full scale so you can see whether the vanity depth is too aggressive, whether the toilet pan crowds circulation, and whether the shower screen makes the room feel closed in. That is why 3D planning sits at the centre of the process here at SitePro Bathrooms. Clients get to assess the room properly before tiles are ordered, walls are lined, or plumbing is shifted. It saves expensive corrections and gives much better control over the final result.

Design direction matters too. If you are weighing up finishes, joinery style, or a more current layout, these 2025 bathroom design trends for Australian homes show where compact bathrooms are heading. The key is applying those ideas in a way that fits the room, rather than forcing a look that only works in a larger space.

The eight concepts below focus on that exact balance. Each one is practical to build, suited to compact ensuites, and far more effective when reviewed in 3D before work begins. That is how good small bathrooms stop being a compromise and start feeling resolved.

1. Corner-Mounted Vanity with Floating Design

A modern floating wooden corner vanity with a white basin mounted in a minimalist grey bathroom.

You open a small ensuite door and the vanity is what sets the tone straight away. If that unit projects too far, the room feels cramped before you even step in. Put the vanity into the corner and lift it off the floor, and circulation improves fast.

That combination solves two common problems at once. It uses a part of the room that often does very little, and it keeps more floor visible, which helps the ensuite read as larger and cleaner. In practical terms, it also reduces that shoulder-check feeling you get when a standard vanity sits too close to the entry or shower line.

I use this layout regularly in apartment ensuites, narrow side-by-side plans, and older homes where existing plumbing does not leave much room to move. It suits compact rooms, but it still needs discipline. A corner vanity can look sharp in drawings and still fail on site if the basin overhang is too generous, the drawer hardware clashes with the wall, or the tap set-out is left unresolved until rough-in.

A few details matter here:

  • Keep the basin projection tight: A compact bowl protects elbow room and makes the bench more usable.
  • Choose a true floating unit: The visual gain comes from seeing floor area under the cabinet, not from shaving a few millimetres off the depth.
  • Use drawers where possible: In tight ensuites, drawers are easier to use than cupboard doors that swing into your body.
  • Resolve services early: Waste position, water points, power for mirrored cabinetry, and tile set-out all need to line up before wall linings go on.

The trade-off is storage. A corner unit rarely gives the same drawer width as a full straight vanity, so the joinery has to work harder. That is why I like pairing this idea with a mirrored cabinet or recessed storage elsewhere in the room, rather than asking one small vanity to do everything.

Practical rule: If the vanity sits in the first sightline from the door, keep it light, compact, and off the floor.

This concept is also one of the easiest to test properly in 3D before construction starts. At SitePro Bathrooms, we use that planning stage to check whether the corner angle feels refined or forced, whether the basin edge interrupts movement, and whether the mirror and lighting still sit comfortably on the wall. If you are reviewing 2025 bathroom design trends for Australian homes, this layout is a strong way to bring in a current high-end look while keeping the room practical to build and use.

2. Compact Wall-Hung Toilet with Integrated Bidet

A wall-hung toilet is one of the smartest upgrades in ensuite designs small enough to feel crowded with standard floor-mounted fixtures. It clears the floor line, reduces visual bulk, and makes cleaning easier. In a room where every edge is visible, that matters.

The integrated bidet option is worth considering when you want more function without adding another fitting. Instead of trying to squeeze extra features into a layout that already struggles, you combine them into one better fixture.

What works and what doesn't

This is one area where sleek design can hide poor planning. The pan might look compact, but the in-wall cistern still needs proper wall depth, service access, and the right framing arrangement. If the builder or designer leaves that decision too late, the whole room starts making compromises for one product.

One Australian guide for small ensuites points to practical comfort targets of about 900 x 900 mm for a shower, roughly 800 mm clearance in front of the toilet, and around 700 to 800 mm circulation space, while also recommending a P3 to P4 slip rating under AS 4586 for bathroom floors in these spaces, as outlined in this Australian small ensuite article. That's the key conversation. Not just whether the toilet looks modern, but whether the room still feels comfortable and safe once everything is installed.

The best wall-hung toilet layouts don't just save space on paper. They preserve movement in front of the pan and stop the room from feeling pinched at the knees.

In practical terms, this suits compact Melbourne renovations where the brief is clean lines, easy cleaning, and less visual clutter. Brands with slim seats and concealed cistern systems often suit that look well. Add flush plates in a brushed finish and the room starts to feel considered rather than merely compressed.

If you're adding bidet functionality, make sure the electrical point is coordinated early. That's one of those details clients often assume can be “sorted later”. It can't, not cleanly.

3. Wet Room Layout with Frameless Shower Enclosure

A modern, small ensuite bathroom featuring a walk-in wet room shower with beige tiled walls and floating vanity.

When a small ensuite feels boxed in, removing the shower cubicle can completely change the room. A wet room layout opens the floor, simplifies the lines, and lets the eye travel from wall to wall without interruption. That's why this approach keeps turning up in modern bathrooms with a luxury feel.

Frameless glass is the key part. Even a minimal fixed panel can do the job without creating a heavy visual barrier. In small rooms, the absence of chunky framing and shower hobs often makes a bigger difference than the actual floor area.

The trade-offs you need to respect

Wet rooms look effortless when they're done well. They're not effortless to build. Falls to drains, waterproofing transitions, floor levels, ventilation, and tile selection all have to be handled properly from the start.

A consistently cited benchmark for compact ensuites is the use of floating vanities, wall-mounted toilets, and larger-format tiles to increase perceived and functional space. Larger tiles reduce grout lines and help the room feel more continuous and easier to clean, as described in this ensuite design inspiration guide. In a wet room, that advice is particularly useful because too many visual breaks can make the floor feel messy and smaller than it is.

I'd also say this plainly. Wet rooms aren't ideal for every client. If you hate wiping down glass, dislike open shower spray, or have poor ventilation in the existing structure, a conventional screened shower may be the better move.

  • Use a linear drain: It makes tile set-out cleaner and simplifies the visual line.
  • Choose slip-conscious floor finishes: A beautiful floor that feels risky when wet is a bad specification.
  • Model the water zone in 3D: At this point, clients often realise whether they want fully open or semi-screened.

If you're exploring designing an ensuite, this is one of the layouts where visualisation pays for itself fast. You can test splash zones, sight lines, niche placement, and whether the room still feels warm rather than clinical.

4. Vertical Storage Solutions with Floor-to-Ceiling Cabinetry

Storage is usually the first thing people underestimate in a small ensuite. They focus on the shower, vanity, and tiles, then realise too late there's nowhere to hide daily clutter. The result is a room that looked clean at handover and messy two weeks later.

Tall cabinetry fixes that, but only if it's handled with restraint. Floor-to-ceiling joinery can make a compact room feel organised and premium, or it can make it feel like a cupboard with plumbing. The difference comes down to depth, finish, and how much open visual relief you leave in the design.

How to stop it feeling bulky

I prefer one tall storage zone rather than several medium-height units scattered around. A single vertical tower near the vanity or over the toilet wall keeps the room cleaner to read. In family homes, it's often the best way to separate daily-use items from backup products, cleaning stock, and spare towels.

A good setup usually includes:

  • Closed lower storage: This hides practical items that never improve the look of the room.
  • Lighter upper sections: Open shelving or mirrored fronts reduce the visual weight.
  • Integrated lighting: Soft cabinet lighting helps the space feel designed, not overbuilt.

For investors and landlords, this kind of storage can be a strong practical win because it improves usability without demanding more floor space. For owner-occupiers, it supports that high-end hotel feel where everything has a place.

In a small ensuite, clutter doesn't just look untidy. It makes the room feel smaller every day.

This is also where 3D design is useful for proportion checks. A cabinet can look sensible on plan and still dominate the room once visualized and rendered. I'd always rather adjust width, handle style, or colour before manufacturing than stand on site wishing it looked less heavy.

5. Pocket Door and Bi-Fold Entrance Solutions

Some of the worst small ensuites are not too small. They're just losing usable area to a swinging door. If the door arc clashes with the vanity, toilet, or a person standing at the basin, the room will always feel awkward no matter how stylish the finishes are.

A pocket door fixes that by taking the door out of the room entirely when open. A bi-fold can also work where the wall cavity can't be used. Neither option is universal, but both are far better than forcing a hinged door into a layout that doesn't want one.

Best use cases in older Victorian homes

In established suburbs, ensuite footprints are often shaped by what the original house allows. You're working around existing studs, drainage points, windows, and robe walls. That's exactly where a pocket door earns its keep. It can free up the wall where the vanity should go, or stop the entry from colliding with the toilet zone.

What I look for first:

  • Wall cavity availability: Pocket doors need clean coordination with plumbing and electrical work.
  • Privacy needs: Frosted or solid options change the feel of the adjoining room.
  • Maintenance access: Hardware quality matters. Cheap tracks become a long-term annoyance.

Bi-folds are the fallback when wall conditions are against you. They're not as integrated, but a well-made unit can still solve an entry problem without chewing up room inside the ensuite.

This is one of those changes clients often underestimate because it's “just the door”. Then they see the 3D layout with and without the swing path and the decision becomes obvious. If the entry is currently making the room feel cramped, changing the door type can transform the layout before a single tile is chosen.

6. Pedestal Sink Alternatives with Wall-Mounted Trough Sinks

Pedestal basins belong in some bathrooms. They don't belong in most small ensuites. They leave you with no meaningful storage, expose plumbing that often looks fussy, and rarely deliver enough bench utility for real daily use.

A wall-mounted trough sink is a better answer when you want a lighter look without falling into the no-storage trap of a pedestal. It gives you a slim profile, a stronger designer edge, and enough basin length to feel generous even when the room isn't.

Where this style earns its place

This works well in guest ensuites, minimalist apartments, and high-end renovations where the client wants a cleaner architectural line than a standard vanity provides. It can also suit narrow rooms where a conventional cabinet would feel too boxy.

To make it practical, pair it with something else that carries the storage load:

  • Add a recessed mirror cabinet: That keeps products hidden without making the room feel heavy.
  • Use wall-mounted accessories: Towel rails, soap ledges, and robe hooks need to be deliberate.
  • Keep the plumbing neat: Bottle traps and exposed pipework need to look intentional, not leftover.

The trough style also plays nicely with premium tapware. A wall mixer above a slim white basin, paired with stone-look tile and a large mirror, gives a compact ensuite a proper designer bathroom finish.

The mistake is treating this as a shortcut fixture. It isn't. If you remove under-basin cabinetry, the rest of the room has to compensate. In a well-planned ensuite, that trade-off can look excellent. In a poorly planned one, it turns into bench clutter and nowhere to put anything.

7. Mirror Wall Illusion and Lighting Integration for Spatial Perception

A small ensuite can be technically well laid out and still feel mean. That's usually a lighting problem, a mirror problem, or both. Good spatial perception doesn't come from one trick. It comes from how reflective surfaces, shadow lines, and task lighting work together.

Large mirrors are one of the fastest ways to improve ensuite designs small in footprint but short on visual depth. They bounce light, widen the room visually, and reduce the stop-start effect created by too many materials or joinery breaks.

Make the mirror do more than reflect

Backlit mirrors are especially effective in compact modern bathrooms because they soften the room and remove the harshness you often get from a single ceiling fitting. They also help a vanity wall feel more architectural. That's useful when you want the room to read as a complete design rather than a collection of products.

A few principles hold up well on site:

  • Run the mirror wider than the basin: It broadens the wall and stops the vanity area feeling undersized.
  • Layer lighting: Use mirror lighting for faces and ceiling or niche lighting for overall mood.
  • Control glare: Gloss everywhere can make a compact room feel harder, not larger.

“If you can't change the footprint, change how the eye reads the room.”

This is exactly the kind of move that benefits from 3D visualisation. Clients often think they want a certain mirror size until they see it in relation to the vanity, tile joints, and wall lights. Once it's modelled properly, the better choice usually becomes clear. For inspiration, these small ensuite bathroom ideas show how proportion and visual balance can carry just as much weight as the fixture list.

8. Recessed Niche Storage and Integrated Shelving Systems

Recessed storage is one of the cleanest ways to make a compact ensuite work harder without making it feel busier. Instead of adding baskets, shelves, or bulky shower caddies, you build the storage into the wall line itself. The room stays tidy, and the essentials stay close at hand.

Done properly, niches look custom and calm. Done badly, they look like afterthoughts. Position, size, waterproofing, and tile set-out all matter.

The best places to integrate it

Shower walls are the obvious location, but they're not the only one. A niche above the toilet can hold spare paper and small accessories. A slim recess beside a vanity can take daily-use bottles without crowding the benchtop. In narrow ensuites, these details often make the difference between a room that feels organised and one that always feels full.

I usually recommend multiple smaller recesses over one oversized opening. That keeps the wall composition neater and helps avoid a big dark rectangle cutting through the tile work.

Good niche design usually comes down to:

  • Set it out with the tiles: The niche should look like it belongs to the wall, not like it was carved in later.
  • Match depth to product use: Shampoo bottles need a different depth from decorative shelving.
  • Light it carefully: A subtle LED strip can improve the finish if the wiring is planned early.

This is another feature that sells the value of proper pre-construction planning. In 3D, you can test whether the niche aligns with the screen, mirror, tapware, and grout lines. That lets you create a result that feels intentional. In a compact ensuite, that level of coordination is what separates a decent renovation from a polished one.

8-Point Small Ensuite Design Comparison

A small ensuite can look great on a mood board and still fail once real dimensions, wall framing, plumbing positions, and door swings come into play. This comparison is more useful if it helps you choose what suits your room, your budget, and your renovation appetite before work starts.

That is also where 3D visualisation earns its keep. We can test these options against the actual footprint, sight lines, tile set-out, and service locations, so you are not choosing ideas in isolation.

Design option Best suited to Build risk level Maintenance level Resale appeal Best checked in 3D before approval
Corner-Mounted Vanity with Floating Design Very tight rooms where every walkway matters Medium. Plumbing location and wall support need to be right Low to medium. Easy floor cleaning, but corner clearances need thought Strong, especially in modern apartments and compact homes Vanity depth, drawer opening, mirror size, and how much circulation space it actually gives back
Compact Wall-Hung Toilet with Integrated Bidet Premium compact ensuites and projects already opening walls High. In-wall services, power, and access planning must be resolved early Medium. Cleaning is easy, servicing concealed components needs planning High if the rest of the ensuite matches the quality level Pan position, wall thickness, carrier fit, and whether the added cost is justified in the room
Wet Room Layout with Frameless Shower Enclosure Larger small ensuites, accessible layouts, and high-end renovations High. Falls, drainage, waterproofing, and ventilation must all work together Medium to high. More open spray zones mean more regular wiping and good extraction High in the right property, but only if detailing is excellent Shower spray path, drain placement, glass extent, and whether the room feels open or exposed
Vertical Storage Solutions with Floor-to-Ceiling Cabinetry Households that need real storage without using more floor area Medium. Joinery, lighting, and service locations need coordination Low to medium. Great for keeping clutter away, but tall cabinets need practical internal layout Strong for family buyers and owner-occupiers Door swings, overhead bulk, bench clearance, and whether the joinery makes the room feel tighter
Pocket Door and Bi-Fold Entrance Solutions Layouts where a standard swing door wastes usable space Medium. Pocket doors involve more wall work. Bi-folds are simpler but less refined Medium. Hardware quality matters over time Good, particularly where the space gain is obvious Door clearances, wall cavity conflicts, privacy, and how the entry feels from the bedroom
Pedestal Sink Alternatives with Wall-Mounted Trough Sinks Minimalist ensuites and shared morning-use bathrooms Low to medium. Fixing and waste placement are straightforward if planned well Medium. Open plumbing and splash zones need regular attention Moderate. Style-driven choice, not right for every buyer Tap placement, splash control, under-sink usability, and whether open space feels practical or empty
Mirror Wall Illusion and Lighting Integration Dark or visually cramped ensuites that need a stronger sense of width Low to medium. Electrical rough-in and exact mirror sizing matter Low. Good lighting lasts well if specified properly Strong, because buyers notice light and perceived space quickly Reflections, glare, shadow lines, and whether the mirror improves the room or just duplicates clutter
Recessed Niche Storage and Integrated Shelving Systems Almost any small ensuite that lacks bench or cupboard space Low to medium. Framing, waterproofing, and tile set-out need accuracy Low. Easy daily use if sizing is right Good, because it reads as built-in and intentional Height, width, product fit, grout alignment, and how each recess sits with screens, fittings, and tile lines

The key value in a comparison like this is seeing the trade-offs side by side. Some ideas save space but cost more to build. Others are affordable and effective, but only if they are proportioned properly. In a compact ensuite, one wrong call on depth, clearance, or wall build-up can undo three good decisions.

That is why we model these choices before construction. A 3D bathroom plan shows which options improve the room, which ones only look good in isolation, and where a smaller adjustment will produce a better finished result.

Ready to Visualise Your New Bathroom?

The best small ensuites aren't designed by guesswork. They're solved through planning. That means understanding what the room can realistically do, which fixtures earn their place, and where the pressure points are before demolition starts. In compact bathroom renovations, that process matters even more because there's less room to absorb mistakes.

A lot of homeowners come in with strong new bathroom ideas, but they haven't yet tested how those ideas perform together. They might love the look of a floating vanity, a wall-hung toilet, a wet room shower, and full-height tile. The problem is that every one of those choices affects movement, sight lines, service positions, and storage. Until you model it properly, you're still making assumptions.

That's why 3D visualisation is such a valuable planning tool. It bridges the gap between inspiration and buildability. You can see whether the vanity depth is too aggressive, whether a pocket door is worth the wall work, whether recessed niches line up cleanly, and whether your tile choice helps the room feel larger or more fragmented. It also helps couples and families make decisions faster because everyone is looking at the same outcome instead of imagining different versions of it.

From a builder's perspective, that early clarity reduces avoidable compromises on site. It's much easier to adjust a layout in design than to move plumbing after rough-in or discover a door clashes with a towel rail after installation. For clients, it means fewer surprises and better confidence in the final result. For registered builders unlimited in capability and scope, it's also the cleanest way to align design intent with construction reality.

SitePro Bathrooms approaches modern bathrooms and designer bathrooms with that practical mindset. The job isn't just to make the ensuite look better. It's to make it work better every single day. That applies whether you're upgrading a tired master ensuite in Highett, reworking a compact apartment bathroom, or improving a property for long-term rental appeal.

If your current ensuite feels cramped, dated, or hard to use, start with the plan, not the demolition. SitePro Bathrooms delivers end-to-end bathroom renovations backed by professional 3D design, so you can walk through your space before construction begins and refine the details with confidence. If you're ready to turn smart ideas into a finished room that feels calm, functional, and properly resolved, contact the Highett-based team for a detailed consultation and quote.

  • siteprobathrooms

Bathroom Exhaust Fan Installation: A DIY Homeowner’s Guide

You've probably seen the signs already. The mirror stays fogged long after the shower ends. Towels feel damp by lunchtime. Paint near the ceiling starts to look tired, and grout lines never seem fully dry.

That's usually where homeowners start thinking about bathroom exhaust fan installation. Not because the fan grille looks old, but because the room feels wrong. In a bathroom renovation, ventilation isn't a finishing touch. It's part of the build system. If the fan is decent but the duct is too long, the room stays wet. If the duct is fine but the termination dumps into the roof space, moisture still ends up where it shouldn't. You can install a fan perfectly and still get a poor result if the airflow path is wrong.

That system view matters whether you're planning a practical family update, exploring new bathroom ideas, or aiming for modern bathrooms and designer bathrooms with premium finishes. Moisture doesn't care how much the tiles cost. It goes after plaster, paint, cabinetry, insulation, and timber all the same.

Why Your Bathroom Renovation Needs Proper Ventilation

A bathroom can look finished and still be vulnerable. Fresh tiles, a new vanity, better lighting, and clean fixtures won't stay that way if moisture keeps hanging in the room after every shower.

Good ventilation protects the parts of the renovation you don't want to redo. Ceiling paint lasts longer. Silicone and grout stay cleaner. Cabinet doors are less likely to swell or warp. The room feels healthier to use every day.

Moisture is a building problem, not just a comfort problem

Steam on the mirror is typically noticed first. The bigger issue is what happens after that steam settles. It lands on walls, ceilings, window frames, trims, and inside the room's colder surfaces. Over time, that repeated damp cycle is what drives mould, peeling finishes, and stale odours.

In sealed, energy-efficient homes, that risk becomes more obvious because moisture doesn't escape as easily on its own. Ventilation has to do the work.

Practical rule: If moisture is still clinging to surfaces well after a shower, the room isn't clearing properly.

This is why ventilation should be considered early in bathroom renovations, not after the tiling is done. If you're changing layout, ceiling linings, lighting, or cabinetry, that's the time to think about the full extraction path.

The fan protects your renovation investment

A lot of homeowners spend time choosing tapware, stone, niches, feature tiles, and vanity finishes, then treat the exhaust fan like a cheap add-on. That's backwards. A poor ventilation setup can shorten the life of almost every visible surface in the room.

That also ties into build quality and compliance. If you're investing properly, it's worth understanding why using a registered builder matters for your bathroom renovation. Coordination matters when waterproofing, electrical work, ceiling penetrations, and moisture control all meet in one small space.

What actually works

The bathrooms that perform well tend to have three things in place:

  • A correctly sized fan that suits the room, not one chosen only because it was cheap or in stock.
  • A sensible duct run with minimal bends and proper sealing.
  • An outdoor termination point that sends humid air out of the house, not into the roof cavity.

Miss any one of those, and the whole setup is compromised.

Planning and Sizing Your New Exhaust Fan

A fan can be perfectly good on paper and still fail in a real bathroom. I see that happen when the unit is chosen by price, face size, or noise rating, without enough thought about the duct run and where the air will leave the house. For this part of the job, size the whole system, not just the box in the ceiling.

Start with the room itself. A small ensuite with one shower has a different moisture load from a family bathroom that gets back-to-back showers, has a bath, or has a higher ceiling. Floor area gives you a useful baseline, but it is only the starting point.

Here is a practical guide for typical bathrooms.

Bathroom Size (Square Metres) Minimum Fan Capacity (CFM)
4.5 m² 50
5.5 m² 60
6.5 m² 70
7 m² 75
8.5 m² 90
9.5 m² 100

Use that table as a rough buying guide, not a guarantee of performance. If the ceiling is high, the shower is enclosed, or the bathroom is used heavily, step up the capacity. If the duct run is long or includes multiple bends, I also allow extra capacity because the fan has to work harder once it is connected to real ducting.

That trade-off matters. A quieter, lower-powered unit can be pleasant to live with, but if it cannot overcome the resistance in the duct, steam will still hang around on the mirror, ceiling, and grout. On the other hand, oversizing a fan without planning the duct path can create noise without giving you much better extraction.

Size for the room and the route

Many sizing mistakes happen before installation starts. Someone measures the bathroom, buys a fan to match the room area, then runs flexible duct across the roof space with extra length, loose sagging sections, and sharp turns. The label might say the fan moves enough air, but the installed system does not.

Check these points before you buy:

  • Room use: Main bathrooms usually need more extraction than a rarely used powder room or ensuite.
  • Ceiling height: More air volume usually means more work for the fan.
  • Duct length: Longer runs reduce real airflow.
  • Number of bends: Every bend adds resistance.
  • Termination point: Roof or wall discharge affects the route, weather exposure, and installation difficulty.
  • Available ceiling space: Some housings and duct connections need more clearance than homeowners expect.

Noise still matters

Noise is not just a comfort issue. It affects whether the fan gets used properly. If a fan sounds harsh, people turn it off the minute they leave the shower, which cuts down the drying time the room needs.

The better approach is to choose a fan that is quiet enough to tolerate and strong enough for the actual duct layout. That balance gives you a system people will keep using.

Plan the exit before the ceiling cut

In Australian homes, the biggest mistake I see is air being dumped into the roof space or a duct route being treated as an afterthought. Humid air needs a clear path to the outside. If termination is poorly placed, or the duct is crushed, kinked, or left too long, the fan cannot do its job no matter how neat the grille looks from below.

Before locking in the unit, confirm:

  • Where the duct will exit
  • How straight the run can be kept
  • Whether the roof space allows proper support and sealing
  • Whether a licensed electrician and, if needed, a roofer should be involved

If you are unsure about capacity, roof access, or compliance, get advice before purchase. It is much easier to change a fan selection on paper than patch a ceiling and replace a unit that was wrong from the start.

Tools and Materials for Your Installation Project

A smooth job usually comes down to preparation. If you're halfway through the ceiling cut and realise you still need foil tape, a vent cap, or the right screws, the day gets messy fast.

Here's the practical checklist I'd want on hand before starting.

Tools and materials laid out for a bathroom exhaust fan installation project on a drop cloth background.

Basic tools

  • Tape measure: For checking the opening size, joist spacing, and duct route.
  • Pencil and straight edge: To mark the cut line accurately from below.
  • Stud finder: Helpful when locating framing before cutting the ceiling.
  • Drill and driver bits: Needed for mounting brackets, housing screws, and vent cap fixings.
  • Ceiling saw or plasterboard saw: For cutting the opening cleanly.
  • Utility knife: Useful for trimming foil tape, insulation wrap, and packaging.
  • Ladder: Stable footing matters more than people think in overhead work.
  • Torch or headlamp: Roof spaces and ceiling cavities are rarely well lit.
  • Safety gear: Glasses, gloves, dust protection, and suitable clothing.

Installation materials

You'll also need the pieces that make the system work together:

  • Exhaust fan unit: Chosen to suit the room and the planned duct route.
  • Ducting: Use the type specified for the job. Whatever you use, avoid unnecessary sagging and bends.
  • Exterior vent cap: Roof or wall type, depending on the discharge point.
  • Foil tape: For sealing duct seams and joints.
  • Sealant or caulk: For the ceiling edge and exterior penetrations where required.
  • Mounting screws or brackets: To secure the housing properly to structure.
  • Insulation management materials: Helpful if you need to pull insulation back and reinstate it neatly around the install.

A few trade habits that save time

These aren't glamorous, but they help:

  • Buy extra foil tape: You'll use more than you think once joints and touch-ups start.
  • Lay down a drop sheet: Ceiling dust gets everywhere.
  • Pre-open the fan carton: Check the housing, grille, fittings, and instructions before climbing into the roof.
  • Sort small parts into a tray: Screws vanish quickly in insulation and debris.

A DIY install is much easier when the room, tools, and materials are organised before the first cut.

Mounting the Fan and Running the Ductwork

A bathroom fan installation succeeds or fails on the full airflow path. I see plenty of bathrooms where the grille looks neat from below, but the system above the ceiling is doing poor work because the housing is loose, the duct is kinked, or the moist air never reaches the outside. If any one of those parts is wrong, the fan cannot protect the room the way it should.

A professional installer connecting flexible aluminum ductwork to a bathroom exhaust fan housing in the ceiling.

Cut accurately and mount to structure

Start with the opening. Mark it carefully from below, then confirm from above that the fan body, duct connection, and route to the termination point all fit without forcing awkward angles. A fan can be centred perfectly in the ceiling and still be in the wrong spot if the duct has to turn sharply the moment it leaves the housing.

Fix the unit to framing or to the supplied support rails, using the fastening points intended by the manufacturer. A housing that is only half-supported often ends up noisy, and movement at the body can loosen duct connections over time.

Before you lock it in, check three things:

  • The duct collar faces the cleanest route out.
  • The housing sits flush with the finished ceiling line.
  • There is enough room to connect and support the duct properly above the unit.

That small pause saves a lot of rework.

The duct run matters as much as the fan itself

Fans do not pull moisture well through a bad duct layout. Long runs, tight bends, crushed flex duct, and low sections that collect condensation all cut performance. Homeowners often blame the fan motor when the problem is resistance in the duct.

Aim for the shortest, straightest run the house allows. If a bend is unavoidable, keep it broad rather than tight. Support the duct so it does not sag between fixing points, and seal every joint with foil tape so air stays in the system instead of leaking into the ceiling cavity.

Rigid or semi-rigid ducting usually gives better airflow than a loose, wrinkled flexible run, but access often decides what is practical in an existing home. The trade-off is straightforward. Flex duct can help in tight roof spaces, but it needs more care to avoid kinks and drag.

Terminate outside, not into the roof space

The duct must discharge outdoors through a proper roof cap or wall vent. Venting into the roof cavity moves steam and moisture from the bathroom to another part of the house, where it can soak timbers, insulation, and plasterboard over time.

This is the system view many DIY guides miss. Mounting the box is only one part of the job. The fan, the duct, and the exterior termination have to work together, or the renovation is carrying unnecessary moisture risk from day one.

In tighter floor plans, that margin for error gets even smaller. If you are planning combined wet-zone functions such as laundry zones within bathroom layouts, the room will generate more humidity and the extraction path needs to be thought through early.

What good installation looks like

A sound install is easy to describe and harder to fake. The housing is secure. The duct leaves the fan without an immediate sharp turn. Joints are taped. The run is supported. The termination is weatherproof and positioned outside the building envelope.

Poor installs tend to follow the same pattern. The fan is mounted where it fits rather than where it can vent well. The duct is left draped across the ceiling. The exterior cap is skipped, or the air is dumped into the roof space and forgotten until mould, odour, or staining shows up later.

If roof access is tight, the route is complex, or the termination needs roof penetration work, that is the point to bring in the right trades. It is far cheaper to install the ventilation system properly now than to repair moisture damage after the bathroom is finished.

Wiring Your Fan The Safe and Compliant Way

Wiring is the point where a tidy bathroom upgrade can turn into a safety problem. In Australia, fixed bathroom electrical work belongs with a licensed electrician. If you are not qualified to test, connect, and certify the circuit properly, stop here and book one in.

A fan is only one part of the ventilation system, but poor wiring can shut the whole system down or leave it running unreliably. I have seen good fan units blamed for poor performance when the actual issue was a bad connection, the wrong switching setup, or a circuit that was never planned properly with the rest of the renovation.

A close-up view of electrical wiring inside a metal junction box for a bathroom exhaust fan.

What the wiring stage actually involves

The basic sequence is simple on paper. Isolate power at the switchboard, confirm the circuit is dead, route the cable correctly to the fan junction box, make the terminal connections to manufacturer requirements, secure the cable, close the enclosure, then test operation once power is restored.

Bathrooms rarely stay simple for long. Ceiling insulation, tight roof access, older wiring, shared lighting circuits, and switch changes all affect how the job should be done. If the fan is being added late, after plasterboard, tiling, or lighting positions are locked in, the electrician has less room to solve those issues neatly.

That coordination matters. The fan needs to switch in a way that suits how the room is used, and the wiring layout needs to work alongside lighting penetrations and ceiling clearances, especially if your design includes downlights in bathroom spaces.

Why this part is usually worth handing over

Paying for a licensed electrician is not just about getting the fan to turn on. It is about getting a compliant installation that works with the rest of the system. The electrical side may involve a new supply, switch changes, isolation checks, load considerations, and fault finding if the existing circuit is not as expected.

On a full bathroom renovation, that trade coordination protects the finish you are paying for. There is no value in fitting a quality fan, running decent ducting, and terminating it properly outside if the wiring leaves the unit unreliable or unsafe.

Call a licensed electrician if any of these apply

  • There is no existing fan circuit or wiring point. A new supply changes the scope straight away.
  • The fan has extra functions. Lights, heat, timers, humidity sensors, or separate switching all add complexity.
  • The ceiling wiring is old, altered, or unclear. Guessing in a wet-area renovation is a poor decision.
  • You are changing other fixtures at the same time. Fans, lights, and switches should be planned together.
  • You cannot confidently test isolation and verify connections. That alone is enough reason to stop.

A bathroom fan should be safe, compliant, and dependable every time the room fills with steam. If there is any doubt on the wiring, get a licensed electrician involved before the ceiling is closed up.

Final Touches Testing and Troubleshooting

A bathroom fan only earns its place when the whole ventilation path works together. The grille might look tidy from below, but if the housing leaks, the duct is kinked, or the termination is blocked, steam still stays where you do not want it. That is how a good renovation ends up with peeling paint, musty smells, or moisture sitting in the ceiling cavity.

A person applying white sealant to the edges of a bathroom ceiling exhaust fan with a caulk gun.

Seal the ceiling line properly

Start at the room side. Check the gap between the fan housing and the ceiling lining, then finish that edge neatly with a paintable sealant where needed. The goal is not just appearance. A clean seal helps stop unwanted air leakage around the cut-out, which can reduce how effectively the system pulls steam through the intended path.

Fit the grille so it sits flat and square. Wipe away dust, insulation fibres, and plaster residue before you call it done. Those small details make the install look finished and help the grille sit properly.

Test the system, not just the switch

Turn the fan on and confirm it is extracting. A simple on-site check is to hold a square of toilet paper near the grille. If it lightly holds against the cover, the fan is drawing air.

Then check beyond the bathroom. Go outside and confirm air is discharging at the external vent, eave outlet, or roof cowl. If you cannot verify where the air is leaving, you have not fully tested the system.

A noisy fan can still be underperforming.

Troubleshoot in order

If extraction seems weak, work through the airflow path from end to end instead of guessing.

  • Rattling or vibration: Check the housing fixings, mounting brackets, and grille fit. A loose unit often sounds worse once the ceiling amplifies the vibration.
  • Weak suction at the grille: Inspect the duct for crushing, sagging, sharp bends, or loose joints. Flexible duct that is too long or left bunched up is a common reason a new fan feels disappointing.
  • Poor discharge outside: Check that the termination is open and clear, and that any flap or grille is not jammed shut by debris or paint.
  • Steam hanging around after a shower: Look at the whole run. Air may be leaking into the roof space through unsealed joins, or the duct route may be too restrictive for the fan you installed.
  • Cold draughts or marks around the fan: Recheck the seal at the ceiling cut-out and inspect the exterior penetration for gaps or poor weather sealing.

I see the same issue on renovation jobs more often than people expect. The fan itself is fine. The problem is usually in the ducting or the outlet. That is why testing needs to follow the full path of the air, from the bathroom ceiling to the outside.

Fix faults before the bathroom is back in use

Do not leave a loose duct, blocked outlet, or persistent rattle for later. Moist air finds the weak point quickly, and the cost shows up in mould growth, stained paint, swollen trim, or a fan nobody wants to run because it is too noisy.

If the system is still not performing after these checks, get the installer back or call the right trade. In a bathroom renovation, ventilation is not a cosmetic extra. It protects the room you just paid to upgrade.

Frequently Asked Questions About Bathroom Fans

Can I install a fan with a built-in light or heater

Yes, but the complexity goes up. Combined units can be a smart choice in smaller bathrooms where ceiling space is limited or you want a cleaner look. The trade-off is wiring and switching. Heater functions especially need careful electrical planning, so this is usually where professional input is worth it.

What if my bathroom has no attic or roof space access

It can still be done, but access limits your options. The install may need to happen from below, and the duct route needs more thought. In those bathrooms, planning matters more than ever because there's less room for correction once the ceiling is cut.

How often should I clean the fan

Clean it regularly enough that dust doesn't build up on the grille and internal parts. In practical terms, if the grille is visibly dusty, it's time. Turn off power first, remove the cover carefully, vacuum or wipe away dust, and reinstall it properly. A clean fan maintains airflow more effectively than one clogged with lint and debris.

Can I vent the fan into the roof space if it's only temporary

No. Even as a stopgap, it's a bad idea. The whole purpose of the system is to remove humid air from the building, not relocate it into a cavity.

Is a bigger fan always better

Not automatically. Oversizing without considering noise, duct layout, and room use can leave you with a fan that's unpleasant to run. The better approach is matching the fan to the room and the discharge path, then making sure the full system is installed properly.


If you're planning bathroom exhaust fan installation as part of a full upgrade, the smartest results come from treating ventilation as part of the renovation system, not a separate accessory. SitePro Bathrooms helps homeowners across Highett and greater Victoria design and deliver bathrooms that look sharp and perform properly for the long term. If you want practical guidance, coordinated trades, and a renovation approach that protects the whole room, explore SitePro Bathrooms.

  • siteprobathrooms

Cost to Renovate a Bathroom: A 2026 VIC Guide

A basic bathroom renovation in Australia usually lands around A$10,000 to A$20,000, a mid-range renovation sits around A$20,000 to A$35,000, and a high-end bathroom starts at A$35,000+. In Highett and across Victoria, where older homes often hide compliance issues and tired plumbing, your final cost often depends less on the room's size and more on what's behind the walls.

Most homeowners start in the same place. The bathroom feels dated, the grout never looks clean, the shower screen annoys you, and you've saved a rough figure in your head without knowing whether it's realistic. Then the quotes start coming in, and the gap between “new vanity and tiles” and “full rebuild” becomes very real.

That's where the cost to renovate a bathroom gets misunderstood. People naturally focus on the things they can see. Tiles, tapware, vanity, mirror, lighting. In practice, the expensive part is often the work you can't show off when the job is finished. In Victoria, that can include waterproofing, plumbing changes, electrical upgrades, and remedial work once demolition starts.

Thinking About a Bathroom Renovation

You stand in your current bathroom after another leaking shower screen, cracked grout line, or vanity drawer that no longer closes properly, and the question sounds simple. How much will it cost to redo it? In Highett, the honest answer depends on what sits behind the tiles as much as what you want to see when the job is finished.

A “new bathroom” can mean a quick visual update, or it can mean stripping the room back to the framing, correcting old work, and rebuilding it to current Victorian standards. Homeowners often budget for fixtures first because they are easy to price online. The cost to renovate a bathroom is often misunderstood at that stage. Waterproofing, plumbing alterations, electrical work, substrate repairs, and compliance items are usually what push a project beyond the figure people first had in mind.

Start by defining the real scope

Before talking finishes, define the type of job.

  • Basic renovation suits a bathroom that works reasonably well but looks tired. The layout stays largely the same, and the focus is on replacing fixtures and finishes.
  • Mid-range renovation usually involves a full strip-out, better-quality fixtures, improved storage, and some changes to how the room functions.
  • High-end renovation includes custom joinery, premium materials, layout changes, and more labour-intensive detailing.

That distinction matters because layout changes trigger extra trade work fast. Move a shower, toilet, or vanity and you may also be moving waste points, water lines, floor falls, power, lighting positions, and waterproofing zones. On paper it looks like a design choice. On site it changes labour, materials, coordination, and risk.

A simple rule helps. If the services are moving, treat it as a rebuild, not a cosmetic update.

Why local Victorian context matters

Highett homes often come with history. Older brick homes, weatherboards, and units around Bayside can hide failed waterproofing, swollen wall sheeting, out-of-level floors, outdated plumbing, and patch-up work from previous renovations. None of that shows in a Pinterest image or a national average.

That is why generic bathroom cost articles often miss the mark for local owners. A bathroom with easy access, modern plumbing, and sound structure is one type of project. A bathroom in an older Highett home that needs rectification, new waterproofing, or compliance upgrades is another, even if both rooms are the same size.

Registered builder involvement matters here. In Victoria, the job is not just about fitting off nice tapware. It is about coordinating licensed trades properly, handling waterproofing and wet-area requirements, and pricing the hidden work before demolition turns up surprises. That usually leads to a quote that feels more realistic from day one.

If you want a budget that holds up, start with two questions. What are you changing, and what is likely to need fixing once the old bathroom comes out?

Bathroom Renovation Costs in Victoria for 2026

A bathroom in Victoria can sit in the same footprint and still land in very different price brackets. In Highett, I see the gap come down to the age of the home, the amount of rectification needed after demolition, and whether the job is a surface update or a proper rebuild carried out to current standards.

A modern, minimalist bathroom with a floating wood vanity, arched mirror, and glass-enclosed shower area.

Basic bathroom renovation

A basic bathroom renovation often starts around A$10,000 and can run to about A$20,000 for a straightforward update, as noted earlier in the article.

This price range usually suits bathrooms where the layout already works and the existing services can stay put. The toilet remains in place. The shower stays on the same wall. The vanity is replaced without shifting plumbing. That keeps labour and compliance work more contained.

Typical work in this range includes:

  • replacing fixtures like-for-like
  • standard vanities and off-the-shelf fittings
  • simple tiling selections
  • new waterproofing, finishes, and fit-off within the existing layout

In Victoria, even a basic renovation still needs proper waterproofing, licensed plumbing and electrical work, and a clean sequence between trades. That is why a cheap quote can be misleading. If it does not allow for strip-out, substrate preparation, waste removal, or rectification of minor water damage, the final cost can move quickly.

Mid-range bathroom renovation

A mid-range bathroom renovation usually falls between A$20,000 and A$35,000. In many Highett homes, this is the range where a full bathroom rebuild realistically lands.

This is common for family bathrooms and ensuites that need better function, not just better finishes. Owners usually want improved storage, a larger shower, better lighting, more durable fittings, and a cleaner layout. Some service changes may be worthwhile, but the design still needs to respect the cost of moving plumbing, drainage, and power.

Here is what that level often includes:

Scope area What it often looks like
Layout Mostly retained, with one or two practical changes
Finishes Better tiles, tapware, shower screens, and cabinetry
Storage Mirrored shaving cabinets, niches, drawer vanities, custom touches
Use case Main bathrooms, family bathrooms, and higher-quality ensuites

This bracket is often the best balance between cost and long-term value. It gives enough room to fix underlying issues properly and improve the way the room works day to day, without pushing into fully custom construction.

High-end and designer bathroom renovation

High-end bathroom renovations generally start from A$35,000 and can climb well beyond that once custom work, premium materials, or major layout changes are involved.

At this level, the room is usually being rebuilt around a specific brief. That might mean full-height feature tiling, custom joinery, recessed storage, frameless glass, underfloor heating, feature lighting, or a more complex shower area. On site, those details add labour hours, coordination, and tighter tolerances. A minimalist bathroom often costs more to build than it looks.

Clean finishes rely on precise set-out.

In older Victorian homes, high-end projects also tend to expose more hidden work. Floors may need levelling. Walls may need straightening. Existing framing may need adjustment before tiles, cabinetry, or glazing can be installed properly. If the home is in Highett or surrounding Bayside suburbs, that is not unusual. It needs to be allowed for early, especially if you want the final result to look sharp and hold up over time.

A registered builder matters more in this bracket because the margin for error is smaller. The more custom the bathroom, the more important it is to price selections accurately, confirm lead times before work starts, and make sure the room is being rebuilt to suit Victorian requirements rather than a generic online budget.

What Really Drives Your Renovation Cost

The visible bathroom is only the top layer. The true cost to renovate a bathroom sits underneath. Once demolition begins, the room becomes a coordination problem involving multiple trades in a very tight space.

Open wall showing interior plumbing, electrical wiring, and wooden studs during a home bathroom renovation project.

Australian cost guidance notes that bathroom renovation cost is driven more by trade density and plumbing complexity than by visible finishes, because demolition, waterproofing, plumbing, electrical, tiling, and fittings all need to come together in one compact area. It also notes that full renovations commonly move into the mid-five-figure band when layout changes or premium fixtures are involved, as outlined in this bathroom renovation cost breakdown for Australian renovators.

Labour is the centre of the budget

People often assume expensive tiles create expensive bathrooms. Sometimes they do, but labour usually decides the outcome.

A bathroom can have modest finishes and still cost more than expected because the work is dense. Trades don't get much room to move. Everything has to be sequenced correctly. The room must be stripped, prepared, waterproofed, set out accurately, tiled properly, and fitted off without shortcuts.

That's why “small bathroom” doesn't automatically mean “cheap bathroom”.

Layout changes trigger the biggest jumps

Keeping the existing footprint is usually the easiest way to control cost. Once you move the shower, vanity, toilet, or waste points, you increase the amount of trade work before the room even starts looking better.

The biggest cost triggers usually include:

  • Plumbing relocation because new pipe runs, drainage adjustments, and set-out changes add labour quickly
  • Electrical reworking when lighting, exhausts, power points, or heated features move
  • Shower reconfiguration because waterproofing details and falls become more complex
  • Custom joinery and glazing where tighter tolerances leave less room for error

Modern bathrooms can be more complex than they look

Many homeowners want modern bathrooms with floating vanities, frameless showers, recessed niches, strip lighting, and minimalist fixtures. Those features can look simple. Building them properly isn't always simple.

A floating vanity may need stronger wall preparation. A wall niche needs precise waterproofing and set-out. Linear drainage or cleaner floor lines can demand more planning during the rough-in stage. Minimal design often asks the trades to do more, not less.

If a bathroom looks calm and effortless when it's finished, someone had to solve a lot of detail behind the walls first.

The hidden layer most people miss

The first quote often reflects known work. The problem work usually appears after demolition.

Common hidden issues in older Victorian bathrooms include:

Hidden issue Why it matters
Previous water ingress Substrates and framing may need repair before new finishes go in
Outdated plumbing details Existing services may not suit the new set-out
Drainage problems Falls and waste positioning may need correction
Older construction methods The room may need more preparation than expected

This is why two bathrooms that look similar in photos can be priced very differently in real life.

Sample Budgets for Highett Homes

The easiest way to understand bathroom costs is to look at realistic project types, not abstract averages. In Highett, three jobs come up repeatedly. A compact ensuite refresh, a practical family bathroom overhaul, and a full designer bathroom rebuild.

Smaller rooms deserve special attention because homeowners often expect them to be dramatically cheaper. That doesn't always happen. Guidance on compact bathrooms notes that while they can be cheaper per square metre, ensuites and powder rooms still carry concentrated labour and service costs, so savings aren't linear with size, as discussed in small bathroom remodel cost guidance.

The compact ensuite refresh

This is the job where the existing layout is workable, but the room feels old and cramped. The owner wants a cleaner shower, updated vanity, fresher tiles, and a better mirror and light setup. The smartest version of this job keeps plumbing positions close to where they already are.

For many homeowners exploring small bathroom remodel cost guidance, this is the point worth understanding. A compact ensuite can still take serious labour because waterproofing, plumbing, tiling, and fit-off don't shrink in proportion to floor area.

Cost Item Basic Ensuite Refresh
Demolition and strip-out Included within overall build scope
Plumbing and electrical works Moderate, if layout is retained
Waterproofing and tiling Essential core cost
Fixtures and fittings Standard to mid-range selections
Vanity and storage Off-the-shelf or lightly customised
Typical project total A$18,000

That total sits near the top end of a basic renovation because ensuites can be deceptively labour-heavy.

The functional family bathroom overhaul

This is common in older Highett homes where the bathroom still works, but not well. The storage is poor. The shower is awkward. The room needs to handle busy mornings, family use, and easier cleaning.

The mid-range family bathroom is usually where the best balance sits. The owner might improve the shower size, add a niche, choose stronger cabinetry, and update the lighting plan. The finishes feel current, but the brief stays practical.

Cost Item Mid-Range Family Bathroom
Demolition and preparation Full strip-out and rebuild setup
Plumbing adjustments Some changes, not a full re-route
Electrical and lighting Updated layout and improved usability
Waterproofing and tiling Full room waterproofing and new tile installation
Fixtures and screens Better-grade selections
Vanity and joinery Improved storage and family-friendly design
Typical project total A$30,000

This type of budget usually buys a bathroom that feels properly rebuilt, not just redecorated.

The ultimate designer bathroom

At this point, homeowners stop asking what they can replace and start asking what they can create. The brief often includes custom joinery, premium finishes, feature tiling, frameless glass, and a layout shaped around comfort rather than the original room constraints.

Designer bathrooms also tend to involve more exacting construction. Alignment matters more. Visual clutter is reduced, so any installation flaw is easier to see. The end result can be exceptional, but it needs a disciplined build process.

Cost Item High-End Designer Bathroom
Full demolition and remedial preparation Extensive
Plumbing and layout changes Significant
Electrical, lighting, and feature details Advanced
Waterproofing and substrate preparation Detailed and non-negotiable
Premium fixtures and fittings Higher-spec selections
Custom vanity and joinery Bespoke
Glazing and finishing details Premium finish standard
Typical project total A$50,000+

Sample bathroom renovation cost breakdown

Cost Item Basic Ensuite Refresh (A$18,000) Mid-Range Family Bathroom (A$30,000) High-End Designer Bathroom (A$50,000+)
Demolition and preparation Lower Moderate Higher
Plumbing and electrical Moderate Moderate to higher Higher
Waterproofing and tiling Core cost Core cost Major cost
Fixtures and fittings Standard Upgraded Premium
Joinery and storage Basic Better storage Custom
Finishing detail Simple Refined High-detail

These aren't fixed formulas. They're decision tools. If you know which story sounds most like your home, you're much closer to an honest budget.

Budgeting and Planning Your Project Timeline

The biggest budgeting mistake isn't choosing the wrong tapware. It's treating the quote as if nothing unexpected will happen once the room is opened up.

In Victorian homes, hidden issues matter. General cost guides often skip over this, yet guidance on bathroom remodel surprises notes that water damage, drainage problems, and pipe fixes can add meaningful cost once demolition reveals them. That's why a contingency matters for older properties, as explained in guidance on hidden bathroom remodel costs and contingency planning.

A person reviewing bathroom renovation plans and a digital budget sheet on a tablet with a calculator.

Budget for the known work and the likely surprises

A sound renovation budget has two parts. The planned spend, and the reserve for issues you can't confirm until the old bathroom is gone.

That reserve becomes important when you uncover:

  • Water damage behind shower walls or around the base of the room
  • Drainage corrections needed for proper falls or waste placement
  • Previous poor workmanship that has to be undone before new finishes go in
  • Compliance-related upgrades needed to complete the rebuild properly

If your home is older, assuming a smooth run is optimistic. A more realistic approach is to expect that some hidden work may appear and build your finances around that possibility.

Leave room in the budget for what the existing bathroom has been hiding from you.

Understand the renovation sequence

Homeowners usually feel less stressed when they understand the build order. Bathroom renovations don't move in a straight decorative line. They move in technical stages.

A standard sequence often looks like this:

  1. Design and selections so fixtures, tiles, and layout are resolved before site work begins
  2. Demolition to remove the old bathroom and expose the condition of the room
  3. Rough-in works for plumbing and electrical adjustments
  4. Preparation and waterproofing because the room has to be built on a sound, compliant base
  5. Tiling and surface installation once waterproofing is complete
  6. Fit-off and finishing including fixtures, screens, mirrors, and final details

If you want a broader sense of scheduling, this guide on how long a bathroom remodel should take is a useful starting point.

Planning decisions that save money

Good planning doesn't always make a bathroom cheap. It does stop avoidable spending.

The choices that usually help most are:

Planning choice Budget effect
Keep the layout workable Reduces plumbing and electrical variation
Finalise selections early Lowers the risk of delays and change costs
Choose practical finishes Helps balance style with long-term maintenance
Allow for contingency Prevents panic decisions mid-project

A bathroom remodel runs better when the owner knows where they'll spend, where they'll hold back, and what they'll do if hidden work appears.

Finding the Right Builder and Asking Key Questions

The builder you choose affects more than workmanship. They affect compliance, communication, sequencing, and how variations are handled when the project becomes more complex than expected.

For substantial bathroom renovations, especially when structural work or major coordination is involved, many homeowners feel safer working with a registered builder unlimited because the project is being managed under a clearer professional framework. It's not just about who can swing a hammer. It's about who can take responsibility for the whole job.

A cheaper quote can look attractive at the start. It becomes expensive if details are vague, waterproofing documentation is missing, or the scope hasn't accounted for likely site conditions.

Questions worth asking before you sign anything

Ask direct questions and expect direct answers.

  • Registration and insurance
    Ask whether the builder is properly registered for the work and what insurance cover is in place.

  • Who manages the trades
    Find out who coordinates plumbing, electrical, waterproofing, tiling, and finishing on site.

  • Waterproofing process
    Ask how waterproofing is handled, documented, and certified.

  • Variations
    Get clear on how changes are priced and approved if hidden issues appear after demolition.

  • Inclusions and exclusions
    Make sure the quote spells out exactly what's included, and equally, what isn't.

What a solid quote should tell you

A professional bathroom quote should show scope, not just a lump sum. You want enough detail to understand how the room is being built and where your money is going.

Good signs include:

  • Clear allowances or fixed inclusions for fixtures and finishes
  • Defined scope of demolition and rebuild work
  • A process for dealing with unforeseen site conditions
  • A realistic timeline and payment structure

For a more detailed explanation of why this matters, read why using a registered builder matters for your bathroom renovation.

The right builder doesn't just quote the pretty part of the bathroom. They account for the work that makes the room safe, durable, and compliant.

How to Get an Accurate Quote from SitePro Bathrooms

An accurate bathroom quote starts before pricing. It starts with clarity.

That means understanding how you use the room, what layout changes you're considering, what finish level you want, and whether the home itself is likely to need extra remedial work. If those points aren't defined early, the quote can only ever be a rough guess dressed up as certainty.

What helps produce a better quote

The strongest quoting process usually includes a site visit, measured planning, selection guidance, and enough design detail to stop assumptions from creeping in. That's especially important when you're comparing basic bathroom renovations with more customised modern bathrooms or fully resolved designer bathrooms.

A well-run process generally works like this:

  • Initial consultation to understand the space, budget range, and priorities
  • Design development so layout decisions are made before site work starts
  • 3D visual planning to test new bathroom ideas before committing to construction
  • Detailed fixed-price quoting so the scope is clearer and price movement is reduced

Construction costs have remained under pressure in recent years, with ABS-linked commentary noting significant price growth in building materials and services through the early 2020s. In practical terms, that makes a detailed fixed-price quote more valuable because it gives renovators stronger protection against price volatility during the project, as noted in this overview of construction-related pricing pressure and why fixed quotes matter.

Why detail protects your budget

The more detailed the quote, the less room there is for confusion later. Homeowners usually benefit when the builder has already resolved selections, layout intent, and scope boundaries before work starts.

That's where SitePro Bathrooms adds value. As a Highett-based renovation specialist, the team handles consultation, 3D design, construction, and finishing as one coordinated process. For homeowners trying to pin down the actual cost to renovate a bathroom, that matters because the quote isn't being built on vague assumptions. It's being built around your room, your priorities, and the actual work required.

If you're planning a bathroom renovation in Highett or elsewhere in Victoria, the best next step is simple. Arrange a consultation, discuss your layout and finish goals, and get a quote detailed enough to show what's included, what could affect cost, and how the project will run from demolition to handover.


If you want a bathroom quote that reflects real site conditions, practical design choices, and the standard of finish you're aiming for, contact SitePro Bathrooms to start the process.