Art Deco Kitchens: Glamour Meets Modern Function
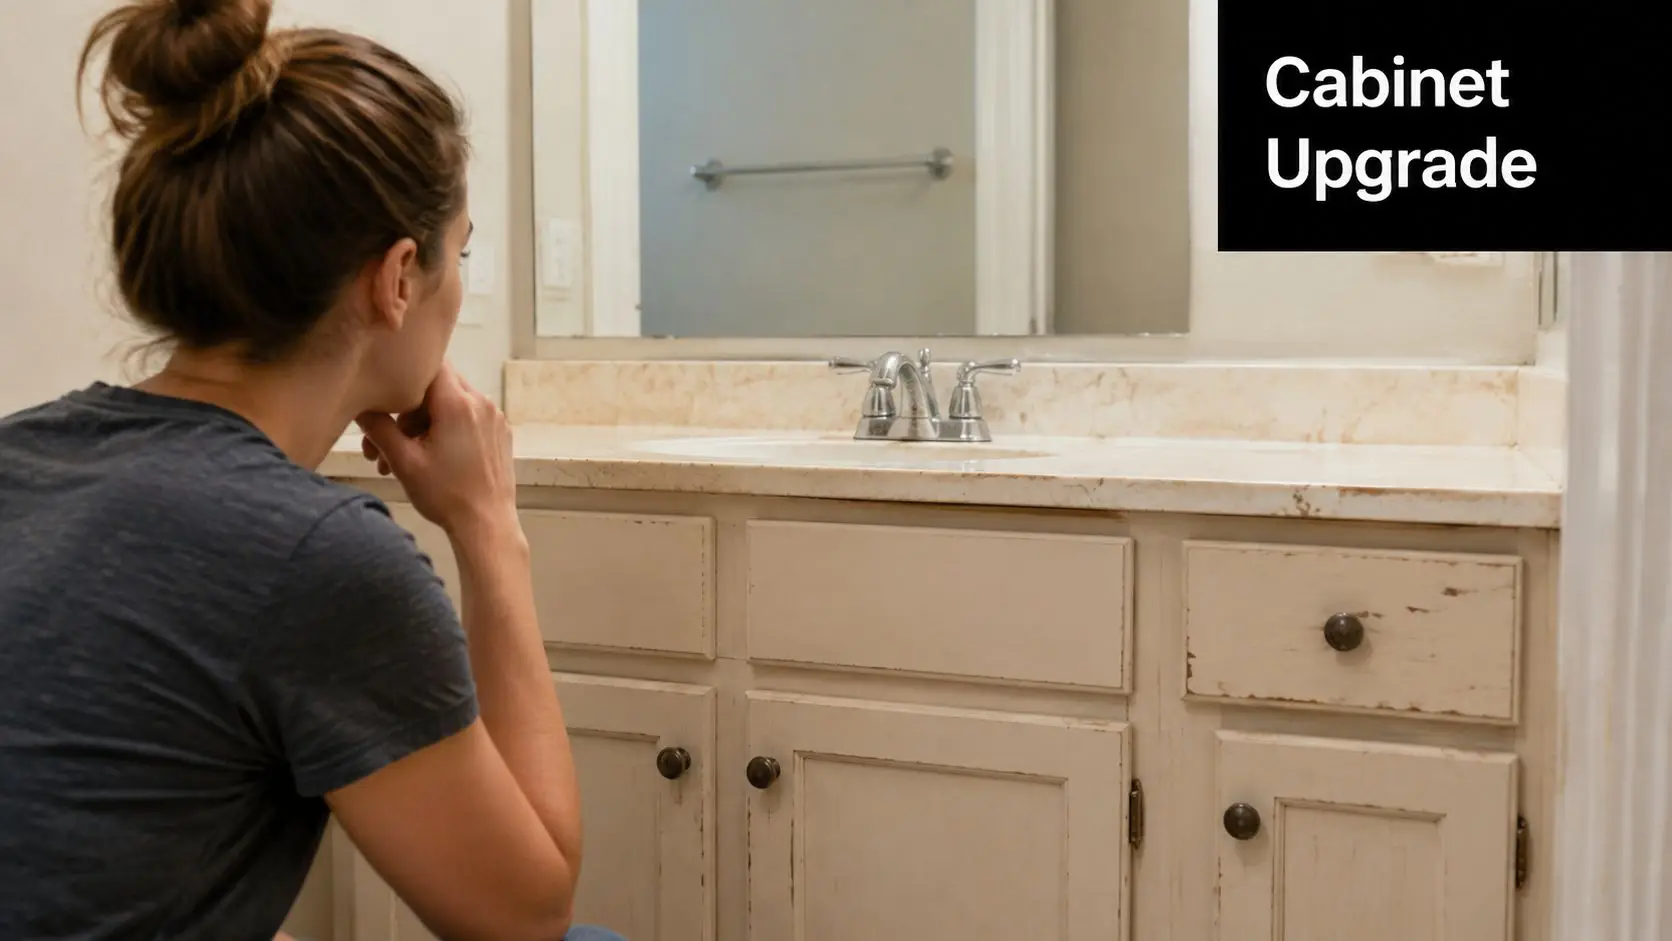
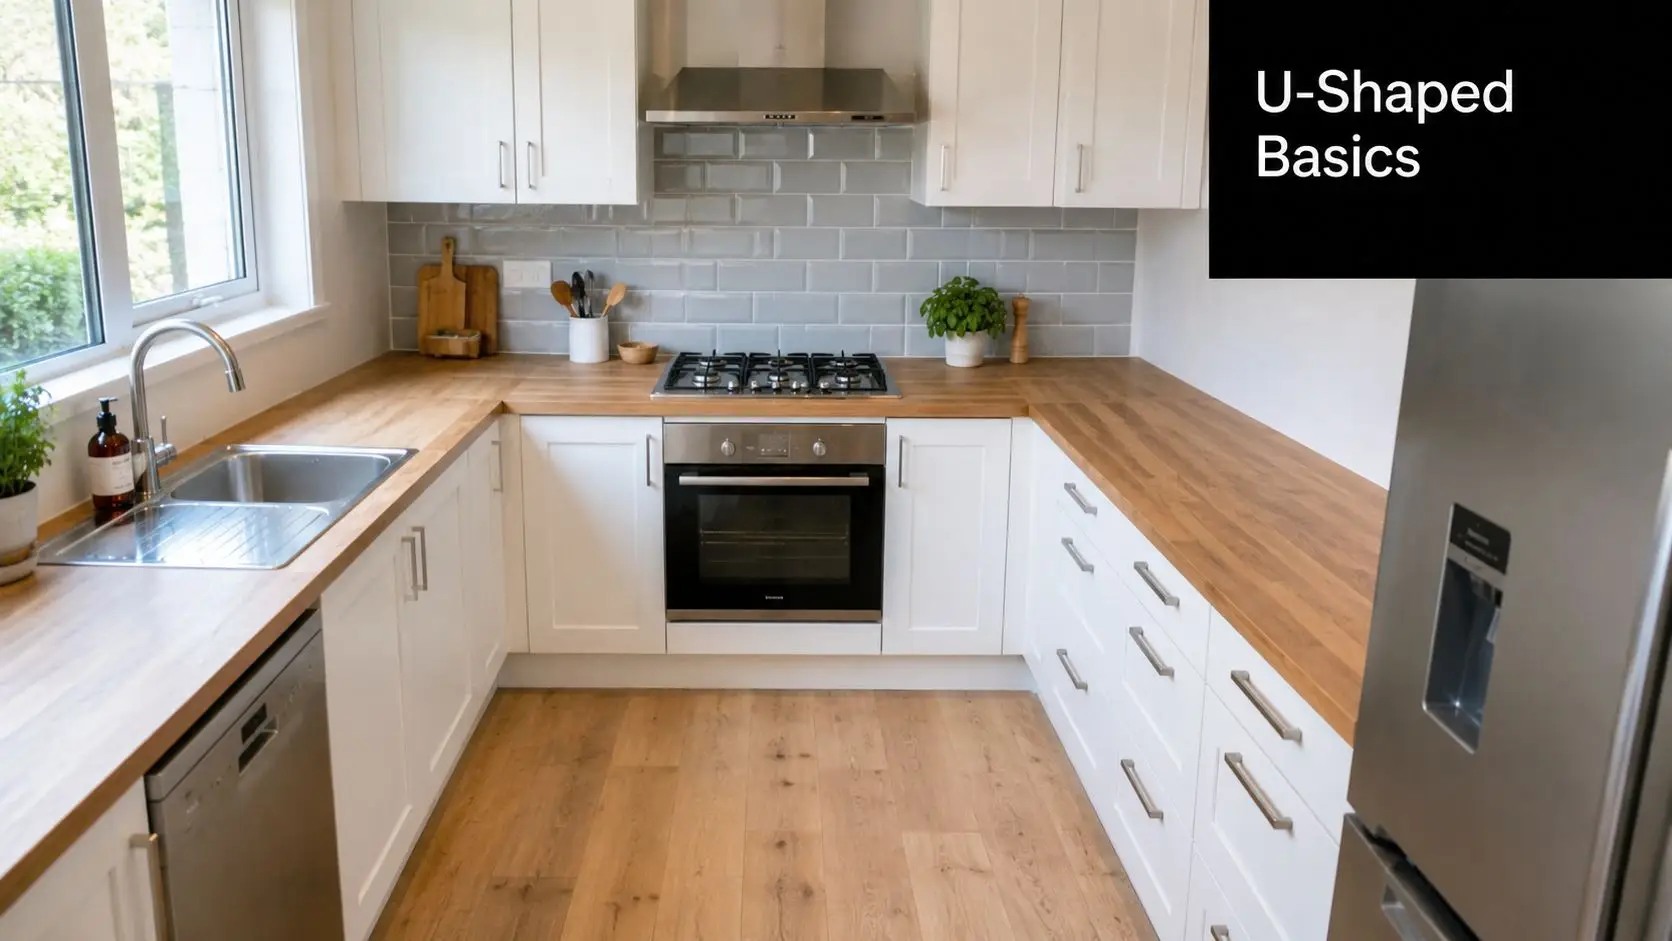
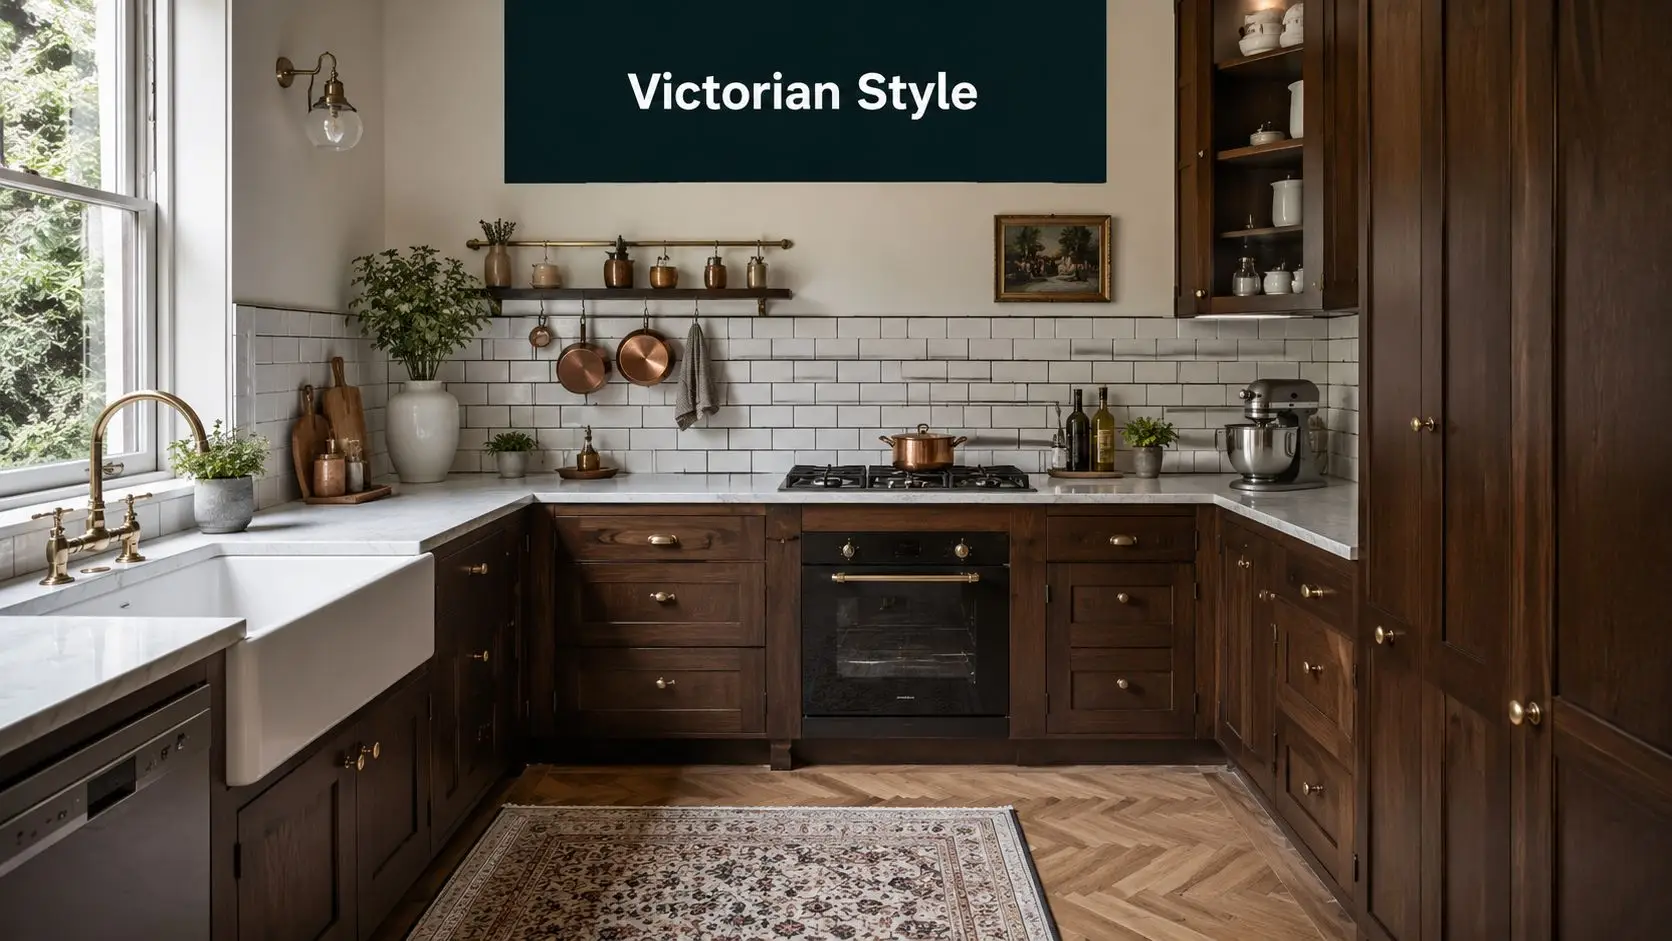
You're probably looking at a kitchen that works well enough, but doesn't say much. Flat cabinetry, safe colours, standard splashback, standard lighting. It's practical, but it could belong to almost any house in Victoria.
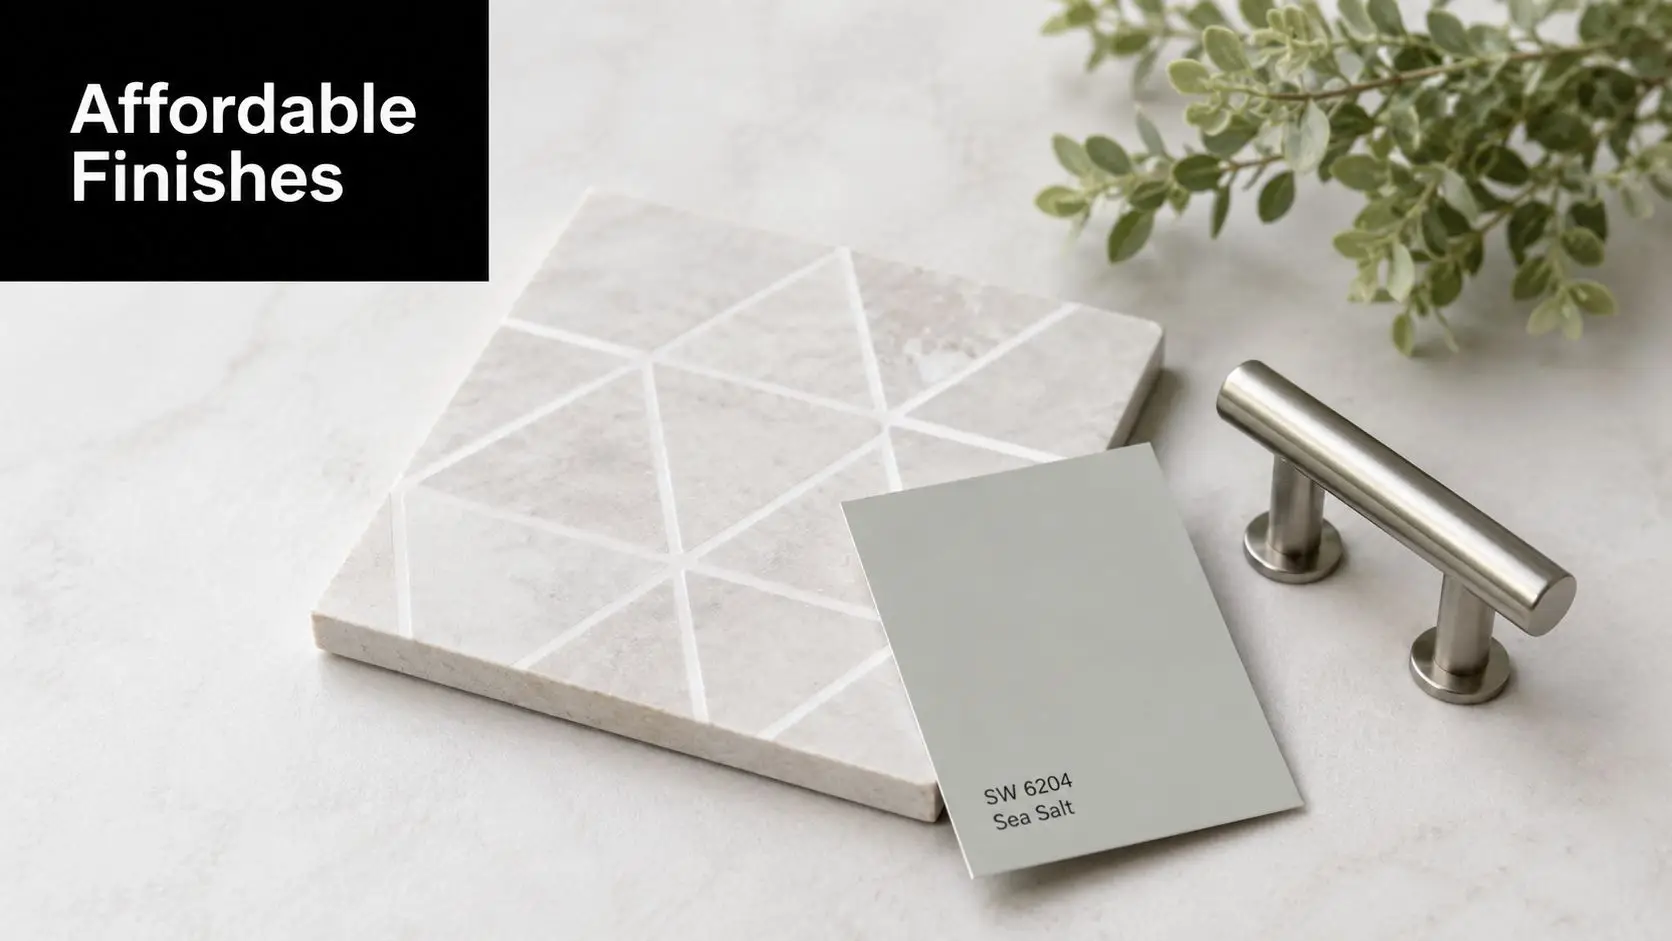
That's usually the moment people start looking at Art Deco. Not because they want a museum set. They want a kitchen with identity. They want glamour, yes, but they also want storage that makes sense, surfaces that can handle daily use, and a layout that still works when the school bags land on the floor and dinner has to happen fast. The same thinking often carries into bathroom renovations too, especially when homeowners want a consistent design language across kitchens, modern bathrooms, and even more expressive designer bathrooms.
Why Art Deco Kitchens Are Making a Timeless Comeback
A lot of homeowners reach this style after getting bored with safe design. They've saved screenshots of white kitchens for years, then realise every second renovation looks the same. The room might be fresh, but it has no character.
Art Deco changes that immediately. It brings shape, contrast, polish, and confidence. Instead of disappearing into the background, the kitchen becomes part of the home's personality. That's a big reason it still resonates in houses across Victoria, especially where owners want something richer than minimalism but more disciplined than a decorative vintage theme.

In renovation work, this style often suits two very different clients. One owns an older property and wants to respect the architecture without turning the kitchen into a period replica. The other lives in a newer home and wants to add visual depth that standard joinery and neutral finishes can't deliver.
Why the style still works now
Art Deco has enough structure to feel organised and enough ornament to feel special. That balance matters in a kitchen, where every decision has to do two jobs.
A good Art Deco kitchen can deliver:
- Strong visual order: Symmetry helps the room feel settled rather than busy.
- Memorable detail: Curves, metallic trims, and patterned surfaces create a focal point.
- Everyday practicality: Durable finishes and clear zoning still matter more than decoration.
- Whole-home cohesion: The same language can carry into cabinetry, tiles, mirrors, and fittings elsewhere in the home.
Art Deco works best when the room feels edited. The style is glamorous, but it shouldn't feel crowded.
That's the difference between a renovation that looks intentional and one that leans into costume. If the bones are right, Art Deco doesn't date. It gives the kitchen presence, and that's exactly what many generic renovations are missing.
What Is an Art Deco Kitchen
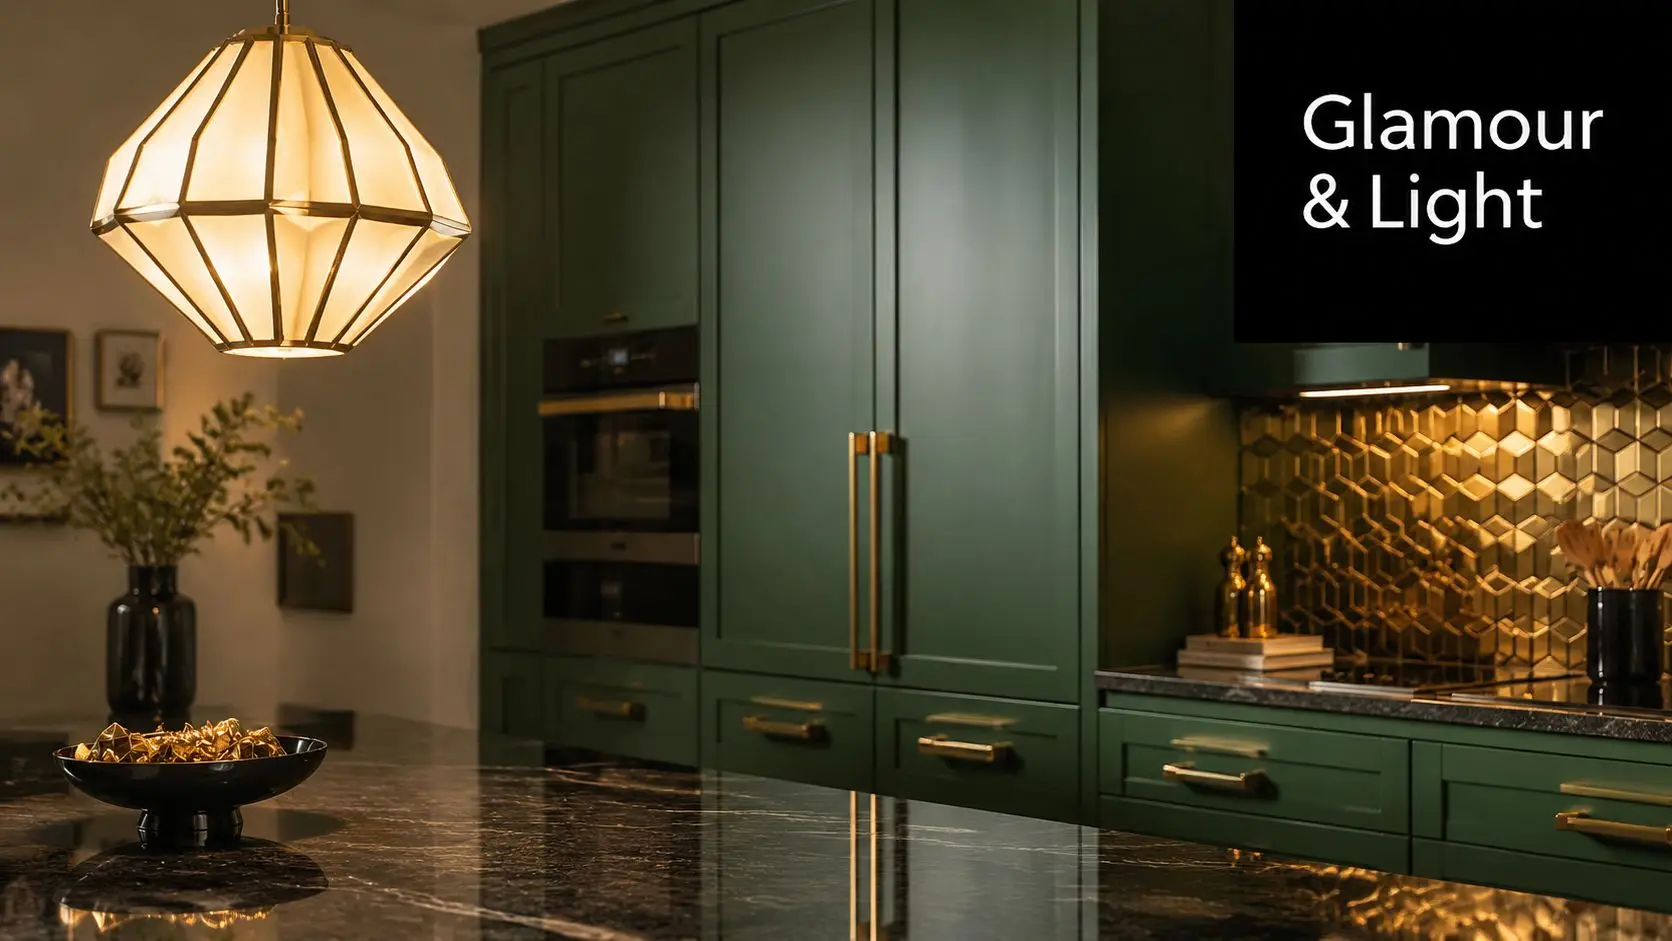
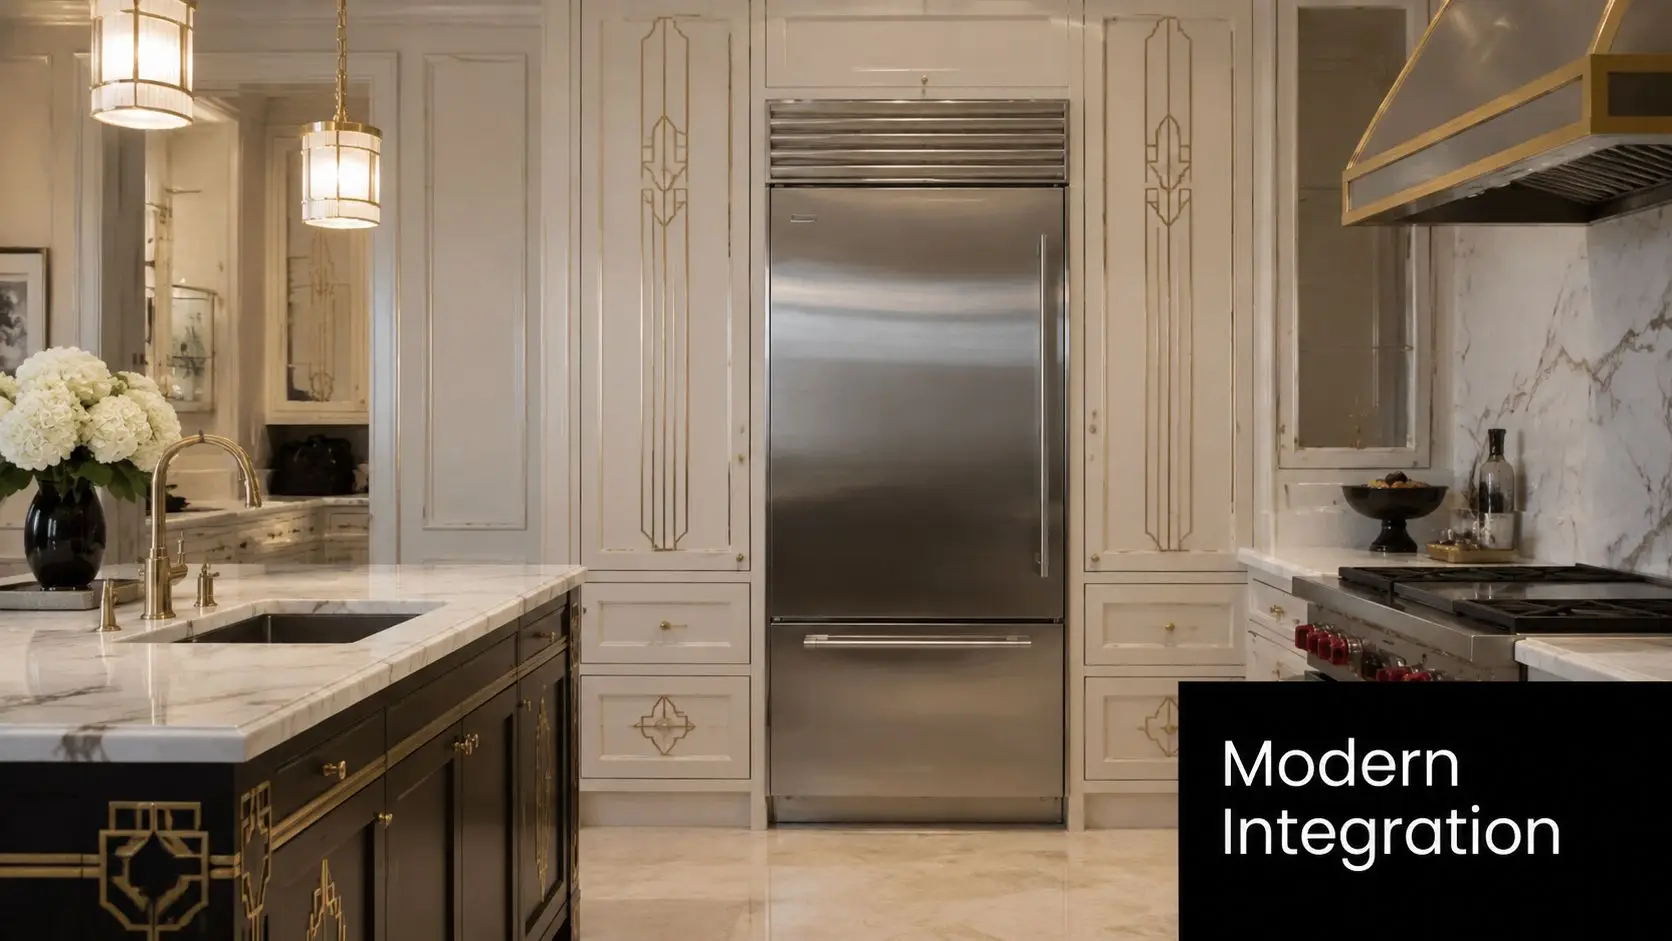
Art Deco isn't just “old-school glamour” or “Gatsby style” copied into a kitchen. It's a design approach built on symmetry, sleek forms, and rich material contrast. The style reached its historical peak in the 1920s, carrying the confidence of the Roaring 20s through luxurious individual items and decorative curved lines. In Australian kitchens, that often translates into bold palettes such as velvety black, gold, violet, and emerald green, as noted in this Art Deco kitchen guide.
The design logic behind the look
If you strip Art Deco back to its core, three principles do most of the work.
First, geometry. You see it in repeated shapes, stepped forms, strong verticals, and disciplined layouts. Even when the room includes curves, those curves look controlled.
Second, luxury through contrast. Art Deco doesn't rely on clutter. It gets impact by pairing dark colours with reflective metals, glossy surfaces with stone, and bold outlines with clean joinery.
Third, confidence. This style doesn't apologise for being decorative. It's meant to feel polished and composed.
What that means in a real kitchen
In practice, an Art Deco kitchen usually has clear focal points. That might be a curved island edge, a patterned splashback, a dramatic light fitting, or cabinetry with strong framing and metallic hardware. The room should look intentional from every angle.
A few signs the style is working:
- The layout feels balanced: Main elements line up rather than drifting visually.
- The finishes speak the same language: Metals, tiles, and colours relate to one another.
- There's one clear hero move: Not five competing ideas.
- The function still leads: Storage, circulation, and cleaning haven't been sacrificed for style.
The easiest mistake is treating Art Deco as surface styling. The strongest kitchens build the geometry into the joinery, flooring, and layout first.
That's why some renovations look convincingly Deco while others only hint at it. Wallpaper alone won't do it. Neither will gold handles on plain cabinetry. The style needs structure underneath the decoration.
It also adapts better than people think. A compact kitchen can use stepped details, symmetry, and jewel-toned accents without becoming heavy. A larger kitchen can support chandeliers, curved shelves, and antique furniture references more comfortably. The point isn't to recreate the past exactly. The point is to use Deco principles so the room feels refined, bold, and liveable.
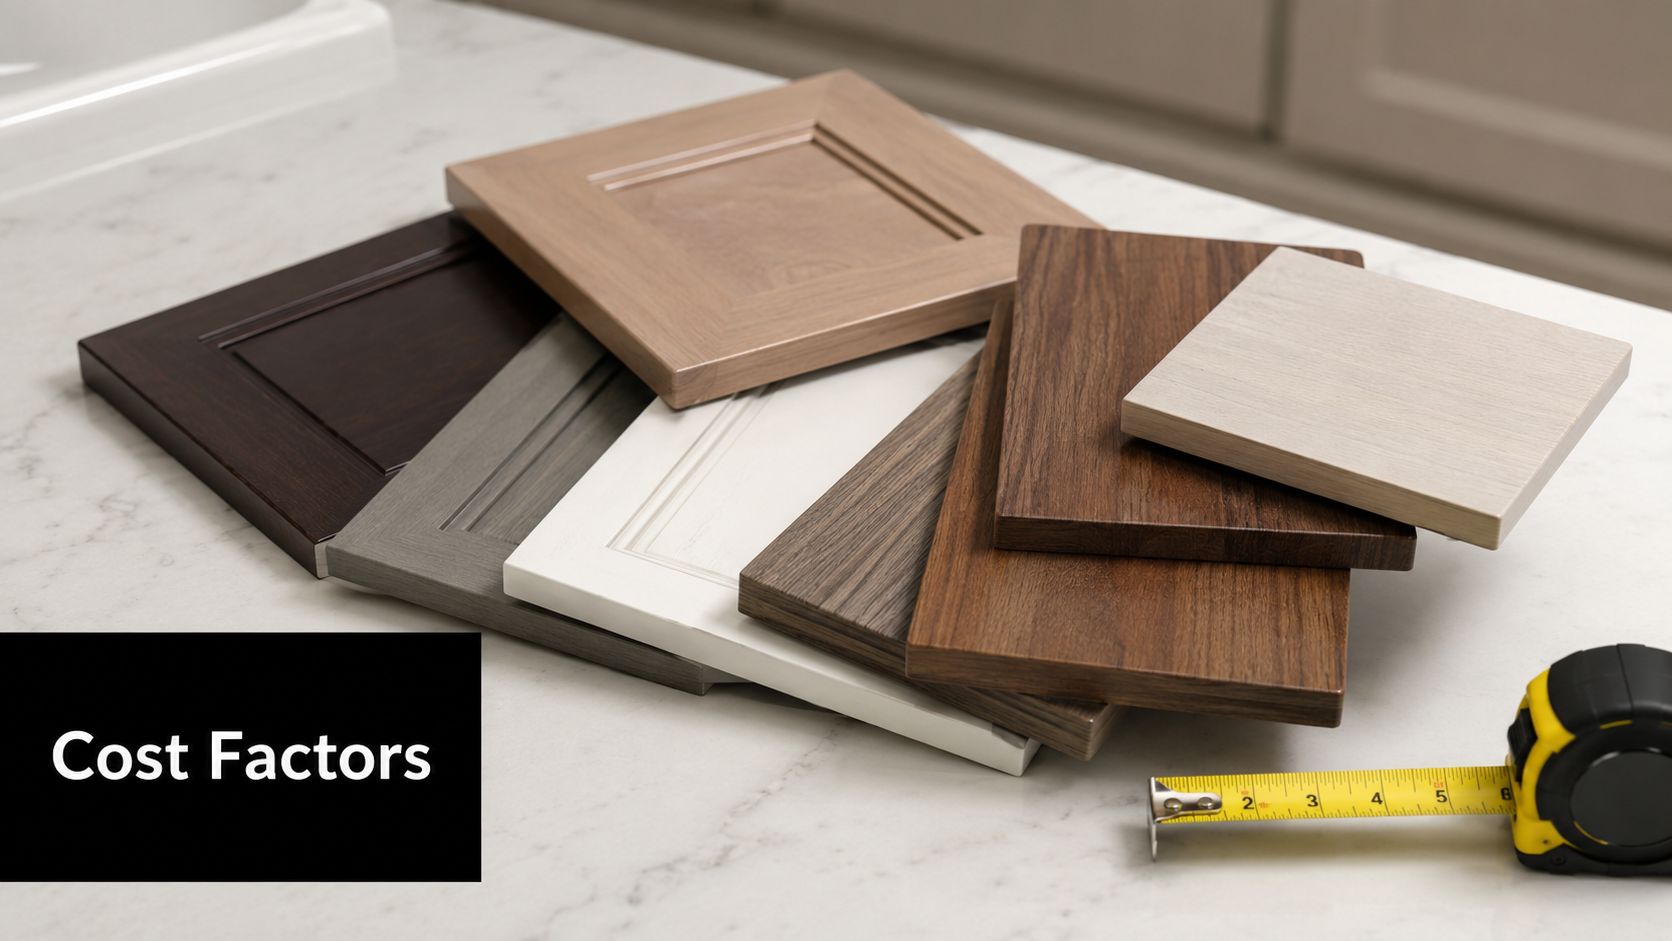
Essential Materials and Motifs for Your Renovation
The fastest way to lose the Art Deco effect is to choose finishes that look nice individually but don't build a coherent language together. This style depends on disciplined material selection. Every surface has to earn its place.
Authentic Art Deco character relies on a few specific technical choices. Renovations need geometric tiling for splashbacks and herringbone flooring to create structural symmetry, while polished chrome, brass, and stainless steel finishes carry both the visual grandeur and the durability needed in a hard-working kitchen, according to guidance on designing an Art Deco-inspired kitchen.
Materials that do the heavy lifting
Some materials create the style. Others just decorate it.
| Material | Typical Application | Aesthetic Contribution |
|---|---|---|
| Brass | Handles, tapware, trims | Warm luxury and period character |
| Chrome | Edging, fixtures, lighting details | Crisp reflectivity and streamlined glamour |
| Stainless steel | Appliances, benchtop details, functional zones | Practical durability with Deco polish |
| Stone-look or marble-look surfaces | Benchtops, splashback features | Opulence and visual depth |
| Geometric tiles | Splashbacks, feature wall sections | Pattern, rhythm, and historical reference |
| Herringbone flooring | Main floor finish | Direction, symmetry, and movement |
| Fluted or ribbed glass | Cabinet inserts, pendants, screens | Softened reflection and texture |
| Lacquered or high-gloss cabinetry | Doors and panels | Sleek glamour and light bounce |
Motifs that actually suit a kitchen
Not every Deco motif belongs in every room. Kitchens need patterns that can survive close inspection and daily wear.
The most reliable options are:
- Sunburst forms: Best used sparingly on tiles, glazing details, or custom feature panels.
- Stepped profiles: Excellent for rangehood surrounds, island ends, and cabinetry framing.
- Chevron and herringbone patterns: Strong underfoot and ideal for giving the room direction.
- Curved corners: Useful where you want the room to feel softer and more expensive.
- Linear symmetry: Often more effective than adding too many decorative references.
A practical way to refine your palette is to study adjacent spaces as well. If you want the kitchen to connect with the rest of the home, it helps to look at how similar detailing works in Art Deco bathroom design, where symmetry, metallic hardware, and geometric tiling often translate just as well.
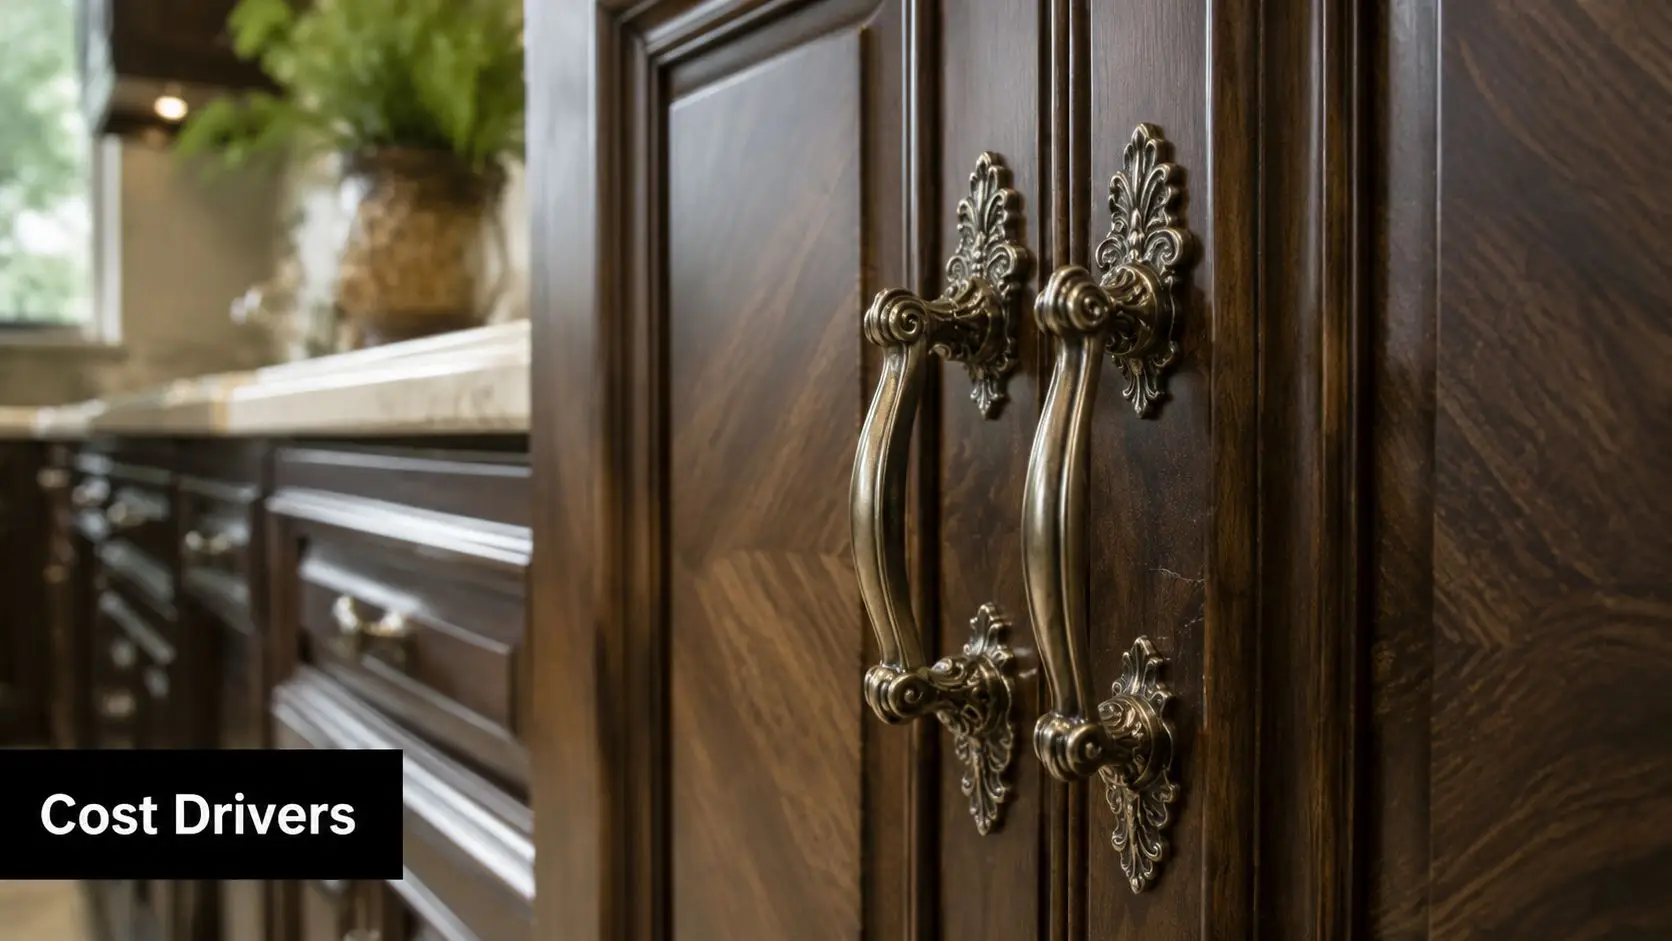
Hardware is small, but it changes everything
Handles and knobs are where many renovations either sharpen the Deco look or water it down. Plain contemporary hardware can flatten the entire scheme. Oversized novelty pieces can make it theatrical in the wrong way.
Choose hardware with:
- Strong geometry: Rectilinear forms, stepped edges, or elongated proportions.
- A deliberate finish: Brass, chrome, or polished nickel style finishes suit the brief best.
- Consistent repetition: Mixing too many handle styles weakens the composition.
If the cabinetry is simple, the hardware can carry more of the period reference. If the cabinetry already has stepped detailing, quieter hardware usually works better.
The most successful Art Deco kitchens use fewer materials than people expect. The room feels richer because the selections are tighter, not because there's more going on.
Choosing Colours and Lighting for Glamour and Function
Colour is where Art Deco kitchens can become stunning or oppressive. The style welcomes dark tones and dramatic contrast, but it still has to function as a workspace. If the palette absorbs too much light, the room can feel boxed in very quickly.
An effective Art Deco palette balances deep jewel tones with black and chrome accents to maximise light reflection. That approach improves the perception of space in compact Victorian kitchens and stops dark, ornate schemes from feeling heavy, as outlined in this explanation of Art Deco interior colour strategy.
Building the palette properly
The safest route is to start with one dominant colour family, then add contrast and reflection.
A practical sequence looks like this:
- Choose the anchor colour: Emerald, midnight blue, black, or another deep tone.
- Add the frame: Black or near-black elements create definition.
- Bring in the reflective layer: Chrome, polished metal, or glossy surfaces stop the room feeling flat.
- Use warmth selectively: Brass or gold accents should highlight, not flood, the room.
In a smaller kitchen, full-height dark cabinetry can work, but only if lighting and reflective surfaces are planned properly. If they aren't, the design can look handsome in samples and gloomy in real life.
Lighting needs layers, not just one statement piece
A chandelier or geometric pendant often gets the attention, but that's only one part of a functional lighting plan. Kitchens need ambient, task, and accent lighting working together.
Use this mix:
- Ambient lighting: A central pendant or chandelier sets the tone.
- Task lighting: Under-cabinet lighting and well-placed fittings illuminate prep zones.
- Accent lighting: Internal cabinet lights, toe-kick glow, or shelf lighting add depth.
- Reflective support: Gloss finishes, mirrored details, and metallic trims help spread light.
Good lighting lets the glamorous parts look better. It also makes chopping, cleaning, and reading labels easier. Both matter.
Warm light often flatters jewel tones better than harsh cool light. But the exact choice should follow your stone, tile, and cabinetry samples in the room itself, not in a showroom under unrelated lighting.
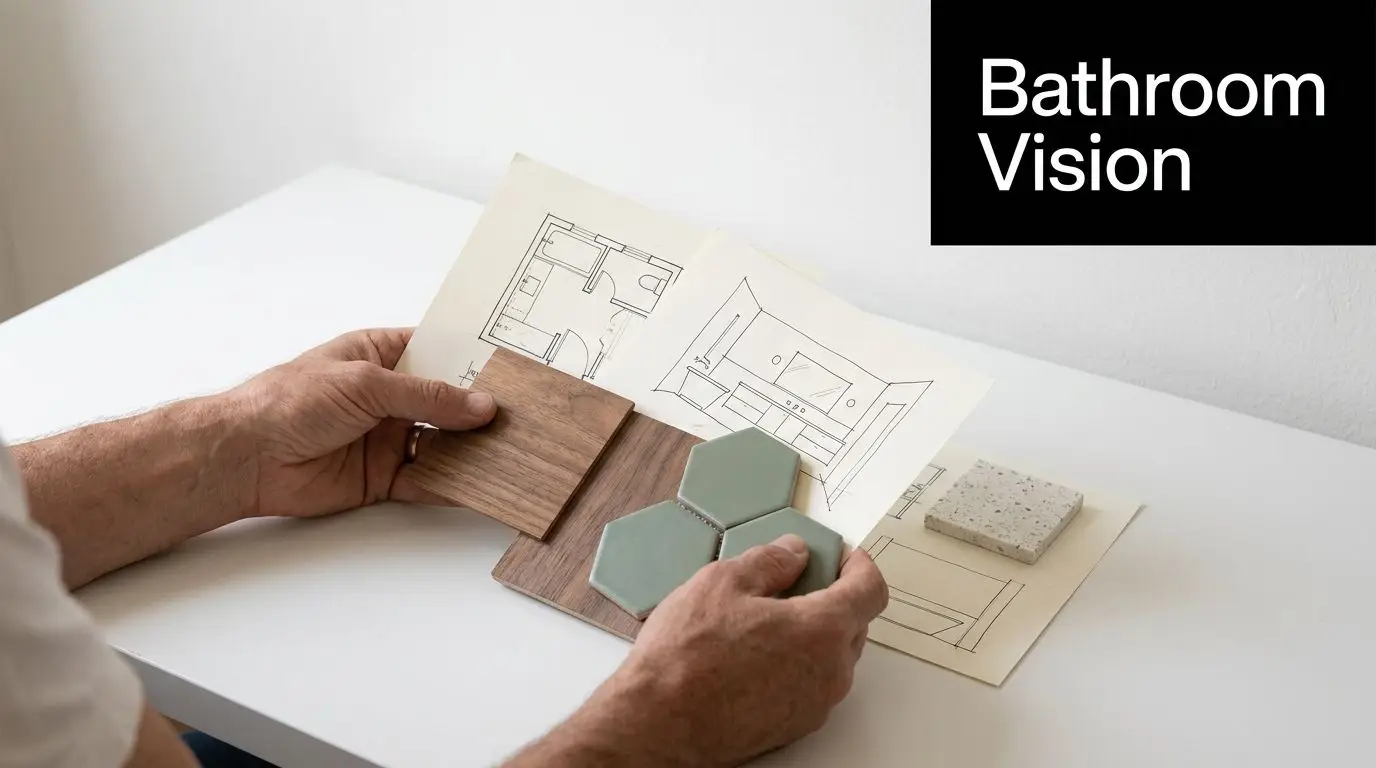
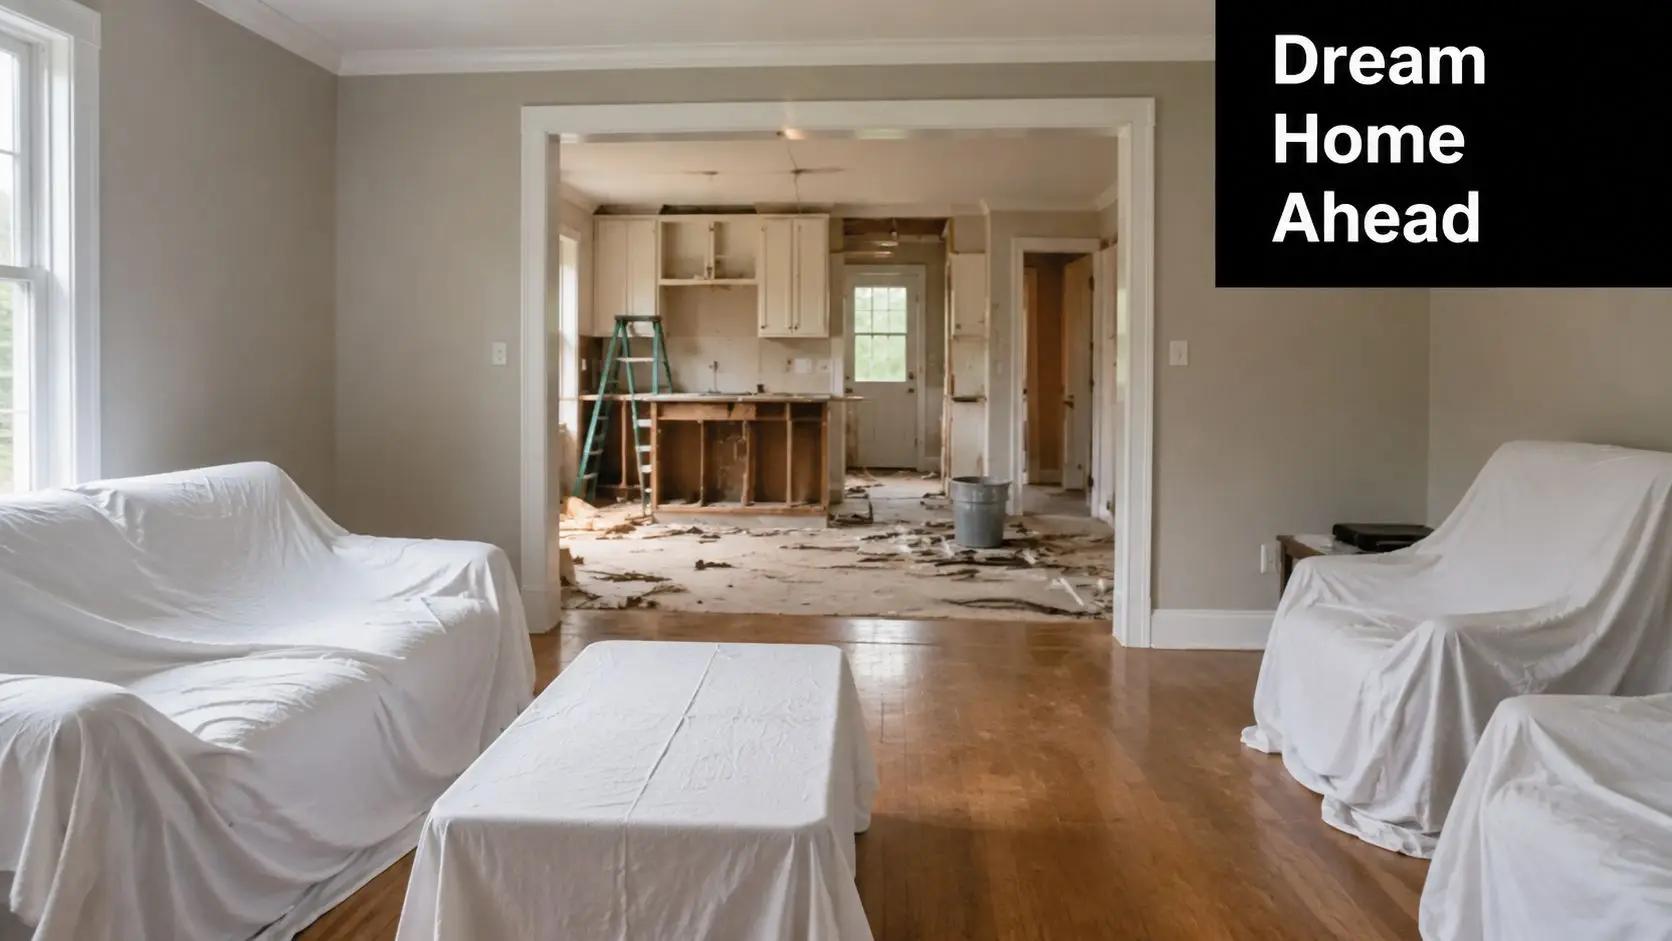
A Step-by-Step Guide to Your Kitchen Transformation
Most Art Deco kitchens don't come together by luck. They need a process that controls style, function, and buildability from the start. That matters even more if the project is part of a wider upgrade involving bathrooms, laundry areas, or a whole-home refresh.
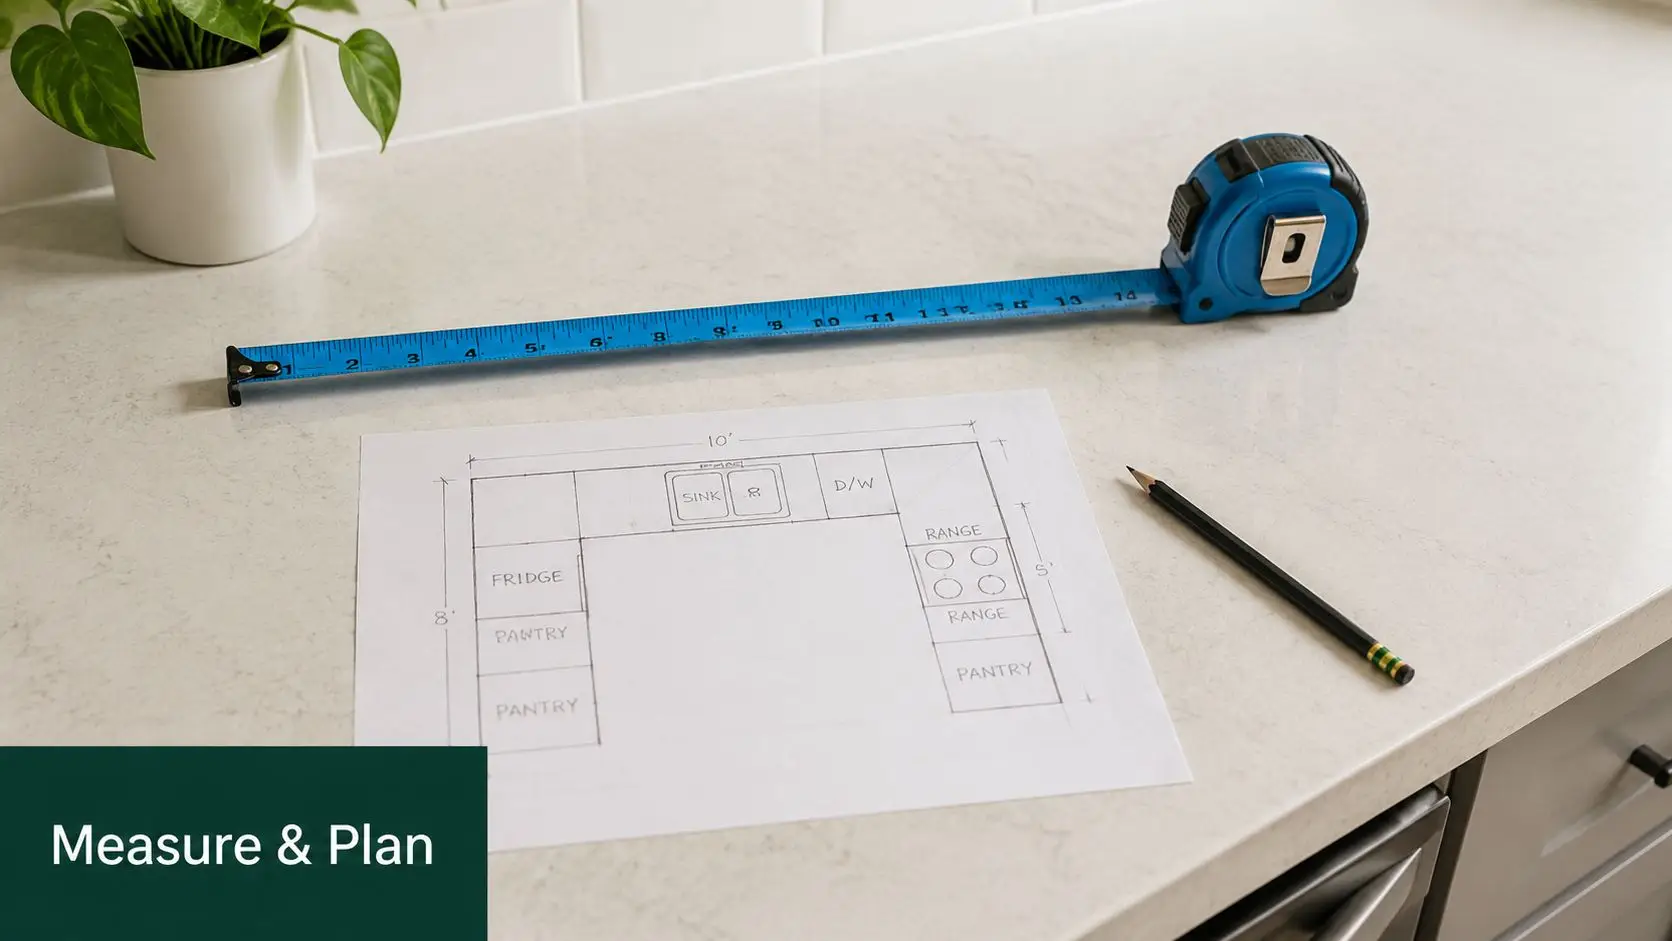
The smartest renovations begin before any demolition starts. That means measuring properly, checking what the room can realistically support, and translating ideas into a tested plan rather than building from mood boards alone.

Step 1 through Step 3
Start with briefing and priorities
A good brief doesn't start with “I want gold handles.” It starts with how the kitchen has to work. How many people use it. Whether the home needs better storage. Whether the dining zone needs to connect more clearly. Whether you're also planning new bathroom ideas so the finishes should speak to each other across the property.
Move into concept planning
Art Deco choices are often filtered through the room's practical realities. Curved joinery may look excellent, but it can tighten circulation if the footprint is already constrained. A dramatic island may suit the style, but not if it blocks appliance clearance or compresses walkways.
Use 3D visualisation before construction
This stage is one of the most valuable parts of the process. A 3D design shows whether your black cabinetry is elegant or too dominant, whether the splashback pattern is balanced, and whether lighting features suit the room height. It also helps clients compare a bolder Deco option against a more restrained version before anything is ordered.
Step 4 through handover
Finalise the budget against the design
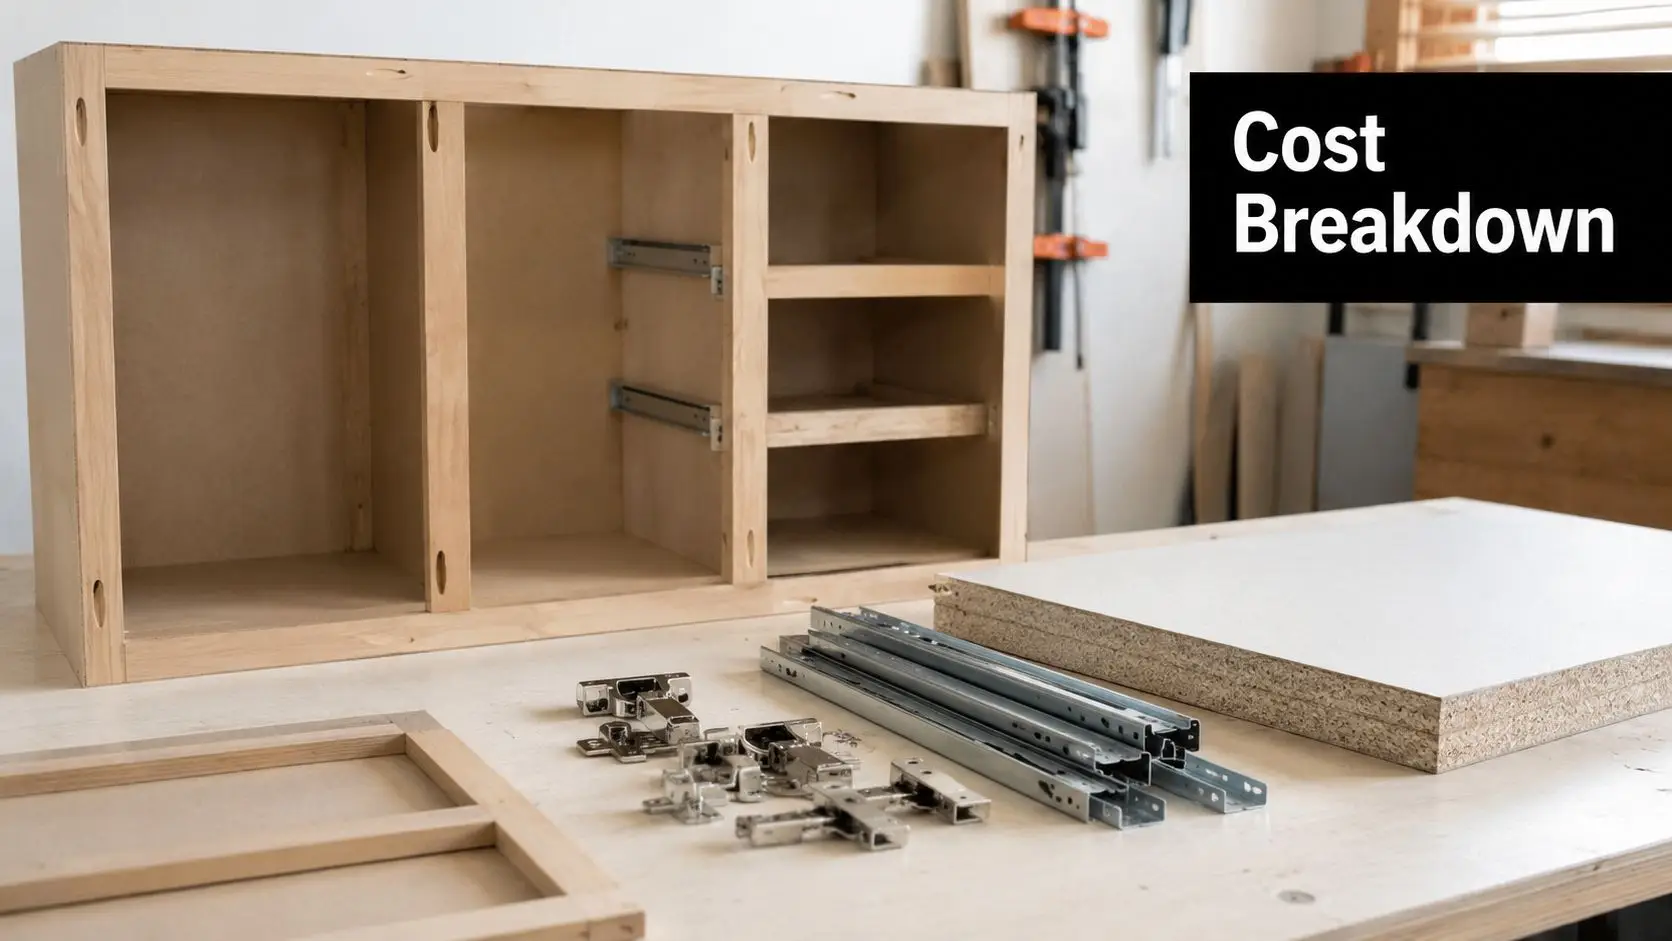
The budget should reflect the actual specification, not a rough idea. In Deco kitchens, costs often shift because joinery detailing, tile laying patterns, metallic finishes, and custom curves all require precision. If the budget is tight, scale back in controlled ways. Reduce the number of feature moments, not the quality of the core materials.
Build with the right level of licensing and coordination
For structural and high-scope renovation work, homeowners want confidence in who is managing the construction. That's where working with registered builders unlimited becomes important. It keeps the project grounded in compliance, sequencing, and workmanship rather than styling alone.
Complete the finishing layer
The room achieves coherence. Paint sheen, trim profiles, hardware alignment, grout choice, mirror placement in nearby rooms, and decorative lighting all matter. The same disciplined approach is what separates generic updates from true designer bathrooms and kitchens.
A clear renovation roadmap helps. Many homeowners use a practical planning resource on how to remodel a kitchen to understand the stages before committing to a full redesign.
The build rarely goes wrong because of one big decision. It usually goes wrong when small unresolved decisions pile up and hit the site at the same time.
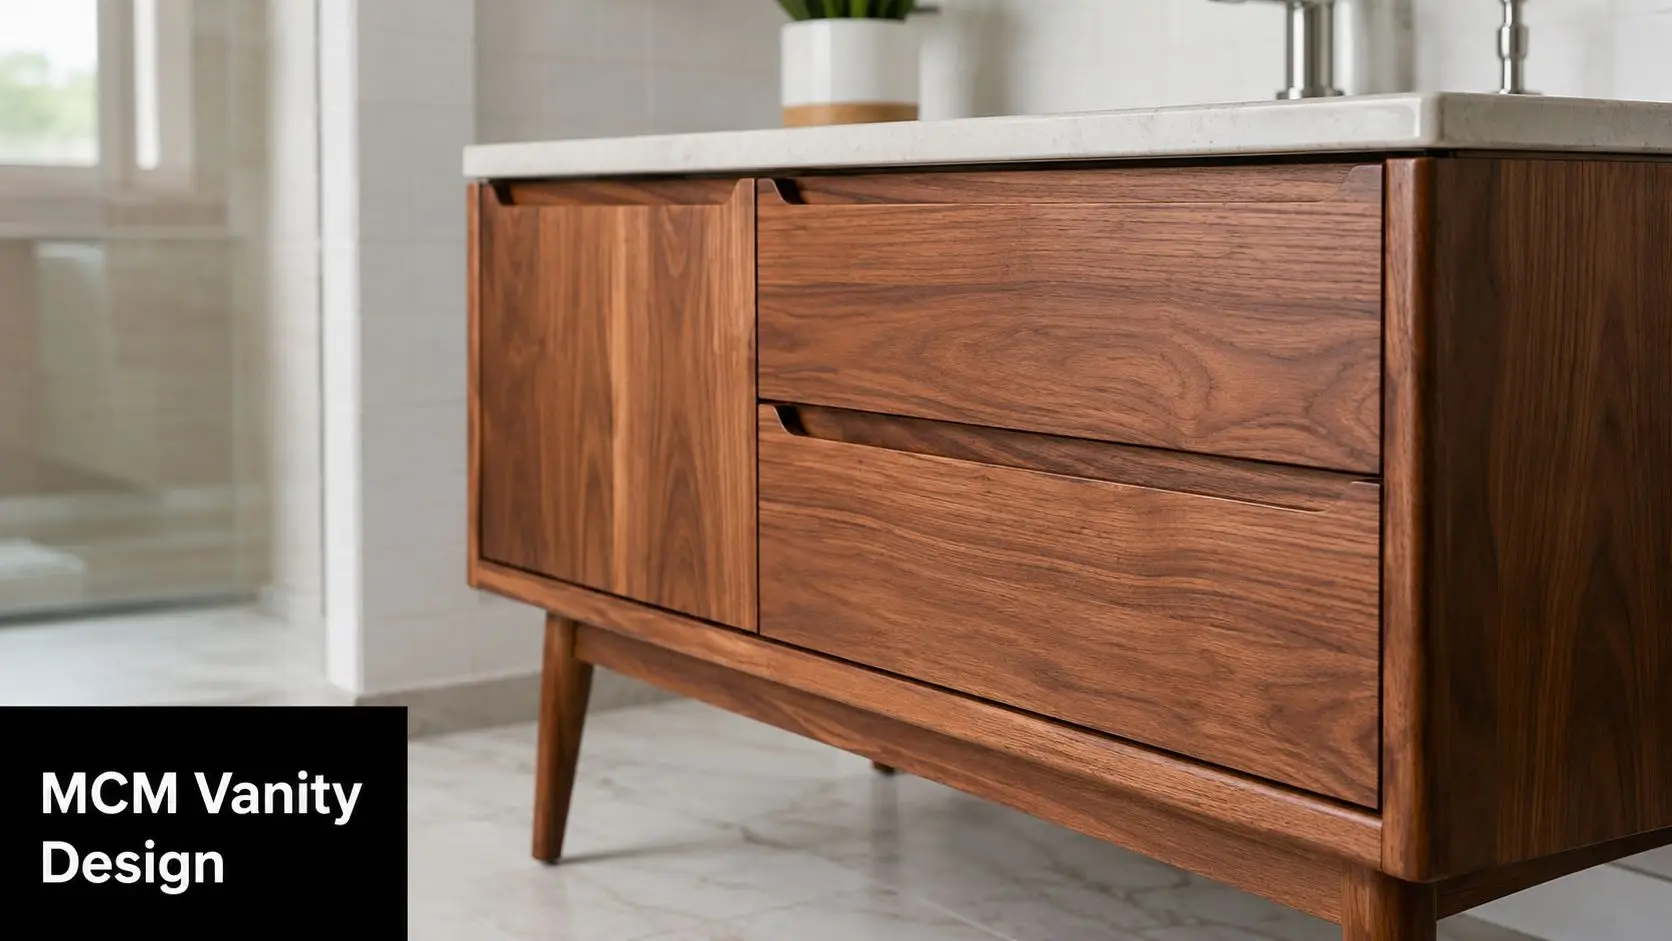
Modernising Your Art Deco Kitchen for Today
Some people love the look of Art Deco kitchens but worry they'll be harder to live with. In practice, the opposite is often true when the design is handled properly. The style has enough discipline to hide modern demands neatly.
A strong local example comes from a leafy Australian suburb, where a kitchen took on an American Diner flavour with chrome trim, smooth curves, and a sky-blue palette, showing how contemporary Australian Deco renovations can blend vintage glamour with modern function, as featured in this Art Deco home renovation story.
What works in a current household
Modern life asks more from a kitchen than homes of the 1930s ever did. You need charging points, better extraction, integrated appliances, practical rubbish storage, and surfaces that are easier to clean.
The style can absorb all of that if you're deliberate:
- Integrate appliances: Panel-ready dishwashers, concealed rangehoods, and built-in microwave zones keep the lines cleaner.
- Use modern materials selectively: You can choose lower-maintenance surfaces that still deliver gloss, veining, or metallic detail.
- Hide the mess: Appliance garages, deep drawers, and internal organisers preserve the formal visual order.
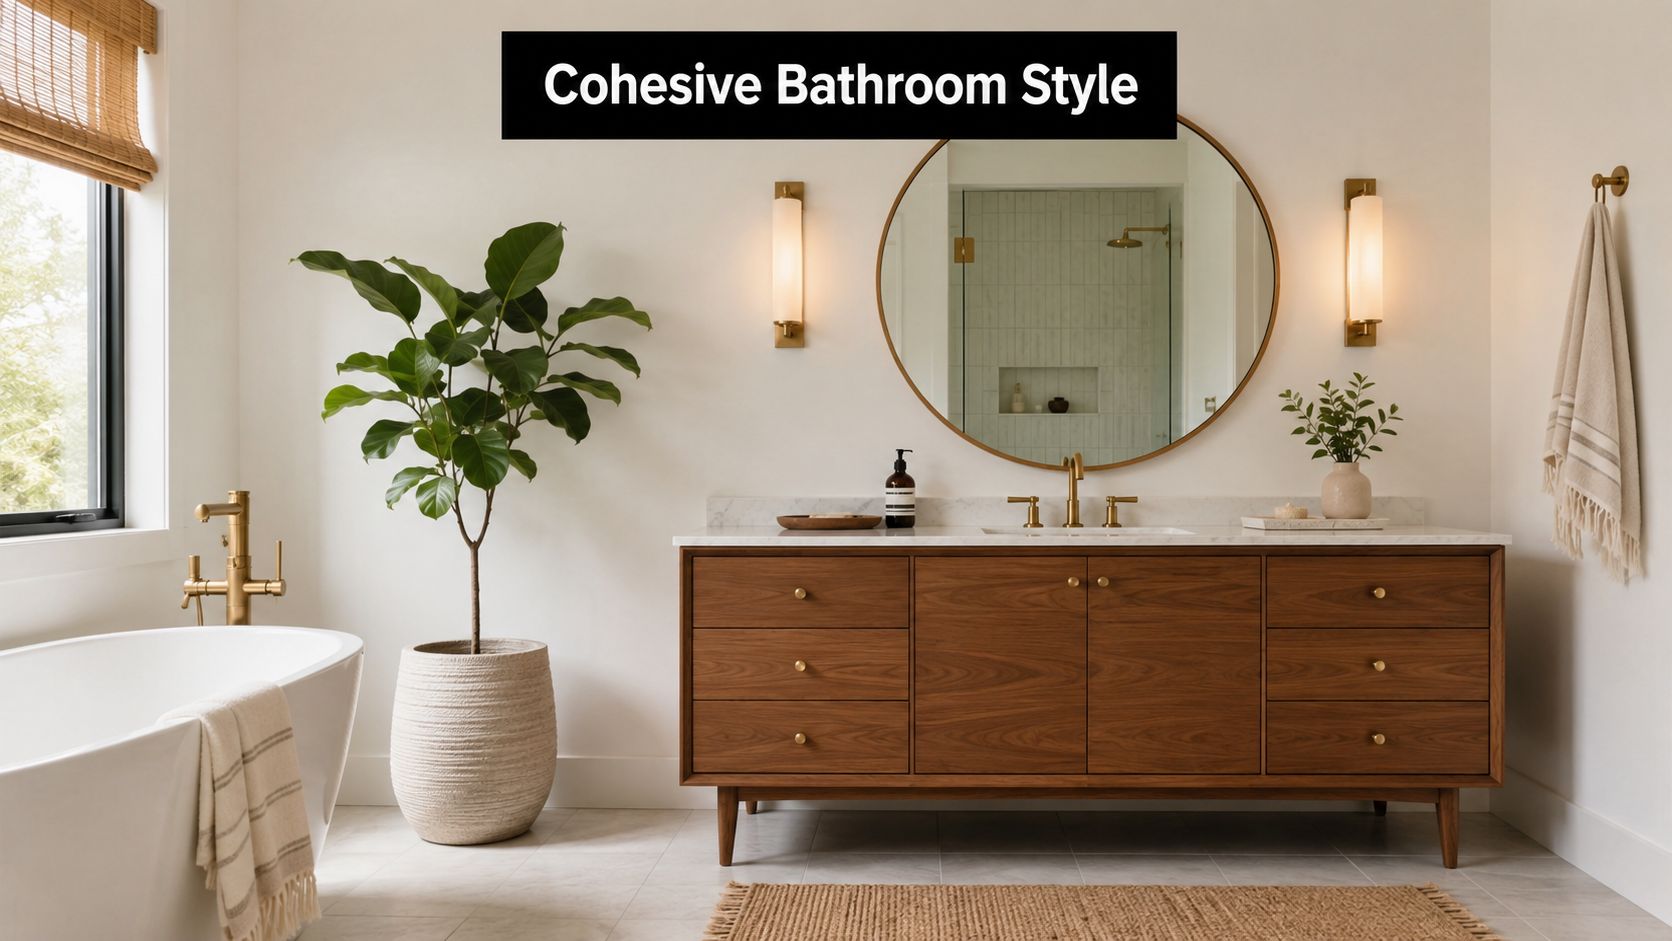
- Repeat details elsewhere: Matching hardware tones or tile geometry can tie the kitchen to bathrooms without making every room identical.
Homeowners planning both kitchens and modern bathrooms often get better results by choosing a shared palette. Brass, black framing, fluted glass, or geometric tiles can appear in both spaces, with each room using them differently.
Scope decisions matter more than chasing a fantasy fit-out
There isn't one correct budget for an Art Deco renovation. The cost depends on whether you're refreshing finishes, replacing cabinetry, reworking services, or altering the footprint. A cosmetic update can focus on colour, lighting, and hardware. A deeper renovation might involve layout changes, custom joinery, and full material replacement.
The key is to match the Deco ambition to the project scope. If you're spending on joinery profiles, patterned tile work, and bespoke lighting, keep some quieter surfaces around them. That balance usually delivers better value and a more polished result.
If you're weighing surface options, a guide to kitchen benchtop materials can help narrow down what suits both the style and your maintenance tolerance.
Your Art Deco Kitchen Questions Answered
Can Art Deco work in a small kitchen
Yes, if you lean on symmetry and restraint rather than trying to fit every Deco motif into one room. Smaller spaces benefit from one hero finish, disciplined joinery lines, and reflective accents. The room should feel composed, not overloaded.
Will it clash with the rest of the house
Not if you carry the language thoughtfully. A kitchen can lead with geometry and metallic detail while nearby rooms use softer versions of the same idea through mirrors, tiles, tapware, or lighting. That's often how people connect kitchens with bathroom renovations and keep the house feeling unified.
Is it only worth doing in period homes
No. Art Deco can sit comfortably in newer homes when the proportions, materials, and lighting are handled well. In newer builds, the style often feels sharper because the room can be planned around it from the start.
Does it add value
Design alone never guarantees resale, but some features are consistently read as high quality. Symmetrical patterns and sunburst motifs in layouts are linked to a 15 to 20 per cent increase in perceived property value in the Victorian housing market, according to Australian interior design institute benchmark data. That perceived uplift comes down to craftsmanship and visual intent.
What's hardest to maintain
Usually high-gloss surfaces, metallic finishes, and detailed tile work. They're not difficult, but they do need consistent cleaning and sensible product choices. Good planning helps more than harsh maintenance. Choose finishes that suit the way your household lives.
Should the kitchen and bathroom match exactly
No. They should relate, not repeat. The best result usually comes from shared cues such as brass, black detailing, curved forms, or geometric tile language. That gives you cohesion without turning every room into the same set.
If you're planning an Art Deco kitchen and want a renovation process that includes concept development, 3D design, and construction managed with care, SitePro Bathrooms can help bring the whole vision together across kitchens, bathrooms, and the spaces in between.