
• siteprobathrooms

Temporary Bathroom During Renovation: Options and Costs

You've chosen the tiles, the builder's discussing demolition, and then someone asks where everyone will shower on Monday morning. If you're renovating your only bathroom, that question needs an answer before the toilet comes out, not after the skip arrives.

A temporary bathroom during renovation should be planned as a working service, with water, waste disposal, safe access and someone responsible when something fails. For homeowners in Highett and greater Victoria, the right arrangement depends on the construction sequence, household routines and whether the home is owner-occupied or rented.

Temporary Bathroom Options Compared

Temporary bathroom options at a glance

Option Works best when Main cost driver Setup time Key check
Portable toilet and shower unit No other bathroom in the home Hire period and delivery access Days, once booked Power, drainage and waste route approved
Temporary plumbing to a laundry or basin Works are staged and one wet area must stay usable Licensed plumbing and certification Weeks of planning Licensed plumber and compliance certificate
Neighbour, family, nearby gym or garage Short, low-risk stages Travel time and access agreement Immediate once agreed Written agreement with access times
Keep the existing bathroom running Demolition can be sequenced around it Staging, dust control and cut-over timing Planned before demolition Cut-over date agreed with the builder

Treat the cost column as a quote checklist, not a published price range. The setup timings are planning allowances to confirm with the people supplying and connecting the facilities, not delivery promises.

Choose around the hardest daily task

A portable toilet and shower unit makes sense when the household needs complete facilities at home throughout a substantial rebuild. Its main trade-off is convenience against placement and servicing: a unit that fits in the driveway still needs a safe resident route and access for waste removal.

Temporary plumbing in a laundry can keep washing indoors and avoid trips outside. However, a basin alone doesn't replace a shower or toilet, and an improvised shower over an unprotected laundry floor isn't a suitable shortcut. Have the plumber assess the complete arrangement before committing.

Borrowed facilities suit short, predictable interruptions. Confirm keys, opening hours, privacy and whether children can use them, rather than relying on a casual offer. A garage only counts as an option if it already contains suitable facilities or can accommodate an approved installation.

Keeping the existing bathroom operational avoids hiring a separate unit, but it can complicate trade access. Agree exactly which fixtures remain connected and when the builder can remove them.

Compare the whole cost

Request an itemised hire quote covering delivery, weekly hire, service visits, waste removal and collection. Ask a licensed plumber for a fixed price for temporary connections and disconnection, with exclusions clearly stated. Compare that total against the days of lost bathroom use it prevents.

If the household can't reliably shower or use a toilet beyond a brief interruption, I'd start by pricing a complete portable unit. An occupied rental requires a different assessment because an informal arrangement elsewhere may not preserve the required amenity.

If staying home looks impractical, Stay Norwich Apartments' guide can help you compare places to stay during renovations. Use it to consider accommodation logistics, rather than assuming temporary facilities are always the cheaper overall choice.

Rules and Builder Terms to Lock In First

A household can have a temporary bathroom ready and still face a compliance problem if the setup is unsuitable for the property. Check the rules that apply, then put the responsibilities and timing in writing.

Under Consumer Affairs Victoria's rental minimum standards, bathrooms in covered rental agreements must have a sink, a shower or bath, and reasonable hot and cold water. Renters can request urgent repairs if the property falls below minimum standards during a tenancy.

Requirements by case

Case What must be in place Check before demolition
Owner-occupier A practical working toilet and clear access route Agree the cut-over date with your builder
Occupied rental Sink, shower or bath, and reasonable hot and cold water Written agreement with the rental provider
Shower in a temporary setup Applicable water-efficiency rating Confirm suitability with the supplier
Altered plumbing requiring certification Licensed plumber issues a compliance certificate Record who supplies it and when
Replacement toilet in a rental or strata Approved sewerage or wastewater connection Confirm council, lease and approval requirements
Structural changes Registered builder and building permit Permit issued before work starts

Rental showers require a 3-star water-efficiency rating unless impracticable. For an owner-occupied home, the table's working-toilet row is a practical planning baseline.

Put responsibilities in writing

For Victorian bathroom renovations costing more than $10,000, Consumer Affairs Victoria's builder guidance says a builder must hold the relevant BPC registration and use a written major domestic building contract. Structural work requires registration and a building permit regardless of price. If you're comparing builders, check the actual registration category and scope.

Hobless (walk-in) layouts need the waterproofing membrane extended to at least 1,800 mm above the finished tiled floor under the NCC wet-area provisions.

Put the temporary arrangement in the project scope: who supplies and removes the unit, arranges certification, handles breakdowns, and pays for extensions. For broader guidance on local permits and plumbing for remodels, check how local requirements may affect the work; Victorian rules govern this project.

SitePro Bathrooms provides bathroom renovation project management, from demolition and plumbing through waterproofing, tiling, fixture installation and final finishes. Confirm that the temporary facilities, access, servicing and removal dates are also assigned in the written project terms.

Match the Setup to Each Renovation Stage

The temporary arrangement must cover the whole period the bathroom is unavailable, not just demolition. Don't book collection against the hoped-for tiling finish; connect it to the point when the permanent fixtures have been tested.
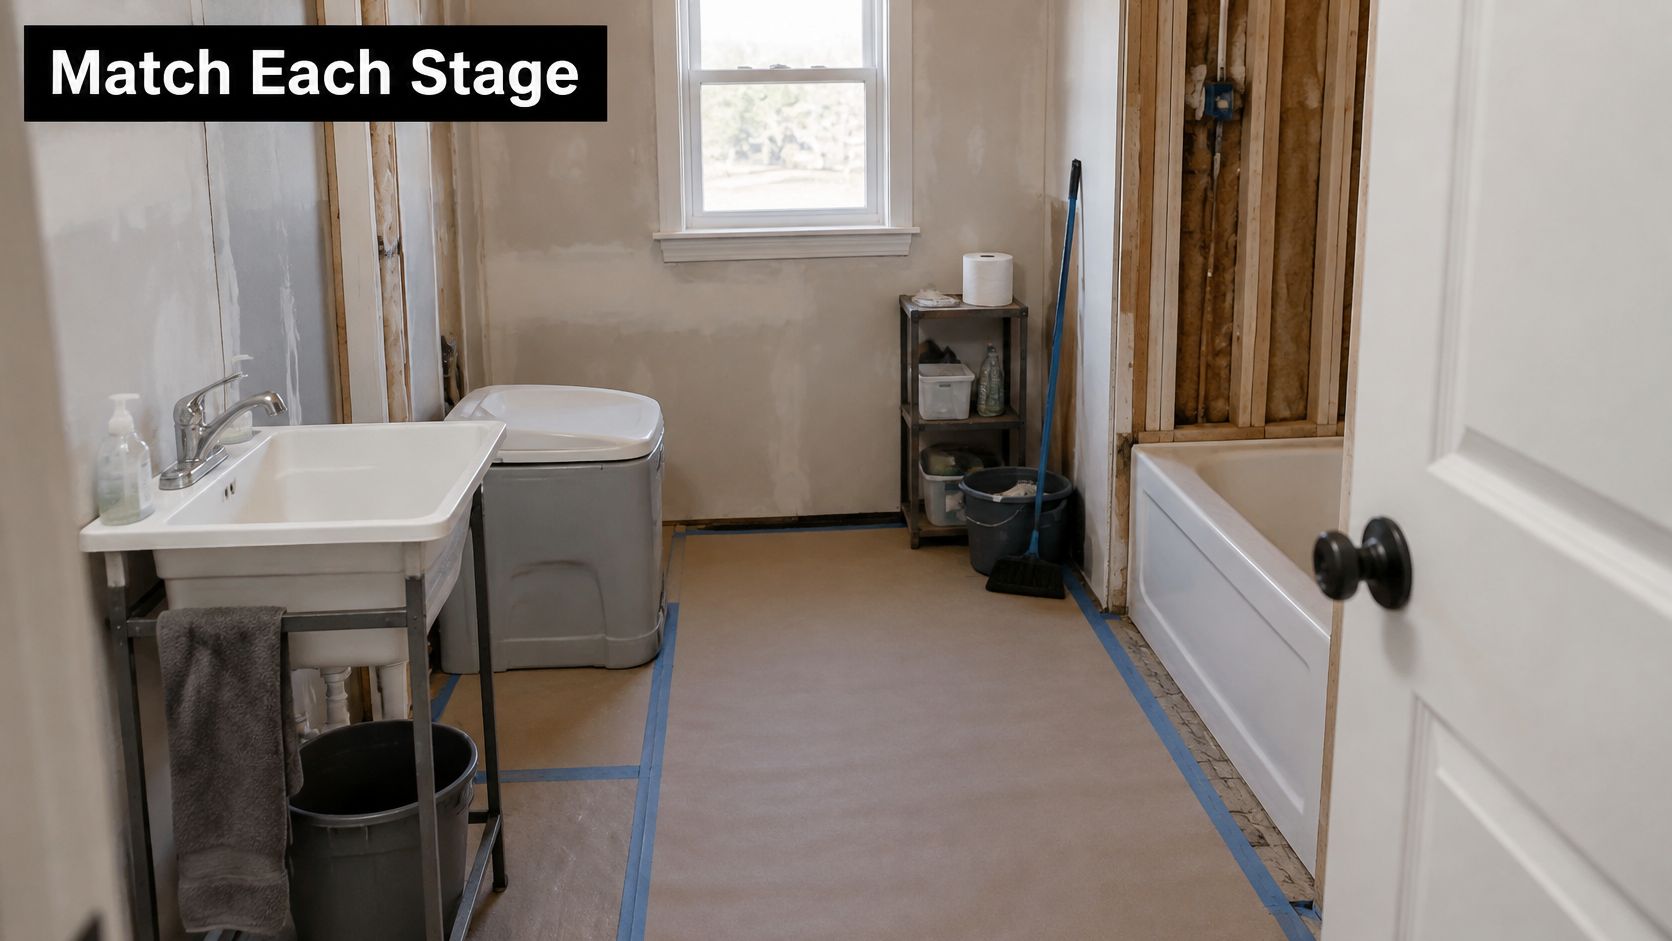
A bathroom undergoing renovation featuring a portable toilet, a utility sink, and exposed wall studs.

Renovation stage and temporary bathroom need

Stage Bathroom out of use? Temporary arrangement needed
Consultation and design No Confirm the setup and its start date
Demolition Yes Alternative bathroom working before strip-out
Framing and structural work Yes Keep the alternative and access route for the whole stage
Plumbing and electrical rough-in Yes, for wet areas Licensed work; temporary power kept out of wet areas
Waterproofing and tiling Yes Ventilation and drying time before showering
Fixture installation and final finishes Partly Test permanent fixtures before moving back

Schedule around service availability

During consultation, add a target end date and a release condition beside each stage. Demolition requires the alternative to be operational; framing requires the access route to survive changes to walls, floors and material storage.

Rough-in can affect services outside the bathroom. Heatwave Air Conditioning, Plumbing, & Electric's explanation of home remodel plumbing rough-in costs helps distinguish service work from fixture installation, but use your Victorian contractor's scope for budgeting.

Waterproofing and tiling aren't a suitable window for occasional showers in the unfinished room. Let the contractor confirm when the completed assembly is ready, rather than judging it by whether tiles look dry.

In most cases, homeowners can stay home during our renovations, although the bathroom is out of use and there may be noise and dust. If you're considering renovating a bathroom in stages, establish which facilities remain usable between stages.

For occupied rentals, include the Consumer Affairs Victoria rental minimum standards checklist in the planning paperwork. Stage completion doesn't excuse an interruption to required amenities.

How to Set Up a Temporary Bathroom Step by Step

Arrange the installation as a controlled handover between the household, builder and licensed trades. Plumbing and electrical rough-in is licensed work that repositions services for the new bathroom, so the temporary installation must be coordinated with it.

A woman sits at a wooden table planning a temporary bathroom renovation with documents and tools.

  1. Write the work sequence. Record stage dates and the point when the existing toilet stops being usable. Avoid a schedule that says only demolition starts Monday, without identifying the service cut-over.

  2. Prepare the alternative before disconnection. Have the unit delivered and its location assessed while existing facilities remain available. If you're borrowing facilities, obtain the key and confirm access hours. The common failure is assuming a booking confirmation means the household already has a usable toilet.

  3. Separate residents from construction. Barricade the work zone with a controlled entry point and preserve a clear route. Keep tiles, tools and packaging out of hallways, stairs, exits and fire-equipment areas.

  4. Isolate services under trade control. Arrange water and electrical shutdowns, then have the relevant trades isolate and lock out services before cutting or connecting. Nobody should rely on an unverified assumption that a pipe or cable is dead.

  5. Install and certify temporary connections. Have licensed trades verify water, drainage, electrical and hazardous-material conditions, then install and test supply, drainage, leaks and electrical protection, keeping RCD-protected power out of wet areas. Under the Victorian framework described by the Building and Plumbing Commission, prescribed plumbing work includes work exceeding $750, with the compliance certificate generally due within five days of completion.

  6. Check the complete service. Confirm the toilet, handwashing point and lighting are reachable and the waste route is approved. A shower that drains isn't enough if wastewater disposal or safe access remains unresolved.

  7. Document the handover. Photograph the setup and record isolation times, emergency contacts and the person responsible for breakdowns. Keep those details accessible outside the work zone so a night-time failure doesn't turn into a search through building paperwork.

Keeping Hygiene and Daily Life Workable

A portable bathroom becomes difficult to live with when cleaning, supplies and household routines have no clear owner. Set a simple maintenance schedule before demolition, and agree who handles household cleaning and who arranges servicing.

Stock the hygiene kit

  • Toilet paper: Store spare rolls in a closed, dry container beside the facility.
  • Handwashing: Provide flowing potable water and soap at the handwashing point.
  • Hand sanitiser: Keep alcohol-based sanitiser available for times when the handwashing point is temporarily out of service.
  • Hand drying: Supply paper towels or a suitable air dryer.
  • Waste tank: Follow the supplier's emptying schedule and arrange an earlier service if the tank reaches its stated capacity.
  • Cleaning: Keep suitable cleaning supplies outside children's reach and follow the product directions.

For rental properties, check the minimum standards for rental properties in Victoria before choosing the temporary arrangement.

Protect the household routine

Keep the construction zone separate from occupied rooms. Fit plastic sheeting at the work-zone doorway without blocking the agreed exit route, and remove dust from the resident access route rather than sweeping it towards bedrooms.

Plan for daily use, especially at night. Keep ventilation openings clear, light the entire route including steps and changes in level, and set shower times around children's routines and shift work. Arrange pet washing separately so it does not block household shower access.

A carry caddy keeps toiletries together. Give each person a dry place for clothes and towels, or these items can end up cluttering the temporary space. The guide to living in a house during renovation covers ways to organise occupied rooms around construction.

A clean, reachable bathroom matters most after dark.

Test the Temporary Bathroom Before Demolition

Before demolition starts, run a full-day rehearsal with the permanent bathroom out of use. Keep it intact as a fallback until the test passes. This checks whether the setup works for the household, including child access, a place for dry clothes and a shower schedule that fits around work.

Use it like an ordinary day

  1. Test the morning routine. Use the temporary toilet and handwashing facilities, then follow the household's expected shower sequence. Check that water drains without pooling and the hot supply stays steady.

  2. Repeat access at midday and after dark. Carry the towels and children's clothing you'll need. Check that doors, gates and lighting work along the route, without requiring anyone to enter the construction zone.

  3. Check the route during site activity. Confirm with the builder where deliveries and materials will go. A route that is clear during an empty-site inspection may be blocked when demolition equipment arrives.

  4. Record failures and assign fixes. Note leaks, pooling, access problems and missing supplies, then name who will address each one. After a fix, repeat the task that failed and confirm it works.

Set a clear pass standard

The arrangement passes when everyone can use the facilities without relying on the permanent bathroom's tap, light, toilet or shower. Keep a record of the test and any corrections alongside the project paperwork.

Consumer Affairs Victoria's renovation checklist explains that homeowners remain responsible for checking approval requirements, even when a builder manages an application, and that required permits must be issued before work begins.

Contact SitePro Bathrooms to arrange an on-site consultation and measurement before setting your demolition date. Discuss your renovation goals, layout and budget, including how your new bathroom ideas affect the construction sequence and temporary facilities. Free quotes are available for bathroom renovation projects, so you can plan the rebuild and household arrangements together. Do not start strip-out until the rehearsal passes.

  • siteprobathrooms

Small Kitchen Renovation Steps for Small Homes

The usual advice for a small kitchen renovation is to choose pale colours, add clever storage and keep the appliances compact. That can improve appearances, but it won't rescue a room where the dishwasher blocks the fridge or the sink relocation consumes the cabinetry budget. Start with the scope, not the finishes. A smaller kitchen still needs design, demolition, service connections and installation, so removing floor area doesn't remove the expensive parts of the job.

Three Scope Pathways and What They Cost

A compact kitchen isn't automatically the cheaper renovation. Trades still need to attend, cabinets need accurate measurements, and someone must coordinate the plumbing, electrical work and installation. The useful budget question is therefore which scope solves the daily problem without buying unnecessary construction?

Choose between retaining the footprint, reconfiguring inside the walls and altering the structure. These are different jobs, not interchangeable versions of a kitchen makeover.

Match the budget to the work

Small kitchen scope pathways and indicative spend

Pathway What changes Indicative spend (AUD) Disruption Stop or go
Retain footprint Doors, hardware, paint, splashback and possibly the benchtop; services stay Cosmetic updates are quoted at $8,000–$20,000 in the Australian cost coverage summarised by Canstar's kitchen renovation cost guide Localised work, with interruptions when surfaces and appliances are disconnected Go if the cooking, cleaning and refrigeration positions already work
Reconfigure inside the walls New carcasses, taller storage and appliance changes; plumbing mostly stays Use a measured cabinetry and installation allowance, rather than treating a small-kitchen average as a quote The kitchen becomes unavailable during removal, rough-in and installation Go if storage and landing space fail but the walls can stay
Structural alteration Changes to walls, doors or bulkheads, potentially with relocated services Broad national kitchen coverage includes $15,000–$40,000, but this isn't a structural-work allowance or a ceiling Approval-dependent work, followed by building work and kitchen installation Go only when the circulation improvement justifies the additional scope

The national range in the structural row comes from the same Canstar cost coverage. It describes kitchen renovations generally, not the price of removing a particular wall.

For a historical size-specific benchmark, the 2018 Houzz Australia Kitchen Trends Study defined small kitchens as under 10 square metres and reported average spending of $14,600, compared with $22,600 for kitchens of at least 10 square metres, an overall average of $19,300, and 59% of renovating homeowners increasing their kitchen's size.

Keep that older benchmark separate from the 2023 AU Houzz & Home Renovation Trends Study, which found kitchens were a priority in 33% of renovation projects and recorded a $30,000 median spend across kitchen sizes. Neither study prices your property.

Set a stop point before upgrading

Retain sound carcasses when their dimensions and positions suit the household. Replacing doors won't fix swollen panels, failing hinges with damaged fixing points, or shelves that prevent useful appliance storage.

Reconfigure when drawers, pantry access and usable preparation space will make the room work better without moving its boundaries. Structural work earns consideration when a doorway or wall creates an unavoidable bottleneck, not just because an open-plan image looks appealing.

Say a Highett apartment keeps its services along the existing wall. That supports a contained scope, although the cabinet condition still matters. Opening the kitchen into the living room introduces structural and approval questions that need surveyor advice before design decisions are locked.

Use our guide to the cost of a new kitchen to organise the allowances you'll need to compare.

Budget stop point: If a quote moves into a more disruptive pathway, identify the specific daily task that becomes easier. If there isn't one, reconsider the upgrade.

Layouts That Keep Two People Moving

A useful kitchen lets someone cook while someone else washes, unloads groceries or gets a drink. A room can look open in a photograph and still fail that test.

Start with a measured floor plan showing finished cabinet faces, handles and appliance doors. Then model the room in use, not just with everything closed.

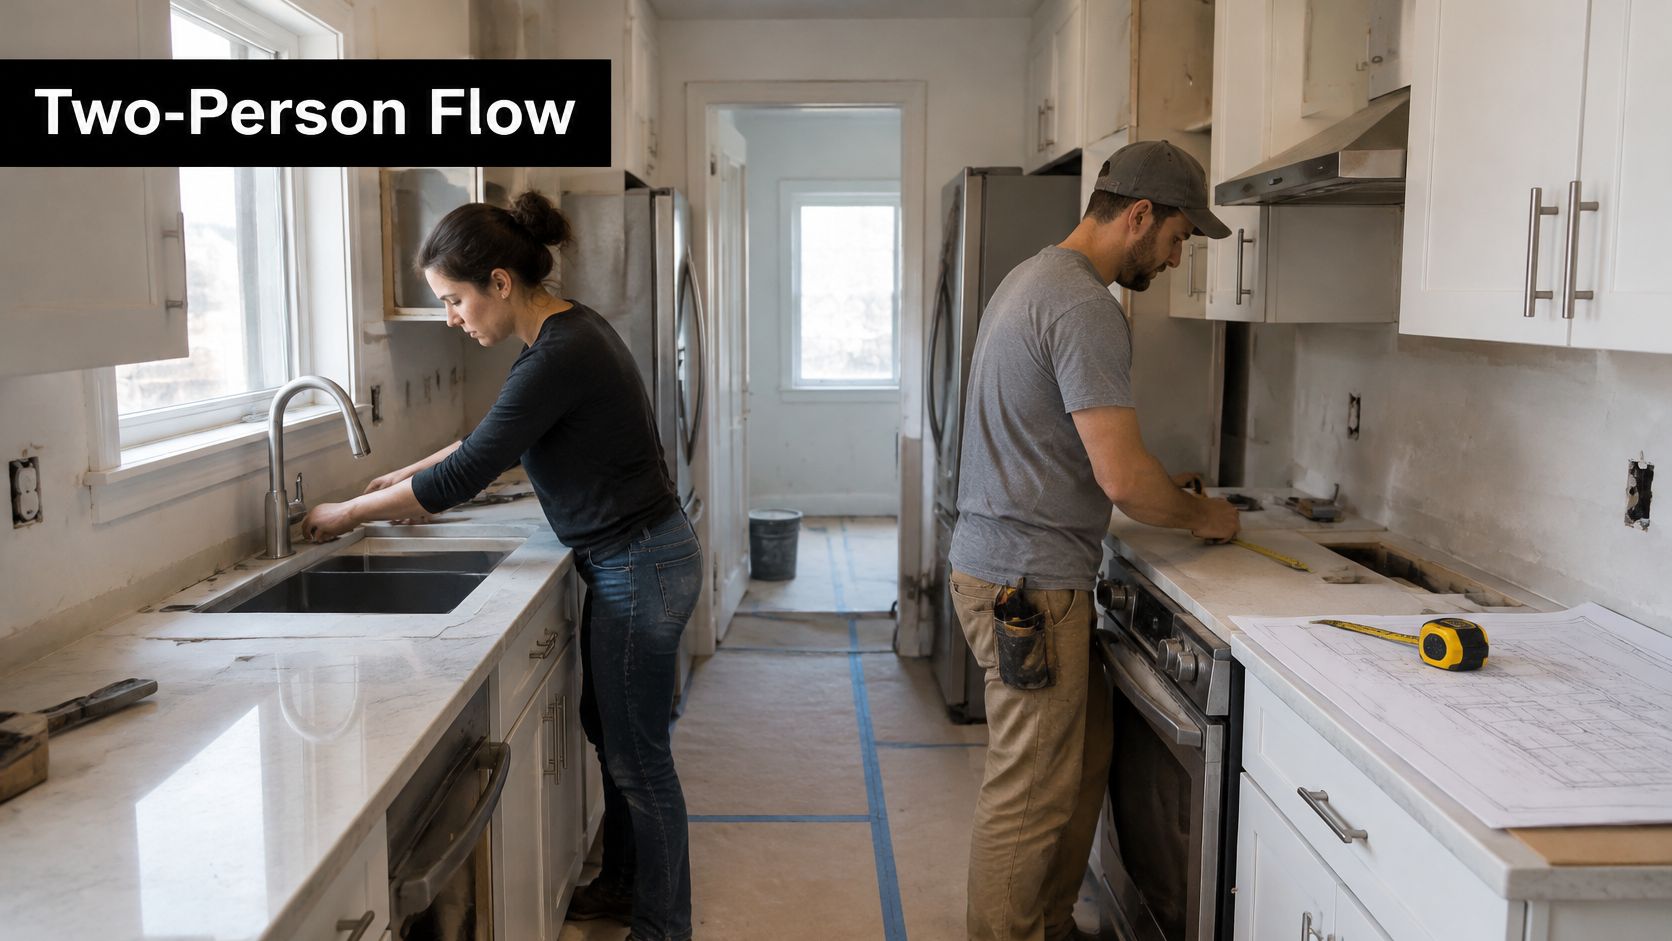
A man and woman renovating a small kitchen while taking measurements for a countertop installation project.

Give each layout a working test

A galley needs separate working positions. In a narrow Melbourne kitchen, placing the sink and cooktop along one run and refrigeration opposite may work, provided the fridge user doesn't occupy the cook's preparation position. Draw the dishwasher open and check whether someone can still leave the room safely.

A single-wall kitchen needs an uninterrupted preparation zone. For a Highett studio, test a sequence of fridge, preparation space, sink and cooking zone. Keep wet dishes out of the only chopping area, and don't add an island merely to reproduce a larger kitchen's appearance.

A peninsula needs a clear end route. In a compact family home, it can provide a landing surface and a place to sit without requiring circulation around every side. Check that a seated person won't block access to the fridge or become an obstacle between the kitchen and living room.

An island should survive the same test with doors open, stools occupied and someone carrying a hot tray. Reject it if the remaining route requires another person to step aside.

Draw the awkward moments

Use these checks before ordering cabinetry:

  • Appliance doors: Show the fridge, oven, dishwasher and pantry fully open, including handles and adjacent drawers.
  • Landing surfaces: Provide somewhere beside refrigeration and cooking equipment to put groceries, utensils and hot dishes.
  • Waste handling: Place the bin within easy reach of preparation and scraping, rather than across the main passage.
  • Family visibility: Test sightlines towards children's activities without placing seating beside hot cookware.

A tall pantry door that hits the fridge is a planning failure, not something to solve later with different hinges. Our kitchen designs for small spaces can help you assess the arrangement before concentrating on its appearance.

Skip a scullery in a small room unless the measured plan proves its value. The Australian modern kitchen design guide identifies an additional cost of roughly AUD 8,000–$20,000, alongside the circulation space it consumes.

For visual selections, Everti's discussion of modern kitchen materials and finishes is a useful companion to a functional plan. Use it to compare the look you want without allowing a finish or cabinet profile to dictate an unsuitable layout.

Finally, trace a complete meal on the drawing: retrieve ingredients, rinse, prepare, cook, serve and clear away. Have another household member trace their movements at the same time. Reject any arrangement that only works when everyone else stays out.

Storage Appliances Lighting and Benchtops

The first failures in a compact kitchen are often mundane: a saucepan drawer that won't open past the oven handle, a dark preparation bench, or a replacement fridge that doesn't fit its enclosure. Specify those details before spending on decorative features.

Storage should match the contents you keep. Empty the existing cupboards and group cookware, crockery, food and small appliances before deciding how much joinery to order.

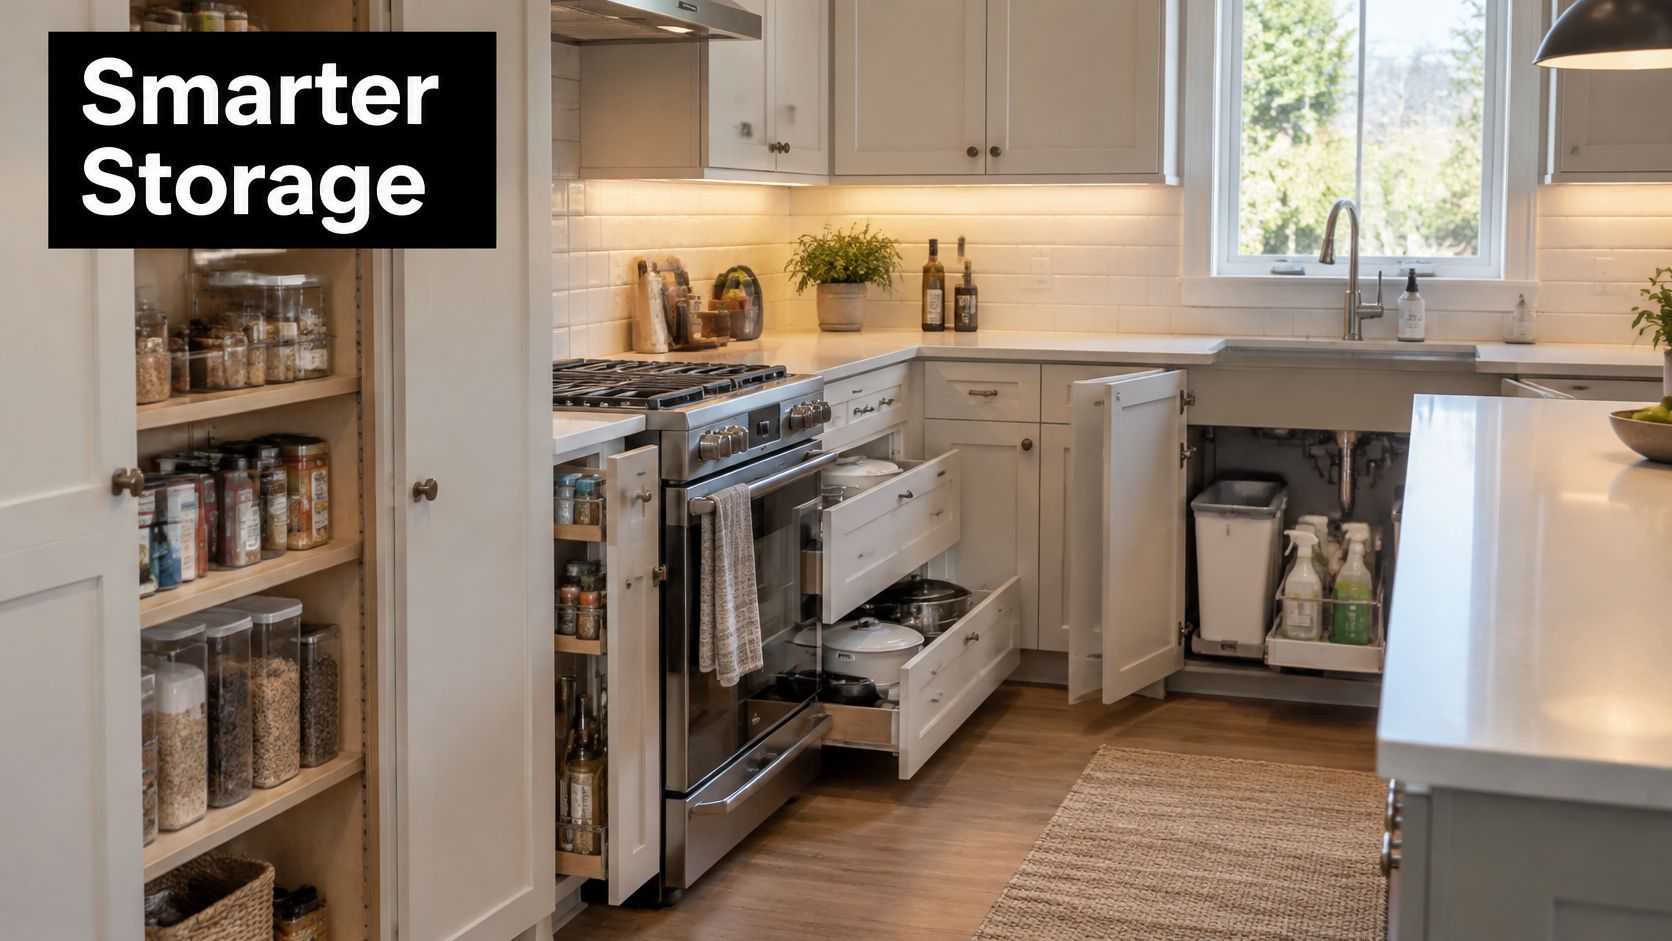
A modern kitchen interior featuring smart storage solutions like pull-out pantry shelves and organized under-sink drawers.

Buy accessible storage rather than extra doors

A full-height pantry with usable internal fittings can be more practical than scattered shallow cupboards. Deep drawers bring pots towards you; narrow vertical compartments keep trays accessible without stacking everything together.

Keep everyday plates between comfortable hip and shoulder reach. Reserve high cupboards for light, infrequently used items, and check drawer load ratings before allocating heavy cookware.

An under-sink pull-out needs clearance around the trap, hoses and isolation valves. Draw those services inside the cabinet rather than assuming the storage fitting will somehow fit around them.

Appliances require the same discipline:

  • Dishwasher: Choose capacity around the household's washing habits, then check the open door against the passage.
  • Cooktop: Compare pan positions and control access, including whether reaching the controls takes an arm over hot cookware.
  • Fridge: Allow for ventilation and the door opening needed to remove internal drawers.
  • Integrated appliances: Check replacement dimensions and panel compatibility, especially for a rental where straightforward repairs matter.

Choose surfaces for the repair you can manage

Benchtop materials after the engineered-stone ban

Material Best pathway Check before ordering
Laminate Retain footprint Confirm edge detailing, joins and protection around wet areas
Porcelain Reconfigure inside the walls Confirm cabinet support, substrate requirements and edge vulnerability
Natural stone Any pathway with a sealer plan Agree on sealing, stain care and ongoing upkeep
Solid surface Retain footprint or reconfigure where repairability matters Check heat limitations, specialist repair access and join placement

Laminate is a sensible choice when the existing room works and the aim is a durable refresh. Porcelain needs careful fabrication and support; natural stone requires a maintenance routine suited to the particular stone. Solid surface can suit owners who value repair options, but it still needs protection from hot cookware.

Ask how a damaged edge would be repaired, not just how the sample looks under showroom lighting. For landlords, a readily understood cleaning and maintenance routine can be more useful than a delicate finish.

Lighting should illuminate hands and food, not cast your body's shadow across the bench. DLG Electrical's guide to installing under cabinet lighting in Brisbane offers useful planning context; installation in Victoria belongs with the appropriate licensed electrician.

Coordinate task lighting, appliance outlets and rangehood ducting before the splashback is selected. Specify ventilation for the cooking appliance and room conditions, rather than treating recirculation as an automatic substitute for an achievable exhaust route.

How to Phase the Renovation With Less Disruption

Compliance belongs at the beginning of design. It's much harder to resolve an exhaust route, shared service or structural question once cabinets are manufactured.

A household also needs a practical shutdown plan. Decide where food, dishes and appliances will go, how trades will enter, and which rooms must remain separated from dust.

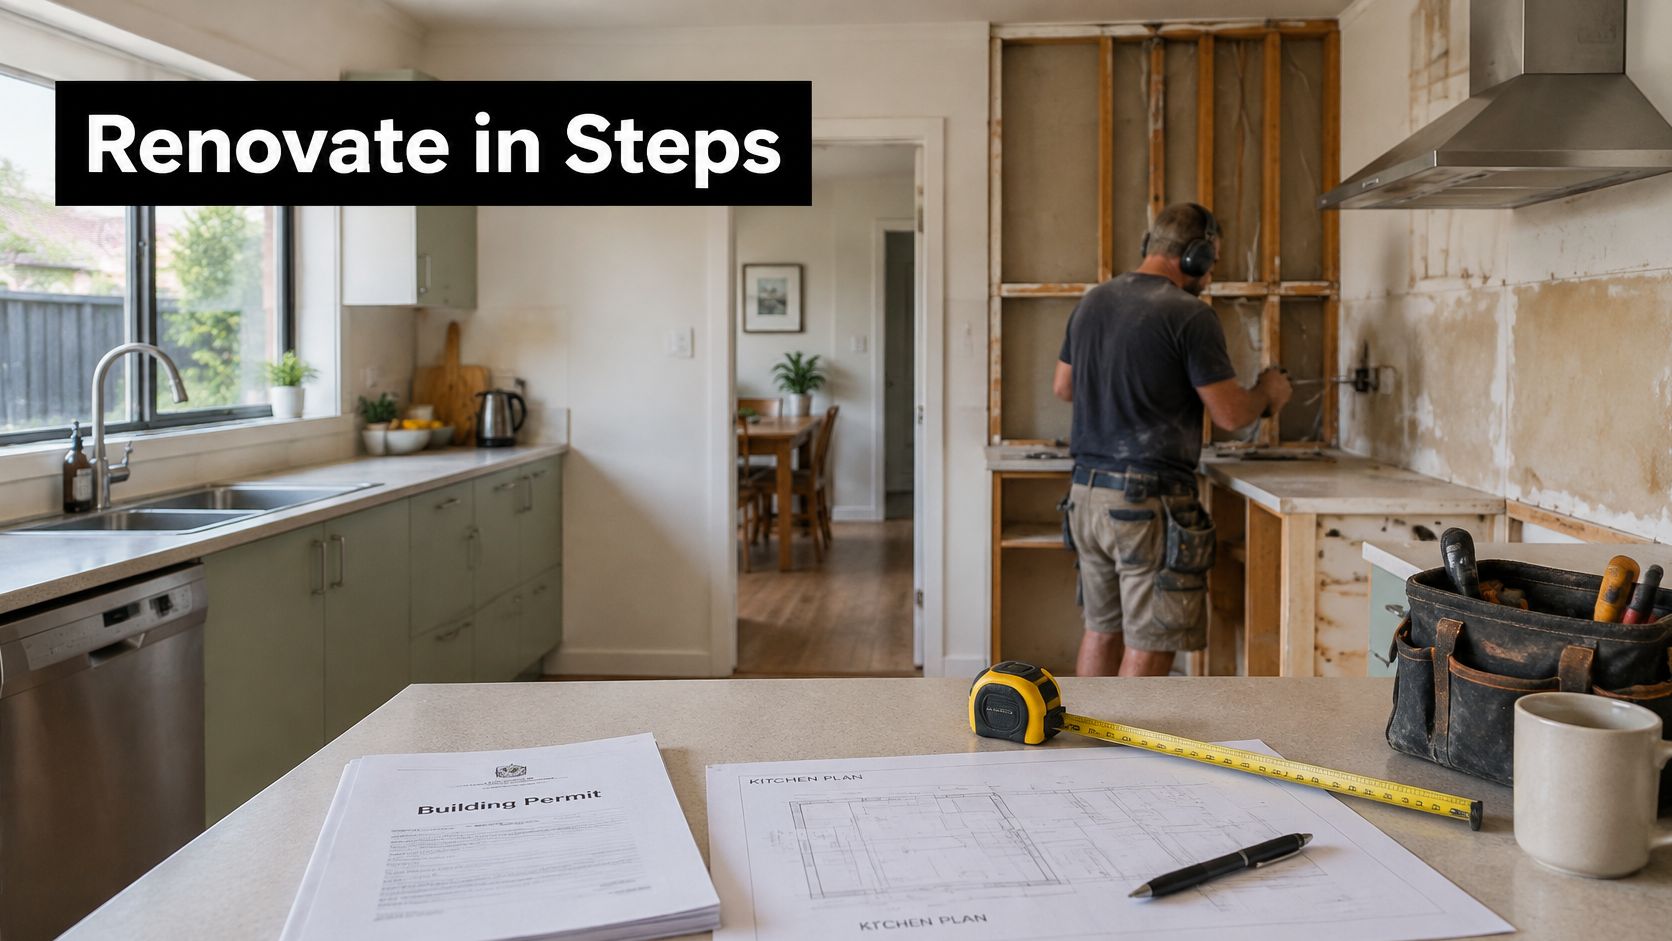
A professional construction worker renovates a kitchen while blueprints and a building permit sit on the counter.

Use a sequence with clear hold points

  1. Measure and define the household requirements. Our personalised on-site consultation covers your vision, lifestyle requirements, budget and timeframe, with accurate measurements of the existing space. Include awkward corners, window reveals and existing appliance connections, not just the room's overall dimensions.

  2. Mark every proposed building and service change. Identify walls, plumbing, gas, circuits, ventilation and structural elements before pricing joinery. Where required, our kitchen renovations include structural adjustments and upgraded or relocated plumbing and electrical systems to suit the new design.

  3. Freeze the coordinated layout. Produce matching cabinet, appliance and services drawings. A tap position should be resolved alongside the sink bowl, waste fitting and drawer arrangement, not discovered when the splashback installer arrives.

  4. Confirm the approval requirements. Have the building surveyor and relevant licensed trades establish which permits and inspections apply to the actual work. An owner-builder arrangement doesn't remove the need to resolve approvals, trade qualifications and completion documentation.

  5. Obtain approvals, then isolate services. Confirm that the people disconnecting electrical, plumbing and gas installations are authorised to do so. Don't start demolition while a service remains unidentified or an approval affecting the work is unresolved.

  6. Remove only what the chosen scope requires. Our demolition stage removes existing cabinetry, benchtops, splashbacks and flooring where required, then prepares the space for construction. Set up a temporary kettle and microwave station away from dust, with safe power access and a separate arrangement for washing dishes.

  7. Inspect before concealing work. Verify framing, plumbing and electrical locations before lining walls. The plumbing permit guidance should be checked against the project's Victorian requirements with the responsible trades, including a plumbing Certificate of Compliance for applicable work costing $750 or more and a Certificate of Electrical Safety for electrical installation work.

  8. Install, test and hand over. Sequence cabinetry, benchtop measurement and fabrication, splashback, appliance connections and lighting around the installers' requirements. Our kitchen renovations finish with a thorough final inspection and professional cleaning, ready for immediate use at handover.

Plan for the shutdown, not just the finish date

Staying home may be practical, but a rough-in stage without a functioning kitchen changes meals, washing up and access through the house. Discuss noisy work, dust separation and delivery access before the start date.

Use our kitchen renovation timeline guide to prepare questions about the sequence. Distinguish working time from waiting time for approvals, fabrication and inspections.

Never authorise wall linings simply because the next trade is available. Verify the concealed work first, or the finished surface may need to come off again.

For investors and body corporates, keep permits, trade certificates, appliance specifications and completion documents together. Shared exhaust routes, penetrations and common-property walls need particular attention because permission may extend beyond the apartment's interior.

Bathroom Work and Registered Builder Rules

For combined kitchen and bathroom renovations, registration comes before tile selection. Consumer Affairs Victoria's building-practitioner guidance states that registration is required for domestic building work worth more than $10,000, including labour and materials, and a major domestic building contract is required above that threshold.

Registration must be approved before work begins. The guidance also identifies registration requirements regardless of value for re-blocking, re-stumping, demolishing or removing a home.

Check the class as well as the registration

The phrase registered builders unlimited refers to the Domestic Builder (Unlimited) registration class, not a general promise that someone can perform every licensed trade.

The Building and Plumbing Commission's domestic builder class guidance describes responsibility for carrying out, managing and arranging all components of eligible domestic building work on Class 1, Class 2, Class 4 and Class 10 buildings. That distinction matters when a contract combines demolition, carpentry, cabinetry, plastering, tiling and waterproofing coordination.

A suitable registration class supports management of the building scope. It doesn't replace the specialist licensing required for plumbing or electrical work.

Check the practitioner's current registration through the commission's search service, and make sure the contract identifies who is responsible for the complete job. Don't assume that a collection of individual trade quotes gives you the same coordination as a clearly defined building contract.

Choose bathroom changes that relieve household pressure

The most useful new bathroom ideas address access, cleaning and competing routines. A decorative feature won't help if someone has to wait outside while another household member uses an unrelated fixture.

The Australian Government's YourHome minor home upgrades guidance recommends the highest available WELS star ratings, step-free showers, non-slip flooring and lever taps, and suggests considering a two- or three-way bathroom layout to separate household functions.

Translate those ideas into the actual room:

  • Step-free shower: Coordinate the floor build-up, drainage and waterproofing before committing to the visual detail.
  • Accessible fittings: Check reach, grip and operating effort rather than selecting tapware from appearance alone.
  • Separated functions: Test whether dividing the toilet, shower and vanity resolves queues without adding another complete bathroom.
  • Manageable surfaces: Consider grout, screen hardware and cleaning access alongside colour and texture.

Modern bathrooms and designer bathrooms still need accessible maintenance points and fixture positions that suit everyday use. A concealed cistern or wall-hung vanity should include a workable servicing arrangement, not just a neat elevation.

For a compact home, I'd question a feature bath before reducing useful kitchen storage to pay for it. Allocate the combined budget according to the household's actual frustrations, and keep bathroom waterproofing records in the property file alongside the other renovation documents.

Lock the Scope Before Demolition

Write the chosen pathway into the scope before placing orders. Name what stays, what changes and what would require written approval as additional work.

That definition should be specific enough to settle disagreements. Retaining the sink location, for example, is different from retaining every existing pipe and connection regardless of its condition.

Make the quotation testable

Our kitchen renovation clients receive an itemised quotation covering labour, materials, fixtures, finishes and a projected timeline. Use those categories to check whether the design and the priced work describe the same room.

Look for clear treatment of the following:

  • Retained components: Identify cabinets, flooring and appliances that need protection during construction.
  • Service work: Separate necessary upgrades from relocations chosen for the new layout.
  • Selections: Record the actual fixtures and finishes, rather than leaving important decisions as vague allowances.
  • Exclusions: Identify approval fees, unforeseen repair work and any tasks outside the agreed scope.
  • Timing: Distinguish the proposed construction sequence from items awaiting confirmation.

Bathroom work within the same project should have its own defined scope and quoted amount. Use that project-specific figure for the household budget rather than applying a broad bathroom price band to an unmeasured room.

Use the design freeze to prevent rushed decisions

Treat the coordinated design approval as a purchasing checkpoint. Cabinetry finishes, benchtop material, splashback, sink, tapware, appliances and hardware should be selected together so that fixing requirements and dimensions agree.

Clear cupboards before demolition and label anything being retained. If managing that pack-down alongside work and family commitments is difficult, House Moving Melbourne's information can help you compare packing and unpacking options before deciding whether outside assistance is worthwhile.

Bring body corporate restrictions into the discussion early, including access, delivery and common-property conditions. A workable apartment renovation needs an agreed route for people, materials and waste, not just a finished kitchen drawing.

Before you sign: You should be able to explain what the renovation will improve, what you're paying to retain, and which decisions could change the price.


Book a personalised on-site consultation with SitePro Bathrooms in Highett. Bring your existing plan, appliance shortlist, budget and any body corporate conditions so we can measure the space and develop an itemised scope. Our services include Kitchen Renovations, Bathroom Renovations, 3D Design, and Construction and Renovations, giving you a coordinated next step from layout decisions to handover.

  • siteprobathrooms

Veneer Kitchen Cupboards Compared: Costs and Durability

Choosing veneer kitchen cupboards by timber species and colour is popular advice, but it starts at the wrong surface. A beautiful oak face won't compensate for an unsuitable board, an undocumented adhesive system or an unsealed cut edge beside the sink.

The better comparison starts with the core, bonding system and edge protection, then considers appearance. That approach also makes costs easier to judge: you're comparing complete cupboards rather than paying for a finish whose supporting construction remains unknown.

Veneer Kitchen Cupboards Against the Main Alternatives

A veneer cupboard, a laminate cupboard and a solid-timber cupboard can all present the same oak-coloured face in a showroom. What separates them sits inside the door.

Kitchen cupboard materials compared

Material Construction Moisture tolerance Repairability Typical cost position
Timber veneer Thin real-timber face on MDF, particleboard or plywood Good when edges are sealed; absorbent cores can swell if water enters Light refinishing where thickness permits; deep damage needs refacing Mid to high
Laminate Decorative paper-based sheet or film bonded to particleboard Good on flat faces; seams and edges are weak points Limited; damaged panels are usually replaced Low to mid
Melamine Melamine-faced particleboard or MDF Good on flat faces; edge banding needs protection near sinks Limited; chips are hard to blend Low to mid
Solid timber Solid hardwood or softwood doors and frames Good with a suitable finish; humidity changes can cause warping or cupping Can be sanded and refinished repeatedly within material limits High

These are relative cost positions, not installed-price estimates. Custom fabrication and finishing can change the order.

Australian kitchen cabinetry commonly combines particleboard or MDF carcasses with a matching timber veneer, while solid timber is often reserved for doors and drawer fronts. The timber you see on the face therefore isn't necessarily the material carrying the hinges or supporting the cabinet.

What the comparison means

Veneer provides genuine grain without full solid-timber construction. Its repair advantage is real but limited: a thin face can't tolerate the aggressive sanding possible on solid timber.

Laminate and melamine generally suit cost-led projects, though an invisible chip repair is difficult on either. Solid timber offers the greatest refinishing scope, alongside higher cost and movement as humidity changes.

For finish planning, our guide to timber kitchen cabinets helps distinguish construction choices. If repainting existing cupboards is another option under consideration, the Painters North Shore cabinet spraying guide provides useful preparation context when weighing that route.

Buying rule: Choose veneer for timber character and repairable faces, then verify the board underneath before you compare quotes.

What Sits Beneath the Timber Face

A natural-looking face tells you little about board quality or emissions. The substrate underneath does the structural work. MDF, particleboard and plywood each have different structures, and suitability turns on product grade, moisture classification and fixing requirements.

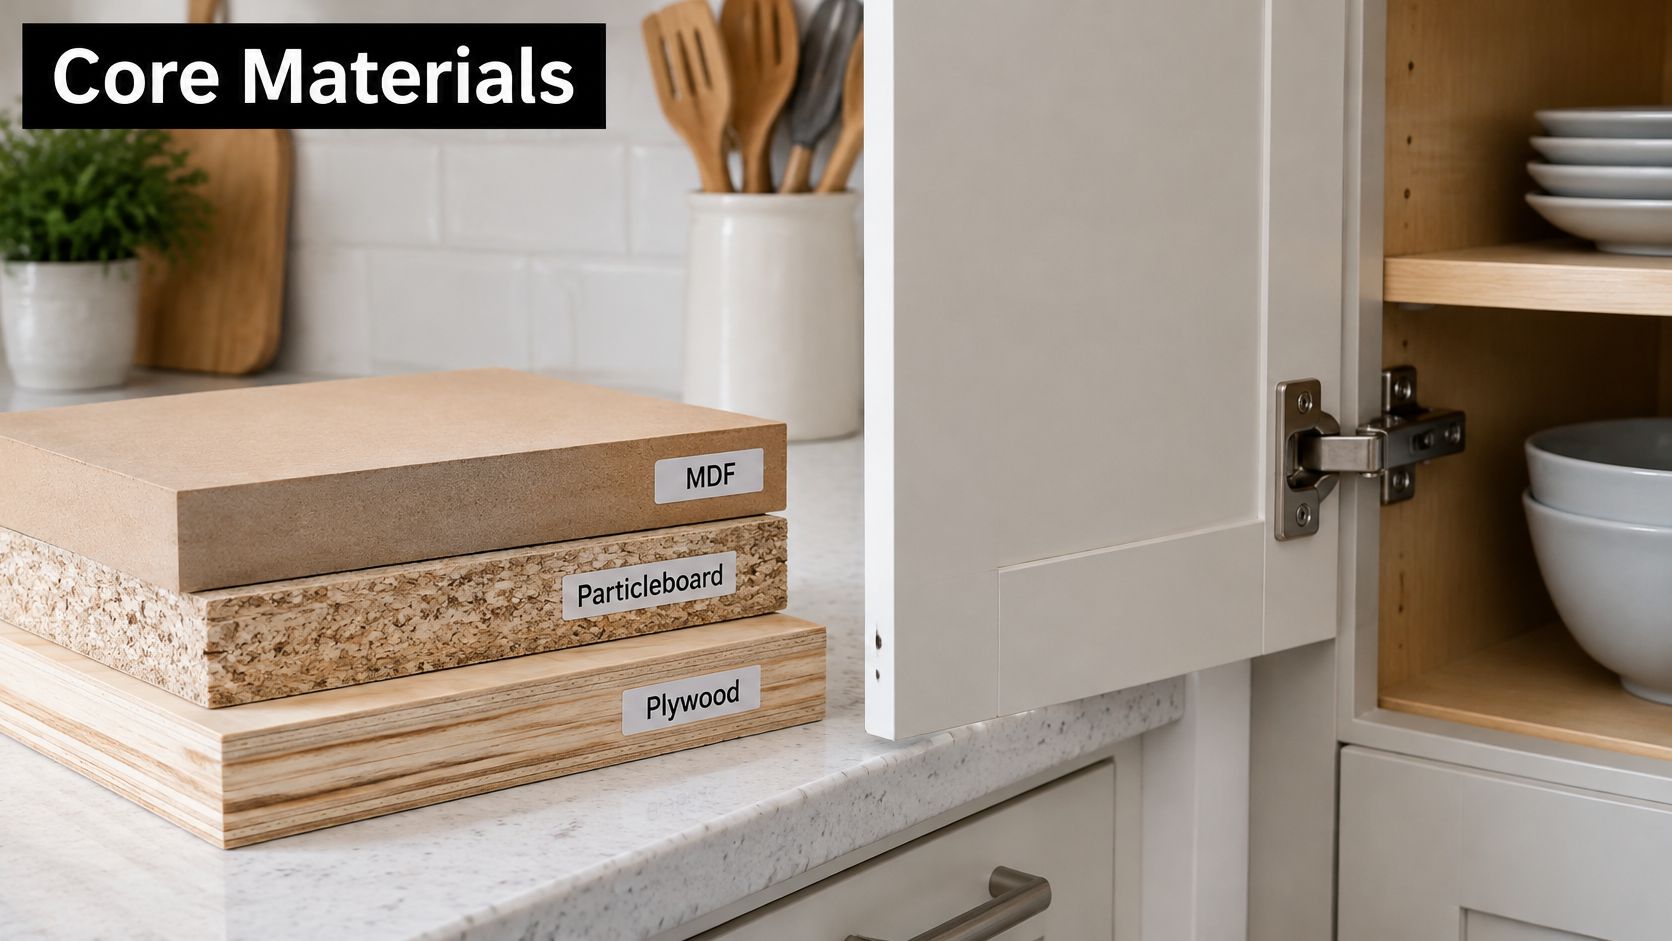
MDF provides a uniform surface for fabrication and machines cleanly. Particleboard calls for careful edge fixings, while plywood's layered construction grips fasteners differently. A board name covers a whole family of products; the grade, density and resin system inside that family decide whether a given panel suits the cabinet it will become.

A sample stack of wood core materials including MDF, particleboard, and plywood next to kitchen cabinetry.

Read the certificate, not the colour sample

Resins used in engineered boards can release formaldehyde over time. The Australian Government's YourHome indoor-air-quality guidance recommends checking for low-formaldehyde-emission certification such as E1 or E0, and warns that some imported products may have higher emissions.

The E0 category in the South Australian Government environmental specification sets limits of no more than 0.5 mg/L in the cited test framework and no more than 0.041 mg/m³ for the listed air concentration. The two figures measure different things, so a certificate quoting only one leaves the other question unanswered.

That specification excludes timber veneers themselves. The certificate that matters is the substrate's, sitting beneath the decorative face. E0, E1 and E2 describe emission categories, with E0 lower than E1, and a like-for-like comparison still needs the test method behind each label.

Adhesive and edge sealing deserve the same scrutiny as the core. Ask which glue bonds face to substrate and how each cut edge is sealed; a veneer lasts only as well as the bond beneath it and the edge protecting the core.

Build these questions into the quotation request:

  • Board manufacturer: Who makes the specified product, and where is it manufactured?
  • Core type: What board and grade will each component use?
  • Emission class: What classification does the product carry?
  • Test method: Which procedure supports that classification?
  • Certification reference: Can the product declaration be supplied?
  • Coverage: Does it cover the actual doors, panels and carcasses being ordered?

Our kitchen cabinet materials guide provides context for comparing these assemblies. For edge detailing, Neasden Hardware's oak edging for furniture makers illustrates a separate component to identify alongside the face veneer; the edging still needs a suitable bond and finish.

Ventilate during and after installation, and run kitchen extraction that discharges outdoors. Product-level evidence beats descriptions such as natural or eco, especially where a large amount of cabinetry shares the household's living space.

How Veneer Holds Up to Moisture and Daily Wear

Start the inspection at the sink base, dishwasher surround and panels beside the cooktop. These positions expose weaknesses that aren't obvious on a showroom door: plumbing penetrations, steam paths, vulnerable joints and appliance clearances.

AS 4386:2018, Cabinetry in the built environment, covers cabinetry design, manufacture, materials, hardware, strength, durability, safety and installation, including applications near water sources. Specify the complete assembly against that benchmark, rather than treating a premium veneer as a durability certificate.

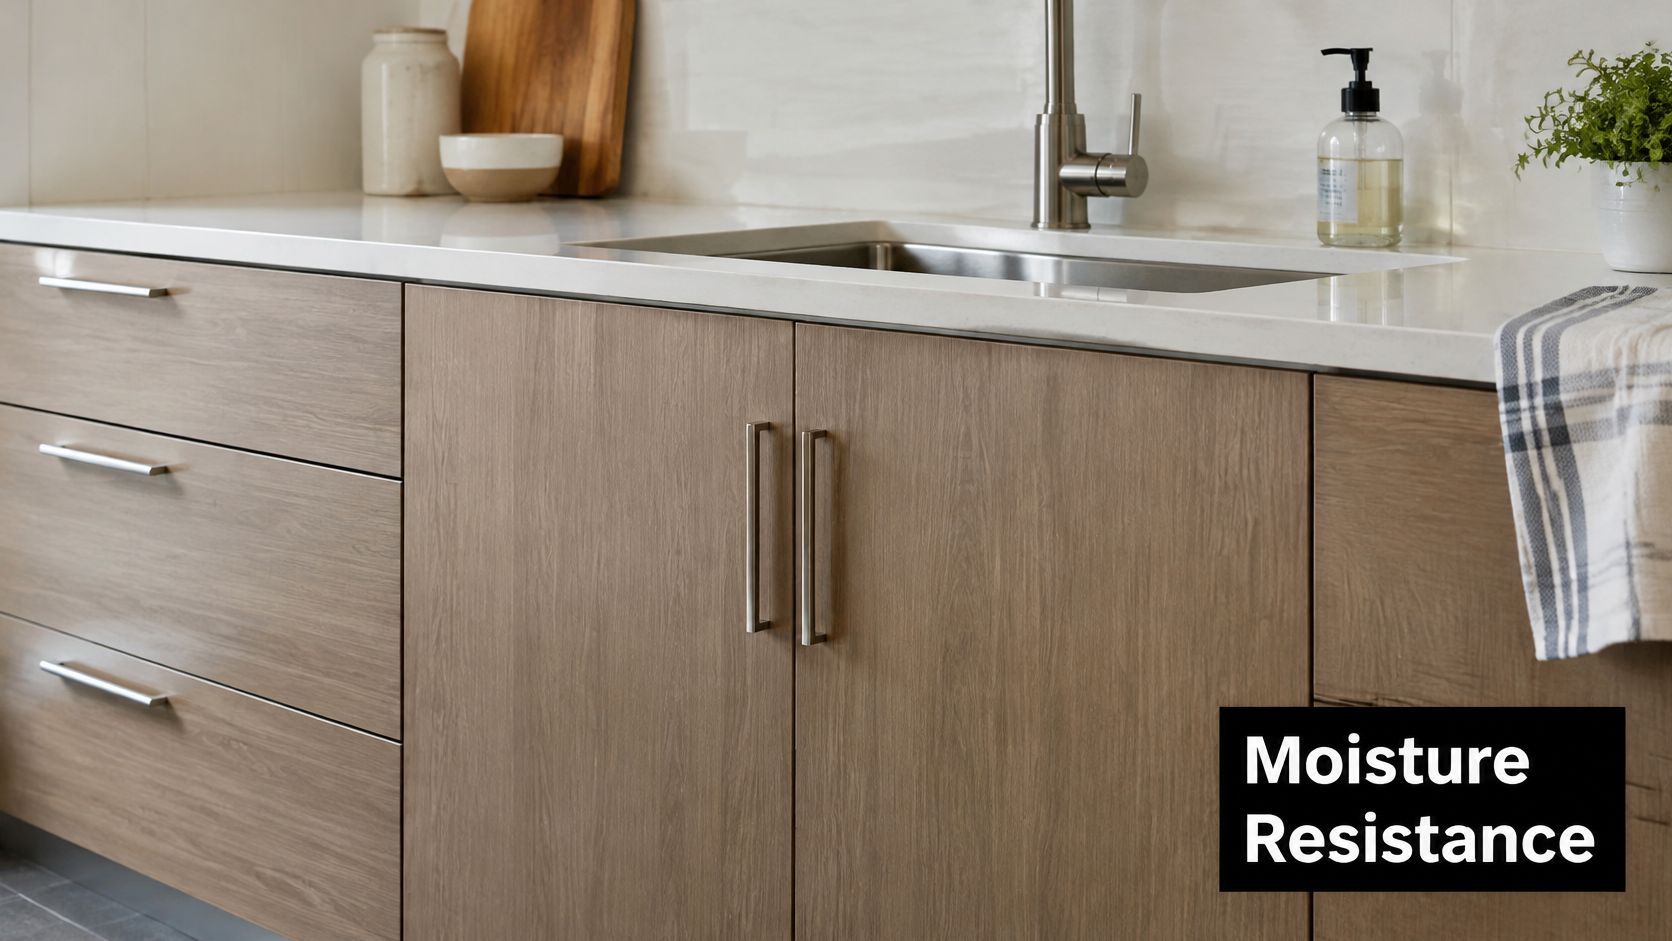
A modern kitchen sink area featuring light wood veneer kitchen cupboards with sleek stainless steel cabinet handles.

Require the moisture-resistance classification in writing and identify who seals every exposed cut edge. That includes holes made on site for pipes and appliances, not just factory-finished door edges. Water entering an absorbent MDF or particleboard core can cause swelling that no decorative face can conceal.

Match the repair to the damage

Veneer cupboard damage, repairability and fixes

Damage Repairable? Usual fix
Surface scratches and wear Yes, within veneer and finish limits Touch up with matching stain, or sand lightly and refinish after checking thickness
Chipped edge Usually Fill small chips with matching filler and re-seal the edge
Lifting veneer at an edge Yes, if caught early Re-glue with compatible contact adhesive and clamp as the adhesive system requires
Swollen core from water No reliable cosmetic repair Replace the door or panel and fix the water source
Sun fading on exposed faces Partly Refinish the face; older faces may not match new work

For superficial scratches, test the touch-up on a concealed area before treating the visible face. A chipped edge needs its protective finish restored, not merely colour-matched filler.

Catch lifting veneer before it breaks. Dry the area, remove loose contamination without tearing the timber, introduce an adhesive compatible with the original assembly, then press it flat between protected clamping blocks. Contact adhesive needs the correct application and flash-off procedure; clamping alone won't correct a poor bond.

A swollen panel needs replacement, while fading requires a whole-face colour assessment. Spot treatment can leave a more noticeable patch.

A repair is only durable when the installer also removes the cause, whether that's a leak, escaping dishwasher steam or an unsuitable joint.

For daily care, wipe spills promptly with a soft cloth and dry the surface. Avoid standing water at benchtop joins, run the rangehood while cooking, and check hinge alignment annually so doors don't rub through their edge finish.

Matching Veneer Cupboards to Budget and Home

The tier a kitchen belongs in depends on what sits under the face: the core board, the adhesive system and how completely the edges are sealed. Two cupboards with the same timber look can belong to different budgets entirely.

Veneer cupboard options by budget tier

Budget tier Typical build Best fit Main trade-off
Tight budget Melamine or laminate carcass and doors Rental properties or a quick refresh Limited repair options and less timber character
Mid budget Veneer-faced MDF or plywood carcass with timber-veneer doors Family homes with a long holding period Needs sealed edges and a documented board class
Higher budget Solid timber doors on a veneered or plywood carcass, or bespoke work Heritage or high-end finishes Higher cost and potentially longer fabrication lead times

A cupboard price without a construction schedule isn't a useful comparison. Layout, board classification, region, supplier and finishing requirements all affect the quotation, so a universal dollar allowance would hide more than it explains.

Compare itemised quotes, not totals. The guide to the cost of kitchen cabinets gives a starting point for organising the budget, but the specification still has to identify what each allowance buys.

Order the budget by what failure would cost

Review cost drivers in this order:

  • Board class and certification: Establish the baseline material before comparing decorative upgrades.
  • Door profile and veneer species: Include grain matching, edge details and finishing labour.
  • Hardware: Identify hinge and drawer systems, including soft-close requirements.
  • Layout changes: Separate new cabinetry from demolition and room alterations.
  • Service relocation: Show plumbing and electrical changes independently.
  • Benchtop type: Keep fabrication, cut-outs and installation visible in the budget.

The order follows how disruptive each item is to fix later, rather than any fixed ranking of prices. It stops a decorative upgrade from consuming money needed for a suitable carcass.

An unknown core can make a low quote poor value if the owner later has to replace the assembly. Equally, paying for veneer inside every concealed cupboard may add little to the result. Specify carcasses first, doors second and hardware third, then decide where premium finishes deserve their cost.

Choose for the way the property will be used

A family home with a long holding period. Mid-tier veneer earns its cost where you want genuine timber and the possibility of future surface restoration. Prioritise accessible hinges, replaceable components and a finish sample you're comfortable maintaining. An assumed resale premium is a weak justification; judge the upgrade by its usefulness and appearance.

An investment property. Melamine or laminate is a sensible starting point when straightforward cleaning and controlled replacement costs matter most. Veneer can still suit a higher-specification rental, provided the upgrade matches the property's presentation standard rather than an expectation of higher rent.

A compact or period home. Timber veneer can support traditional styling through colour and grain, while flat-panel fronts and concealed hardware suit a restrained modern kitchen. In a small room, decide where the timber will be visible from adjoining spaces before covering every surface. A coordinated feature run reads as more deliberate than an unrelated collection of timber tones.

A heavily exposed sink wall. Specify a moisture-tolerant carcass, sealed edges and protected service penetrations before paying for elaborate grain matching. Solid timber isn't automatically the answer, and plywood isn't automatically waterproof; the specified product and installation detail must suit the exposure.

Spend where failure would force dismantling, then spend where the finish improves how you use and enjoy the room.

Households renovating a kitchen alongside a bathroom should treat the rooms as separate specifications, since shower exposure and waterproofing demands differ from anything a kitchen cabinet faces. The Australian Government's water-use guidance recommends efficient fixtures and notes that even apparently minor bathroom changes may need approval when waterproofing or plumbing layouts are affected. YourHome's minor-upgrade guidance identifies licensed plumbing and electrical work and professional structural assessment as requirements relevant to these alterations.

The overall choice is straightforward: favour veneer when timber character, restoration potential and long-term enjoyment justify it, and choose a less expensive composite finish when initial cost and uncomplicated replacement take priority.

Reface or Replace Your Existing Cupboards

Assess the existing cabinetry before assuming demolition is necessary. The Australian Government's renovations and additions guidance identifies building and renovation waste as about 35%, around 7 million tonnes, of Australia's landfill waste each year, supporting a retain-and-reuse approach where materials remain serviceable.

Inspect before choosing the finish

  1. Check the carcasses. Empty the cupboards and inspect sink corners, bottom edges and backs for swelling, delamination, water staining and failed fixings. Investigate staining before deciding that a cabinet is dry and sound.
  2. Check fit and function. Confirm that hinge locations and carcass dimensions can accept replacement doors. Test whether the layout still works for cooking, storage and appliance access.
  3. Compare equivalent scopes. Price new doors and exposed panels against replacement using comparable board, edging and hardware requirements. Include removal, finishing and installation in both options.

Refacing or replacing by condition

Condition Refacing Full replacement
Carcasses sound with no water damage Reface doors and panels Not needed solely for appearance
Layout still suits daily use Reface in place Replace if a layout change is wanted
Swollen particleboard or water staining Not suitable until damage is assessed; swollen boards need removal Replace damaged carcass and fix the water source
Carcasses cannot take new hinges or fixings Not suitable Replace carcass

Refacing makes sense when the structure is sound and the layout stays. Replacement is more defensible when new faces would conceal damaged boards, unreliable fixings or an arrangement you already find frustrating.

For another explanation of the scope distinction, Home Pro's Remodeling & Repairs cabinet guide is a useful companion when comparing refacing and replacement proposals. Local material and installation requirements should still govern the work.

Specify reversible fixings where practical so future removal doesn't unnecessarily destroy adjacent components. Before demolition, get written answers about which doors, panels and carcasses will be retained, which can be reused, and how the remainder will be recycled or disposed of.

Confirm the Specification Before You Order

Two quotations can both promise "timber veneer cupboards" and describe completely different products. Comparing them means pinning each supplier to a written specification before the colour gets chosen. Copy this checklist into the quotation request:

  • Moisture performance: Documented board classification for the intended location.
  • Hardware and installation: Hinges, fixings, appliance clearances and maintenance information.
  • Sample-board approval: A physical sample of the actual veneer, signed off for colour, grain direction and sheen before production.
  • Warranty terms: Cover period for doors, panels and hardware, plus exclusions such as unsealed site cuts or steam exposure.
  • Variations: How changes after sign-off are priced, and what they do to the timeline.
  • Handover documentation: Care instructions, warranty certificates and finish records needed to match repairs later.
  • Price breakdown: Separate carcasses, doors, hardware and installation, with a projected timeline.

Check the contract and registration

For Victorian domestic building work exceeding $10,000 including labour and materials, Consumer Affairs Victoria states that builder registration and a written major domestic building contract are required, including where the project is divided into smaller agreements. Registration can also be required below that threshold for specified work, including structural work or work requiring a building permit.

When comparing builders, check the actual registration class rather than relying on advertising language. The Building and Plumbing Commission's domestic-builder classification identifies Domestic Builder (Unlimited) as covering responsibility for carrying out, managing and arranging all components of domestic building work. Regulated plumbing and electrical tasks still need appropriately licensed trades.

Bring photographs, your existing layout and a list of storage problems to the consultation, and approve finishes only once the written specification matches what was quoted.


A proper site visit should produce every item on that list. Book a consultation with our Highett-based team at SitePro Bathrooms. We start with a personalised consultation covering your vision, lifestyle requirements, budget and timeframe, take accurate measurements of the existing space, and guide finish selections before providing an itemised quotation covering labour, materials, fixtures, finishes and a projected timeline.