

Porcelain Slab Shower Walls for Modern Bathrooms
The most repeated advice about porcelain slab shower walls is that they solve leaks. One continuous sheet, almost no grout, nowhere for water to hide. It sounds convincing, and it gets the waterproofing exactly backwards.
Fewer grout lines cut cleaning. That's the gain. A large porcelain panel gives you one plane to wipe instead of a grid of joints that holds soap film and discolours. Keeping water out of the wall assembly is a separate job, done under the slab, to a standard that doesn't change because the tile got bigger.
What follows is the version of this decision a careful renovator would give you standing in the room: what the panel costs in 2026, what it can and can't do, how it gets onto a true wall, which bathroom renovations suit it, and where the builder's registration has to match the scope. For most homes in Highett and across Victoria, the useful answer is selective slab use over a compliant wet-area system, not slab everywhere because it photographs well.
Porcelain Slab Shower Walls Prices in 2026
The first figure you see for a porcelain slab shower is rarely the one you end up paying. Three costs stack up behind it: the panel itself, the preparation of the wall it sits on, and the labour to set it. Published Australian figures for 2026 cover those at different levels of completeness, which is why two quotes for the same shower can sit far apart and both be honest.
At the top of the market, a single manufacturer's 2026 list price put premium Italian and Spanish porcelain slabs at AUD 1,200 to 3,500 per slab, roughly AUD 230 to 675 per square metre for material only. A slab list price works like a car's sticker price: nothing has been cut, carried upstairs, bedded or sealed, and the on-road costs live in separate line items you have not seen yet.
How wide the choice is
Stock is not the constraint. One large Australian supplier's 2026 catalogue ran to hundreds of bathroom-wall options in the 600 mm class alone, spanning marble effects, concrete tones, limestone and plaster finishes. What varies far more than the design is what sits outside a supply-only or material-only figure. Our guide to bathroom tiling cost shows how floor area, tile size and preparation move a quote before a single finish is chosen.
Porcelain slab shower wall costs and formats in 2026
| Specification | Typical size | 2026 price guide | Grout joints | Usual role |
|---|---|---|---|---|
| Premium Italian or Spanish slab, material only | Sold per slab | AUD 1,200 to 3,500 per slab, about AUD 230 to 675/m² (single manufacturer's list price) | Very few | Designer feature plane |
| 600 × 1,200 mm porcelain feature wall | 600 × 1,200 mm | AUD 200 to 250/m² installed | Few | Shower feature or accent wall |
| Large-format porcelain for bathroom projects | Often over 600 mm on one side | AUD 120 to 200 or more/m² supplied and installed | Fewer than small tile | Broader shower lining where access allows |
| Conventional small-format tile | Typically under 600 mm | Quoted per job, no published installed rate | Many | Niches, penetrations and future-access zones |
Read the second row against the first and the gap makes sense. A repeatable panel in a familiar size attracts a lower installed rate, because the setter has done the sequence many times. A floor-to-ceiling sheet inverts that: the material may cost less per square metre than its per-slab sticker suggests, but it needs a handling frame, a long cut and three people moving as one.
What a supply-only figure leaves out
A material-only or supply-only number stops at the showroom door. Each of the items below arrives on site as labour, time or a higher grade of consumable:
- Substrate repair and flattening. Old render, drummy sheeting and out-of-plumb framing have to be corrected before a rigid panel will bed flat.
- The membrane and its approved seals. A wet-area system applied to Australian Standards is a set of compatible products, not a line item you can trim.
- The right adhesive. Panels over 600 mm call for a polymer-modified class, a step up in grade from standard thin-set.
- Cuts around mixers, outlets, niches and windows. Every hole is skilled time and a chance to lose a sheet.
- Lifting and handling. Suction frames, an extended wet saw and a second or third pair of hands.
- Waste. One broken panel is a far bigger loss than one broken tile.
The cheapest row in that table is not the automatic pick for designer bathrooms. The right row is the one whose access, cuts and waterproofing the rest of the job can support, which is why most bathrooms end up with slab where it shows and conventional tile where future access matters.
What a Porcelain Slab Wall Looks Like
A finished slab shower is easier to recognise than to describe. Here's the moment the difference shows, with a sample held against the wall before the screen goes on.
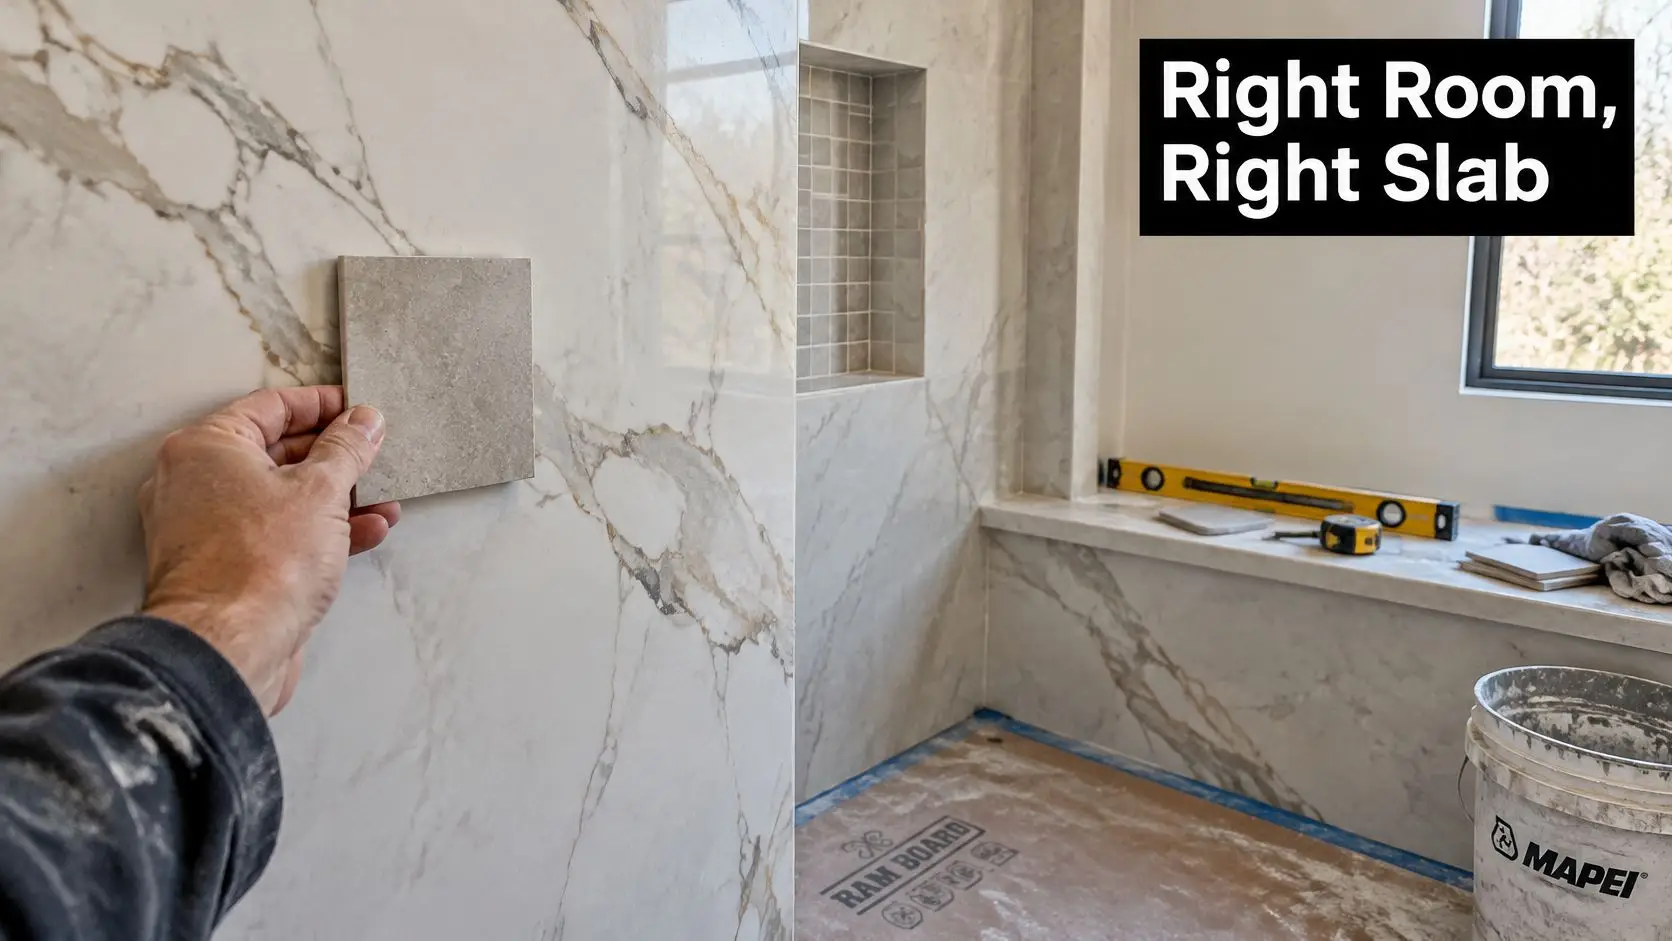
A porcelain slab shower wall is a large, low-absorption porcelain panel used as the visible lining of a shower. It isn't a coating, a block of solid stone or a waterproof layer. The porcelain is pressed and fired into a thin, flat sheet, so one panel can cover most of a wall.
Stand in a tiled shower and your eye counts the grid: horizontal lines, vertical lines, the slightly darker grout at the floor. Stand in a slab shower and your eye reads one plane. Veining or a concrete texture runs across the whole wall without interruption.
Think wallpaper against patchwork quilting. Wallpaper hides the joins, but it doesn't straighten the wall underneath, and neither does a slab. The comparison matters because the visual calm is real, while the structural forgiveness people assume comes with it is not.
The looks people actually specify
- Book-matched marble effect on a single feature wall. Two panels are set in a mirrored layout so the veining runs across the seam, which reads as one slab of stone rather than a printed surface.
- A quiet stone or plaster tone wrapping a walk-in. A soft limestone effect from the shower into the main floor settles a modern bathroom without making the shower a feature.
- A darker slab behind a frameless screen. Charcoal or deep green behind glass makes the shower read as a piece of joinery rather than a wet box.
Those are the new bathroom ideas that fill design feeds, and they work because of what porcelain does as a material. It's graded low-absorption, generally under 0.5 percent water absorption under the ISO 10545-3 classification cited in the National Construction Code's guidance on wet areas. That density is why the face feels tight and hygienic, and why a manufacturer can print a convincing stone into it.
Format matters as much as finish. 600 × 1,200 mm large-format porcelain is increasingly used on Australian shower walls, and it still requires a perfectly flat substrate and installation to AS 3740:2021 (MyHomeware's walk-in shower guide).
What the panel doesn't do: it doesn't square a crooked wall, and it doesn't seal a corner. Those belong to the trades behind it.
Edges and cuts decide whether the illusion holds. A slim joint at internal corners and at the floor reads as deliberate detail. A niche or mixer cut placed after the panel is fabricated reads as a patch, because it is one.
Why Fewer Grout Lines Do Not Stop Leaks
Grout gets blamed for leaks it never caused and credited with sealing it never did. It is a rigid filler between pieces, and the waterproofing in every compliant Australian wet area lives in the membrane system behind the lining. Strip the grout back to a handful of joints and the cleaning load drops, while the leak risk stays exactly where it always was.
The dimensions are set by AS 3740:2021, the principal standard for domestic wet areas: shower walls waterproofed to at least 1,800 mm above the floor substrate, walls beside a bath to at least 150 mm above the bath rim, and a horizontal flashing leg of at least 40 mm where the wall meets the floor. The same standard governs membrane application, junctions, penetrations and detailing. A large panel raises the stakes on every one of those points, because the slab layout, joints and penetrations have to be coordinated with the membrane and substrate before anything is fixed.
Where water still gets in on a near-groutless wall
- Internal corners. Two planes move differently, so the joint takes a flexible sealant that can absorb the movement.
- The wall-to-floor junction. The most loaded transition in the room, and the place the flashing leg earns its keep.
- Mixer and outlet penetrations. Every drilled hole is a break in the finish unless the membrane maker's seal is used around it.
- Niche shelves and bench seats. Horizontal surfaces hold water and depend on fall toward the drain.
- Screen fixings and any tile drilled after handover. A glass installer's screw can undo a sealed wall in a minute.
- A crack in the substrate. Movement behind a rigid panel can open a path that never shows on the face.
A wall of six grout lines and a wall of sixty fail in exactly the same places. Porcelain's dense face keeps water out of the slab itself, while a failed membrane or an unsealed penetration still wets the wall assembly behind it. The large panel hides the evidence for longer, until paint lifts in the hallway or flooring outside the shower starts to swell.
A compliant job is a coordinated set: compatible substrate, membrane, cured waterproofing, and the membrane maker's approved components at every penetration. Bathroom waterproofing is certified and applied to floors and walls in full compliance with Australian Standards, and that layer is the part of the build worth photographing. Our bathroom waterproofing guide shows what a finished membrane should look like before tiling starts.
A slab is cladding over the membrane. The membrane is the waterproofing.
Before the panel is fixed, ask for photographs of the membrane preparation, the product names and batch details, and written confirmation from the waterproofer that the work is complete. For Highett and wider Victoria, that inspected membrane is the milestone. The slab sample is just the part you can see.
How Slabs Are Set on a True Wall
Size makes a panel less forgiving, not easier. A small tile can follow a slightly wavy wall because the joints absorb the variation. A rigid sheet can't. It either rocks on a high spot or bridges a hollow, and in both cases the mortar behind it isn't doing its job. The wall has to be smooth, clean and true before any adhesive goes on, because local hollows create unsupported areas and stress concentrations under a panel that has no flex.
The tolerances are published. Installation guidance associated with AS 3958:2023 identifies a substrate tolerance of roughly 3 mm beneath a 2 m straightedge and recommends high adhesive coverage in wet areas of around 95 to 100 percent, with edge voids eliminated. For slabs or tiles over 600 mm, the same guidance points to a polymer-modified C2S1 or C2S2 adhesive, so the bond can cope with movement and deformation.
The sequence that prevents the failures
- Finish and inspect the substrate. After demolition, any framing or floor repair is completed and signed off before surface preparation. Our framing stage covers wall framing, floor repairs and structural adjustments to support the new layout, and it's the point where a hollow wall gets fixed cheaply.
- Install and cure the membrane. Penetrations get the membrane maker's approved seals. Skipping the cure time is the most common way a good membrane gets wrecked by the next trade.
- Confirm flatness with a straightedge. Not by eye, and not by running a hand over it. Mark the high spots and grind or level them.
- Plan every cut before fabrication. Niches, windows, mixers and outlets get their positions fixed from finished references. A hole 20 mm off is a trim plate; one badly off is a whole sheet.
- Apply the specified large-format adhesive within its open time. Back-butter the panel and comb the wall, then bed for near-continuous contact. Voids are both an impact weak spot and a moisture path at joints.
- Seal joints with compatible materials. Internal corners and the floor transition take a flexible sealant, and movement joints go where the system requires them.
Access, hands and waste
The route matters as much as the wall. Stairs with a turn, a narrow hallway and a bathroom door decide whether a full sheet arrives intact or has to be cut down before it goes upstairs. Lifting gear, two people minimum and somewhere safe to store panels on edge all belong in the schedule.
We work with licensed plumbers, certified electricians, qualified waterproofers, professional tilers, and carpenters and builders, so the flatness, the membrane and the bedding sit in one sequence rather than three separate visits. Tiling installation covers wall and floor tiles, laid with precise layout and premium finishes, and the large-format porcelain installation process is where that precision shows or fails.
If a quote skips flatness, adhesive class or a cured membrane, the slab is being sold on appearance alone.
Which Bathroom Renovations Suit a Slab
A slab earns its place where the eye wants one uninterrupted surface and the site can deliver it. It becomes a liability where the sheet can't be carried in, the wall can't be made true, or a future plumber will need to open the wall. In practice the answer is rarely all or nothing: the strongest designs use the slab selectively, on the planes where it performs, and drop to smaller tile where cuts and access demand it.

Slab suitability by bathroom type
| Bathroom type | Verdict | Reason |
|---|---|---|
| Straight walk-in with clear street-to-room access | Yes, large-format slab on the main plane | Sheets can be delivered and few penetrations need cutting |
| Feature wall in a designer bathroom with clear access | Yes, single slab feature plane | Uninterrupted surface, though repair stock must be planned |
| Corner shower with mixer, outlet and niche cuts | Selective, slab on one plane with small tile in cut zones | Penetrations and cuts need planning before fabrication |
| Shower where plumbing may need future access | Selective, smaller compatible tile on the access zone | Opening a slab panel can sacrifice the whole sheet |
| Compact ensuite with a tight stair | No for full lining, accent slab only | Sheets may not be handled around the corner |
| Wall out of plane or with old, drummy substrate | No until the substrate is rebuilt | A rigid panel is left unsupported over hollows |
The four tests behind each verdict
Can the sheet get in? Measure the front steps, the hallway, the stair landing and the bathroom door before you measure the shower. If a full panel won't make the turn, the design drops to a smaller format rather than fighting the route.
How many cuts does the wall need? A plain shower plane with one mixer and one outlet is simple. Add a niche, a window, a hand shower and a bench, and the panel gets cut into pieces that give up the continuous look you were paying for.
Is the wall true and stable? A stable, sufficiently flat wall compatible with the approved adhesive and membrane system is the entry price. Where the wall fails that test, a rigid sheet sits unsupported over hollows, and the visual benefit arrives carrying extra installation risk.
Can a plumber open it later? Product guides rarely put this question up front, but it shapes the layout more than any colour choice. A damaged panel means replacing a much larger area than a single conventional tile, and matching stock years later is uncertain. Concealed plumbing is the harder limit: reaching a failed mixer body behind the sheet can cost the whole panel. That is why so many rows in the table read "selective." Put the slab on the main shower plane or a feature wall, and keep smaller compatible tiles in the high-risk cut zones and anywhere likely to need access down the track.
Ventilation belongs in the same brief
Extraction isn't a finishing detail. Sustainability Victoria notes that exhaust fans work particularly well in bathrooms because they remove pollutants, odours and moisture, and recommends discussing the home's ventilation strategy with the builder (Sustainability Victoria on energy-efficient design). Settle the fan, the airflow path and any window before the slab layout is drawn, because a duct run affects where a bulkhead goes and a bulkhead affects where the panel seam falls.
Durability Cleaning and Later Repairs
"Is it durable" covers two different questions. One is how the surface behaves in daily use. The other is what it takes to keep it looking that way over years of showers. Porcelain answers the first almost too easily. The second is decided at the joints, not the panel.
Weekly cleaning, which the slab wins
The face is hard, fired and low-absorption, so typical shower use leaves little behind. Warm water, a soft cloth and a pH-neutral bathroom cleaner handle almost everything, and hard water spots lift without specialist products. Acidic cleaners that would etch a marble wall do nothing to porcelain.
Compare that with a fully tiled wall. Every grout line is a tiny gutter that holds soap film and body oils, and cleaning it means scrubbing along the lines, not just wiping across them. A slab swaps hundreds of metres of grout for a handful of joints, so the weekly job shrinks from a scrub to a wipe.
What still needs maintaining
What's left is the small stuff: the few joints that remain, the screen channel, the floor waste and the silicone at corners and the floor transition. Those lines are the visible maintenance the slab didn't erase, and they carry most of the water load the panel itself shrugs off.
Treat silicone as a consumable rather than a permanent part. When it yellows, pulls away or traps grime that no cleaner shifts, cut it out and re-seal the line. Where grout does remain, specify a wet-area joint material rather than a decorative one, because it's the part that will discolour first.
Moisture that gets behind the finish and stays there is the exception to all of this. Mould is the symptom people notice first, and when to call a mold pro sets out where cleaning stops being the answer.
Judge maintenance on the lines, not the face. The panel takes care of itself. The joints, seals and channels decide how the wall looks in five years.
The same logic applies to heavy-traffic rooms. A family bathroom needs finishes chosen for the traffic they'll get, and a home shower's real test is moisture sitting at the joints week after week. Keep the seals healthy and the slab does the rest.
Confirm Builder Scope Before You Commit
A quote for a slab shower is only as good as what it names. Three items belong in writing before you sign: the waterproofing system, the adhesive specification, and the slab product code, each covered in detail in the sections above. Once those appear on the page, two quotes can be compared line by line. A bid that names a membrane system can be weighed against a different one. A line that just says "waterproofing included" cannot be weighed at all.
Then match the builder's registration to the work. In Victoria, a person registered as a Domestic Builder, Unlimited (DB-U) may personally carry out, manage or arrange subcontractors for all domestic building work, including the construction, renovation, improvement or maintenance of a home. The Domestic Builder, Limited to Bathroom, Kitchen and Laundry Renovation class is restricted to wet-area projects that remain within the existing external walls, floor and ceiling (Consumer Affairs Victoria on builder registration).
That difference decides which jobs a limited-class builder can legally take. An internal re-tile with the layout staying put sits inside the limited class. Moving walls, altering structure or extending beyond the existing envelope calls for the broader registration, and the time to find out is before the quote is signed, not after demolition.
What to check on the quote itself
- Waterproofing named by system. Membrane brand, approved penetration seals, who applies it and who issues the certificate.
- Adhesive class stated. The C2S1 or C2S2 rating from the installation section, written as a product name rather than "tile glue".
- Access and handling included. Who carries the sheet in, and who wears the cost if it breaks on the stairs.
- Two numbers that reassure. The builder registration number and the waterproofing certificate.
- Repair details on the invoice. The product code and batch recorded in writing, so the spare-material advice from the repair section can be followed.
SitePro Bathrooms provides detailed quotes and honest pricing with no hidden costs, and payment is made on completion, so each of these items can be requested in writing before work begins.
Approve the waterproofing system and the registration scope first. Approve the slab second.