
The most repeated advice about a galley kitchen layout is a number and a boast. Keep the aisle near a metre, run cabinetry to the ceiling on both walls, and everything will be within arm's reach.
That advice is half right, and the wrong half is expensive. A galley measured between closed cabinet faces isn't the room you cook in. It's the room you cook in with the dishwasher door down, the oven open, a second person reaching past you for the kettle, and, in more Victorian households than the standard advice accounts for, a walker or a wheelchair that needs to turn at the bench.
The measurement that matters: the aisle the kitchen has when every door is open, not the aisle it has on the plan.
Cabinet depth is where the confusion starts. Two 600 mm runs claim 1,200 mm of a 2,400 mm room before anyone has stood in it. Fill both walls with full-depth storage and you've spent the width on cupboards, then asked the cook to work in whatever is left over.
What follows is a width you can tape out on the floor tonight, an order for placing appliances along each run, and a decision test for the point where parallel benches stop serving the household. It starts with the shell, because the shell settles most of the argument.
Why a Galley Still Fits Australian Homes
Australian houses got bigger, and the galley survived anyway. The narrow two-wall kitchen is routinely described as a leftover from a poorer era, yet it keeps turning up in new apartment plans, in townhouse developments and in quotes for houses built before 1970. Growth in the Australian house has slowed, apartments have stayed compact, and the rooms people renovate are the rooms already standing.
Here's the kitchen this article is about.
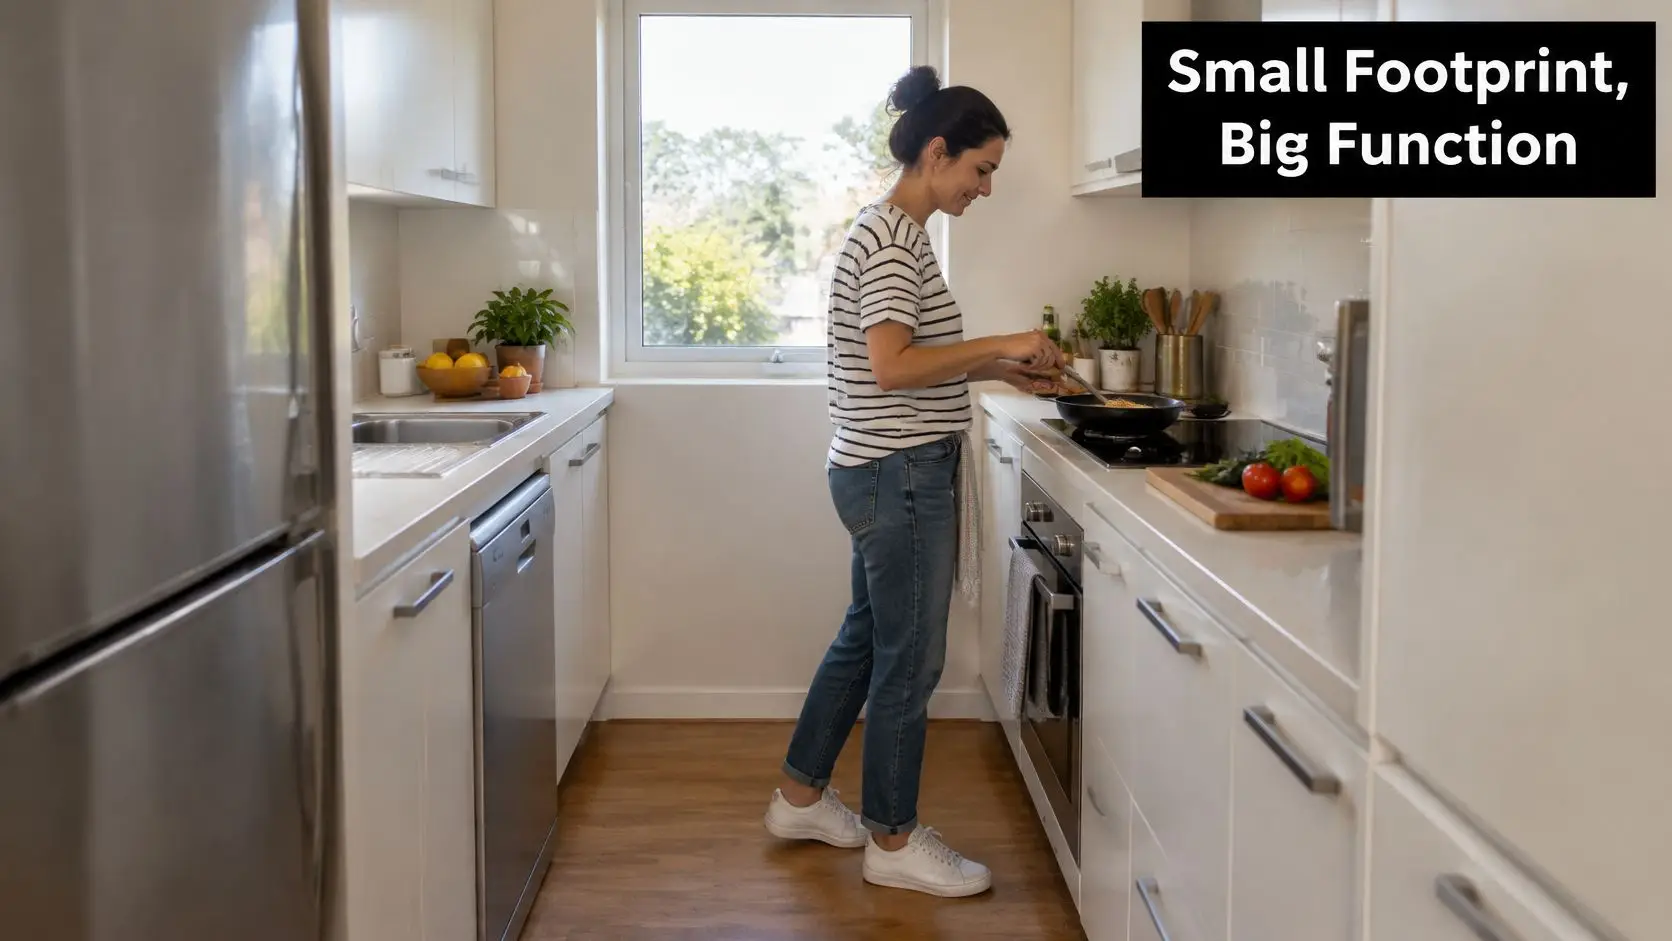
A galley kitchen layout is two parallel runs of cabinetry and benchtop with a single working aisle between them, and the cook moving sideways from one station to the next. The form comes from ship and aircraft galleys, where every task sat within a short turn because there was nowhere else to put it. No island to walk around, no deep corner cabinet to reach into, no travel between fridge, sink and hob beyond a step or two.
The dwelling-size record explains why the shape keeps appearing. ABS figures on average floor area put the average new Australian residential dwelling at 149.7 square metres in 1984–85 and 207.6 square metres in 2012–13. New houses grew from 162.4 to 241.1 square metres over that period, while apartments and other residential dwellings moved only from 99.2 to 133.9 square metres. In Victoria, the average new house measured 251.6 square metres in 2019–20 and 253.5 square metres in 2024–25, so recent dimensions have held steady rather than climbing.
Steady is the point. A house that isn't growing outward has to be organised inward, and the kitchen shows that first. Kitchens also wear out faster than any other room, which is why they lead renovation work rather than follow it. Australian Bureau of Statistics data on renovation activity recorded kitchen upgrades in approximately 1.133 million dwellings in 1999, or 38.5% of all renovation projects in that dataset, ahead of bathroom upgrades at almost 1 million dwellings.
For a narrow room, that history is practical rather than nostalgic. Two parallel runs squeeze cabinetry, appliances, storage, plumbing and preparation into a footprint that doesn't need an extension approval.
Three things decide whether the shape works in your house:
- A width you can measure. Cabinet run plus aisle plus cabinet run, with the doors open.
- A one-cook sequence. Which appliance sits where, and what that placement stops people walking into.
- A test for when the shape stops working. Households that outgrow a 1,000 mm strip between benches usually find out after the joinery is installed.
Efficiency fails the moment two people, a mobility aid or an open dishwasher share the same strip of floor. That failure is predictable before demolition, and predicting it costs a fraction of discovering it.
Galley Widths You Can Measure Tonight
A galley can fit a narrow room and still fail in daily use. Start by measuring the full room width, then subtract the depth of both cabinet runs to see what remains for the aisle. Published Australian room-size guidance describes opposing base runs about 600 mm deep and an aisle of 1,000–1,200 mm, for an overall width around 2,200–2,400 mm before wall linings, handles, fillers or projecting appliances. The 600 mm figure matches typical Australian base-cabinet depth.
| Planning item | Working figure | What changes it |
|---|---|---|
| Each base cabinet run | About 600 mm deep | Slimmer carcasses if the aisle must grow |
| Clear aisle, one cook | 1,000–1,200 mm | Dropping toward 900 mm clashes with open doors |
| Preferred aisle, two people passing | 1,200 mm, or around 1,800 mm with several users | How many cooks work at once and how often doors open |
| Overall room width before linings | About 2,200–2,400 mm | Handles, fillers and wall linings add width |
| Landing beside sink | About 300 mm | Hot pans and wet prep need a set-down |
| Landing beside hob | About 400 mm | Safety buffer, not a full prep bench |
| Clear space in front of appliances | At least about 1,000 mm | Manufacturer door and drawer requirements |
| Typical appliance door sweep | 600–700 mm into the aisle | Test with dishwasher, oven and fridge open |
Why the Closed-Door Measurement Lies
1,200 mm is a practical target when two people cook or pass each other. At around 900 mm, the aisle may remain usable, but open doors can block the route. A fridge, oven, dishwasher or pantry door sweeping 600–700 mm into the aisle changes how much space is left to stand and move. Cabinets can maximise storage while leaving too little room to use them.
Mark both cabinet faces on the floor, then swing each door through its full opening. Check every door arc against the walking route. If an open dishwasher or oven blocks the aisle, the plan needs adjusting before cabinetry is ordered. Measuring only between closed cabinet faces is like checking a corridor while ignoring the doors that open into it.
The same check matters when a second cook or a wheelchair needs to share the aisle. A galley that suits one person with doors shut may become a pinch point once someone needs to pass or an appliance is open. More cabinetry does not help if it makes the kitchen difficult to use.
Where the Published Numbers Sit
Recommendations vary within the planning range. A 2024 Australian galley kitchen design guide places the working aisle at 120–150 cm and notes about 180 cm as more usable when several people share the kitchen. These are planning benchmarks, not a single statutory kitchen-width rule. Appliance manufacturer instructions determine actual door and drawer clearances, while gas, electrical, ventilation and access requirements also affect the layout.
Before ordering cabinets, tape out both runs and mark every door arc. Walk the route with the doors open, checking where someone would stand while cooking and whether another person can pass. The test reveals whether the measured aisle works in use, not just on a drawing.
How to Sequence the Galley Work Zones
Treat the aisle as a corridor with stations on two walls, and give each station one job. Order matters more than finish. A badly sequenced galley turns every meal into a series of side steps, and no benchtop material rescues that.
A sequenced run shown in place.
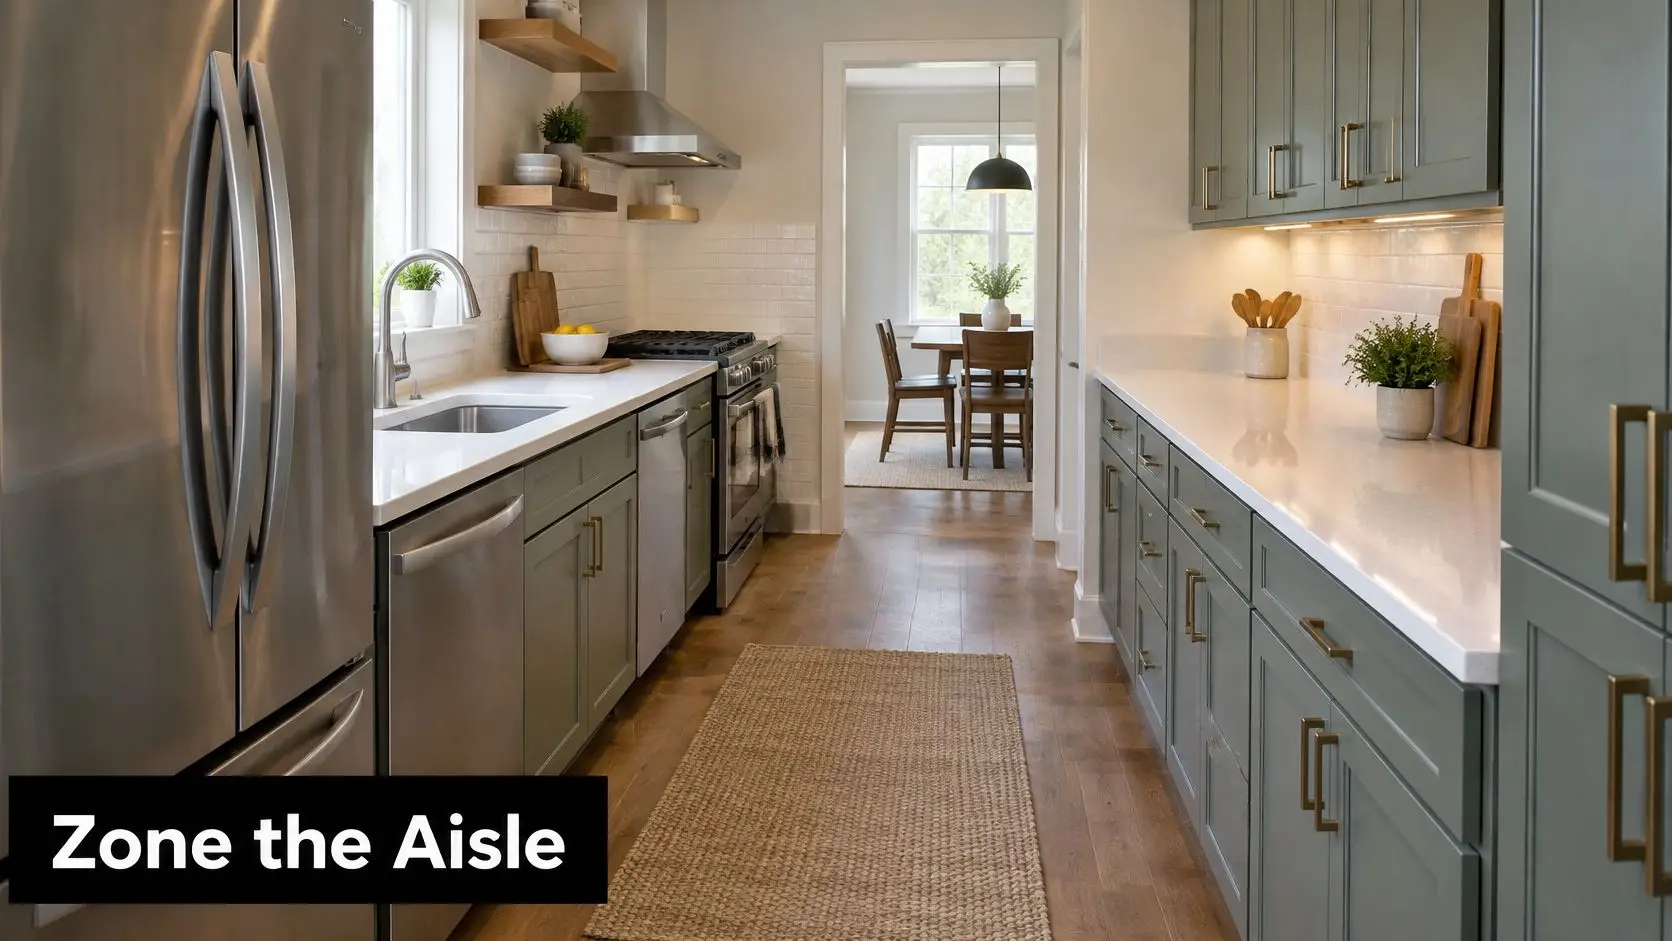
- Park the refrigerator at the entry or at one end. Drinks, leftovers and grocery unloading then happen outside the cooking aisle, so nobody has to squeeze past a working cook to reach the milk.
- Put the sink between refrigerator storage and the cooktop. Every carried pot crosses less floor, and the wet mess stays in one stretch of bench instead of migrating.
- Keep the dishwasher off the wall directly opposite the oven. Two doors opening into the same strip pinch a corridor that met its number on paper. Where space allows, offset them by a cabinet width.
- Build the landings in. Allow about 300 mm beside the sink and 400 mm beside the hob, plus at least 1,000 mm of clear space in front of appliances while doors and drawers are open, as set out in this Australian kitchen layout planning guide. A landing is where a hot tray goes down; without one, it goes on the floor or into a person.
- Hold the working space clear. Doors, drawers and the person standing at them compete for the same square metre. Recessed handles and drawer stacks instead of deep cupboards buy back clearance without moving a wall.
- Keep bins and daily tools on the sink-to-hob side. The opposite run then stays calmer storage, which matters when the aisle doubles as the household's main path.
What the Sequence Is Protecting
Weekday and weekend cooking sessions have grown long enough that the sequence has to stay comfortable well past the first twenty minutes. Someone chopping, stirring and wiping for an hour needs bench, light and a place to set things down far more than they need an extra cupboard.
That's why the order belongs in the design file rather than on site. Testing a fridge position in a drawing costs an afternoon, which is the whole reason a kitchen renovation design stage exists before cabinets are cut. A standard aisle isn't automatically an accessible one either, and that question gets its own answer below.
When the Aisle Should Stop Being Narrow
Full-depth cabinets on both walls look like a win. In an ageing, adapting or multigenerational household they're often the wrong one. The standard advice to maximise storage assumes a standing cook who owns the aisle alone, and that assumption fails years after the invoice is paid.
Your Home's guidance on liveable and adaptable homes sets out what a kitchen needs in order to keep working: short distances between cooktop, preparation areas and sink, clear workspace beside appliances, contrasting surfaces, task lighting, and modular joinery that can be lowered or modified later. Storage volume isn't on that list.
The same body of Australian universal-housing guidance treats roughly 1,000–1,350 mm as an efficient galley corridor, but prefers about 1,500 mm between benches for wheelchair manoeuvring where two 600 mm benches are installed.
A galley can be efficient for a standing cook and unsafe for the person carrying a hot pan between two benches, or for anyone who needs to turn a wheelchair in that same strip.
| Household situation | Clearance to aim for | Layout move |
|---|---|---|
| One standing cook, little passing traffic | 1,000–1,200 mm aisle | Keep two 600 mm runs |
| Two cooks passing, doors often open | 1,200 mm or more, checked with every door open | Keep the galley but test every door arc |
| Wheelchair turning between benches | About 1,500 mm between benches | Widen the aisle or slim one cabinet run |
| Walker, ageing cook, or hot pans across the aisle | Short cooktop-to-sink distance plus knee clearance | Drawers, adjustable bench, induction, task lighting |
| Aisle is also the only hallway | More than a working galley can honestly give | Change to a single wall or an L |
Keeping the galley makes sense when one standing cook owns the aisle and the appliance doors clear the walkway. Widening toward 1,500 mm is the answer when a wheelchair has to turn inside the room, and that width rarely arrives free. It usually comes out of a cupboard run. Slimming one side to shallower carcasses grows the corridor without touching a wall, which suits a heritage overlay or a body-corporate building where the shell is fixed.
Converting to a single wall or an L is the honest move when the aisle is also the only through-route for children or a walker. Two opposing benches in a hallway isn't efficiency, it's an obstacle course with a sink in it.
Future-proof while the walls are open. Drawers instead of deep cupboards, knee clearance under one stretch of bench, non-slip flooring, induction rather than an open flame, and lighting that separates bench from floor. Storage won today can force another renovation when someone needs to sit to cook.
Galley Layouts for Real Victorian Rooms
Four shells, four answers. The room you're renovating decides which layout is honest, not a style board. Prep time has also stretched: Australian daily food preparation rose from 47 minutes on weekdays in 2006 to 72 minutes by 2024, and from 49 to 85 minutes on weekends, according to industry reporting on Australia's kitchen and bathroom renovation market. That same reporting estimates potential Australian demand at about 163,000 kitchen renovations in 2024–25, which tells you how many households are working through this exact problem.
A One-Cook Galley of Three to Four Metres
A single cook with a compact run can keep the aisle at the bottom of the band if the fridge sits near the doorway and the dishwasher isn't opposite the oven. A basic 3 to 4 metre galley renovation of that scope has been estimated at AUD 8,500 to 18,000 excluding appliances, according to an Australian kitchen renovation cost guide, which frames the job as joinery replacement rather than a structural rebuild. The layout change that scene requires is simple: move the fridge to the entry end.
When Two Cooks, Children and Strata Share the Aisle
Two cooks need the top of the aisle band, not the middle, and the dishwasher has to come off the oven wall. A weekend session that runs for well over an hour makes a narrow pass-through a daily argument rather than an occasional squeeze.
A family galley that also serves as the path to the back door needs a different fix. Shift the cooktop away from the traffic end and keep a landing beside it, so pans are plated where they're cooked instead of carried through a crowd.
An apartment or body-corporate kitchen is a separate case again. Cosmetic joinery can usually proceed while services stay put. Relocating waste, gas or a nib wall can pull in permits, access arrangements, noise limits and owners-corporation approval that a detached Highett house never has to consider.
The site sequence is the same in all four: measure the shell, map who walks through it and when, open every appliance door to its full swing, then compare whichever layouts survived.
Registered Builders Unlimited for Wet Area Work
Most galley projects stop at joinery. The moment the job widens to take in the bathroom next door, the questions move from millimetres to paperwork. In Victoria, domestic building work costing more than $10,000, labour and materials included, must be carried out by a builder registered with the Building and Plumbing Commission, and that registration has to be approved before work begins. Lodging an application isn't the same thing as holding an approval. Consumer Affairs Victoria's checklist for becoming a registered building practitioner covers the registration threshold and the separate building permit step, which is written approval from a registered building surveyor confirming the plans and specifications comply with the regulations.
Registration class then determines how much of the job one person can carry. The Domestic Builder (Unlimited) class covers all components of domestic building work, including construction, renovation, improvement and maintenance of homes, as the Building and Plumbing Commission's builder class descriptions explain. An unlimited builder can personally carry out, manage or arrange subcontractors across the full scope, which is what a project involving demolition, structural change, waterproofing, cabinetry, electrical and plumbing needs.
Specialist work sits in a different category. A contractor doing only tiling, plumbing, electrical work, glazing, painting or floor coverings doesn't need Commission registration for that task alone, but the broader domestic contract above $10,000 does. The Commission registers individuals rather than companies, and registered practitioners must hold the qualifications, expertise and domestic building insurance behind the registration, as Consumer Affairs Victoria's detail on specialist trades sets out.
Fixtures deserve the same rigour as the contract. For new bathroom ideas that hold up, specify products under Australia's Water Efficiency Labelling and Standards scheme, which Sustainability Victoria's advice on saving water when renovating recommends for kitchens and bathrooms alike. Toilets, taps and showers then get chosen on a labelled water rating instead of a brochure photograph, and modern bathrooms stop being a purely visual decision.
Designer bathrooms with five trades on site still need one person accountable for the whole contract, which is the practical argument in why using a registered builder matters for your bathroom renovation. Confirm registration and permit requirements before either the kitchen services or the bathroom is stripped out, because that's the point where the wrong answer gets expensive.
Confirm the Shell Before You Rebuild
Finish with a pass or fail test rather than another style list.
- Tape both cabinet faces and every appliance door arc on the floor, at full opening.
- Keep the galley only if that open-door aisle works for everyone who cooks, including the second person passing behind them.
- If a wheelchair, a walker or constant through-traffic fails the test, choose the wider aisle, a slimmer run, or a single wall or L before cabinets are ordered.
- For a straight replacement, record vision, lifestyle, budget, timeframe and measurements, then demolish only the cabinetry, benchtops, splashbacks and flooring the new layout needs.
- If services move, scope the structural work and the relocated plumbing or electrical before the joinery is locked in.
A kitchen renovation with us starts with a personalised on-site consultation covering your vision, lifestyle requirements, budget and timeframe, and we take accurate measurements of the existing space while we're there. Demolition then removes the existing cabinetry, benchtops, splashbacks and flooring where required, and the space is prepared for construction.
To start, contact SitePro Bathrooms to arrange a consultation, where we assess the space, discuss your vision, and provide a detailed quote and timeline. Bring the taped floor plan from your open-door test, and compare it against the quoted scope before anyone lifts a crowbar.