

The popular advice is to pick wood effect bathroom tiles by how convincing the timber print looks under showroom lights. That's backwards. Grain, knots and colour won't save a floor that's slippery when wet, too rigid to follow the fall to the waste, or laid over a failed membrane. Judge the tile by its body, its tested slip rating and the wet area system underneath it first, then argue about oak versus walnut.
Compare Wood-Look Tile Materials at a Glance
Porcelain is usually the practical choice for bathroom floors: its dense body absorbs little water and needs relatively little upkeep. Ceramic suits walls and drier areas, while timber-look vinyl and real timber require careful attention to product limits and exposure.
Wood-look materials compared for bathroom use
| Material | Water absorption | Wet-area suitability | Maintenance |
|---|---|---|---|
| Porcelain wood-look tile | Low | Floors and walls, including showers, when the product is rated for the intended use | Low; grout may need sealing |
| Ceramic wood-look tile | Higher than porcelain | Walls and drier zones; use on floors only when the product has a suitable slip rating | Low; grout may need sealing |
| Timber-look vinyl | Surface resists water; seams can let it through | Only where the manufacturer rates it for wet-area use | Low; check seams |
| Solid or engineered timber | Can swell or stain with moisture | Avoid in showers | High; requires timber care |
How to use the comparison
For a wet floor, check the product's suitability and slip rating rather than relying on material alone. A porcelain plank may be a sensible starting point, but the tile still needs to suit the room and installation. Ceramic can be easier to cut, but its greater water absorption makes the product rating particularly important. Vinyl feels warmer underfoot, yet moisture can collect beneath it if water gets through a seam or edge. Timber can move, gap or stain in a steamy bathroom.
To compare plank proportions and finishes, compare timber effect bathroom tiles. For a closer look at the differences in tile bodies and where each may be used, read this guide to porcelain and ceramic bathroom tiles.
Three-question test: Is the product rated for this location? Does its slip rating suit a wet floor? Do the product details support the intended use?
If any answer is no, choose another product or keep the tile to a more suitable area.
What Wood-Look Tiles Are and How They Are Made
A realistic timber print cannot compensate for a tile body or finish unsuited to its location. A wood-look tile is a digital timber photograph bonded to a fired body; the image supplies the grain and colour, while the body and surface determine how the tile wears and performs.
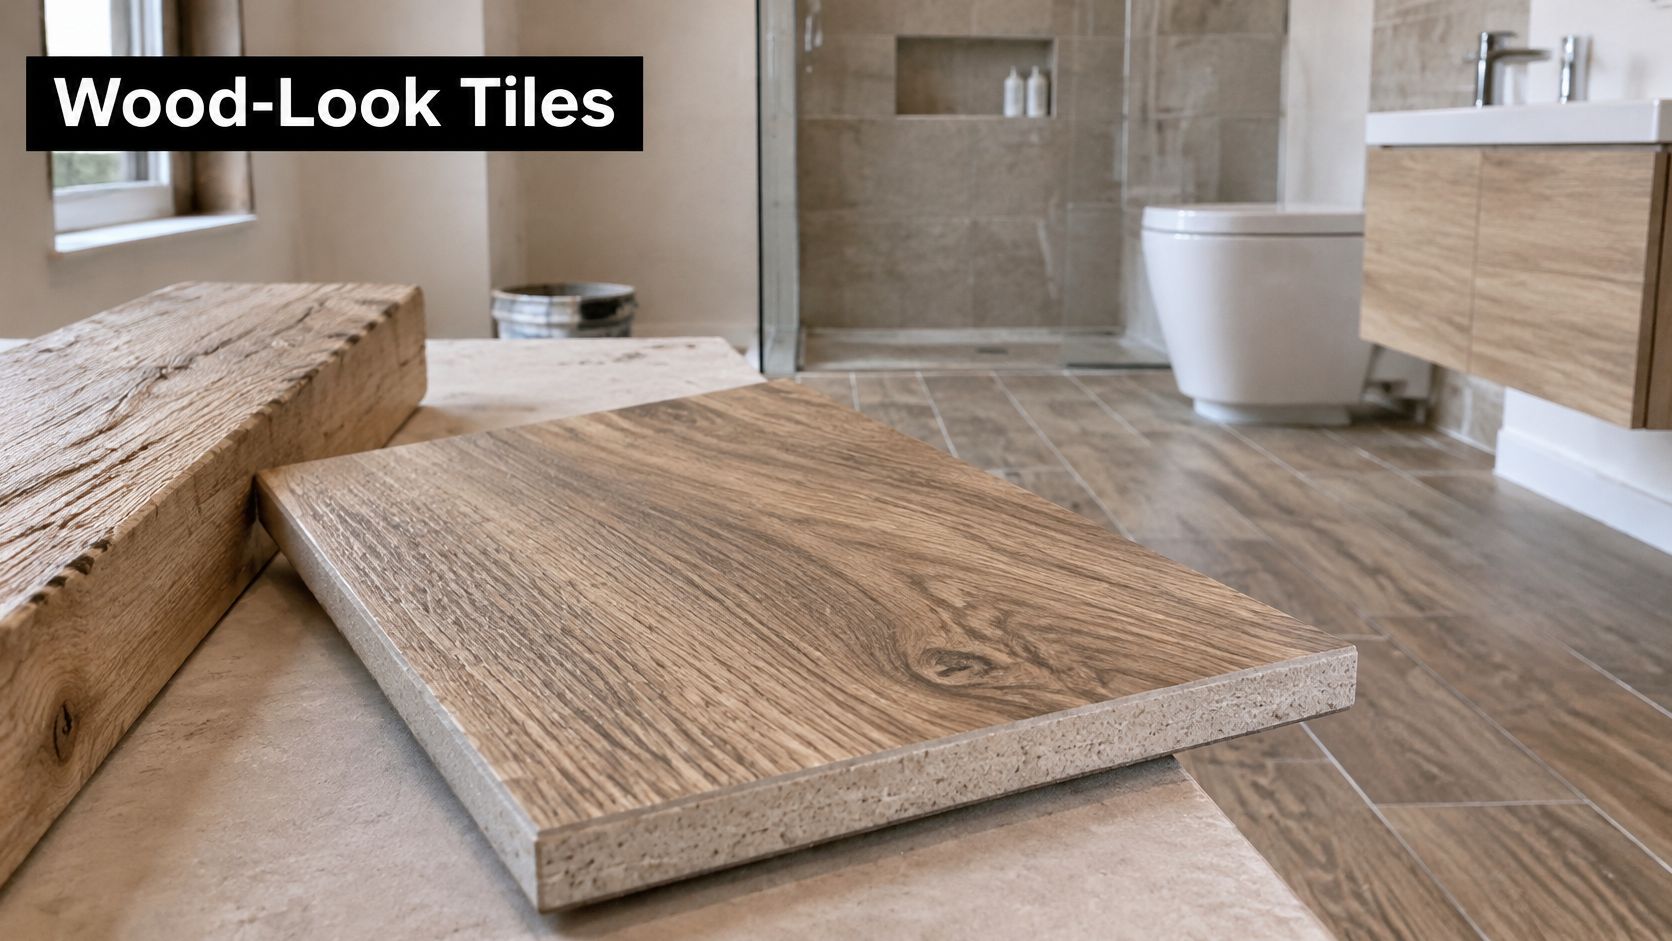
Manufacturers form clay into planks and fire it to harden. A high-definition digital print then reproduces features such as grain, knots and saw marks. A glaze or textured finish protects the print and gives floor tiles their surface characteristics. Better ranges use multiple print faces, reducing the repeated-knot effect across a run of planks.
Why the body matters more than the print
The image sits at the surface. A chipped edge can expose the body beneath, and an impact may leave a pale mark. The tile body determines how readily water can enter.
- Porcelain: fired to a dense body with low water absorption; commonly used on wet-area floors and walls.
- Ceramic: generally absorbs more water; often used on walls and drier areas unless its product rating permits other use.
- Timber-look vinyl: a printed plastic wear layer rather than a fired tile body.
Australia imported 45,577,062 square metres of ceramic tiles in 2018, with porcelain making up 57.2% of total import volume, according to Elite Publishing's summary of ceramic tile imports. Check each product's print variation, edge finish and technical paperwork rather than assuming similar-looking samples share the same specifications.
Rectification affects both the joint and the finished appearance. A rectified plank is cut to precise dimensions after firing, allowing a narrower, more consistent grout joint. Non-rectified planks have slightly variable edges and need wider joints. Either can work; the joint width changes the timber effect and the amount of grout to maintain.
Apply one rule when sorting samples: check the stated material, intended use and product data for the exact tile. A convincing print does not establish whether a tile is suitable for its planned location.
Checking Slip Resistance Before You Buy
A realistic timber print cannot tell you whether a tile is safe underfoot. Check the tested slip result for the exact tile and finish, then match it to the floor zone and keep the data sheet with your renovation paperwork.
In Australia, AS 4586 sets out methods for assessing slip resistance. P-ratings indicate wet pendulum test results, with higher ratings indicating greater slip resistance. Use the rating as a starting point for a conversation with your tiler, and confirm it against the data sheet. The right choice also depends on the floor's intended use and how easily its texture can be cleaned.
P-ratings by wet-area use
| P-rating | Typical wet-area use | What to check |
|---|---|---|
| P3 | Domestic bathroom floors | Confirm the tested result and suitability for the intended floor zone |
| P4 | Shower recesses and wetter zones | Check texture depth and ease of cleaning |
| P5 | Higher-risk wet areas and commercial use | Confirm the product is rated for this use |
Checks to make before you pay
- Tested P-rating: Ask for the result for the exact finish and colour, not just the product range.
- Intended-use classification: Confirm the tile is suitable for a wet-area floor, rather than for walls only.
- Technical data sheet: Get the documentation and keep it with your renovation paperwork.
- Surface description: Matte, textured and wood effect describe appearance or feel. They are not evidence of a slip rating.
Texture involves a practical trade-off. Deep grain can provide more texture underfoot, but its recesses may hold soap film and grime, calling for more frequent scrubbing. A smooth plank is easier to wipe down, but may be unsuitable for a shower floor. If an existing tiled floor needs attention, J.G. Carpet Cleaning's tile coating guide explains coating options. For a new bathroom, choose a tile with a suitable tested result rather than relying on a coating to correct a poor selection.
Check floor and wall tiles separately. A tile suitable for vertical use may not provide the grip needed underfoot. For a broader look at suitable surfaces, see our guide to slip-resistant bathroom flooring. Match the documented rating to the tile's intended zone, whether that is the shower floor, the general bathroom floor or a wall.
Waterproofing, Layout and Plank Size for Wet Areas
The membrane beneath the tile does the waterproofing. Tiles and grout form the finish, while a compliant waterproofing system protects the building from water passing through joints, penetrations and cracks. For bathroom work, the membrane must comply with AS 3740. SitePro Bathrooms applies certified waterproofing to floors and walls in full compliance with Australian Standards, with the system specified for the wet area.
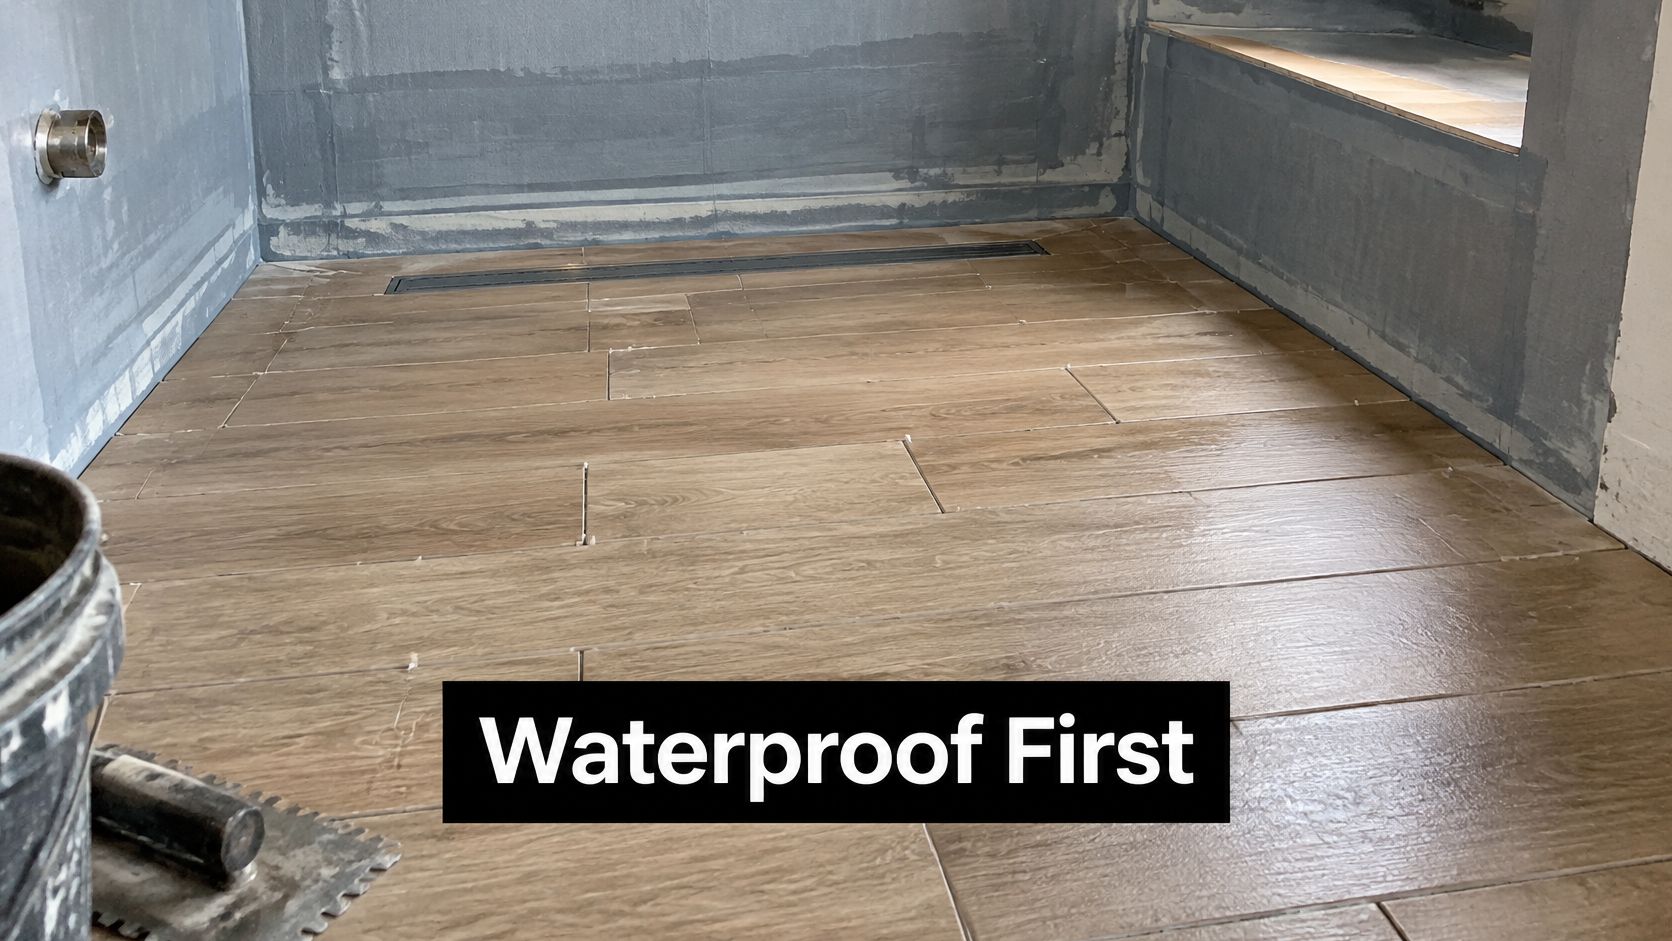
Plank size affects how readily tiles can follow the floor's falls to the waste. Long, rigid planks can bridge changes in slope, leading to lippage or spots where water collects. Smaller formats usually follow compound falls more readily, though they create more grout joints to clean. Choose the format around the drain position and floor shape, not just the timber effect you prefer.
Plank formats and what each means for wet areas
| Plank format | Grout joints | Fit on falls to a waste | Cleaning effort | Best use |
|---|---|---|---|---|
| Standard plank, 150 to 200 mm wide | More | Easier to follow falls | More grout lines to clean | Small floors with a steep fall |
| Large plank, around 300 by 1200 mm | Fewer | Harder on compound falls | Easier wipe-down | Larger floors with a simple fall |
| Long plank, above 1200 mm | Fewest | Needs a flat substrate and careful setting-out | Fewer joints to clean | Floors with a simple fall and suitable layout |
| Matched wall and floor format | Depends on module size | Check the layout at the waste | Depends on grout area | Feature walls and niches |
Layout decisions that affect drainage
Start the set-out at the waste. A linear drain along one wall generally creates a simpler, single-direction fall for long planks than a central point waste, where the floor slopes from several directions. Before ordering, check that the chosen format can follow the planned falls. Dry-lay the first rows and use a straight edge to check for rocking. Correct uneven substrate before tiling; adhesive is not a levelling compound.
For wall preparation before tiling, read the shower preparation advice from Trademaster Construction. SitePro Bathrooms explains bathroom waterproofing and where the membrane is applied.
Choose grout close to the timber colour to soften the plank pattern, or use contrast to make each tile stand out. At junctions, penetrations and drains, use the specified waterproofing and sealing details. These points need careful treatment because movement can crack grout.
The right plank is the largest format that suits the floor's falls without compromising drainage or creating lippage.
How to Install Wood-Look Tiles in a Wet Area
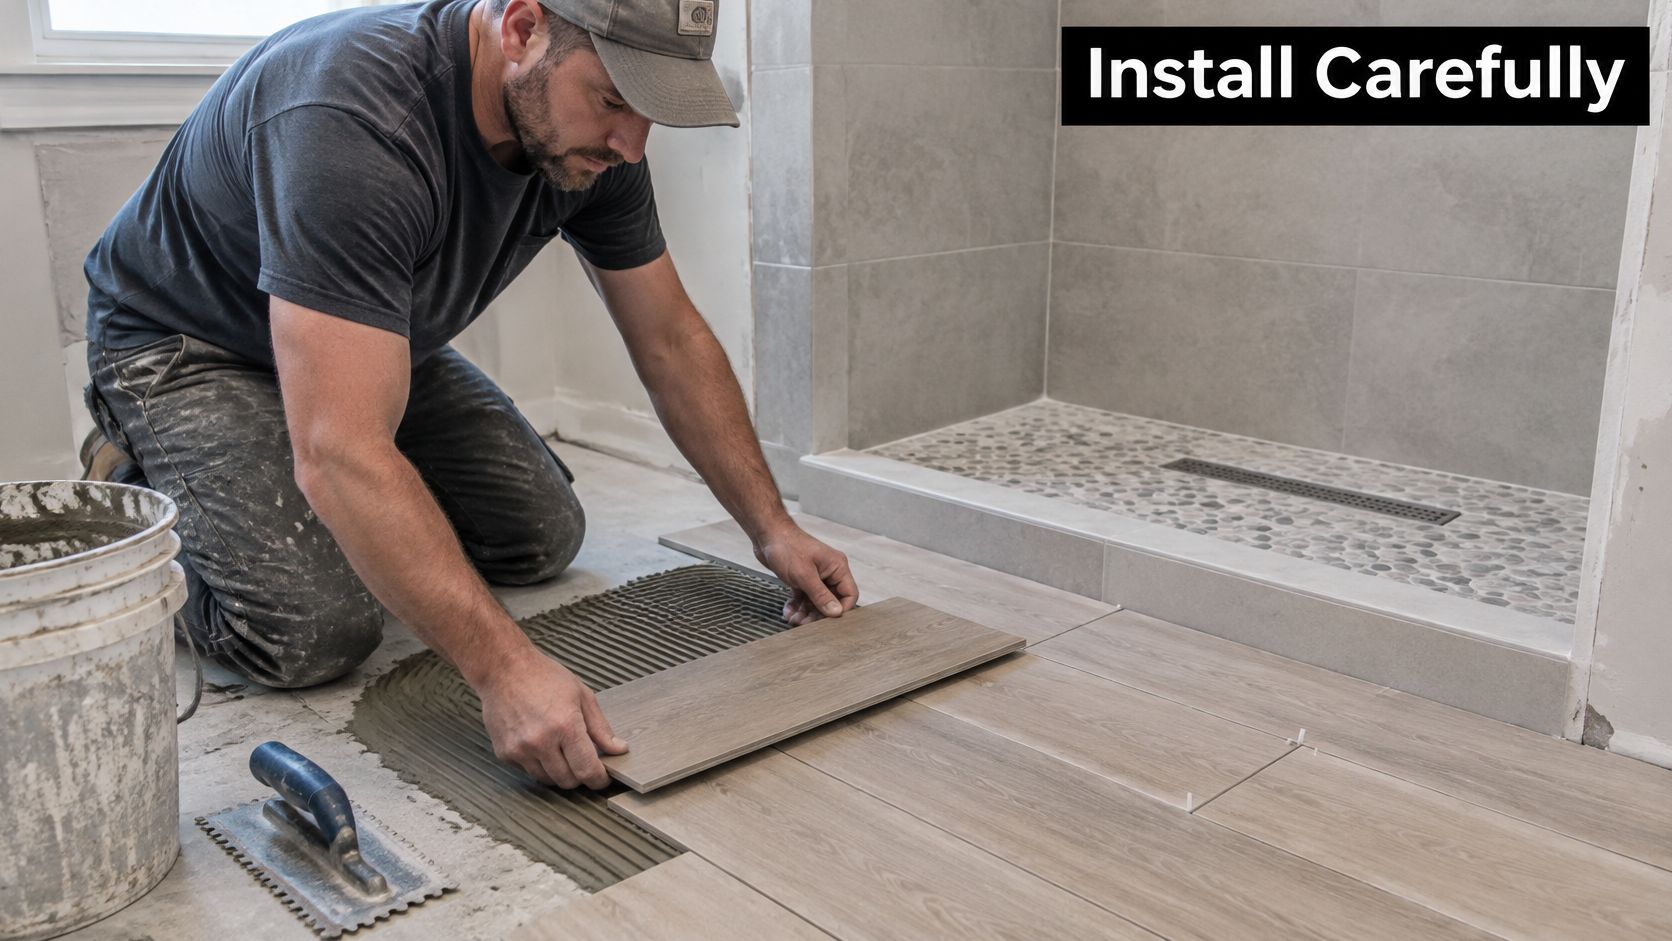
Good installation is a sequence, not a single skill. Skip or rush one step and the steps after it inherit the problem. I would not let tiling start until substrate, fall and membrane are each signed off in order.
- Prepare the substrate: confirm it's flat, sound and dry, and check the fall to the waste with a level and straight edge. Grind high spots, fill dips with a suitable levelling compound and let it cure, because a long plank telegraphs every hollow underneath it.
- Apply the membrane: install a waterproofing membrane that complies with AS 3740 across floors and walls, including corners, penetrations and the shower recess. Respect the manufacturer's cure time, since tiling over a soft membrane can damage the very layer you're relying on.
- Check heating compatibility: if there's underfloor heating, confirm the cable or mat is protected, the adhesive is rated for use over it, and heat isn't switched on early to speed drying. Forcing adhesive dry with heat weakens the bond.
- Use the right adhesive: choose a flexible adhesive suited to the plank format and substrate, comb it in one direction, and back-butter each tile where the manufacturer requires it so there are no hollow corners.
- Set out and check as you go: work from the drain or room centre, keep joints consistent with spacers or a levelling system, and run a straight edge across each row to catch lippage while the adhesive is still workable.
- Grout and cure: grout with a product matched to the joint width, tool the joints clean, and allow full cure before the room is used or sealed. Rushing this stage traps moisture and weakens joints.
- Clean and seal: wipe grout haze and adhesive residue off the timber-look surface before it hardens in the grain texture, then apply the first grout seal exactly as the product instructions state.
Who does which part
A wet area needs several trades in the right order, and gaps between them are where defects hide. We work with licensed plumbers, certified electricians, qualified waterproofers, professional tilers, and carpenters and builders, so plumbing, electrical, membrane and tiling are sequenced rather than improvised. Our bathroom waterproofing is certified and applied to floors and walls in full compliance with Australian Standards, and that certificate should be handed over at completion alongside the tile data sheet.
Keep those documents. If you sell, insure or claim on defective work later, the membrane certificate and the tested tile rating carry more weight than a showroom brochure.
Design Choices for Small and Large Bathrooms
A convincing timber print cannot fix a slippery floor, a poor fall or a failed wet-area system. Judge wood-look tiles by how they work in the room, then choose a pattern and colour that suit its size.
When you're choosing a design direction for a Victorian bathroom, wood-look tile carries timber warmth into floor-to-ceiling schemes and open showers. Porcelain is a practical choice for bathrooms because it is durable and low maintenance. The finish gives you the look of timber without relying on untreated wood in a wet area.
Small bathrooms
- Carry one tile onto a wall: using the same wood-look tile on the floor and one wall reduces visual breaks and can make a compact room feel more unified.
- Choose a lighter timber tone: pale oak effects can help a room with limited natural light feel brighter.
- Keep to one feature: a wood-look niche, vanity panel or bath surround adds warmth without making the room feel crowded.
Vertical planks on a shower wall draw the eye upwards, which can help a low ceiling feel taller. On the floor, follow the planned fall to the waste. The wall and floor grain do not need to line up.
Large bathrooms
Large planks create fewer grout joints and give the timber pattern more room to read. A timber feature wall behind a freestanding bath can soften a large expanse of white, while a quieter, grippier finish may suit the floor better.
Stacked layouts look calm and architectural, but make uneven joints easier to spot, so accurate setting out matters. Herringbone adds movement to a long room, with more cuts and labour at the edges. Keep it to a feature wall if the extra complexity is not worthwhile on the floor.
The layout still has to suit the wet zone. A herringbone feature wall does not make that tile suitable for a shower floor. Small pieces around a waste can look busy and may be difficult to lay evenly where the fall is steep.
Choose the pattern around the room dimensions and floor fall. Check the tile's slip rating and confirm that the wet-area system beneath it is specified and documented before settling on the finish.
Cost Ranges and Long-Term Care
A 4 m² bathroom floor can have several separate cost lines: tile supply, substrate preparation, waterproofing, adhesive and grout, tiling labour, trims, and sealing. The total depends on the tile format, floor condition, layout and wet-area system, so get itemised figures from suppliers and installers before setting a budget.
Indicative cost drivers for wood-look bathroom tiles
| Item | What changes the cost |
|---|---|
| Porcelain wood-look tile, supply only | Brand, size, finish, rectification |
| Ceramic wood-look tile, supply only | Glaze, wet-area rating |
| Timber-look vinyl, supply only | Wear layer, wet-area rating |
| Tiling labour | Region, plank format, floor preparation |
| Waterproofing membrane and certification | System chosen, area, documentation |
| Grout sealing, initial and yearly | Grout type, traffic, product |
Large rectified planks usually cost more to handle and lay because they demand careful substrate preparation. Herringbone and other patterned layouts add cutting time. A floor that needs screeding to establish the correct falls also takes more work than a flat, well-prepared surface. List adhesive, grout, trims and sealant separately when comparing quotes.
Care that protects the print and the joints
- Sweep or vacuum weekly: grit can scratch the glaze, especially around doorways.
- Use a pH-neutral cleaner: abrasive pads and strong acids can dull the tile surface or damage grout.
- Wipe standing water promptly: porcelain resists water, but grout and sealant joints still need care.
- Reseal grout as specified: follow the grout manufacturer's instructions and check whether water still beads on the joints.
- Inspect joints early: repair cracked grout or lifted edges before water can enter and the damage spreads.
A tile's service life depends on the quality of the substrate, waterproofing, installation and ongoing maintenance. Porcelain itself is hard-wearing, but it cannot compensate for a failed membrane or poorly finished joints. Vinyl performance depends on its wear layer and seam quality; a lifted seam in a wet zone can be difficult to repair inconspicuously.
Choose the wet-area system and installation quality with care. A low tile price offers little value if poor rectification slows the laying work or failed waterproofing requires the area to be stripped and redone.
Confirm Builder Registration Before You Order Tiles
Order tiles after you've confirmed who can legally build the room around them. In Victoria, the Building and Plumbing Commission info sheet on domestic building work states that a bathroom renovation costing more than $10,000 is generally treated as domestic building work requiring a registered building practitioner and a written major domestic building contract. The threshold applies to total project value including labour and materials, and splitting a job into smaller contracts doesn't avoid it. Structural work requires registration regardless of cost and may also require a building permit.
Registration class matters as much as registration itself. The Building and Plumbing Commission guide to domestic builder classes explains that a Domestic Builder, Unlimited may personally carry out, manage or arrange subcontractors for all domestic building work, while the limited bathroom, kitchen and laundry class is restricted to wet-area renovations that remain within the existing external walls, floor and ceiling. When you compare registered builders unlimited and limited registrations for bathroom renovations involving reconfiguration, wall moves or several trades, check that the class covers your scope.
Insurance is the next check. Consumer Affairs Victoria guidance on builders and tradespeople states that for projects above $16,000, the builder must provide a current certificate of domestic building insurance before taking a deposit and starting work, identifying the project address, project cost and builder registration details. Don't transfer a deposit against a promise that the certificate is coming.
For a Highett home, which falls within the City of Bayside, check early with council whether your layout or any structural change needs a building permit. Finding out after demolition is an expensive way to learn.
Paperwork checklist
- Registration class: confirm BPC registration matches the exact work, including any structural changes.
- Written contract: get scope, price, materials and responsibilities in a major domestic building contract where required.
- Insurance certificate: sight the current certificate before deposit or start on qualifying projects.
- Tile evidence: record the tested P-rating and data sheet for every floor tile.
- Waterproofing certificate: collect it at completion and file it with your contract.
We include free practical 3D design, guidance and layout planning as part of our bathroom renovation service, and the 3D design service provides detailed 3D images of the bathroom showing its layout and materials. We also offer free quotes for bathroom renovation projects. Bring tile samples and this checklist to the quote meeting so layout, slip rating, plank format and paperwork are settled before construction, not discovered during it.
If you're planning a bathroom in Highett or elsewhere in Victoria and want wood effect bathroom tiles that are rated, waterproofed and laid to last, request a free quote from SitePro Bathrooms and ask for a 3D design showing your layout, plank direction and materials before any work begins. Bring your samples, your P-rating questions and your builder registration checklist, and we'll work through them with you before you order a single box.