Renovating a Toilet: Victoria Permits & Costs Guide
You’re usually at the same point when renovating a toilet first becomes urgent. The old suite still works, technically, but the room feels tired, harder to clean, and increasingly out of step with the rest of the house. In older Highett homes, that often comes with deeper worries too. What’s behind the wall, what’s happening under the floor, and whether a “simple swap” is really simple once the work starts.
That’s why a toilet renovation should never be treated as a one-item upgrade. The toilet sits inside a wet area, connects to plumbing and drainage, and affects layout, waterproofing, ventilation, accessibility, and resale value. If you’re planning your first major bathroom project in Victoria, the right approach is to think like a renovator from day one. Start with planning, confirm the rules, open the room carefully, then build it back properly.
The Foundation Planning, Budgeting, and Design Inspiration
Most homeowners start with appearance. They want a cleaner look, a better layout, or one of those new bathroom ideas that makes a small room feel sharper and calmer. That’s a good instinct, but design only works when it begins with the actual room you have.
A toilet renovation in Victoria should start with three questions. What’s staying, what’s moving, and what’s essential? If the waste position stays where it is, the job is usually more straightforward. If the toilet needs to shift, the layout, plumbing route, and floor build-up all need a closer look.
In resale terms, bathrooms remain one of the stronger places to spend money. In Australia, mid-range bathroom renovations, including toilet upgrades, recoup approximately 65-73% of costs at resale, according to 2026 Cost vs. Value reporting adapted for the local market. That’s one reason many Highett owners renovate the bathroom before touching more ambitious projects elsewhere in the home.

Start with the room, not the showroom
A good site assessment is more valuable than a long wishlist. Measure the room. Check the wall positions. Look at the door swing. Confirm where the sewer outlet sits. If the house is older, assume there may be hidden repairs needed until proven otherwise.
I tell clients to separate ideas into two groups:
- Functional upgrades: better toilet position, easier cleaning, stronger ventilation, more practical storage, wider circulation space
- Visual upgrades: wall-hung vanity, fluted tile, brushed finishes, niche shelving, feature lighting, larger mirror
That split helps you protect the essentials when choices get tighter.
Practical rule: If you spend your budget on finishes before solving layout and moisture issues, the room may look expensive and still perform badly.
Modern bathrooms and designer bathrooms mean different things
People often use those terms as if they’re interchangeable. They’re not.
A modern bathroom usually prioritises clean lines, simple detailing, practical fixtures, and easy maintenance. That might mean a back-to-wall toilet, large-format tiles, a floating vanity, and restrained colour choices.
A designer bathroom is more composition-driven. It leans harder into material contrast, lighting, feature stone, custom joinery, and carefully resolved sightlines. Done well, it feels cohesive. Done badly, it can become difficult to maintain and too specific for the rest of the house.
A first renovation usually lands best in the middle. Borrow the clarity of modern bathrooms, then add a few designer bathrooms ideas where they’ll matter most. A shaped mirror, warmer lighting, or a stronger tile selection will do more than overloading the room with statement pieces.
Build a planning framework before demolition
The planning stage should answer more than colour and tile questions. It should also define how the room will be used.
Use this checklist before you approve a design:
Who uses the bathroom most often
A family bathroom needs different clearances and storage than a compact powder room or ensuite.Whether the toilet location stays or moves
This affects plumbing complexity, floor prep, and sequencing.What level of finish suits the home
A modest home can still have a beautifully detailed bathroom, but the room should feel consistent with the property.How much visual maintenance you can live with
Matte tiles, textured grout lines, and dark fittings can look excellent, but they don’t all wear the same way.How the renovation timeline affects the household
If this is your only toilet, staging and access matter. A clear programme matters even more. This guide on how long a bathroom remodel should take helps frame the practical side of scheduling before work begins.
Why 3D planning saves expensive mistakes
Most toilet renovation errors happen before demolition. The toilet ends up too close to the vanity, the in-wall cistern conflicts with framing, or the tile set-out leaves awkward cuts at eye level.
That’s where detailed drawings and 3D visualisation earn their place. You don’t need them for decoration. You need them to test the room before trades arrive. They show whether a toilet pan projects too far, whether the vanity edge crowds the entry, and whether the wall finish and floor finish work together in the light your room gets.
SitePro Bathrooms offers end-to-end renovation services that include concept development and detailed 3D design, which is useful when you want the layout, finishes, and construction details resolved before demolition starts.
Navigating Victorian Regulations and Finding a Registered Builder
A toilet renovation feels small until it intersects with Victorian compliance. Then it stops being a decorating project and becomes building work with legal and practical consequences.
That’s especially true when the renovation changes plumbing, alters waterproofed areas, affects accessibility, or sits inside a strata property. This is the part many generic online guides skip. In Victoria, the rules around wet areas, approvals, and trade responsibility aren’t optional.
Why approvals matter more than homeowners expect
If you own an apartment, townhouse, or unit under an owners corporation, approval can be part of the job before any trade starts. In Victoria, 28% of households are in strata schemes, and toilet renovations in those properties require body corporate approval. Non-compliance can lead to fines up to $10,000 per breach, and 65% of strata renovations without pre-approval exceed timelines by 40%, according to the Victorian strata renovation data referenced here.
That matters because toilet works can affect shared services, acoustic separation, waterproofing responsibility, and access for inspections. Even when the room is wholly inside your lot, the works may still trigger approval requirements.
A simple way to think about it:
| Situation | What usually matters |
|---|---|
| Freestanding home | Scope of plumbing, building compliance, wet area standards |
| Apartment or strata unit | Owners corporation approval, building rules, shared infrastructure |
| Older home in Highett | Existing condition, hidden repairs, compliance upgrades once room is opened |
What a registered builder unlimited means in practice
Homeowners often ask for a “registered builder unlimited” because they’ve heard the phrase, but they’re not always sure what they’re asking for. In practice, you’re looking for a properly registered professional who can take responsibility for the work, coordinate licensed trades, and manage compliance in a wet area.
That matters for three reasons:
- Accountability: one party coordinates sequencing instead of leaving you to manage separate trades
- Compliance: plumbing, waterproofing, and structural changes are handled within the right regulatory framework
- Protection: documentation, trade oversight, and defect responsibility are clearer
If a renovator shrugs off permits, approvals, or certification, that’s not efficiency. It’s risk shifted onto you.
The fastest renovation on paper is often the slowest one in real life once approvals, rework, or disputes catch up.
Before engaging anyone, review why using a registered builder matters for your bathroom renovation. It’s one of the easiest ways to separate a coordinated project from a patchwork one.
Council, access, and local practicalities
Highett projects also bring local practical issues that aren’t glamorous but matter a lot on site. Waste removal, parking, noise management, apartment access times, and material delivery can all affect how smoothly the renovation runs. A builder who works locally will usually raise those points early.
For homeowners, the practical test is simple. Ask who is handling approvals, who is booking inspections where required, and who is responsible if existing conditions trigger changes once demolition starts. If the answer is vague, the project isn’t ready.
The Transformation Begins Demolition and Plumbing Rough-In
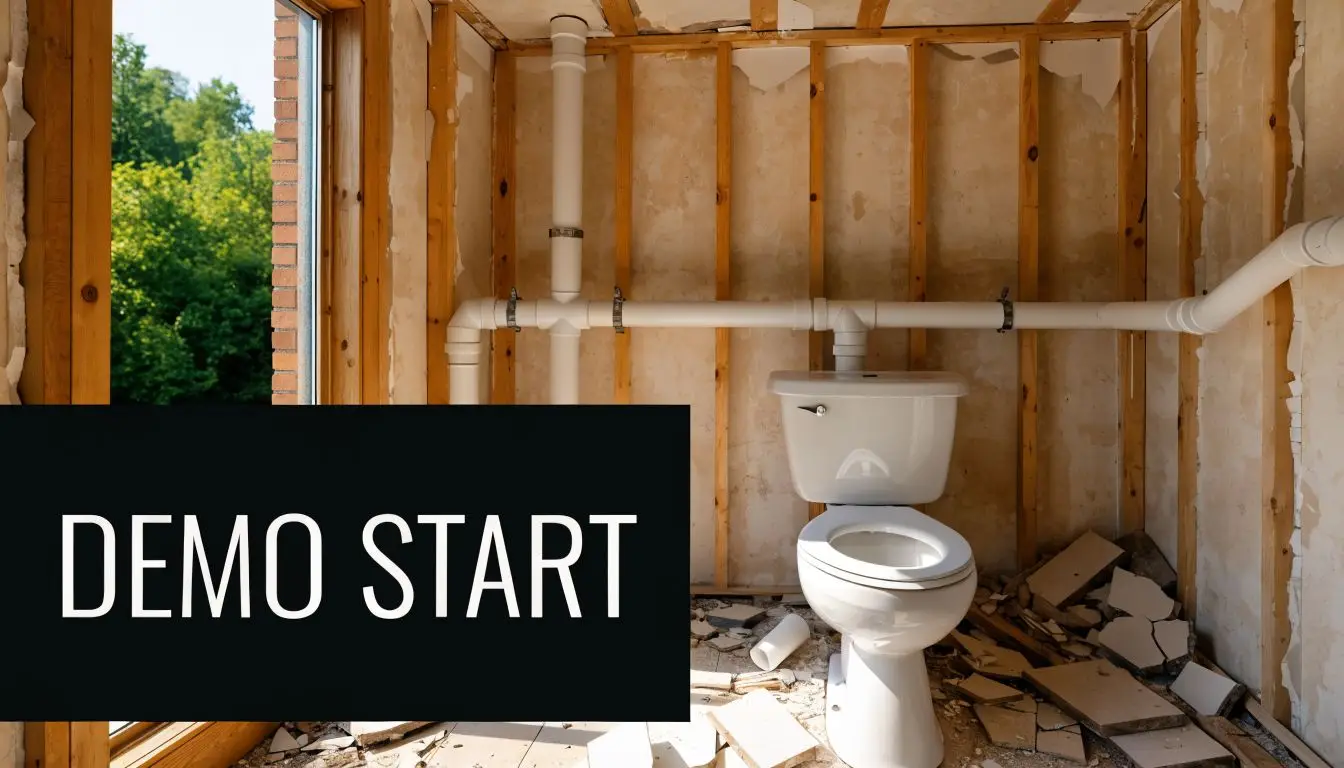
Demolition is where optimism meets reality. Until the old toilet, tiles, and sheeting come out, you’re still working from assumptions. Once the room is open, you finally see the substrate, the waste line position, the state of the framing, and whether previous work was done properly.
This stage is noisy, dusty, and disruptive, but it’s also where a renovation is either set up for success or compromised early.
What proper demolition looks like
In a toilet renovation, demolition should be controlled, not fast for the sake of speed. The sequence matters. Water is shut off. The toilet is flushed and drained properly. The cistern and pan are removed without leaving water trapped inside. Fixtures are disconnected carefully. Then the floor and wall linings come out in a way that protects surrounding rooms and makes it easier to inspect what’s underneath.
The drainage stage is where many DIY attempts go wrong. The demolition and drainage process is where 28% of DIY renovation failures occur, according to this bathroom renovation checklist reference. That aligns with what trades see on site. Spills, cracked fittings, damaged flooring, and rushed removal create mess and extra repair work before the new room has even started.
What professionals look for after the room is stripped
Once the floor is visible, the next job isn’t installing anything. It’s assessing the base.
In older Highett homes, the subfloor deserves close attention. Professionals find and rectify subfloor rot in an estimated 35% of pre-1970 Highett homes, which is exactly why this stage can’t be rushed. A new toilet installed over a compromised floor may look fine at handover and still fail later through movement, moisture, or poor fixing.
Key checks after demolition usually include:
- Subfloor integrity: soft spots, prior water damage, delamination, or uneven sections
- Wall framing condition: swelling, mould history, poor previous repairs, or framing conflicts with a new cistern setup
- Waste and water service positions: whether the intended fixture layout matches the existing pipework
- Level and squareness: tile set-out and toilet alignment depend on this more than is often appreciated
Open walls and floors are an opportunity. If you ignore what they reveal, the finished bathroom only hides the problem.
Rough-in is where the layout becomes real
Rough-in is the point where the plan turns into fixed positions. The toilet waste location, water feed, any electrical changes, ventilation route, and vanity services are all set before the room is closed up again.
This is also where practical trade-offs show up. Keeping the toilet in the existing position usually saves complexity. Moving it may improve circulation or sightlines, but only if the plumbing route and floor depth can support it properly. The right choice isn’t always the boldest one. It’s the one that works structurally and spatially.
For first-time renovators, the main lesson is simple. Don’t judge progress by how quickly fixtures return to the room. Judge it by whether the hidden stages were checked, documented, and corrected while access was still easy.
Waterproofing and Tiling Building a Resilient Wet Area
If there’s one stage that decides whether a toilet renovation lasts, it’s waterproofing. Homeowners rarely see most of it once the room is finished, yet it protects the very parts of the renovation that cost the most to repair later.
That’s why waterproofing shouldn’t be discussed as a product choice alone. It’s a system. Surface prep, falls, membrane application, curing, junction treatment, and tile installation all have to work together.

What compliance actually means in a Victorian bathroom
In Victoria, waterproofing in wet areas must comply with AS 3740-2010. That standard affects how the substrate is prepared, how transitions are treated, and how water is directed to waste.
The issue that trips up many projects isn’t just membrane coverage. It’s the fall. Water has to move where it’s meant to move. When the floor is too flat, or falls are inconsistent, water sits, tracks, and eventually finds weak points.
According to this waterproofing reference, professional success rates are near 96%, while DIY success drops to 65%, and inadequate fall is the cause of 40% of waterproofing failures in Victoria. That tells you where to focus. Not on marketing language, but on floor preparation and workmanship.
The shortcuts that fail
Bad waterproofing usually comes from one of a few familiar mistakes:
- Uneven screed: the floor looks level to the eye but doesn’t drain correctly
- Poor junction treatment: wall-to-floor transitions and penetrations aren’t resolved properly
- Tiling over rushed prep: adhesives and membranes are asked to compensate for substrate problems
- Wrong sealing assumptions: silicone is treated as the waterproofing instead of a finishing component
A tiled floor can still leak if what’s underneath is wrong. Homeowners often judge tile by colour, size, and pattern. Trades judge it by fall, bond, edge control, and movement management. The second view is the one that protects the room.
Choosing tiles that work in real life
Porcelain is often the practical choice for a toilet or bathroom floor because it handles moisture well and wears hard. Ceramic can still work in the right application, but the decision should be based on performance as much as appearance.
When selecting tiles, think beyond the showroom sample:
| Consideration | What it affects |
|---|---|
| Tile size | Set-out, drainage, and how easily falls can be formed |
| Surface finish | Slip resistance, cleaning effort, visual softness or sharpness |
| Grout choice | Staining resistance, maintenance, and edge definition |
| Edge details | How cleanly the room finishes around doorways and fixtures |
Waterproofing doesn’t fail because the tile looked wrong. It fails because the layers under that tile weren’t built with enough discipline.
The rooms that age best aren’t always the most elaborate. They’re the ones where the floor drains properly, the membrane system is respected, and the tiling is set out to suit the room rather than forcing the room to suit the tile.
The Final Fit-Out Installing Fixtures and Finishing Touches
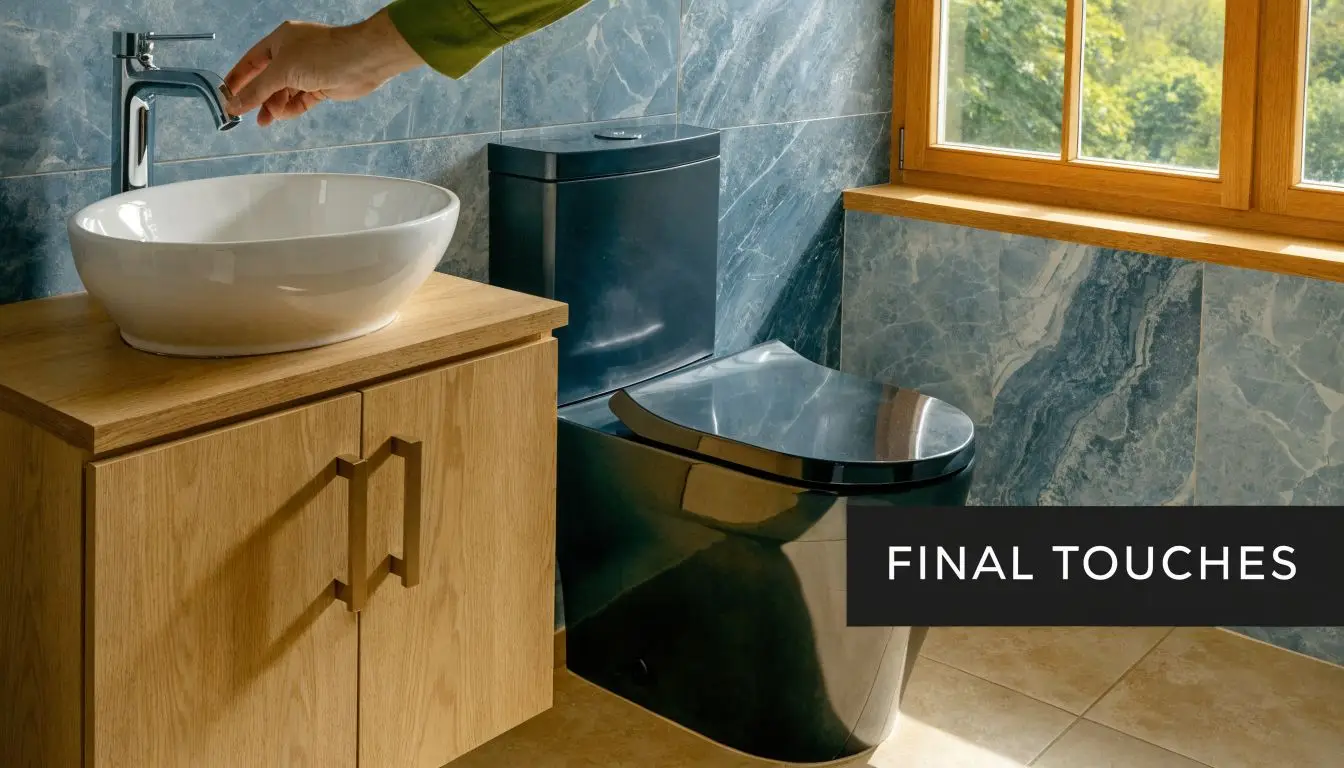
The fit-out is where the room starts to feel worth the disruption. The walls are finished, the floor is tiled, and the bathroom finally shifts from construction zone to usable space. But this stage still needs precision. A crooked pan, poorly sealed basin, or badly placed accessory can spoil work that was excellent up to that point.
Homeowners are also more fixture-conscious than they used to be. The global market for bathroom fixtures like toilets was valued at USD 51.3 billion in 2025 and is projected to grow at a 5.1% CAGR, according to this bathroom fixtures market report. In practical terms, that reflects a broader move toward better-looking, more water-efficient, better-performing fixtures.
Installing the toilet properly
A toilet installation isn’t just a matter of setting the pan in place and tightening it down. The floor level must be right. The set-out must be right. The seal must be right. And the finished position has to feel intentional within the room.
A well-installed toilet should:
- Sit level on the finished floor without rocking or being forced into place
- Align cleanly with wall lines, joinery, and tile set-out
- Seal properly at the connection point and around the pan where required
- Allow practical cleaning access instead of cramming the fixture into a visually neat but awkward gap
Style and practicality finally meet. Back-to-wall suites usually make cleaning easier. Wall-faced toilets can sharpen the look of modern bathrooms. A more sculptural pan may suit designer bathrooms, but only if the room is large enough to carry the form.
Vanities, lighting, and the details that finish the room
The toilet may be the focus of the renovation, but the room succeeds or fails as a whole. Vanity height, mirror size, lighting temperature, and ventilation all affect how the bathroom feels every day.
A few finishing choices make a bigger difference than people expect:
- Lighting at face level: better for grooming and less harsh than relying on one ceiling point
- Storage that hides clutter: especially important in compact bathrooms where every object becomes visible
- Paint suited to humidity: standard interior paint in a wet room is a false economy
- Ventilation sized to the room: the right fan protects grout, paint, and cabinetry over time
If you’re choosing lighting, this guide to bathroom downlight planning is a useful reference before final electrical positions are locked in.
What works and what doesn’t
Here’s the trade view.
| Works well | Usually disappoints |
|---|---|
| Simple fixture forms with good cleaning access | Overly bulky fixtures in tight rooms |
| Consistent finishes across tapware and accessories | Too many finish changes in one compact space |
| Vanity and toilet scaled to the room | Showroom-sized pieces forced into modest bathrooms |
| Lighting layered for task and ambience | A single bright fitting that flattens the room |
The best fit-outs don’t try to impress in every corner. They make the room easy to use, easy to clean, and visually calm. That’s the point where new bathroom ideas become a finished space that improves daily life.
Your Renovation Checklist and Frequently Asked Questions
A good toilet renovation doesn’t come down to luck. It comes down to selecting the right team, asking better questions early, and understanding where corners should never be cut. If you’re hiring for bathroom renovations in Victoria, this is the checklist I’d use before signing anything.
The hiring checklist for a Victorian toilet renovation
Ask these questions in plain language and expect clear answers.
Registration and trade responsibility
Are you properly registered for this type of renovation, and who is responsible for coordinating the licensed trades?Scope clarity
Does the quote cover demolition, plumbing, waterproofing, tiling, fixture installation, waste removal, and final finishing, or are some of those left out?Compliance pathway
How will you handle approvals, certifications, and inspection requirements if they apply to my property?Strata and owners corporation experience
If the property is under an owners corporation, who prepares the information needed for approval and who manages access requirements?Waterproofing method
How is the waterproofing system documented, and how do you confirm the room has the right falls before tiling starts?Existing condition risks
What happens if demolition reveals damaged framing, subfloor problems, or previous non-compliant work?Design sign-off
Can the layout and finishes be resolved before construction starts so there’s less guesswork on site?Programme and communication
Who updates me during the project, and how are variations handled if the scope changes?
A professional answer is usually specific, even when the answer is “we need to inspect first”. A vague answer during quoting often becomes a vague answer during construction.
A quick homeowner pre-start list
Before renovating a toilet, get these items straight in your own mind:
Your must-haves Better cleaning access, more storage, improved appearance, accessibility, or resale value
What you’ll compromise on
Feature tile, custom joinery, premium fittings, or layout changesWhether the home has another usable toilet
This affects staging and daily disruptionWhether the property is strata-titled
If it is, approval steps should be confirmed earlyHow the new bathroom should feel
Quiet and minimal, warm and layered, or more architectural and bold
Frequently asked questions
How long will I be without a toilet
That depends on scope, whether the toilet is being moved, and whether this is a standalone toilet room or part of full bathroom renovations. If it’s your only toilet, raise that at the first meeting. Sequencing matters, and temporary arrangements may need to be planned before demolition starts.
Do I need approval for renovating a toilet in an apartment
Often, yes. In Victoria, strata properties commonly require owners corporation approval for wet area works, plumbing changes, or works that affect common property responsibilities. This should be confirmed before materials are ordered.
Is renovating a toilet worth it if I’m selling soon
Often, yes, if the existing room is visibly dated, difficult to clean, or functionally poor. Buyers respond well to bathrooms that feel maintained, practical, and current. The strongest value usually comes from balanced upgrades rather than overcapitalising.
What’s the difference between a P-trap and an S-trap toilet
The difference is where the waste exits. One discharges through the wall and the other through the floor. Which one suits your renovation depends on the existing plumbing layout and whether that layout is being altered.
Can I keep the same layout and still get a much better result
Yes. In many projects, keeping the waste position and improving the room through better fixture selection, tiling, lighting, and joinery is the smartest move. A layout change can help, but it isn’t always necessary to make the bathroom feel new.
Are modern bathrooms always the best option for resale
Not automatically. Buyers usually respond to bathrooms that are coherent, durable, and easy to maintain. A modern bathroom often fits that brief, but the finish level should still suit the age and style of the home.
Do I need a builder for a small toilet renovation
If the work touches plumbing, waterproofing, layout, or multiple trades, professional coordination matters. Small rooms are less forgiving than large ones. There’s less room to hide bad set-outs, poor sequencing, or weak detailing.
If you’re planning on renovating a toilet in Highett or elsewhere in Victoria, treat it as a building project first and a styling project second. That approach protects your budget, your timeline, and the finished result. The room will look better because it was built better.