
Bathroom Renovation Steps: From Plan to Handover
Each residential bathroom claim finalised under Queensland's 2024–25 Home Warranty Scheme averaged almost AUD 25,000 in rectification costs, according to the Queensland Building and Construction Commission. That's a strong reason to treat bathroom renovation steps as more than demolition followed by attractive finishes.
For homeowners in Highett and greater Victoria, the important work often disappears behind tiles: approval checks, repaired substrates, correctly detailed waterproofing and inspection records. A cosmetic-looking renovation can still disturb plumbing or a wet-area membrane. Plan those hidden stages properly, and you give the finished bathroom a sound foundation.
Bathroom Renovation Stages at a Glance
| Stage | What Happens | Hold Point Before Moving On |
|---|---|---|
| Consultation and measurement | On-site visit to confirm goals, layout, budget and measurements | Agreed scope and budget |
| Design and approvals | Layout, fixtures, tiles and finishes; permit and registration checks | Approved plans and scope signed off |
| Demolition | Services isolated, fixtures, tiles and substrates removed | Exposed substrate inspected |
| Framing and rough-in | Wall framing, floor repairs, plumbing and electrical rough-in | Rough-in inspection before walls close |
| Waterproofing | Membrane applied to floors, junctions, penetrations and shower walls | Membrane coverage and curing documented before tiling |
| Tiling and fixtures | Tiles set and grouted; basin, toilet, shower and tapware fitted off | Leak and pressure tests passed |
| Final clean and handover | Quality control, final clean, handover pack with inspection and approval records | Walkthrough completed and records handed over |
A bathroom build runs on seven stages, each closing at a hold point. A hold point is a condition that must be met before the next trade starts: an inspection result, a signed drawing or a photographic record with a named owner.
The consultation settles scope and budget in writing. Design and approvals end with a signed scope plus the permit and registration checks. Demolition exposes the substrate, which someone inspects before framing closes over it. Rough-in is checked while the walls are open, the cheapest moment to correct it. Waterproofing coverage and curing are documented before a tile goes down. Tiling closes on leak and pressure tests, and handover on a walkthrough plus the records pack. For a general view of how dependent tasks are sequenced, Tuff's guide to implementation phases is a useful reference; in a bathroom it means booking trades against cleared prerequisites.
Time the trades to the hold points
Most SitePro Bathrooms renovations are completed within 2 to 4 weeks once construction begins, and larger or more complex projects may take longer. That estimate holds when scope, access and approvals are settled before the first trade arrives.
In most cases homeowners can stay in the house during the work, though the bathroom is out of use and noise and dust come with it. Arrange alternative bathroom access before demolition, particularly in a single-bathroom home.
Coordinating demolition, plumbing and electrical, waterproofing, tiling, fixture installation and final finishes sets the timeline. A discovery during demolition changes what the next trade must complete.
Practical rule: If a stage isn't finished and its hold point hasn't been cleared, don't start the next one.
Match your project to a row and name both the stage you are in and the evidence that clears it. That keeps a cosmetic-looking job from carrying an unseen compliance risk.
Scope, Approvals and Registration Before Demolition
Approvals follow the work you're doing, not the appearance you're aiming for. Replacing finishes doesn't automatically make a project exempt, particularly if the work disturbs waterproofing, drainage or walls.
Our process starts with an on-site consultation and measurement covering your goals, layout and budget. Agree the preliminary scope and budget in writing before detailed design, then finalise the fixture, tile and finish selections with the construction scope.
The Victorian Government's plans and permits guidance requires the homeowner or their agent to establish whether planning permission is needed, with any required planning permit obtained before the building permit. A registered building surveyor issues the building permit, assessing the plans and specifications against applicable building regulations.
Match the scope to the requirement
| Trigger | Requirement |
|---|---|
| Changes to walls, structure or plumbing layout | Planning permit check first, then any required building permit from a registered building surveyor |
| Domestic building work over $10,000, including labour and materials | Generally, a registered builder and major domestic building contract, subject to the exceptions described by Consumer Affairs Victoria |
| Work valued at $20,000 or more | Domestic building insurance, as stated in the Building and Plumbing Commission's domestic builder guidance |
| Single-trade job such as tiling, plumbing, painting, glazing or electrical | May be exempt from the major domestic building contract rule |
| Wet-area work within existing external walls, floor and ceiling | Bathroom, kitchen and laundry registration class may cover the scope |
| Full renovation across several trades or with structural changes | Check Domestic Builder-Unlimited registration against the scope; don't assume a limited registration covers work beyond its conditions |
| Work affecting shared services or common property in an apartment | Owners-corporation consent may be required separately |
When comparing registered builders unlimited with limited wet-area practitioners, check the actual registration class and conditions. Multiple trades alone don't establish that every bathroom requires an unlimited registration, but work extending beyond a limited practitioner's authorised scope needs appropriately registered management.
A cosmetic refresh might avoid planning approval while still needing other checks. The government's YourHome guidance on minor home upgrades warns that even minor bathroom work can require approval where waterproofing or plumbing layouts change.
Finish the design before authorising demolition
Confirm tile set-out, niche dimensions, screen clearances, door swings, ventilation and access for maintenance. Moving a niche after rough-in can affect framing and waterproofing, while changing a vanity can shift waste and tap positions.
Use our building permit requirements guide to prepare your questions, then obtain project-specific advice from the council and building surveyor. Don't authorise demolition until required permits and any owners-corporation consent are in place.
Keep a project folder containing:
- Approved documents: Plans, specifications, signed scope and written variations.
- Practitioner details: Registration class, insurance information and licensed-trade responsibilities.
- Compliance records: Plumbing certificates, inspection results and waterproofing documentation.
Book the on-site consultation with your wish list, rough measurements, existing approvals and body-corporate rules. Have registration and insurance details ready for checking, then confirm the scope and approval responsibilities in writing.
Map User Risk and Layout Before Demolition
Design around the people using the room, including how their needs might change. Falls account for 77% of injury hospitalisations and 71% of injury deaths among older Australians, and bathrooms, particularly around toilet use, are recognised fall locations in the Australian Senate committee's home-modification discussion.
Mark a user-risk map directly on the layout. Check the approach to the toilet, shower entry, wet walking route, night lighting and whether controls can be reached without leaning across the shower.
- Reduce obstacles: Choose step-free shower access, a lip-free entry and slip-resistant floor finishes.
- Prepare support zones: Mark future grab-rail locations and concealed blocking against the framing plan.
- Check drainage space: Make sure an open shower, linear drain or flush transition can accommodate the necessary waterproofing zone and falls.
Modern bathrooms and designer bathrooms don't need to look institutional to work safely. Test new bathroom ideas in the proposed layout before accepting a finish-led concept, using our bathroom layout mistakes guide to check circulation and fixture conflicts.
Keep access clear outside the room
Remove stored items from the work route as well as the bathroom. MG Self Storage advice for Exeter homeowners offers practical context for organising belongings during renovation, although local storage arrangements are your own decision.
Include the user-risk map in the approval pack so the builder and building surveyor assess the same layout.
How to Strip Back and Rough In the Bathroom
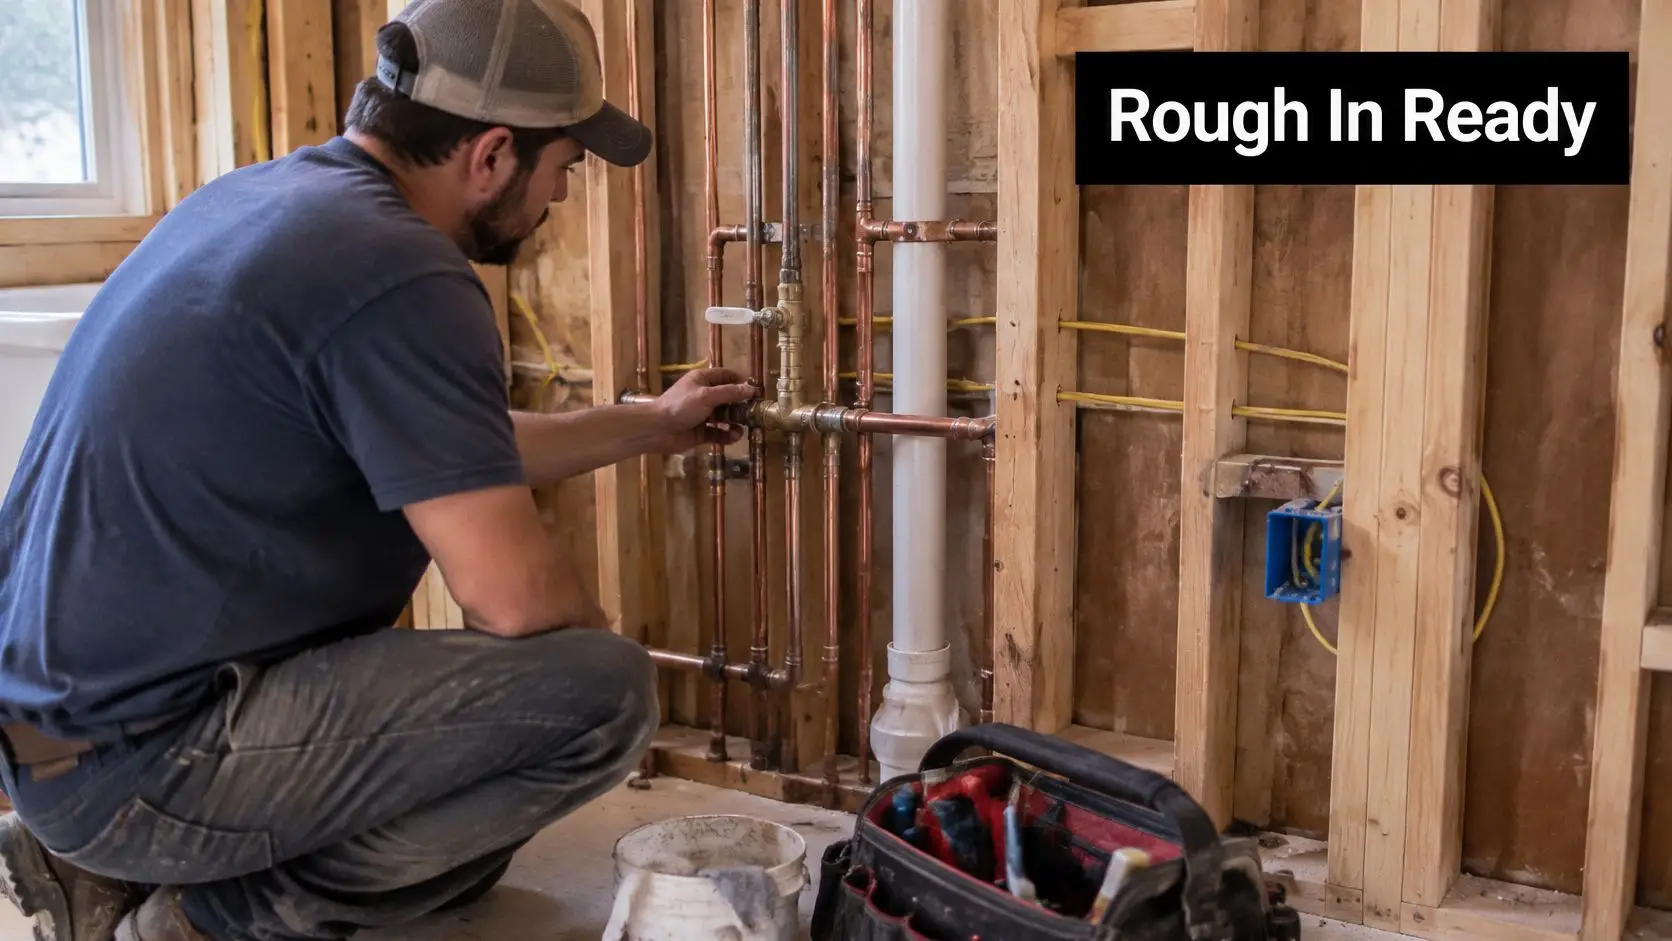
Demolition should reveal the condition of the room without damaging services or areas you're keeping. Our demolition stage safely removes existing fixtures, tiles and substrates; framing then covers wall framing, floor repairs and structural adjustments supporting the new layout.
Open the room in a controlled order
Isolate water and power. Have the licensed trades isolate the relevant water supplies and electrical circuits at the valves and switchboard, then verify isolation before cutting begins. Turning off a light switch isn't proof that wiring in the wall is safe.
Remove fixtures, then tiles, then the substrates scheduled for replacement, with dust containment and protection to adjoining rooms. Uncontrolled demolition can damage retained pipework or nearby finishes, so mark what stays before tools come out.
Inspect the exposed construction. Check framing, floor sections and sheeting for rot, water staining, movement and unevenness, photographing each area before repairs. The common mistake is checking the walls but overlooking the floor, then concealing damaged material beneath new tiles.
Repair framing and floor sections, provide suitable support for sheeting and establish the required drainage geometry. A stiff, sound substrate matters more than a surface that merely looks flat; don't use tile adhesive as a substitute for correcting the underlying construction.
Rough in to the selected fixtures. The plumber and electrician position services for the basin, toilet, shower, lighting and exhaust fan using the agreed drawings and product dimensions. Guessing from a generic vanity or tap arrangement can leave connections clashing with drawers or screen fixings.
Book the rough-in inspection and leave the work accessible until the required checks are complete. Closing walls early turns a straightforward inspection or adjustment into removal and reinstatement.
Make future support practical
Transfer the planned grab-rail positions onto the framing, especially around the toilet and shower. Fit suitable concealed blocking while the walls are open, and record its location against fixed reference points.
Blocking is straightforward at this stage but disruptive once tiled. A level-access shower also needs early coordination of floor depth, structure and drainage; it isn't always a cheap change if the existing construction cannot accommodate it.
Don't accept a photograph of an open wall as a complete record. It needs to show where the services and reinforcement actually sit.
Before closing walls, confirm the photographs show:
- Services: Pipe routes, joints, waste locations and electrical routes.
- Support: Repaired framing, sheeting supports and grab-rail blocking.
- Orientation: Enough surrounding detail to locate concealed items later.
- Condition: Previously damaged areas and the completed repairs.
Waterproofing Requirements to Check Before Tiling
The membrane under the tile does the waterproofing. Tile and grout are the wearing surface, and the membrane plus its junction details control water beneath them. Get that sequence wrong and the room looks finished while moisture tracks into the frame.
Removing tiles can damage the membrane below, so a tile replacement shouldn't automatically proceed over the old waterproofing. Older bathrooms also need assessment against applicable current requirements rather than reconstruction to whatever detail was originally there. Weak falls and poor junctions get harder and costlier to correct once the finish is down.
Check coverage, drainage and junctions
| Element | Requirement | Check Before Tiling |
|---|---|---|
| Shower-area walls | Waterproofed to 1,800 mm under NCC 2022, described by the Australian Building Codes Board | Membrane coverage and thickness recorded |
| Unenclosed shower | Waterproofing extends 1.5 m from the shower rose connection, with a waterstop at a minimum horizontal distance of 1,500 mm, under the same Victorian guidance | Waterstop and membrane edges inspected |
| Floor with a floor waste | Minimum continuous fall of 1:80 toward the waste under Victorian building technical guidance | Falls checked before membrane application |
| Pipe, tap, shower and fixture penetrations | Waterproof detailing under AS 3740, discussed in the Western Australian wet-area inspection report | Each penetration photographed |
| Internal corners and junctions | Compatible bond-breaker detailing and full membrane coverage | Corners inspected individually |
| Membrane curing | Each coat cured for the manufacturer's specified time | Curing time and batch number logged |
Start with a clean, sound substrate and established falls. Apply compatible bond-breaker tape or the specified bond-breaker detail at internal corners and junctions, install waterstops, and seal pipe, tap, shower, recess and floor-waste penetrations.
Then apply the specified primer and membrane coats, letting each cure under the product's stated conditions. Record coverage and thickness using the membrane manufacturer's checking method instead of judging the application by colour alone. The defects I see most often sit at the waste and inside a corner, not across the middle of the floor, so check those first.
Before tiling: Inspect every corner, penetration, waste, threshold and recess. A generally tidy surface doesn't prove these details are complete.
Resolve open-shower details before covering them
An unenclosed shower's waterproofing zone must fit the room, and the finished floor must drain without creating an unintended barrier at the doorway. Flush transitions and linear drains still need workable membrane terminations and drainage beneath the visible finish.
Our Australian waterproofing standards guide explains the terminology, but the surveyor and installer must confirm the details applicable to your project. Requirements differ across Australian states, so treat the NCC and Victorian measurements above as reference points and confirm the rules applying to your state and council before tiling.
Retain product batch numbers, data sheets, curing records, installer credentials and photographs of each application stage. For apartments, include the documentation the owners corporation requires before finishes make the membrane inaccessible.
How to Tile, Fit Off and Test Before Handover
A bathroom can look complete before it has been properly commissioned. Finishing is installation followed by testing. The cosmetic result tells you nothing about whether the membrane, falls and connections will hold.
Finish without compromising the hidden work
Set tiles after waterproofing clearance. Confirm curing and drainage checks, then generally work from walls to floor while protecting completed surfaces. Check set-out against niches, tap centres and visible edges before committing to the layout.
Grout the tile joints and seal surfaces where the selected products require it. Inspect coverage around the waste and use the specified flexible sealant at movement junctions rather than filling every joint rigidly. The check is for continuous, correctly finished joints with no gaps.
Fit off fixtures and ventilation. Install the basin, toilet, screen, tapware and exhaust fan without unplanned penetrations through the membrane. Open doors and drawers fully, check screen clearances and confirm that service points remain accessible.
Photograph the finished junctions before decorative work obscures their edges. Don't paint over silicone unless the specified sealant and coating system explicitly permits it, because ordinary silicone generally won't accept paint reliably.
Commission the room under normal use
Test supplies and wastes. Run hot and cold water, check operation and have the plumber complete applicable pressure and leak testing. Run each outlet long enough to expose slow leaks at traps, inspect connections with dry tissue and verify isolation-valve operation.
Confirm the exhaust duct discharges outside, not into the roof space. Check tile falls with a level, then run a controlled water test once materials have cured sufficiently. The room should drain without unintended ponding or water escaping into adjoining areas.
Complete quality control and the walkthrough. Compare the finished room with the signed scope, check fixtures and finishes, complete the final clean and walk through the bathroom with the homeowner. Record any outstanding item, who will resolve it and how completion will be confirmed.
The final stage includes quality control, a final clean and handover. Identify accessible defects now, before normal use makes their cause harder to establish. A room that looks right but has no test records or hold-point evidence carries compliance risk that surfaces later.
The handover pack pulls together what the project folder has been collecting since scope stage: certificates, warranties, product data sheets and inspection records from each hold point, plus care instructions and the concealed-work photographs. Keep them in one place rather than scattered across messages.